HOLIDAY DONATION DRIVE - SUPPORT MSW - DO YOUR PART TO KEEP THIS GREAT FORUM GOING! (Only 20 donations so far - C'mon guys!)
×


James H
-
Posts
6,067 -
Joined
-
Last visited
Content Type
Profiles
Forums
Gallery
Events
Everything posted by James H
-
 That is very sweet. A small project in its own right.
- 216 replies
-
- 3
-

-
- masterkorabel
- ships
- (and 3 more)
-
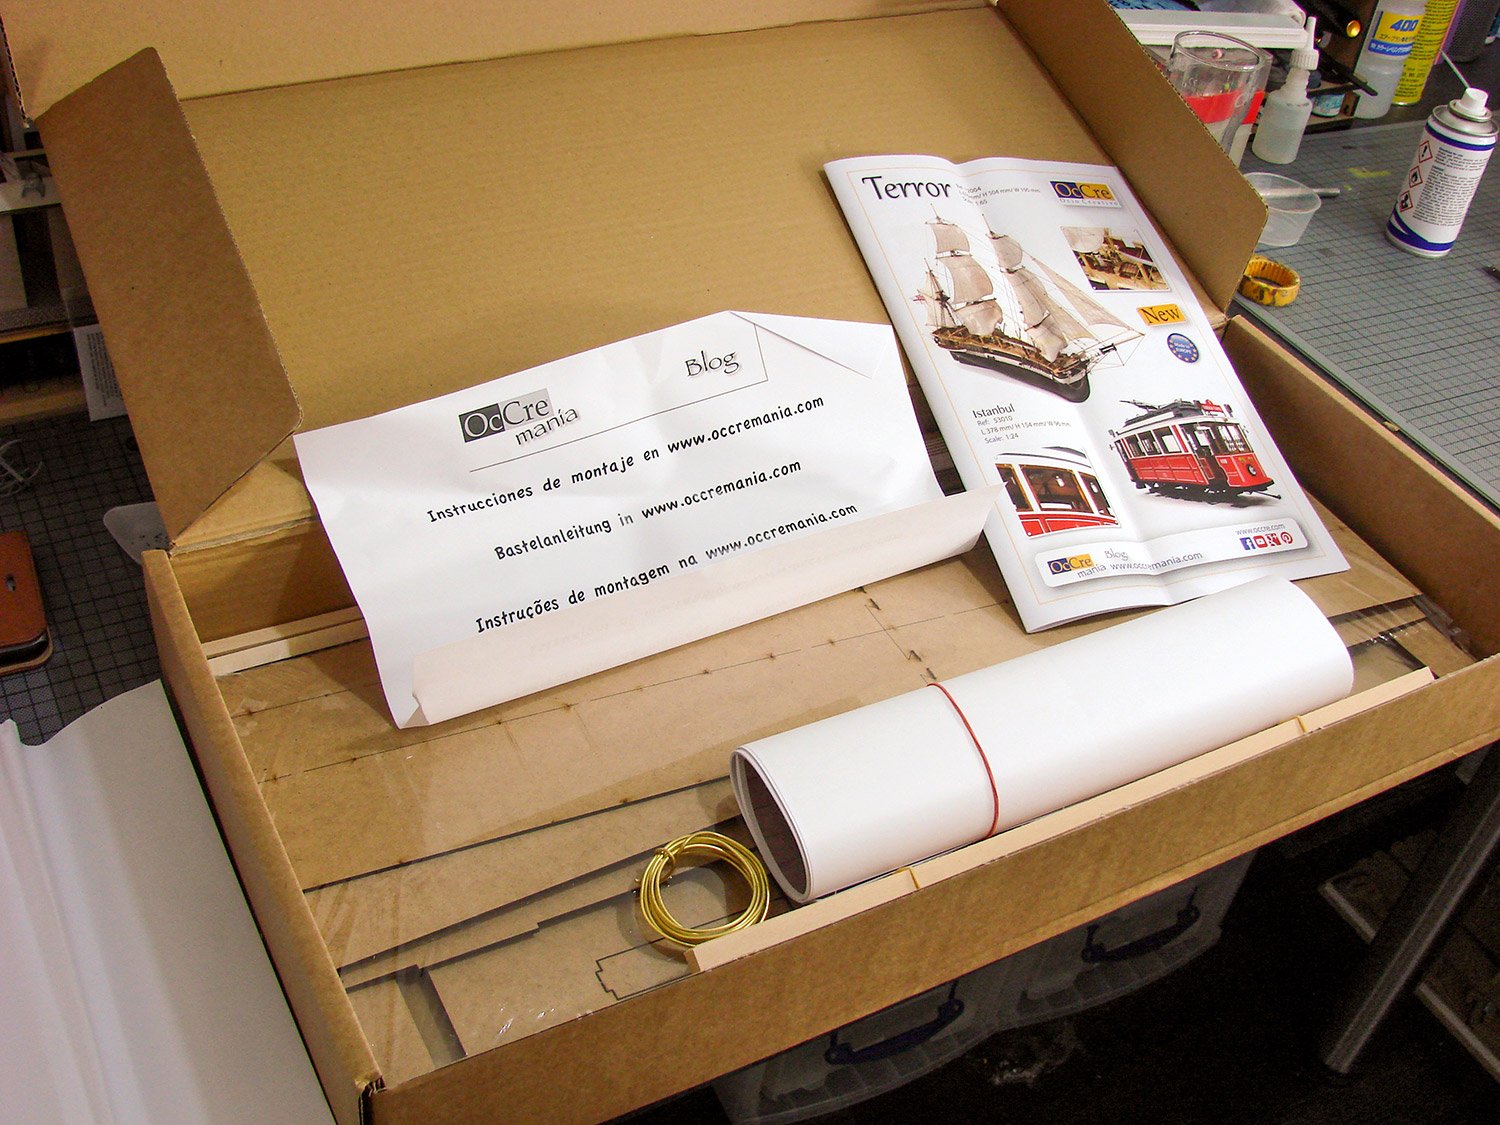
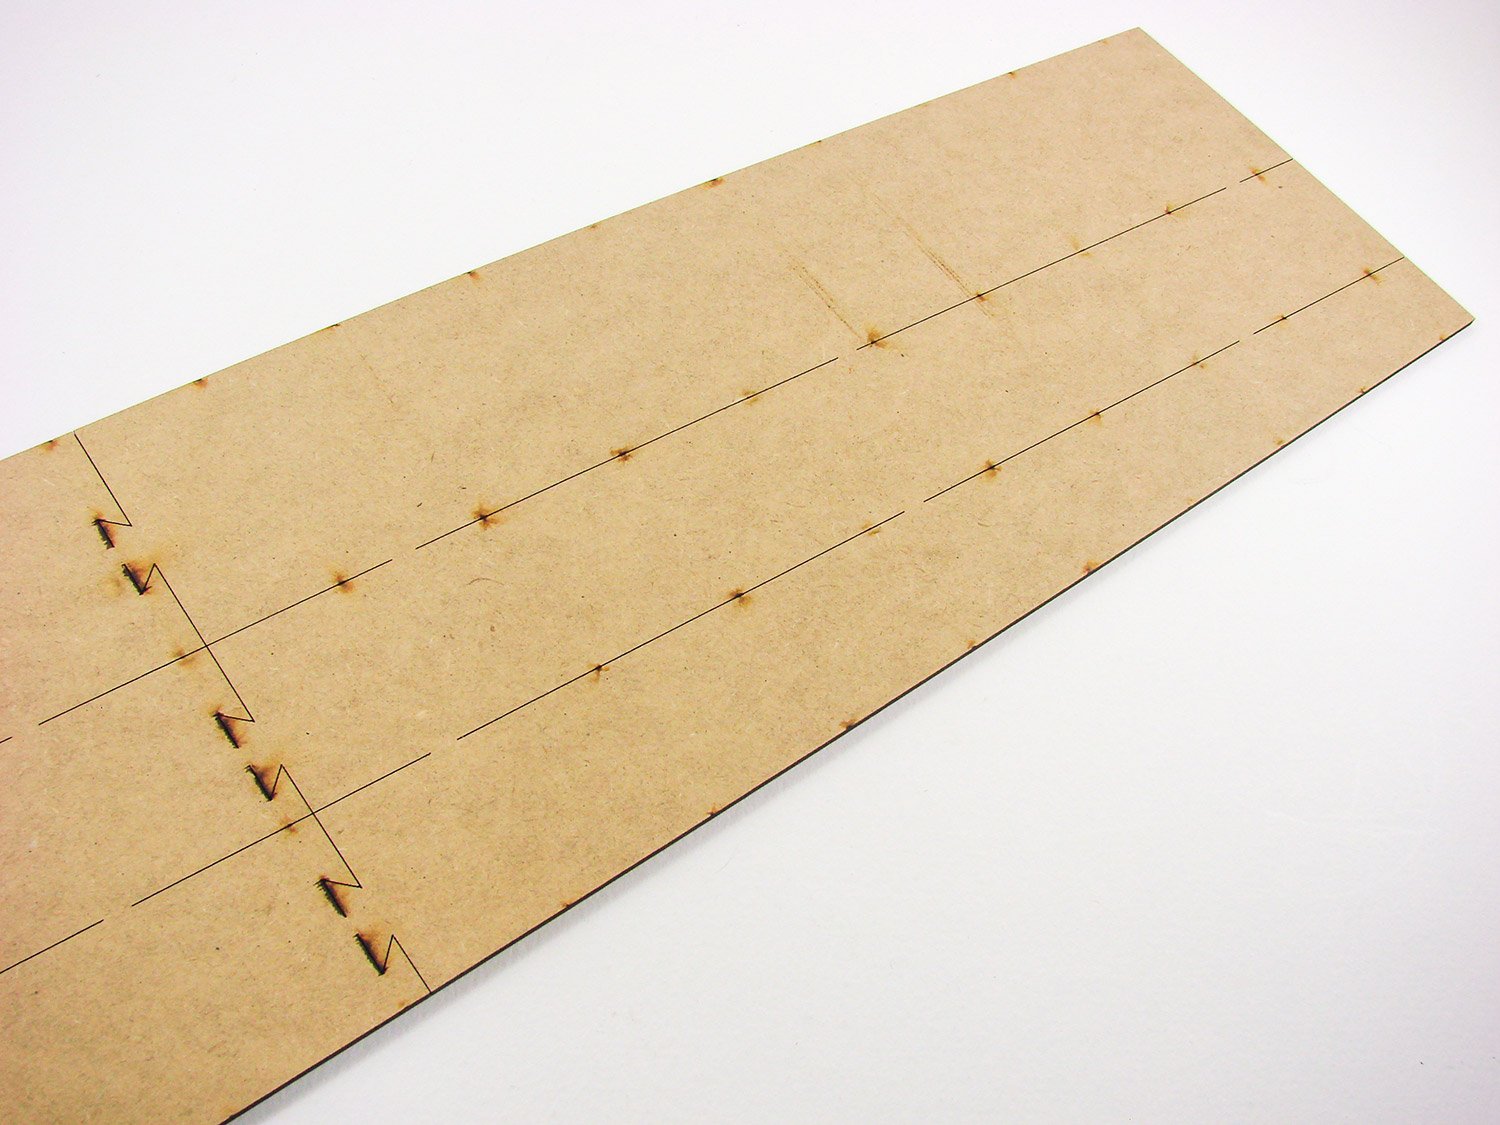
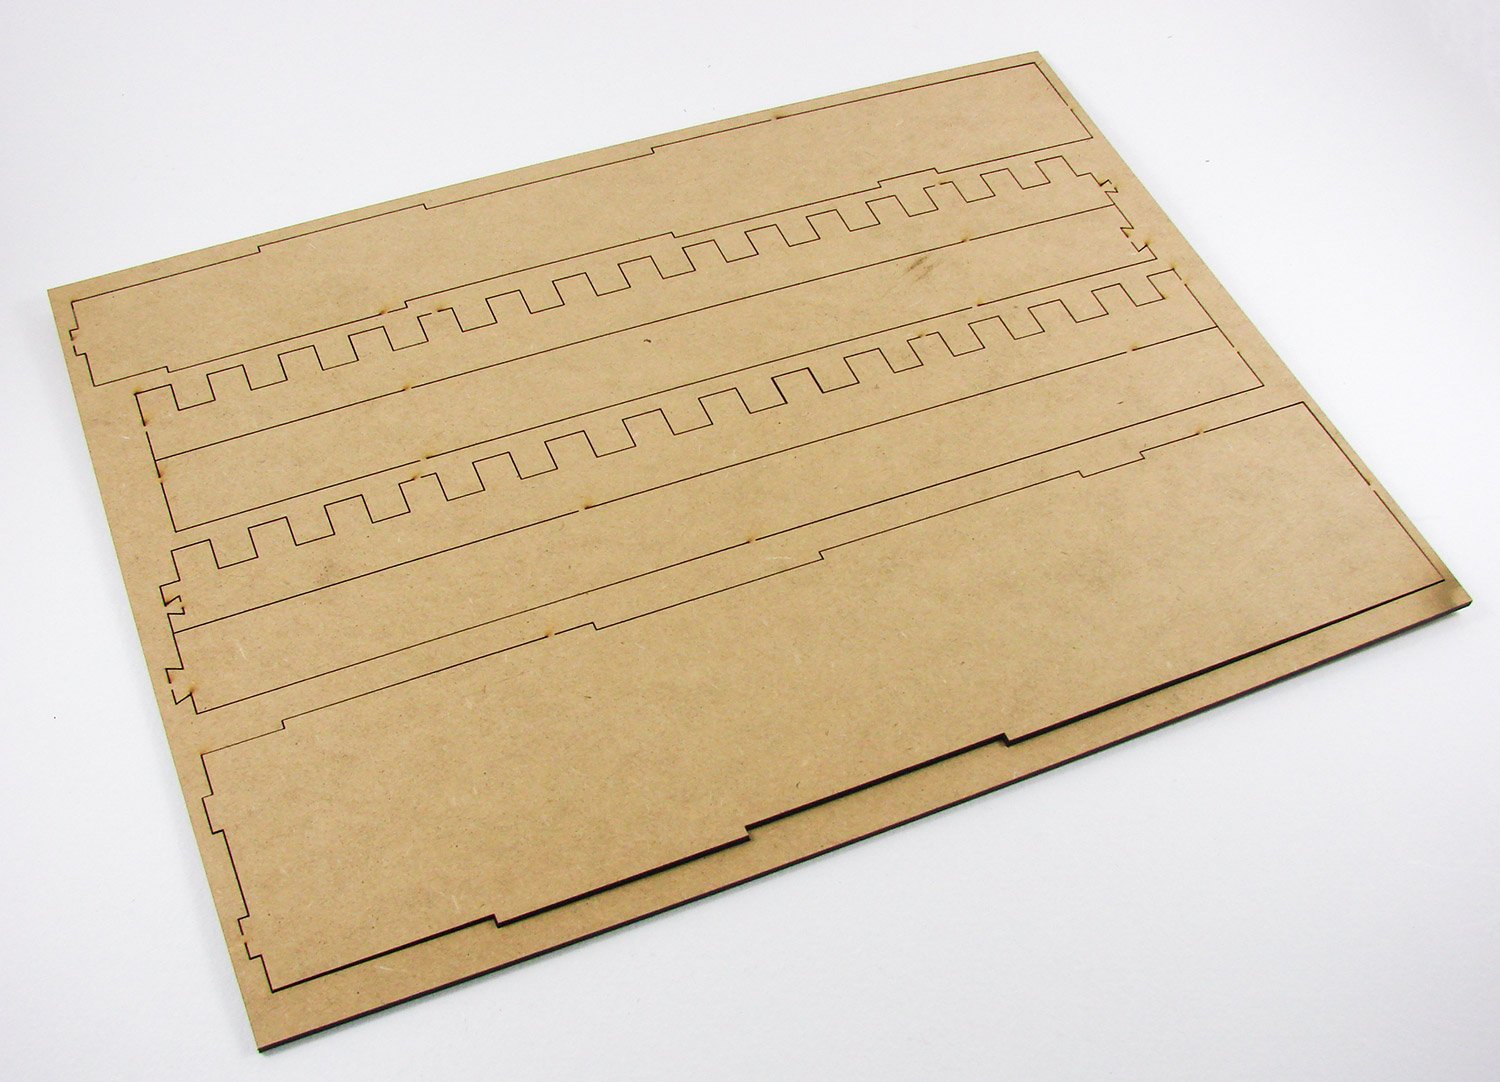
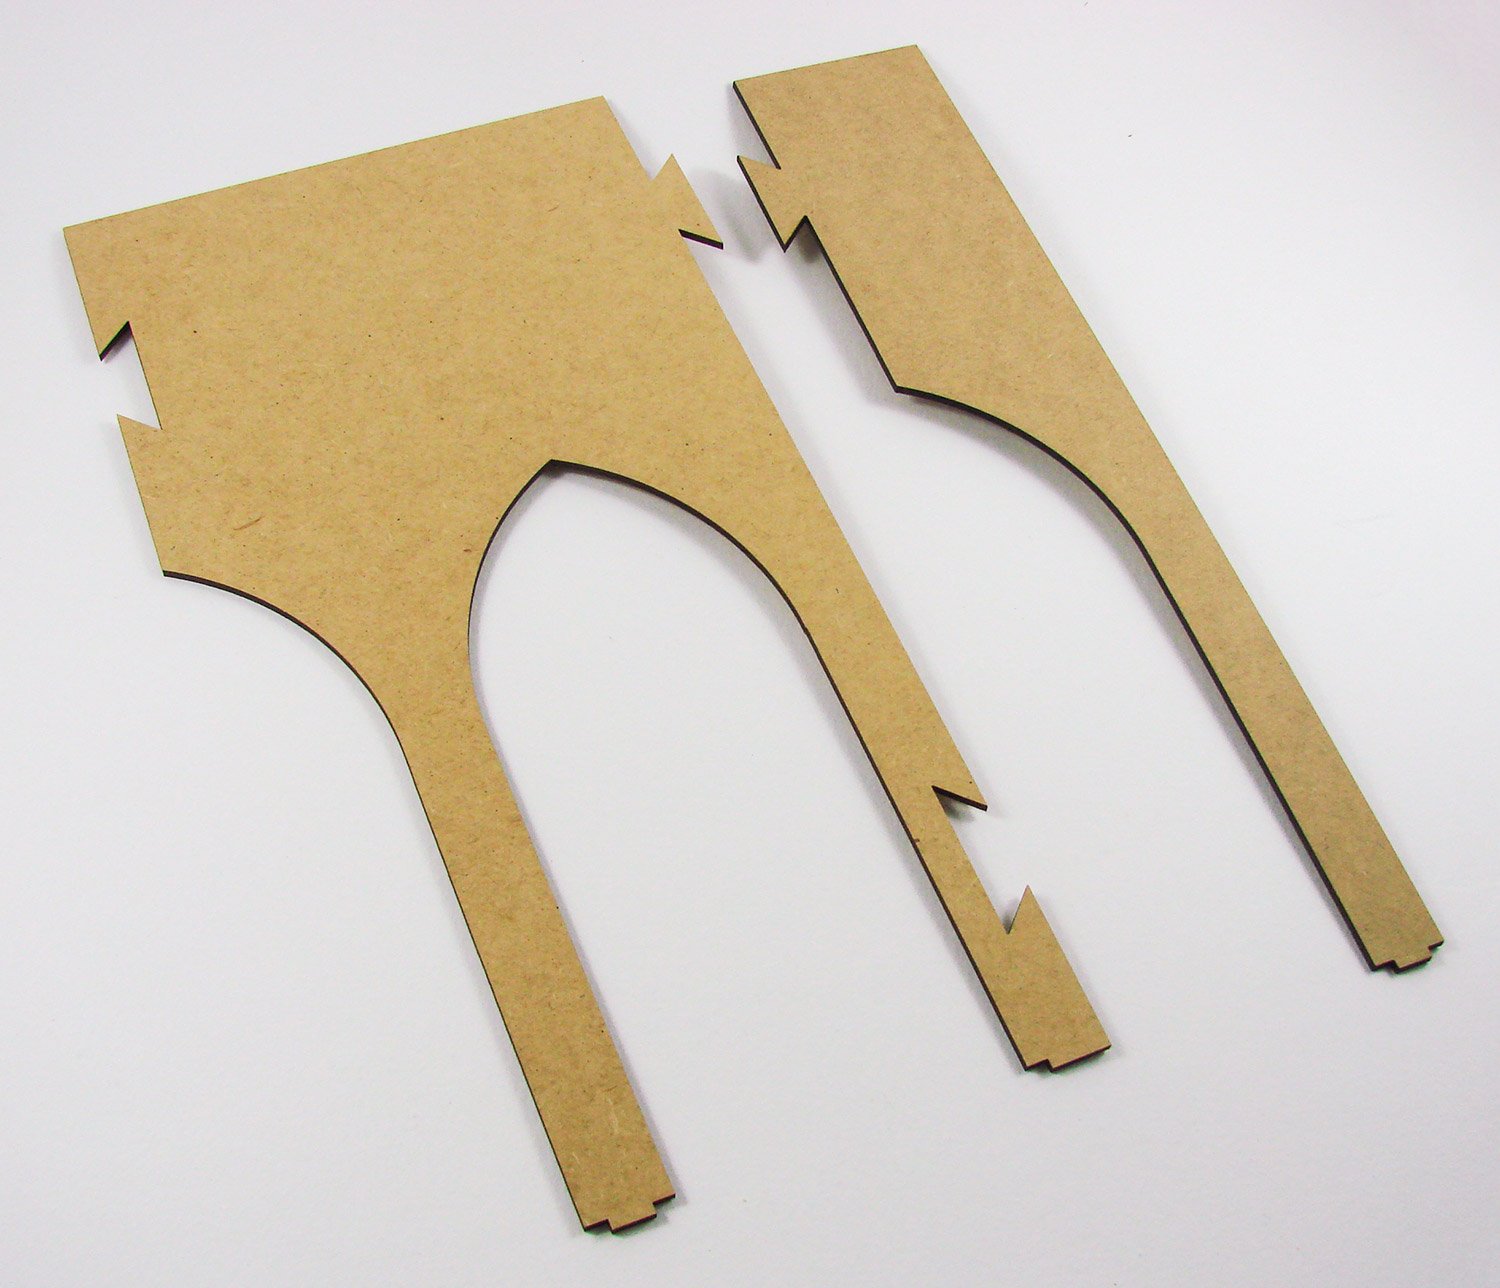
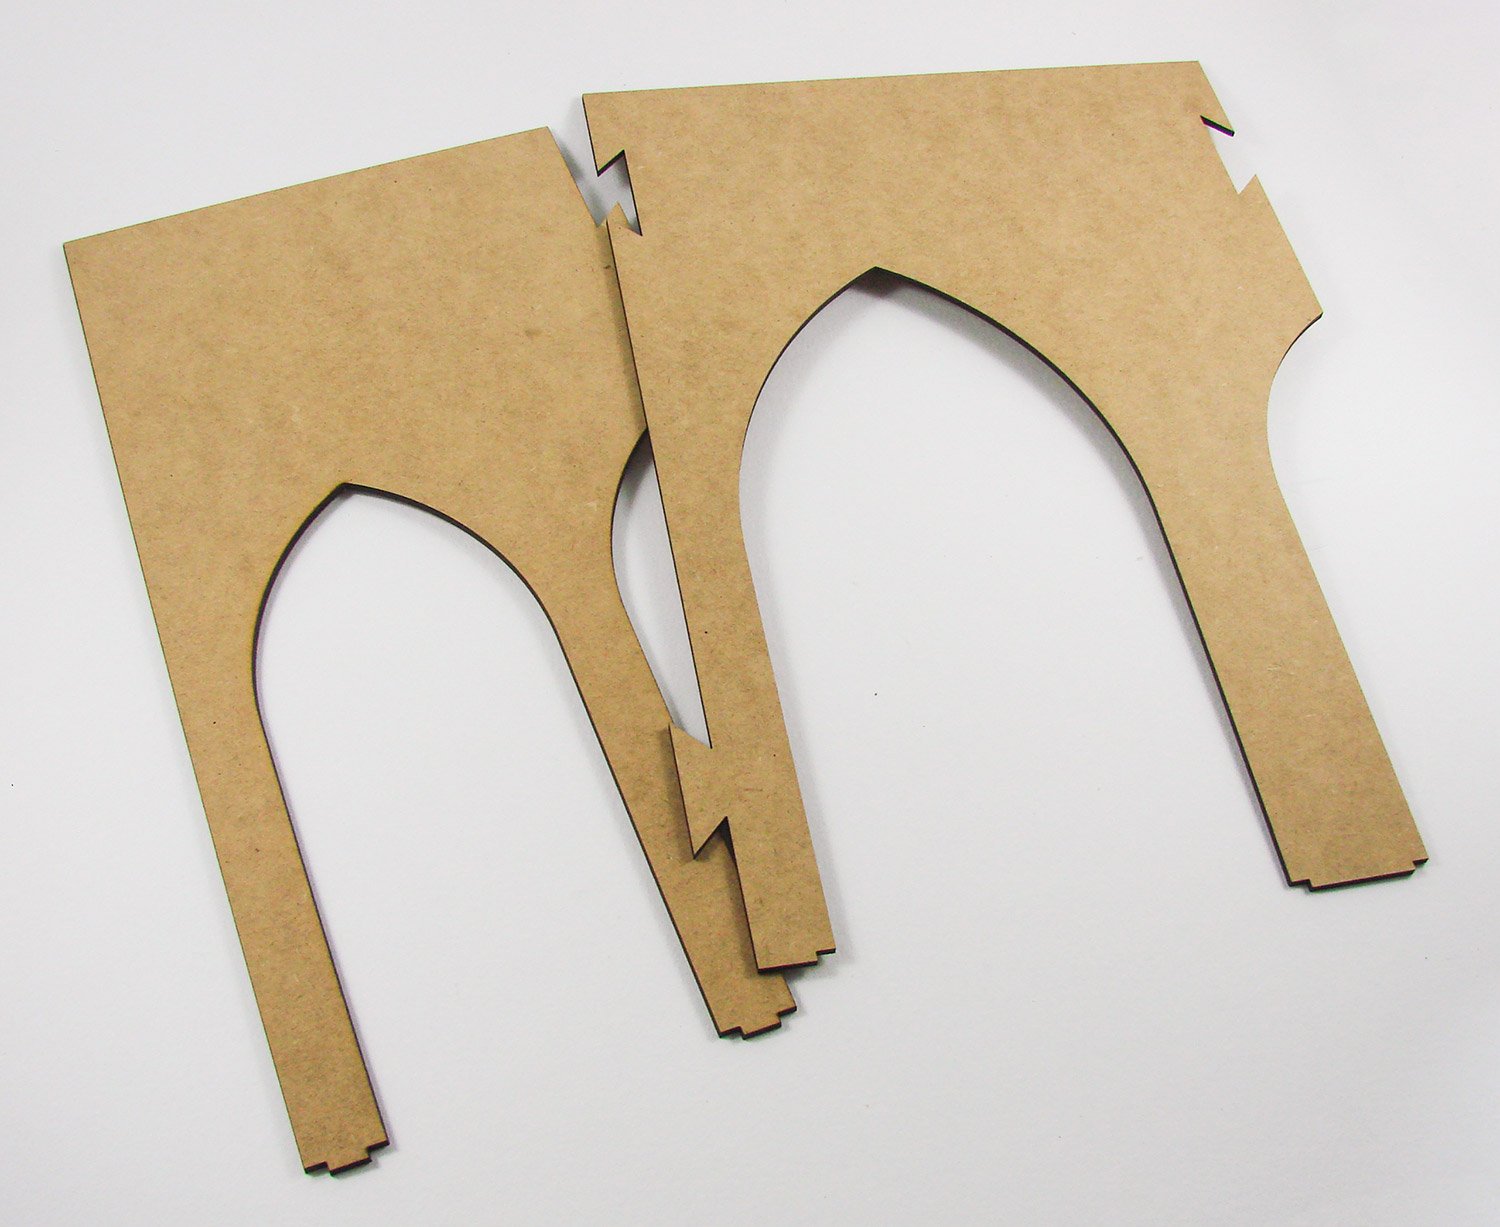
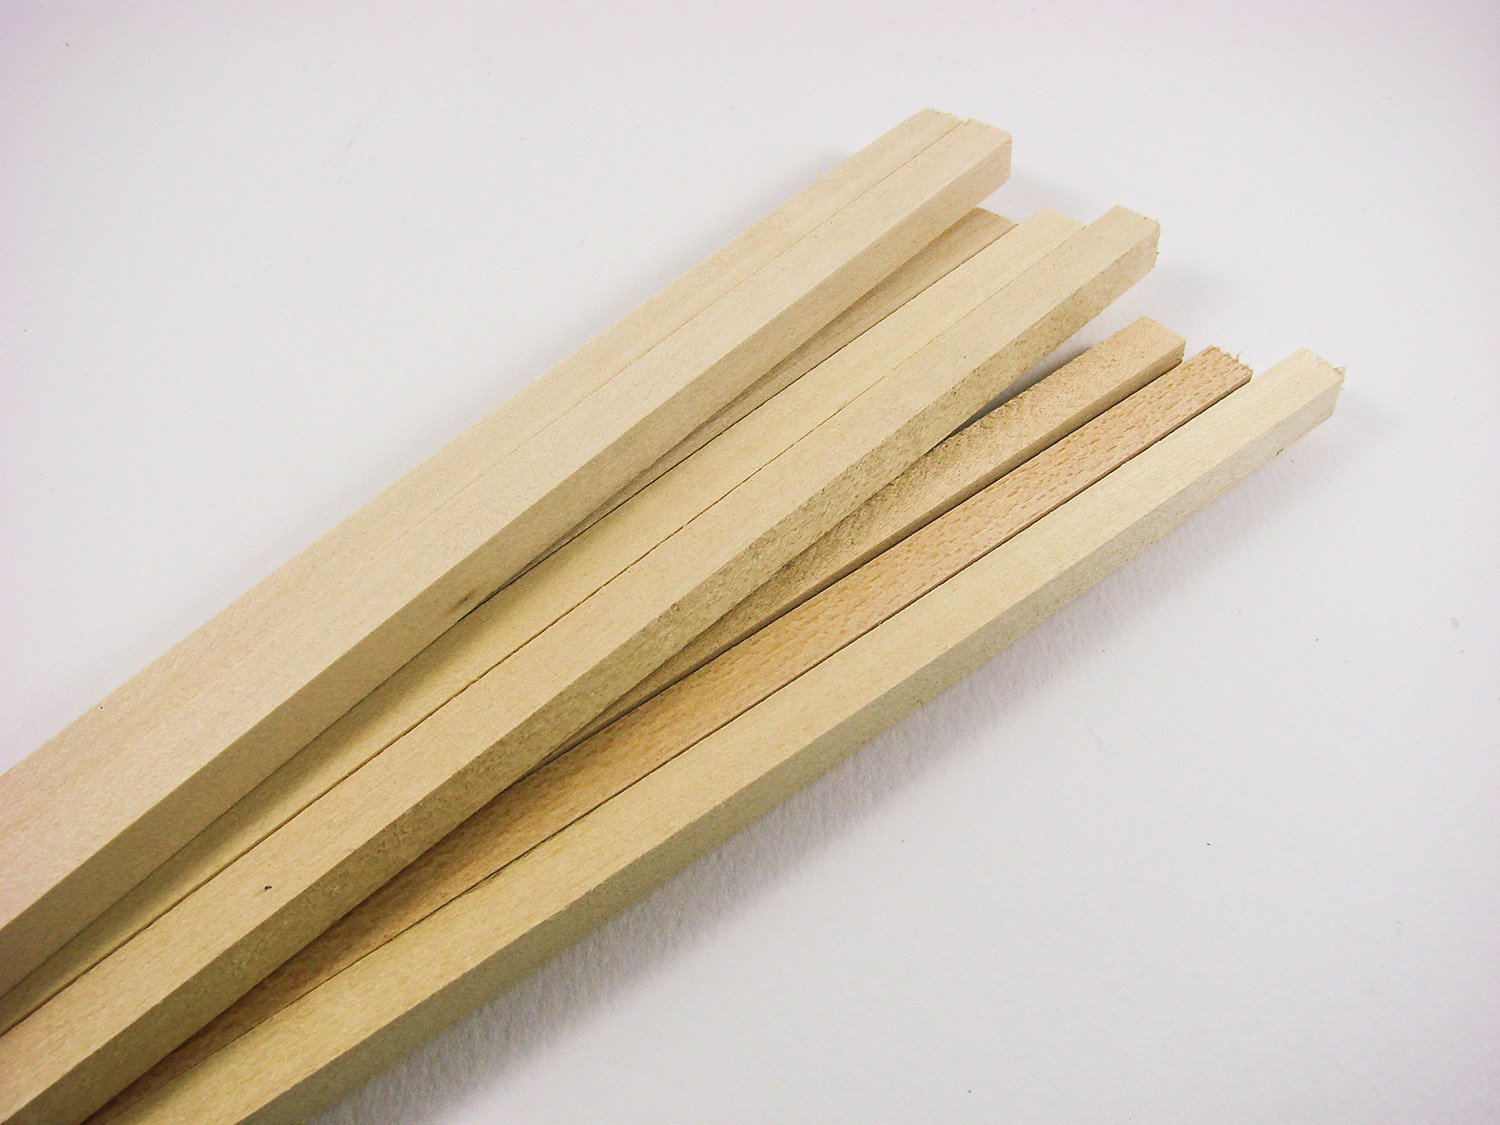
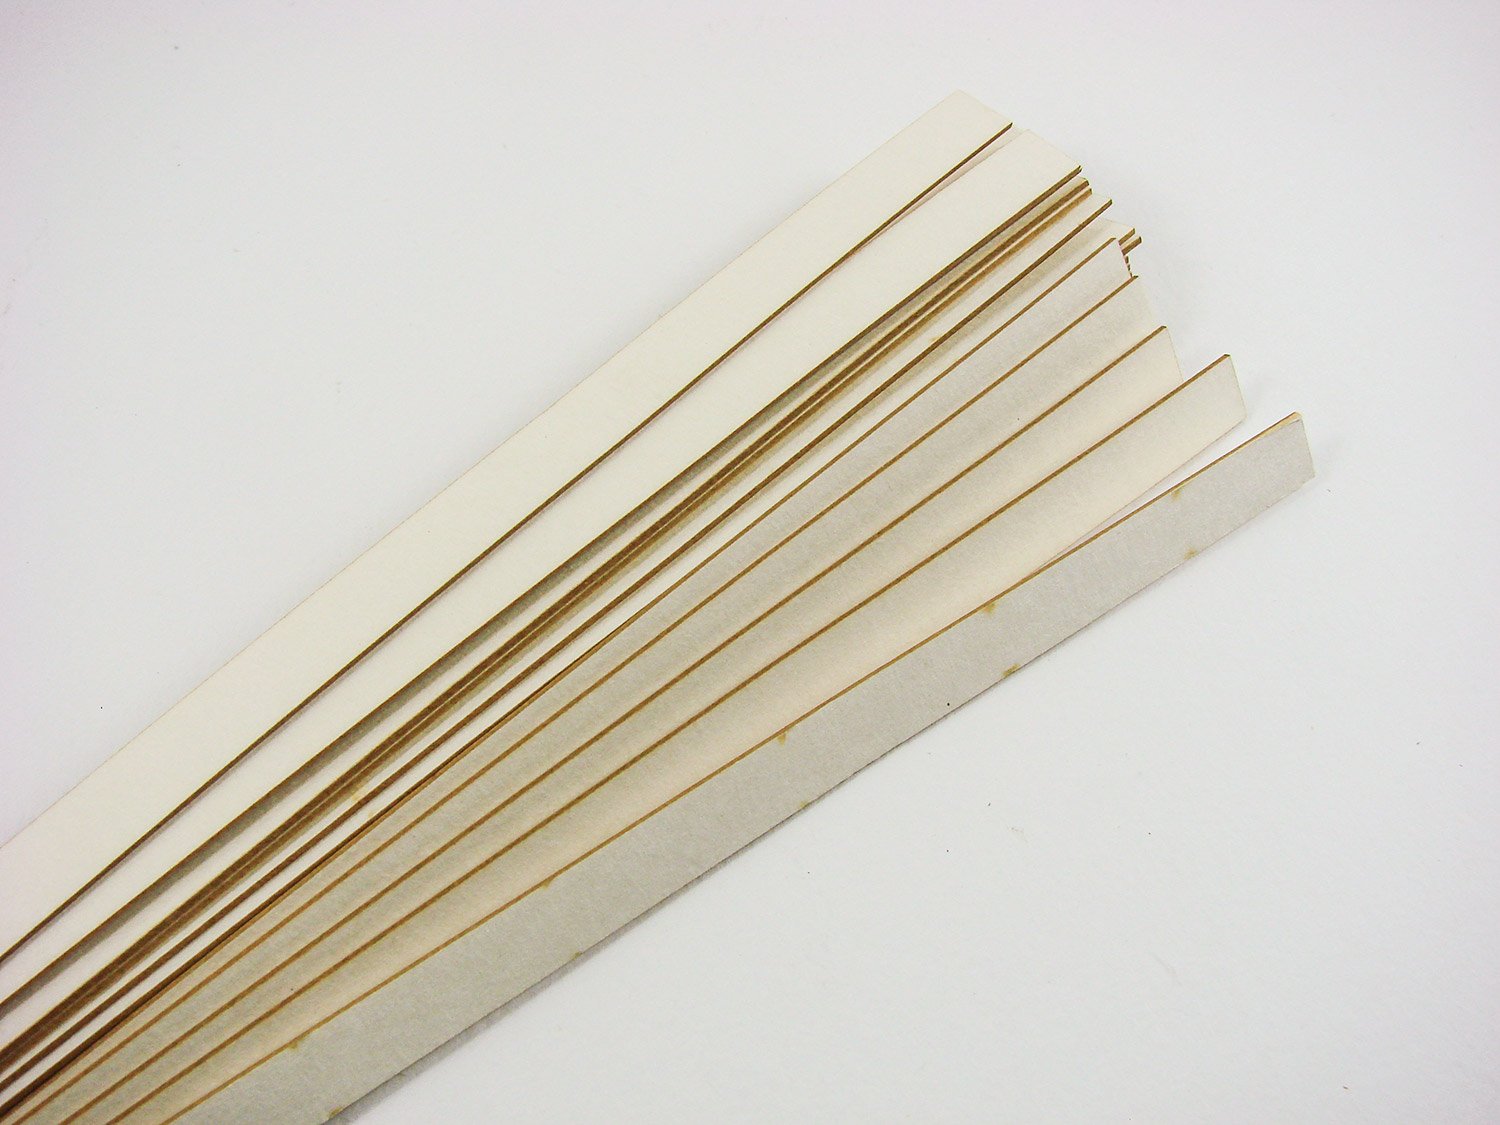
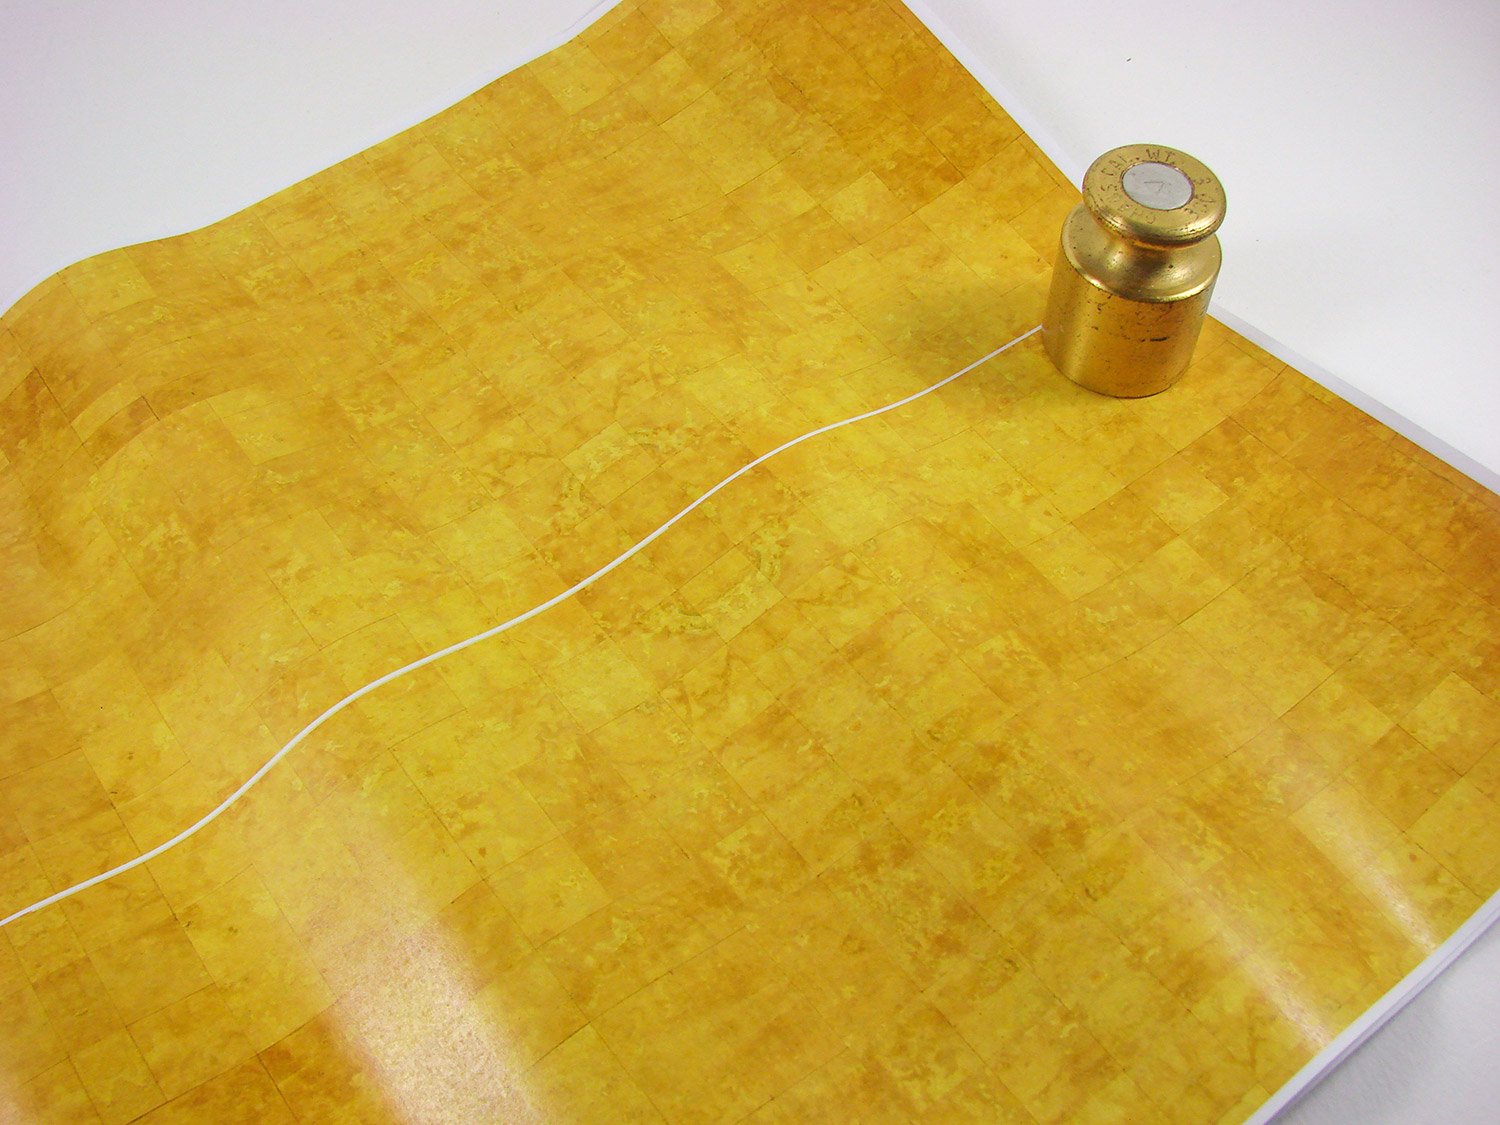
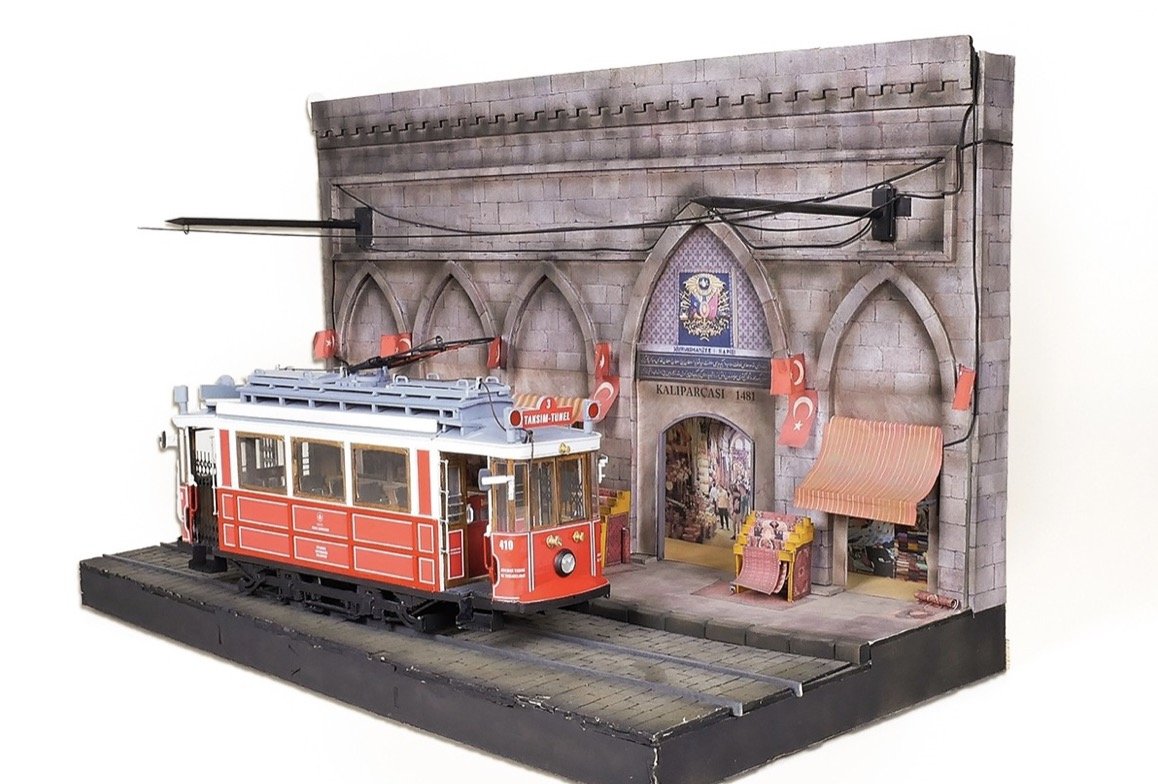
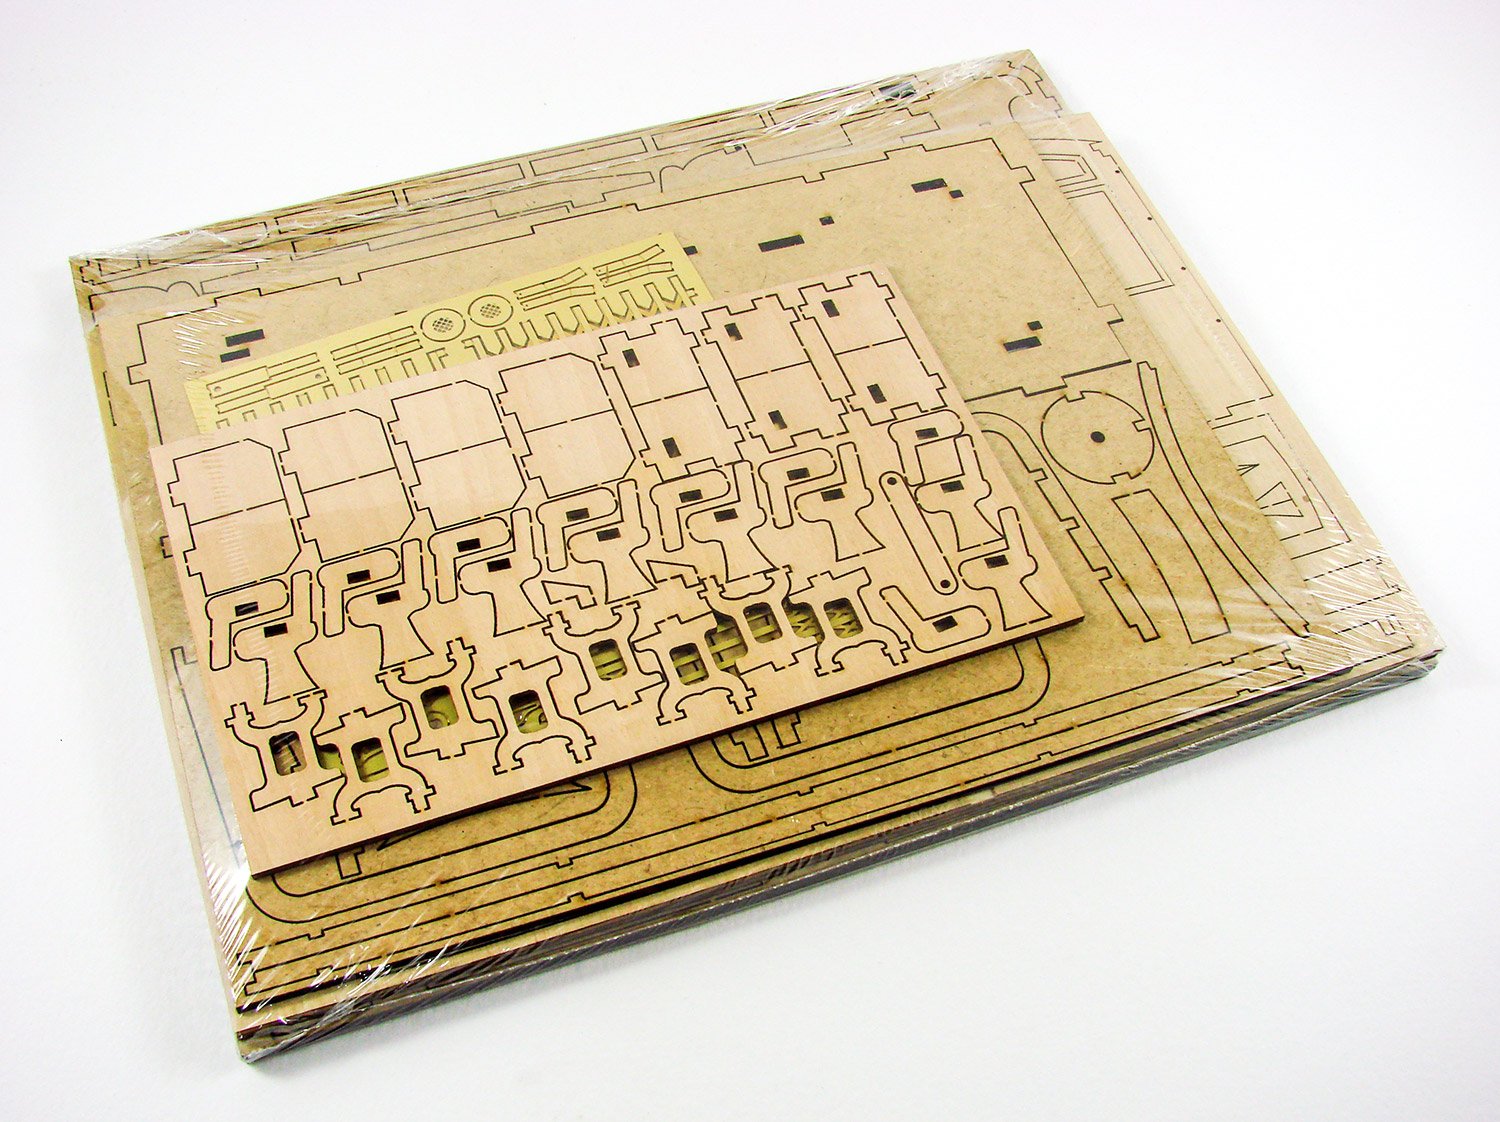
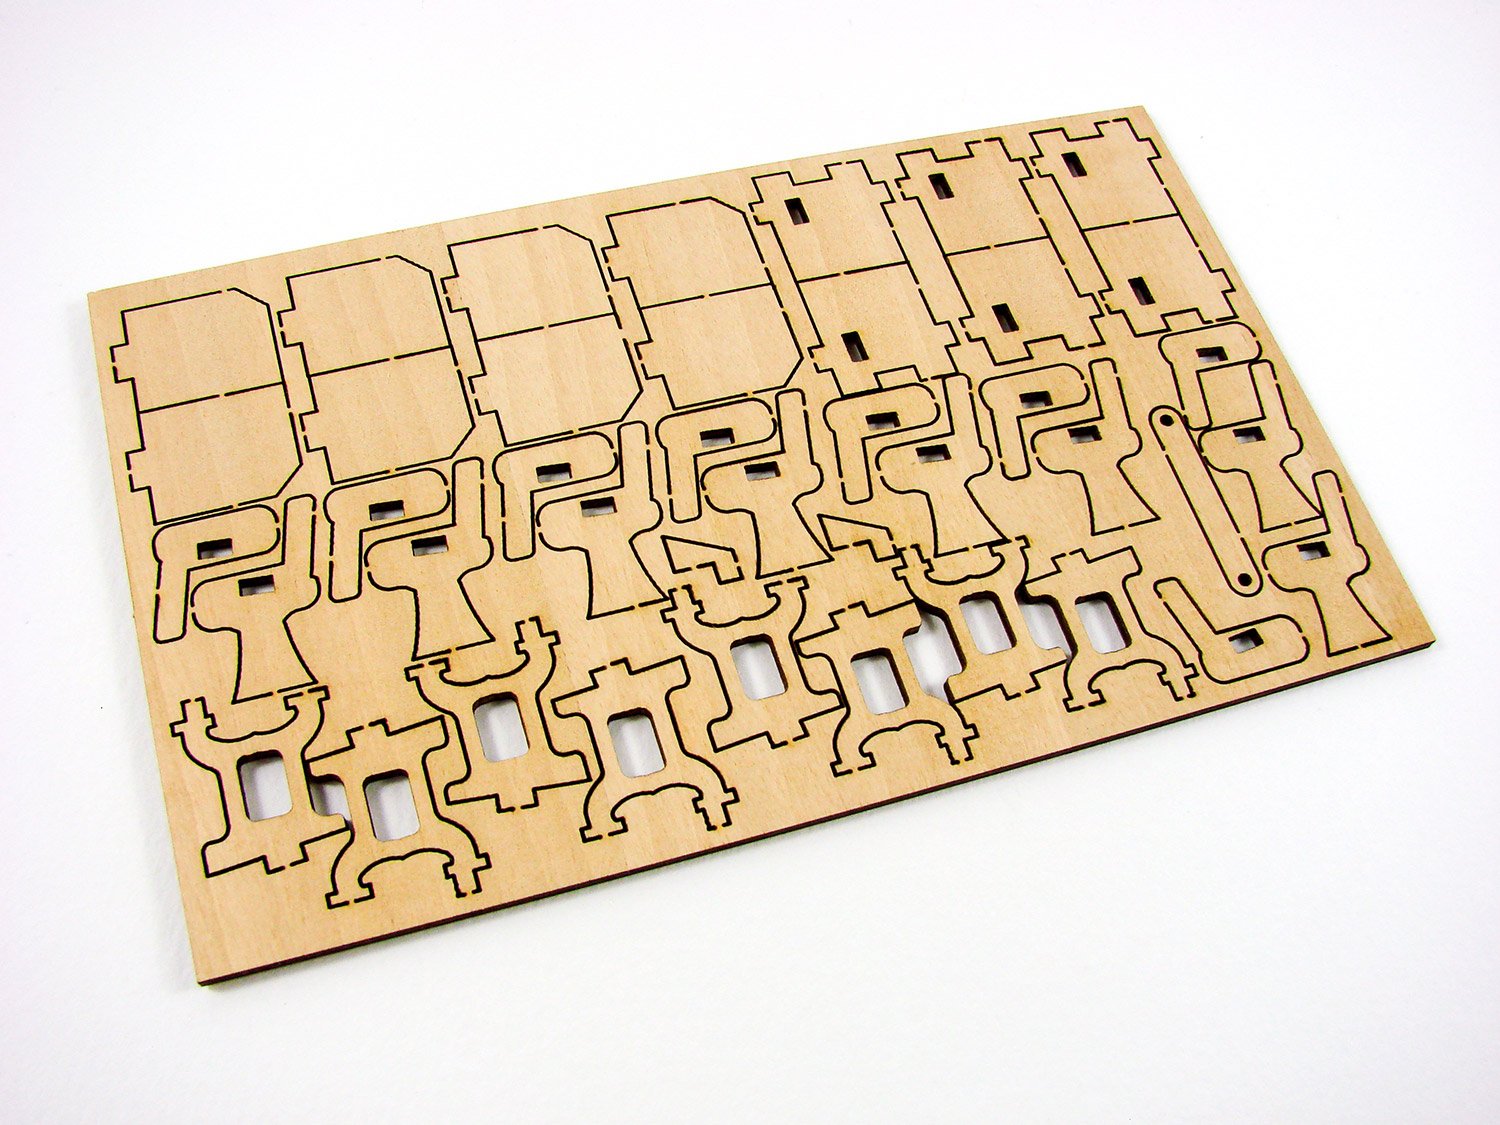
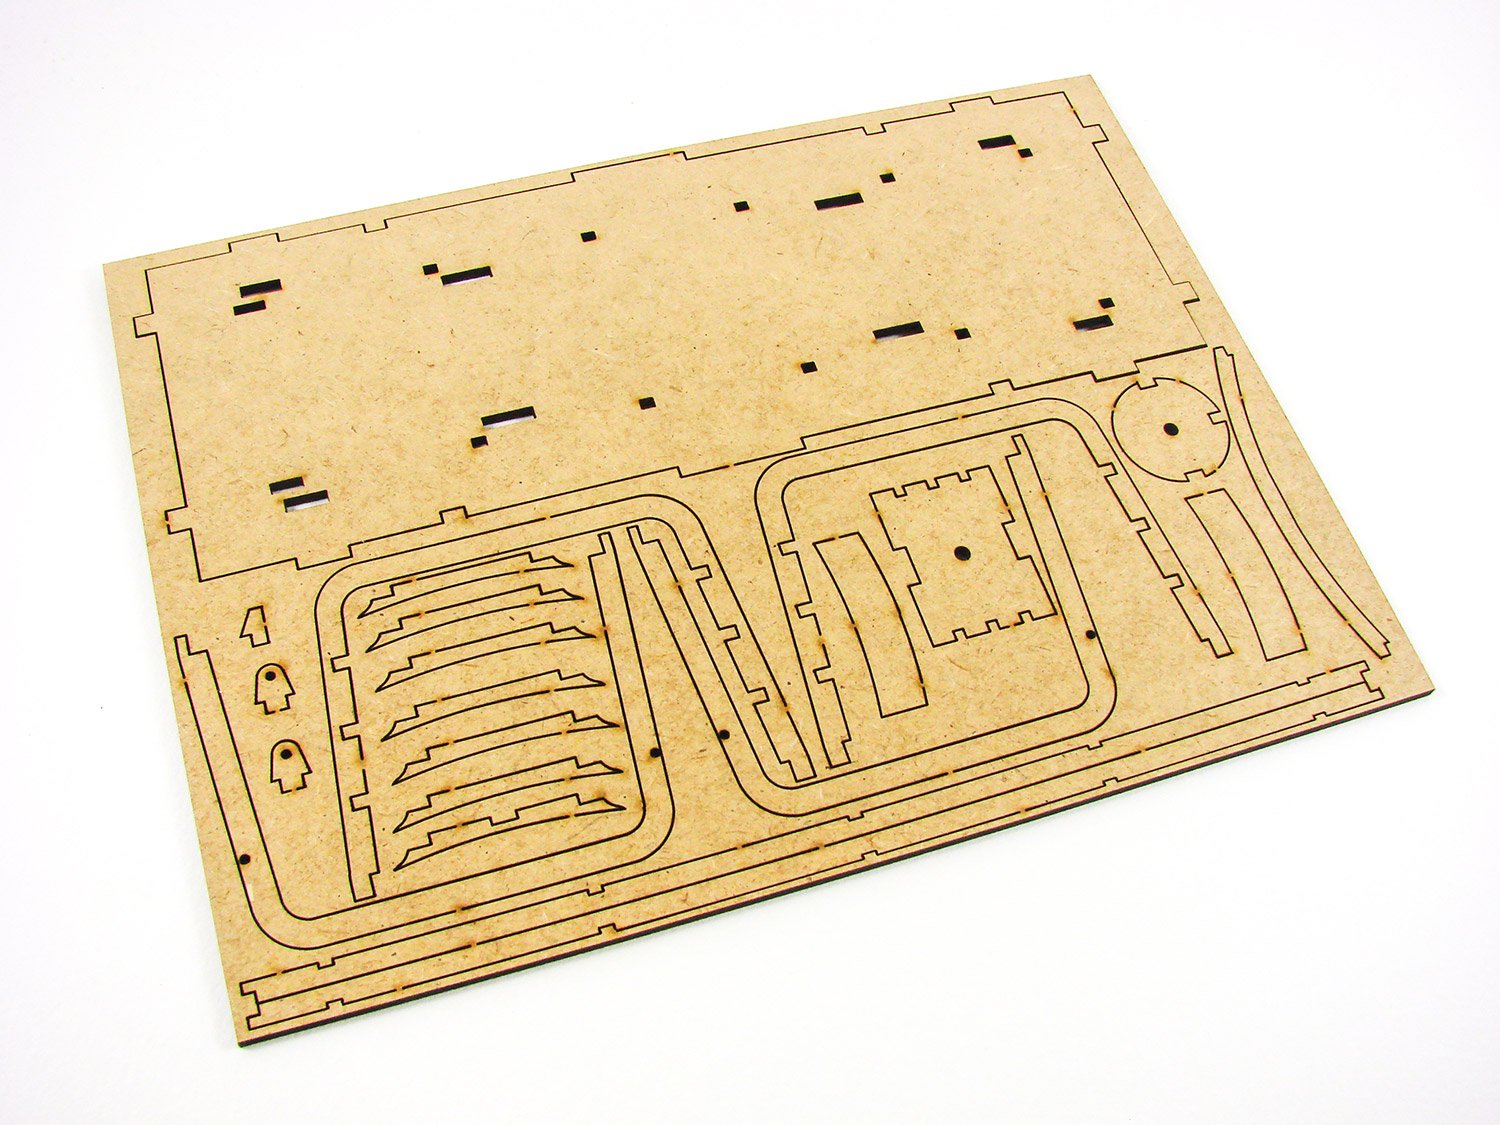
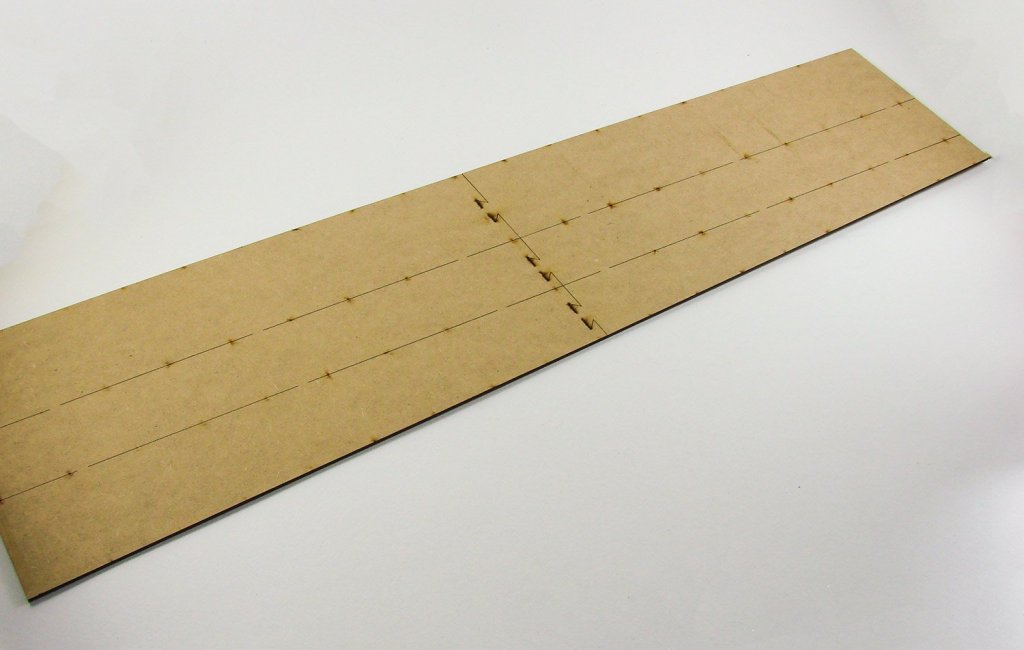
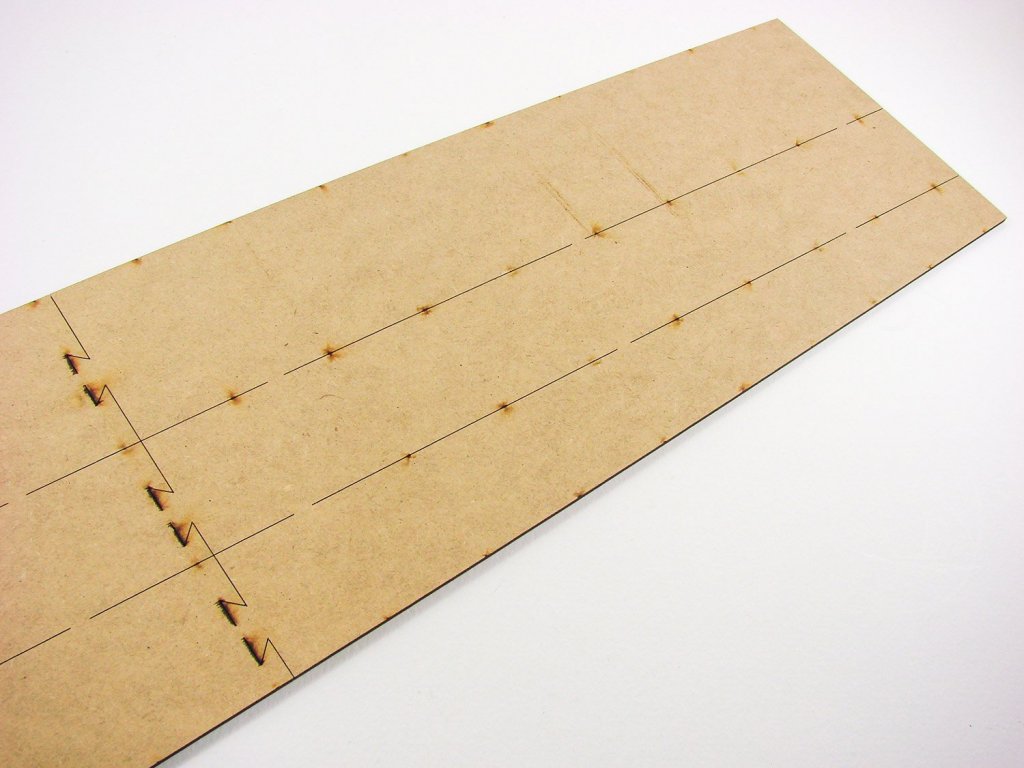
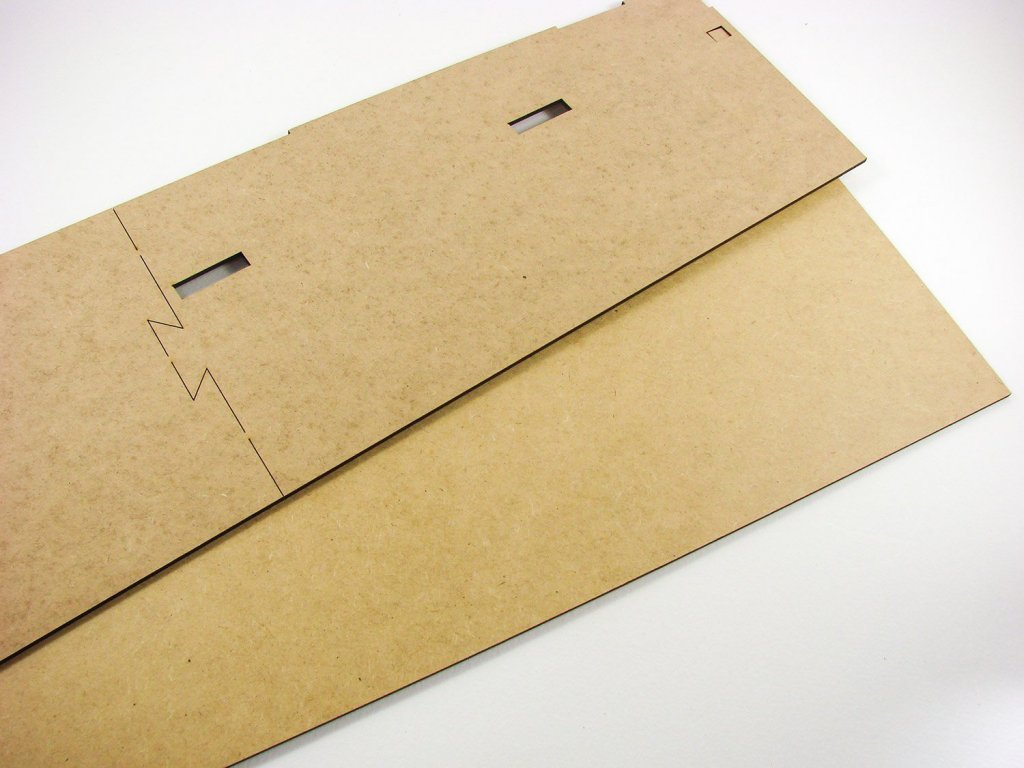
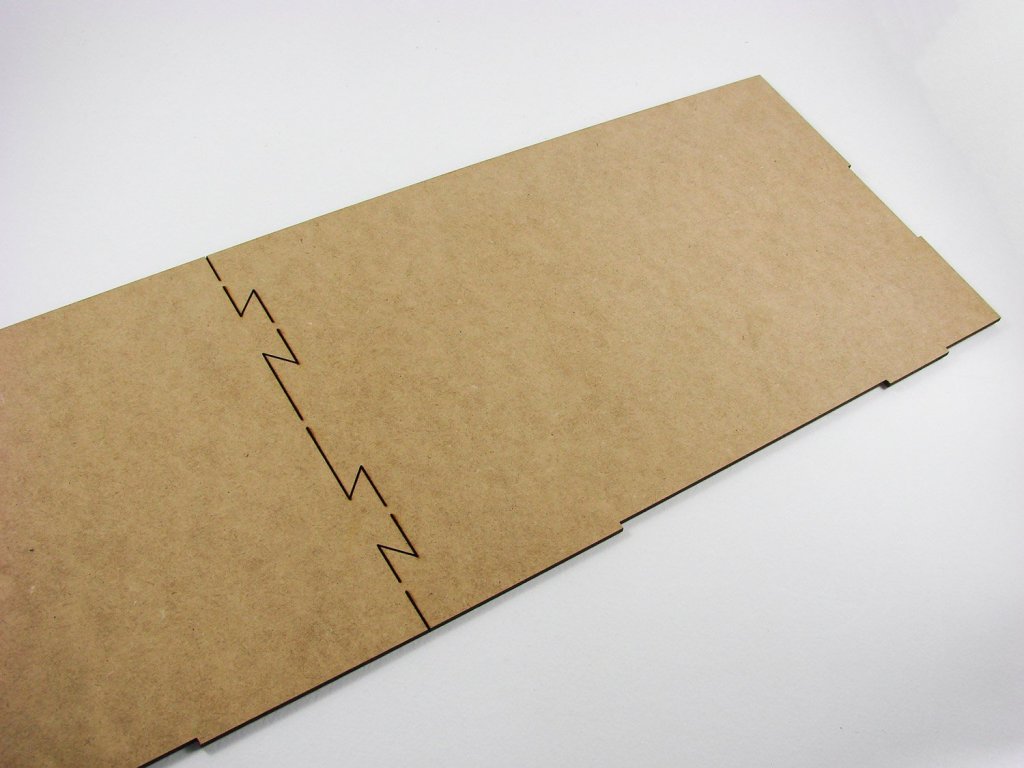
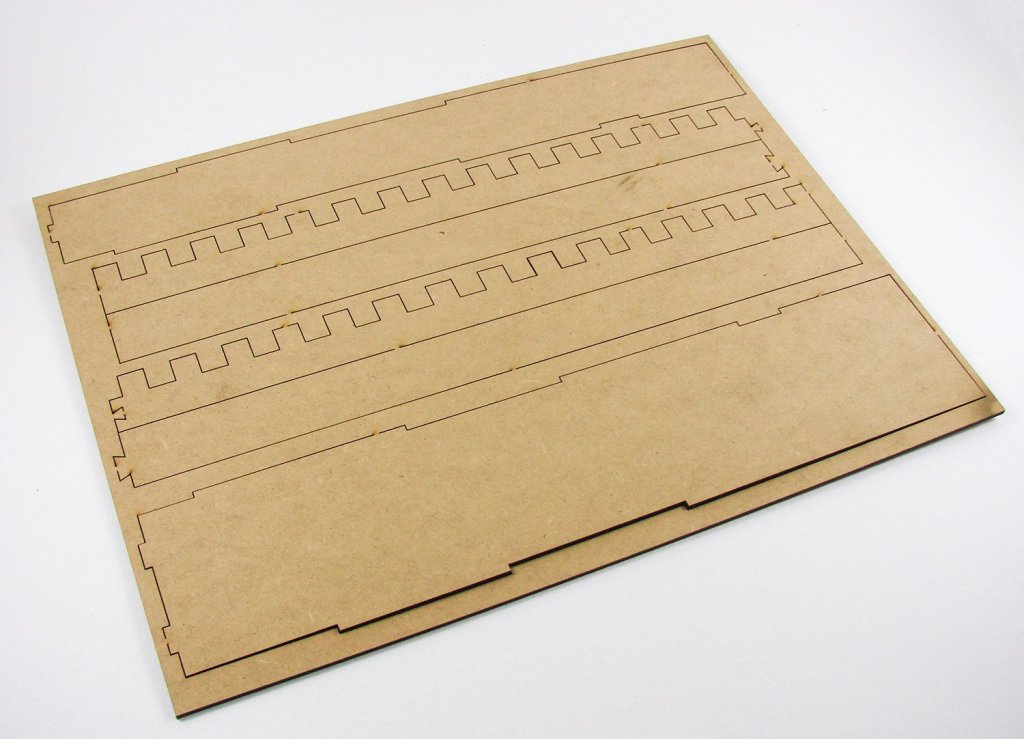
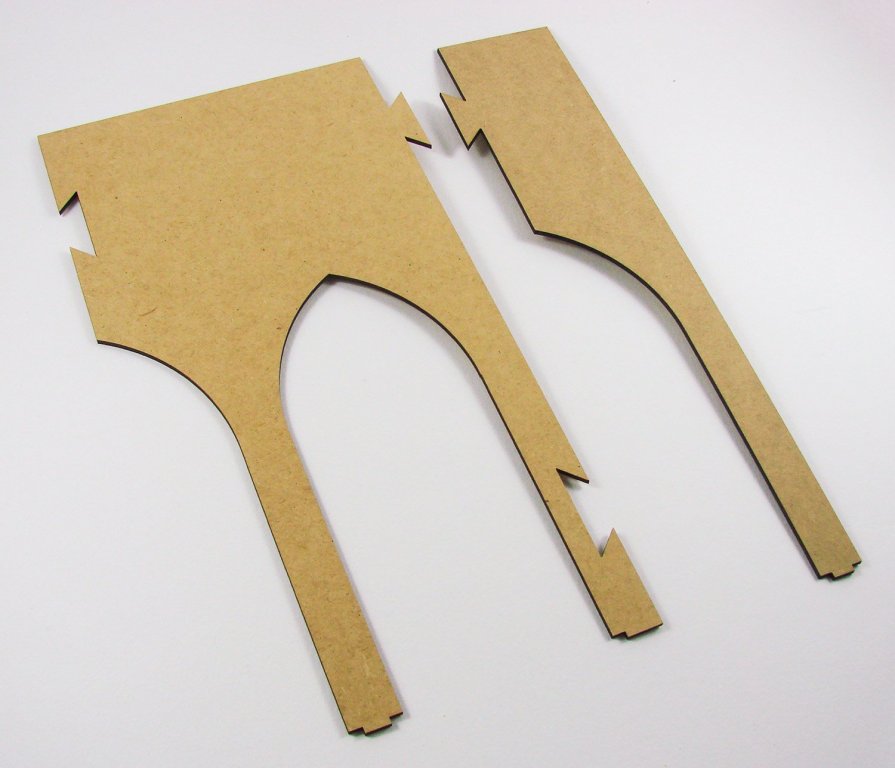
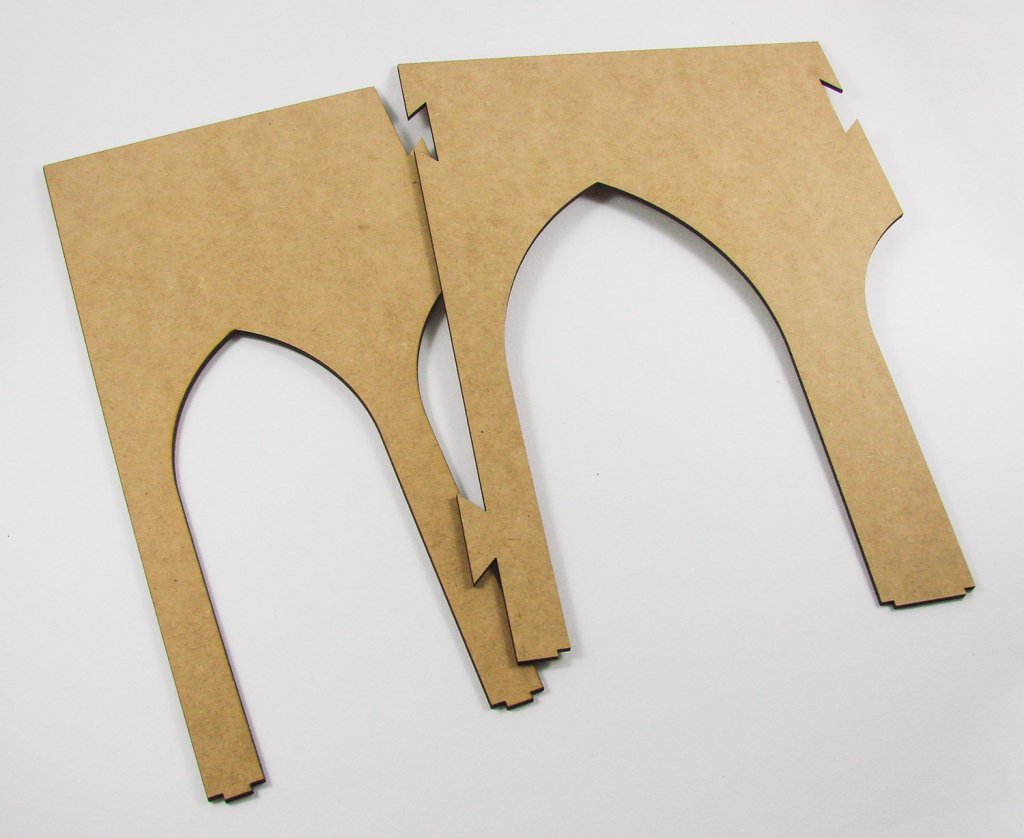
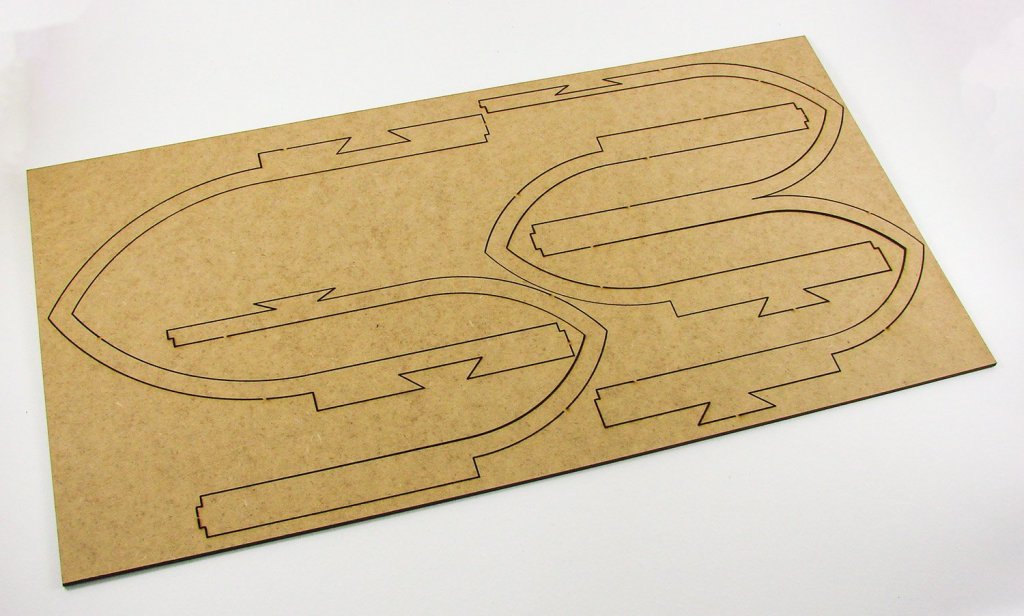
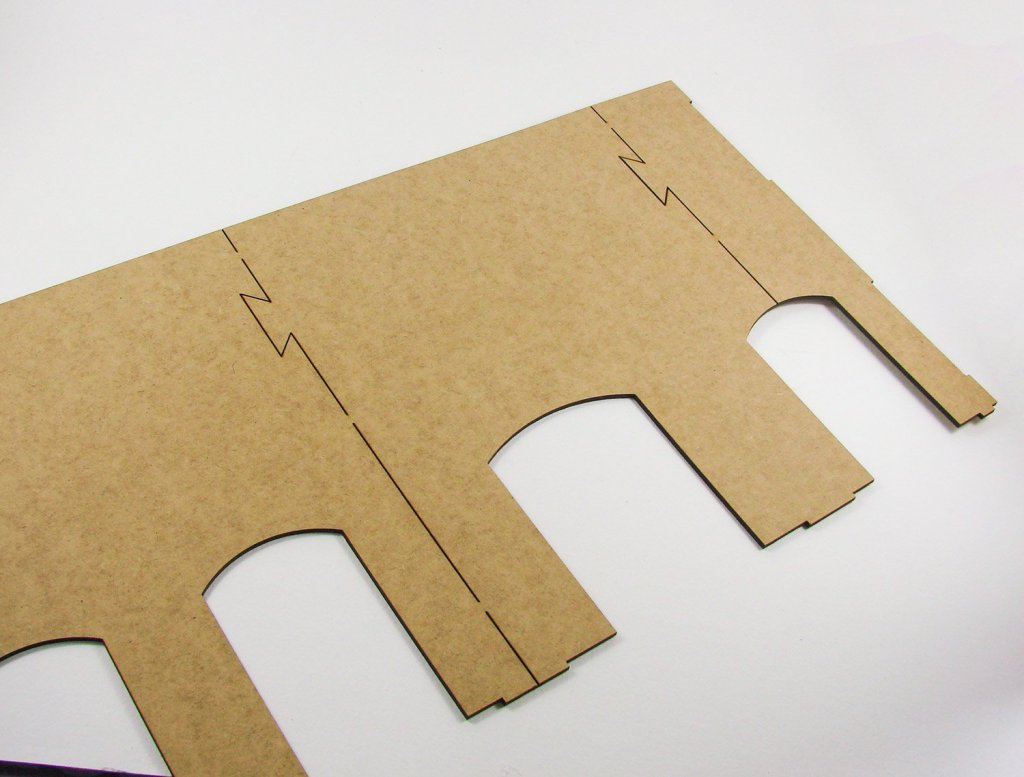
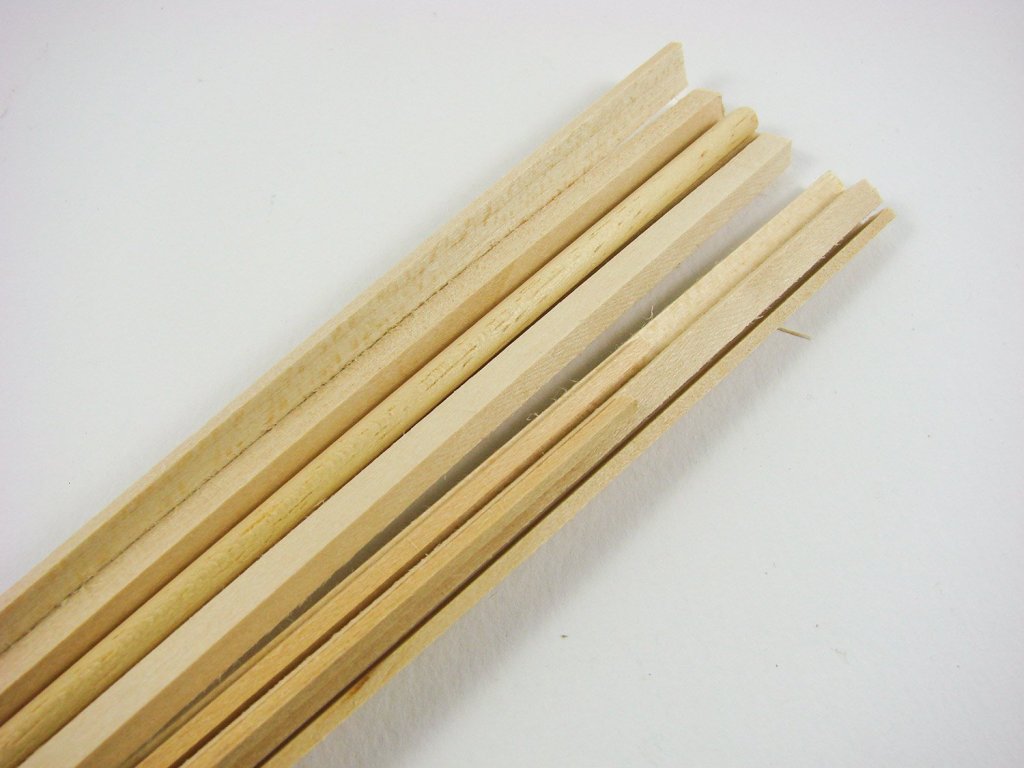
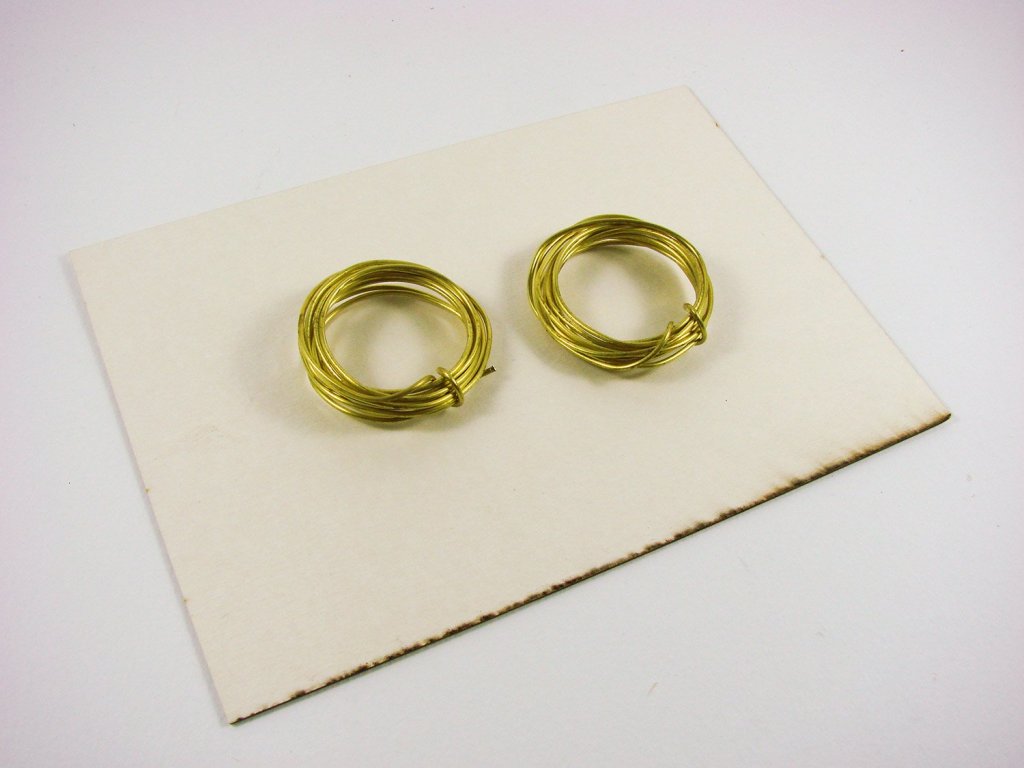
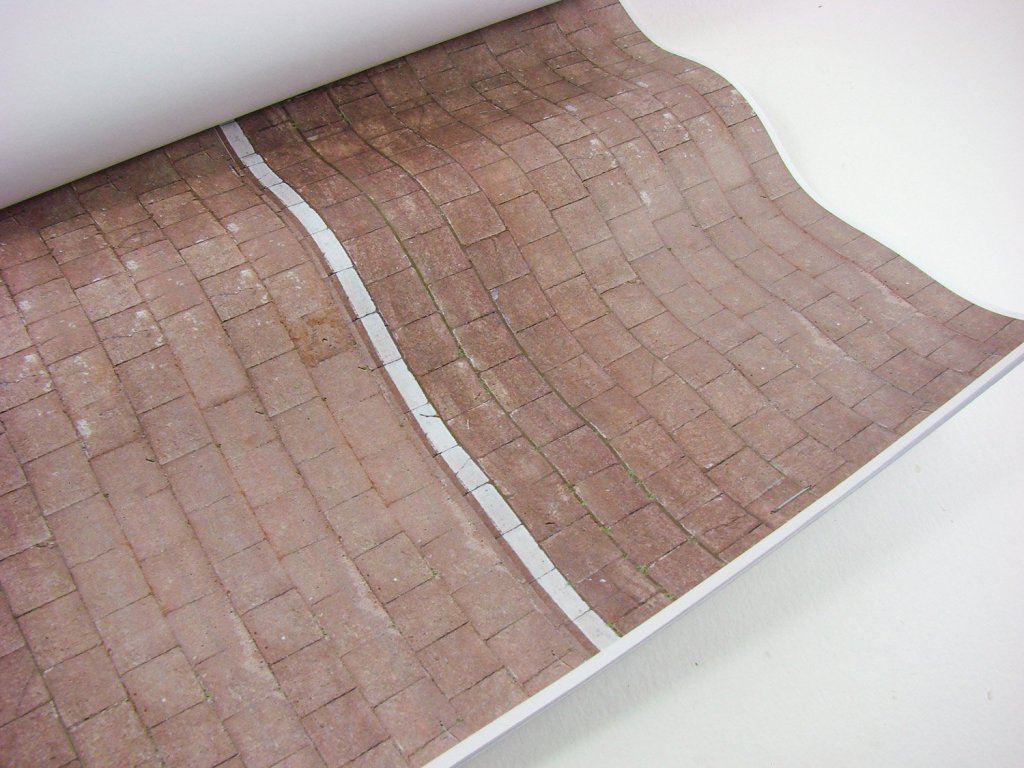
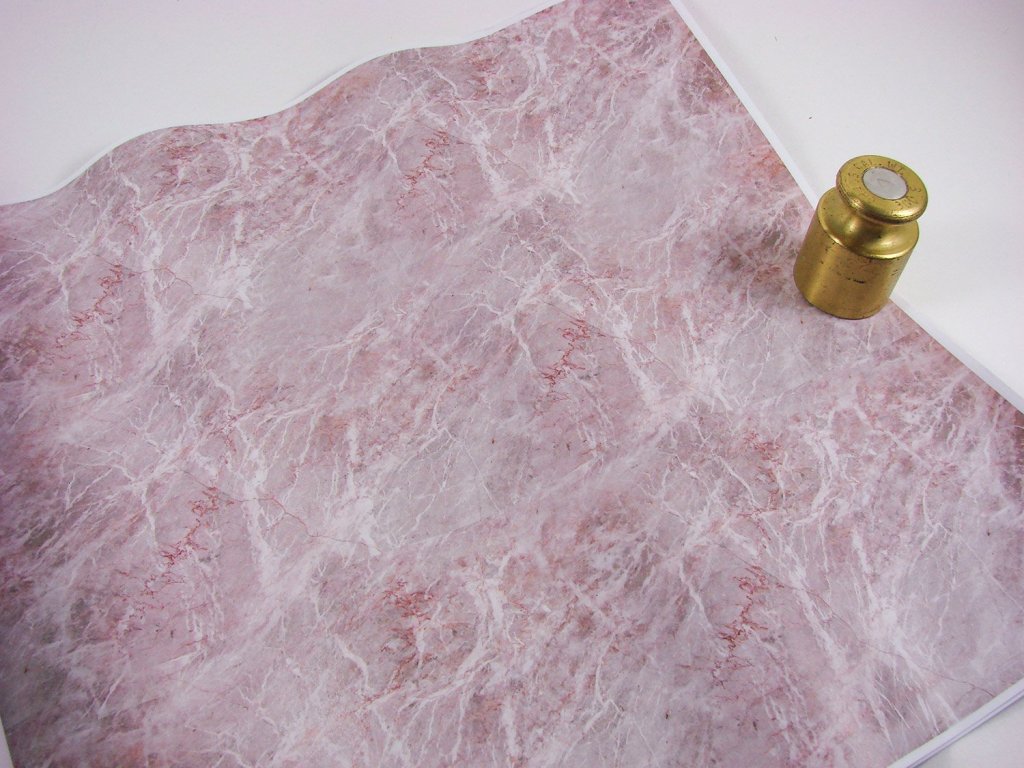
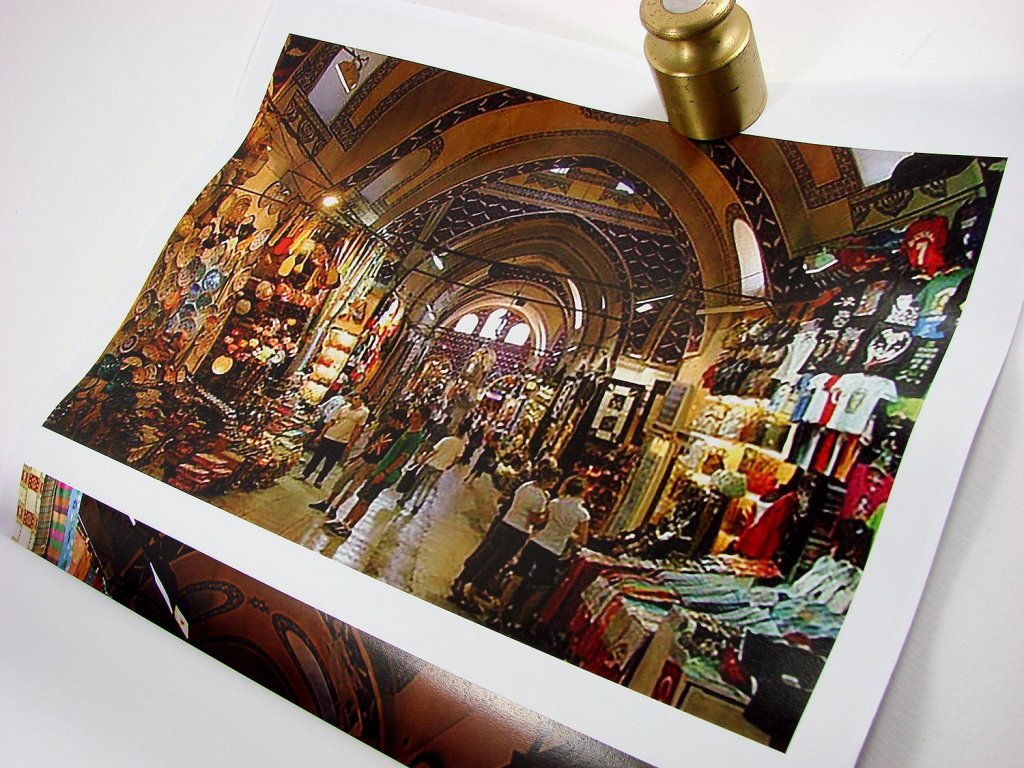
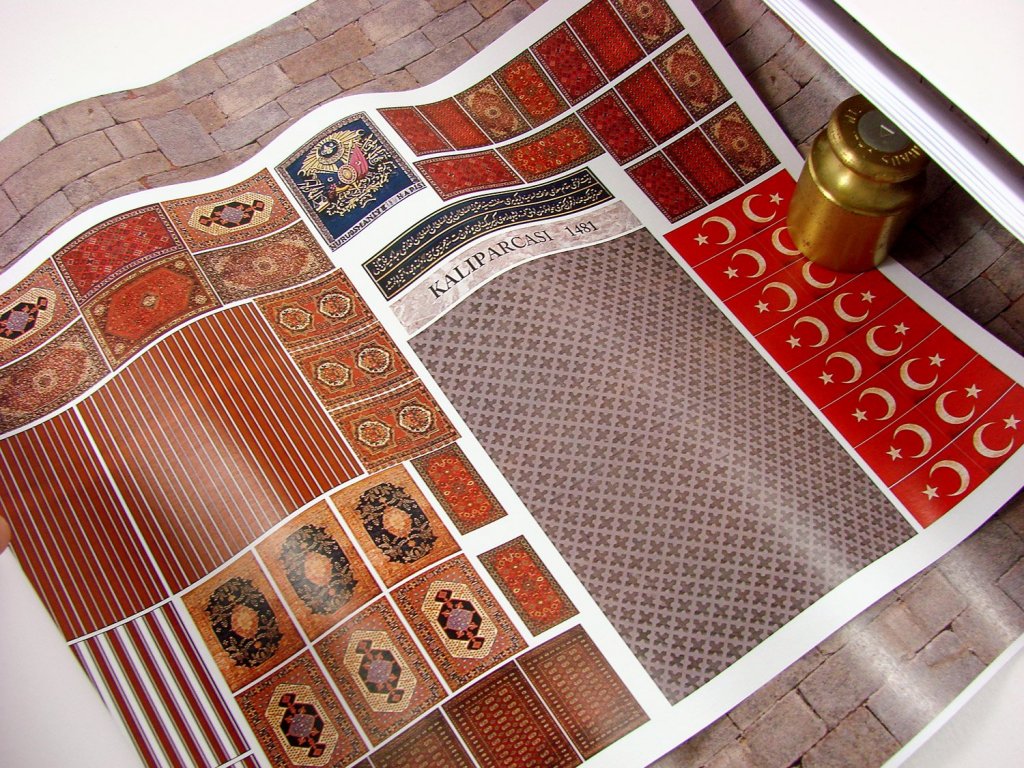
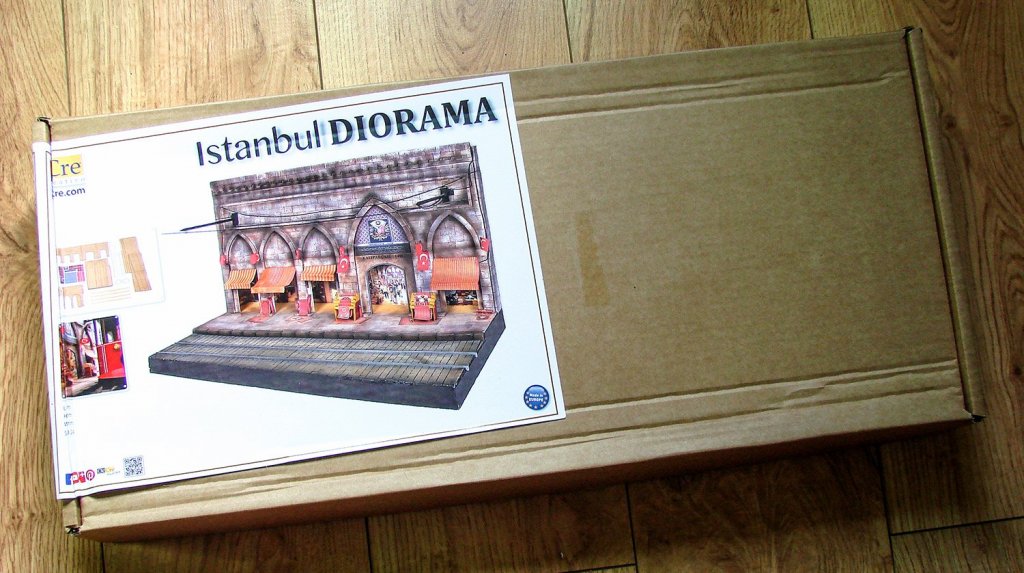
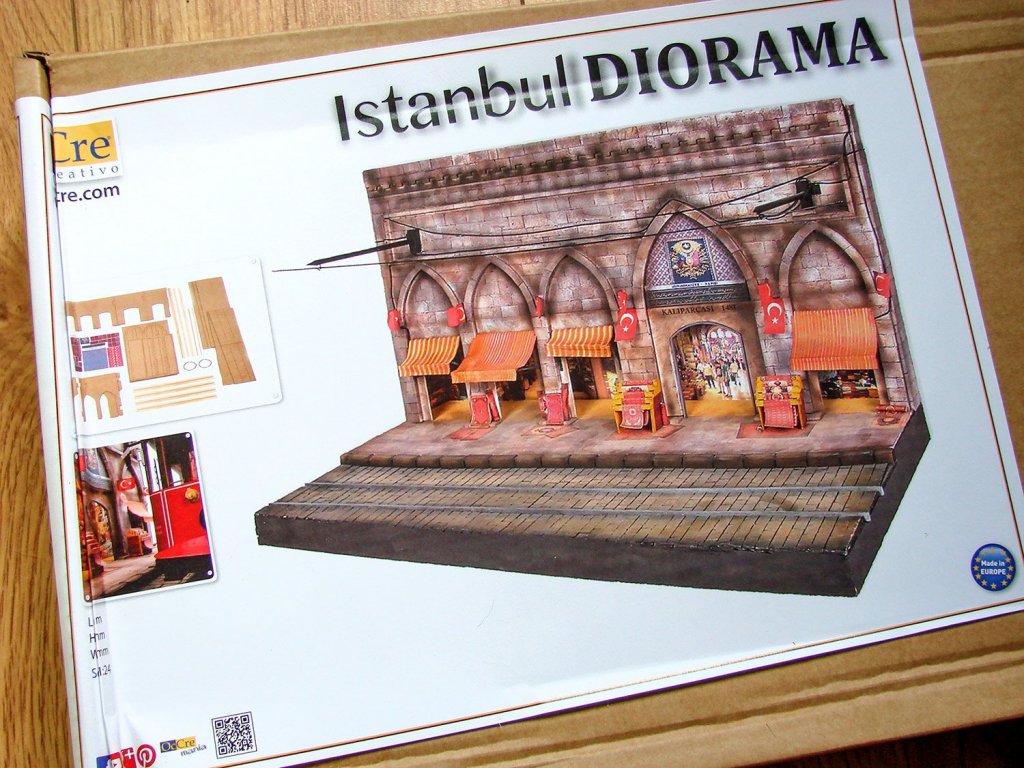
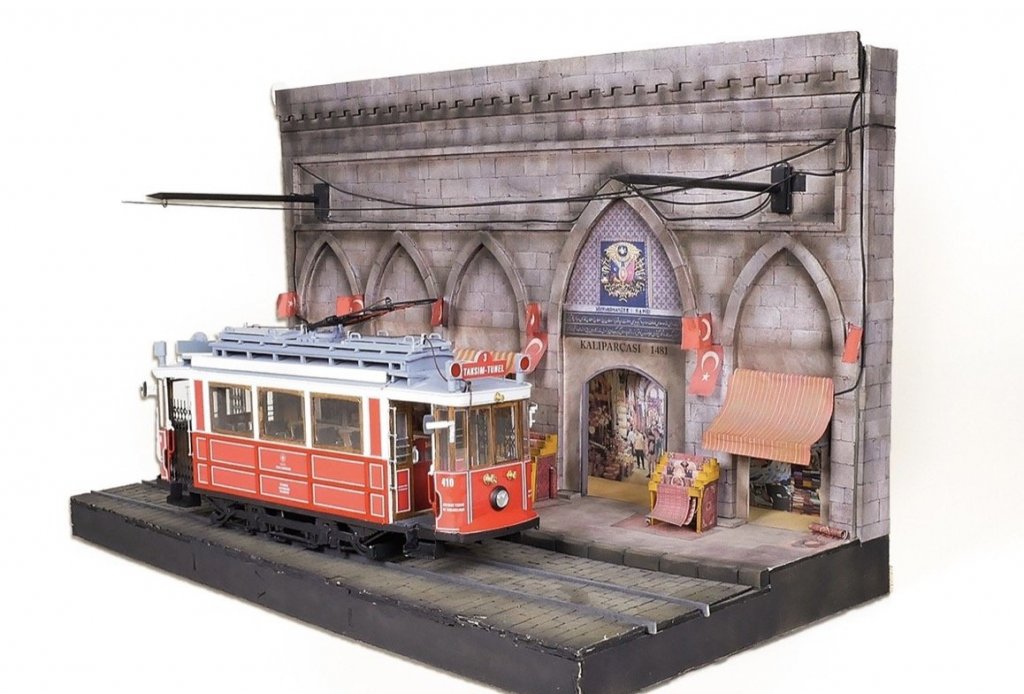
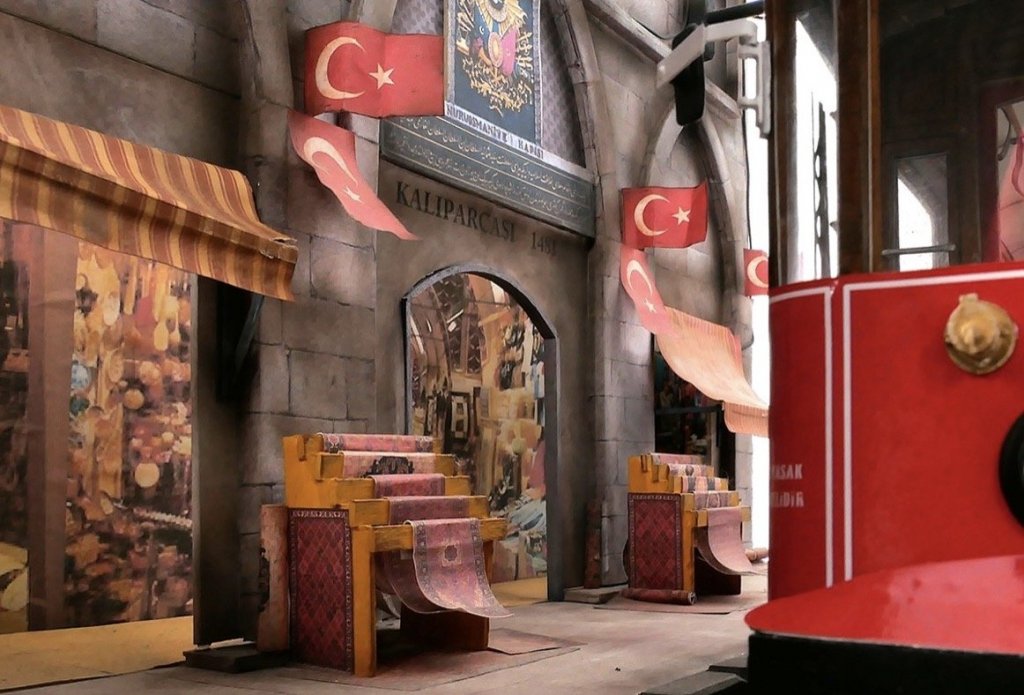
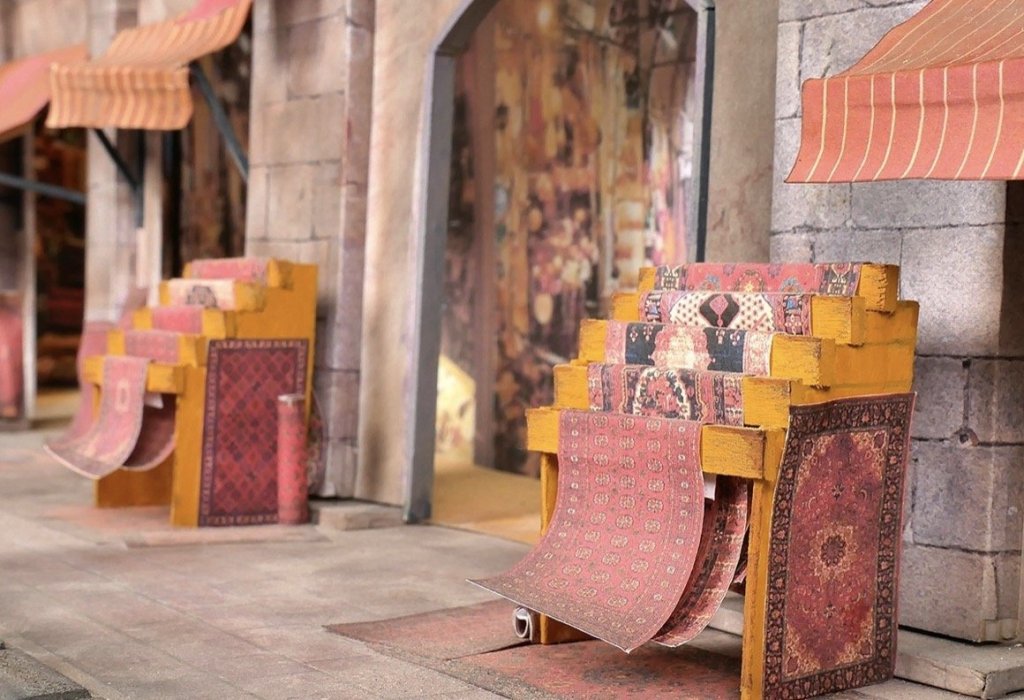
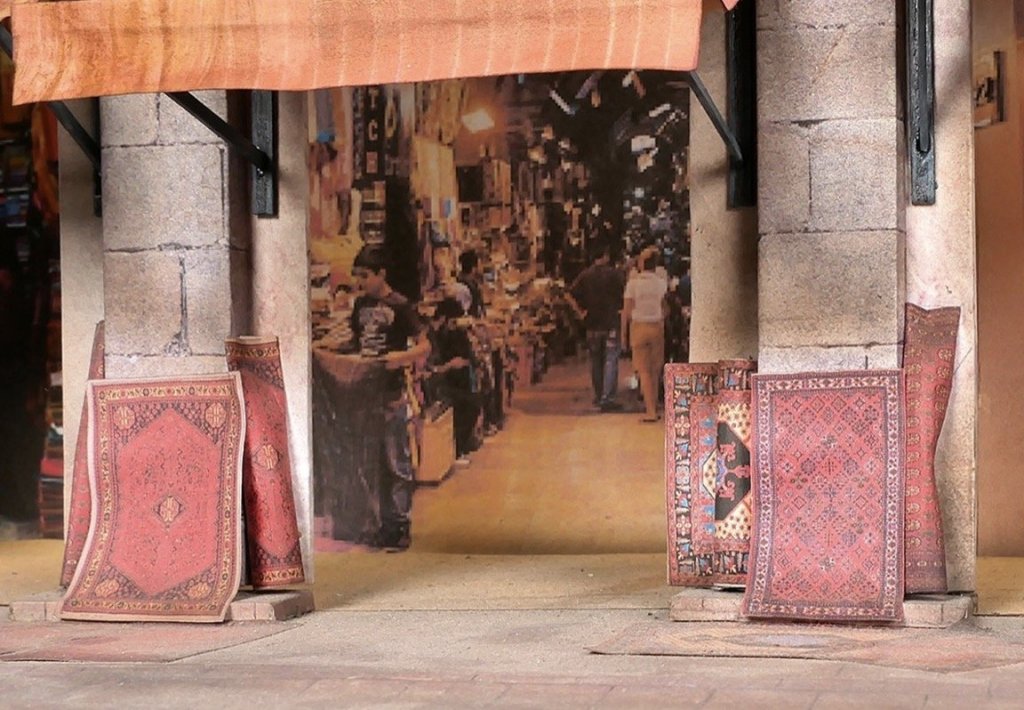
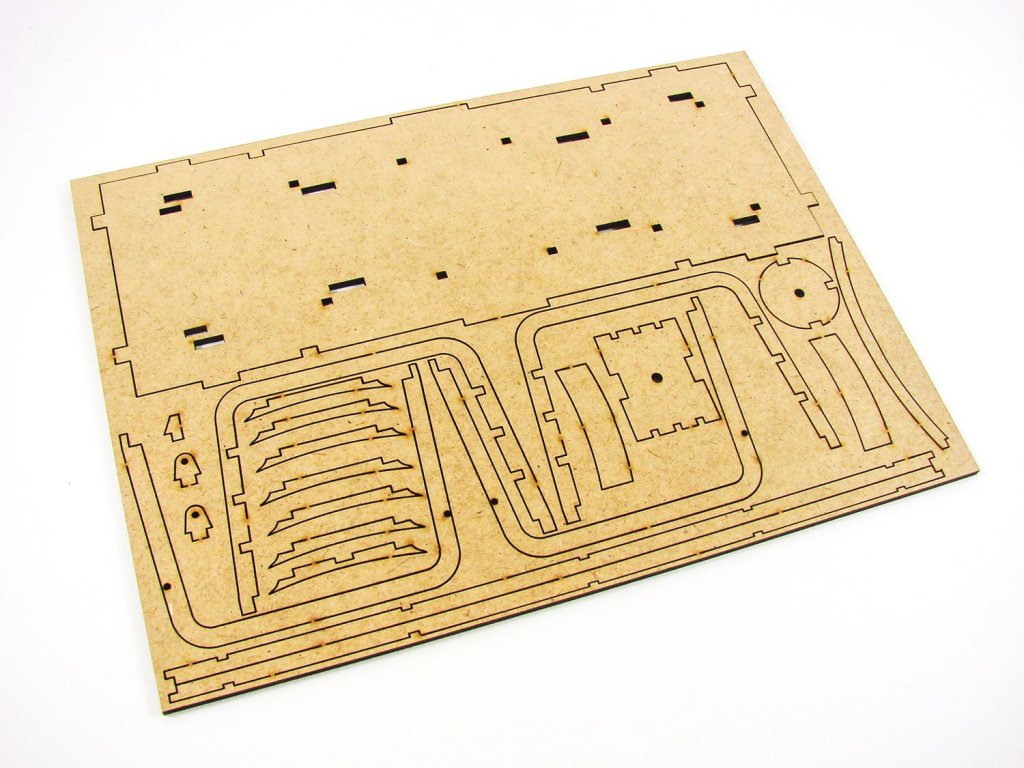
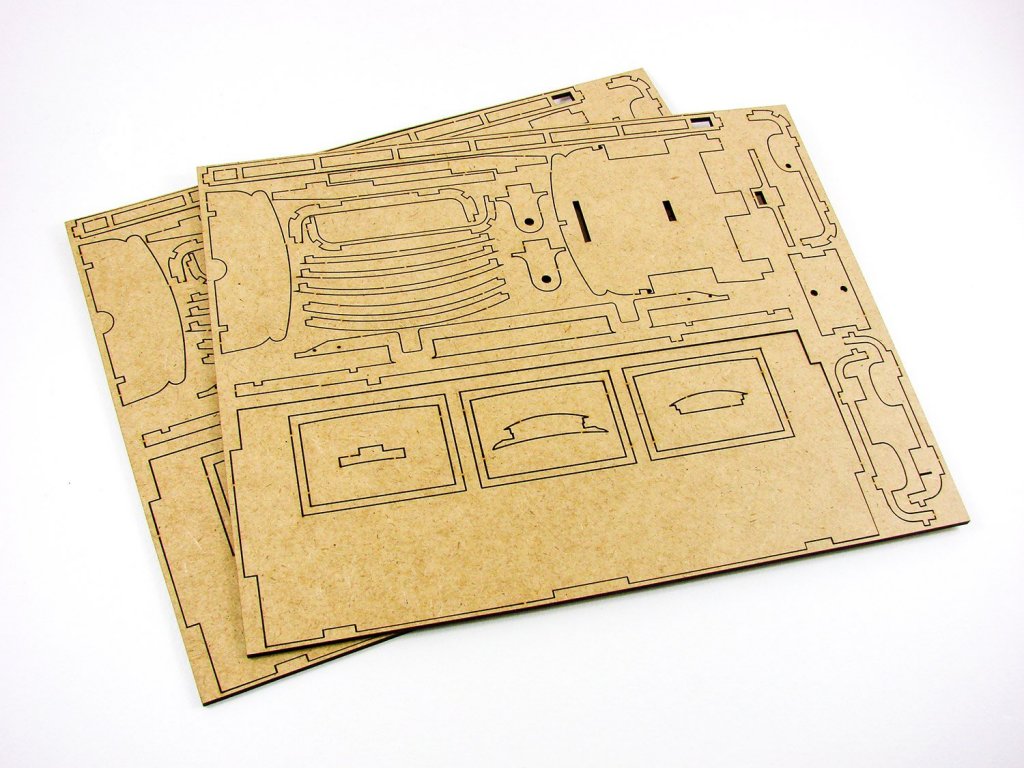
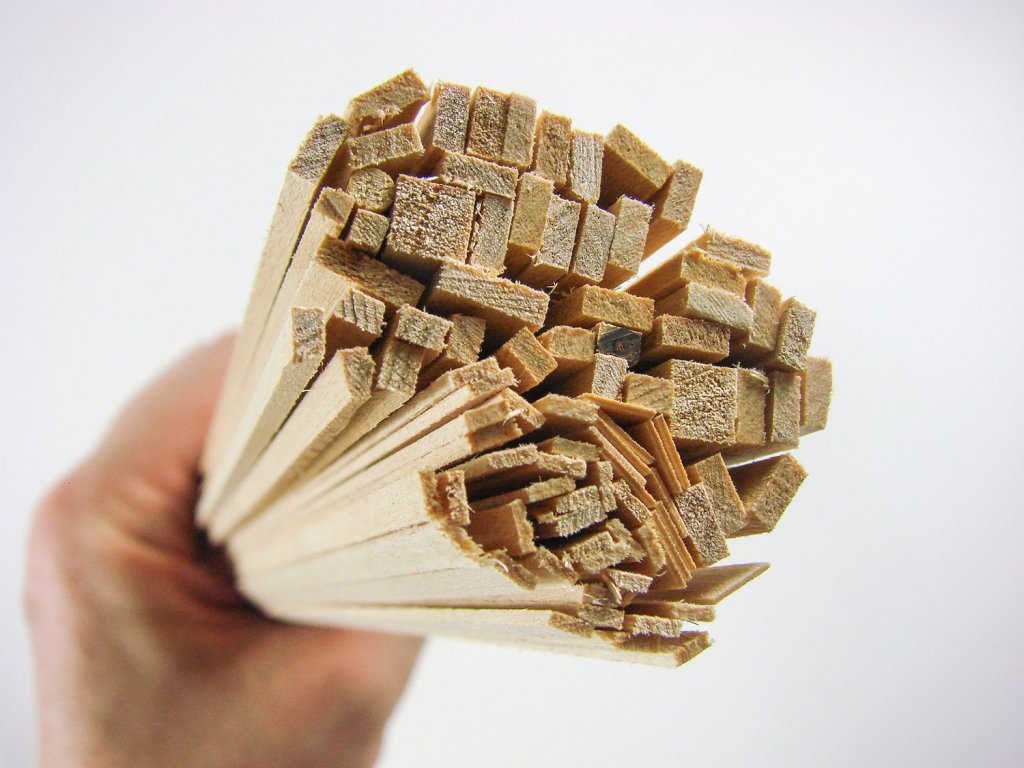
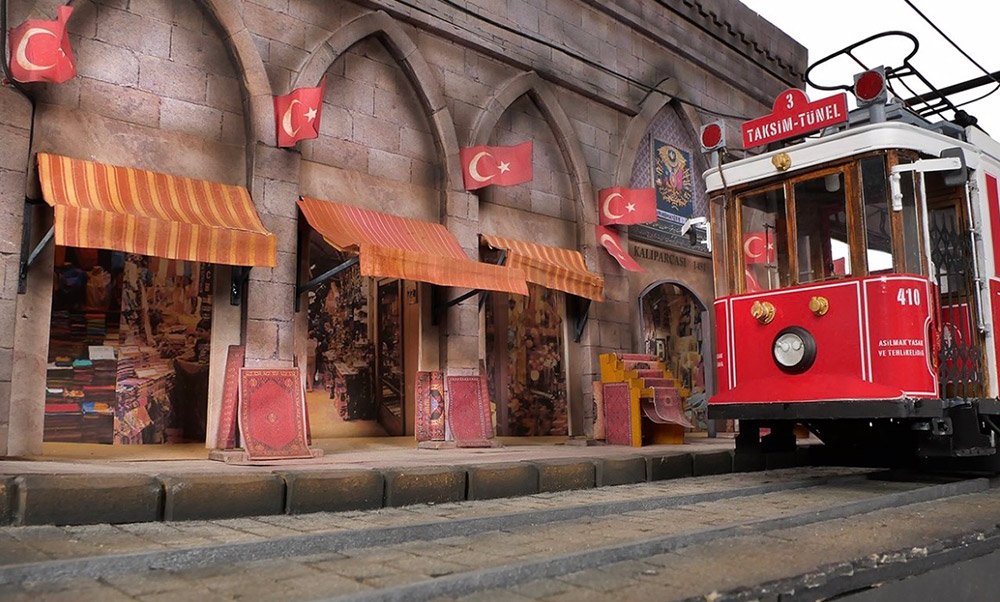
1:24 Istanbul Diorama OcCre Catalogue # 53010D Available from OcCre for €60,95 If you’ve recently taken a look at our Istanbul tram review, you might like this particular review article. Yes, of course you can display your tram on a shelf, or in a cabinet, but what about outside Istanbul’s Grand Bazaar? That’s exactly what this new product from OcCre allows us to do, and with relative ease of construction. This is what OcCre have as their website product description: “The diorama is a representation of the entrance to the Grand Bazaar of Istanbul, one of the largest in the world. Located inside the old “walled city", on the European side of Istanbul, between Nuruosmaniye, Mercan and Beyazıt, with more than 58 covered streets and 4,000 shops or stalls, every day the bazaar attracts between 250,000 and 400,000 visitors. The bazaar offers a wide range of products, in particular jewellers, precious metal workers, spice shops and carpet shops. The stalls tend to be grouped together by type, following the tradition of the ancient guilds. The bazaar includes two Bedestens, or domed stone-built structures, which are used for the storage of merchandise. The first of these was built in 1464, by order of Mehmet II, although it then had to be mostly rebuilt in 1864, following the earthquake. This fabulous diorama combines perfectly with the tram of Istanbul, joining the nostalgic line of Taksim-Tunnel with the Grand Bazaar, in an effort to group two large emblems of the city of Istanbul.” The kit The Istanbul diorama is packaged into quite a plain, shallow corrugated cardboard box, with a colour product label attached. There is also a reasonable amount of weight here too, so you know there’s plenty of building material afoot. Upon opening the box, it ca be seen that the multitude of sheet material is wrapped in a heat-sealed sleeve that needs to be cut away. As the sheets in here are various sizes, and the internal box has no compartmentalisation, this is a good way of ensuring that damage risk is minimised. There are also a number of printed sheets which are rolled up, some strip timber and brass wire. A catalogue and sheet pointing to the instructions, are also included. More on the latter in a moment. The numerous sheets are made from MDF and are very neatly laser-cut. You will note how some of the parts have dovetail connections too. In essence, the entire diorama is built up from a series of wall panels that have the Islamic arch shapes that attach to them to create a 3D relief, and this is sat upon a base which is built from sections, to incorporate the ruts along which the tram lines would run. Oddly enough, there is no actual brass section strip to recreate the tram line itself, but instead, timber strip, painted silver, it what’s prescribed. Using some metal strip could be a nice enhancement, but you would need to purchase that yourself, measured against the OcCre tram wheels for best fit. The idea behind this diorama is that anyone can typically build it, simply out of the box contents. To decorate the walls and floors etc. a series of colour-printed textures are provided, on A4 sheets. These include stone, marble and parquet styles, and these need to be cut out to suit the various structures, and then glued into position with a glue stick, for example. Using wet glues may cause the sheets to ripple and not adhere as flat as they should, although the instructions do actually show brushed PVA as being the glue of choice. Sheets of paper are also supplied to simulate the Bazaar interior, with crowds of people and stalls etc. When it comes to depicting the exterior details, more printed sheets are supplied, with such things as Turkish rugs, flags etc, and these can be draped over the display stands that sit outside the various stalls on the exterior of the Bazaar. These stalls also have printed awnings to shelter them from the Turkish sun. To recreate the road itself, then a series of strip card is supplied. This needs to be cut into brick-sized sections, and then plastered over the road in a staggered manner. You can of course then paint and infill between them and add some airbrushed staining to weather things realistically. Brass wire is supplied for all manner of things, such as the random-looking electrical cables that run along the outside walls. OcCre supply no instructions for this kit. Instead, they provide an online build guide which is very comprehensive, showing everything right down to measuring out specific dimensions for everything. This multi-part guide is excellent, with the facility to be able to download each part as a PDF. To check out the guide, head to this link: http://www.occremania.com/diorama-de-istanbul-parte-8-2/ Conclusion Dioramas aren’t usually my thing, but this looks very tempting, just to see if I can make a reasonable attempt at it and add some airbrush work to make it look a little more lived in. There’s certainly a nice quantity of building material here, and all nicely produced. Recreating the street surface will also be quite absorbing, as well as those kerb stones that are cut from the thick strip timber. My sincere thanks to OcCre for providing the review sample seen here. To purchase directly, click the link at the top of the article.


-
non-ship review 1:24 Istanbul tram - OcCre
James H replied to James H's topic in Non-ship kit reviews
There are a series of videos showing construction. These are excellent and also to be found linked from the OcCre Mania website, too, here: http://www.occremania.com/tranvias/istanbul/ Here are a few to whet your appetite. -
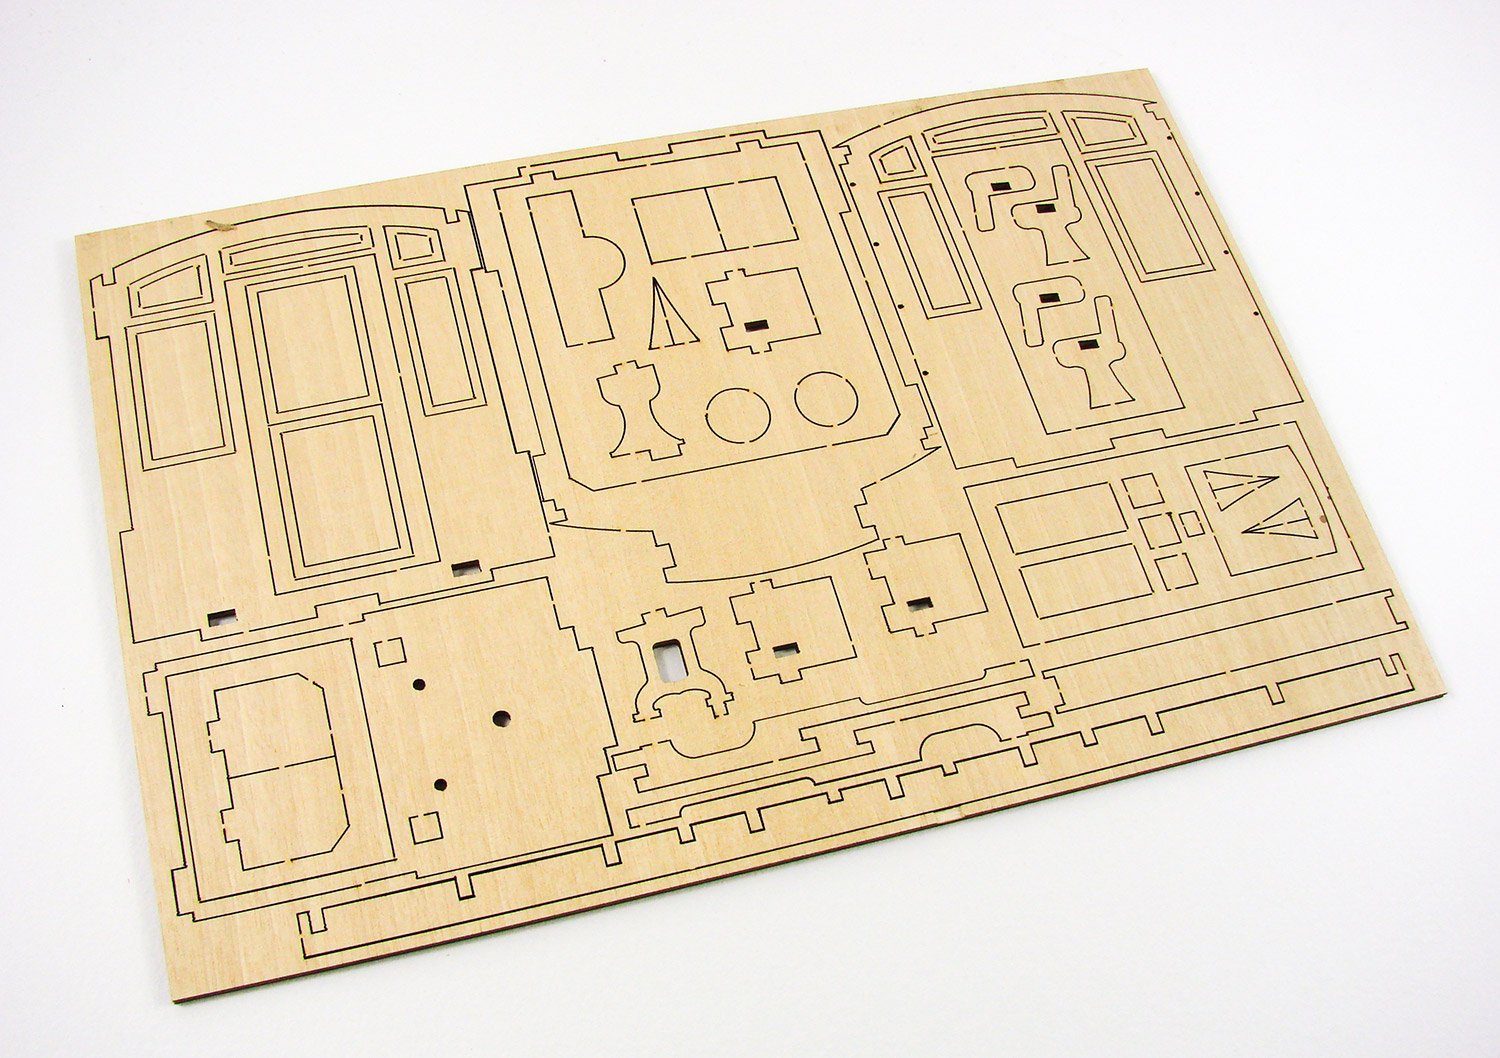
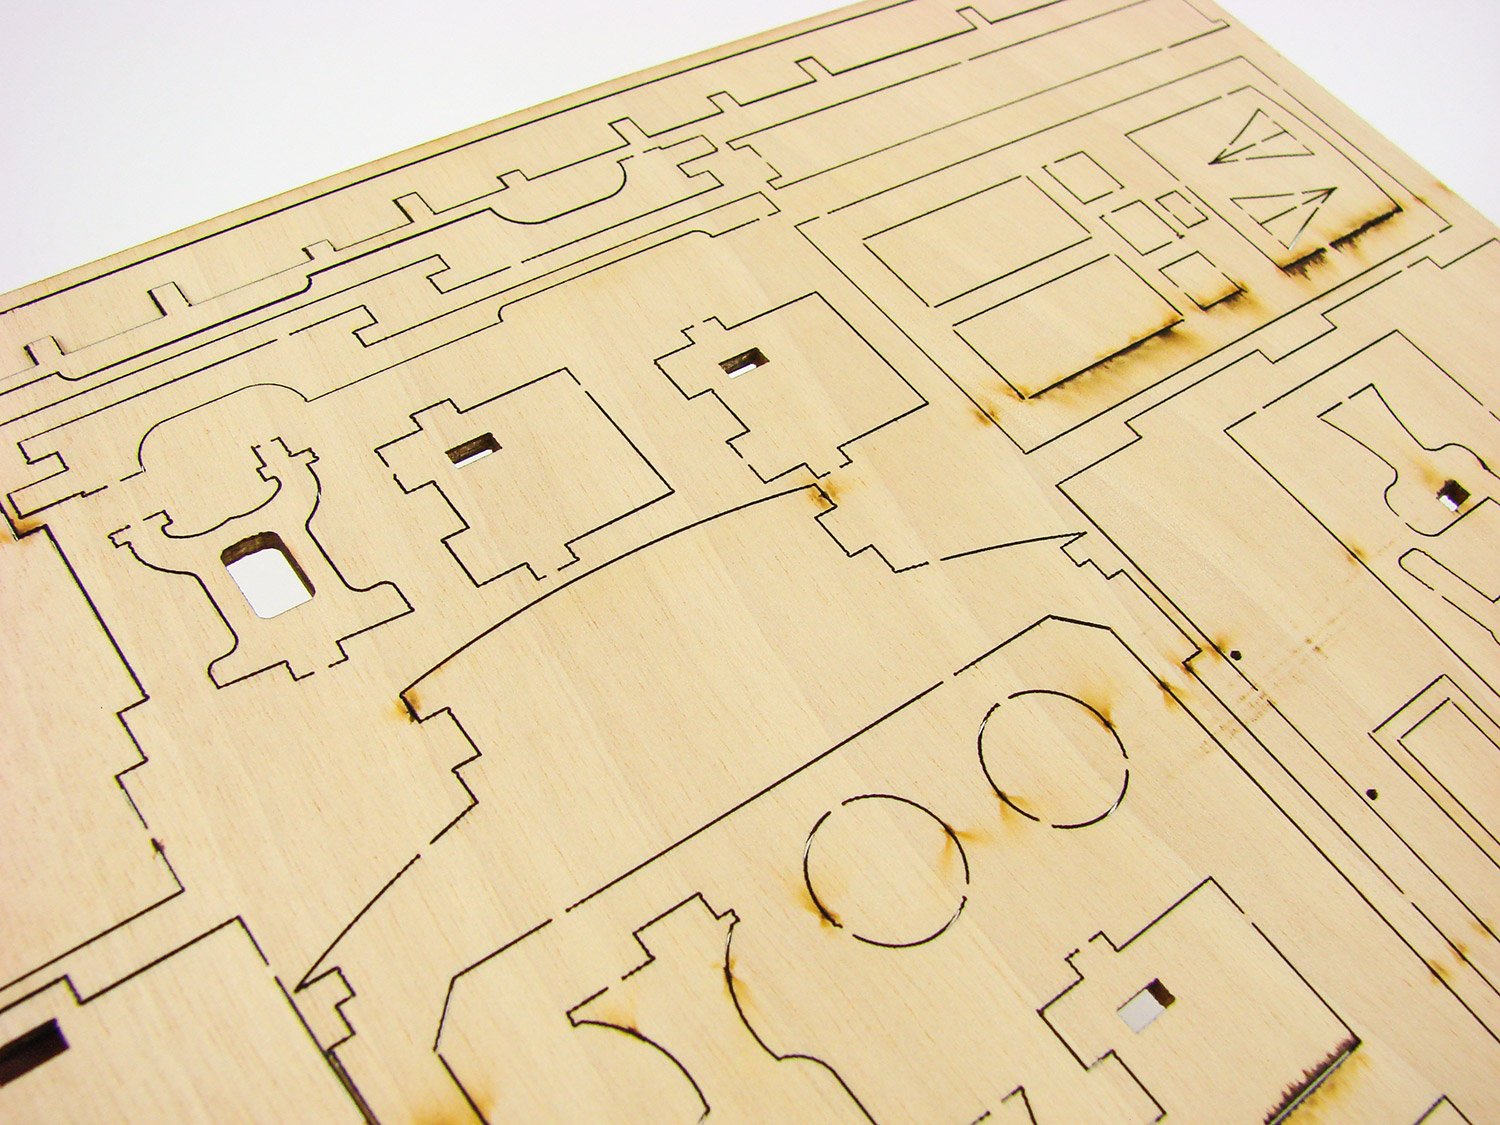
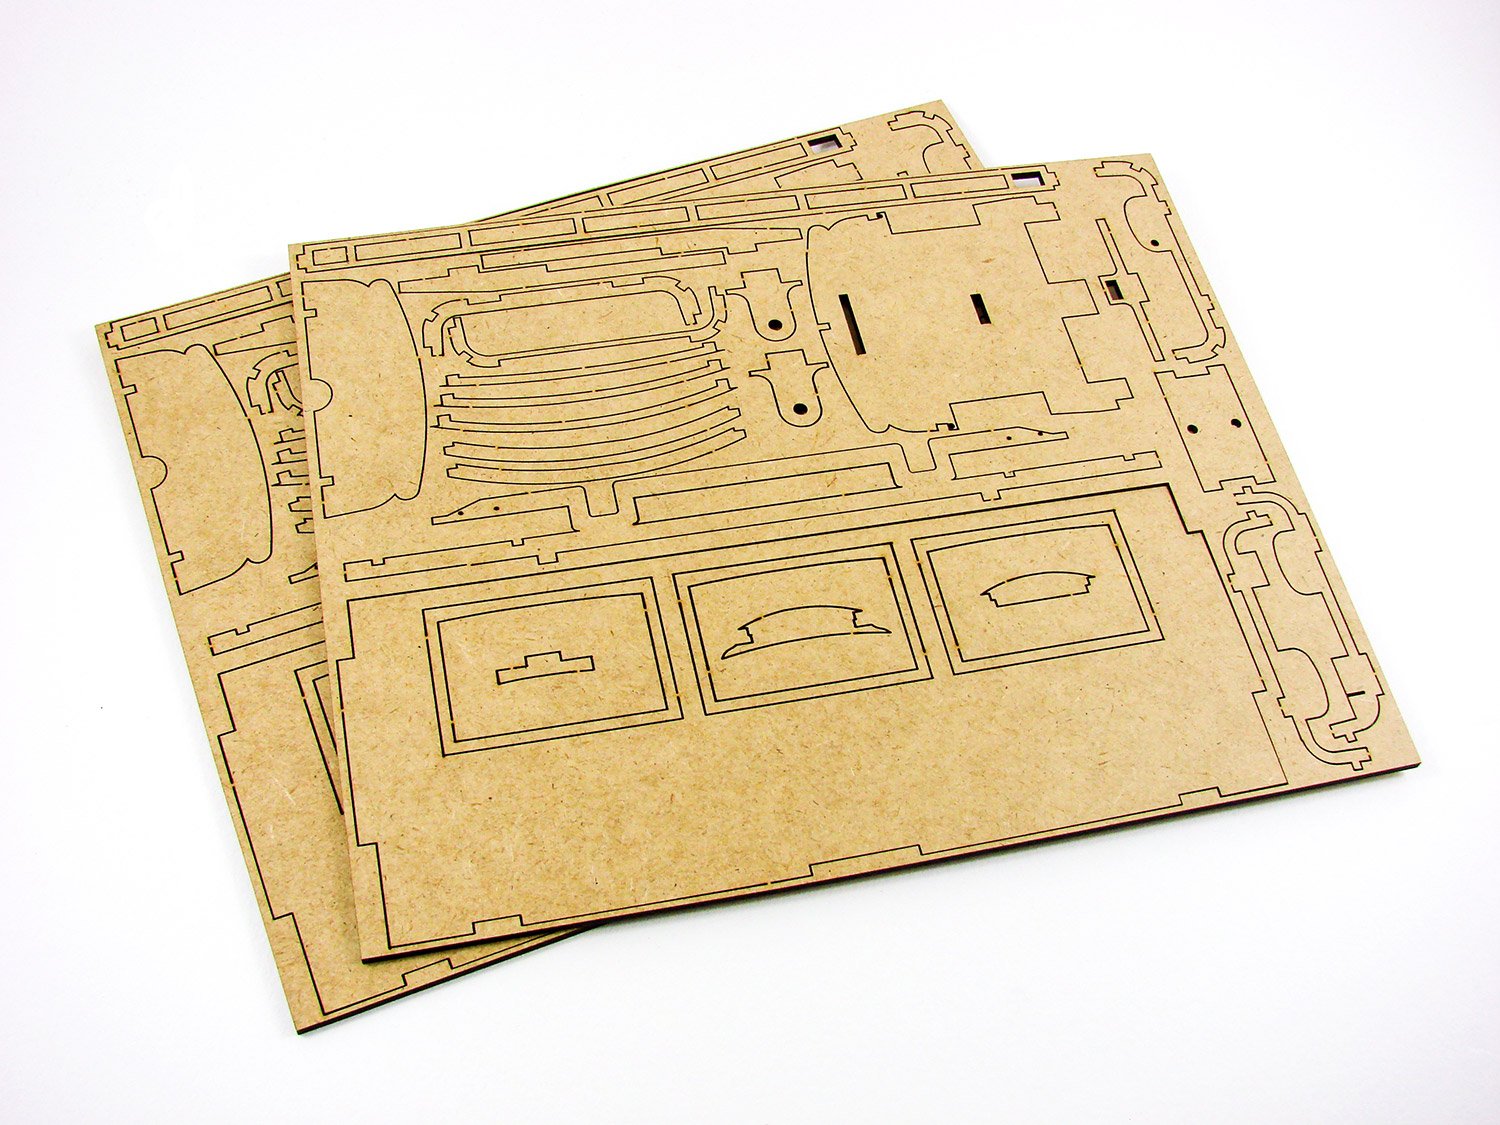
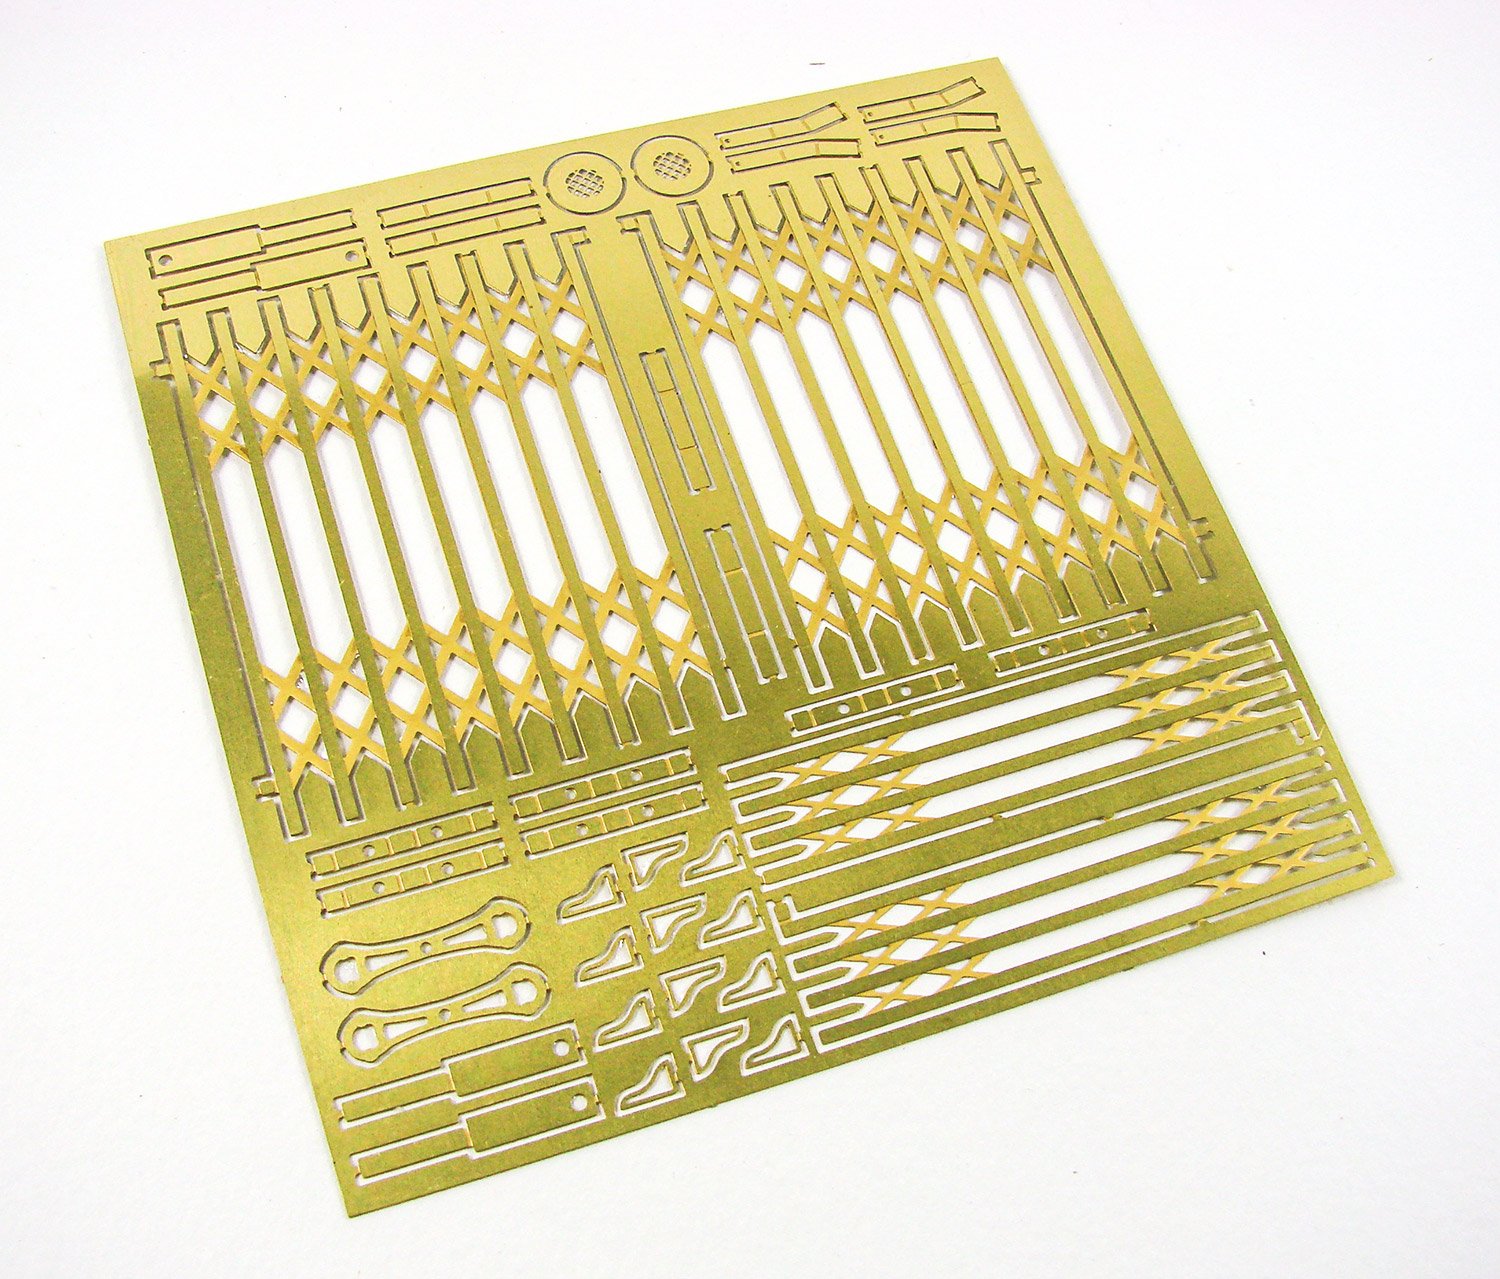
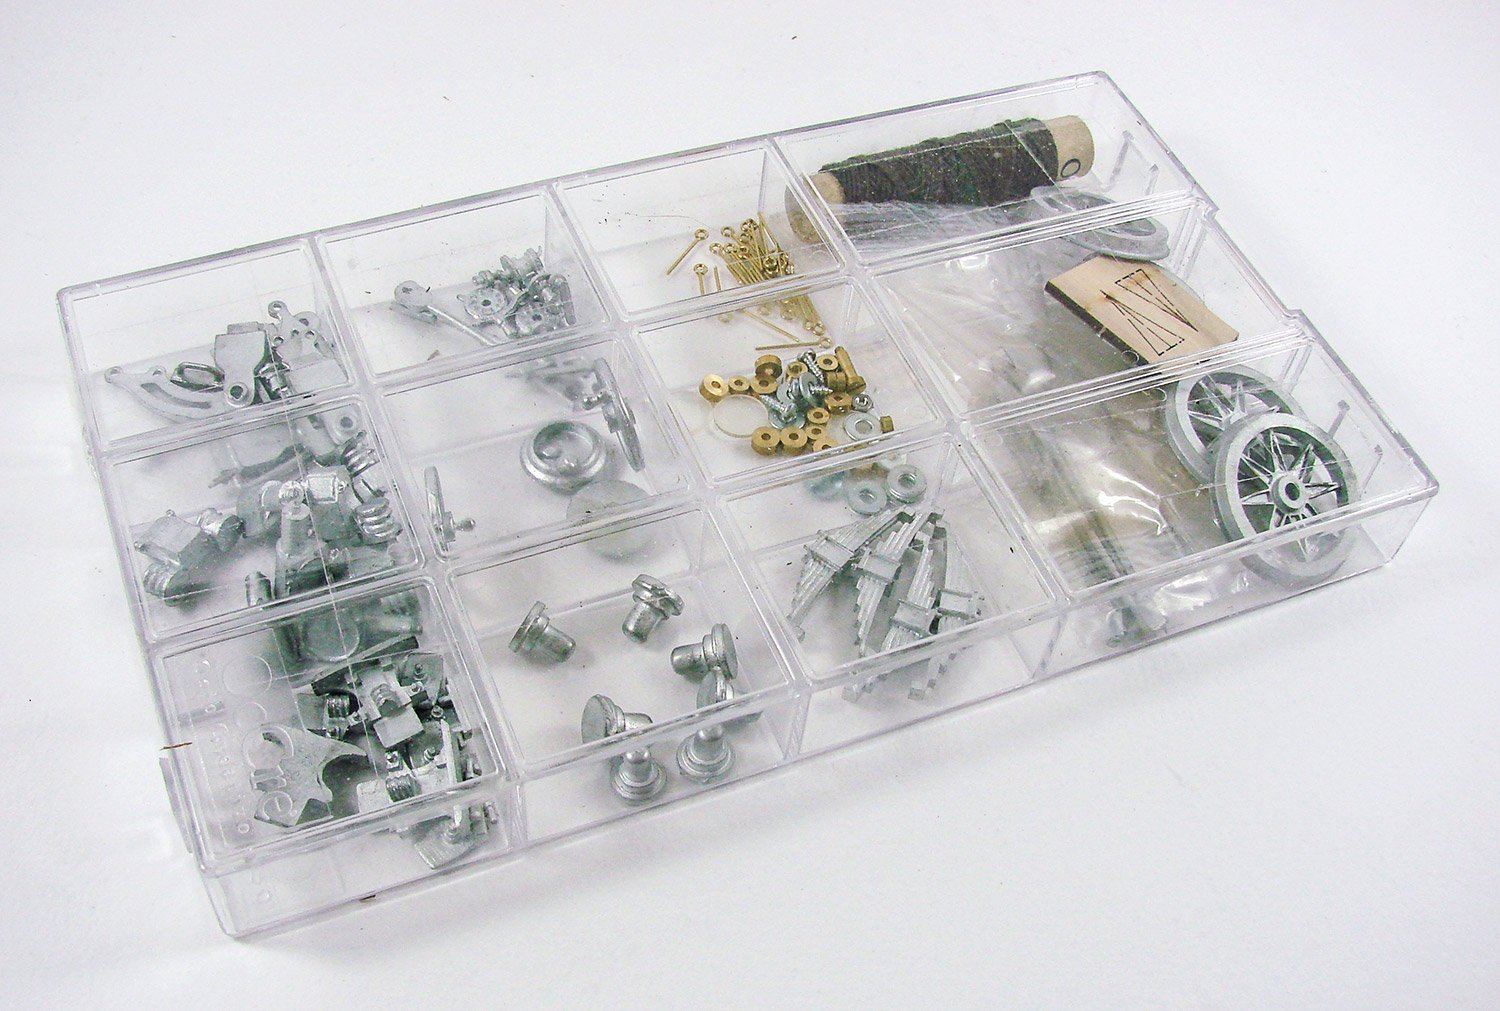
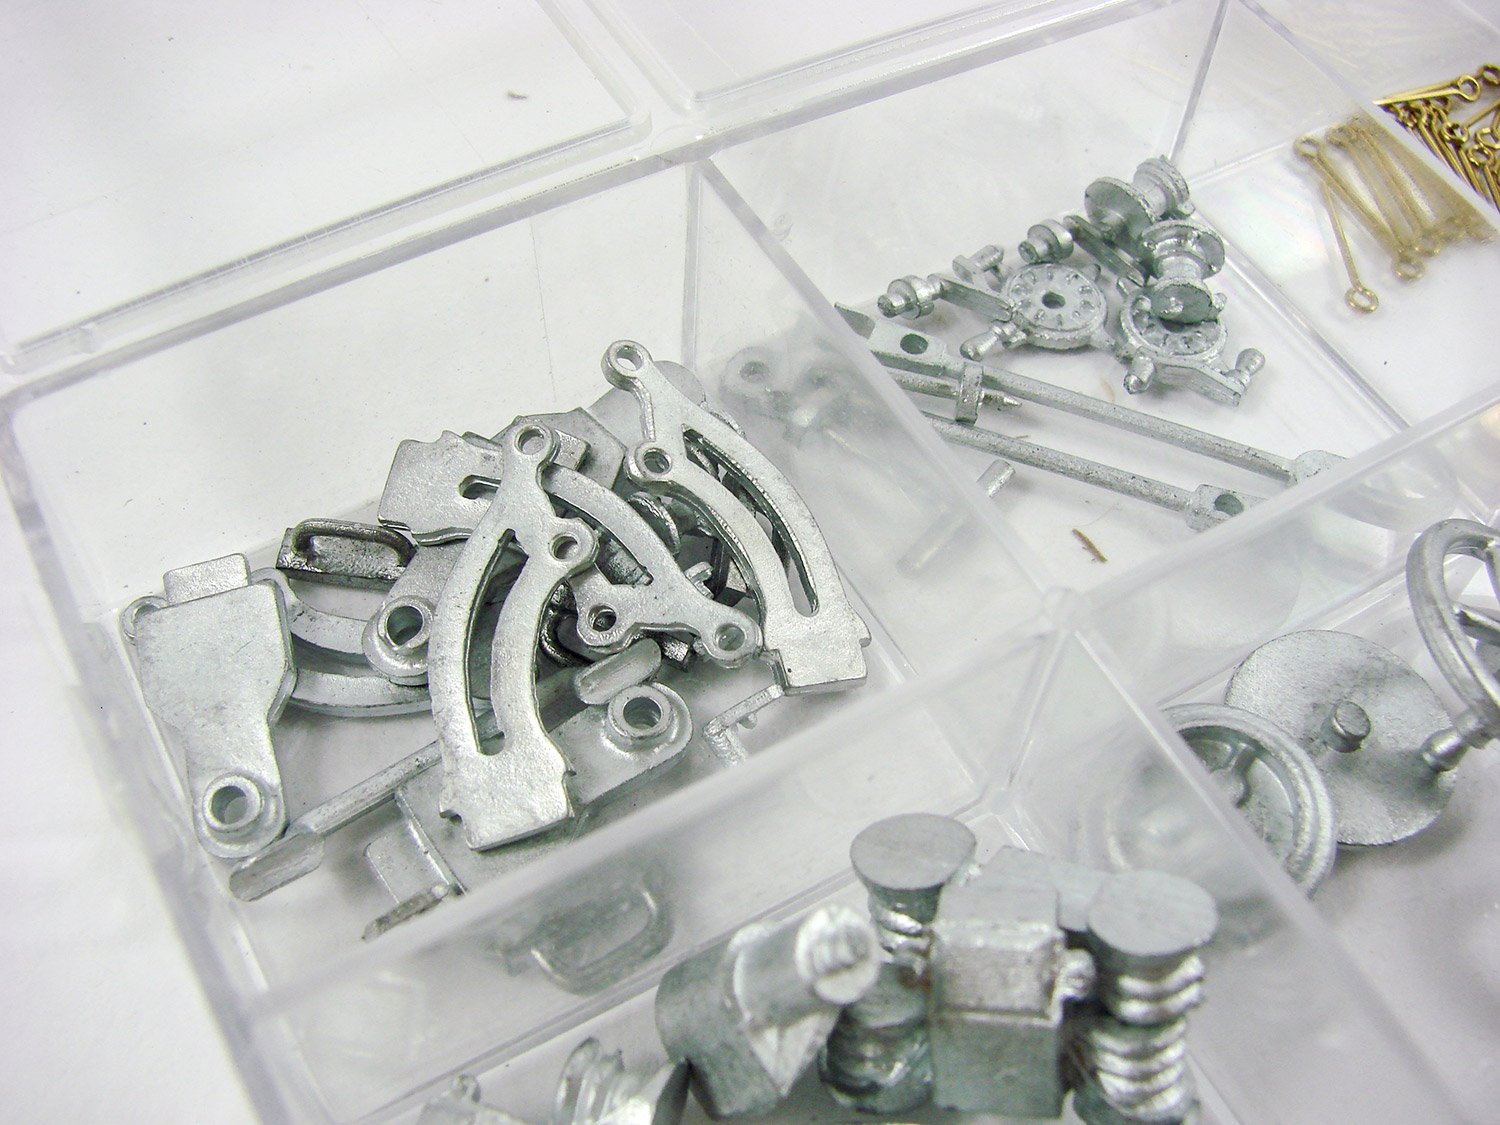
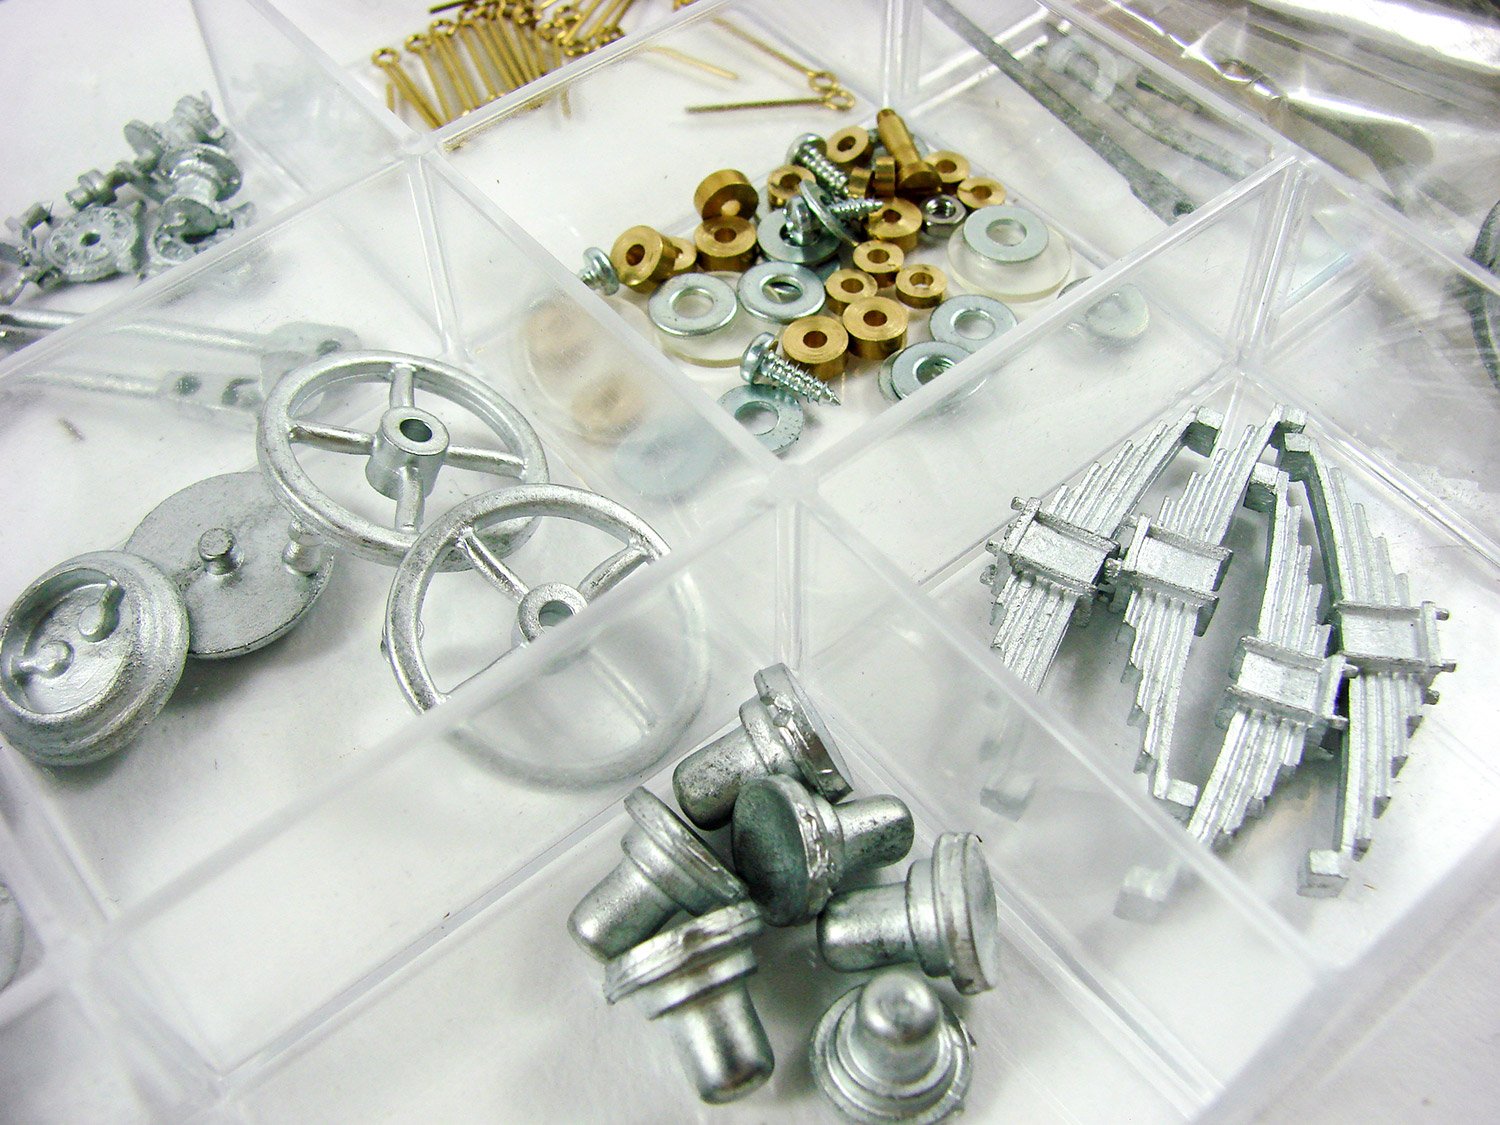
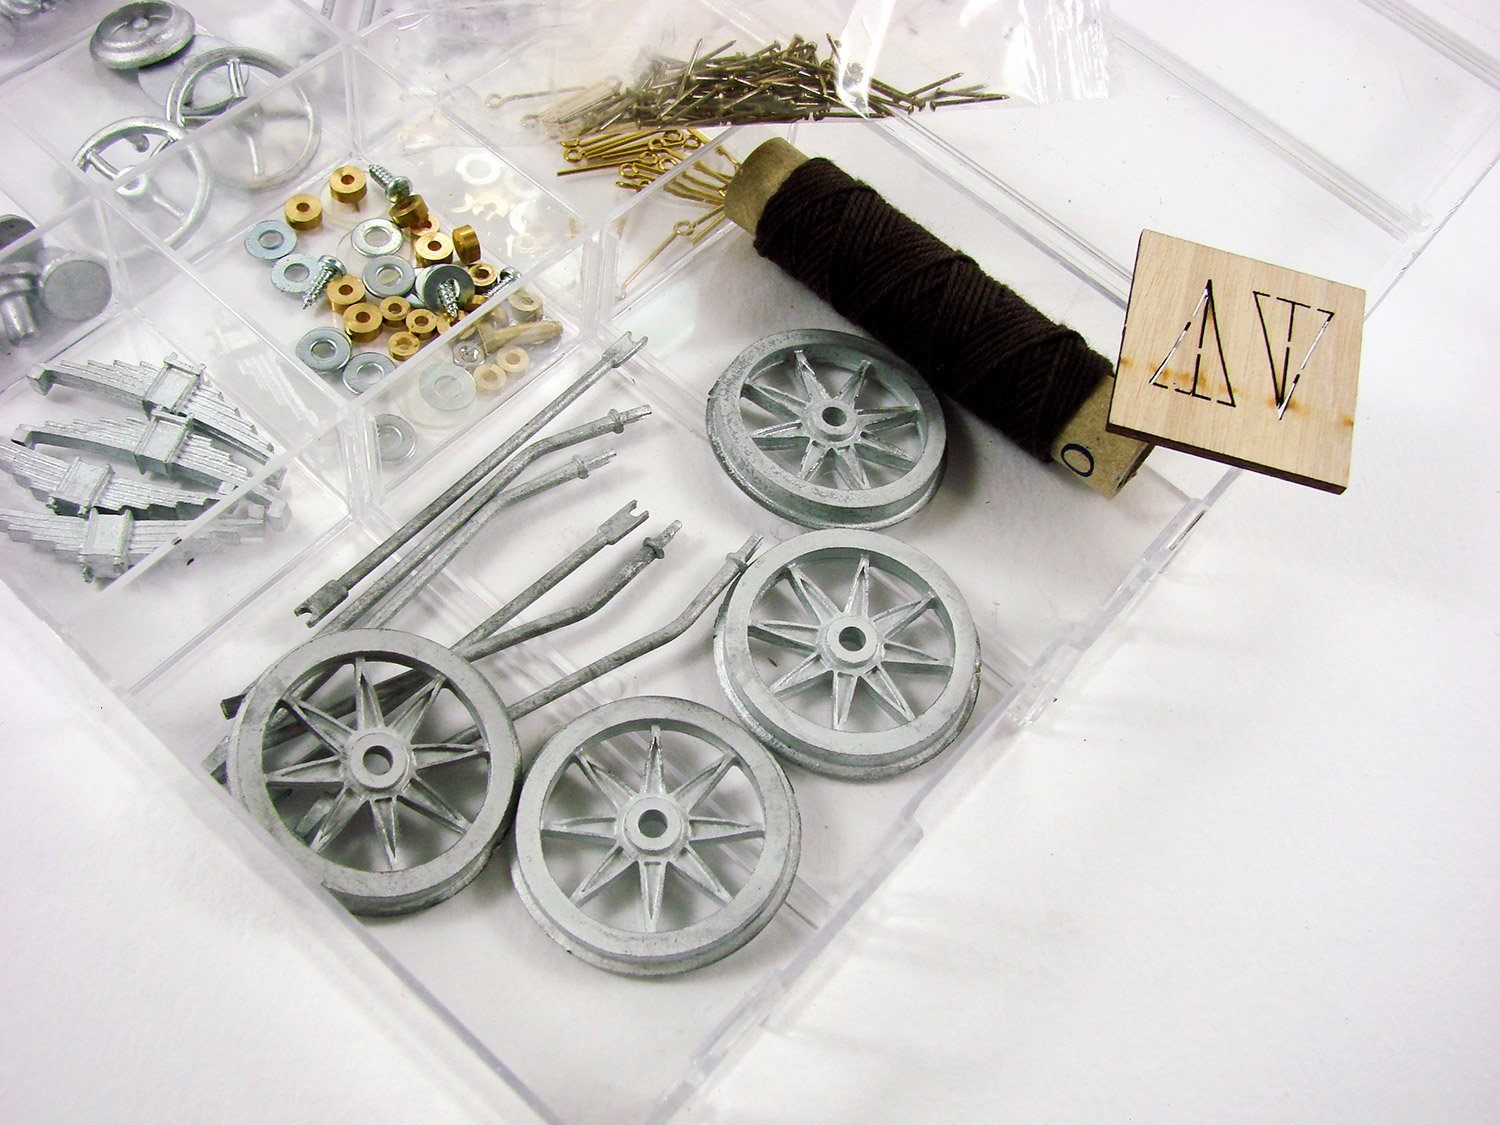
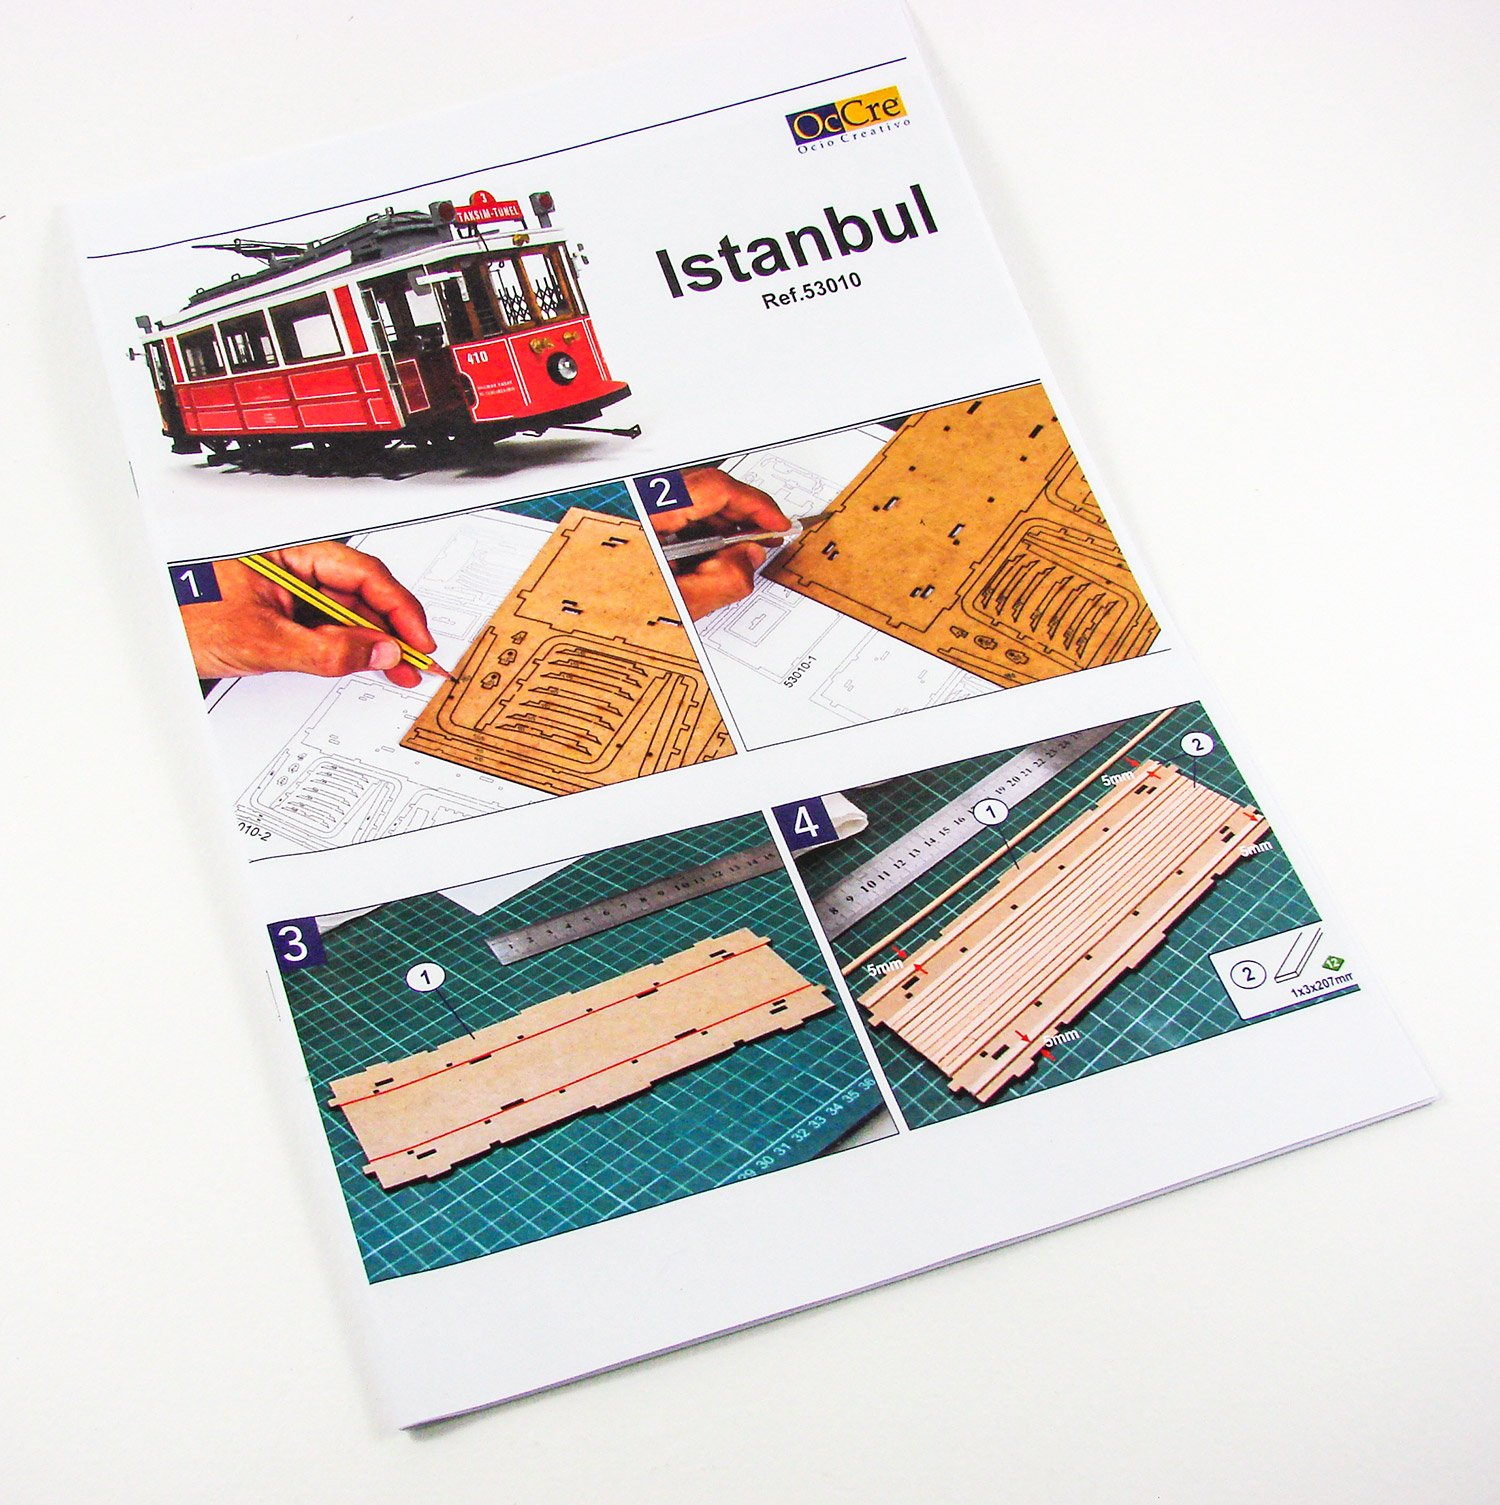
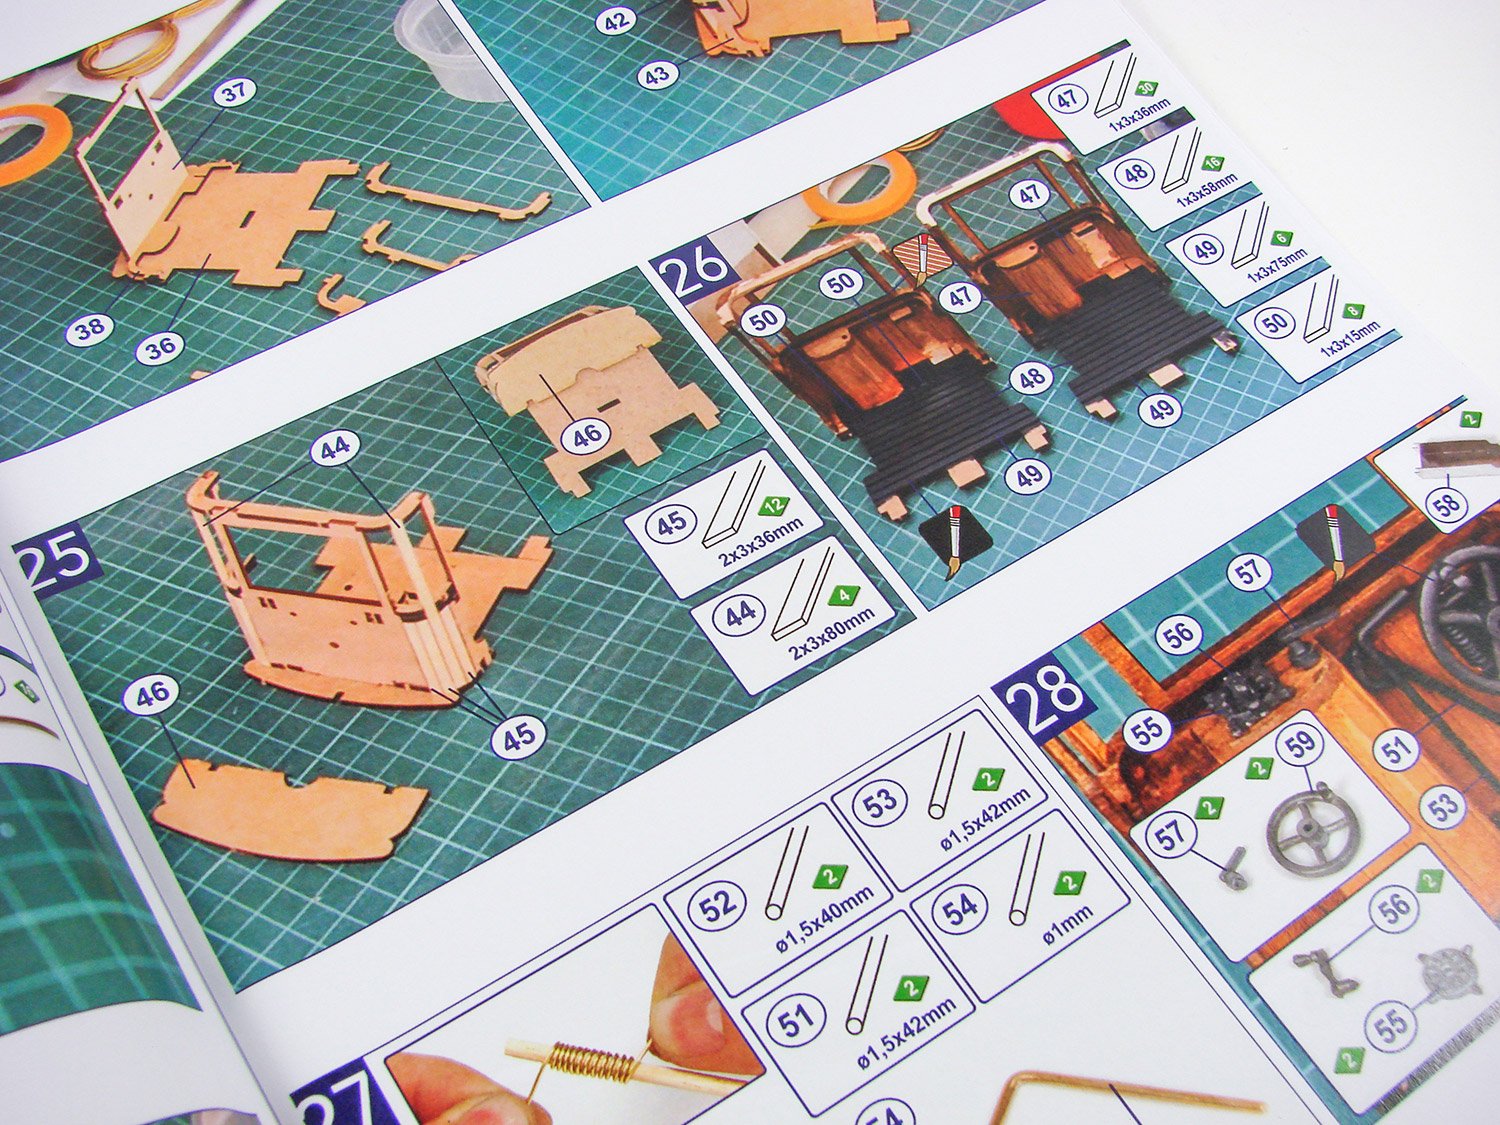
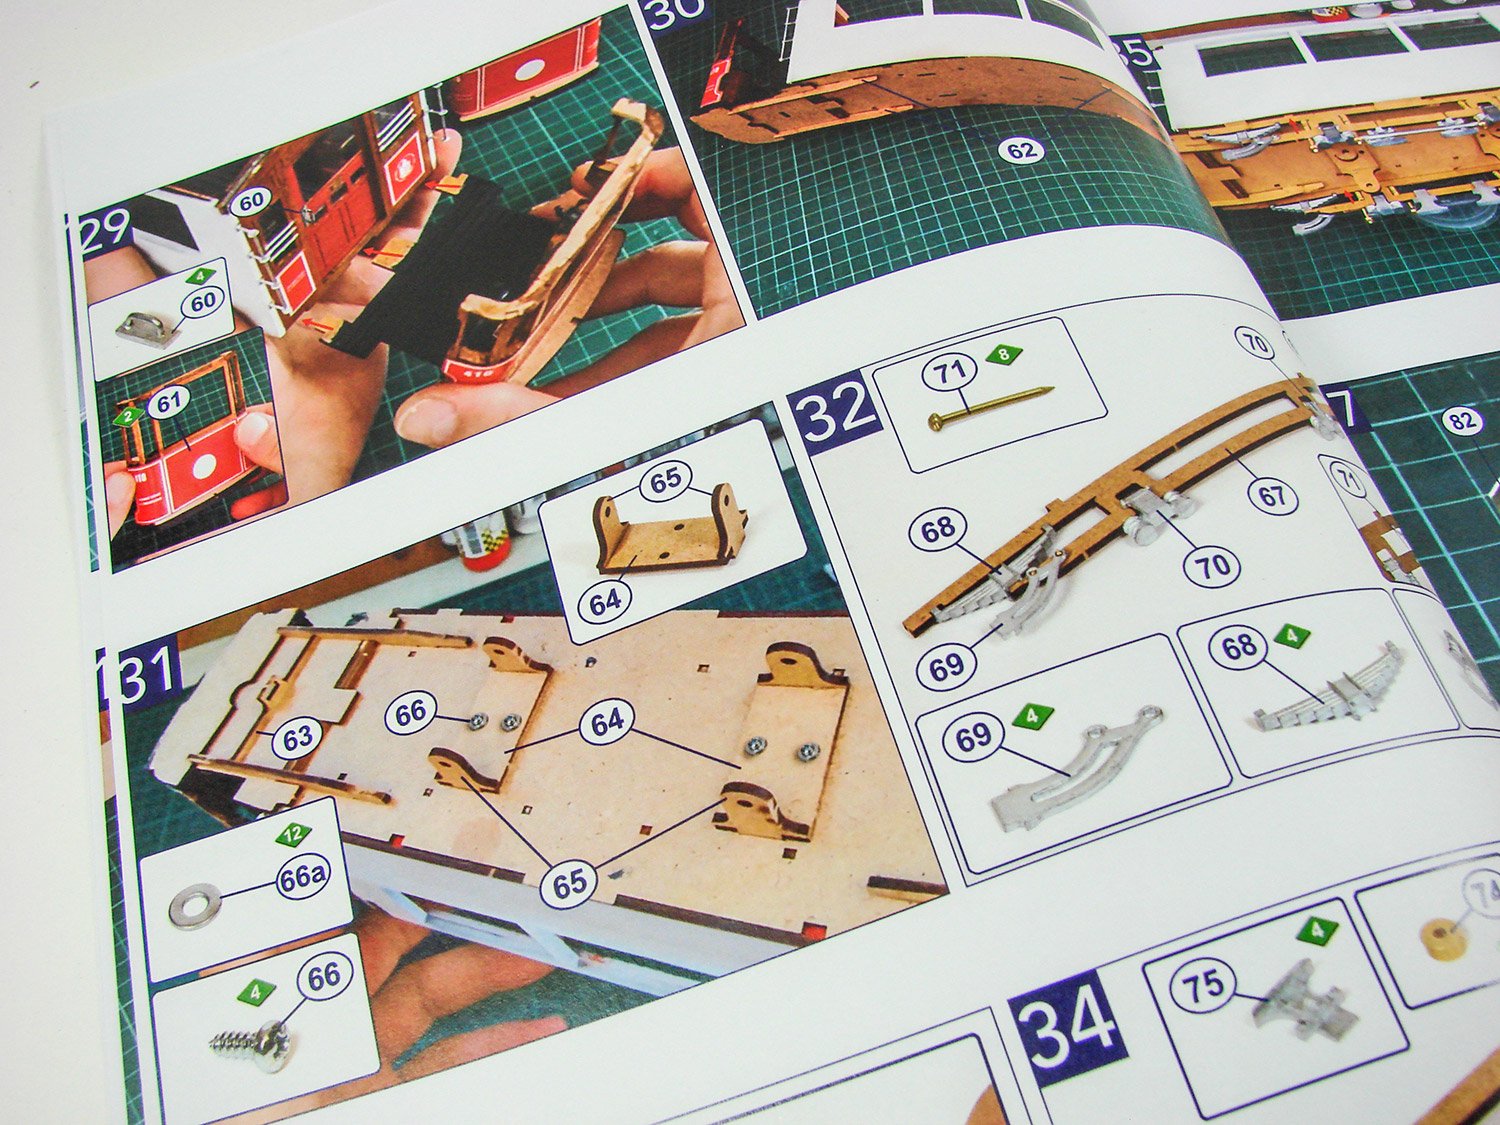
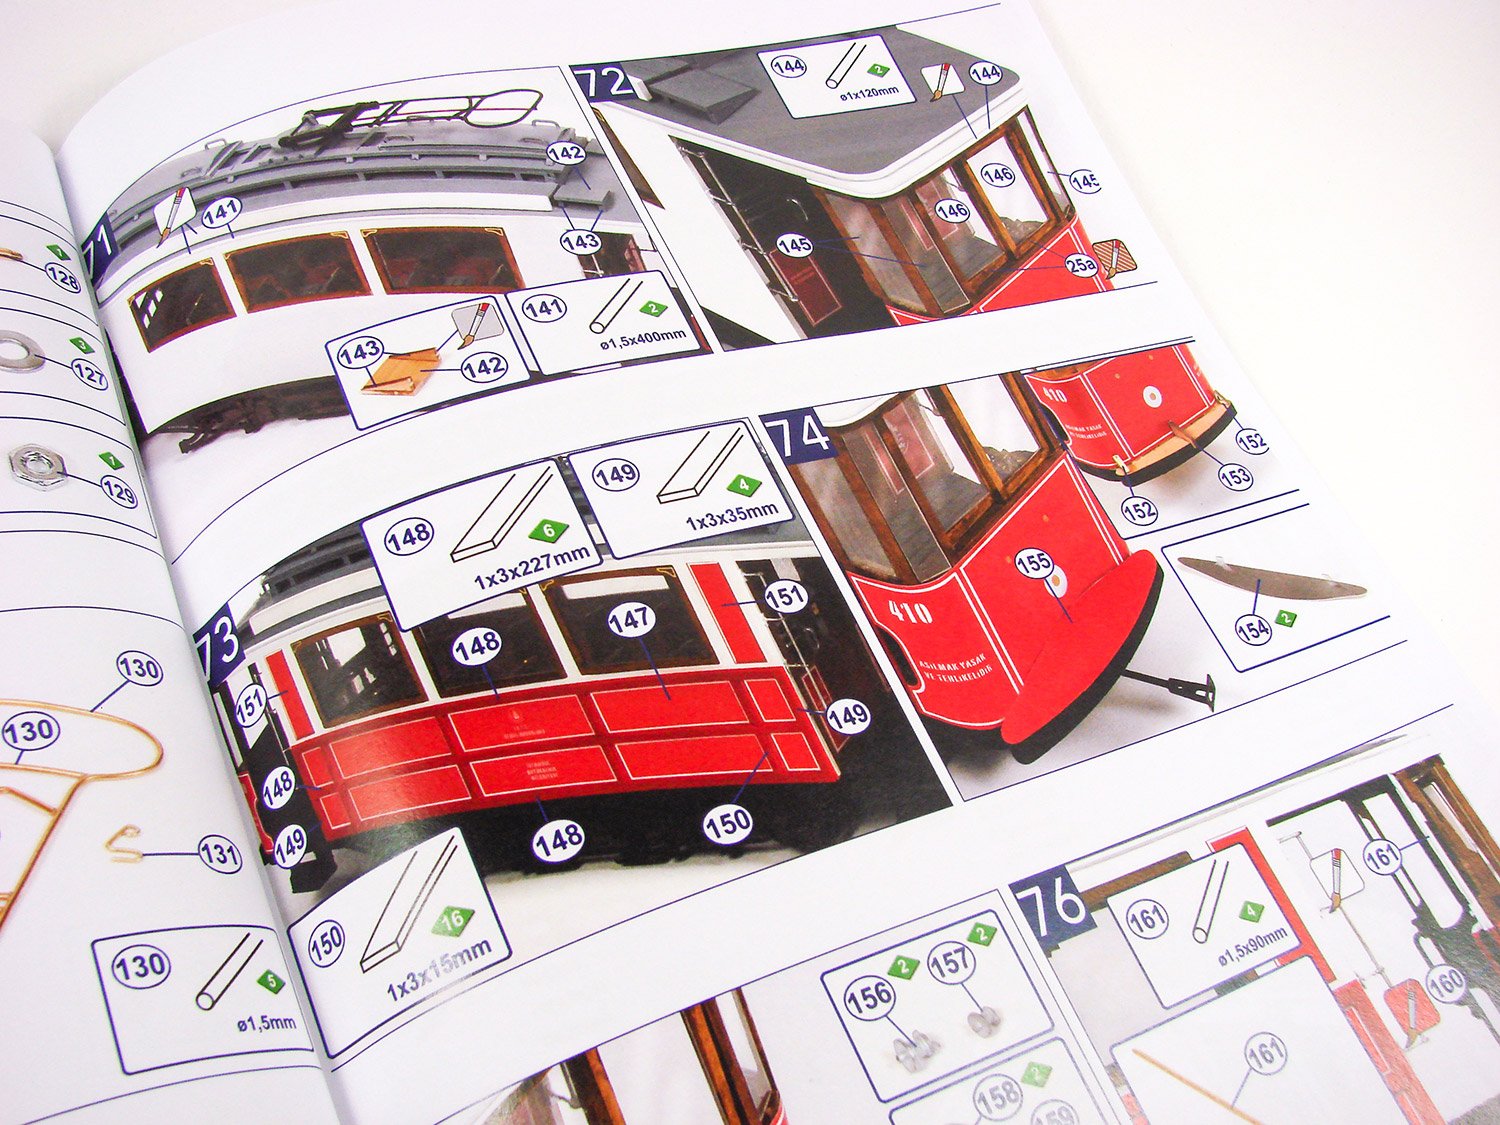
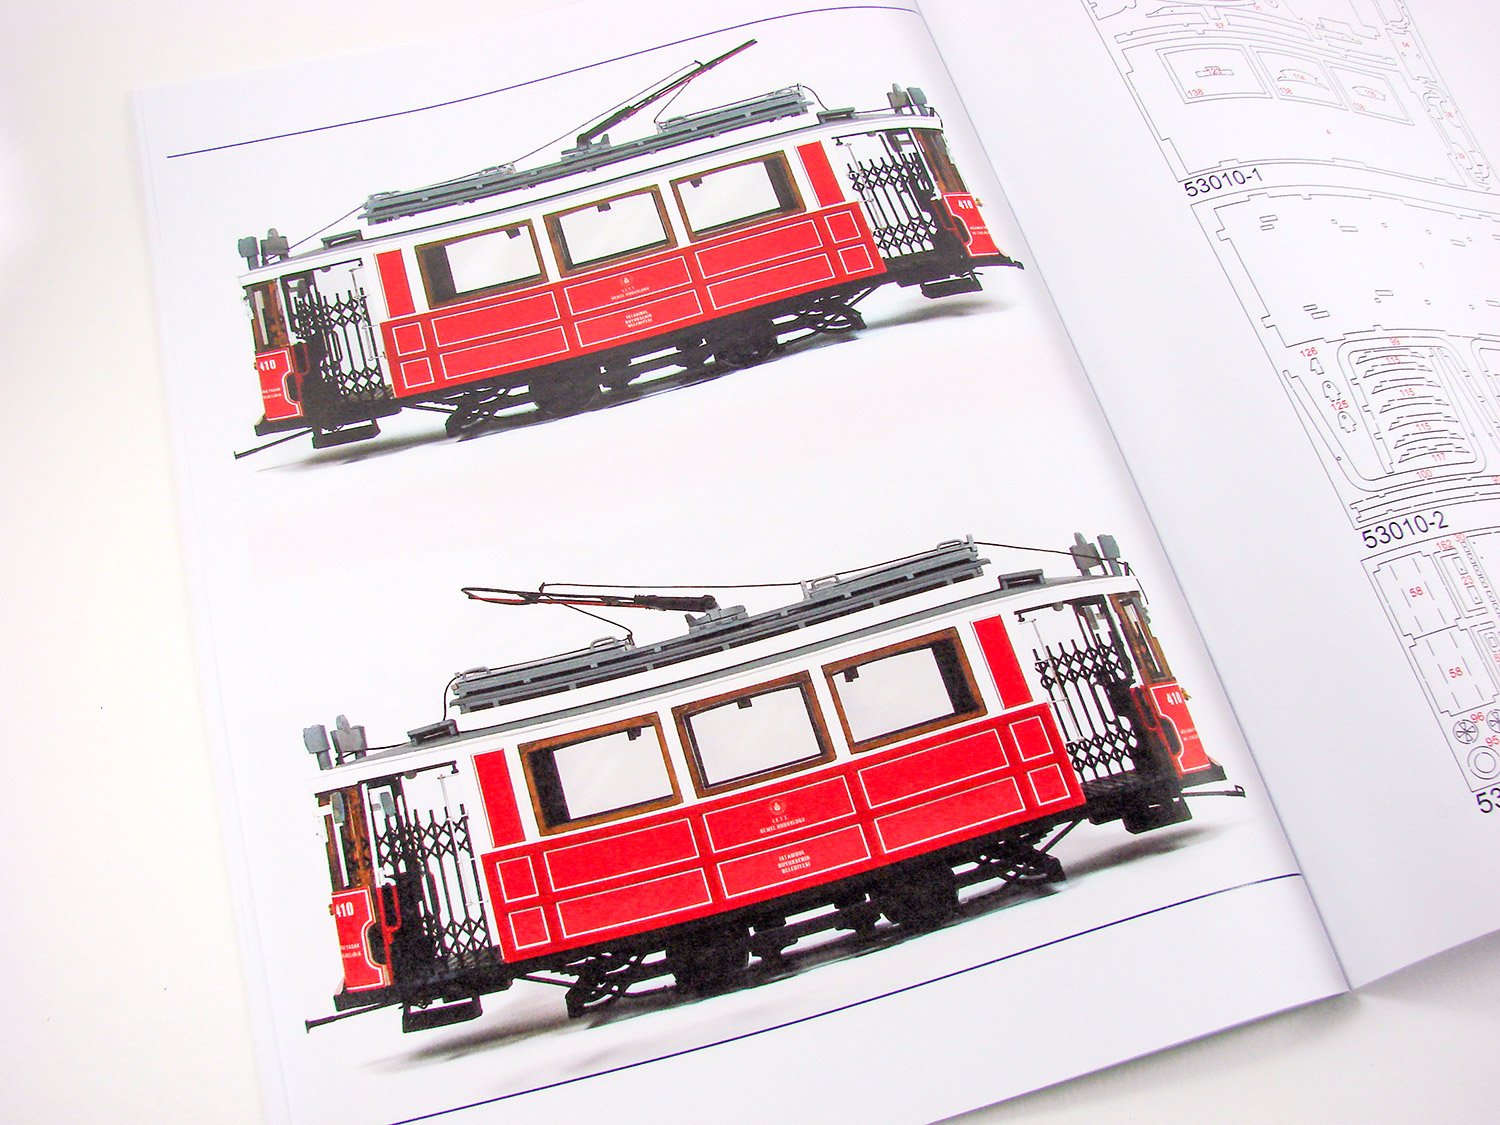
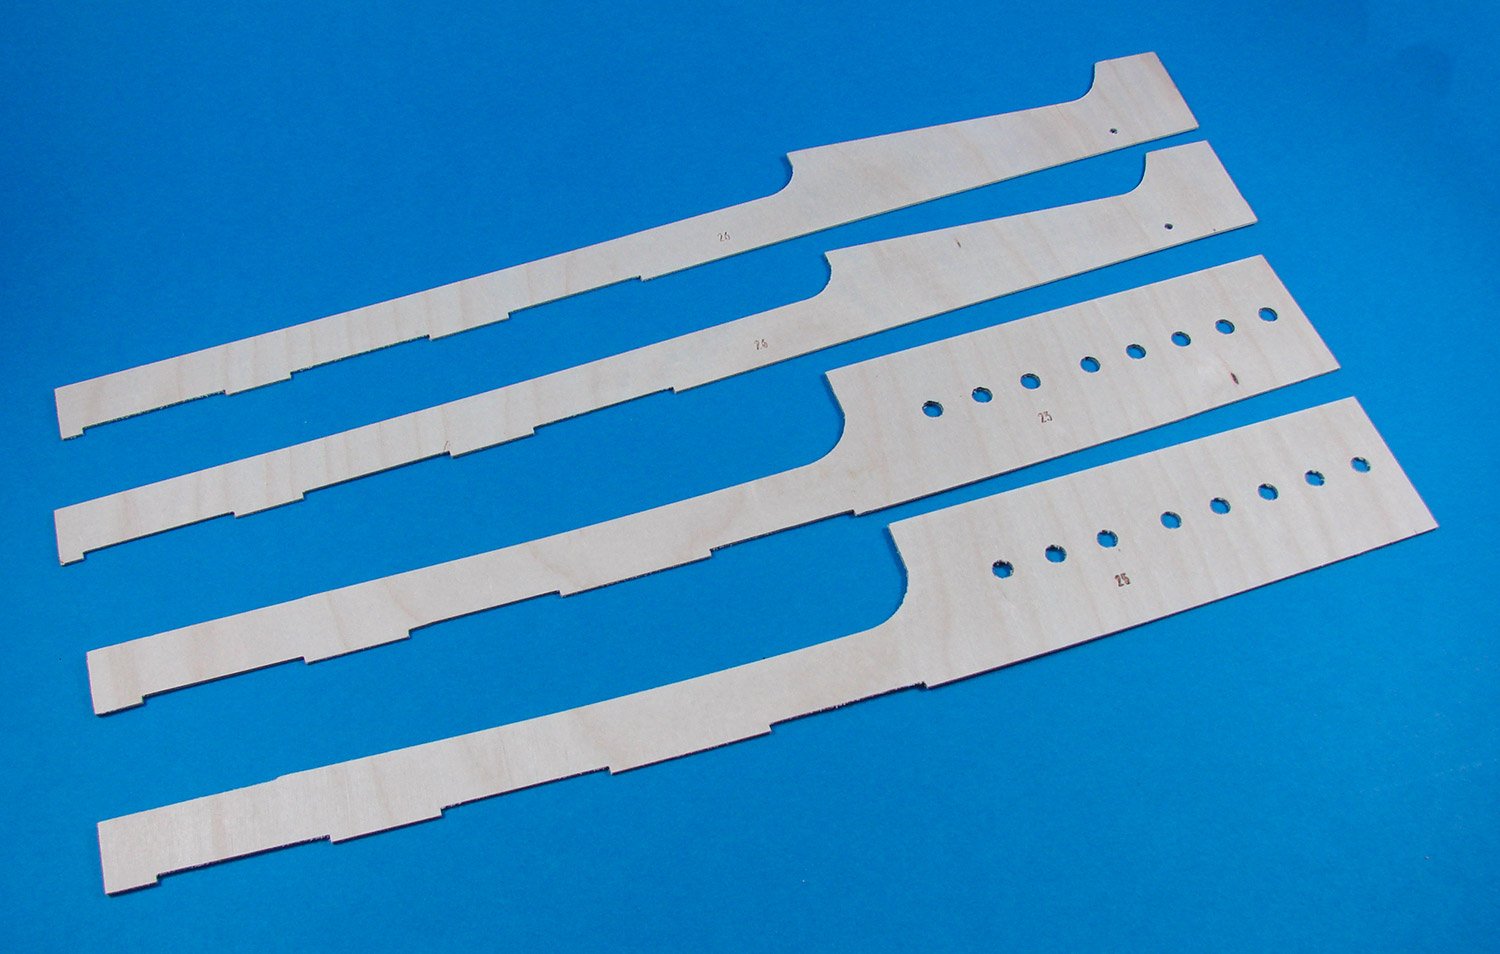
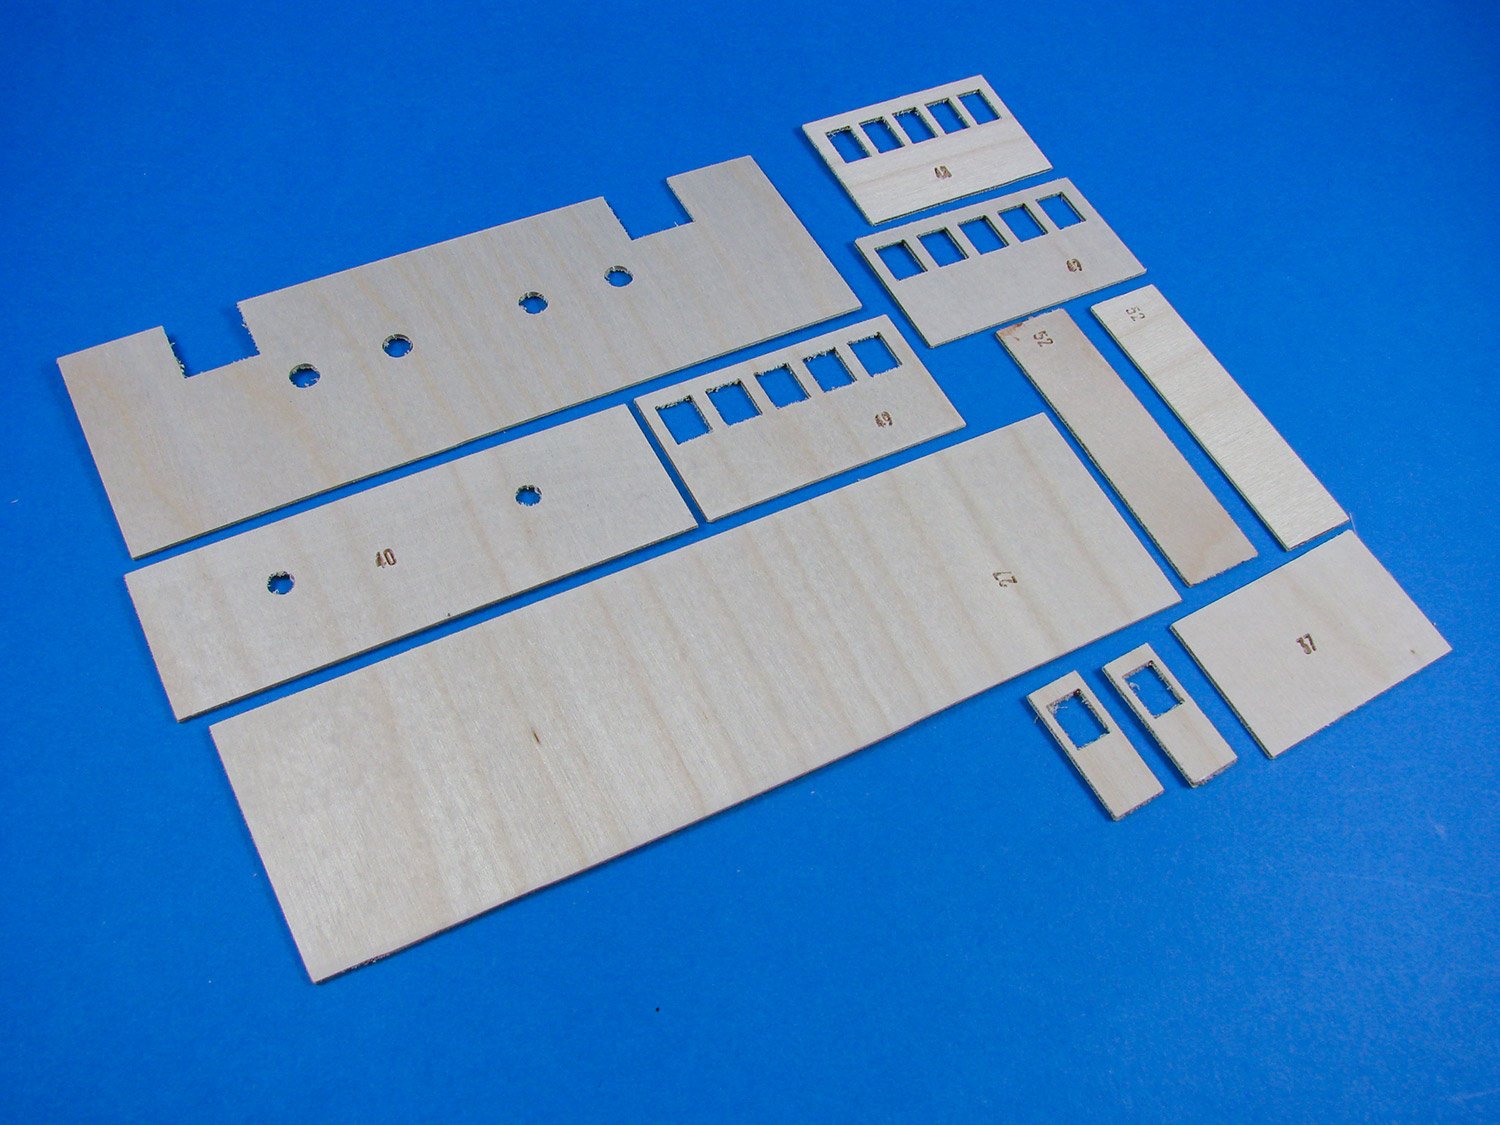
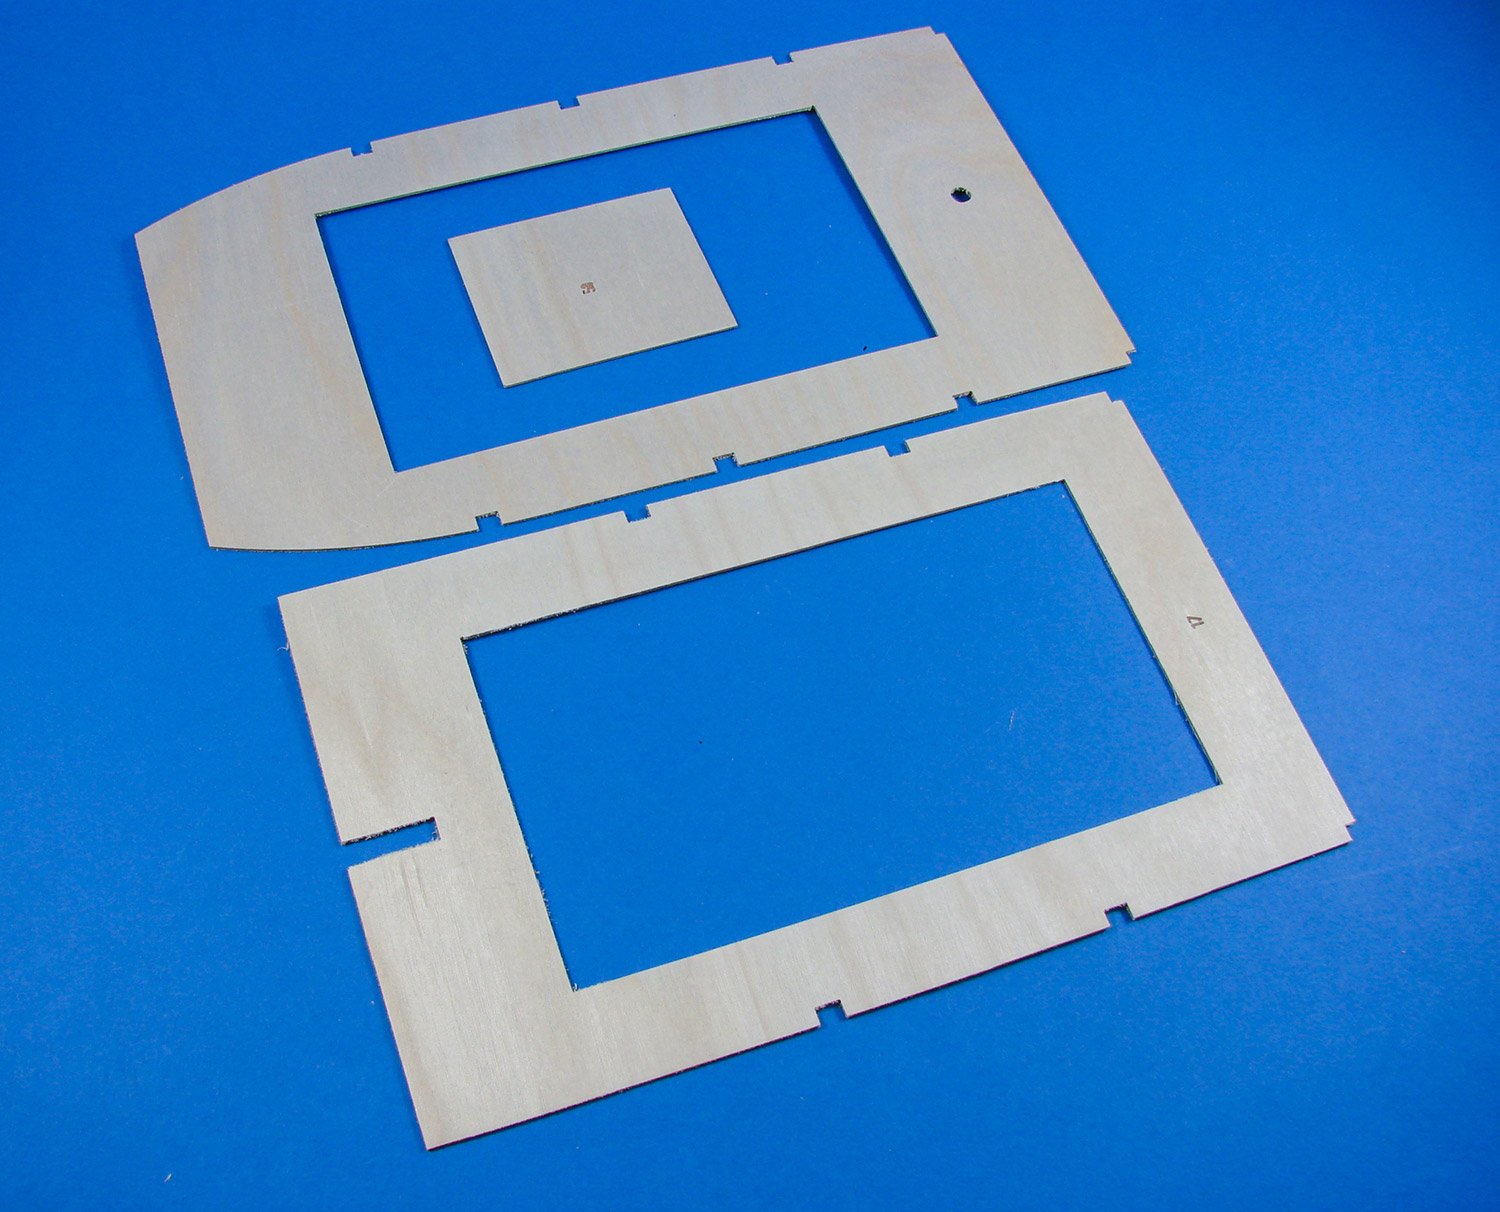
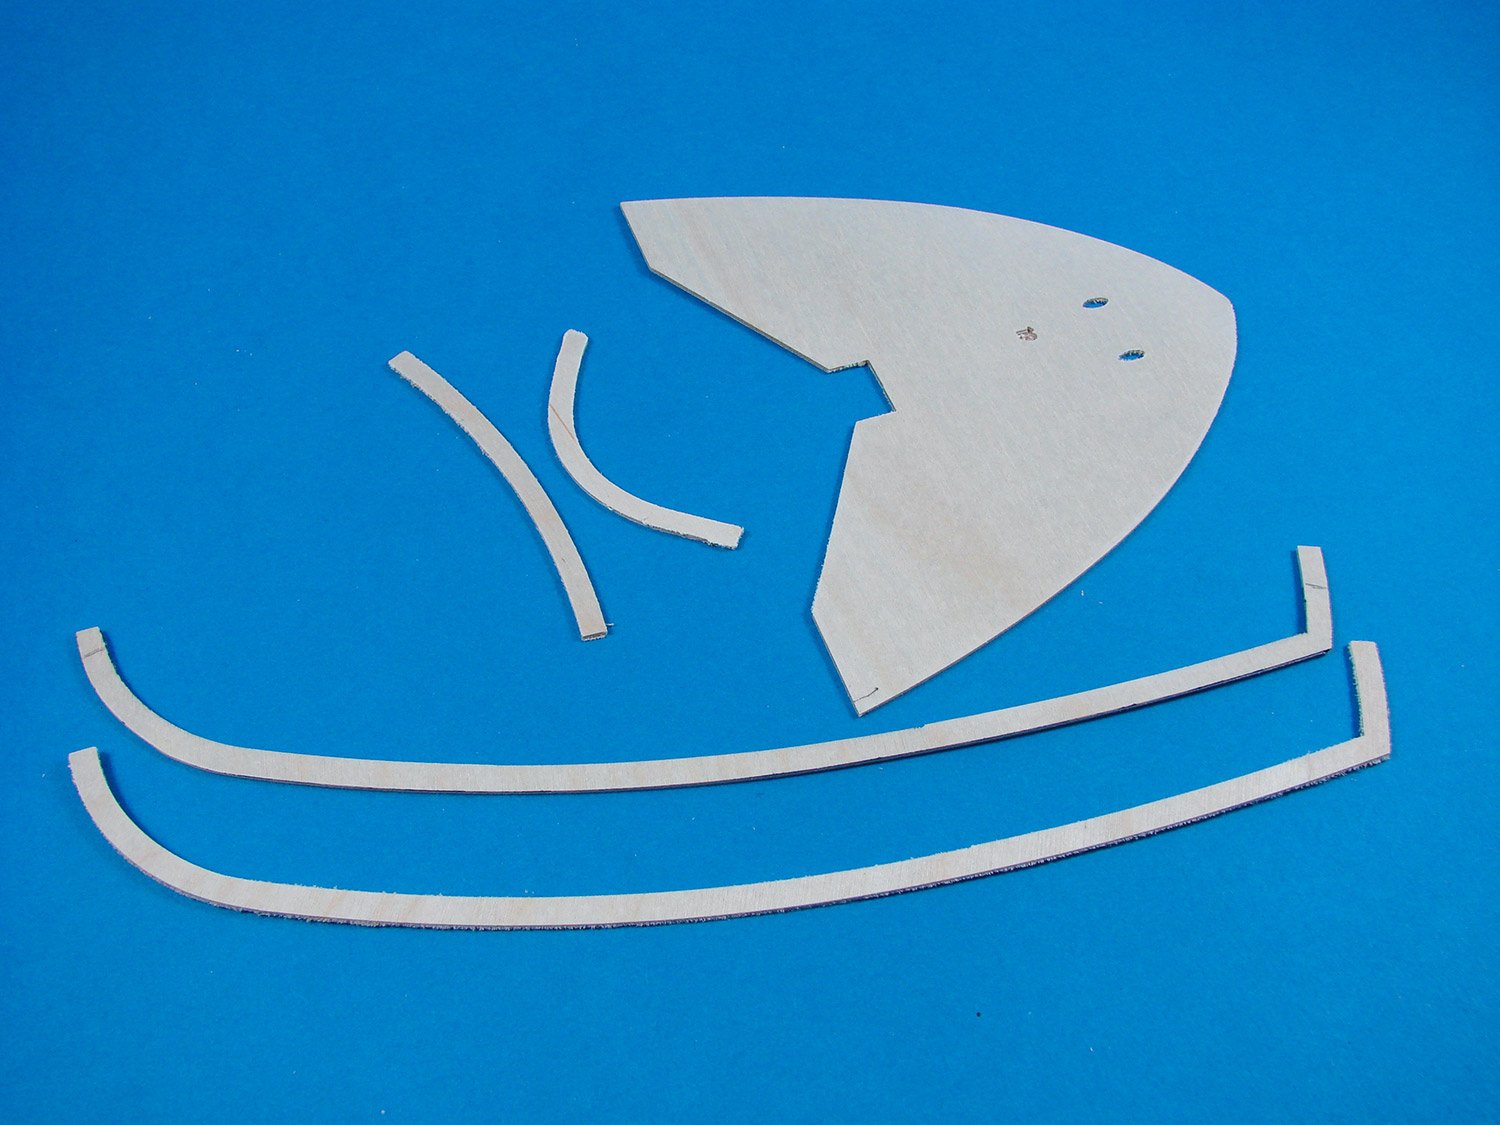
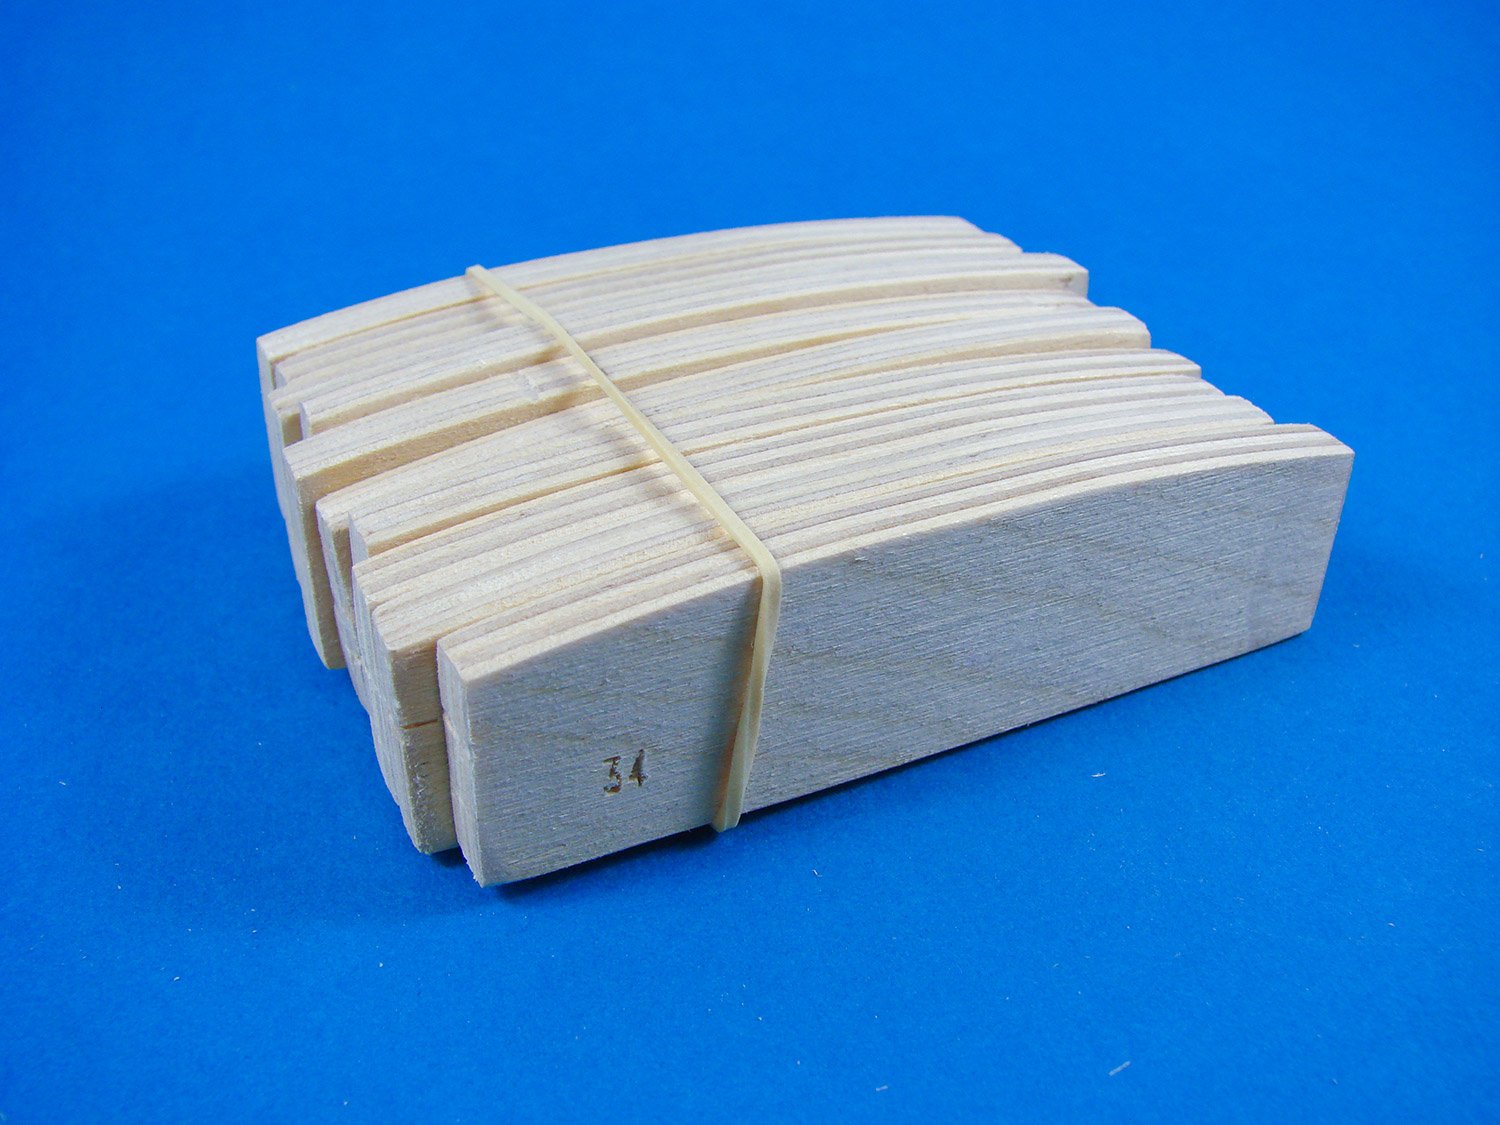
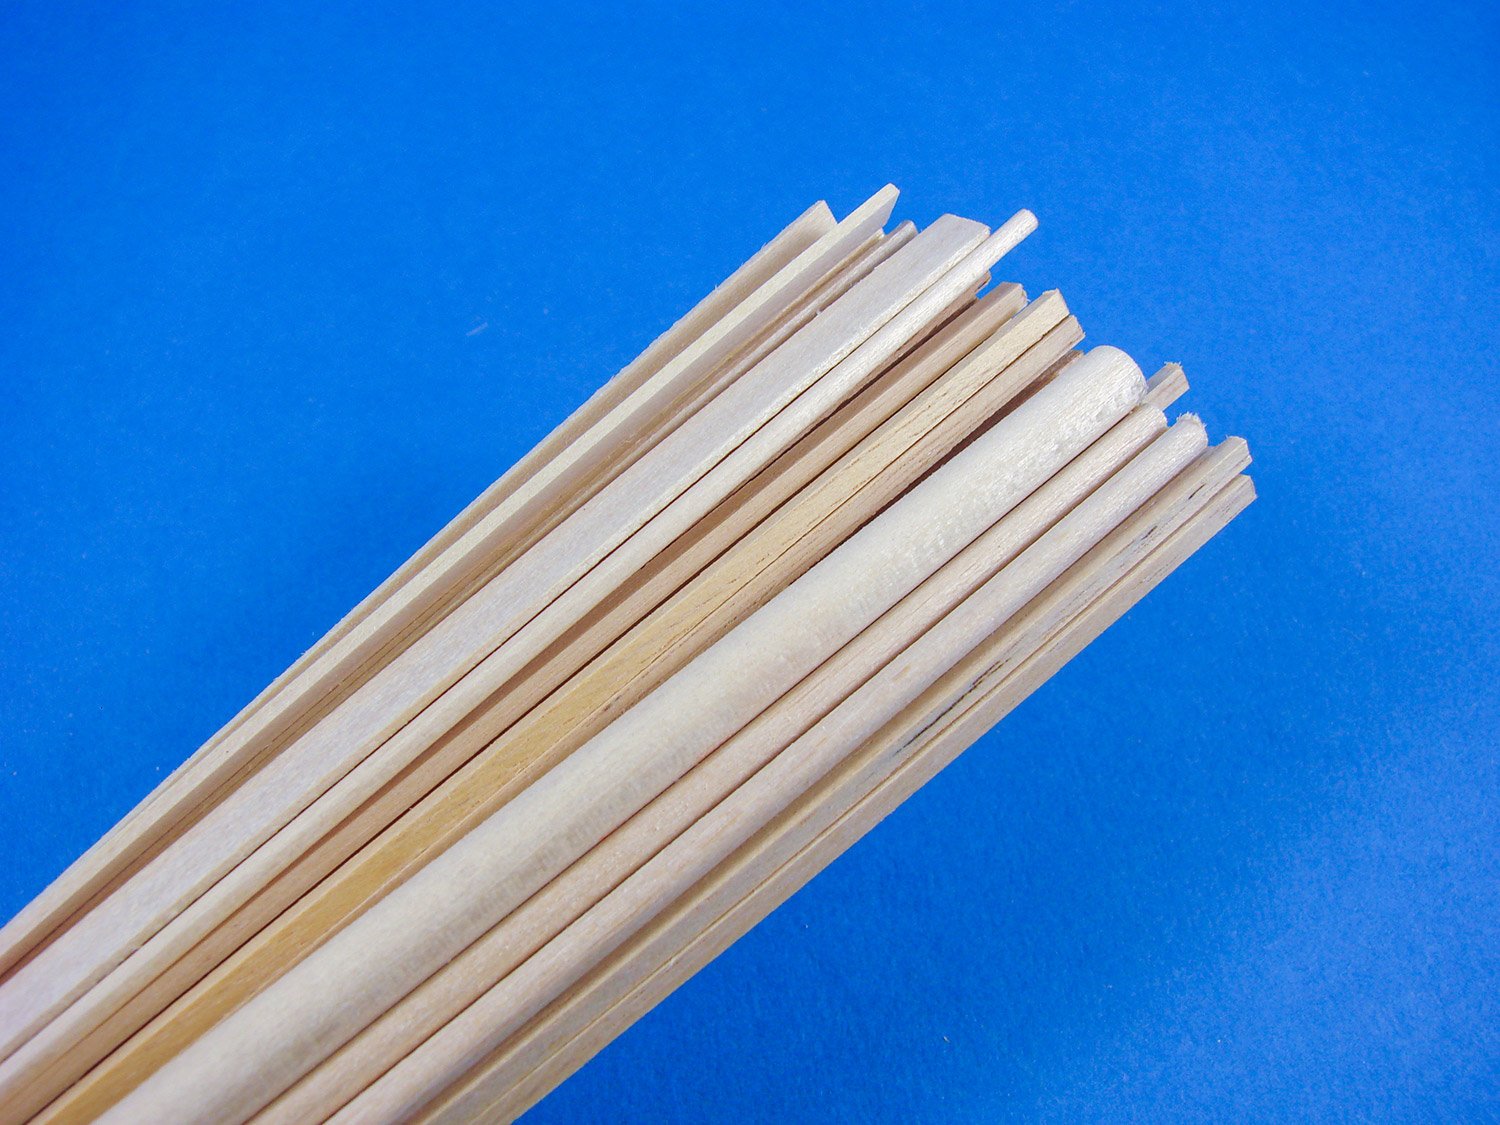
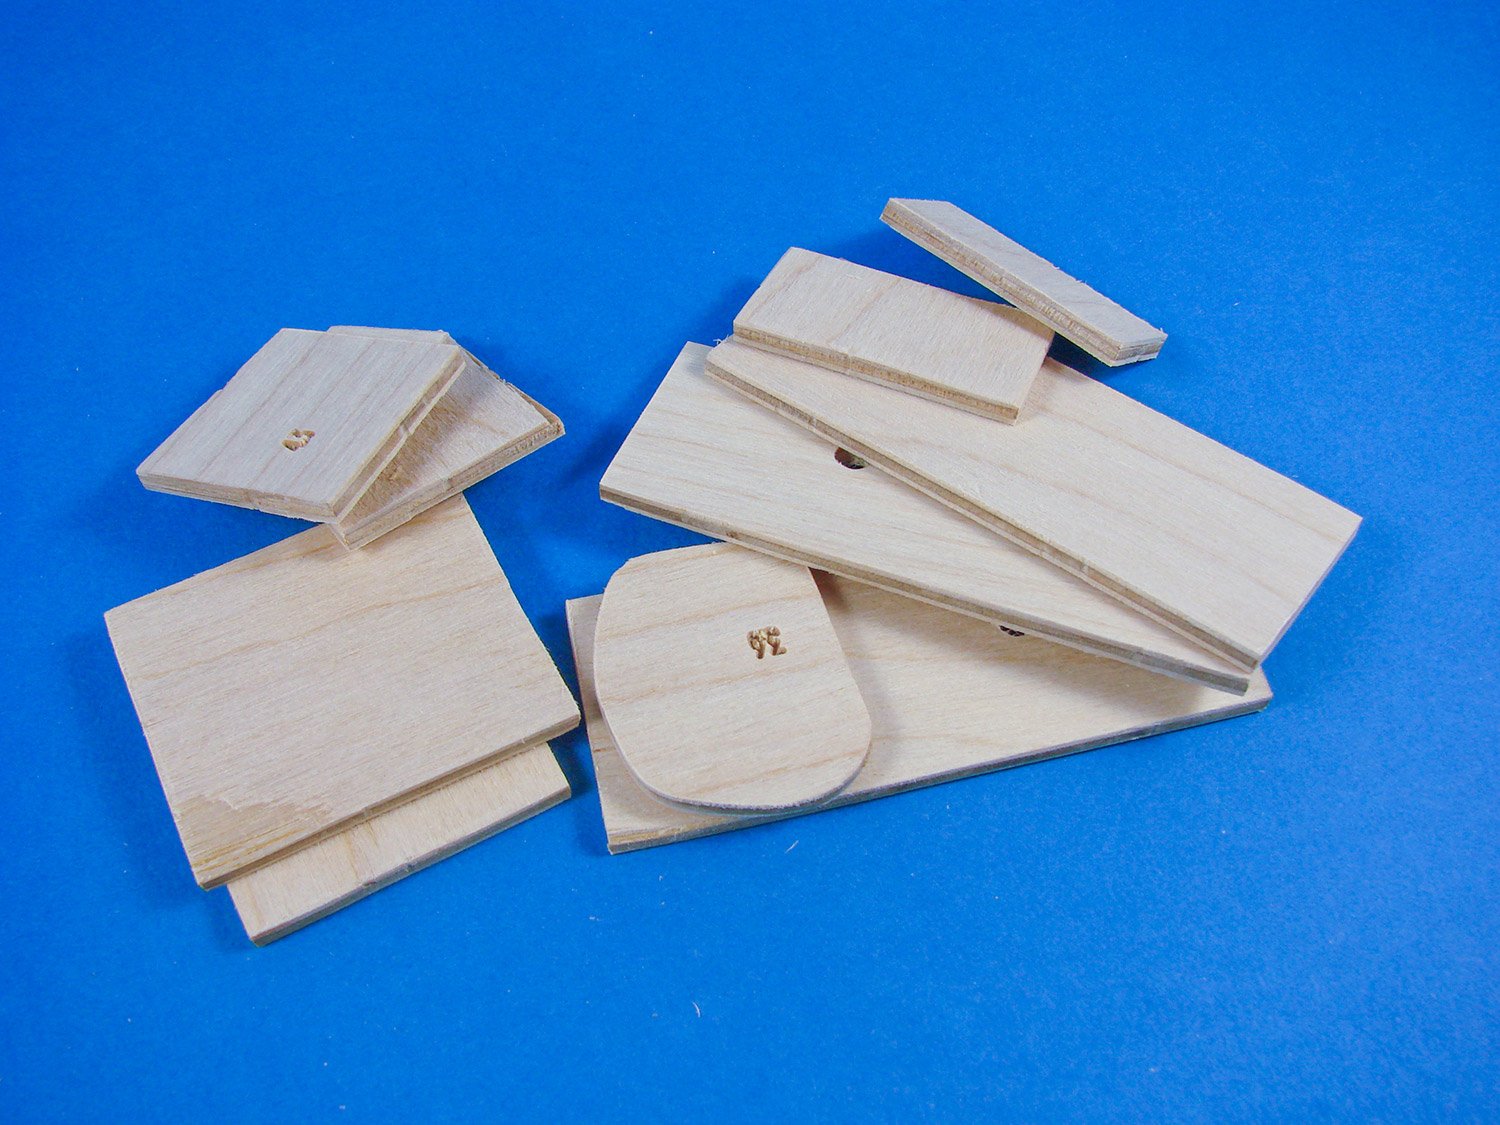
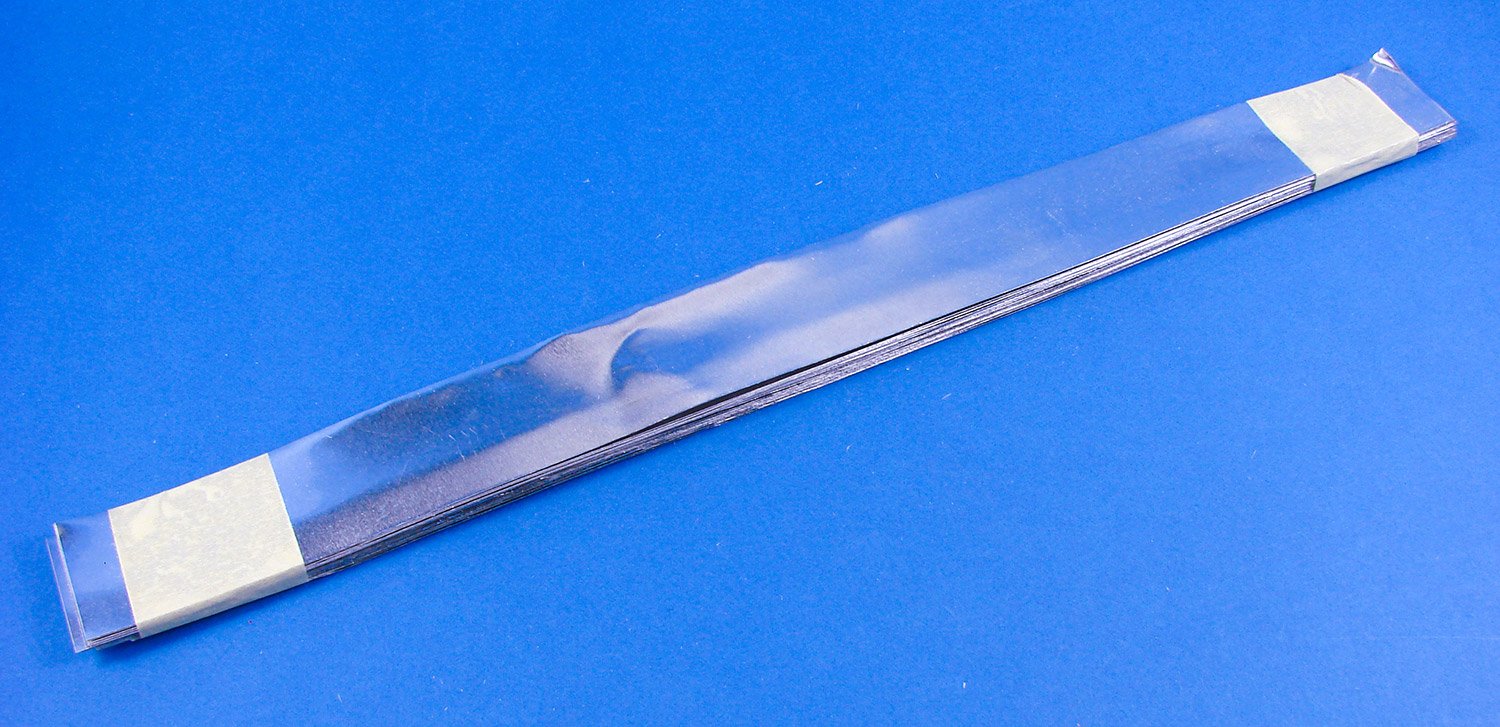
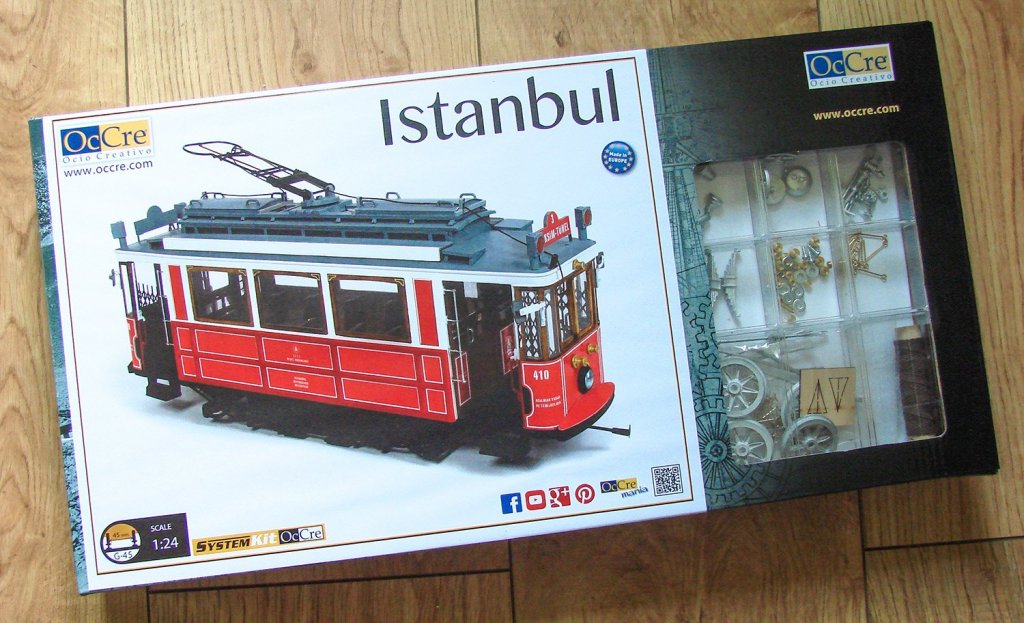
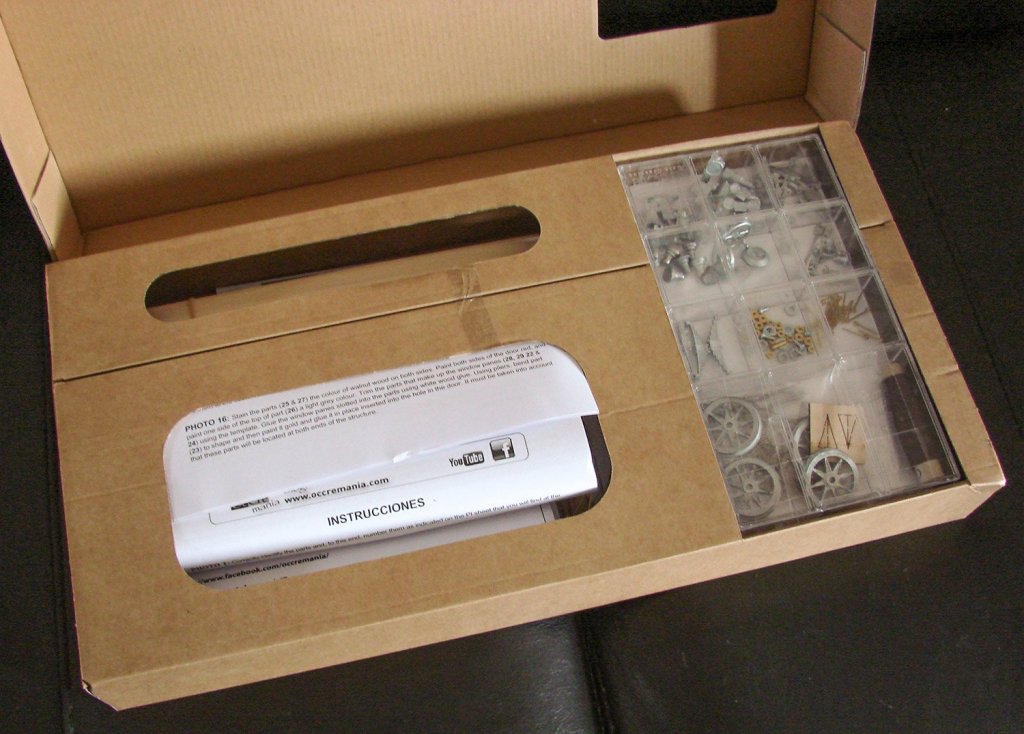
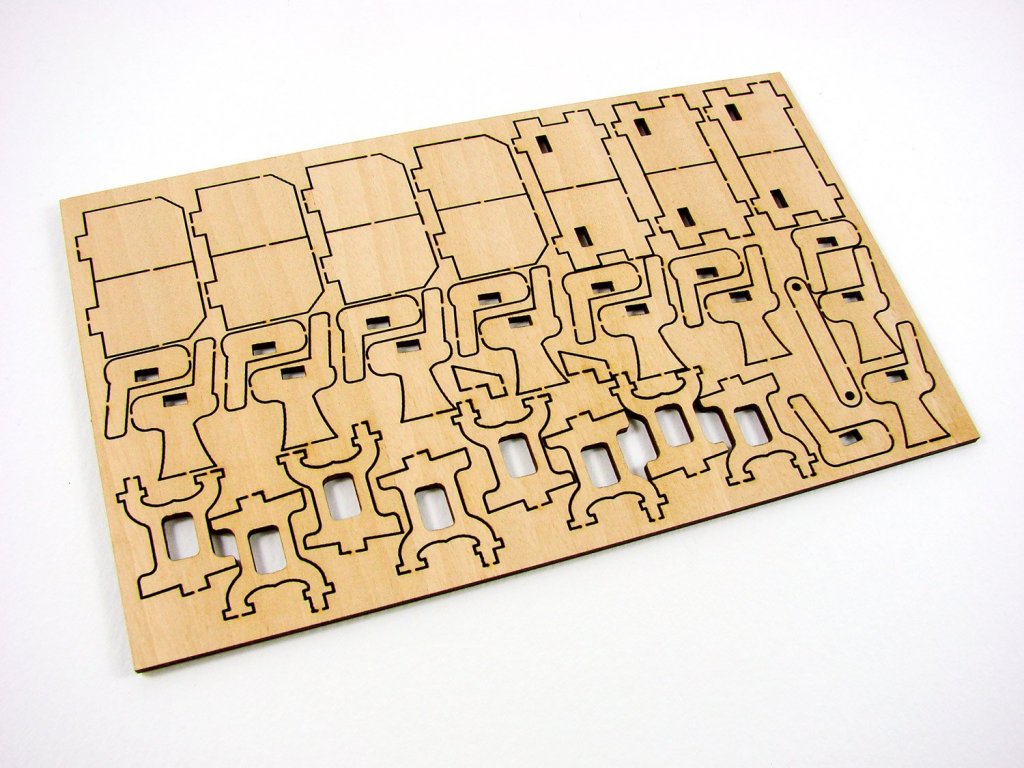
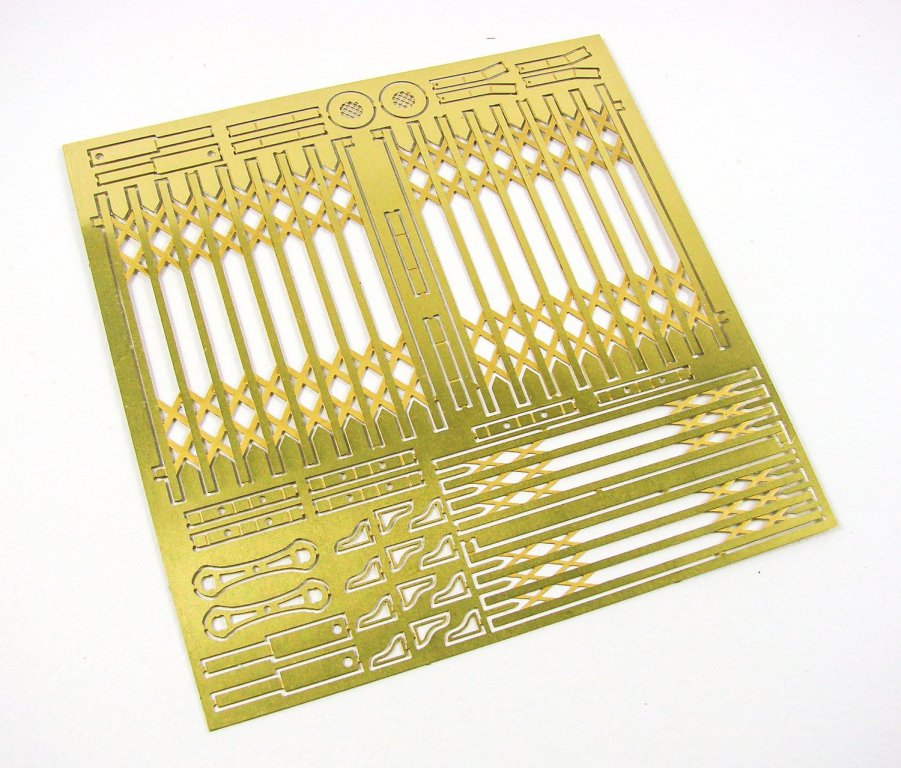
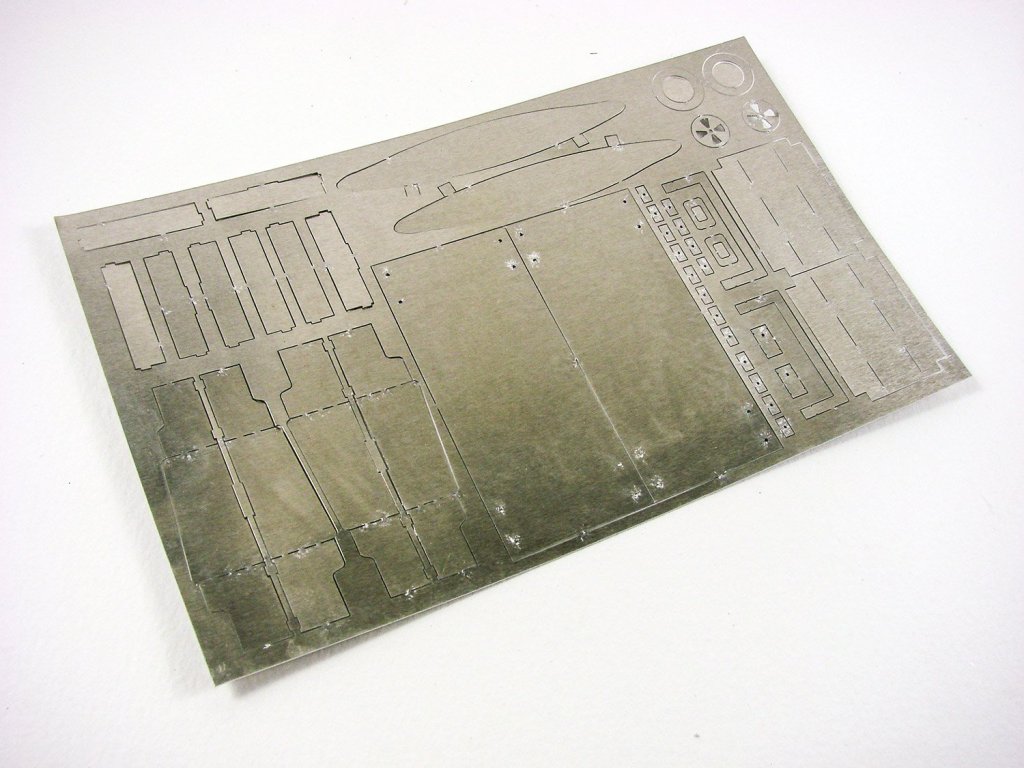
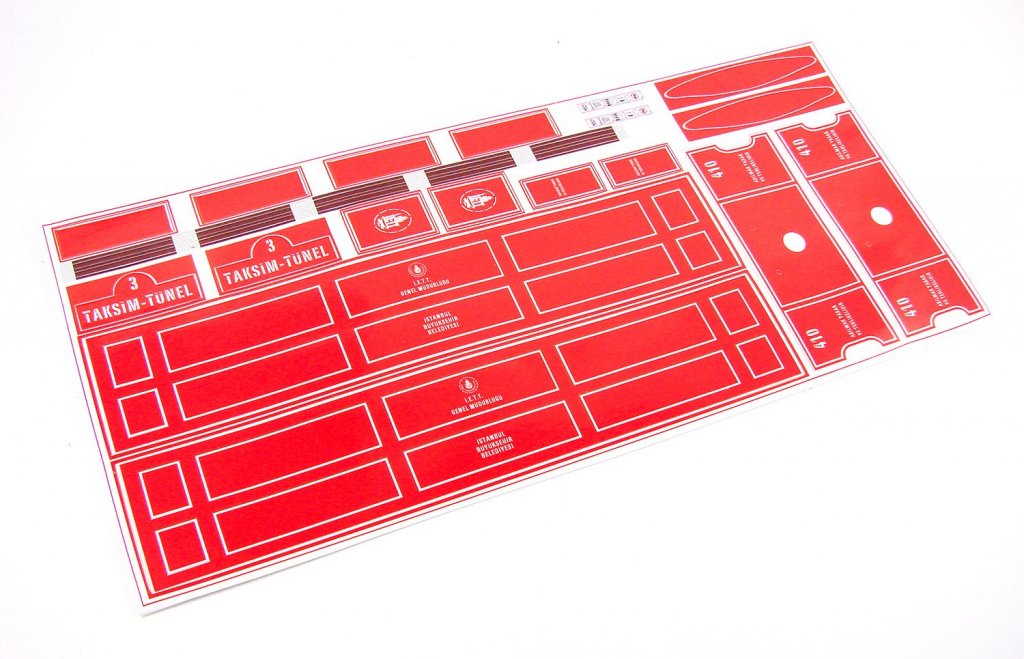
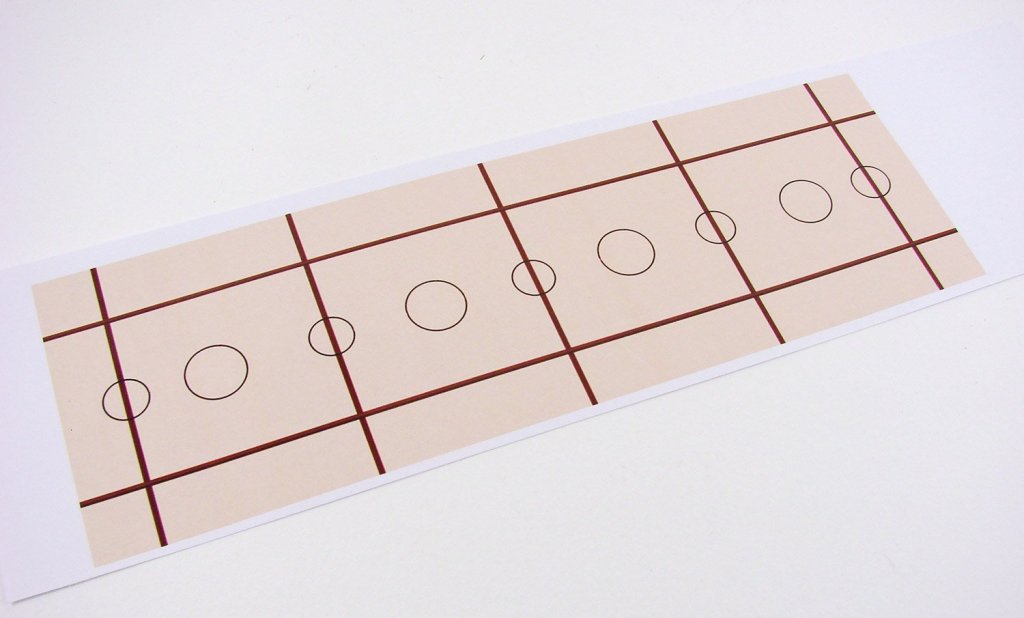
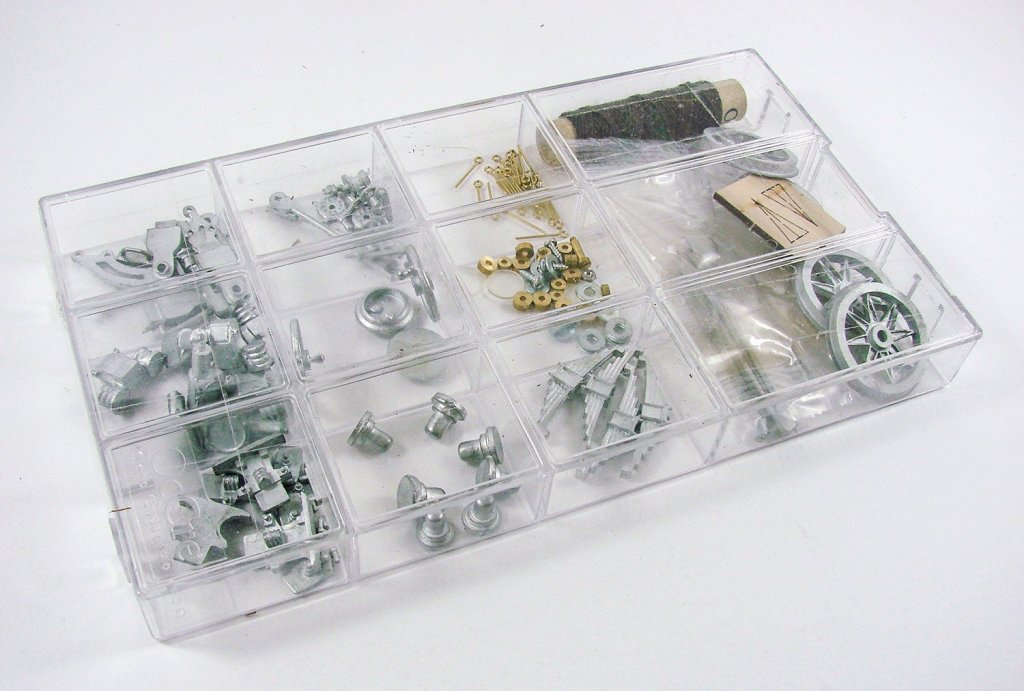
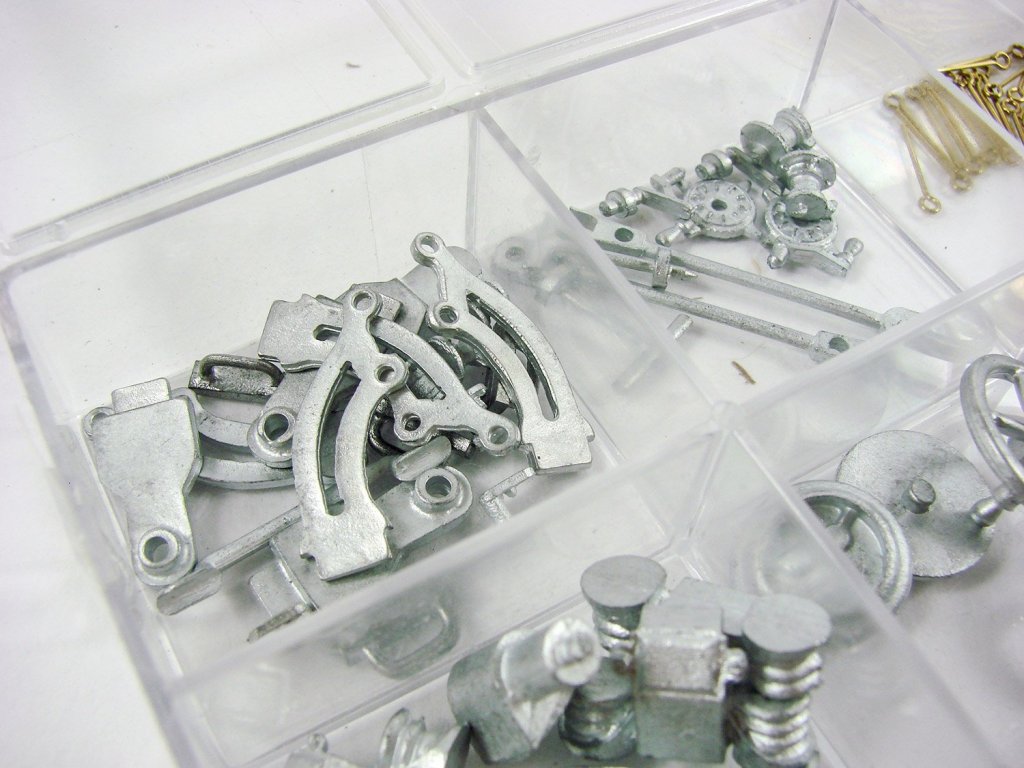
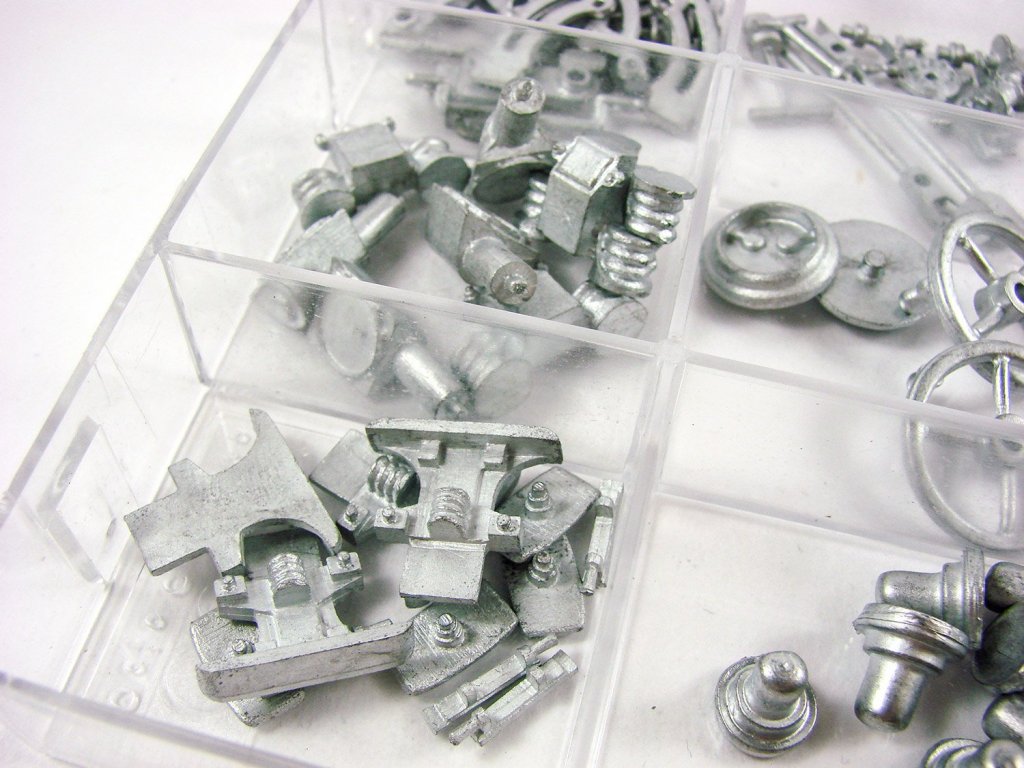
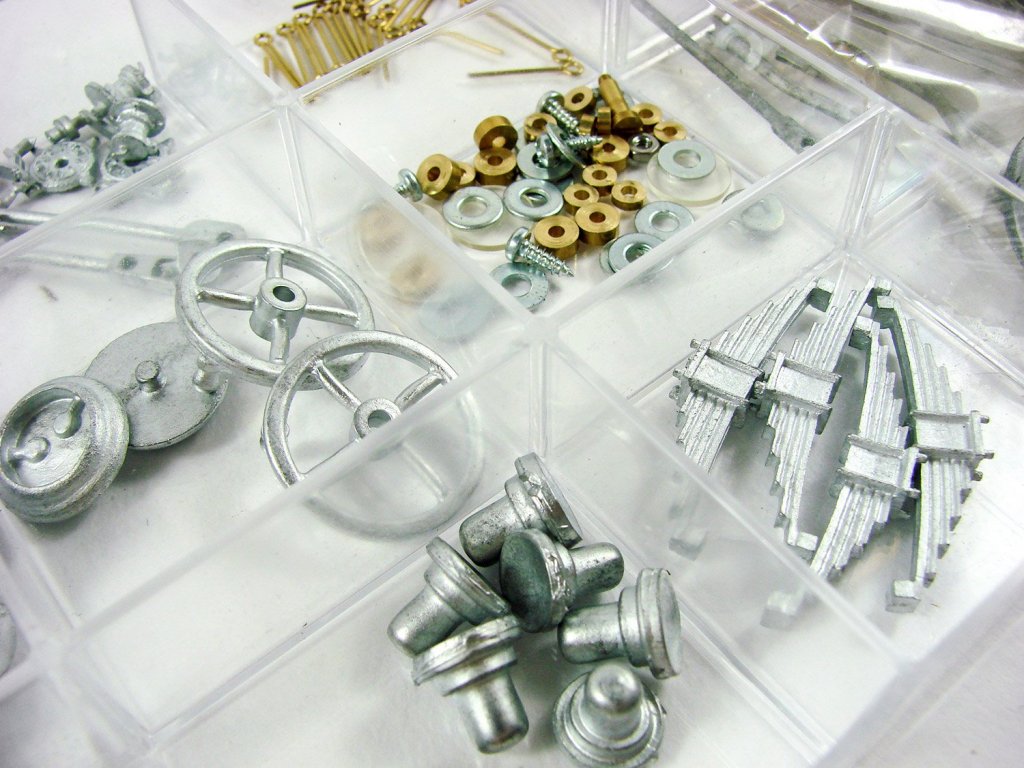
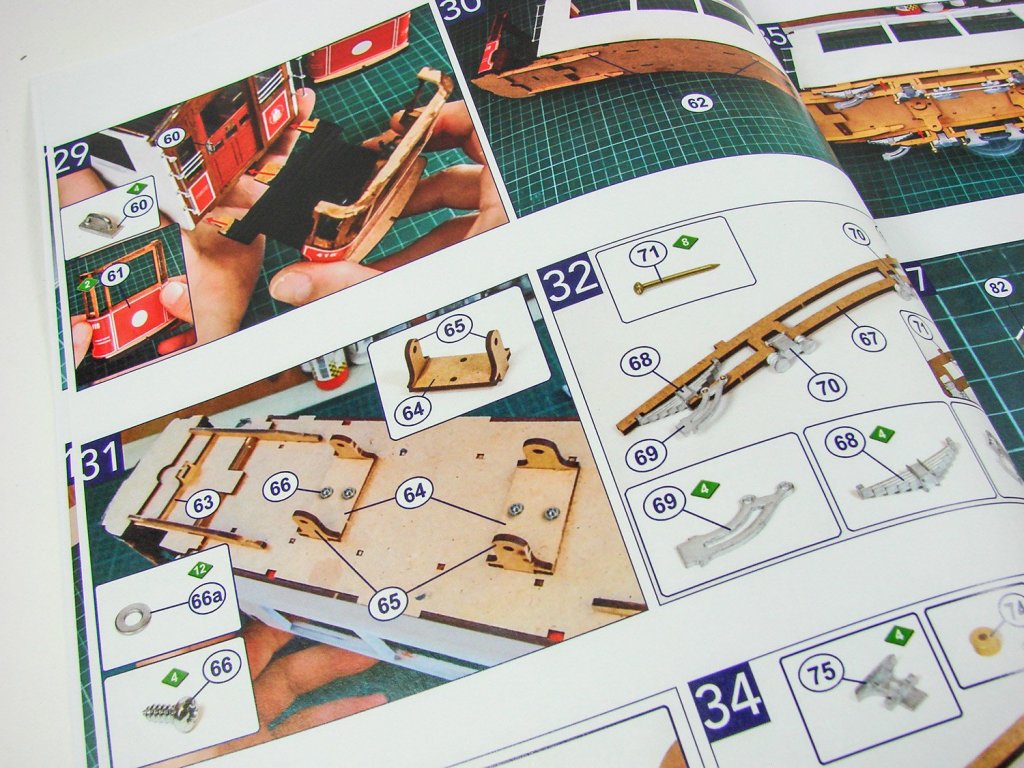
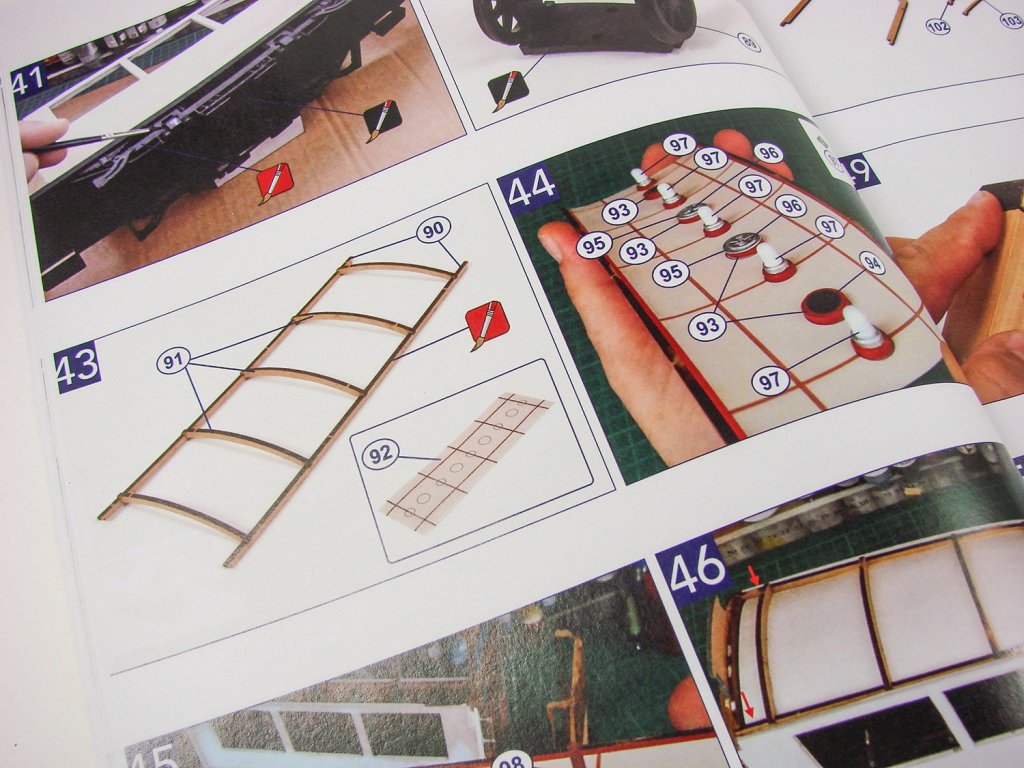
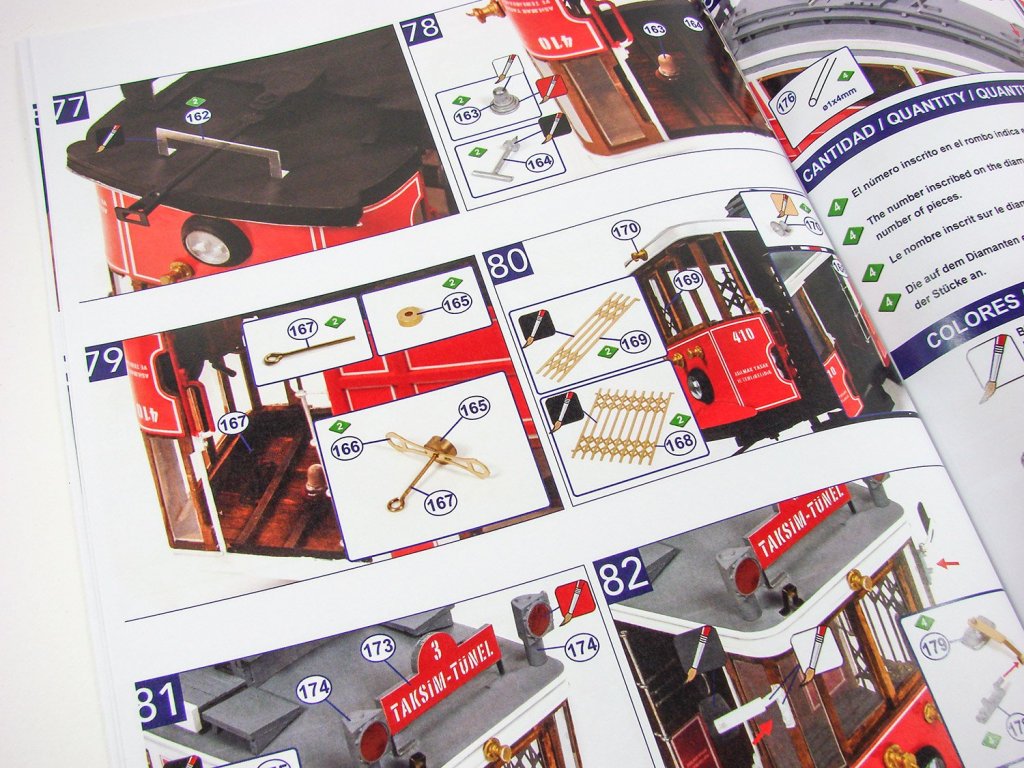
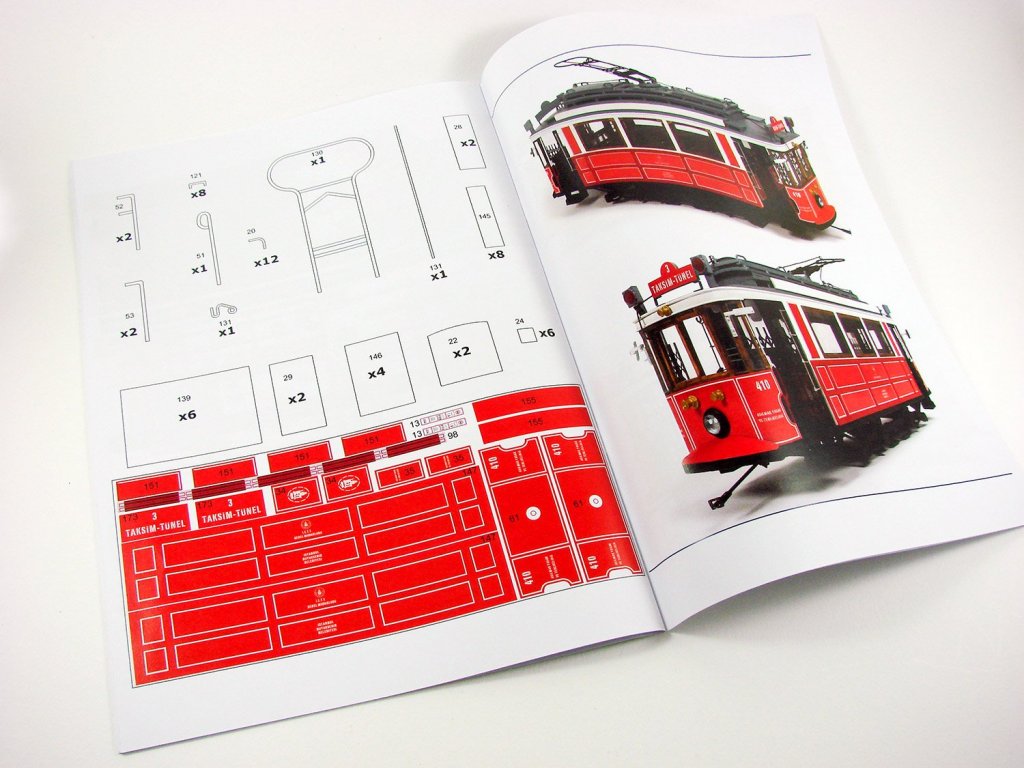
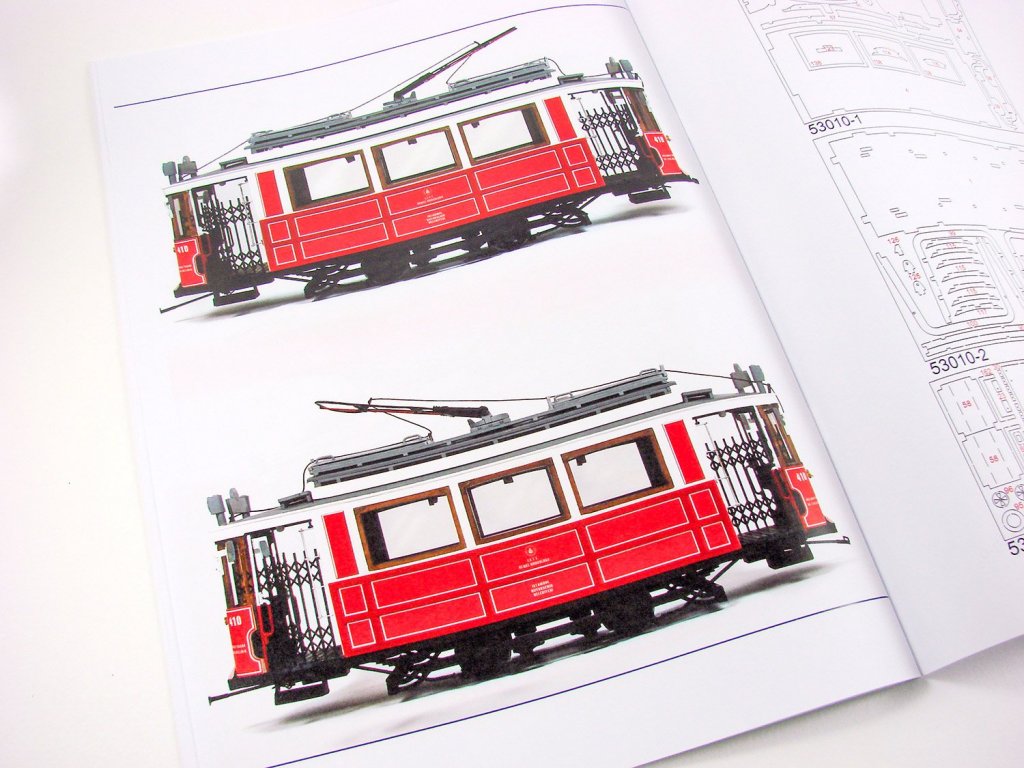
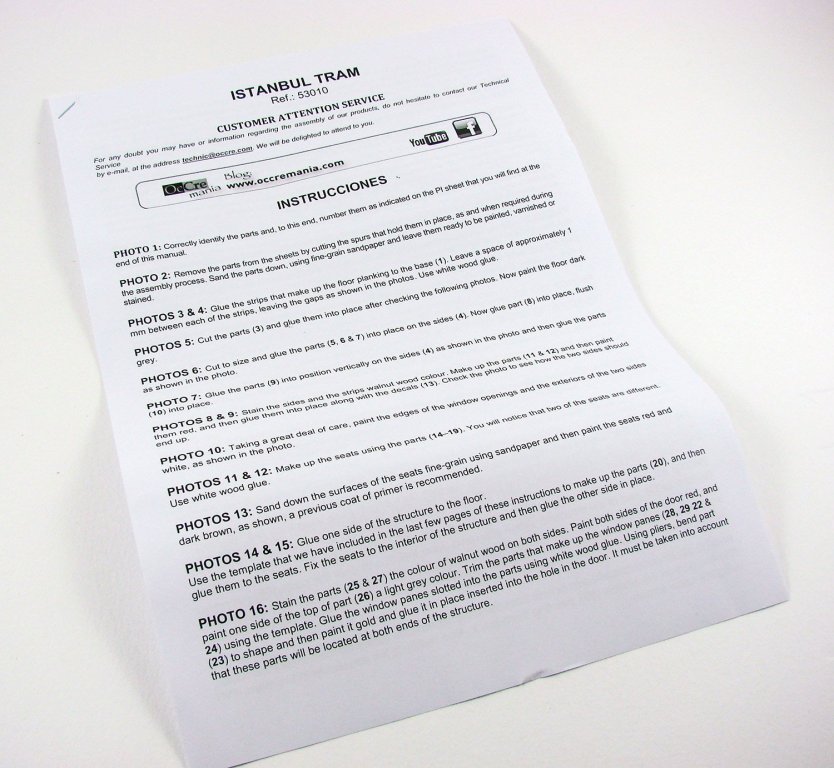
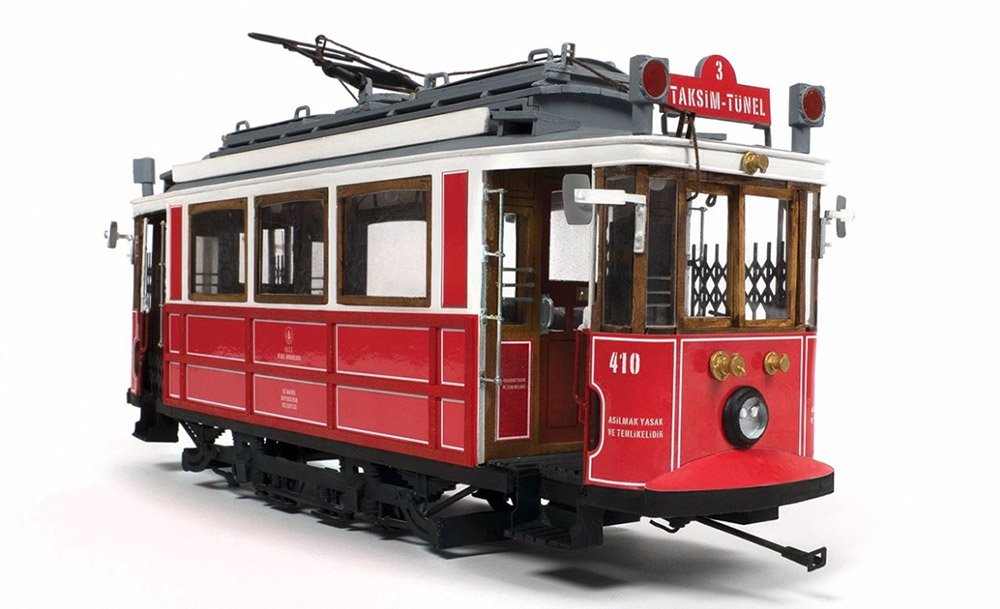
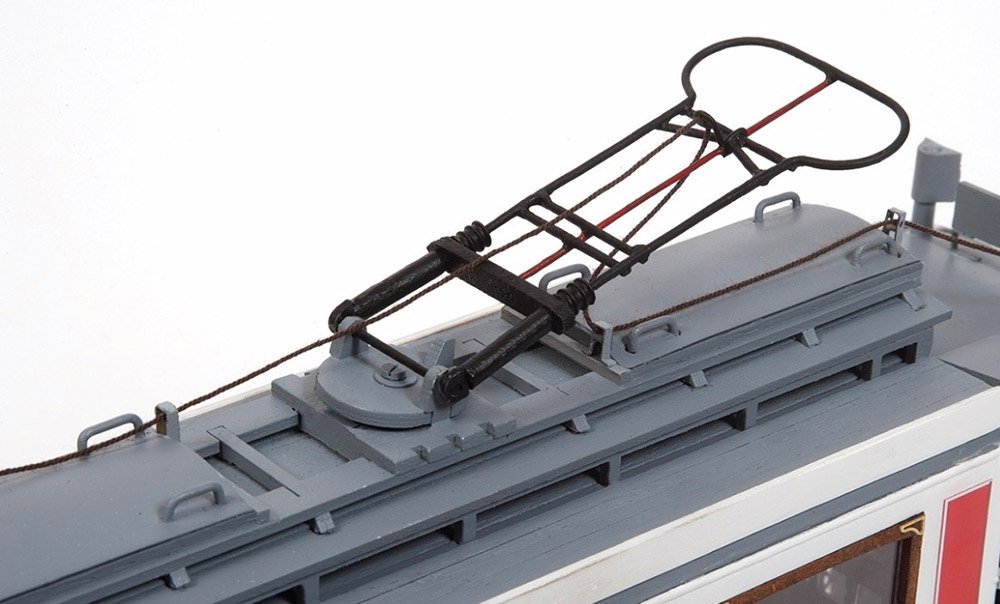
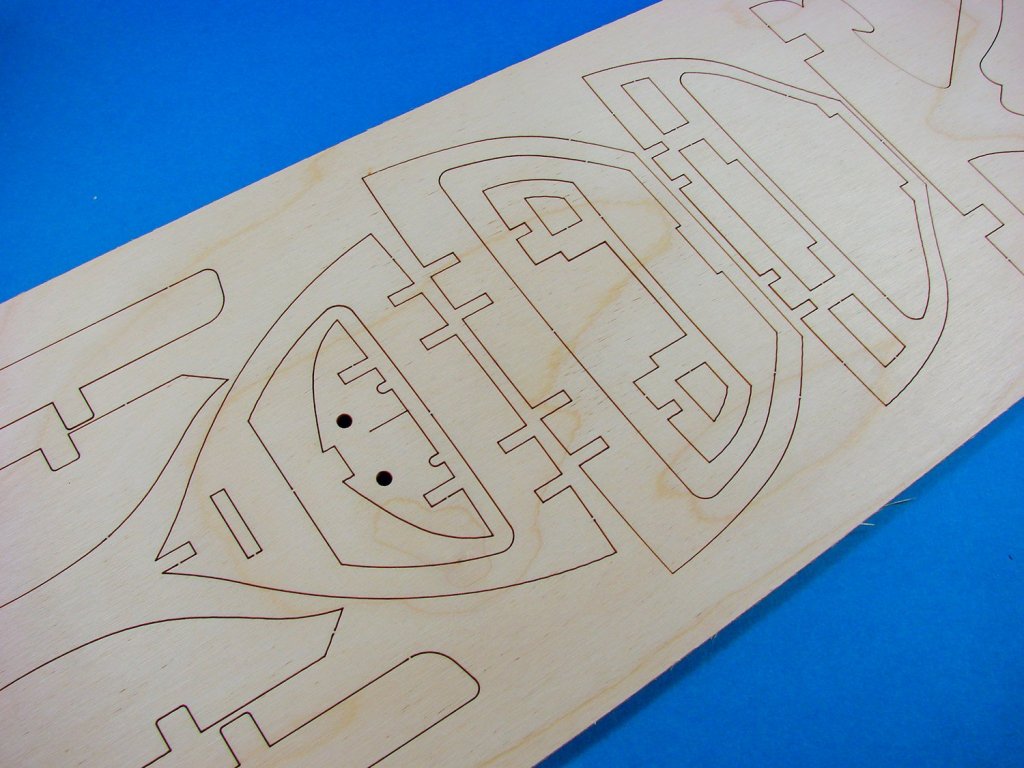
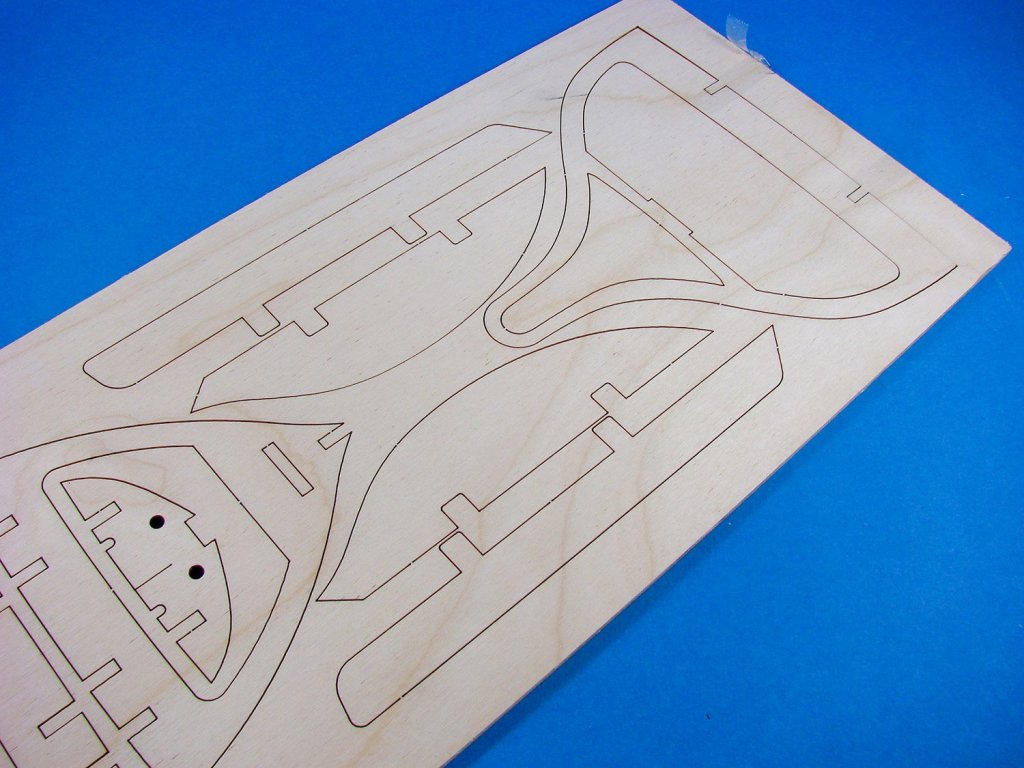
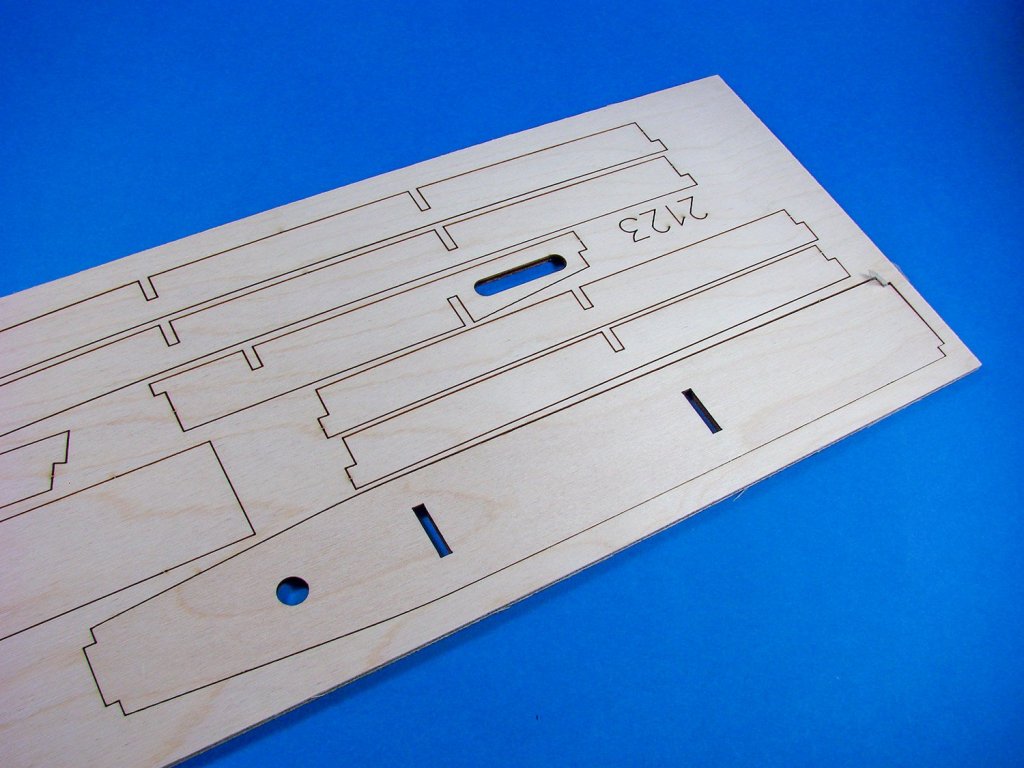
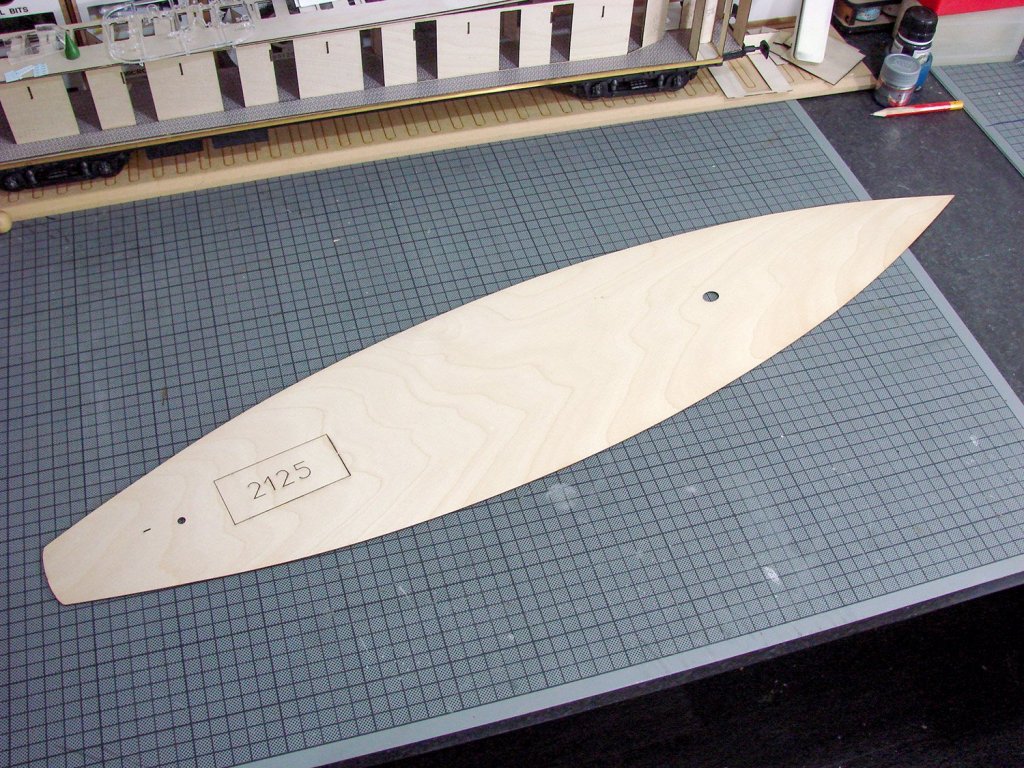
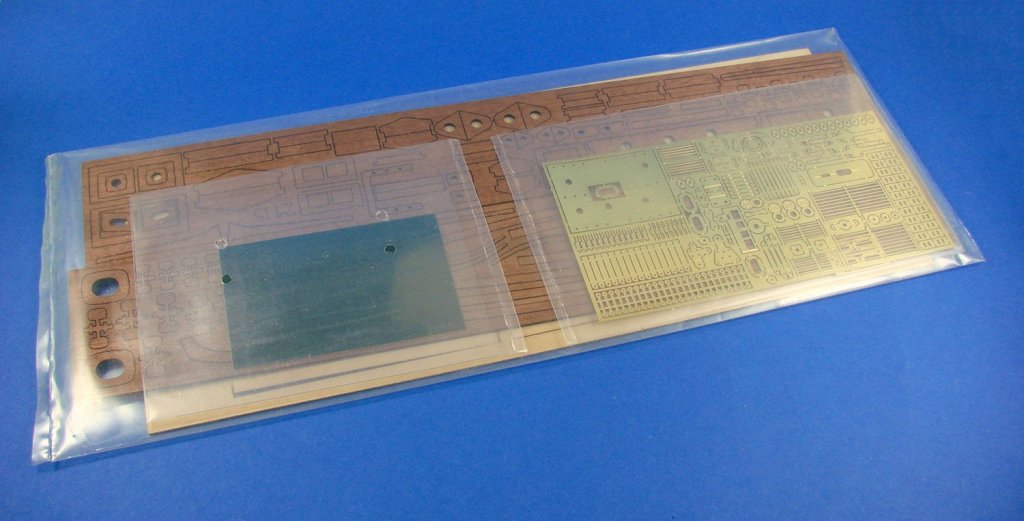
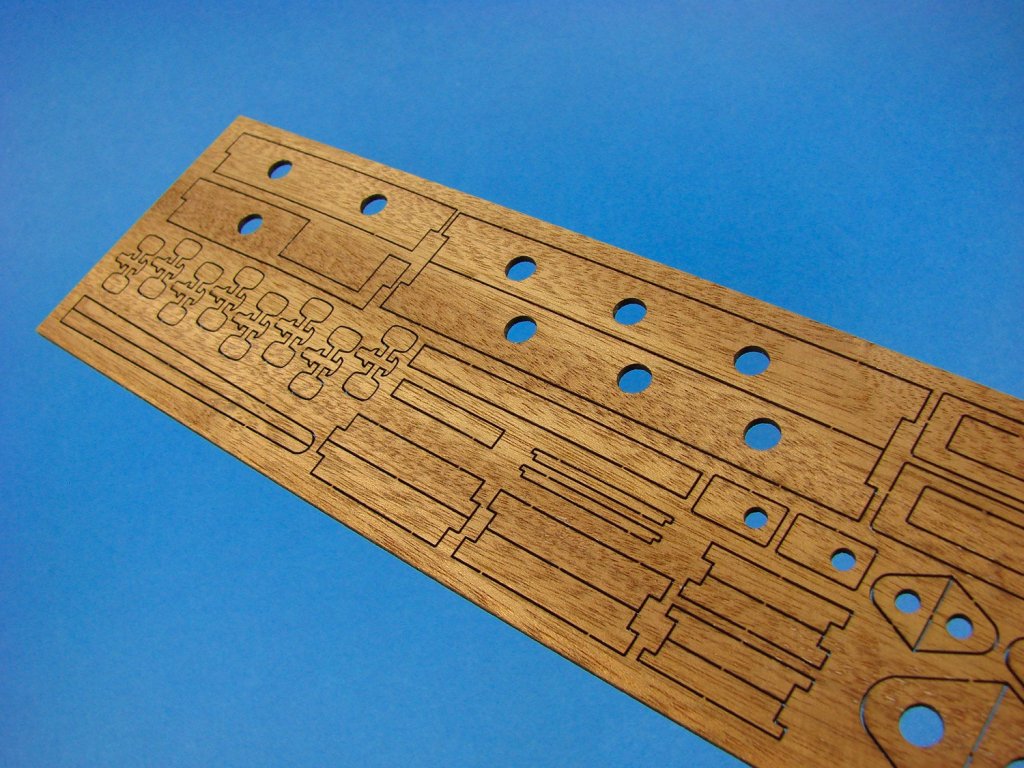
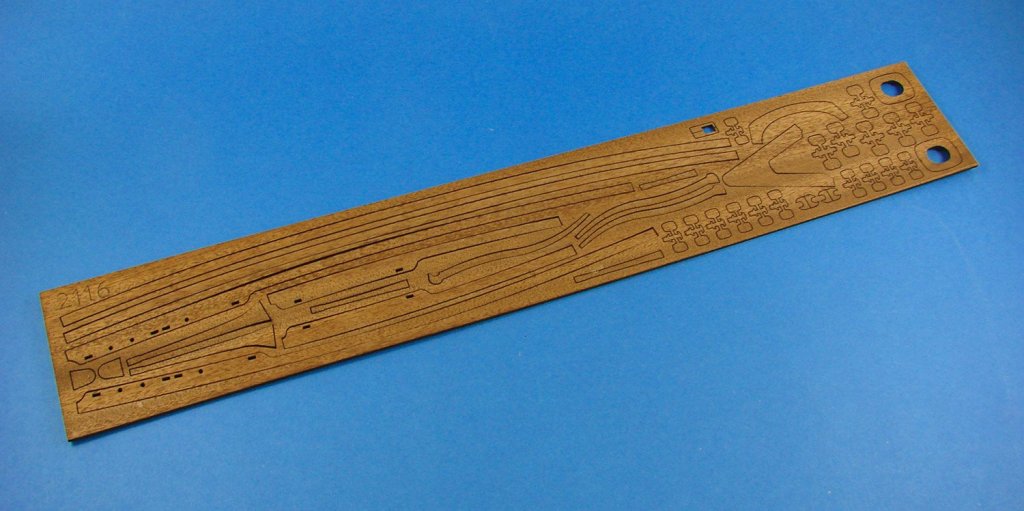
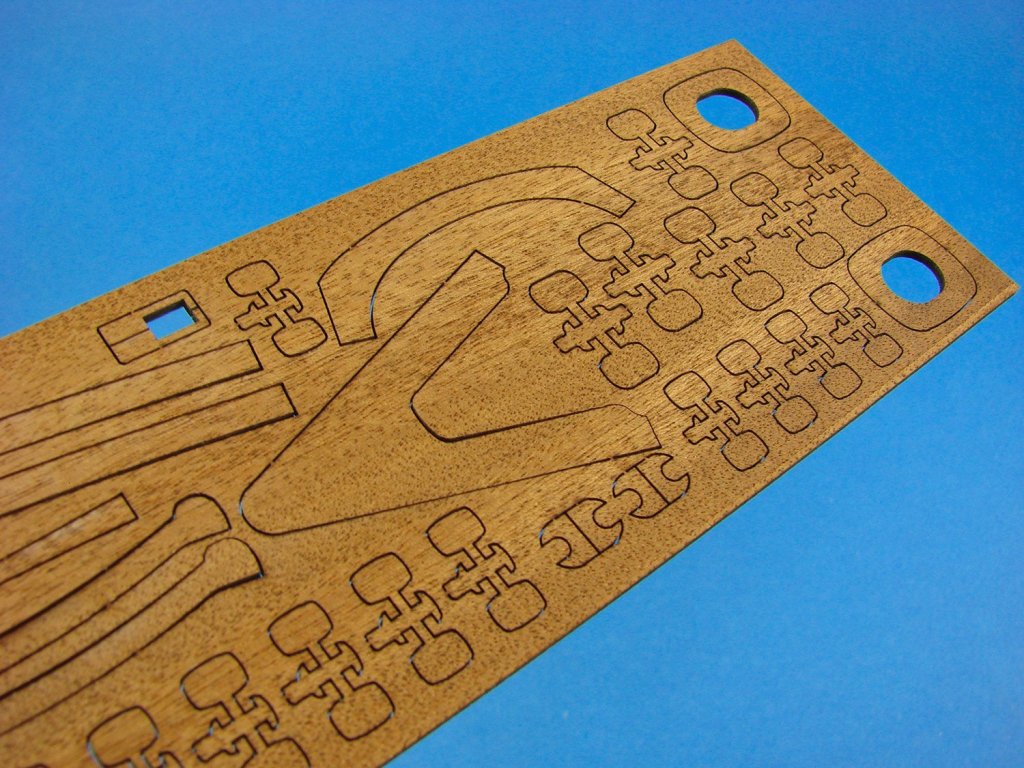
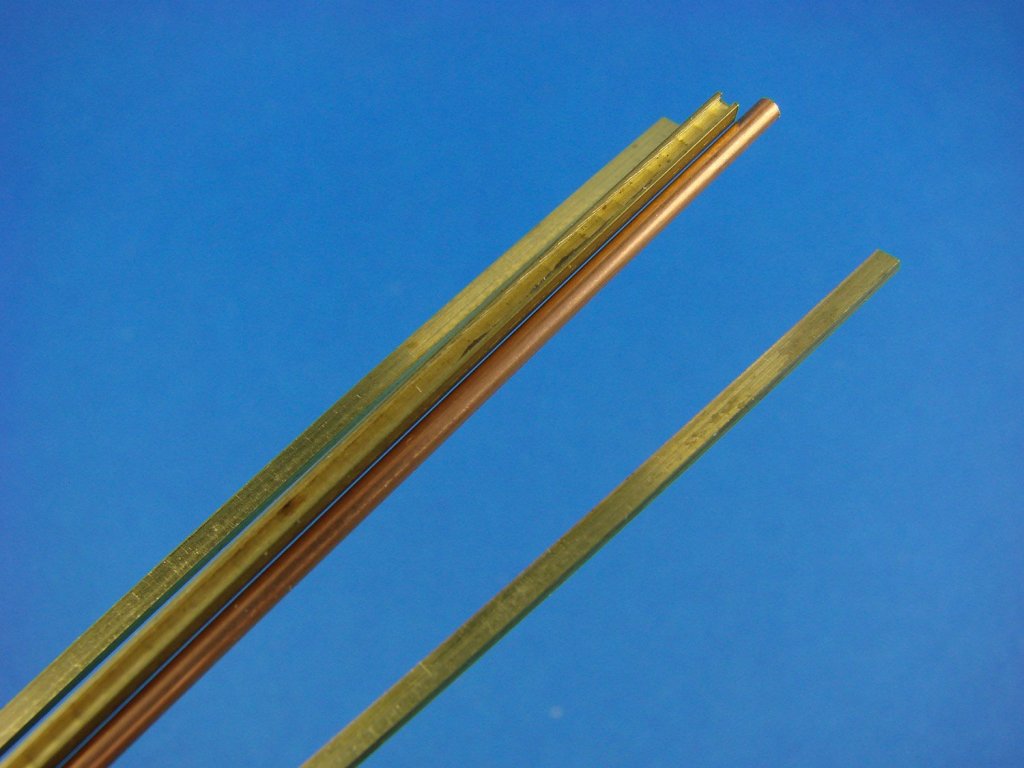
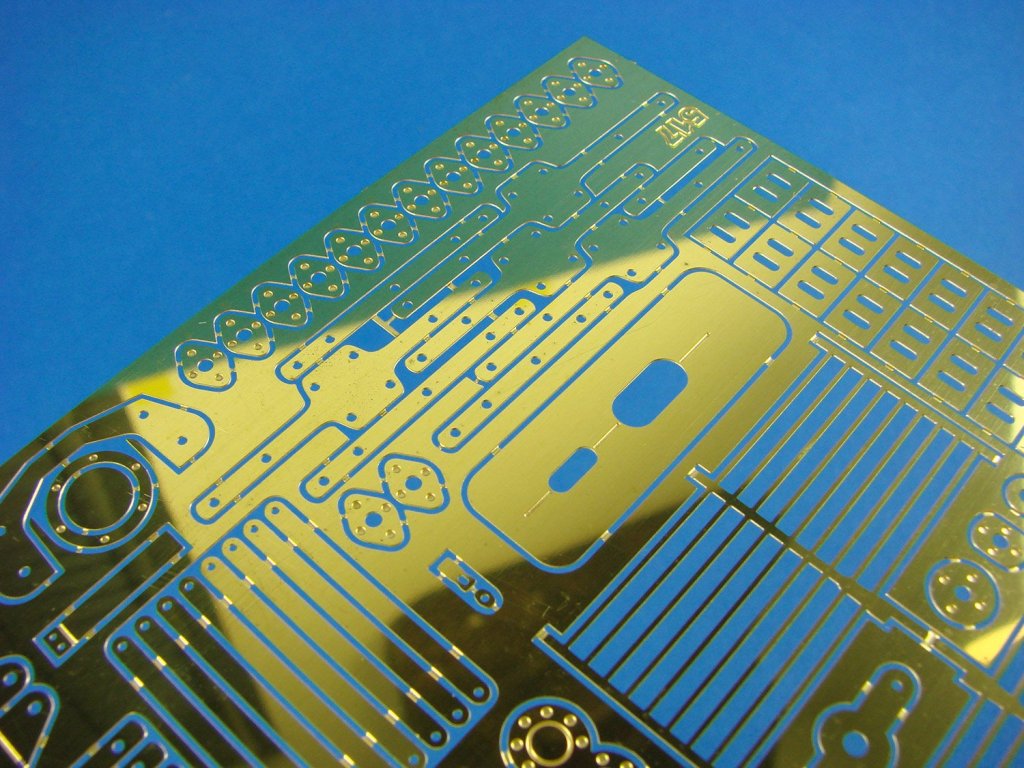
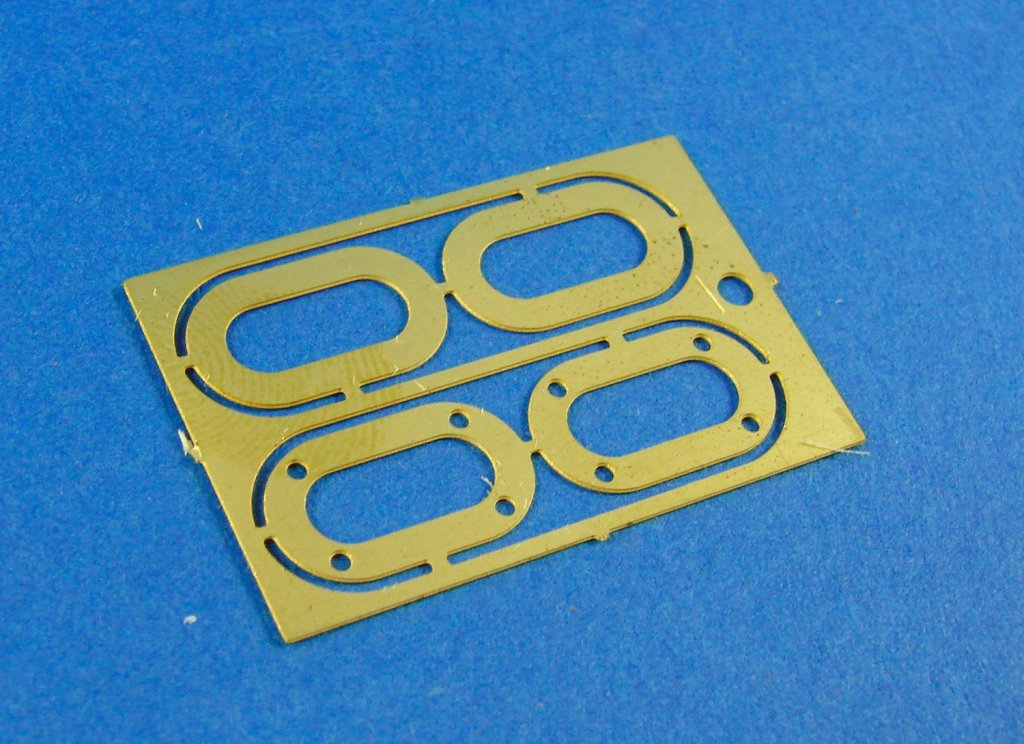
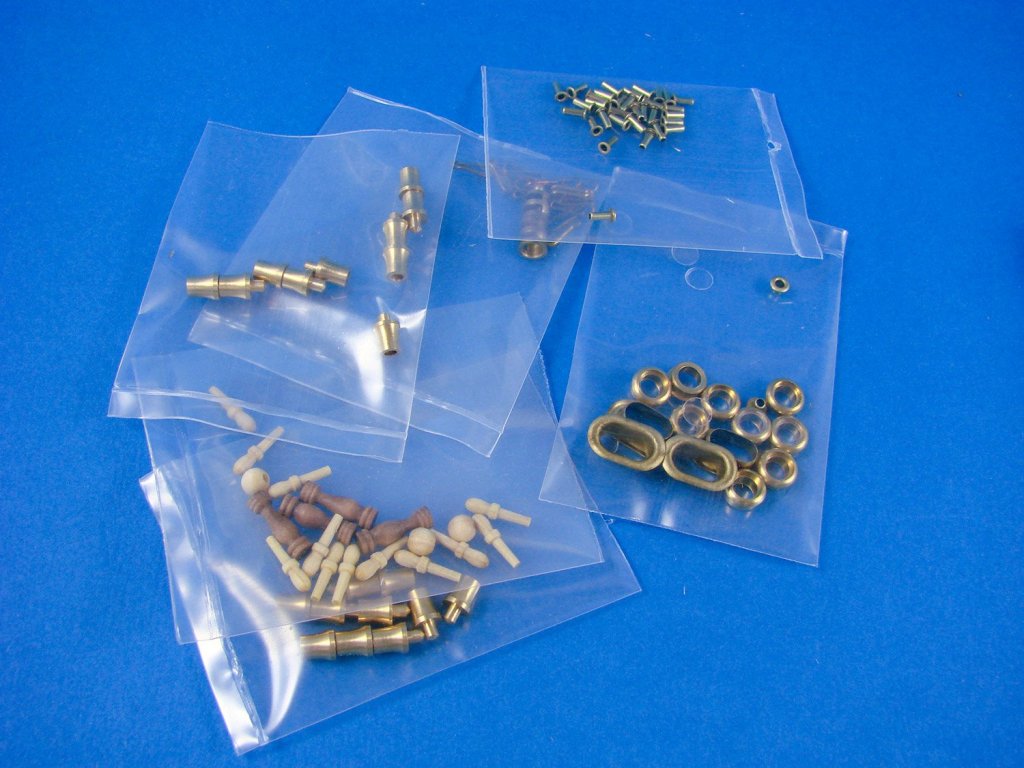
1:24 Istanbul tram OcCre Catalogue # 53010 Available from OcCre for €96,45 Istanbul, the former capital of the Ottoman Empire, once had a large tramway network on both the Asian and the European sides. It first started as a horse tram in 1860 and was gradually converted to an electric tram system starting in 1912. Many additional routes were added to the tram system, in progressive stages over time. The network reached its most widespread extent in 1956 with 108 million passengers being carried by 270 tram-cars, on 56 lines. However reflecting developments in many cities around the world during the 1960s, the tram service began to be closed down in 1956 and was completely stopped in 1966. The Authority thought to re-introduce heritage trams in Istanbul using the same type of rolling stock which was running in European part until 1962, and in the Asian part until 1966. The original Istanbul tram network was almost completely destroyed, including depots, termini, electric power stations, etc., except for some of the rolling stock which had been preserved in transport museums. Using old photographs, people's memories, and other sources, some rolling stock was built for the European side resembling pre-1962 European-side tram stock, including the size, shape, interior, colour scheme etc. The prototypes had originally been built in 1915. Around 1990, the Istiklal Caddesi became a pedestrian zone, and the tram was restored and revived in 1990, in the form of the Taksim-Tünel Nostalgia Tramway. After a 24-year absence, trams returned to Istanbul. The length of the line is 1.64 kilometres (1.02 mi) and there are 5 stops. The Istanbul nostalgic tramways are two heritage tramlines in the city of Istanbul, Turkey. The city has two completely separate heritage tram systems, one on the European side (the Taksim-Tünel Nostalgia Tramway, aka. T2 line), the other on the Asian side (T3 line, aka. the Kadıköy-Moda Nostalgia Tramway). The kit OcCre’s new Istanbul tram kit replicates one of those heritage trams mentioned in the passage above, and is packed into a slender, standard OcCre box, as per our Terror article that we published recently. A colour-printed wraparound label is affixed to this with tape, and a cut-out in the lid is designed to display the plastic tray of components within. Lifting the lid and removing the inserted component tray, we come to the main box and here you slice a few tape tags to open up the contents. All the timber parts are bundled with two sheets of photo-etch parts and are securely held together with a shrink wrap covering. This compact method of packaging ensures zero damage and all parts are pristine. Now we cut away the cellophane… This sheet of parts, all cleanly laser-cut, concerns the construction of the tram seating. Each seat is comprised of four parts, varying slightly, dependant on where in the tram it is installed. Note that no parts are engraved with numbers. Instead, you will need to refer to the printed parts plan that is a part of the assembly manual. Timber quality here is high, and all parts are only held in situ with small, easily cut tags. We now have an MDF sheet included. This one contains a number of parts for which removal of wood grain would have been a PITA, so this is a nice move. The largest part is the tram floor, with various slots and connecting tabs, roof side supports, roof end frames and roof support frames etc. Our next two plywood sheets are identical, containing frames, cabin ends and internal frameworks, more seat parts, door parts, bulkheads, etc. Each sheet contains over 30 parts, again, all cleanly cut in high-grade ply. Laser scorching is very low, and very localised, and char clean-up should be nice and easy. The next two sheets are also identical to each other, but instead of being produced from ply, these are also supplied as MDF. This is actually quite a savvy move as I mentioned, as a good number of these will go into building exterior areas of the tram, and of course, there will be no wood grain to remove. Here you can see the slab sides for the tram, more roof frames, boarding platform and chassis frames etc. A nice thick bundle of various size timber strip stock is included and bundled together with elastic bands. This material will form areas such as internal framing and the planked roof etc. Quality is very good, with only a little wispy material needing to be removed from some of the strip. That’s the last of the timber areas in this kit, as we now look at the two photo-etch sheets included here. The first one is made from brass, and includes the instantly obvious shutter gates, tram destination sign brackets, external window frame corner trims, etc. Etch quality is superb, with the removal tags being thin and narrow. The second PE sheet appears to be manufactured from some sort of nickel-alloy, and parts here include the boarding step housings, electric roof sheathing, cabin parts, ventilators, external footplates, and also hand rail mounting points. A number of lengths of thick brass wire are included for fashioning all manner of items, such as the trolley pole that catches the overhead electrical lines. Some of these items will need straight edges, so you’ll need to be careful when it comes to ensuring you straighten the wire suitably. I do think that some of these wire items will really lend themselves to being soldered, so if you are capable of that, it’s time to ready the hot iron! I admit that I didn’t really know how the exterior livery was going to be approached on this model, such as paint, decal etc., but OcCre have in fact included a nice, glossy sheet of self-adhesive panel stickers that should adhere nicely to the smooth MDF surfaces. These have the livery and text already in situ. You will need extreme care in applying these to ensure they line up perfectly, as I don’t know just how sticky they are. Printing quality is excellent, and this really will create the appearance of the tram you see in the photo at the start of this article. For the windows, a sheet of acetate is included, and for the internal ceiling, another printed sheet is included. This needs to be glued to the internal roof framework before fitting the various ceiling lights and ventilators etc. I do suggest you don’t use any glue which is too wet and would damage the thin paper sheet. Look at using a quality glue-stick instead. Now we can take a look at that neat plastic tray of components that we can see through the box lid. This is split into twelve compartments, with each holding either a singular type of item, or multiples of different elements. Many of the parts in here are made from cast white metal, such as leaf-spring suspension, interior lights, dampers, cabin components, wheels, couplings, lights, grab-rails etc. There are a small number of turned brass parts and screws in here too, as well as brass eyelets, washers, and a spool of rigging cord to simulate the electricity cable for the trolley pole. There is a small ply sheet too, with just four small parts for an external roof ventilation opening. As with the previous OcCre kit we looked at, the instructions for this release are all driven by clear colour photos of each stage, showing actual construction of the prototype model. This series of colour, foldedr A3 sheets goes through the building process in a clear and organised way. It’s also worth noting that the parts themselves are added to the mix in a sequential way, meaning it’s easy to trace where in construction a particular element is required. All stock timber sizes are also shown in dimensional form too, to ensure you use the correct material in the appropriate area. A set of written instructions is also included, referring to the specific photos. Conclusion This is certainly an unusual and well-executed little project from OcCre. There’s quite a lot of construction to be had here in both frame and PE, with a more than generous number of extra fittings thrown into the mix. A thoroughly detailed and nicely designed model of a famous heritage tram, and one that I image will be addictive to build. Just as well there’s a whole fleet of world heritage trams to choose from! Maybe we’ll look at a couple more soon. My sincere thanks to OcCre for the review sample seen here. To purchase directly, click the link at the top of this article.


-
Always happy to link Ages of Sail into all future articles, if you have it on inventory. EDIT: Added your link to article.
-
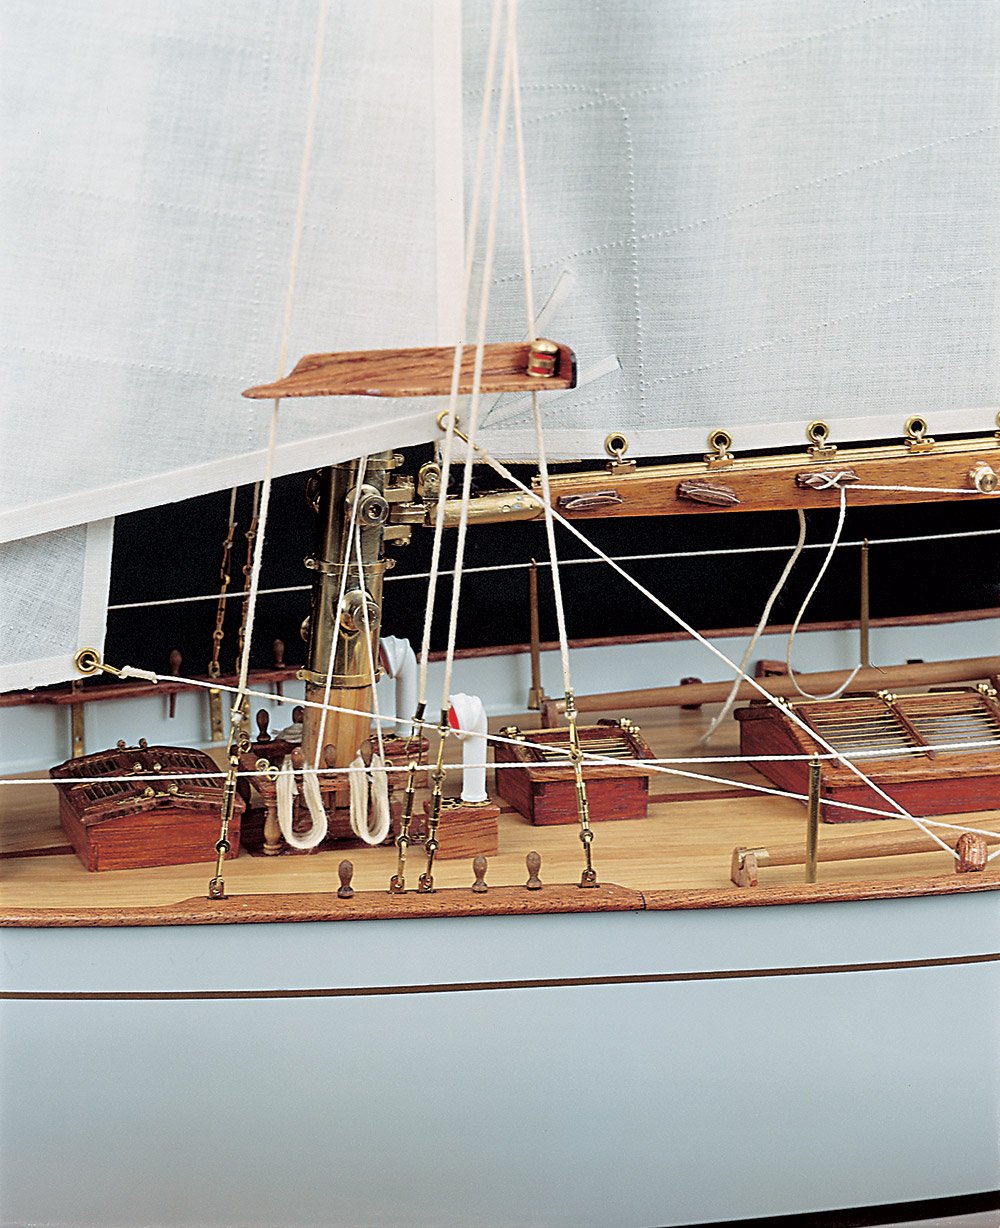
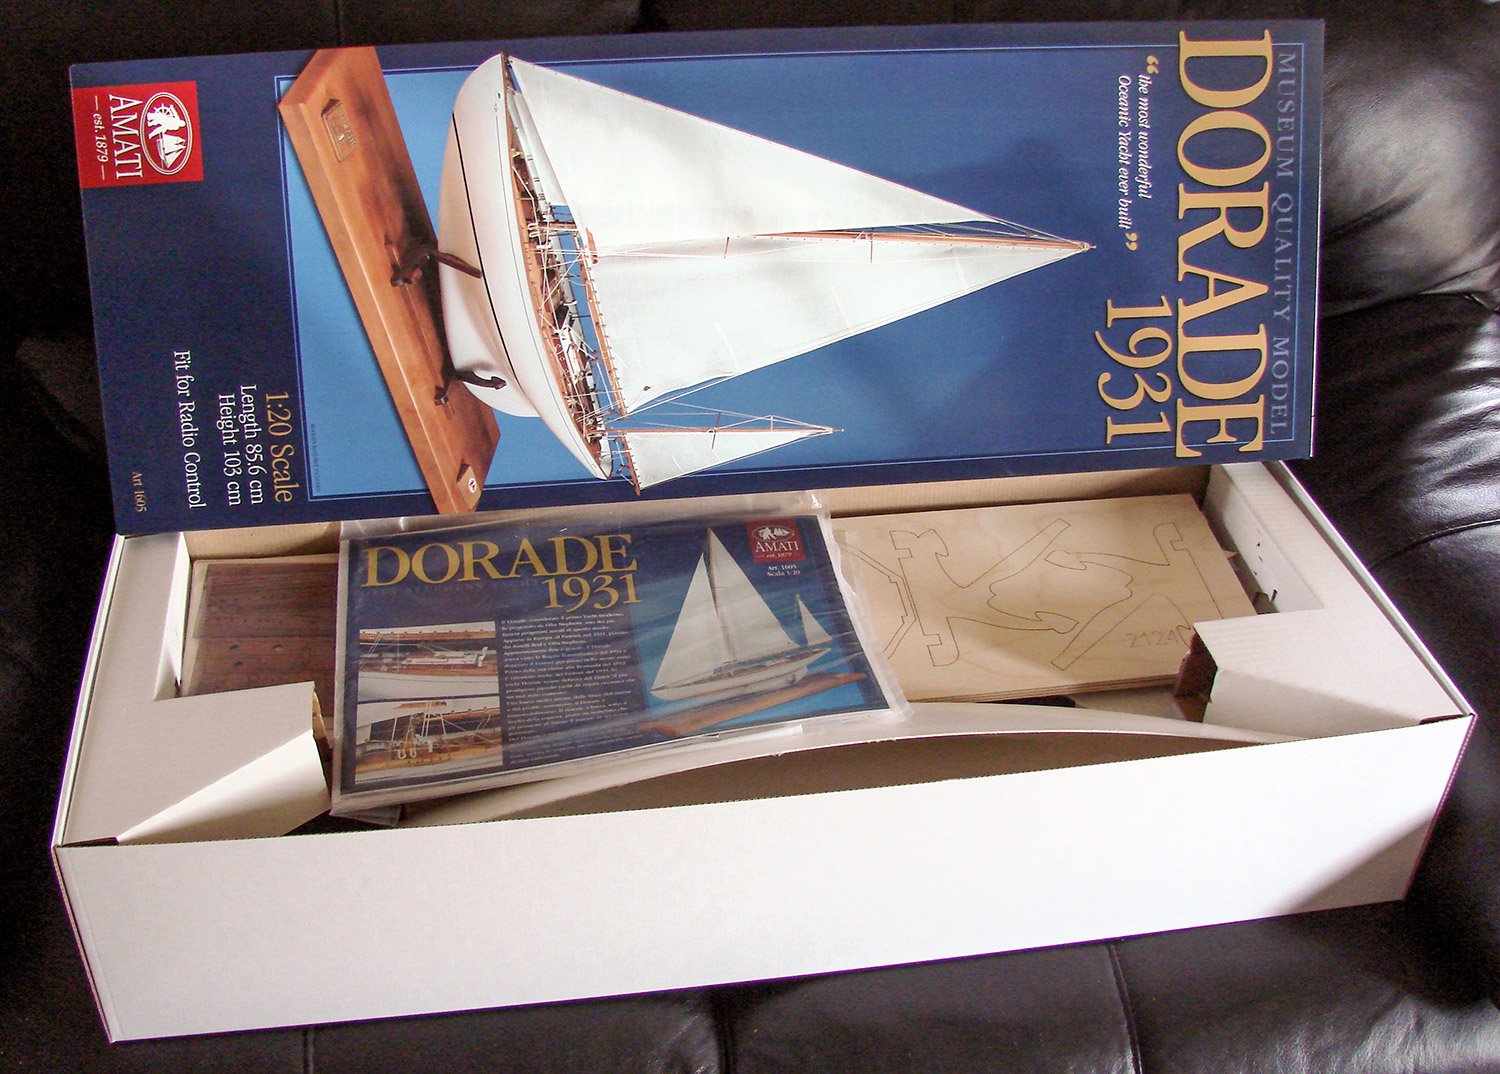
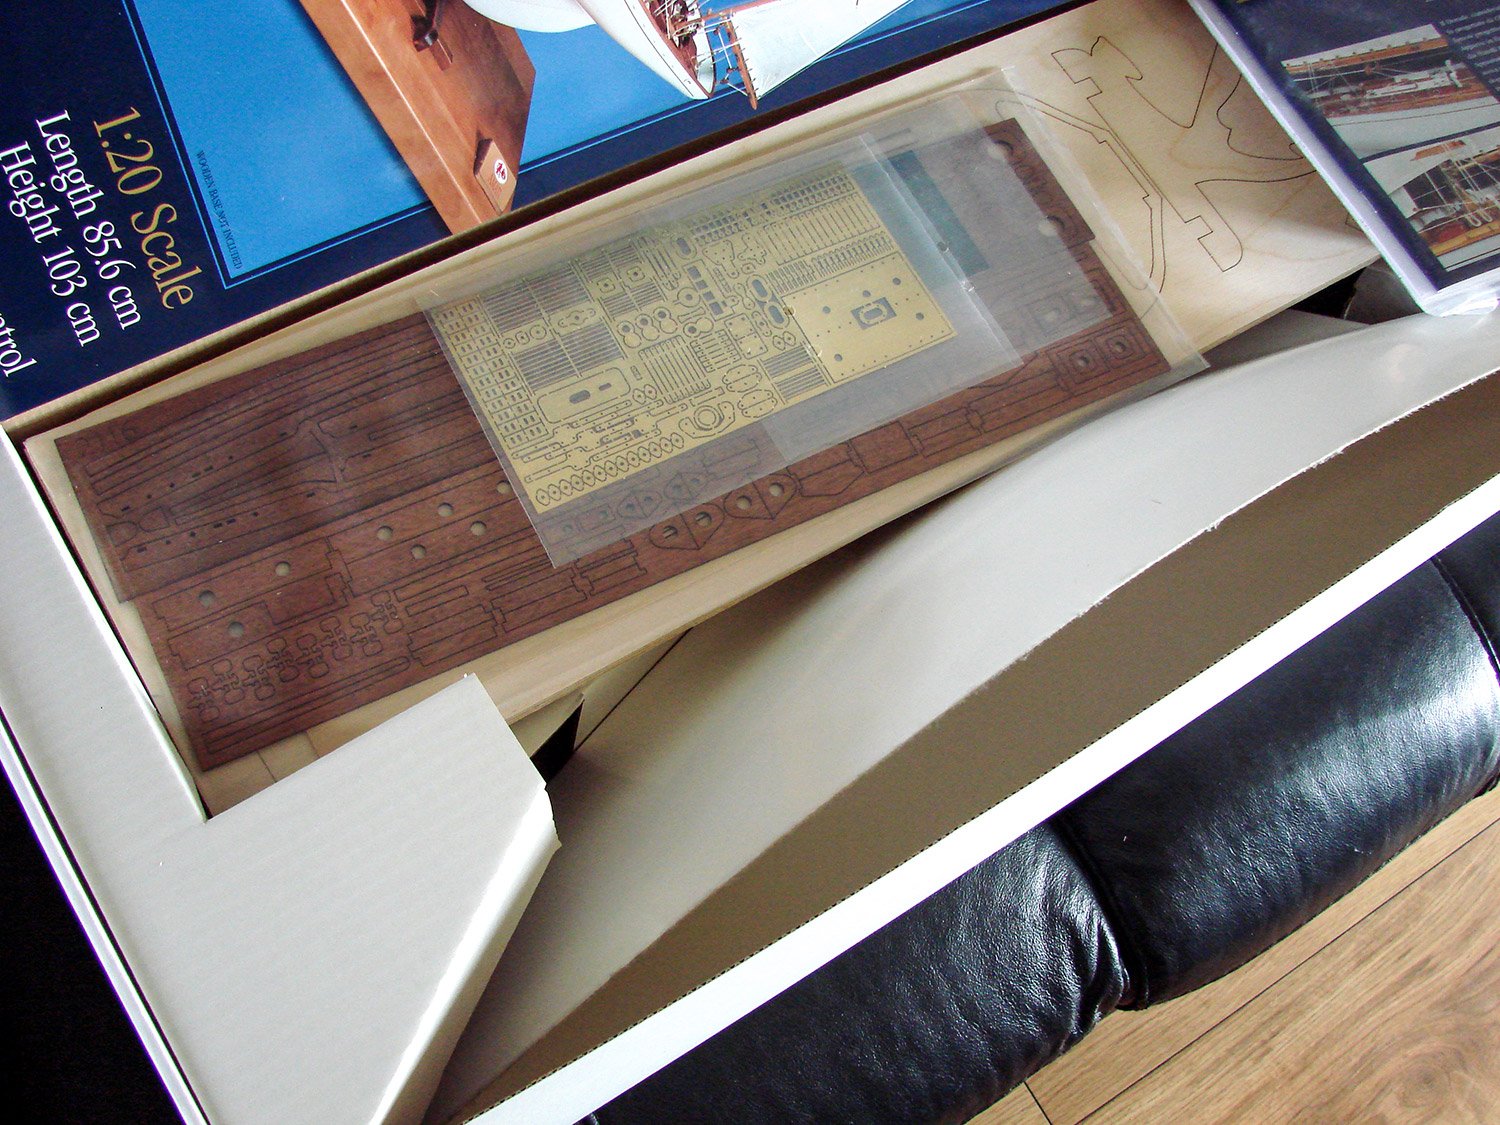
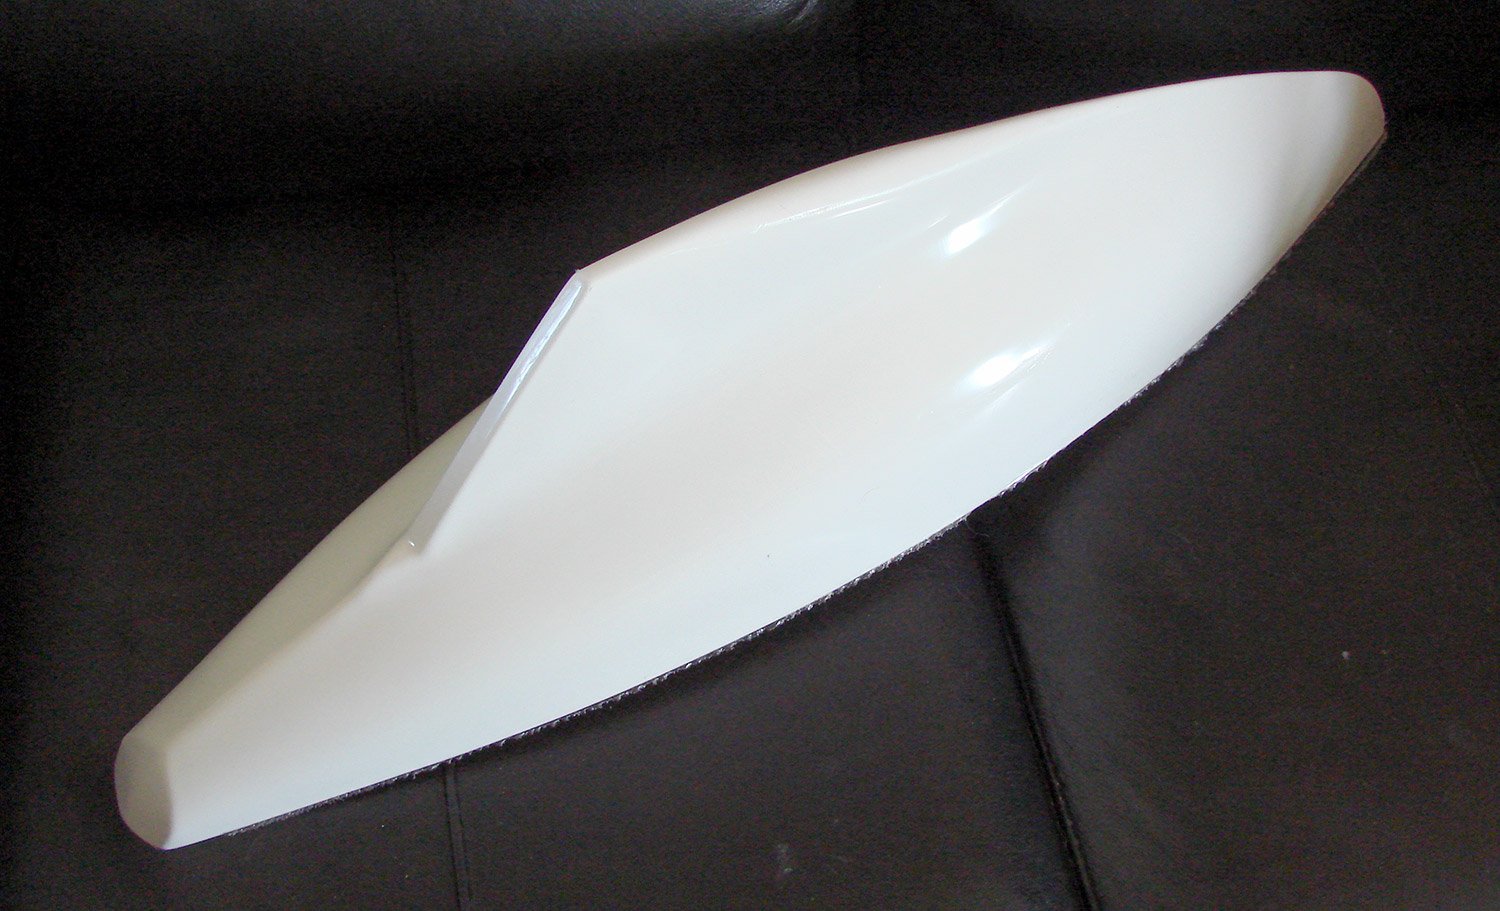
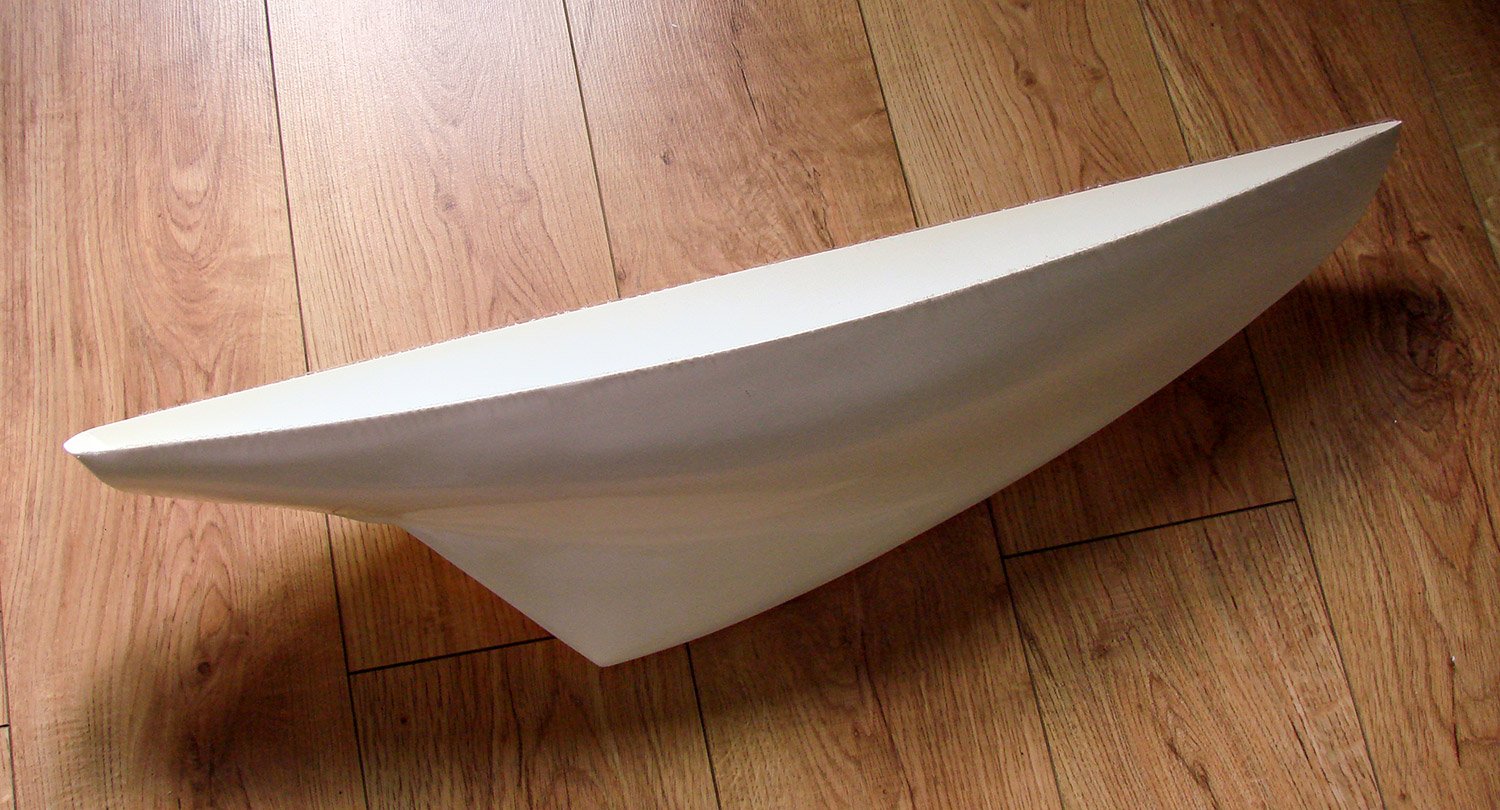
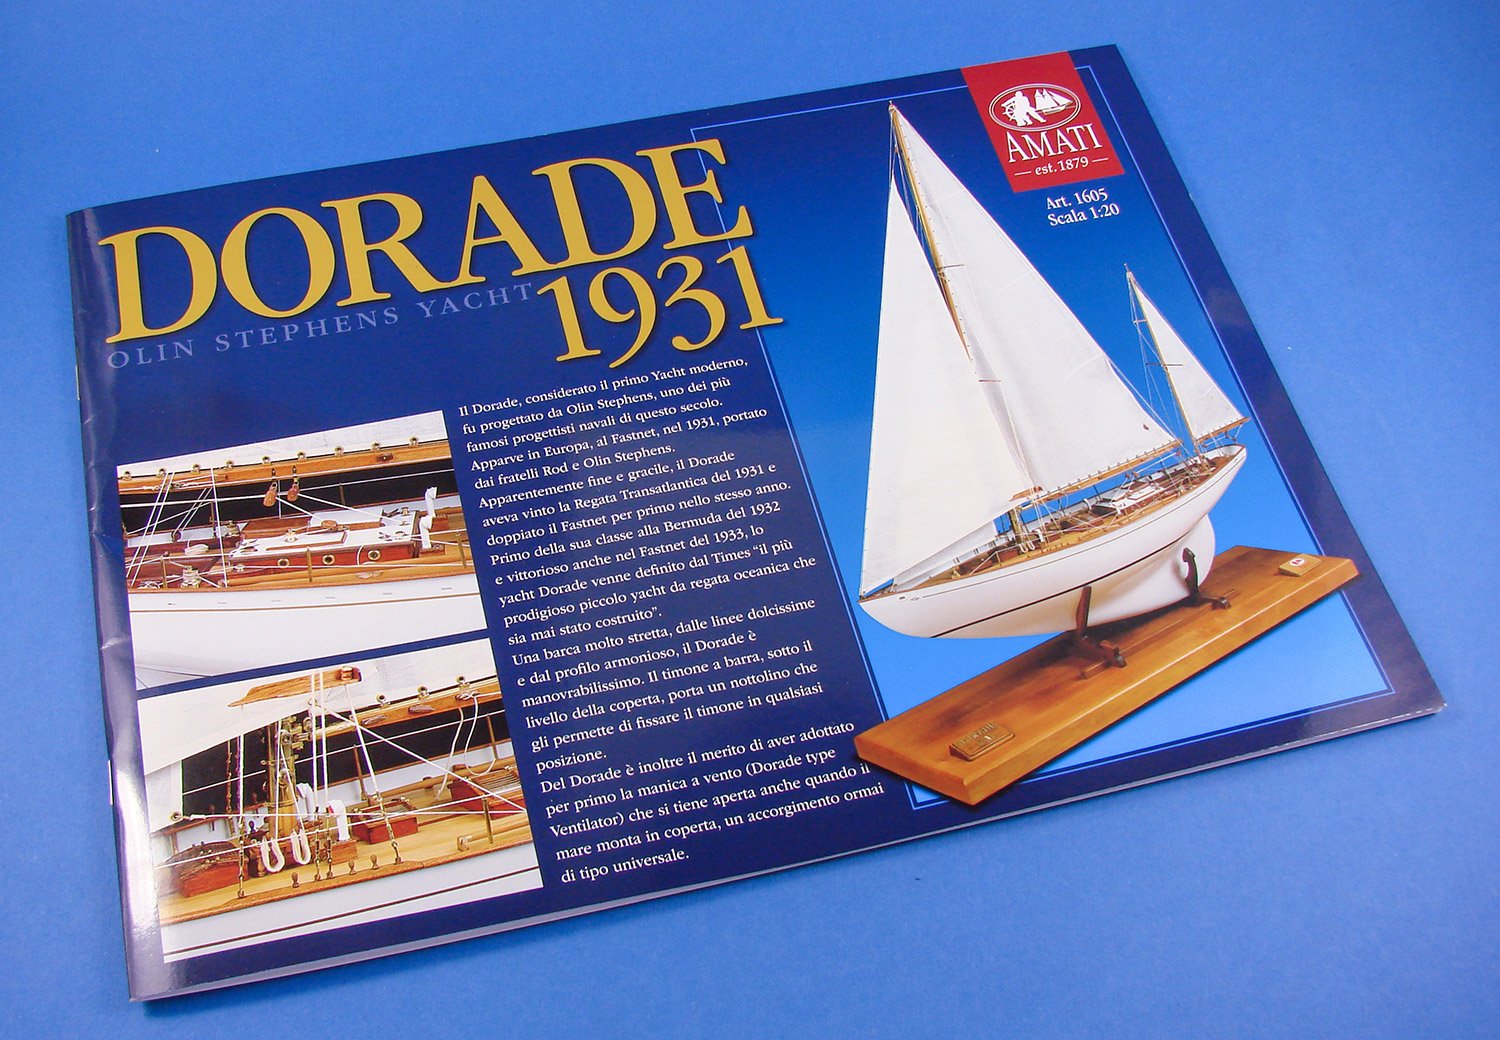
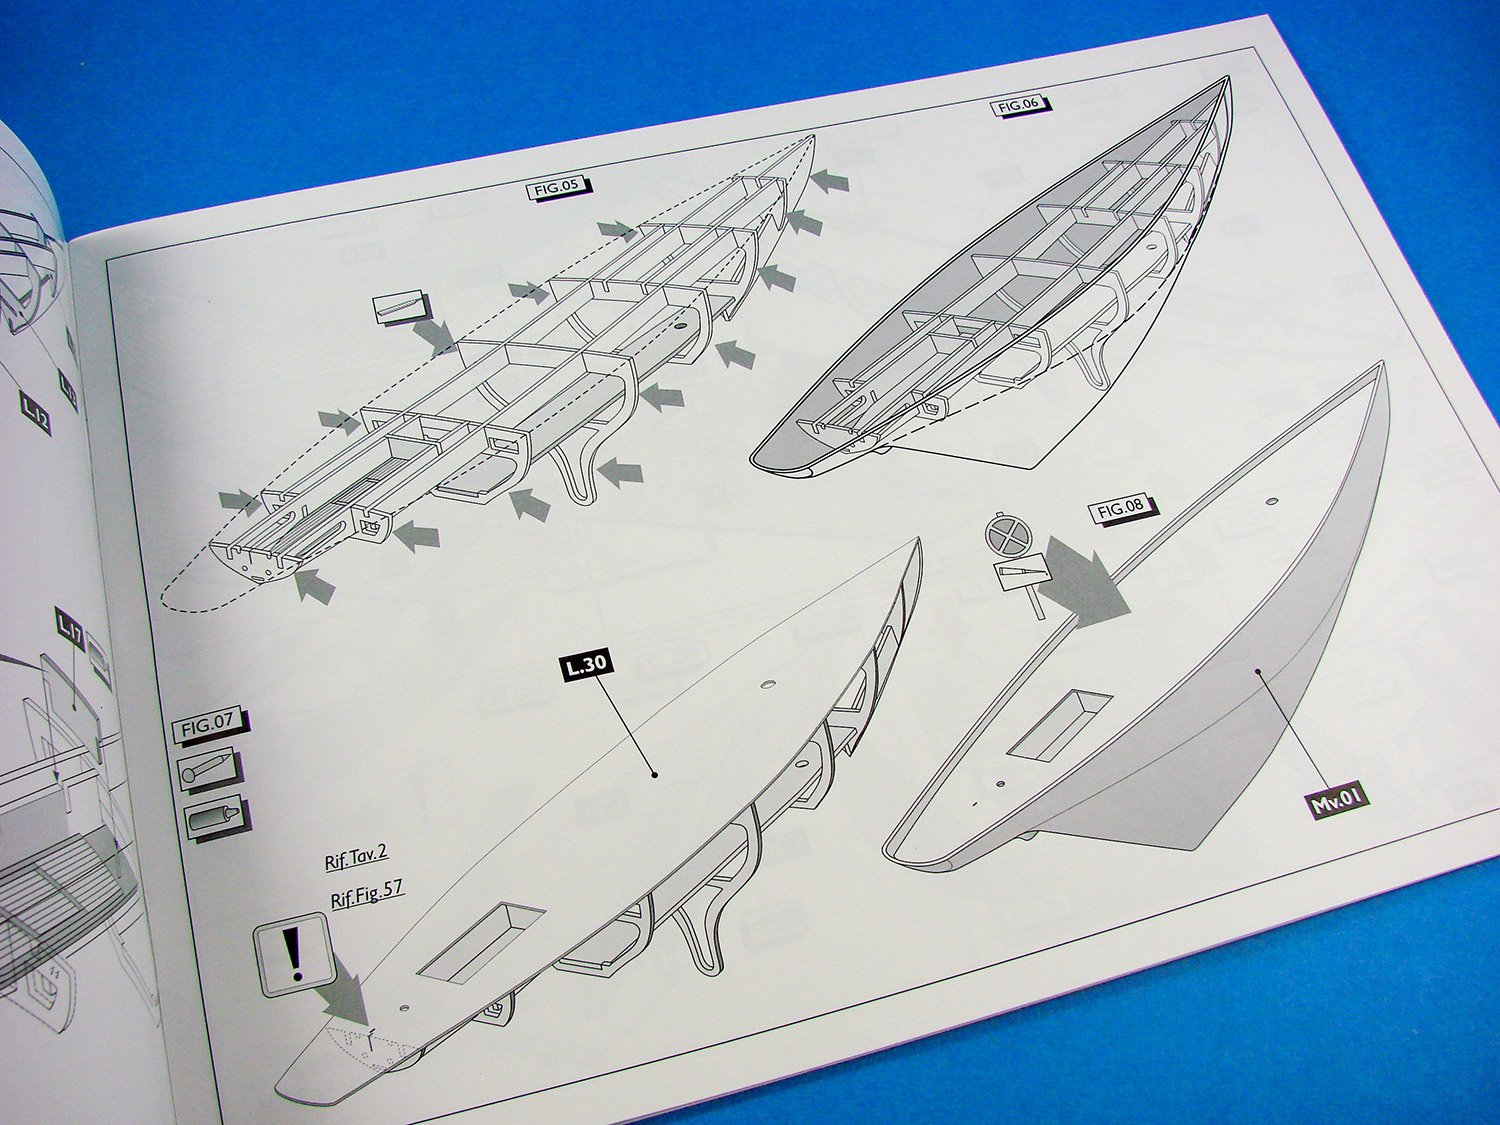
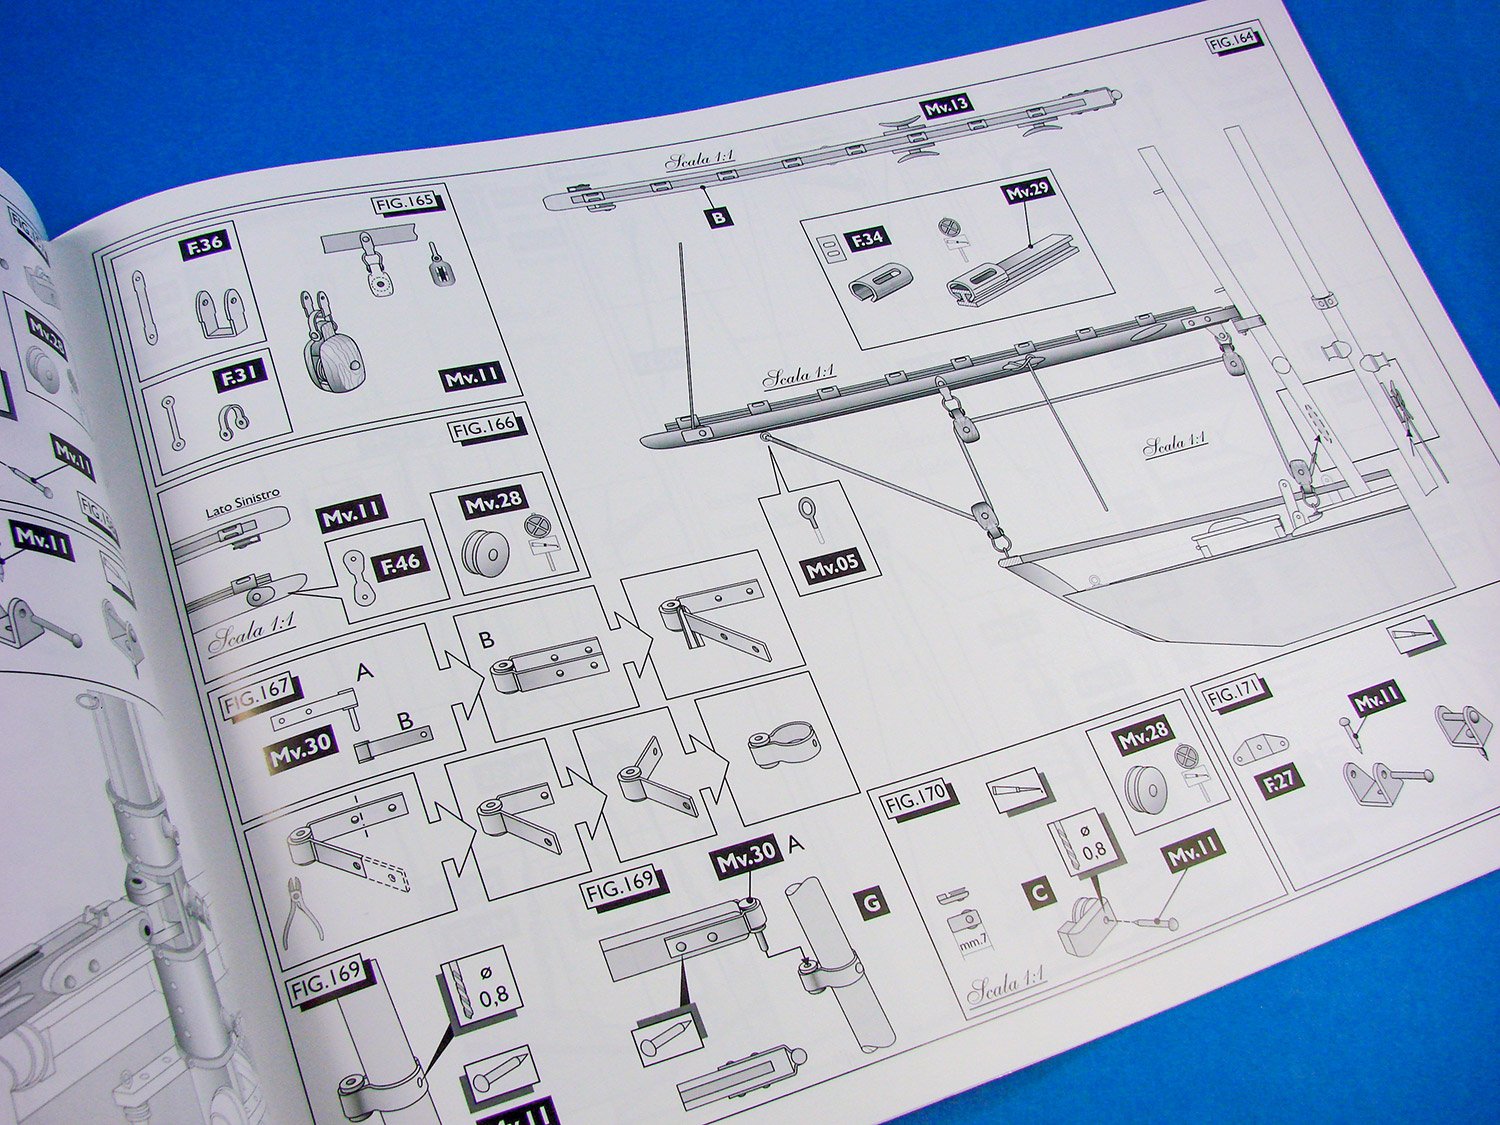
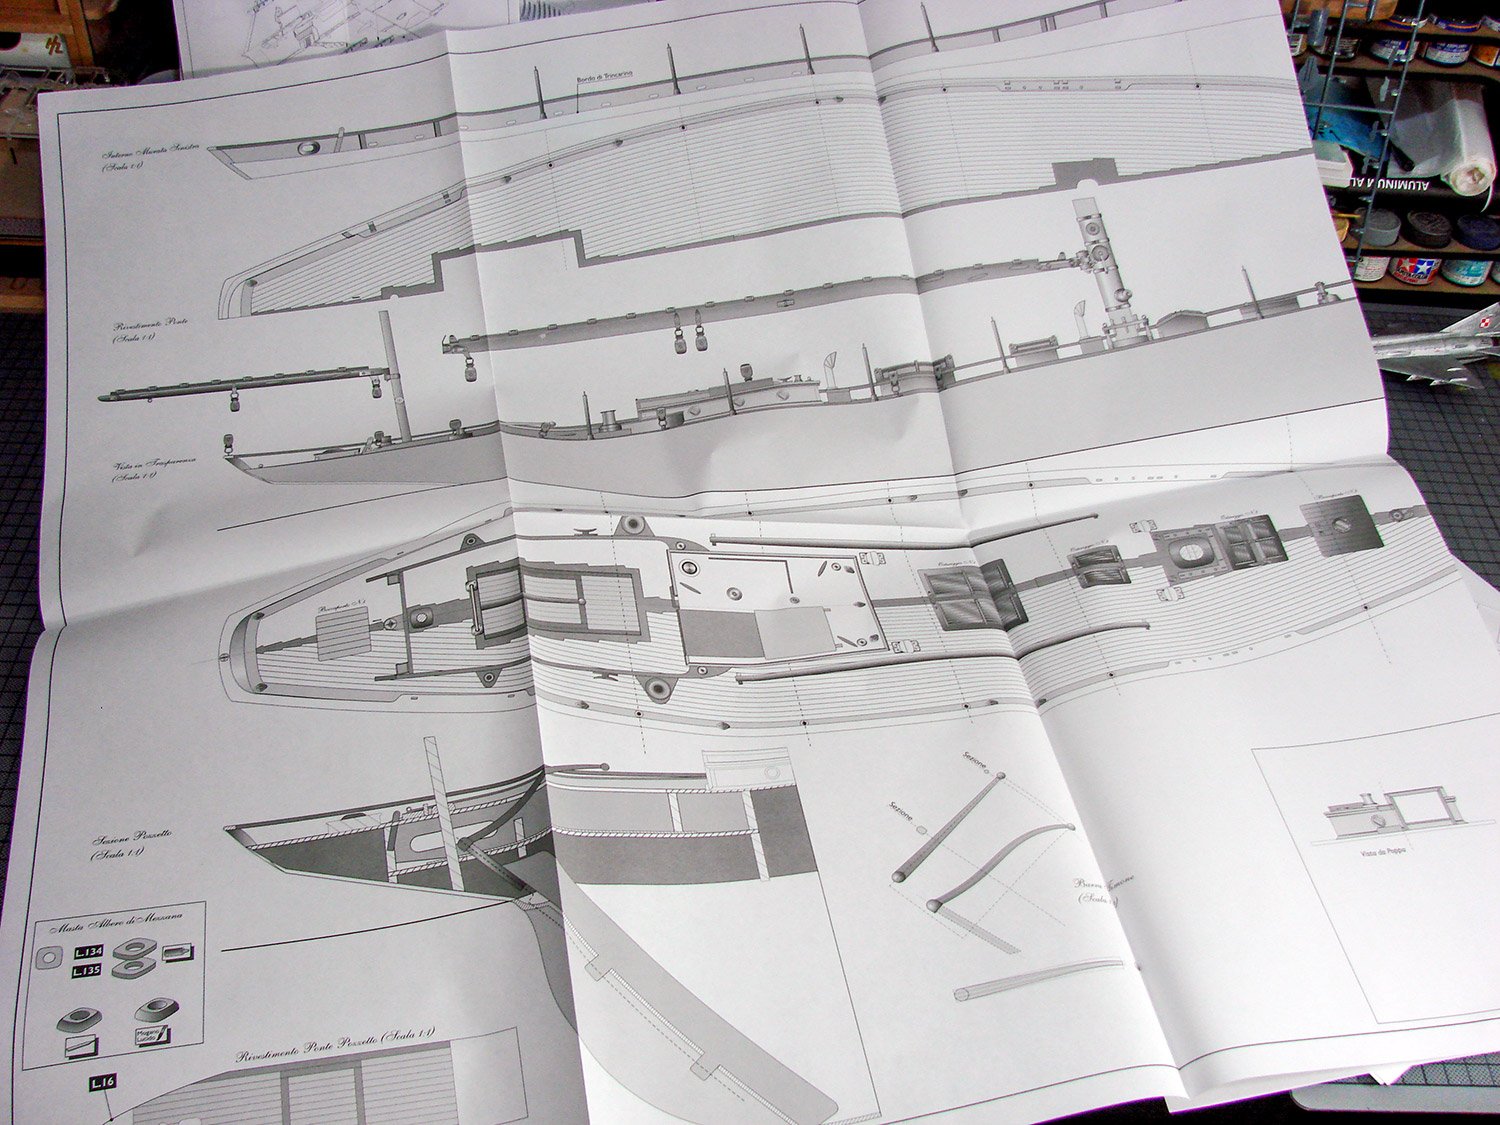
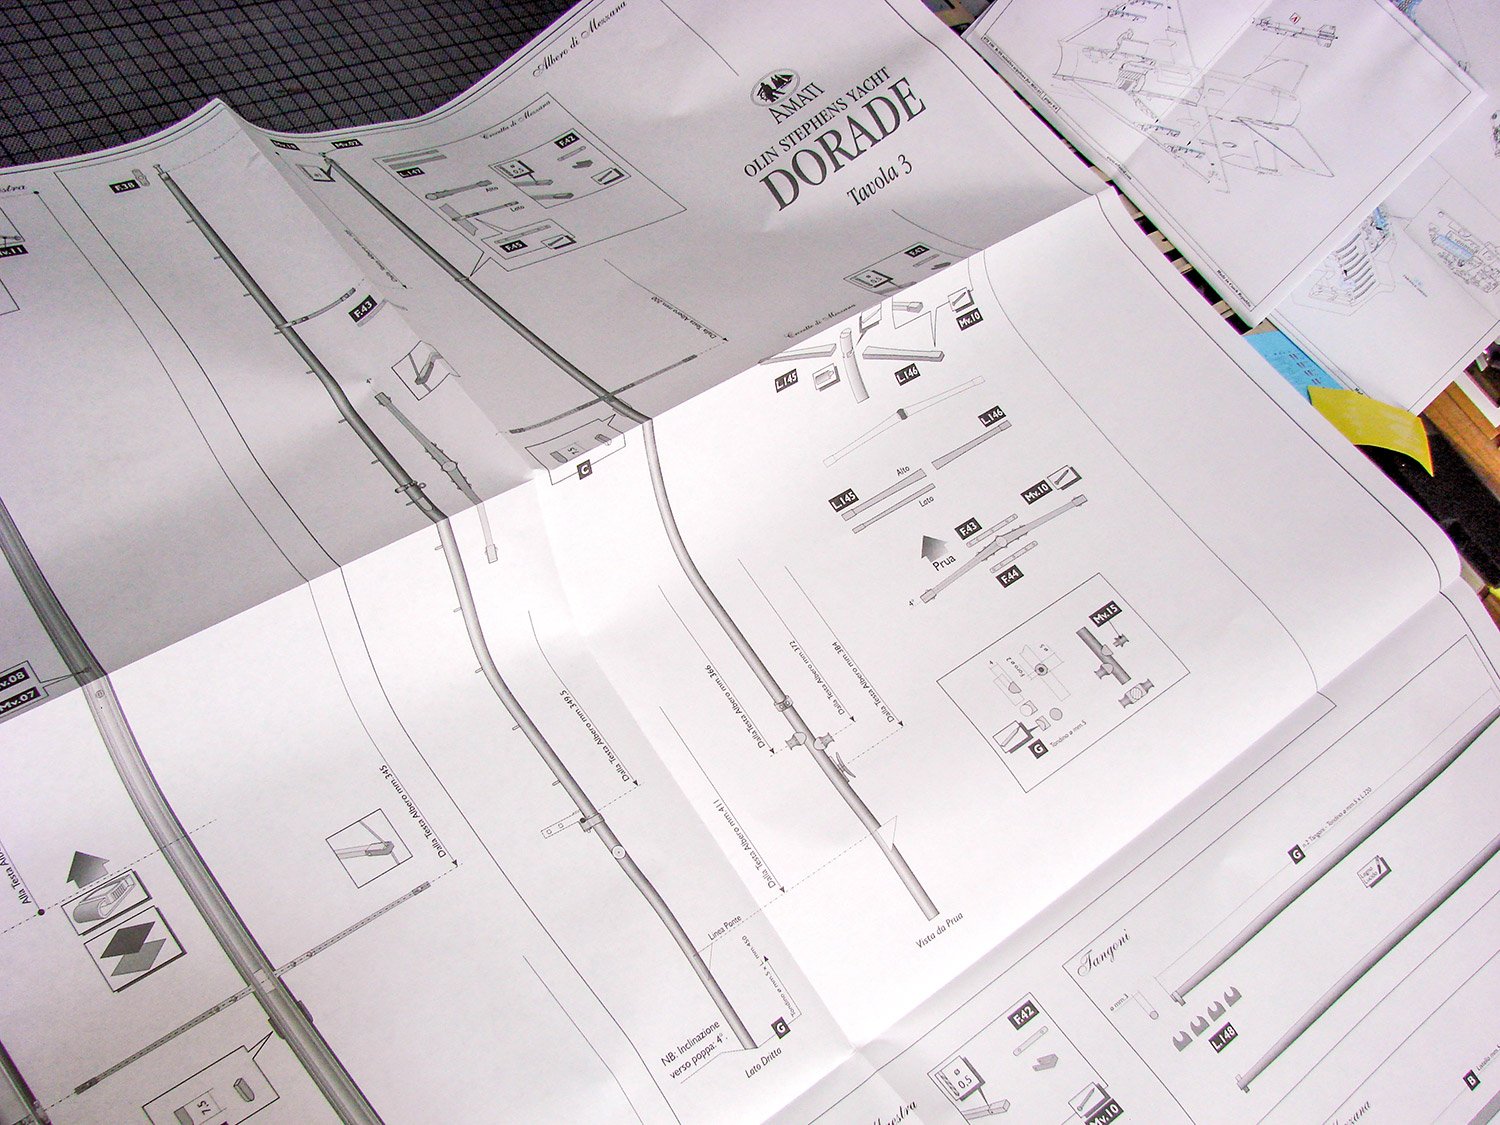
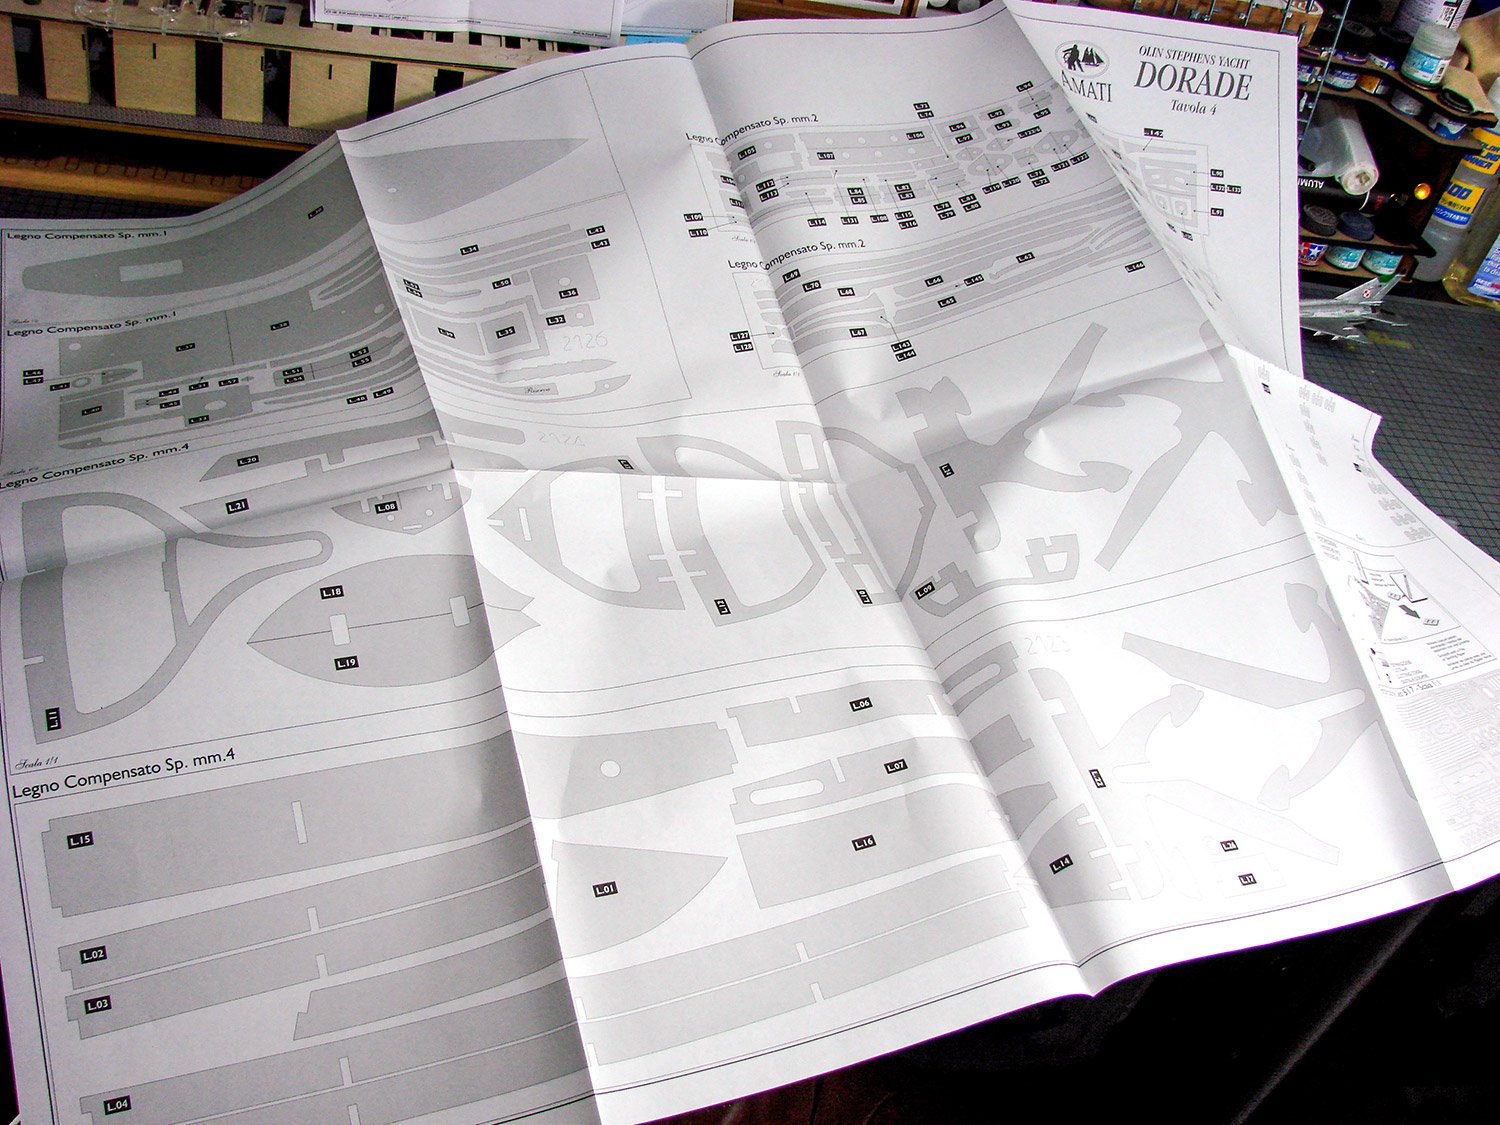
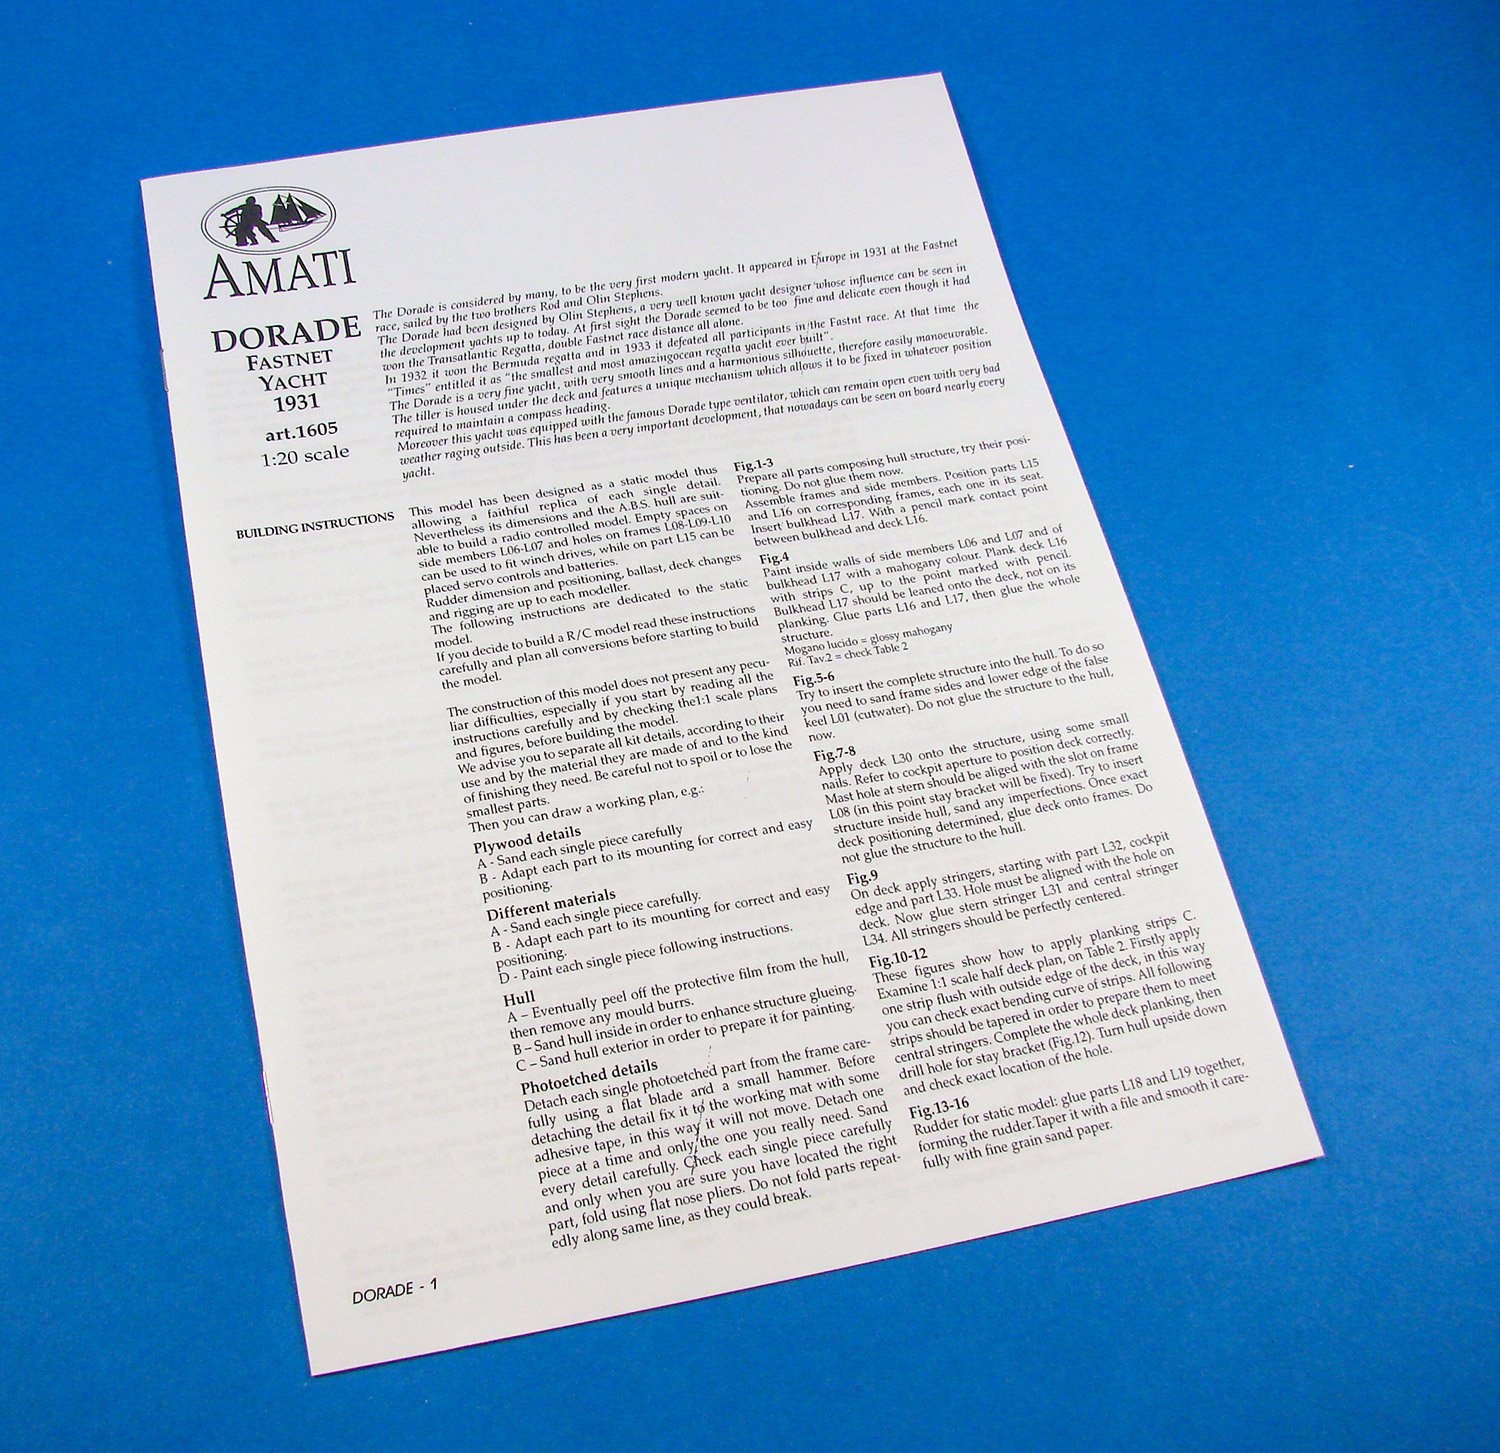
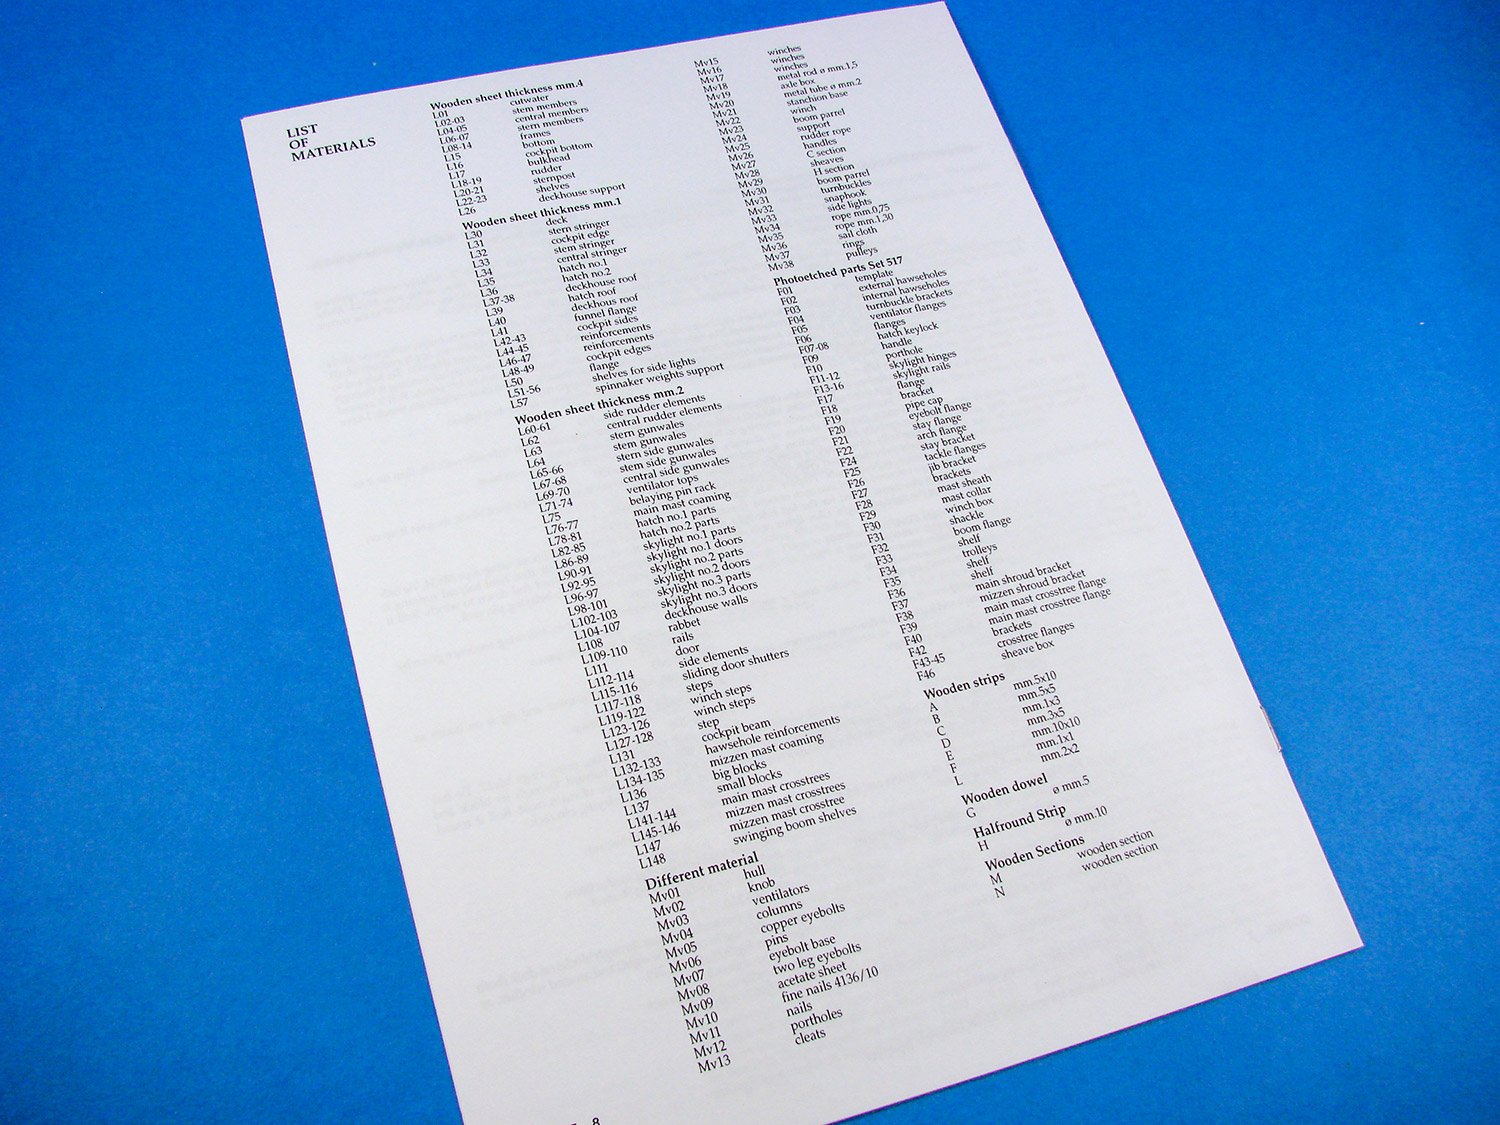
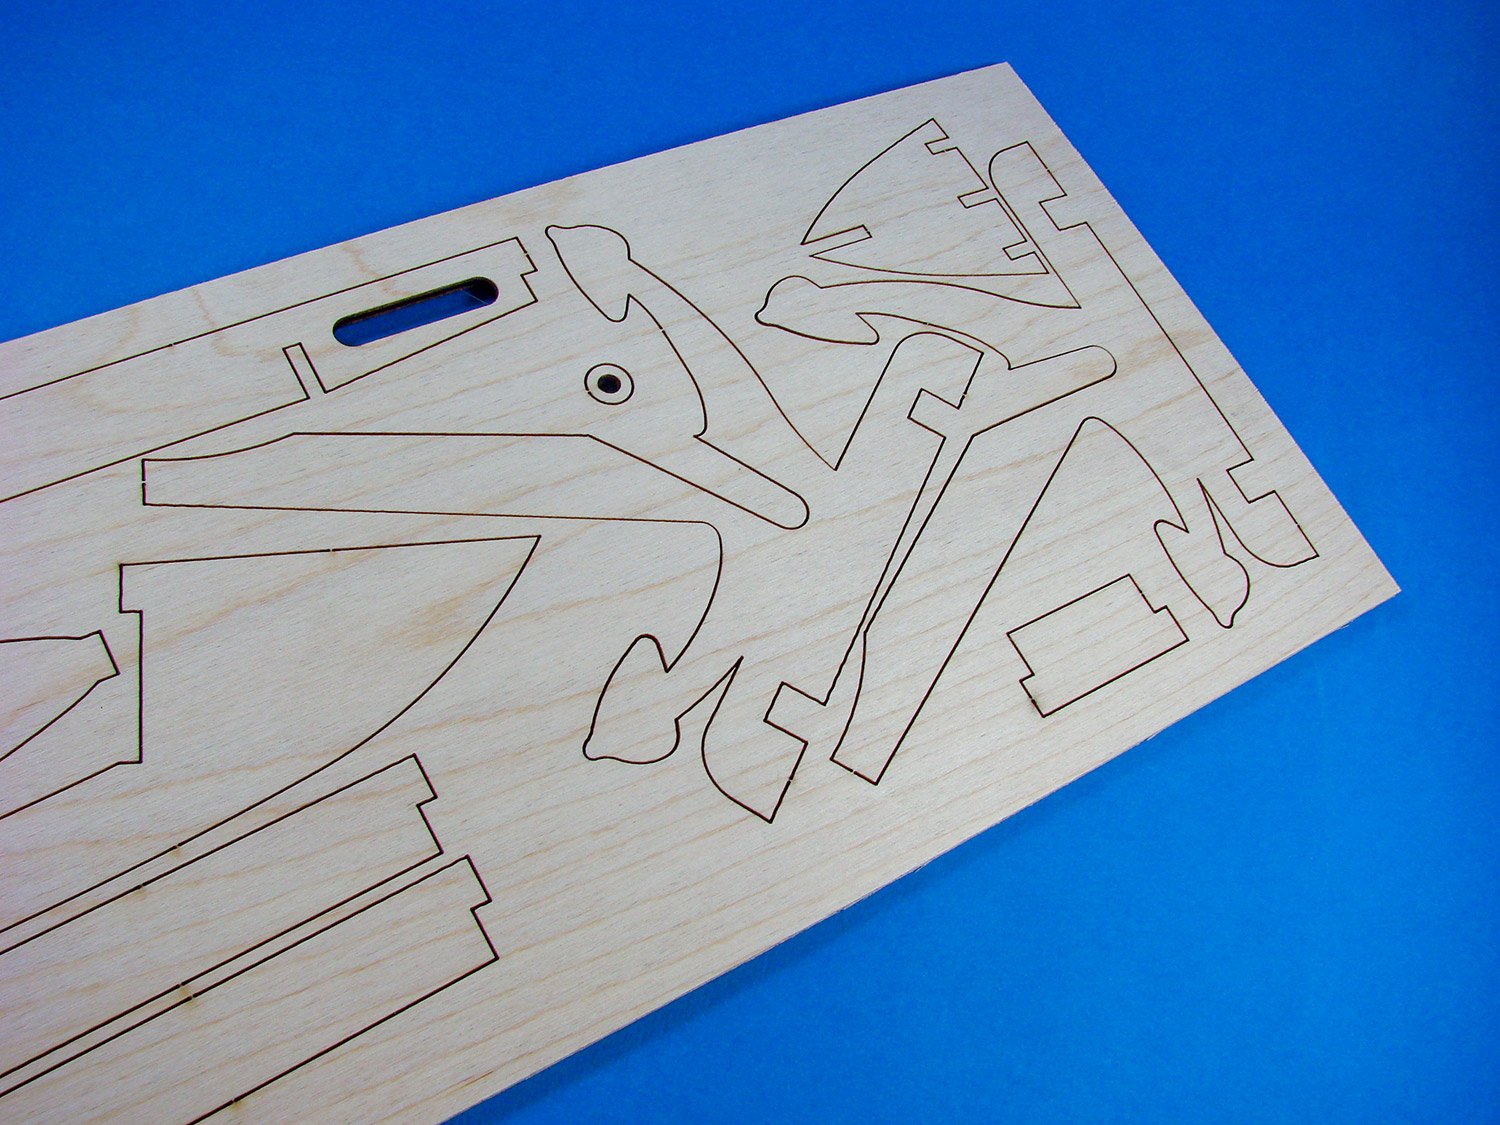
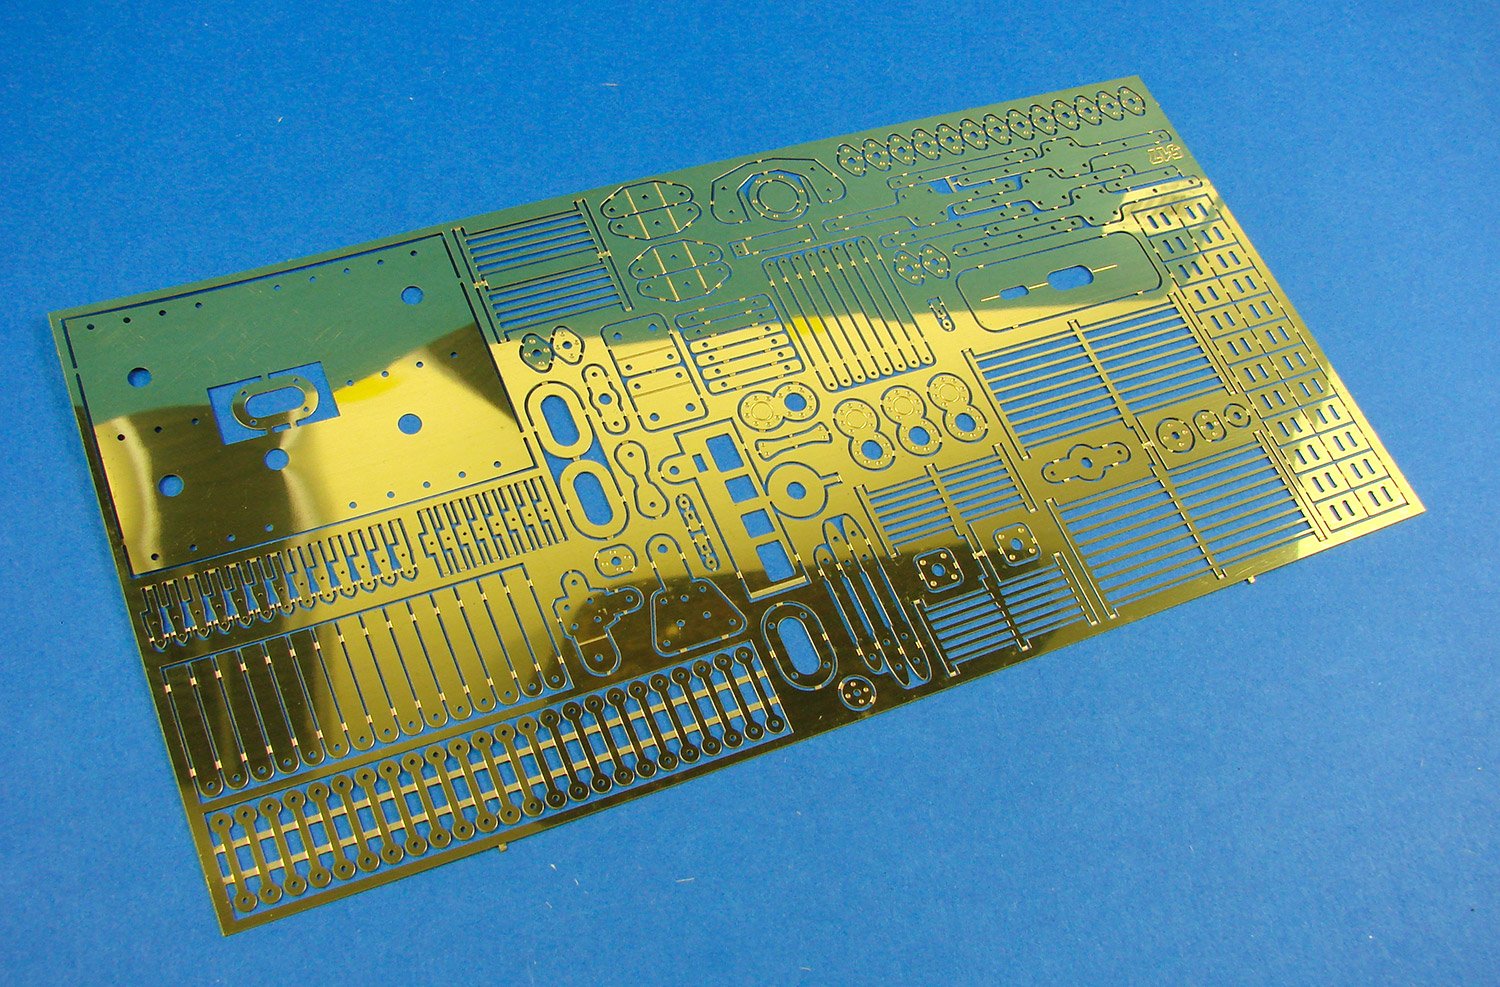
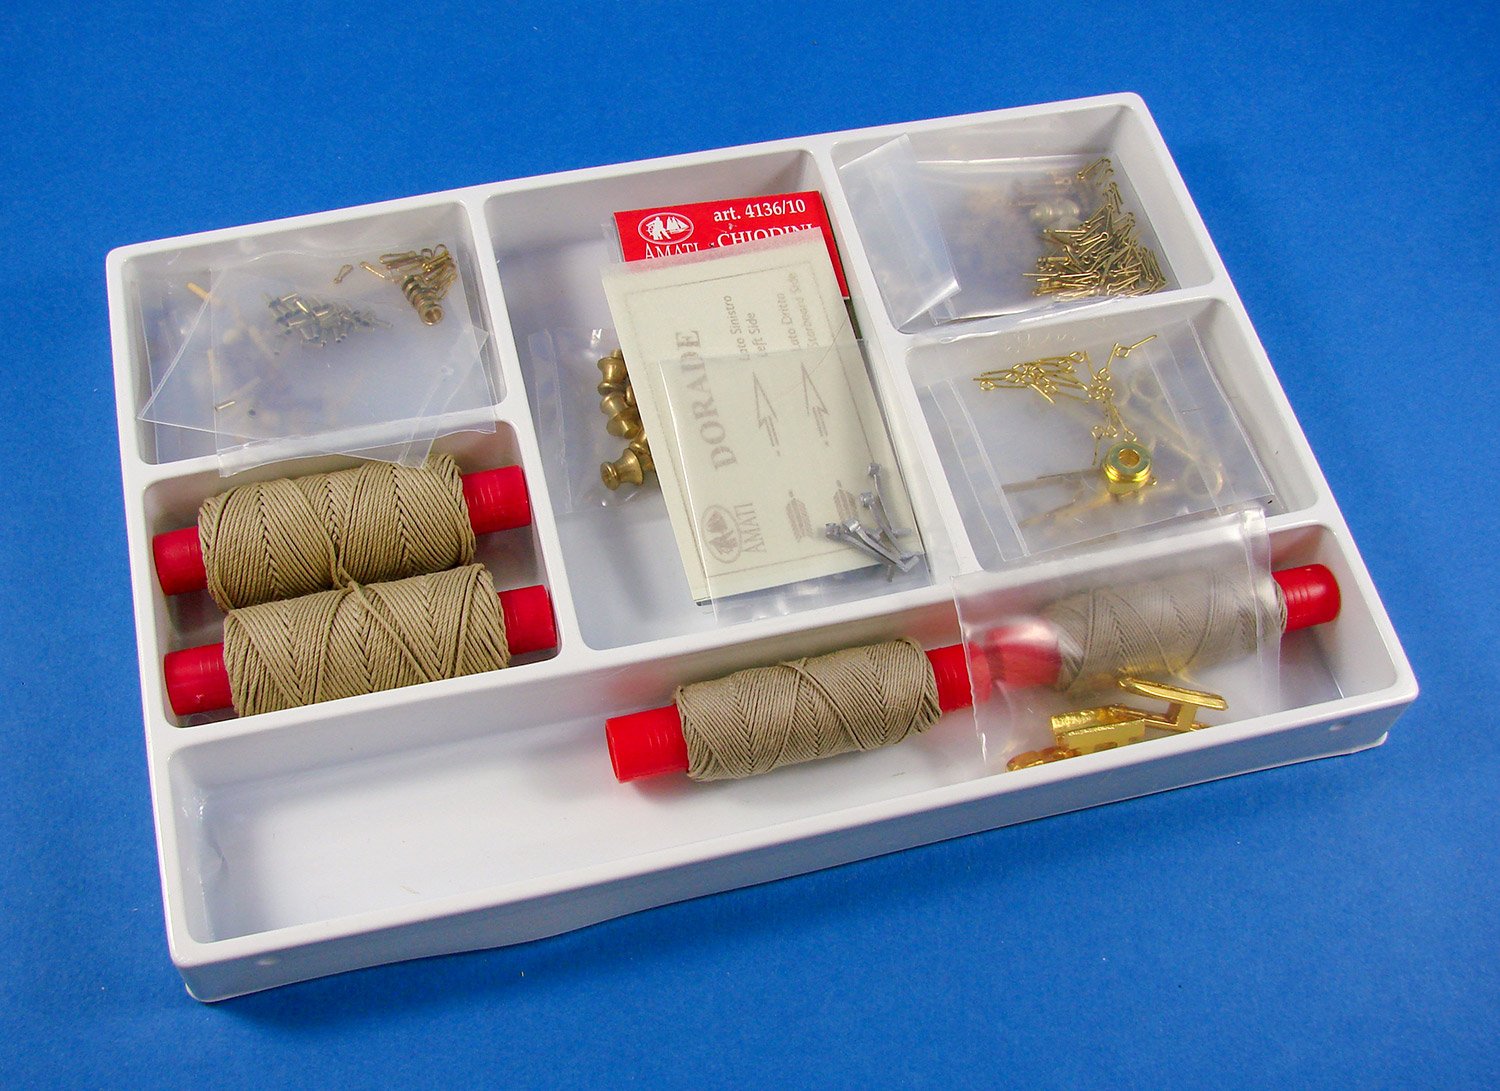
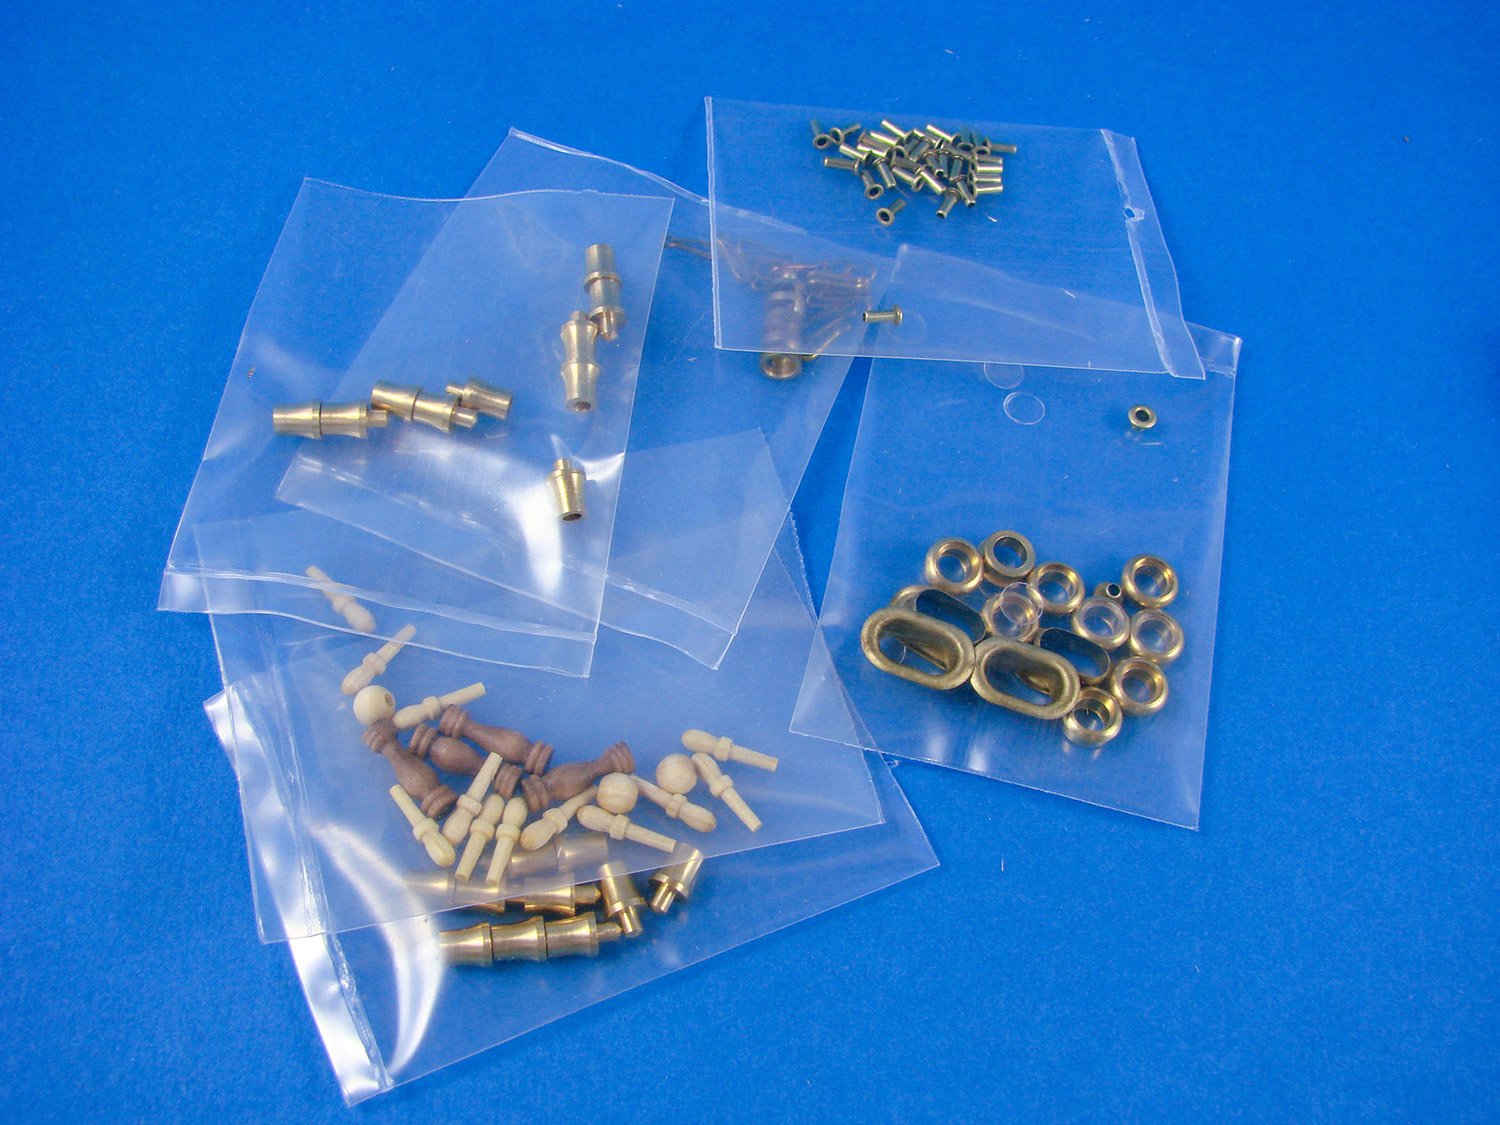
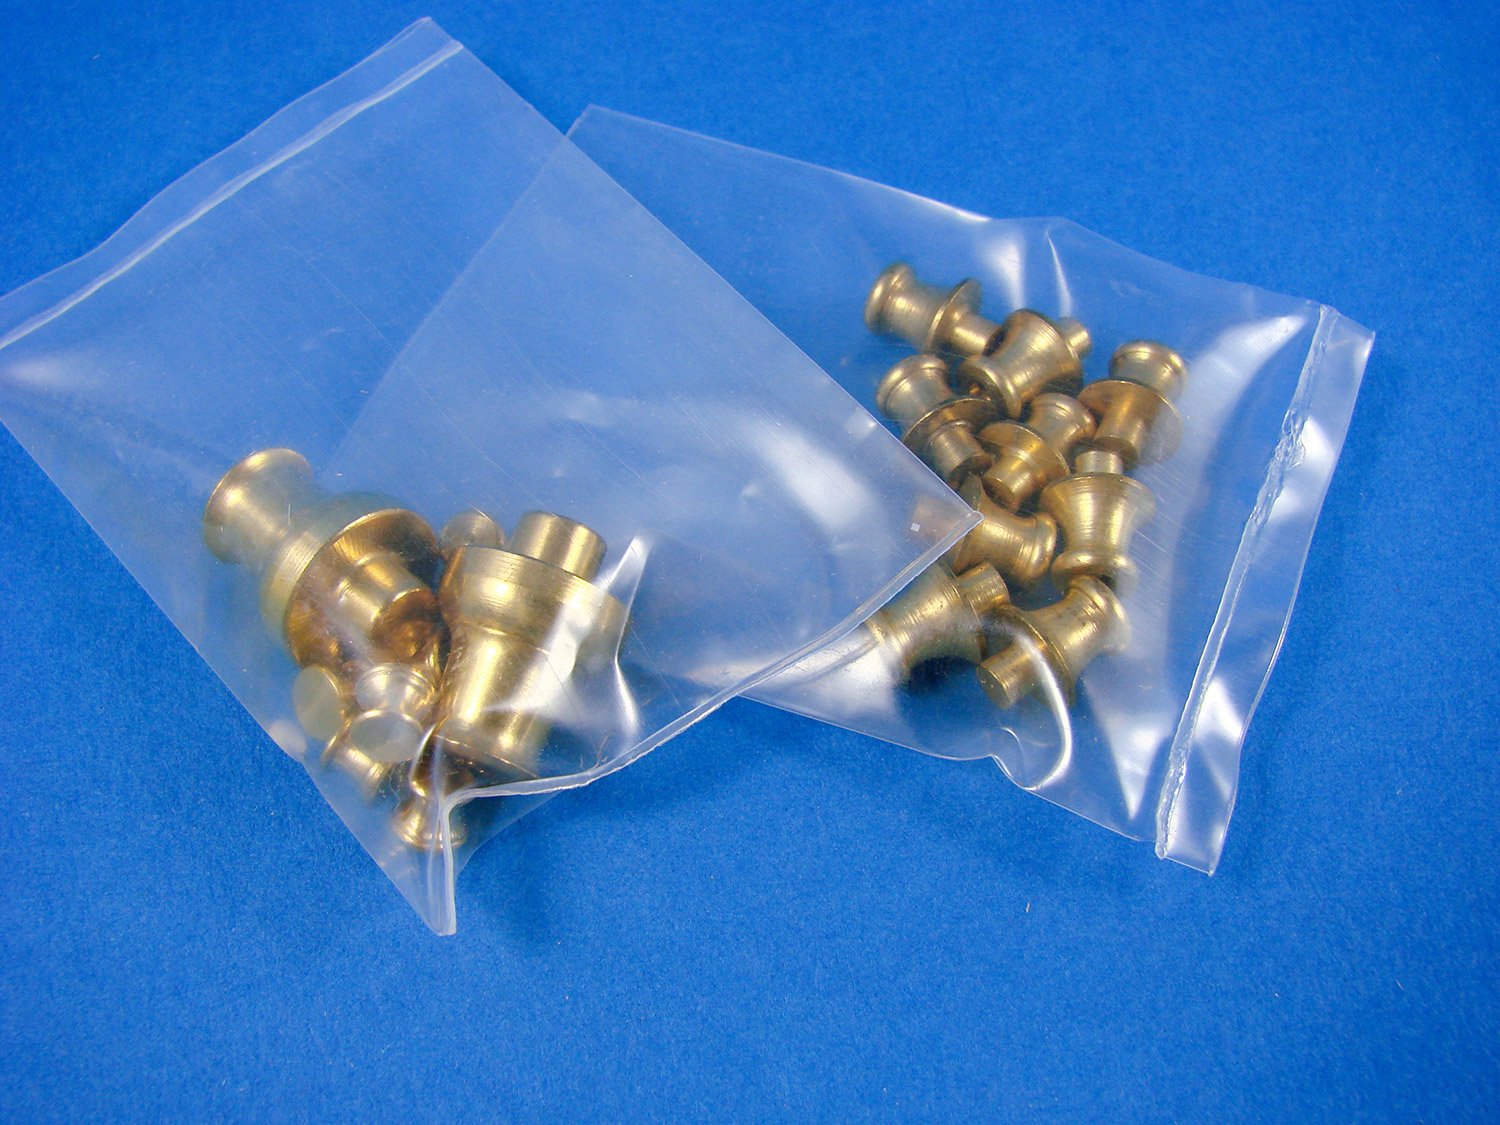
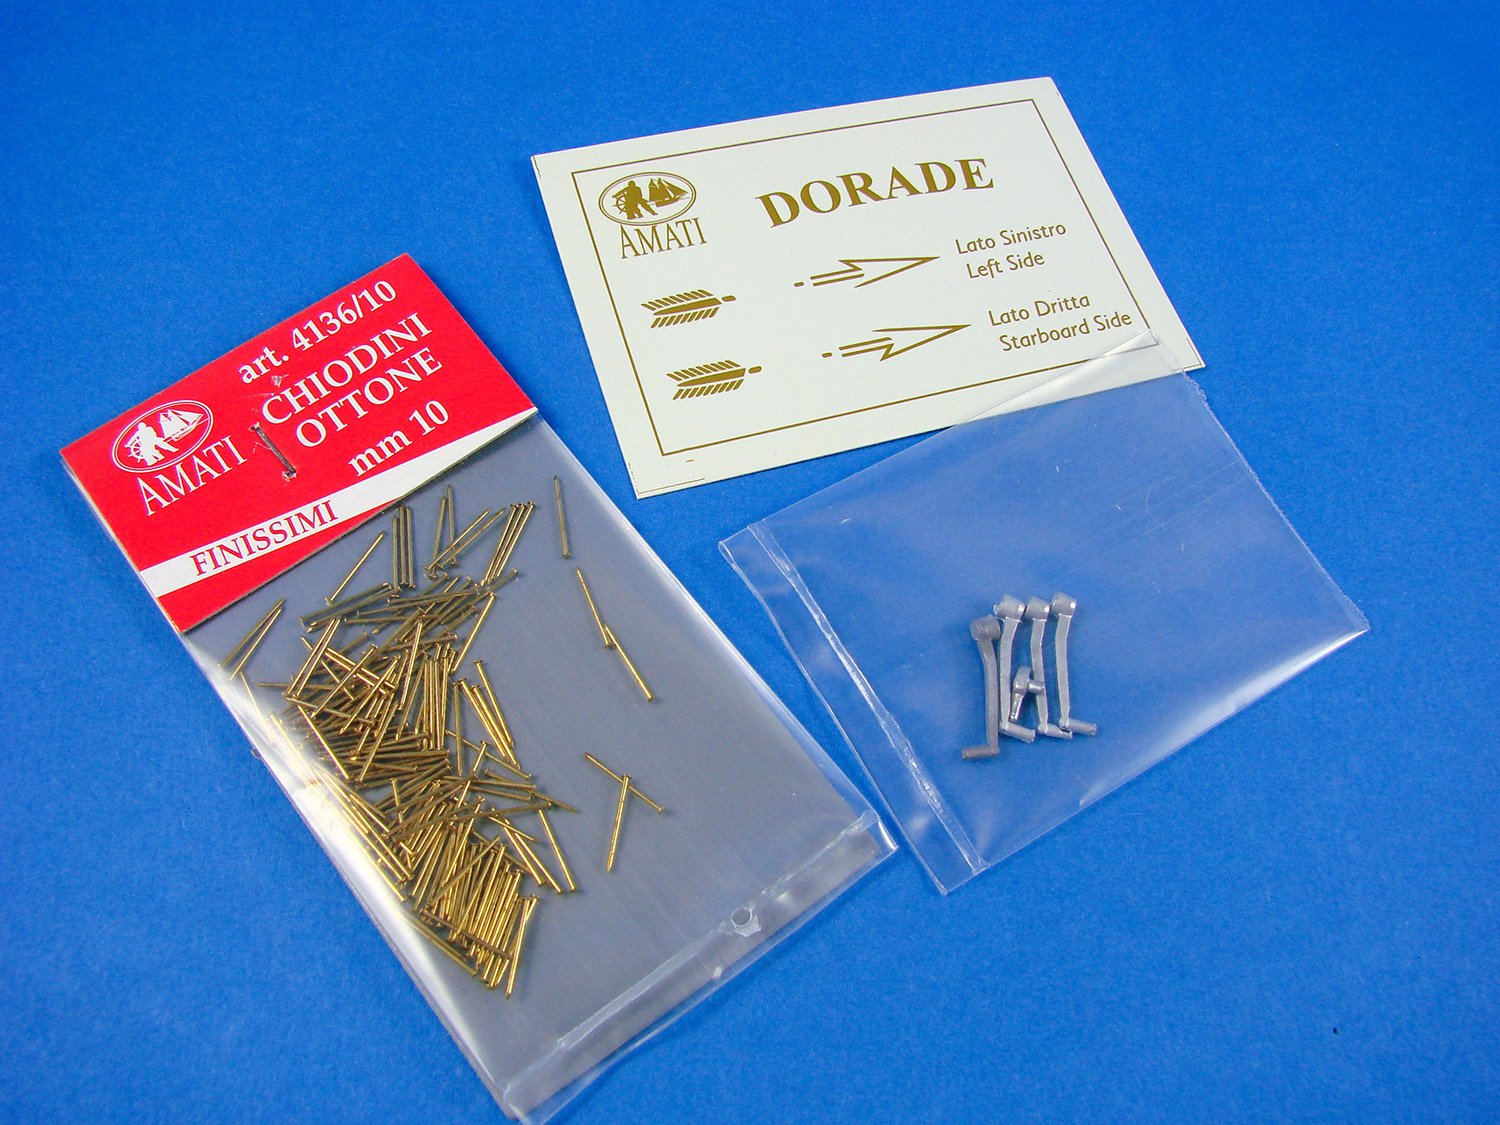
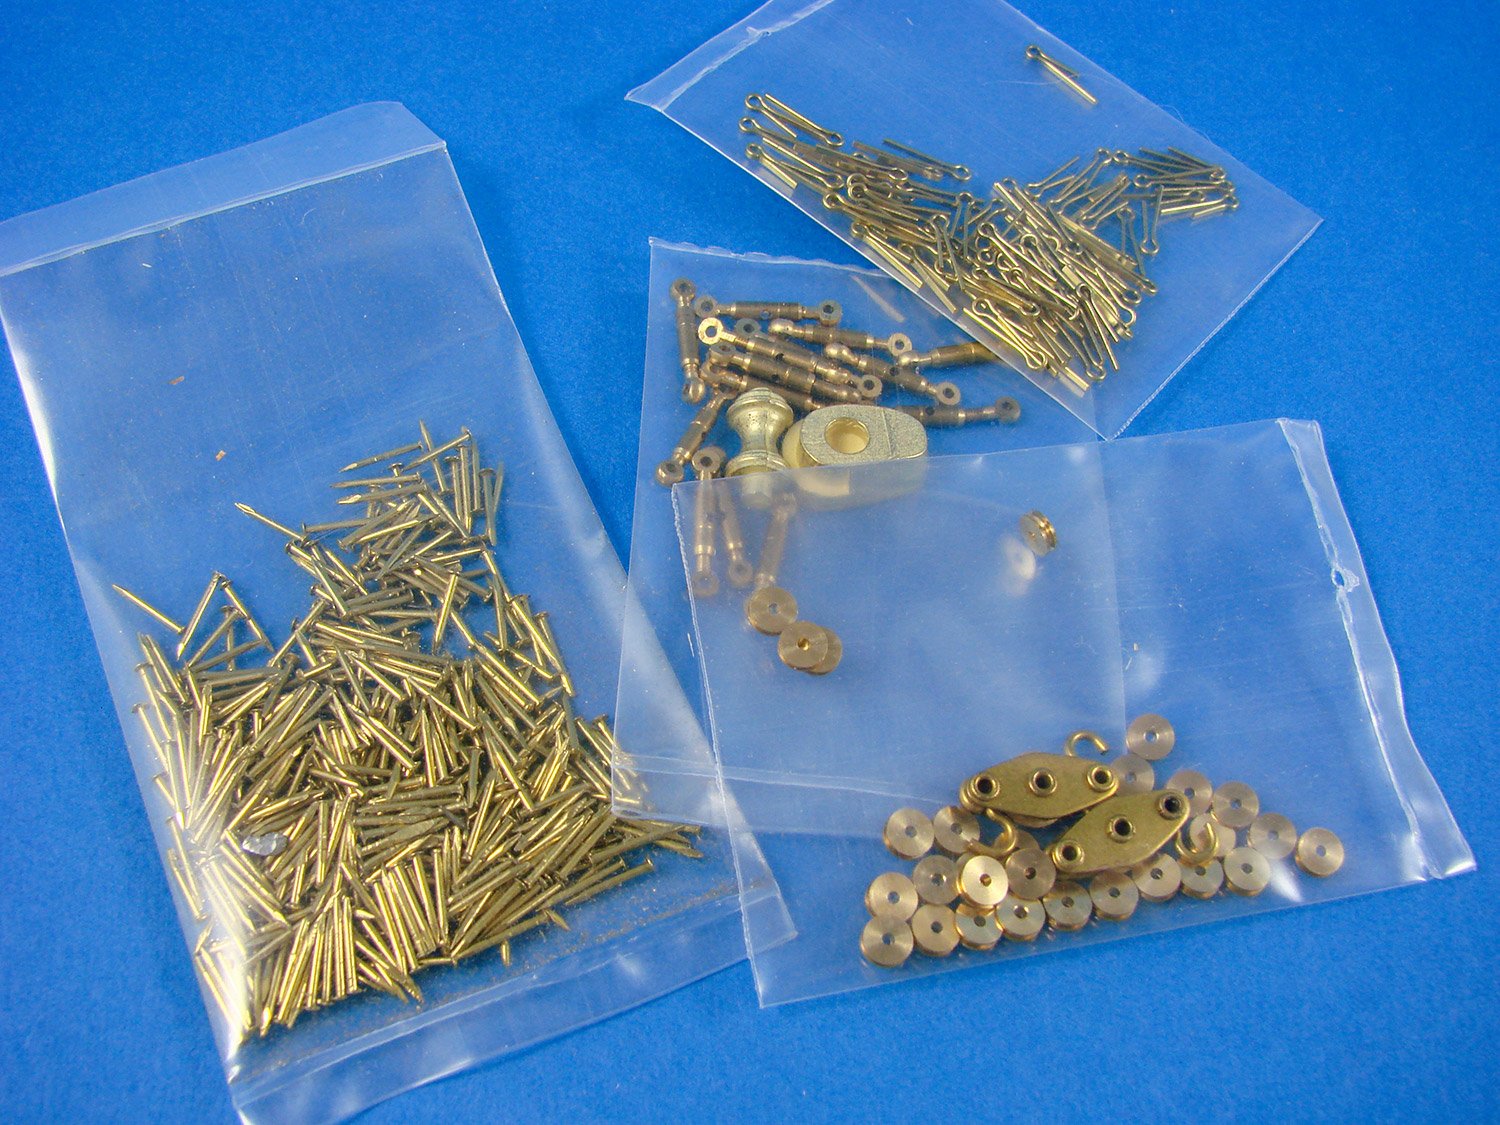
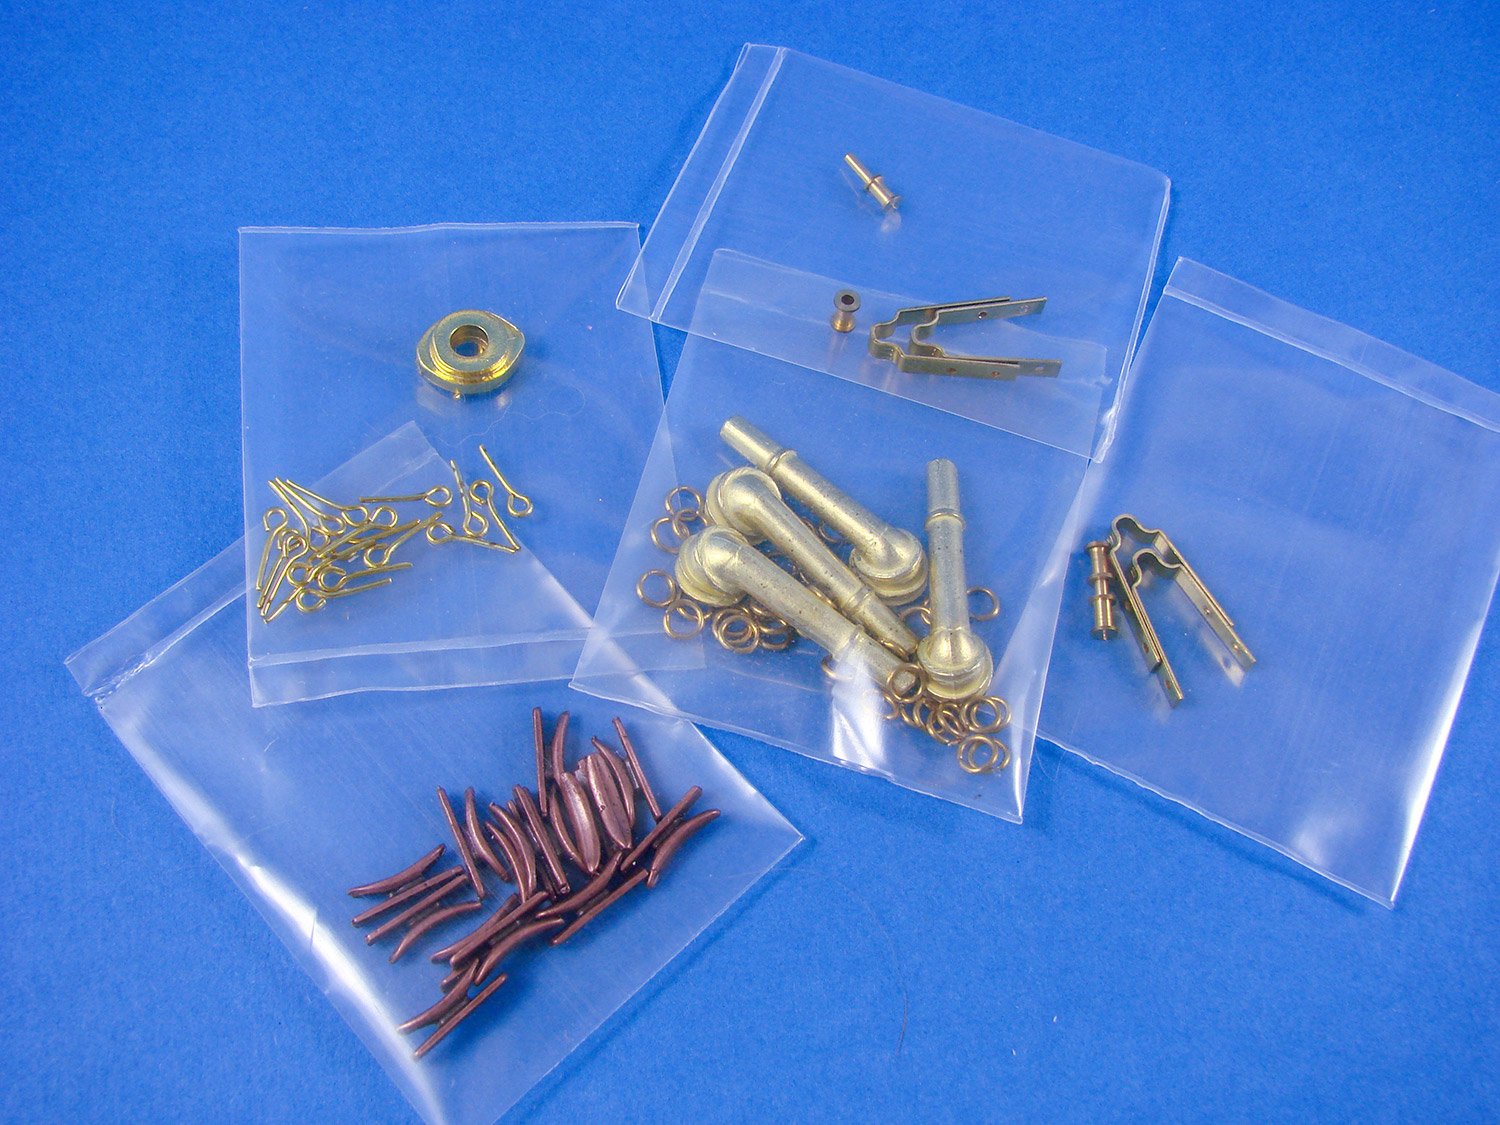
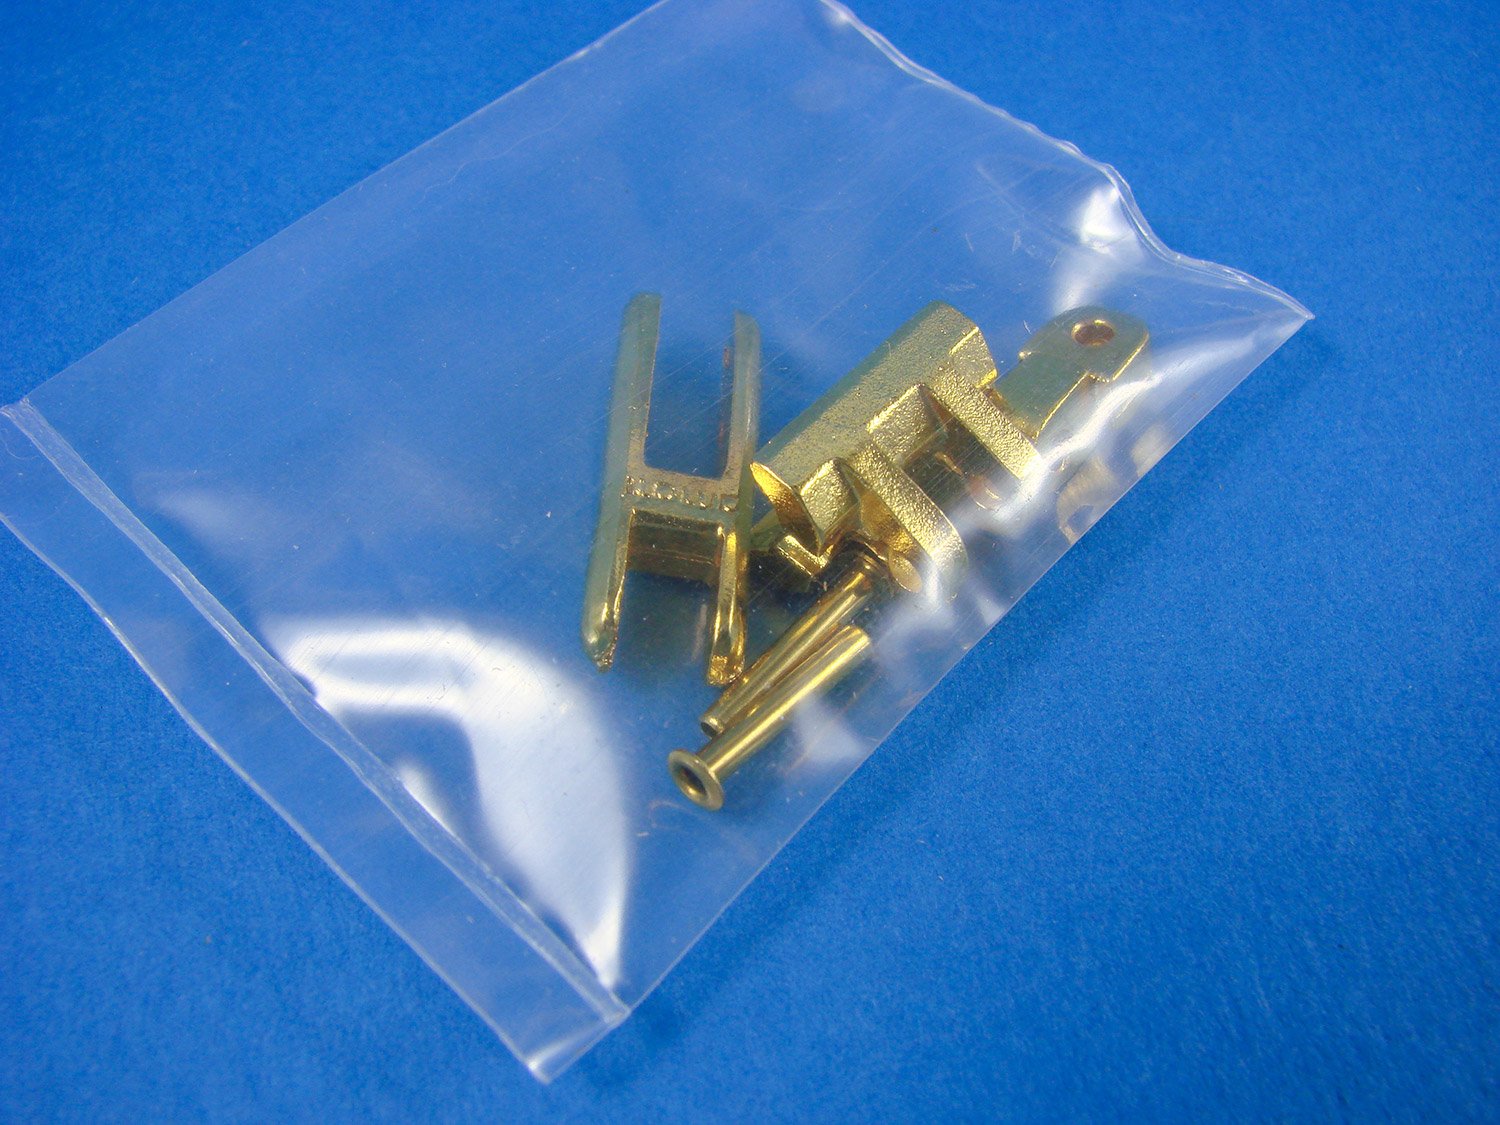
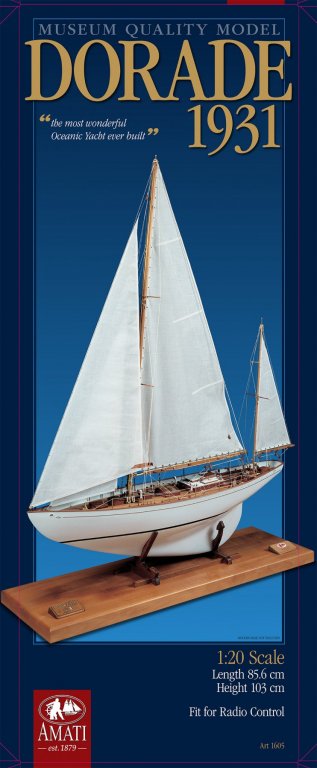
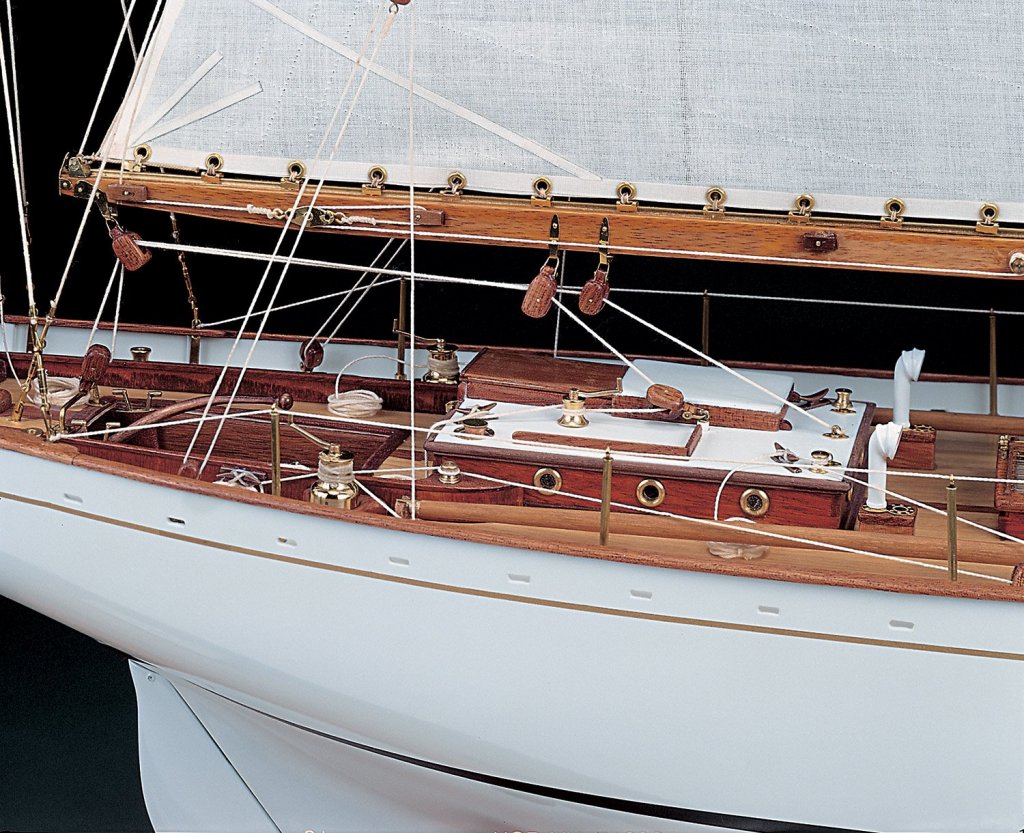
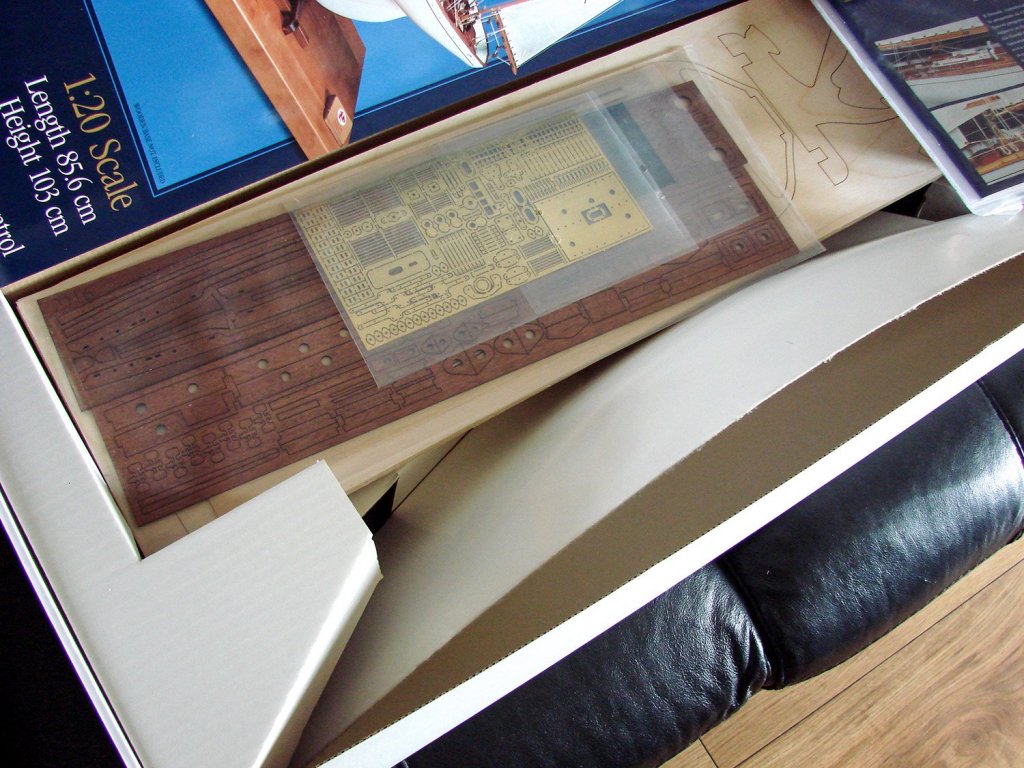
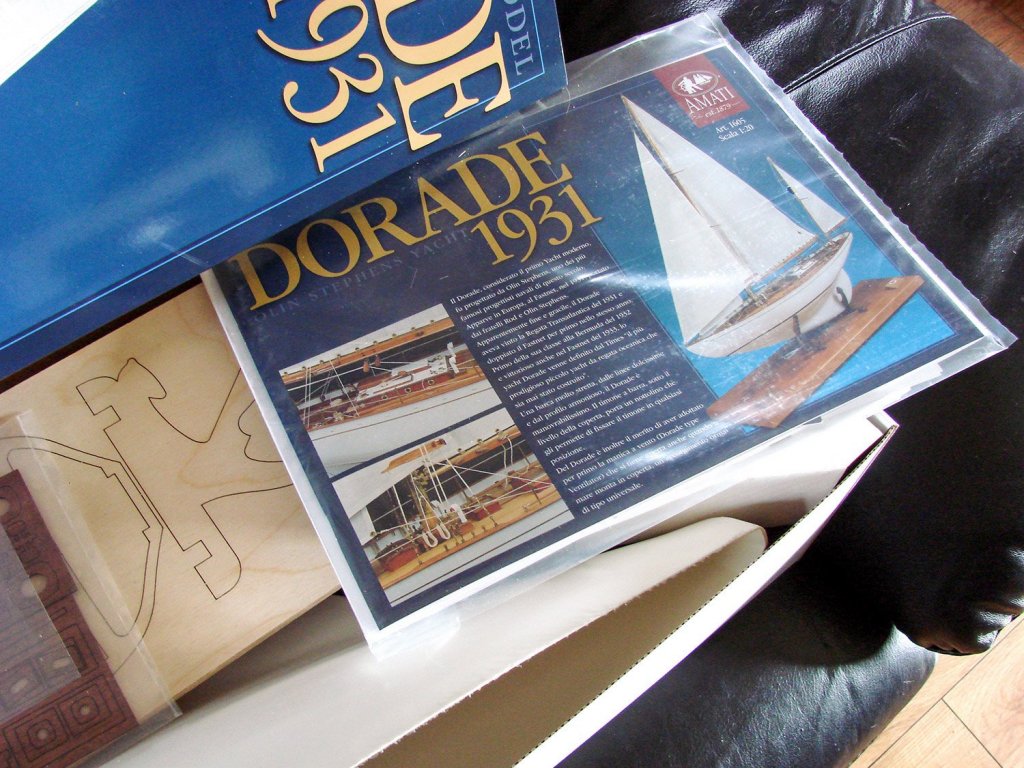
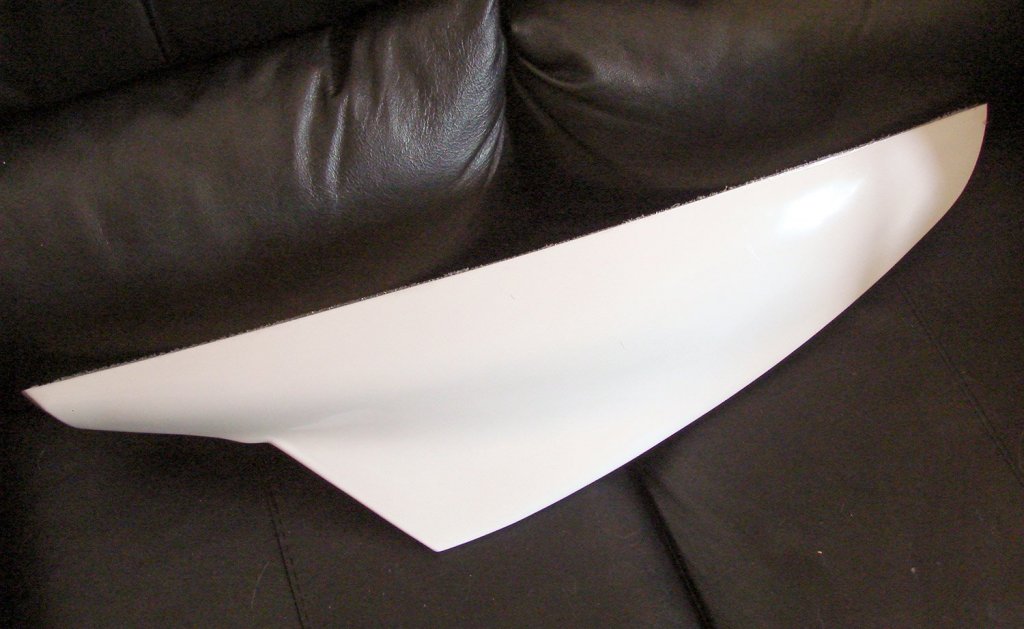
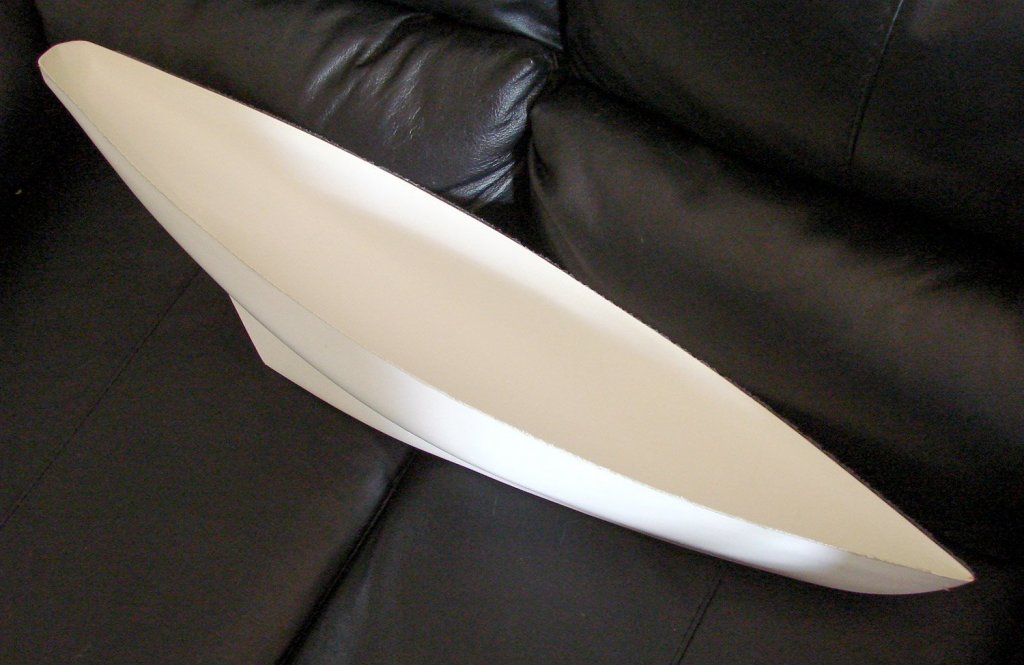
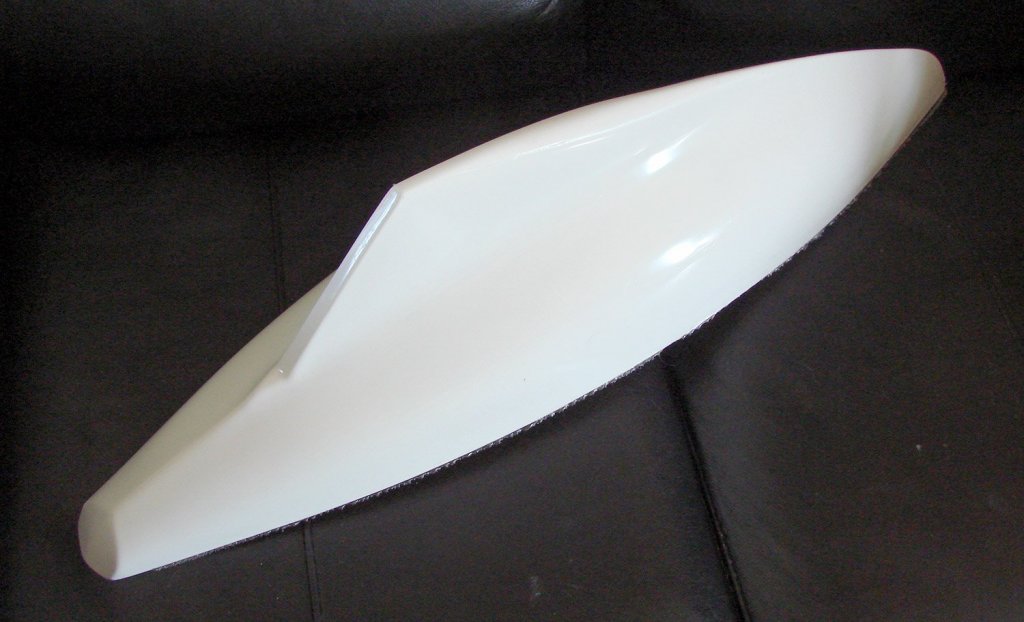
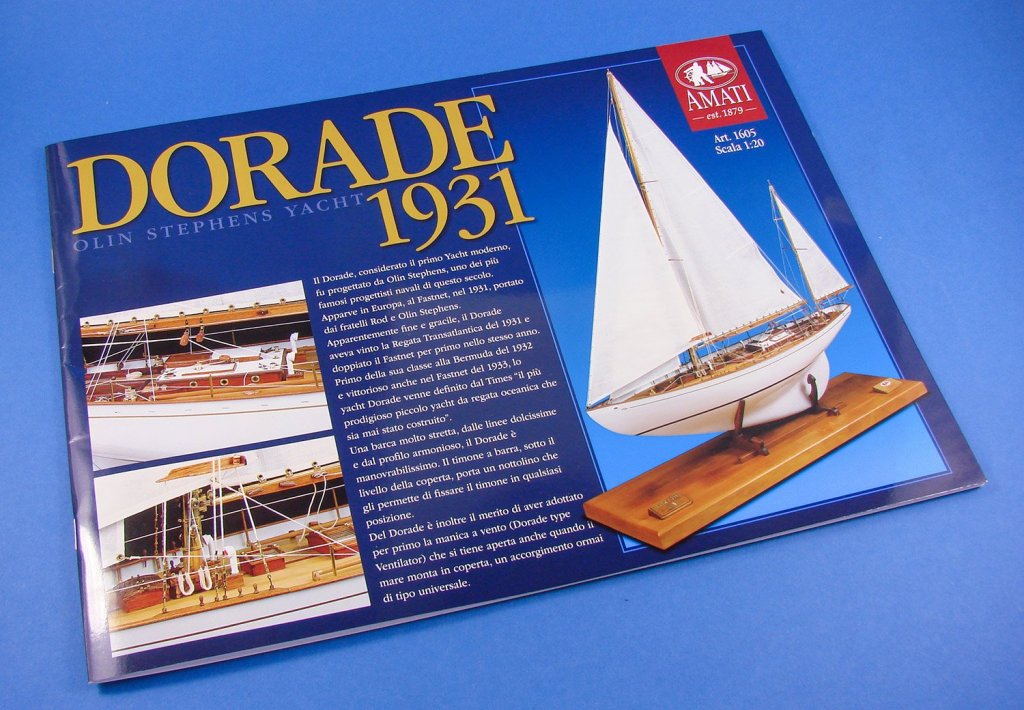
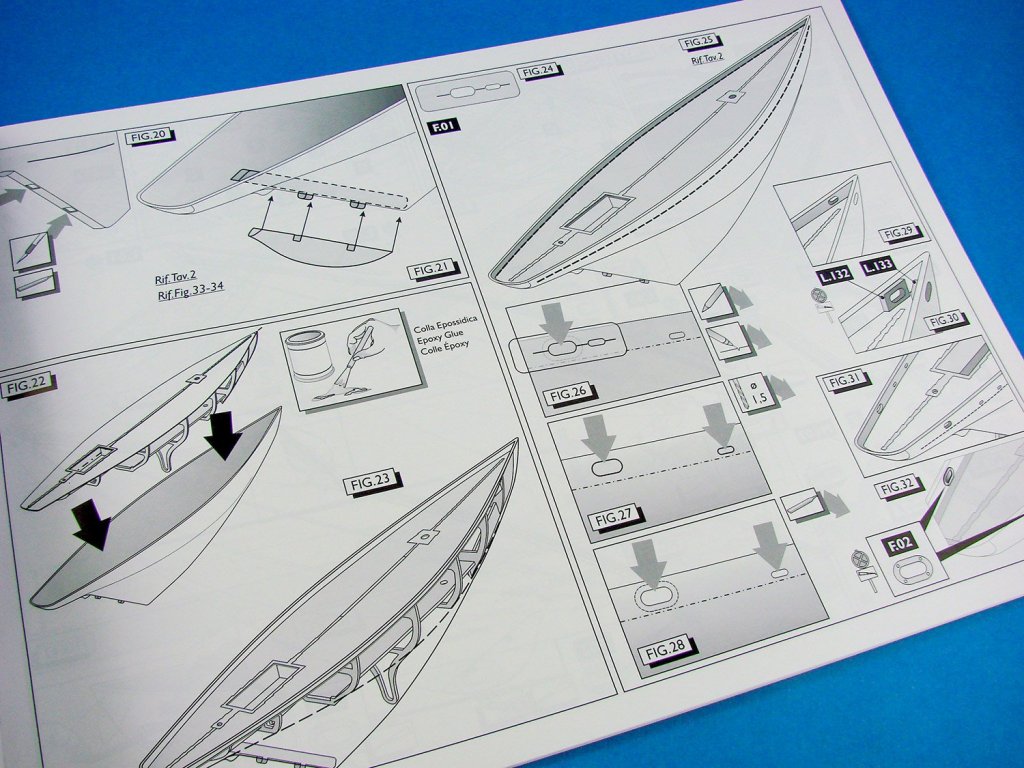
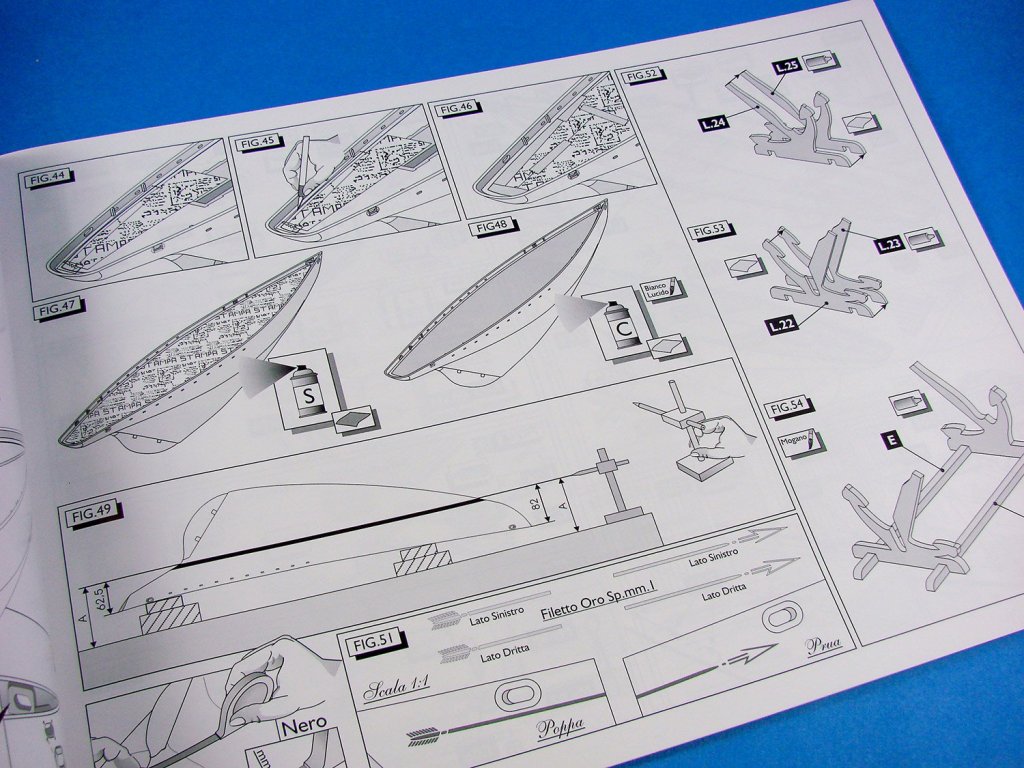
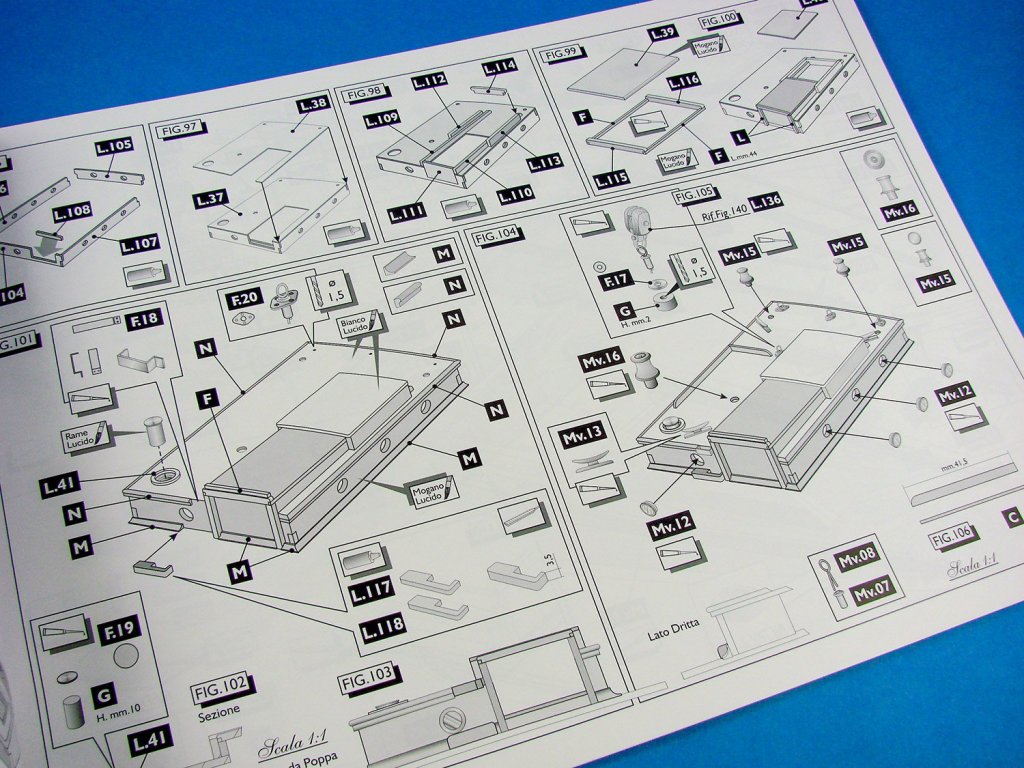
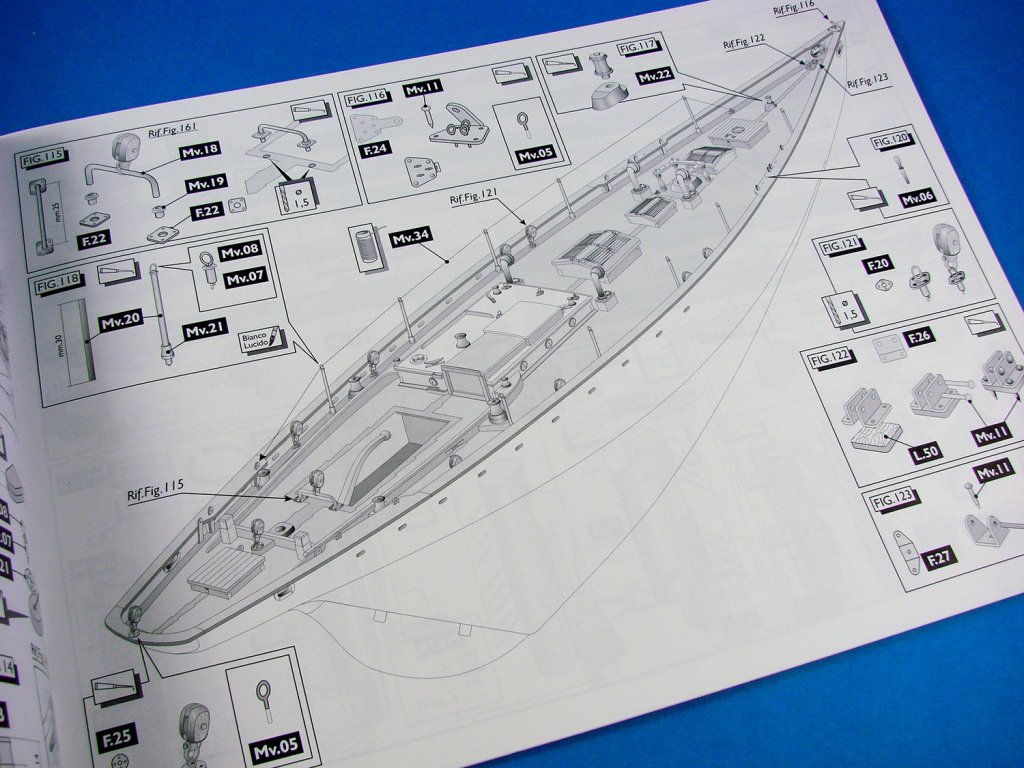
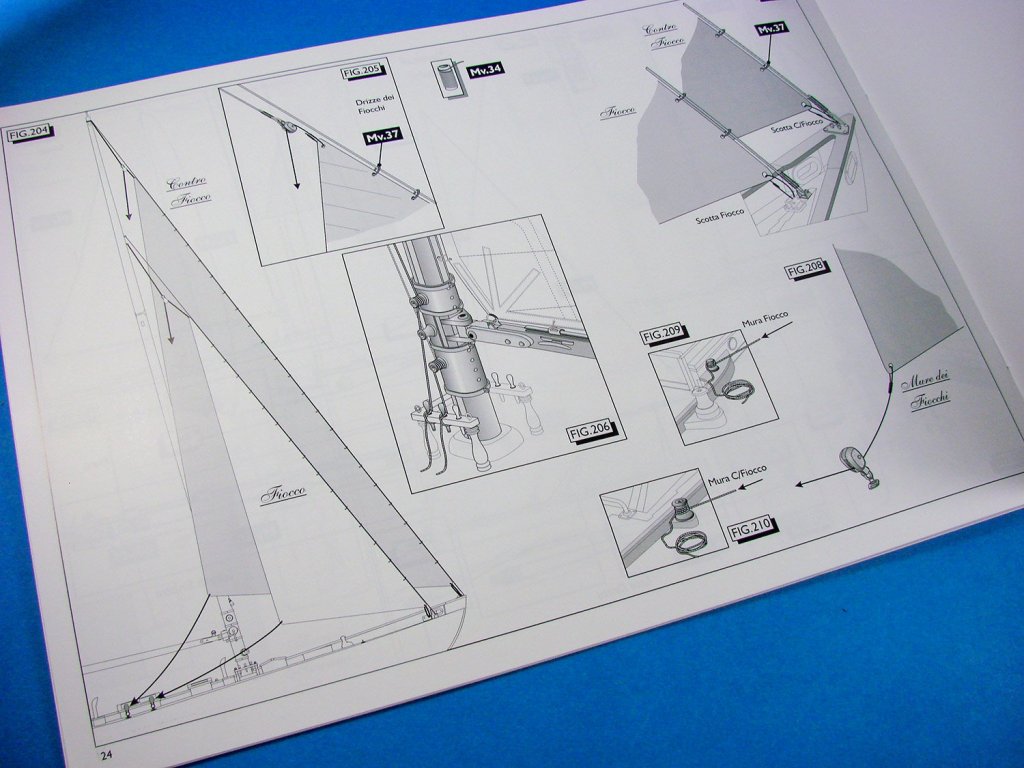
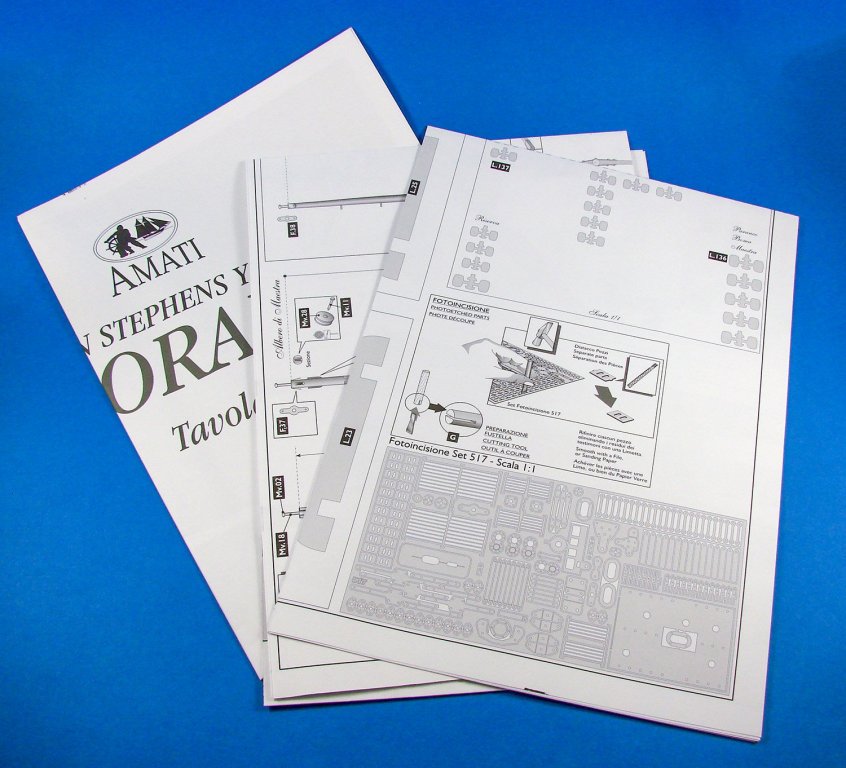
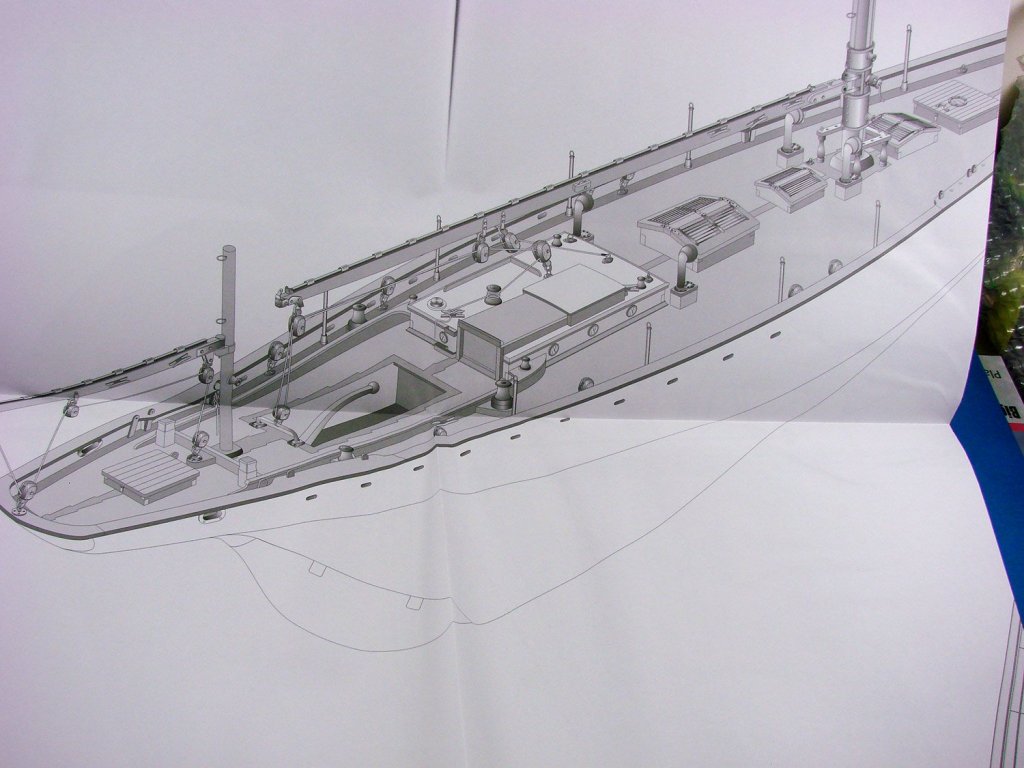
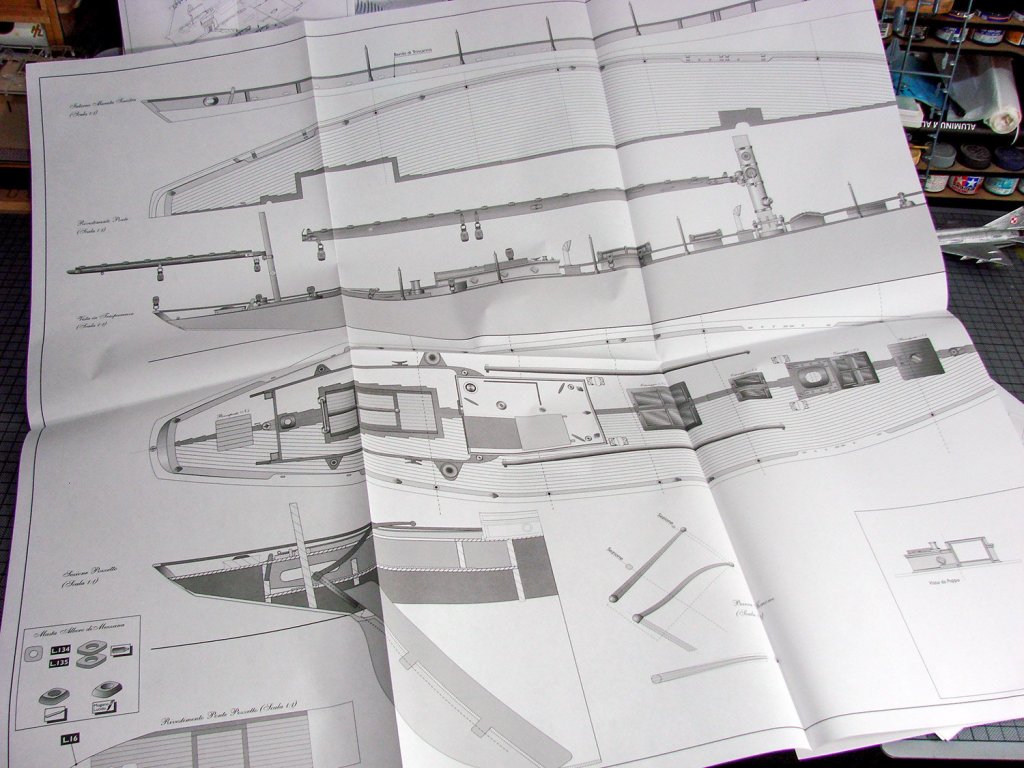
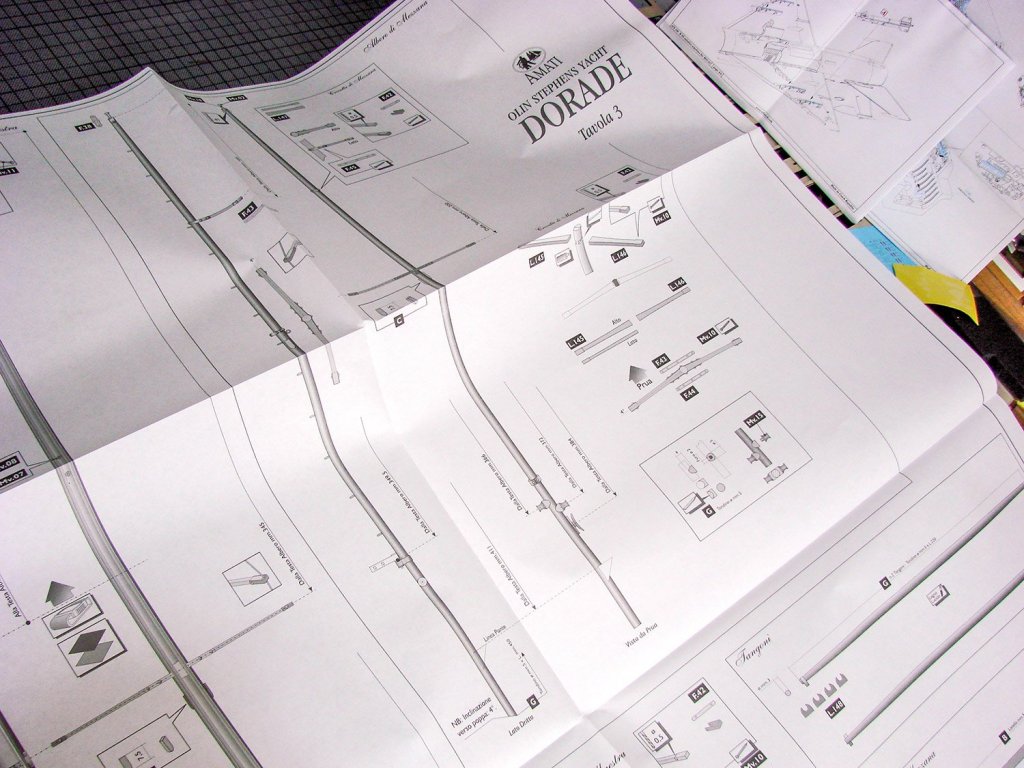
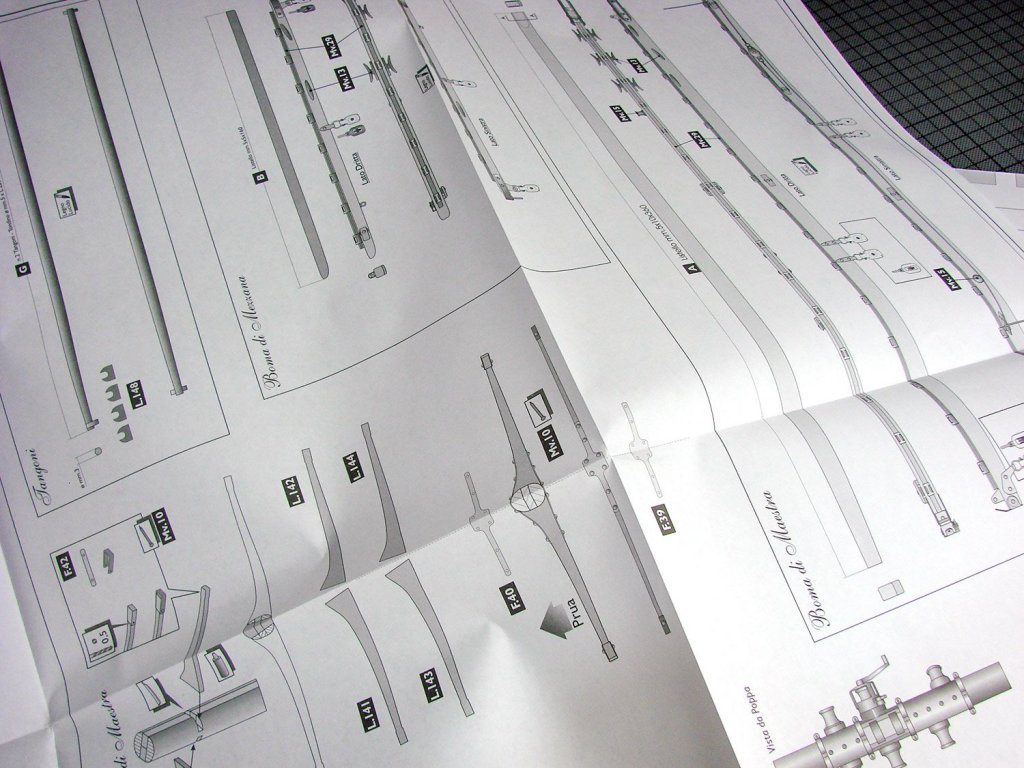
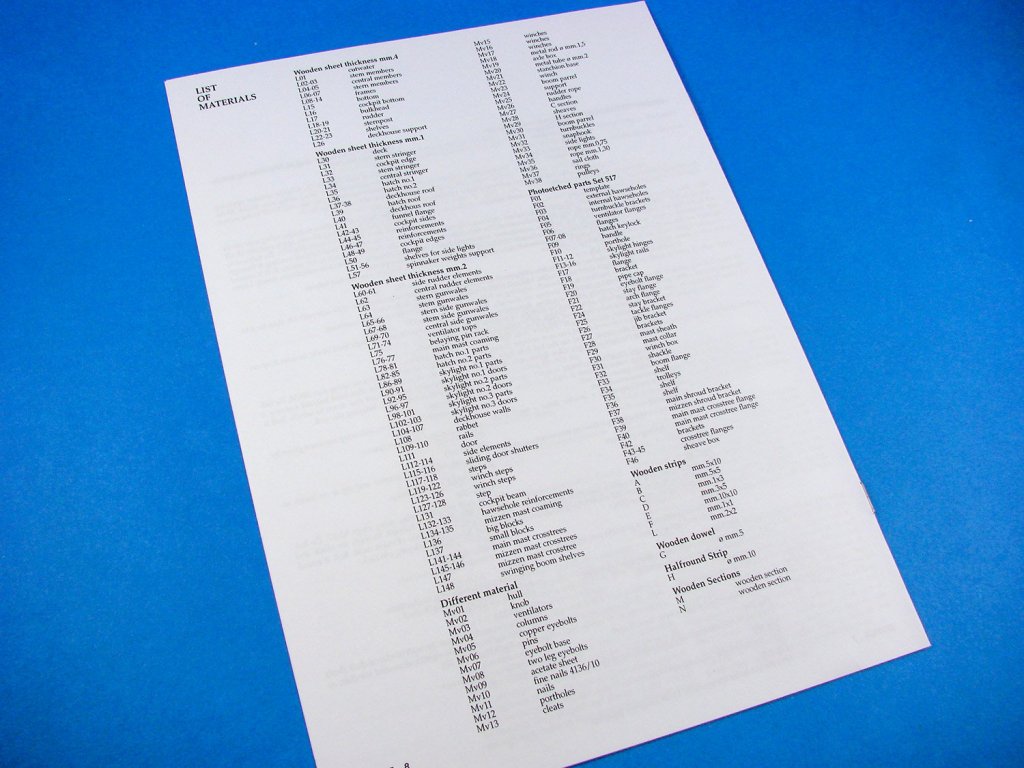
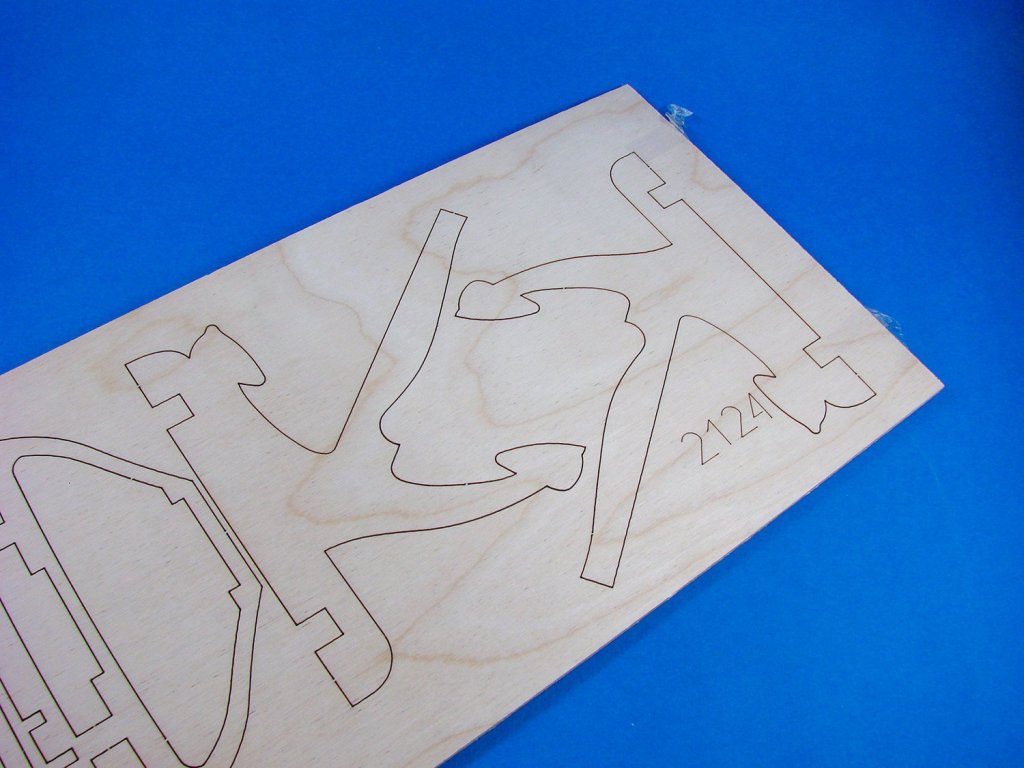
1:20 Dorade – 1931 Amati Catalogue # 1605 Available from Ages of Sail for $429.00 Dorade is a yacht designed in 1929 by Olin Stephens of Sparkman & Stephens and built 1929–1930 by the Minneford Yacht Yard in City Island, New York. She went on to place 2nd in the Bermuda Race later that year. The crew for its first race received the All-Amateur Crew Prize. However, it would be a win in the Transatlantic Race that would bring the boat its name. She completed a race that takes an estimated 3–4 weeks in just 17 days, earning her crew a parade upon the ship's return and a reception for Olin Stephens hosted by the mayor of New York. Olin Stephens, the designer, was skipper through 1932 when he handed the boat to his brother, Rod Stephens. Led by Rod, Dorade sailed to victory in the 1932 Bermuda Race. From Bermuda, Dorade sailed back to Norway, down to Cowes, England, and finally back to America after winning the Fastnet Race. The victory of the 1932 Fastnet Race was of substantial significance given the unusually severe weather, several ships feared missing as well as one recorded drowning among the events that unfolded. Dorade was completely restored in 1997 at the shipyard of Argentario, in Porto Santo Stefano, Italy. In 2013, Dorade took first place (after applying her handicap) in the Trans-Pacific race that she had won in 1936. Edit courtesy of Wikipedia For further information on Dorade, check out this excellent page at Dorade.org The kit The size of this box (and it’s huge!) certainly belies the weight of it. You’d expect something as heavy as the Vanguard that we looked at a couple of months ago, but that’s certainly not the case at all. The reason for this will be seen in a moment. The box itself is beautifully presented with a super-glossy lid depicting a finished Dorade model, and of course in a portrait format due to the shape of the vessel. The model itself, at 1:20 scale, has given measurements of 85.6cm long, and 103 cm tall. More images of the completed vessel adorn the sides of the box. Now, lifting that lid reveals an open top lower box, unlike the complete and enclosed boxes of other large Amati kits I’ve looked at. Immediately, your eyes are drawn to the reason why this box is relatively light, and that is the inclusion of a complete ABS hull, and hence the reason why this model is stated as being suitable for RC conversion, although the modeller will have to fathom that themselves, as no instructions are given for that particular path. Internally, the box has a number of card inserts to stop the various contents from jangling around loose. It’s only the components tray itself that seems to be a little freer to move, but thankfully, mine hadn’t spilled open or become dislodged. That ABS hull is very nicely moulded, is fairly thin, and super-light in weight. It has a glossy external finish and will just need some buffing and polishing to remove some very minor surface abrasions. The upper edge will need the fuzziness removed from, but again, this is something that’s very east to do, and not a reflection of the quality, which really is excellent. First, we take a look at the thick, clear sleeve and the paper contents within. Quite a few Amati releases have a glossy instruction manual, and this has one too, well…at least the cover is glossy, with Italian text giving a short history of the vessel. Inside, the instructions are given in line drawing format, with shading for clarity. All stages have a reference number which can be cross-checked with the written assembly instructions. For these, a glossy Italian manual is provided, with standard A4 sheets provided for both the French and English versions. Going back to the main illustrative instructions, there is some annotation given in all three set languages also. Parts are also clearly identified, whether they be wooden, or one of the many fittings that are supplied. Please note that the timber parts themselves aren’t actually numbered, and you will need to refer to the component identification plan sheet. Construction tips are also given, such as how to mark the waterline. As for the fittings etc., these can be identified against a comprehensive parts list that is provided in each language, which gives the part number, name, and specific number of included components. I suggest that each packet of components be put in a zip-lock wallet with the kit identifying code written on, to make it easy to locate the parts needed during construction. FOUR large plan sheets are included in this release, printed on relatively thin paper. The first three sheets provide large scale drawings of the Bessel, from profiles, to upper elevations and sectional material, plus those all-important fitting positions etc. Annotation on the main plans appears to be in Italian, but the illustrations are clear to see, so for a competent modeller, there shouldn’t be any problems encountered. If the worst comes to worst, just use an online translator tool. The last of the large plan sheets is the parts guide for the wooden sheets, with all parts being easily identified against the instruction booklet. I’m sure I once read that the Dorade kit provided no parts reference for things such as the internal hull framework etc. and that everything was in Italian. Well, if that was the case, then it certainly isn’t now. Remember that companies like Amati revise their kits from time to time, in instructions as well as parts, so maybe that referred to an old issue. A sandwich of timber is now provided as two long plywood sheets are taped together, with the thin ply deck hiding between them. These main sheets are the thickest timber components in the box and provide the modeller with the various internal hull frames and bulkheads, as well as the parts that make up stand (note that no main plinth is supplied, as shown on the box lid). All parts are cleanly laser-cut with very small tags to cut through to remove them from their sheets. The deck is a full-length piece of thin ply with mast holes in situ, and the rear panel for lower deck access, just needing removal. As this is a stylish sail yacht, you need some decent sail material, and a packet of this is included here. You’ll need to cut and stitch these yourself as per plan. Another thick, clear sleeve contains more timber components, plus a number of other items. One of the timber sheets is a smaller, thin ply sheet with parts associated with the various deck structures, to name but a few. Cutting is again nice and clean, and timber quality is excellent. Parts here are for the various stringers, cockpit sides and edges, funnel flange and deckhouse roof etc. Two thicker walnut sheets include parts for the rudder, gunwales, belaying pin rack, ventilator tops, skylights, doors, winch steps. Mizzen mast coaming and crosstrees, plus other coamings and side elements. As a number of these parts will be varnished and the wood generally seen, you will need to remove any charring from the laser cutting. One packet contains some good quality acetate for the various deck structure windows, and also a piece of what appears to be a glossy dark green card. I can’t identify that as of yet. Timber strip quality is high and also cleanly cut. This first bundle, held by a thread and paper wrap, is for the deck planking. Remember, no hull planking here! This creamy coloured material will need to have a nice deck caulk effect set between them. Another bundle of timber includes circular and semi-circular dowel lengths, and more strip timber in Ramin and walnut. Several lengths of brass section strip are included, as is a length of thick copper rod. Amati has included a reasonably sized sheet of brass photo etch. This really must be the shiniest, most polished PE that I’ve ever seen. Totally mirror-like in quality. Here you will find parts that include mast collars, shelves, trolleys, flanges, portholes, jib brackets, sheave boxes, rails, and turnbuckle and ventilator parts, again, to name but a few. Production quality is first rate, with narrow, thin tags holding the components securely until you need to remove them. A separate, smaller piece of PE contains the external and internal hawseholes. Lastly, we take a look at the plastic tray of components. This tray is a typical Amati storage box in vac-form plastic, with a clear lid. This is compartmentalised to accommodate the numerous packets of fittings within. Dorade’s fitting tray is certainly weighty, with NINETEEN packets of fittings, nails, decals and rigging cord. Fittings include cleats, portholes, winches, eyebolts, ventilators, boom parrels, turnbuckles, snaphooks, rings, pulleys, sheaves and side lights. Where those parts are cast, the finish is very good, with just a buffing needed before priming. Conclusion If you want a project that is a little different from the norm, then Dorade may be just what you are after. With the hull just requiring some remedial finishing before use, plus cutting out the scuppers, you should also find that it’s a relatively quick project that will take a few months instead of running into years. Dorade is a beautiful yacht, and Amati have very much caught her lines here. There is of course a little jigging around between the parts plan, materials and the instructions, and of course with any model this size, you’ll need a reasonable working space, plus some intermediate skills when it comes to tackling the various task required. For the price, she’s also a very attractive subject and will doubtless be a real centrepiece when on display. Quality is typically Amati, and I’m sure you’ll really like this one! My sincere thanks to Amati for the review sample seen here. To purchase, click the link at the top of this article.


-
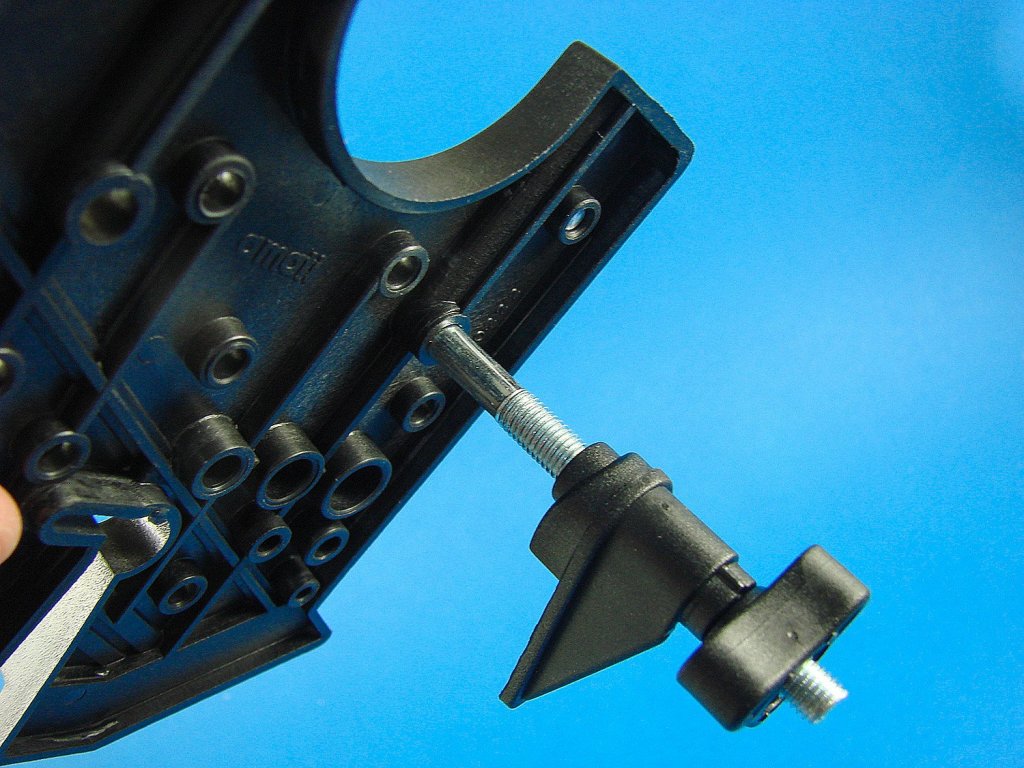
The blade doesn't seem to come down much more than on the horizontal, so there's minimal chance of the mat being chewed. I've not tried lifting the mat to rotate it. I'd have to ask the manufacturer if removal/replacement is possible. As for price, with RP Toolz stuff, you really do get what you pay for. I've been using their tools for a number of years in my magazine publication work. It's supposedly a real tough grade of aluminium and it's quite heavy too. Superbly constructed. Not sure. I can't see them being specific to this. I think the cutter will have been designed around the blade.
-
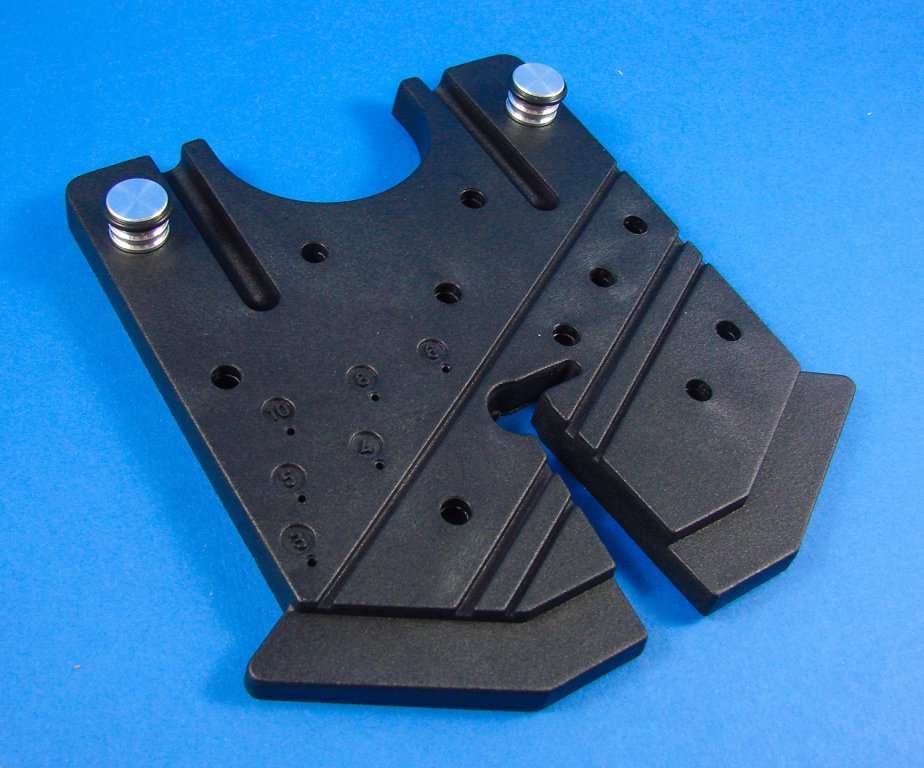
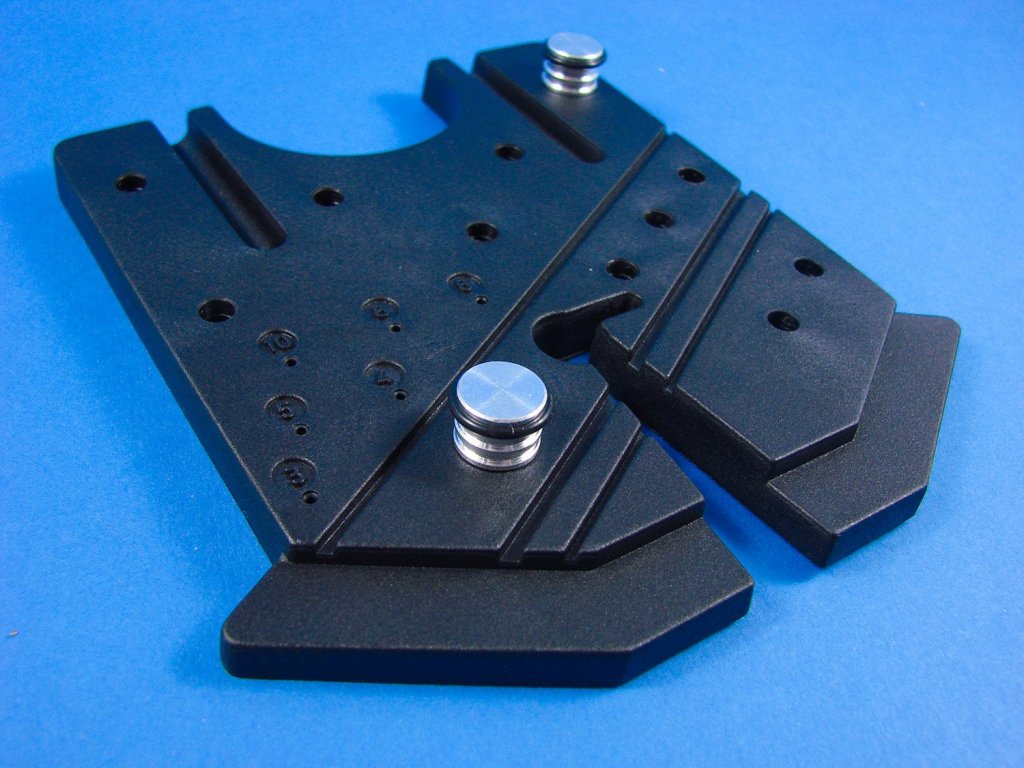
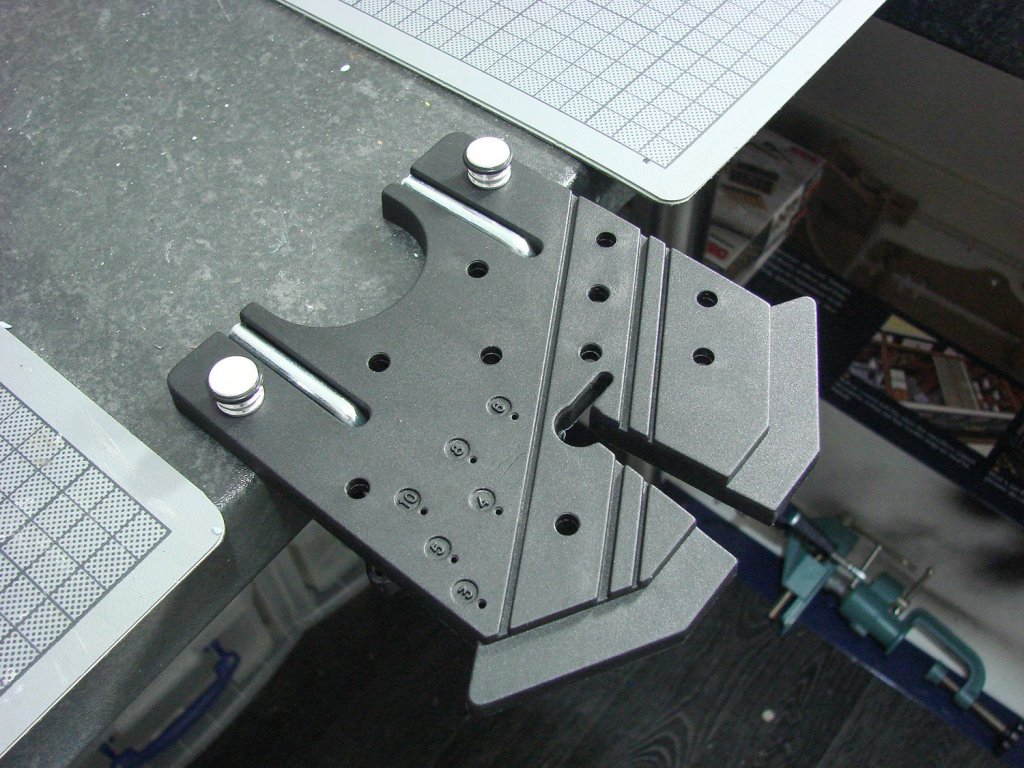
Cutter/Mitre Tool RP Toolz Catalogue # RP-CUTR Available from RP Toolz for €85,00 RP Toolz’ Cutter Tool (or Mitre Tool) isn’t really a new idea. There are of course a few manufacturers out there who produce fairly similar tools, and I used to have one of them myself, so when RP Toolz announced that they were releasing their own, I was pretty keen to see it for myself. A mitre tool is designed so that the modeller can produce mitred plastic junctions of specific angles on strips of either flat styrene or shaped section stock, or indeed thin strip wood. If you’ve ever tried to make a 90-degree angle frame, you’ll know how difficult it is to get right if you don’t have the correct tools. The Cutter Tool is designed to ease all of your woes. This tool is packaged into a robust, corrugated box with a colour product label on the lid. You’ll also notice the weight. There’s some heavy metal in here, and some of the best you’ll see from a tool manufacturer. Unlike some contemporaries who may mould their cutters in some form of plastic, this one is precisely CNC-machined from a very hard grade aluminium, which has also been given a tough matte red anodised finish. The box fits the tool almost perfectly, with an insert used to support the cutter arm. A hex key is provided for changing the blade, as is a second blade with a finer cut. The tool is fitted with a 0.3mm thick blade for regular cutting tasks, with a slightly thinner (0.25mm) blade for something a little finer. The first thing you notice when exploring this tool is that there is no playin any of the parts. That is, there is no looseness or wobble in either the arm pivot or the two adjustable fences. Those fences are also neatly engraved with degree graduations and the base is marked with a reference point too, in order to align the fences. The bottom edge of the fences is also marked, but in centimetres, with ZERO being at the actual cutting point of the blade. With the fences in their neutral position, an end stop can be positioned so you can cut precise and equal straight-edged lengths of strip. This stop can be removed of course so the fences can be adjusted. It can also be switched to the opposite side of the cutter for maximum flexibility. The stop and both fences are tightened using plastic thumbscrews that cover the metal fixing bolt. Now, a cutting area really needs a cutting mat, and this is what is fitted to this tool. A self-healing and graduated mat, sits flush with the upper surface of the tool, and proved a hard yet non-damaging surface to the cutting blade. I made a small number of cut tests with this tool and found it both precise and effortless. Conclusion RP Toolz’ arsenal of quality modelling tools is certainly expanding, and like those before it, the sheer quality of this really does demand the price asked of it. This is no flimsy or inaccurate tool, but one with which you can work with total precision in producing either angled lengths of styrene, or equal, multiple lengths too. If you like to scratch-build or even just improve on what a kit supplies, then this could well be of interest to you. This is the very best of the mitre cutting tools that I have ever seen, without a doubt. My sincere thanks to RP Toolz for the review sample seen here. To purchase directly, click the link at the top of the article.
-
Orient Express Sleeping Car 1929 by James H - Amati - 1/32
James H replied to James H's topic in Non-ship/categorised builds
Probably a couple of weeks yet as I'm dressing the interior walls and building sink units 😎 -
Double Punch & Die Storage Box RP Toolz Catalogue # RP-WB2 Available from RP Toolz for €22,00 RP Toolz make some of the best Punch & Die sets that you can buy. These include the regular large, small and hexagonal sets. When you buy these products, they are packed into a small cardboard box, with a plastic bag containing the punches and hammer. Whilst it’s hardly an elegant solution, this is fairly typical of the market, but RP Toolz has realised that you may want something a little better and organised, especially if you have multiple sets of punches hanging around on your workbench. To this end, they have now released a number of laser-cut plywood boxes that are specifically designed to hold the components for their own releases. Today, we take a look at the twin punch storage box. The old look! The Double Punch & Die Storage Box is flat-packed into a large zip-lock sleeve with a product label attached. Inside the box, there are NONE laser-cut parts of creamy-pale ply, and a single sheet of instructions. This set has also been designed so that the laser-numbered parts are assembled in part number order, which is a nice touch. A sliding lid, emblazoned with the company logo, will keep your punches nice and dust free. First of all, we need to remove the parts indicated in yellow on the instructions sheet. These are several discs and the ends of one of the die storage slots. A scalpel makes clean work of this. Part 1 (base) is now glued to Part 2 (side panel), using Titebond adhesive. Make sure the side panel is square to the base using a right-angle tool. Part 3 is now located into the notched side panel and glued in position. Part 4 simply sits on top of Part 3 and is glued into position. Make sure you get the orientation correct with regards to the large/small punch sides. Part 5 is the last internal floor and again sits in the side wall notches. Again, I glue this in place. Parts 6 & 7 are the side panels with the routed slots. These fit nicely together with a little push (and a few spots of glue) Part 8 is the last side panel and has a scalloped top edge to make it easier for your fingers to slide out the lid (Part 9). That is it! So simple to build. Here you can see what a difference it makes to have all your punches in order. It certainly helps those of us who like a little order in our lives. Conclusion A very nicely designed and produced box that is easy to assemble and really helps to restore karma to an untidy tool storage area I have. These are keenly priced and, in my opinion, very much worth the investment. Functionality and beauty rolled into one. My sincere thanks to RP Toolzfor the review sample seen here. To order directly, click the link at the top of the article.
-
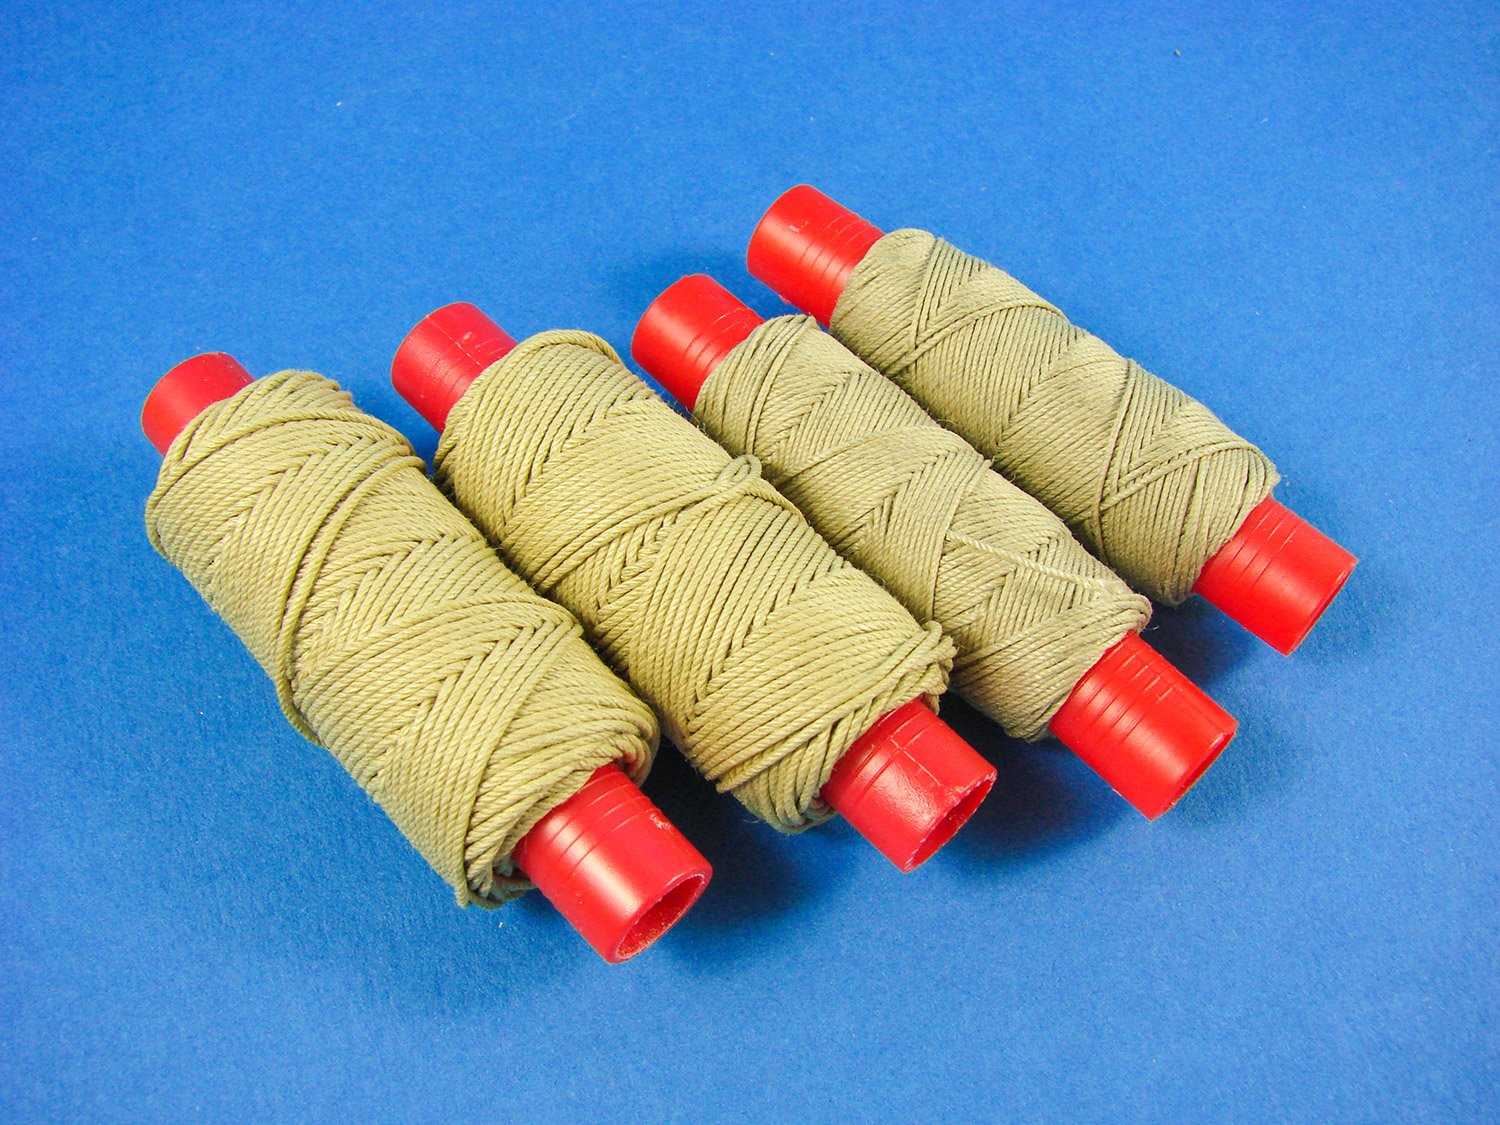
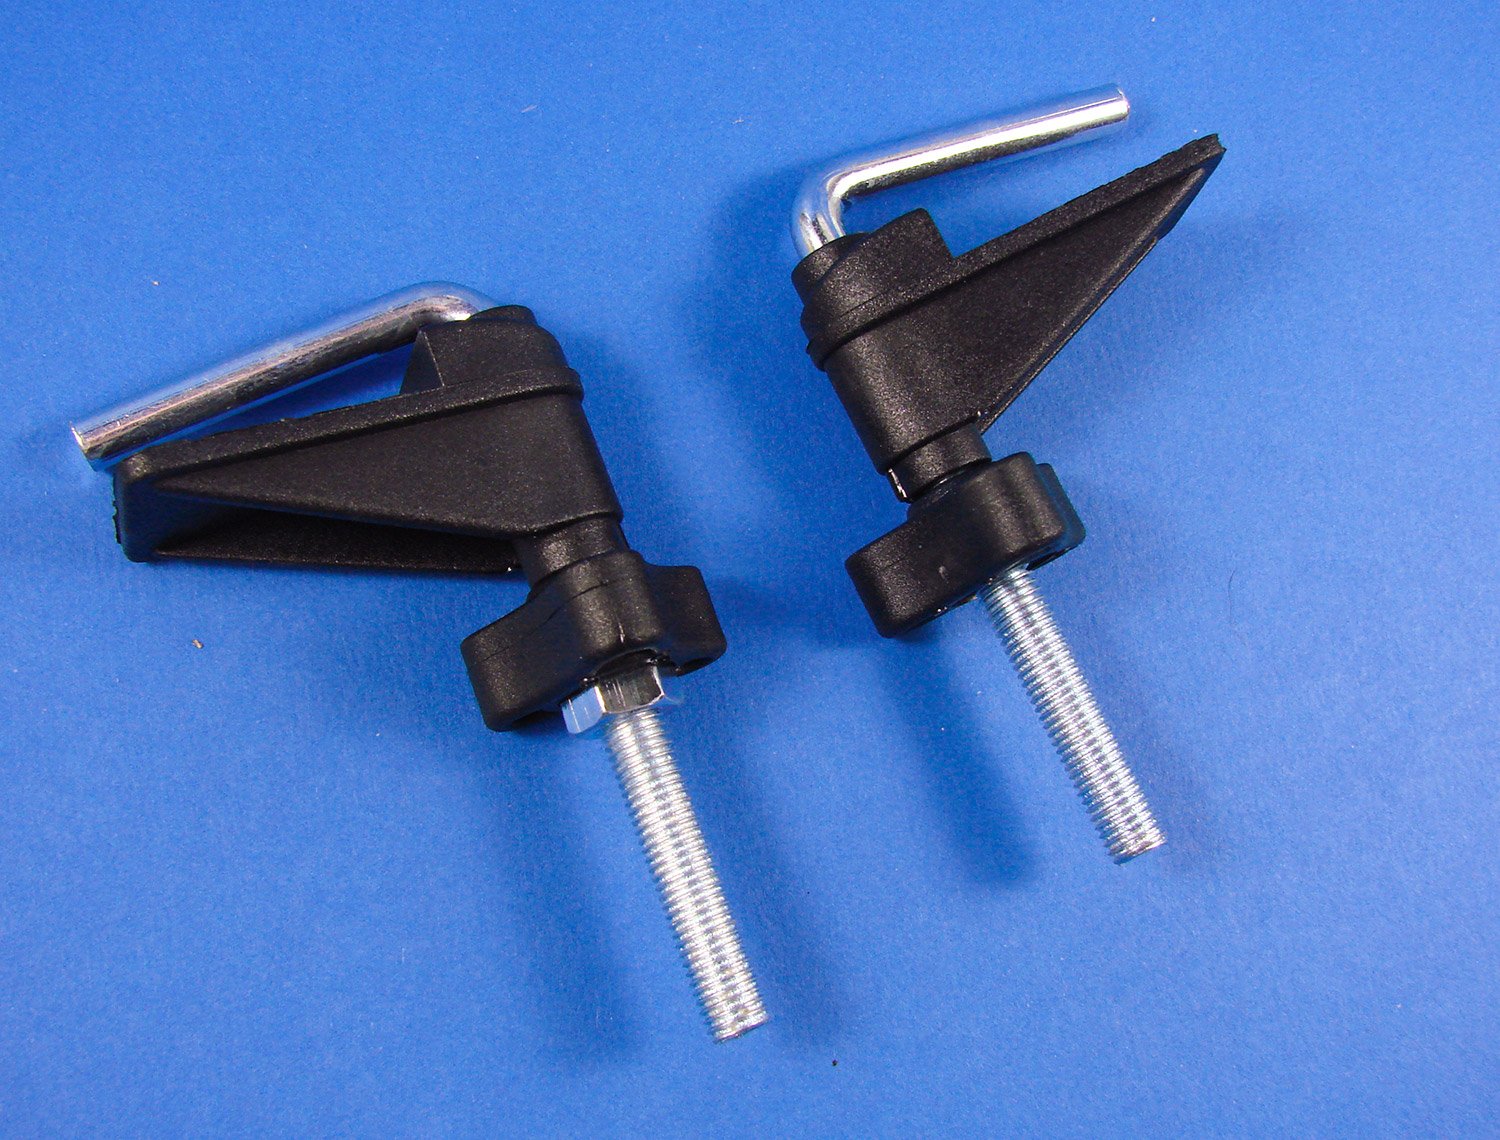
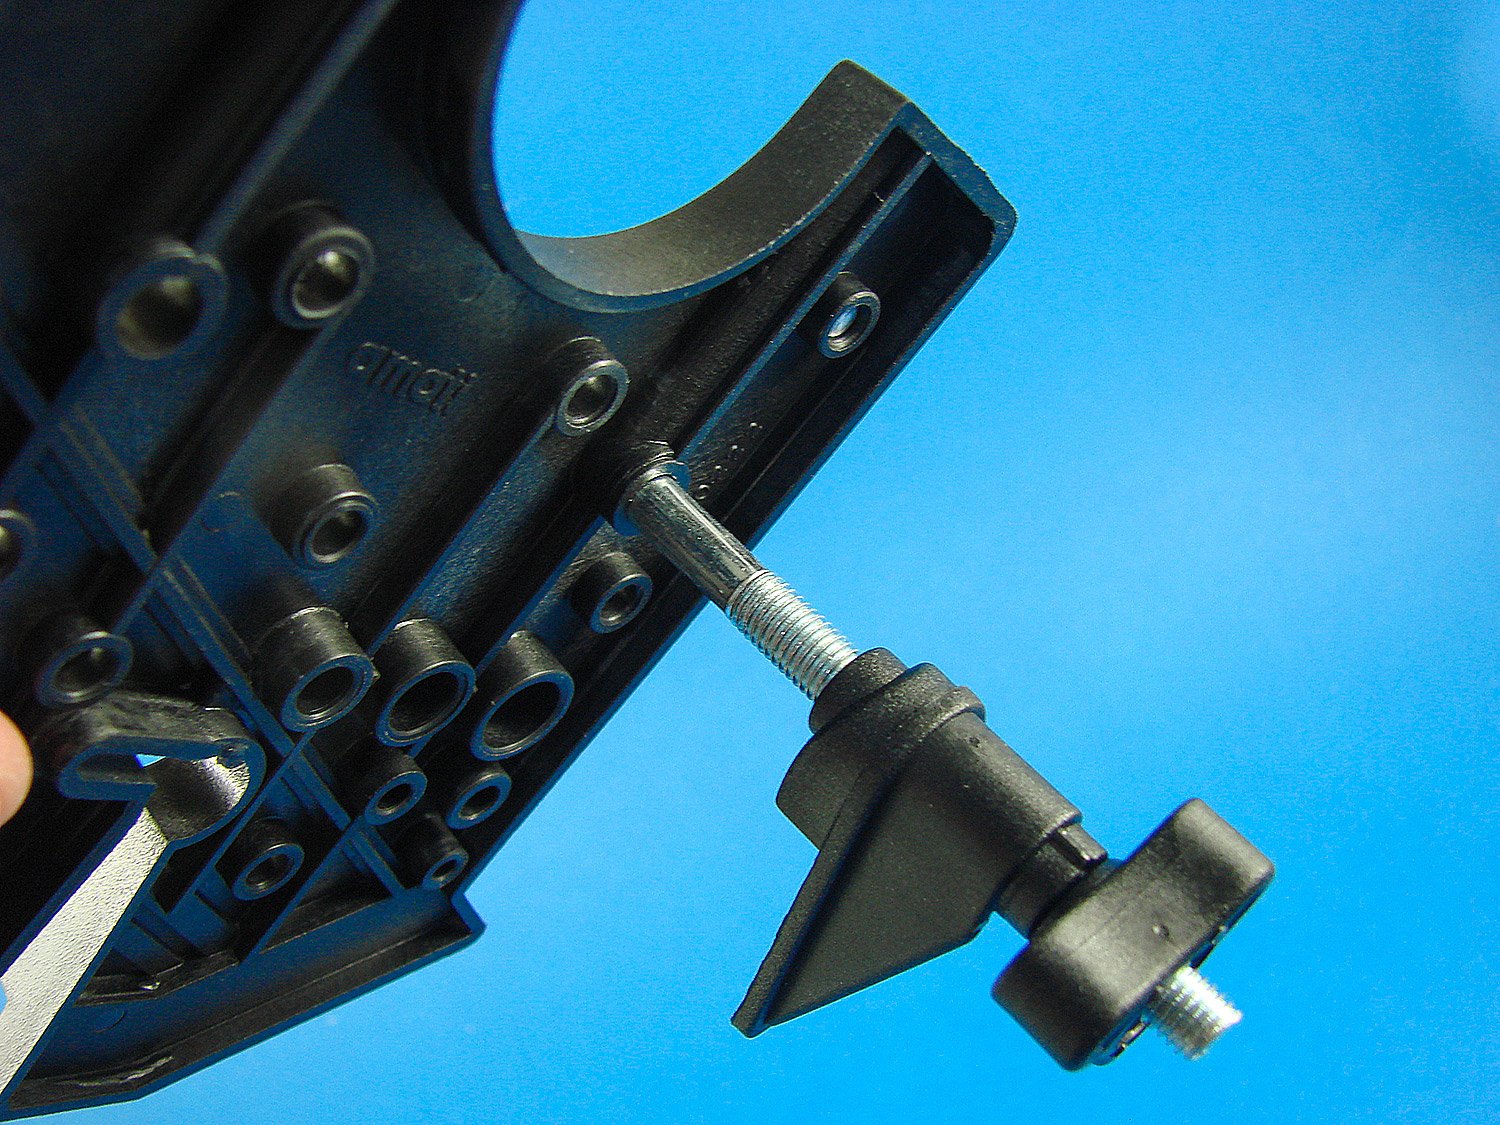
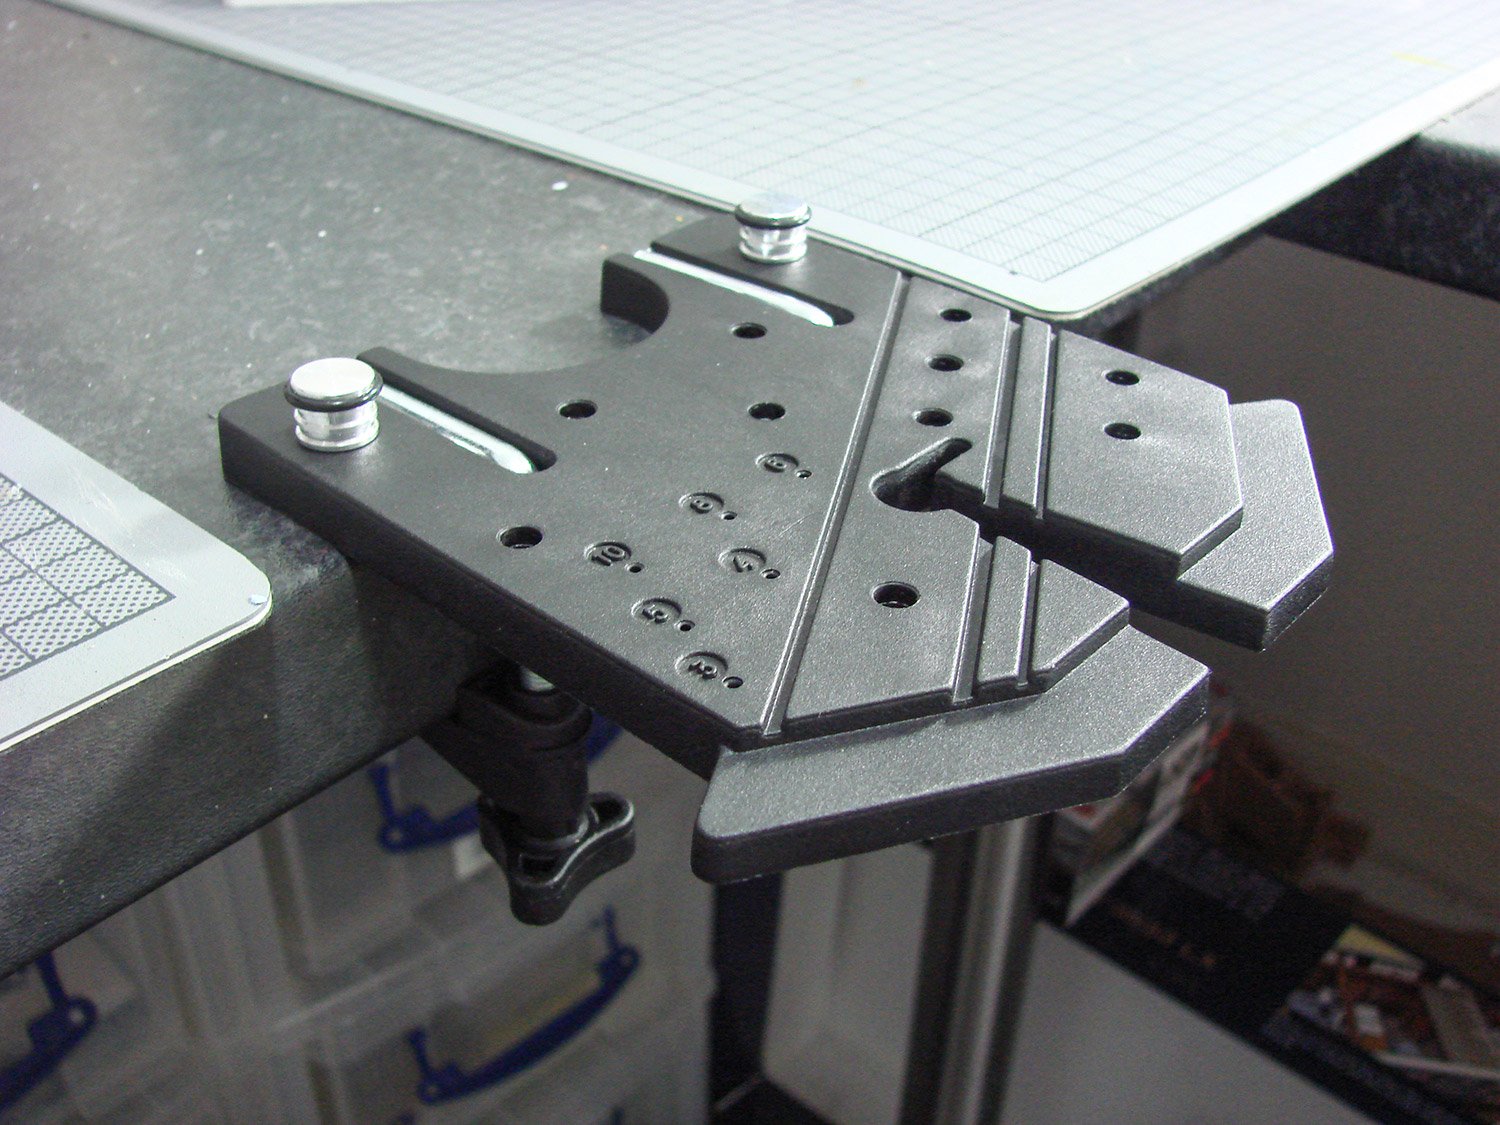
Planet Working Bench Amati Catalogue # 7396 Available from Cornwall Model Boats for £10.58 Having worked in plastic modelling for a while now, where I’m having to remove casting blocks from larger components but doing that either on my cutting mat or between my fingers, a tool like this appears to be very useful. When it comes to ship modelling too, the ability to be able to lay some small timber sheet flat whilst you use a fine saw on smaller components, without sawing tracts into your worktop (ask me how I know!), definitely helps. Amati’s Planet Working Bench is a tool that is designed for work on small components and materials, helping you hold items whilst you saw, file and drill. Let’s take a closer look. Amati’s Planet tool is packed into an attractive, sturdy and glossy box with an image of the tool clamped to a desktop. The back of the box is a little more illustrative, with examples of how this tool can be used with your work. All writing is in Italian, but we can grasp what’s happening fairly easily. Although Amati are generally known for their wooden model ships etc. this tool can of course be used for other areas of modelling where basic tools such as saws, files, and drills, are used. Inside the box, two thick plastic sleeves contain the components. In the largest is the Planet Working Bench itself, complete with two small aluminium bollards plugged into it. These bollards have a rubber O-ring fitted to them to prevent the metal scuffing any delicate work that you will use with the tool. The main part is moulded from a very tough plastic that still does have a little give in it, but it certainly rigid enough for the tasks that it’s designed for. It also has various channels moulded within in as well as holes to reposition the bollards, and a series of small, numbered holes which I’ll come back to very soon. The front slot is there to help you cut into materials, without a risk of cutting into your actual workbench. Just be careful not to start sawing into the Planet itself. The second wallet contains the two clamps which will secure the Planet to the desk. These are formed from two angled, threaded rods onto which a locking nut and the part which forms the lower side of the clamping jaw. To fit these to the Planet, you insert them from the underside and lay the angled part of the metal rod in the moulded channels. Slacken the nut off and then fit to the edge of your workbench, securely tightening the nuts to lock everything in place. Now, those small numbered holes. These refer to a moulded sleeve in the underside of the Planet, into which you will fit a wooden dowel or metal rod into which you wish to drill a hole centrally within the diameter. The hole of course aligns with the dead centre of the sleeve into which you will plug the wood or metal rod. Conclusion This is a very handy little gadget for working on those small model parts, but sold as it is, the full potential of the tool isn’t realised. To really get your money’s worth from it, I really do advise that you also purchase the small clamps which are designed to plug into it. These is called the ‘hand vice’ on Amati’s catalogue page and contains one single unit. Better still, a couple of these would be immensely useful. The Planet itself is very reasonably prices, nicely constructed and is a cinch to fit to your bench. I’ve already started to use it whilst building my Amati Orient Express Sleeping Car. My sincere thanks to Amati for sending this tool out for review. To purchase directly, click the link at the top of this article.


-
That's an admin/moderator power, but we can add them for you, as Mark says. Just drop us a message.
-
I'll have another order going in soon for more workshop modules for my models ship building. I love their stuff.
-
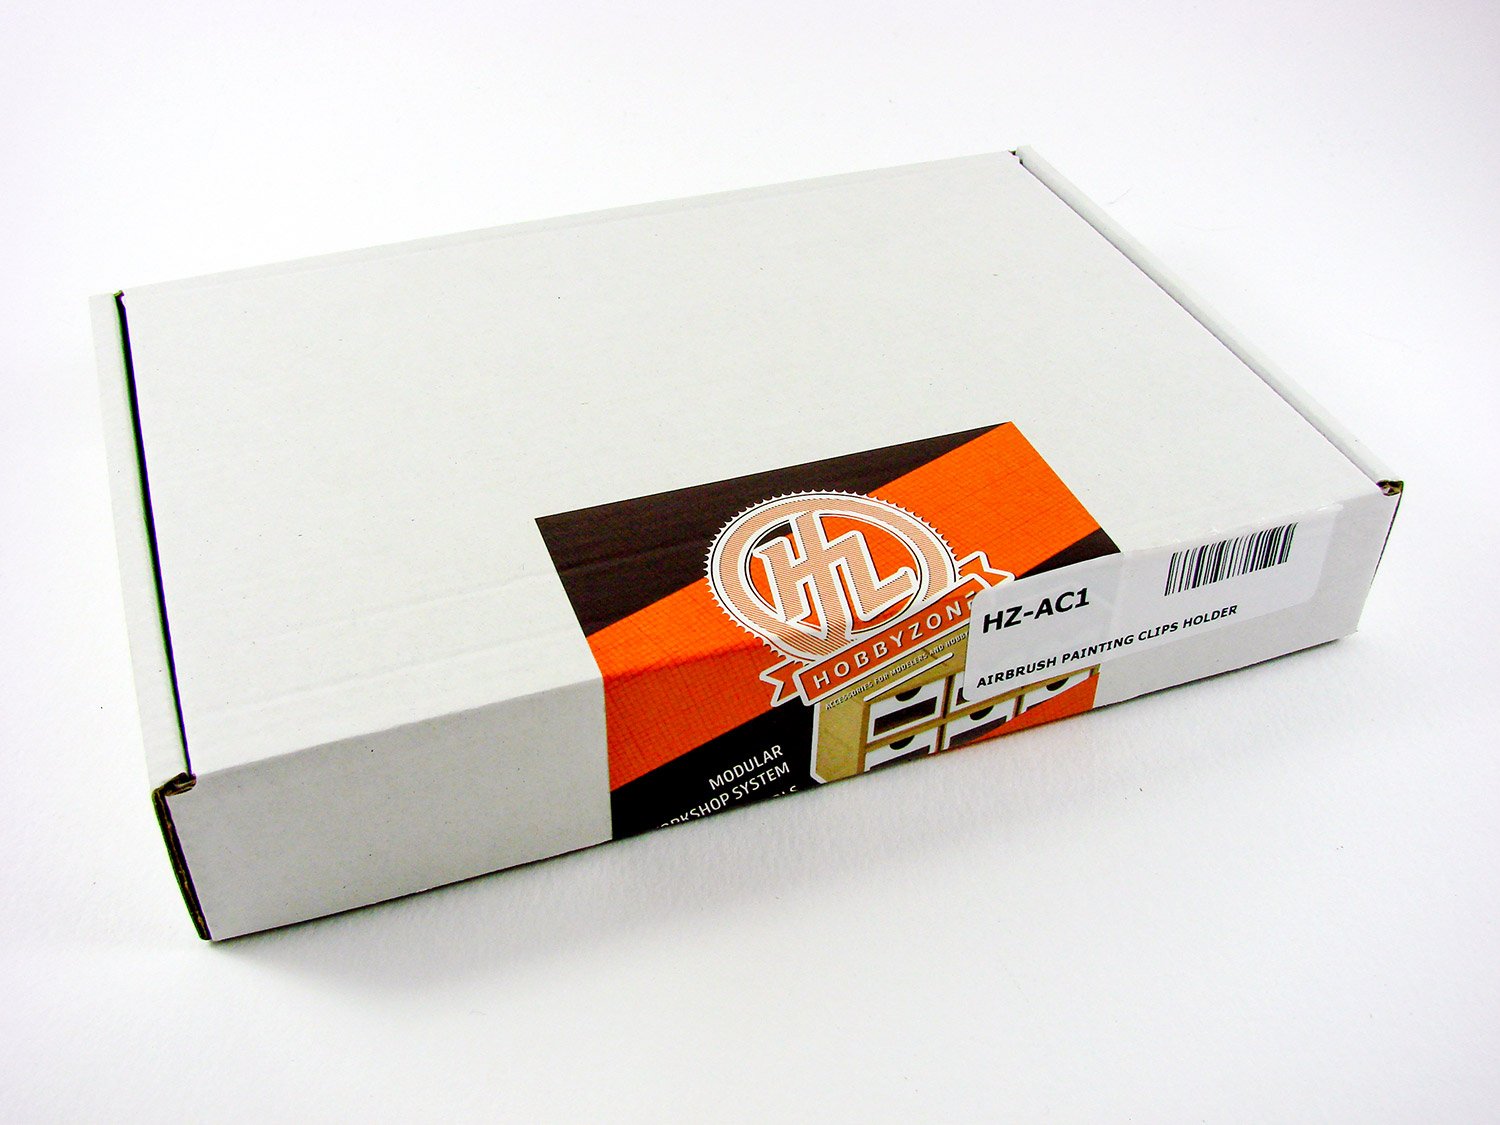
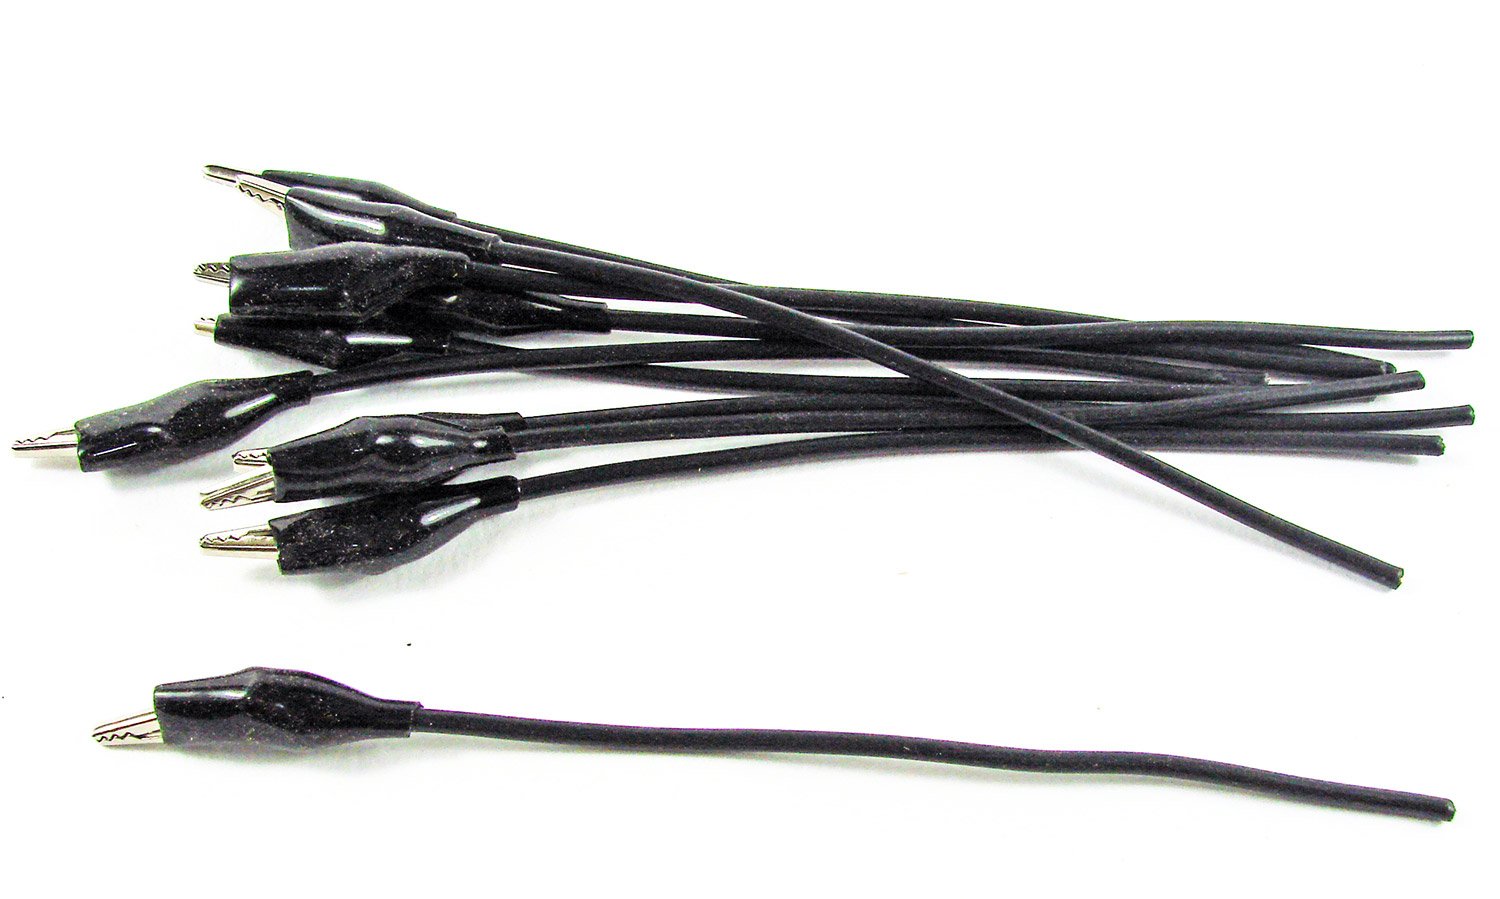
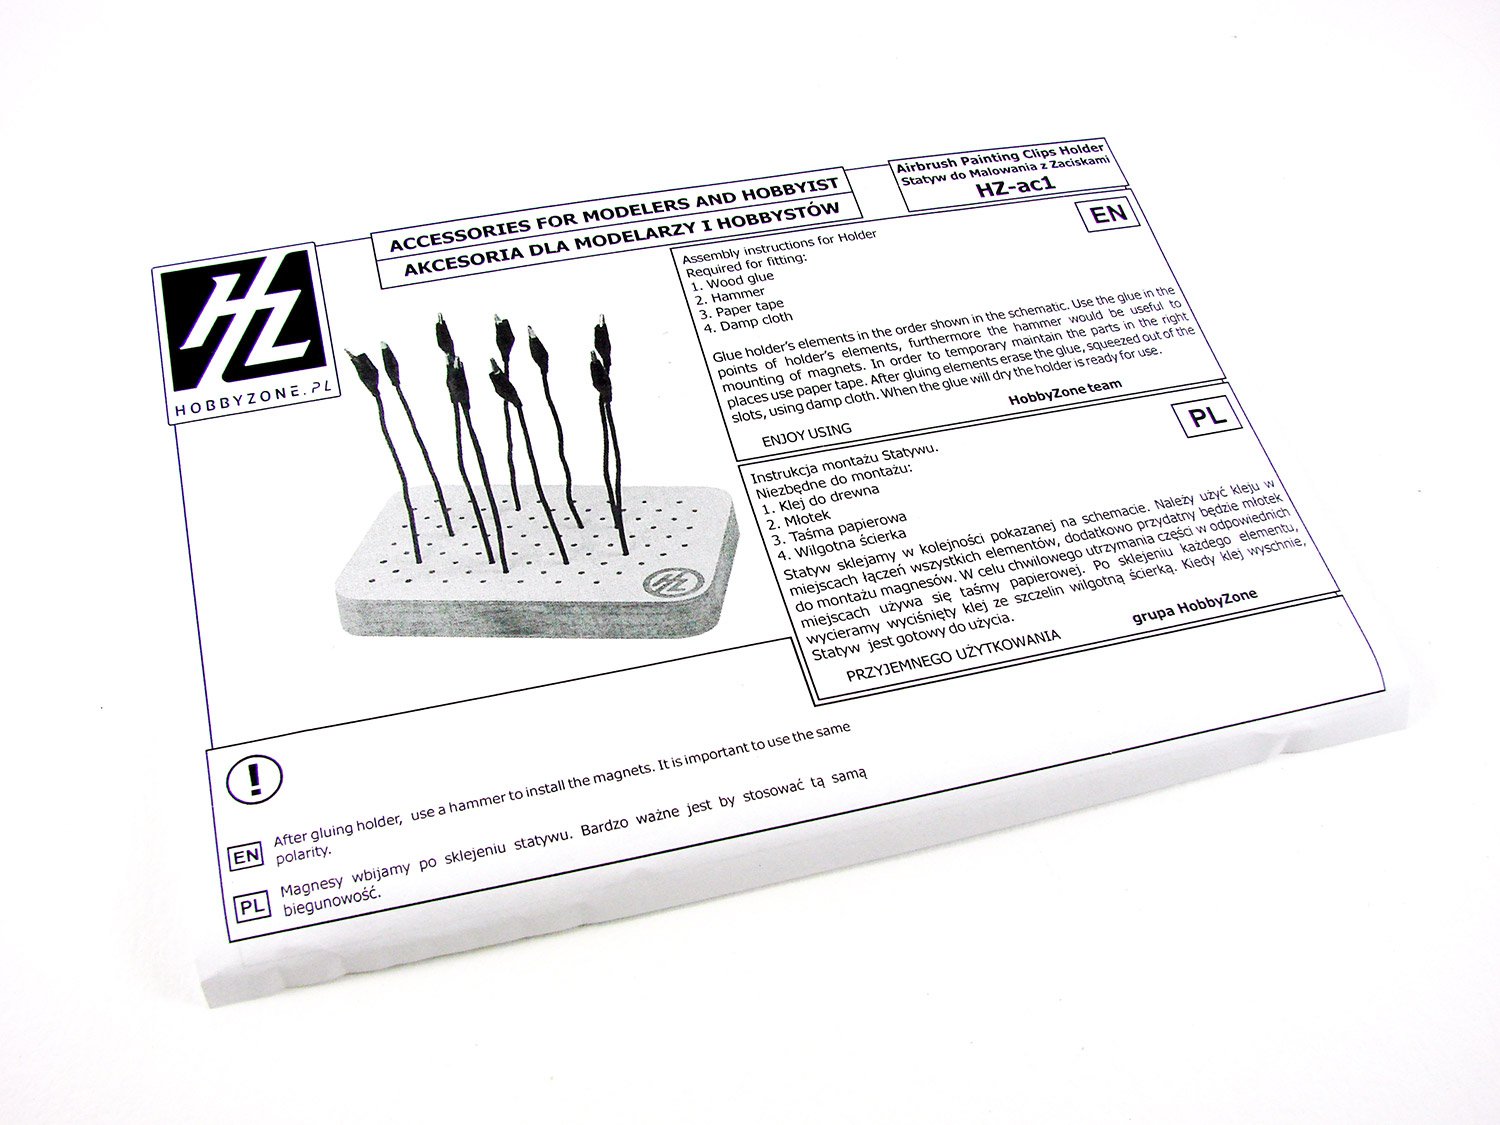
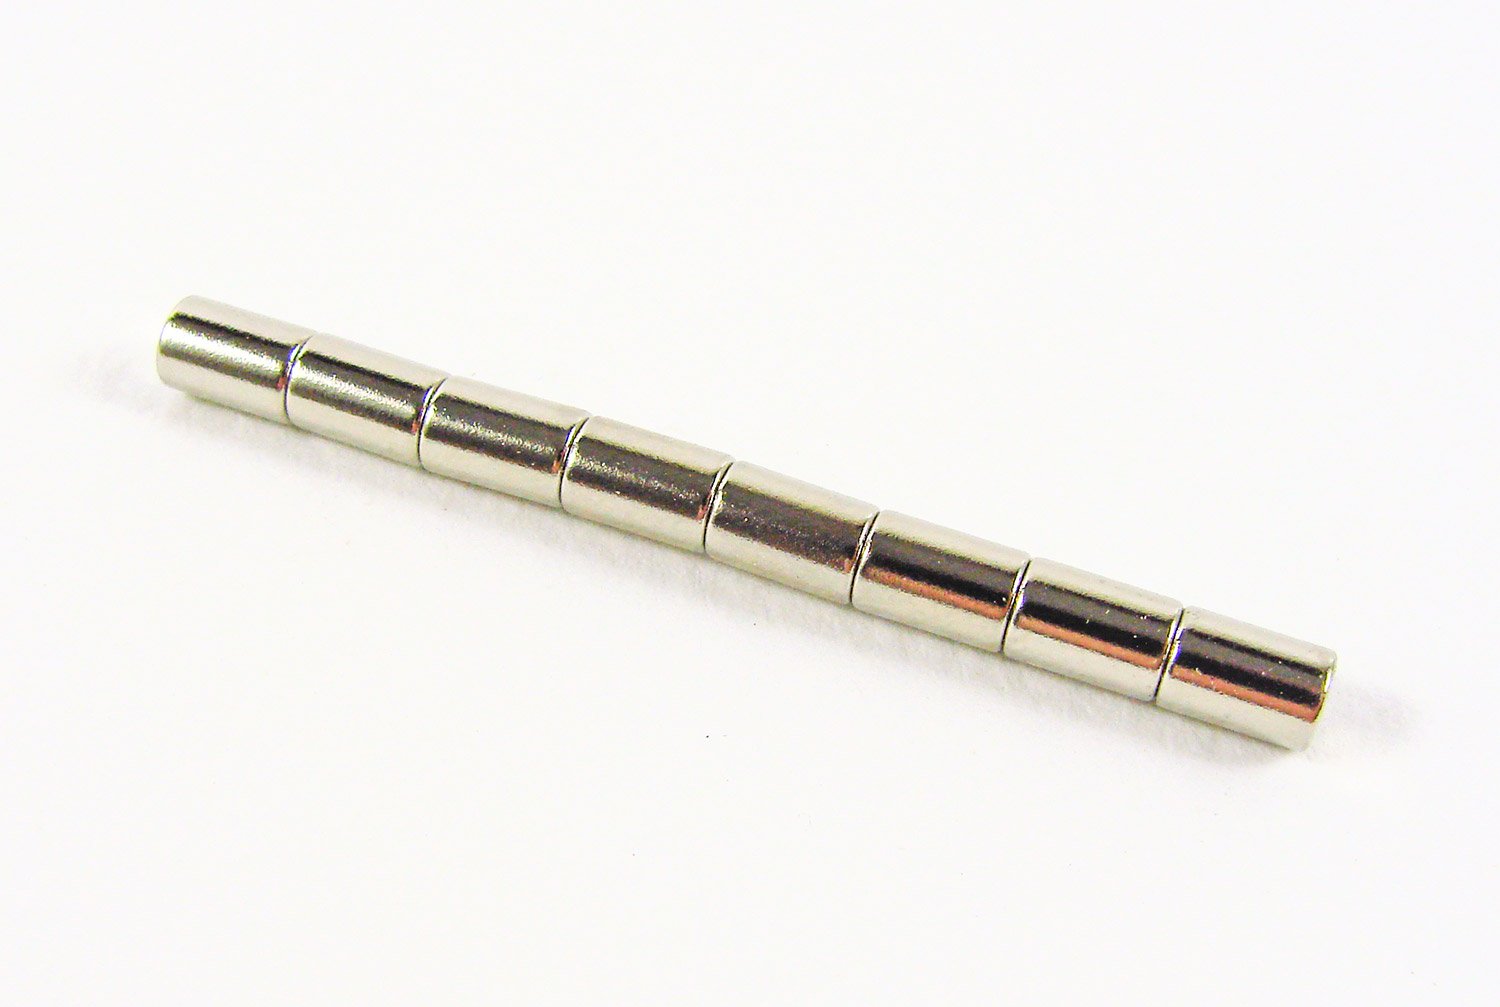
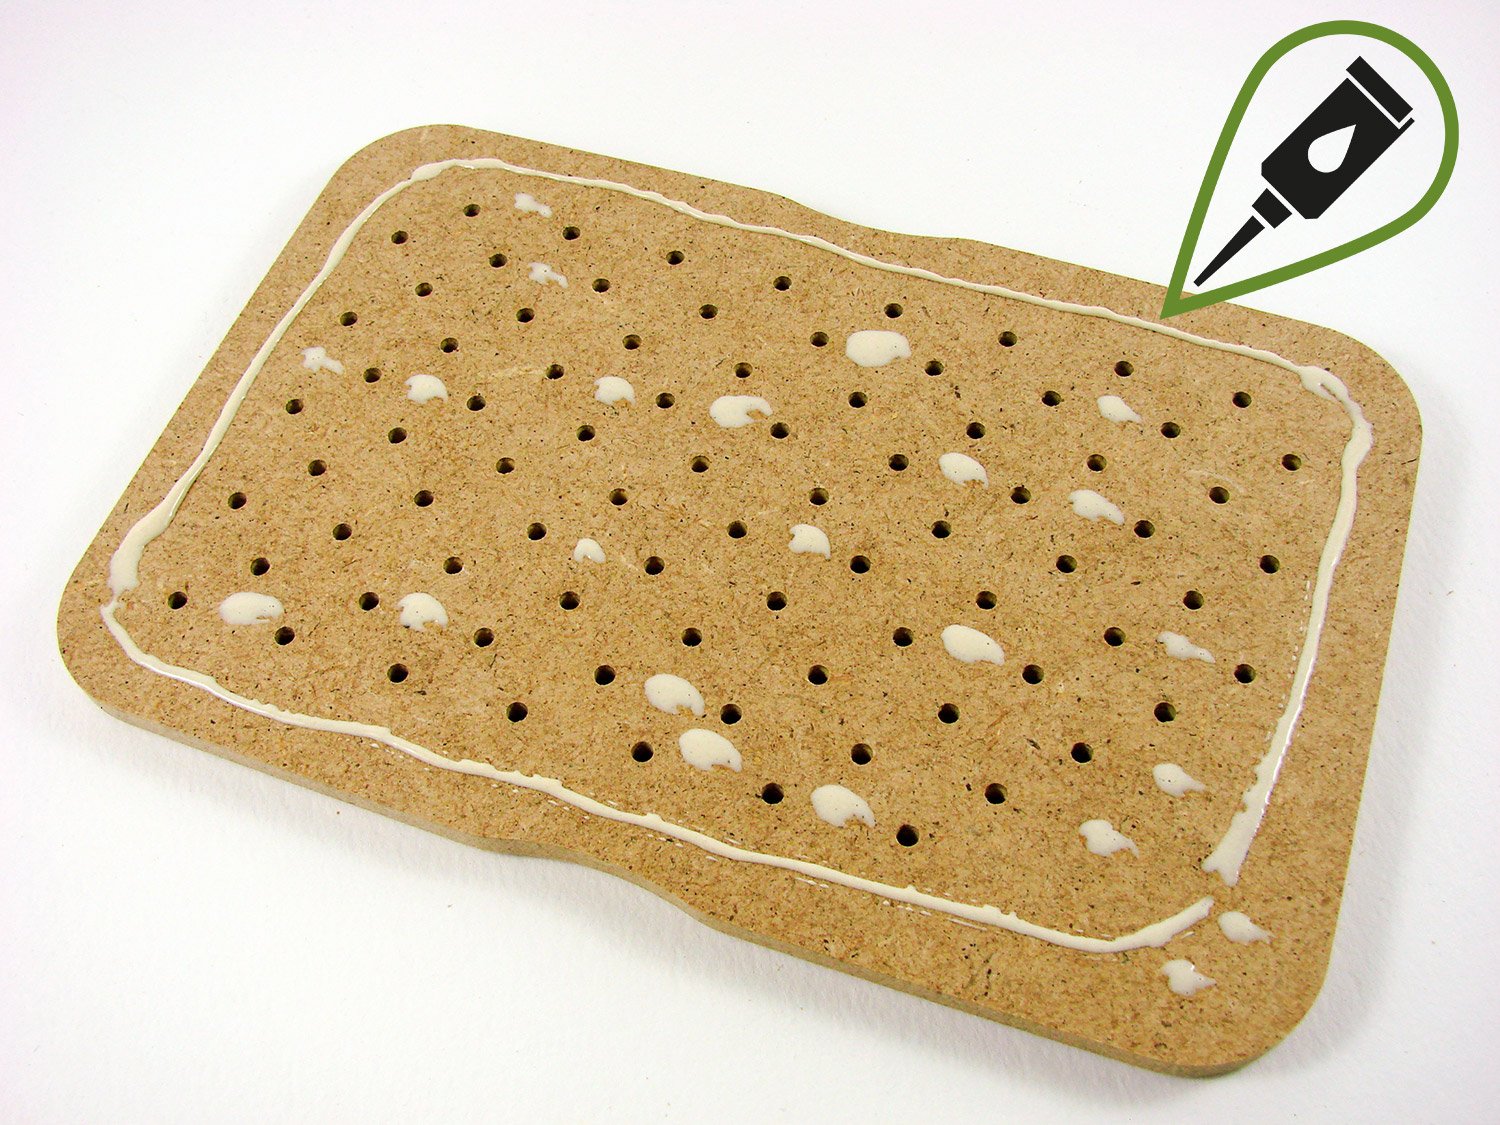
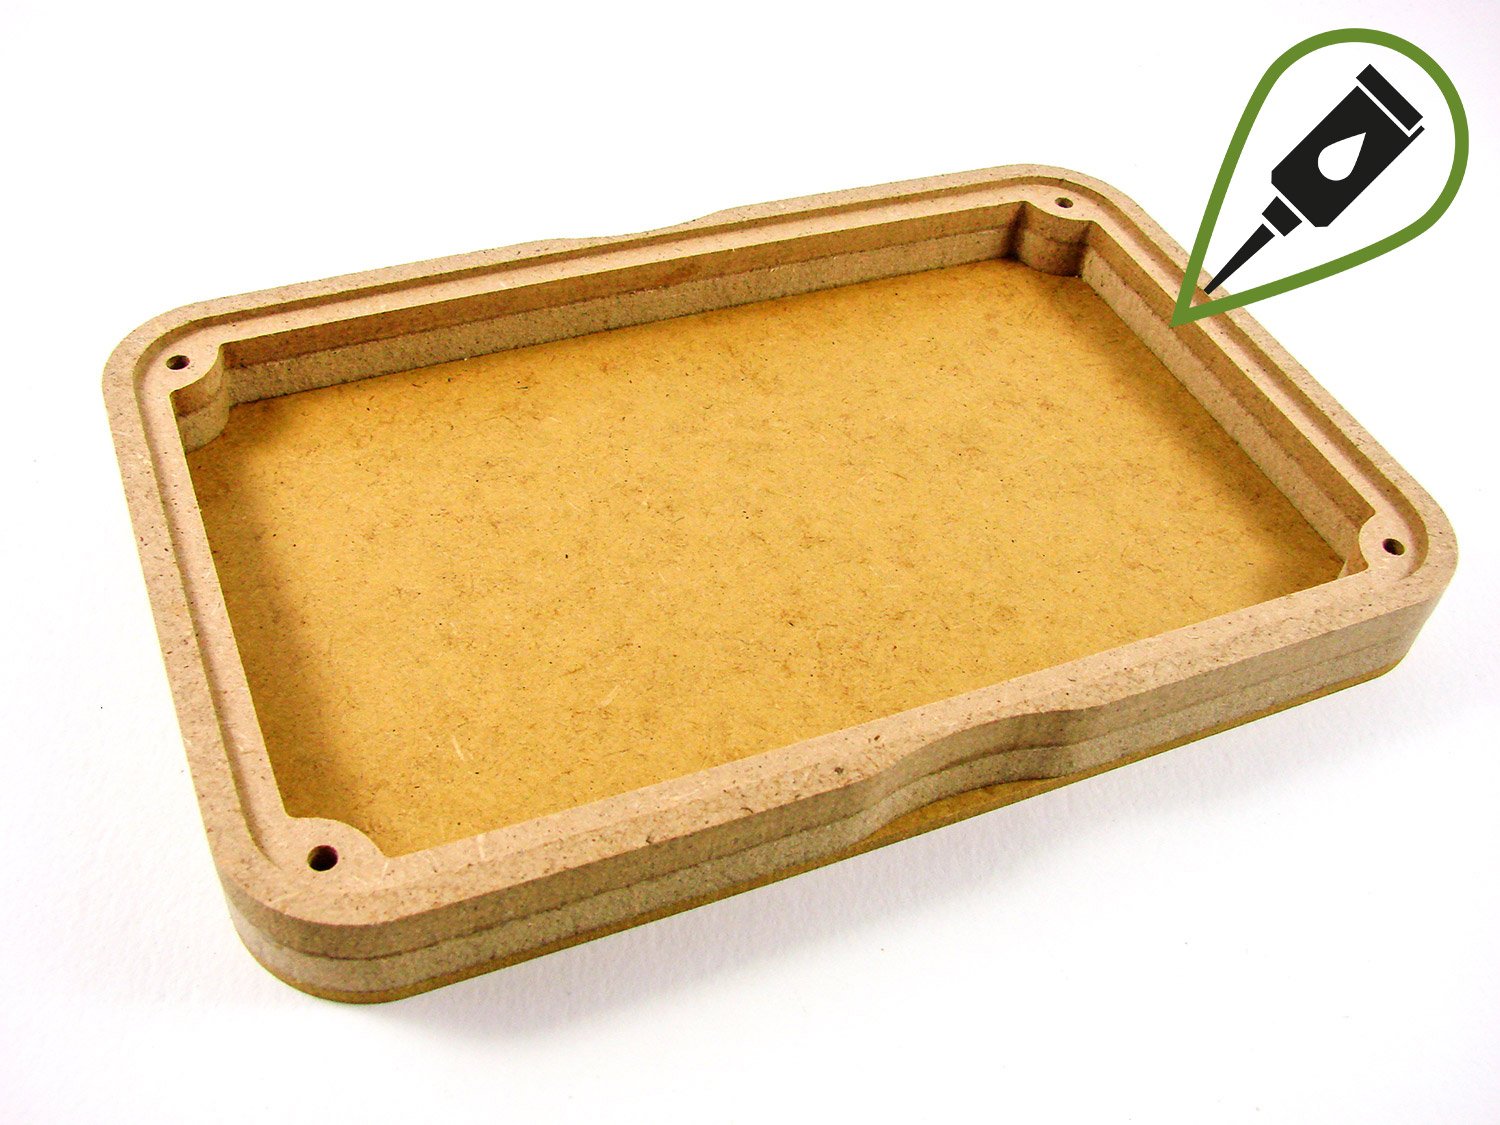
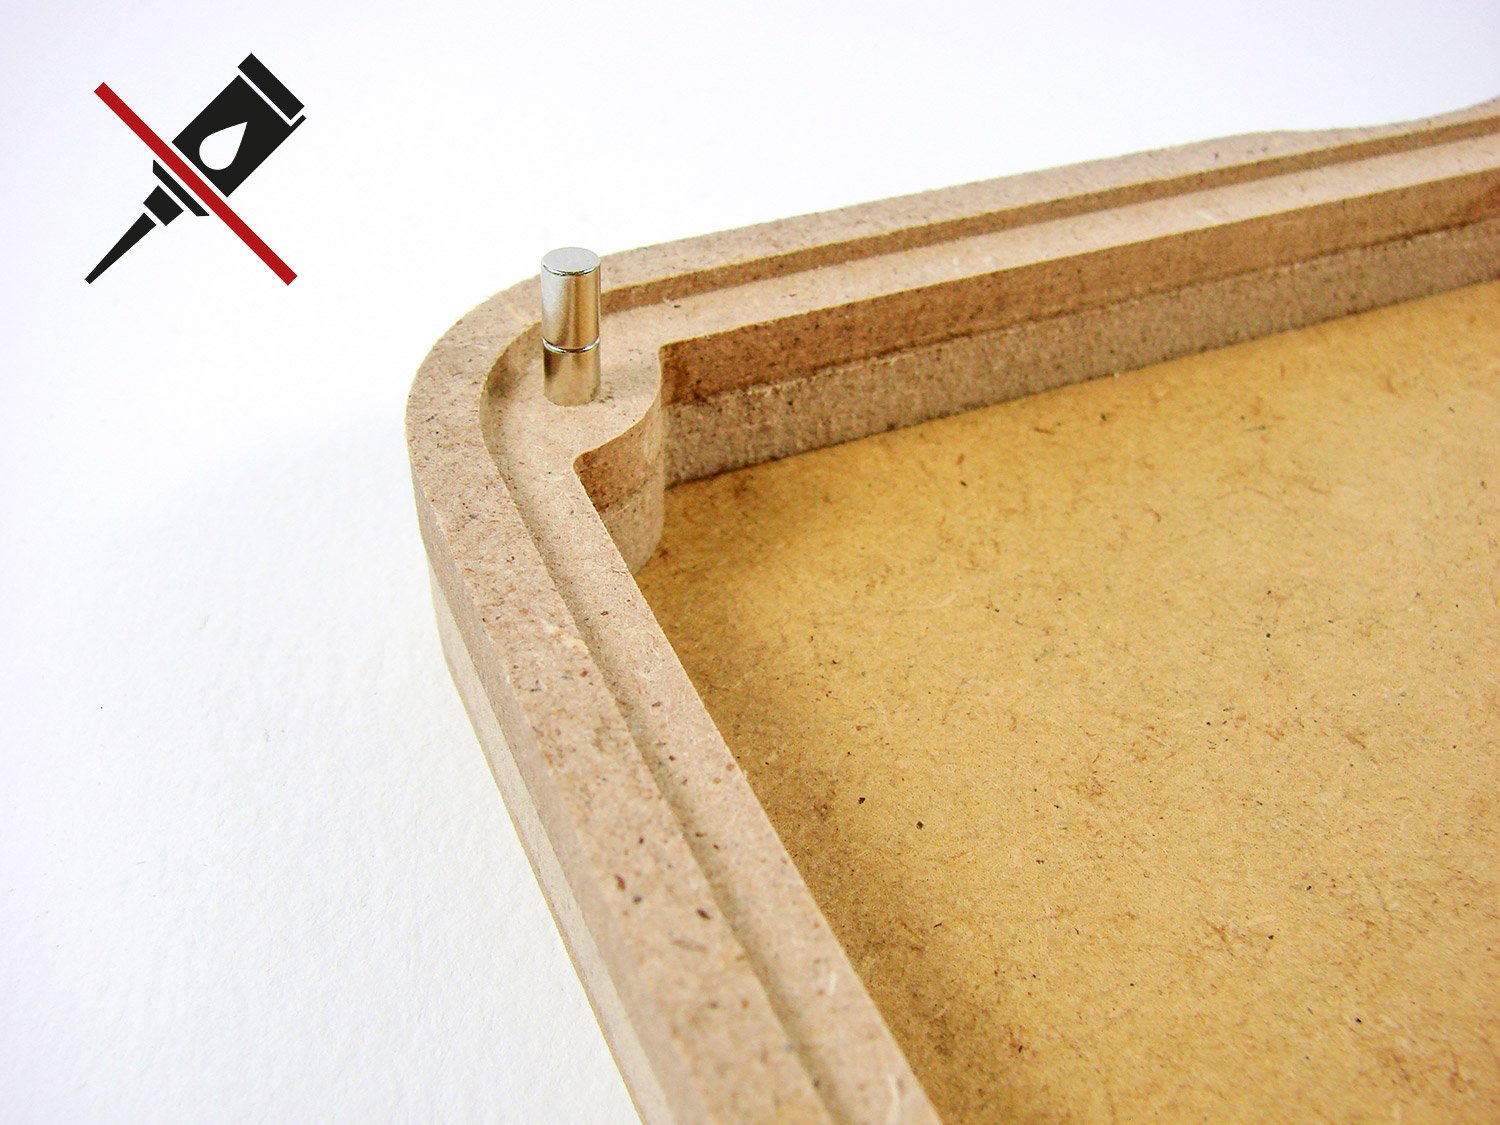
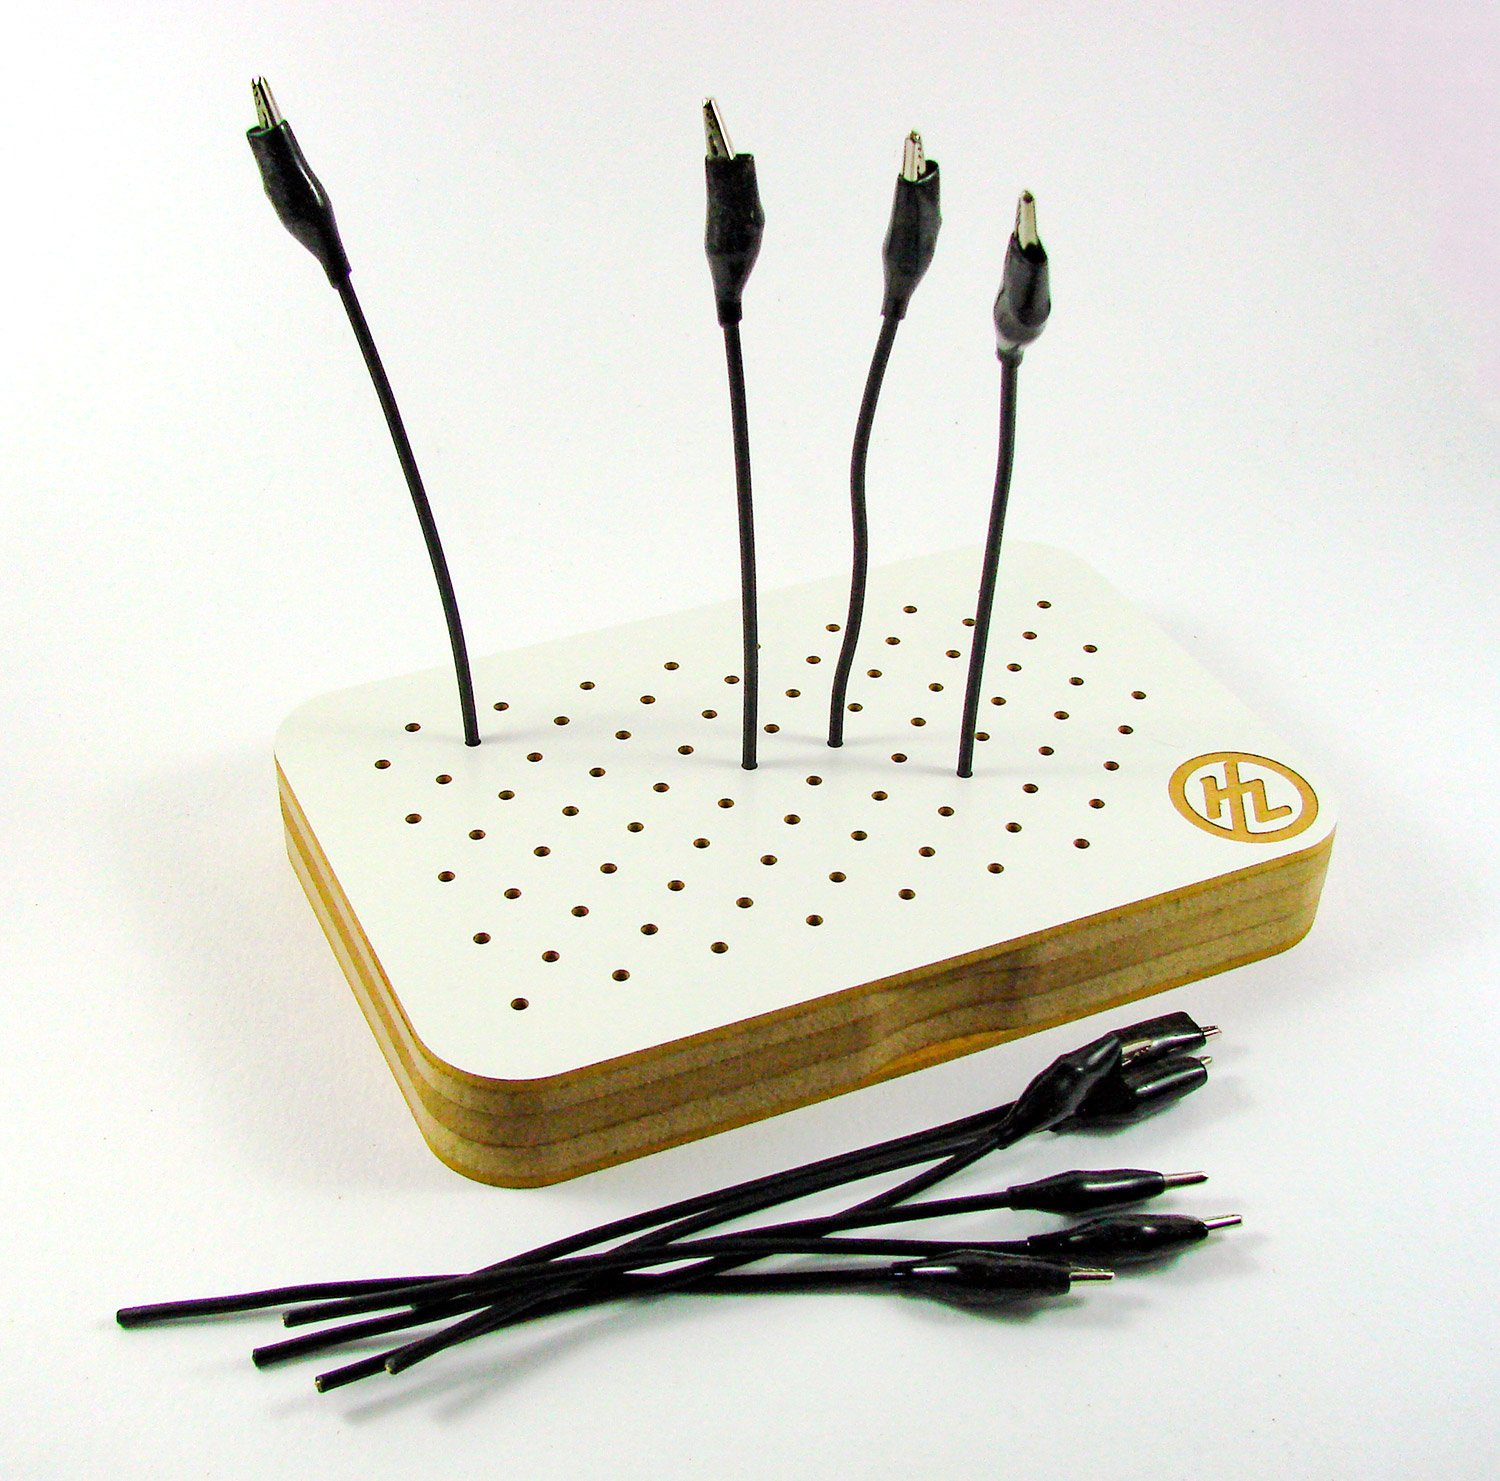
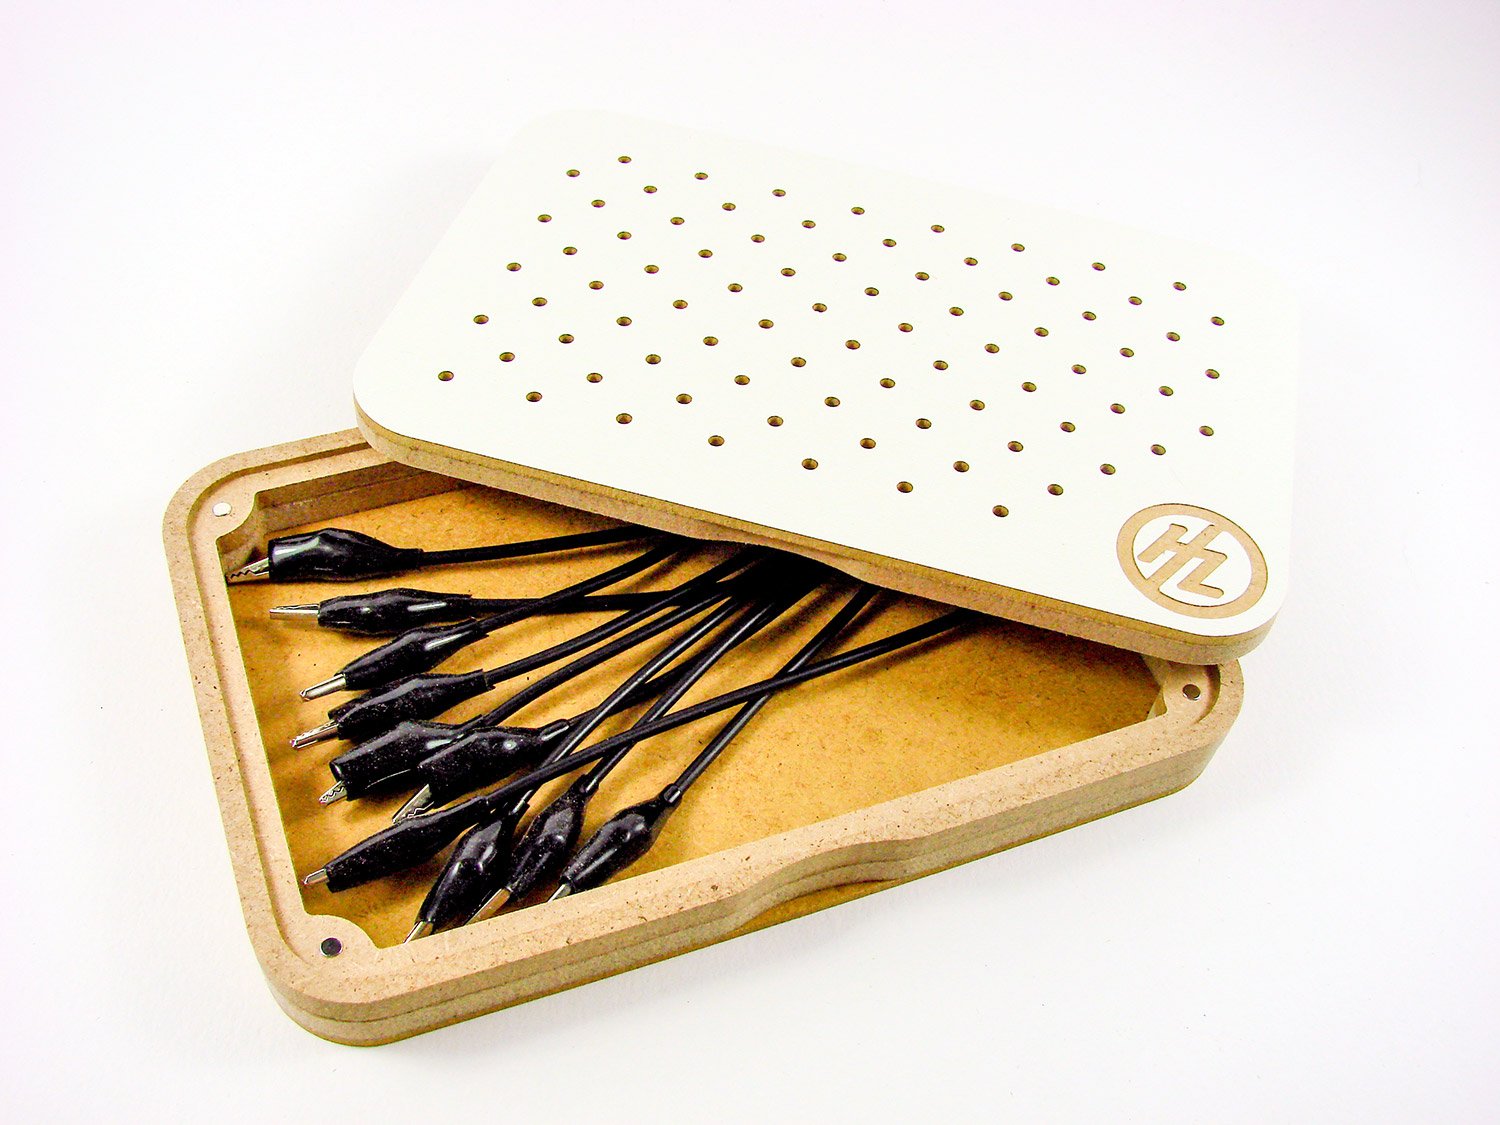
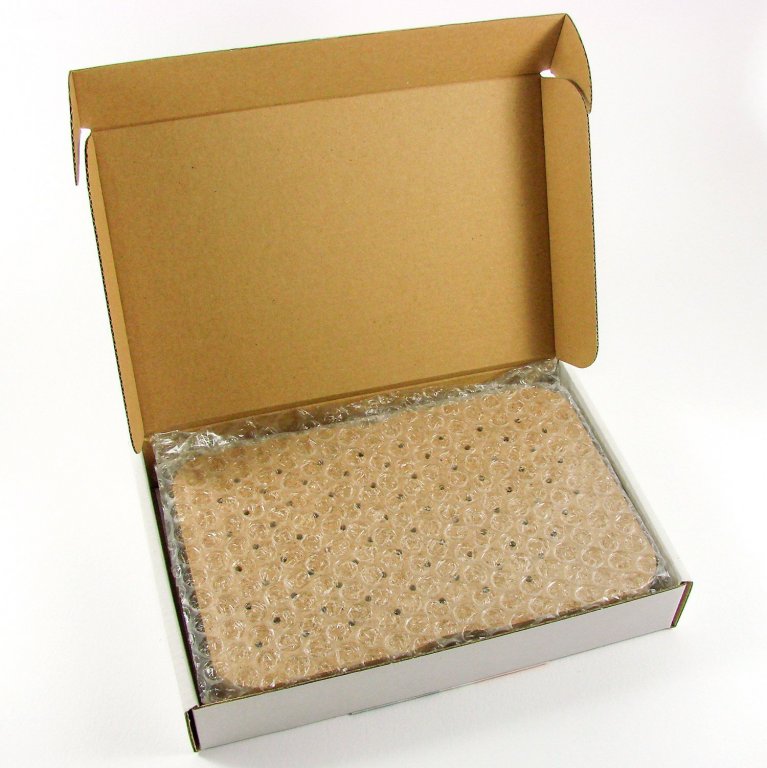
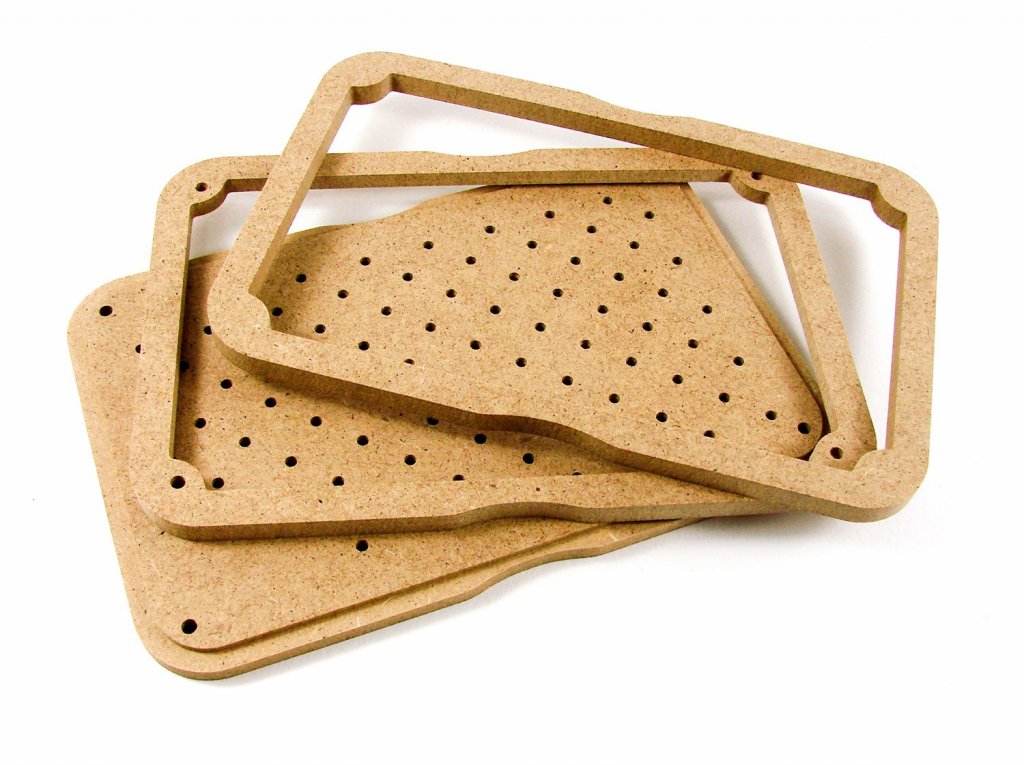
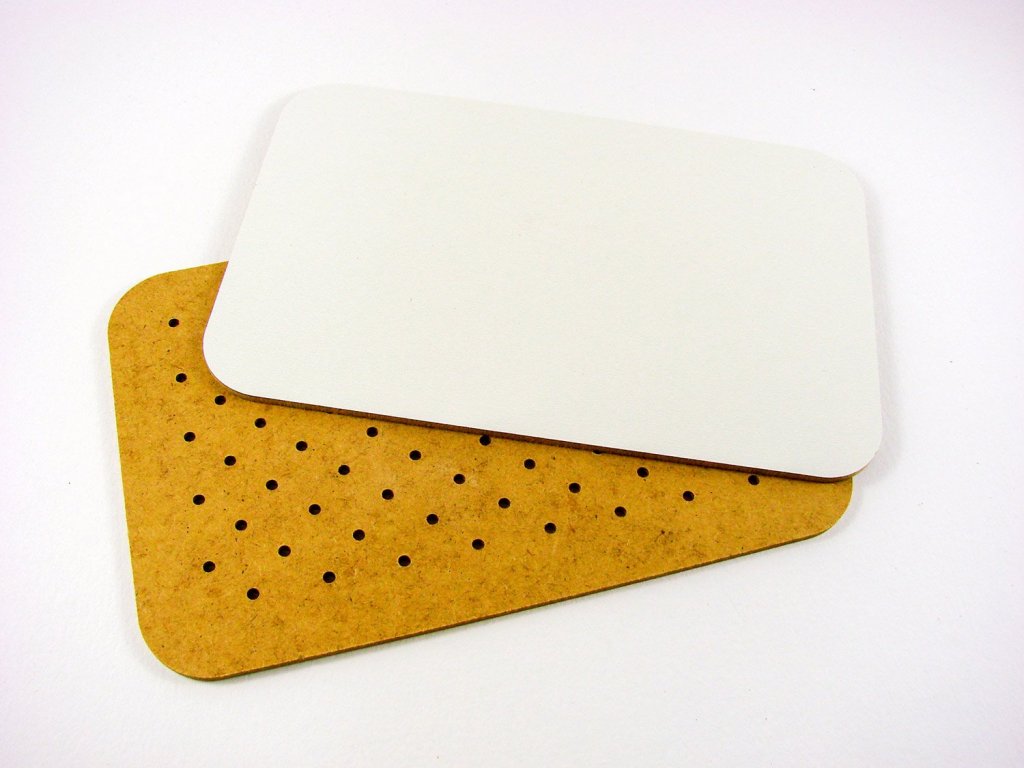
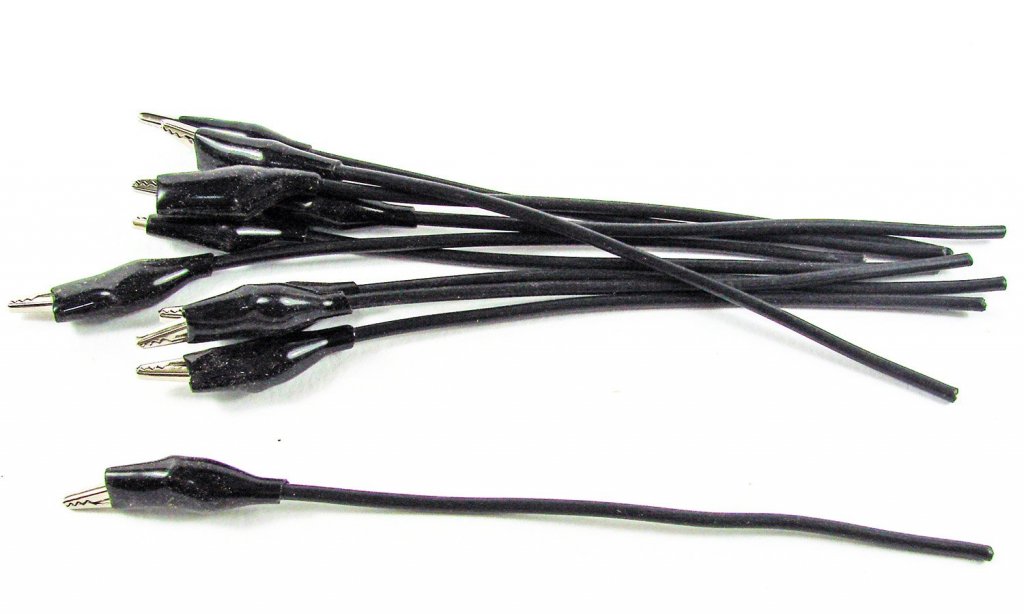
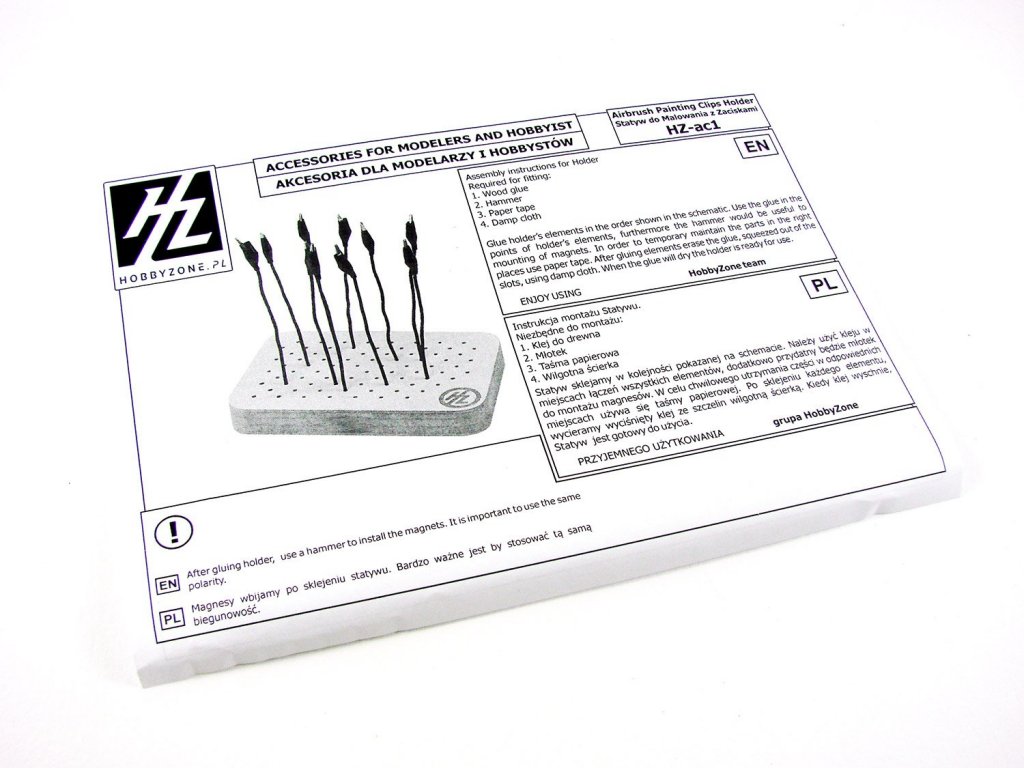
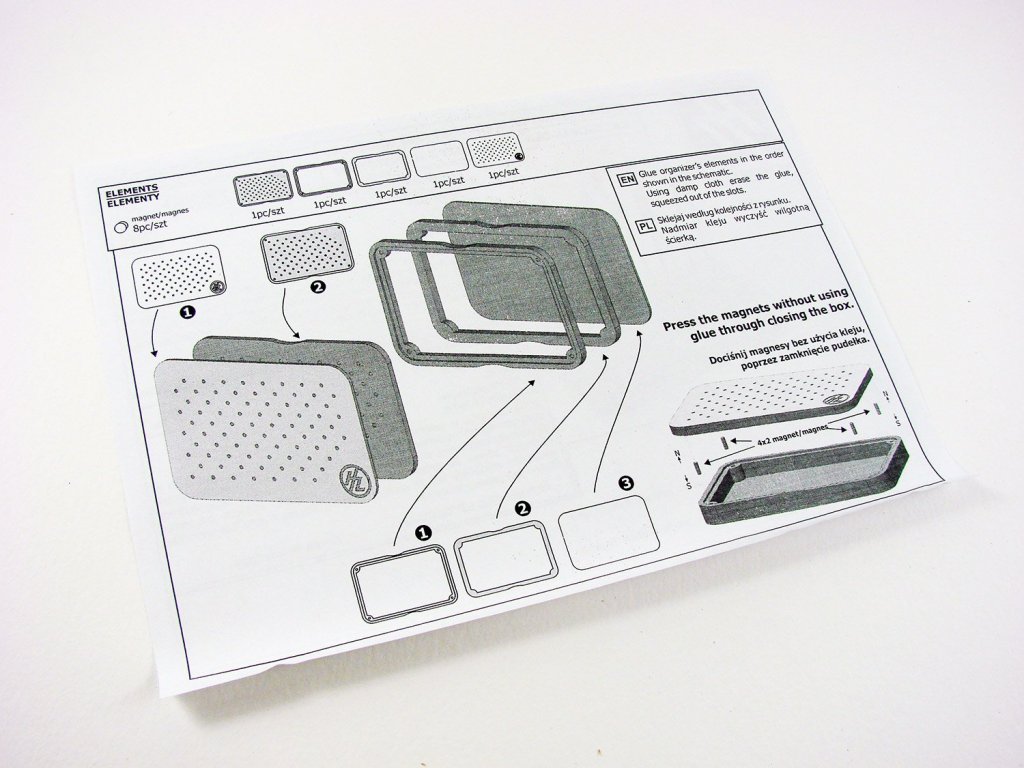
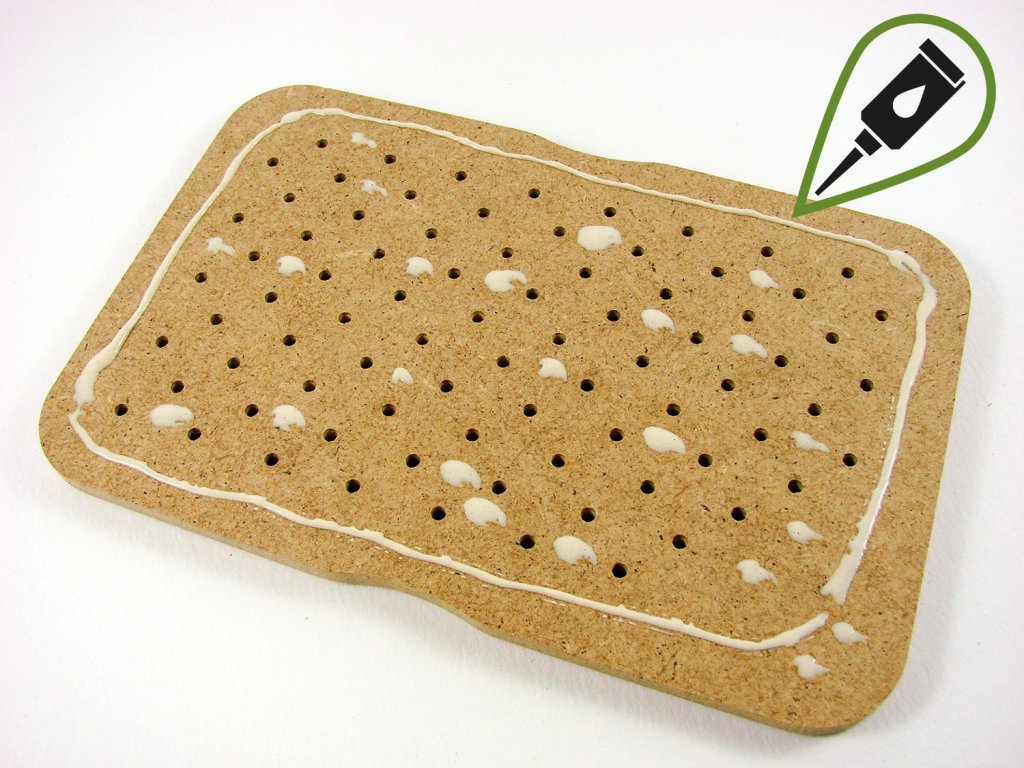
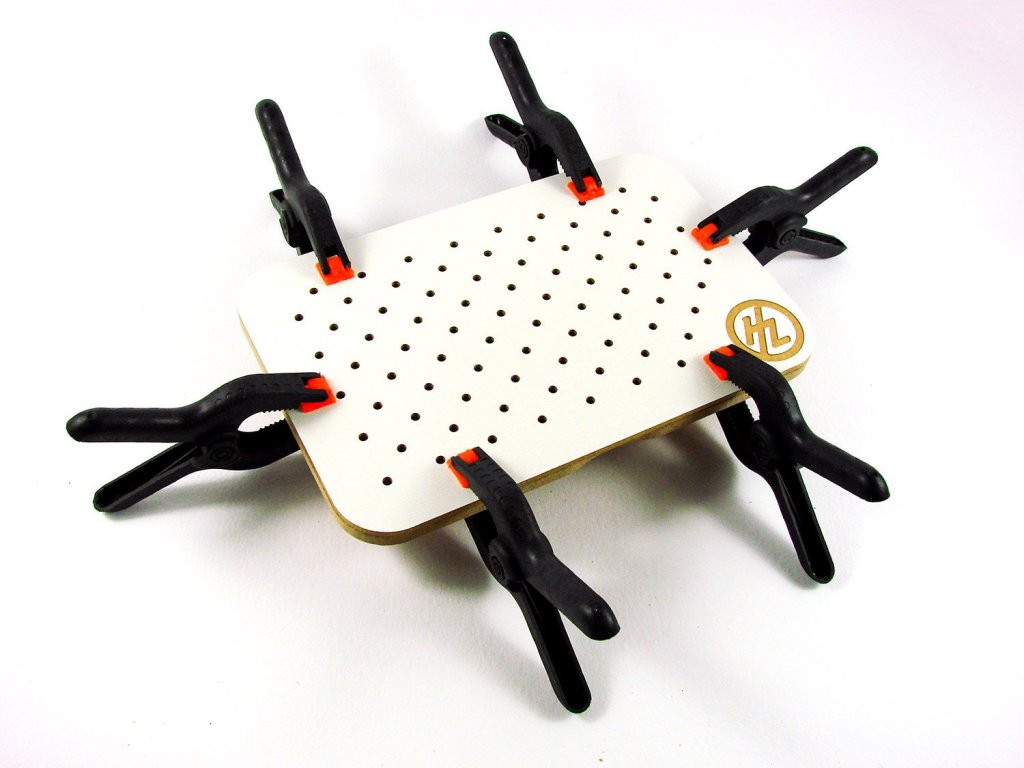
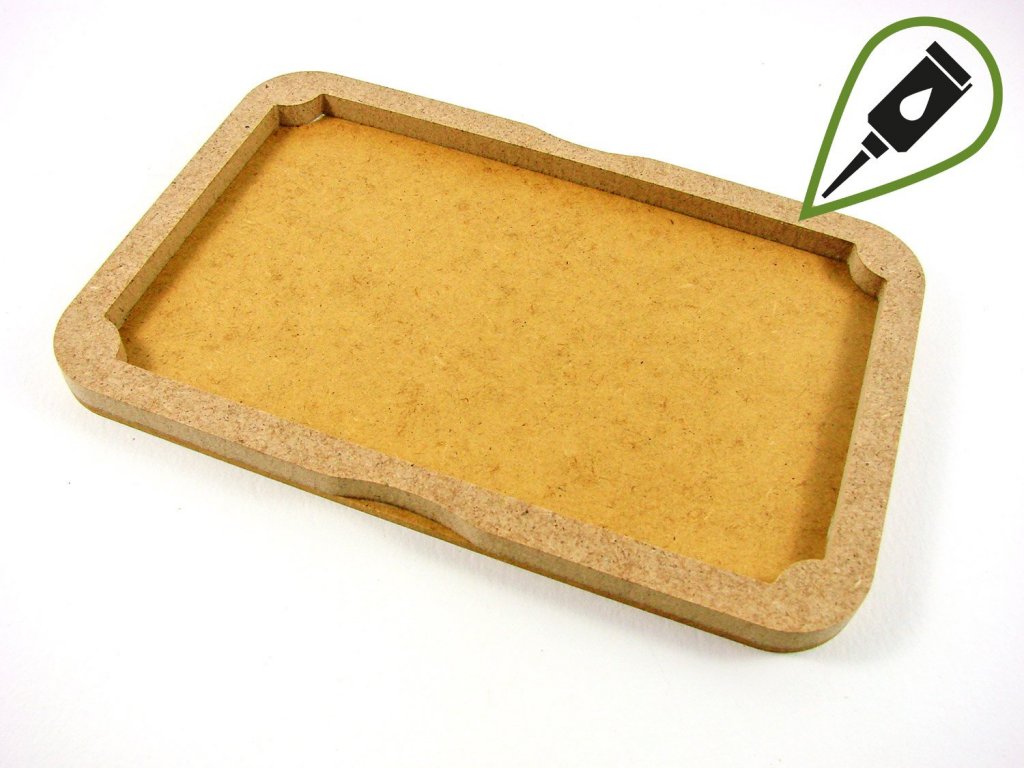
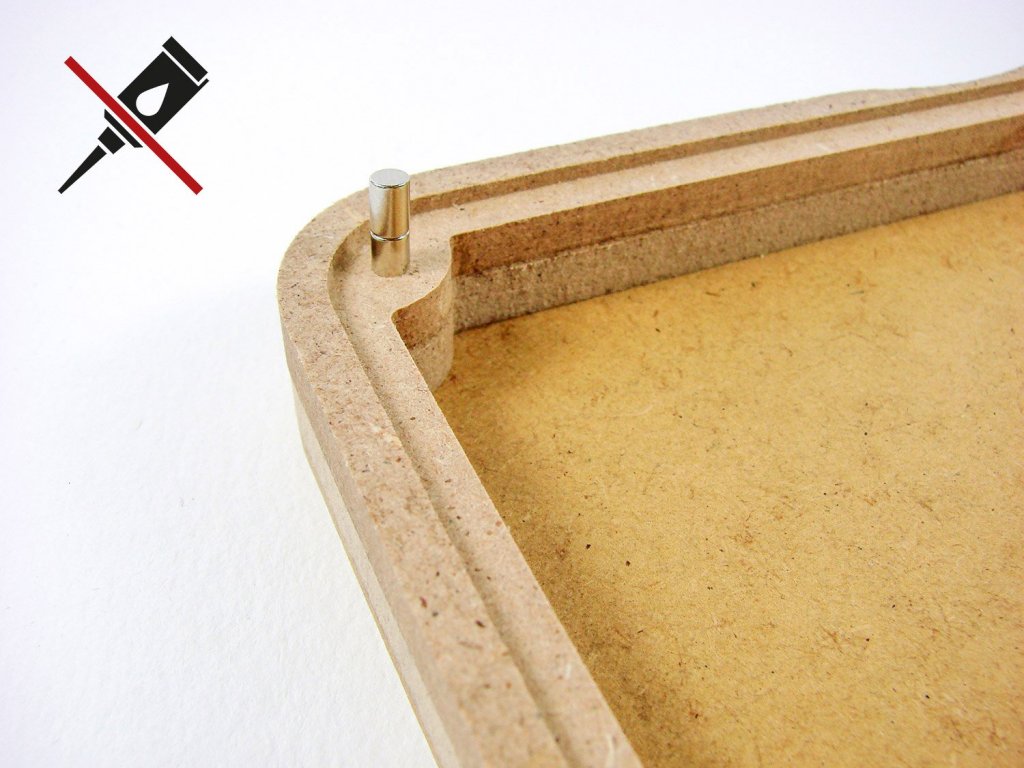
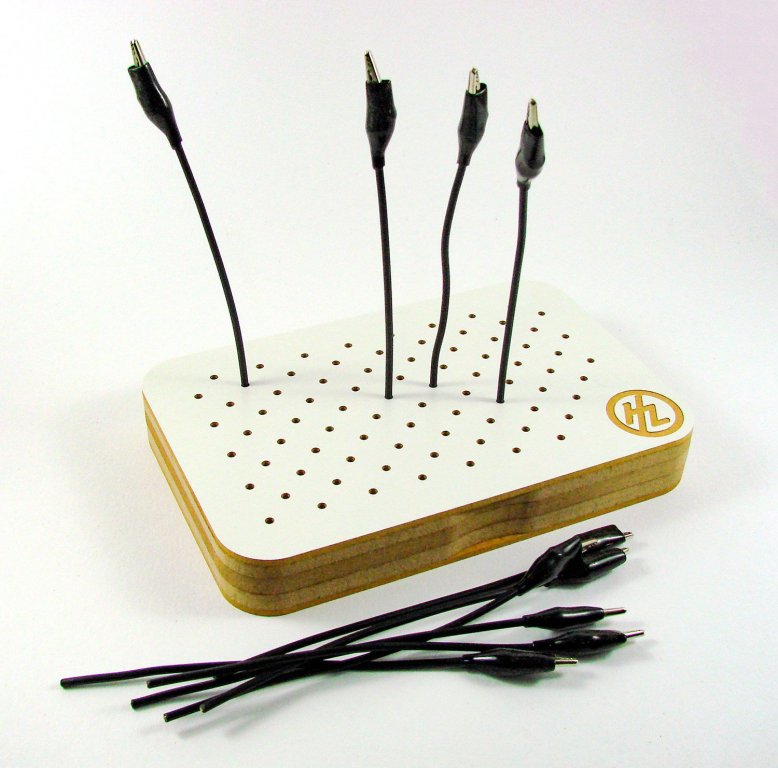
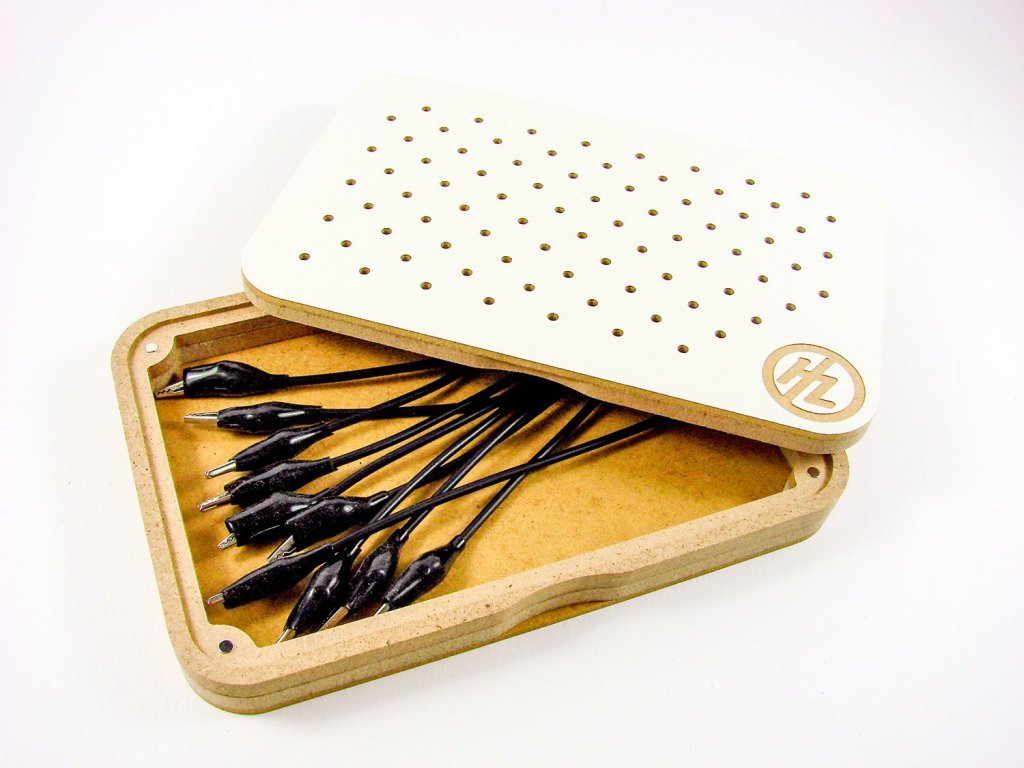
Airbrush Painting Clips Holder HobbyZone Catalogue # HZ-AC1 Available from HobbyZonefor £13.54 (at current rates) Modellers tend to be quite resourceful and innovative folks, from scratch-building parts, to fabricating things to make their hobby a little easier. One such fabrication, for me, is a polystyrene foam block with cocktail sticks to hold parts whilst I airbrush them. I also stick parts to steel rules that have been covered in masking tape, plus I’m always using bits of Blue-Tack to mount parts to whilst I paint. It just seems to be the way I’ve always worked. Doubtless, you do the same, or have your own bespoke solution. HobbyZone have quite a nice solution to this that you may just be interested in. I’ve actually been sitting on this review for a couple of months now, pending the release of this new product from HobbyZone. Today, they asked me to publish it for you. The concept is very simple. It’s essentially a magnetic box with a series of holes in the lid. Into these will fit stiff wires that are furnished with a shrouded crocodile clip on one end. You pop your model part into the jaws and then paint. Whilst drying, you can stand the wire upright in the lid. After your work, all the wires sit neatly in the box, out of the way. This product, like all those from HobbyZone, are machine cut from MDF, and require assembly. This one is packed into a sturdy corrugated box with a simple product label. Upon opening the box, you’ll note that all parts are protected with a covering of bubble-wrap. Upon removing that, you’ll note that the box itself is built up from five layers of MDF. These form the base with a white plastic outside coating, and two frame parts, one of which glues to the base, and another recessed frame which glues to the top of this. The two-part lid then sits in this and is held via magnets. To complete the package, a series of nine neodymium (rare earth) magnets are included, as are nine croc-clip wires and a set of instructions. The instructions are nice and simple to follow and I had no issue with understanding them at all, but for the ease of explaining this product to you, I’ve built this up as a guide for you. Here we go! 1. I start with the lid. Using TiteBond adhesive, I run a line of this around the non-recessed face of this part, and add some spots between the holes, being careful not to put too much glue there, or get too close to the holes. 2. The white, plastic-coated lid is now fitted to the previous part and held with clamps until fully cured. 3. The base is now clued to the lower frame section (the one without the holes) and clamped until fully set. 4. Now we can glue the upper frame in situ, being careful of alignment. Again, clamps hold this until filly set. Note the frames are slightly scalloped on each of the long edges. This is to give your fingers something to hold whilst you remove the lid. 5. Now, this part is VERY important. We need to ensure that the magnets all fit into the holes, so the same pole is facing upwards on each one. This is dead easy. Keeping the stack of magnets upright, and keeping the same orientation, remove two of them and push into the one of the corner holes. Do the same with the others, again, without changing the orientation of your stack of magnets. These push in quite easy, but you know they won’t come out afterwards! Now fit the lid to the box so that the magnets align with the holes in the lid. Push firmly down, and if necessary, gently tap the lid into place with a small hammer, being careful to protect the surface of the product. That’s it! The lid will now come off with magnets and will reattach in the same way. Job complete! 6. After your work, store the wires/clips in the box and replace the lid. There’s plenty of room in there for more, in case you want to make your own clip holders. Conclusion A superbly simple idea, carried off very nicely. As with all of HobbyZone’s products, this is designed to keep your workbench in tidy order, and of course, this has the functionality added to it. I’m quite a fan of HobbyZone, with my workshop being fitted out with all of their various storage modules, so I’m more than happy to stay true to the brand and its style/quality, with this addition. My sincere thanks to HobbyZone for the review sample seen here. To purchase directly, click the link at the top of the article.


-
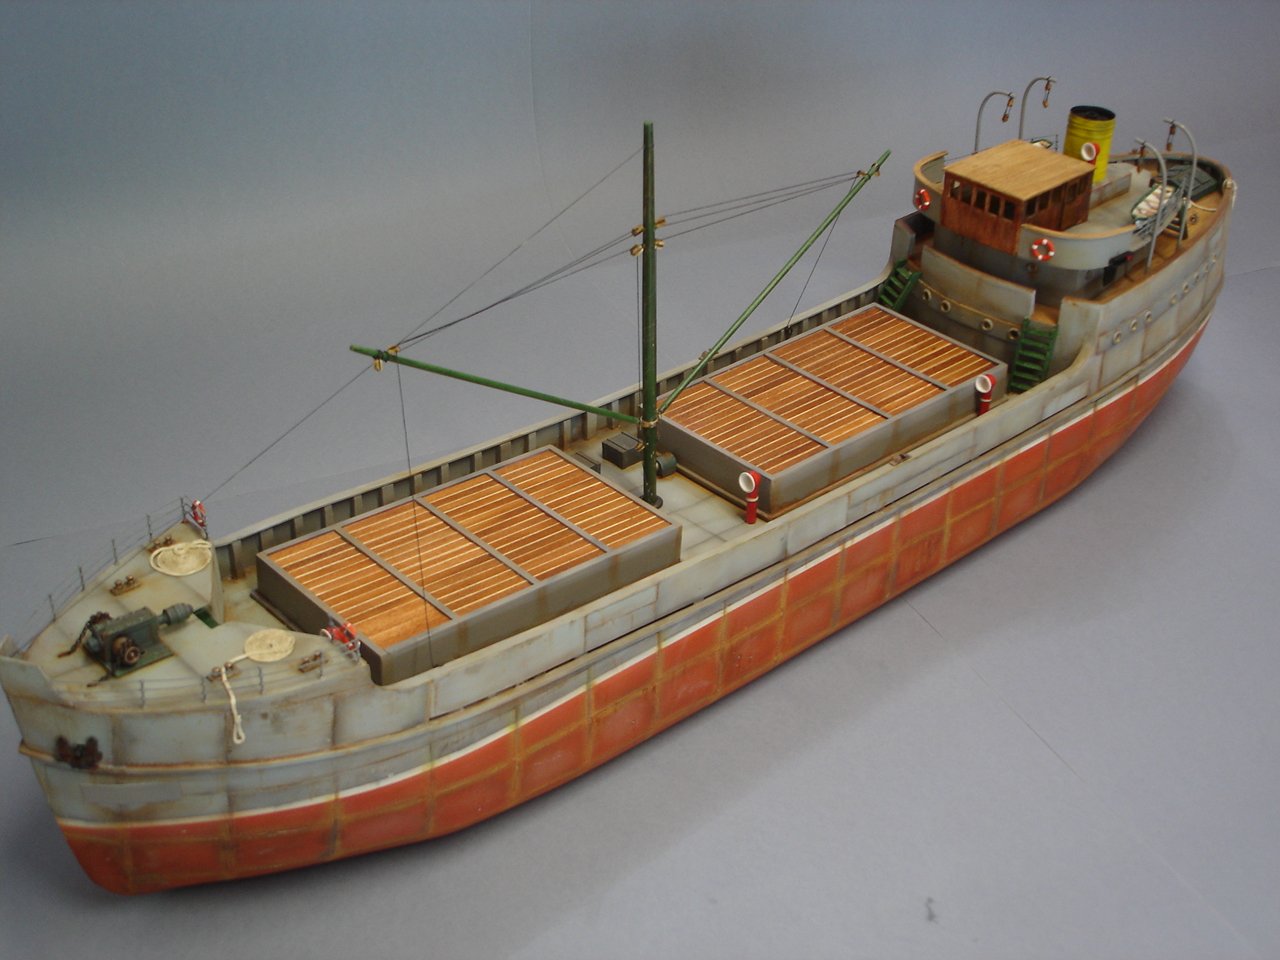
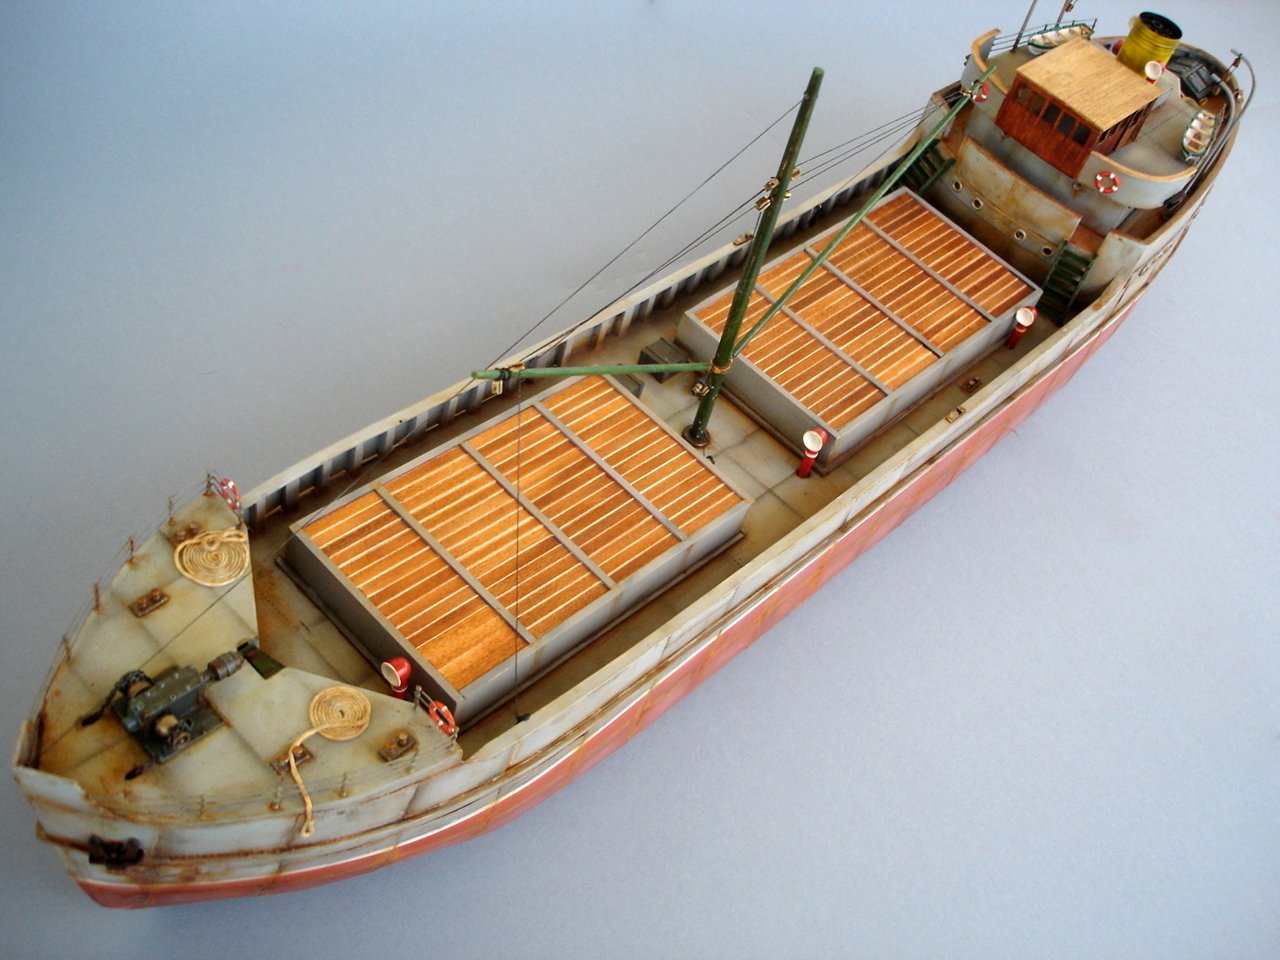
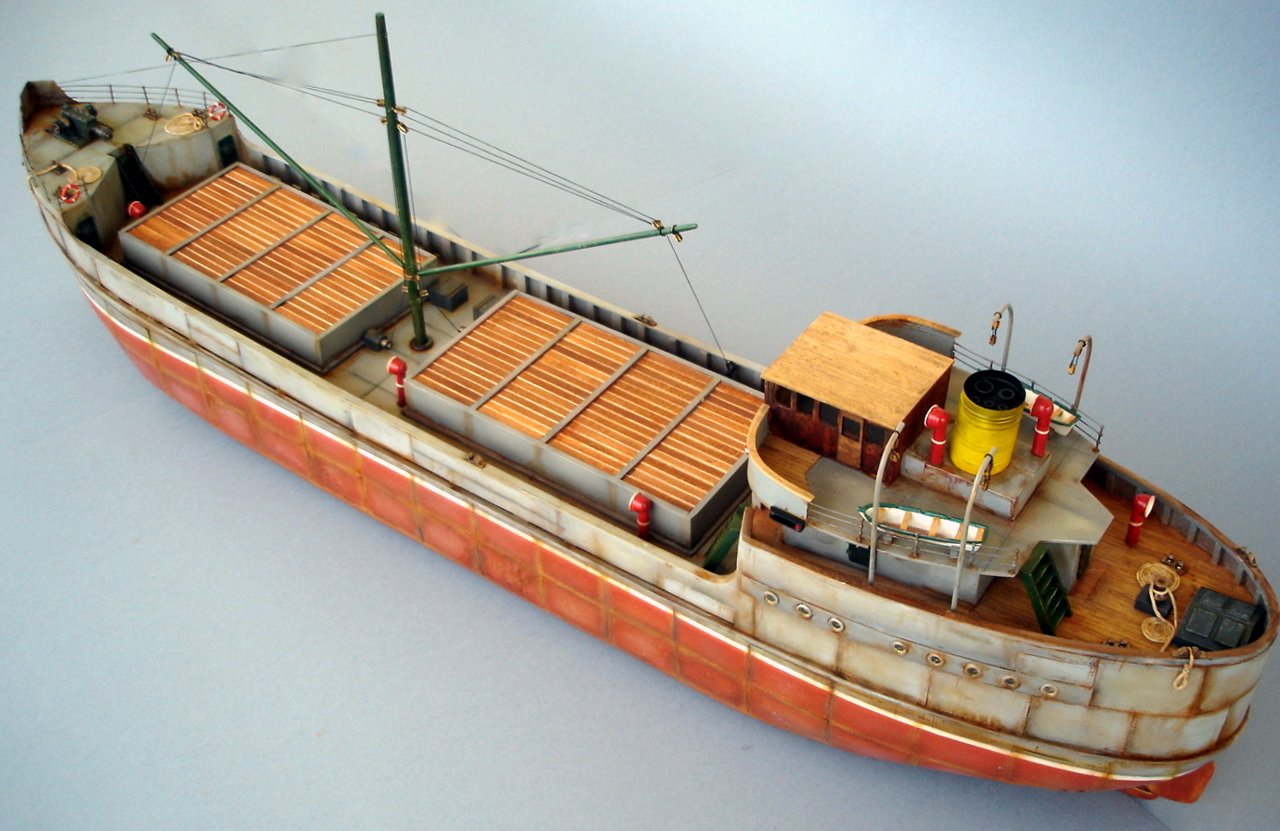
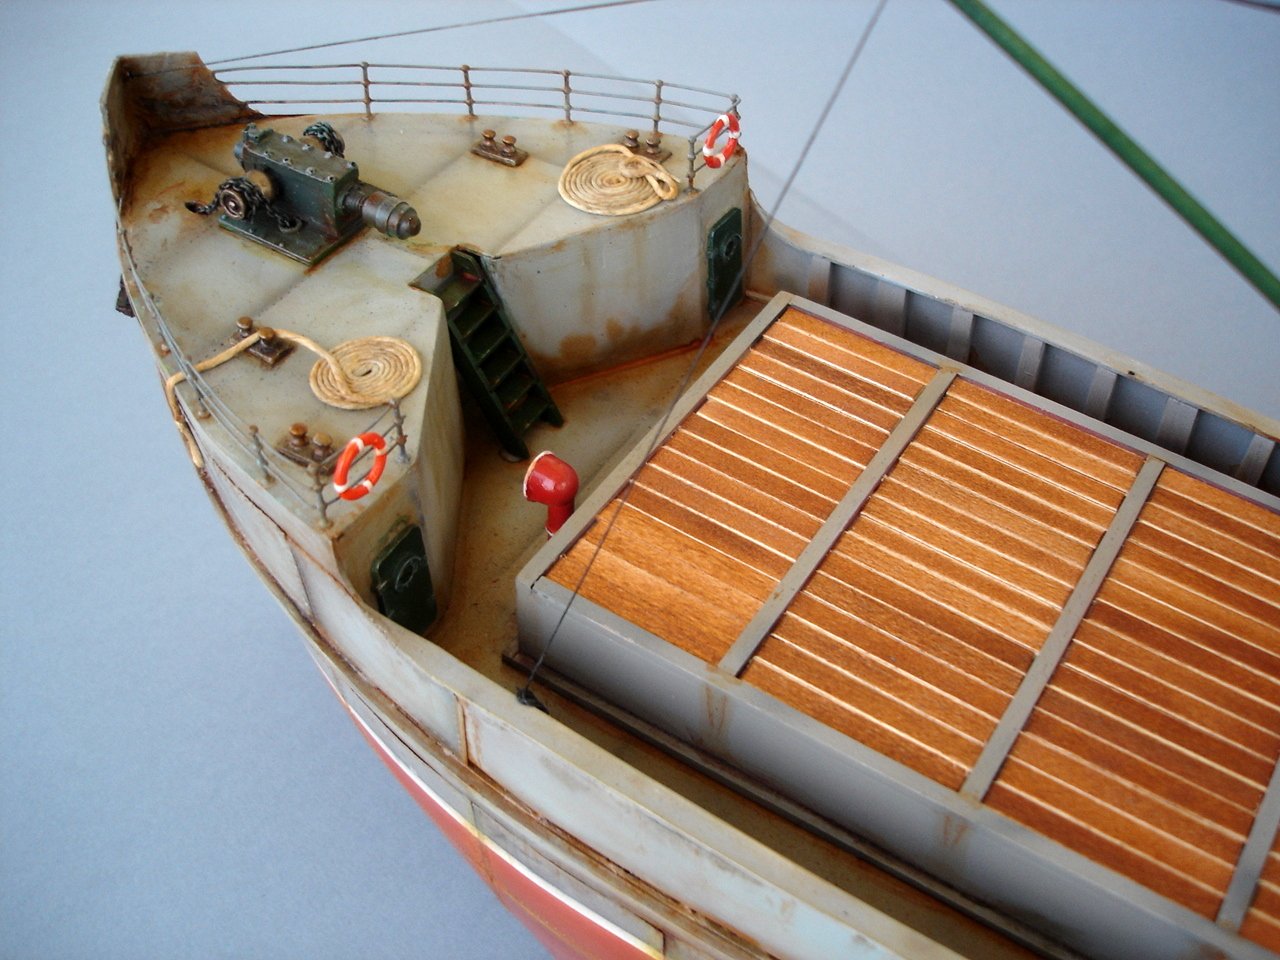
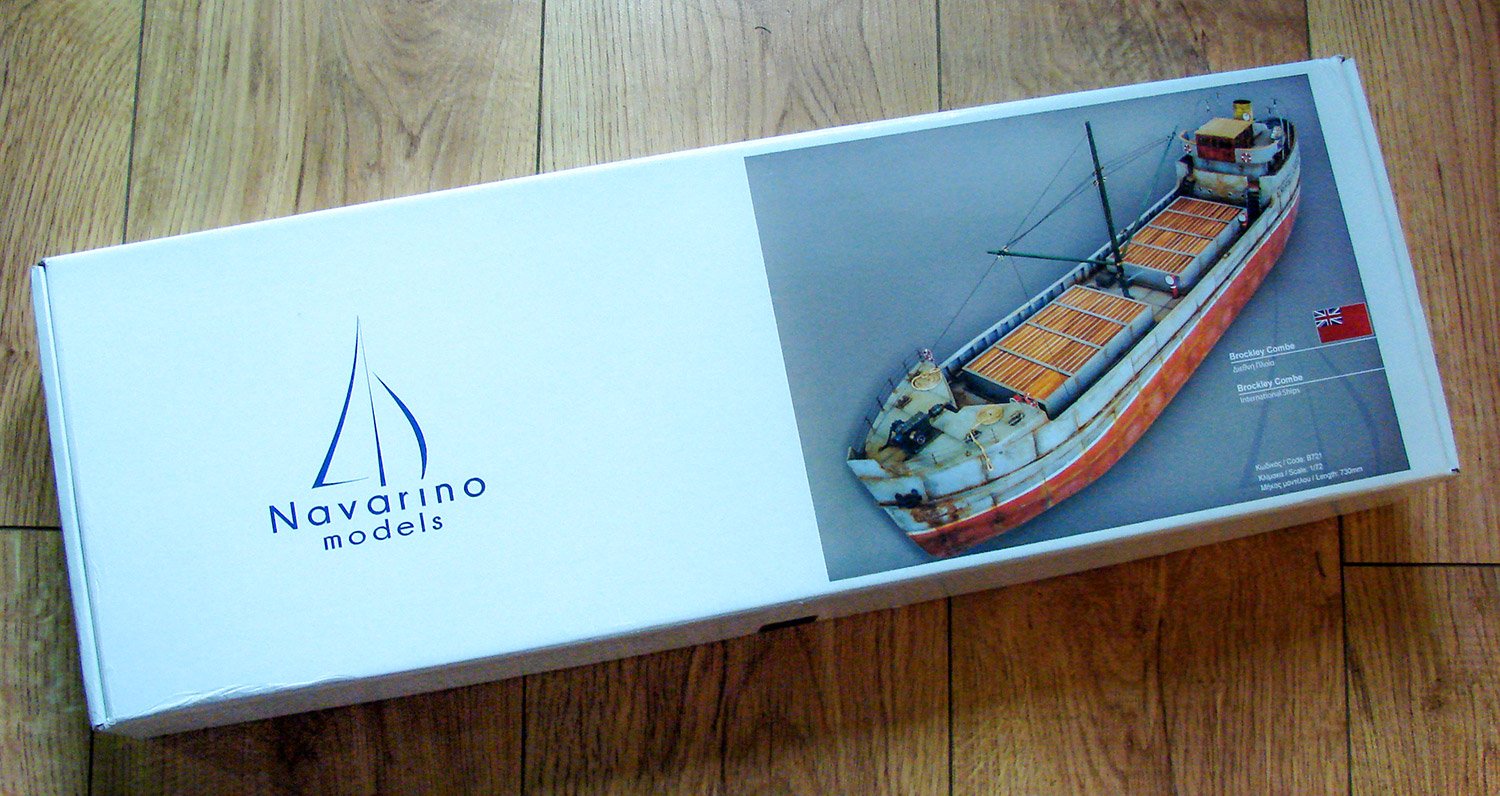
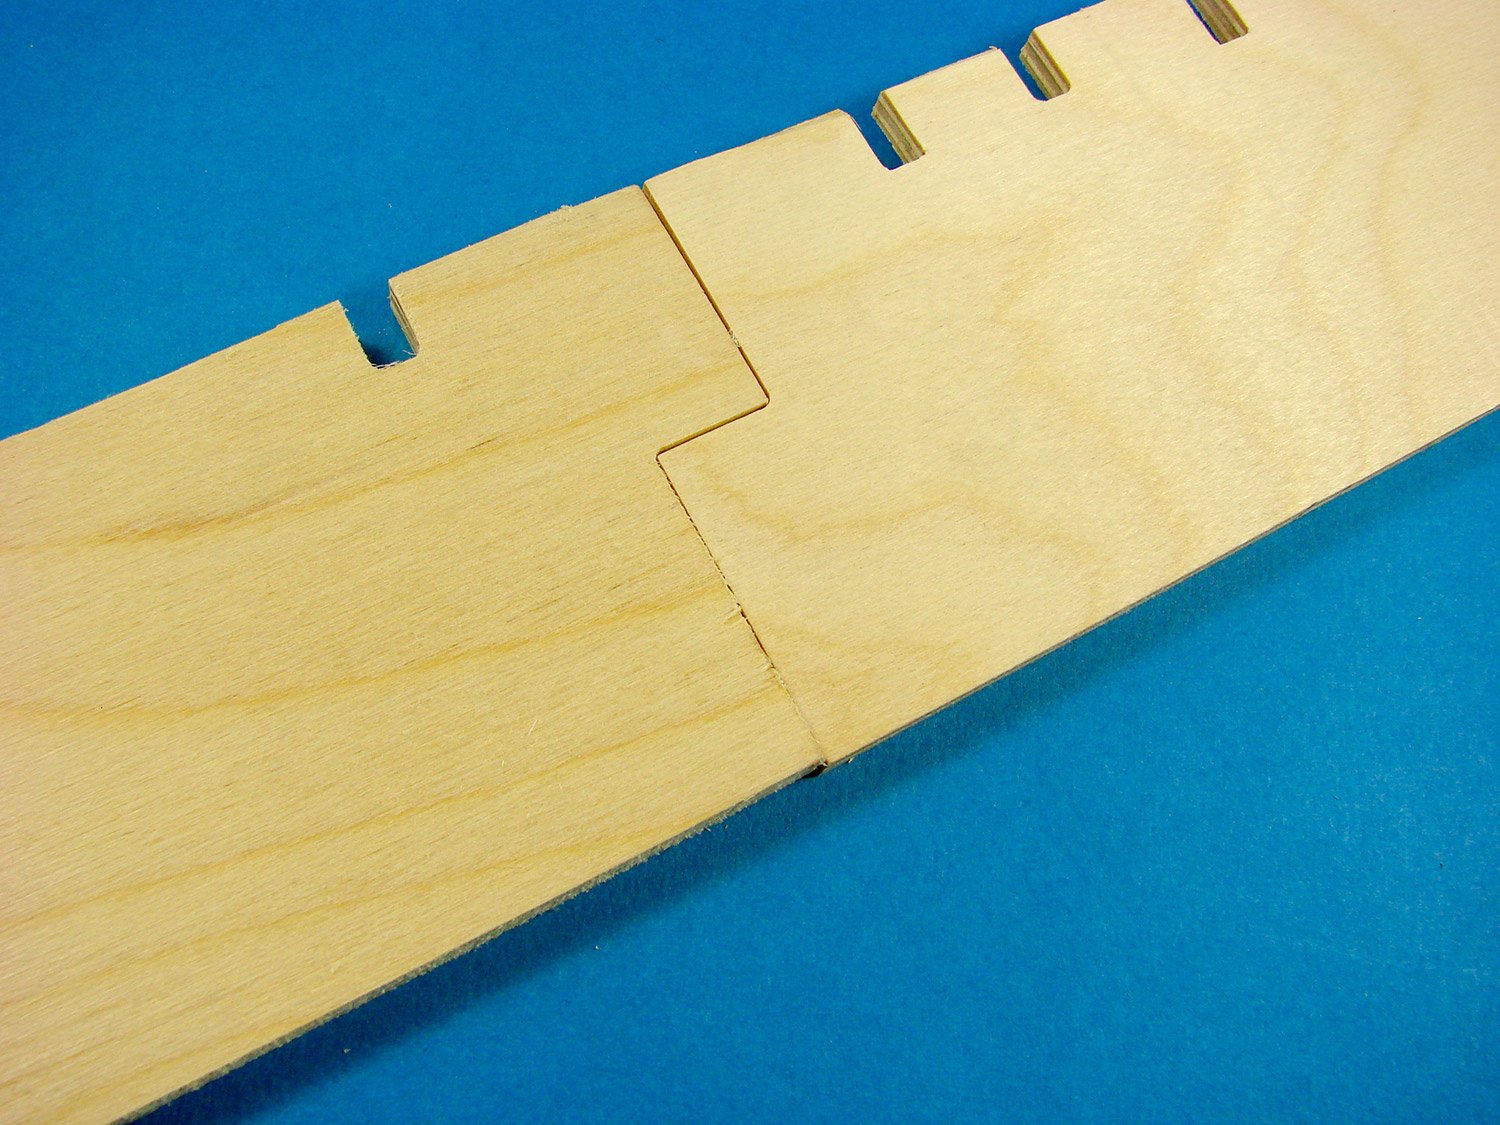
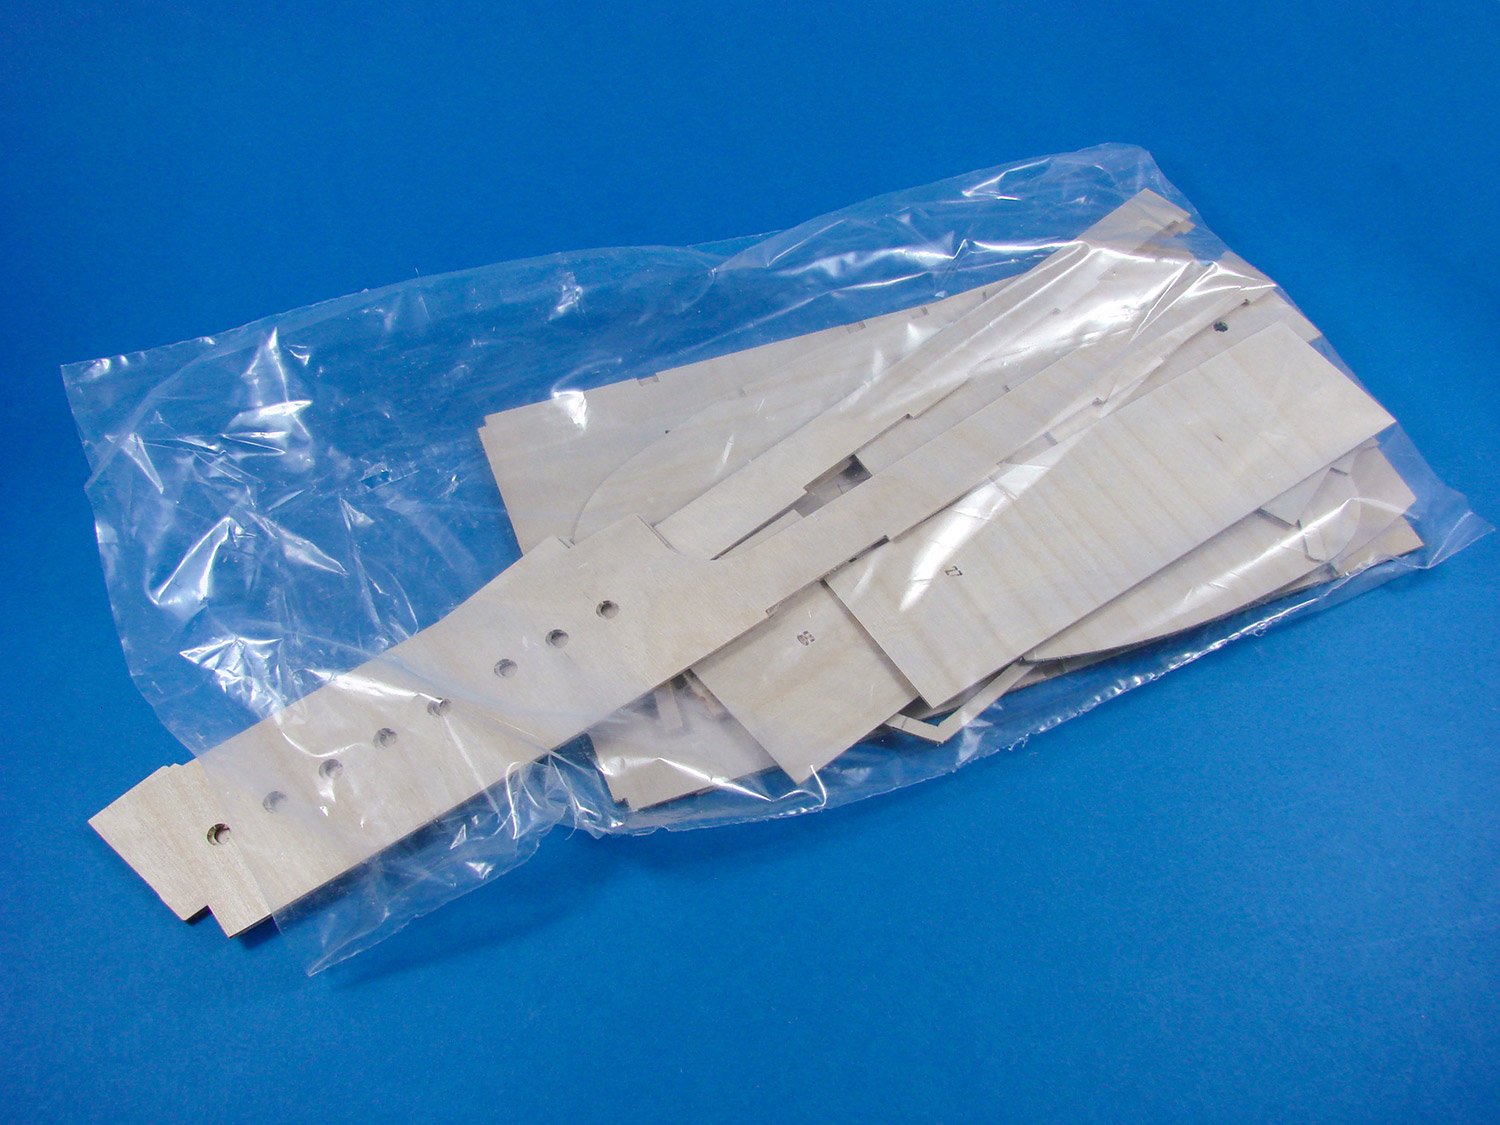
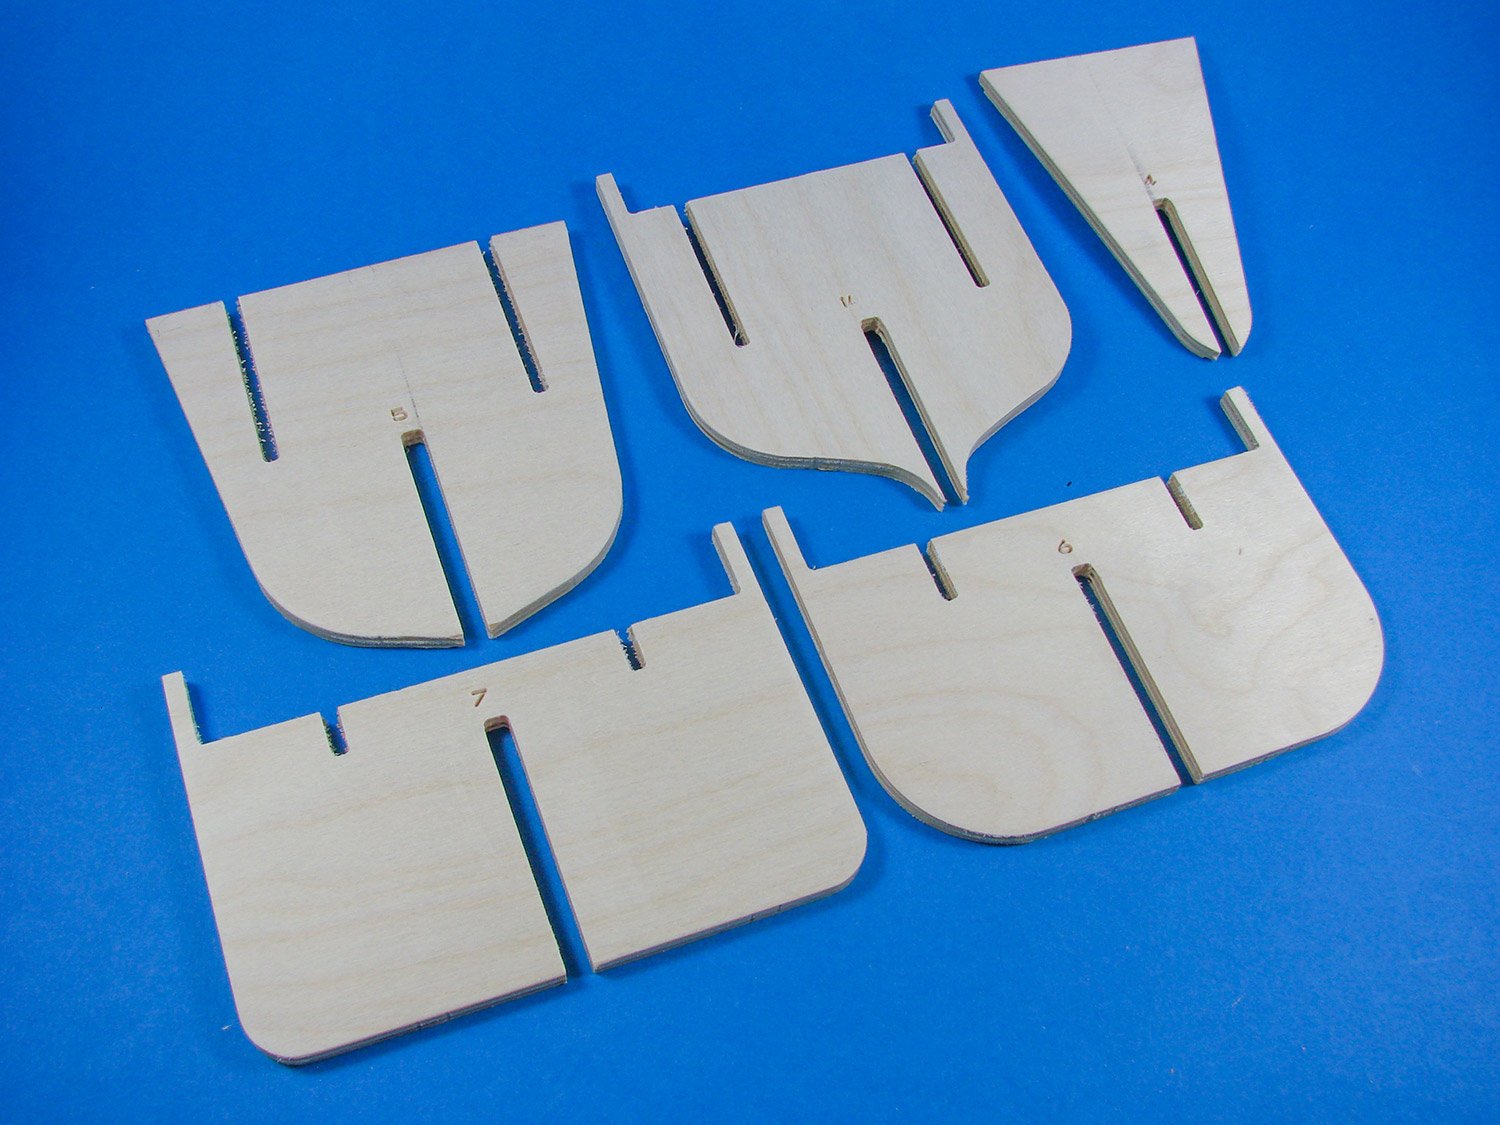
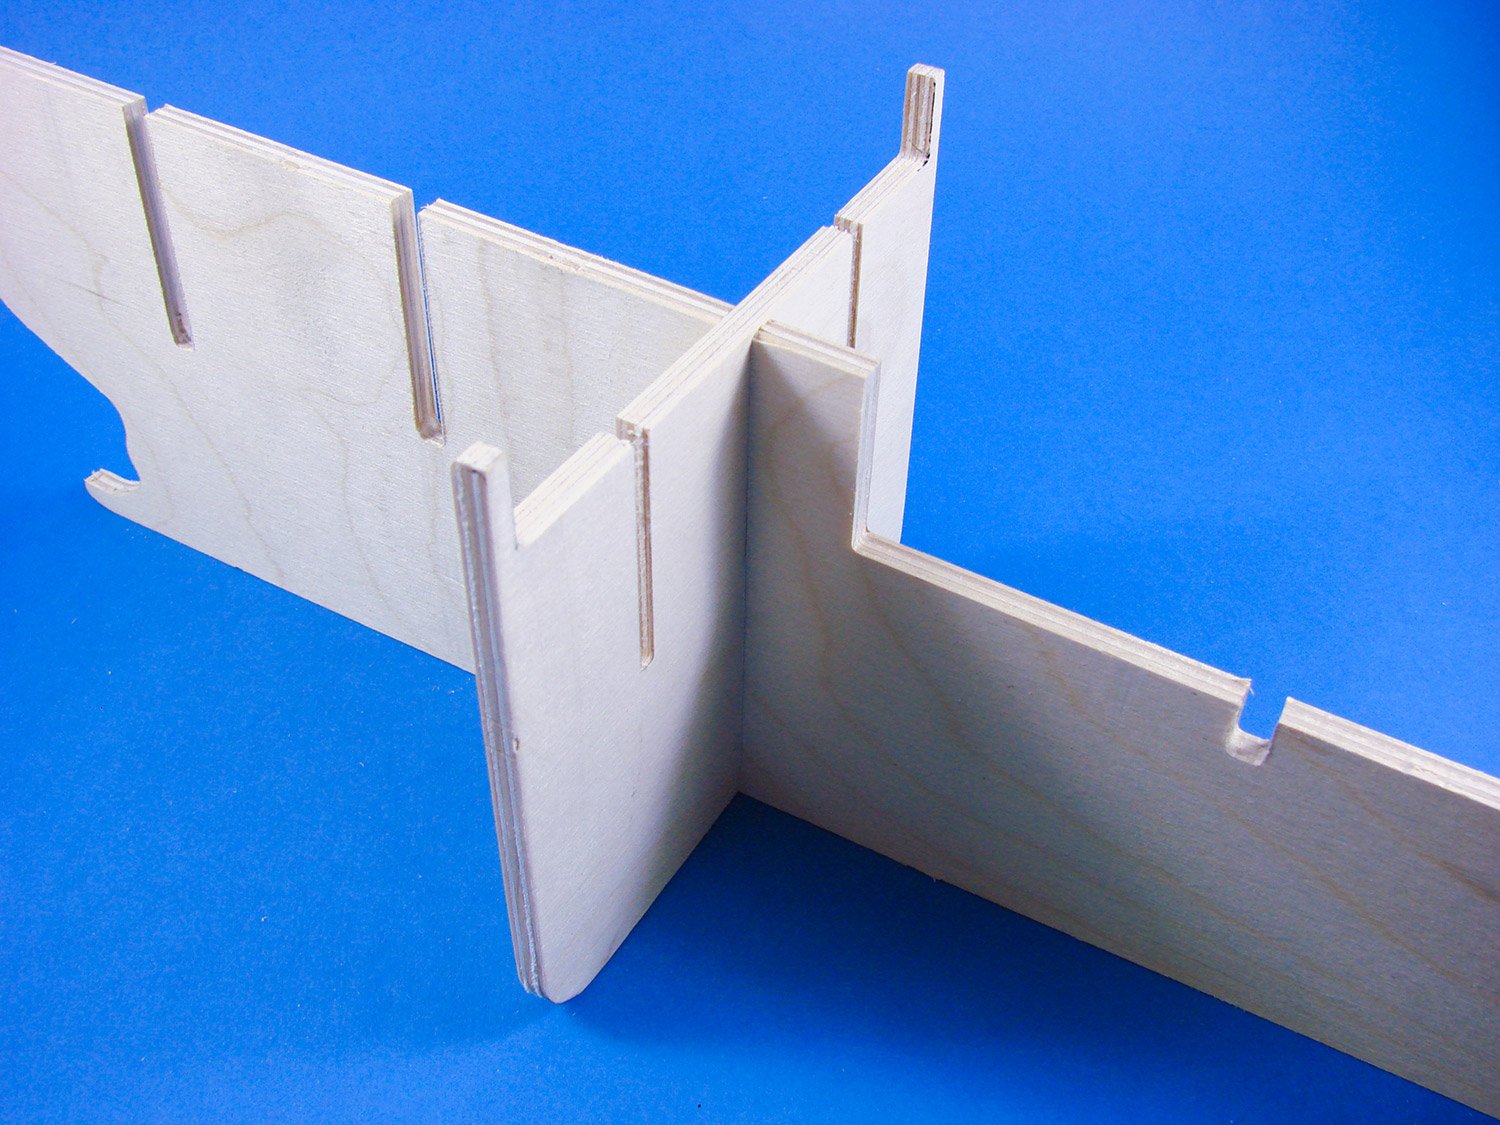
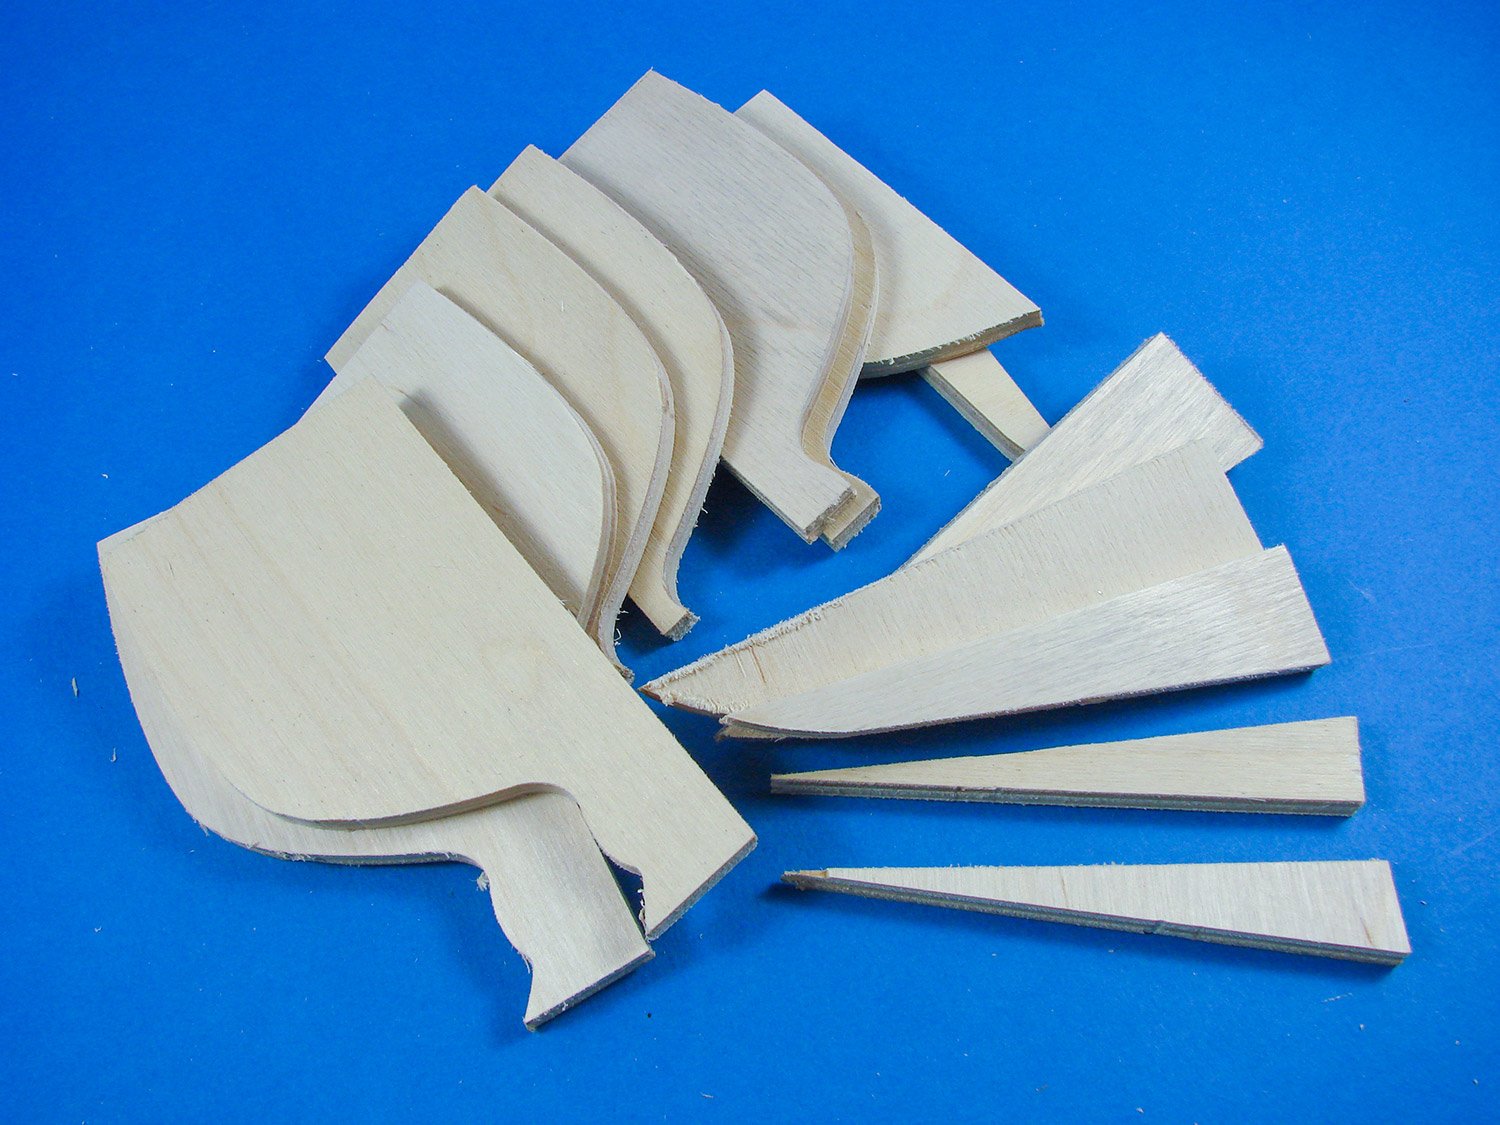
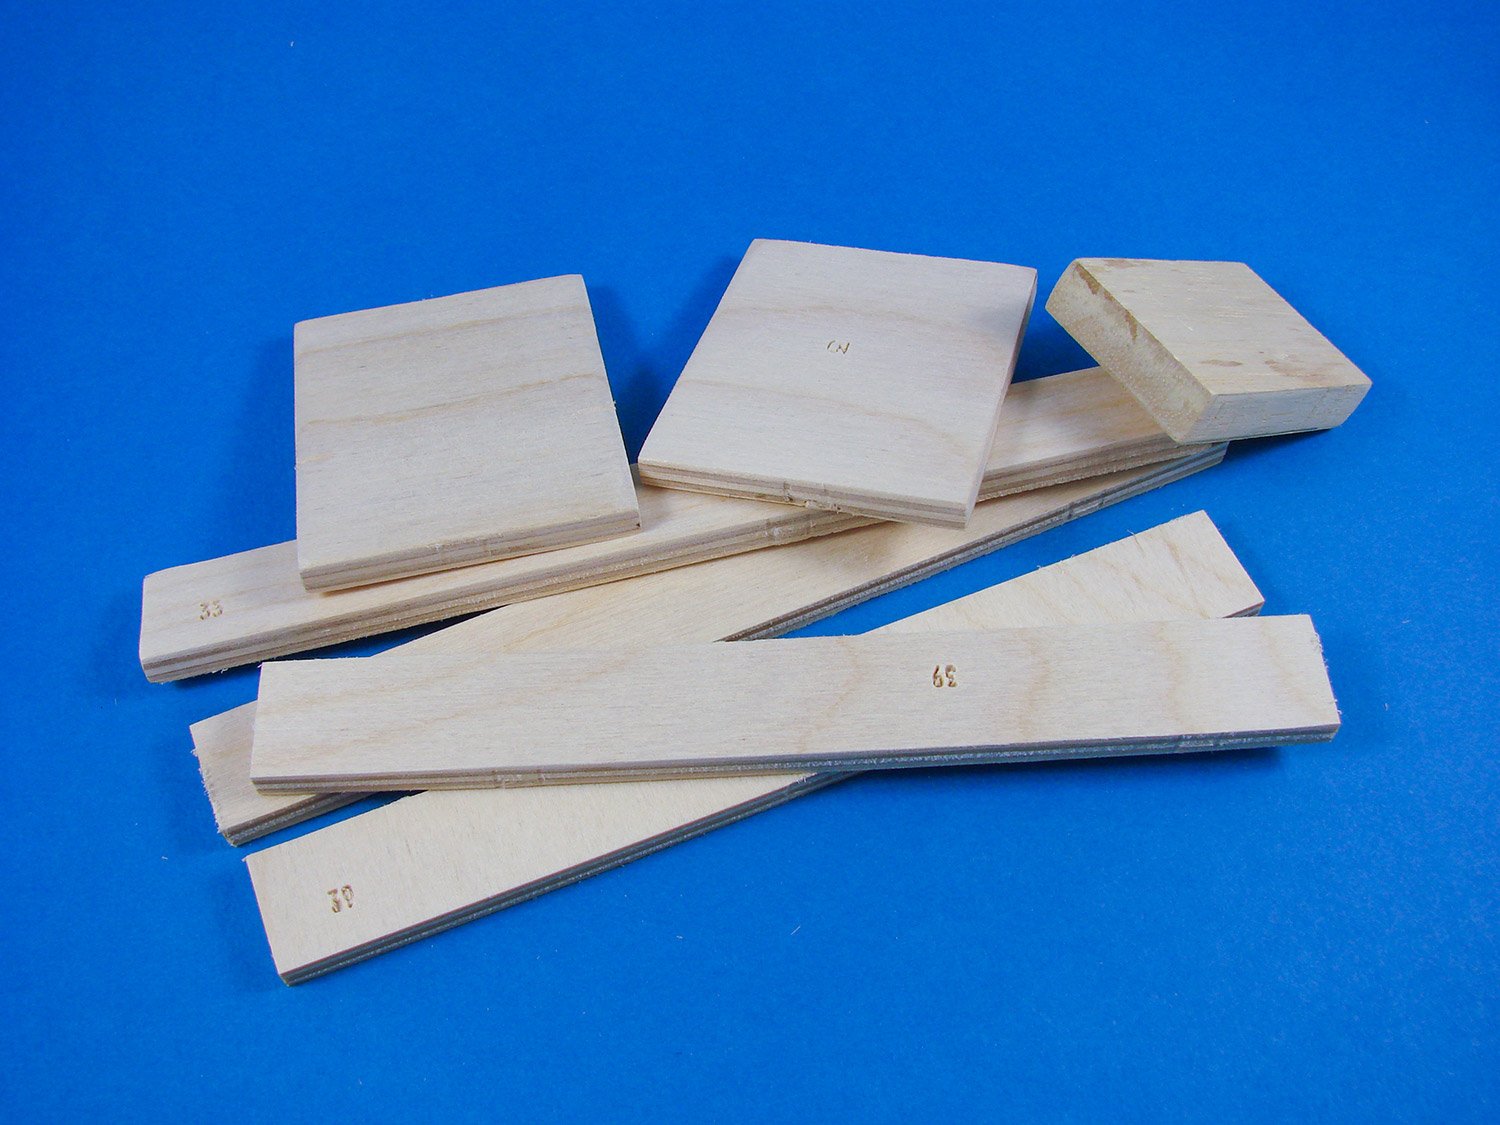
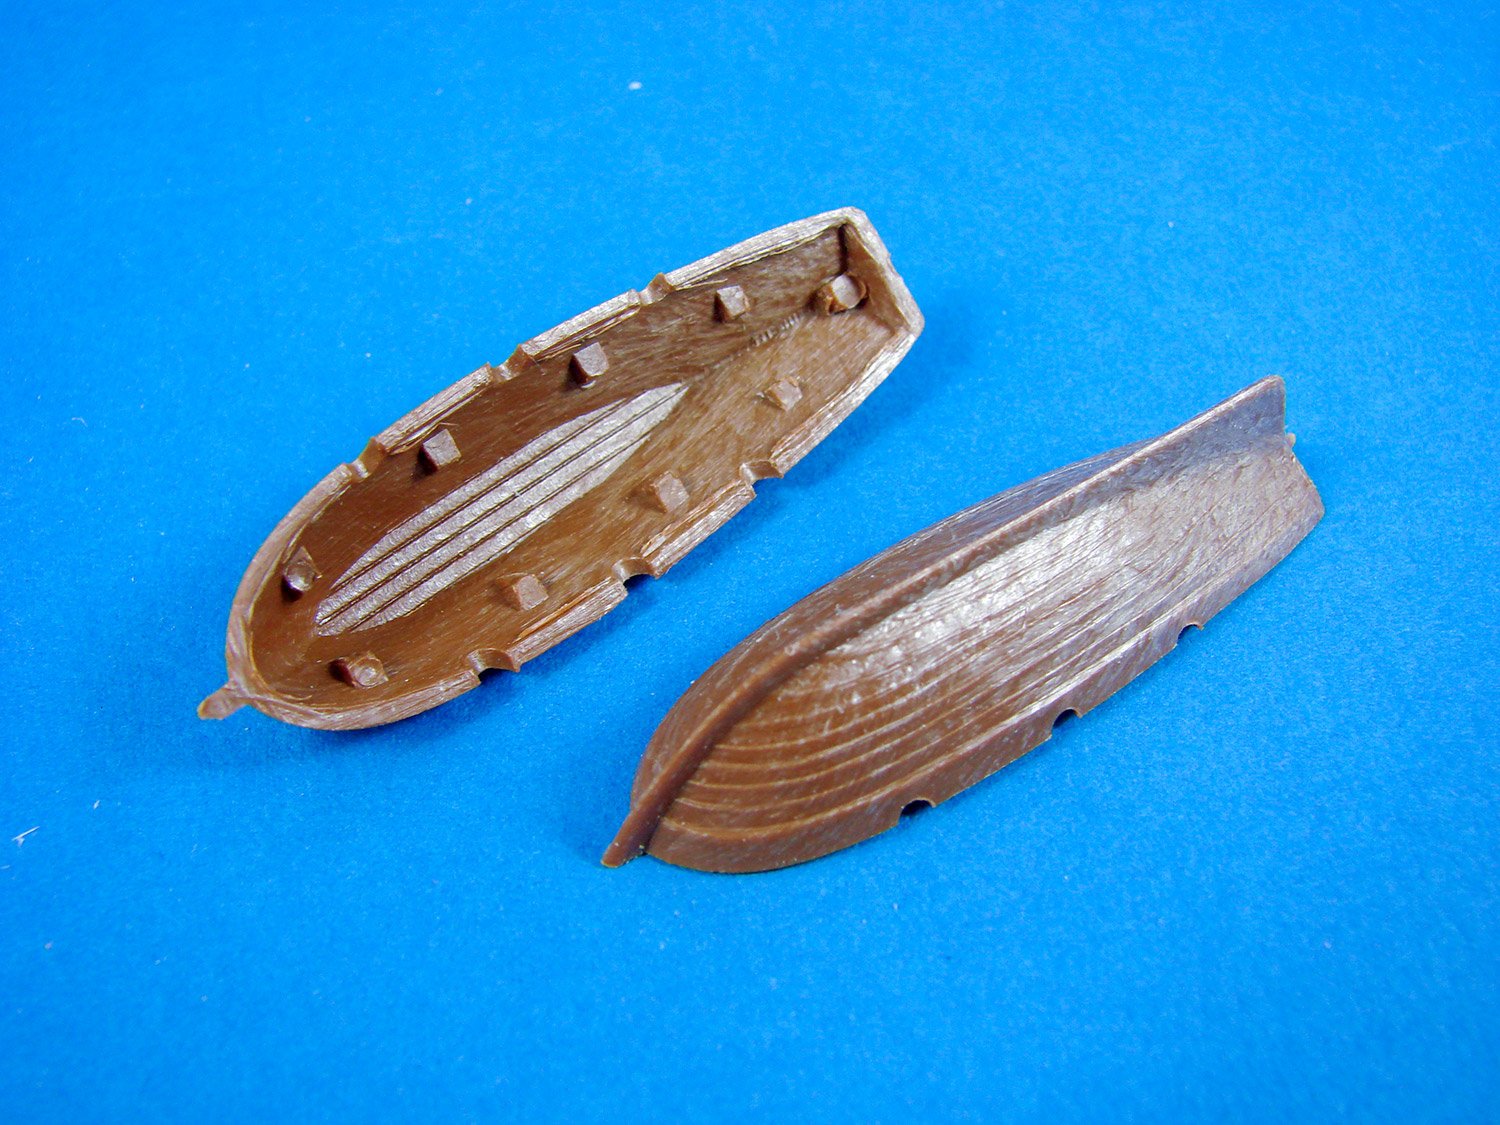
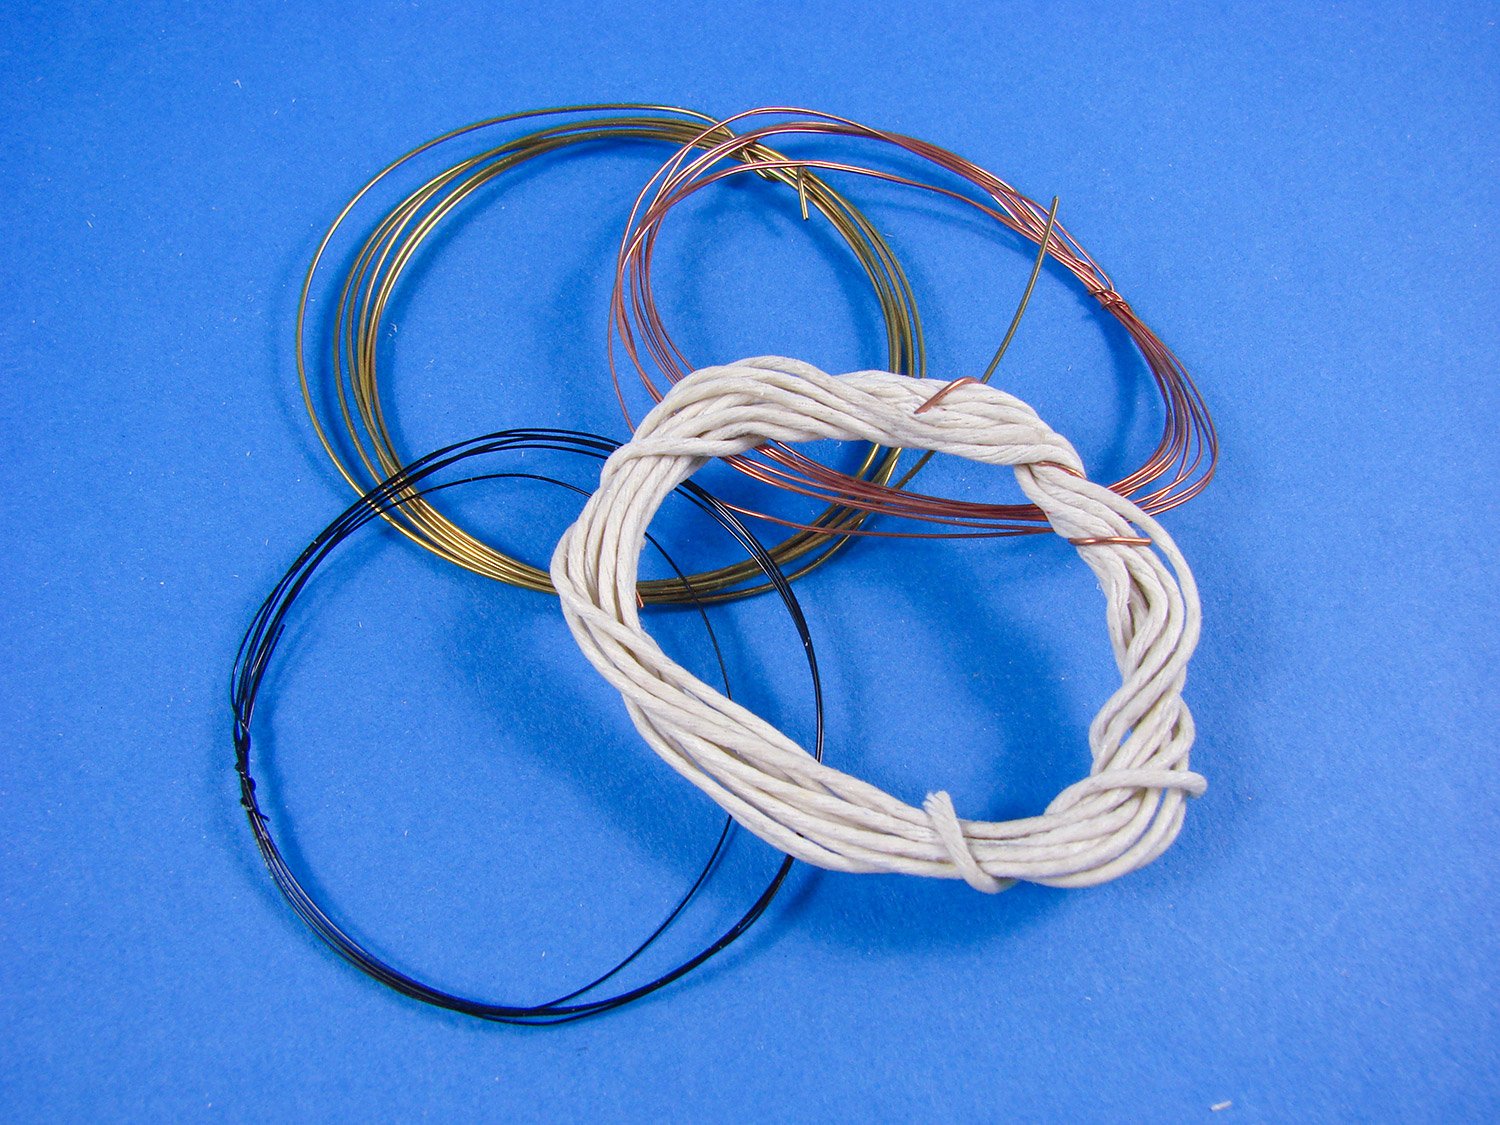
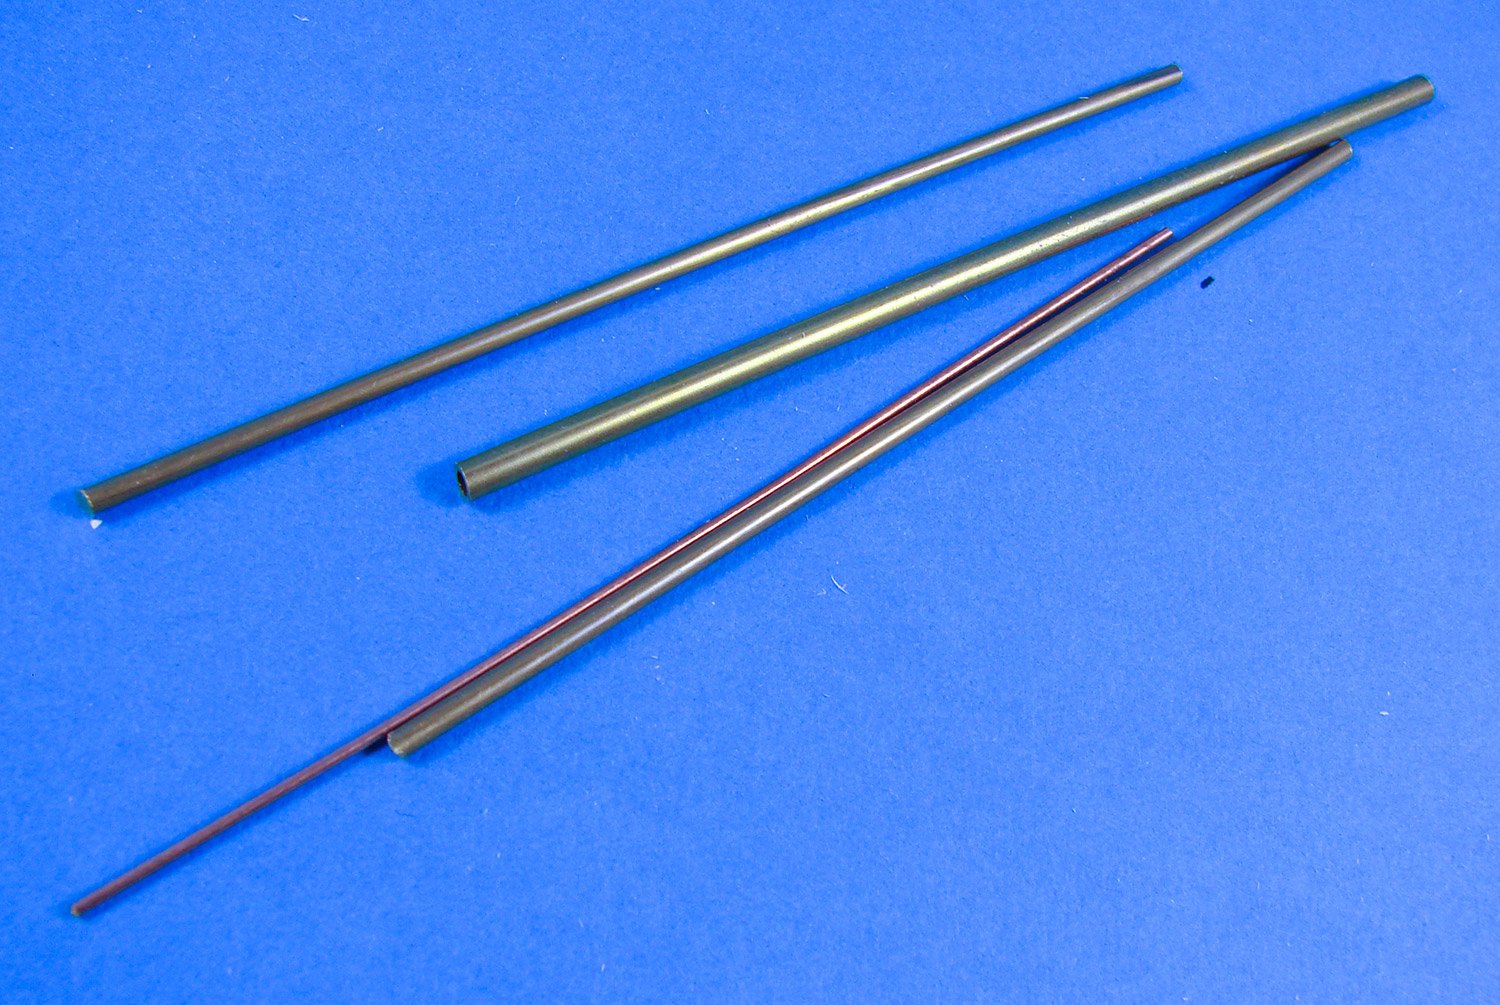
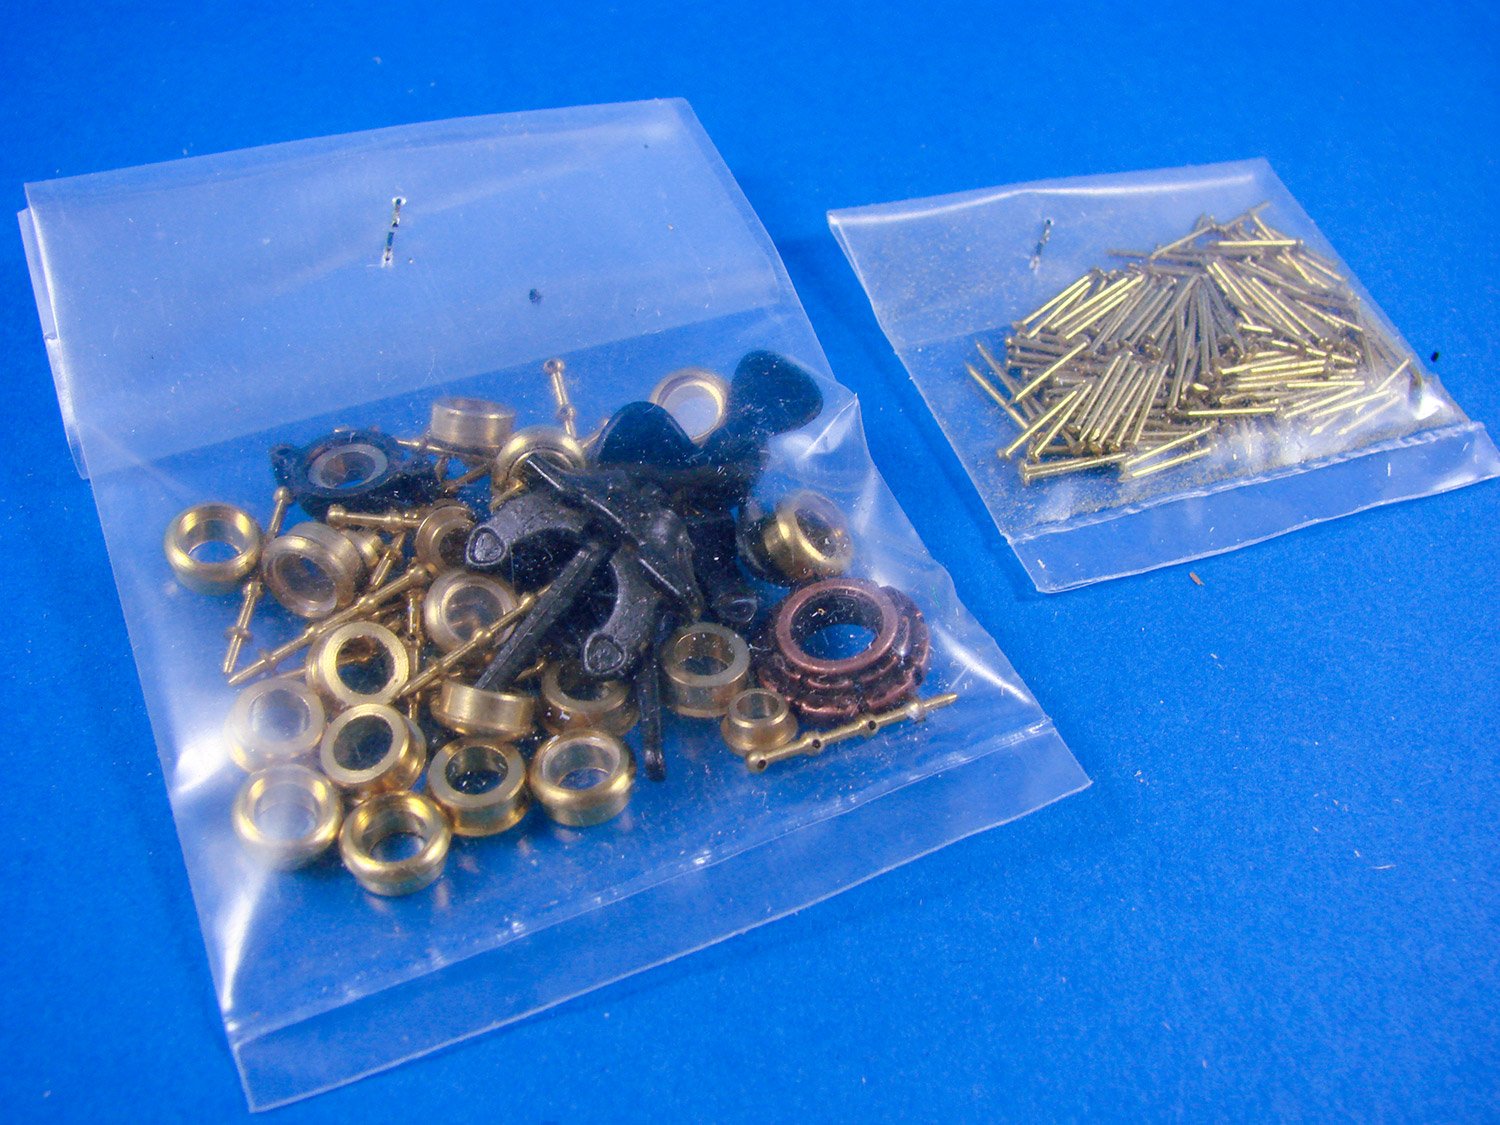
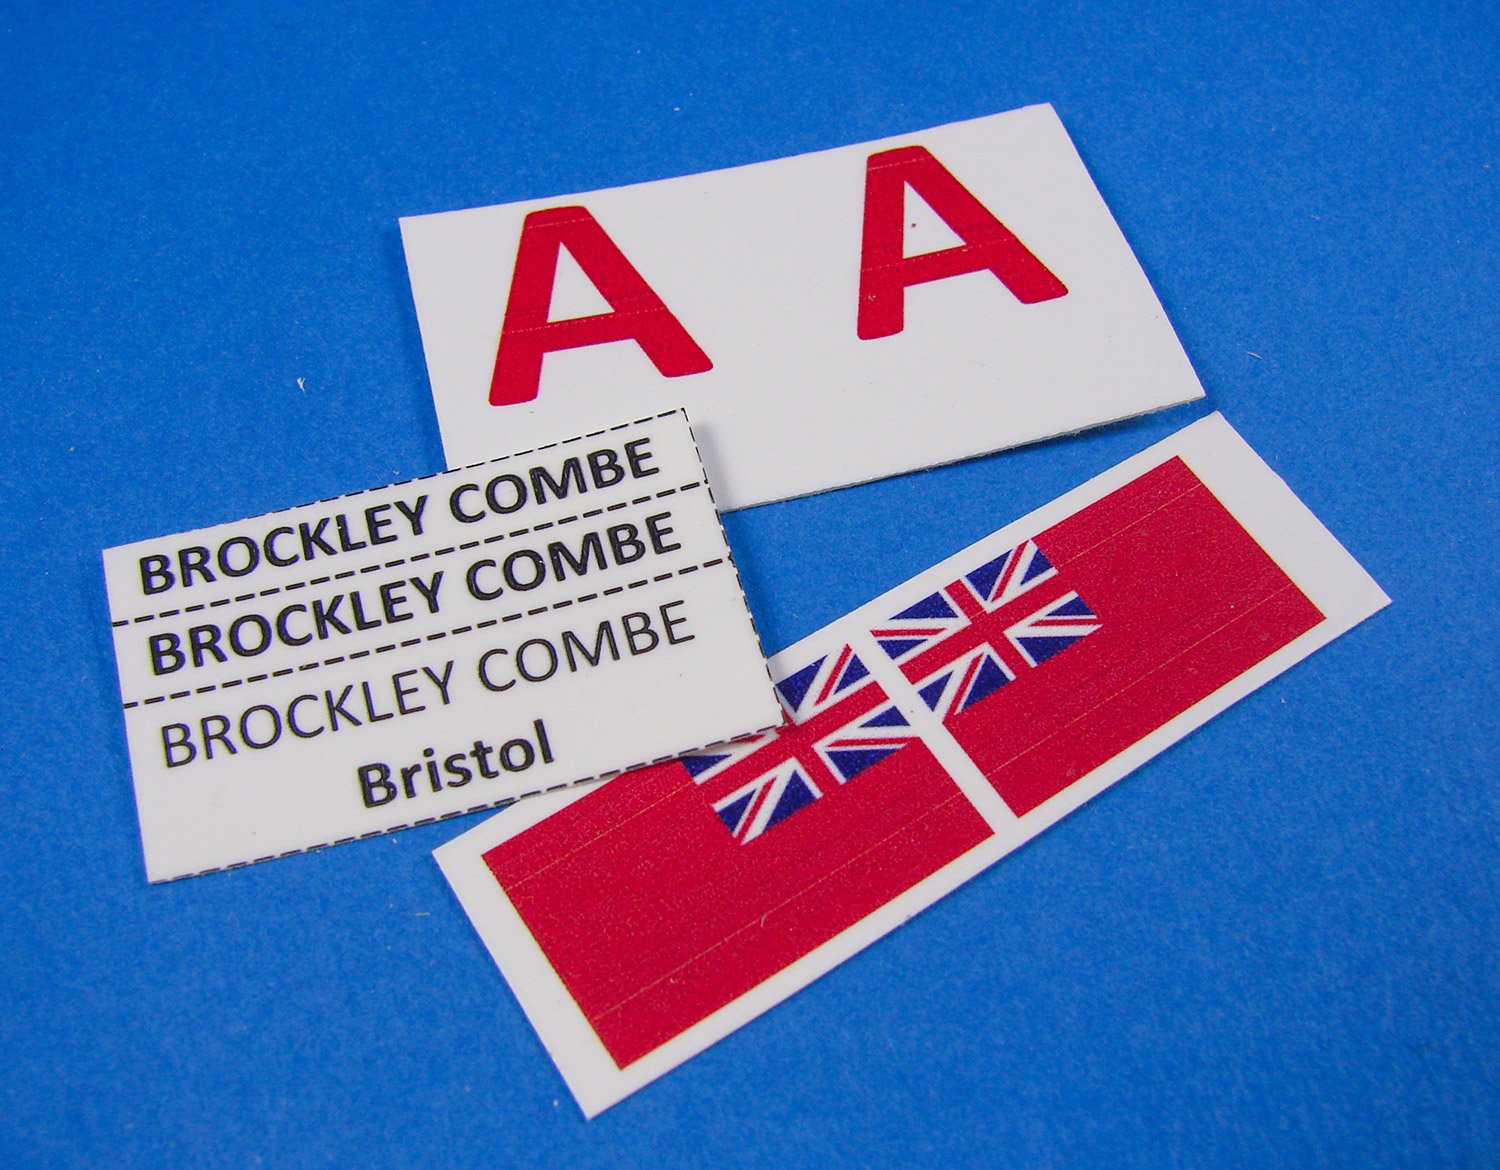
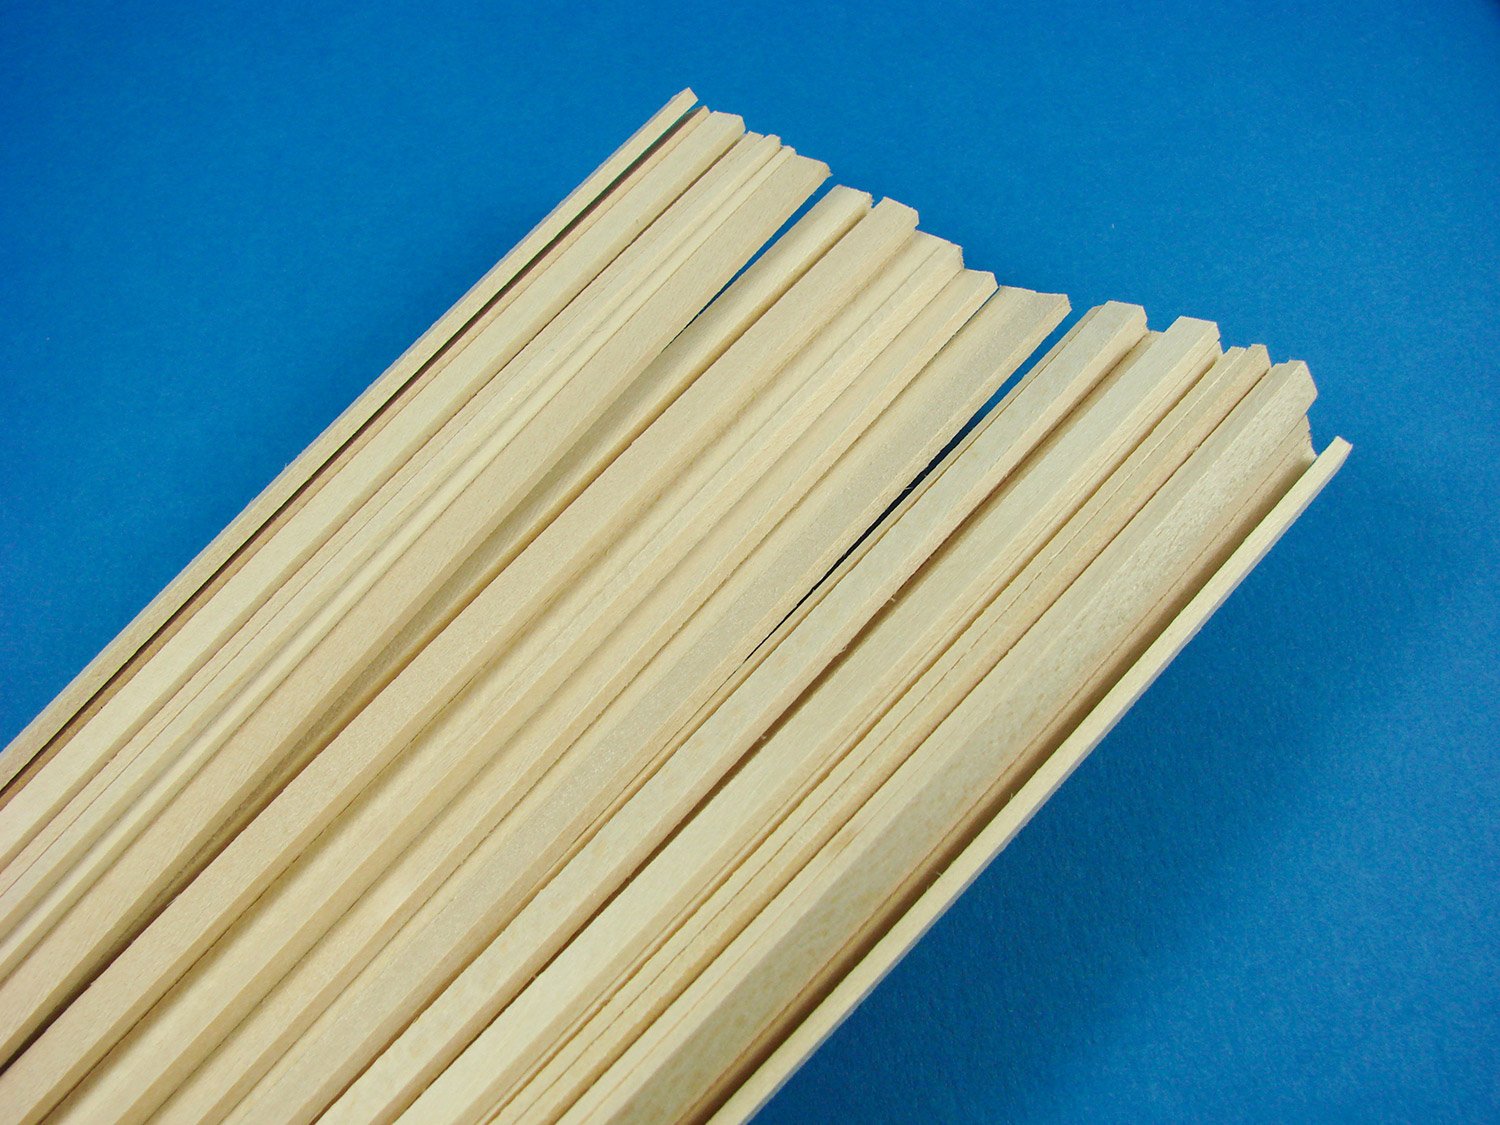
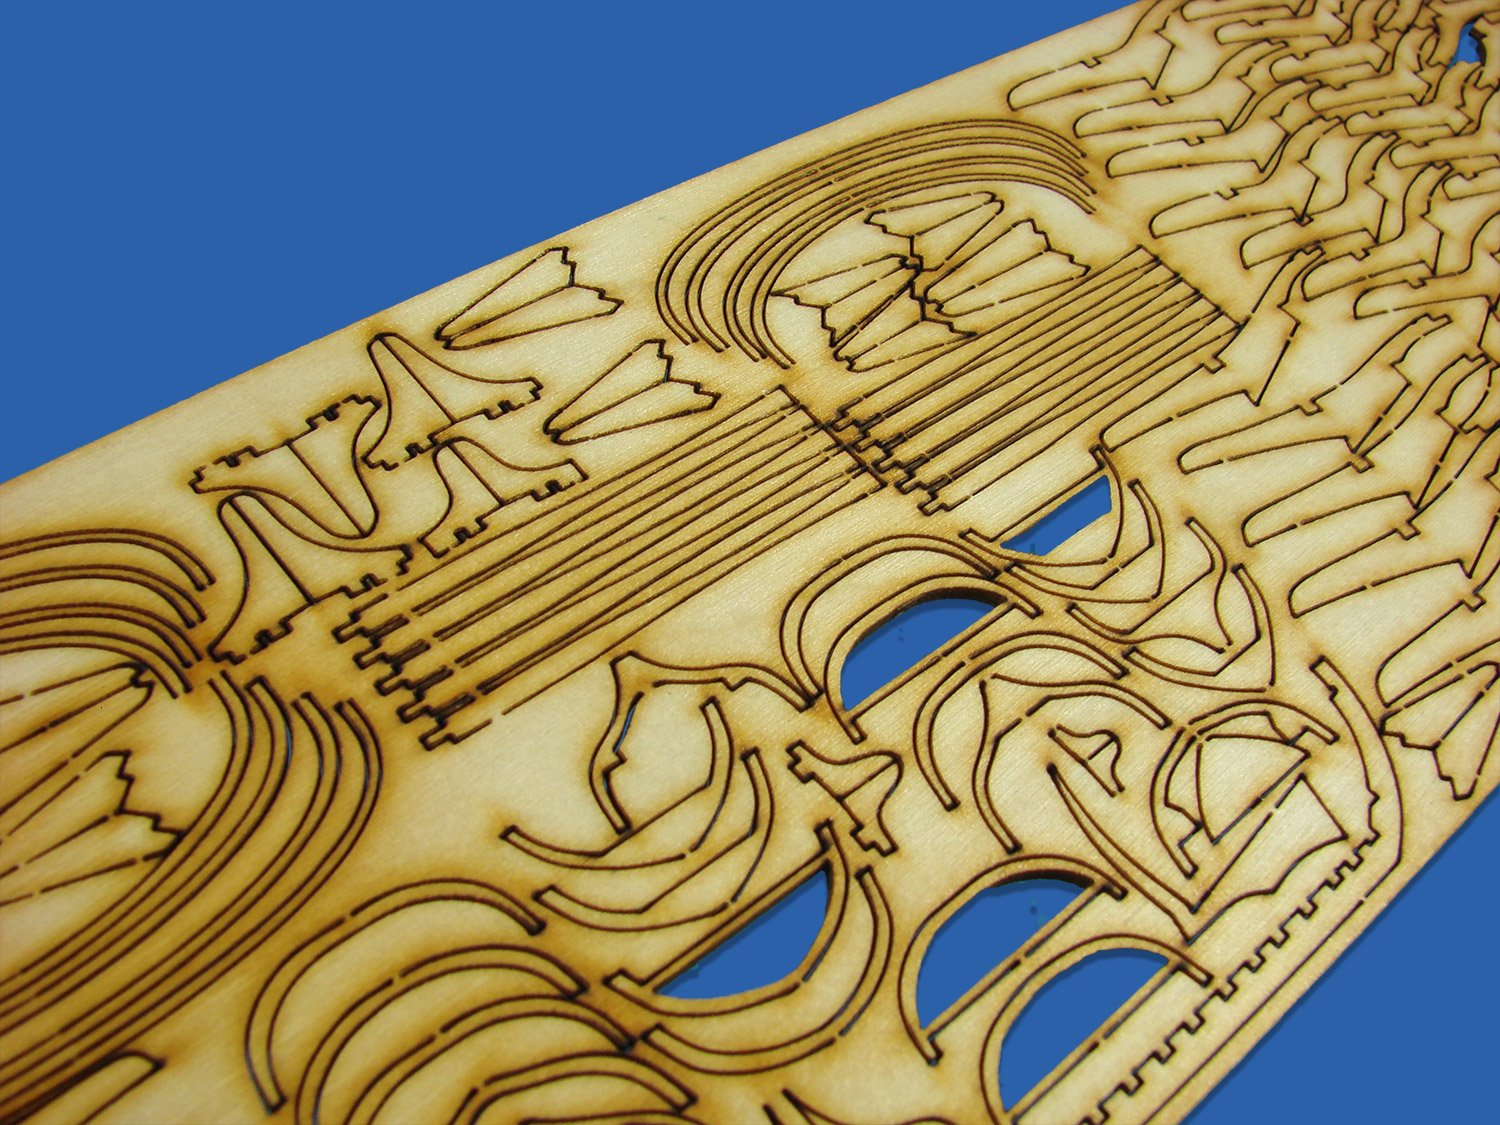
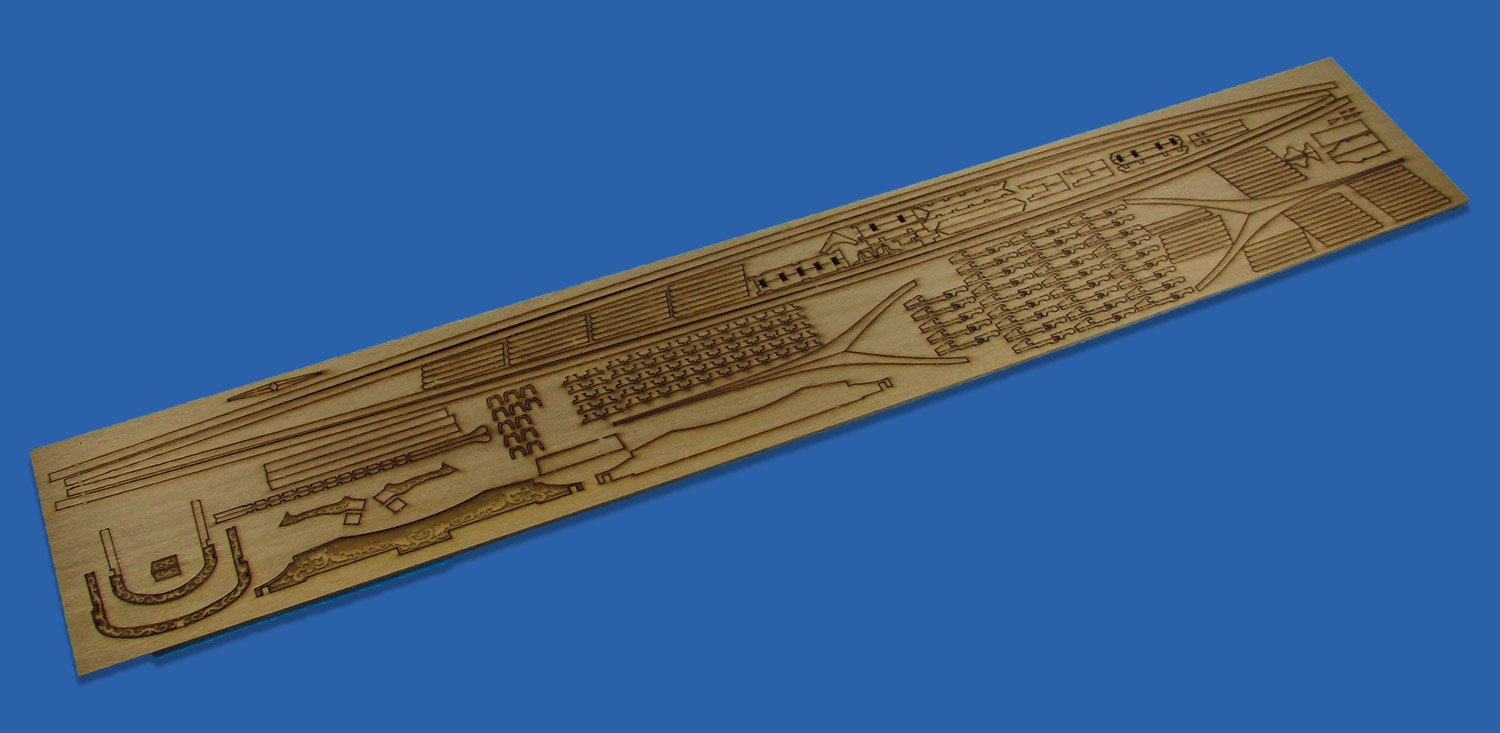
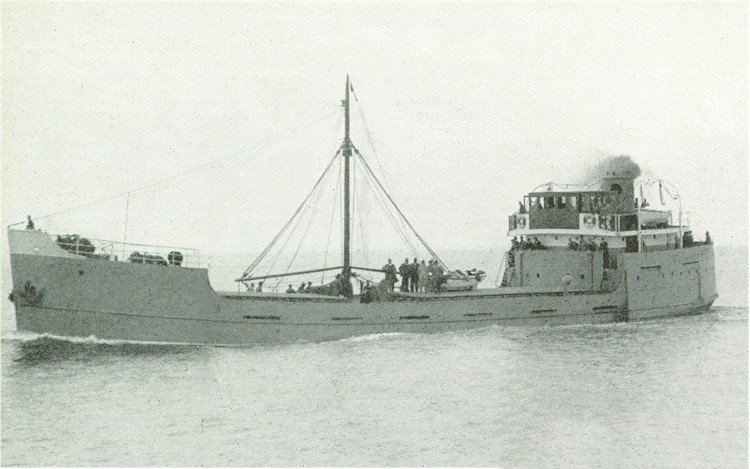
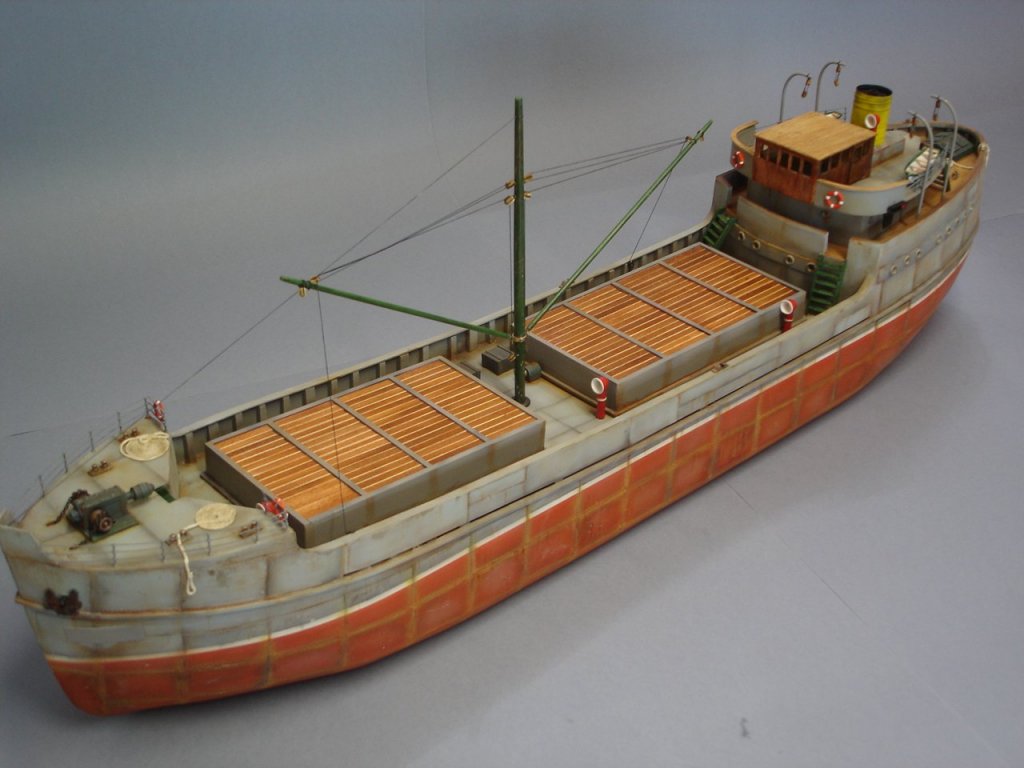
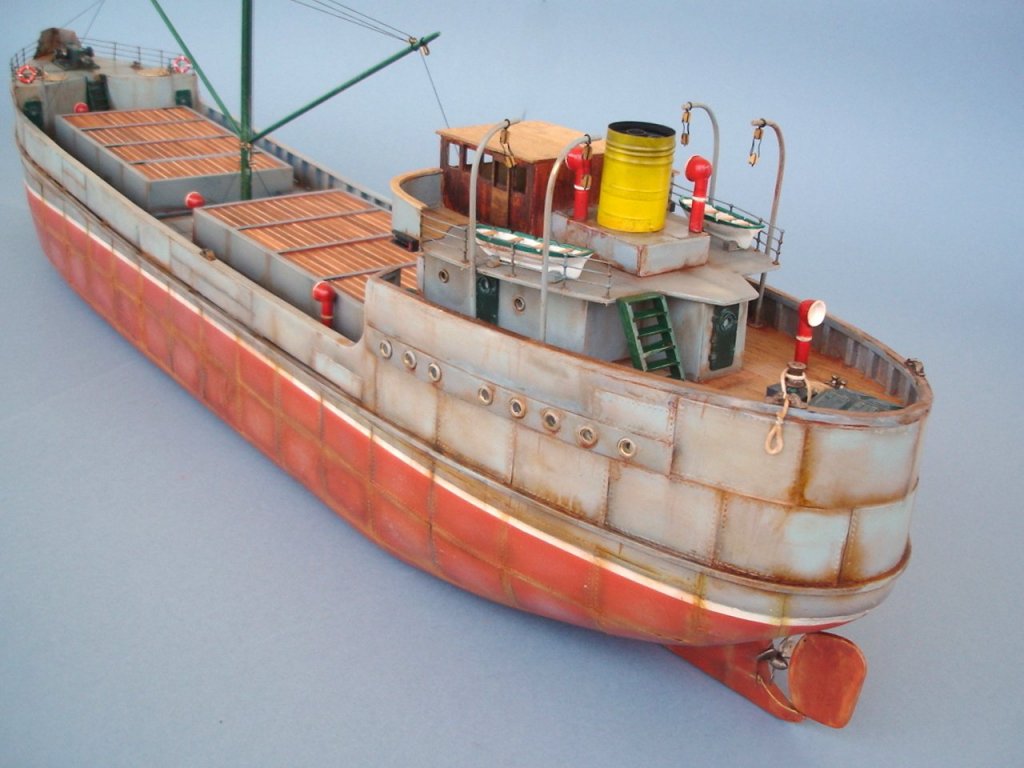
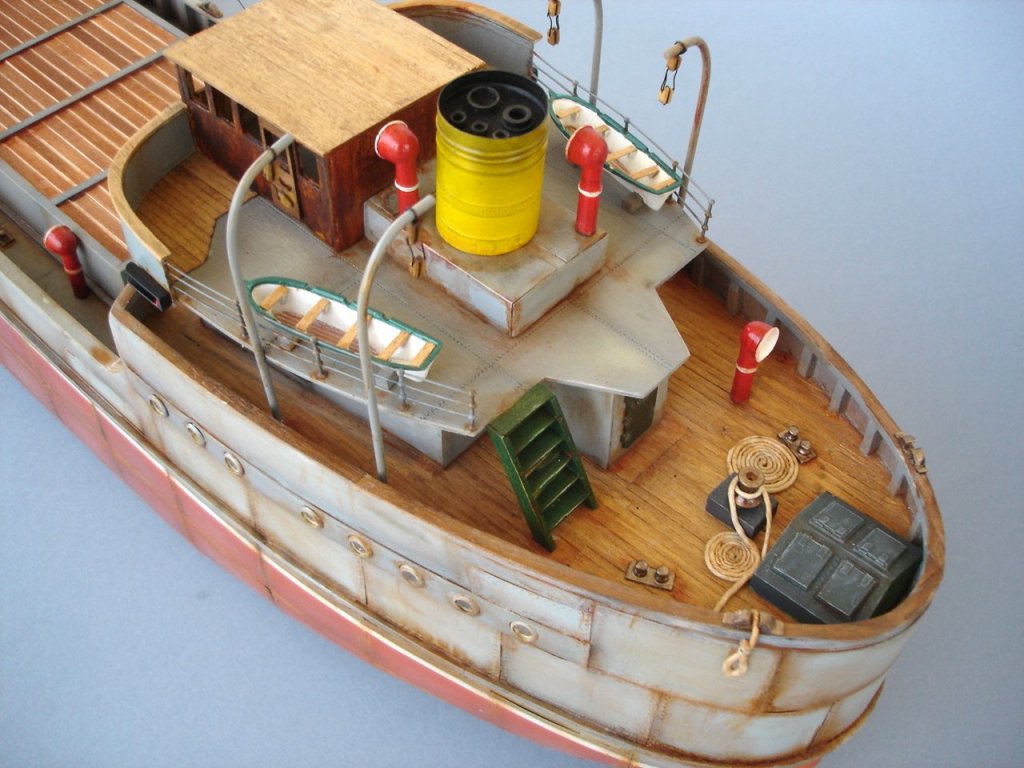
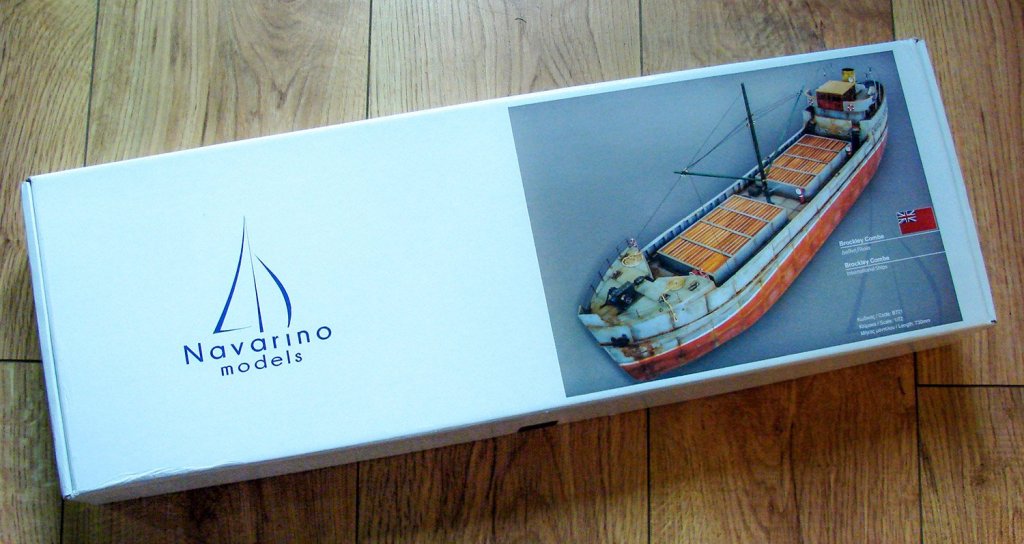
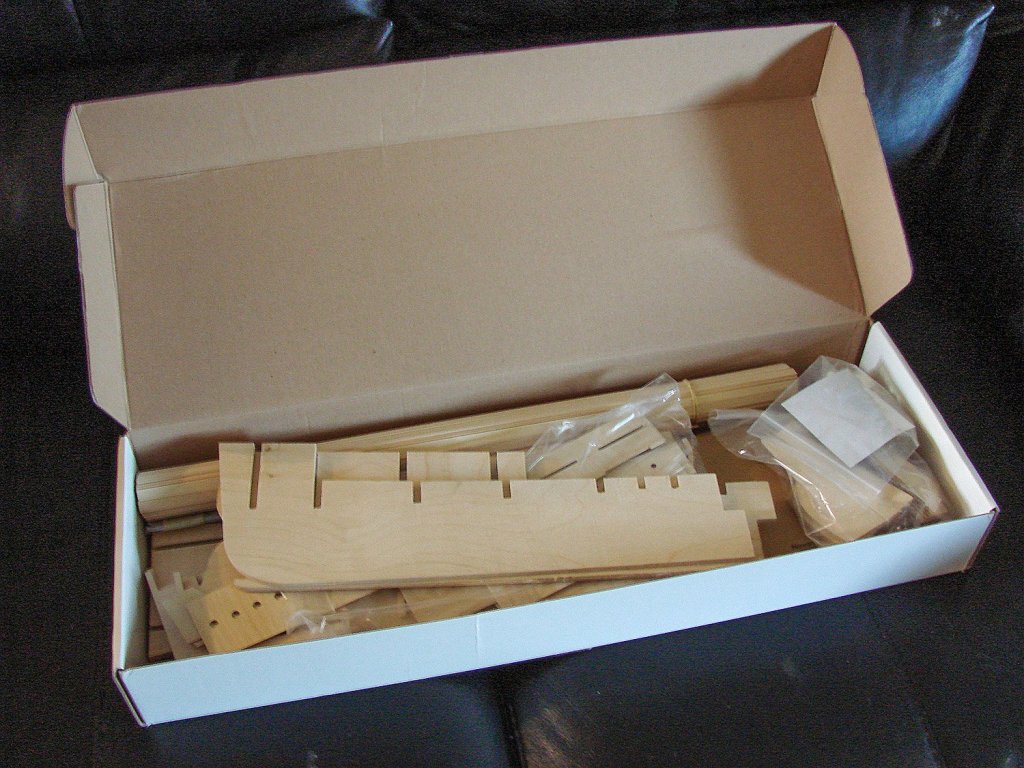
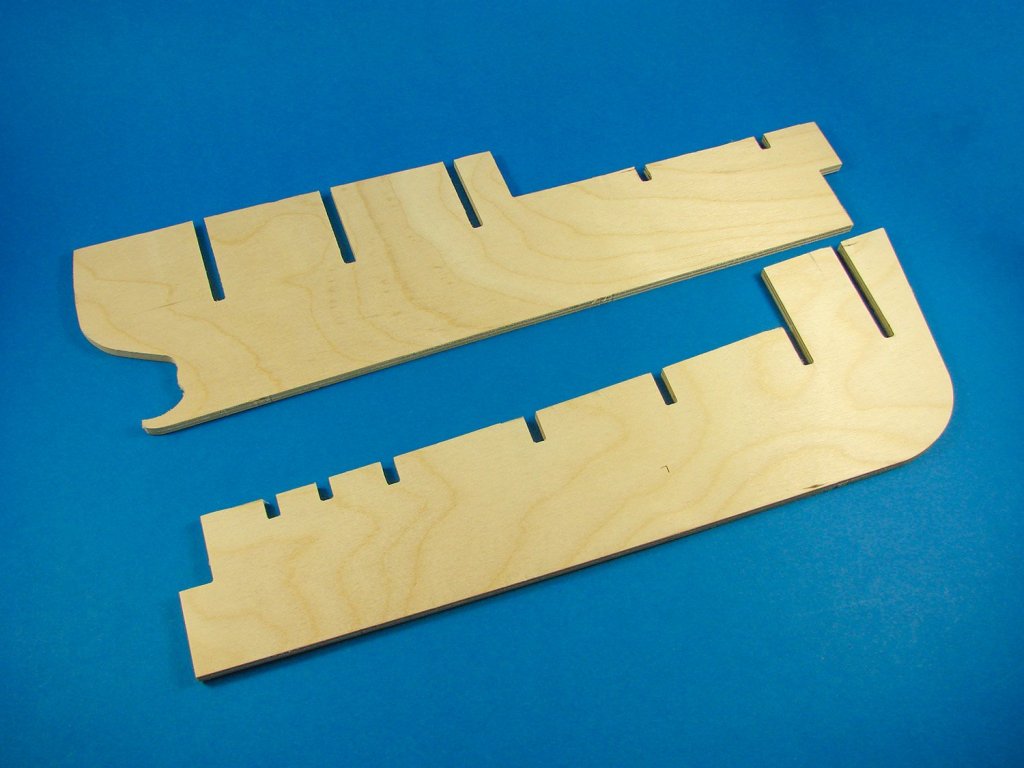
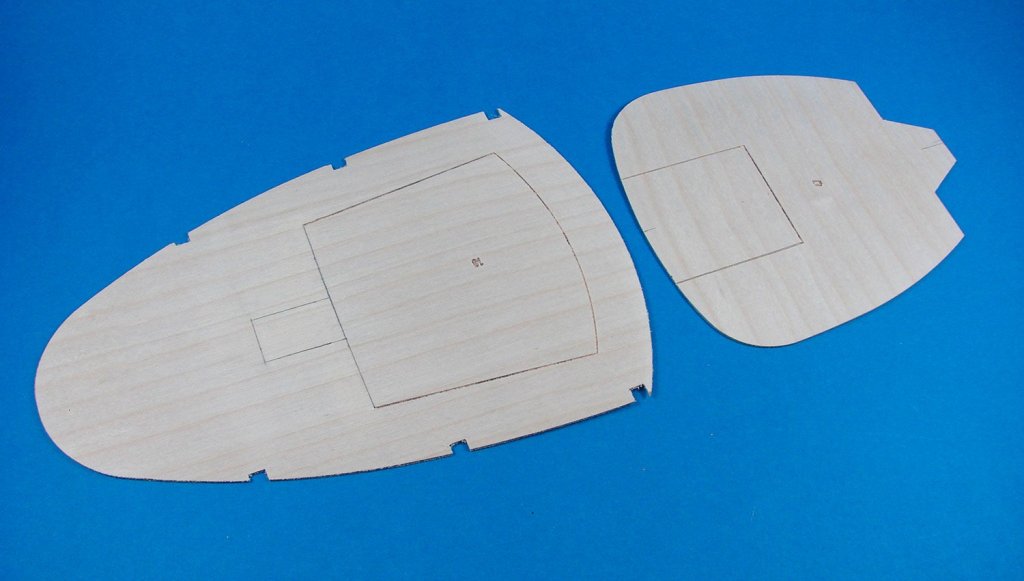
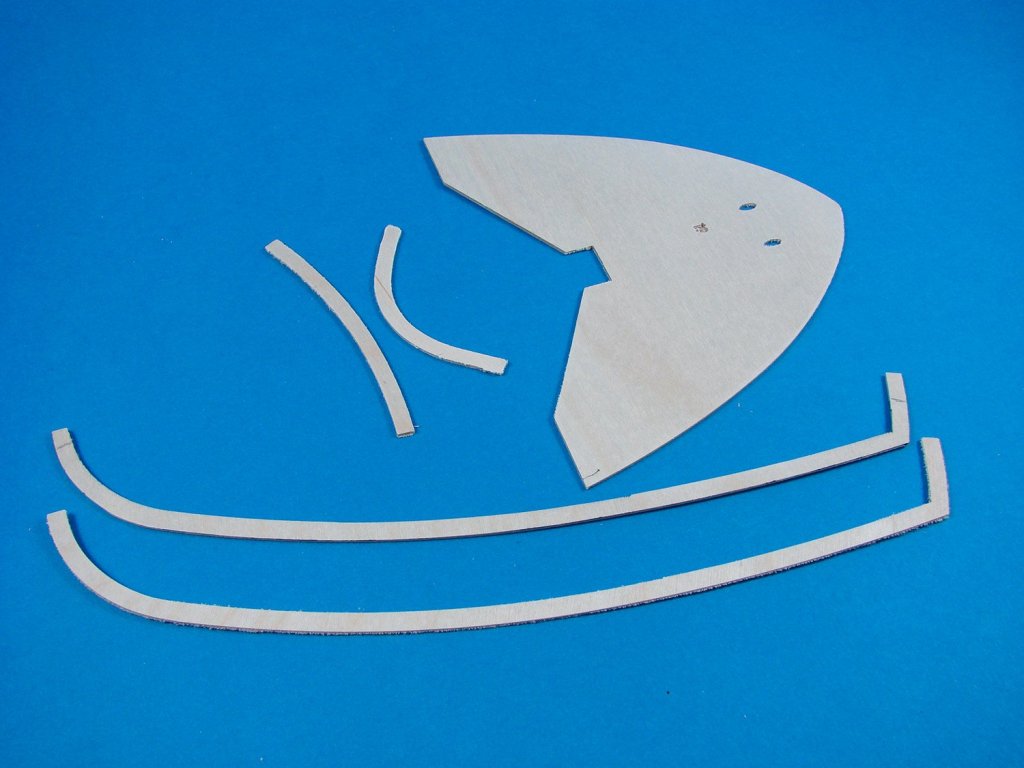
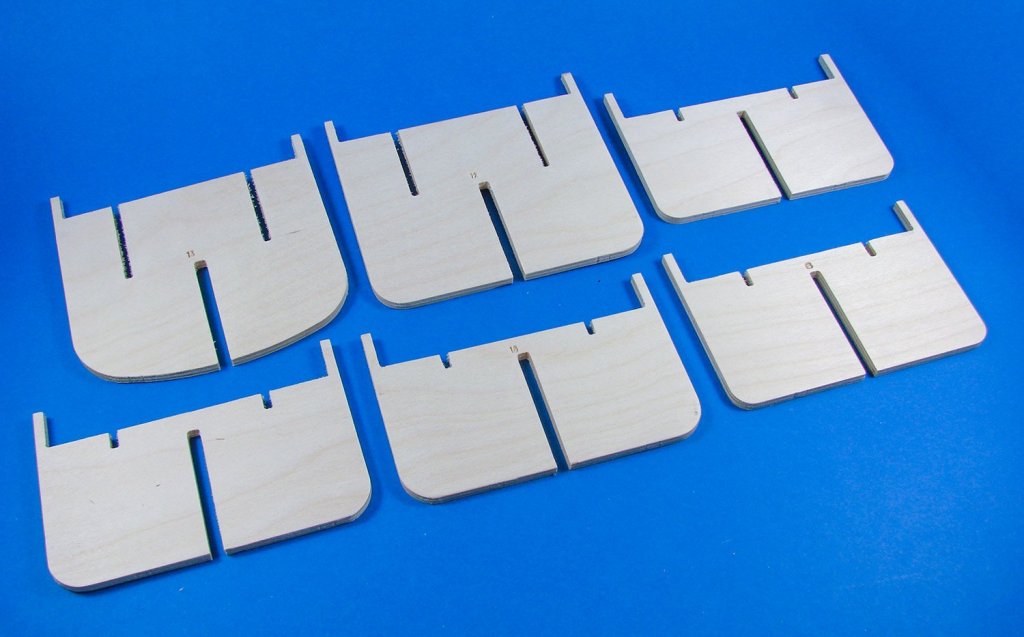
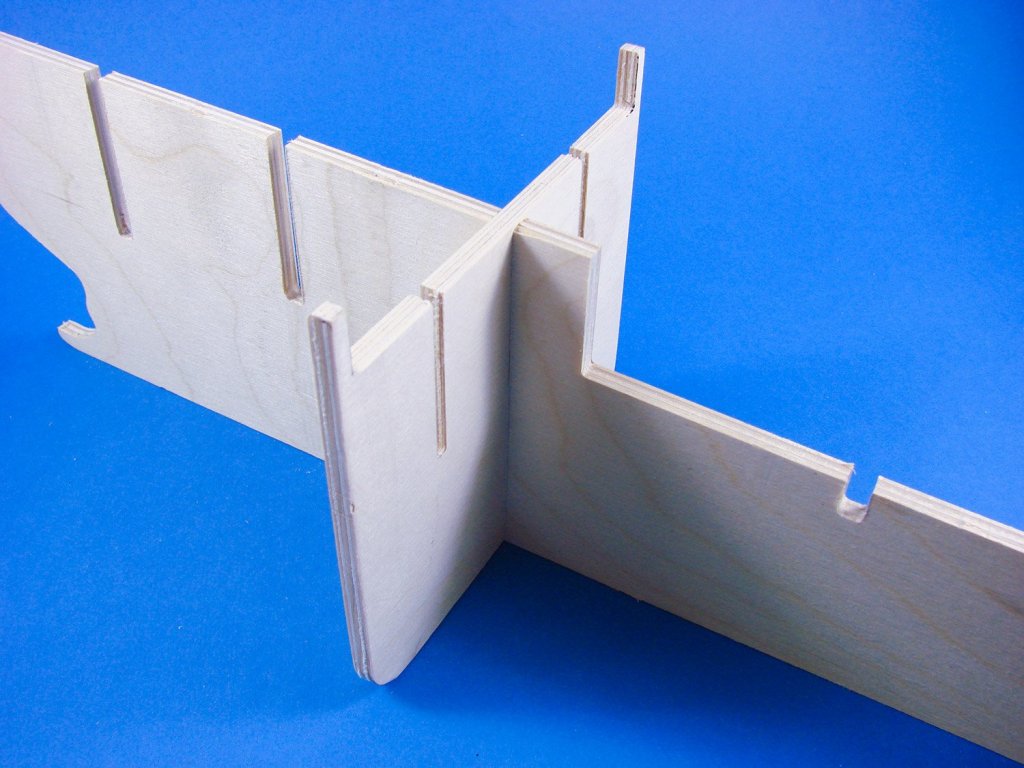
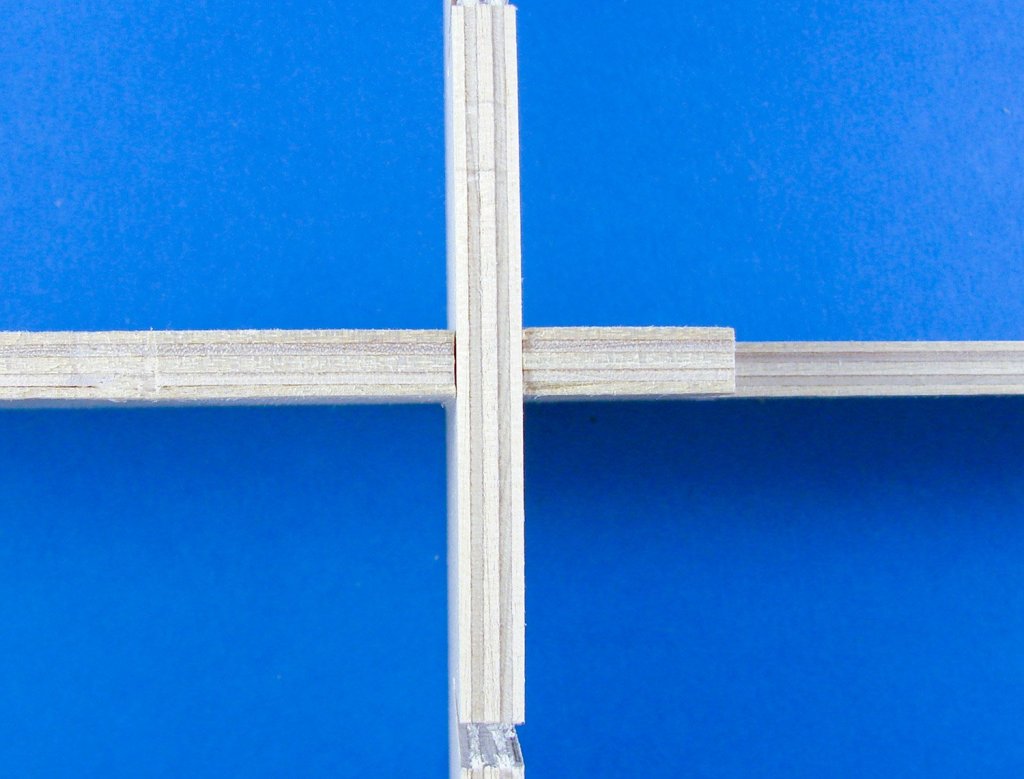
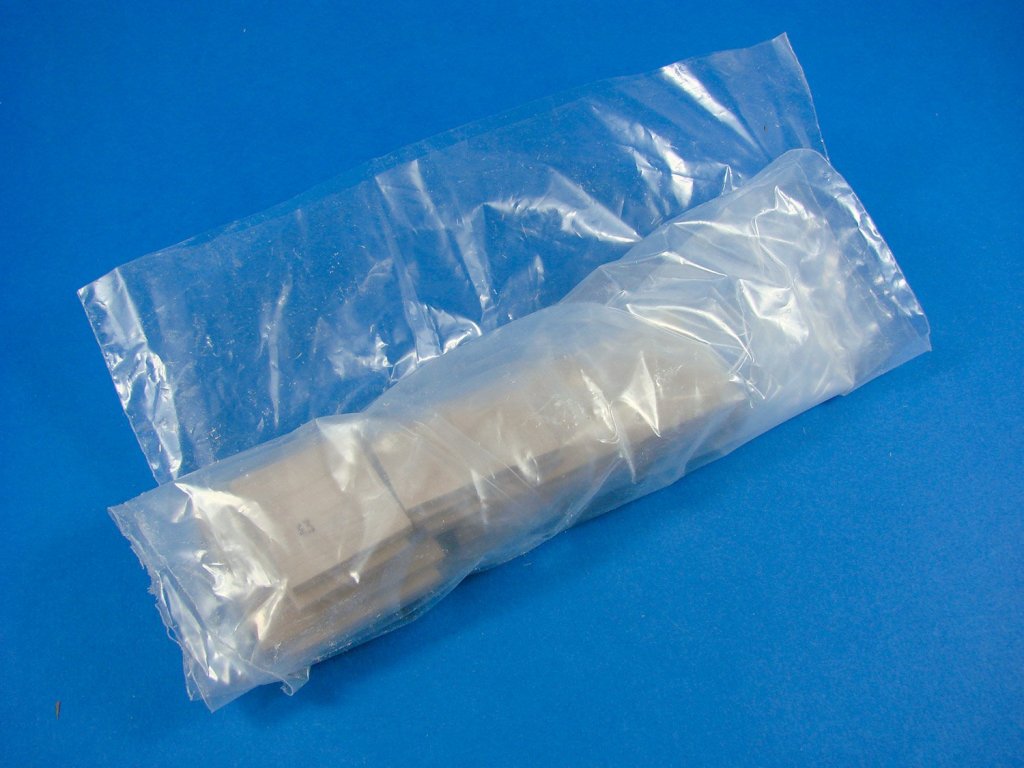
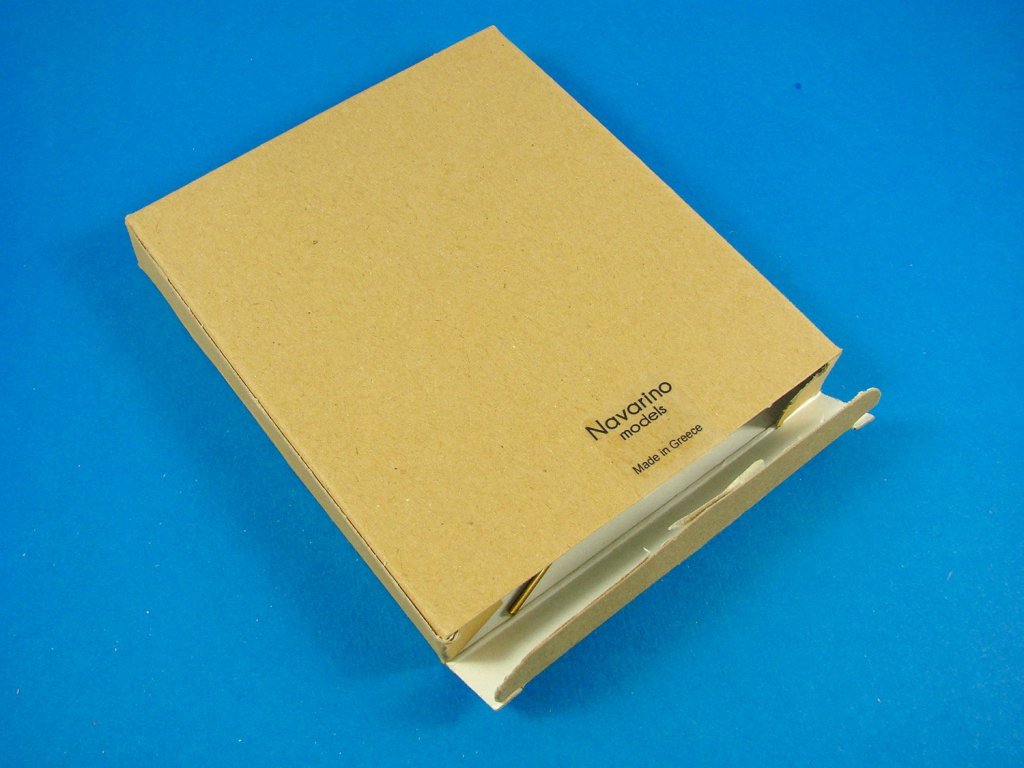
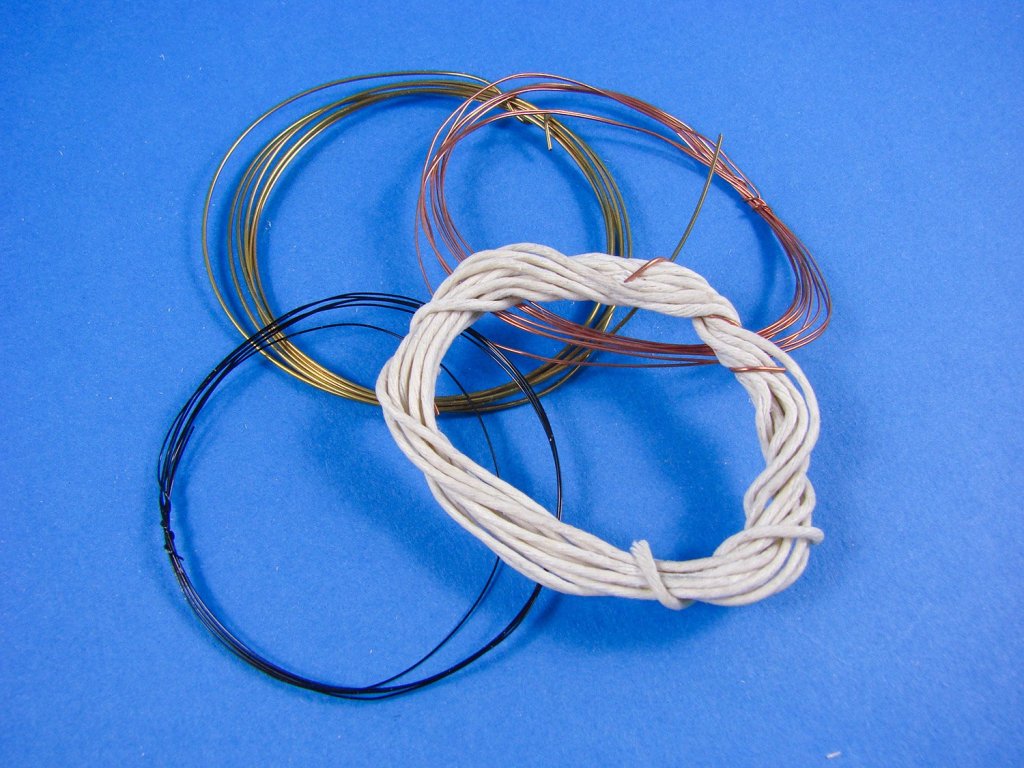
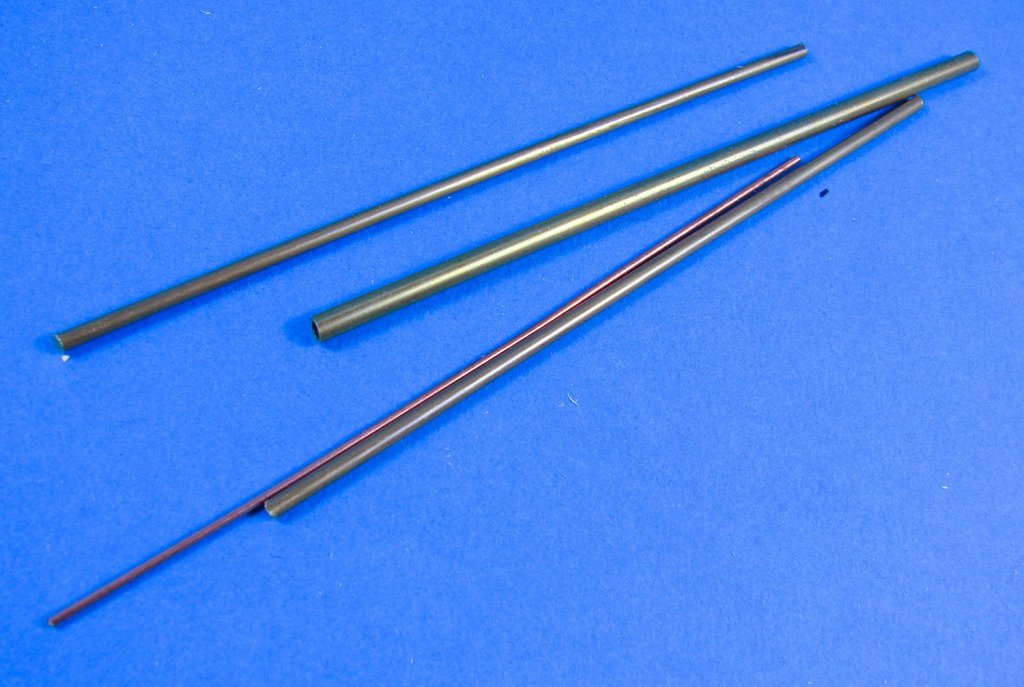
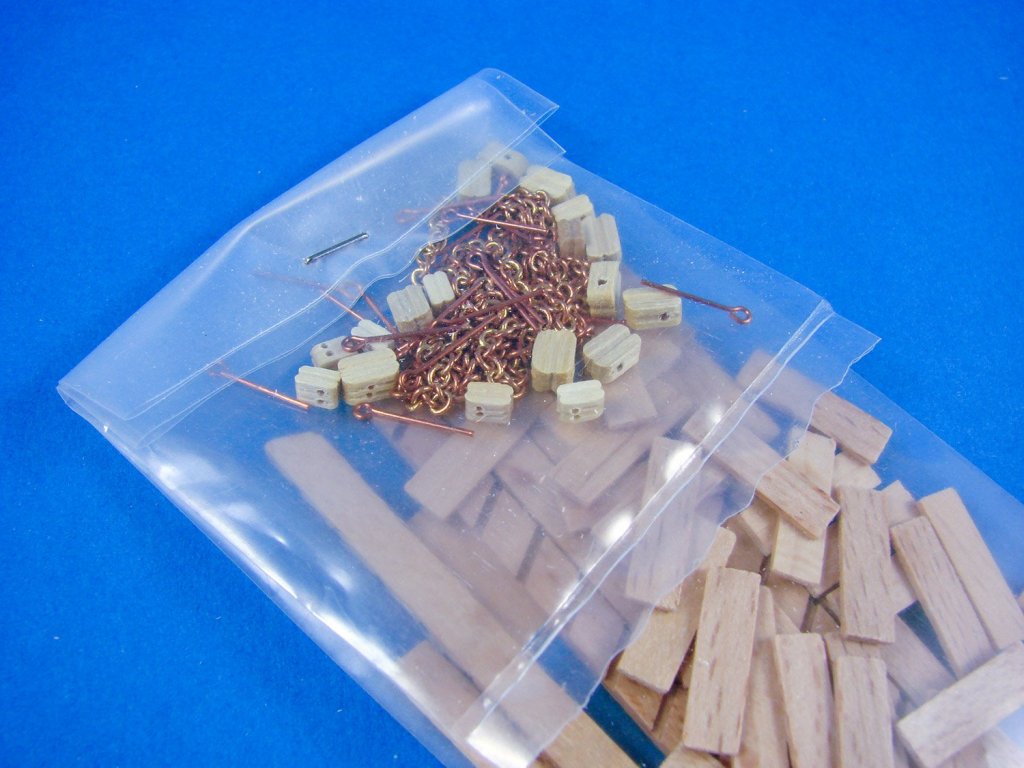
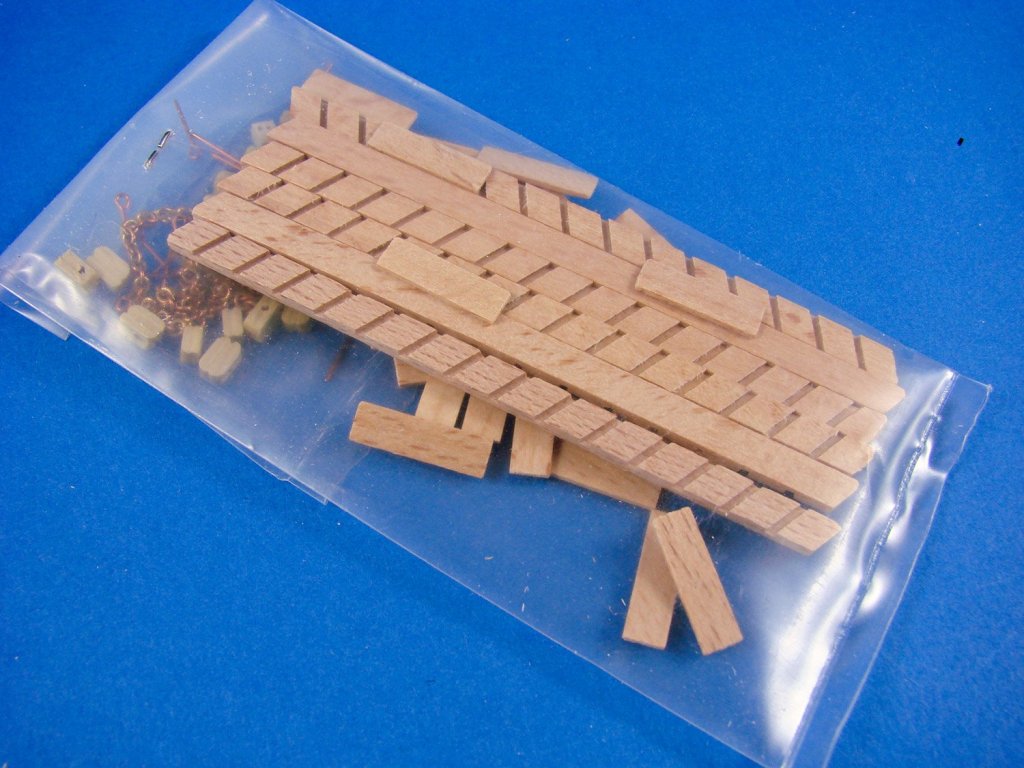
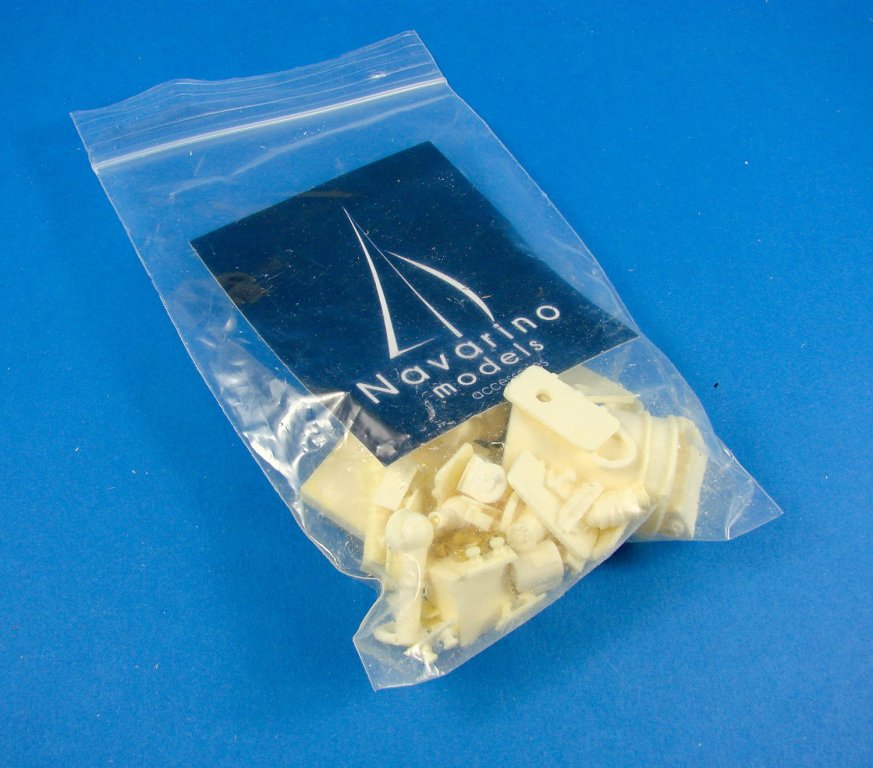
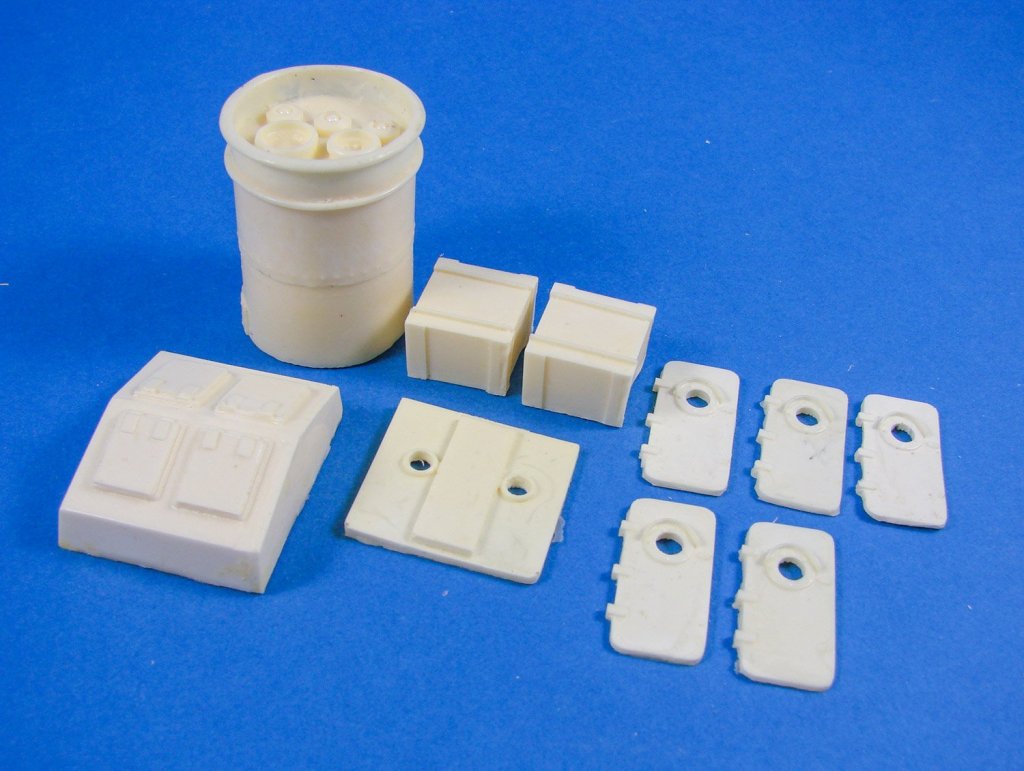
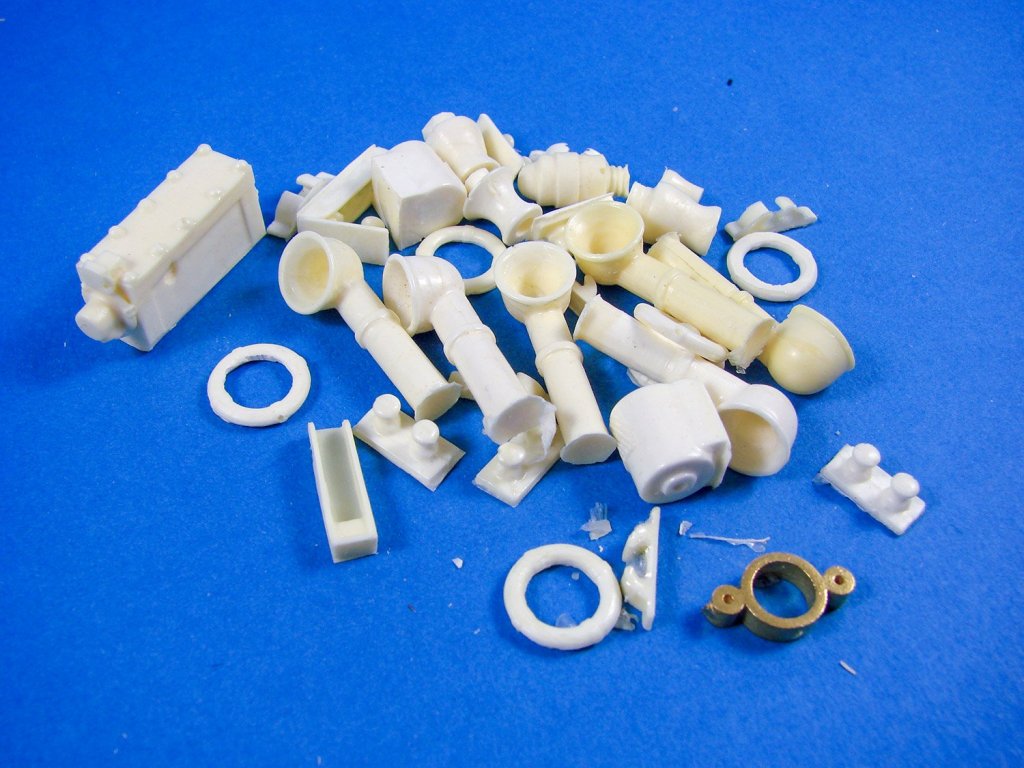
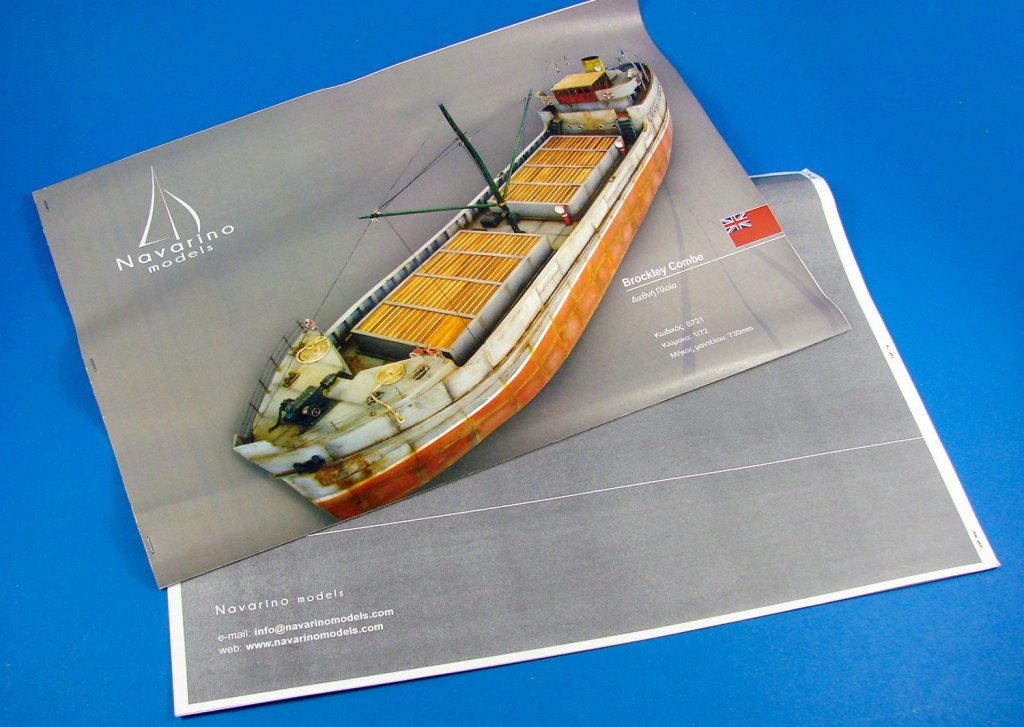
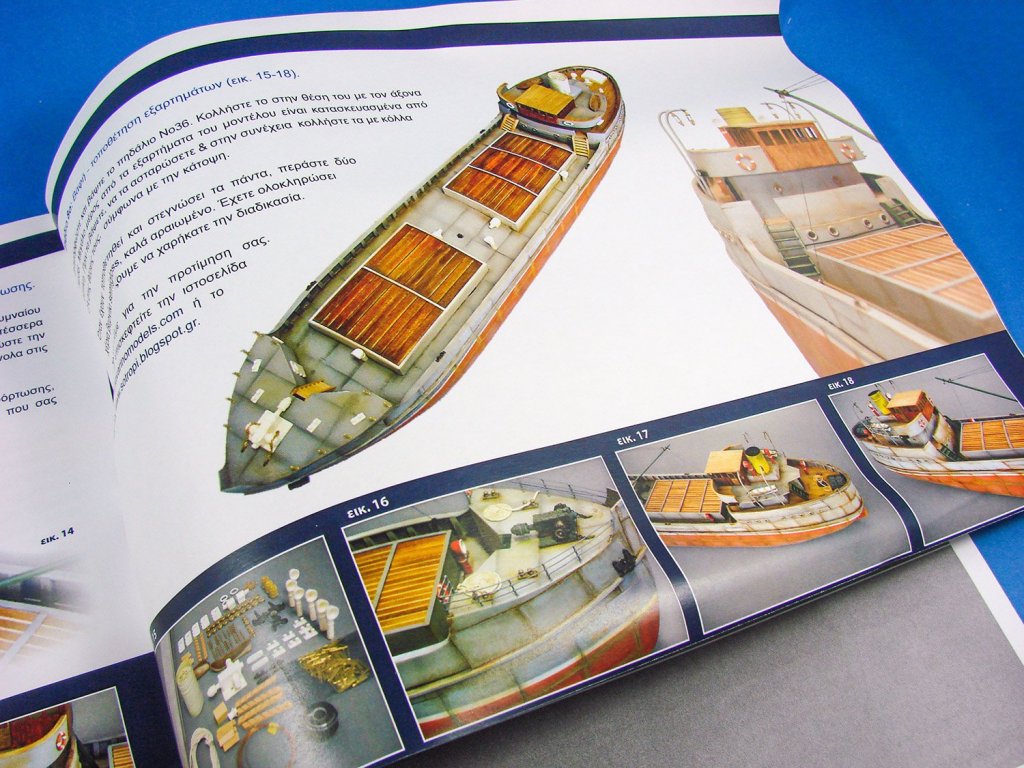
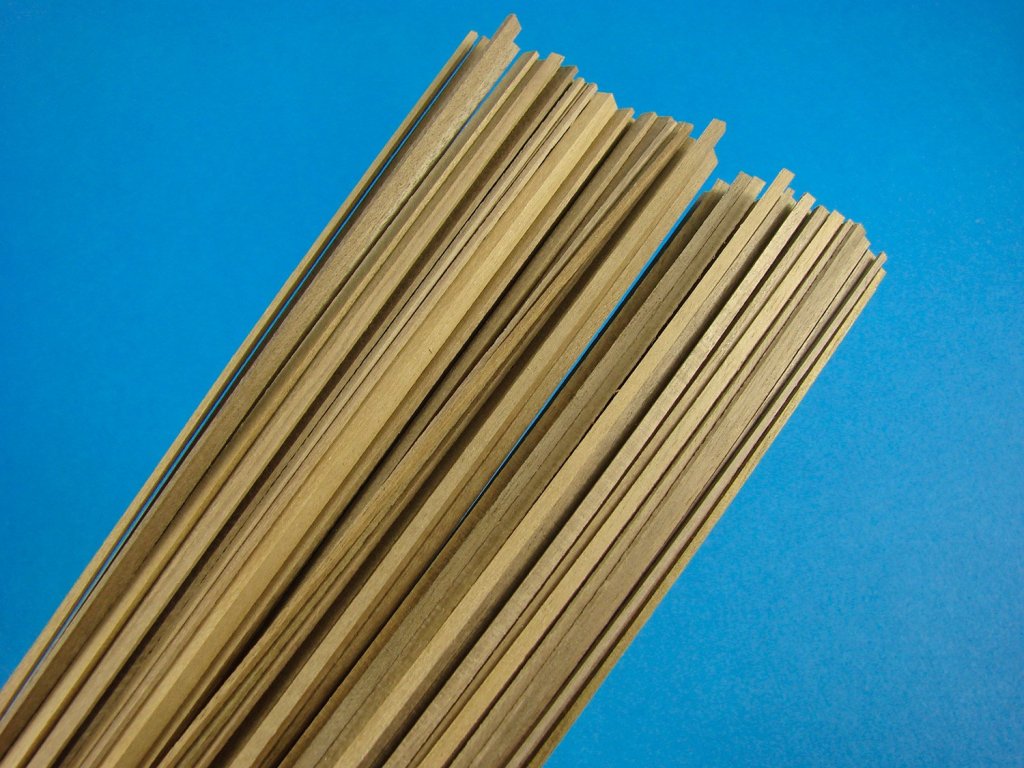
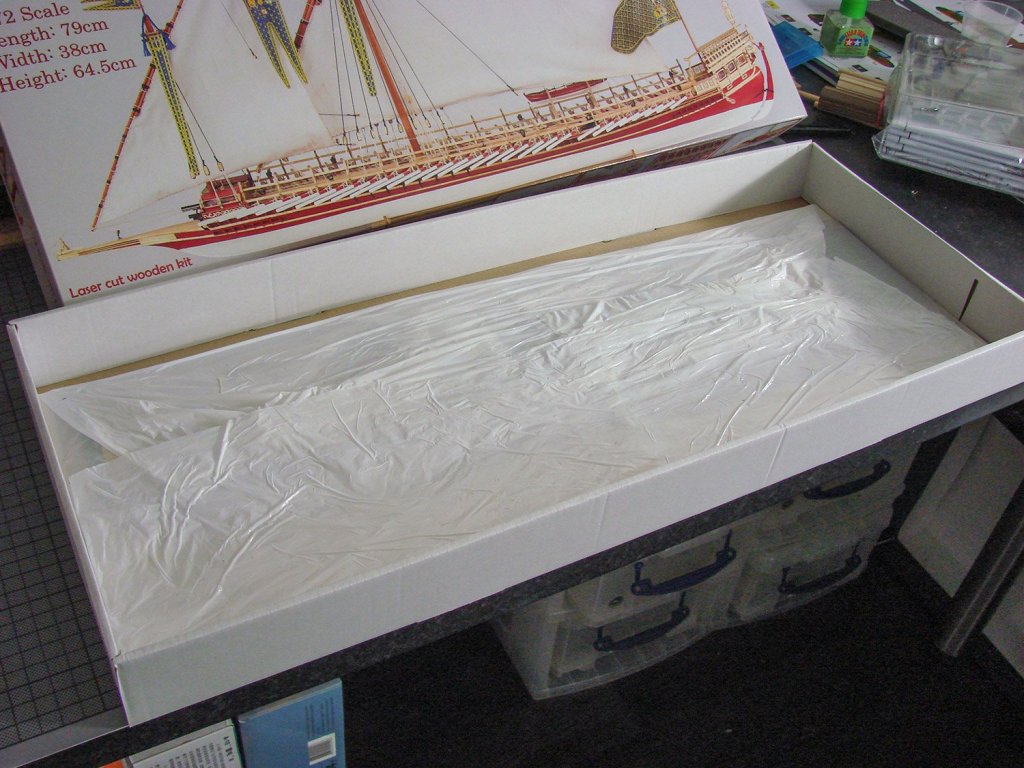
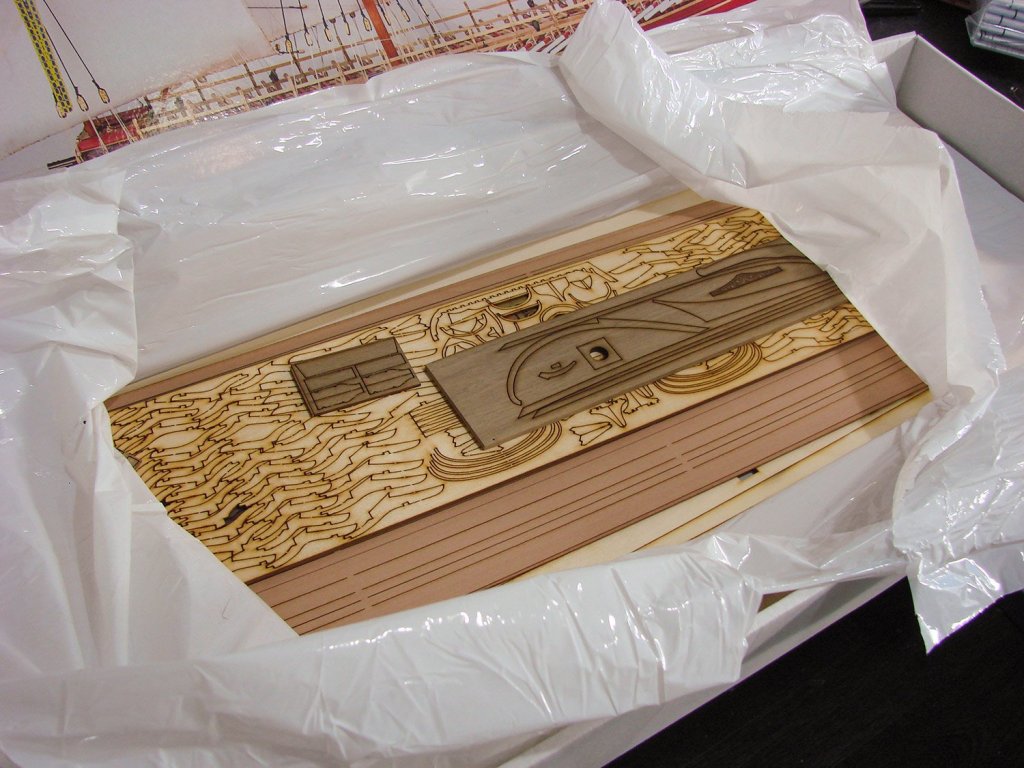
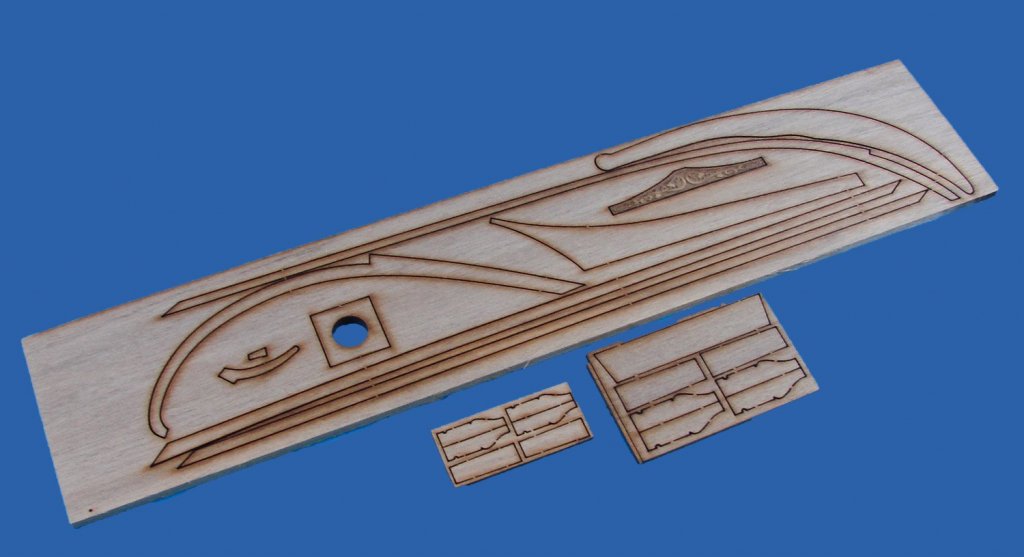
1/72 Brockley Combe, 1938 Cargo Ship Navarino Models Catalogue # B721 Available from Navarino Models for €299,00 Brockley Combe was a British cargo shop which was built by Hill Charles & Sons in their Bristol shipyard, in 1938. She was a typical example of a dry load cargo ship of the age and was 56.2m long. Her power came from a diesel engine. Information on Brockley Combe is scarce at best, with me only being able to pull a single image from an online search. Her career came to a sad end on 15thDecember 1953, when she broke up and sank after running aground south of Jersey, on the islands known as Minquiers (known as "the Minkies" in local English). Thankfully, no one perished in the sinking, with all of her crew being rescued by the Jersey lifeboat. The kit Navarino Models generally produce models of ancient and traditional Greek vessels (being a Greek company), so this particular model stands out a little in their catalogue. Their instruction manual says that the lines of this vessel were found in a book that ironically deals with scratch-building ship models without kits. Navarino took the lines and developed this 2016-release kit of this little-known vessel, sharing her with us and allowing us to recreate a 1930s cargo ship. This is no small venture either, with the model being roughly 730mm in length when complete. Navarino’s kit is packed into a very sturdy, single-piece corrugated box with a colour image of a completed Brockley Combe model on the lid. The lid is tabbed so you just pull this out to unlock the contents within. After removing the two instruction booklets and two plan sheets, your construction materials are uncovered. What you’ll immediately notice is that there are no actual sheets of parts from which to remove the individual components. Instead, all the various bulkheads, false keel, bulwarks etc. are pre-removed and, in some cases, bagged for a little extra security. Unlike many kits these days, the parts in this have been routed on a CNC machine, so there are no black/char edges to clean up before use. There are some slightly fuzzy edges on some parts, and you will need to tickle them with sandpaper to sharpen them up, but that, and regular hull/frame sanding is about the only waste material you’ll create when building this model. No empty wooden frames to dispose of at all. The false keel in this model, like the bulkheads, is machined from a good quality 6mm ply. It also comes in two parts that you will need to glue together and reinforce with the supplied pieces. A quick text of the fit shows that I’ll need to remove a small amount of wood from one joint, so the keel bottom and deck height are even. All slots are evenly machined and also very, very accurate. Test fitting the bulkheads shows not only a very snug fit, but also that they fit at the correct 90° angle to the keel parts. Note also that the bulkheads also have other slots too, into which two 4mm x 4mm longitudinal stringers locate, further helping keep things true and rigid. As an aside note, all parts in this kit are numbered with what appears to be a laser. There are a wide range of 1mm ply components in this kit, and they are all bagged in a clear sleeve. These include the bulwarks with their pre-cut portholes and scuppers, cabin fascias, doors, various deck parts (5 main sections), bulwark cap strips. Also worthy of mentioning are the marked positions on some decal parts, for the deck structure locations. Deck parts are also accurately notched to receive the 6mm bulkheads. Another bag of ply parts contains some 6mm ply sections that glue into the stern and bow areas to create a solid block that you will then sand to profile before planking commences. More 6mm ply forming the false keel reinforcement plates, and forecastle and main loading hatch structures. This little bundle are the parts for the loading hatch profiles, with their curved roof sections. All nicely machined and held together with elastic whilst in the box. When it comes to planking this hull, 60 strips of superbly cut limewood are supplied, each measuring 500mm x 1.5mm x 8mm. You may feel the need to halve that width when you plank around the fairly tight curve that exists on some of the bulkheads. Timber quality really is very nice, with this material being creamy and homogenous in appearance, with nice, sharp edges. Another bundle of wood contains more Ramin and lime strip wood, as well as Ramin dowel. Again, all materials here are of high quality. This material is for the deck planking and to me, it looks like Sapele due to the grain pattern and resin spots. Some edges are a little fuzzy, so it would be an idea to gently sand each edge before fitting to the decks. A smaller bag of ply parts are included for the rudder, and numerous other structural and superstructure areas. No matter how smooth you get that hull, the final planking will be achieved using 0.15mm aluminium sheet, cut into 20 strips of 25mm depth. It would appear that these need to be divided further into their correct lengths and then a riveting tool used to add that important detail to them. This material should form well around the hull but check how this would be laid out in pattern with regards to the bow and stern. You’ll need to fit these with cyano or contact adhesive. A small cardboard box contains various fittings and rigging. In there, you’ll find two small plastic launches with a clinker hull, brass and copper wire, rope, copper and brass rod, brass tubing, brass nails, stanchions, portholes, anchors, rigging rope spool, and other various fittings. Two plastic sleeves hold the parts for the staircases (pre-machined), rigging blocks and copper eyelets. A set of ship name decals is supplied, as are flags, printed on stiff paper. The last bag of components are all cast from a creamy yellow resin, save for one metal cast part for the mast. Here are all of those important detail features that you will scatter around the decks and superstructures. These include funnels, life preservers, bitts, winches, cleats, hatchways, doors, boxes and the single, large funnel. Most parts will need some form of clean-up, as you would expect with resin, and I would also recommend that you wash them first to remove any traces of mould release agent that could prevent paint adhering properly. A set of simple but useful colour illustrations are included in one of the manuals, but the text is in Greek. Another copy of this is included in black and white, but with English text. It also has a table of parts to reference. I think the instructions supplied are adequate for the model as most of it is straightforward and can be referenced on the two plan sheets. Both plan sheets have the charm of being hand-drafted and annotated. This takes me back to my days of school woodwork, but the illustrations are easy enough to follow and should provide a competent builder with no problems. Conclusion This is the first Navarino kit that I’ve seen, and I do really like the way things go together, the quality of materials and those little quirky things like not having to remove parts from frames. Brockley Combe is truly a multimedia kit, with not just timber, but also metal, resin and a little plastic too. Materials quality is excellent. Whilst I couldn’t recommend this kit to a raw beginner, I do think that someone with a model or two under their belt could do this some real justice. Some experience with resin could be useful, but not necessary. In all, a lovely model of a classic cargo ship of yesteryear, and one with character too! My sincere thanks to Navarino Models for sending this kit for review on Model Ship World. To purchase directly, click the link at the top of this article.


- 6 replies
-
- 17
-
-
- brockley combe
- navarino models
- (and 2 more)
-
Very neat. 2500 tiles and you're still sane?
-
Sterling work. Despite the work and relative monotony, that is a very sweet set of completed guns.
- 527 replies
-
- 2
-
-
- caldercraft
- victory
- (and 1 more)
-
Welcome to MSW. Sorry to hear of your health. Time for some modelling therapy?
-
kit review 1:70 Hannah - Ship Model Okumoto
James H replied to James H's topic in REVIEWS: Model kits
I wouldn't think so. Just the kits. A pleasure! -
Anyone using electric plank bender?
James H replied to MESSIS's topic in Modeling tools and Workshop Equipment
My sample came straight from Poland, but I've ordered stuff from then before and know their shipping costs are reasonable. Check out the other Hobbyzone reviews I also did too, such as the building slips. -
Anyone using electric plank bender?
James H replied to MESSIS's topic in Modeling tools and Workshop Equipment
I reviewed one here and found it easy to use: -
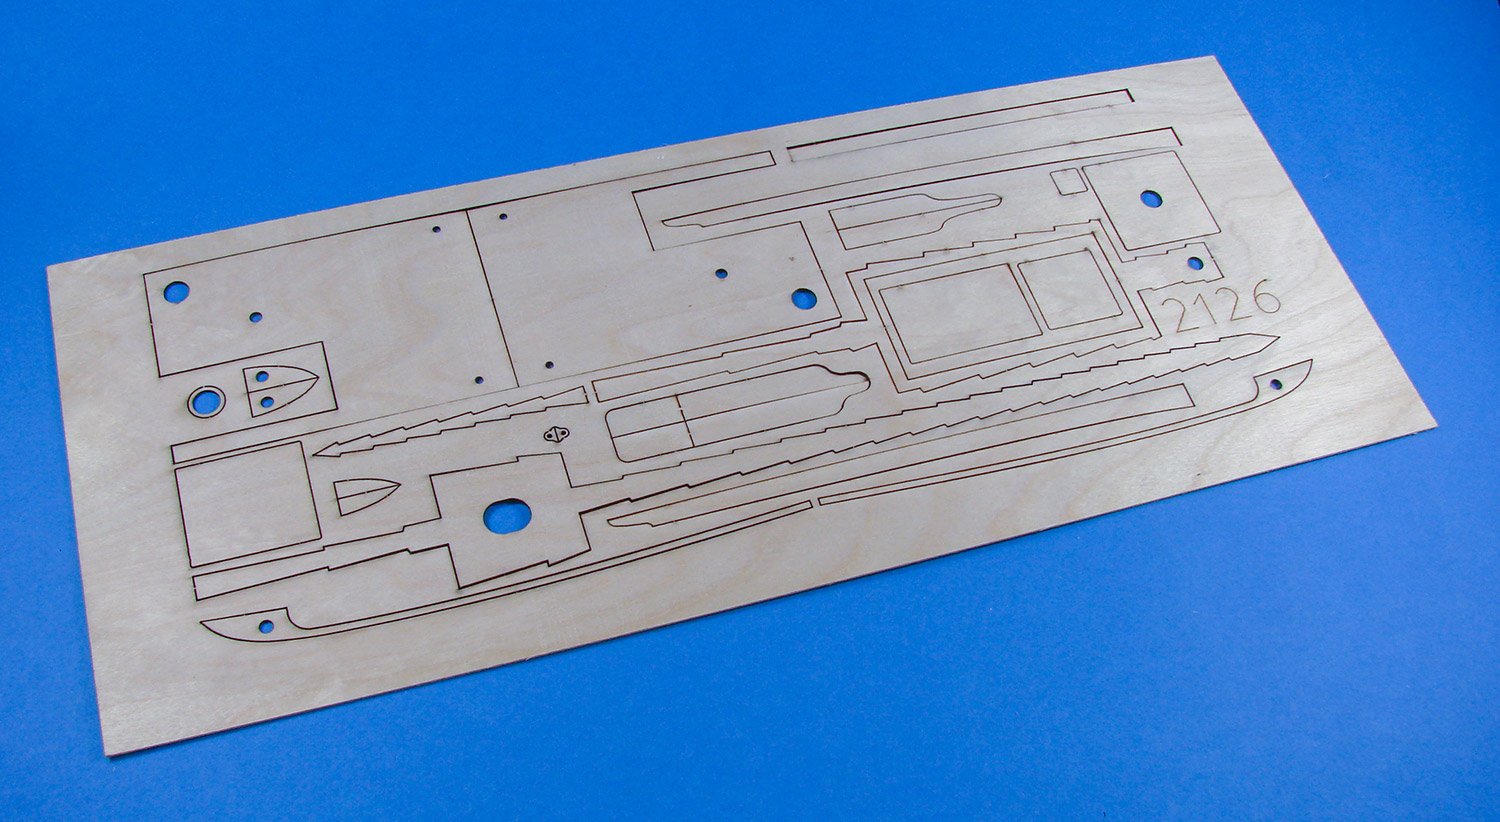
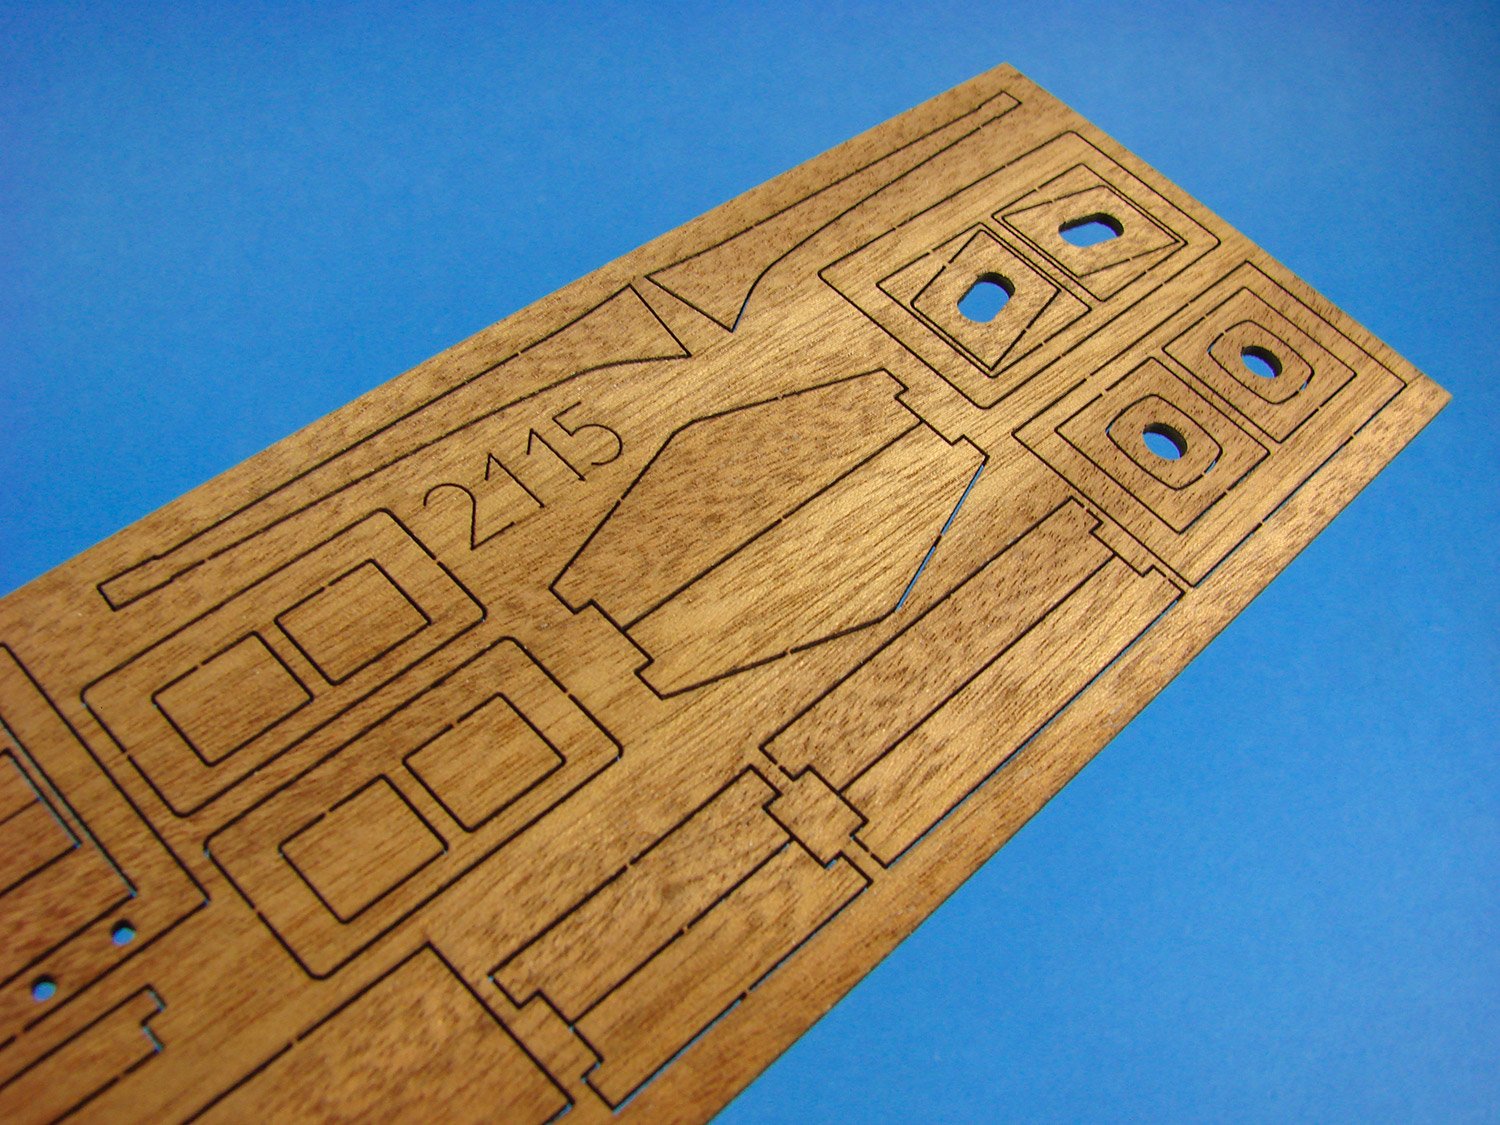
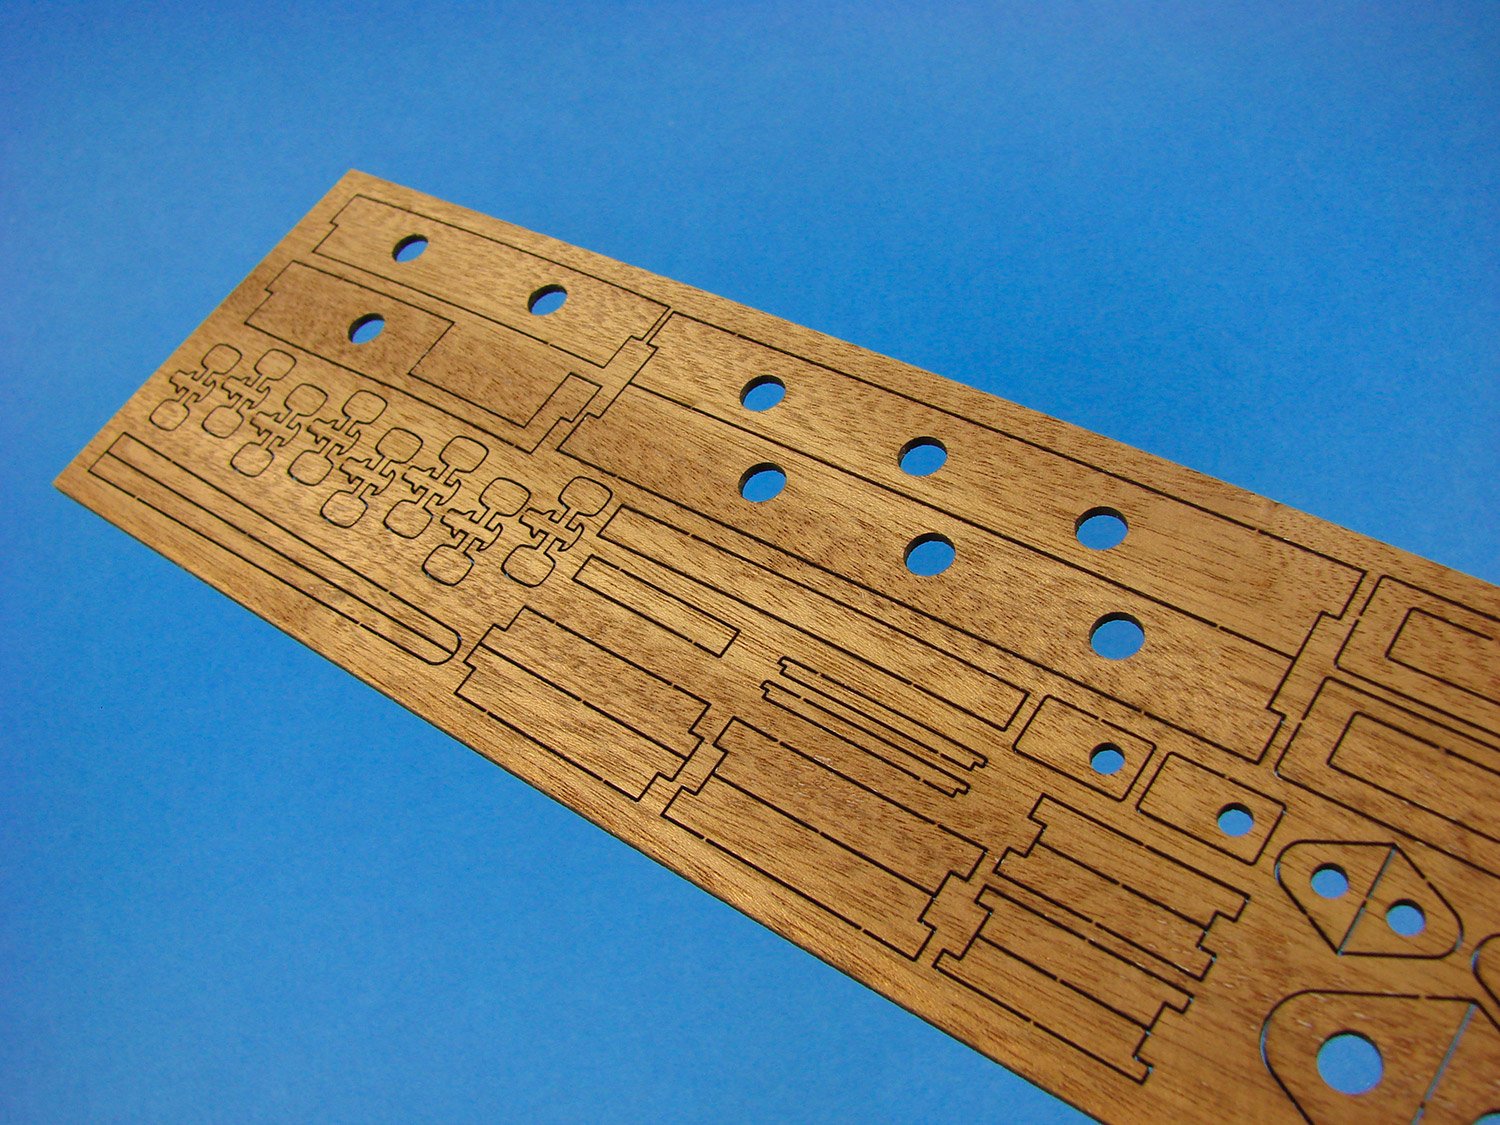
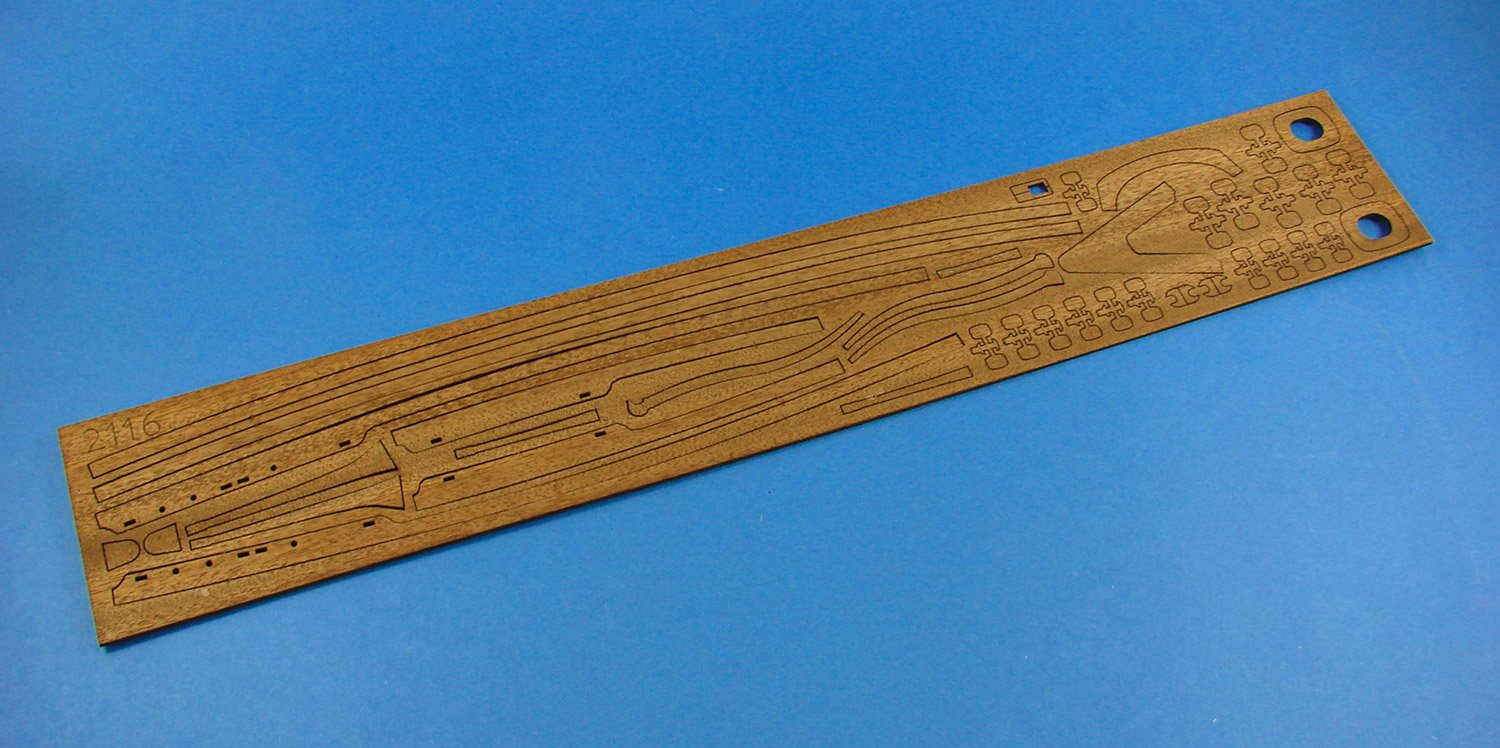
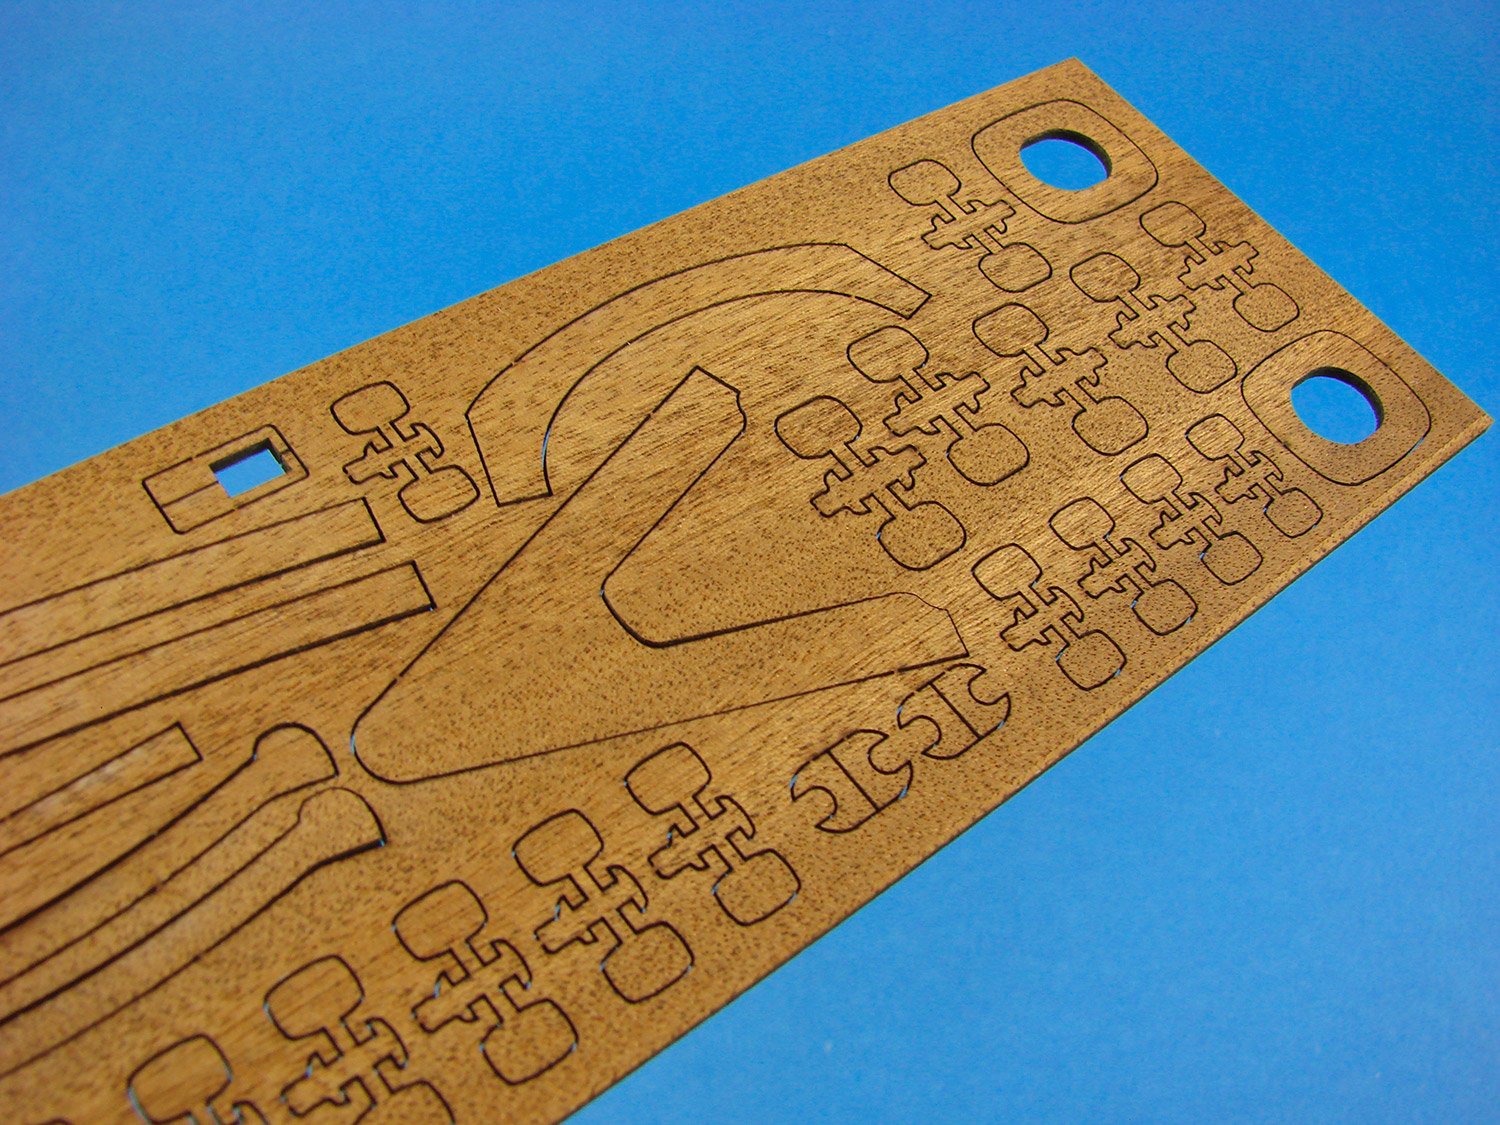
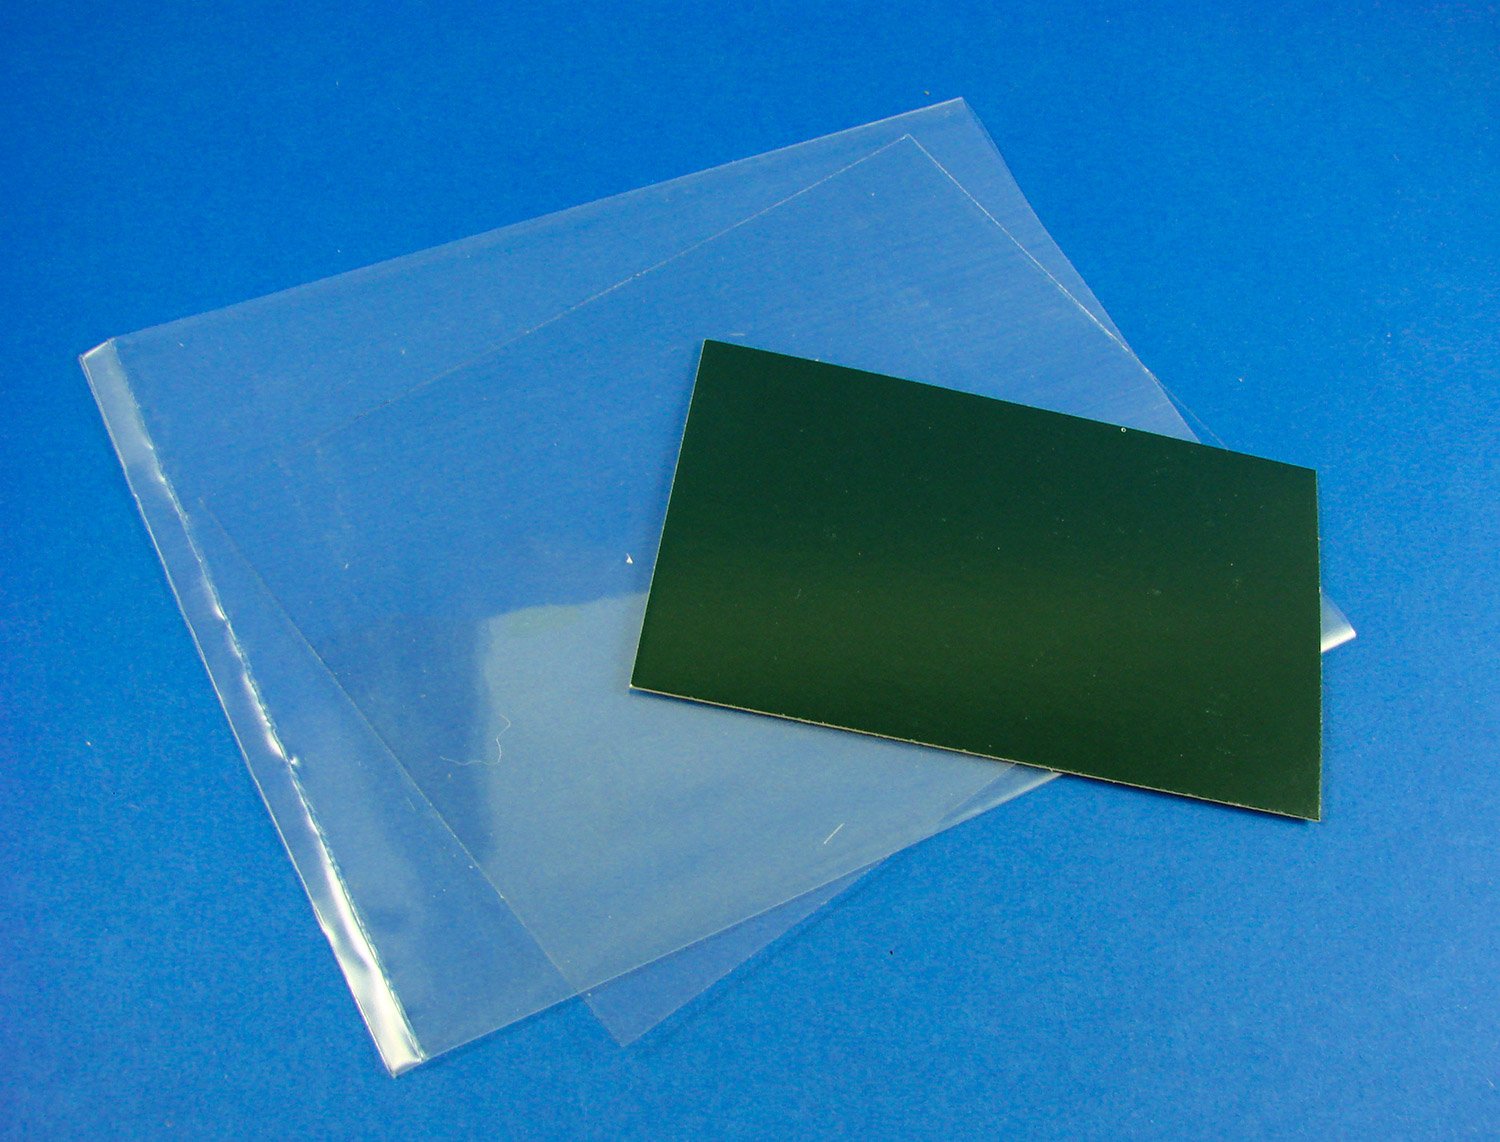
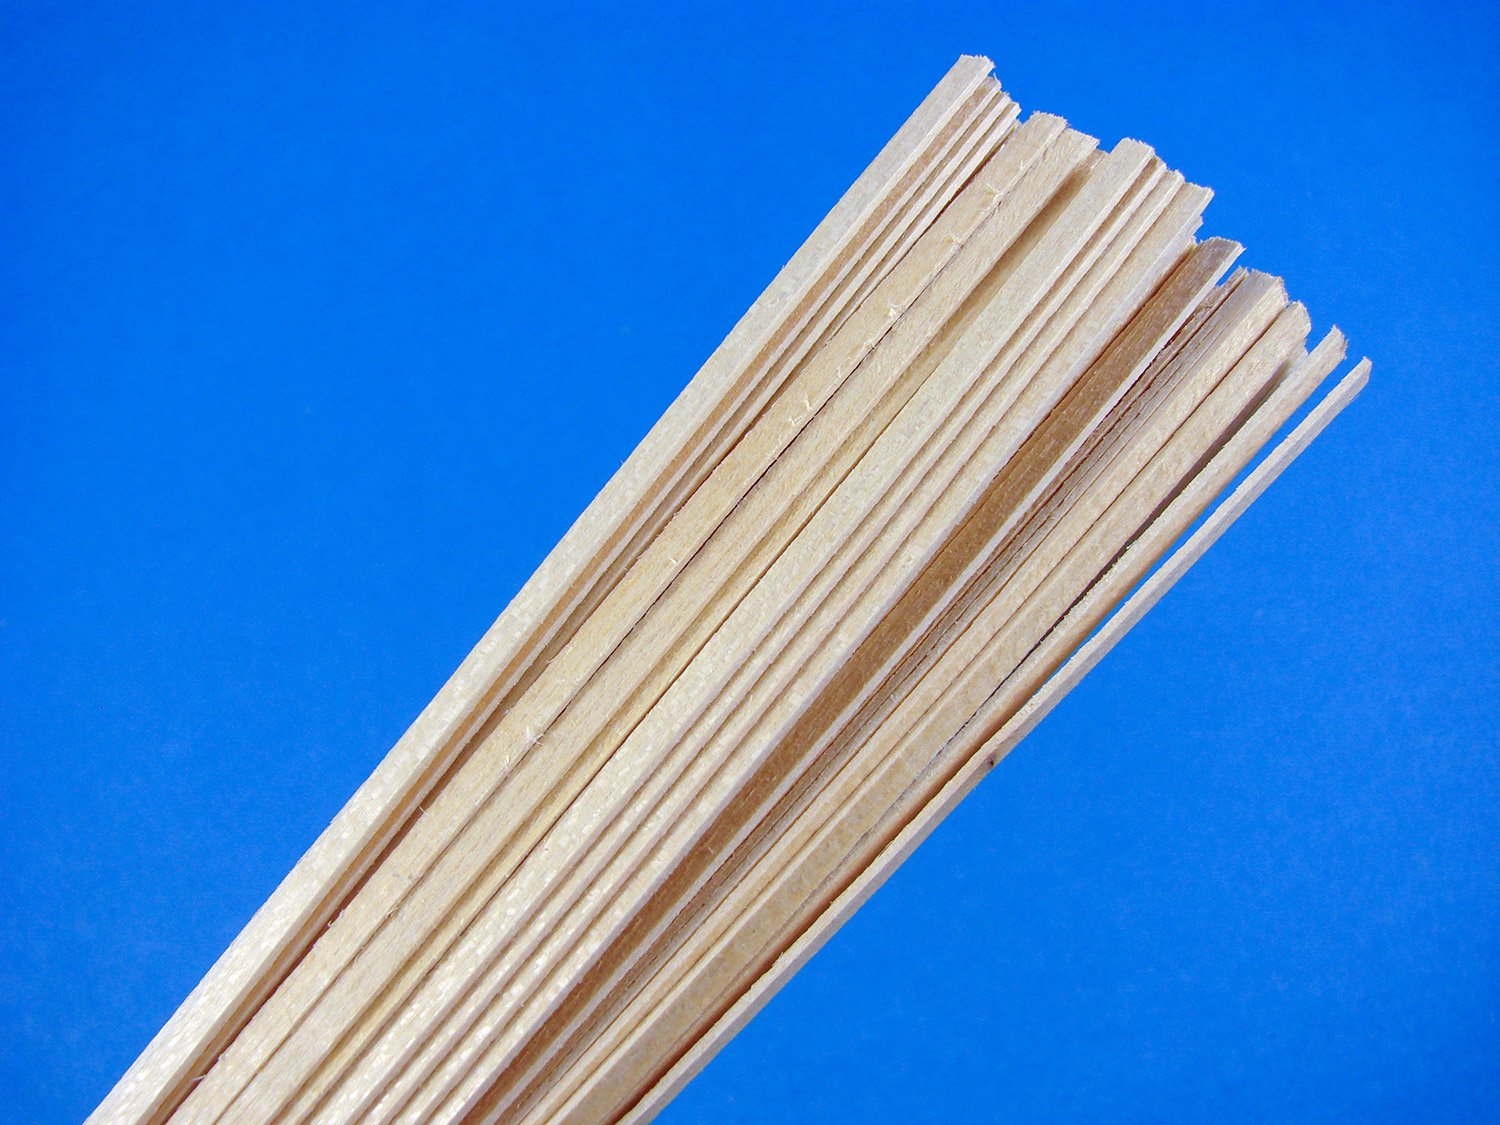
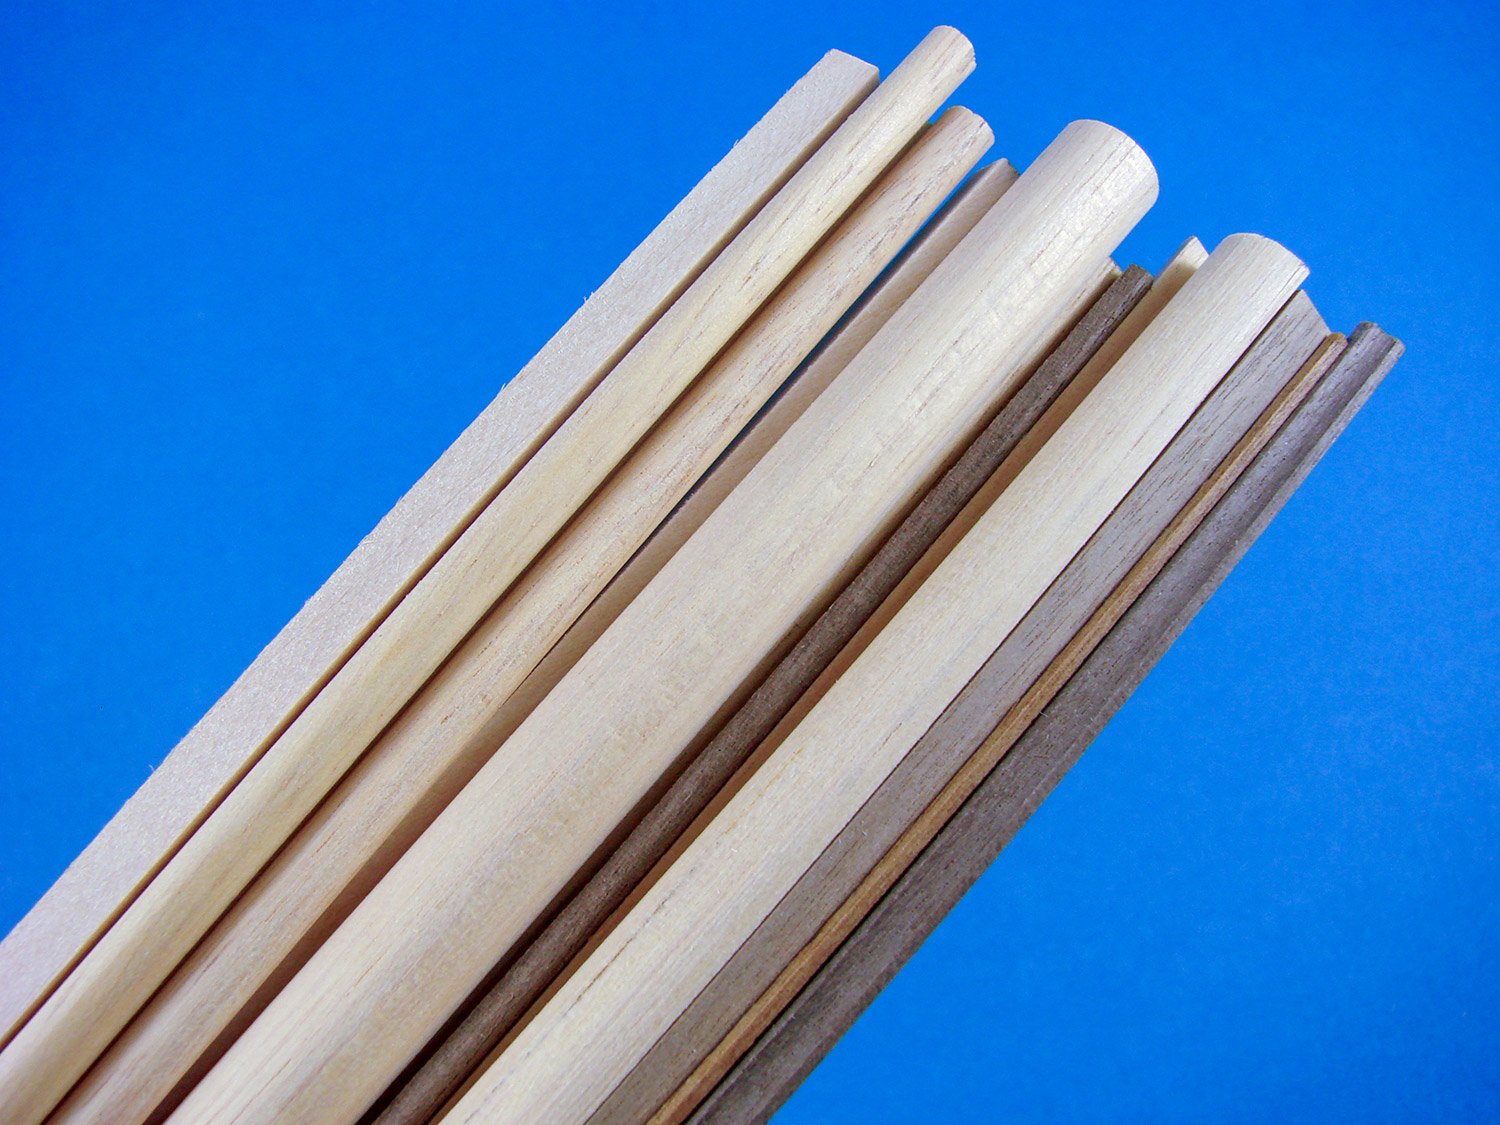
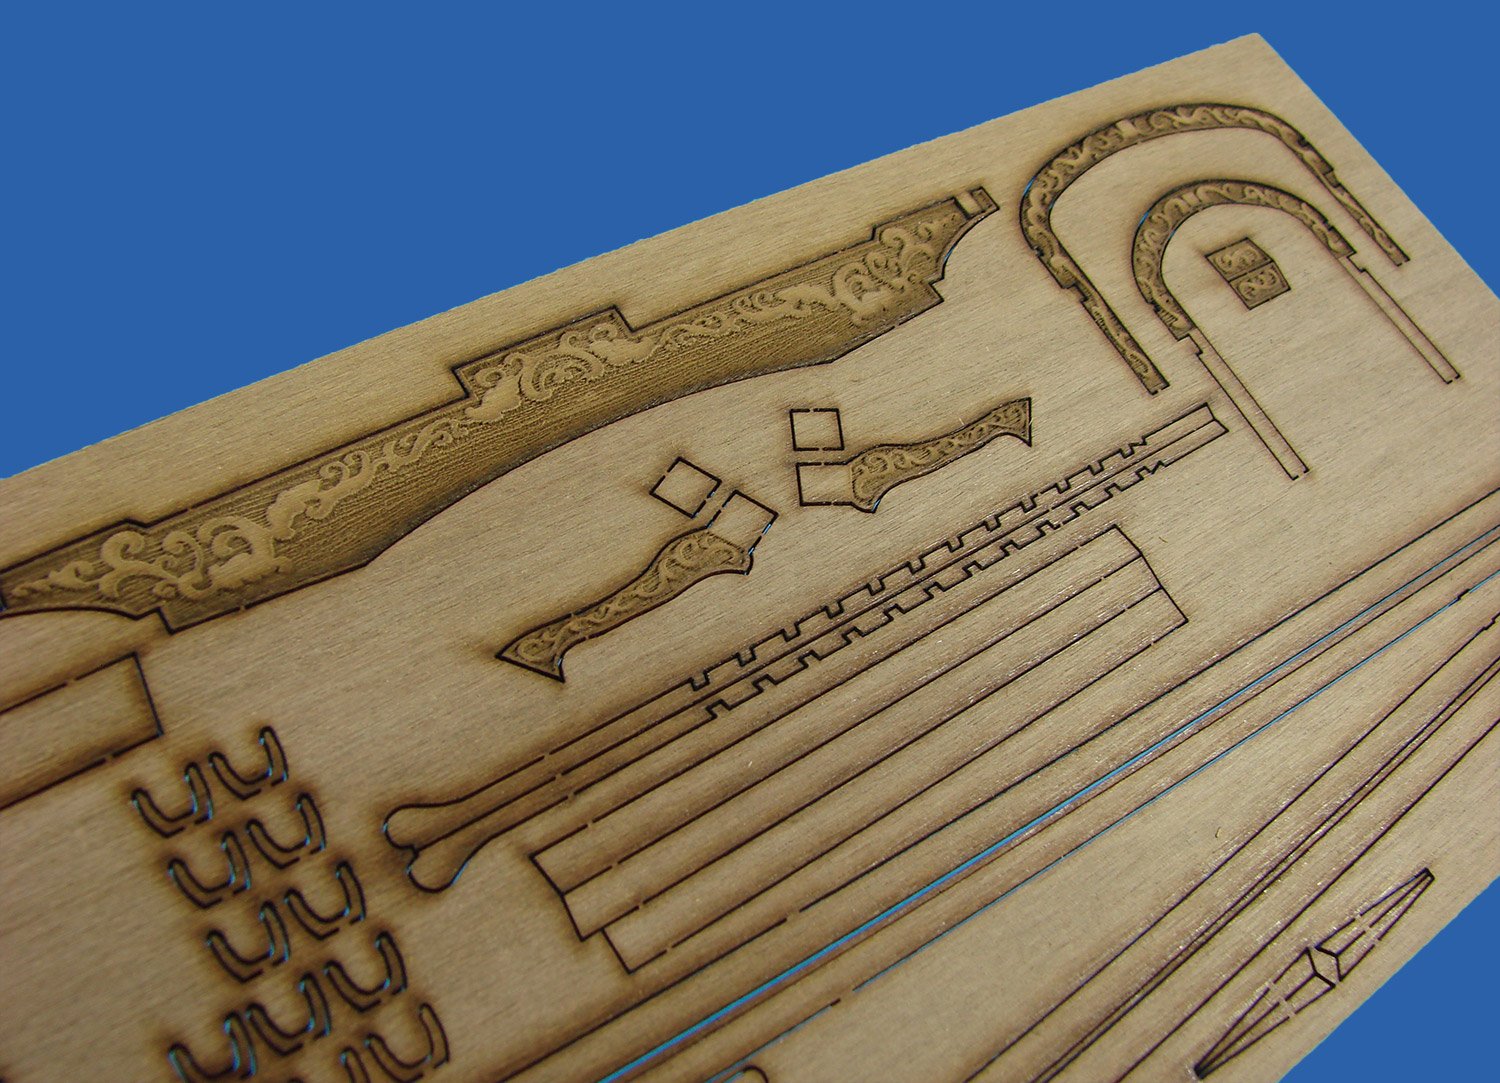
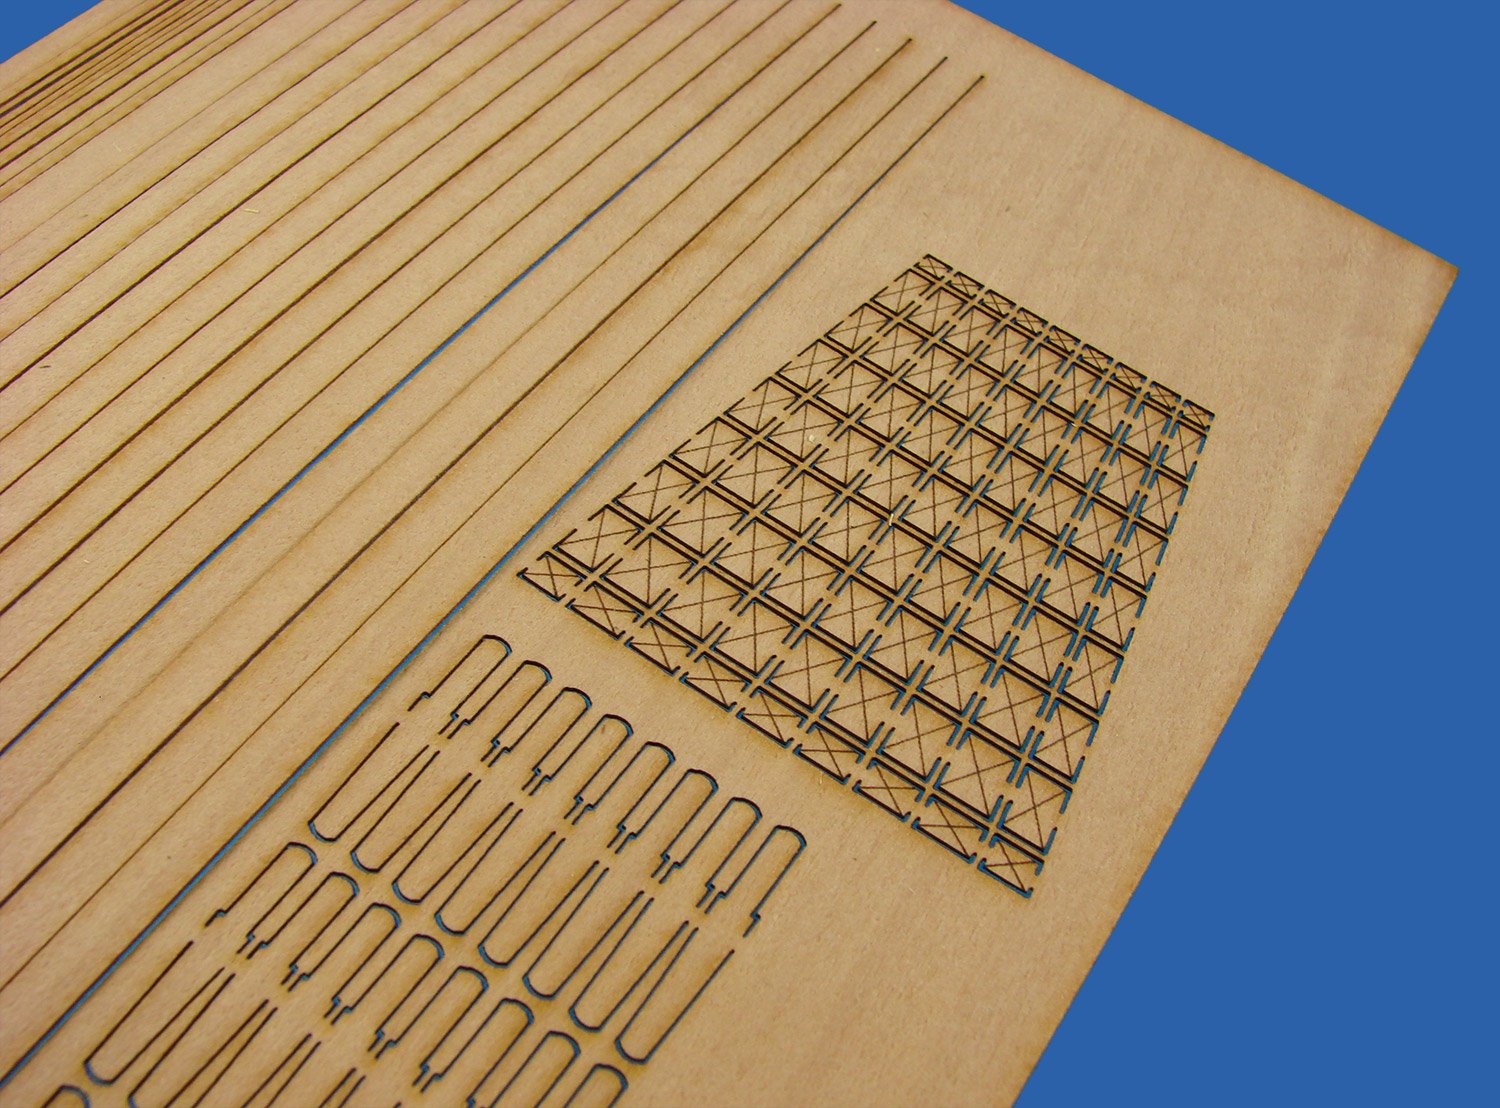
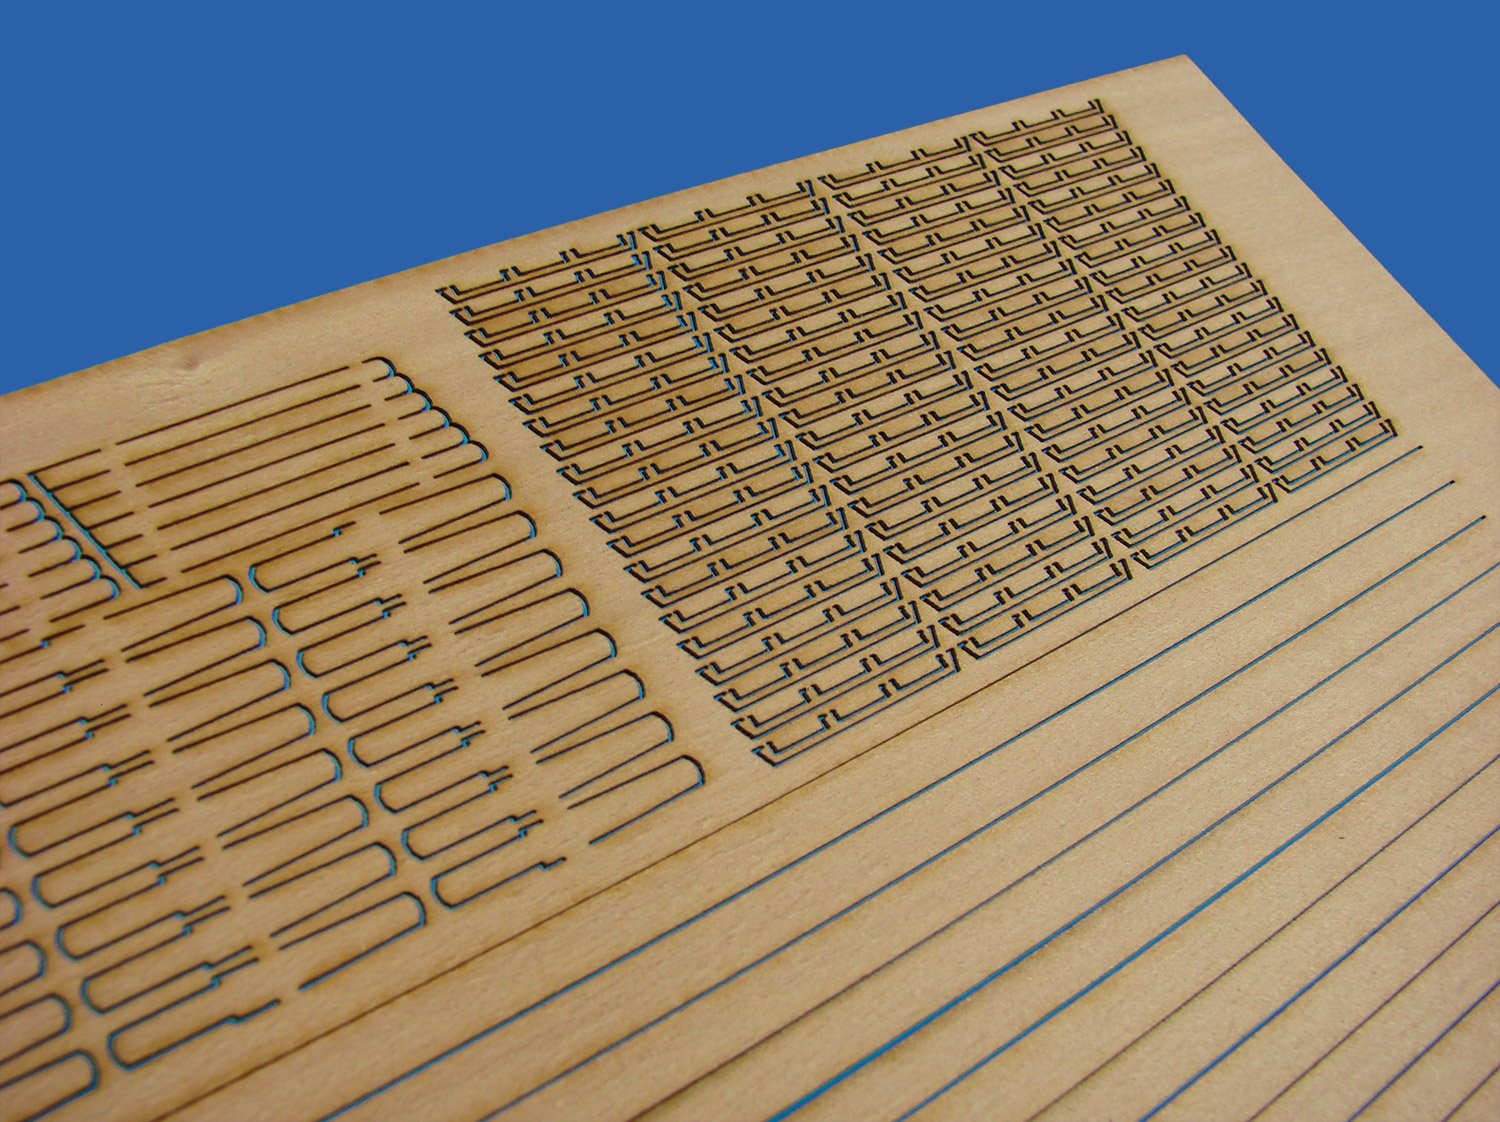
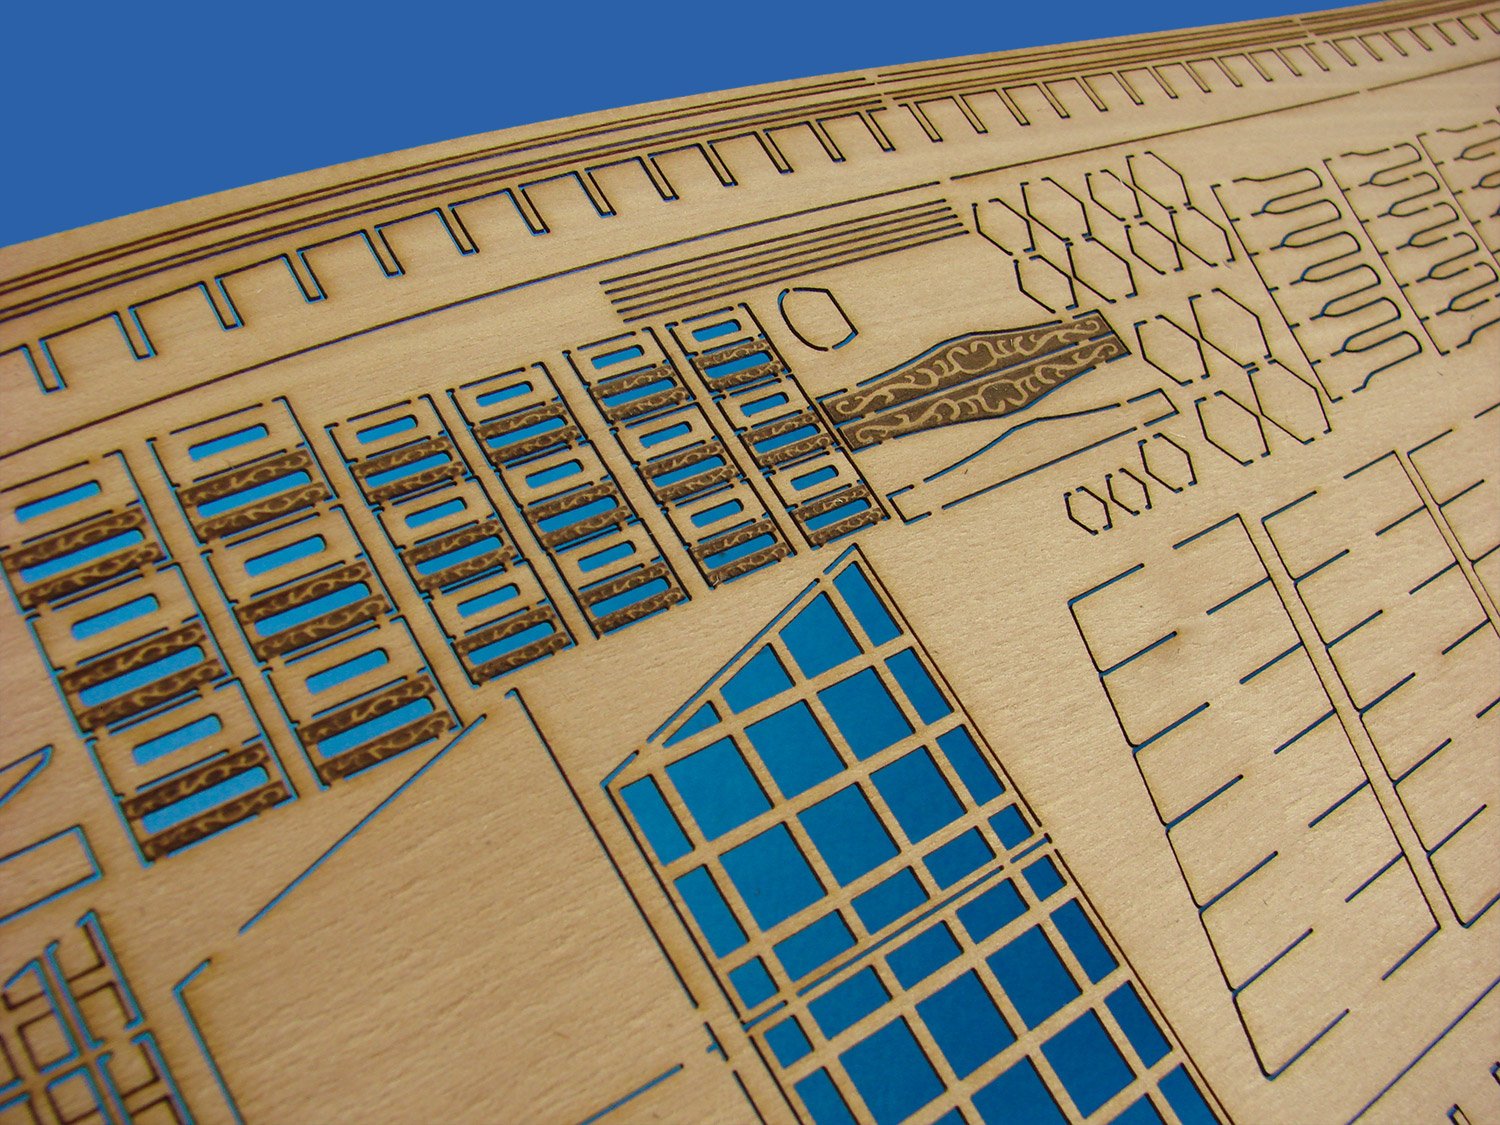
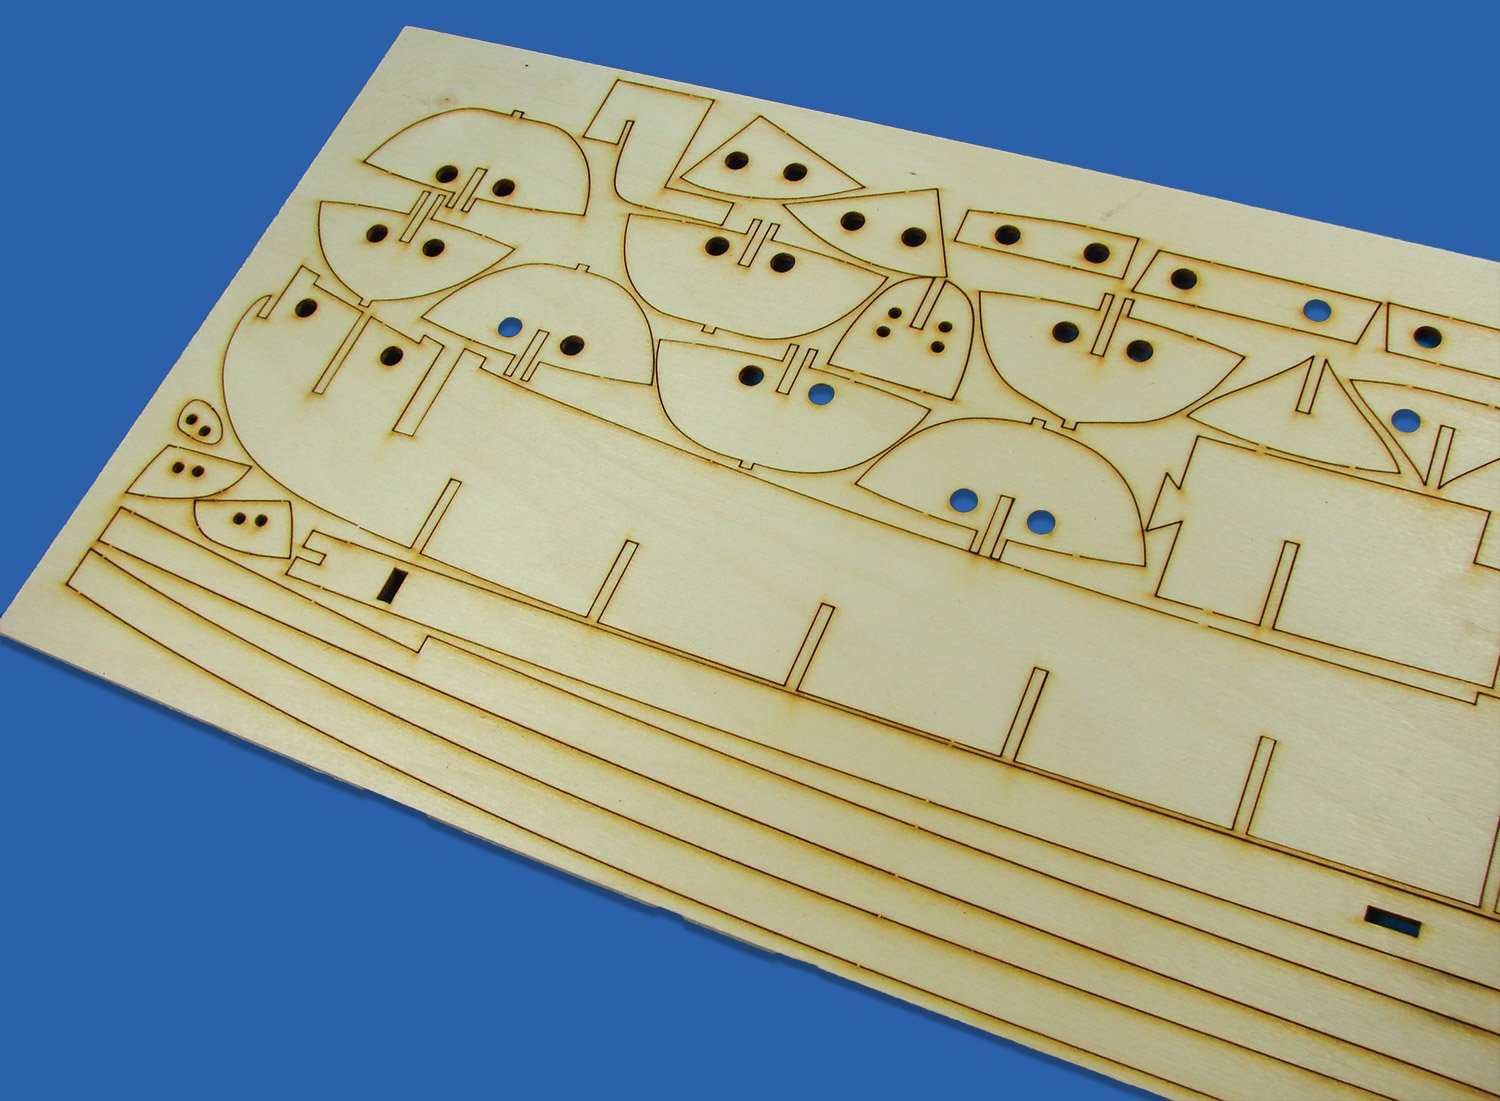
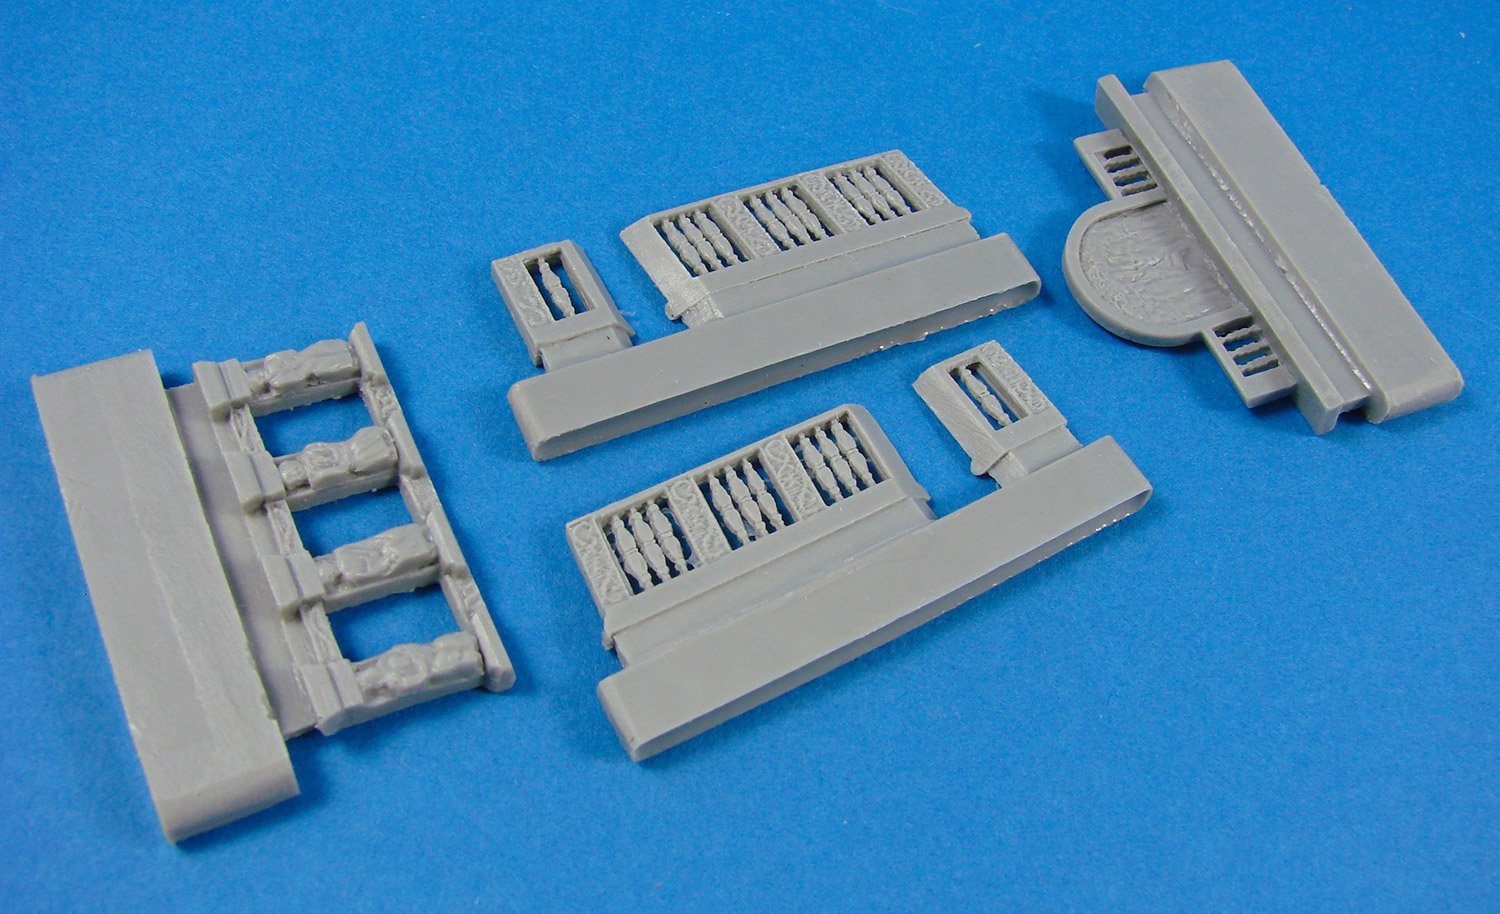
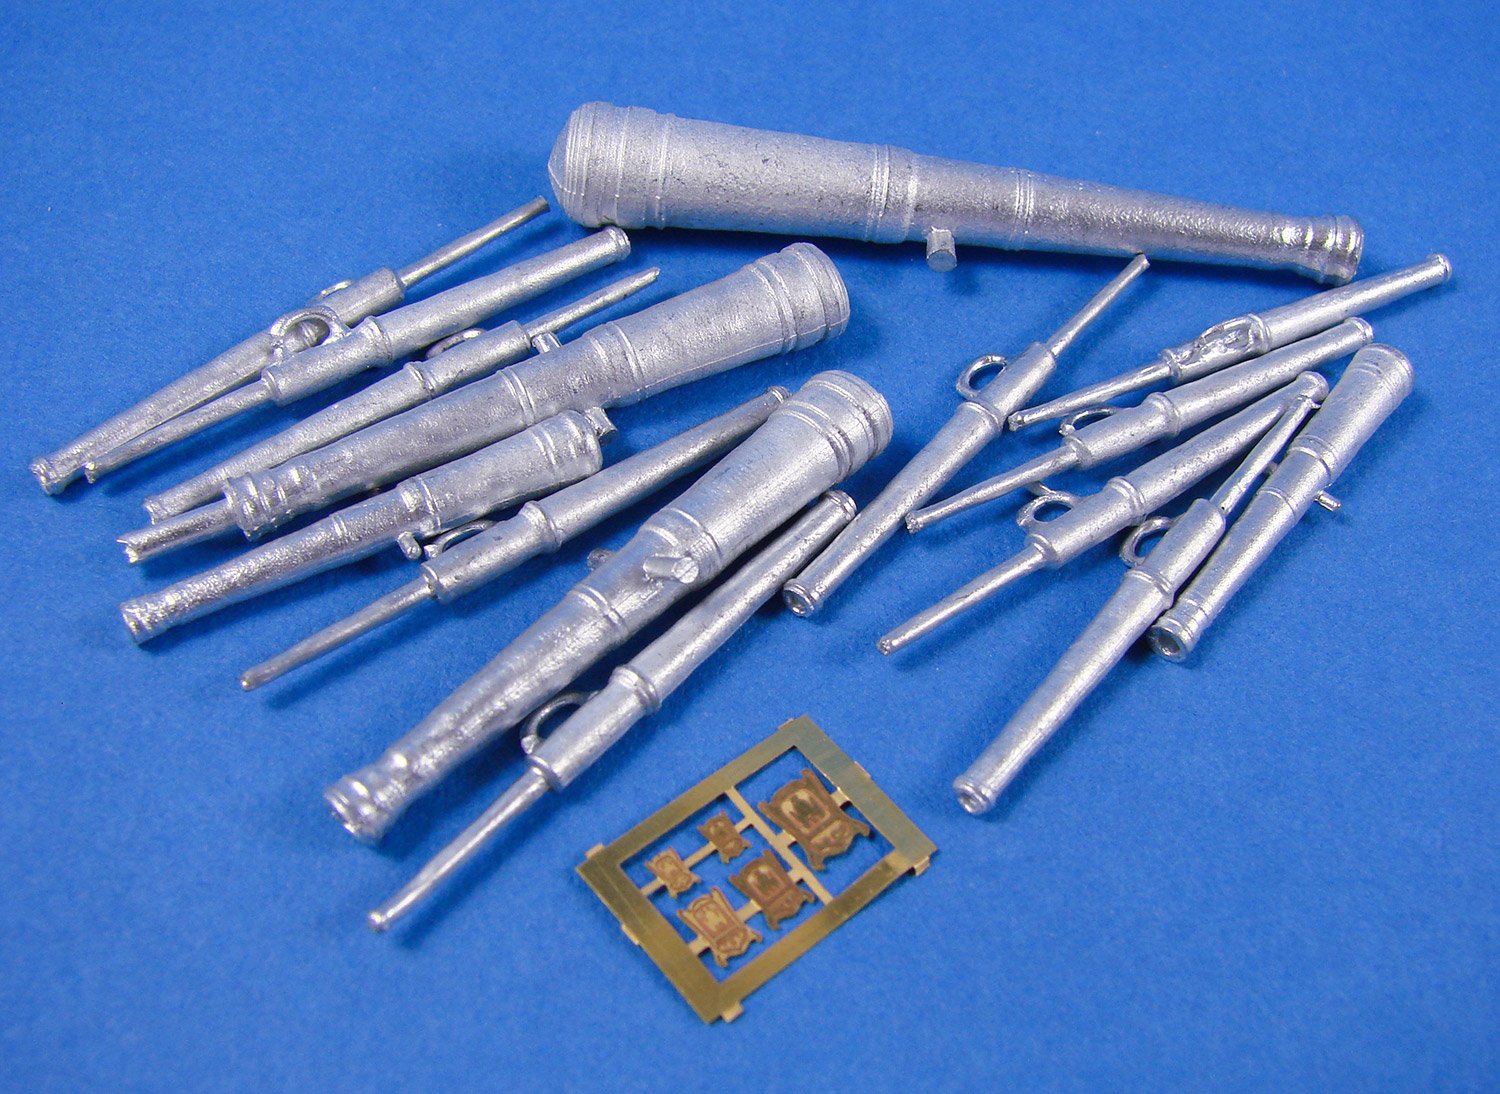
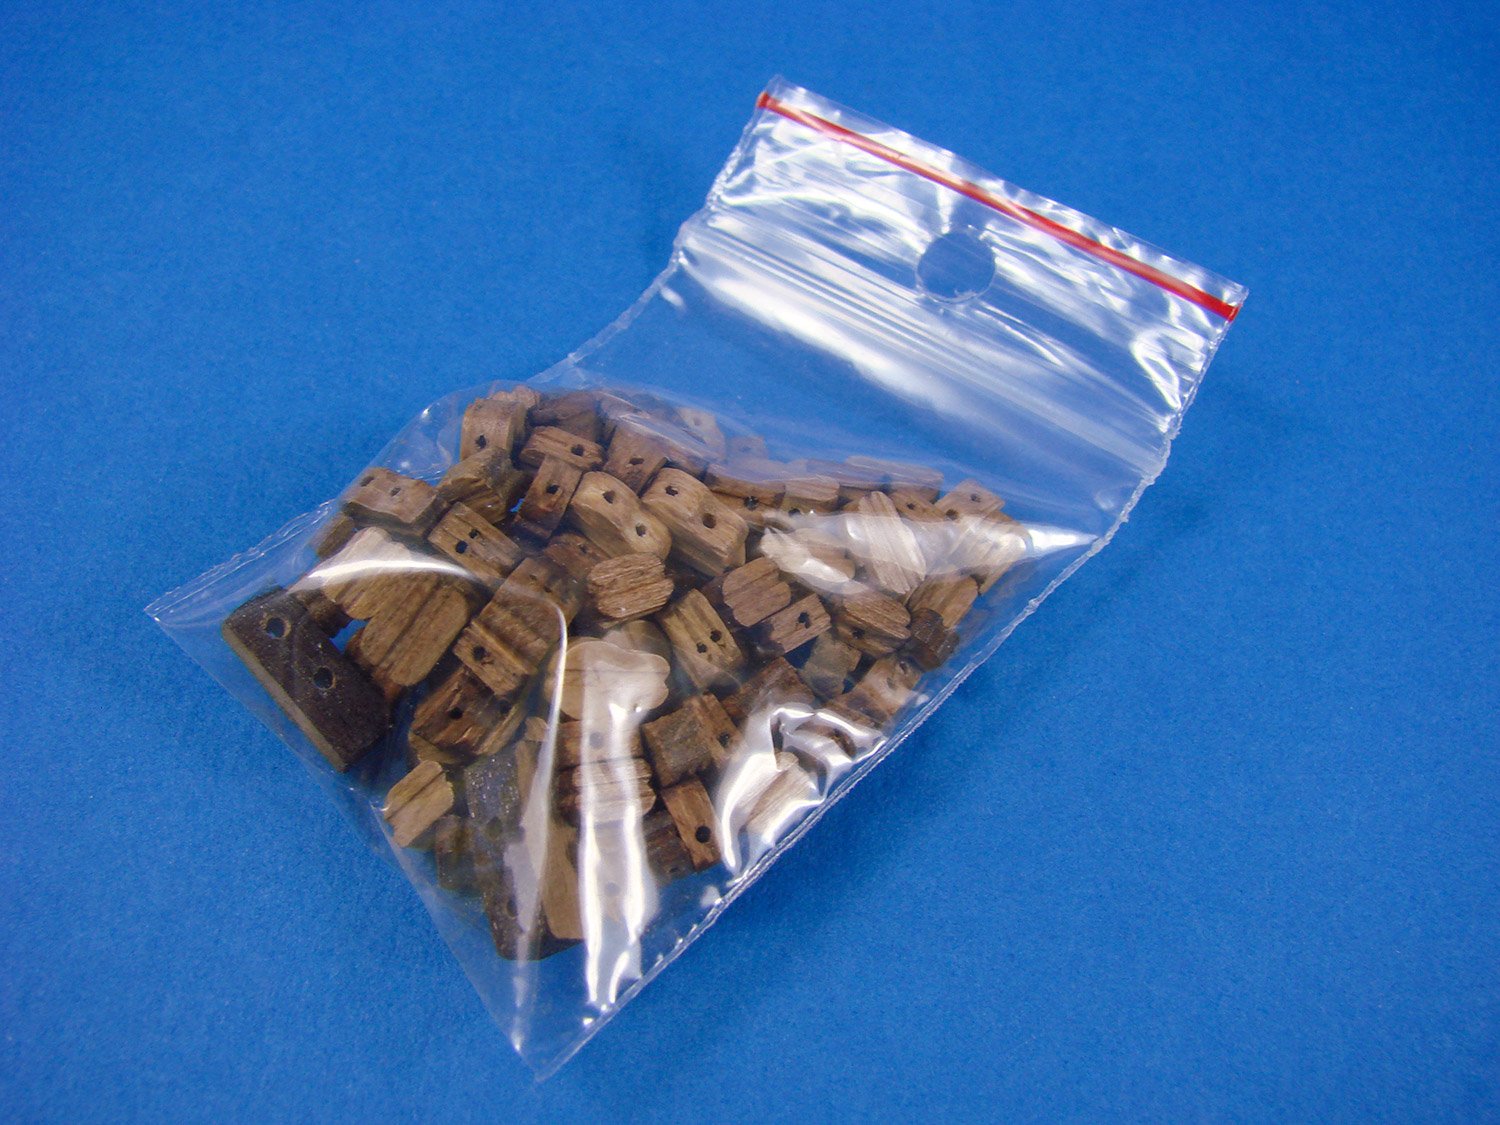
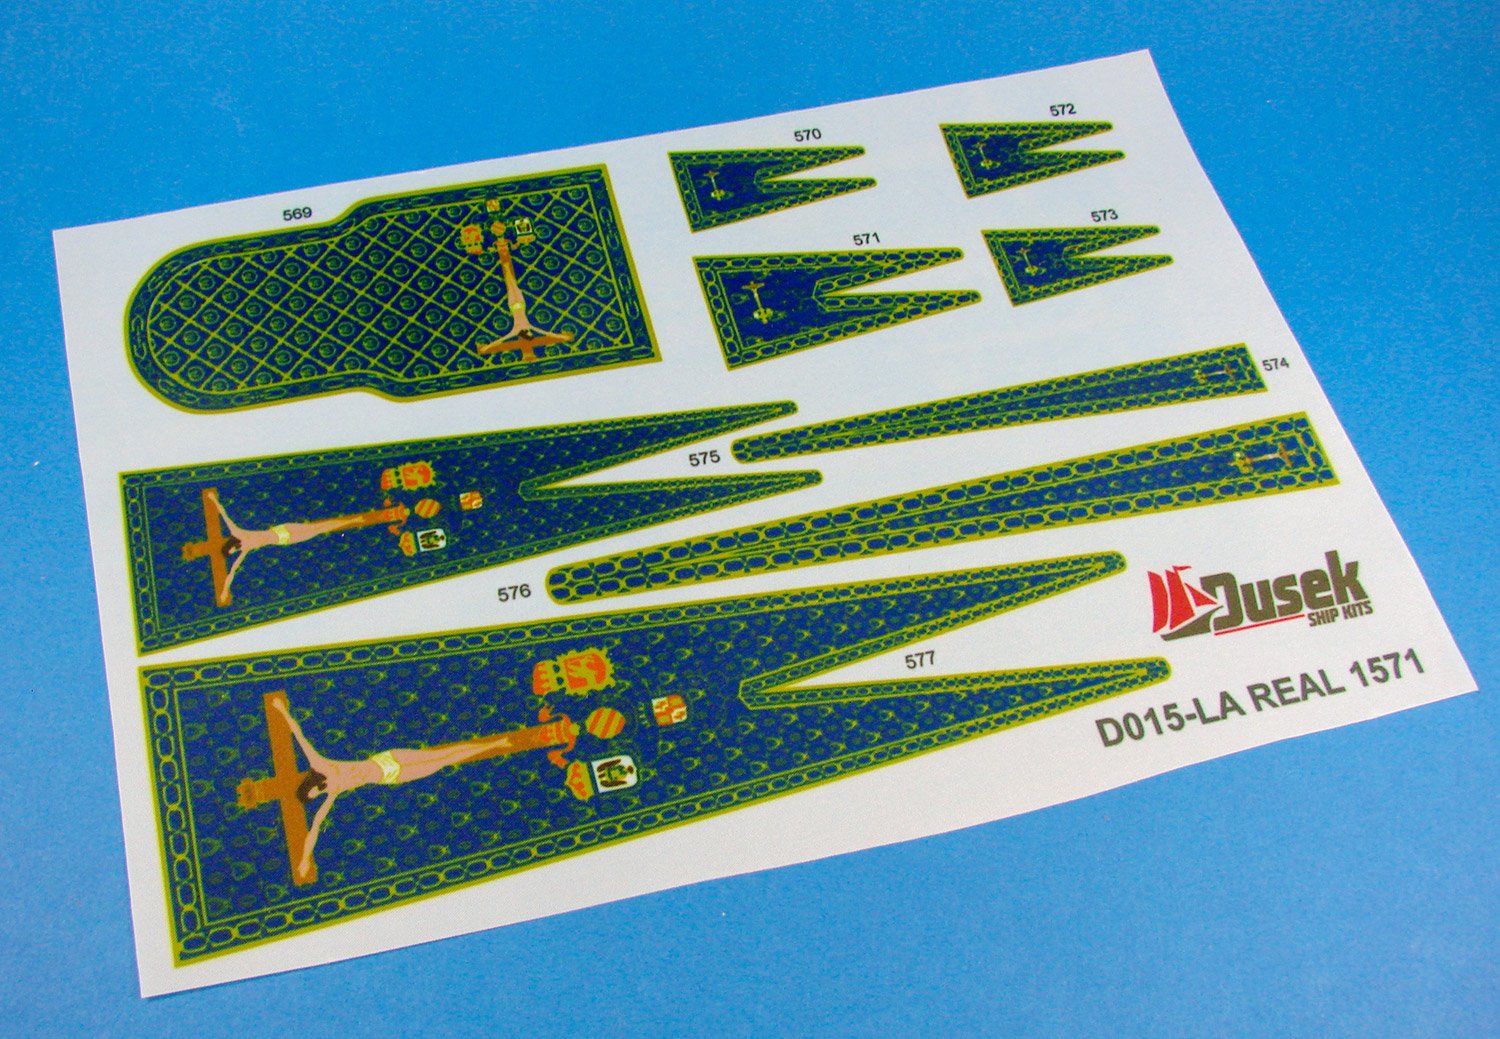
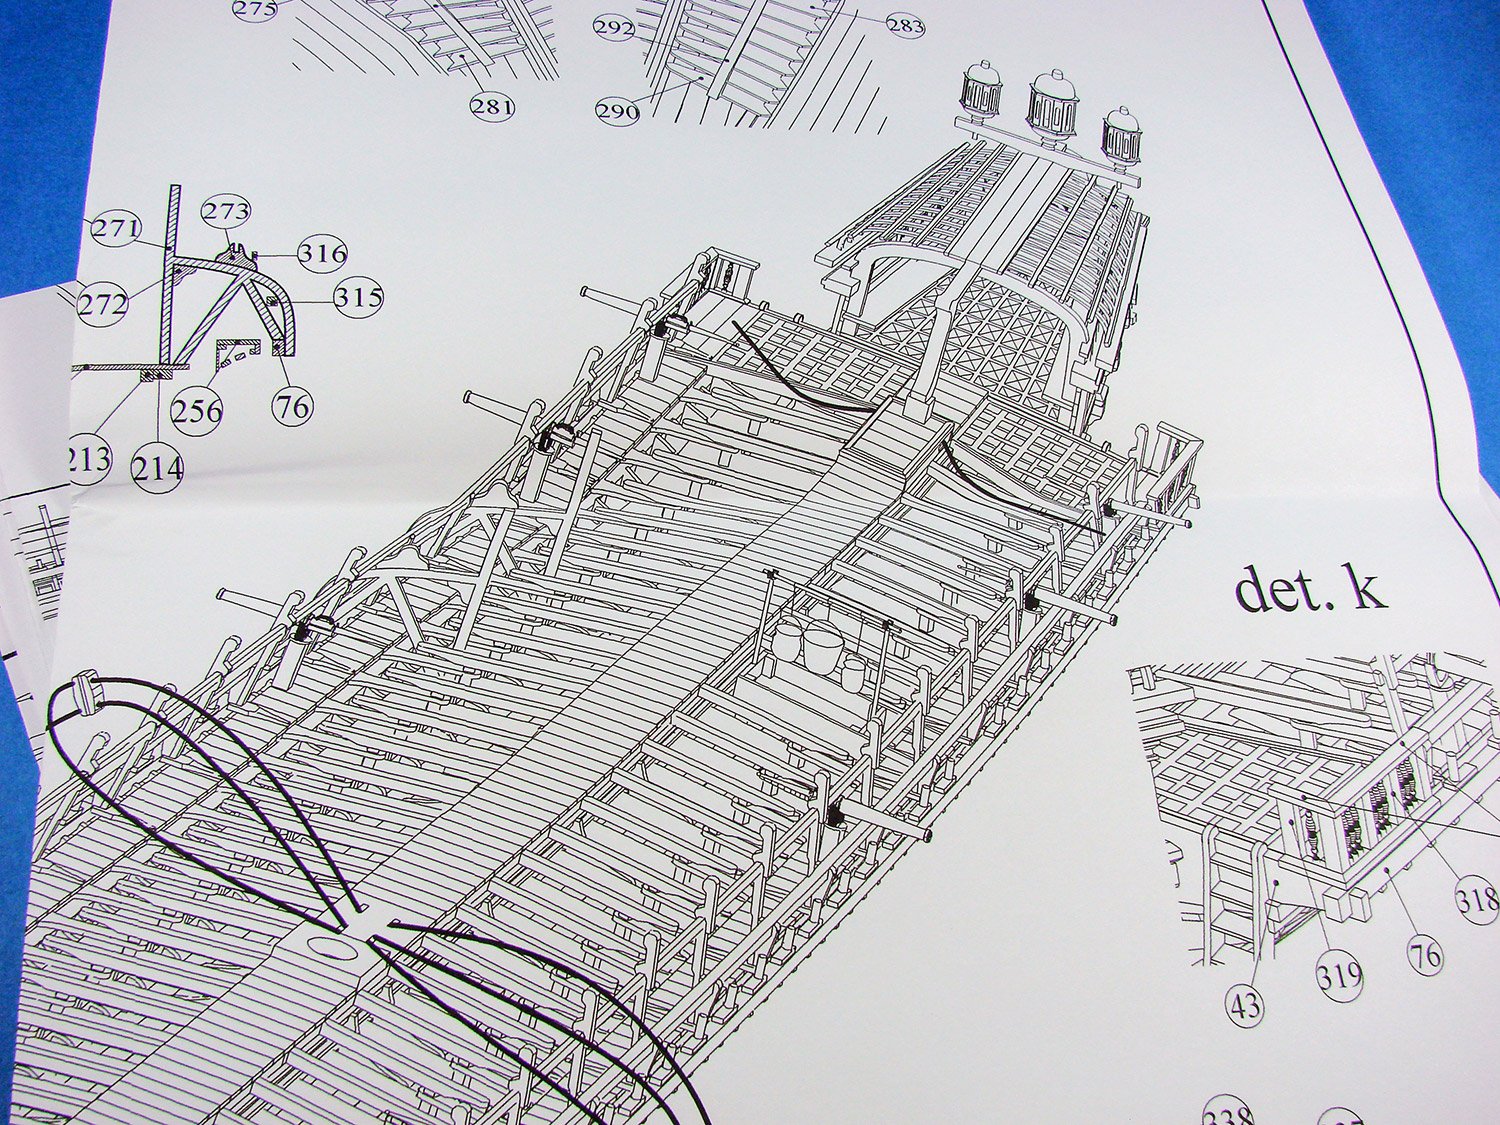
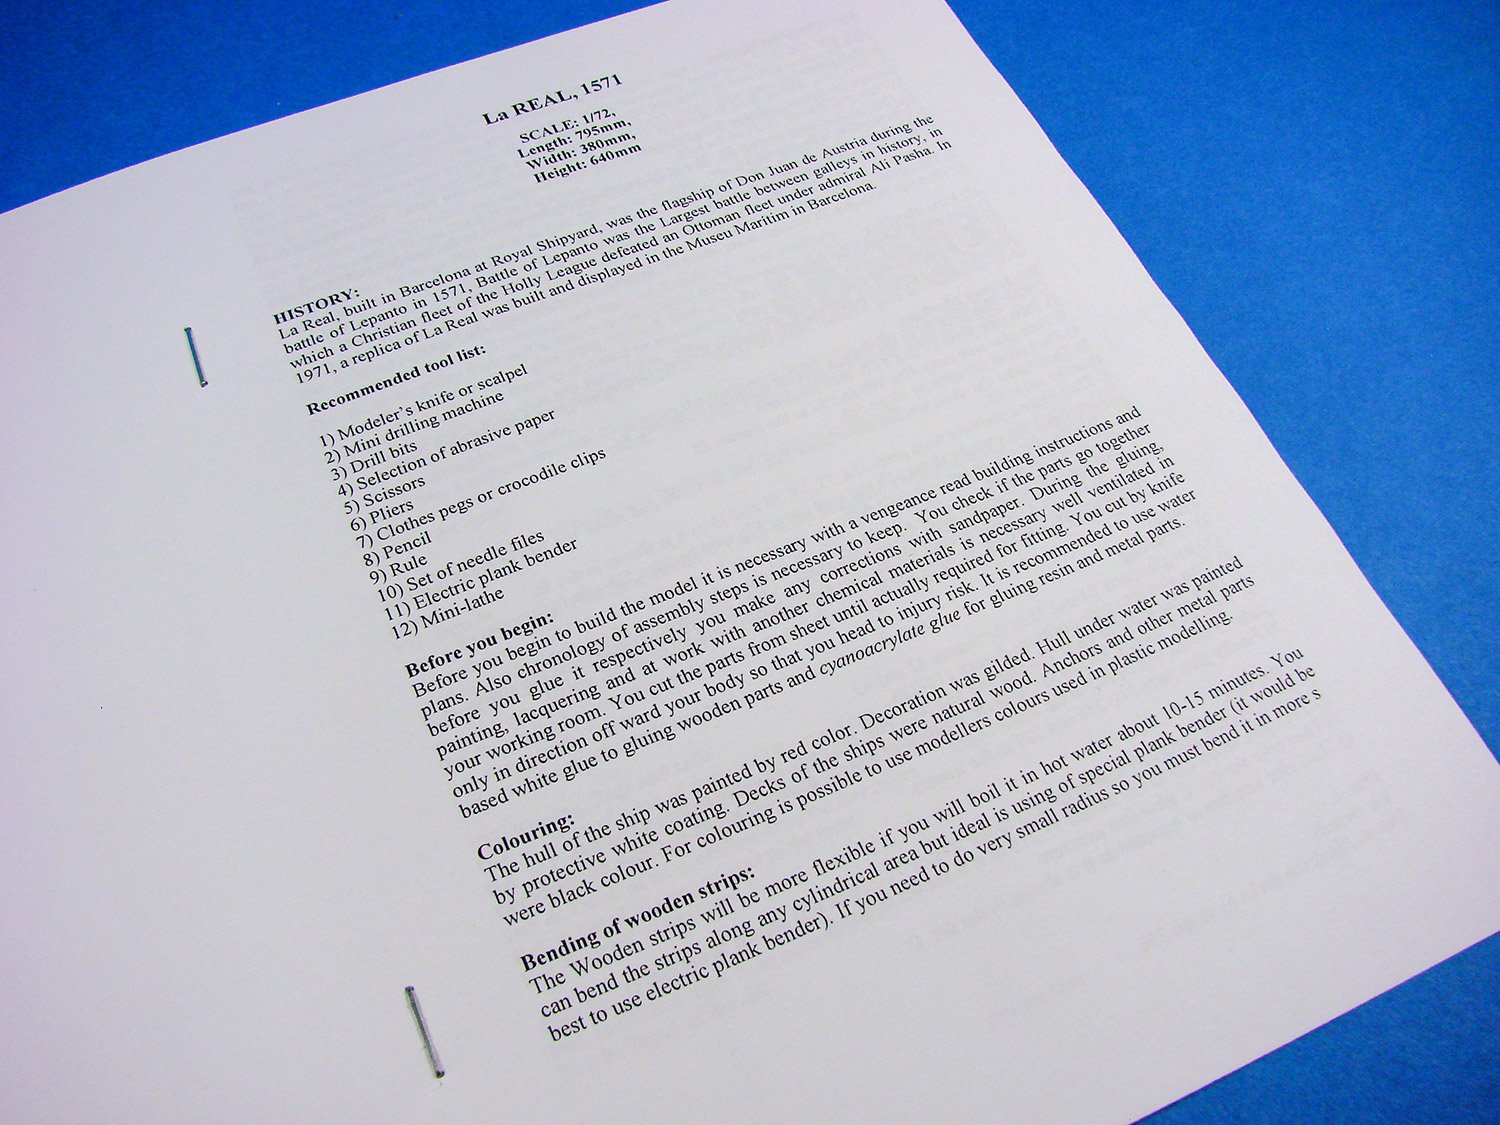
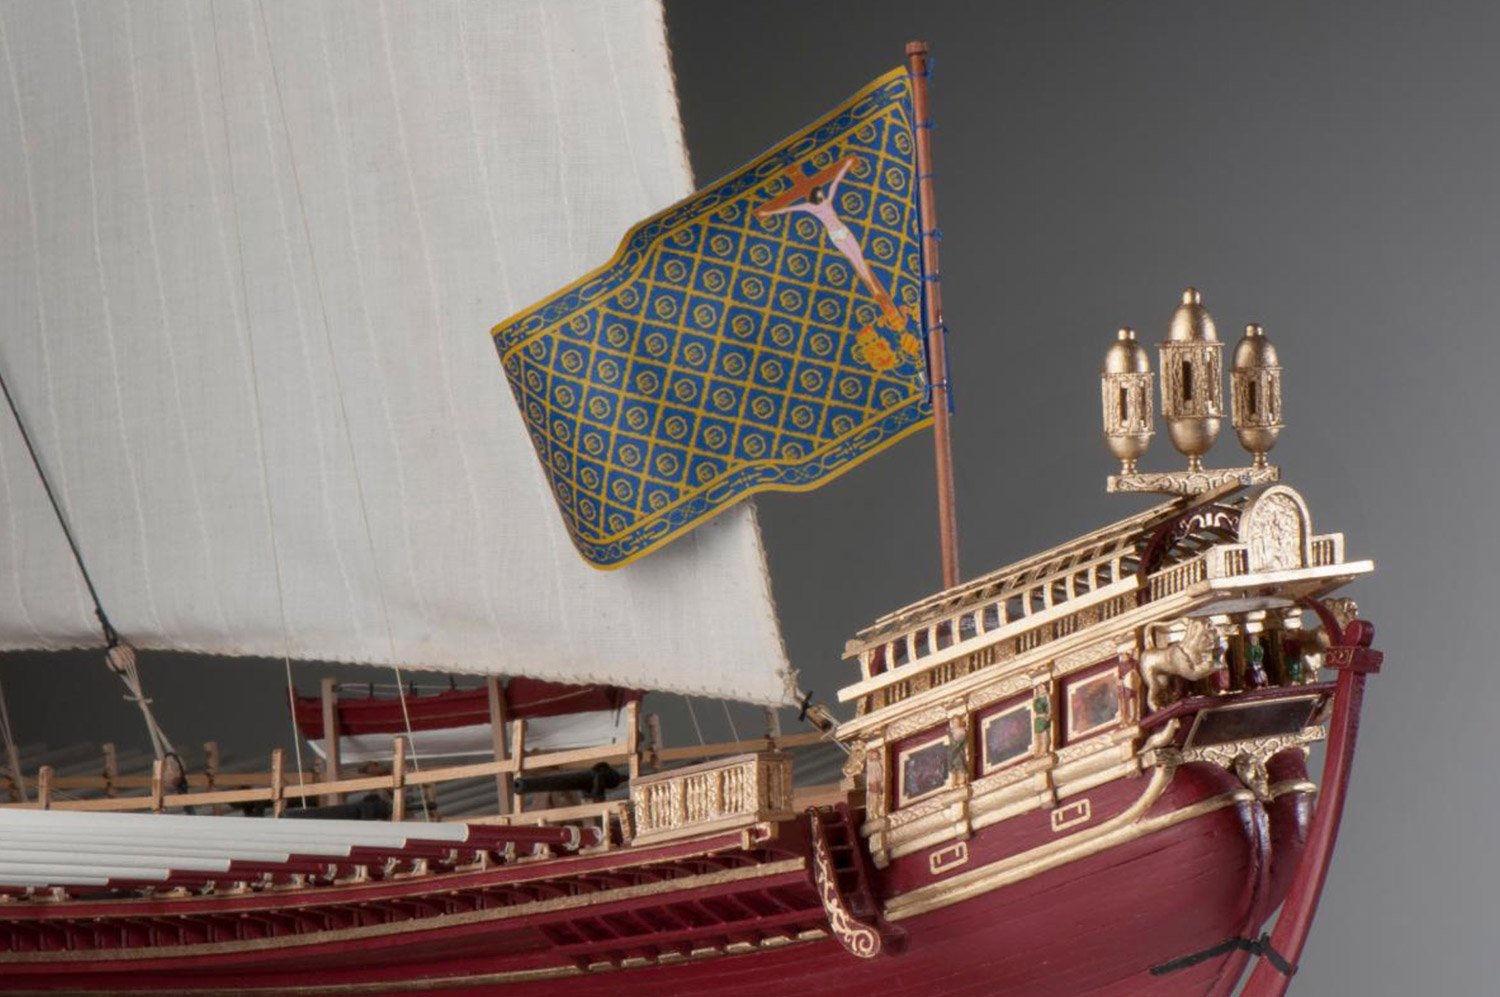
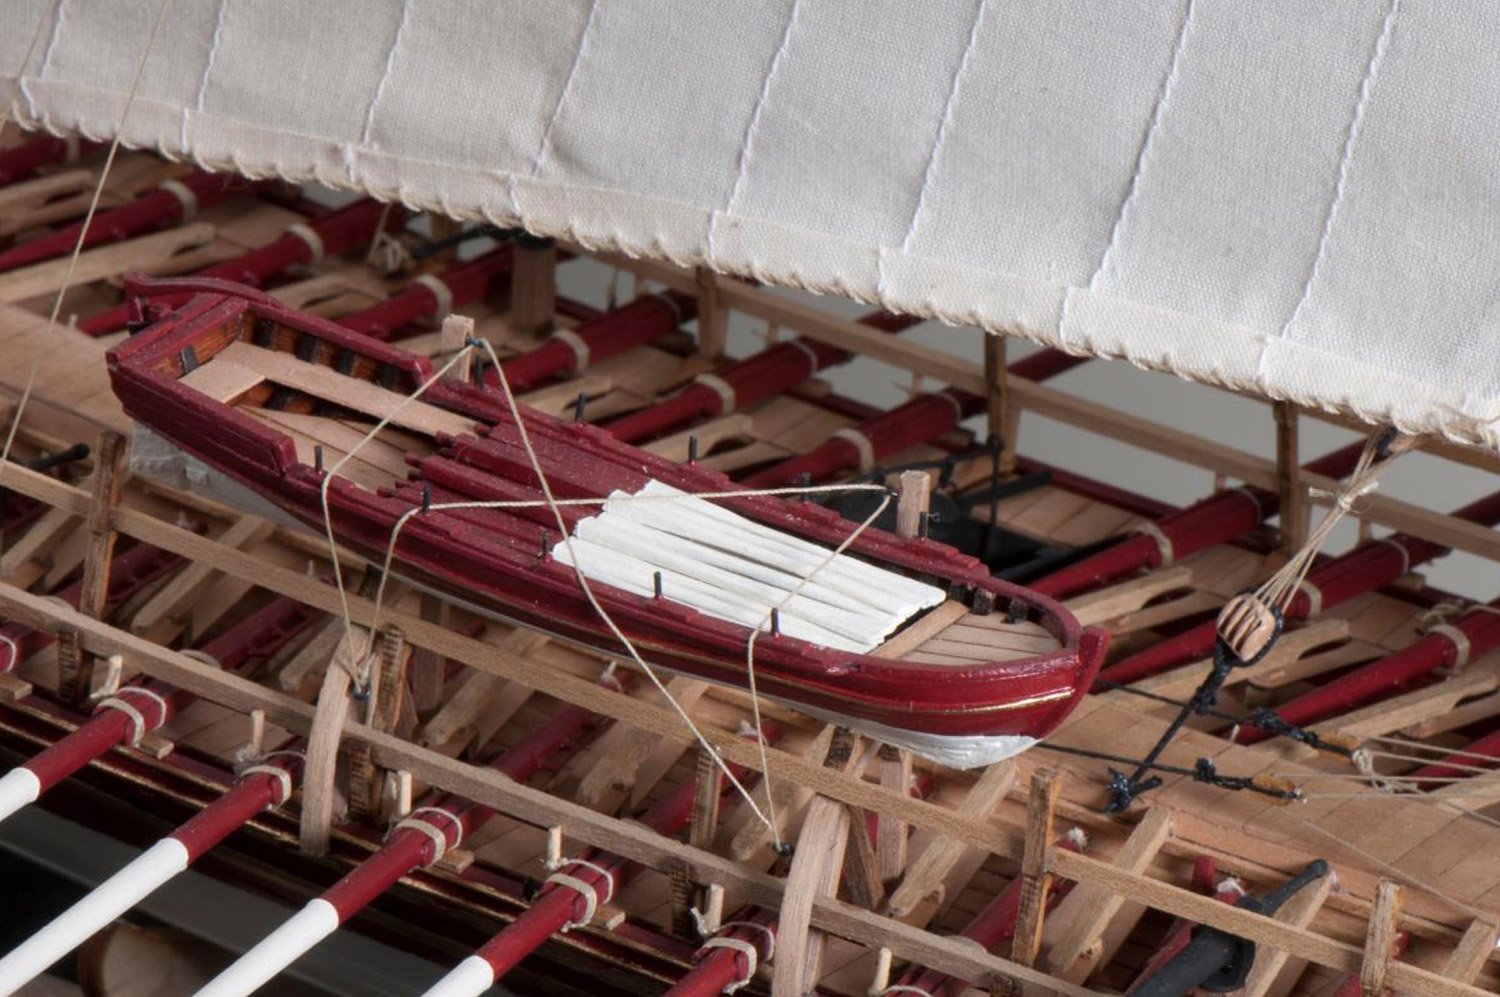
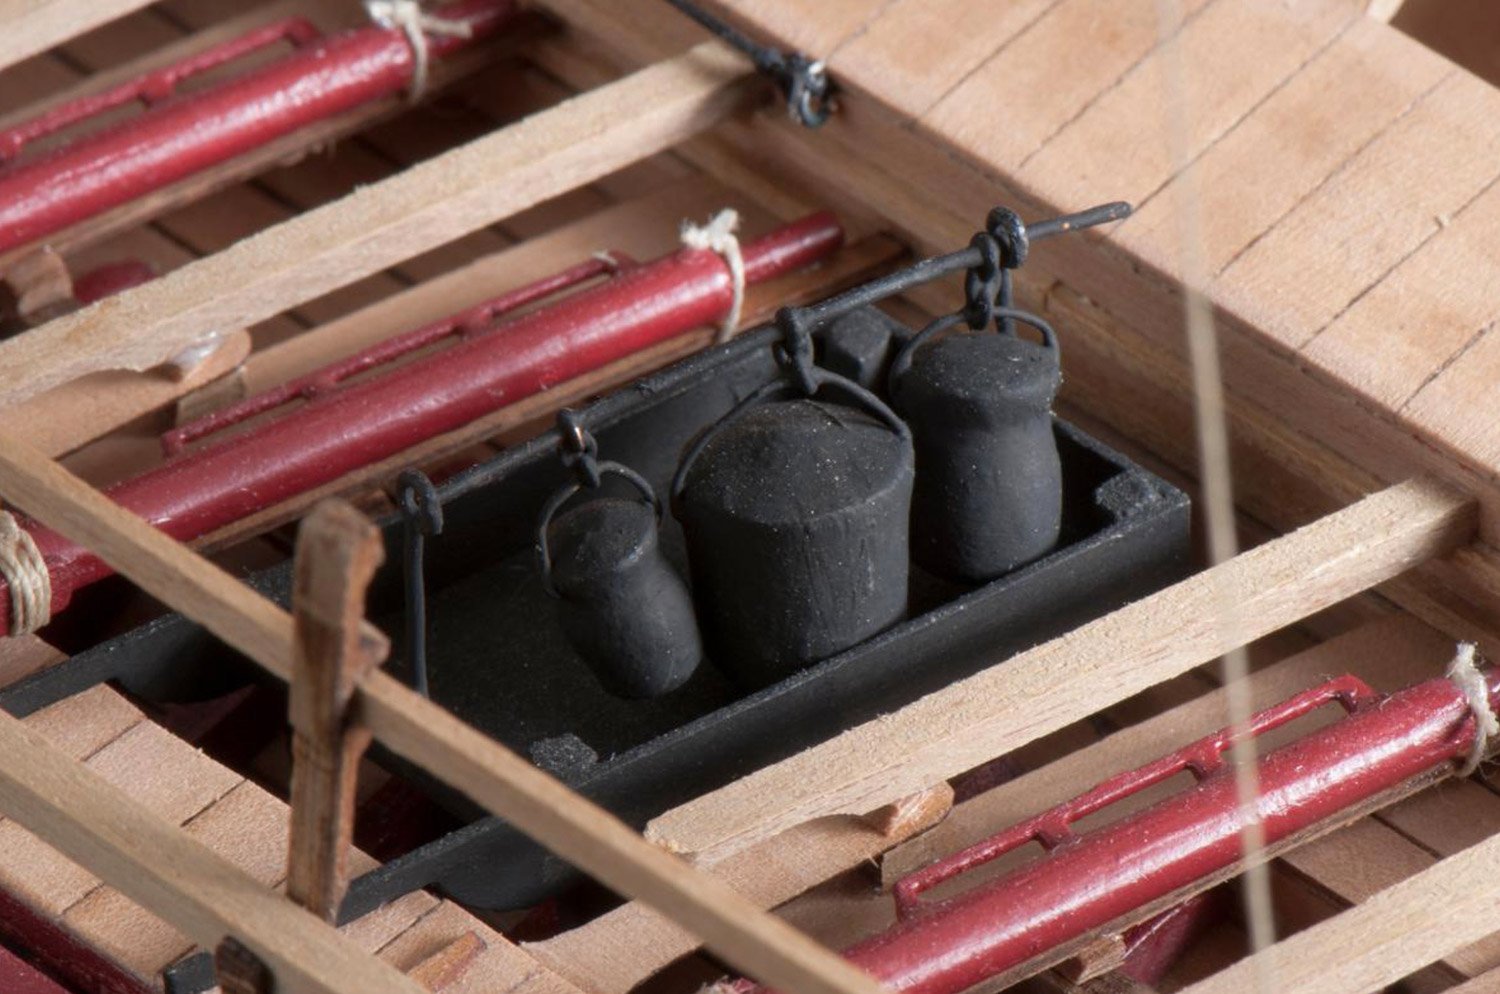
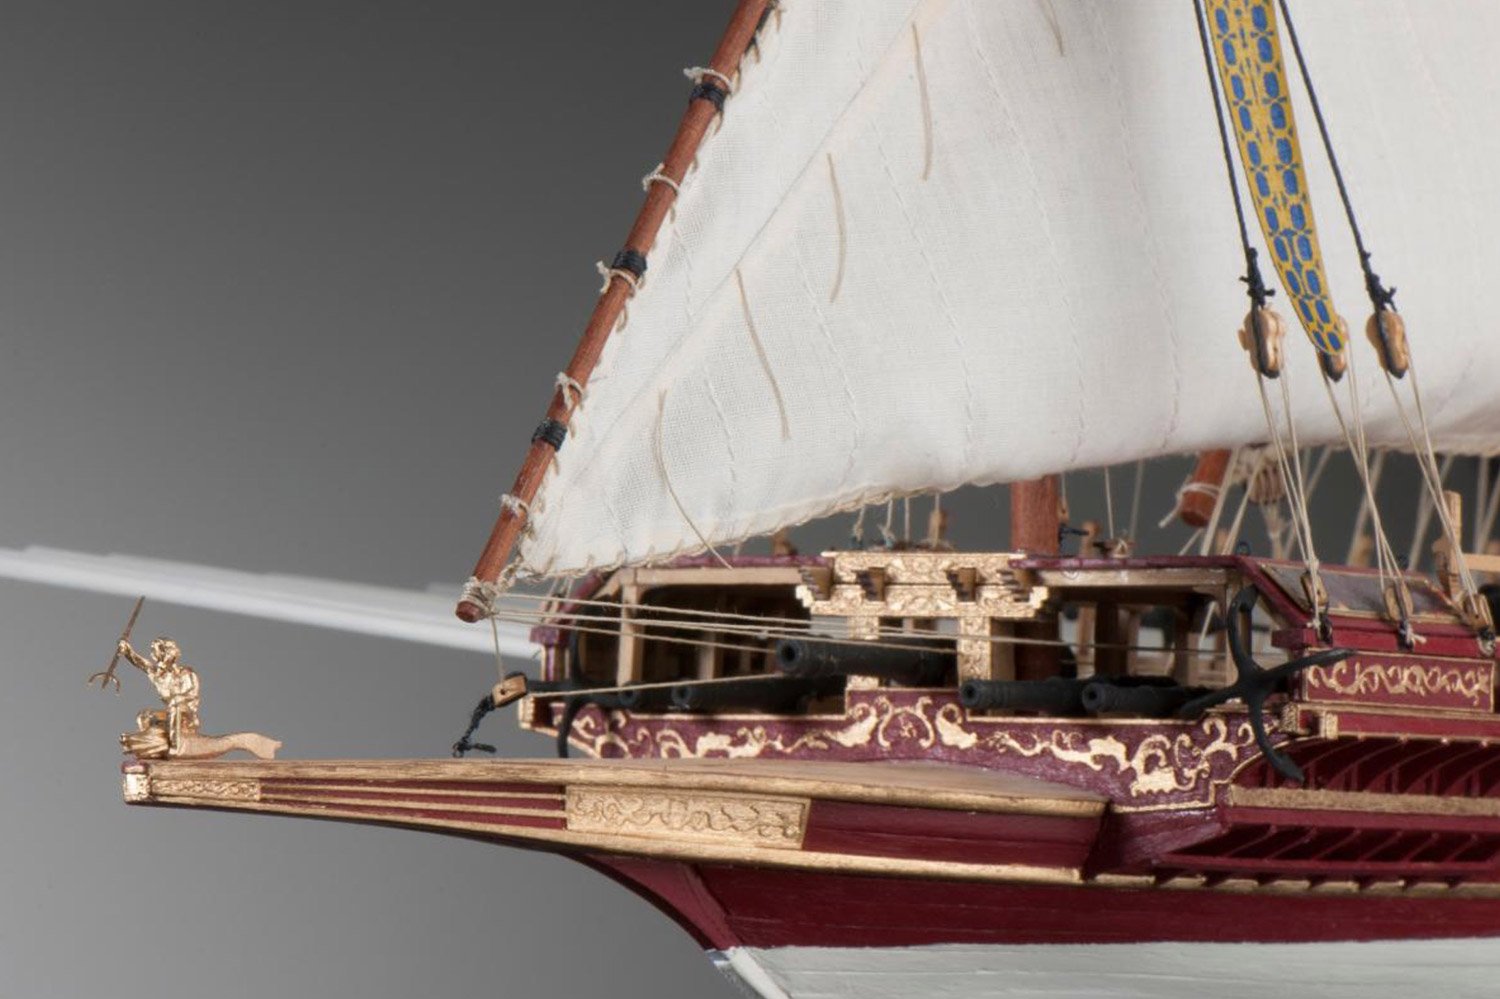
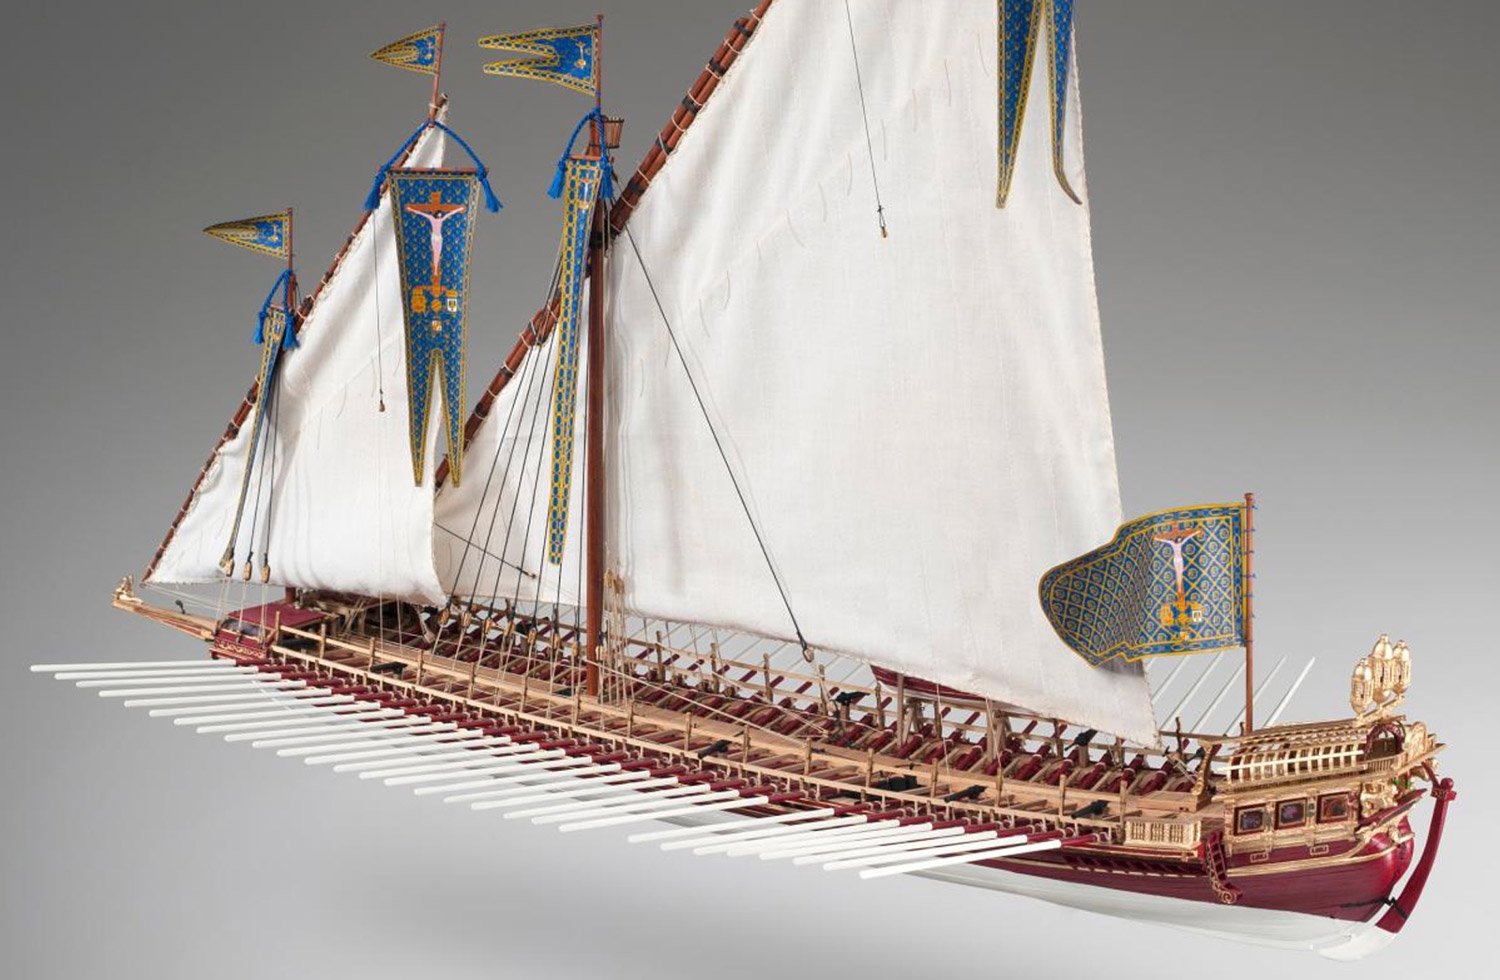
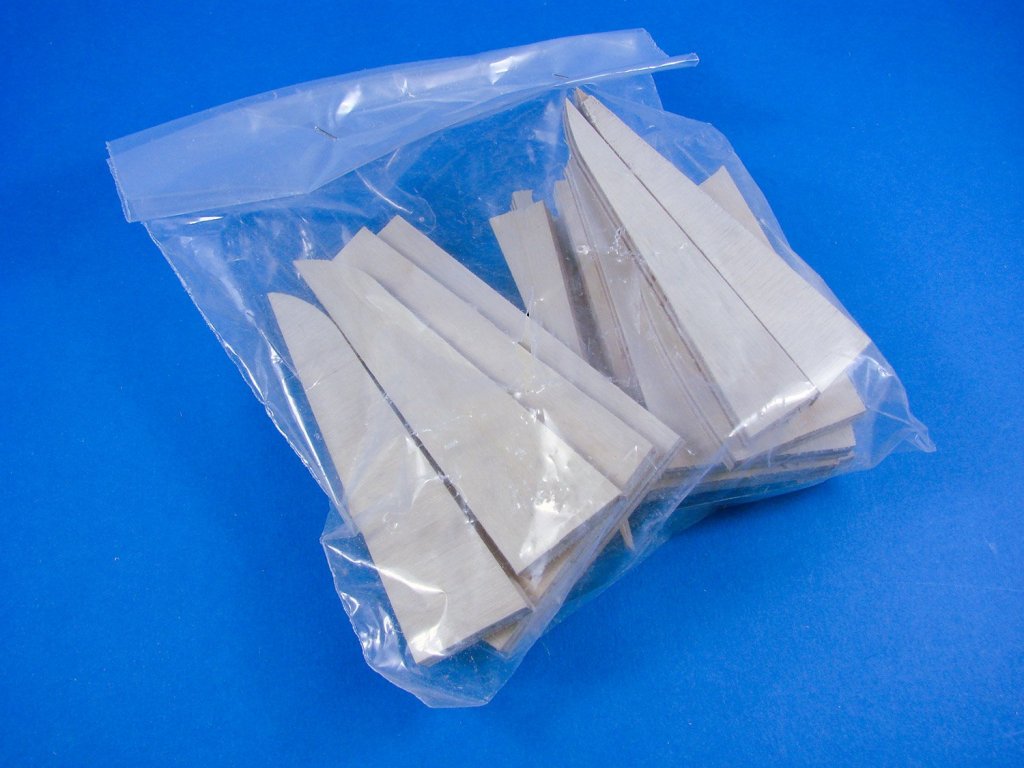
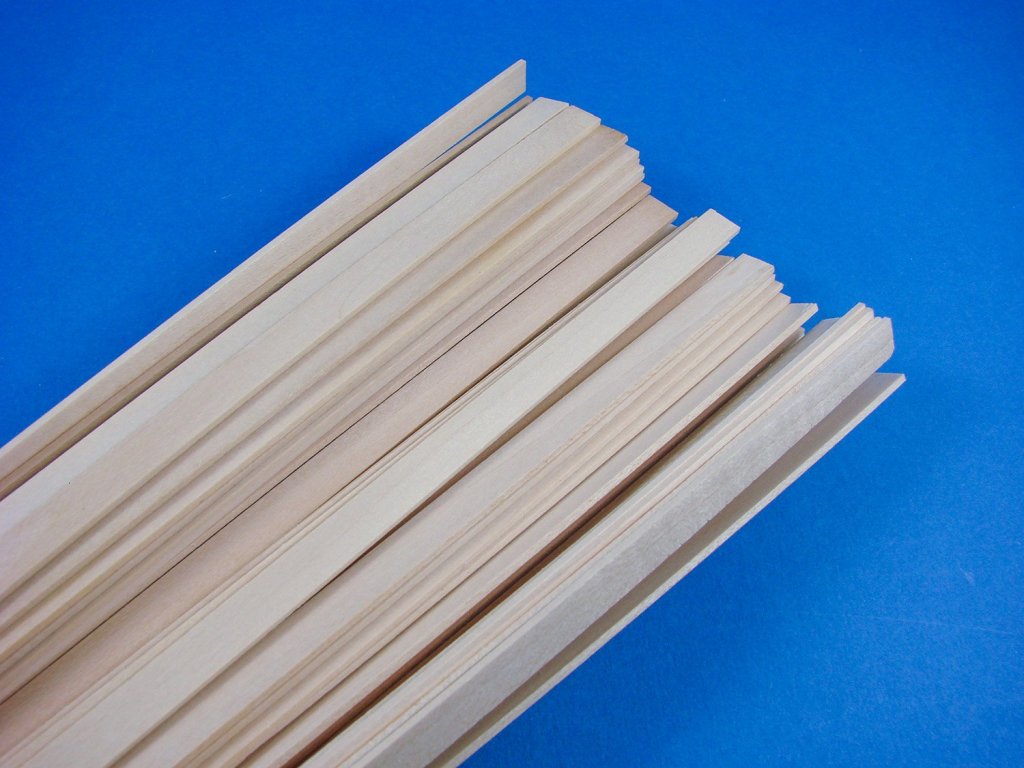
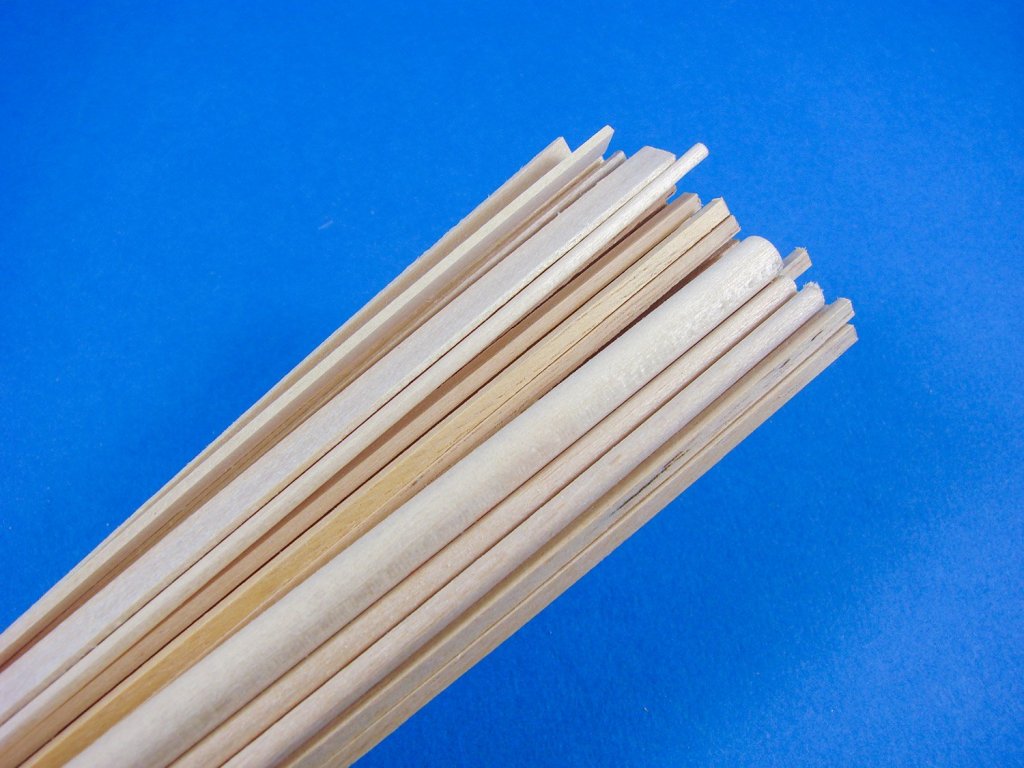
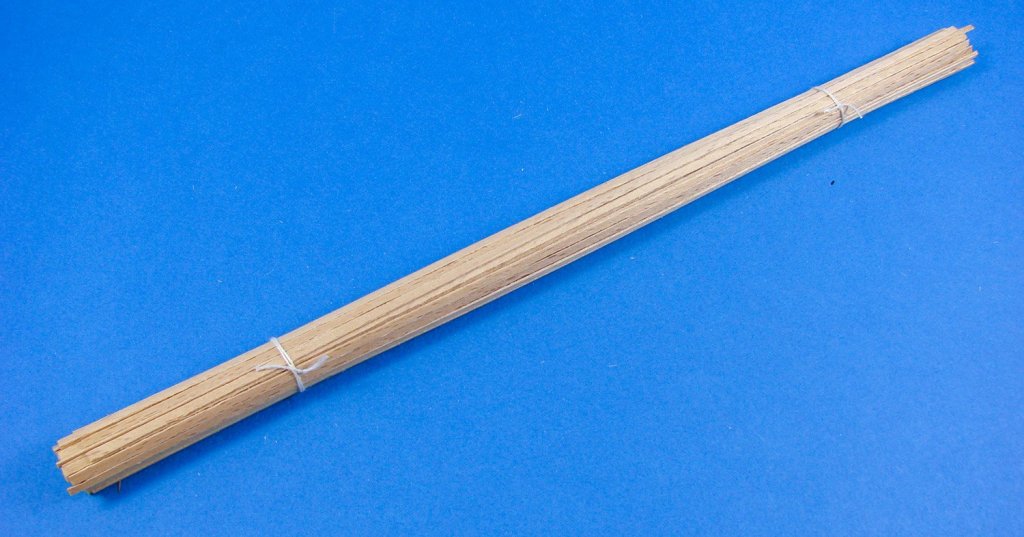
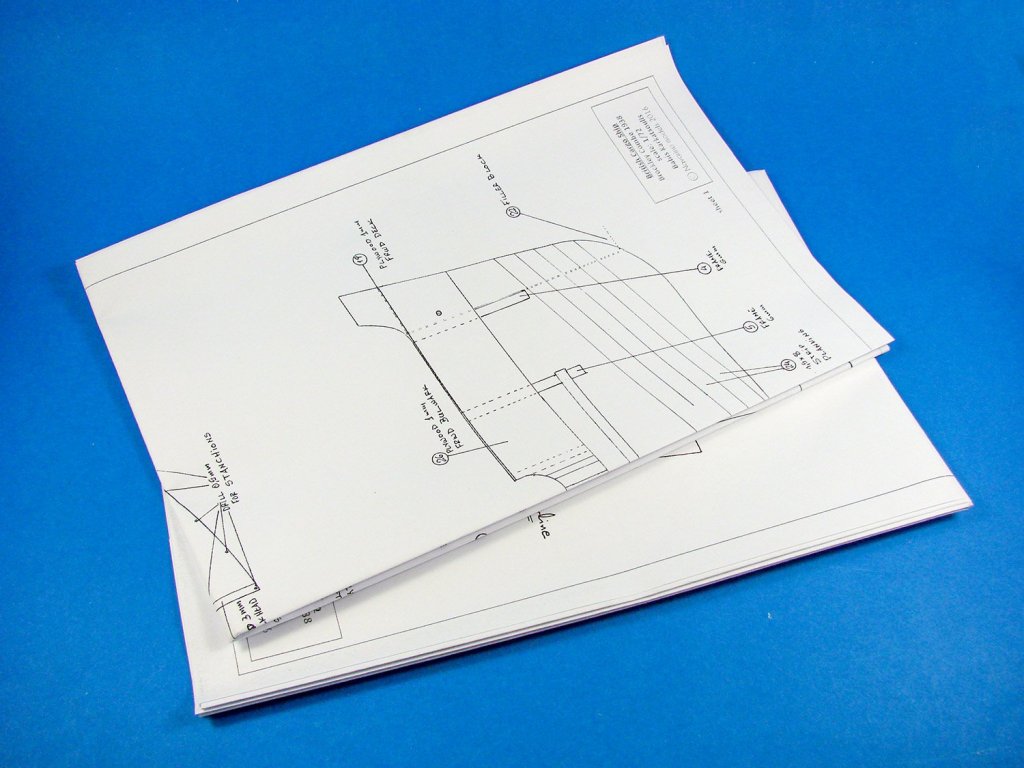
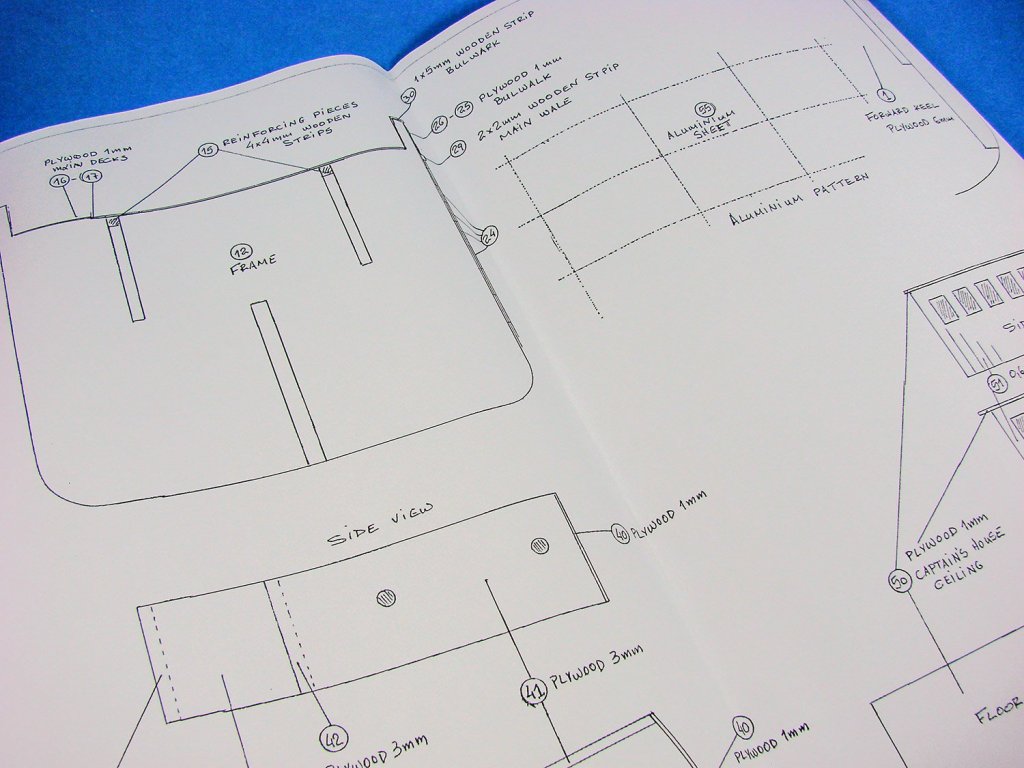
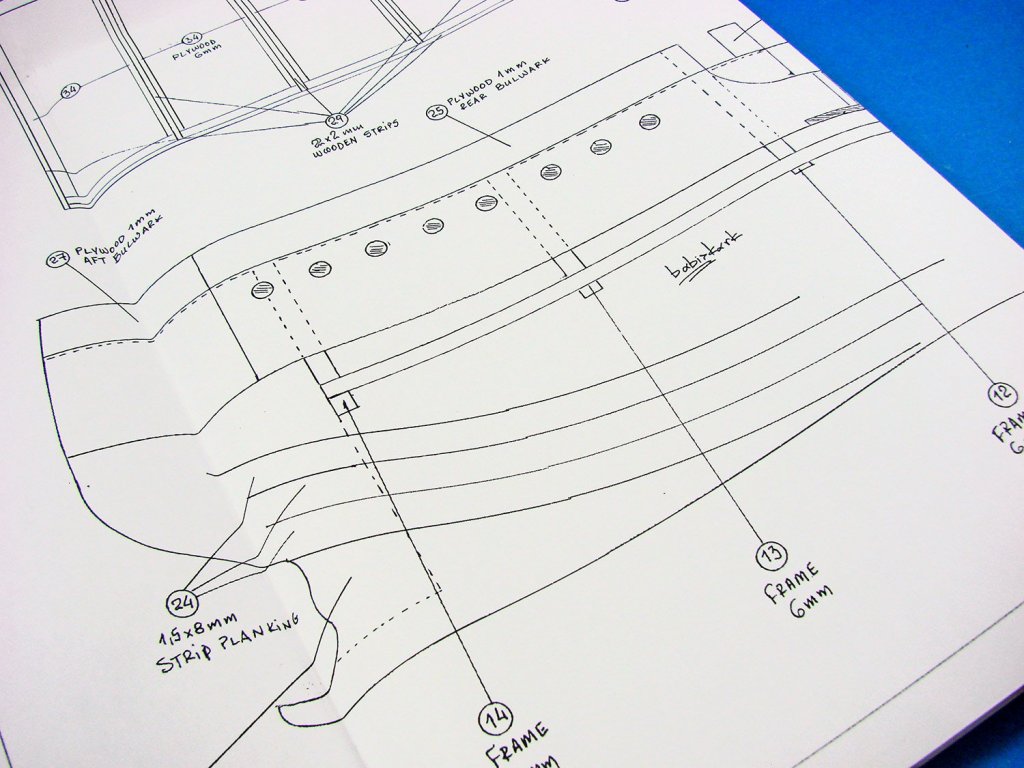
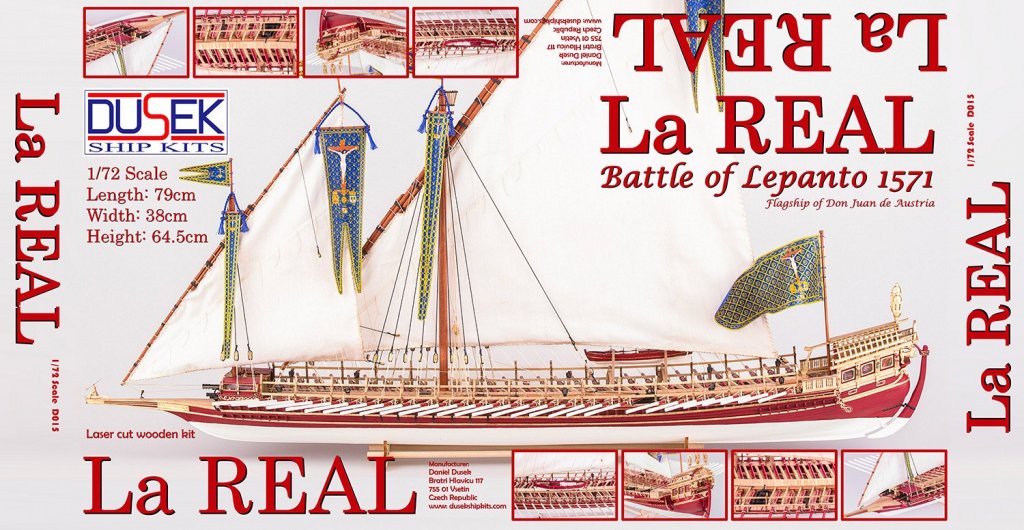
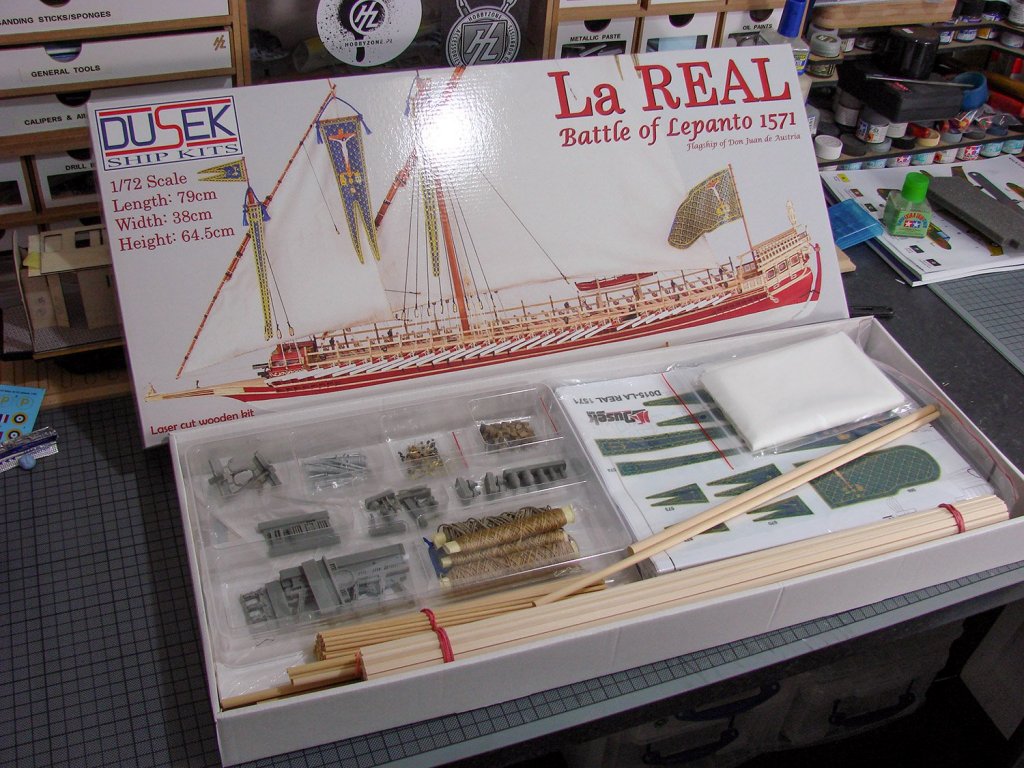
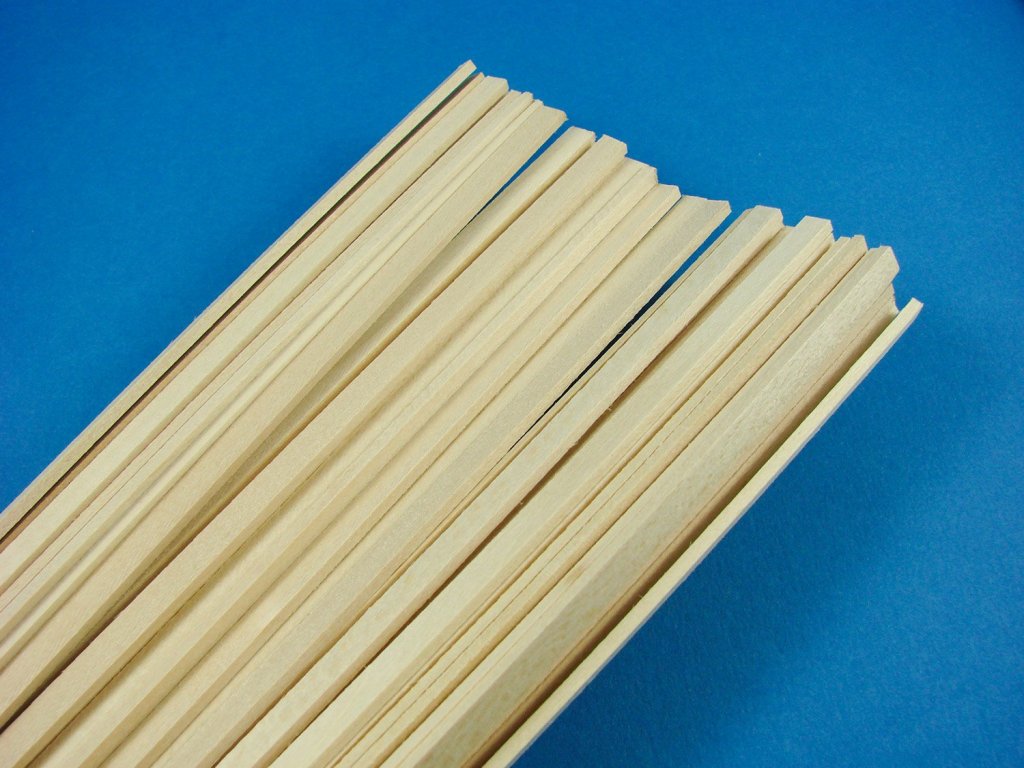
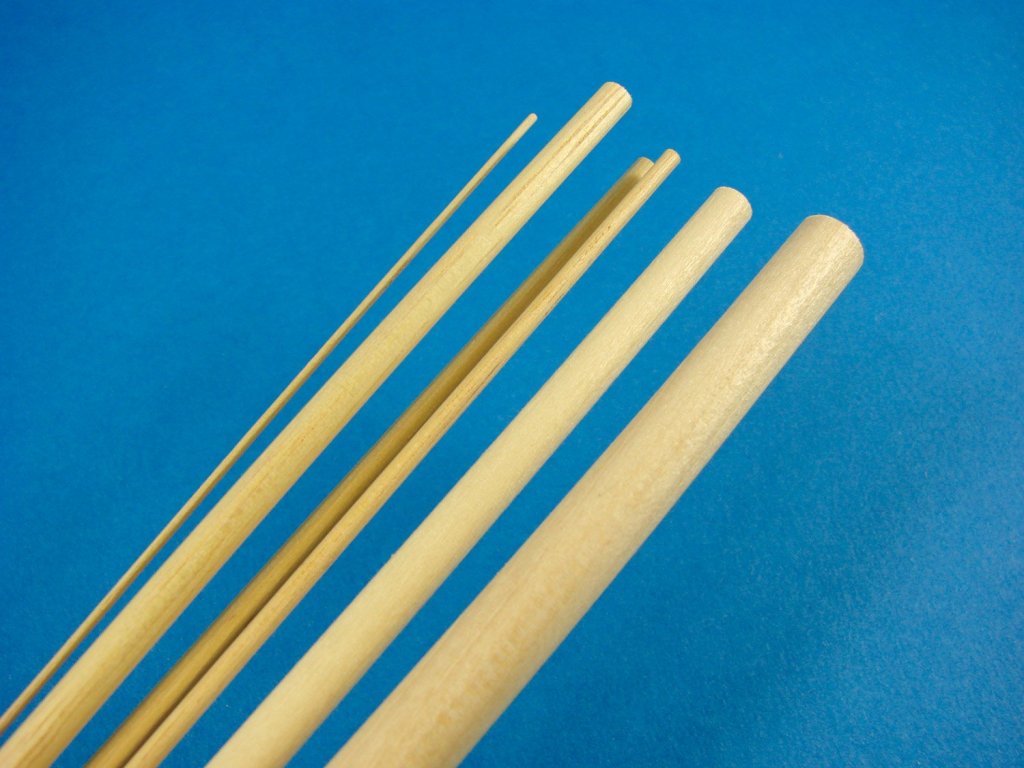
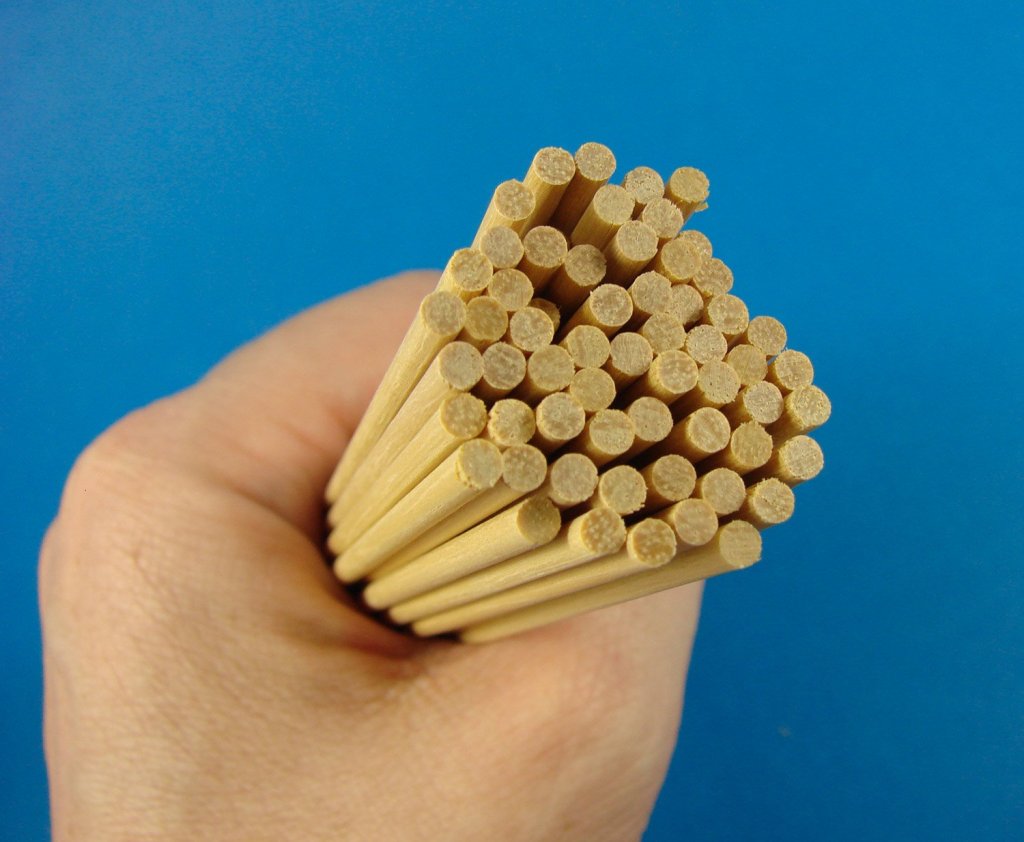
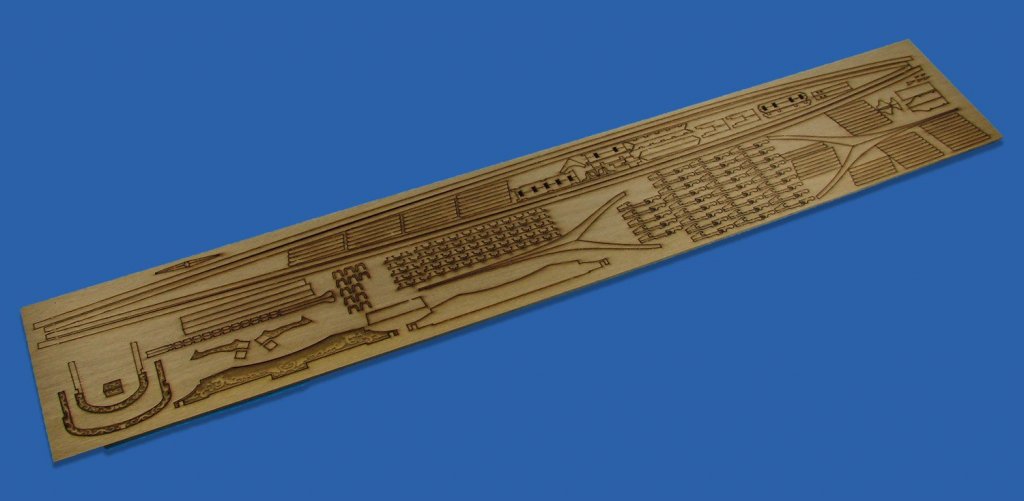
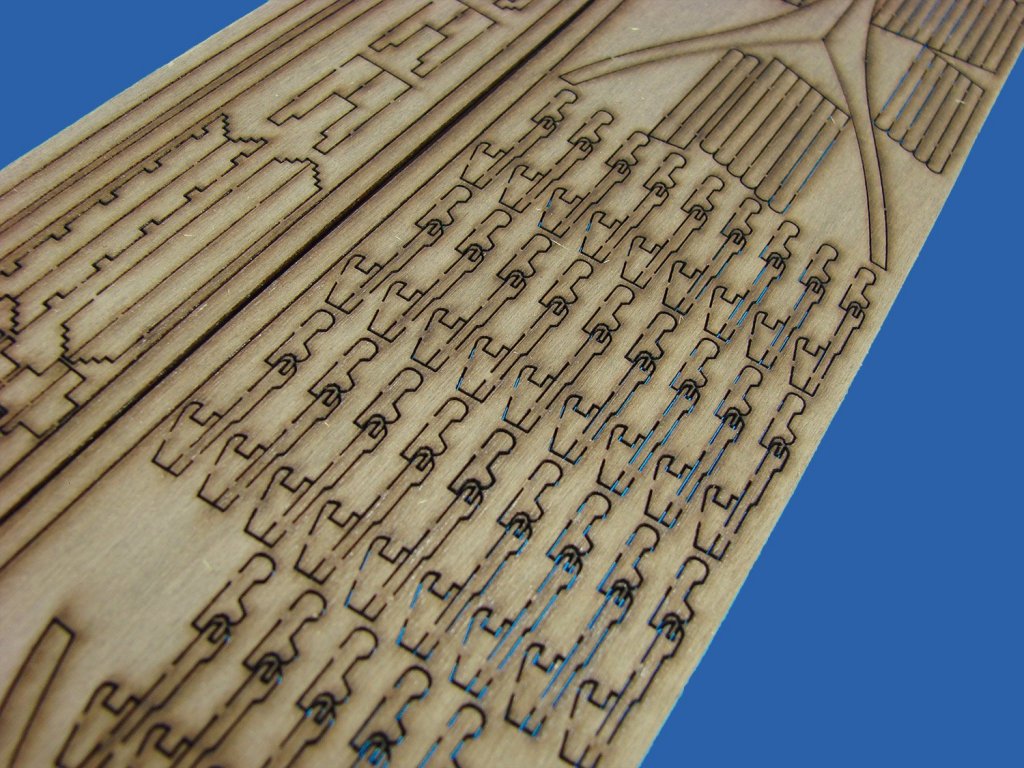
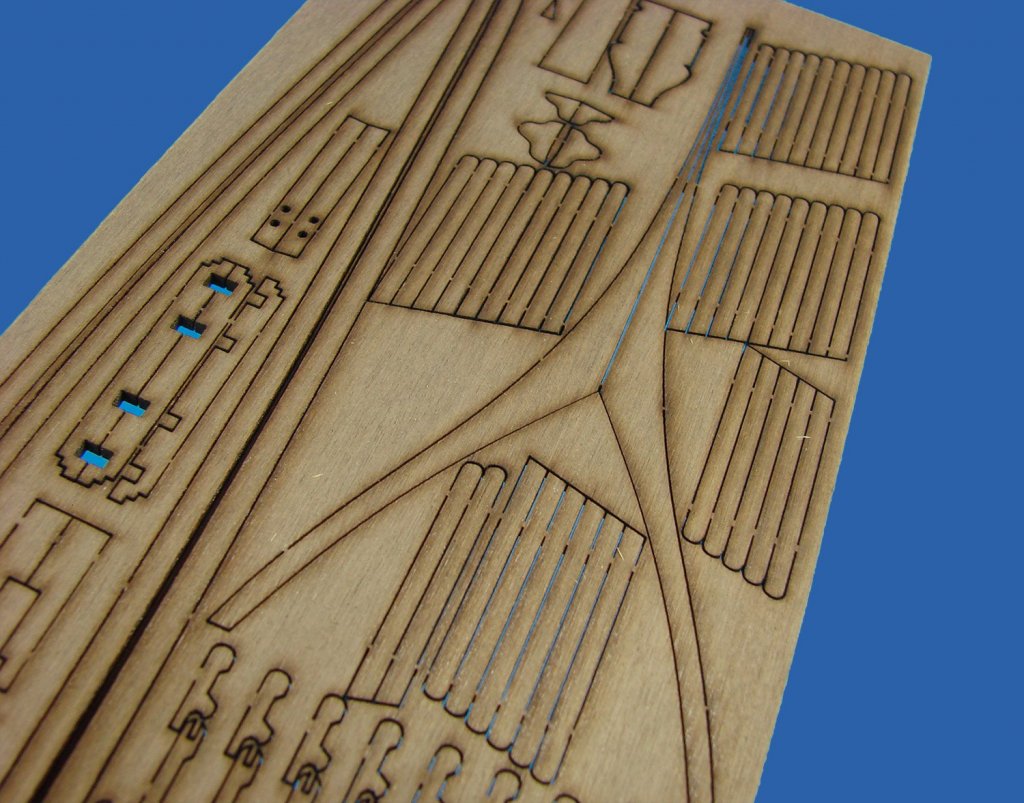
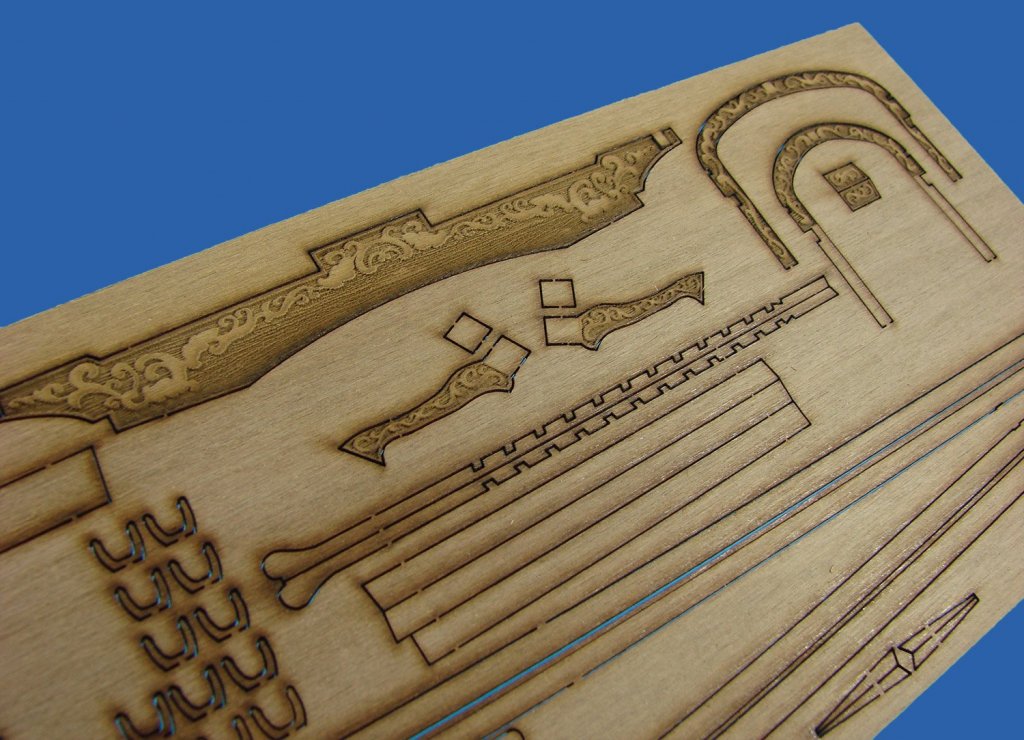
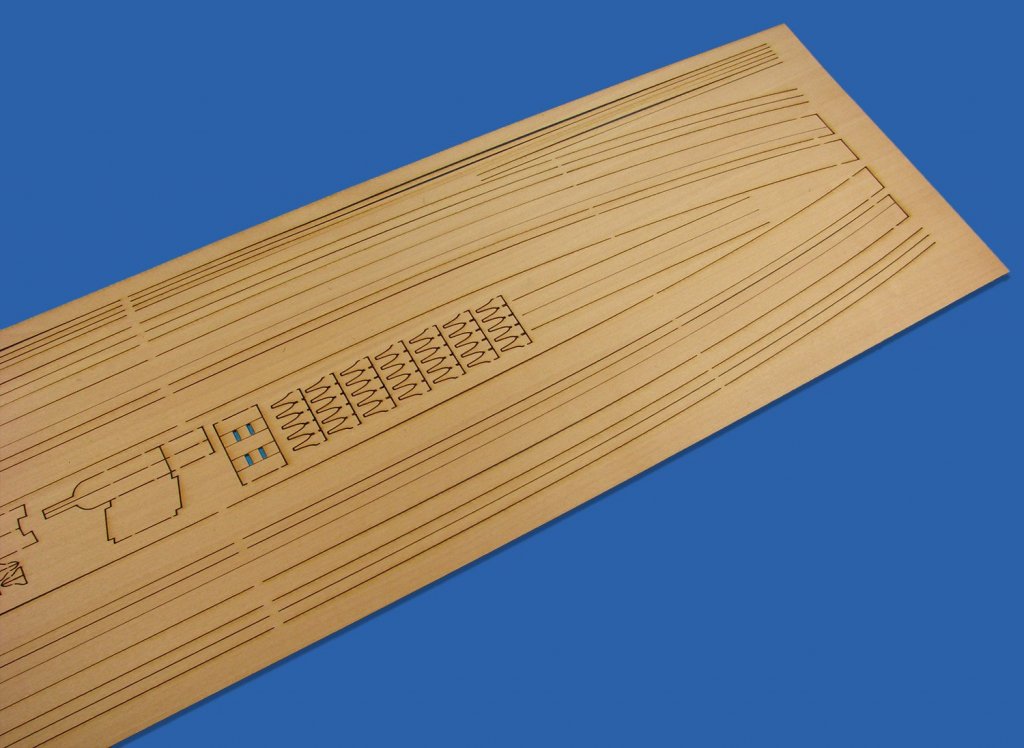
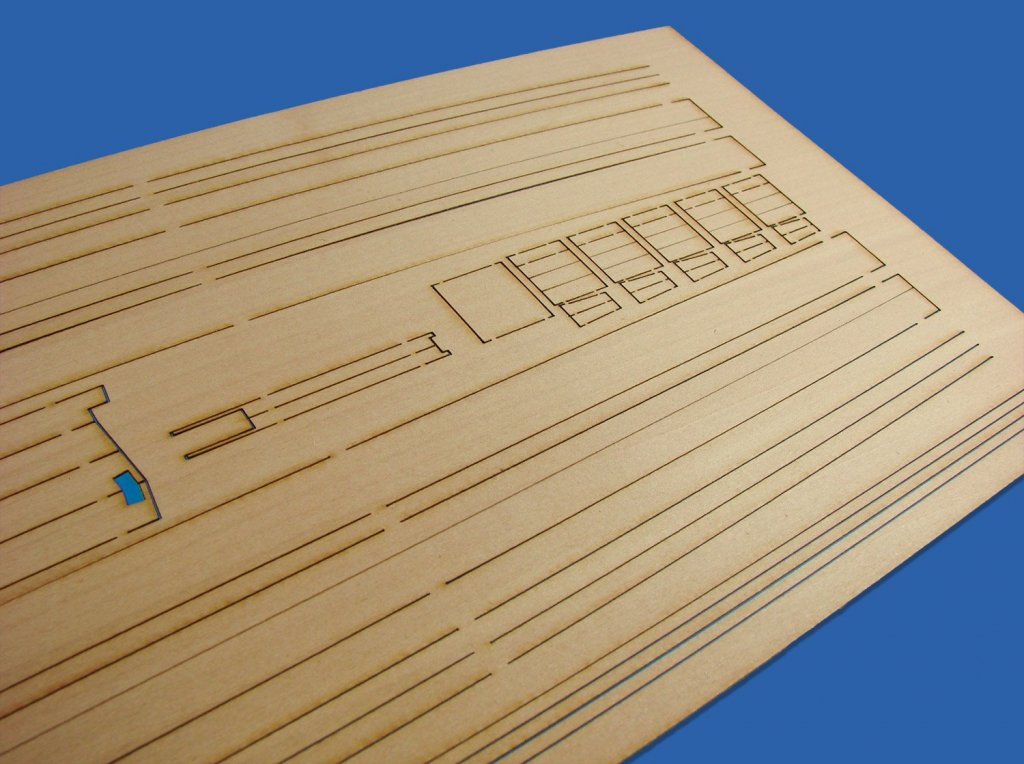
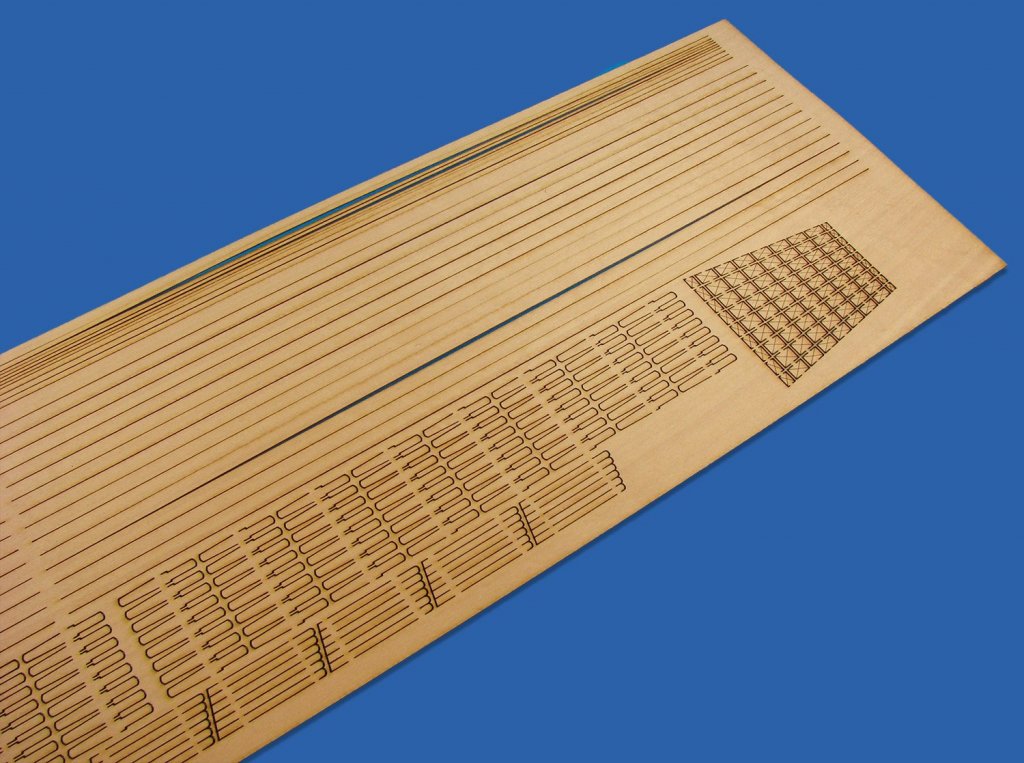
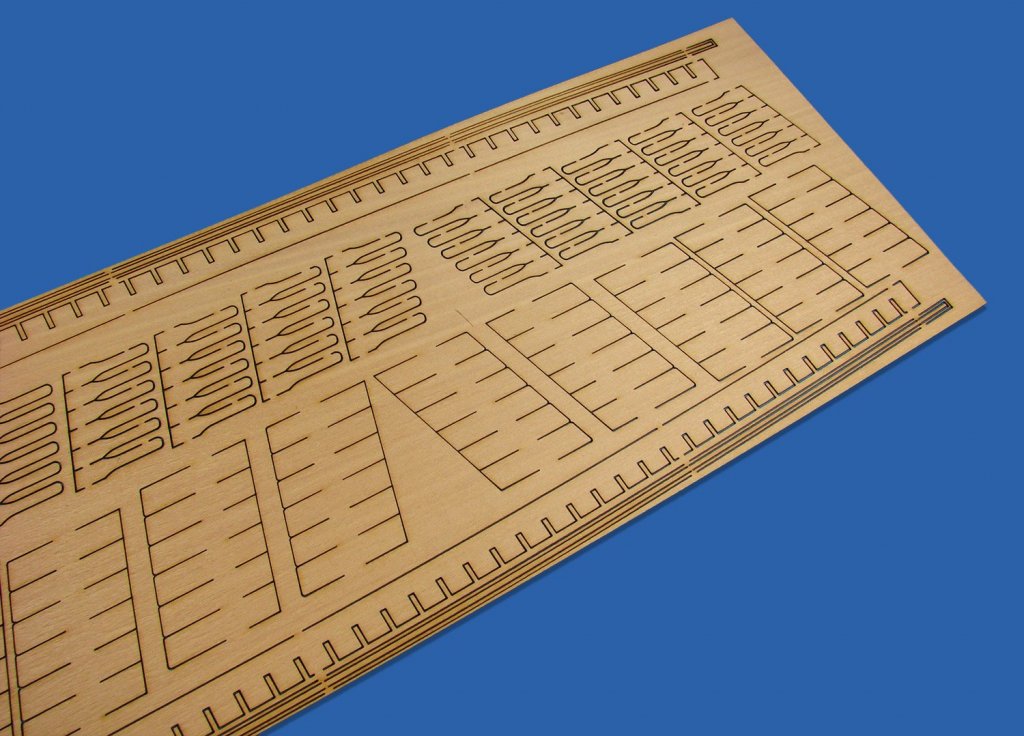
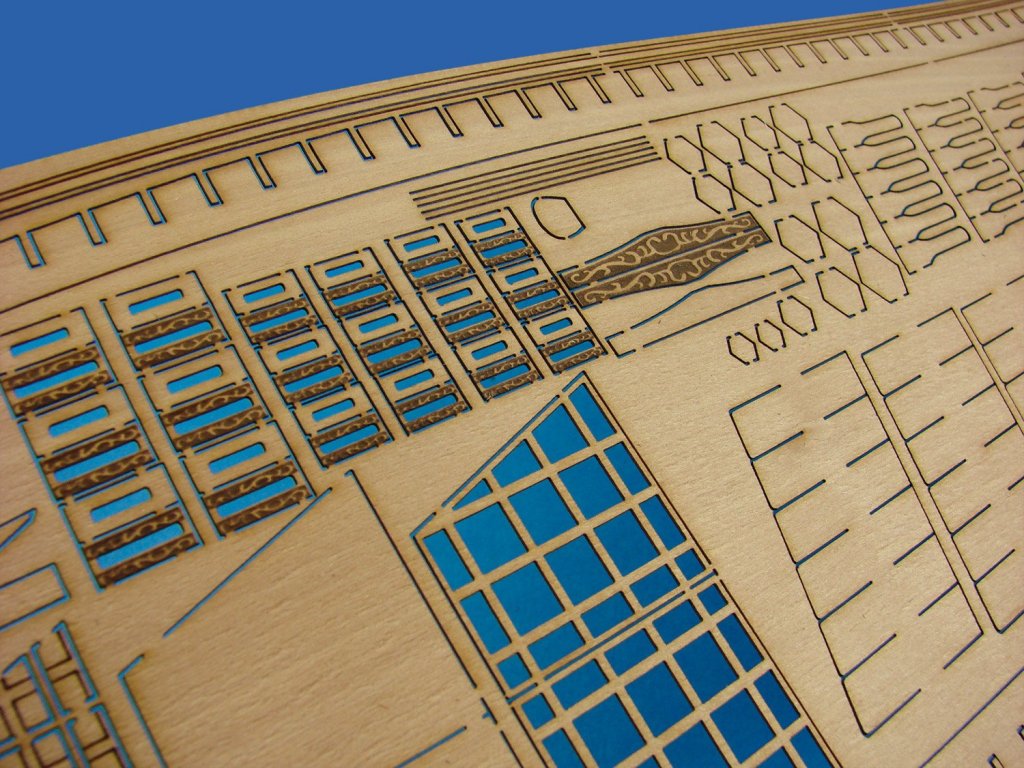
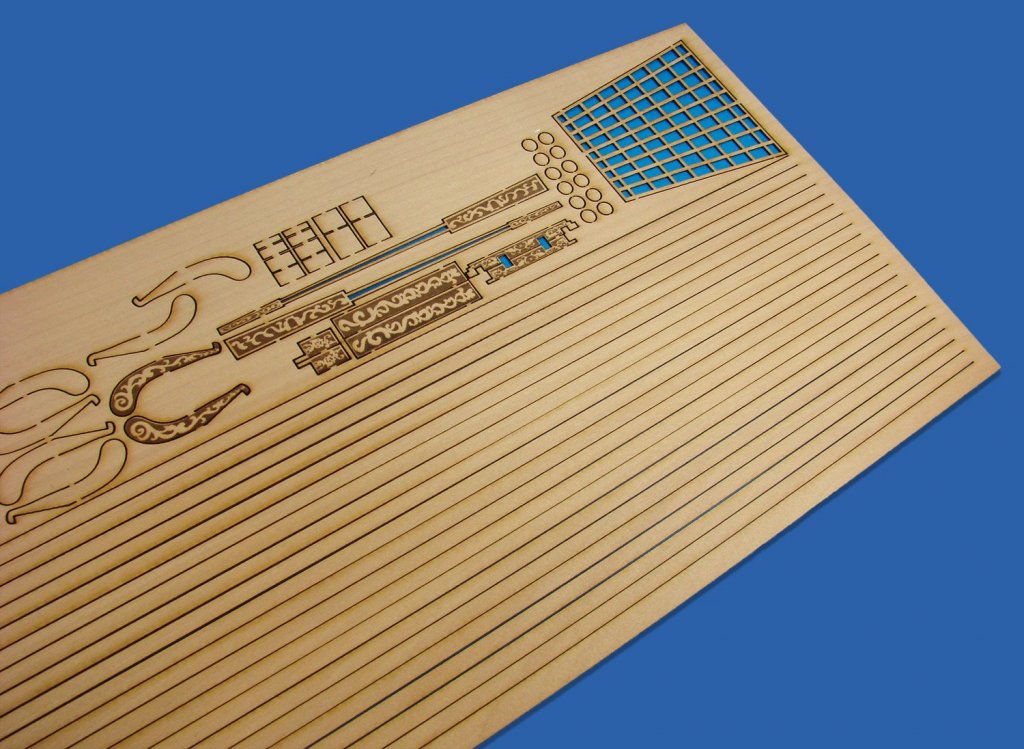
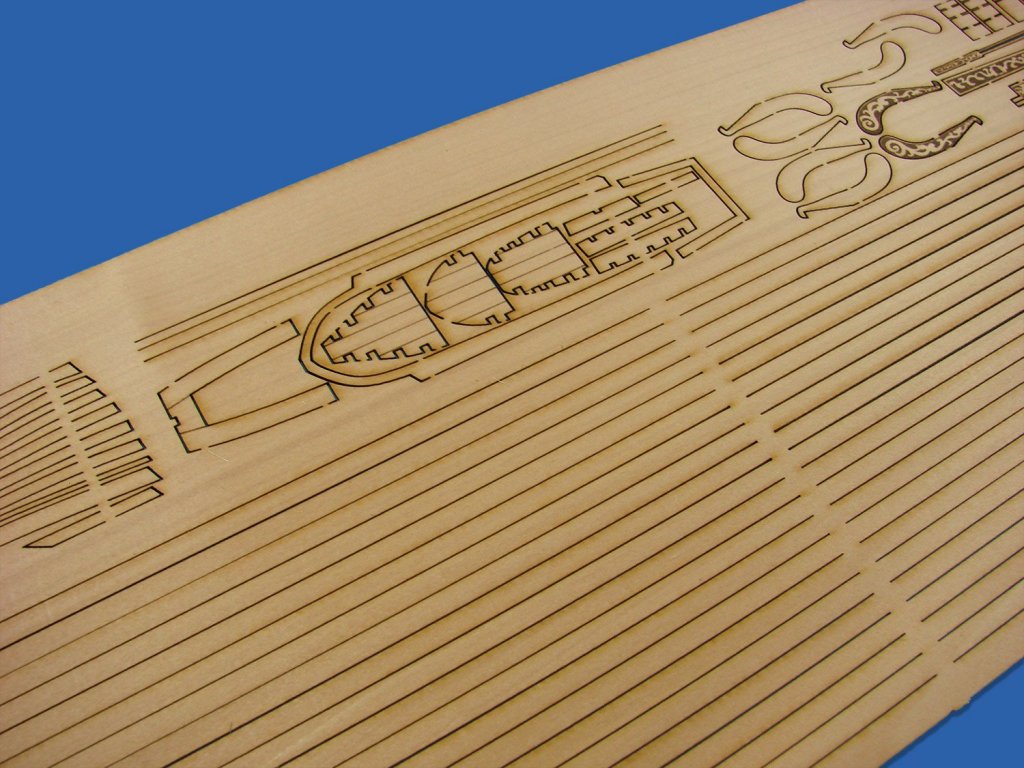
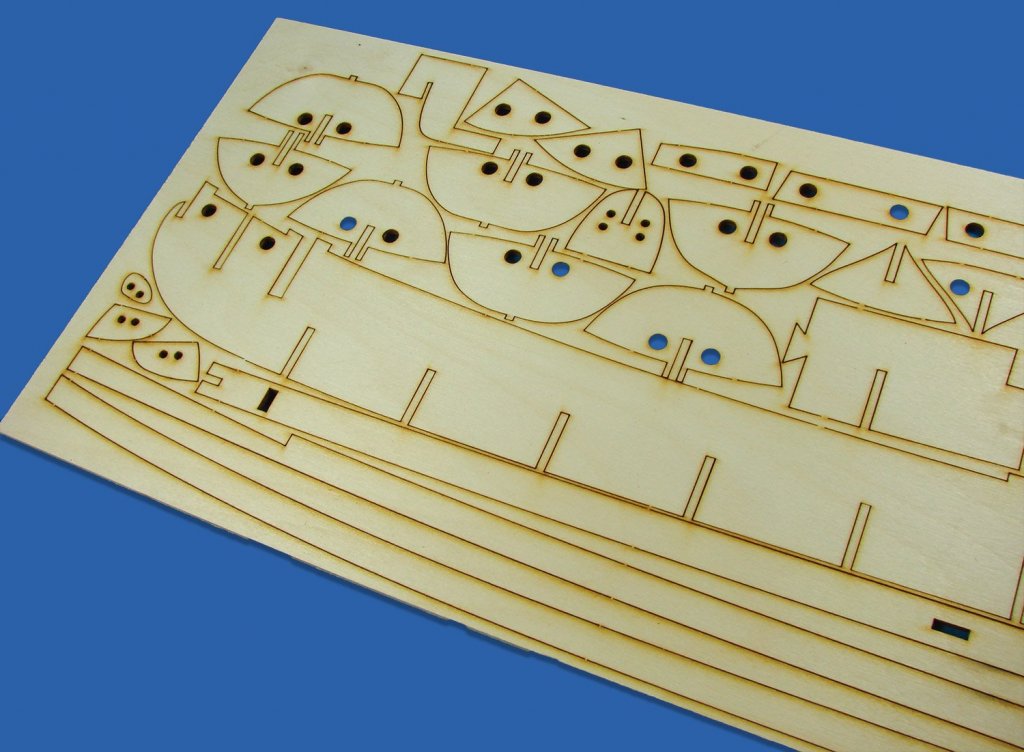
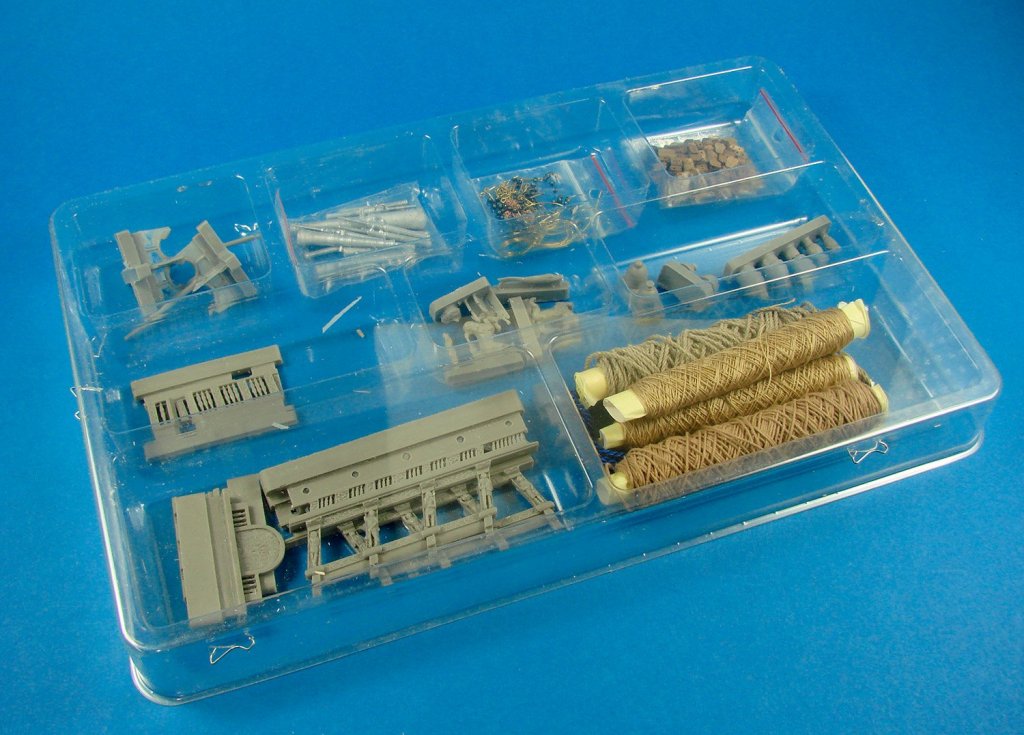
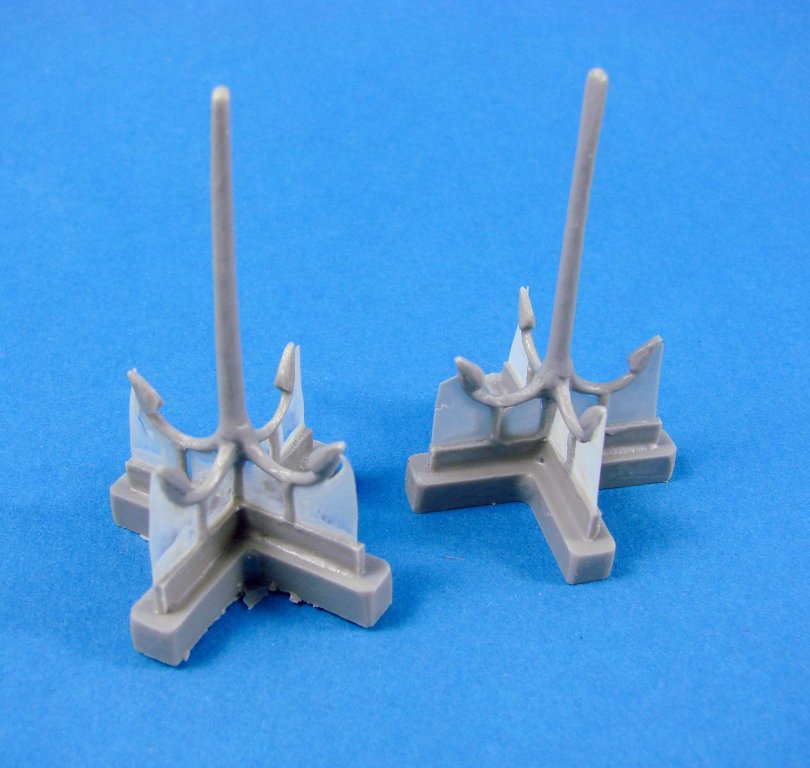
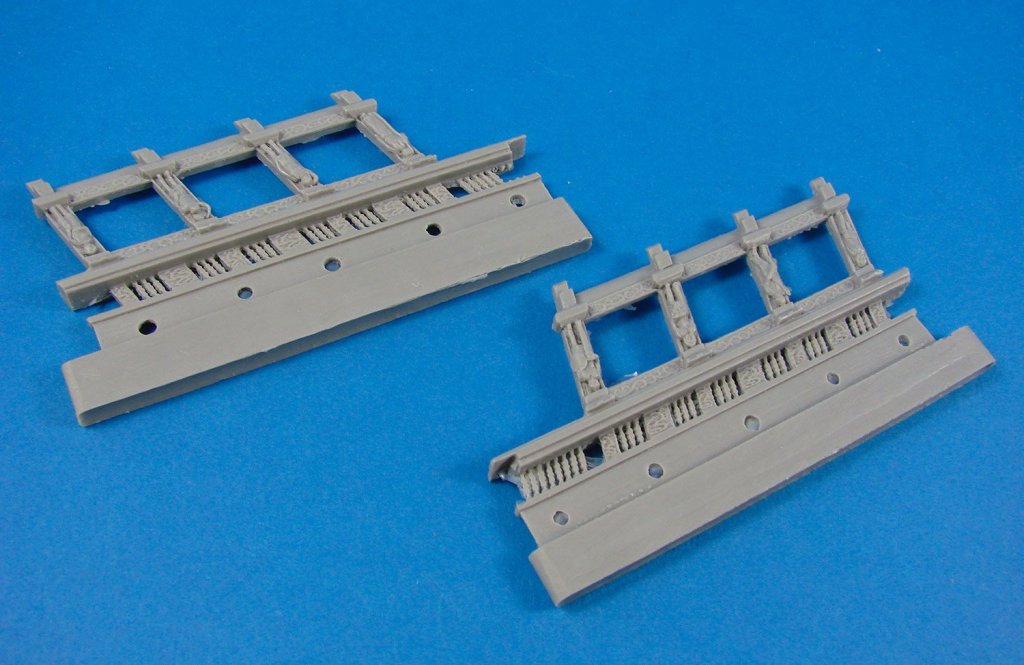
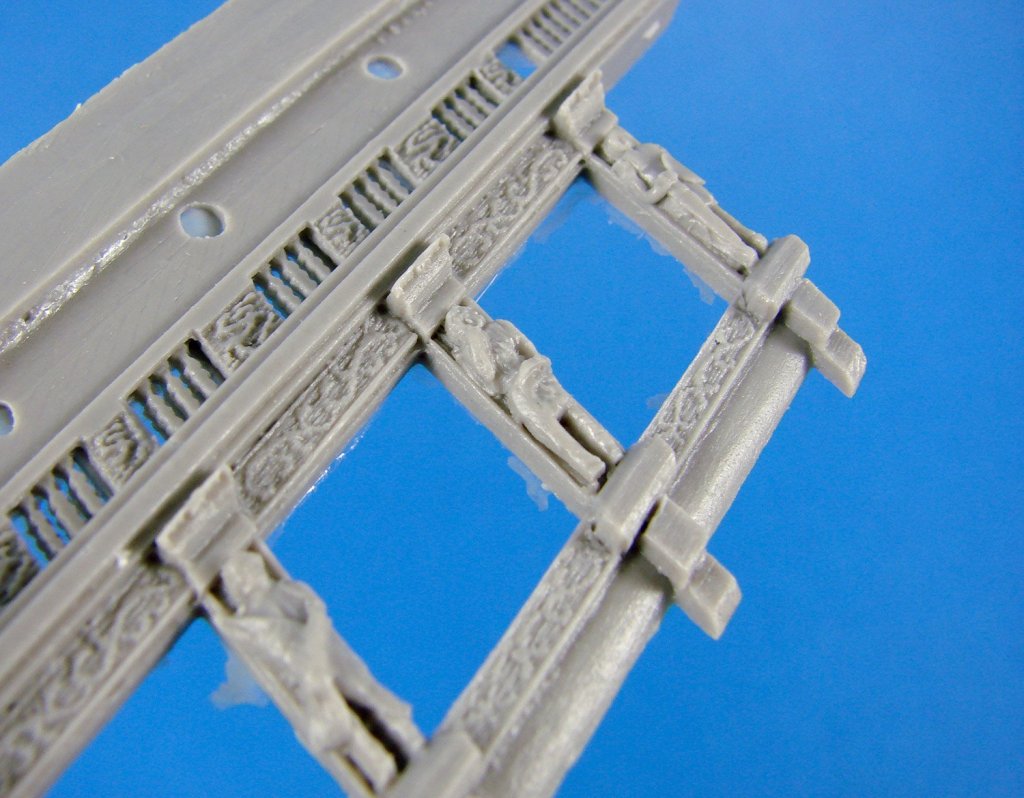
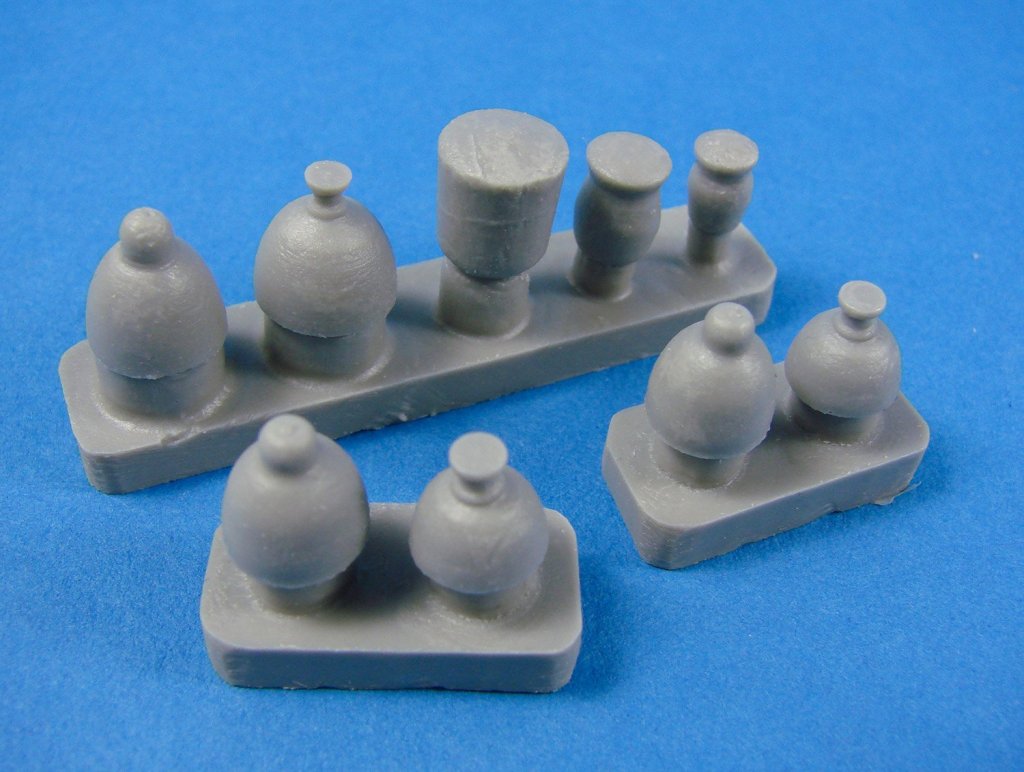
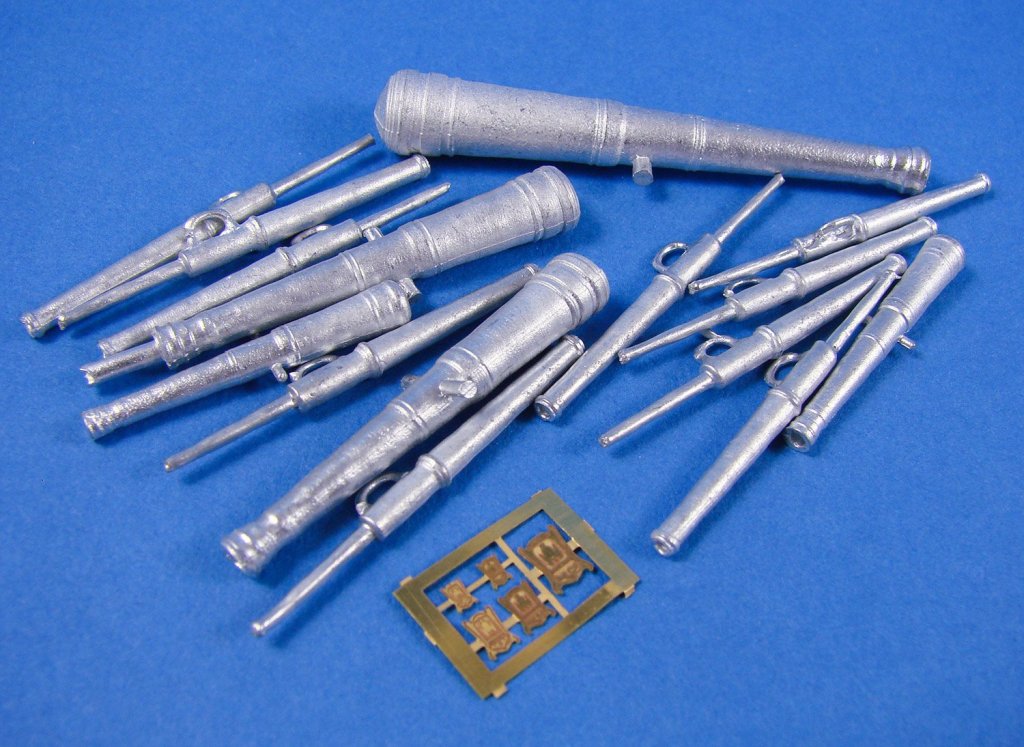
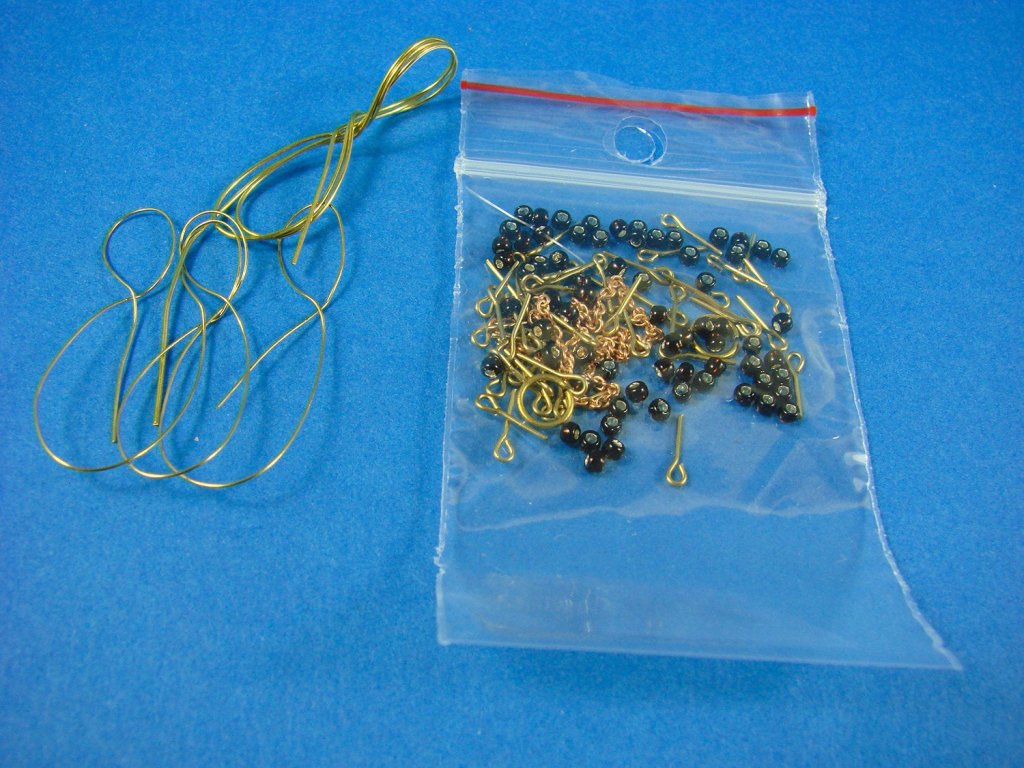
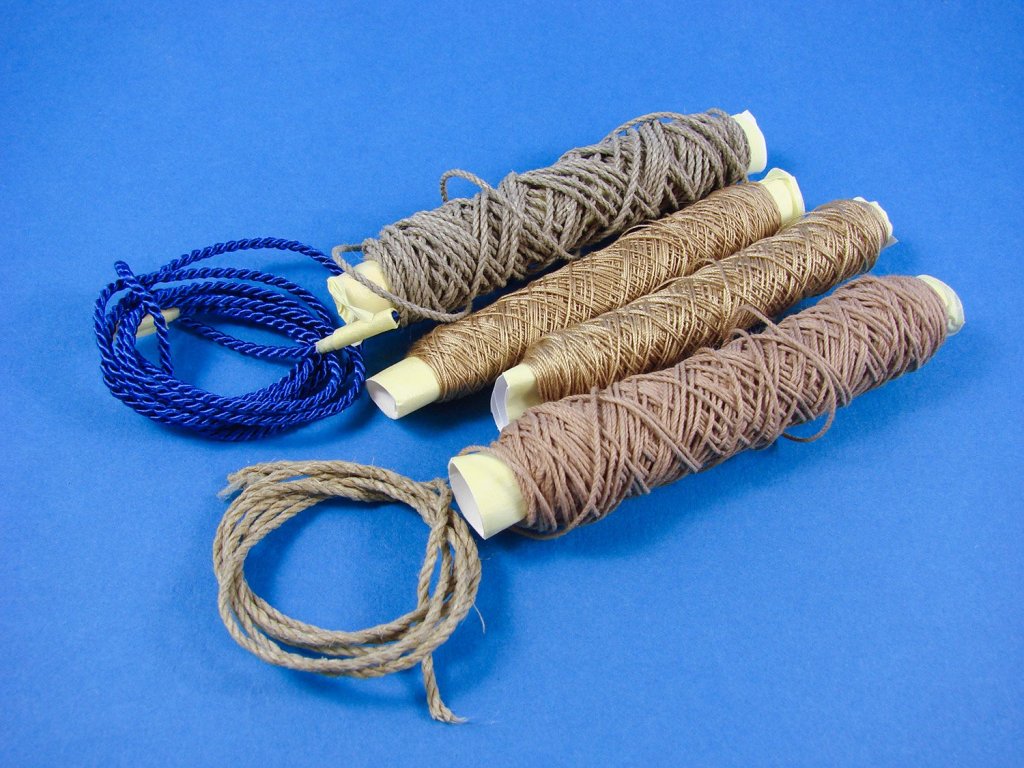
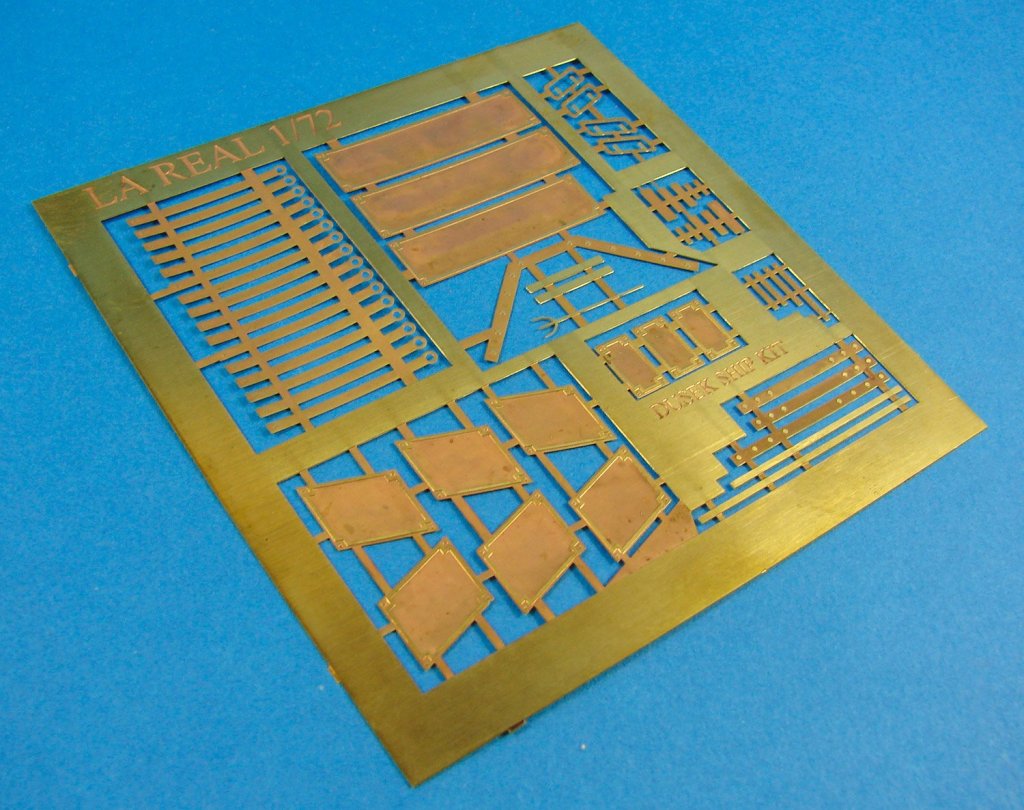
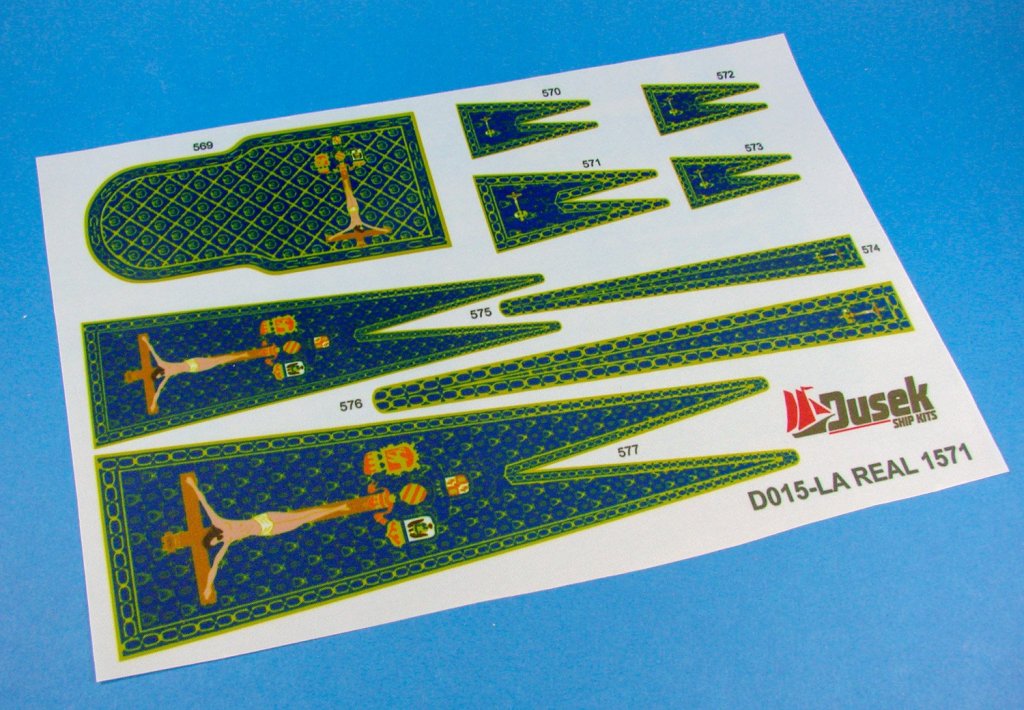
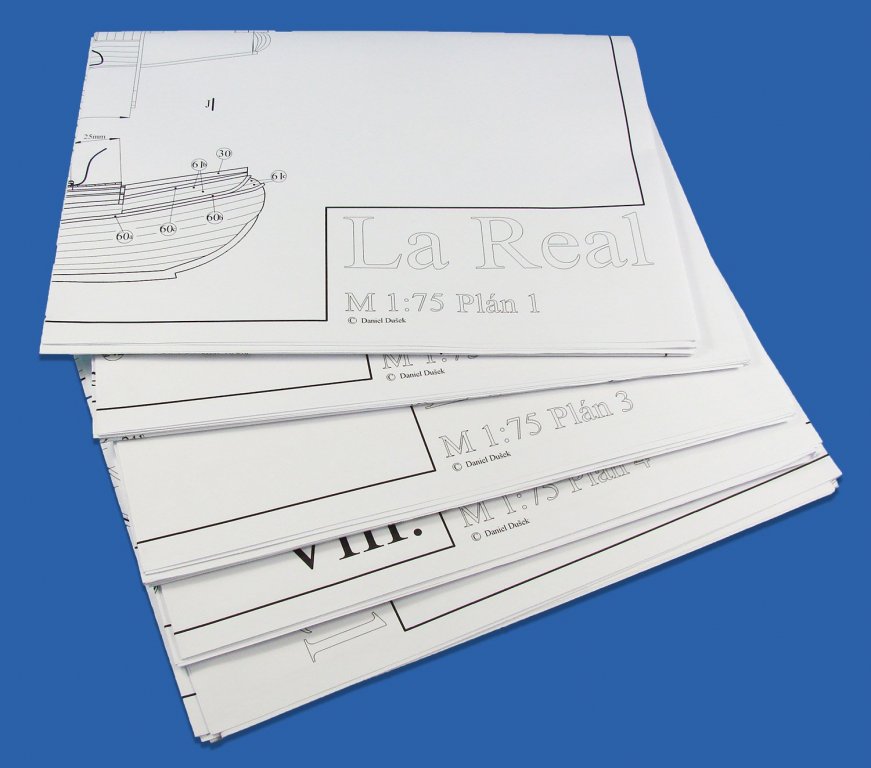
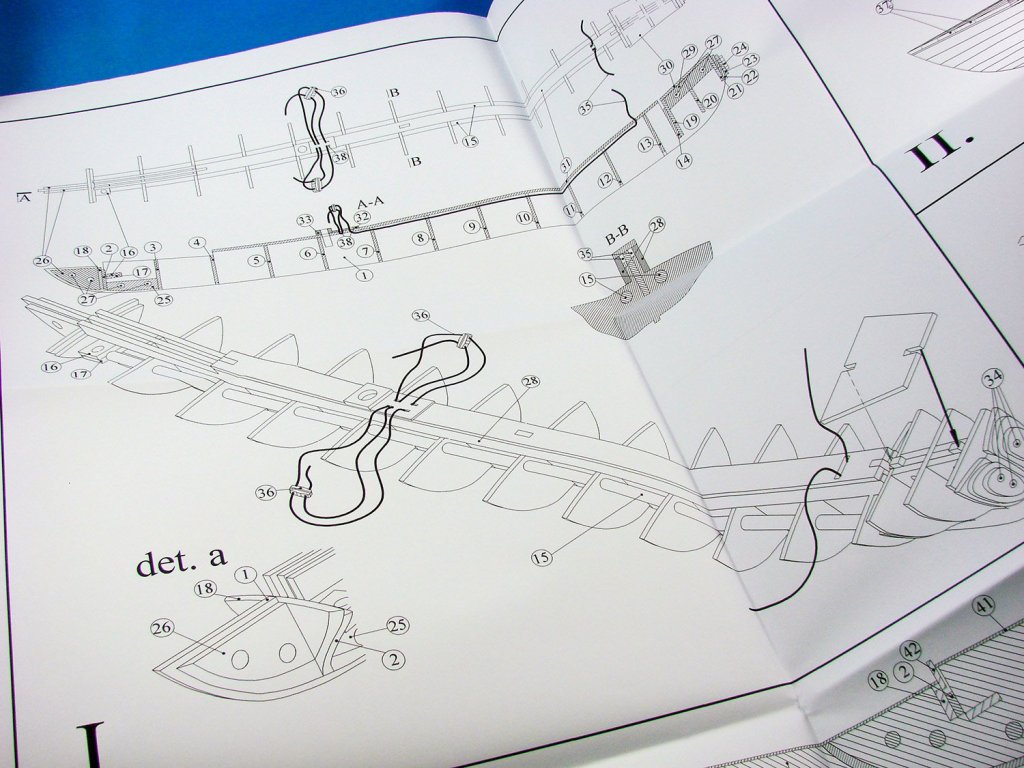
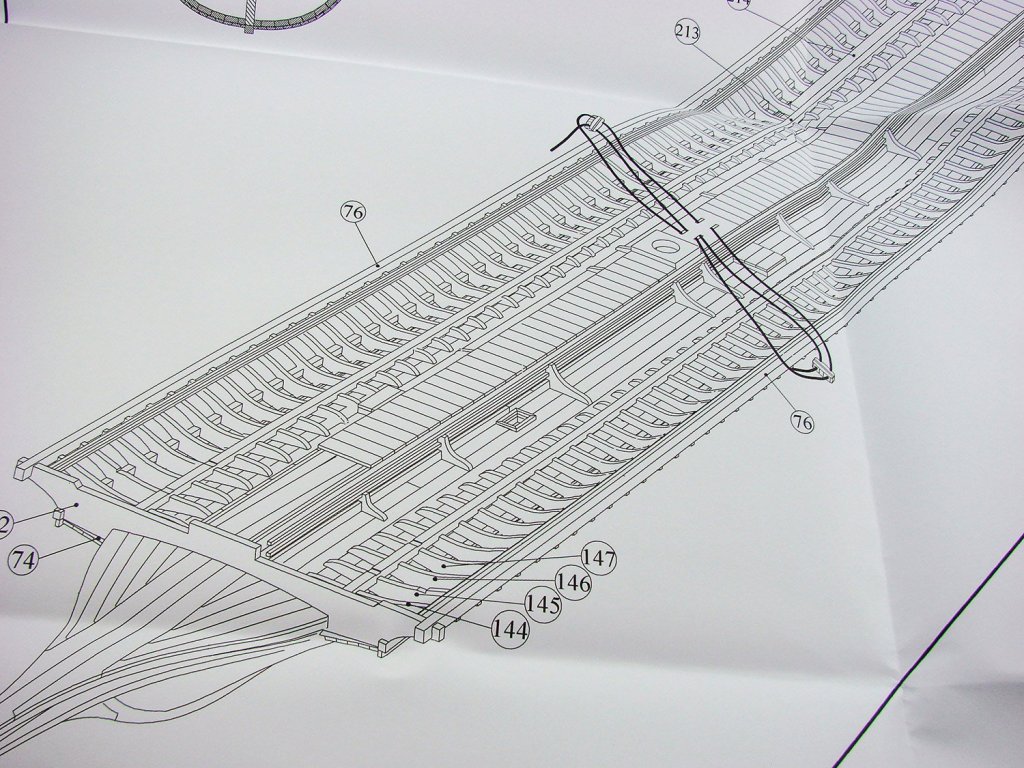
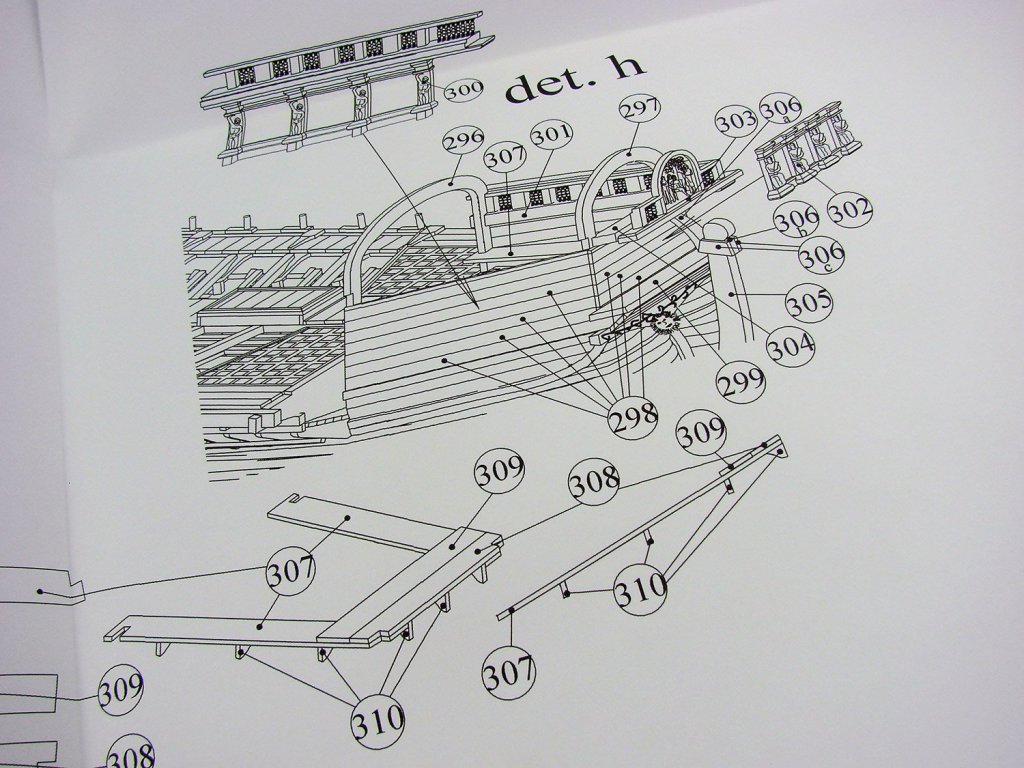
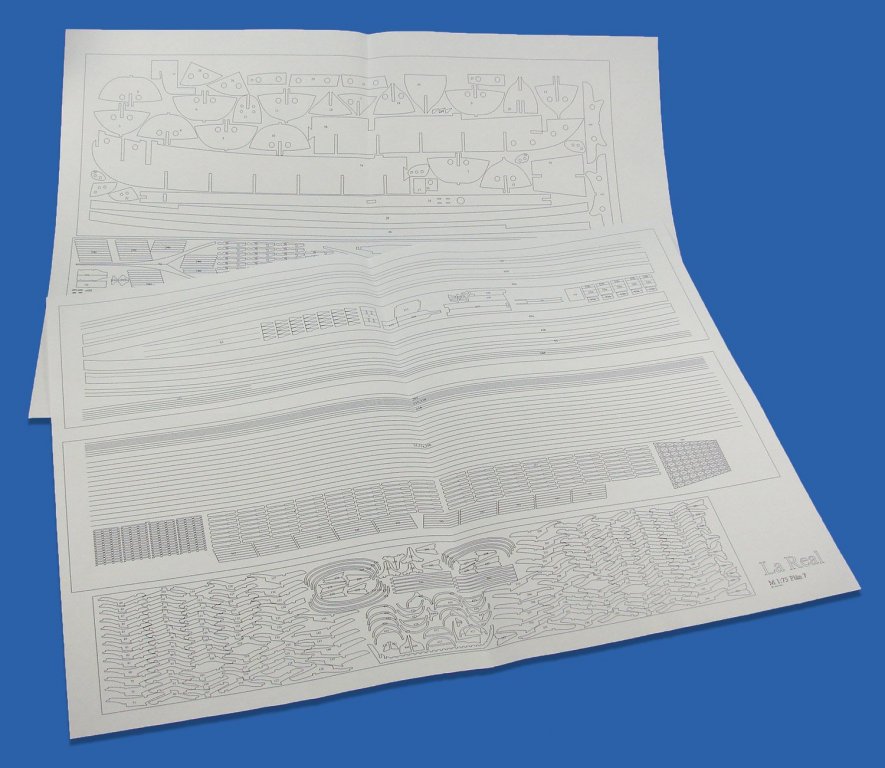
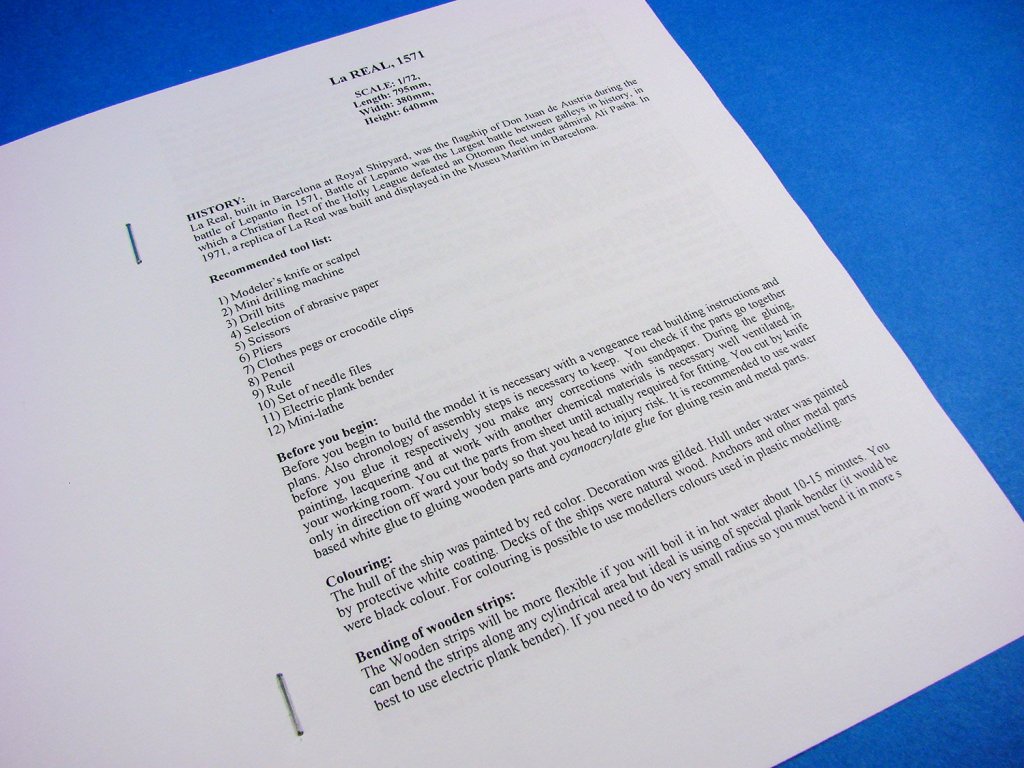
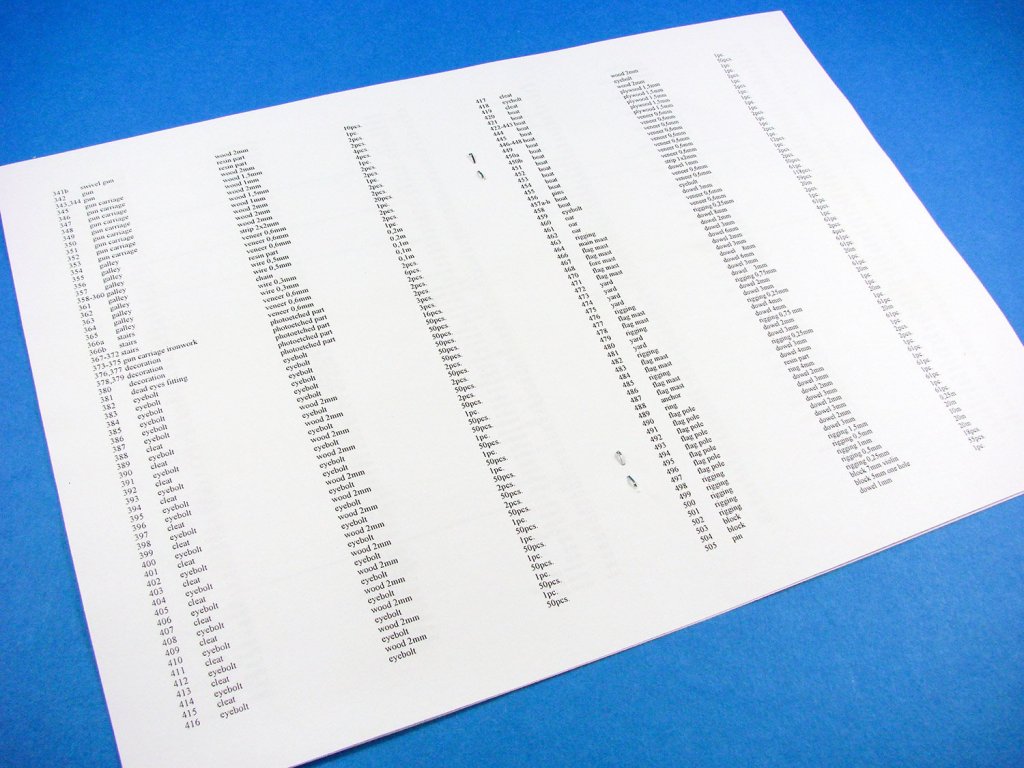
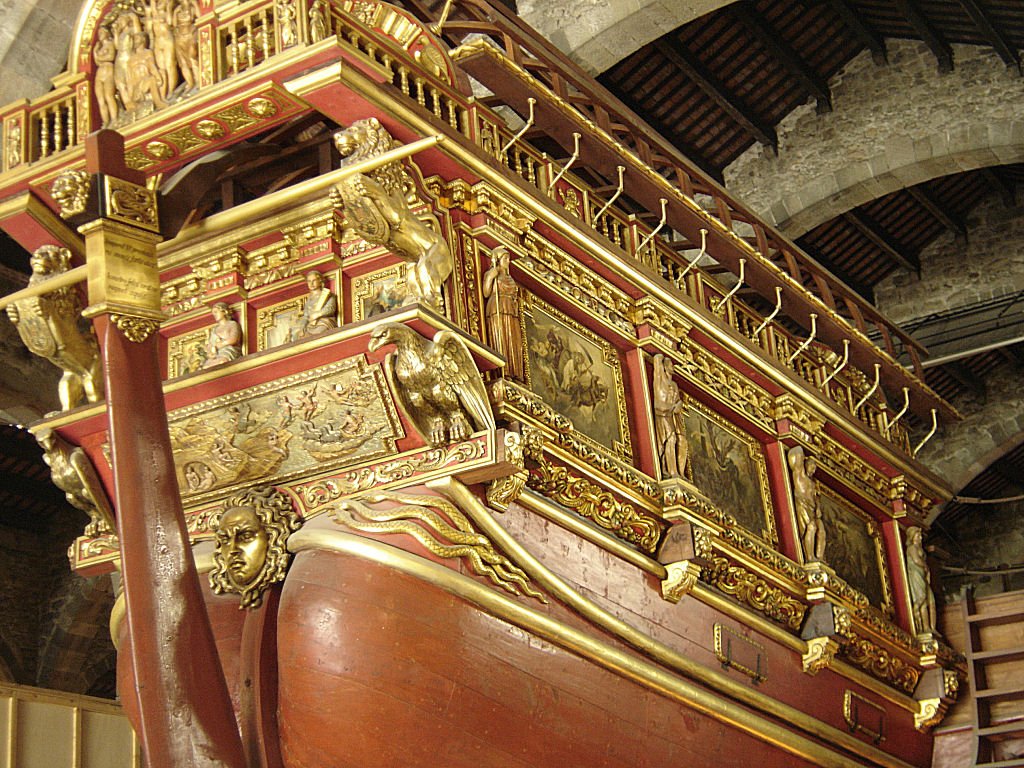
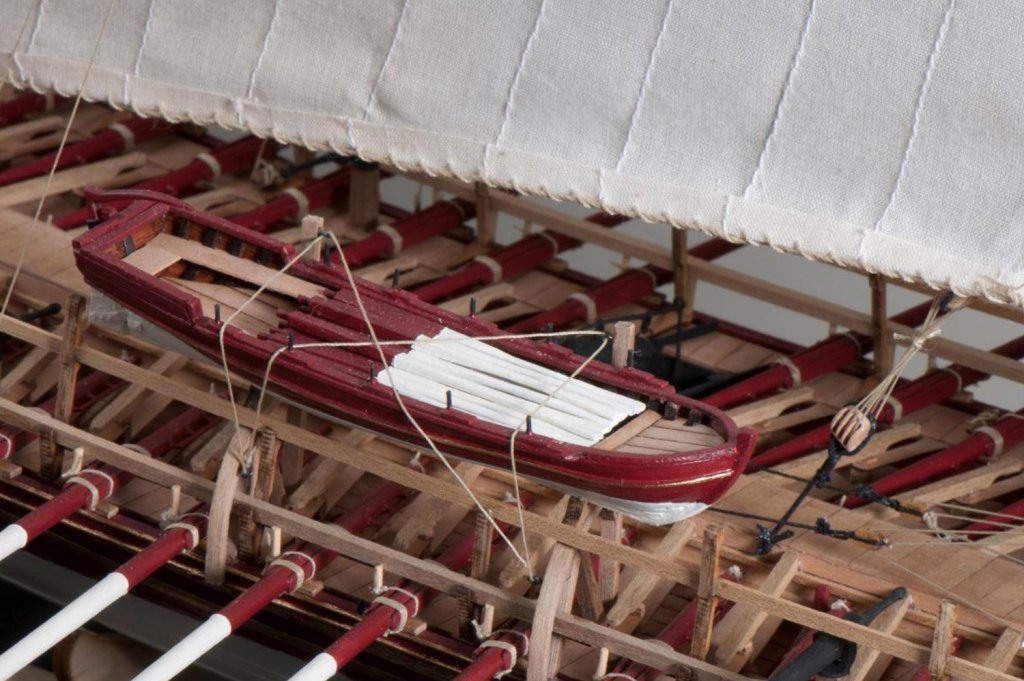
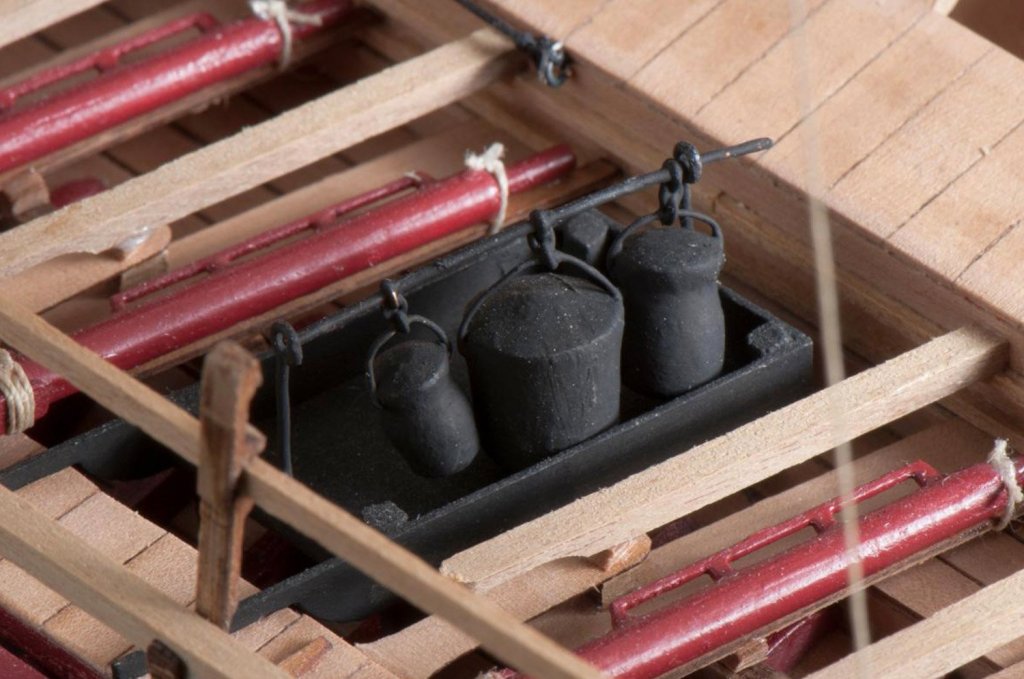
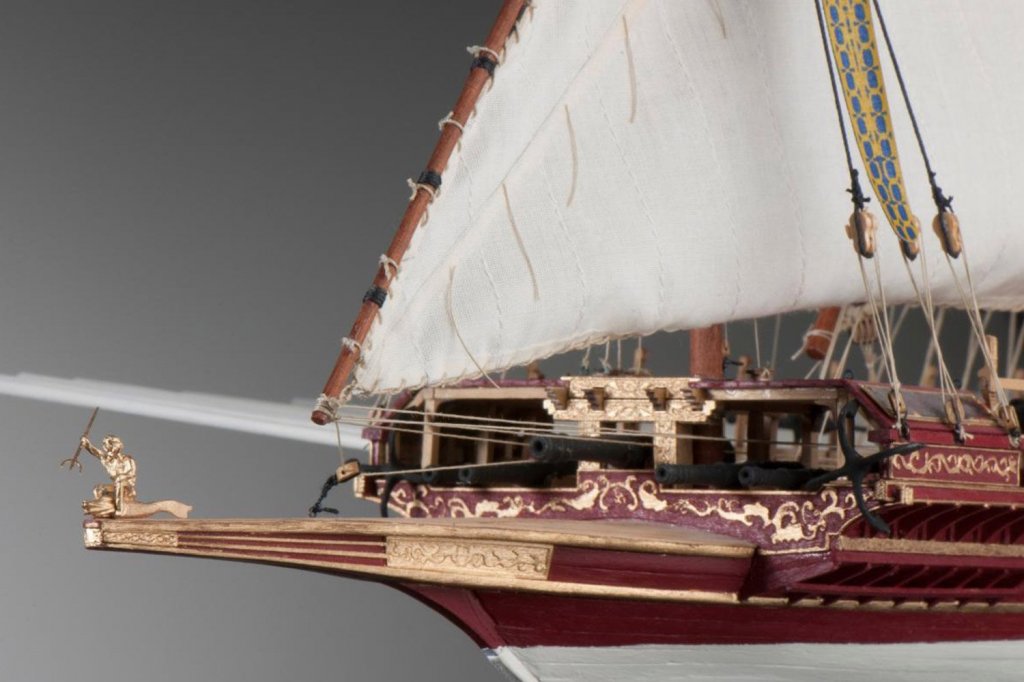
1:72 La Real Dusek Ship Kits Catalogue # D015 Available from Dusek Ship Kits for 409€ La Real was a Spanish galley and the flagship of Don John of Austria in the Battle of Lepanto in 1571, the largest battle between galleys in history. She was built in Barcelona at the Royal Shipyard and was the largest galley of its time. Real was usually the designation of the flagship in a particular Spanish fleet and was not necessarily the actual name of the ship. Almirante was the designation of the ship of the 2nd in command, others with a specific command function were patrona/padrona and lanterna. The galley was 60 metres (200 ft) long and 6.2 metres (20 ft) wide, had two masts, and weighed 237 tons empty. It was equipped with three heavy and six light artillery pieces, was propelled by a total of 290 rowers and, in addition, carried some 400 sailors and soldiers at Lepanto. 50 men were posted on the upper deck of the forecastle, 50 on the midships ramp, another 50 each along the sides at the bow, 50 each on the skiff and oven platforms, 50 on the firing steps along the sides near the stern, and 50 more on the stern platform behind the huge battle flag. To help move and manoeuvre the huge ship, it was pushed from the rear during the battle by two other galleys. As befitting a royal flagship, it was luxuriously ornamented and painted in the red and gold colours of Spain. Its poop was elaborately carved and painted with numerous sculptures, bas-reliefs, paintings and other embellishments, most of them evoking religious and humanistic inspirational themes. Photo by author, Barcelona, 2006 The Battle of Lepanto in 1571 saw Juan of Austria's fleet of the Holy League, an alliance of Christian powers of the Mediterranean, decisively defeat an Ottoman fleet under Grand Admiral ("Kaptan-ı Derya") Müezzinzade Ali Pasha. La Real and the Turkish galley Sultana, flagship of Ali Pacha, engaged in direct deck-to-deck combat very soon after the start of the battle. Sultana was boarded and after about one hour of bloody fighting, with reinforcements being supplied to both ships by supporting galleys of the two respective fleets, captured. Ali Pacha was wounded by musket fire, fell to the deck, and was beheaded by a Spanish soldier. His head was displayed on a pike, severely affecting the morale of his troops. Real captured the "Great Flag of the Caliphs" and became a symbol of the victory at Lepanto. The kit Dusek’s La Real is packaged into a long, very sturdy and attractive box with a nice glossy-finish lid which depicts a completed model of this famous galley, along with finished dimensions. The side panels also contain a further four smaller detail shots of the finished model. Lifting the lid reveals a clear plastic compartmented tray containing rigging cord, resin and fittings etc. Also seen at first look are the bundles of strip-wood and dowel, sailcloth pack, bundle of plans with a flag sheet, and lurking underneath are the timber sheets, wrapped in white plastic sheet. The hull of La Real is double-planked, and our first bundle of timber is for the first planking layer and deck planking, with there being 50 lengths of 2mm x 5mm limewood. Material quality is first rate, with nice, clean cutting, no split or frayed edges and all material being uniform. Also, all timber bundles are held together with elastic bands and these aren’t too tight as to deform the timber. A smaller bundle contains various diameters of Ramin dowel. The material is uniform, straight and again of a high quality. A few lengths of loose dowel are also found within the box, of varying lengths, and also machined from the same quality of Ramin as the previous bundle. Whilst on the subject of dowel, take a look at this little bundle! Here we have 61 lengths of 3mm Ramin dowel. These are for the 60 oars, so a spare piece is given. You will need to taper and shape each of these parts identically, so you could ideally make use of a lathe, if possible. This bundle of timber strip is produced from walnut and caters to the second planking layer for the hull. Colour is mostly uniform, but not all due to the nature of timber, so lay these accordingly. As with the first planking, these are beautifully cut with no fluffy or broken edges. With all other materials removed from the box, you’ll note the rest of the sheet material is wrapped in a sort of thick, white clingfilm material which needs to be peeled open to reveal the contents. Inside this wrap we have all of the laser-cut timber sheets including those manufactured from ply, walnut and pearwood. A real joy to see the latter included in an off-the-shelf kit. Here we see sections for the keel, laser-cut in walnut, along with some fine laser-etched details which are quite common to this release. This sheet is either Ramin or limewood and contains a lot of parts pertaining to the rower areas, as well as the hoops which form the covered section at the stern of the galley, plus the small launch. All parts are packed in very tightly on this sheet, to the point where there are practically touching each other. Save to say there will be little material waste here! Of course, you will need to remove char from all laser-cut parts, and there are some minimal, localised heat-affected areas which should be easy to sand from the surface before you begin to remove parts. It’s worth mentioning at this stage that no parts have numbers on or adjacent to them. There are two sheets of illustrations which map out the parts for you and number them accordingly, so you will need to keep referring to this during construction. A walnut sheet contains further parts that are laser-etched. When you have sealed these, you will need to either paint them gold or, if you have the ability, gold-leaf them yourself. As with the previous sheet, many parts are quite tightly packed on this sheet. There are FOUR sheets of laser-cut and occasionally engraved pearwood here. These are very thin sheets, almost to the point of being veneer, and they are crisply cut with nice, minimal tags for removing the components. The long straight lengths you see are veneers for the deck planking. One large sheet of 3mm ply contains all of the bulkheads and false keel for this vessel. Note that the false keel is in two sections that are linked with a dovetail joint. Also, the bulkheads have two holes in them to accommodate the dowels that will pass through them and help to make the narrow hull all that more rigid. What is quite unusual here is that the bulkheads slip onto the false keel from underneath, defying convention. Like other contemporary kits, this one contains a clear plastic tray and a lid, used to house the smaller kit components. Extensive use of resin has been made here to produce the various rails and features that contain carvings. These look exquisite and underneath gold paint, will look simply superb and very indicative of the gilded ornamentation of La Real. All resin parts, including the anchors, will need to be carefully sawn from their respective casting blocks and then cleaned up before use. It’s also a good idea to wash resin before use, to clean off any residual mould-release agent that could stop paint adhering. Casting is excellent with no visible flaw or defect that I can see. Also in resin are come parts for the stern lanterns and cooking pots etc. Cast in white metal are the cannon, etc. The finish is very good with just minimal seams that will need to be filed away. A small fret of photo-etch metal is included for their embellishments. As well as a length of fine brass wire, here we see a pack containing chain, parrel beads and various eyelets. Looking at the rigging blocks, these look perfectly acceptable in terms of quality, with them looking uniform and having nicely drilled holes and machined slots. Four spools of rigging cord in three colours and three diameters, are supplied. Along with this is a thicker length of rope and a length of blue cord. As is de rigueur these days, a fret of photo-etch parts is included, with parts for the observation top, name plates, dead eye fittings, rudder hinges, to name but a few. Etch quality is excellent, but the connection tags are quite wide, so be careful when it comes to removing the parts, as there will undoubtedly be some clean-up required. A pack of sail cloth is included for you to make your own sails, and illustrations are included as to how these will be made, including sewing in a bolt rope to the edges. Whilst the sails on this model are quite large, there is ample material here to make them. Flags are supplied as prints on a sheet of a material which looks like cloth but is slightly plastic in feel. These just need to be cut out and draped to suit. They are very thin so making them look natural should be an absolute cinch. Print quality is very good too and they most certainly look very attractive. FIVE sheets of plans are included with a LOT of illustrative info supplied. You really will need to study these as La Real isn’t a model for a beginner and deciphering the various sectionals will be vital to get the most from your purchase. Every single facet of construction is shown in super detail, with key areas being shown as separate areas of detail. All rigging and masting is shown in detail, with the galley being relatively simple in comparison to a Man ‘o War of the same or later period. Sheets appear to be A0 in size, so you’ll need some bench space! Two double-sided A3 sheets show the parts maps for everything, including the photo-etch sheet. An instruction booklet takes each main step and gives some simple text to guide you on your way. A complete parts list is also included here. Conclusion La Real and her place in time, for me, have always conjured up an image of a quasi-obsolete military marine technology that had its heyday during classical Roman and Greek times. The juxtaposition it creates when you consider that the Battle of Lepanto took place whilst other European countries were sailing Galleons, really tends to put things into perspective, yet La Real and her contemporaries were fighting against an empire which was creating an existential crisis in Europe, and they won the day. This elegant vessel has been immaculately recreated first in Barcelona in 1971, and now in kit-form by Dusek Ship Kits. This is a kit of superbly high quality and with a refined excellence in design execution, using some of the finest timbers I’ve seen in an off-the-shelf kit, such as sheet pearwood, walnut etc. The pearwood sheets are almost veneer-like in how thin they are, yet still have that laser-engraved etch detail. Superb. I also very much like the resin castings for the anchors and sculptures/rails. I know that resin isn’t generally seen by model shipwrights as a legitimate material, but it works very well and provides the modeller with details that they either wouldn’t be able to recreate at all or would need to use a more 2D photo-etch to simulate. Remember, we saw resin in Amati’s HMS Vanguard that we reviewed HERE. I’m quite used to this material from my plastic modelling time and know how good it can look when used. Dusek Ship Kits’ La Real is an absolute gem of a kit and when complete, its intricacies with all of those rowing positions and the multitude of other small details in décor and fitments, will doubtless result in a really beautiful finished model of this famous vessel. My sincere thanks to Dusek Ship Kits for the review kit seen in this article. This model is available right now from Dusek, so click the link at the top of the article and remember to tell them you read about it on MSW.


-
Did you start this build?
-
I don't think it's under imminent release. That's about all I know. I feel your pain.
-
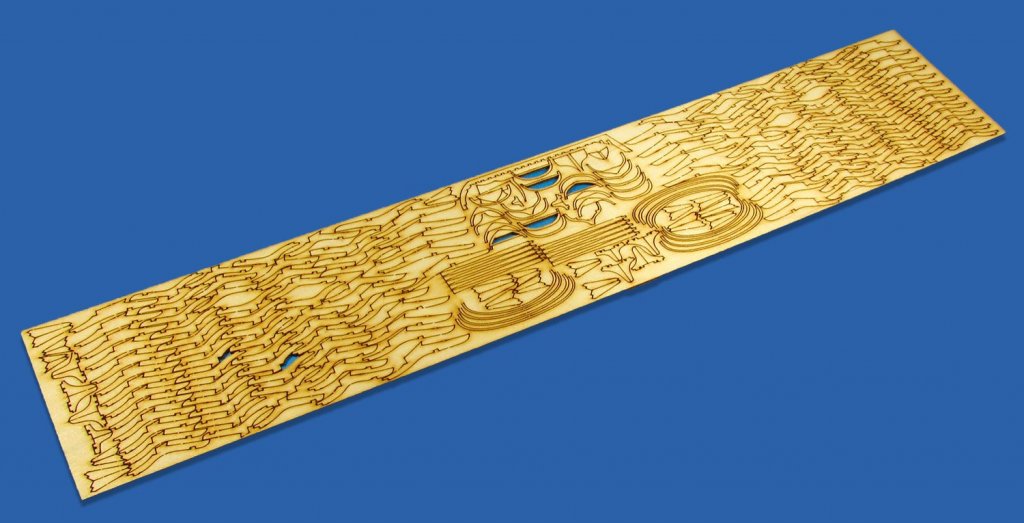
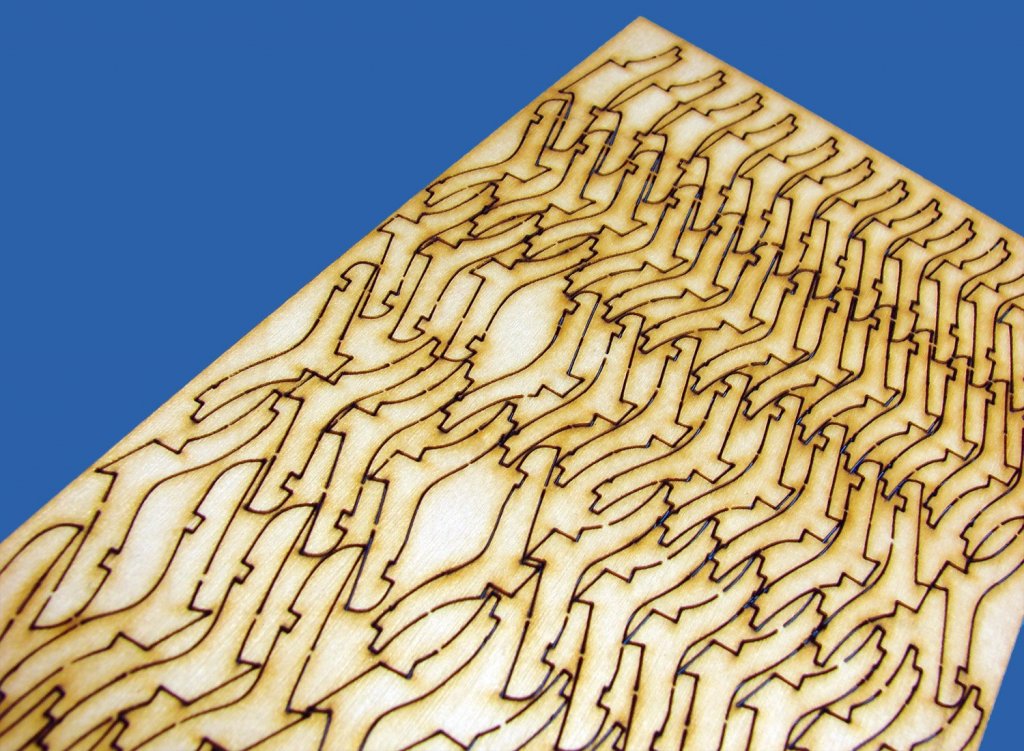
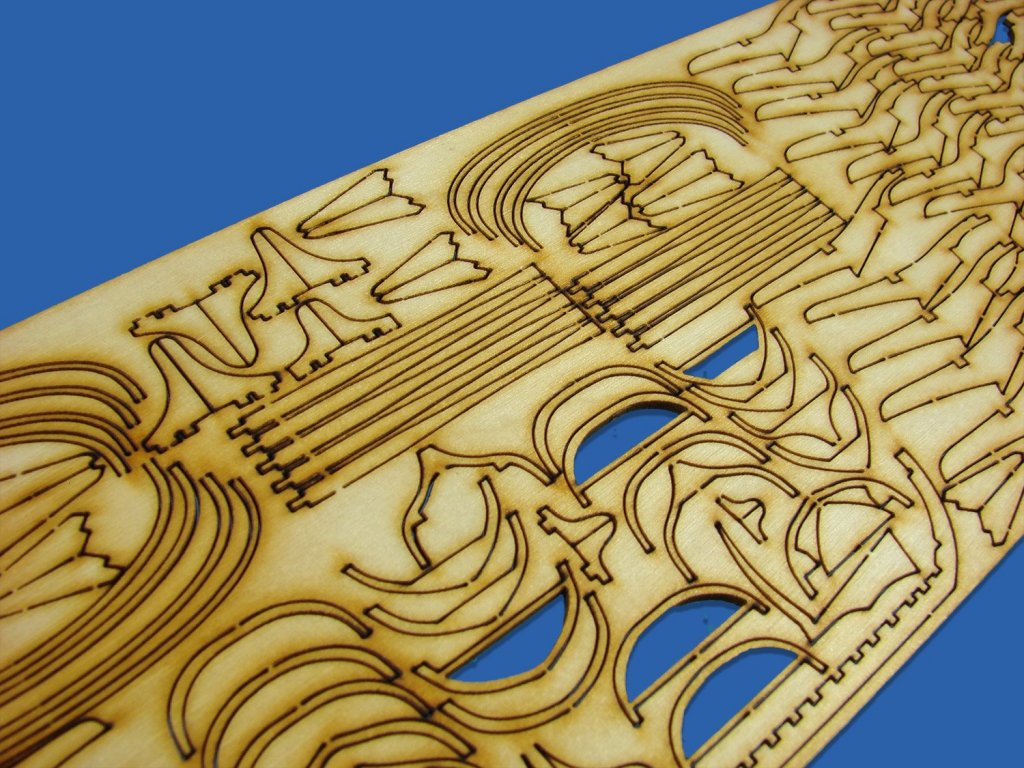
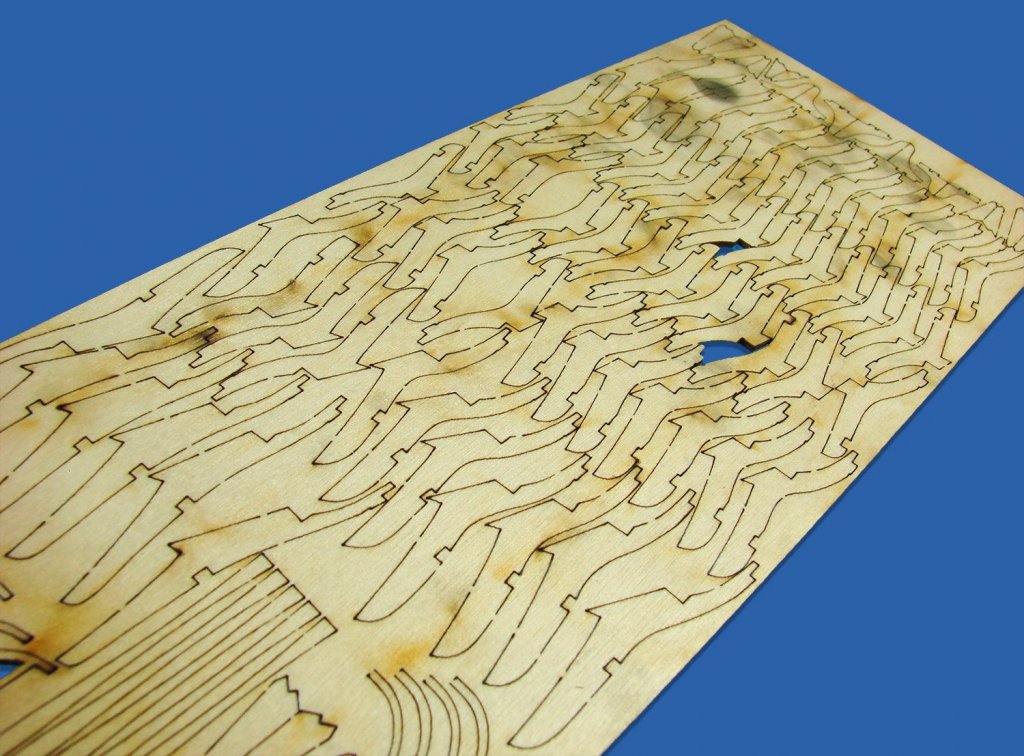
kit review 1/72 Cannon Jolle - Master Korabel - Baltic Sea Gunboat
James H replied to ccoyle's topic in REVIEWS: Model kits
Nice looking kits, and a bolt rope already installed around the sails! That's a win for me.