


Ol' Pine Tar
-
Posts
70 -
Joined
-
Last visited
Content Type
Profiles
Forums
Gallery
Events
Posts posted by Ol' Pine Tar
-
-
After getting my feet wet, so to speak, with a couple of “learner” projects, I wanted to get into something a bit more involved. Model Shipway's Fair American seemed to fill the bill – complicated and detailed enough to be a significant challenge but not entirely overwhelming.
The larger scale – 1:48 – less complicated rigging and the modest price tag helped a lot too...
I received the kit a few weeks ago. Since then I've been studying the instructions and plans, and reading through the various Fair American build logs here on MSW. A lot of talented folks doing some really nice work, not to mention, taking the time and energy to share your knowledge and experience with us! Thanks!
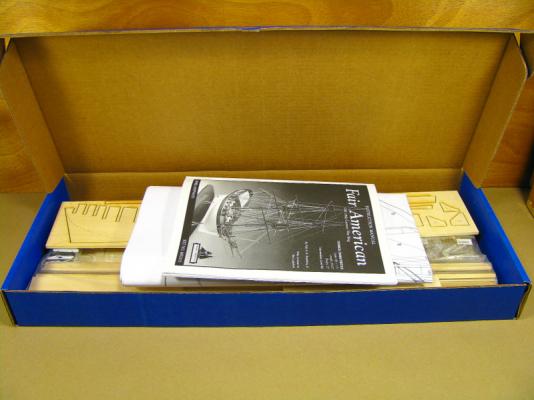
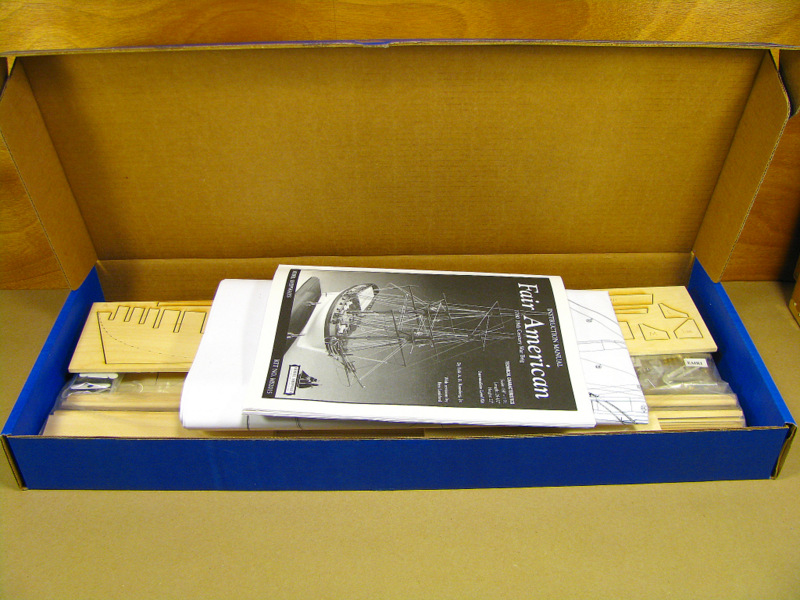
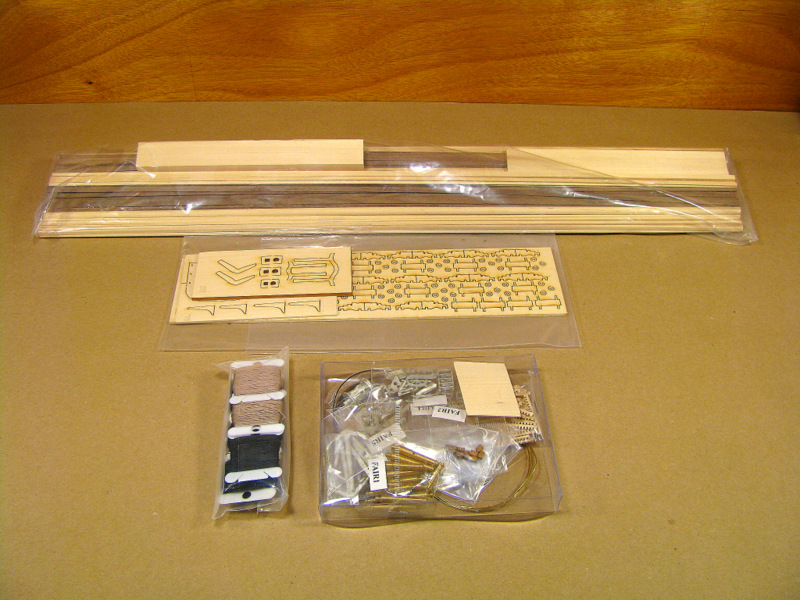
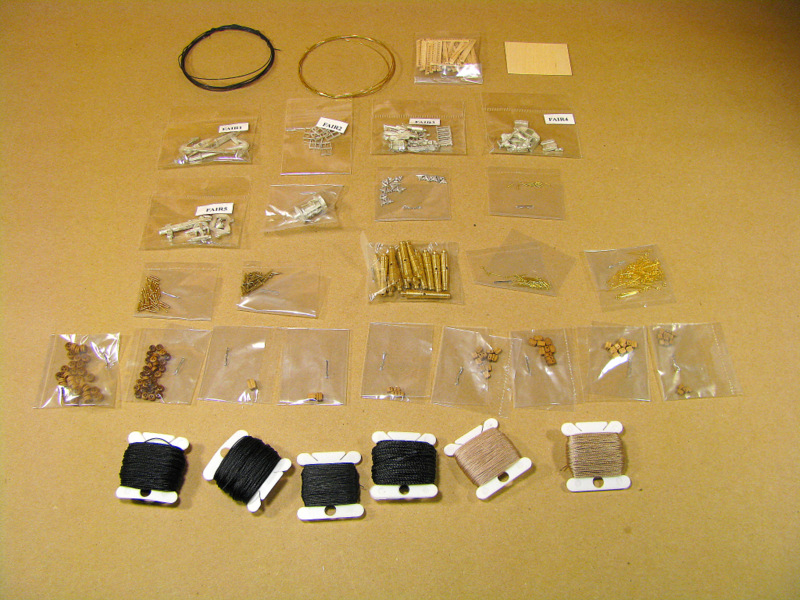
The box and what's inside...
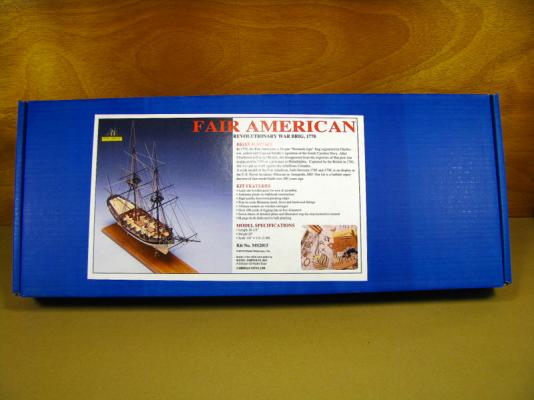


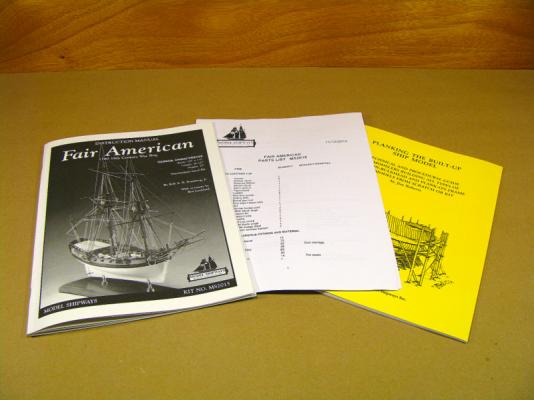
Model Shipways stuff always comes very well packed; kudos for the nice sturdy blue box.
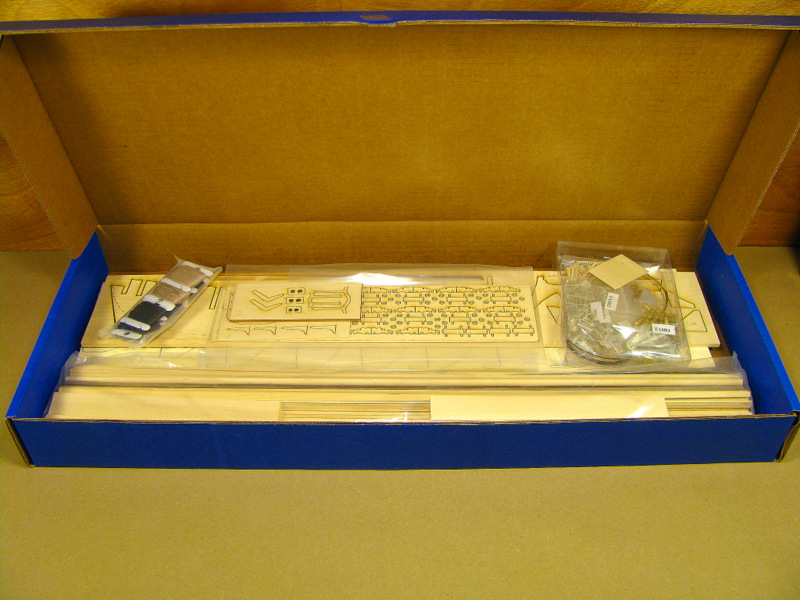
Getting started...
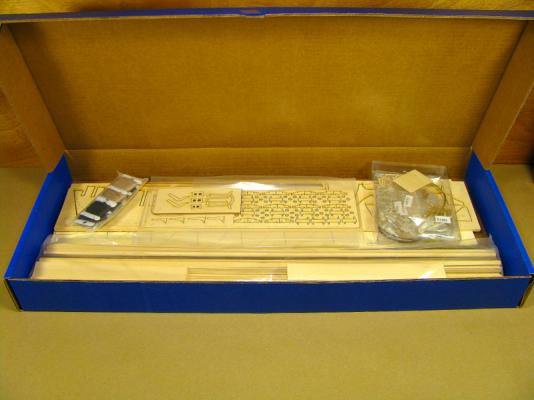
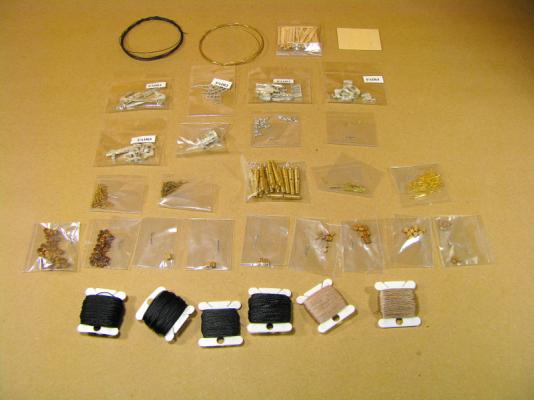
After inventorying the kit contents, one of the first things I wanted to do was look for some of the initial problems with the kit that other builders had found.
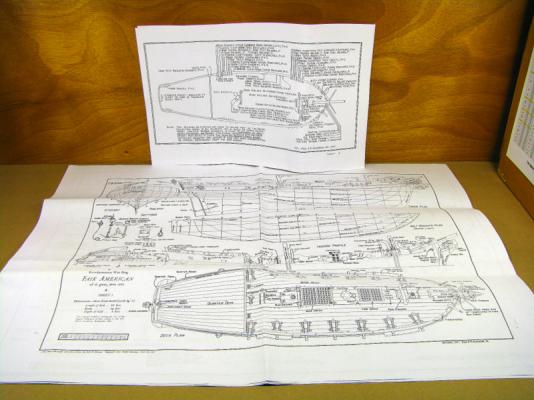
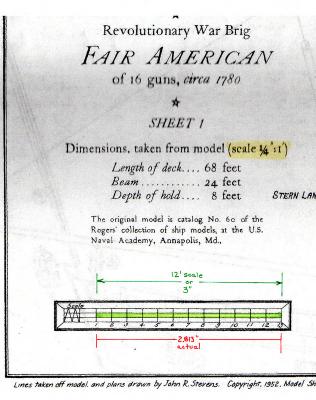
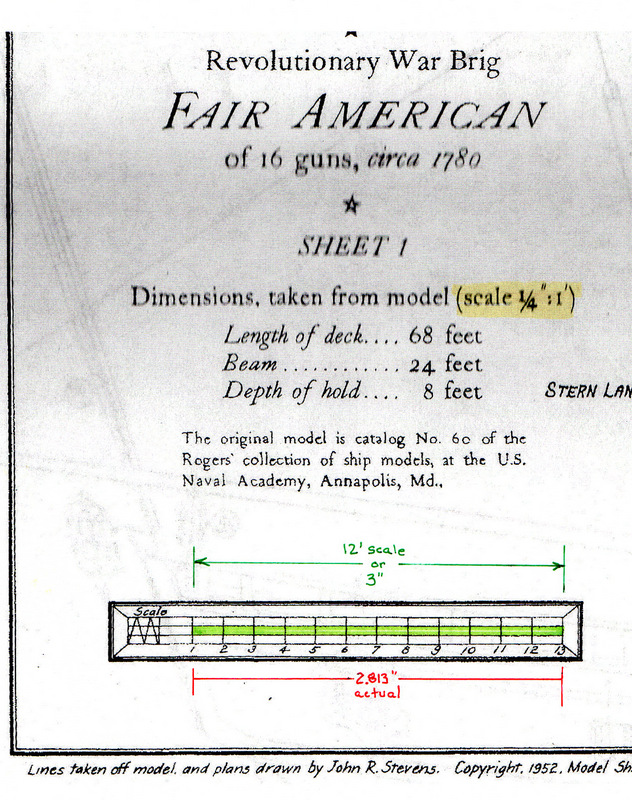
The plans...
There does seem to be some discrepancy in the scale of the printed plan sheets. After measuring the printed scale on each of the sheets, I found three of the large sheets – the Hull & Decking Plan sheets and the smaller Mast & Spar Plan sheet - appear to have been printed a bit undersized. The 4th large sheet - Rigging Plan sheet - was a printed a bit oversized. But when comparing the center keel and bulkheads to the sheets I found that for the most part, they seem to match up with the plan sheet as is. I guess that makes this a non-issue for the time being.
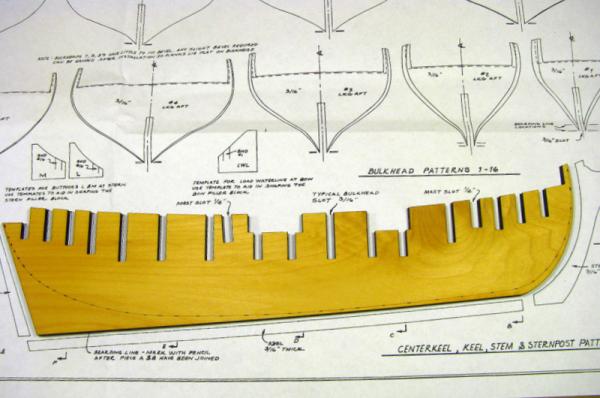
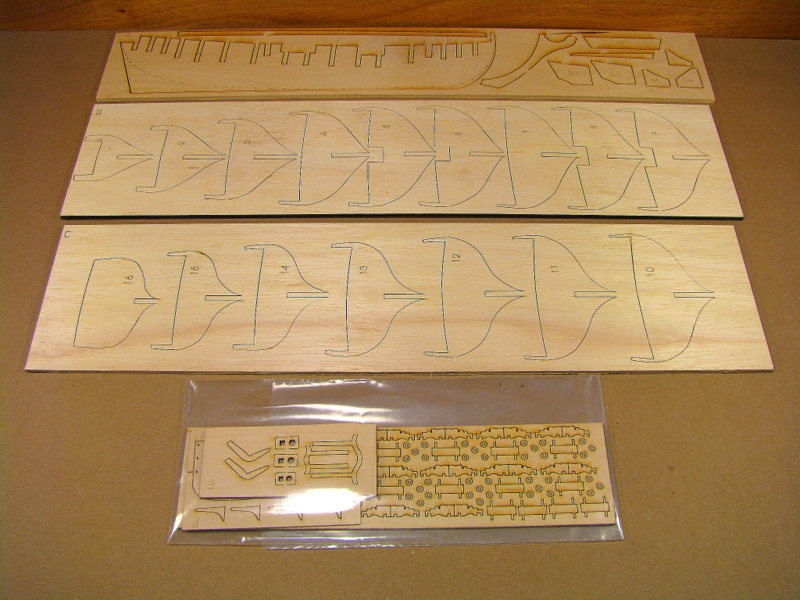
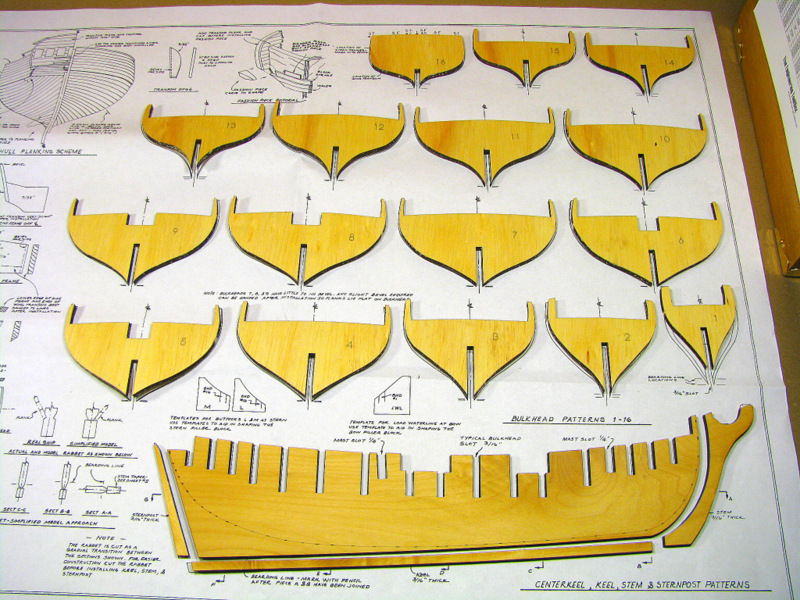
Center keel and bulkheads...
The center keel in the kit I received is a single piece, laser cut from 3/16” basswood. It does appear to be straight, no warps or curves, and fits the template of the plan sheet. The bulkheads are laser cut from 3/16” plywood. On sheet “C”, the laser did not cut all the way through on a couple of the bulkheads. No real problem, just took a little more patience to get them out of the sheet intact. All of the plywood parts look pretty solid. No visible gaps in the inside plies and fairly smooth on the exterior surfaces. All of them tended to match up with the plan sheet within a line width or so.

Stem, stern post and keel...
These parts are laser cut from the same 3/16” basswood sheet as the center keel. The only discrepancy here, as others have mentioned, is the keel being about 1/4” short when compared to the drawing. Looks like there's enough spare material to cut another one from the original sheet or just add an extension onto the original part. The curve of the stem didn't quite match the center keel, but should fit OK with a little trimming and fitting.
That's about it for now.
Again, THANKS! to all who have taken time to share your work.
Your critique and comments are always welcome.
-
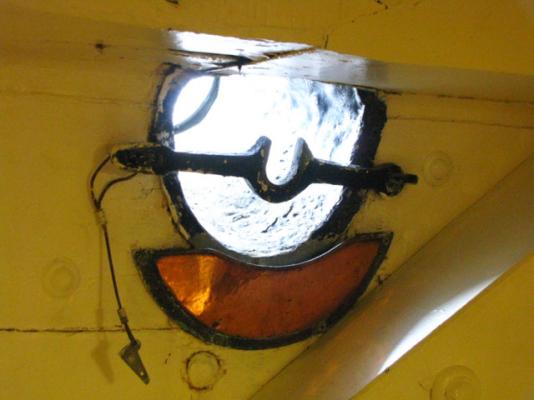
Tom,
Excellent work on your Constitution!
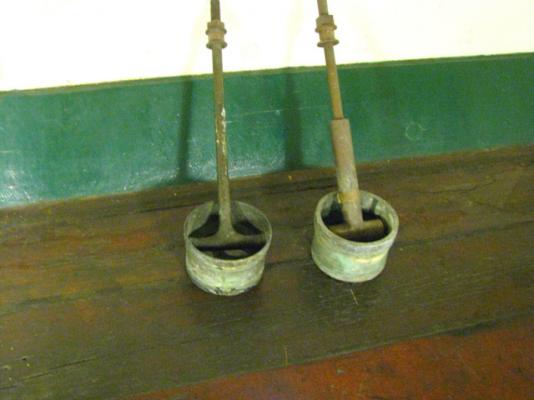
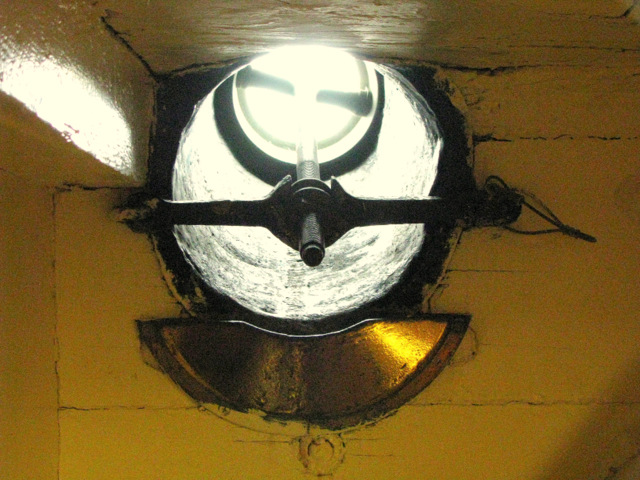
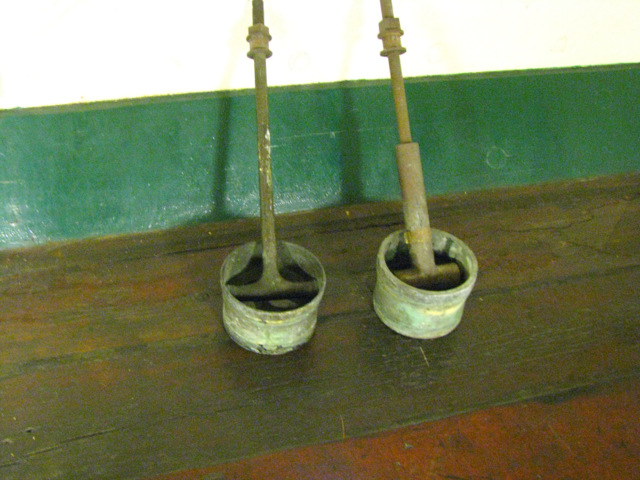
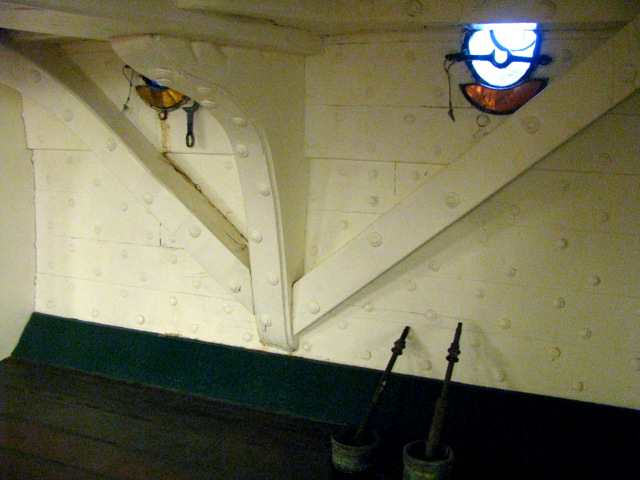
Visited the ship last week and remembered your query about the berthing deck air ports.
Photos from the interior and the plugs used to seal the port...


-
-
-
-
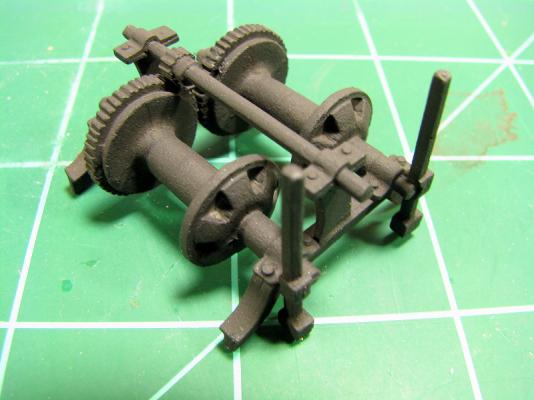
Russ, Thanks! for your comments. - The winder is painted. I scrubbed the parts with a toothbrush and toothpaste, then soaked them in white vinegar to etch them a bit. I assembled it with zap-a-gap CA and sprayed it with Scalecoat "Steam Power Black" which is actually a very dark grey. Finished it off with a couple shots of Testor's "Dullcote"
-
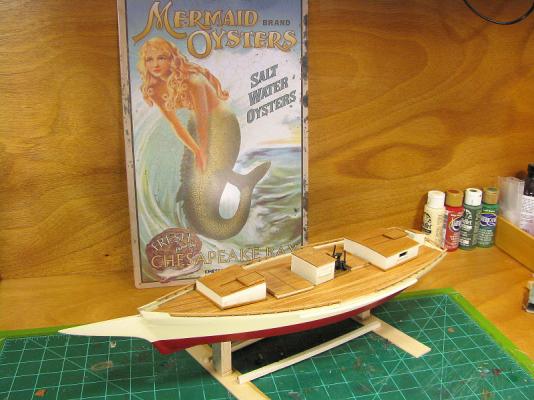
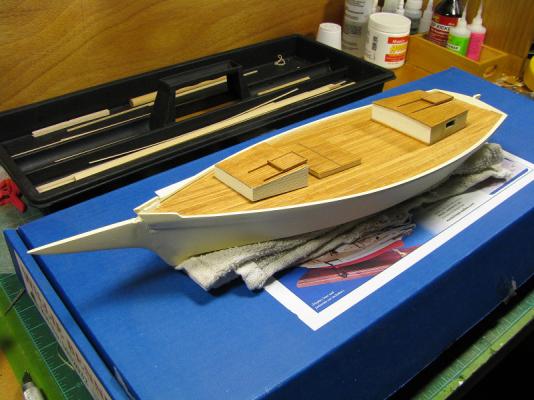
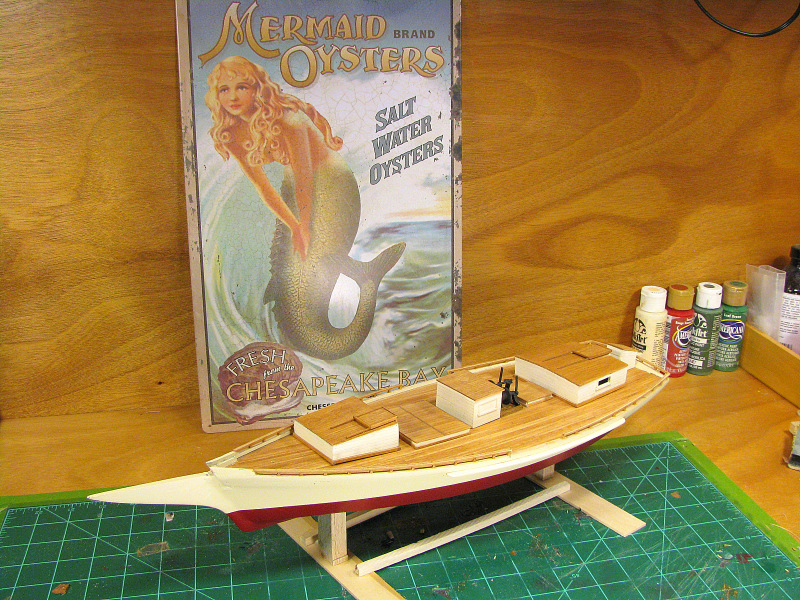
A bit more progress... Assembled the winder, marked off the waterline and painted the bottom of the hull. Deck structures are just sitting on the deck, making sure they'll fit. Cool sign in the background is Father's Day gift from the Girlies. That's about it for now. Thanks everyone for your interest and comments.
-
Thanks Russ and Steve for the comments.
Russ, I rummaged around the mrr paint stock and found some Scalecoat mineral red that I'll probably use for the bottom.
Steve, Thanks for dropping in on the build. Being an old model railroader, everything I've built for the last 40 years has been weathered, the more the better. So for a change, I wanted this first build to have the look of a "recent restoration." I would imagine sometime in the future you'll see an old beat up weathered boat on my workbench.
Sorry folks, but no pics this post. We'll get that caught up in the next post. I did get the small deck hatch and the steering gear housing finished. I'll need to locate the samson post and mast locations before I place anything on the deck.
I also worked on the caprails and guard rails, cutting them from basswood stock, soaking and preforming them. I shaped the guard rails, painted them and glued them on the hull. I then drilled a couple of holes through into the hull and pinned them with some .020 brass wire.
To get the stanchion holes lined up on the caprails and the sheers, I taped them down to the sheers, marked the stanchion locations and drilled through both at the same time. That's sort of where we're at for now.
So, as always, thanks to everyone for your interest and comments!
-
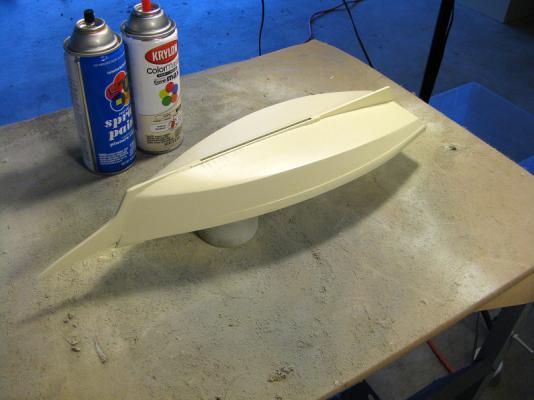
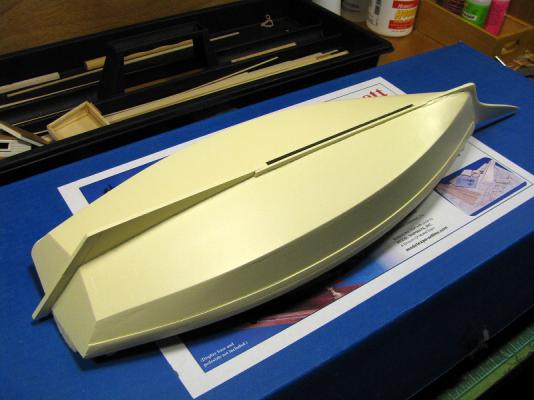
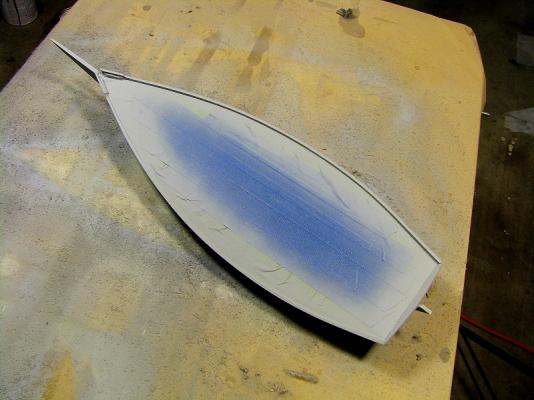
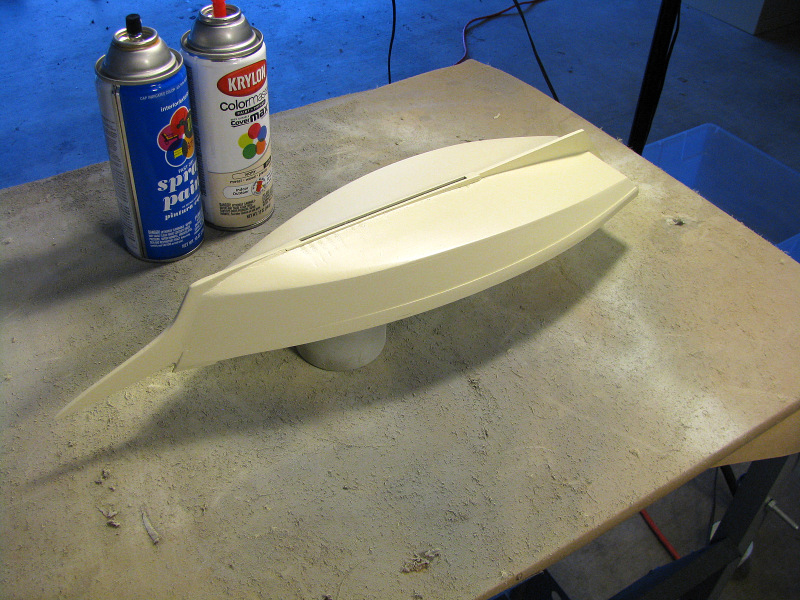
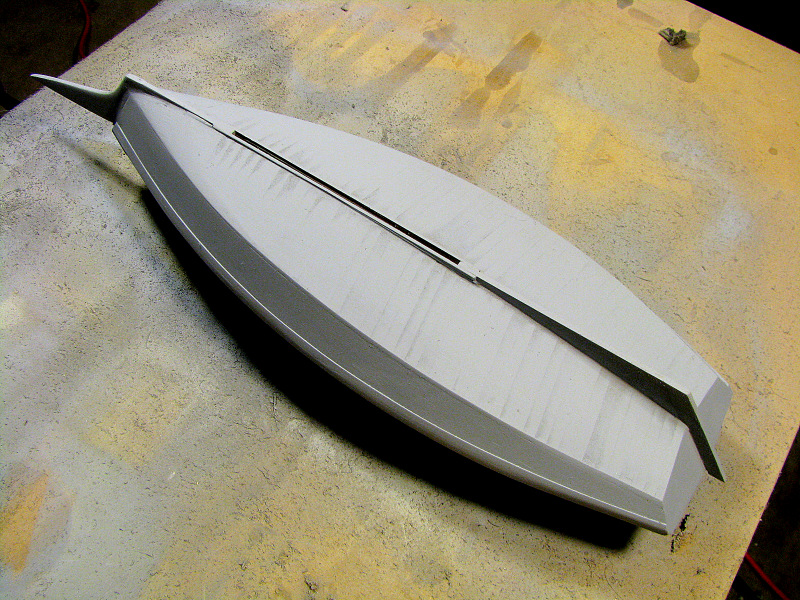
Another busy week away from the work bench, but managed to get the hull primered and the first finish coats done. I used Walmart brand gray sandable primer and Krylon satin ivory. Yes Russ, I'm going to paint the bottom red. Maybe boxcar red... I seem to have a surplus of boxcar red...

I also started constructing the various deck structures.
That's about it for this week.As always, THANKS to everyone for your interest and comments!
-
Nice weather, baseball season, and the ever-expanding “honey-do” list means not a lot of time at the workbench, but did get a bit done.
Sanded and primered the hull and bowsprit. Began constructing the deck cabins, hatches and winder motor cover.

I've also been putting in some time reading a couple of Howard Chappelle's books, American Small Sailing Craft and The American Fishing Schooners 1825-1935. Looks like when I finally do retire, I'll have a whole new genre of history to delve into...
-
Thanks Russ & David for your comments.
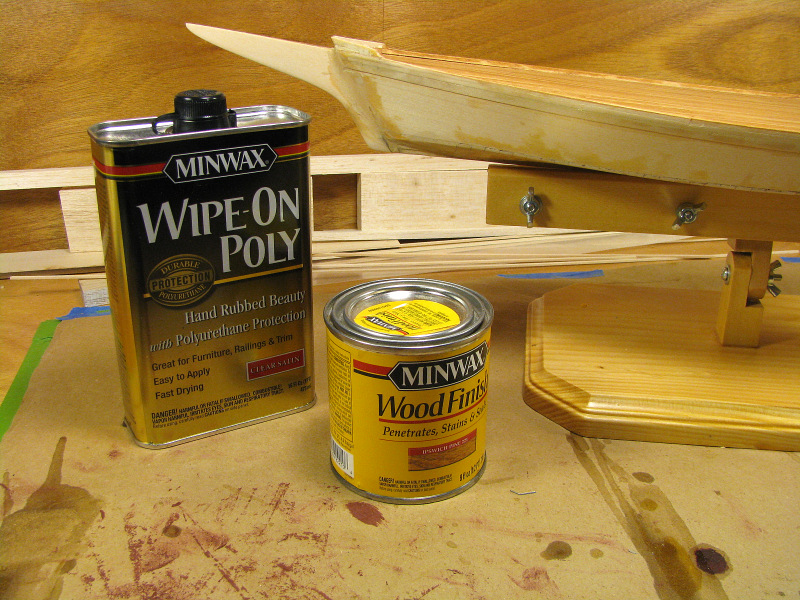
David, I only stained the decking; the discoloration on the hull itself are remnants of the filler I used to smooth it out. It will get painted later. I used the Minwax Ipswich Pine stain on a couple of model railroad projects, mainly the interior of the HO scale sawmill I built a few years ago. I just like the way it looks on basswood.
-
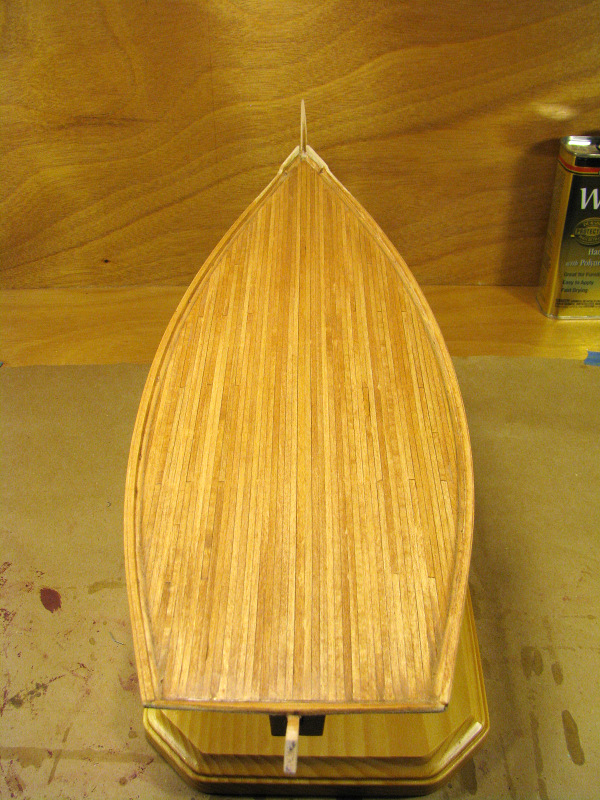
Thanks David, Russ for your interest & comments.
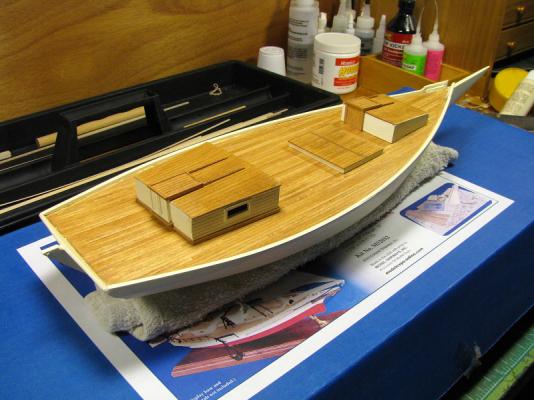
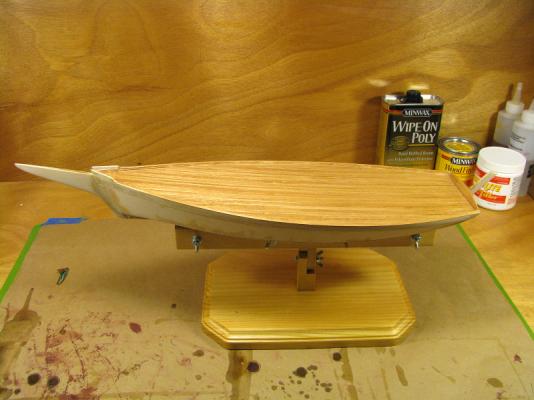
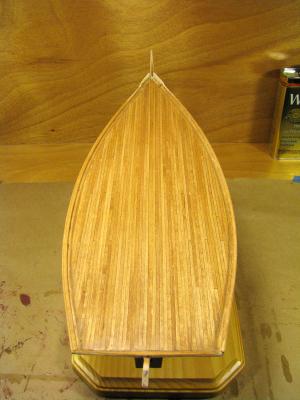
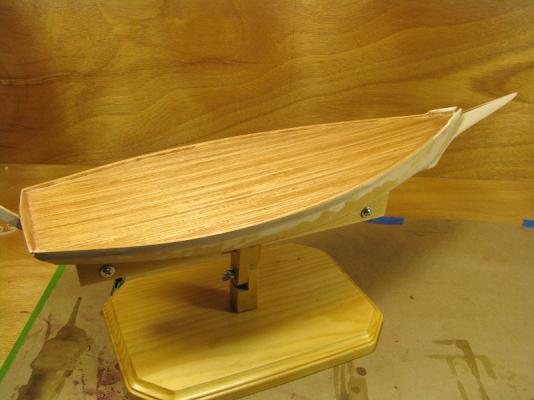
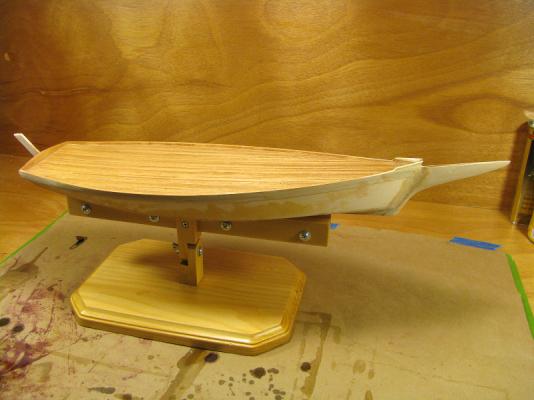
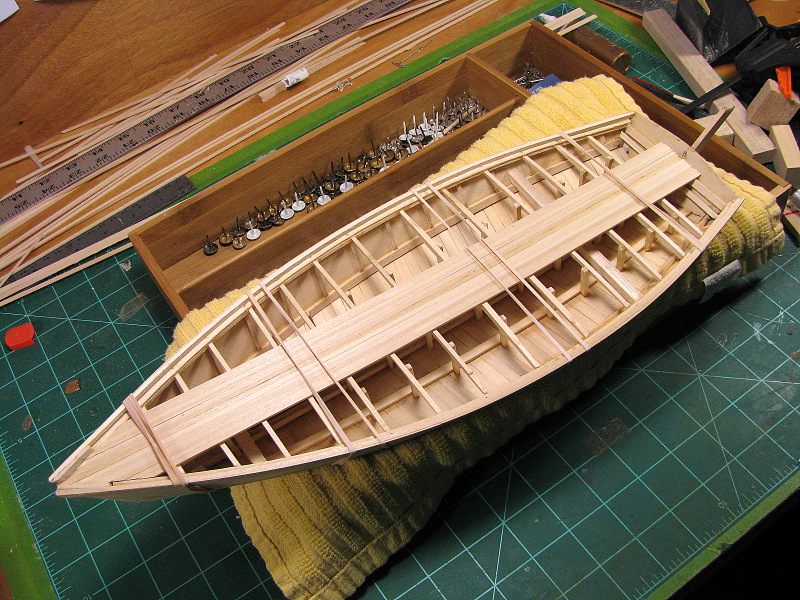
Completed the deck planking, sanded it smooth, and stained it with Minwax Ipswich Pine stain. Topped that off with a couple of coats of Minwax Wipe On Poly. Still got a lot to learn about fairing and planking, but we're getting' there... I do like the way the deck stain came out so I think I'm going to leave it as is.
Next I cut out and shaped the cutwater and stem and epoxied it to the inner stem. Cut out the basic bowsprit and began shaping it.


One thing I forgot to mention and show a pic of; I did put a couple of blocks under the decking for the mast and samson post. I'll drill these out and shape them accordingly when I get to that part of the build.
Also, in response to another topic I saw regarding glues; I use Titebond II for most of the wood stuff and some 5 min or 12 min epoxy. I do use a bit of CA but not much.
And, as always, THANKS everyone for your interest & comments!
-
Thank you gerty. Your Bennett is coming along quite smartly!
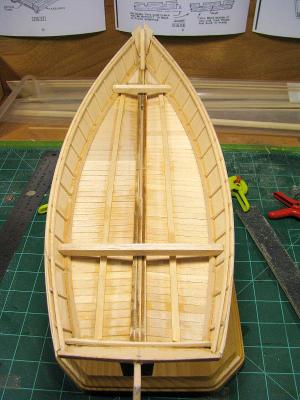
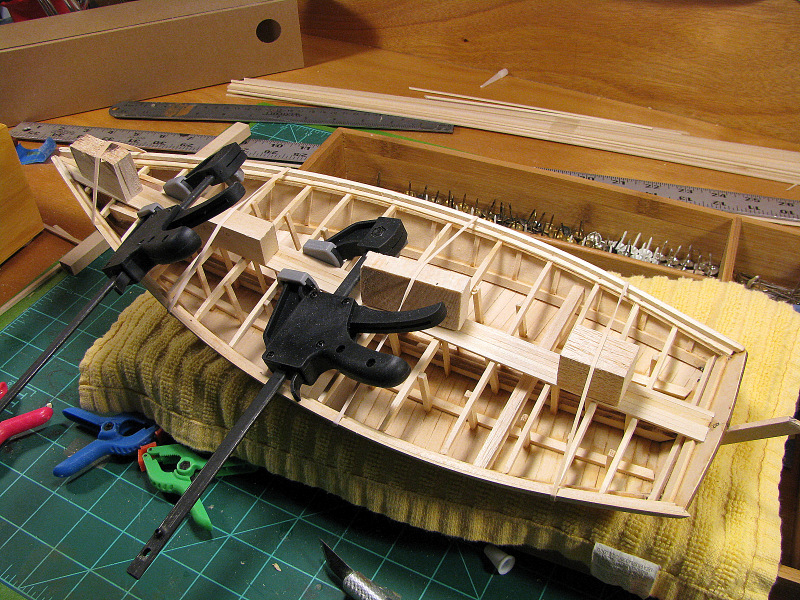
After a bit of thought, I decided to go with non-scale “fake” framing. I know my framing does not look like the plans and instructions, but its all going to be covered by the deck planking. With that in mind, I placed the longitudinal battens, strongbacks, knight heads, side framing and clamps. Next was the “fake” framing for the deck spaced about 1”. I faired the deck framing for the bit of crown of the deck. Added plank sheers and log rails. Sort of cheated on the plank sheers; instead of using a cutting several pieces from single 1/2” width I used 4 pieces of basswood, soaking them and laying them in 1 at a time to make up the width of the sheers. The log rails, after soaking, were no problem and went on nicely. A bit more sanding and we're ready to start the deck planking using the basswood from the kit. I'm going to try to stain the deck planking instead of painting it, depending on how it looks after I finish sanding it down.
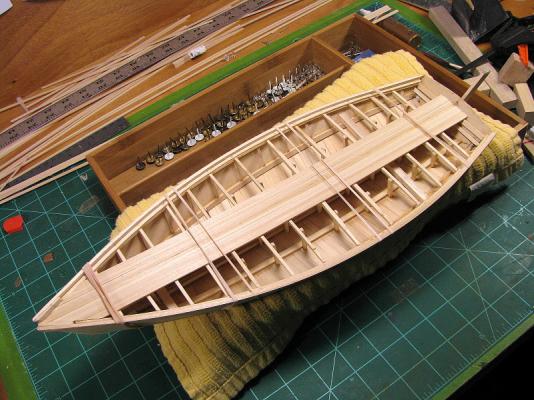


I am subscribed to all the Bennett build logs I could find on MSW. A lot of very nice work by some of very talented folks! So, Bennett builders, keep posting those updates – I need all the encouragement I can get!
As always, THANKS ! To everyone who has taken the time to look and comment.
-
Thanks Russ.
I've got a couple of Chapelle's books already and I'm sure that will be my next one.
-
Thanks Russ!
I checked out your other builds - excellent work! I especially like the Biloxi schooner.
I have a research trip planned to Galveston later this year to try to dig up some plans, drawings and photos of early fishing craft on Galveston area waters.
Thanks again for interest and comments.
-
Thanks Tim! The Pinky is looking quite nice. Your lobster smack also came out really nice!.
And, I checked out your Sharpie. The ultimate model boat - one you can take to the lake and go sailing in.

-
Tim, Gerty, Russ & Dave B – Thanks and welcome to the fray!
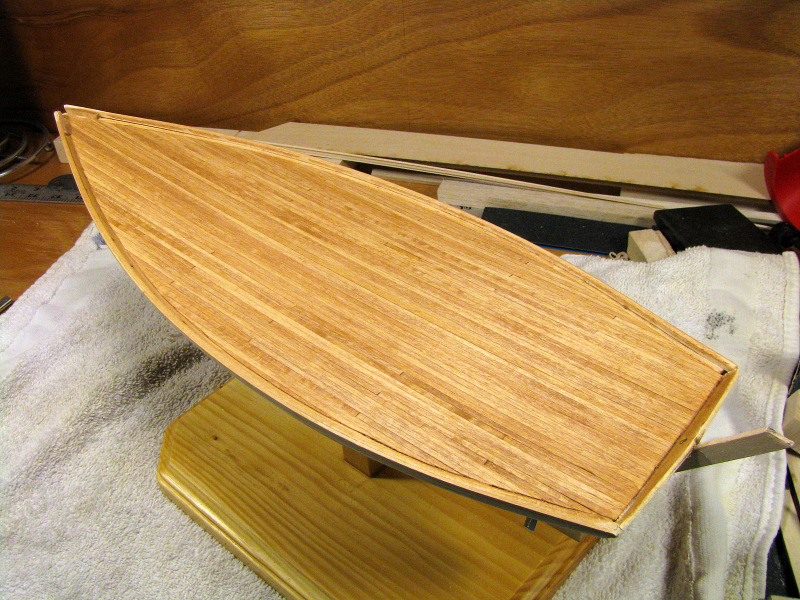
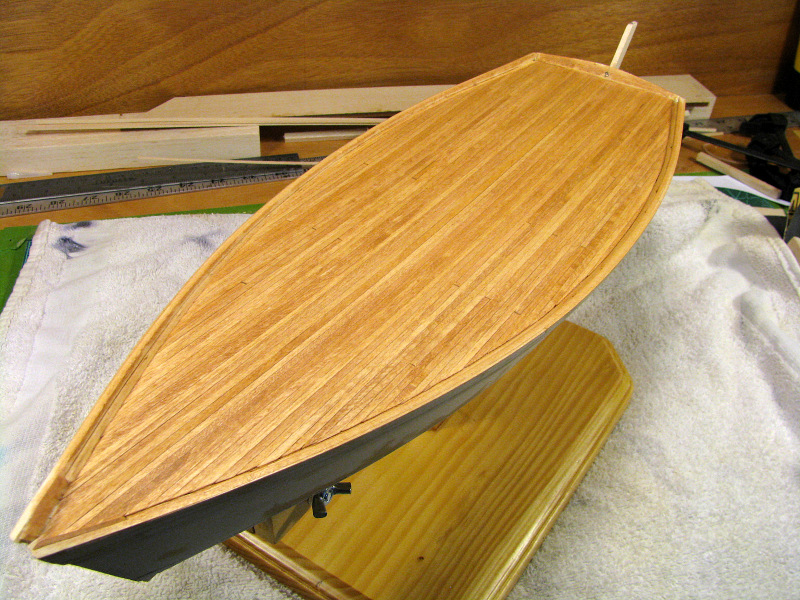
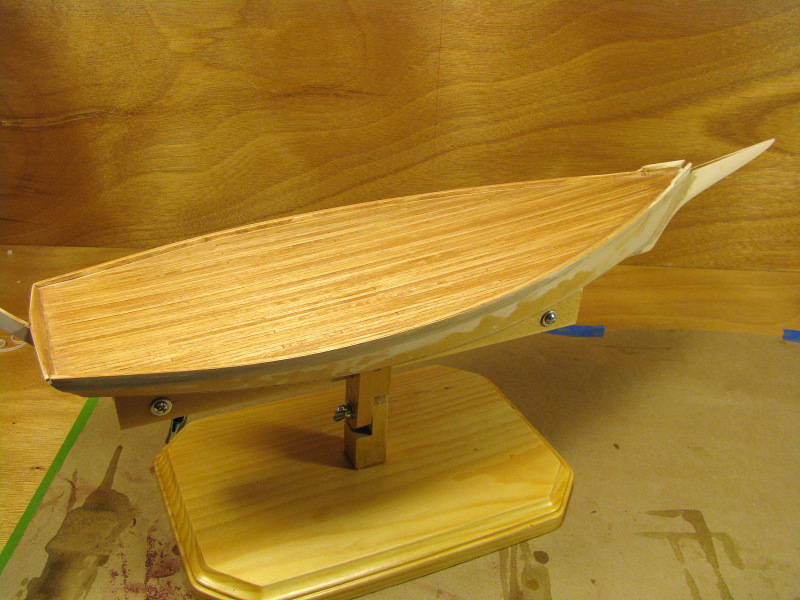
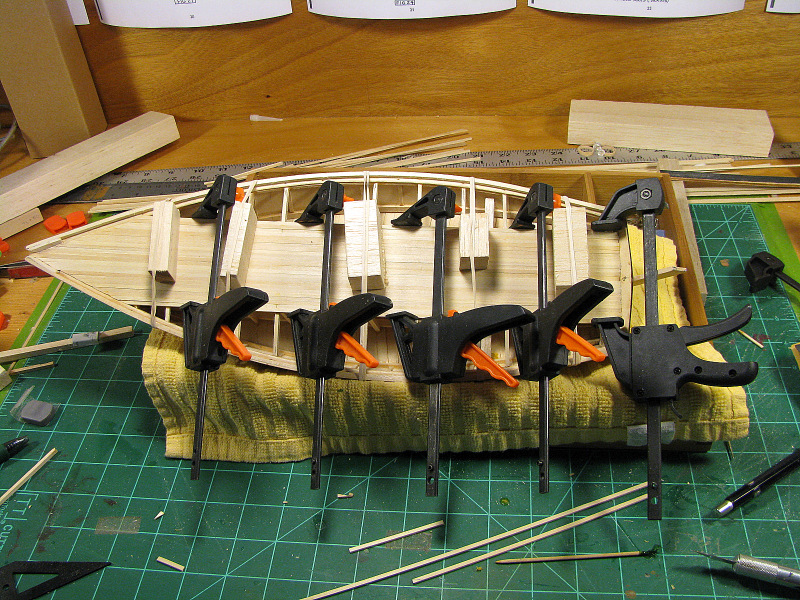
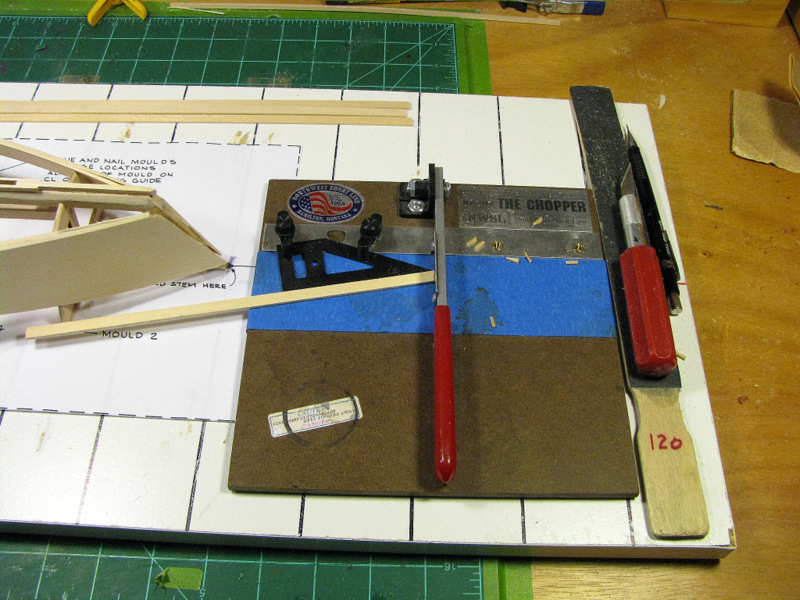
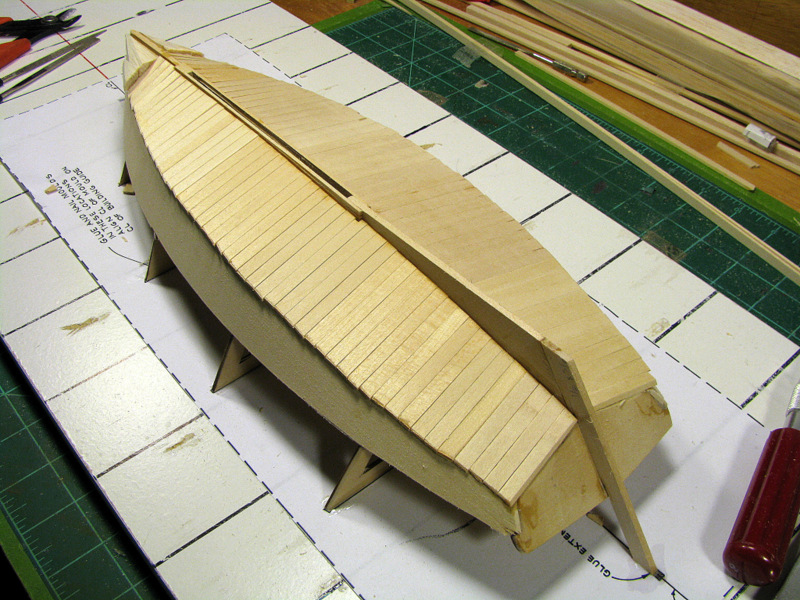
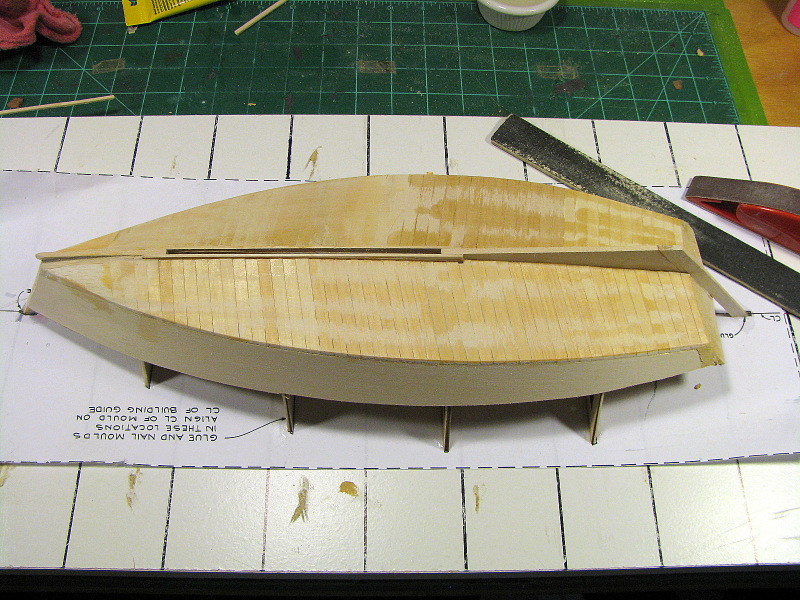
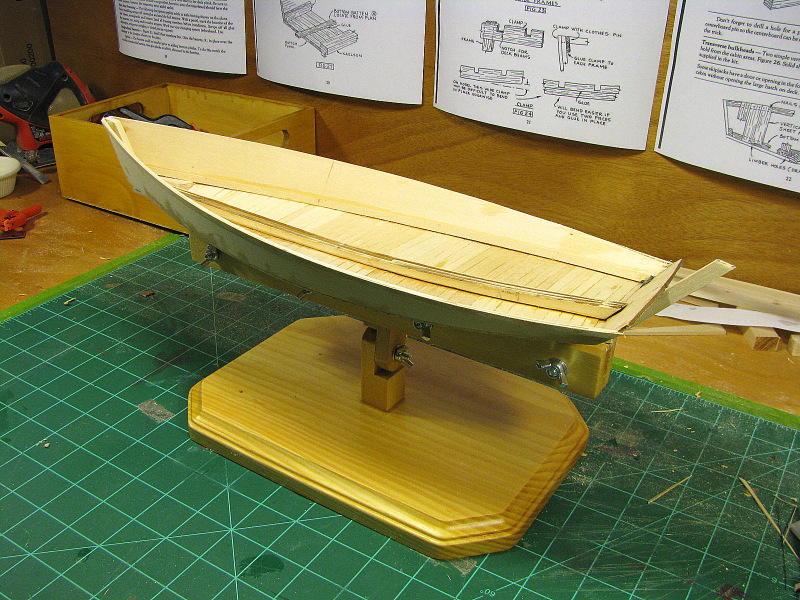
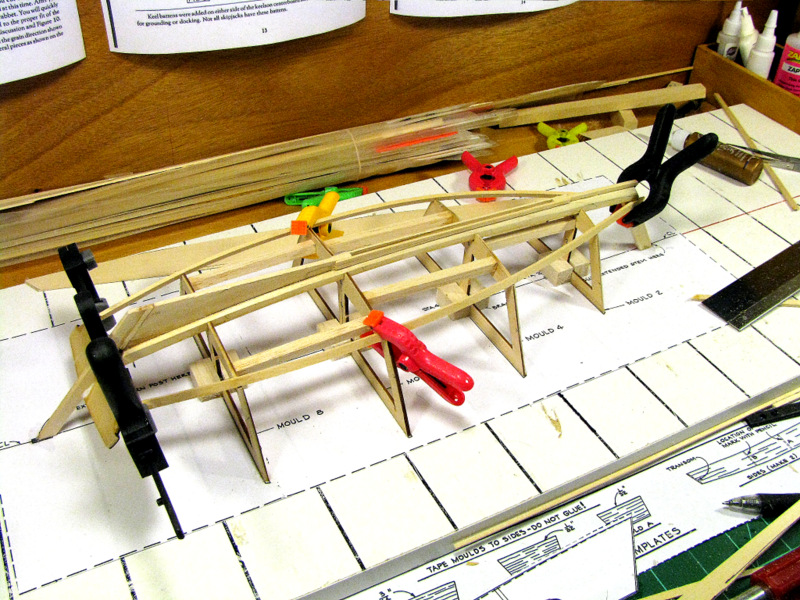
Started the bottom planking. The NWSL Chopper makes cutting the angle on the planks simple and accurate. Towards the bow I glued the planks into the rabbet, let them set, then clamped and glued them to the chine log to get the little “twist” they needed. I used Zap-A-Gap medium CA to glue the planking down. Trimmed the chunks down a bit and glued them in place. Next was some basic shaping and sanding. The planking was a little rough in places so I used a bit of Minwax filler and more sanding. Being the hull will have a painted finished, it seemed important to get a smooth finish rather than trying to preserve the wood grain for staining. Did a bit more sanding, pulled the hull off the moulds and clamped it up in the keel clamp.


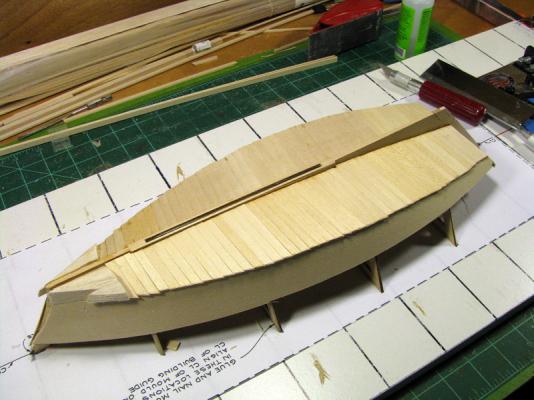


Thanks again to everyone for taking time to look and comment!
-
Planking 101...
 Nice job, Tim!
I like your "creative clamping" demo.
-
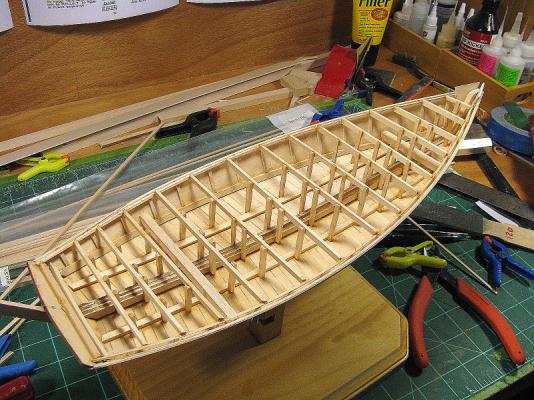
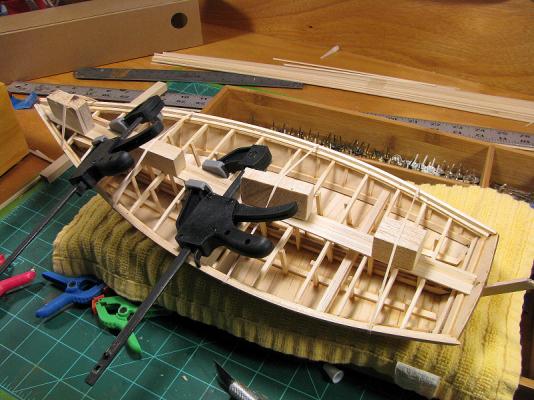
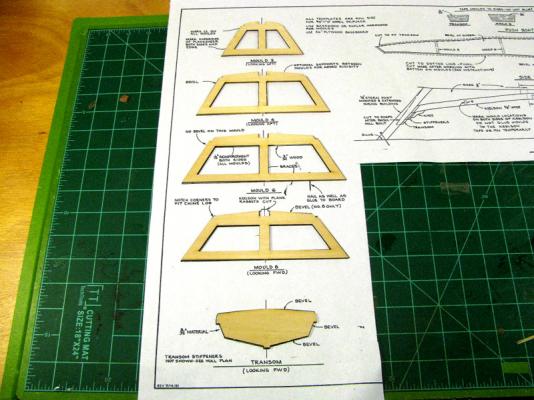
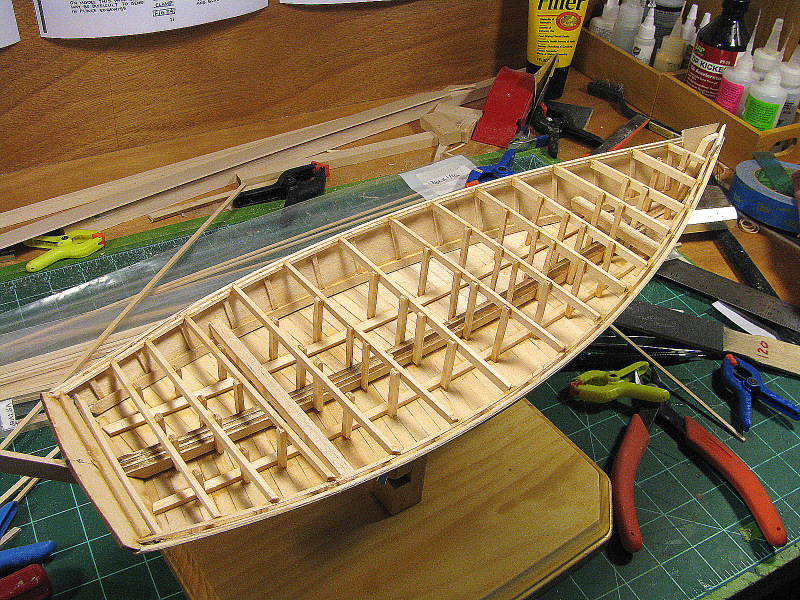
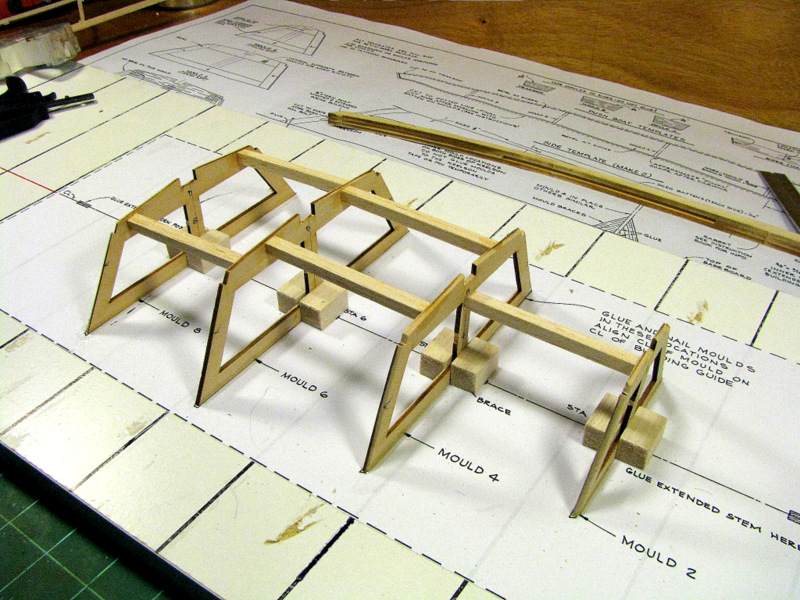
Spent the last several days looking over the instructions, plan sheets and parts list, plus went through every Bennett build thread here on MSW. Lots of fine work by some talented folks! Thanks to all of you who have taken time to post your build progress.
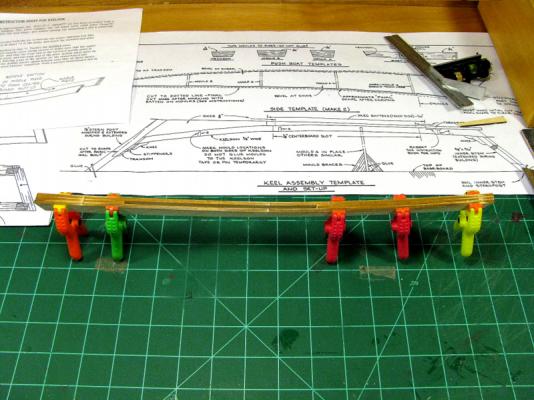
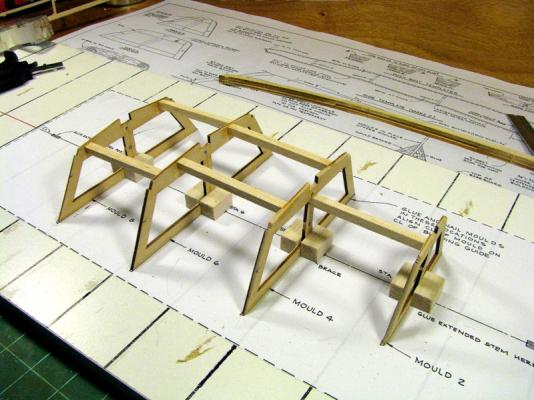
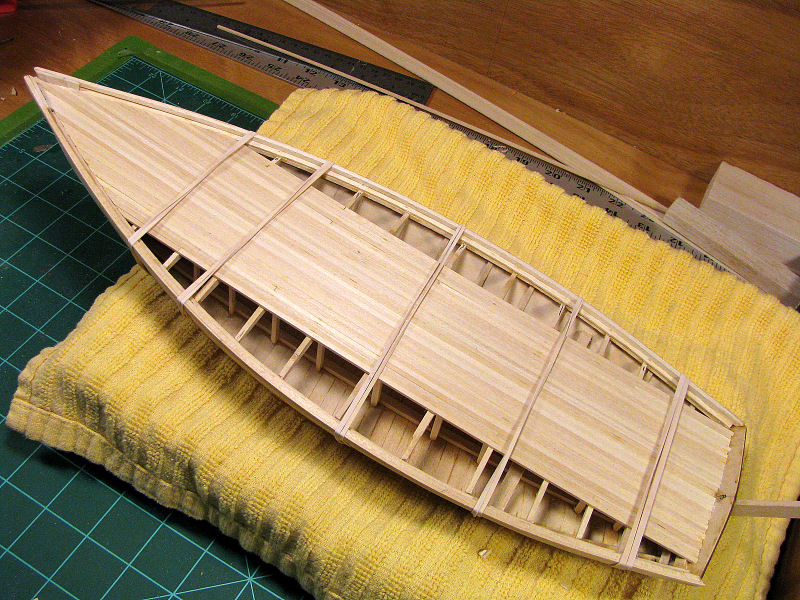
Got started with the build by setting up the build board and attaching the hull moulds. Built up the keel assembly, cut the rabbet; cut, fit, and attached the remaining keel parts and transom. Fit it all into the hull moulds and secured it to the build board at the stem and stern posts. Cut and attached the chine logs and carved and sanded them to shape.
Next thing was to cut the hull side planking pieces and fit and attach them to the chine logs, stem post and transom. Sanded and faired them along with the chine logs. Checked the tick marks for the sheers and looks like the hull side planking is just about wide enough to cover them.
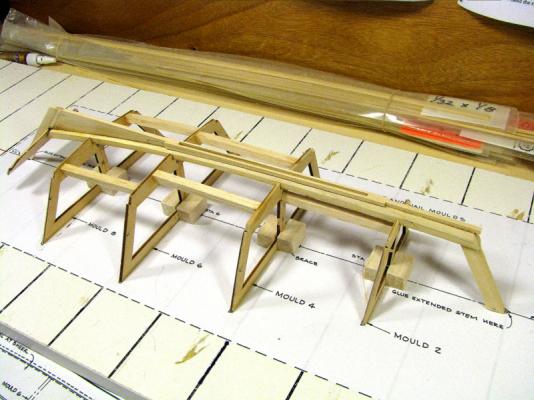

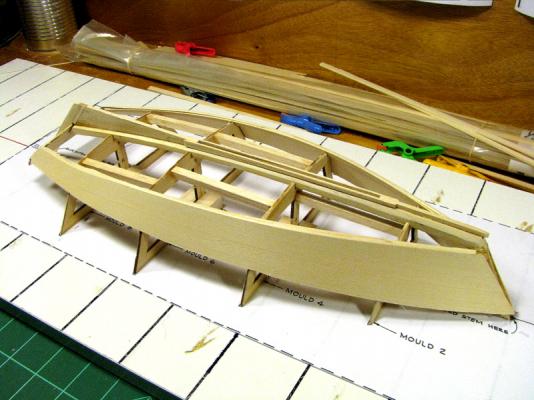
Just a couple of bumps so far; I misinterpreted the plan sheet and cut the aft skeg a tad too short leaving no clearance to attach the transom between the stern post and the aft skeg. Had to remove the stern post and put a short 1/8” strip between the two pieces. Problem solved. Next, had a wrestling match with the chine logs. Finally epoxied those little buddies to the transom and let it set up, then formed them around the molds and clamped and epoxied them to the stem post.
So far, so good... Should get along to the bottom planking in the next few days.
Thanks to all for your interest and comments!
- Ryland Craze, russ, yvesvidal and 2 others
-
 5
5
-
-
Thank you Tim and Gerty!
-
First, let me say I have already found this forum to be an invaluable resource for both the neophyte ship modeler and the experienced builder. To that I offer a big...
THANK YOU !
...to the owners and administrators of Model Ship World and everyone else who has taken time to share your knowledge, experience, and wisdom on this forum. Thanks Folks!
Now on to some business...
Although not my first boat build, this is my first wooden sailing craft build. I've been working on a scale model Dodge Runabout (Legend Model Boats) for several months now (see link in my signature). Its coming along nicely but I still wanted to try my hand at a sailing boat.
As for experience, I've been into model building in general since I was a kid and have been fooling around with model railroad stuff for nearly 40 years – mostly HO with a smattering of On30. I prefer working with wood and build mostly kits, but do a little scratch building too.
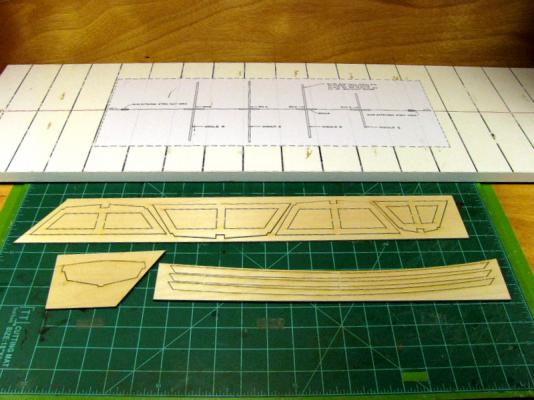
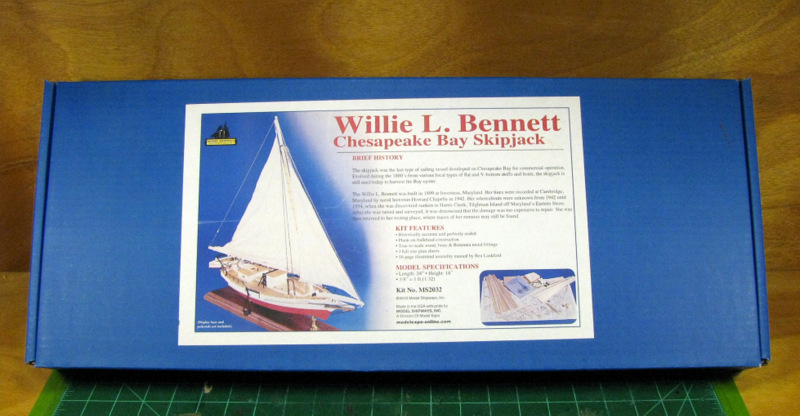
In choosing my first sailing craft build, I thought something rather basic might be in order, so after looking over a lot of stuff I decided on the Willie L. Bennett Chesapeake Bay Skipjack by Model Shipways. Why the Bennett? First, Model Shipways and Model Expo seem to have a topnotch reputation in the model ship business. Second, I like the larger scale, the smaller price tag, and it does seem to be a tad less complicated than, oh say, Nelson's Victory or something on that order...
So we'll start with the obligatory “the box and what's in it” shots...

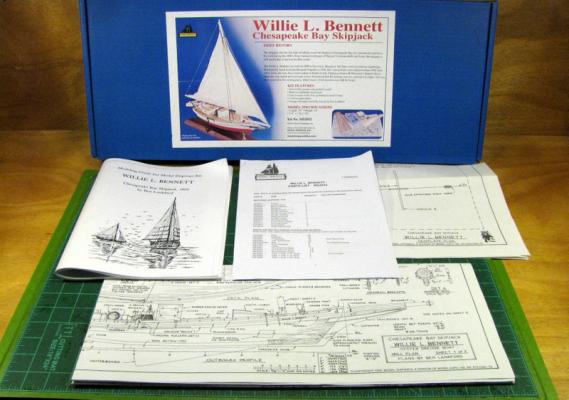
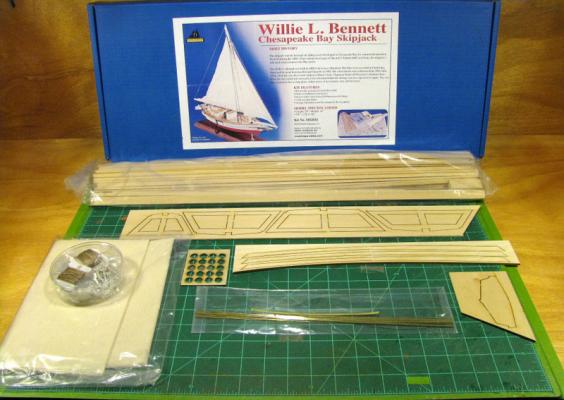
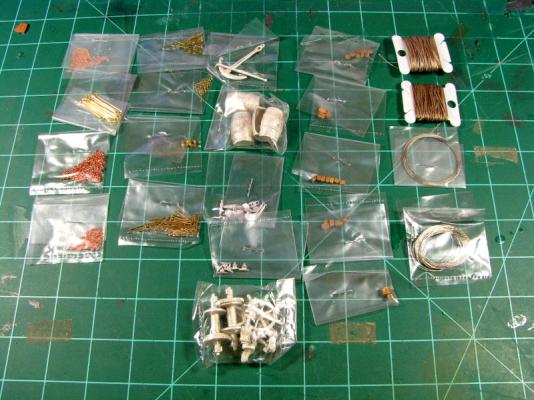
After unpacking, ran through the parts list – everything looks good there. I retrieved the plans and instruction booklet and will spend the next week or so studying this stuff and getting a little more familiar with the pieces, parts, and process. Should get started on this thing for real in a week or so. Until then...
- MEDDO, Ryland Craze and tasmanian
-
3
-
Richard,
Very nice work!
Enjoying watching your build. Thanks for taking time to share your experience.
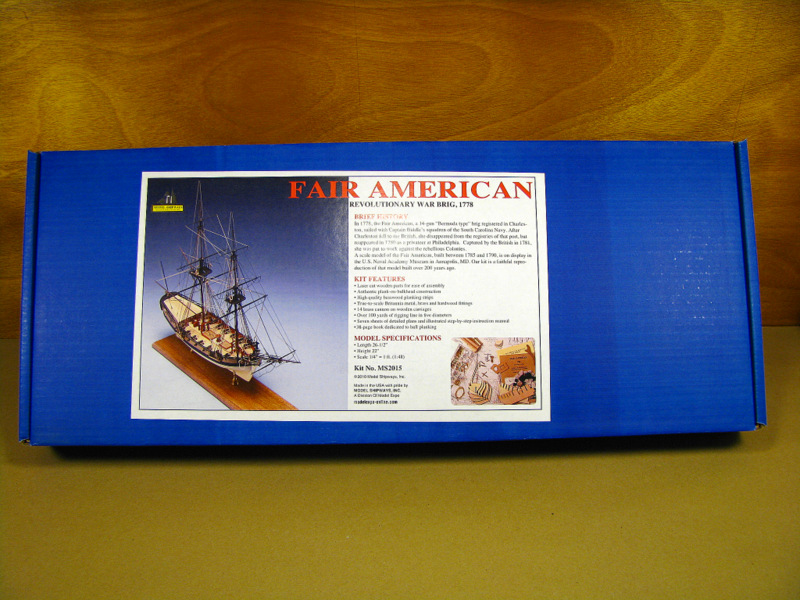


Fair American by Pine Tar – Model Shipways – 1:48
in - Kit build logs for subjects built from 1751 - 1800
Posted
Thanks Pops and GuntherMT for the comments!
Pops: In this case, as the parts are already cut and fit the plan sheet templates, I'm going with the parts. I would imagine if I was going to scratch build from just the plans, I would have them copied and reprinted to actual 1:48 scale and proceed from there.
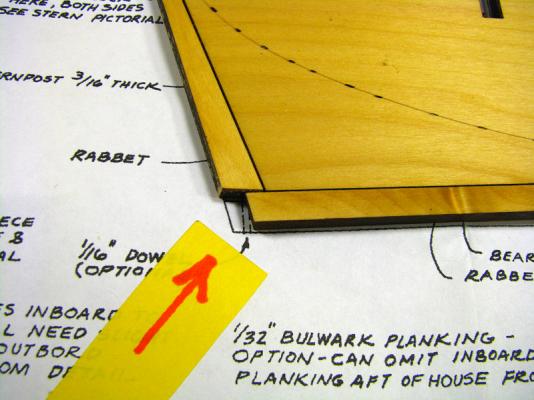
Carving the rabbet...
After a little practice carving on the remnant of the sheet the center keel was cut from I felt a bit more comfortable putting the blade to the to the real thing. To keep the remaining edge of the rabbett consistent, I took a piece of 1/16” x 1/8” strip, soaked it and shaped it around the center keel. After it dried, I colored the 1/16” edge of the strip with a permanent marker. I clamped it and the center keel to the workbench, then tack glued the strip to the center keel edge, keeping both flat on the workbench. The 1/8” wide strip against the 3/16” thick center keel left 1/16” of free material to be cut away for the rabbet. This way I could carve the center keel and the strip down until the colored edge of the strip was carved away with a consistent 1/16” cut. Repeating this on the opposite side of the piece gave a relatively consistent 1/16” cut off each side and 1/16” edge down the center of the center keel.
Fitting the bulkheads to the center keel...
None of the bulkheads would slip into the center keel slots as cut – the bulkhead thickness measured .208” while the center keel slots measured .183” - plus the laser cut indexing made for a bit of trimming, sanding and fitting. The dry fitting looked OK, bulkhead tops flush with the top of the center keel. The bottoms of bulkheads 10 – 16 didn't quite reach the bearding line though. May have to shim them up a bit when we get to fairing the bulkheads.
So far, so good...