TBlack
-
Posts
1,305 -
Joined
-
Last visited
Content Type
Profiles
Forums
Gallery
Events
Everything posted by TBlack
-

SS Vinal Haven by TBlack - FINISHED
TBlack replied to TBlack's topic in - Build logs for subjects built 1851 - 1900
While I wait for the dentils to arrive from CA, I'm turning my attention to the stack. The photo shows the base that I shaped on the lathe. I have a 5/8" brass tube that should serve nicely as a stack. I'm assuming that the holes you see in the photo at the base are, in fact, holes and not rivets. Tom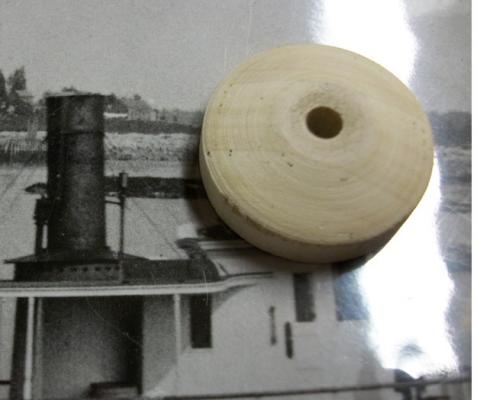
- 326 replies
-
- 3
-

-
- vinal haven
- steam ship
- (and 1 more)
-
Pete, You're out of the starting blocks! I notice that you have the keel set at an angle to the building board. I guess that's to account for the drag? And do the instructions tell you to do that, or is that your initiative? Nice little boat, BTW. Tom
- 209 replies
-
- 1
-
-
- muscongus bay lobster smack
- midwest products
- (and 1 more)
-
Dorade Omega1234 - FINISHED - yawl
TBlack replied to Omega1234's topic in - Build logs for subjects built 1901 - Present Day
Patrick, I'll certainly join the chorus; beautiful work! Could you share with us how you made the winches? There are quite a few of them, all beautifully turned out. Tom -
SS Vinal Haven by TBlack - FINISHED
TBlack replied to TBlack's topic in - Build logs for subjects built 1851 - 1900
Okay, okay, you guys, I get it, sheesh! A practice run with the saw shows a kerf of .5 mm which should be just fine. But yesterday I sprung for Andy's dentils. So I'm committed, and we're going to wait to see how they look first. Tom -
SS Vinal Haven by TBlack - FINISHED
TBlack replied to TBlack's topic in - Build logs for subjects built 1851 - 1900
Andy, Thanks for doing the math. I'll give them a try. Tom- 326 replies
-
- 1
-
-
- vinal haven
- steam ship
- (and 1 more)
-
SS Vinal Haven by TBlack - FINISHED
TBlack replied to TBlack's topic in - Build logs for subjects built 1851 - 1900
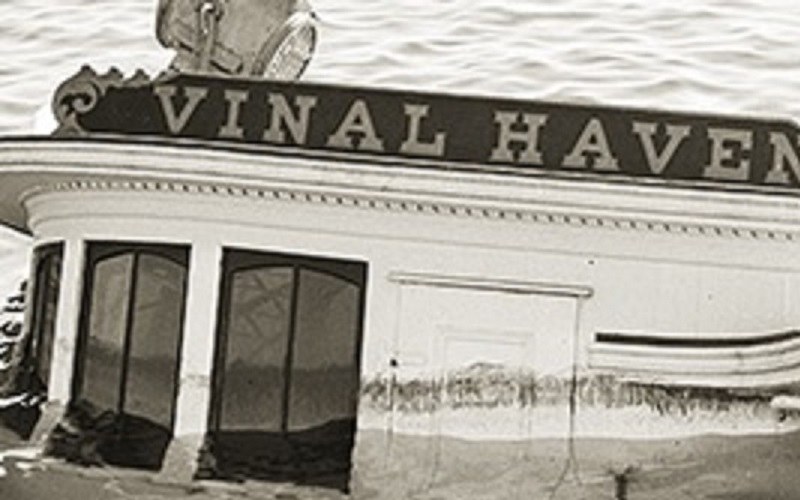
Andy, thanks for the link. I did check it out and it's a little hard to tell the dimensions of the "blocks" from the picture. I'm thinking of going with John's suggestion which is doable. The problem I'm facing is the size of the cuts. If you look at the above picture, the cuts are about as wide as the mullion in the pilot house window. That translates to a cut of .5 mm on the model. I have a Preac saw, a Rolls Royce in its day, but Charlie Files, the creator, died a few years back and that was the end of the company and its supplies. I own a blade for the saw with a .020 thickness, that's going to be on the wide side. Charlie used to make available a blade with a .010 thickness, and I haven't been able to find anyone who sells the thinner blade since Charlie's passing. So I'm stuck with the .020 cut. So there it is. Crackers, I'm no good at lettering. I thought what I would do is just make a copy of the sign on my computer printer to size, cut it out and paste it onto a backing. Tom -
SS Vinal Haven by TBlack - FINISHED
TBlack replied to TBlack's topic in - Build logs for subjects built 1851 - 1900
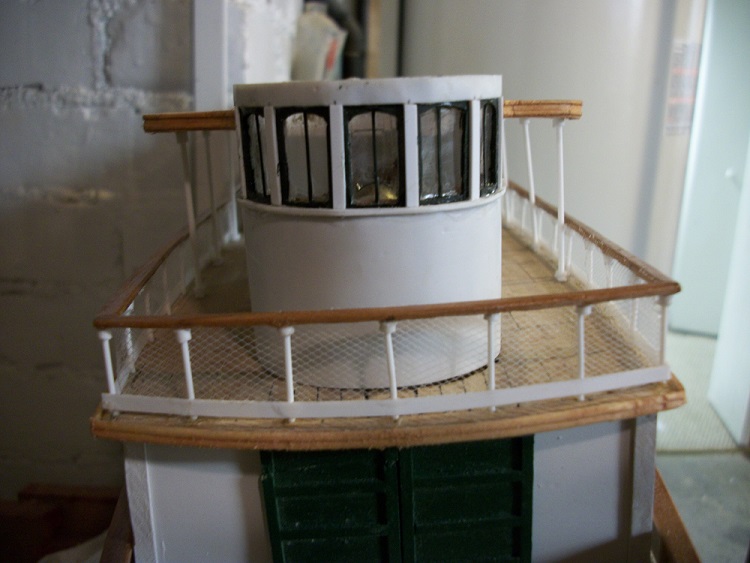
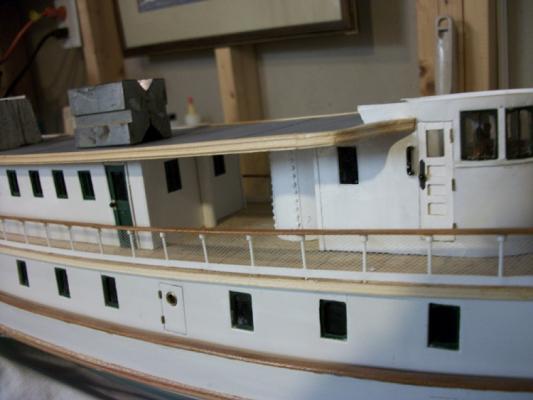
Thanks guys for the support and encouragement. My next task is to come up with a moulding around the top of the pilot house (not the one around the edge of the roof; that's easy) that looks like the original: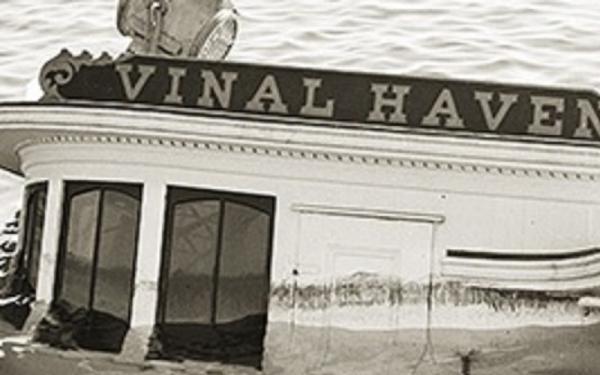
- 326 replies
-
- 1
-
-
- vinal haven
- steam ship
- (and 1 more)
-
SS Vinal Haven by TBlack - FINISHED
TBlack replied to TBlack's topic in - Build logs for subjects built 1851 - 1900
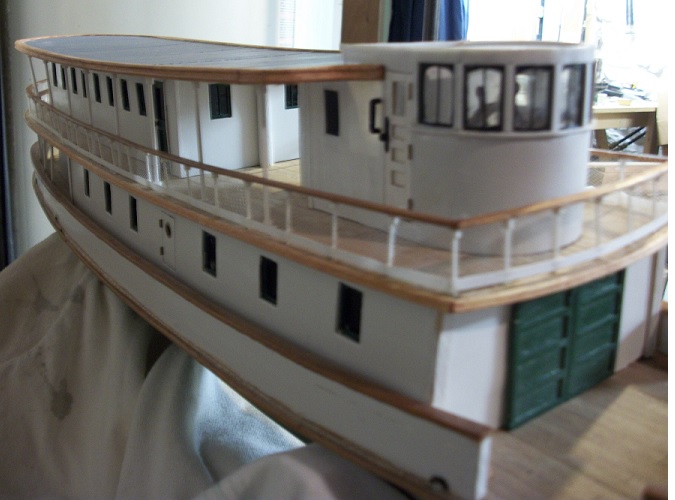
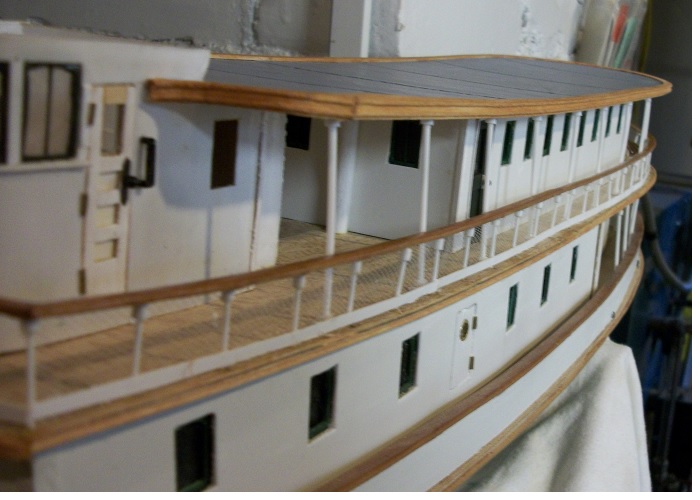
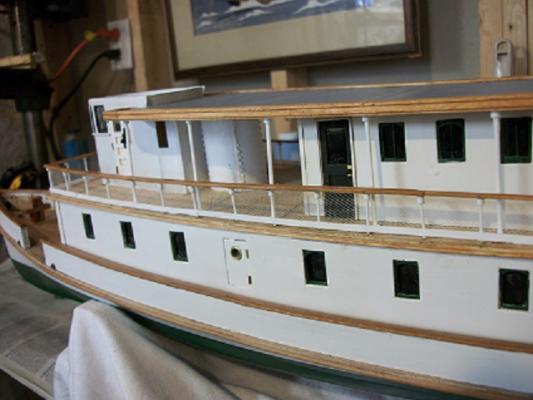
Boat deck secured and support stanchions in place. Some more photos: In the bow shot you'll notice the second stanchion on the right needs fixing. My pipe fitters took care of that this morning as you can see in the subsequent photos. Also, the chief of the boat is in charge of painting that panel on the pilot house door. Tom


- 326 replies
-
- 5
-
-
- vinal haven
- steam ship
- (and 1 more)
-
I'll try to overwhelm you a little more by adding my congratulations on the finish of a job beautifully done. When's the launching party? And are we all invited? Tom
-
Amanda by Tblack - FINISHED - RESTORATION
TBlack replied to TBlack's topic in - Build logs for subjects built 1851 - 1900
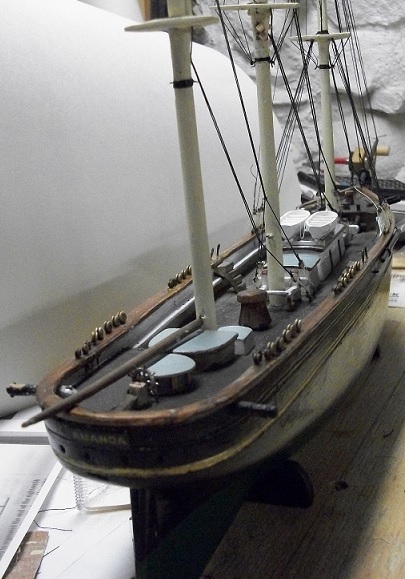
Ronkh, "Scale", great that you bring it up. Scale is a little indeterminate in this model. Something I tried to address before I got started on this project; unfortunately, the normal tip-offs to scale: the doors, the deck furniture, the overall length aren't consistent with any scale. So at the end of the day I just went with boats that seemed to fit. I hope this doesn't destroy your sense of my abilities, or lack thereof. Tom -
Amanda by Tblack - FINISHED - RESTORATION
TBlack replied to TBlack's topic in - Build logs for subjects built 1851 - 1900
A little more progress. I've installed the stays and am on to the shrouds. Mighty small scale! I added a couple of boats that were not on the model originally, but I thought they were needed. Tom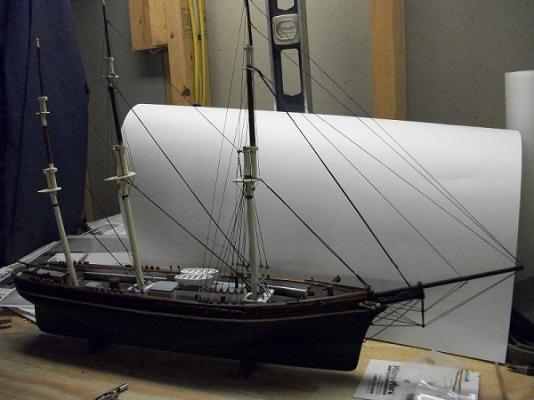

- 40 replies
-
- 4
-
-
- restoration
- finished
- (and 1 more)
-
Bob. The hawse holes along the side have a lip around them. It looks like they're made of wood; is that the case? Also, do you make an inside lip and an outside lip separately or do you have a method of doing it as one unit? As you recall, I, too, had several hawse holes to deal with in Vinalhaven. I finally made them out of styrene to maintain strength. Tom
-
I recently bought deadeyes from CornwallModelsBoats.com in England. They don't make them, but they have a large supply. The shipping took just a week to get here. Tom
-
Amanda by Tblack - FINISHED - RESTORATION
TBlack replied to TBlack's topic in - Build logs for subjects built 1851 - 1900
Michael, I don't actually own the book. I found it in our local library. It has to go back tomorrow, but I think I've gotten adequate notes to get me through the standing rigging. I'll get it out again when I need to do the running stuff. Tom -
Amanda by Tblack - FINISHED - RESTORATION
TBlack replied to TBlack's topic in - Build logs for subjects built 1851 - 1900
Brian, the ambitious part is the scale; it's smaller than 1:96. At my age, I can't work on her too long before my hands start to shake. Fortunately, I didn't commit myself to a time schedule on this project, but I don't get paid until I deliver the goods! Crackers, I've decided to employ the Cutty Sark kind of shroud set-up (no channels). My source, Harold Underhill, in his Masting and Rigging the Clipper Ship, plate 21, page 118 shows that wooden ships did indeed have deadeyes set up on the main rail; they're supported by chainplates which I've omitted. Furthermore, I'm trying not to alter the original model too much beyond what it was. I'm making a few small corrections here and there (I'll be adding ship's boats to the top of the house), but it's still folk art. Tom- 40 replies
-
- 1
-
-
- restoration
- finished
- (and 1 more)
-
Amanda by Tblack - FINISHED - RESTORATION
TBlack replied to TBlack's topic in - Build logs for subjects built 1851 - 1900
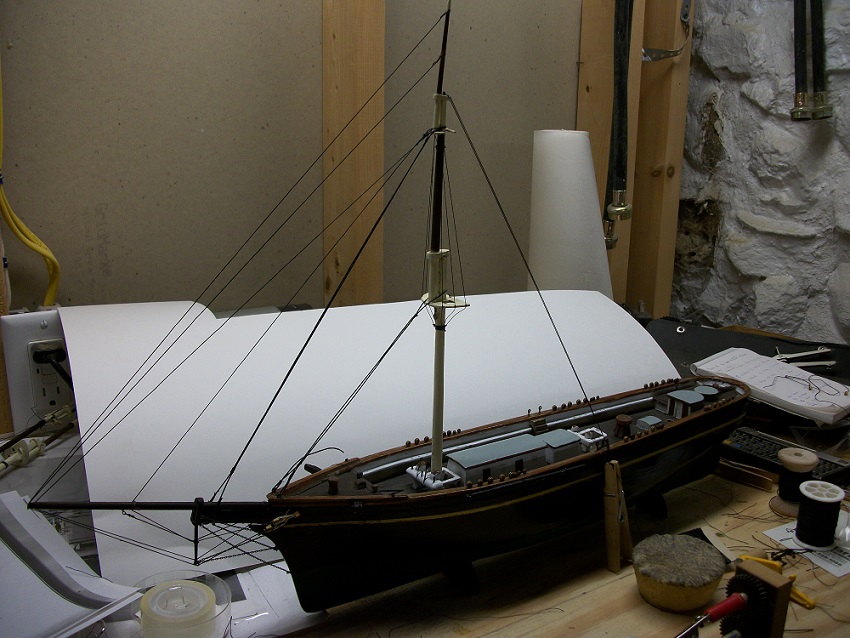
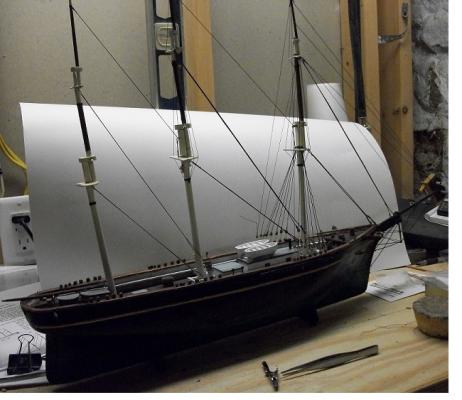
A little more progress. Got the bowsprit/jib boom area rigged and all stays forward. Moving aft. I opted to rig the futtock shrouds and top mast srouds while the mast was off the boat, thinking it would be easier. I've never tried that before, and I don't think it will interfere with the shrouds below. Tom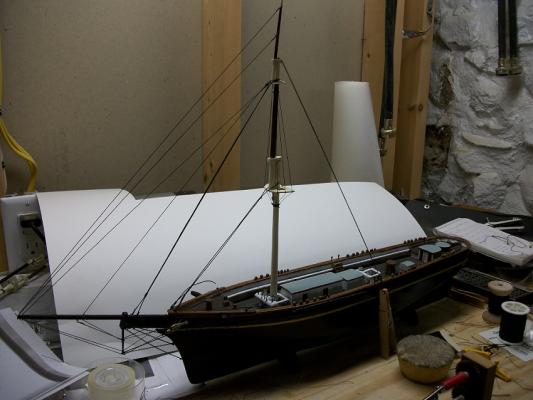
- 40 replies
-
- 2
-
-
- restoration
- finished
- (and 1 more)
-
Andy, I agree with you, the stave doesn't look overly large; it'll pass. You're getting pretty good at this serving stuff; very neatly done, cap't.! Tom
-
SS Vinal Haven by TBlack - FINISHED
TBlack replied to TBlack's topic in - Build logs for subjects built 1851 - 1900
Popeye, Isn't it great when the admiralty has an appreciation for our art/craft/science/hobby? I have a brother who is an architect and who tried to give me a "simple" CAD program to use. The manual is 1.5" thick!.....too much information! The program resides on my computer gathering dust (pixels?). Tom -
SS Vinal Haven by TBlack - FINISHED
TBlack replied to TBlack's topic in - Build logs for subjects built 1851 - 1900
Thanks, Michael, the hard part of the mouldings is cutting the razor blade properly. If everything lines up, it's a miracle. If I knew how to use a CAD program, it might have been simpler. Tom -
SS Vinal Haven by TBlack - FINISHED
TBlack replied to TBlack's topic in - Build logs for subjects built 1851 - 1900
Thanks, guys, for the support. I'm getting there! Tom- 326 replies
-
- 1
-
-
- vinal haven
- steam ship
- (and 1 more)
-
SS Vinal Haven by TBlack - FINISHED
TBlack replied to TBlack's topic in - Build logs for subjects built 1851 - 1900
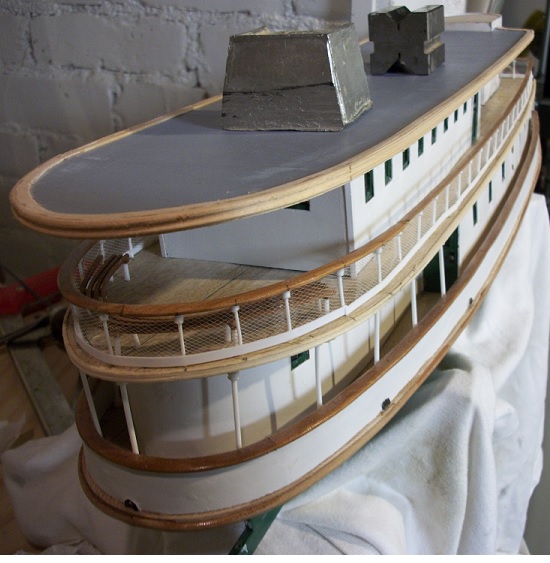
Except for some stain on the moulding, I've finished the boat deck. It's not secured yet, as I have to install support pillars along the edge and I thought it might be easier to fit them before securing the deck. The moulding is basswood subjected to scraping with a razor blade. Pretty straightforward except at the forward end. There's an "S" curve that gave me fits. But we came through it largely intact.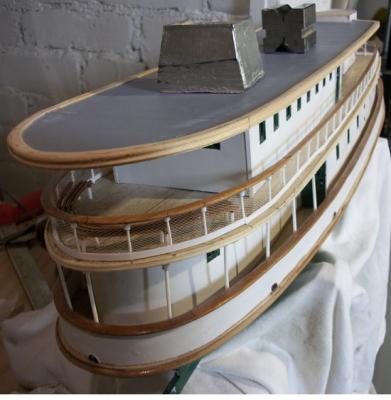
- 326 replies
-
- 6
-
-
- vinal haven
- steam ship
- (and 1 more)
-
The bulwarks must have been fun to fit! It's a little hard to see from the photos, but is it one long strip, or several pieces? Following the sheer line and angling and not much gluing surface? Good work! Tom
-
Peter, You and Dan have quite the shipyard there. I count from April 7 to now as 5 months and a week to build this beauty. Fast work! Nicely done. BTW, where do you stow that huge dime? Tom
-
Amanda by Tblack - FINISHED - RESTORATION
TBlack replied to TBlack's topic in - Build logs for subjects built 1851 - 1900
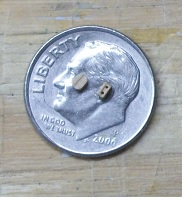
John, Thanks for the corroboration. I've received my supply of blocks from Chuck Passaro; truly remarkable little creations, with the emphasis on little. Here's a picture of the 2mm single block. The first picture is for our folks who are members of the Commonwealth, the second is for our stateside viewers . Stropping it is going to be a challenge. Notice 2 holes, not one! Tom
- 40 replies
-
- 2
-
-
- restoration
- finished
- (and 1 more)
-
Amanda by Tblack - FINISHED - RESTORATION
TBlack replied to TBlack's topic in - Build logs for subjects built 1851 - 1900
I've been involved with putting hardware on the masts prior to stepping them back on the model. I mentioned that I'm using Harold Underhill's book on masting and rigging the clipper ship as my guide through the rigging process. In that book Underhill says that while the yards for the courses are fixed to the mast, each yard above them are fitted with halyards. Fine so far. Then he states that the lifts for the course yards can be adjusted while the lifts for the upper yards are all fixed. Does that sound right? And does that mean that if you raise the main topsail yard, for example, that the lifts go slack? Tom