
HOLIDAY DONATION DRIVE - SUPPORT MSW - DO YOUR PART TO KEEP THIS GREAT FORUM GOING! (Only 13 donations so far - C'mon guys!)
×


JPZ66
-
Posts
173 -
Joined
-
Last visited
Content Type
Profiles
Forums
Gallery
Events
Everything posted by JPZ66
-
Sorry Tuffarts and Brian...Nope and Nope....
-
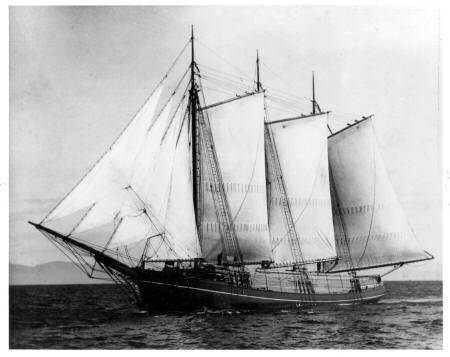
No Sir...it is NOT the Wawona...but good guess ! Joe
-
. This one should be easy as well...... - Joe
-
 Jack....That's a real Stunner ! Really fantstic job !! Joe
 -
USS Columbia - Joe
-
Very clever those mirrors ! I had to look twice....hehe... Joe66
-
Charlie, At this stage, based on limited space and no tools.....I think I would look at purchasing two items. 1. Some sort of work-mate bench top clamp. Being able to hold the hull securely will be important no matter which way you attempt to hollow the hull. 2. A good quality rotary tool might be just the thing. You will be able to use it for many different tasks ! Of course you will need a fair selection of bits to go with it. If you go at it in a logical progression, you can hollow out what you need to...maybe not the most expeditious manner, but one that will work. Take your time, and measure often ! Good Luck with the project ! Joe
-
I have just caught up with your log of this build......Great work ! Joe
-
Thanks for posting Chuck ! Joe
-
Bravo ! Exceptional builds !! Joe
-
Amazing ! Joe
-
Mark, That looks to be a real dandy ! .....nothing wrong with 19th Century that I can see ! Joe
-
Ken, Yes, it works. I have used this technique on 1:1 scale kayak building AND on model ship building. A couple of things to consider for scale models..... 1. I have an industrial heat gun, not a cheap copy....as is, I found the smallest tip to be too wide for modeling so I created a new tip with a much smaller opening to focus the heat better. Used on the low blower setting it seems to work well. 2. The small area that we need the heat in required some additional things....a really good pair of gloves, and sometimes some shielding for the parts of the strip that dont need the heat. I took a piece of 16" long x 8" wide sheet metal and made an elongated slot in it...about 1" wide and 2" long.....then bent the metal into a sort of "C" shape.....the window on the top. It can be clamped to the workbench at the bottom. When I have needed to do so, I pencil mark the location of the bend, then put that plank under the shield and line up the area of pencil marks to the slot or "window".. Aim the heat gun at the opening and heat up the plank....bend / heat / bend / twist...until you are satisfied. The shield help keep heat off the rest of the plank and protect the hand a bit. All my stuff is packed up or would show you a picture, but I think you get the idea...it's really simple. Joe
- 1,051 replies
-
- 3
-

-
- cheerful
- Syren Ship Model Company
- (and 1 more)
-
Once again, I will post one of Paul Budzig videos on primer.....it covers some of the airbrush issues. Also, if you got to his website, you can get more info on airbrushes. Joe
-
So much has been written and suggested by so many..... My first advice is do a search on the forums and read everything you can find.... That being said, in many ways, airbrushes and airbrushing style is very much a personal thing. Some people suggest buying the best and learn to use it....Over the years, I have purchased several airbrushes, starting with a basic Paasche H, single action and moving later onto finer more complex rigs. I still use that H a lot, it has it's place. But, like many tools, it can only do so much...just as it was designed for. Whichever airbrush you decide on, learn it inside and out. Take it apart, assemble it, and take the time to clean and lubricate it properly after using it. I would not be using my double action, very fine spraying Iwata for laying down primer or other broad coverage uses, but the H works pretty well for that....it depends on the size of the piece needing the coverage too. For very large projects I use a binks automotive touch up gun. Of course that will not be a useful tool if I want to lay down tight fine lines for a free hand camouflage finish ! In addition to using the right airbrush for the job, the medium being sprayed is a hugely important consideration. Enamel, lacquer, acrylic.....gloss, semi-gloss, satin, flat....each has distinct properties and carrier solvents. Different manufacturers use different formulas and so all cannot be treated the same. There are many variables to understand when painting in general and when airbrushing in particular. Develop good working habits right from the start and you will eliminate some of the variables. Clean, well ventilated work area, spotlessly clean airbrush, clean subject to be painted, properly mixed and filtered paint and so on. Be sure to have a dust free place to place the model after the paint is applied while it is drying. Allow the paint to dry appropriately before handling further. All of these things will make the job easier and the final finish as flawless as possible. Of course, boo boos are inevitable, so learning how to identify and correct mistakes is also a skill or skills to be learned. It's not all as complicated as I make it sound though, and getting it right brings a great deal of satisfaction ! Best bet is to search the web, the forums and the many youtube videos out there and then get some nice card stock to practice on. You'll be airbrushing like a pro in no time ! Much like screwdrivers......one size does not fit all. ( I have 3 different airbrushes I use, and the touch up gun ) Good Luck ! Joe
-
Chuck, what an amazing project you have going ! Simply beautiful ! A note on heat... I have used only heat when bending strips for kayak building.... Rather than me trying to describe it, Here is a link ( source that I learned from )..... It is midway down the "shop tips" page. http://www.laughingloon.com/shop.tips.html Maybe others will find some of this info useful ! Cheers, Joe
- 1,051 replies
-
- 2
-
-
- cheerful
- Syren Ship Model Company
- (and 1 more)
-
Casting epoxies from Smooth-on
JPZ66 replied to src's topic in Modeling tools and Workshop Equipment
...And here is the thing.... There are many 'generalizations' regarding various resins. It's always best to read the manufacturer's specific literature for any given material. There are soooo many types of resin and resin systems out there. The reason for that is the fact that over the years the formulations have been tweaked for specific applications. Some clear systems are designed for casting, some are for surfacing, like découpage, some are crystal clear, others are not, some will have UV inhibitors, others will yellow when exposed to sunlight... On and on. Some systems can be used for things the manufacturer didn't even design them for. A lot of times it comes down to experimenting and testing. Try to find the most cost effective solution. In looking at the quarter window frames that you made ( quite nice btw ) .....based on the size, and the fact that you dont want the 'glass' too deep...... What about backing up the windows with clear sheet stock, glued in from behind and carefully seal the edges, then , from the front, carefully add a small amount of MM Crystal Clear, in successive layers until you achieve the thickness and level of fill you want ? ...is that a possibility ? Joe -
Casting epoxies from Smooth-on
JPZ66 replied to src's topic in Modeling tools and Workshop Equipment
For molds, I always vacuum degass the mix before pouring... For castings, I have used vacuum, pressure or nothing at all. If the working time after mixing allows for vacuum degassing of the resin, I will often times do it, though with low viscosity materials it really isn't necessary. Also, as Mark mentions....sometimes a careful application of heat can be used to break air bubbles. More often than not, I am casting in closed, two piece molds, so that's not usually an option for me. Pressure casting is a good idea for epoxy clears, but again, it depends on a number of factors, and often won't make any difference. There are so many factors that come into play when dealing with casting resins ! What type of resin, working time / curing time, amount or mass, the type of molds being used and so on. Different resins respond differently to various techniques. This is where trial and error and experience come in. Clear epoxies are a bit of a different animal as compared to polyurethane resins. I could probably write a couple of pages just on the aspect of bubbles....the origin, the type and how to deal with them. I hope some of this proves helpful, and feel free to PM me if I might be able to help further ! Joe -
Casting epoxies from Smooth-on
JPZ66 replied to src's topic in Modeling tools and Workshop Equipment
I agree with Tom..that is, unless these windows have some strange complex shape.... Some clear sheet, even if you have to use a transparent color paint on it, would be so much cheaper and easier then molding and casting. But, the Smooth-On product is good. I don't have the data in front of me, but I do think it is the one you mentioned. If you are looking at the specs, it's the one that has a mixed viscosity of 200cps. That is one of the lowest viscosities I have found for clears, and works especially well if cast under vacuum. And yes, it can be tinted or colored. Joe ******Just checked the link you provided...yes....that's the stuff. -
Pops, Yes..two things to note in the article and wish they would provide the standard or definition of... Highly detailed and Affordable.... The reson that sticks out, is that it is very subjective.... Based on all of the models and types that I have looked at so far.... Yes, currently, high resolution equals greater cost. I think it will be a little while before there are any really good hi-res printers for under$ 1500 dollars. One issue is speed...everybody wants it 'now'....most makers of printers who are focusing on low priced, easy to use machines are really pushing the speed. Interestingly enough, if you take some of these units and slow them down, tweak the settings and use the best available filaments, you can actually get some pretty nice looking prints. On the other hand, again based on what you can get right now.... There are specifically two SLA machines that I am aware of, one priced at around $ 3000 and one priced at around $ 4500 that can do some pretty tight printing. Any and all of these (FDM or SLA) prints will require post finishing to some degree if you want absolutely smooth finished parts. The good news is that a number of printer manufacturers are working to make resolution even better for the lower priced units. I have seen so many articles over the past year, that are quite frankly, very poorly written...mainly due to the fact, that many of these reporters have not done their homework, have not checked the facts and seldom report actual specs. I have been researching these and looking for the specs and the parameters under which they got those results. My angle is a bit different as well. I am not looking for a machine to make party favors and iPhone holders or the latest cartoon character on. I am not looking for the neatest new gadget to impress my friends with. I am looking for the machine that will perform and be viable as a tool to streamline production and increase the quality of parts and pieces for my small business. As such, I am willing to spend a little more, though I certainly don't have 50k to invest at this time. However, something in the $3000-$5000 dollar range is perfectly acceptable to me. I like the fact that I can print with castable resins. This means That with minimal clean up on a print, I can go right to investment molding and produce the cast metal parts I'm looking for. The current machines CAN produce highly complex and accurate models much faster than I can do by hand. Many of these designs cannot even be accomplished on CNC mills in one piece as you can do with 3d printing. Btw- you have to have print files, obviously, to make something....and even this area has jumped ahead tremendously. 3d modeling is different than traditional engineering, and software makers have made things easier. You no longer have to be a CAD master to create what you need. - But that is a topic unto itself, and I won't go into it here. In the end, it is incumbent upon the purchaser to decide what they need, what they want and what they can afford. Up until very recently, I have not seen a printer in my price range that could do what I wanted. I think that has now changed. Joe
-
You are correct about the filament being an important part of the equation. They are not all the same, nor are all the printers, drivers, software, etc, so one has to carefully research the various items a bit. Right this moment, if I were looking to print something, I would send my files to a service like Shapeways...as they have machines that are far too costly for most of us, and those will yield the best quality. Mostly when we think of 3D printers we think of the types using filaments..or FDM type...Fused Deposition Material....usually PVA or PLA.... Each material has distinct charachteristics. Frankly I don't think they can do quite what most of us really want right now. On the other hand, if the parts you want to make can be easily post finished, by sanding and priming, etc, they may be acceptable. Regarding wood filament, you can currently get these in the same sizes as other filaments and they perform about the same. Again, for broad areas that can be sanded and dressed up, they should be fine. Small tight details would involve a much greater effort to get a nice clean finish. That being said, there are now a few options in the SLA category...Stereolithography 3D. For hobbyist units there are DLP and Laser type systems. Each of these use a liquid resin for the material. They have their own demands and quirks, but offer a much better surface finish with thinner layering and higher resolution. I know of at least 3 or 4 models in this category that are priced under $4000 dollars. Some of these machines can also print 'castable' resins. What this means is that the resins, once printed, can go into investment molds and be burned out cleanly for investment casting.....this of course is aimed at the jewelry market, but would also be suited for the model ship people that cast brass. Again, I am certainly no expert, but I have been researching these for some time, and test running a few differnt things to try and see if it is something I want to invest in. It's tough right now because so many new products are coming out so quickly. Hope this information helps ! Joe
-
USS Columbus 1819 by threebs - 1/72 scale
JPZ66 replied to threebs's topic in - Build logs for subjects built 1801 - 1850
Impressive !! Looking forward to seeing this progress !! Joe -
Oh yes.... So far in this thread, I have tried to keep things related to scale modeling, however, as Antony has pointed out, the world of 3D printing and scanning is touching almost everything.... If you want to browse a broad range of things, the link below has articles on materials and materials development. Reading through those will really open one's eyes to the vast range of the applications. It is also interesting to note some of the names behind these developments.... -Joe http://3dprintingindustry.com/raw-materials/page/44/
-
Janos, Email sent.... If resin is an acceptable material for the reproductions, and please note that there are hundreds of materials to choose from, then molding and casting would certainly be a most cost and time effective way to go. Don't let deep undercuts throw you off. The proper techniques and materials can be used to reproduce nearly anything ! I will be posting much more on this subject in the not too distant future. Joe