


Mark Pearse
-
Posts
788 -
Joined
-
Last visited
Content Type
Profiles
Forums
Gallery
Events
Posts posted by Mark Pearse
-
-
Hi Vaddoc
That's looking very good. The line of the planks looks lovely, a difficult thing to get right.
Mess = busy
- vaddoc, FriedClams and Keith Black
-
 3
3
-
Yes, the adaptability of English is an enjoyable part of the language. There's some really nice colourful language in the book I'm currently reading: "The Shipping News", I'm not sure how close to you it's set. A v enjoyable book.
And, the gratings did turn out better than I had hoped, not having done them before.
Thanks,
- Jack12477, Bedford and Kenchington
-
3
-
9 hours ago, Kenchington said:
But don't sell yourself short by calling them "duckboards"
Hi Trevor,
thank you for the compliment; & you are going to have to explain this comment. Is "duckboards" the name of something else?
-
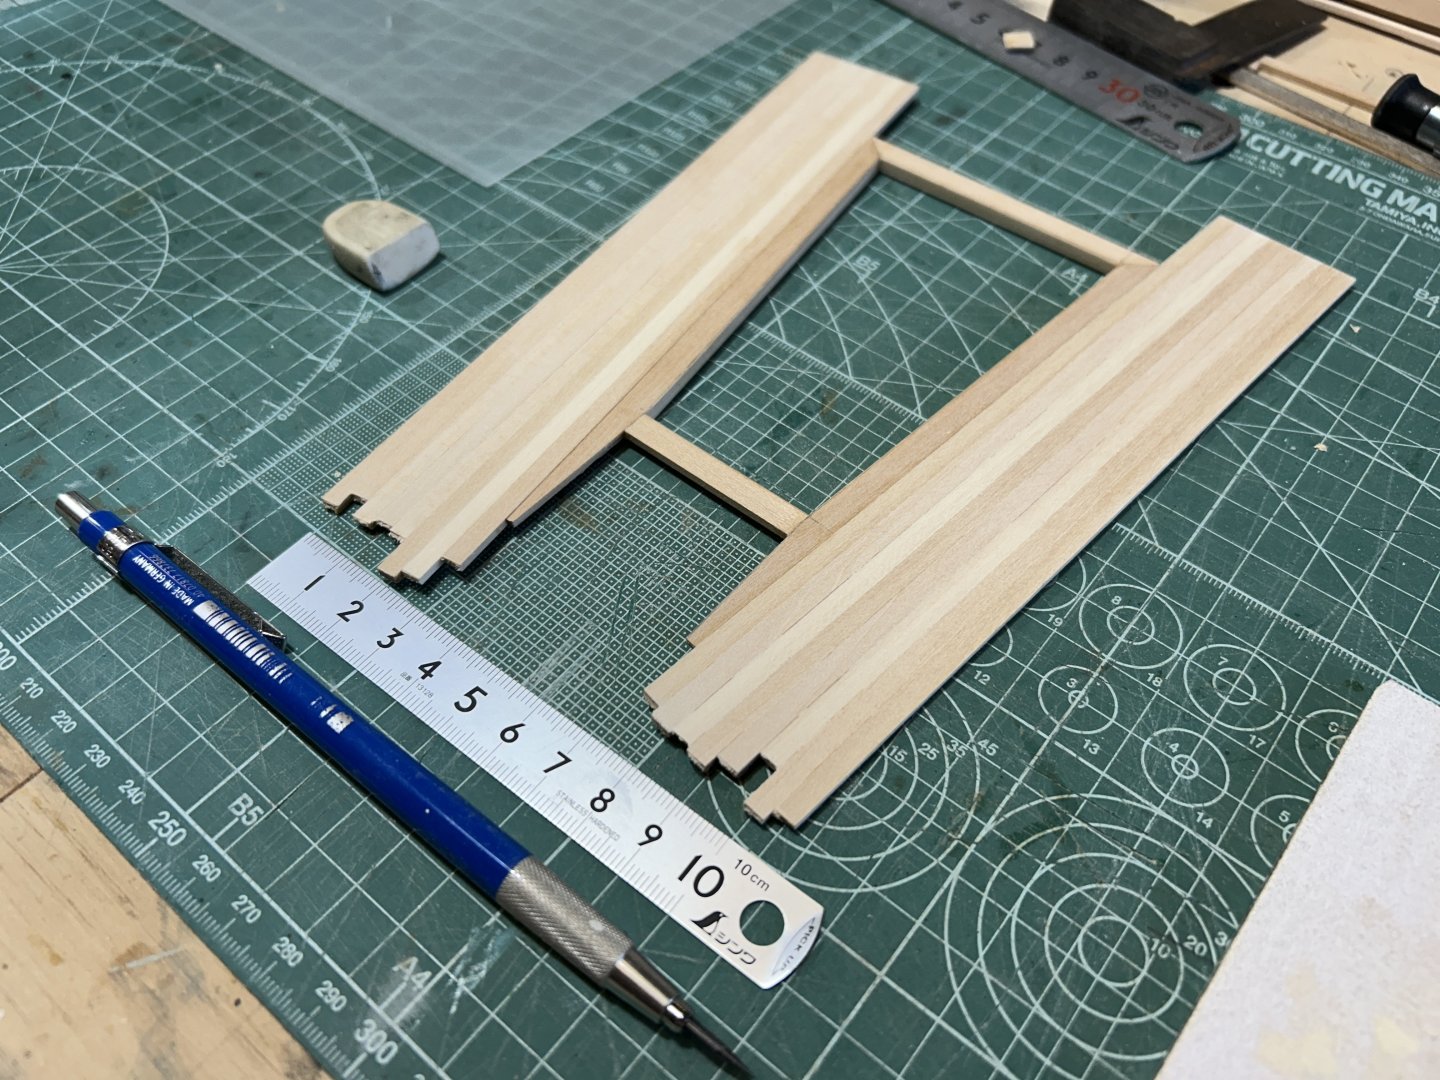
I worked on the cockpit footwell duckboarding over the weekend. I'd prefer to make it to an easier design, but this is what the boat has....

The frames were glued over cardboard templates:

The thickness is 0.3mm over sized, if you compare the completed to the actual the difference is obvious, but the completed piece on the model looks reasonably to scale, so I'm ok with that.
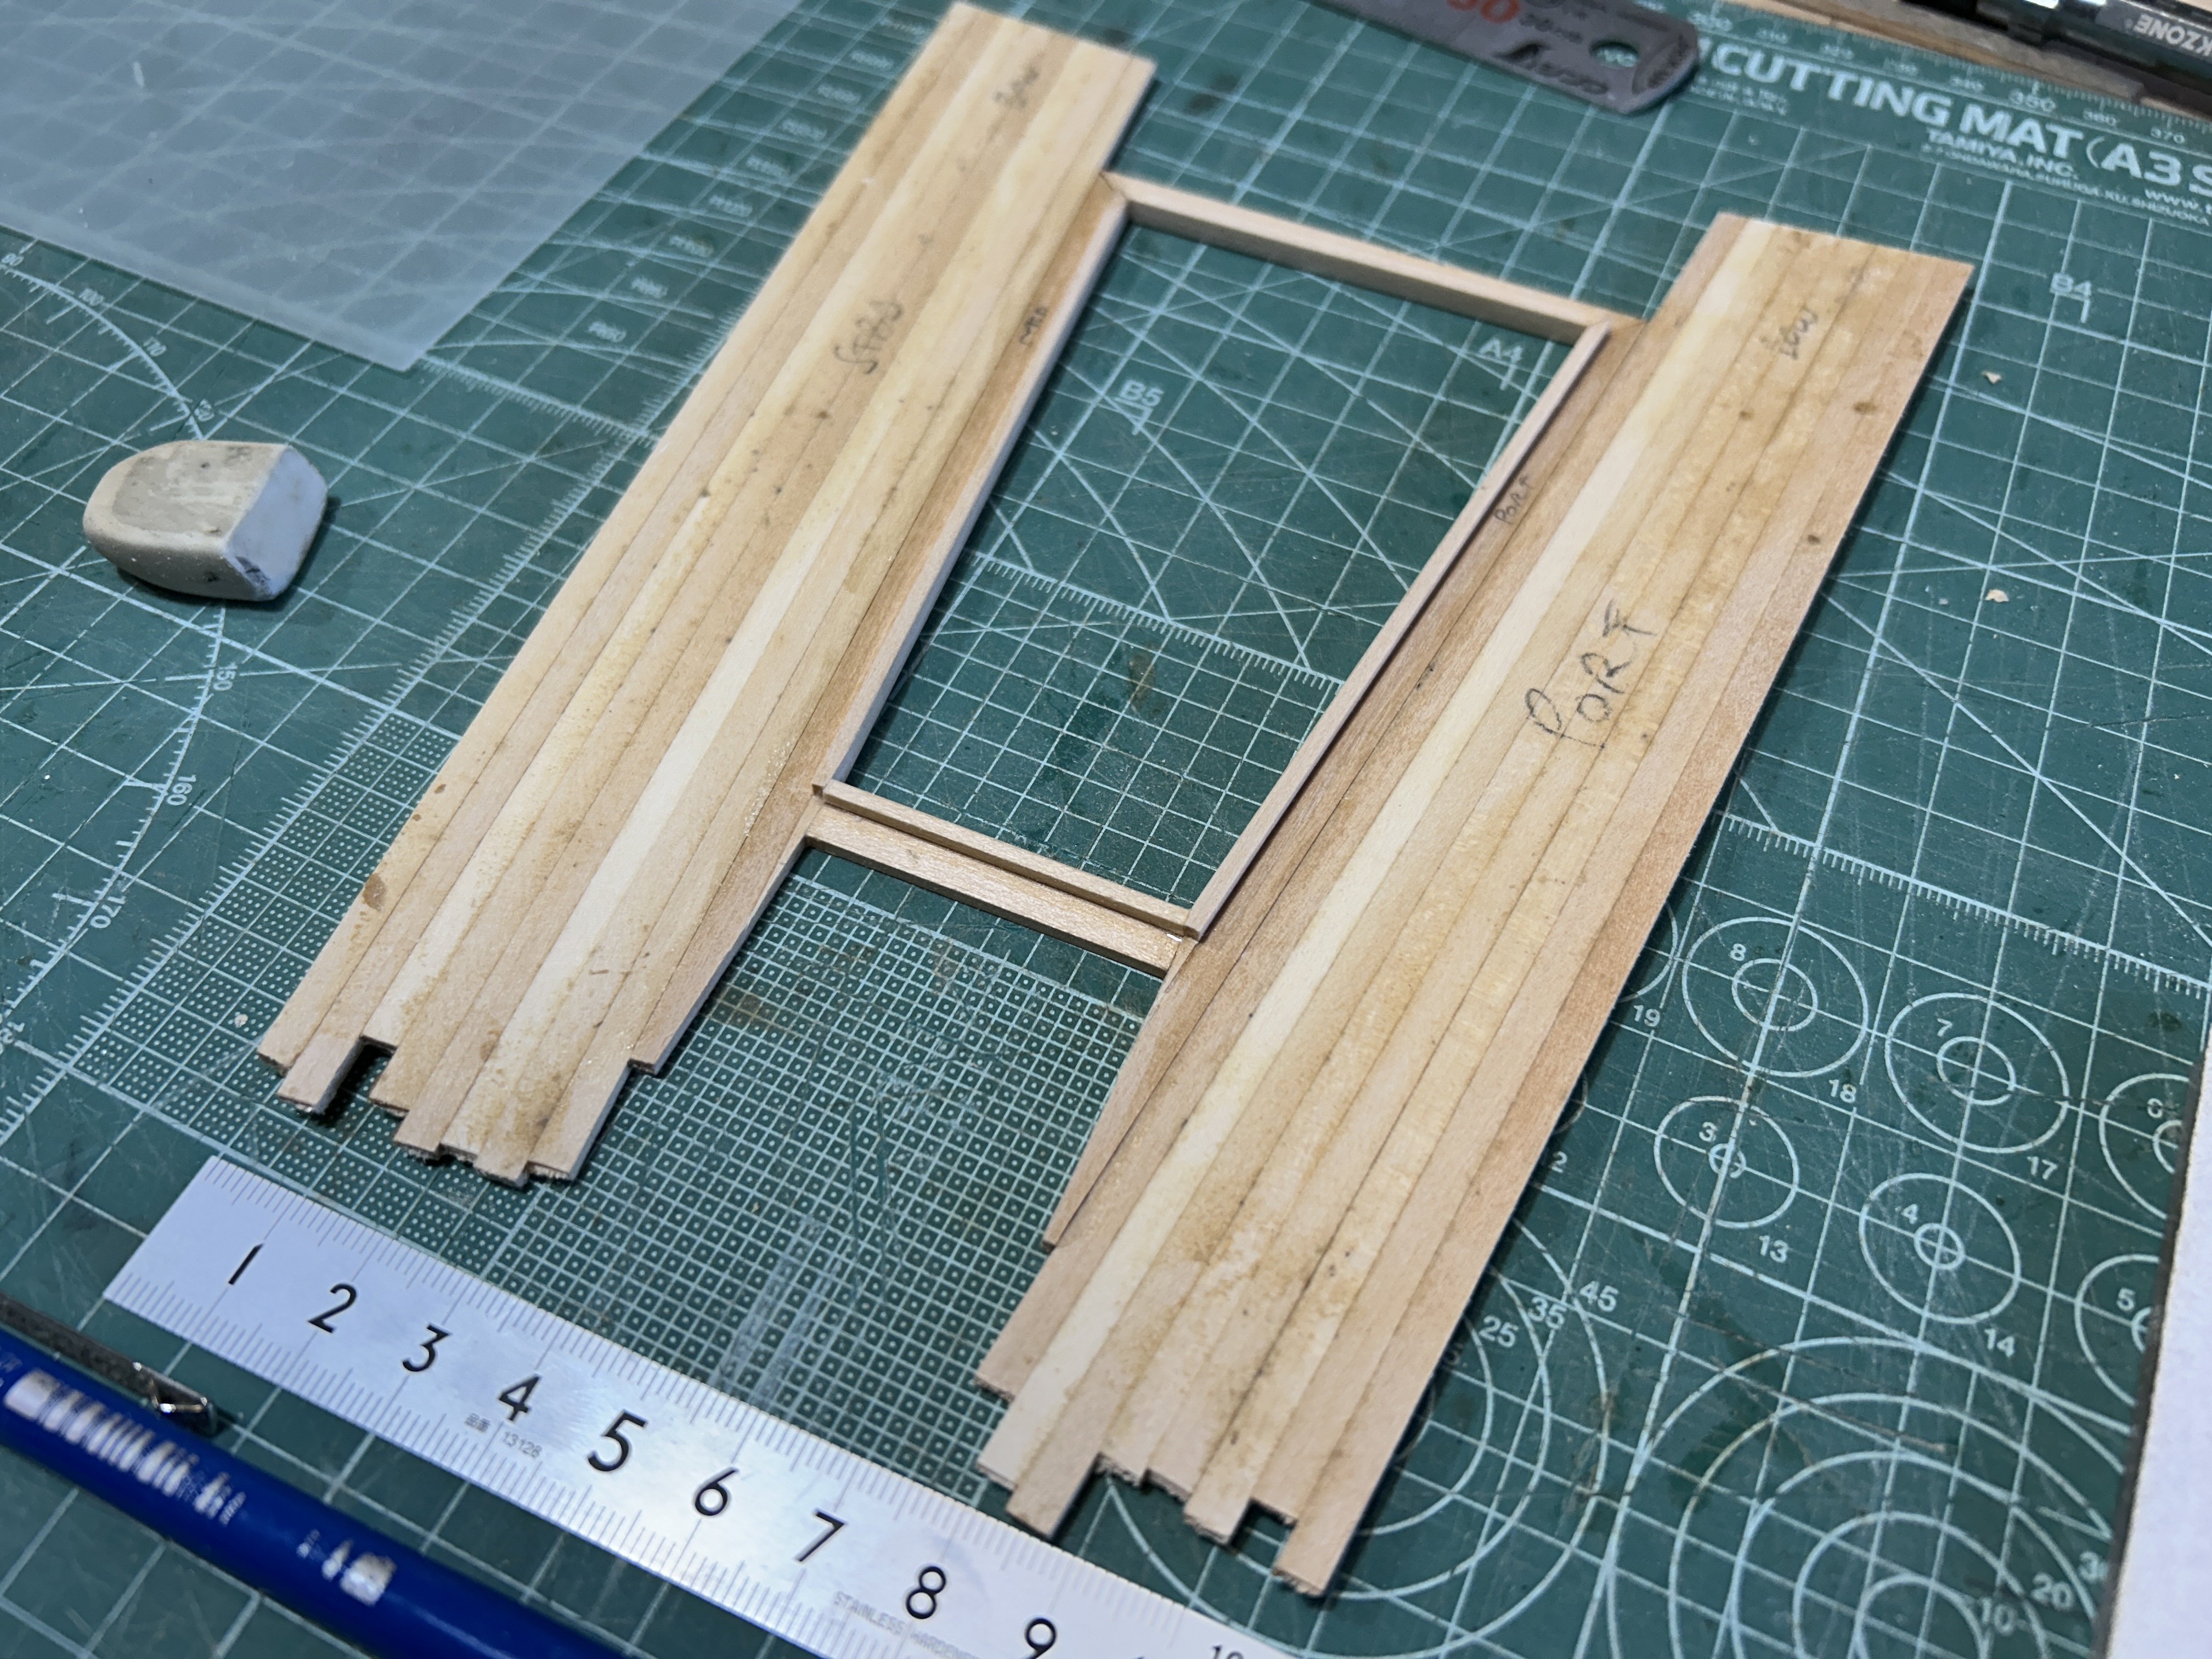
And parallel timber strips on the back, 2 x 2mm are slightly oversized, but should look to scale.

Then the facing strips, with timber strips as temporary spacers:

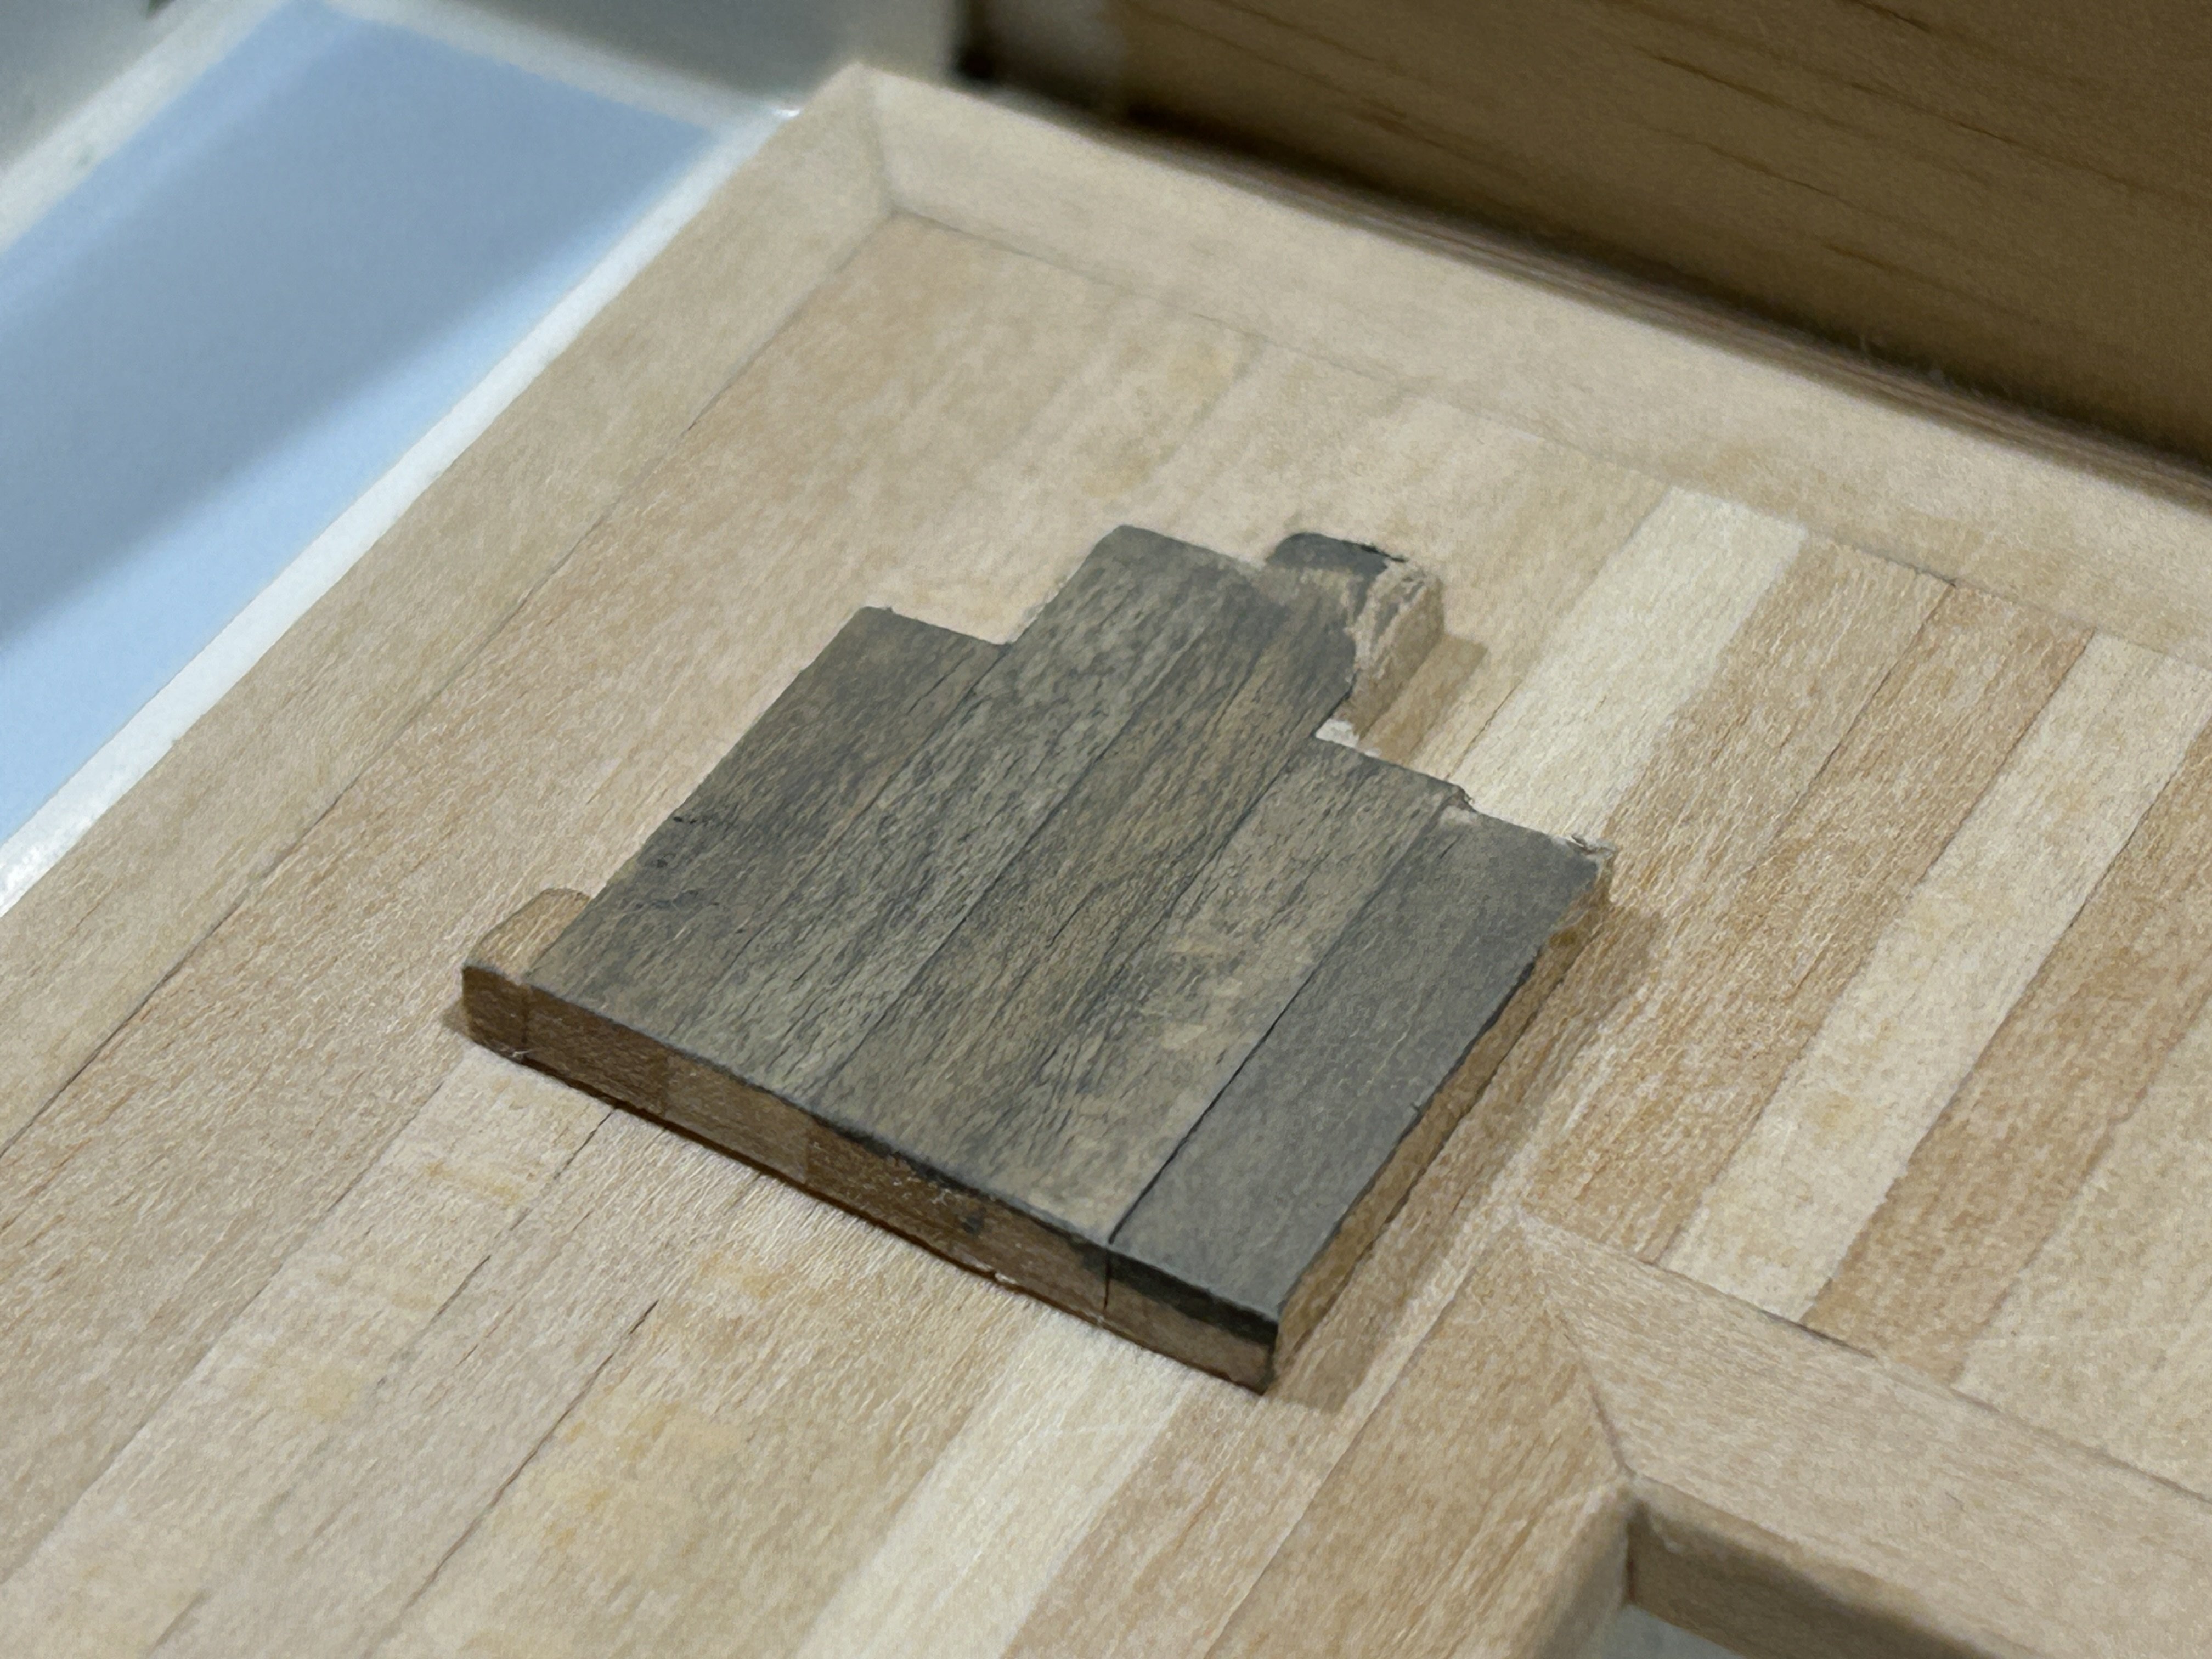
In the lengthwise dimension, the size of the timber strips wasn't naturally suited to the gap in the frames - so I adjusted the meeting frames to get even spacings in the boards. Here you can see the forwards panel completed to that stage & the after one has the meeting frame marked & about the be trimmed:

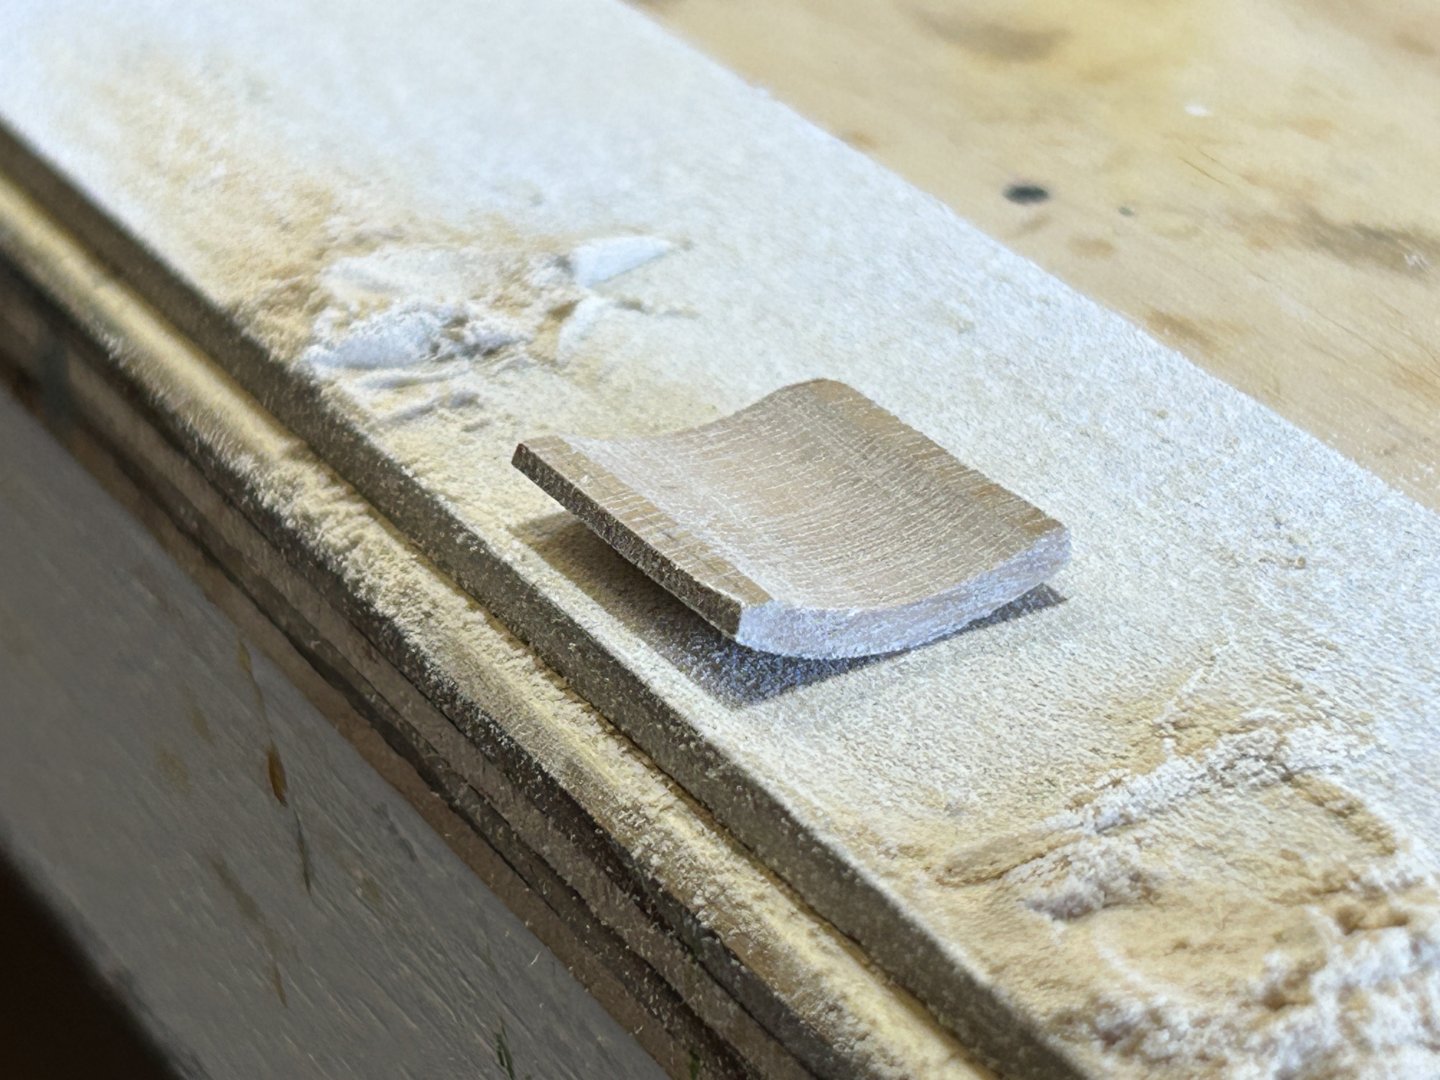
And here with the small infill pieces of timber all in & completed....slow & painstaking but it's done now. Happy with the result as well.

And in the boat. Next is to give it some weathering & also cut out for the mainsheet block, which is fixed off to the sole below the duckboards.

-
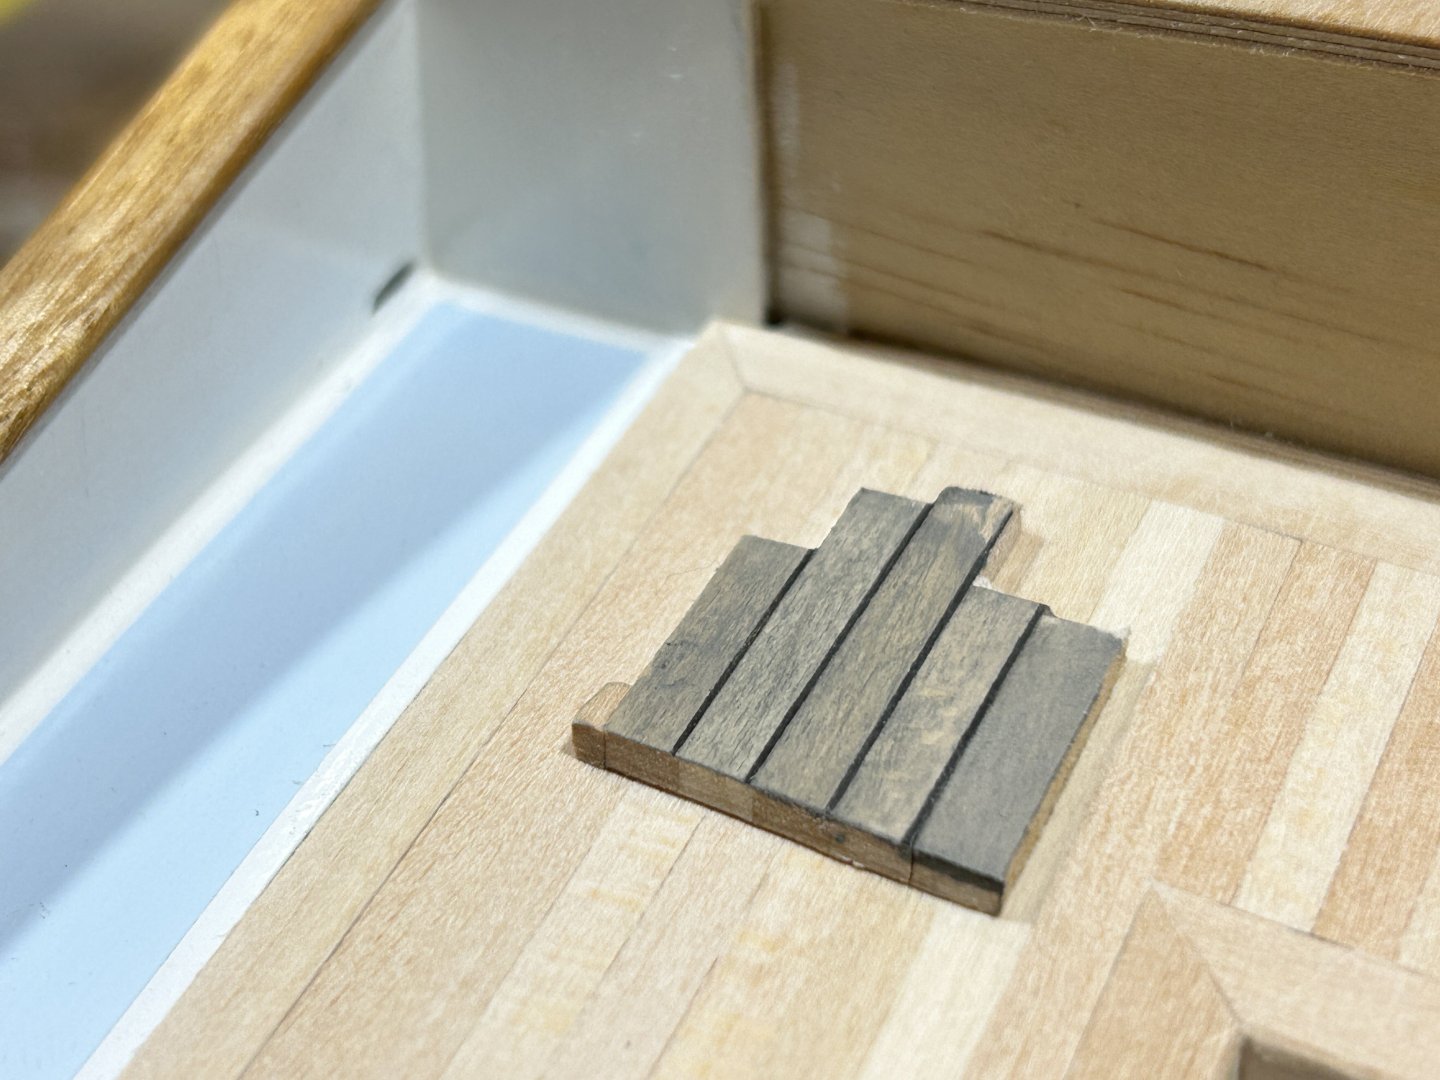
Later yesterday I wiped the dark grey paint onto the timber panel, the cockpit seating, to weather the timber. [On the paint, it was 3 shades of matt acrylic, Tamiya brand - some black, a fair bit of white & a fair bit of beige. It was dirty & still pretty dark.] The effect of the paint on the timber was a bit too strong, & gave it a bit of a wipe with a damp cloth but it didn't change much. The effect I wanted was understated rather than too much, & this was too much.
I was concerned that I'd have to sand while lot off & start again. Anyway, tonight I gave it a delicate sand with 180 grit & it was looking somewhat better but uneven & there were patches (sorry no photos, fear doesn't make me think of taking photos). I suspect that some of the glue I'd used for laminating the timber - CA - had dripped or smeared or whatever on the timber & had changed the rate of paint absorption. So I diluted some of the paint & with a small brush dabbed here & there, plus some more careful detail sanding, & it was starting to look ok. It was time to do the caulking lines, & I'm really happy with the result.


Once the backrests are done, I'll paint the whole lot with clear matt acrylic varnish, maybe 2 coats, then glue it all down. Or maybe varnish in parts, glue down the base & then the backrests.
-
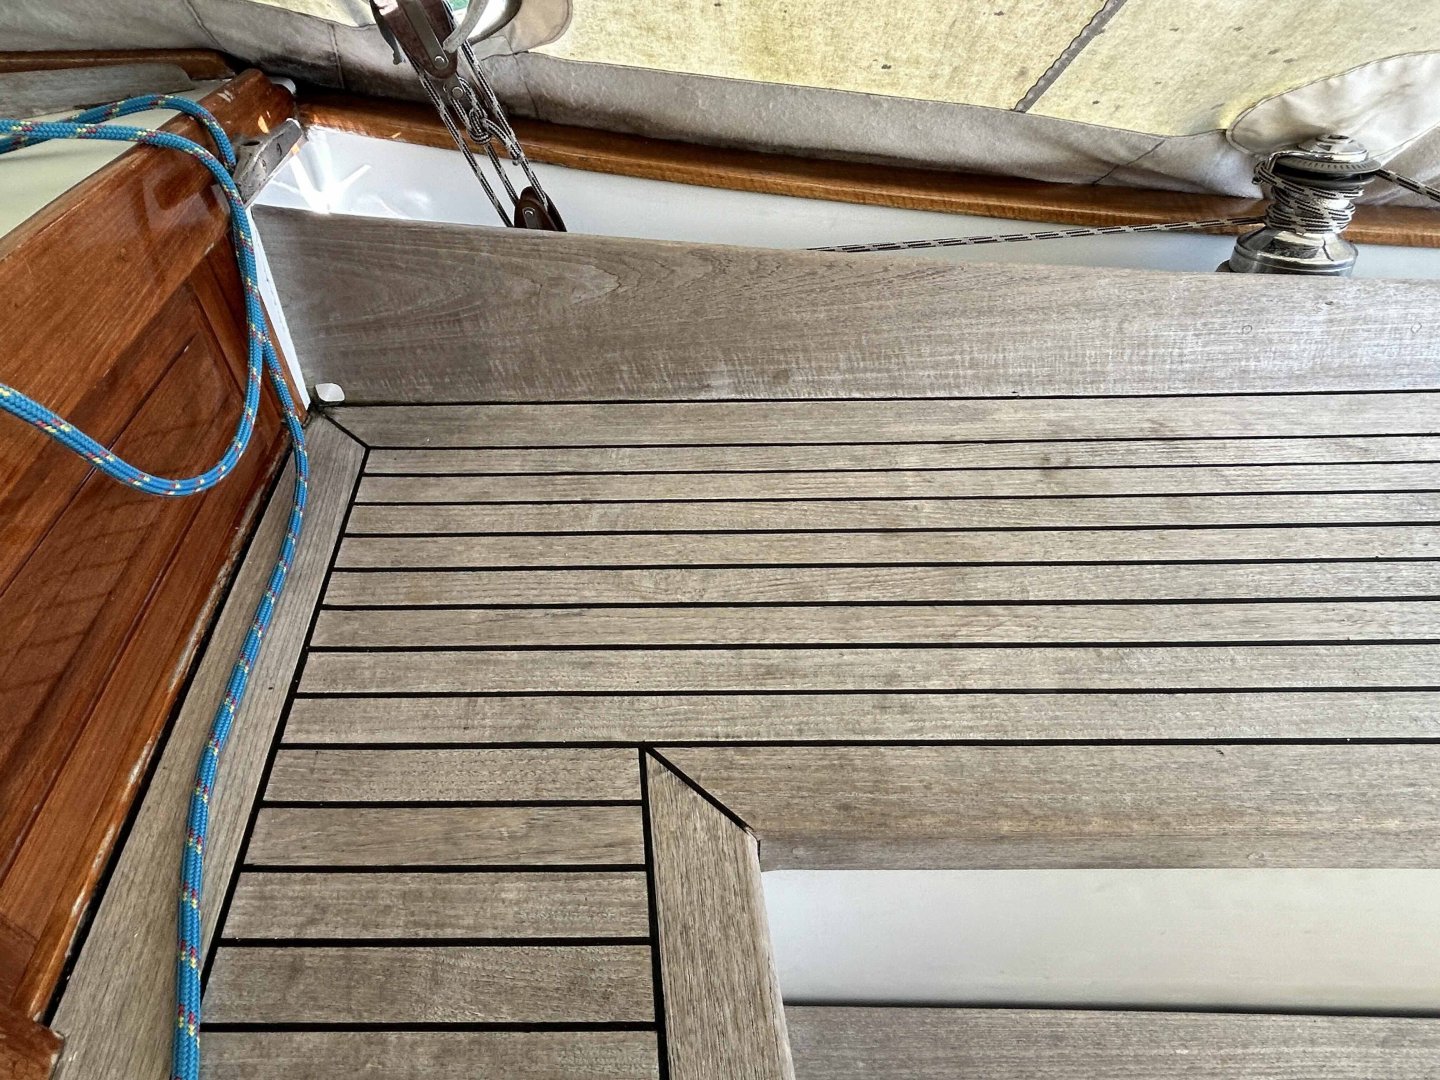
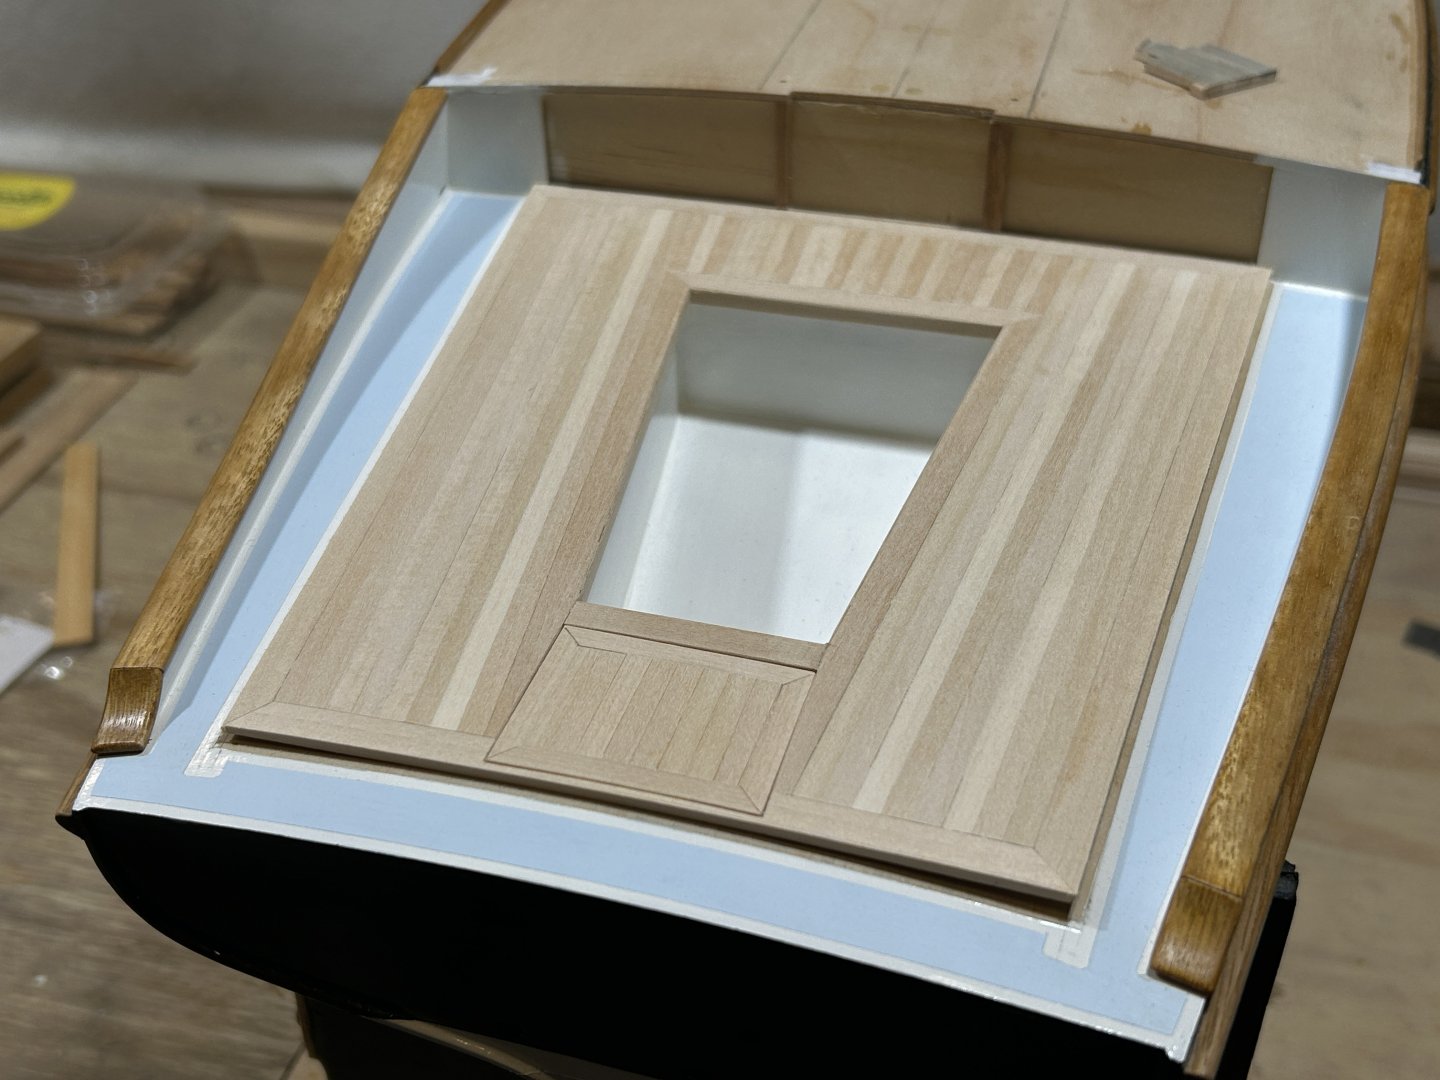
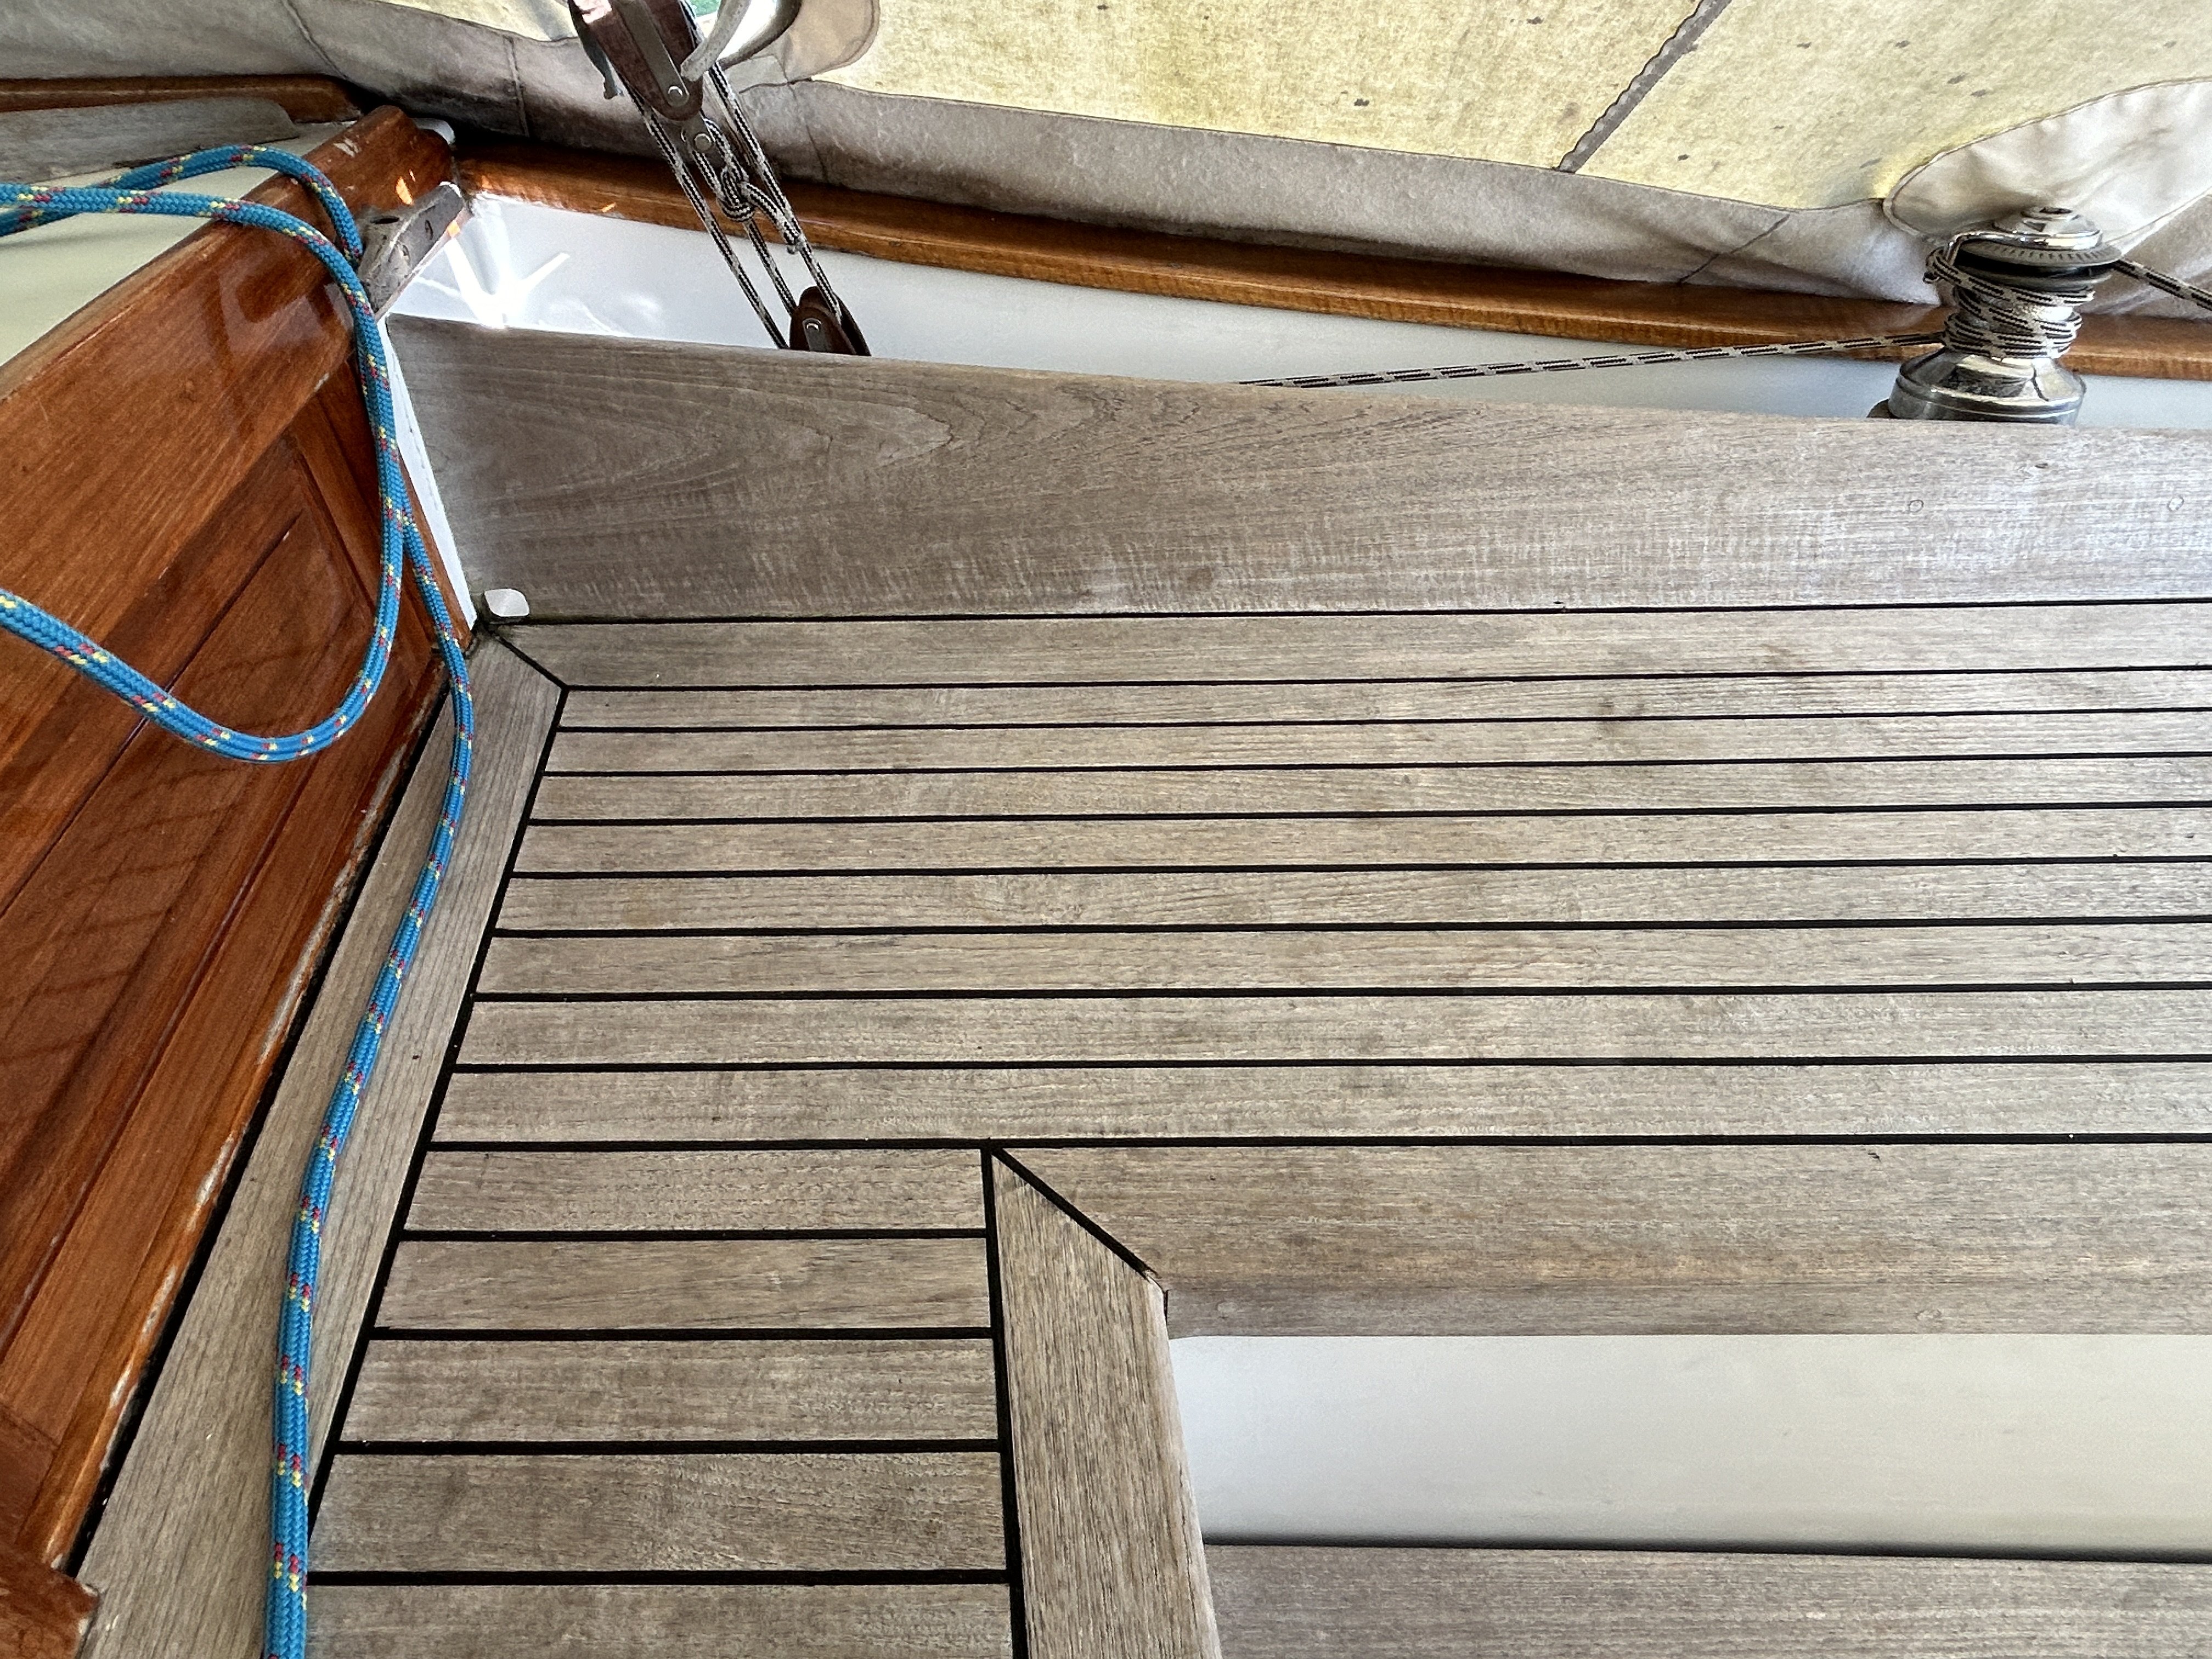
Further progress on the cockpit area seating - the timber is weathered teak with caulked seams, a photo from the actual boat below, the boat covers are on, & the photo is the forwards side of the footwell.
The weathering will be using paint, & then a black pen for the seams, so I will do the seat area first & the backrests of the seating after assembly. Doing the paint or the black lines would be much harder after full assembly. Here's the seats & lazarette hatch done, & ready for paint & the seams. nb: the timber panel isn't glued down, so the edges are currently not following the deck camber.

This is another go at the paint, probably a little dark, but in this photo the grey is darker than the actual sample. Plus with the seams penned on below that. There's no doubt the black lines of the seams tends to make the great weathering gentler than without the black lines.

- Jim Lad, ccoyle, JacquesCousteau and 1 other
-
4
-
Hi John
Yes, I agree with that - the tones of 5th from the right, & as pale as the 2nd from the right. If I could do those I'll be pretty happy.
I find that you have to be careful selecting a colour from a small piece, that's to be used on a wide area - whether it's a room or a scale model.
-
-
Hi Jim
She's a very goof looking ship, her lines are lovely & I hadn't appreciated that earlier. Now that the masts & rigging are coming together it's more visible.
- Keith Black and Paul Le Wol
-
2
-
thank you all,
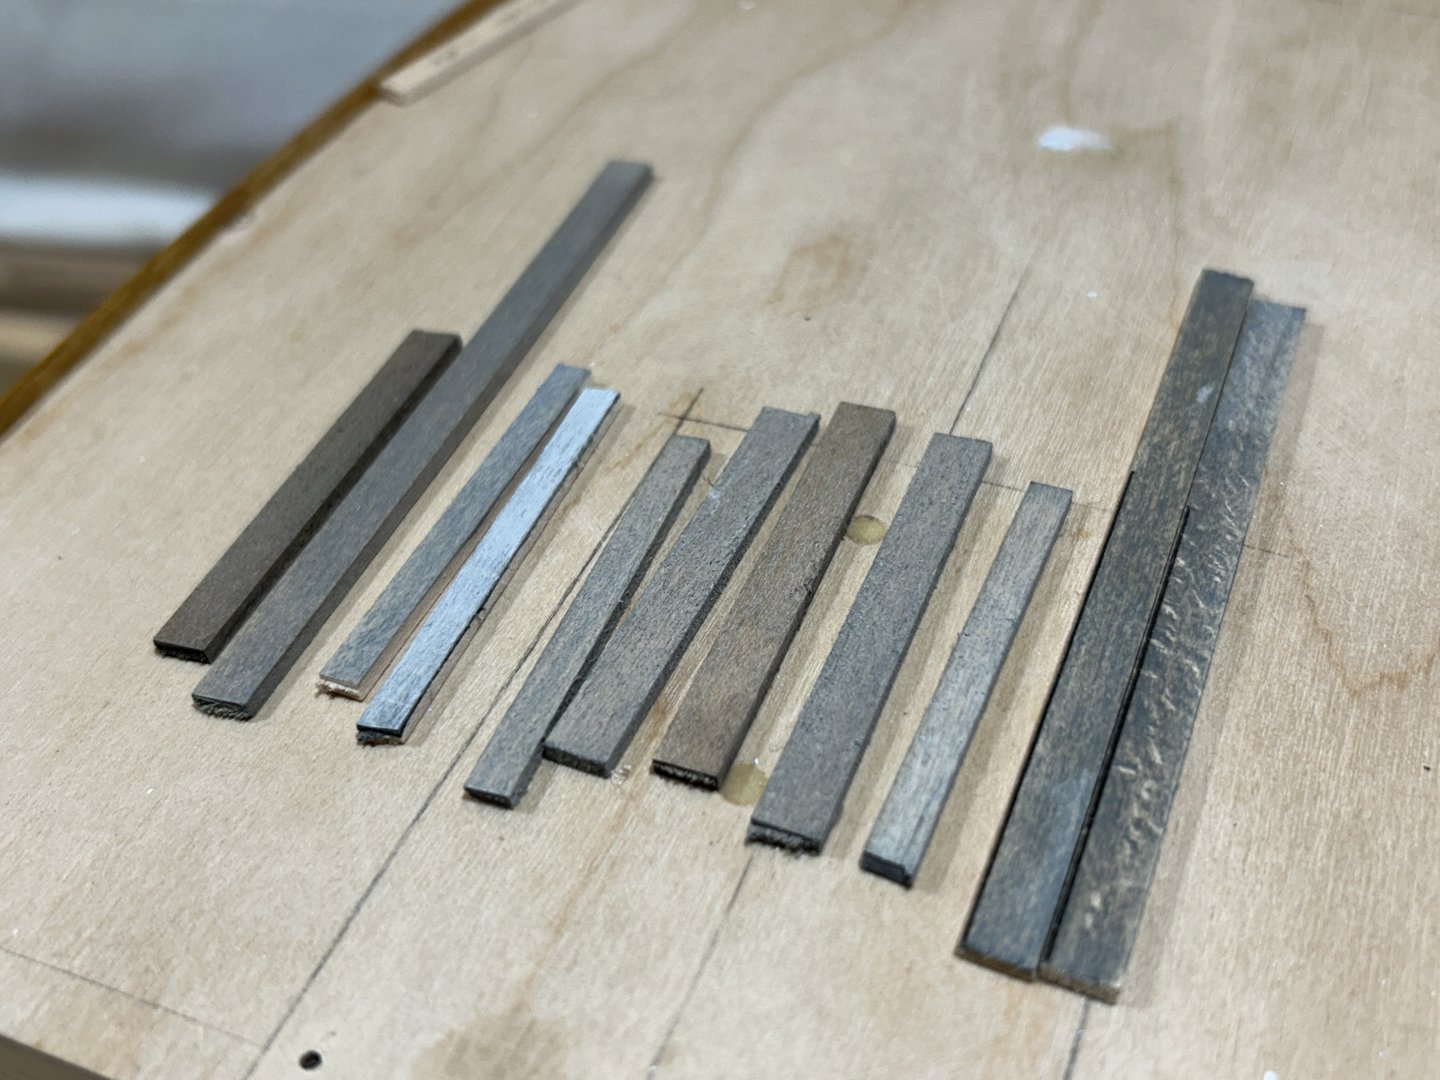
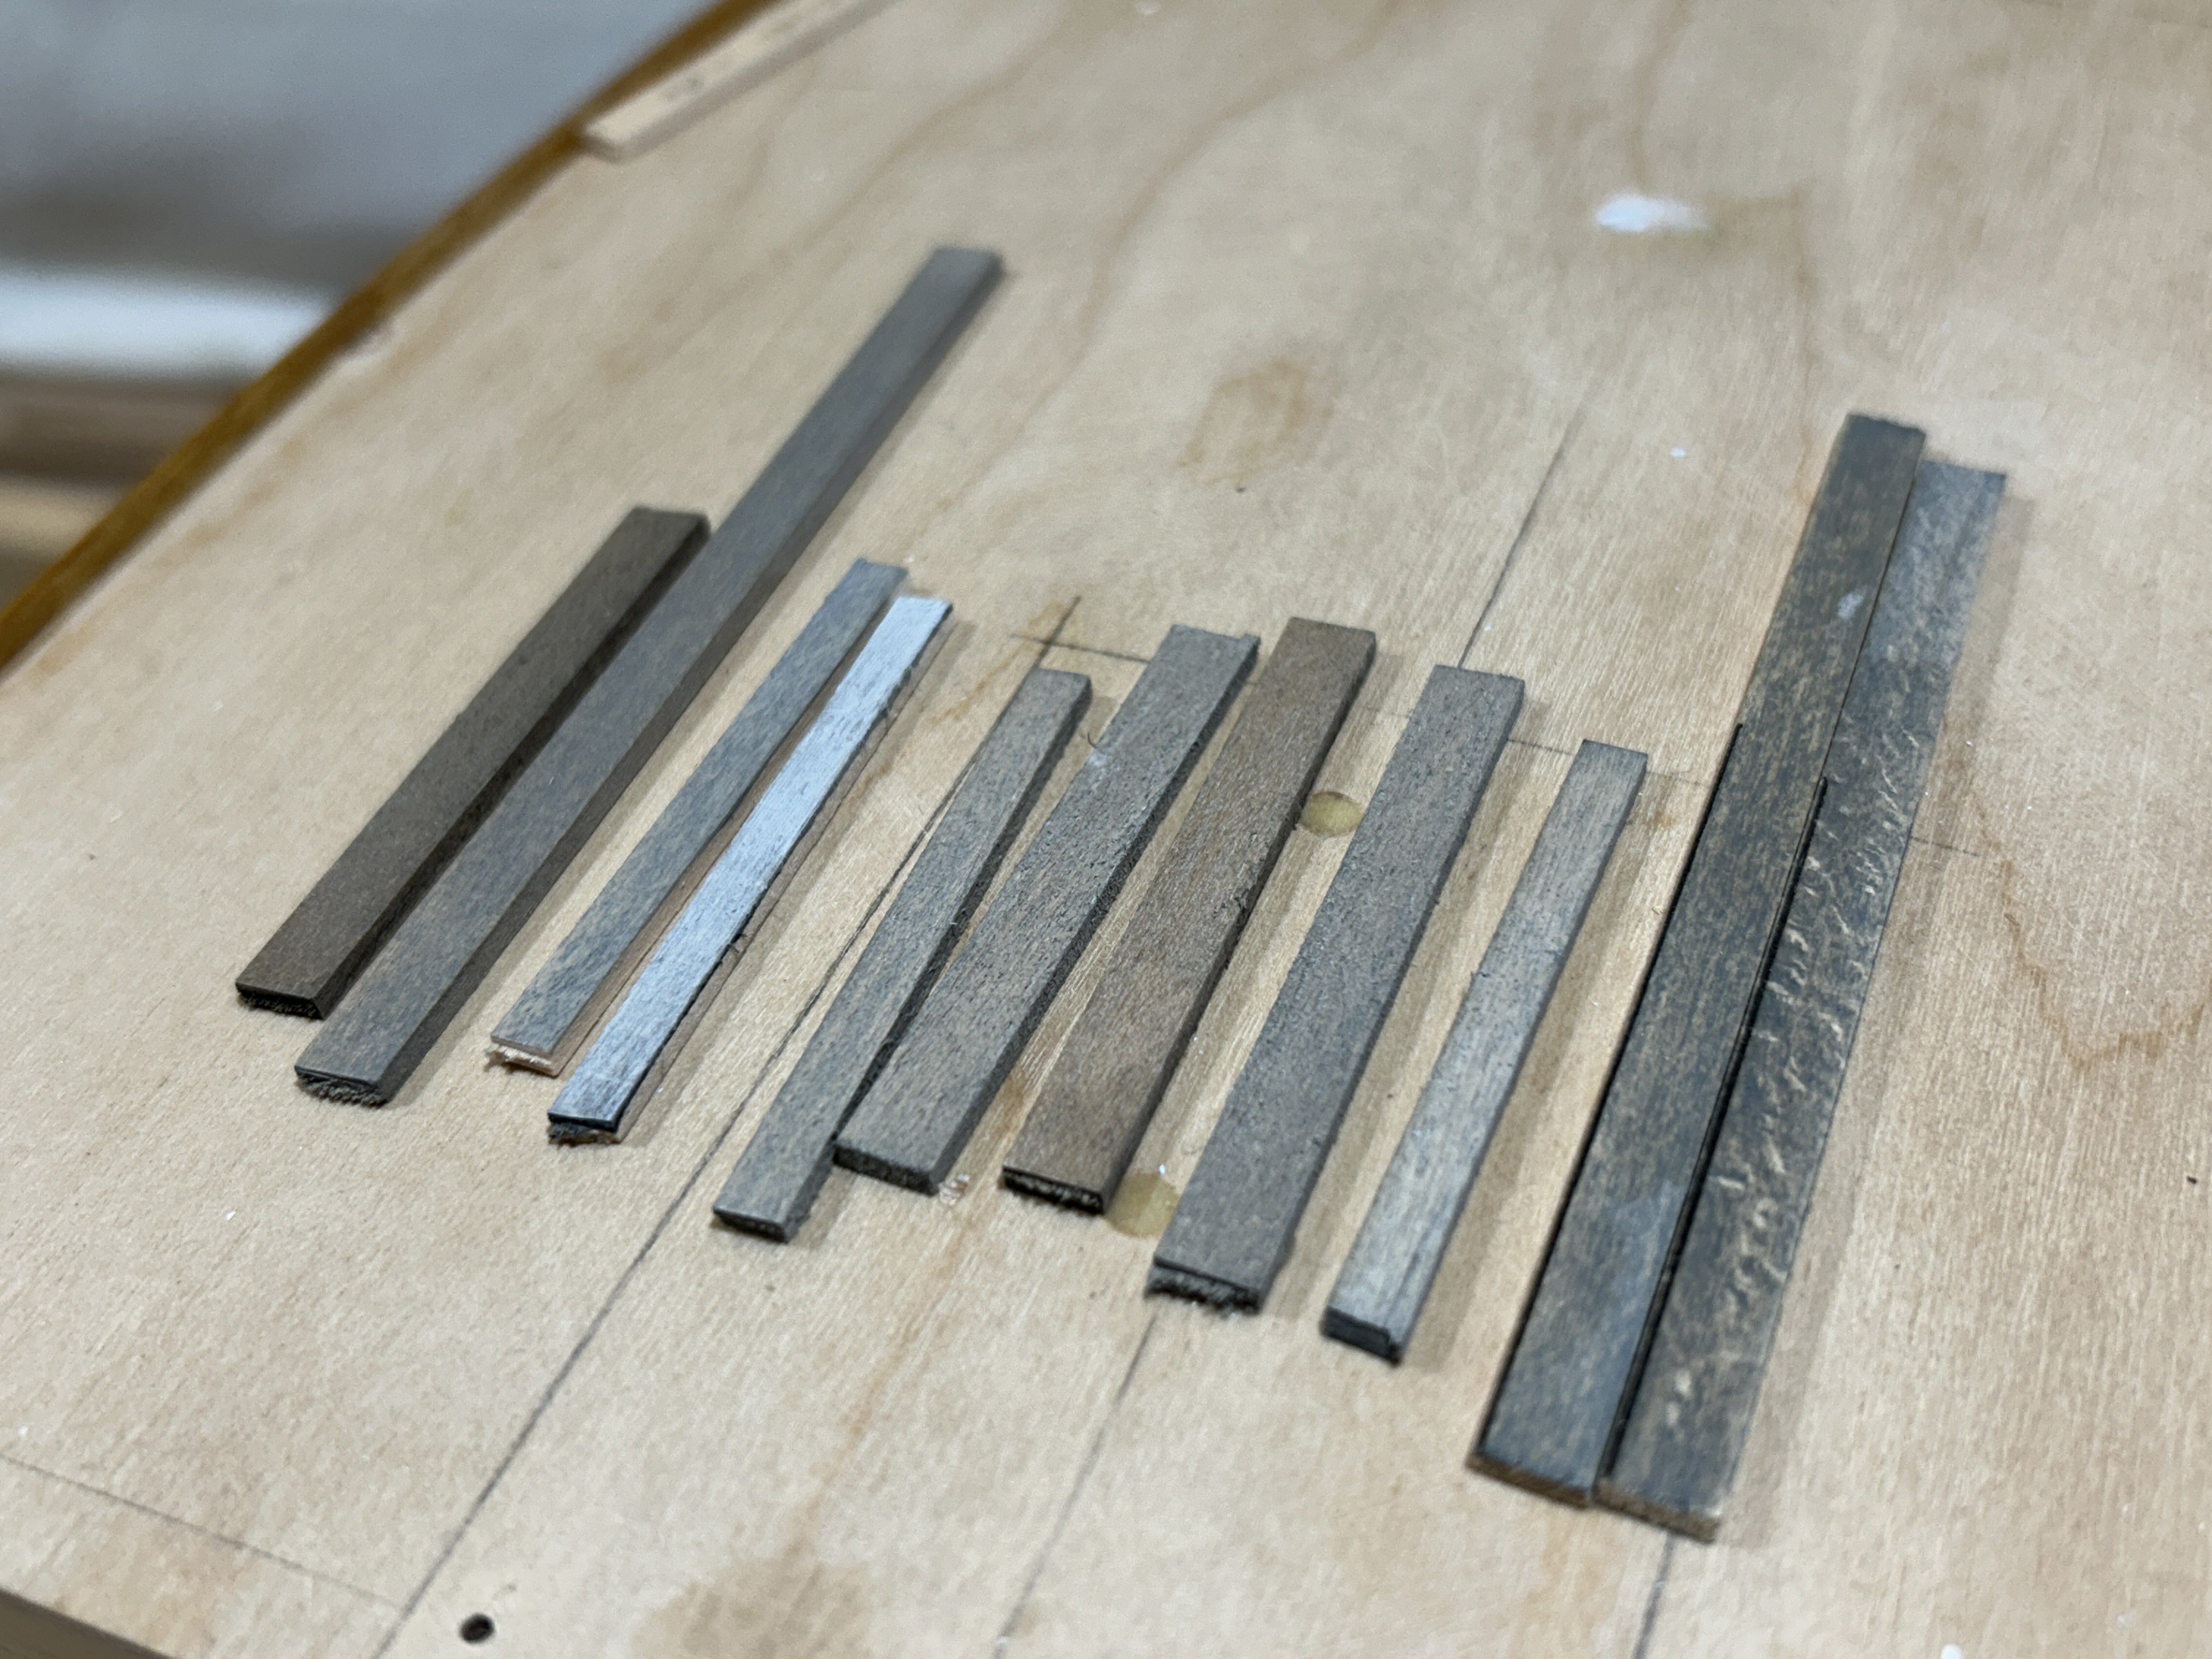
I've started on the cockpit seating & some other details that on the actual boat are unfinished teak, ie: greyed from natural weathering. I was dreading this work, it's got a lot of detail & also getting the weathering right. A few weeks ago I started researching weathering techniques on this forum & the web generally, some techniques are fairly simple but for one reason or another I remained unconvinced that it would be straightforward. The tests I did included rough sanding & scuffing the surface of the timber; dipping in diluted black paint, then with white added, then with beige added; wiping the surface of the timber strips with undiluted paints, diluted paints, on scuffed surfaces....The good news is that the most simple of the techniques seemed to work the best - essentially just wiping unscuffed timber with black or grey undiluted paint. Now that I was confident there could be a reasonable result I started working on the cockpit seating.
The technique was to build it on the model, but not yet gluing it on. The loose strip at the forwards edge is a border strip, to be fitted later.
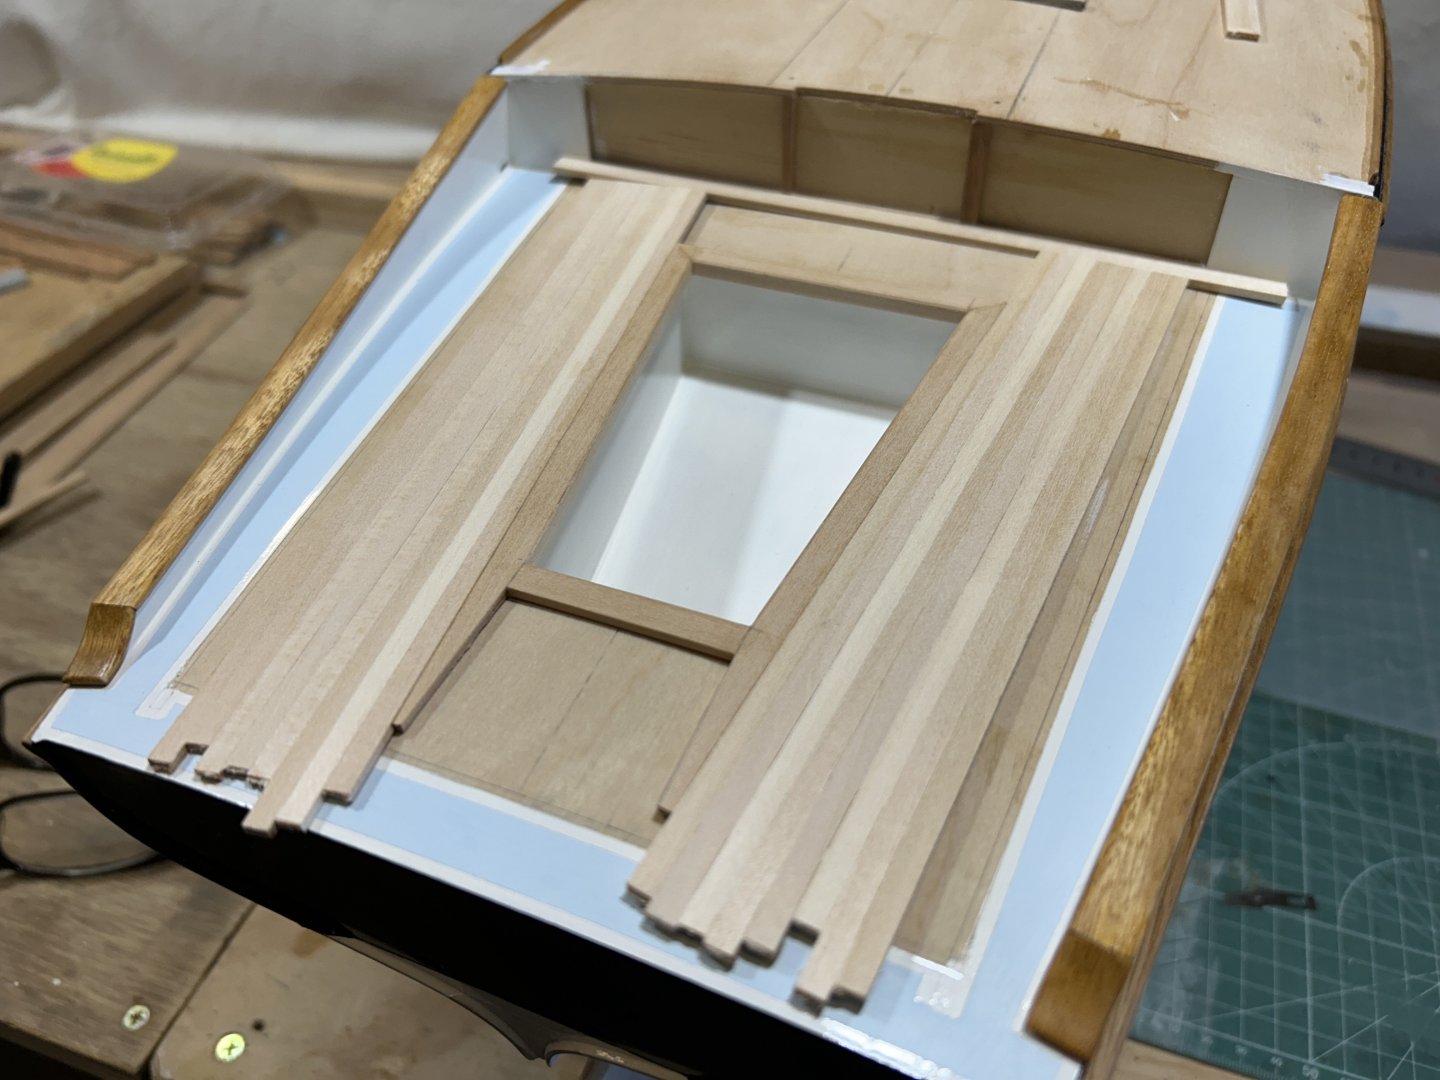
And from the underside, you can see the downturned edge to the cockpit footwell, the edge piece is an L for the visible edge thickness:

And the lazarette hatch underway. You can see a piece of plain plastic sheet underneath, that's how I've been able to glue in situ. I think it's easier to make something accurately to size when you're building off assembled pieces rather than guessing from loose pieces.

A shot of the actual cockpit, when you look carefully the colour still has some natural warmth, it's not a pure grey. Below that are some of the weathering samples. Most of them are too heavy & too dark. Most also obscure too much of the timber colour, the best ones allow that natural colour through a bit.

The single strip 2nd from the right is getting close, needs a little more tweaking but I'm happy that I can do something satisfactory. The caulking will be done with an artist grade 0.5mm ink felt tip pen.
-
Hi Vaddoc
Looks good, & I wish my work space was half as orderly as that. Out of curiosity, are you reinforcing the plank joins? Butt blocks on a yacht....
- Keith Black and FriedClams
-
2
-
I haven't posted for a while, but I'm back working on the model. The sailing trip in Tassie is posted in another part of this forum, linked below if you're interested.
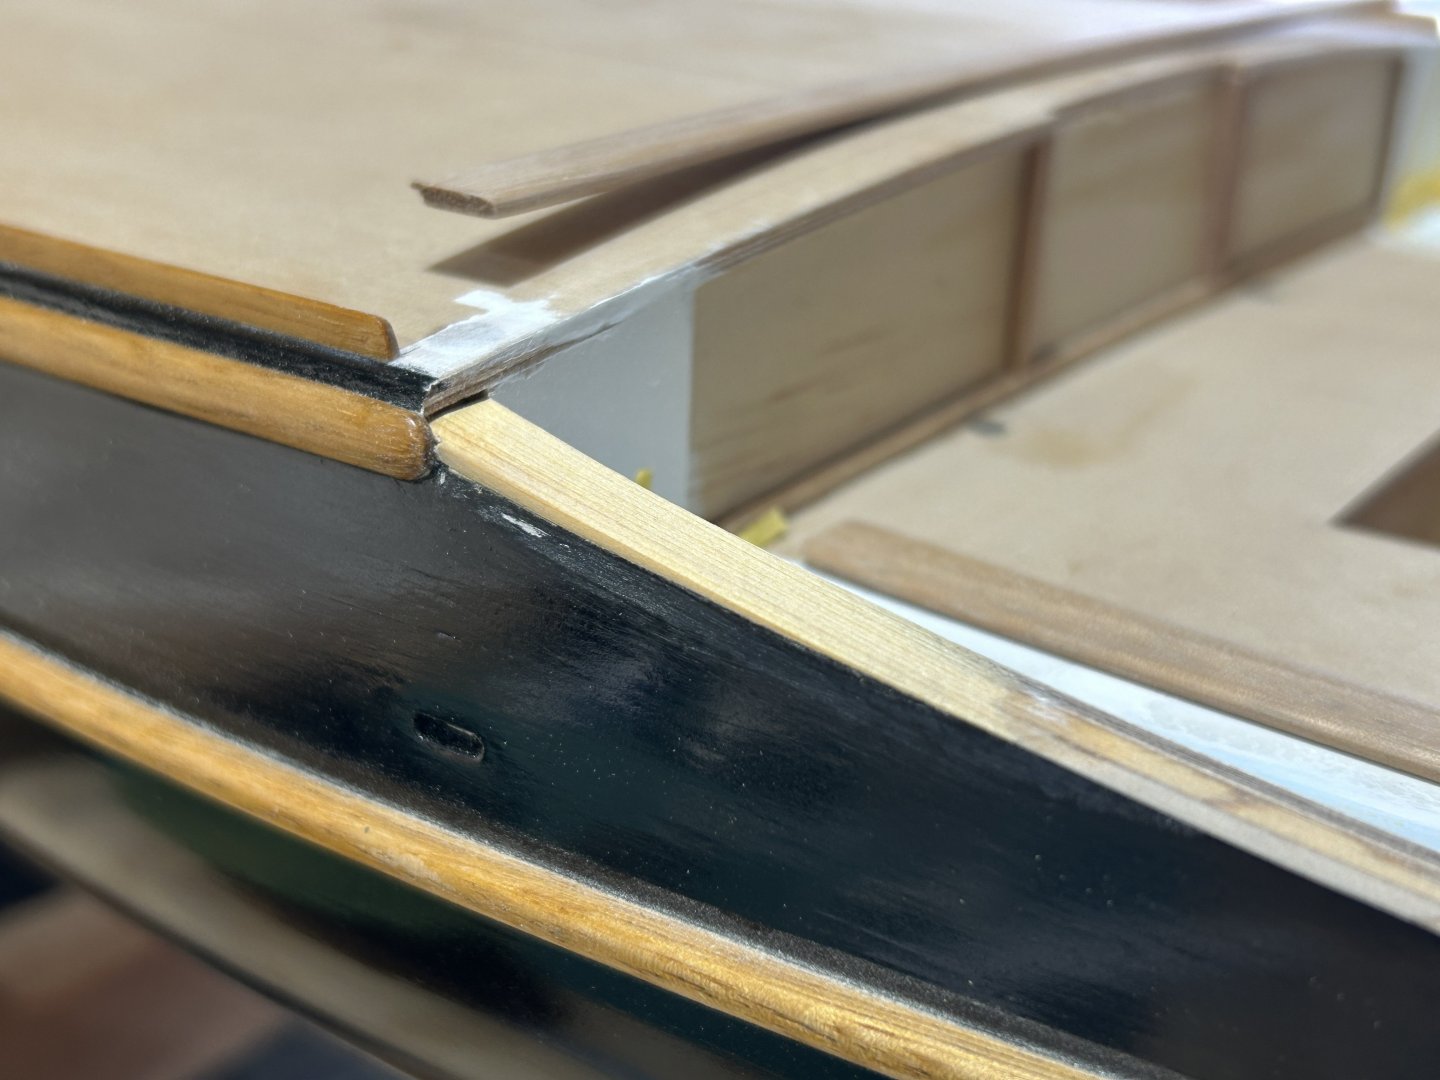
Back to the model, I've been working on the cockpit area, starting with the toe rails, just visible on the upper deck forwards of the cockpit. The toe rails were delicate, about 1.5 x 2.5mm & maybe 300mm long. Then the timber strips that visually complete the hull step-down alongside the cockpit. The timber is Blackbutt, from the same floorboard offcut I used for the gunwales & sponsons.

Then the small cupped strip aft of the previous photo, to fit in this curve:

I had a piece of round acrylic tube about the right diameter:

Then some more sanding:
I picked up an error in that strip of side decks, on one side I'd clearly been daydreaming while sanding....so I added on a filler piece of timber, then undercoat, paint etc.:
I painted the two-tone deck (or scuppers area) around the cockpit seating. On the yacht it's painted in a more modern style, where there's an edge strip with the deck paint set in, & in different colours. Tamiya have masking tape in 2mm width, which helped get a constant gap, plus some 6mm masking tape to help stop overpainting onto the adjoining finished paint.
Then glueing the timber strips on - as per the previous timber, I really prefer shellac for scale varnish, the thin viscosity helps the finish to look right at scale. Not to say you can't get other finishes to look right at scale, but this works for me & it dries quickly...& I like the way you can matt it with steel wool & gradually buff it back to satin with some cotton rag.
Then carefully fitting the little curved pieces...

And one side done.

Then both. Some details fixes will be required to the paint, but I'll do that all in one go later.
The deck will get painted soon, so I started shellacking the cockpit stormboards, made earlier.

I'll paint the deck next I think, then start on the weathered teak cockpit seats & other details.
Thanks everyone

- Landlubber Mike, druxey, Jack12477 and 3 others
-
6
-
On 2/2/2025 at 8:54 AM, vaddoc said:
Strangely, the main pattern it is also off by a millimetre or so.
Hi Vaddoc,
If it is a print that you are talking about, one possible reason for a small error is that some printers slightly shrink to fit the page, without telling you. If you drafted in CAD to a certain size virtual page (eg A3), then when you print, you print to A3 paper size, but the virtual A3 is slightly reduced by the edge margin of the paper that the printer can't print on. The solution is to find the option in the print dialogue window that allows you to set the printing to 100% scale.
- FriedClams, druxey, Paul Le Wol and 1 other
-
4
-
Hi Steven
Some responses from the gallery:
20 hours ago, Louie da fly said:probably the sternpost needs a rabbet as well. Can anybody advise on this?
In modern traditionally built yachts: yes, definitely. The planks ends are then housed which gives you a backed recess into which to bang the caulking, pitch, putty etc. it's a really important joint. And if the stern post is hit heavily by anything (such as a dock), the impact load is somewhat transferred to the planking & on to the hull at large, instead of pushing the stern post only.
20 hours ago, Louie da fly said:Would I be right in thinking that the fore edge of the rudder should be rounded so it can swivel from side to side without any corners to foul the sternpost?
To my simplistic thinking it's logical they would have rounded it. But it would be easy to have it square & not foul anything - it's just a question of where the pivot point is, closer to hull or further away.
-
-
3 hours ago, vaddoc said:
Apologies, just going a bit overboard with CAD
Your exploration of the hull via CAD was very interesting, & CAD drawings are useful in understanding the object drawn. Like you, I also used CAD to get an initial idea of the planking angles where they meet the keel, stem etc.
- Keith Black and FriedClams
-
2
-
-
-
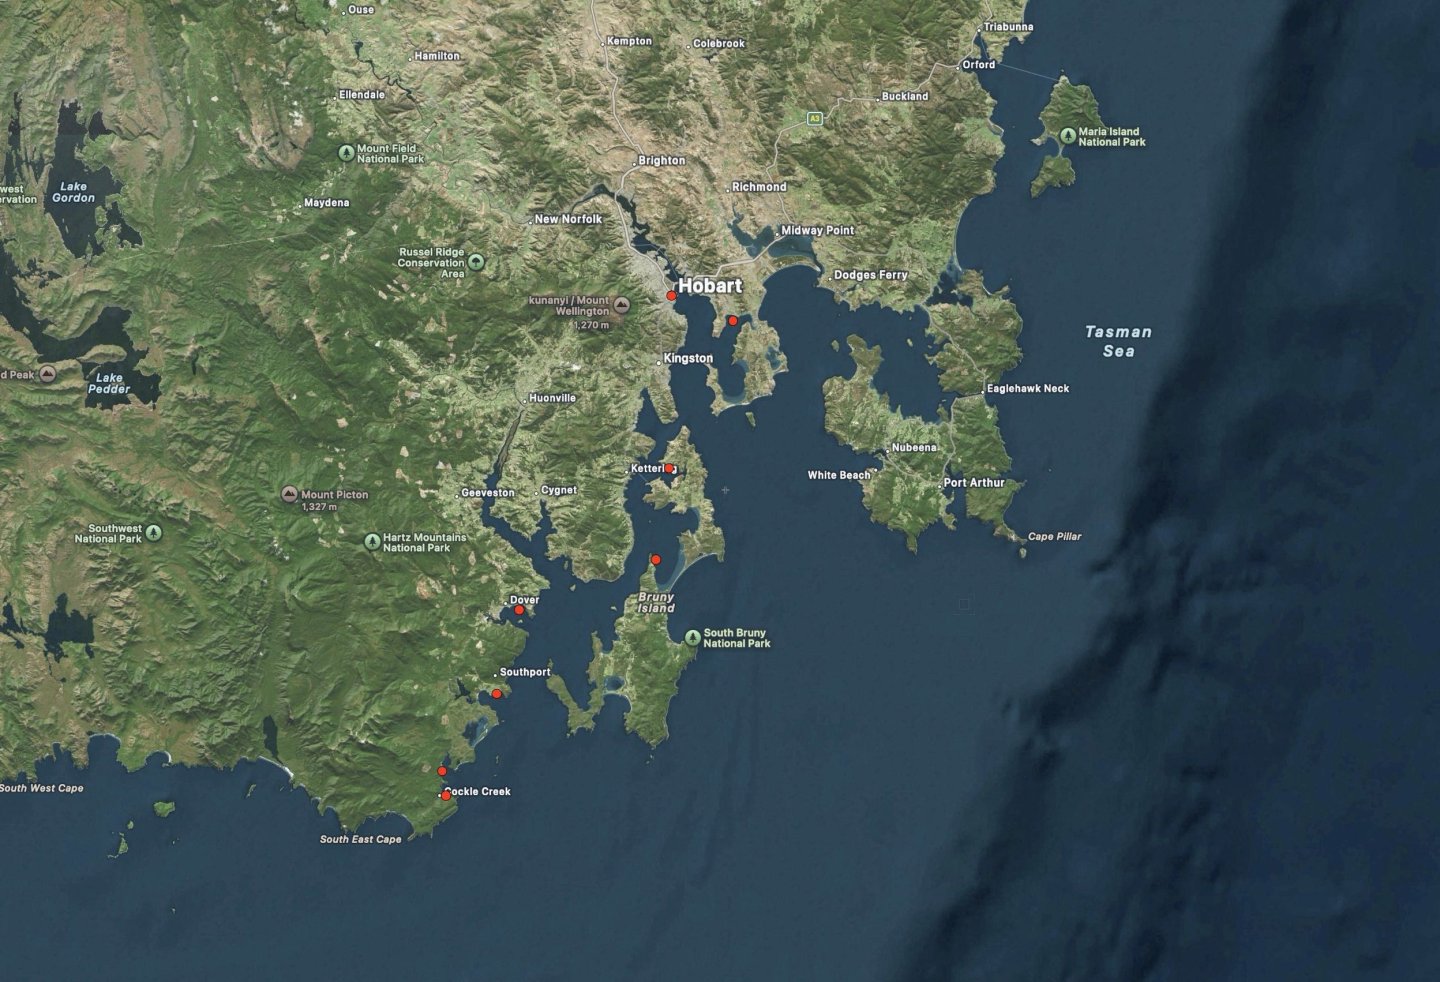
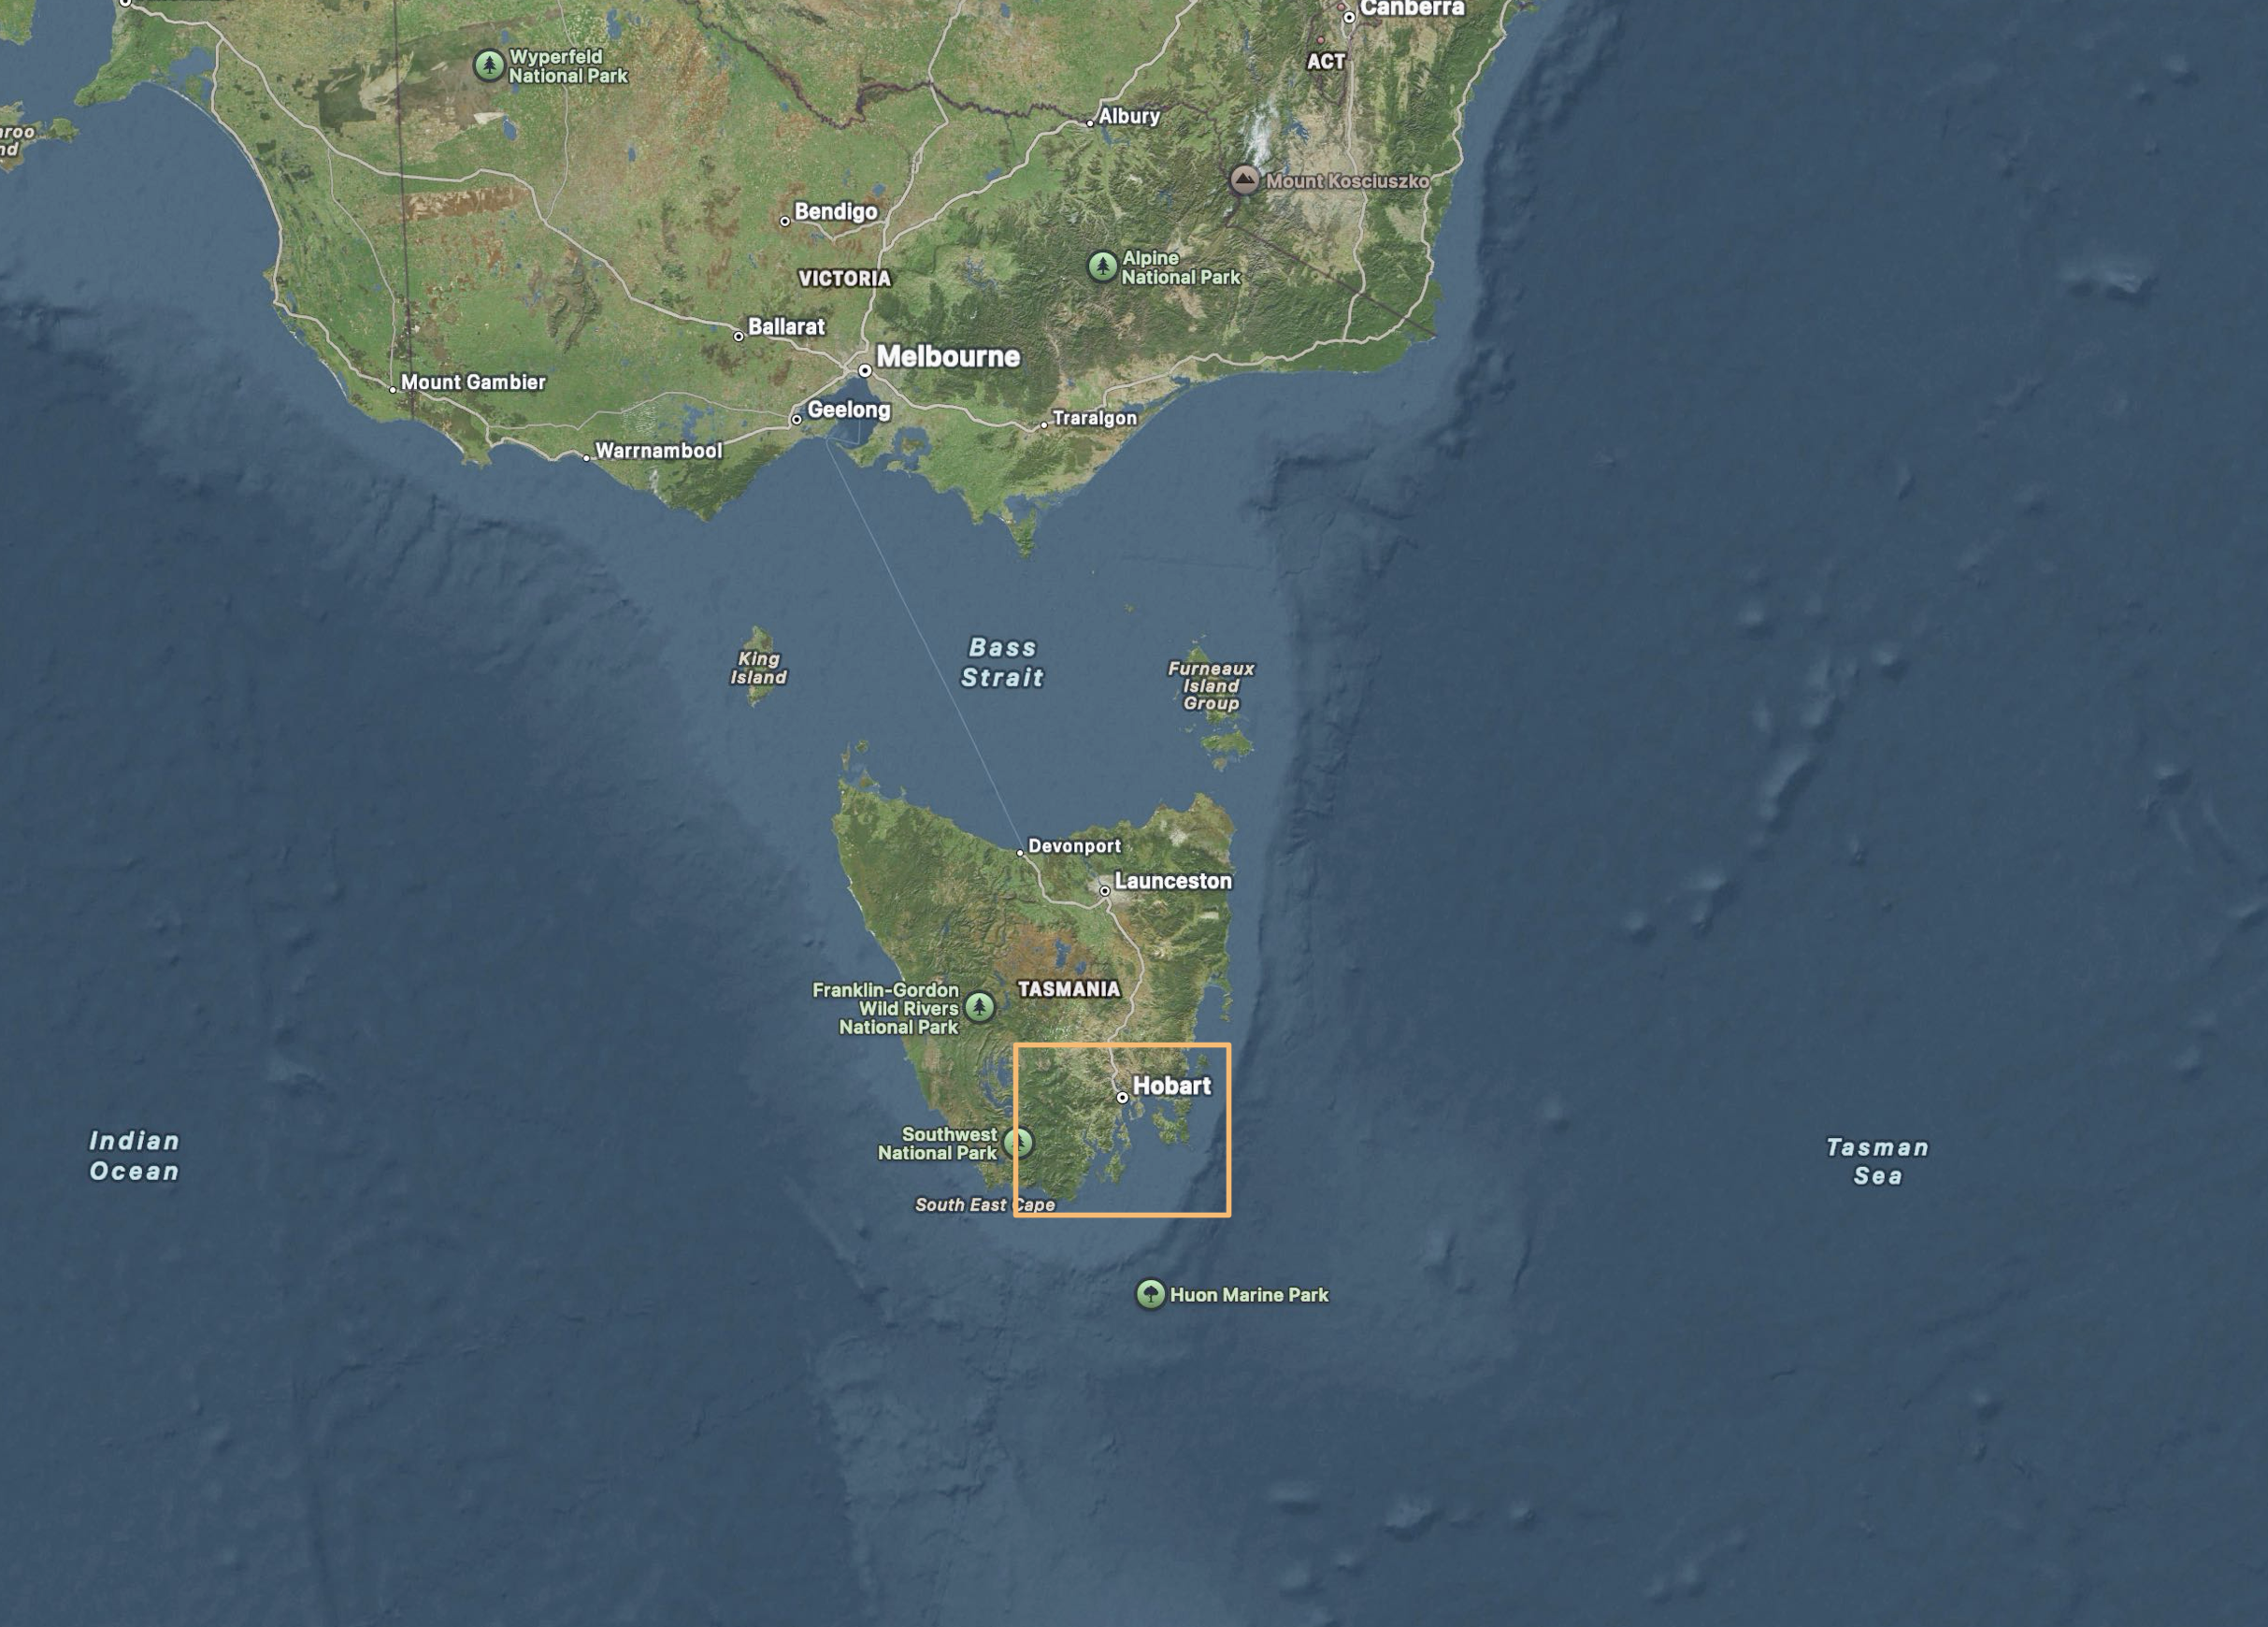
We're all boat trajics here, so I doubt anyone will mind if I go off-topic, on my own blog: I'll be away for a few weeks, happily going to the Wooden Boat festival at Hobart. But, even more exciting, I'm sailing on a small boat raid for 10 days leading up to the festival.
The red dots are the intended stops, starting down the bottom. For context, the detail map is the orange rectangle on the other one. The first few days are obvious exposed to the south & south-east. But assuming the weather is ok, it should be really good, some wonderful country there.

- Javelin, ccoyle, Landlubber Mike and 2 others
-
5
-
-
Hi Vaddoc,
Good progress, & this is something of a departure for you - most of your builds have been for smaller planked sailing vessels. I look forwards to seeing how this unfolds,
- Keith Black, vaddoc and FriedClams
-
3
-
Hi Dick
Have you been using local hardwoods, & how do you find them to work with? Some of the timber looks to me like Jarrah or Karri, both seriously dense & hard wood.
-
Best wishes Håkan
The mast is lovely timber - what species is that?
- mtaylor, FriedClams, Keith Black and 1 other
-
4
-
17 hours ago, Javelin said:
I love the contrast between those wood fenders and black hull.
Thank you Roel, & I like the colours too. I'm doing a model of a specific boat that has these colours, so the timber choice in the case was to replicate the timber on the original, but it does go very nicely with black.
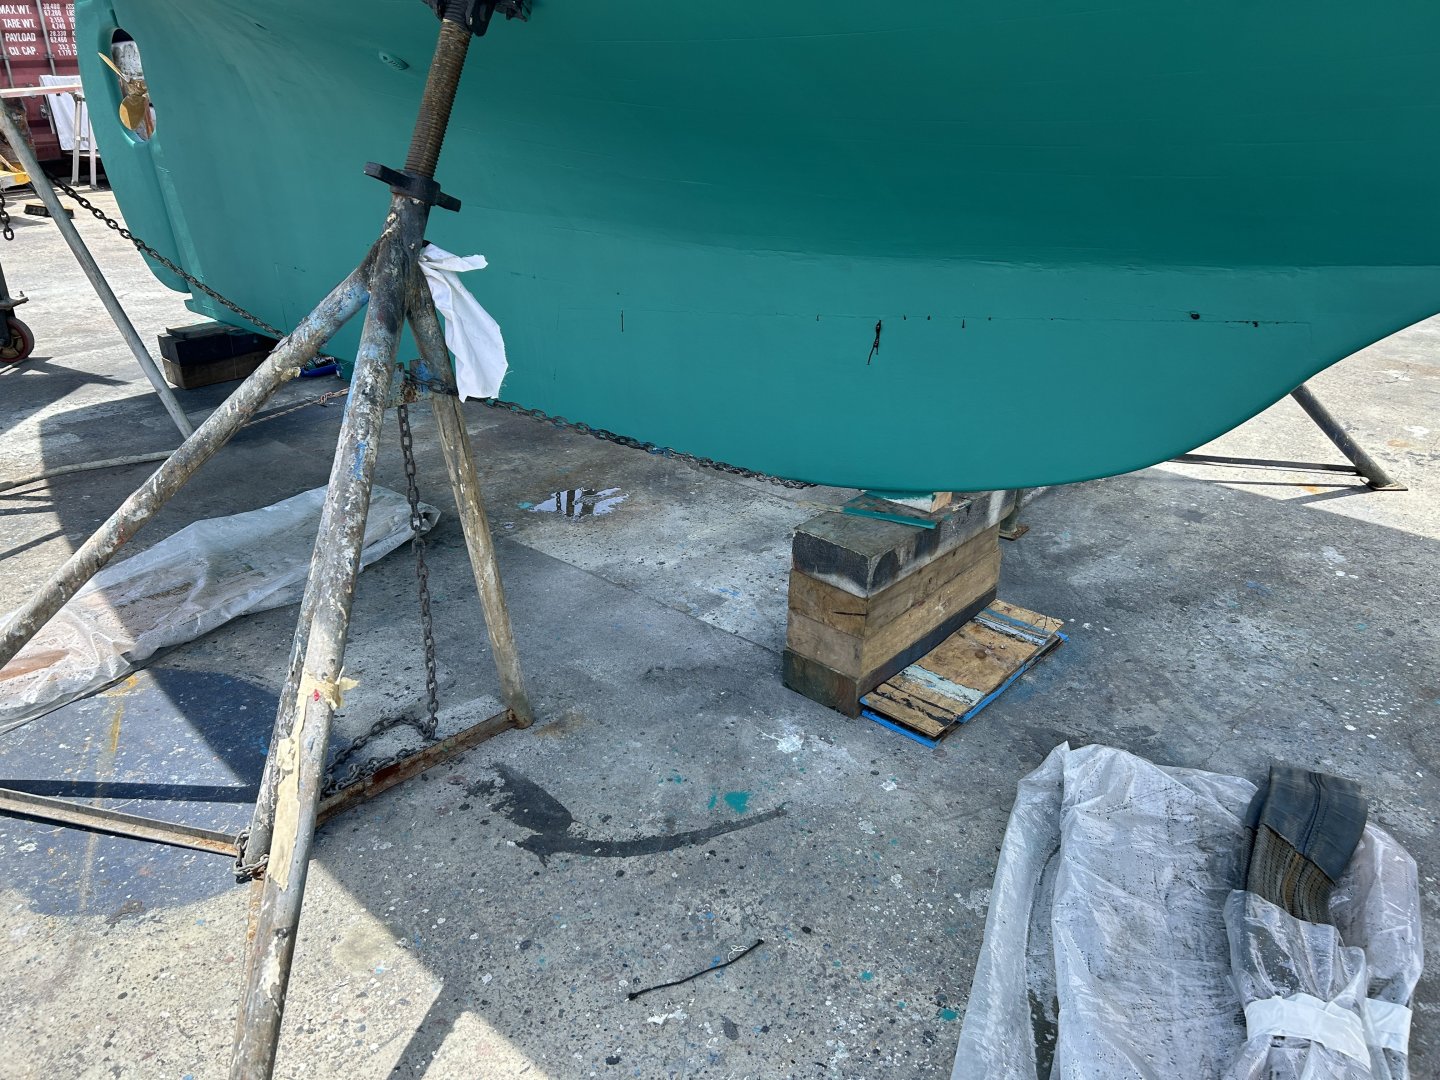
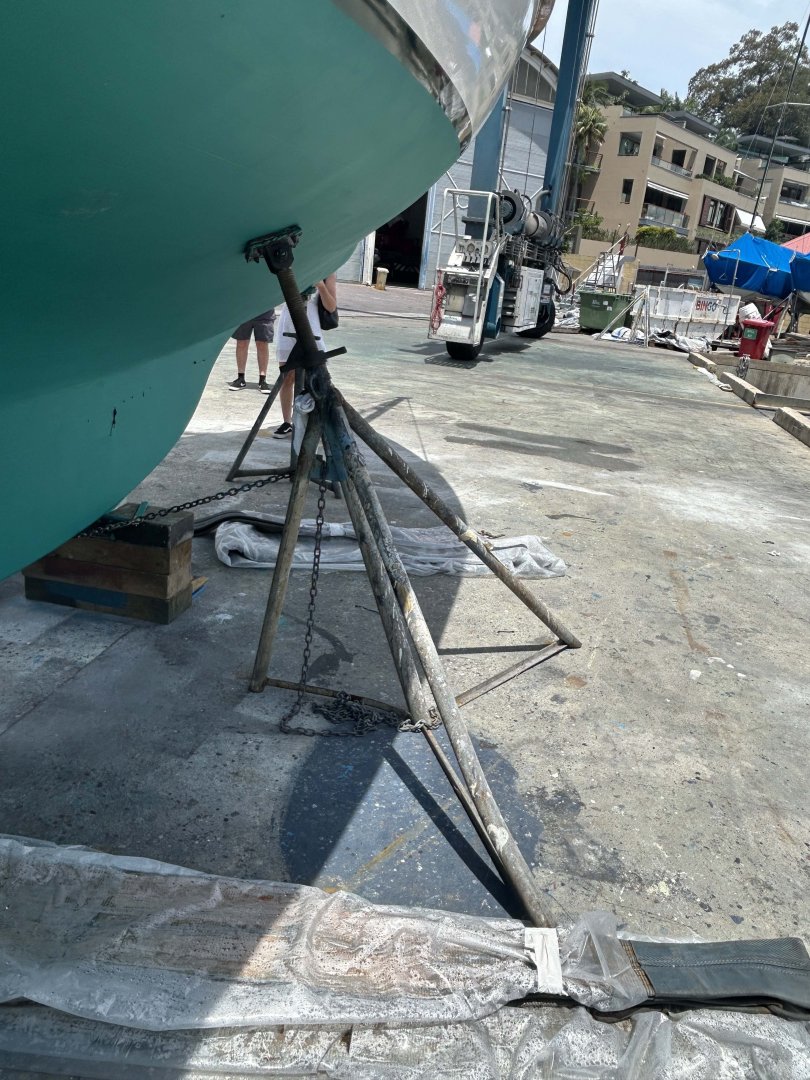
One aspect I'm thinking about is the stand. I've decided to do a flat rectangular base that replicates a boat yard hard-stand area....spilt paint, etc, & the model held up with scaled support frames, some photos below. Maybe a piece of thick compressed fibre cement sheet as a base....

- Jack12477, JacquesCousteau, Jim Lad and 2 others
-
5


Ranger type yacht by Mark Pearse - 1:12 - SMALL
in - Build logs for subjects built 1901 - Present Day
Posted
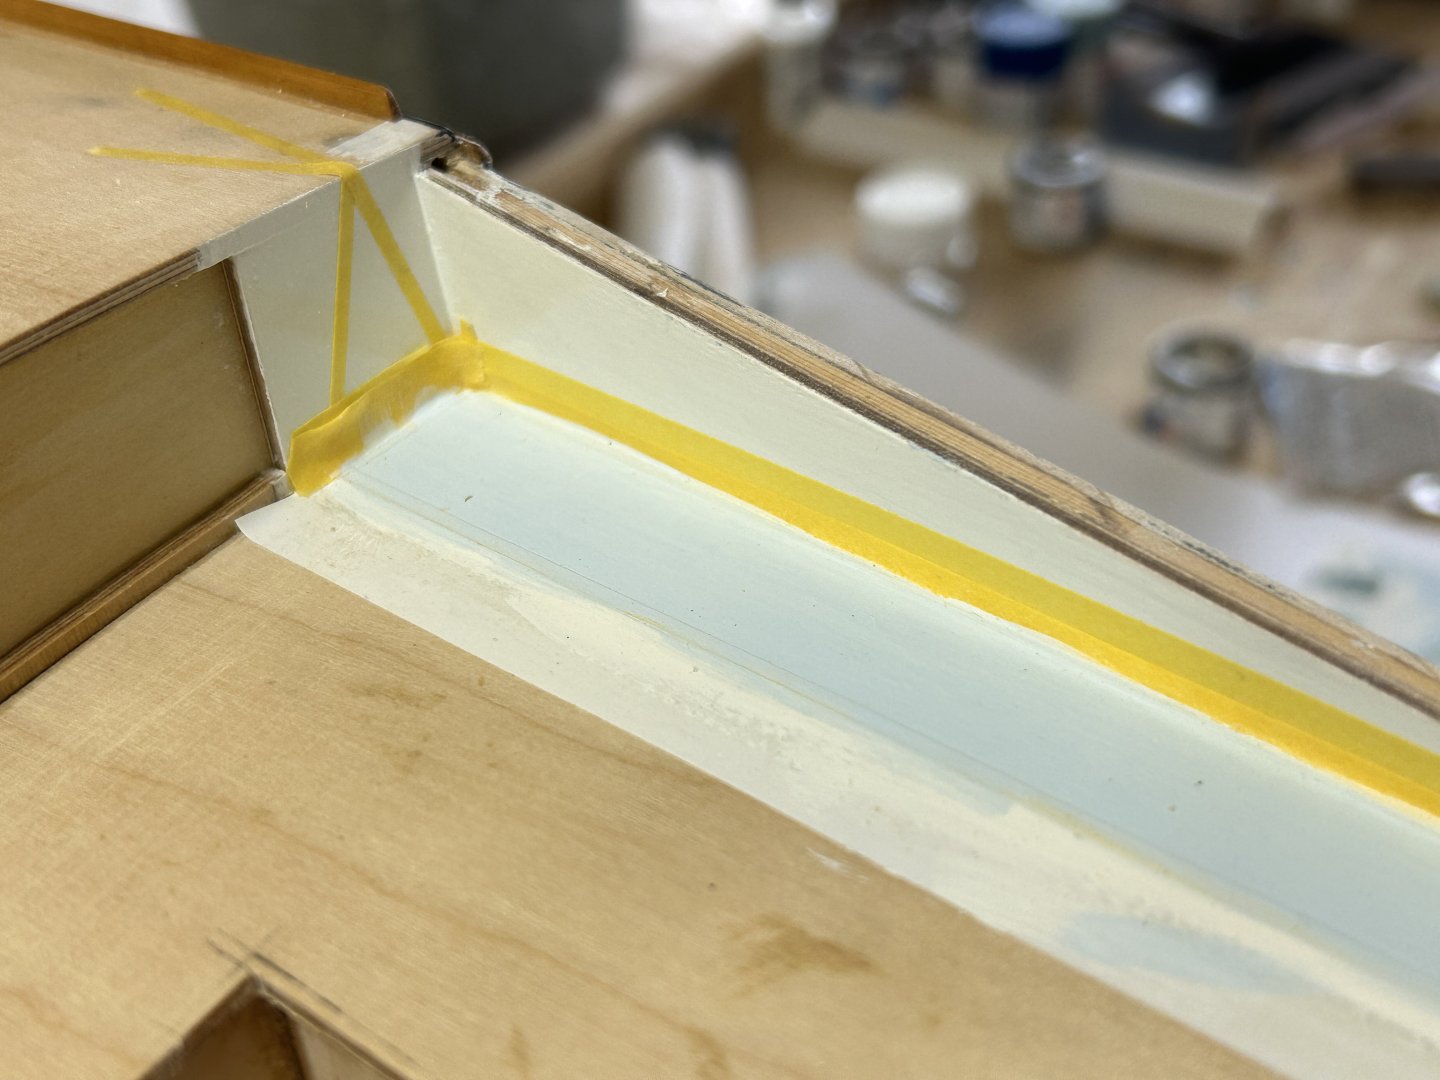
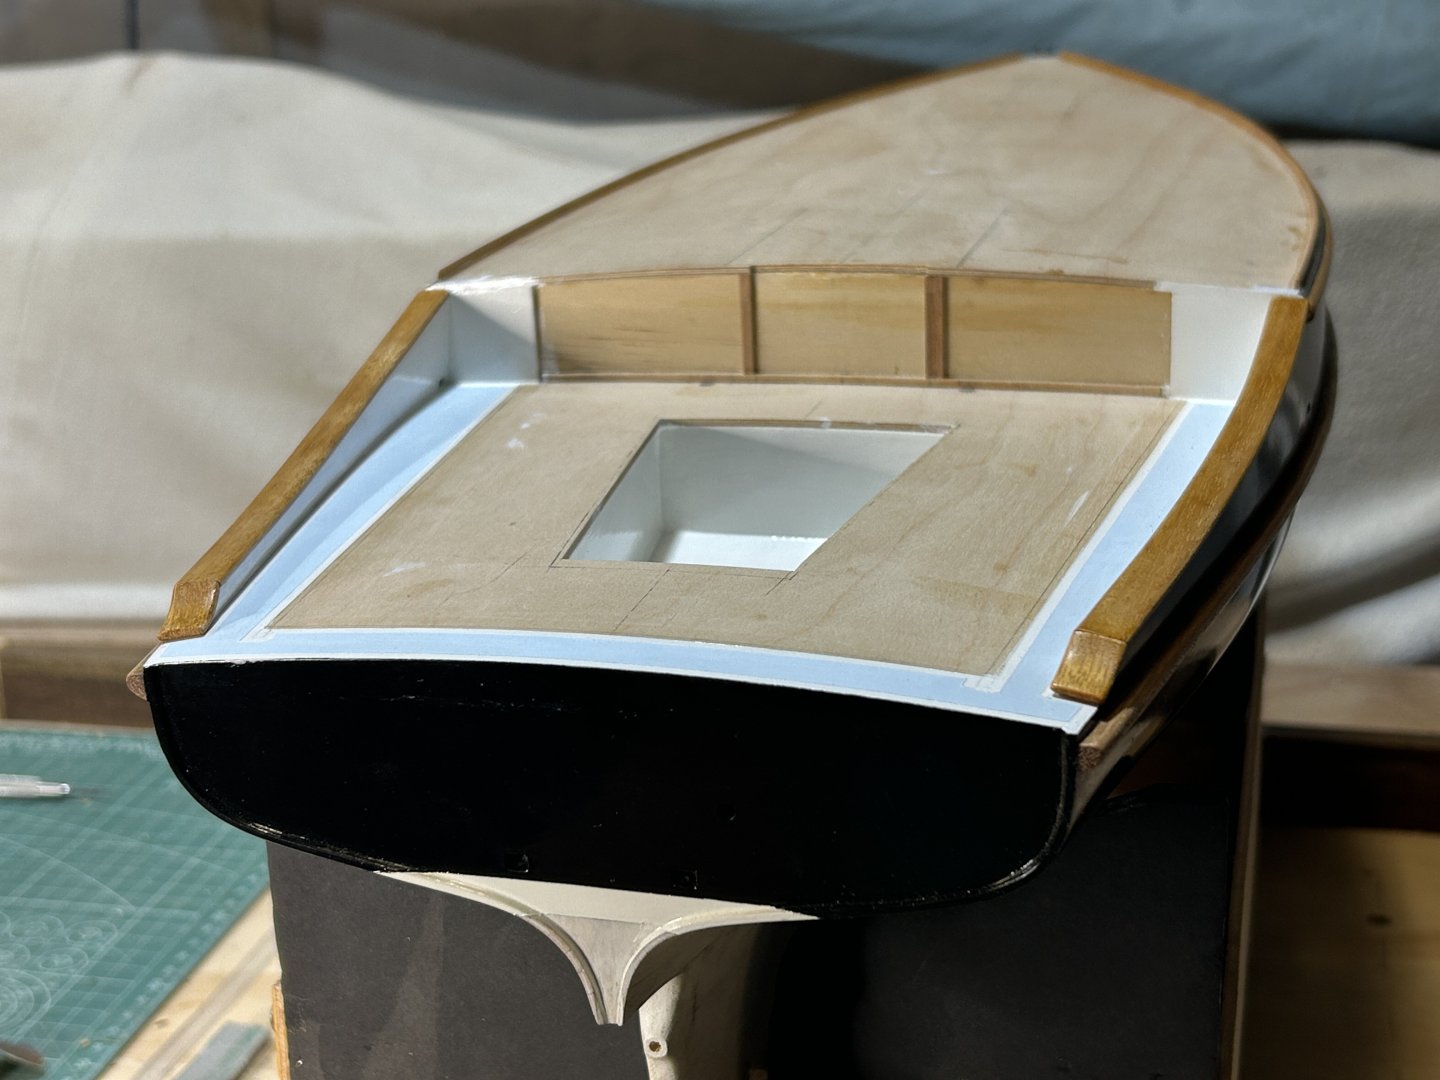
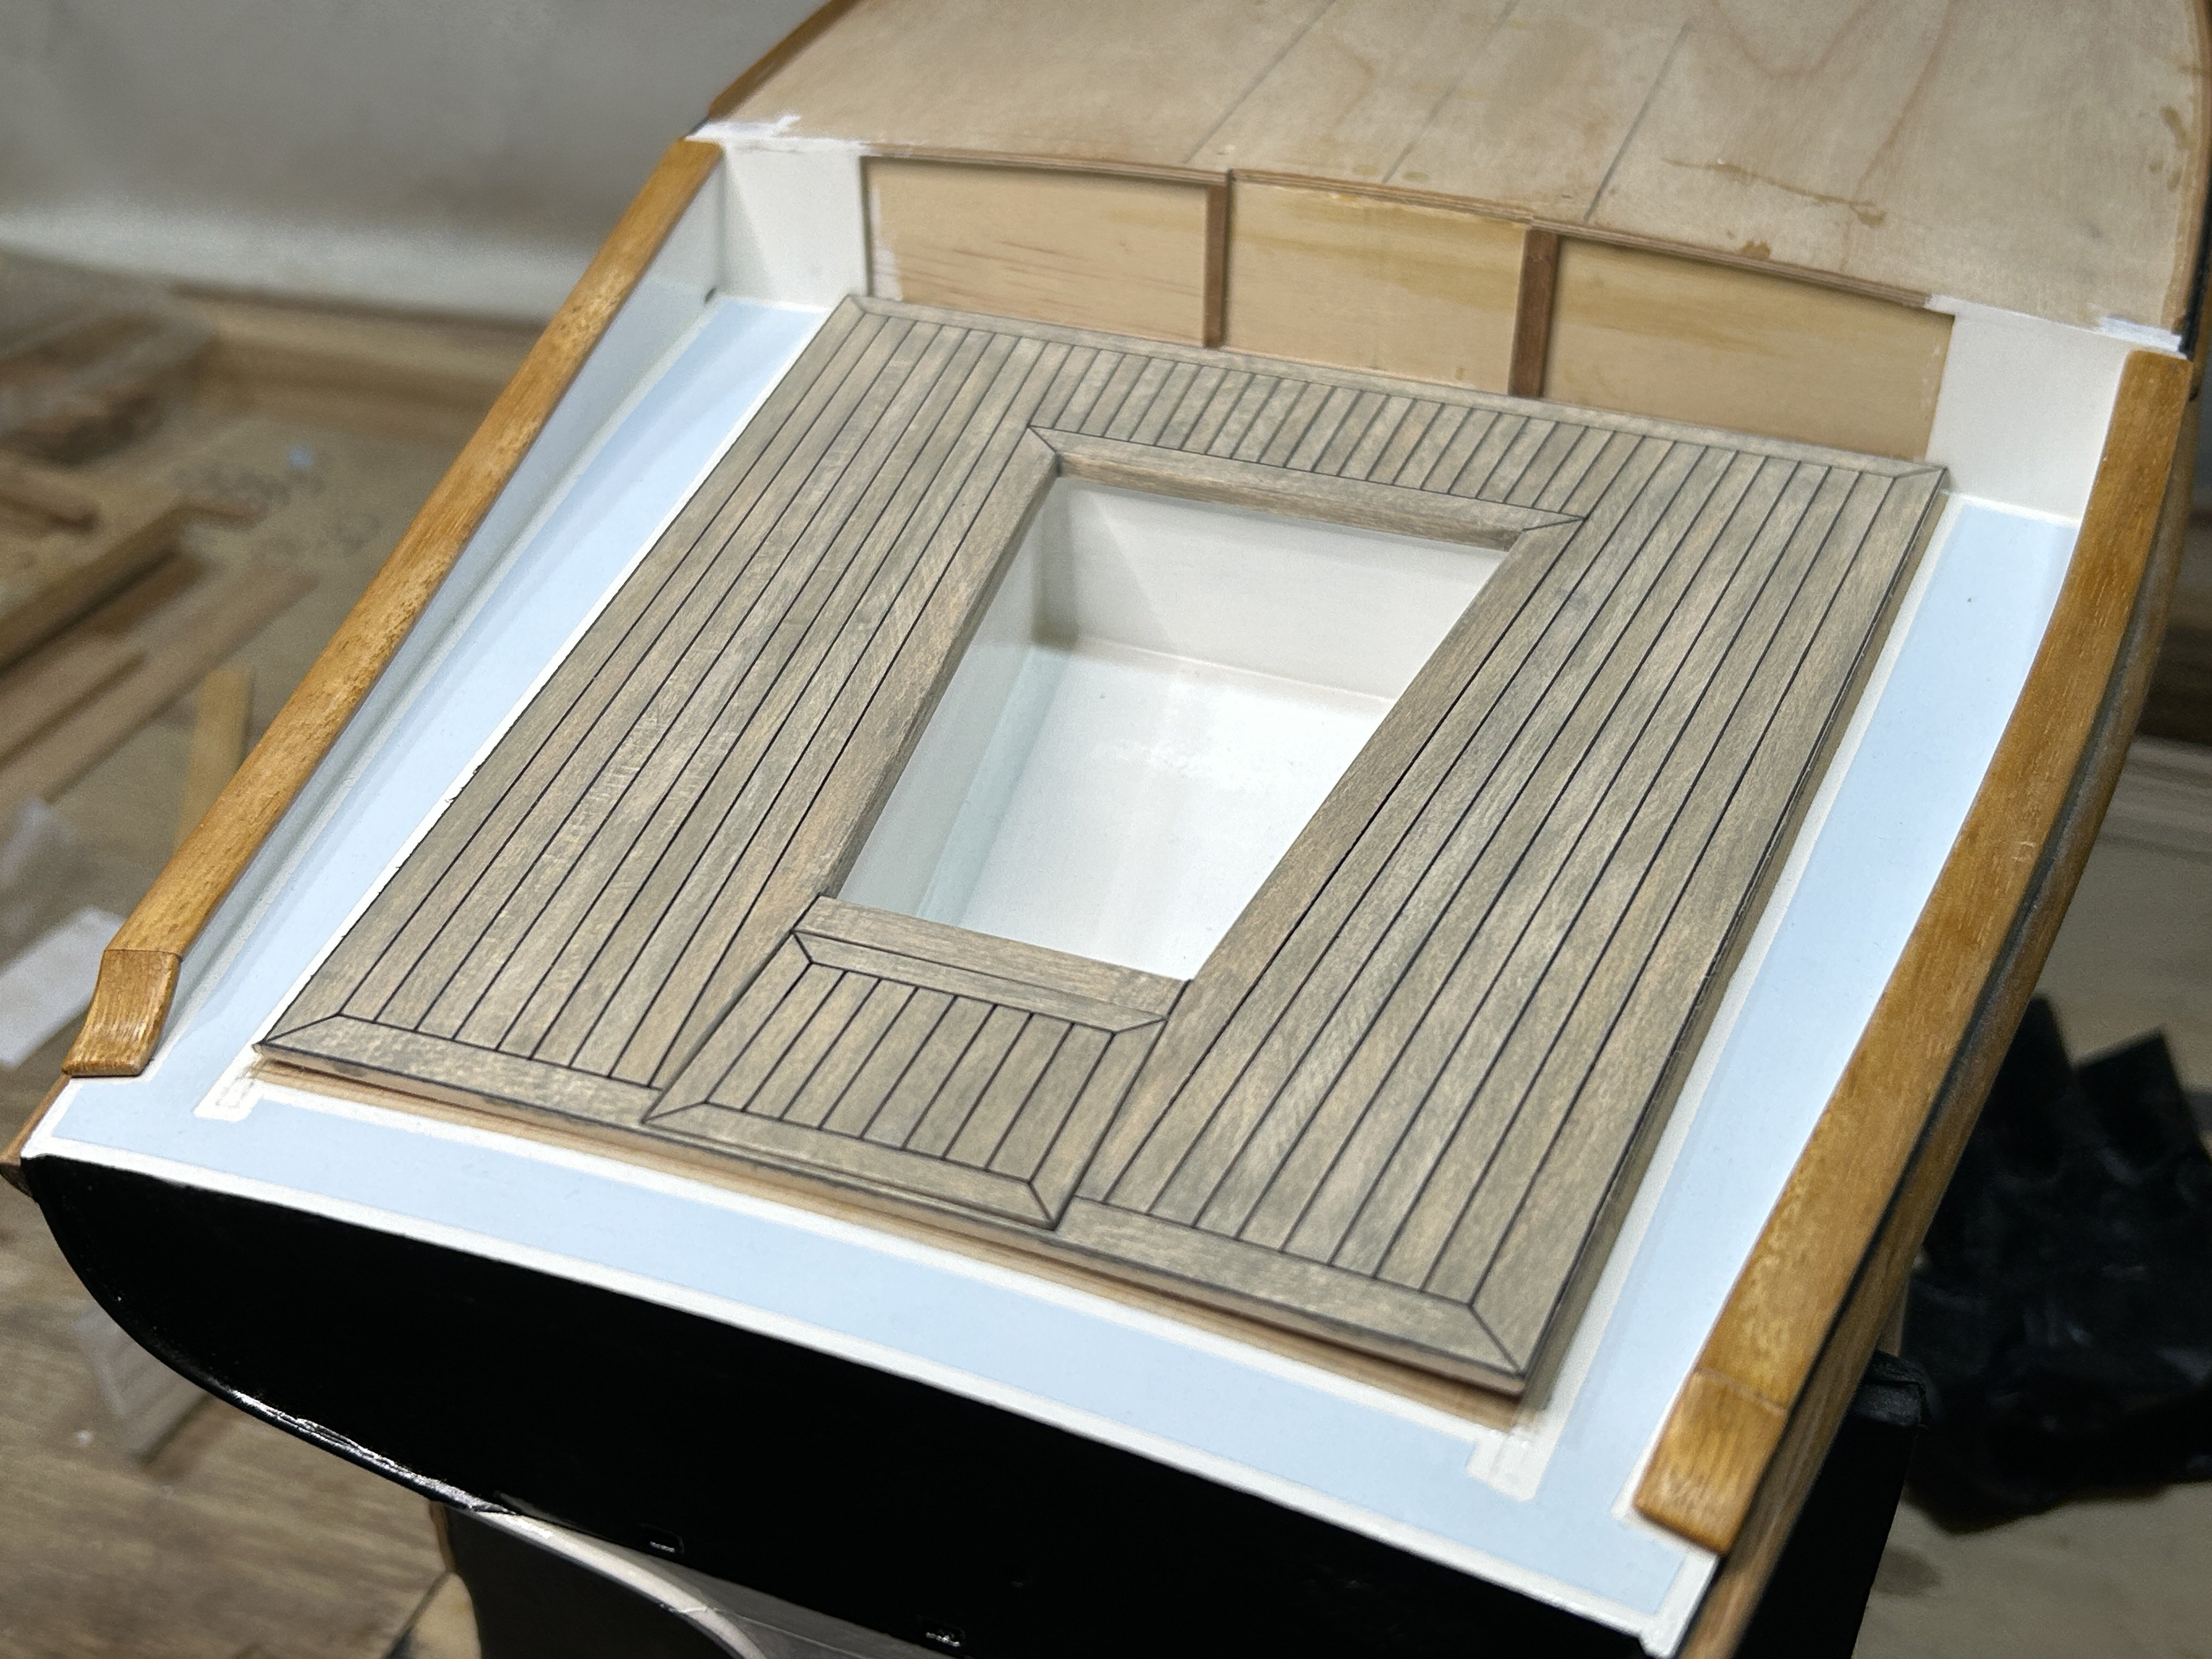
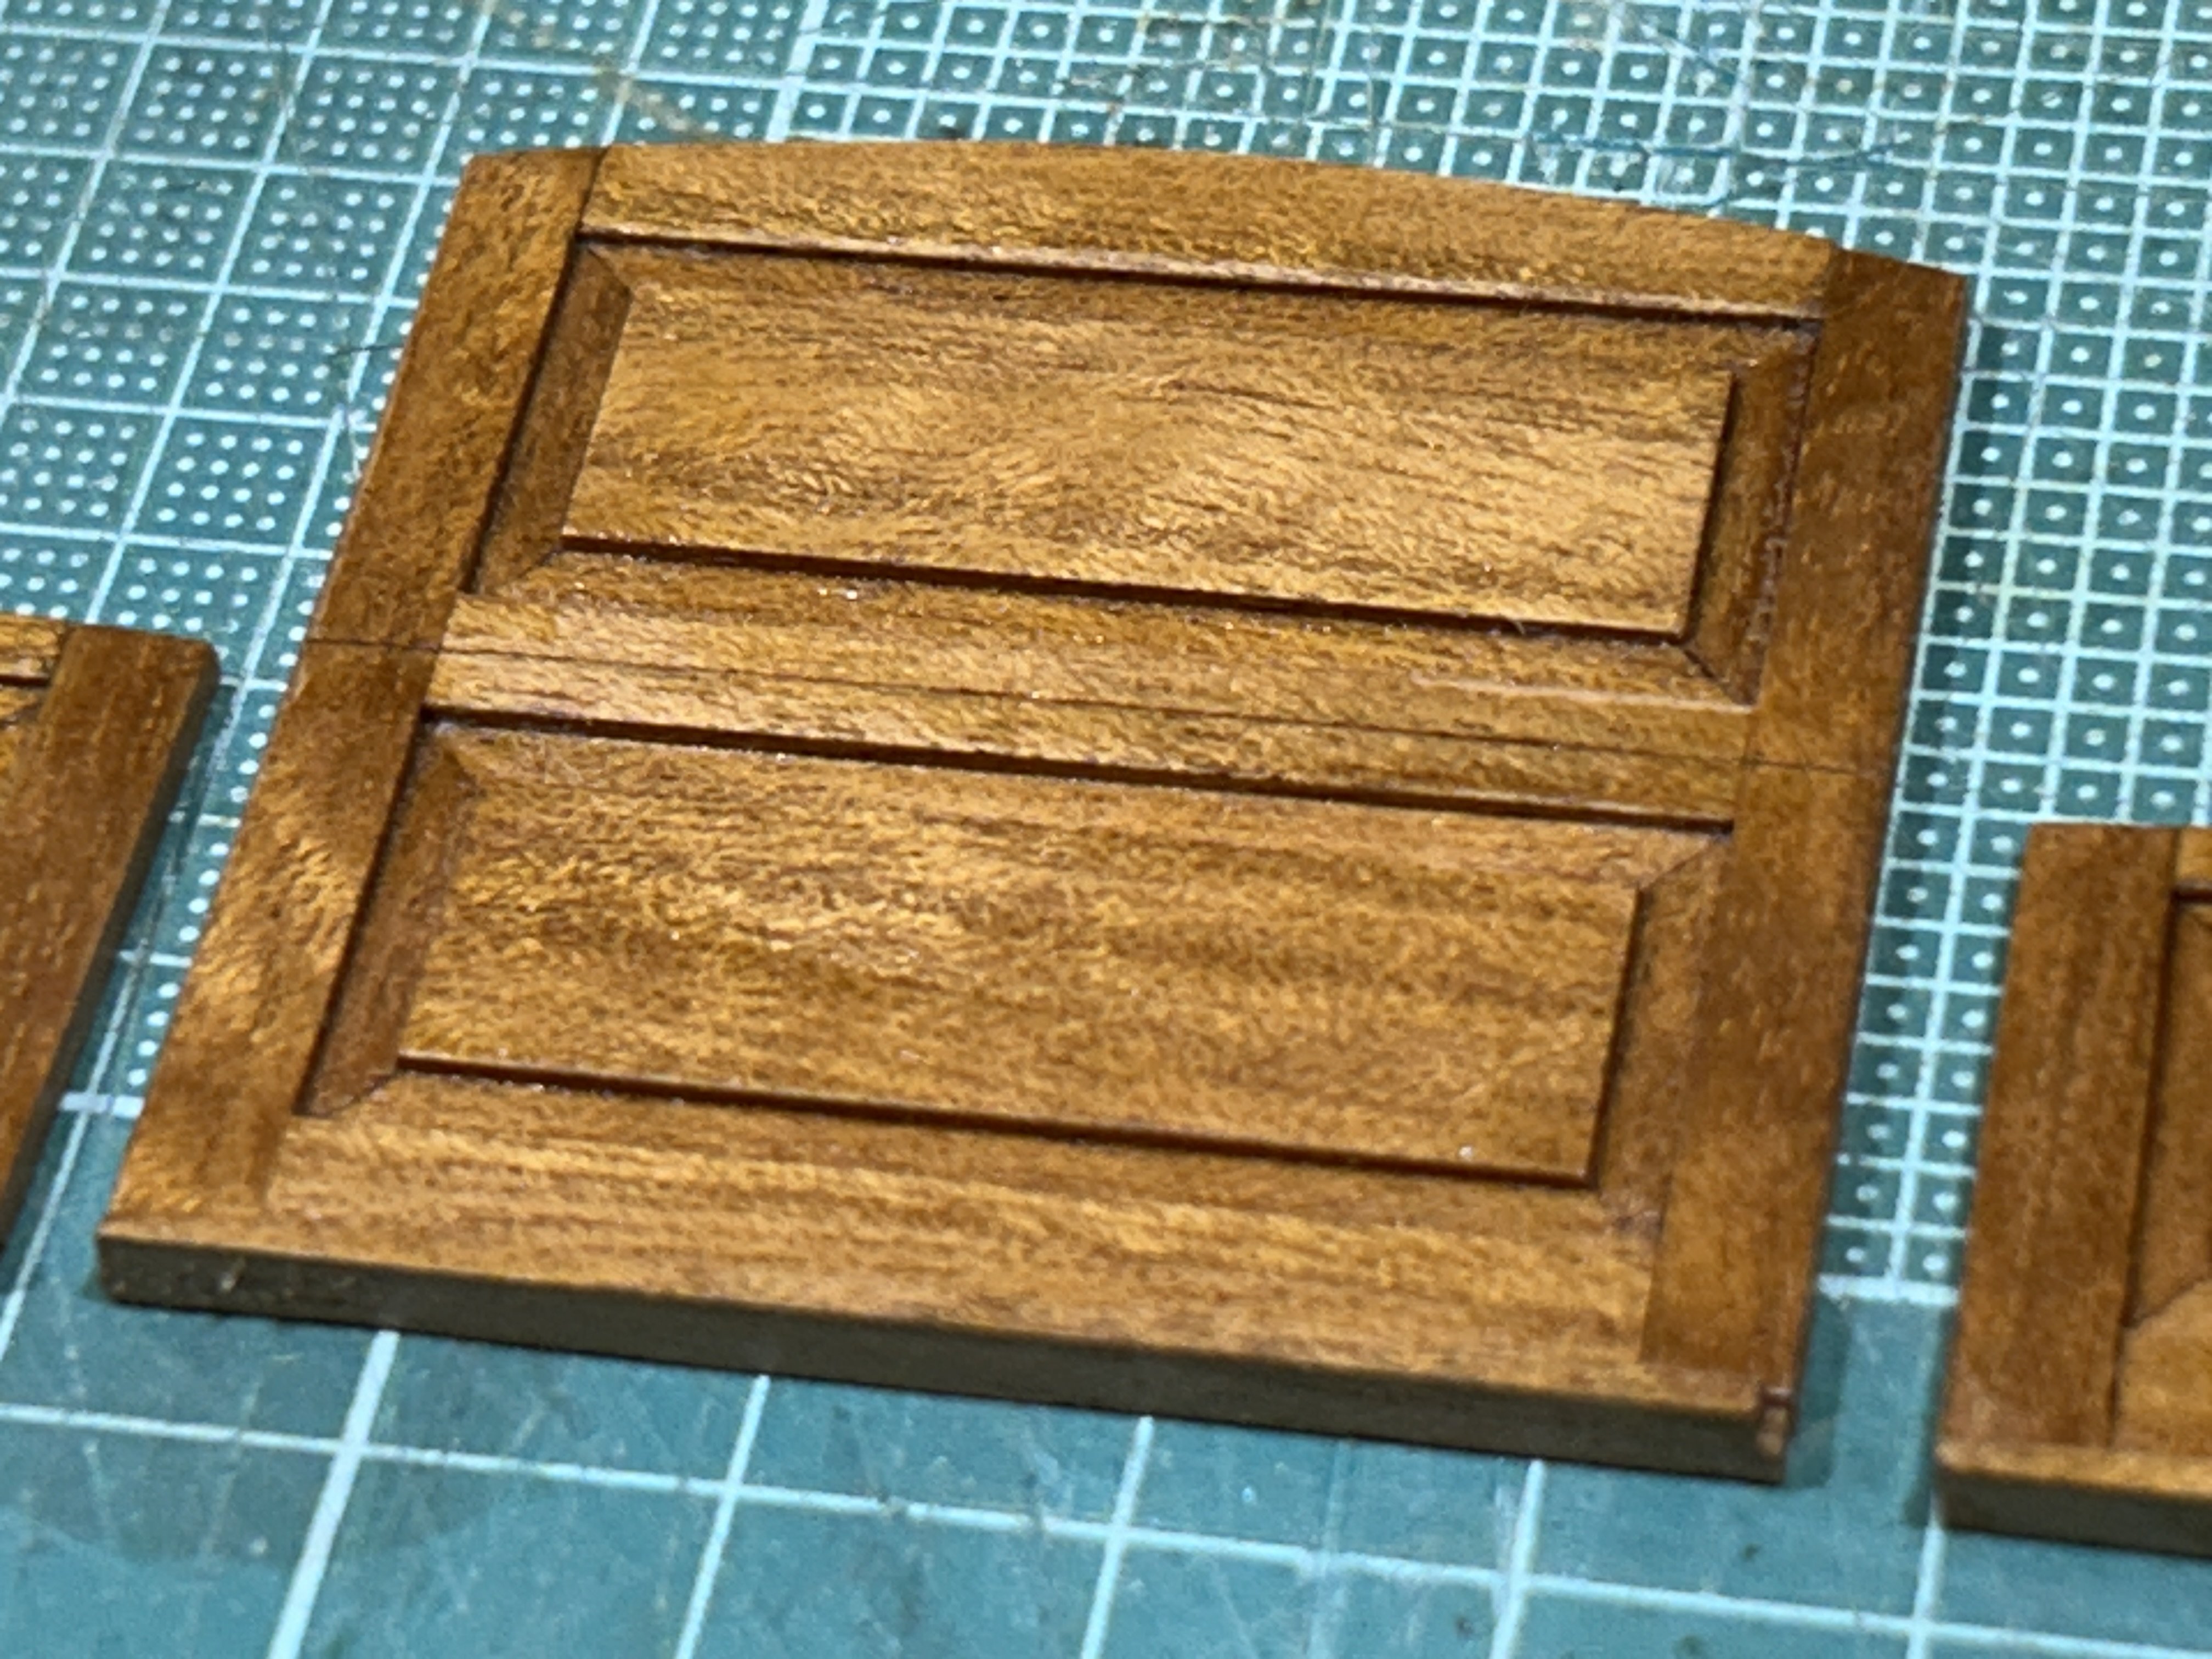
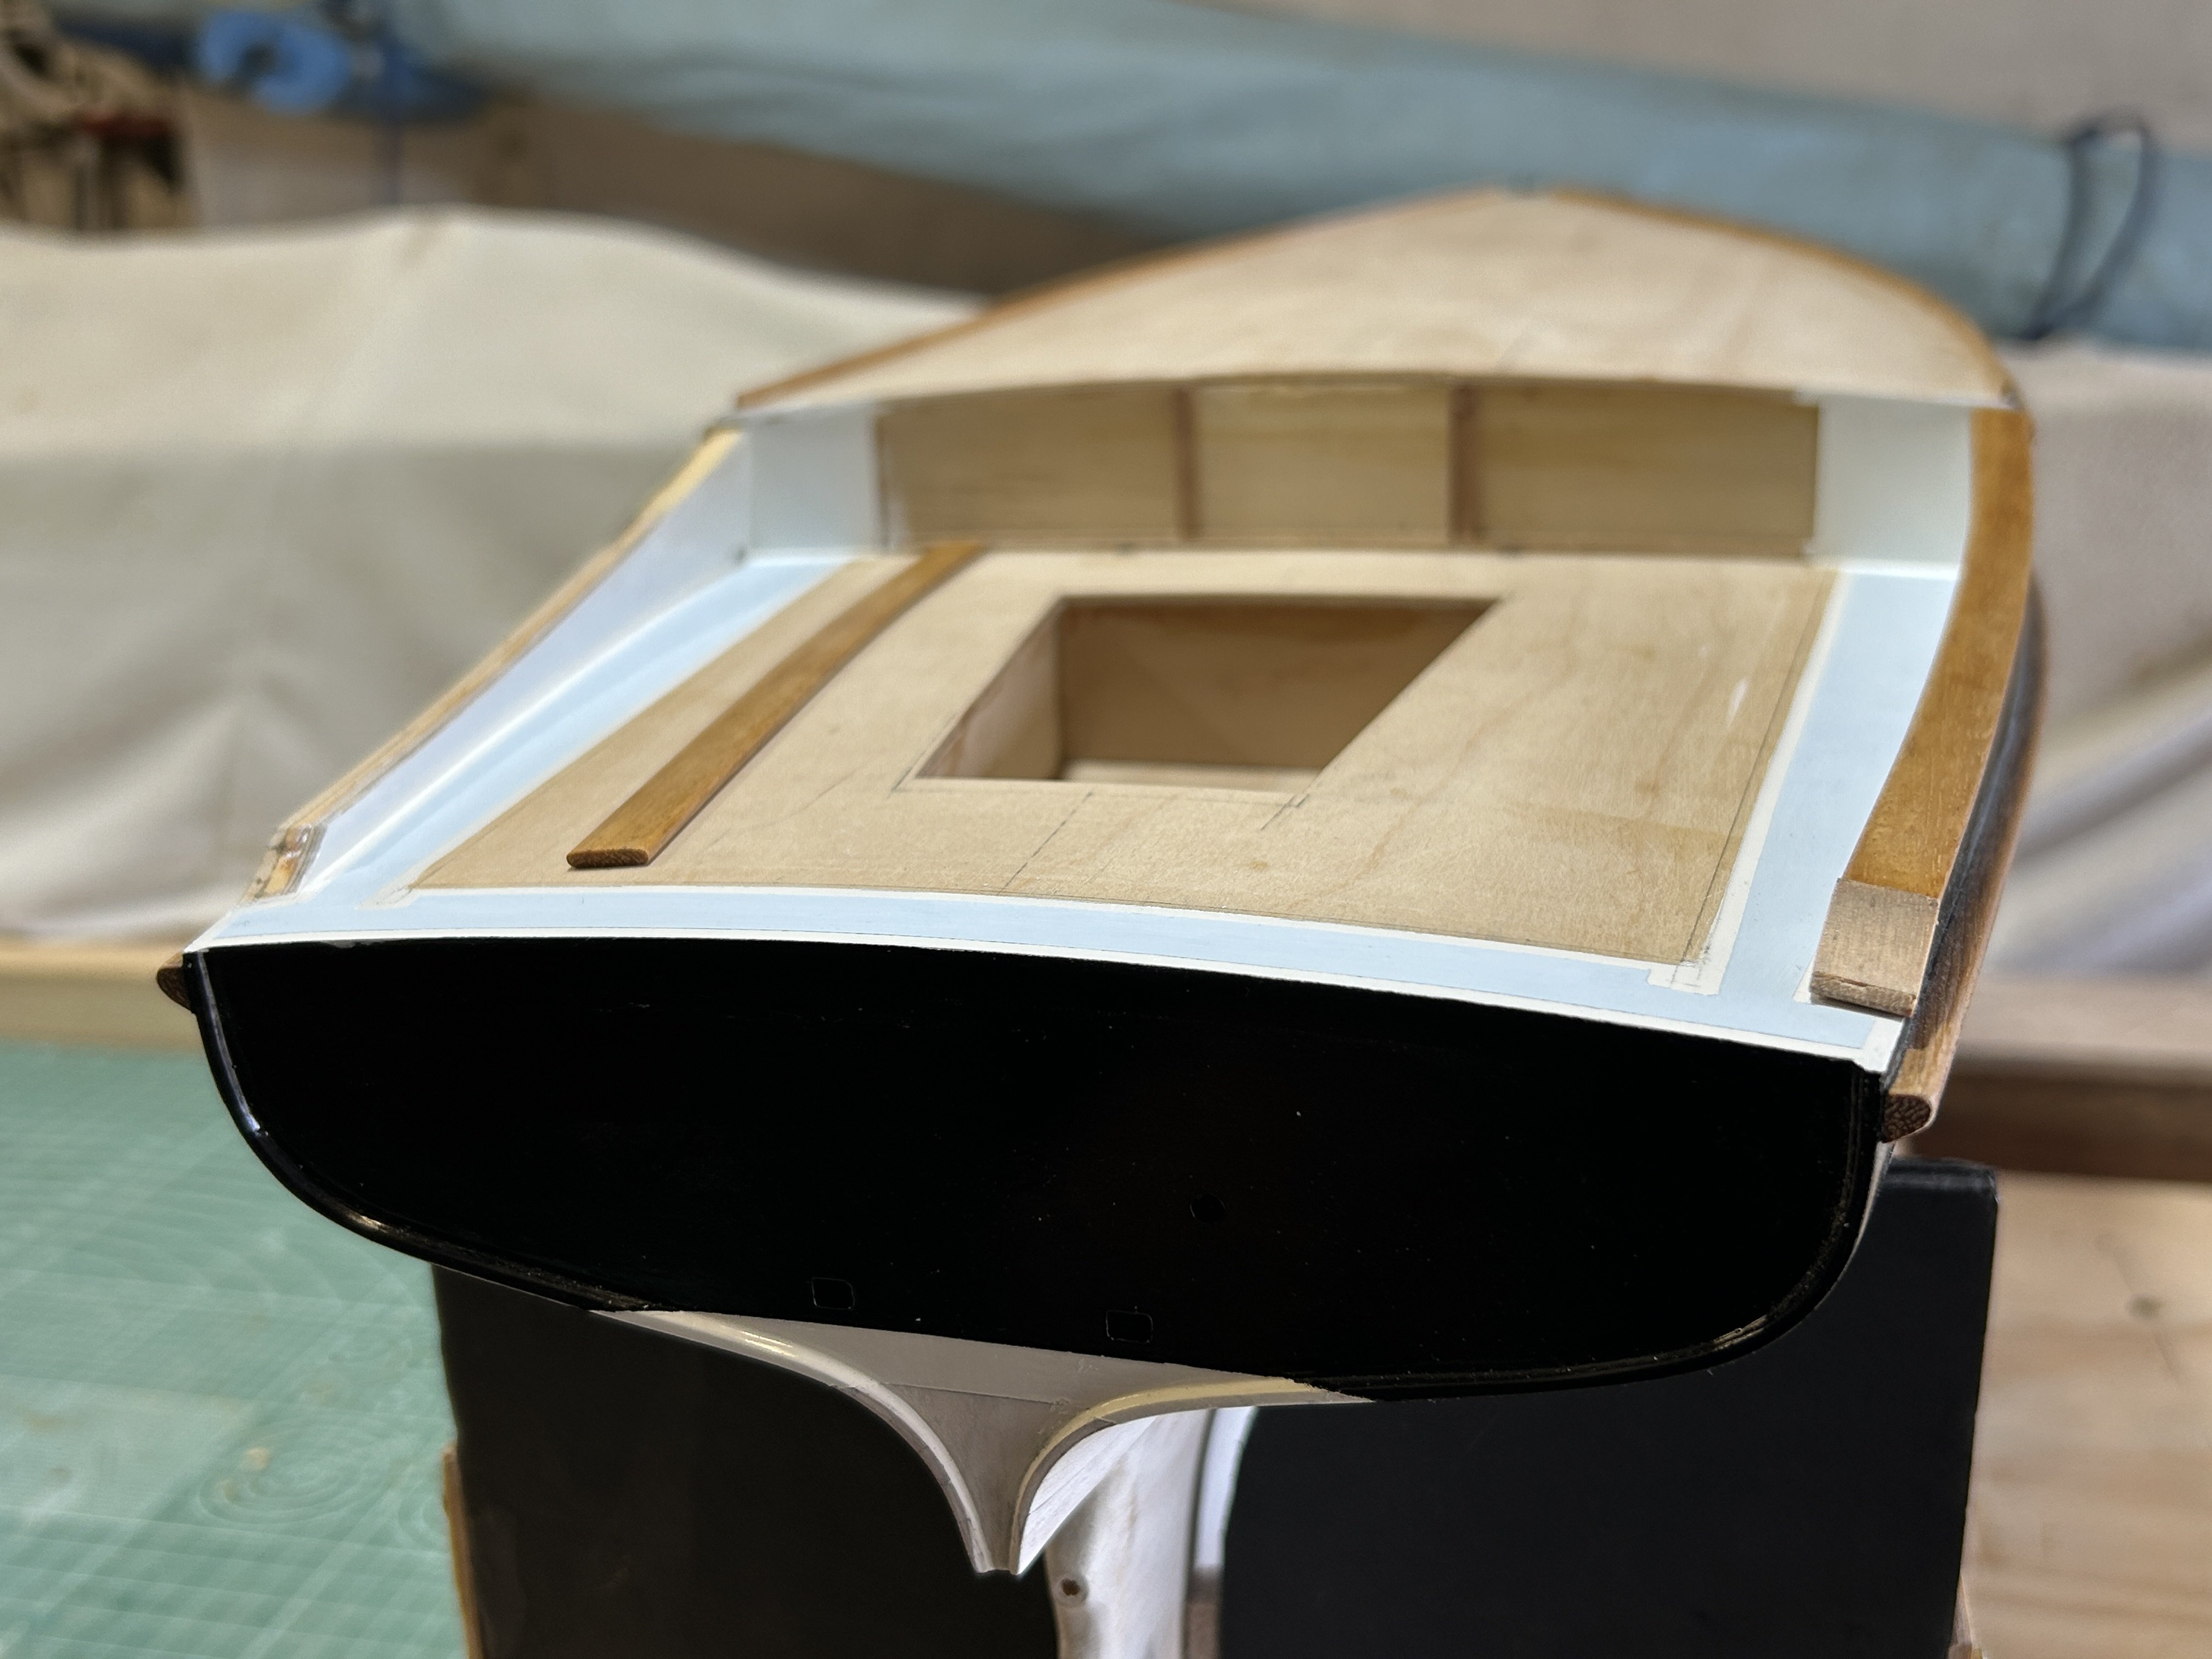
Since the last post, the cockpit sole was given the weathering treatment. The seat backrests are made but won't go on yet as they will restrict access for other pieces.
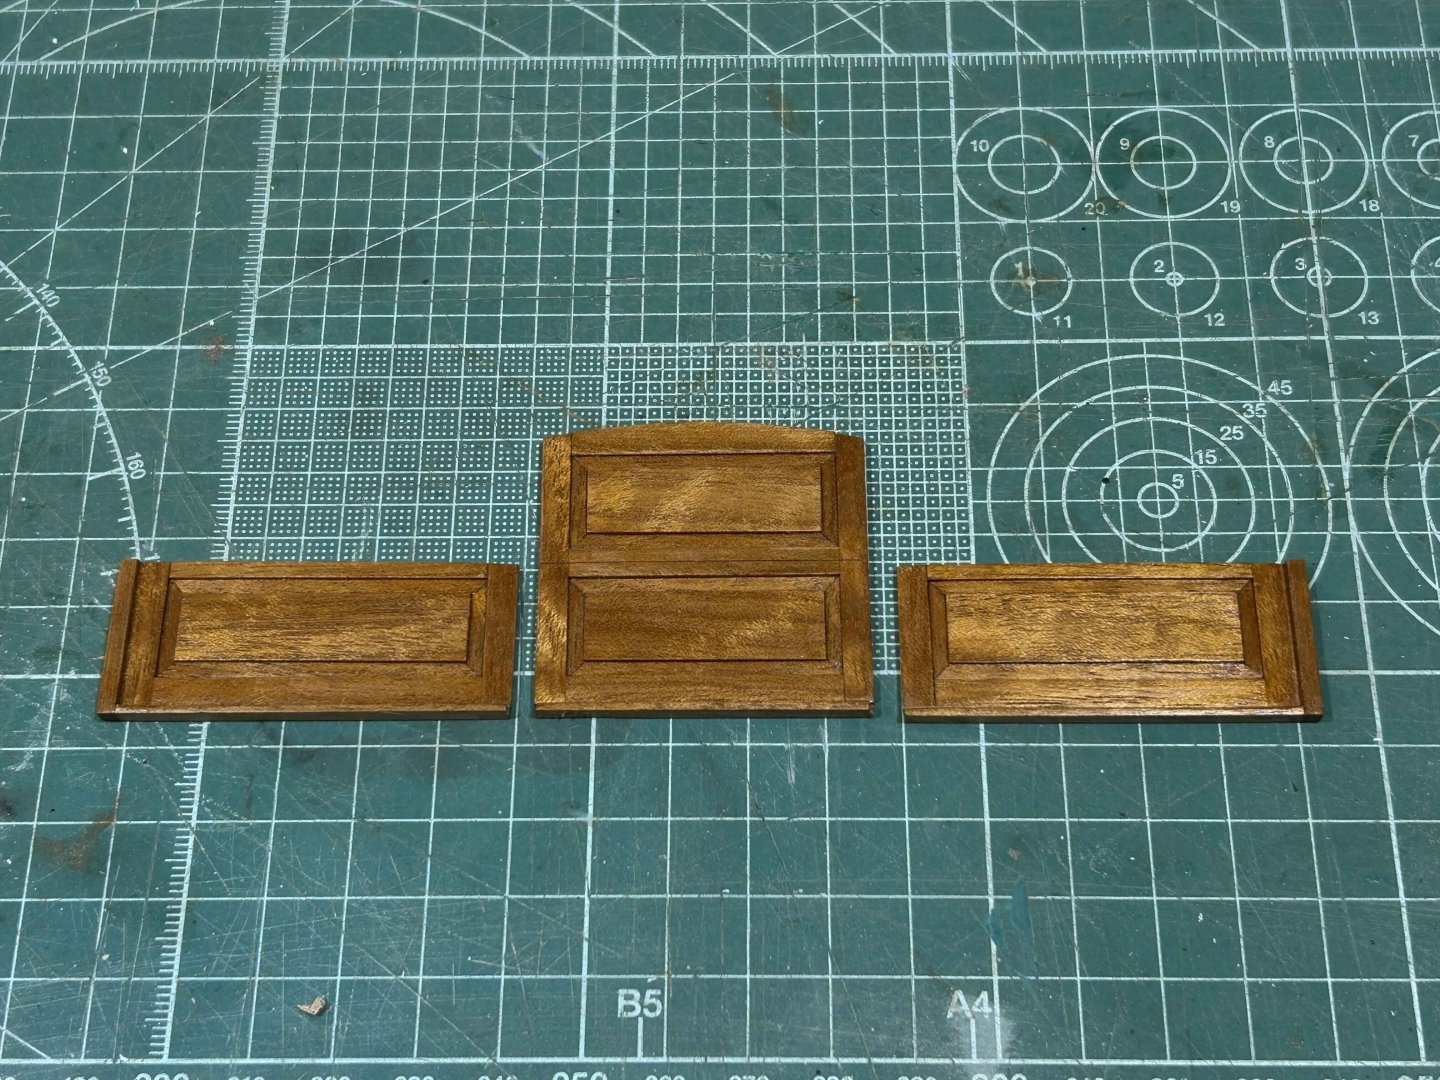
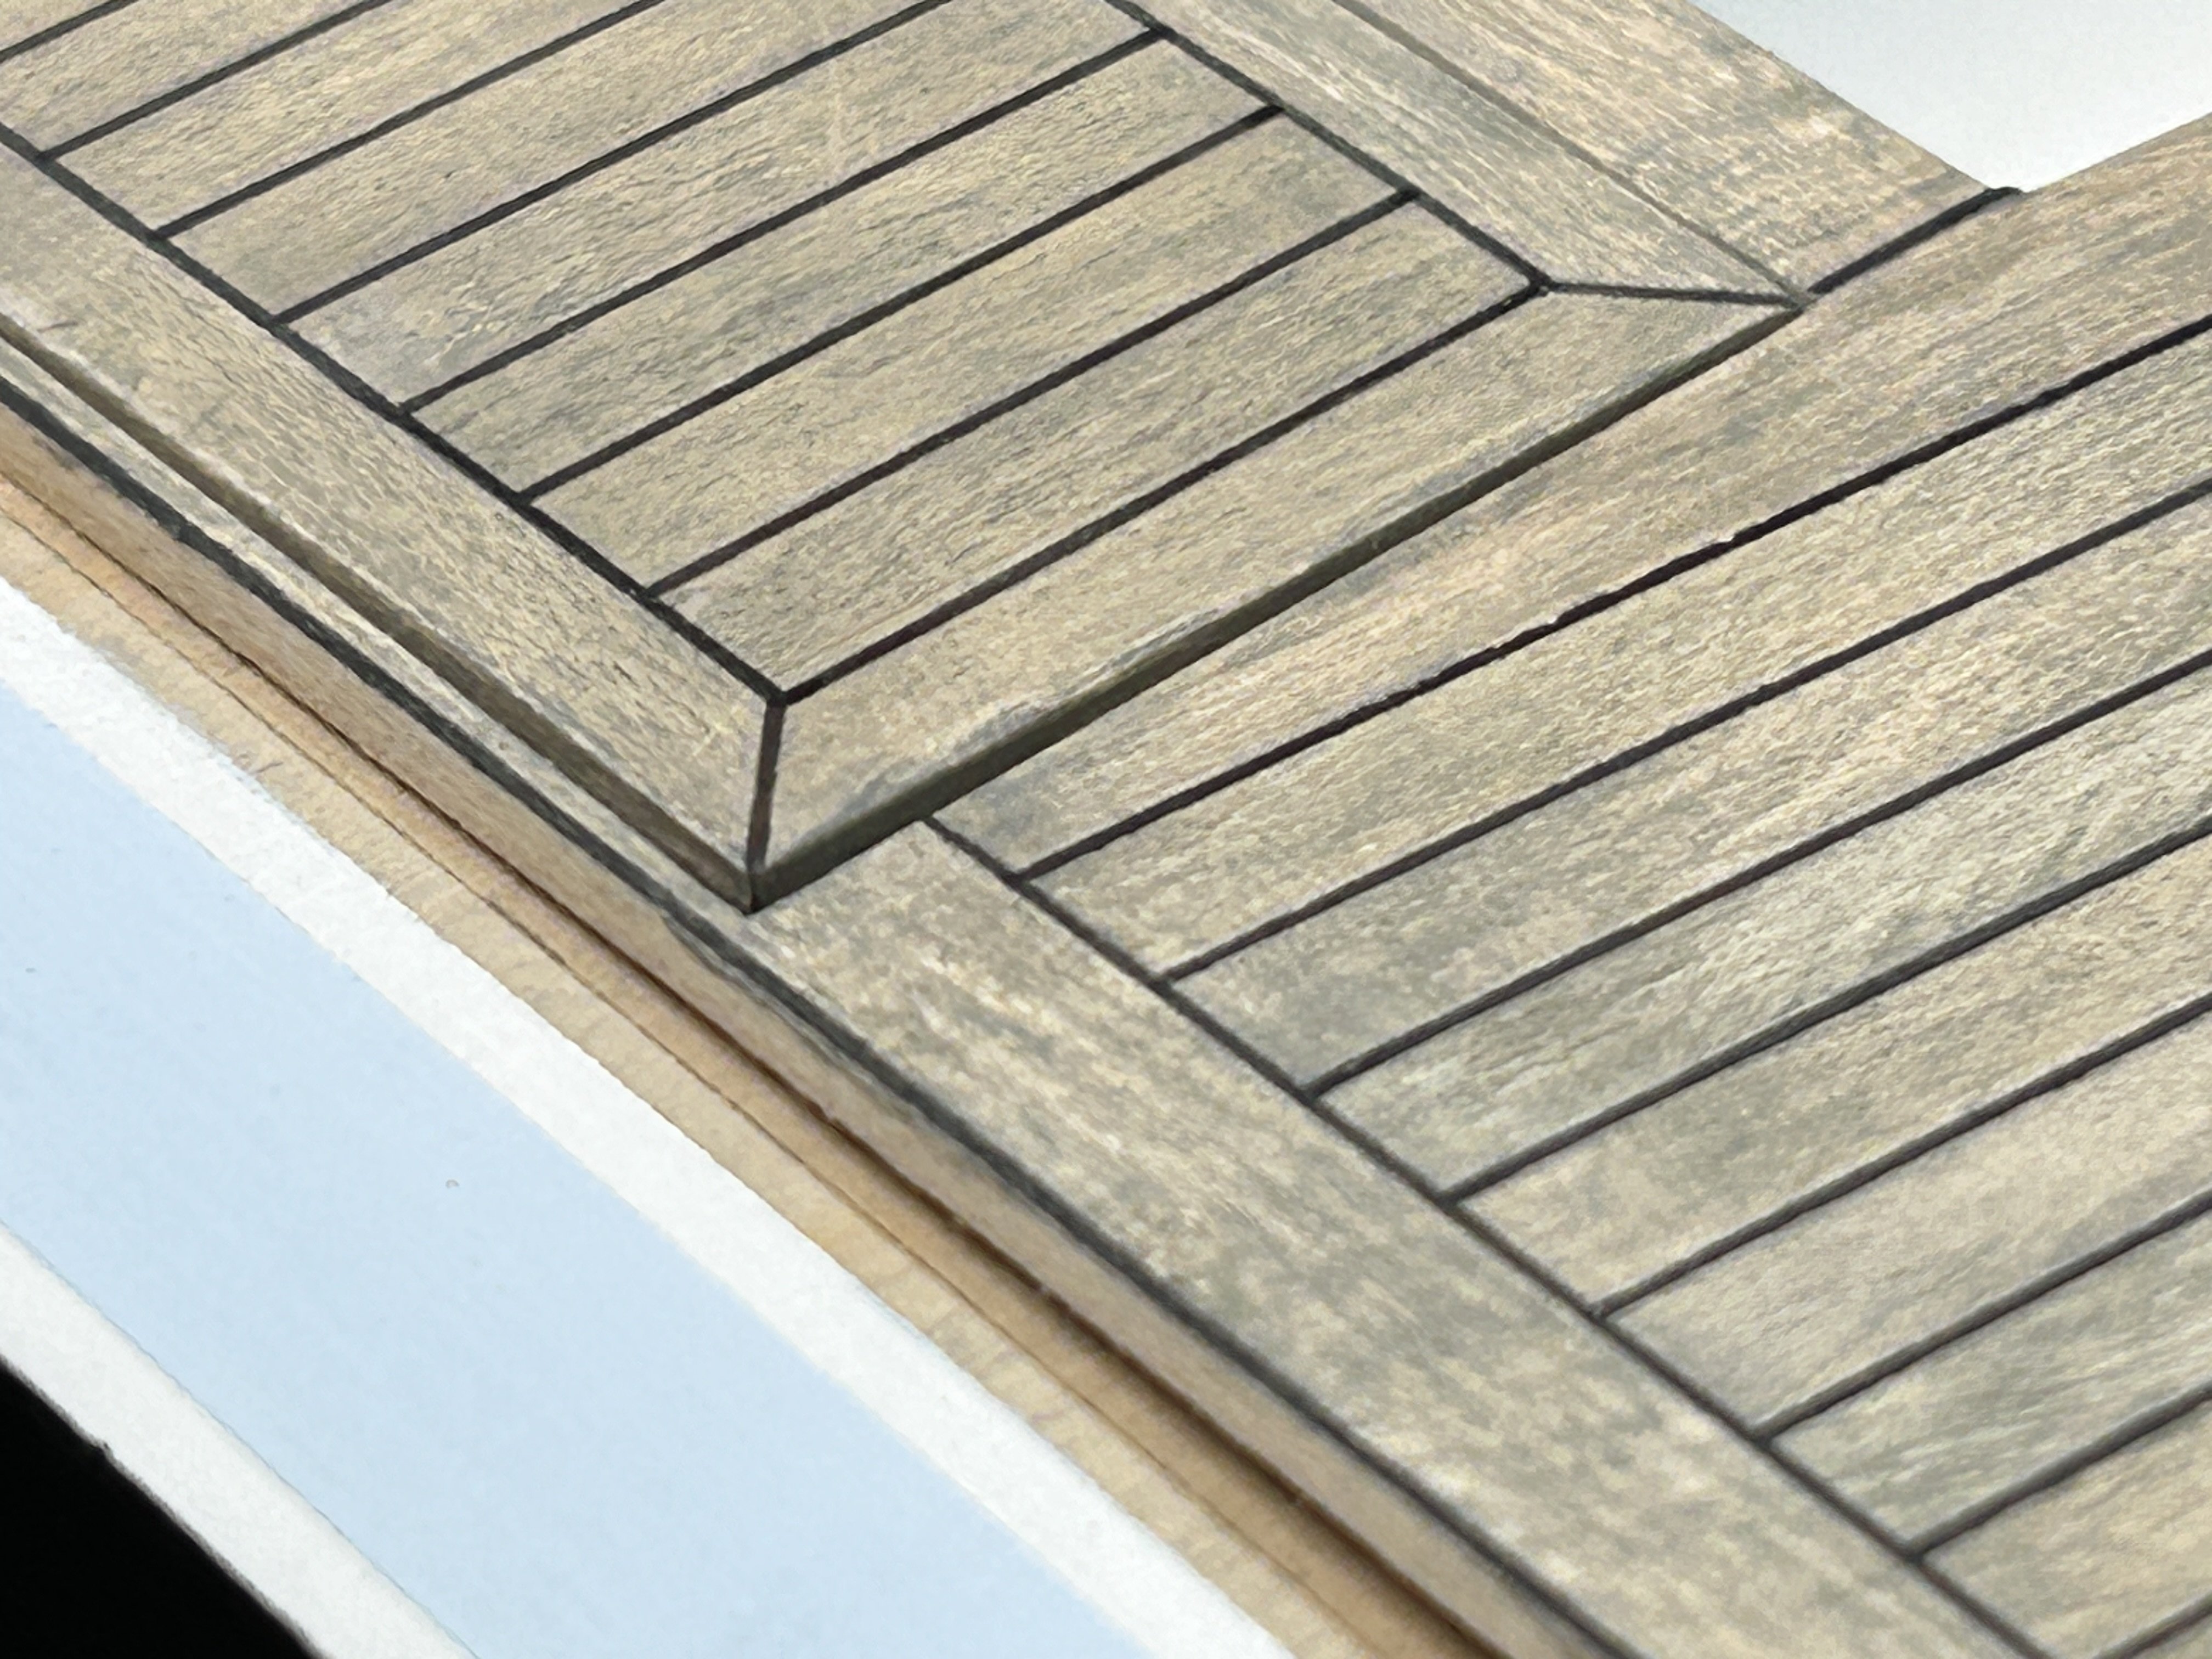
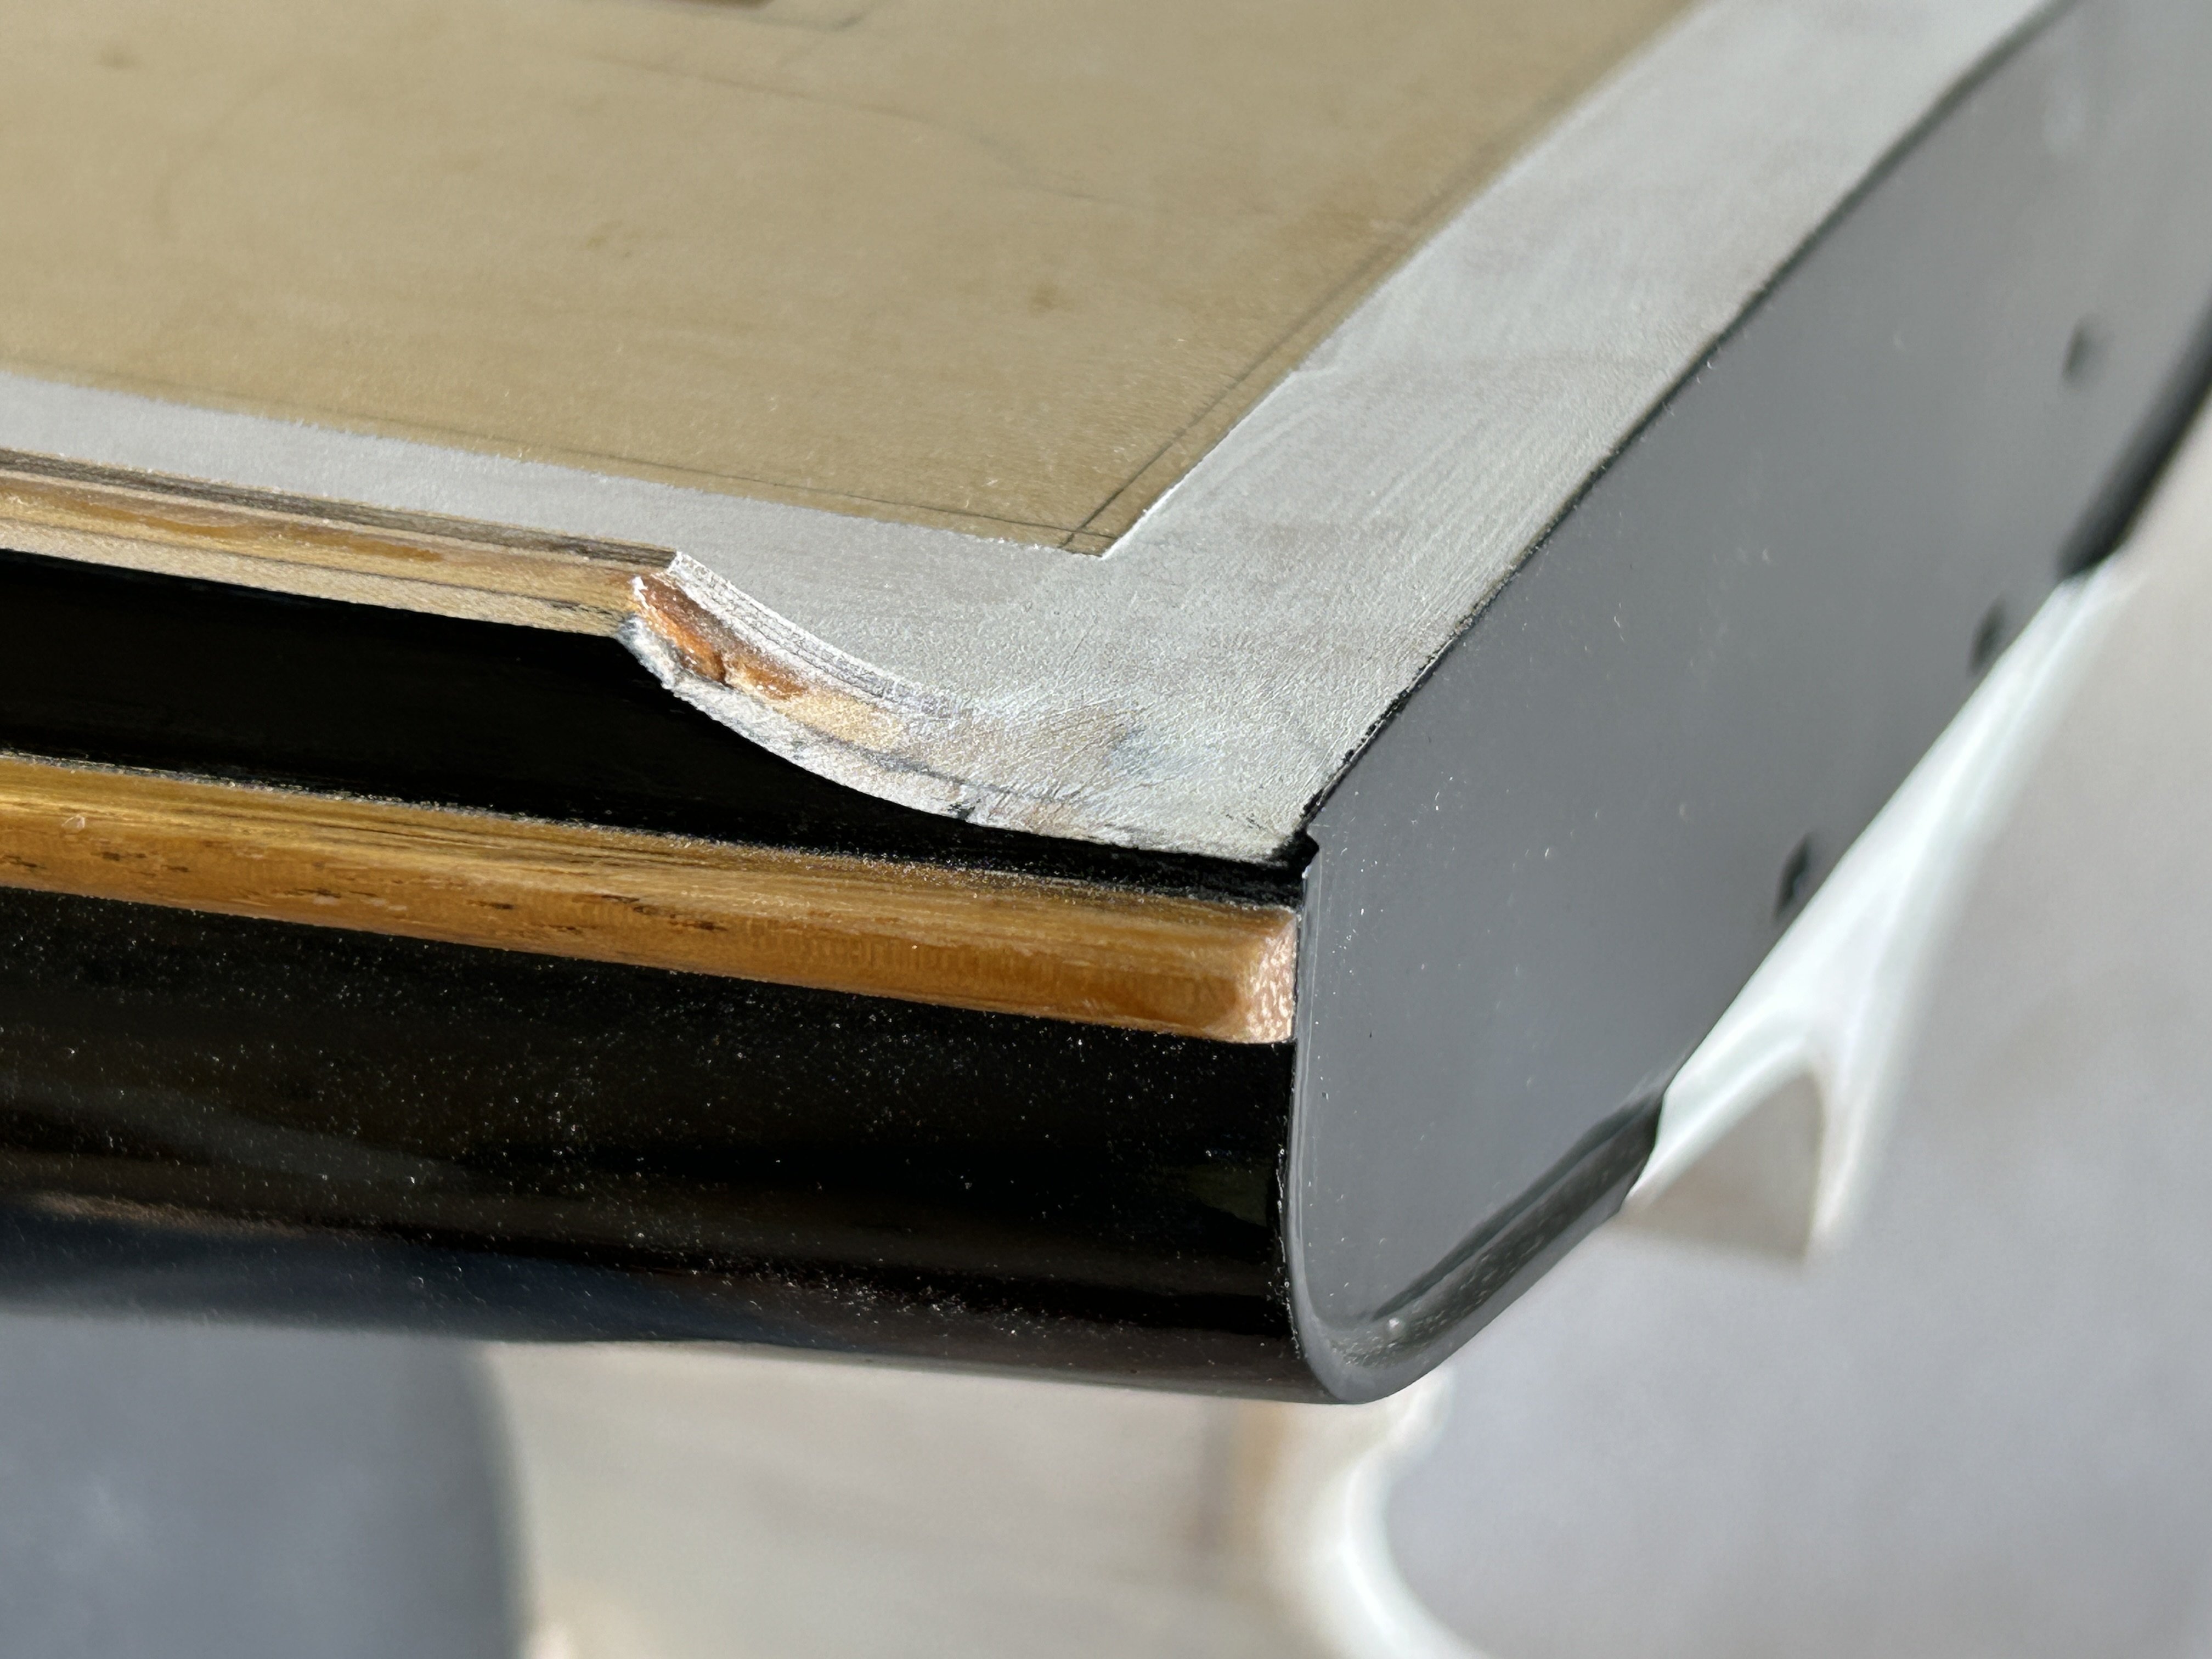
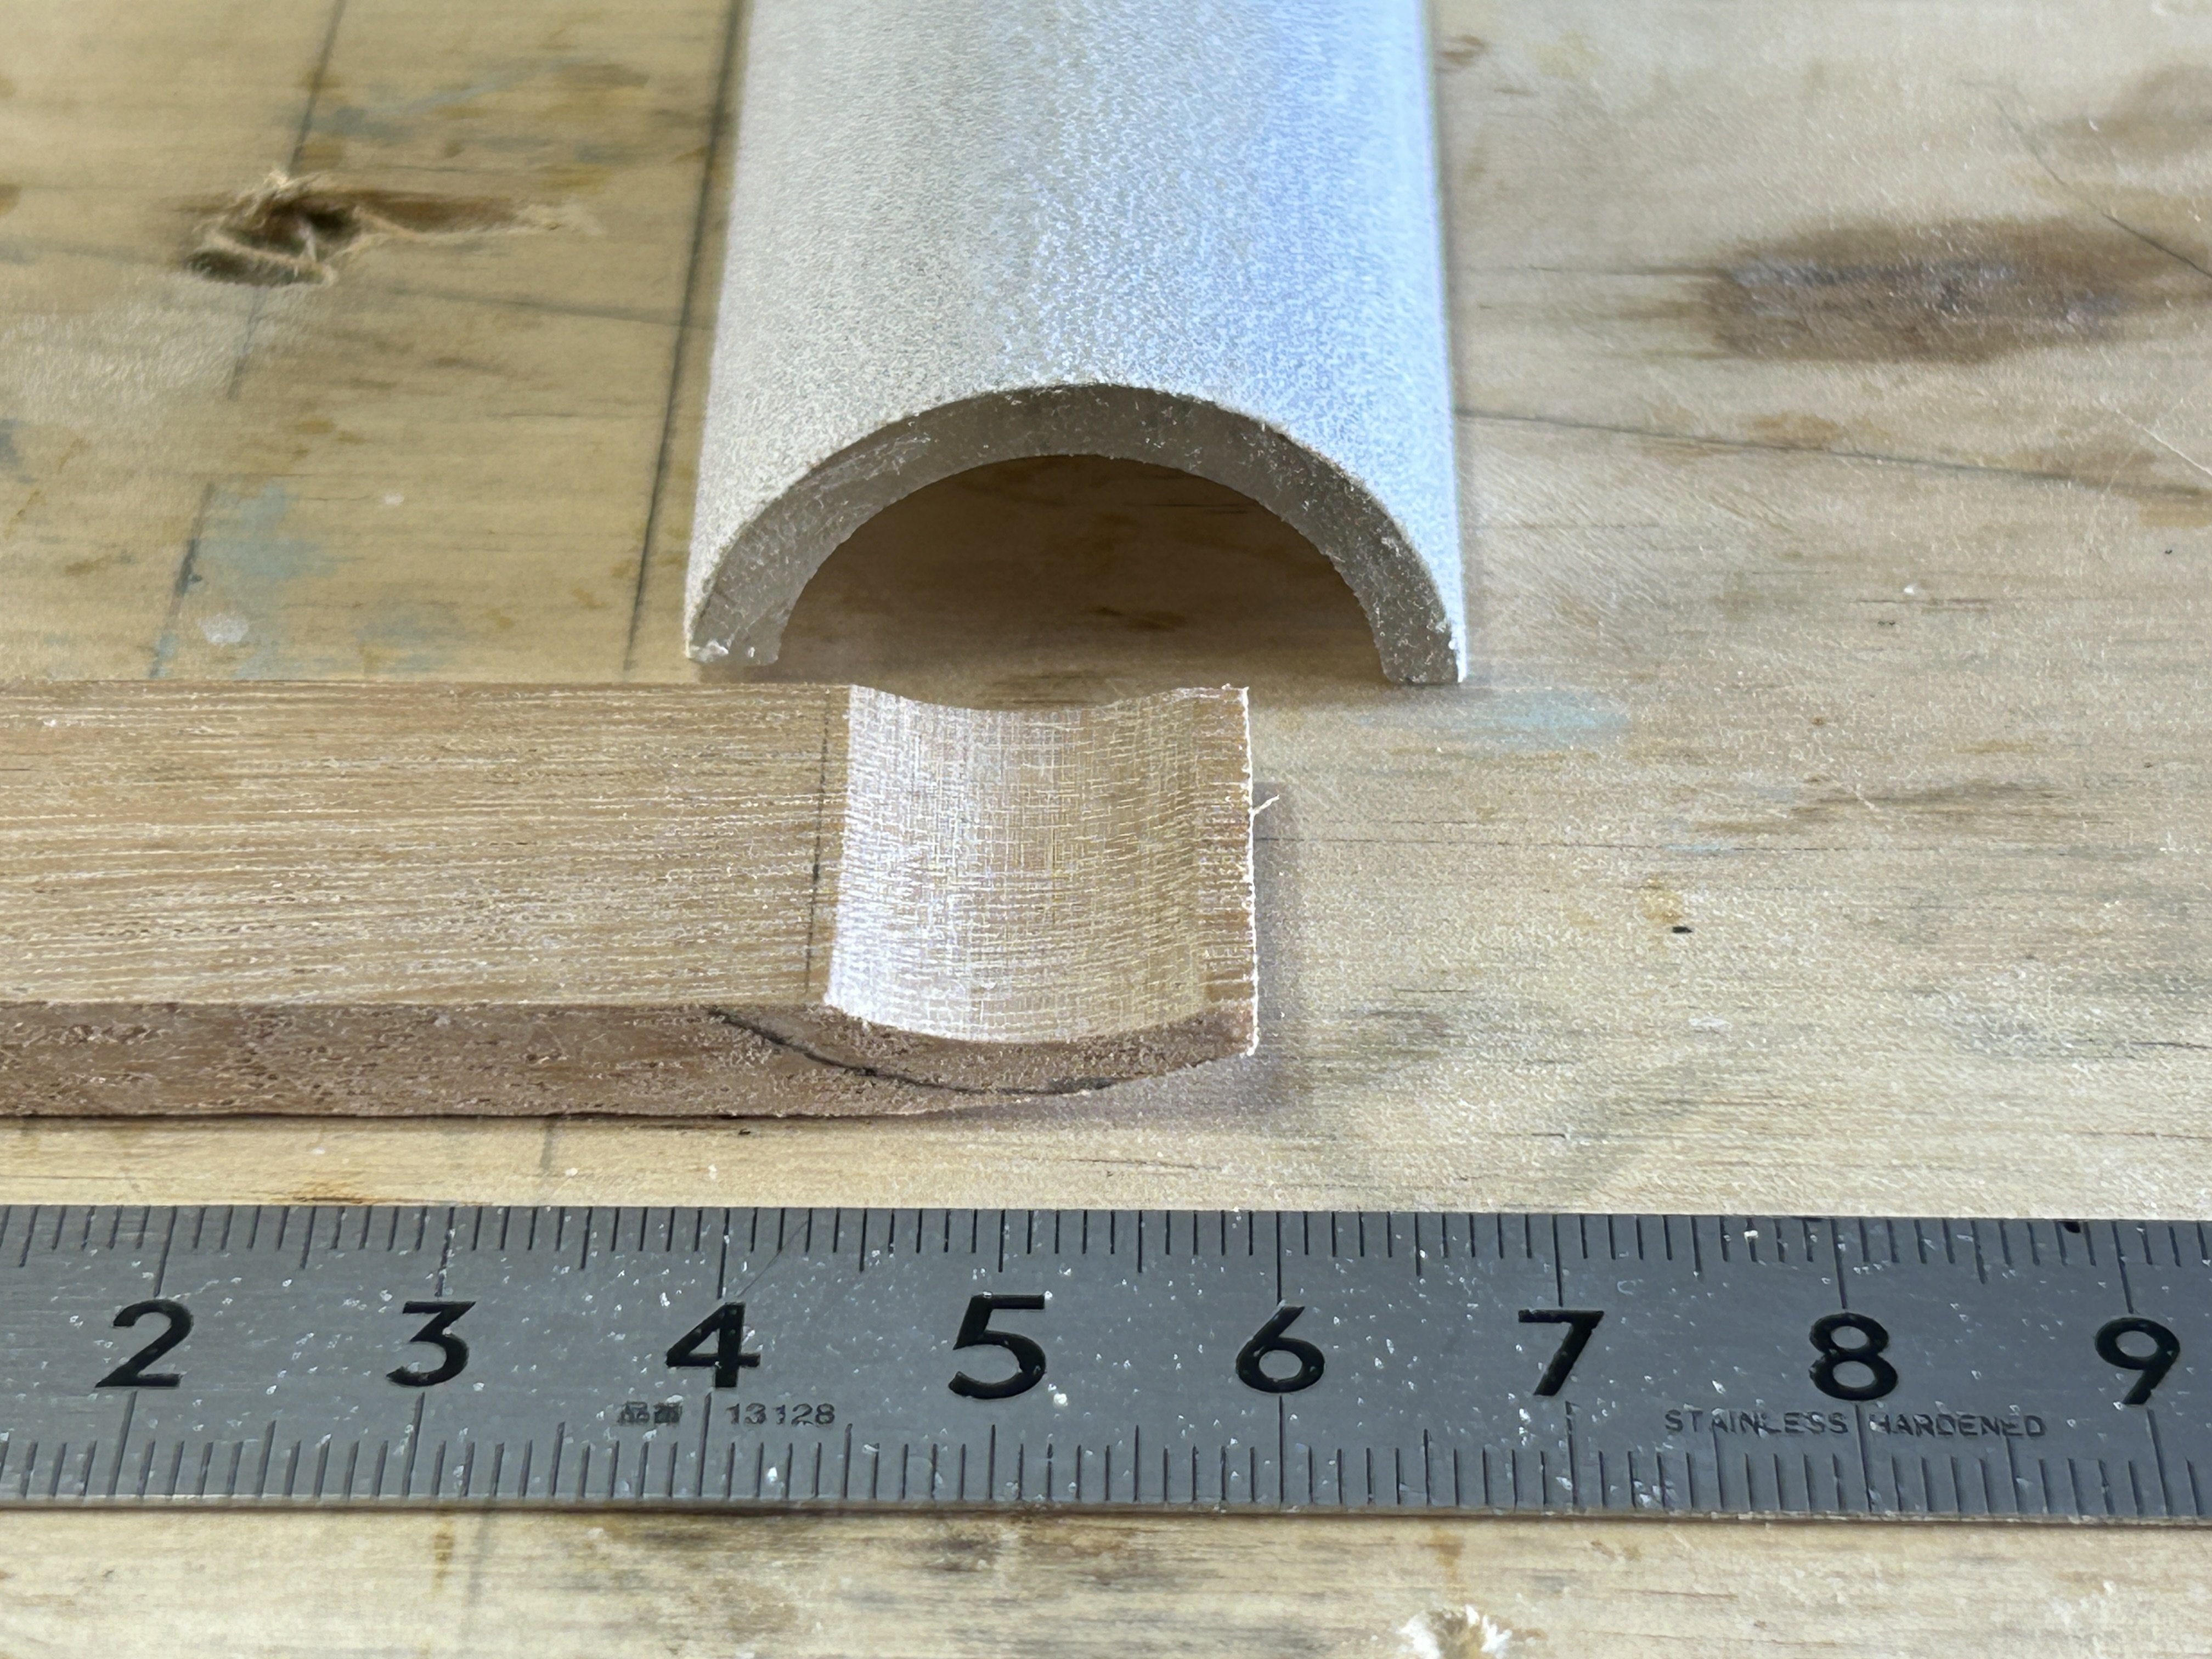
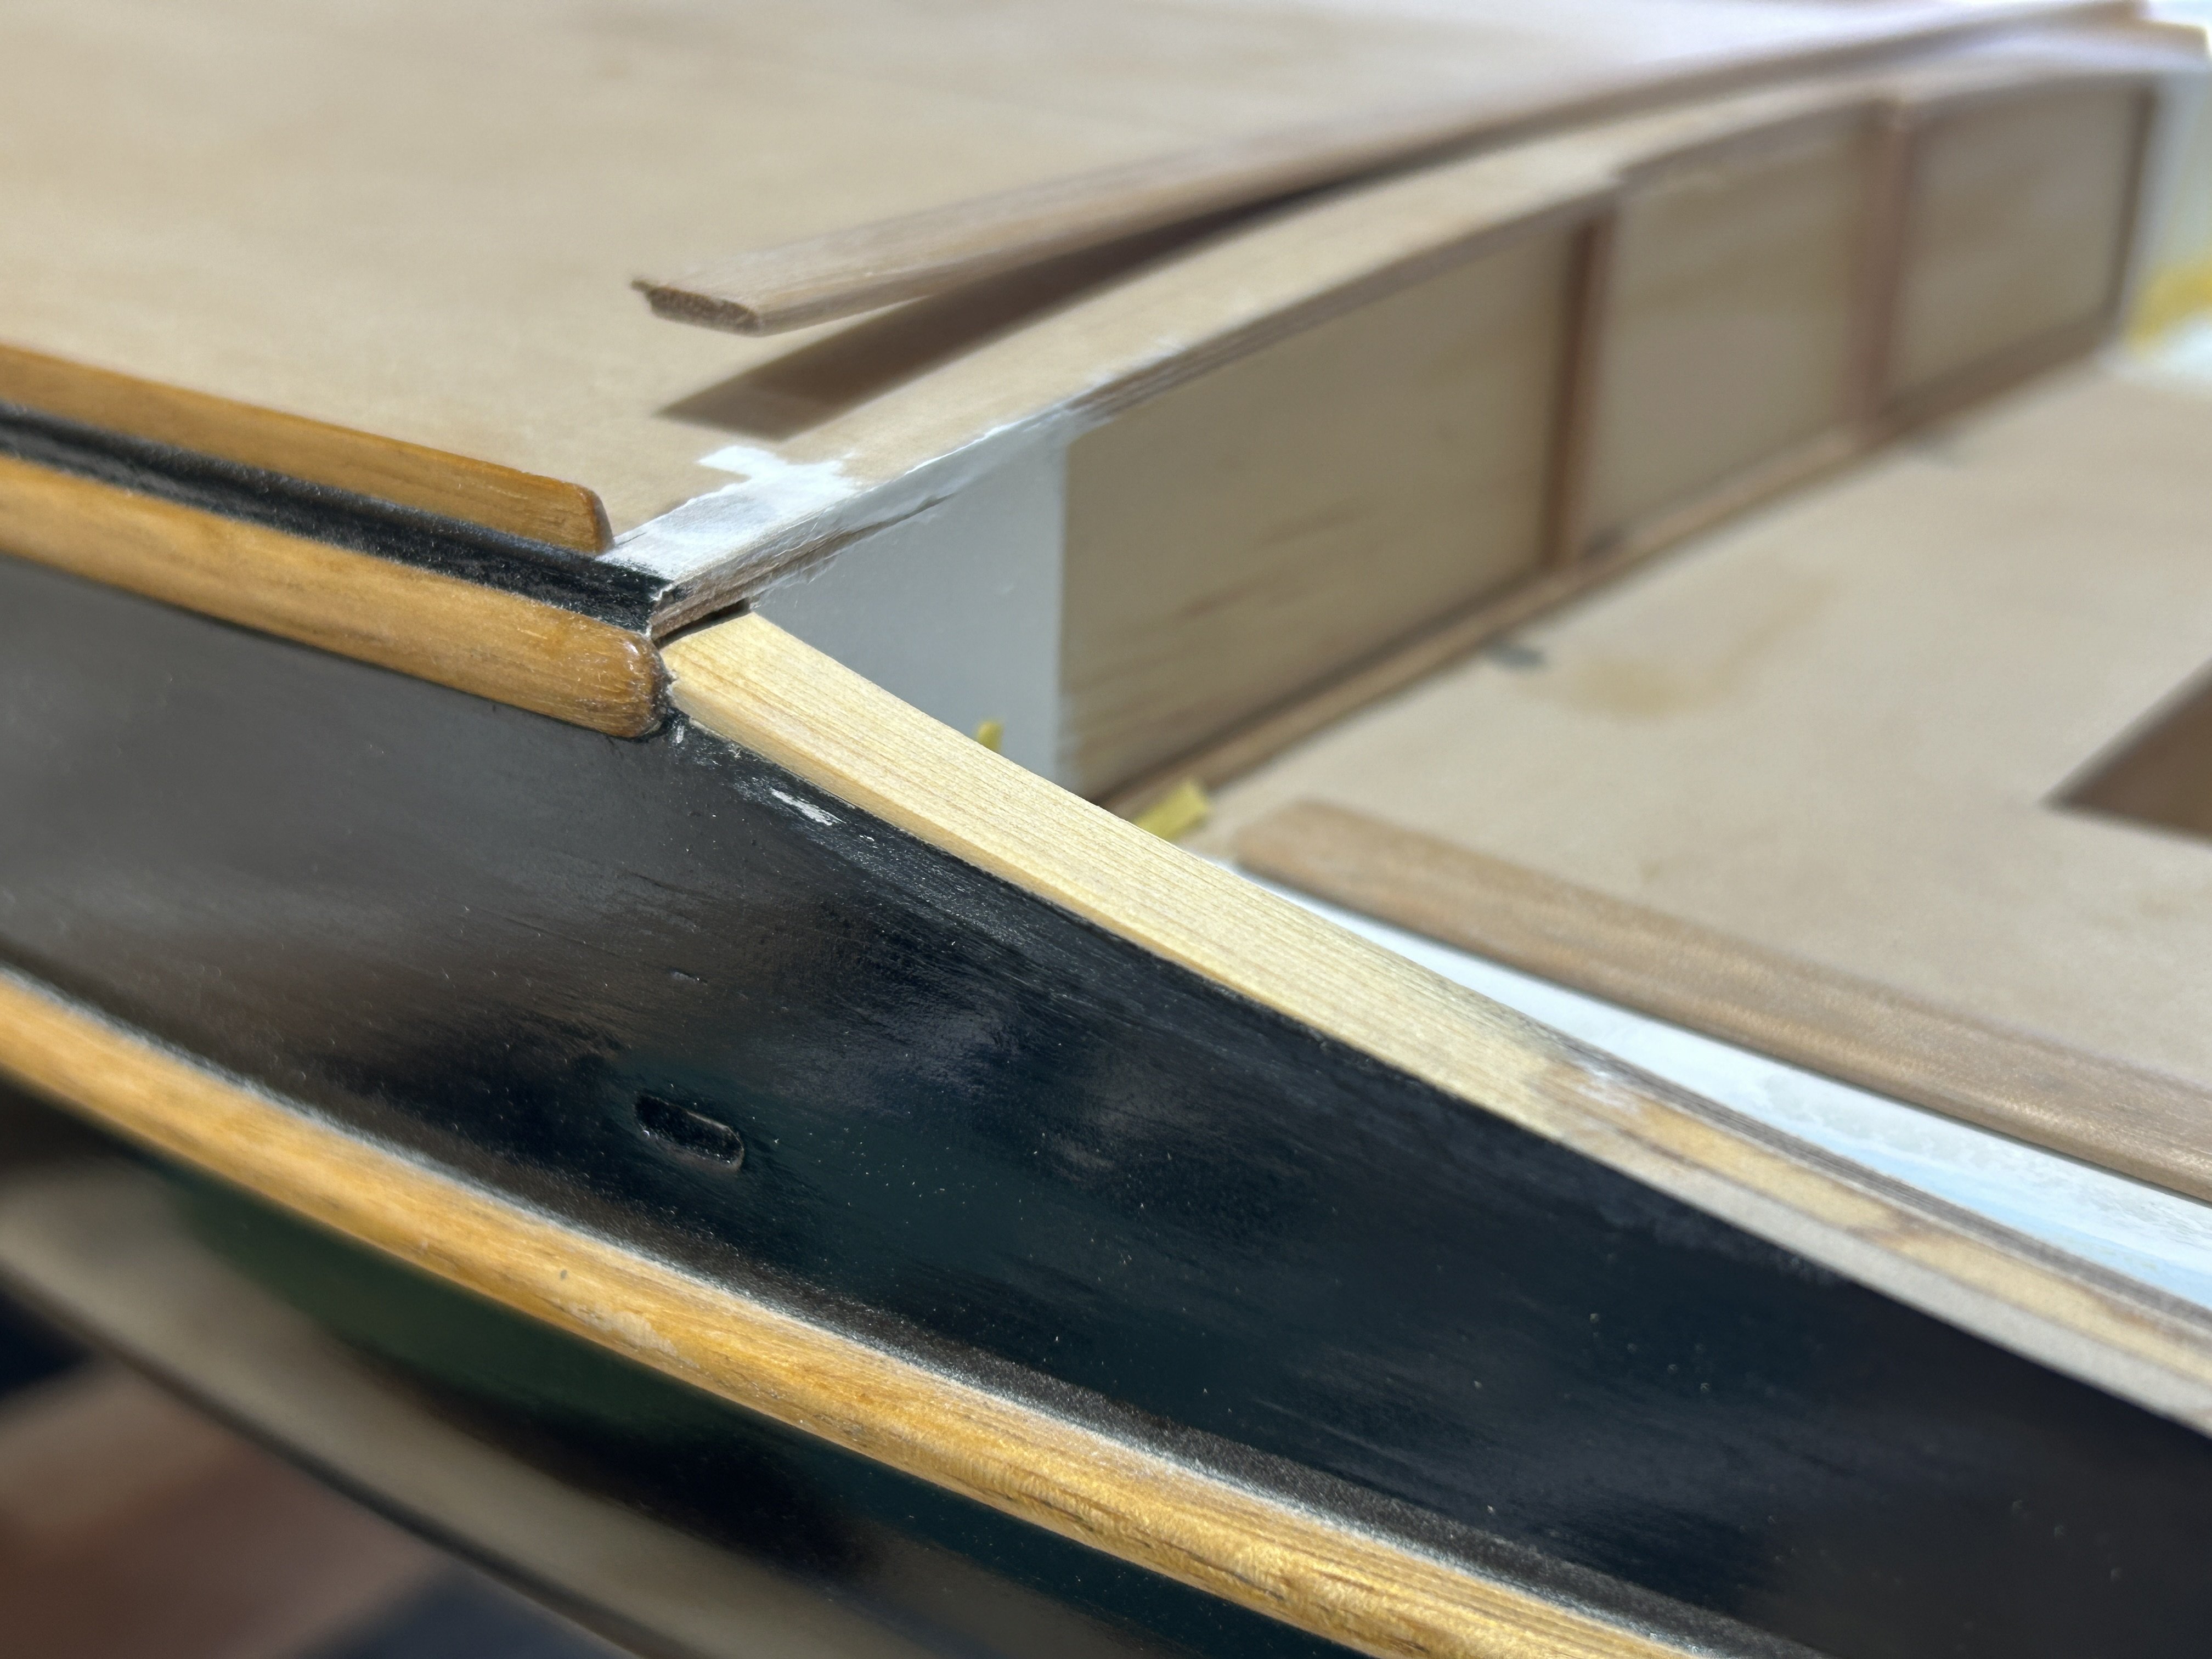
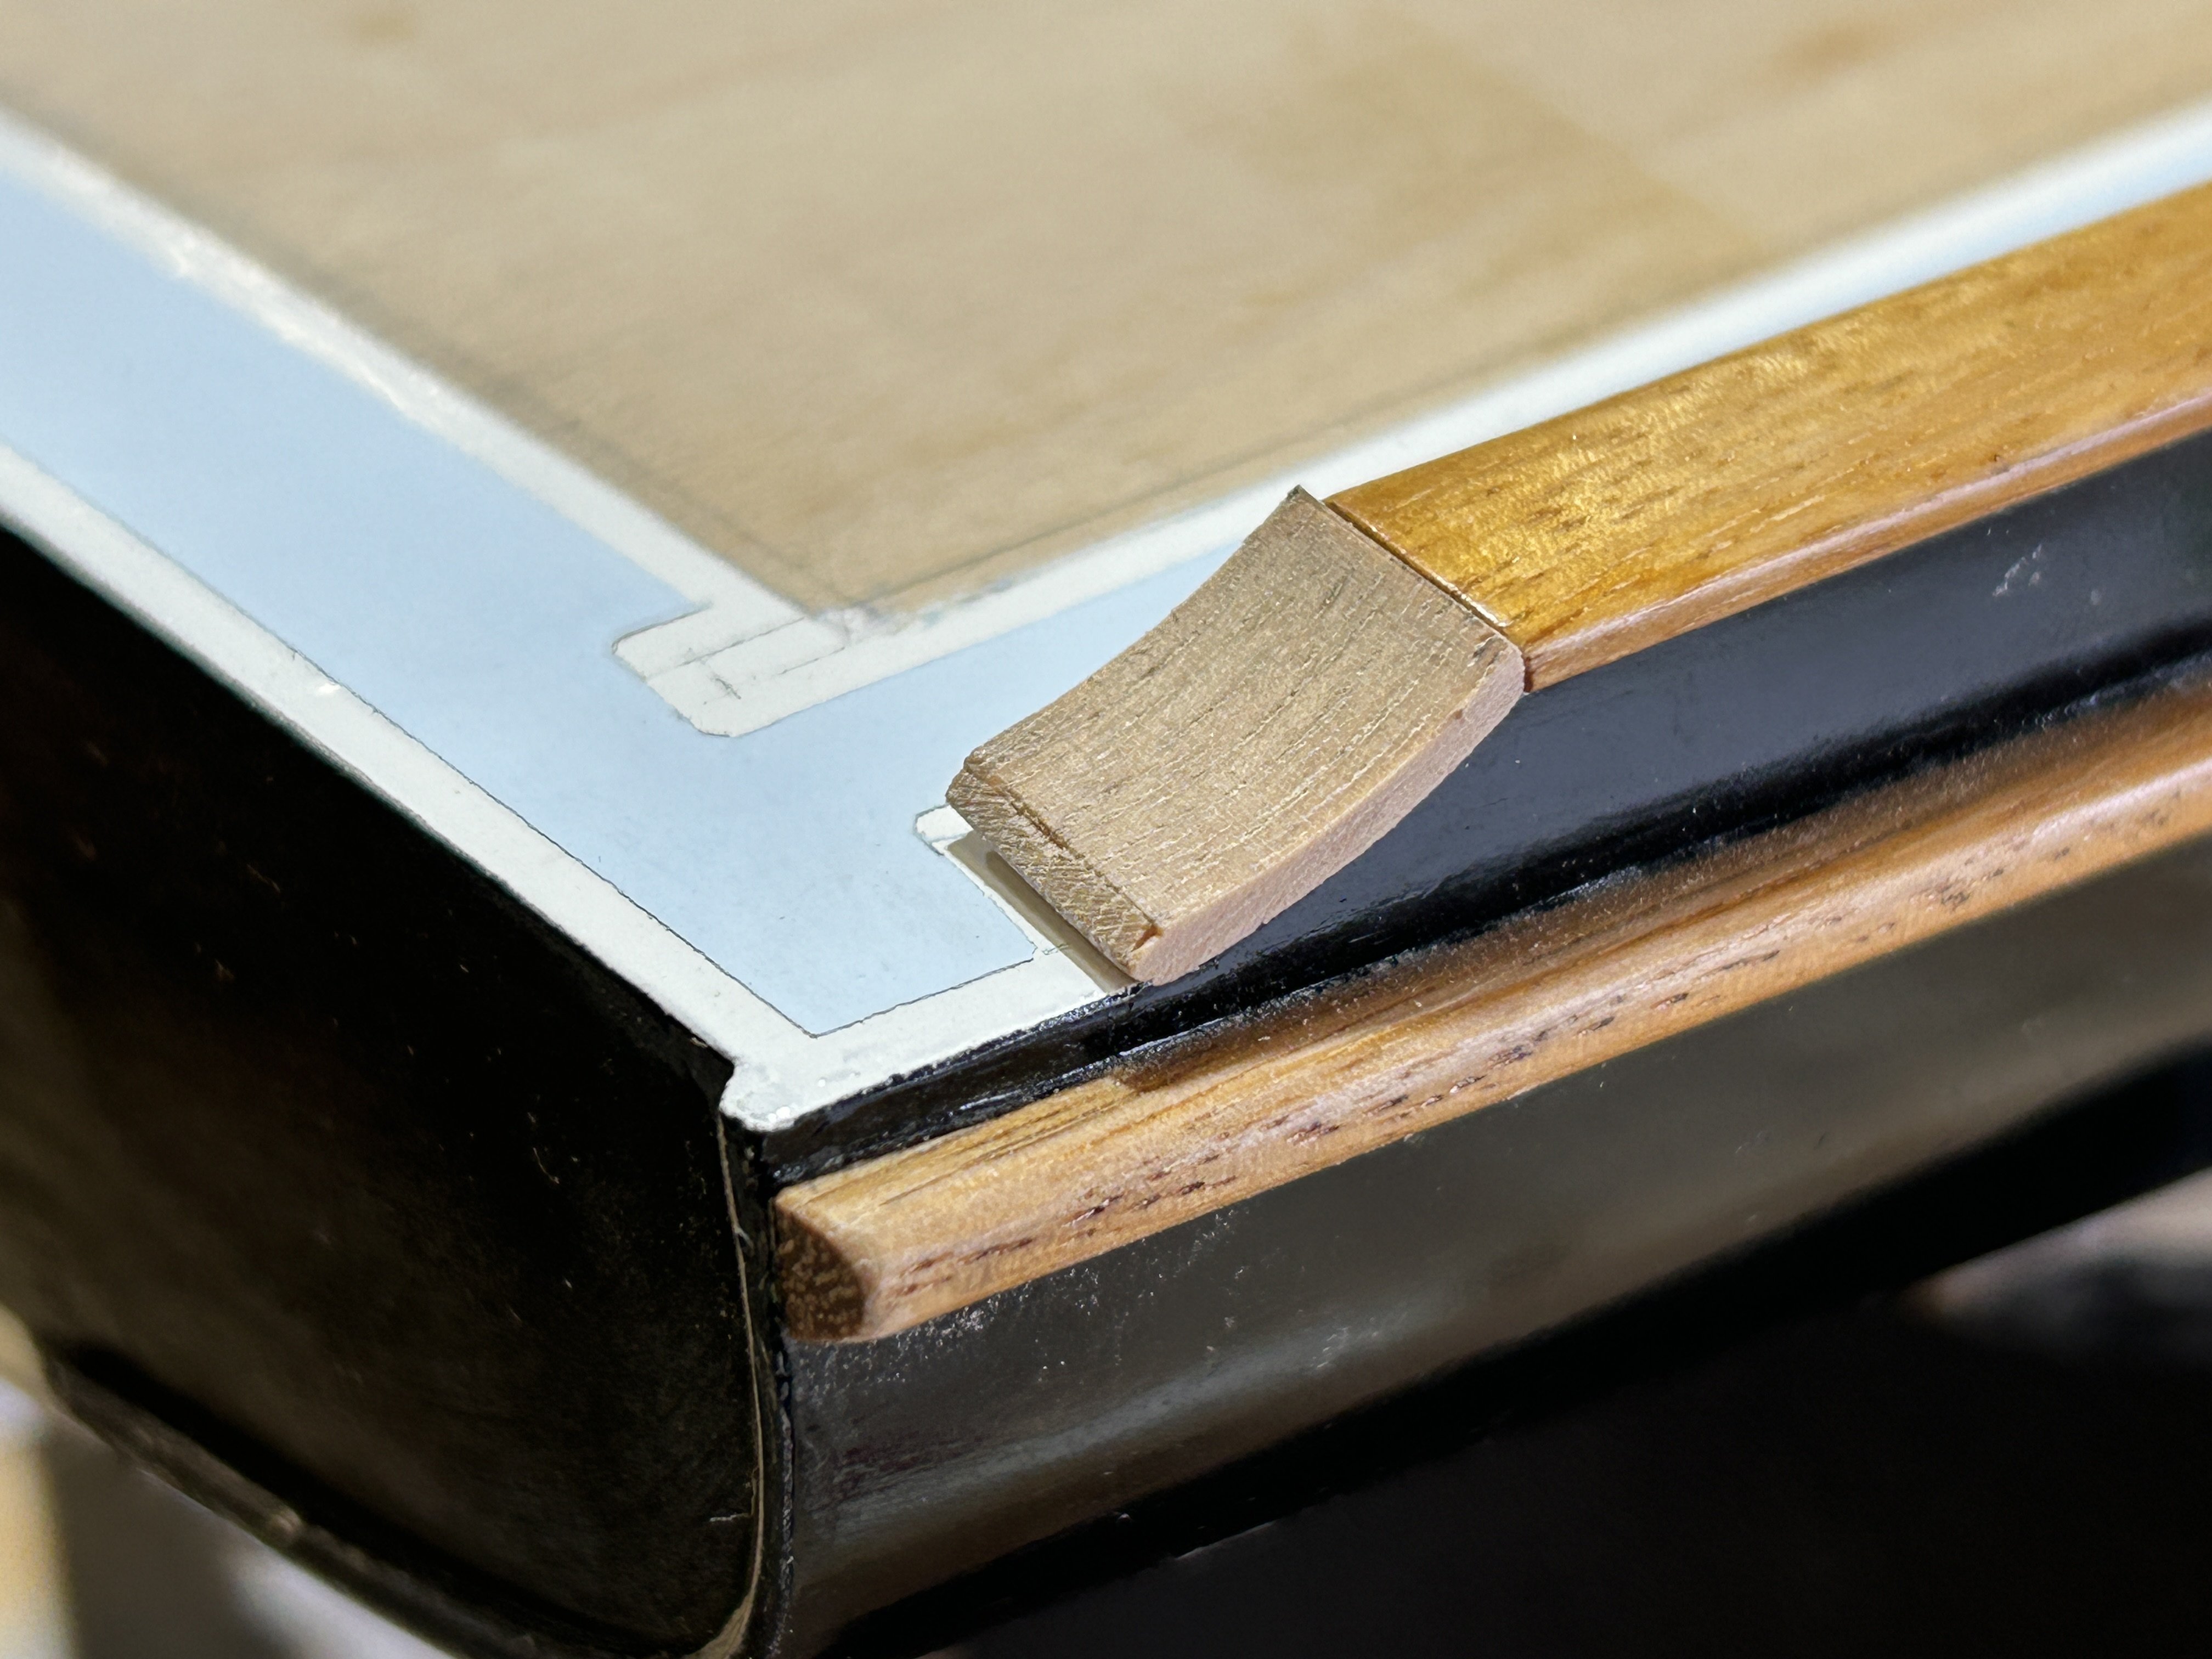
A feature of these yachts is the varnished removable hatches either side of the companionway storm boards, & other varnished details. They are a really nice part of the cockpit area & of course will draw the eye to them on the model. So, with some hesitation I started fitting these pieces, after varnishing them (shellac, to a satin finish). The deck also got painted, matt blue with gloss white edges. On the photo below, cover strips & edge details are still to be added.
This photo to show the finish, & the nice glow of the timber (Queensland Maple on the model, Teak on the yacht).
And the fore hatch also: