usedtosail
-
Posts
2,421 -
Joined
-
Last visited
Content Type
Profiles
Forums
Gallery
Events
Everything posted by usedtosail
-
 Yes, I read on another post that you had to heat them because they were stainless steel. I didn't try them without heating, but that would be a quick experiment, I think. Hey at least you can start messing around with the extras you will be adding. I am doing that as I wait for planks to dry.
 -
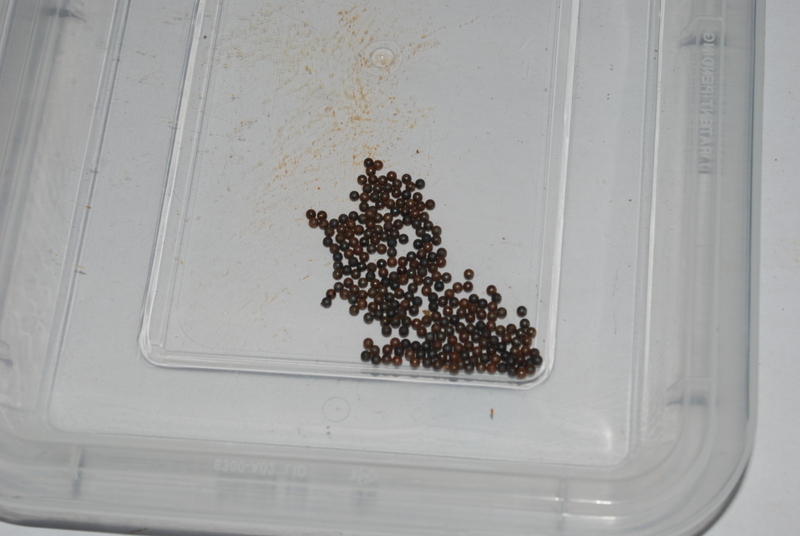
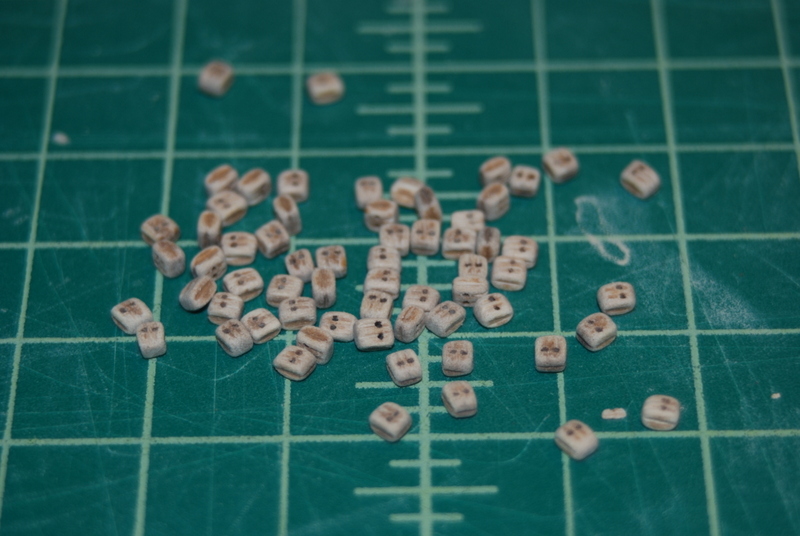
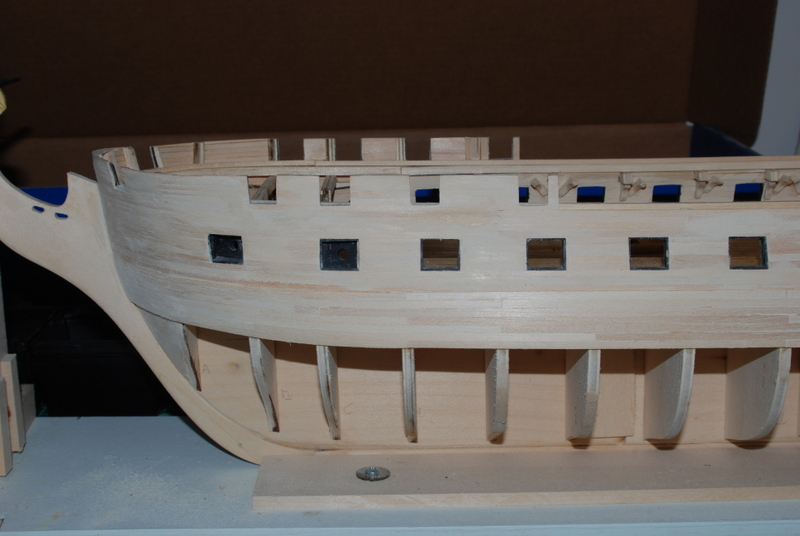
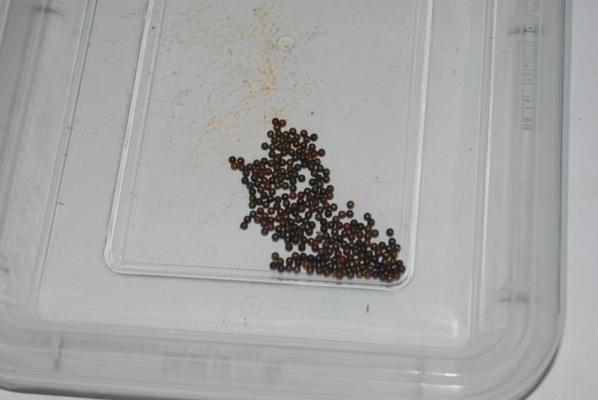
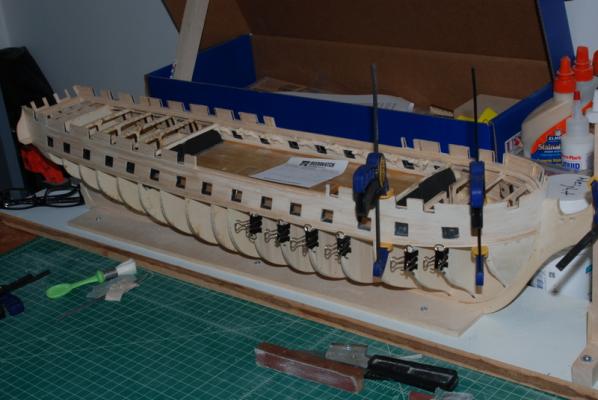
Thanks Tim. PVC pipe does make great wood storage too. That was my first thought until I saw how much pipe I would have to buy. As promised, here is a picture of the cannon balls. I took this picture 24 hours after blackening them. They were much blacker when I first took them out of the solution. I think they rusted a bit, as some are now a little red. Any suggestions on how to get them black again? Maybe put them back into the solution and dry them off when I pull them out? The problem is they are so small and light I am afraid I would loose too many in the drying process. Were the real cannon balls made of iron and if so would they rust too? Maybe I can just leave them like this? What do people think? And here is a progress shot of the starboard side wales going in. The strip clamped around the bow has been soaked and is drying into the rough shape for the next wale plank at the stem. Tim, I am heading up your way this afternoon to get some stuff out of my father's house in Henrietta. Then its off to LI to drop them off to him tomorrow, and back to Boston on Sunday. I am calling it the New York tour, but at least my daughter volunteered to come with me to help with the driving.
- 1,354 replies
-
- 9
-

-
- constitution
- model shipways
- (and 1 more)
-
Whew! Thanks. That is a very professional looking stand.
-
Michael, I was nervous just seeing that bare metal so close to your excellent paint job. Those supports look great, though.
-
Thanks Geoff. I used the product called Blacken It (http://www.modelexpo-online.com/product.asp?ITEMNO=AW2), which is not the Birchwood Casey. I used it full strength, which always seems to work well for me. I have bought a bottle of the Birchwood Casey product to use this runs out, but haven't tried it yet.
-
Wow Nigel, just read through this whole log. What wonderful carving. I can't wait to see you back at it.
-
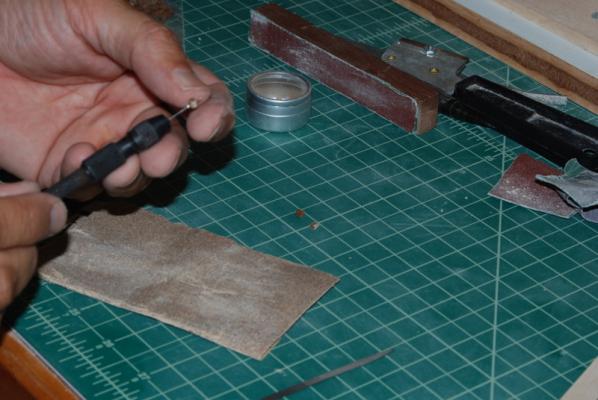
Thanks George. Yes, walking away sometimes is the right thing to do and I don't stay away for long. I finished sanding the starboard planks above the wales for now. These will get a final sanding when the whole hull is preped for painting. I then started adding the wale planks. The first thing I did was measure the wales on the port side at each bulkhead using a tick strip, then transferred those measurements to the starboard side bulkheads. I also entered them into my spreadsheet to get the widths of the planks at each bulkhead, and I used a planking fan to mark these widths onto the bulkheads too. You can see these marks on the bulkheads in the above pictures. I had also bought some of the 2mm ball bearings to use as cannon balls, so I spent a little time last night blackening them. Since these are stainless steel, I first heated them with a micro torch. I held them in a metal pipe cap on top of a few ceramic tiles. The first few I heated to red hot, but the rest I just heated them until they were hot. I then placed these into white vinegar to clean and pickle them, then into straight Blacken It solution for a minute or so. I took them out of the blackening solution and placed them on a paper towel to dry. They came out nice and black and it doesn’t seem to want to rub off. I'll take some pictures of these for the next instalment.
- 1,354 replies
-
- 7
-
-
- constitution
- model shipways
- (and 1 more)
-
Strip storage
usedtosail replied to capt-j's topic in Building, Framing, Planking and plating a ships hull and deck
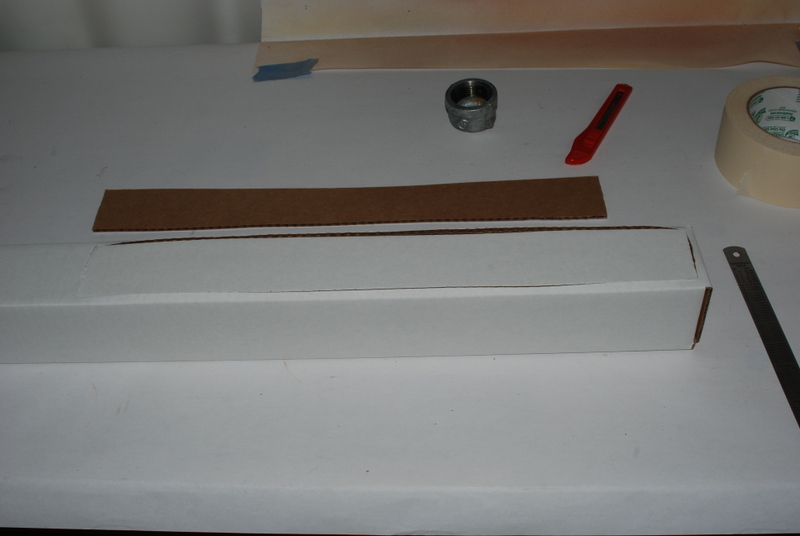
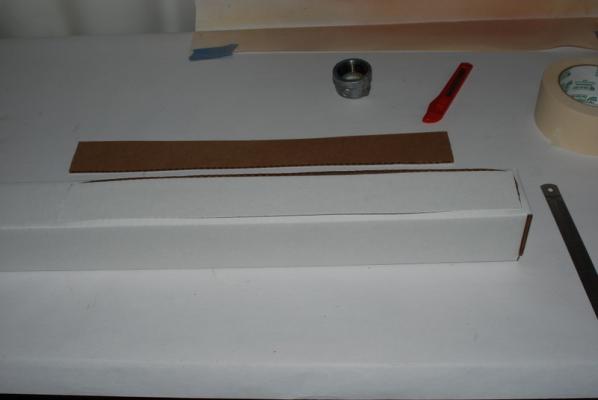
I just implemented this method, using 2" square by 25" square mailing boxes. I cut a section of the top off so I can get the full length strips in the boxes. I bought these on Amazon.


-
Carl, I found them on Amazon. They are Aviditi M2225 Square Mailing Tubes, 2" x 2" x 25" (Pack of 50)
-
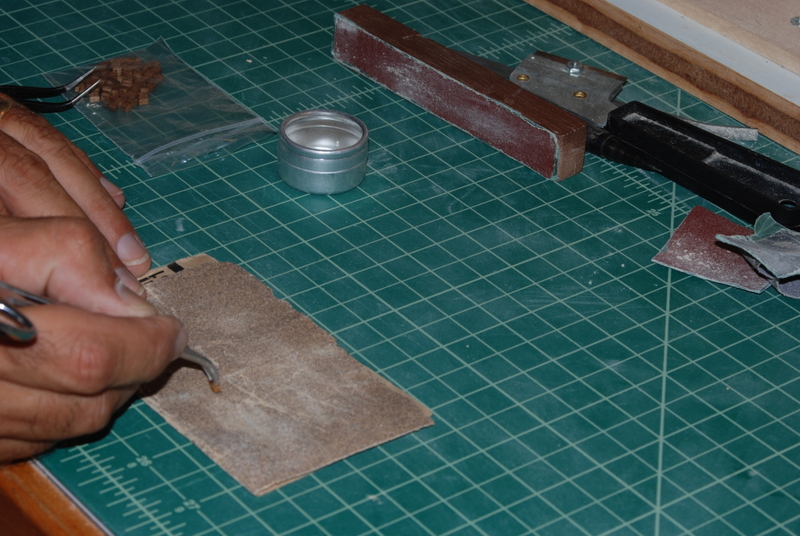
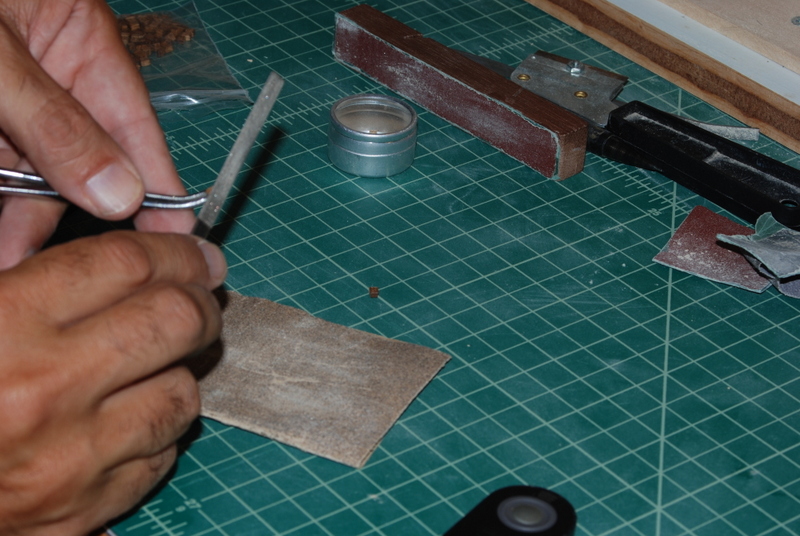
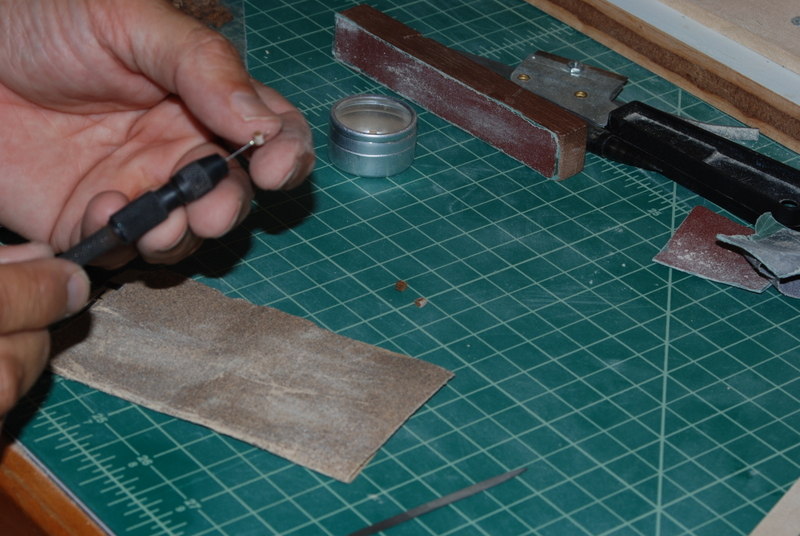
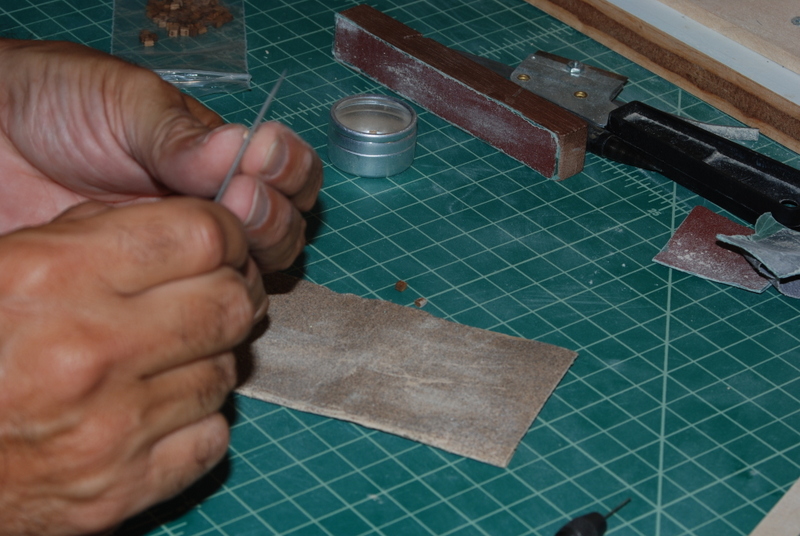
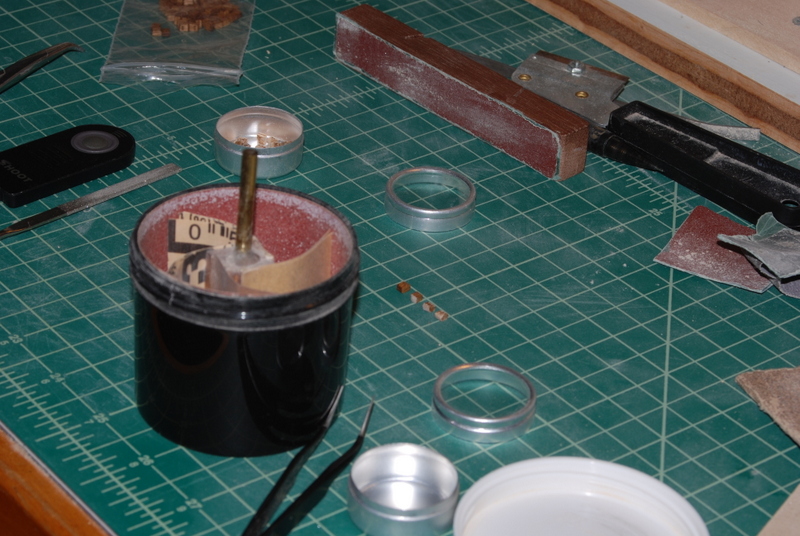
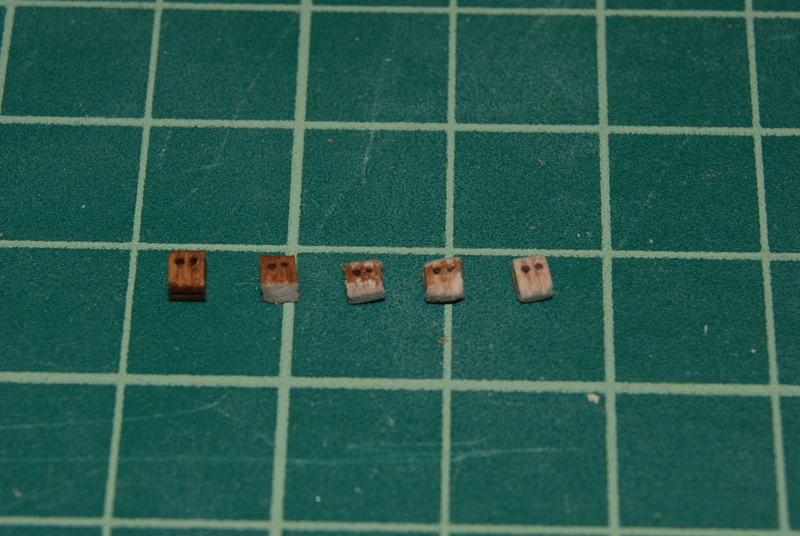
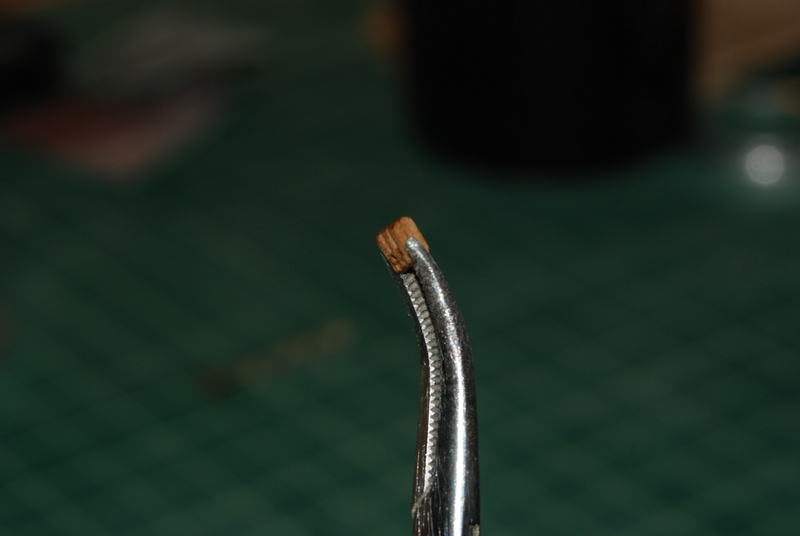
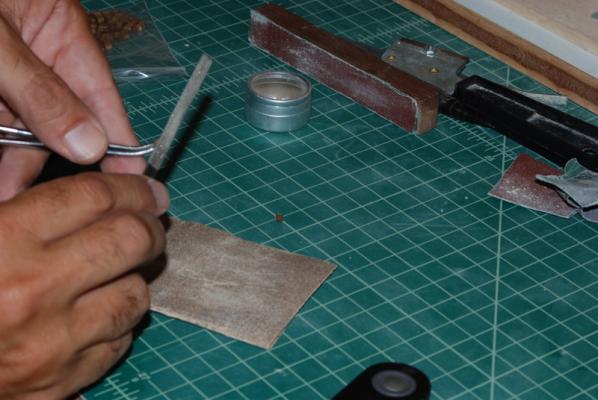
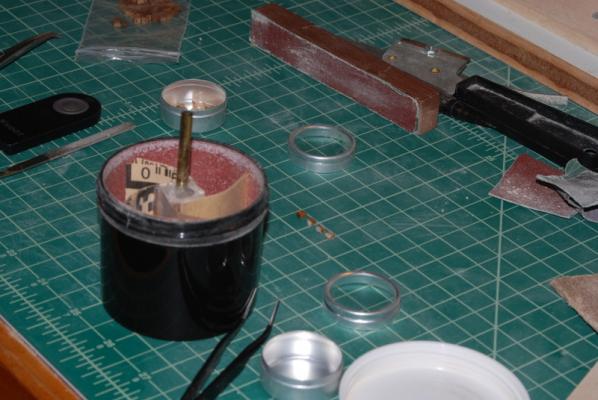
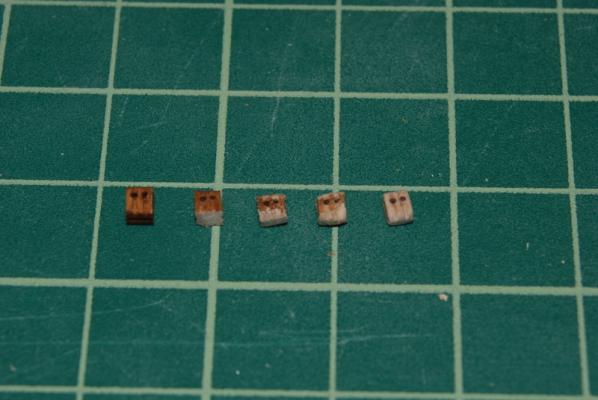
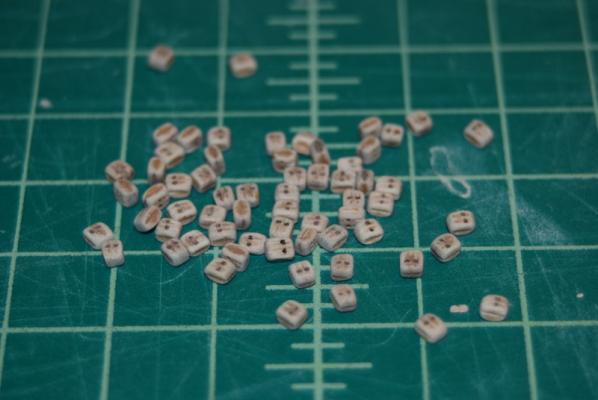
OK, the other side project is more directly related to the build. To rig the guns on the gun and spar decks, I need small single and double blocks. I could have ordered really nice blocks from a few suppliers like Syren, whose blocks I will admit are works of art in themselves, and I haven't ruled these out for the spar deck, but the gun deck will be fairly hidden, so I decided to go with a more economical approach. The smallest single blocks I could get in bulk from Model Expo were 2.5mm which will work fine, but the smallest double blocks are 3mm, which are too large for me. So I came up with this process for making the 3mm blocks closer to 2.5mm, while at the same time making them less boxy. I use a hemostat to hold the block while I work on it, but you have to be careful closing them so as not to crush the block: I then sand the end away from the holes on a piece of rough sandpaper until the length is close to 2.5mm, then use a small file to round off the two edges on this side so the side profile will look rounder. I flip the block around in the hemostat and file the other two edges so the whole side profile is now rounder. I then use a small drill bit to open up the holes in case they closed from the hemostat. I then use the side edge of a small file to make the groove below the holes more pronounced. At this point the blocks looked pretty good to me and I was going to stop there. But, a few years ago I had purchased the Model Expo block tumbler, but was not very impressed with the results. Recently, in another build log, Chuck Pasaro showed his modification to the tumbler, so I thought I'd give it a try. I removed the hard wood paddles and replaced them with three pieces of 220 grit sandpaper at each of the four sides of the center spindle. I put these modified blocks in this new tumbler and ran it for only 45 seconds. I was amazed at the results, which looked so much better than what went in. Here is a shot of how the blocks look after each step, from left to right, and the completed set of double blocks for the gun deck guns, plus some extras: I admit they are not the same quality as the blocks I could have bought, especially since they only have one hole per sieve, but I am happy with them and I actually enjoyed modifying them. There are not too many jobs where I can pack all the tools and supplies in a plastic bag and take them with me to work on wherever I am, but this is one of them.


- 1,354 replies
-
- 7
-
-
- constitution
- model shipways
- (and 1 more)
-
Tim, I don't know who first came up with those clamps but when I first saw them I thought they were brilliant, and they do work so well. I made up some of the smaller size, but don't use them very often as the holding power is a lot less. I haven't tried the very large ones, but they could be useful in some situations too.
-
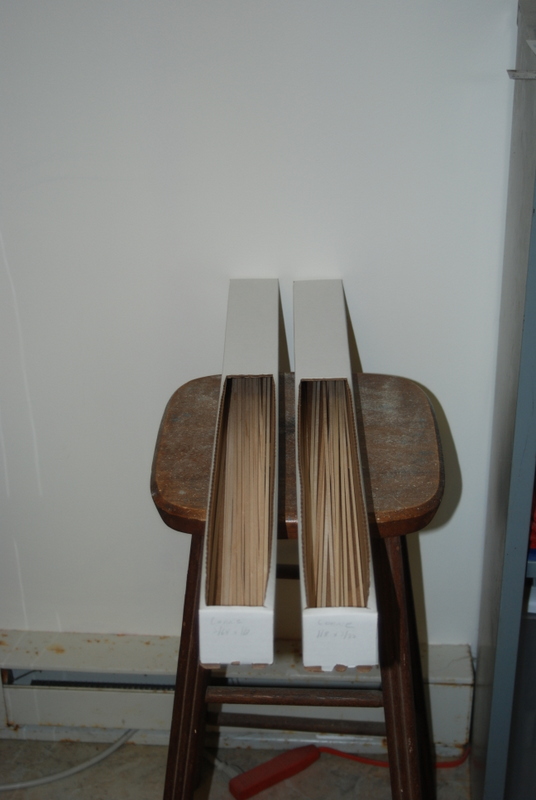
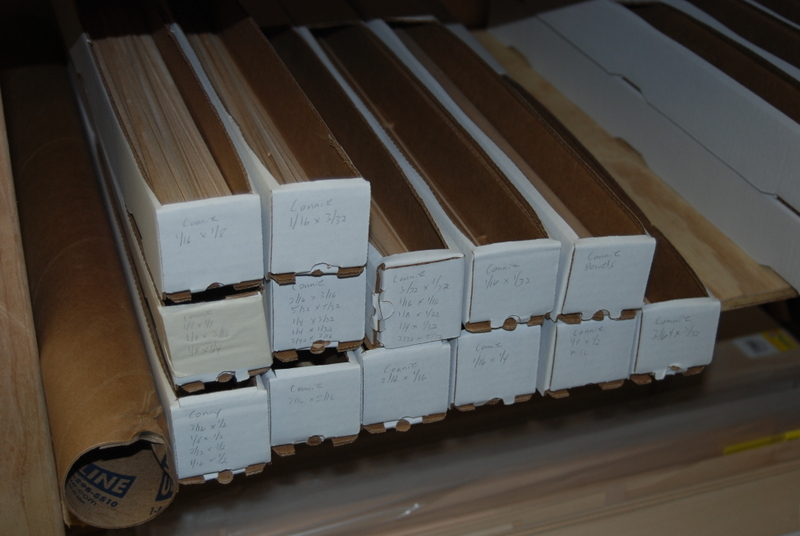
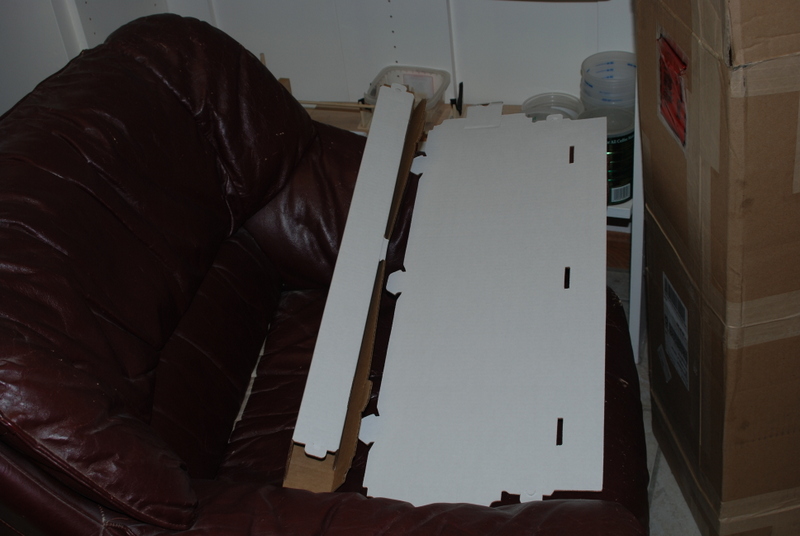
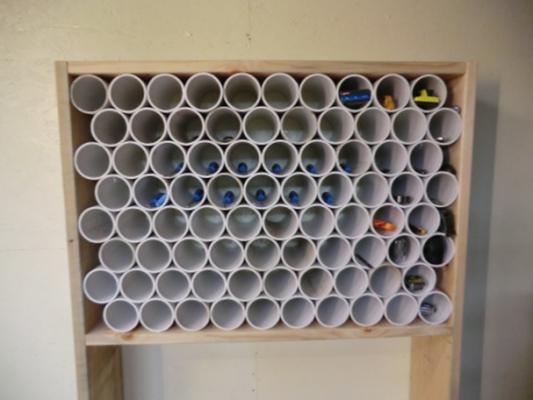
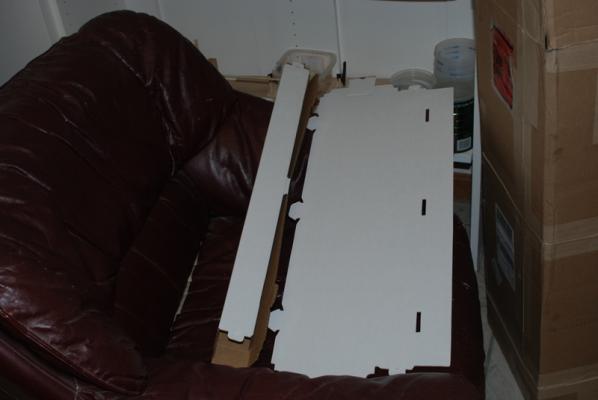
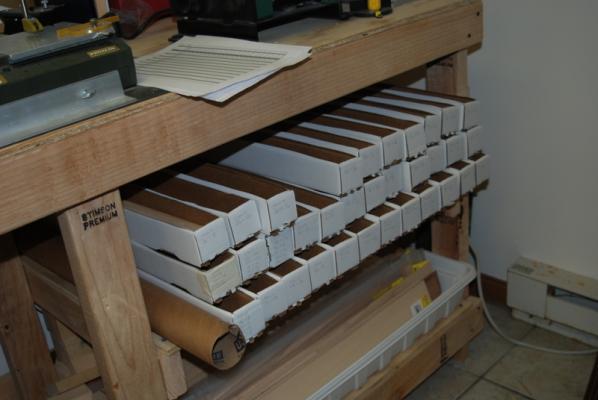
In post #2 of this build log I showed how I have been storing the various wood strips for this project (in golf club tubes), as well as the storage bucket for the other wood strips I have in the workshop. I was not really happy with either of these methods so I started a little research project for a better way to sort and store wood strips. I wanted to store the wood on its side, not upright and be able to get at it easily. My constraints were space and cost. I cleared out a shelf I could use for the storage rack and I wanted to keep this project under $50. I came up with two options for something I could build - one using PVC pipe, something like this: and the other a series of trays, sort of like a stack of 2 foot long draw inserts for silverware. I priced out the PVC pipe I would need and it came out to $90, so that option was out. Then I thought of cardboard mailing tubes, so I priced them out and they did come in under $50, but I would still need to make a wood frame for them. I also was not sure if open ended tubes would be the best way to store these strips. For example, how would this work with partial strips that were less than a foot long? I kept coming back to the tray approach, but realized how much work that would be to make. While looking for the mailing tubes, I came across these 2" square by 25" long mailing boxes, and knew I had found the solution: With a little modification, I had trays that would hold the 24" wood strips nicely: I could get 50 of these for 69 cents each and just stack them on top of each other. I cut a portion of the top off each one, about 16 inches, which lets me get the full strips into the box. It can hold partial strips and I can use the end of the box to write the dimensions of the strips in the box. This was a problem with the PVD approach, as I could not figure out a good way to mark the tubes for contents. I made up enough for the Constitution strips first, and in a few boxes there are multiple dimensions, where the kit only supplied a few strips for those sizes.. Others have only one size in them. I then went ahead and built enough to hold all my surplus wood strips, and still have room on the shelf for more of these: I still have a bunch of boxes left over for future expansion and since they are not folded yet they are easy to store too. I thought about gluing the boxes up into trays, but have left them as individual boxes as it is very easy to pull a single box from the bottom of the pile like a draw. I think this rack will work out nicely for me. When I was finished i was reminded of the wand shop in the Harry Potter movies. I just hope these boxes don't start flying off the shelf by themselves.


- 1,354 replies
-
- 13
-
-
- constitution
- model shipways
- (and 1 more)
-
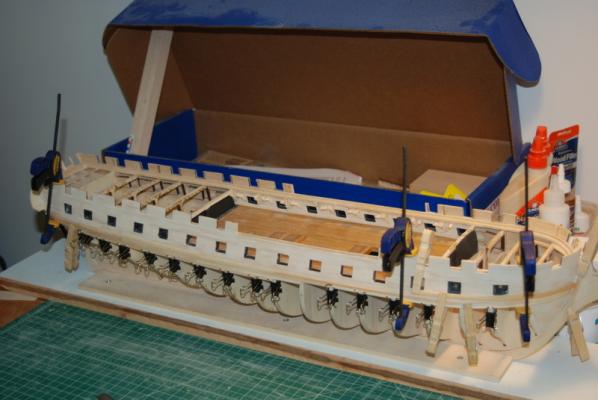
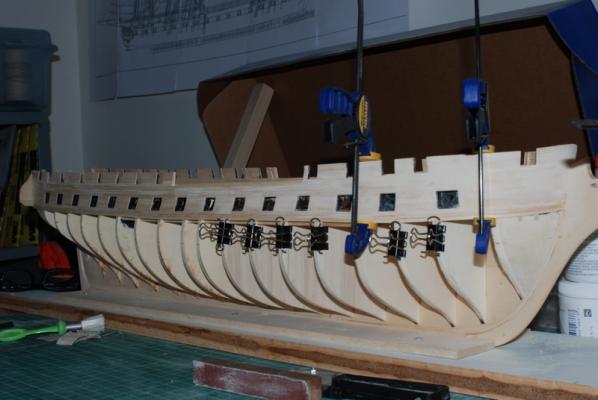
No worries, Tim. I am glad to host this kind of discussion and information sharing, which makes this site so valuable. Some obligatory progress photos. I got the two rows of planks on below the gun port sills, so I can now start on the wale planks for this side. I apparently had not finished sanding the upper planks on this side before I turned the hull around to plank the port side wales, so I spent the last couple of days filling and sanding these upper planks. I still have to sand the two rows of planks I just put on before starting the wales. While I have been waiting for planks to dry, I have been working a couple of side projects, which I will show in the next couple of posts.
- 1,354 replies
-
- 7
-
-
- constitution
- model shipways
- (and 1 more)
-
Hi Pete. I love those logos. What kind of glue did you use to glue the vellum to the hull? Thanks.
- 220 replies
-
- 1
-
-
- finished
- volvo open 70
- (and 1 more)
-
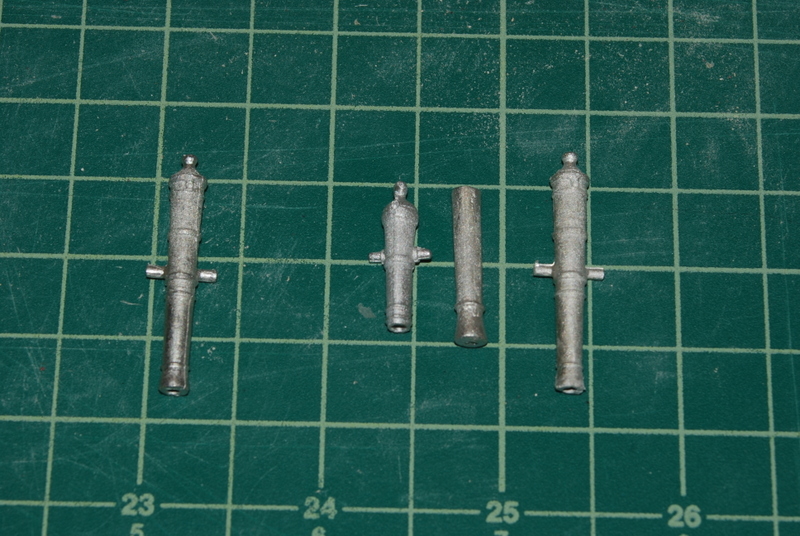
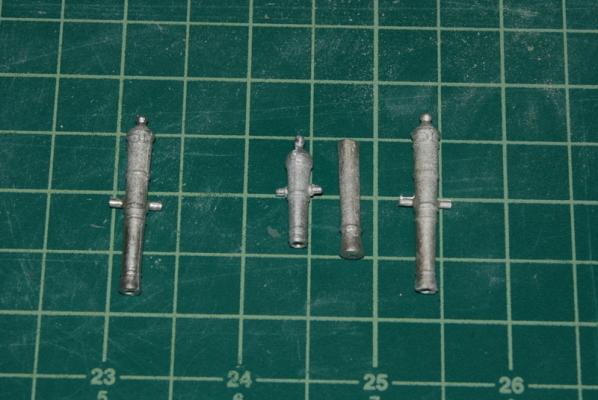
OK, as promised here is a picture of all the gun barrels we have been discussing: The three on the right are the kit supplied barrels, from left to right are the carronade, dummy, and long gun barrels. The barrel on the left is one from the extra gun deck guns that can be ordered from Model Expo. As you can see they are all about the same quality and the long gun and gun deck gun barrels are the same. I am still undecided about adding the two long guns to the spar deck.
- 1,354 replies
-
- 3
-
-
- constitution
- model shipways
- (and 1 more)
-
Yep, I only looked at the two bags on the right, so I have the two long guns too. I thought there were more guns than just the carronades for the spar deck. The barrels in the add on cannons look about the same in quality to the ones supplied in the kit.
-
Hum, I didn't see the long 24's but maybe I overlooked them. I'll look closer tonight and let you know.
-
"Yes winter is just around the corner,..." What! It is still summer here in the Northern Hemisphere. Snow in summer is just unreal. How far north are you Michael?
-
Tim, thanks for that information. You are a fountain of knowledge on this ship and I much appreciate it. George, simple is good, but I'll bet you will add a lot of detail once you get going. I agree that wood building is so satisfying, but can be frustrating at times too. Trying to get the planking to look nice and even is frustrating me at the moment. I checked back into the kit supplied parts last night, and the only armament supplied are the carronades for the spar deck and the dummy gun barrels for the gun deck, so no cannons for the spar deck. Tonight I will take a picture or two of the three barrels (carraonade and dummy from the kit, and cannon from the cannon package), so you guys can see what is available from Model Expo and how they compare to each other. Wes, Thank you. I got the idea for the gun deck from this forum and figured I'd see how far I could go. It was not a big decision because I figured I could always cover it up if it didn't come out right. So far, I am happy with it although keeping it clean while hull planking is a bit of a challenge. Also, I have to figure out how to mask it when I go to paint this monster.
-
Welcome George. You make a very good point concerning accuracy. In my case, the majority of guns on the spar deck will be carronades which came with the kit, which are quite a bit different than the gun deck guns. I think there are a couple of regular cannons that came with the kit for the spar deck and these are probably the same as the gun deck guns, so there is where the inaccuracy may show.. The gun deck guns are a mixture of the dummy cannon barrels that came with the kit and the Model Expo gun kits that they sell separately. The barrels on these are close to the same as the dummy barrels, and should be OK for 24 pounders. I don't know Chuck's schedule for the Syren guns.
-
Yes, the castings in these are a bit rough too, as are the castings that came with the kit. I think they can be cleaned up with some work, though. The carriages needed a lot of modification so that these cannon barrels would match the elevation of the dummy cannon barrels, since i am using both. it wasn't too bad since I am only using 16 of these "real" cannons, though.
-
Yes Tim, I bought that set a while ago. It really is a good deal compared to buying the guns individually. Even without filling the whole gun deck with these guns it was still a lot cheaper then if I just bought the guns I need.
-
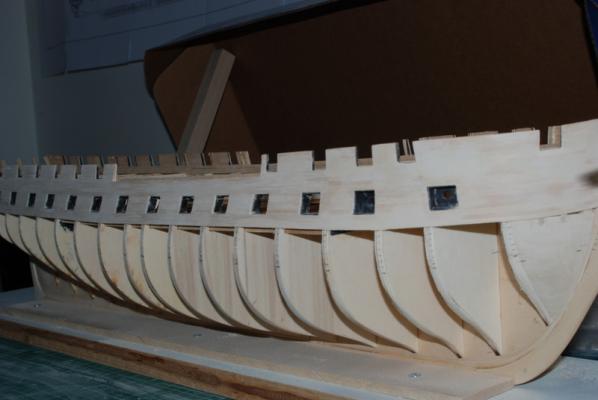
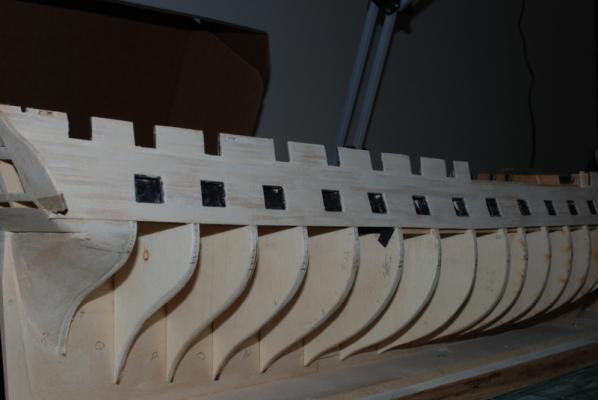
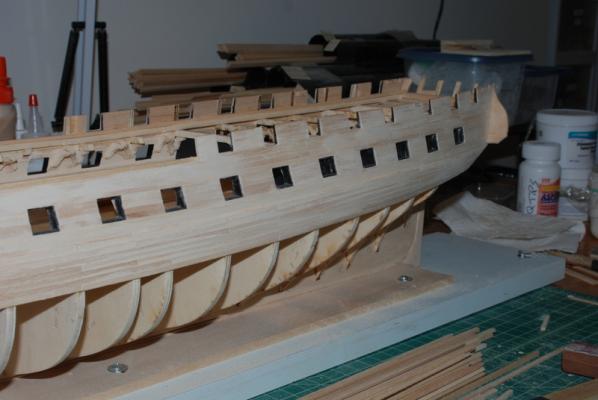
Wow, I guess I haven't updated this in a while. I gave the port side wale planks an initial sanding before moving onto the starboard side. I thinned down the bottom three wale planks so the wales will flow into the rest of the hull planking. I also thinned the wale planks at the stem to be flush with the planks above. I will sand these all some more when I do the final sanding of the whole hull before painting and coppering. I turned the hull around and started adding the two remaining planks between the gun ports and the wales on this side. It took me over a month to get the port side where it is from this point, but hopefully I will have more time to work the starboard side so it won't take as long. We will see...

- 1,354 replies
-
- 9
-
-
- constitution
- model shipways
- (and 1 more)
-
That is an excellent rigging job. I had the same problem with the belaying pins on the rail. Good solution. Rope coils are one of those things that take time and practice to get to look right. After 6 models I am still not there, but I have a feeling yours will look great.
-
So true, Scott. Welcome back Wes. Sorry for your loss. I need more inspiration from your fabulous build.