usedtosail
-
Posts
2,421 -
Joined
-
Last visited
Content Type
Profiles
Forums
Gallery
Events
Everything posted by usedtosail
-

Jim Byrnes Model Machines
usedtosail replied to Mahuna's topic in Modeling tools and Workshop Equipment
I just received mine in the mail today. It will be a few days before I have a chance to set it up, but I am so happy to have it.It does feel like Christmas. -
Very interesting, Frankie. Thanks for the description.
-
Cutty Sark by NenadM
usedtosail replied to NenadM's topic in - Build logs for subjects built 1851 - 1900
Congratulations Nenad. Its always good to have a doctor in the family. You must be very proud.- 4,152 replies
-
- 1
-

-
- cutty sark
- tehnodidakta
- (and 1 more)
-
Nicely done, Pete. She looks beautiful in her element.
- 296 replies
-
- 1
-
-
- herreshoff
- buzzards bay
- (and 1 more)
-
Thanks Pete and Tim. I sanded the port side some but the final sanding will be done after all the planks are on. The starboard side planking is well under way.
- 1,354 replies
-
- 8
-
-
- constitution
- model shipways
- (and 1 more)
-
You are a brave man, Pete. She looks great and will look even better out on the water.
- 296 replies
-
- 1
-
-
- herreshoff
- buzzards bay
- (and 1 more)
-
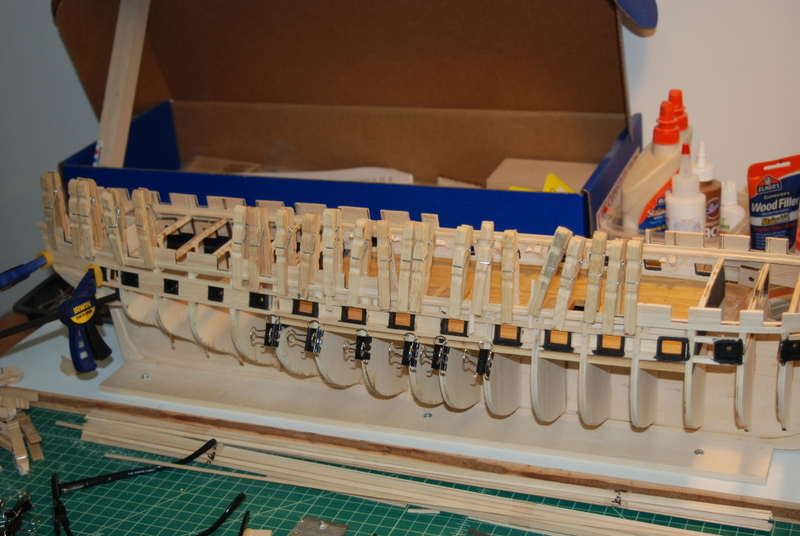
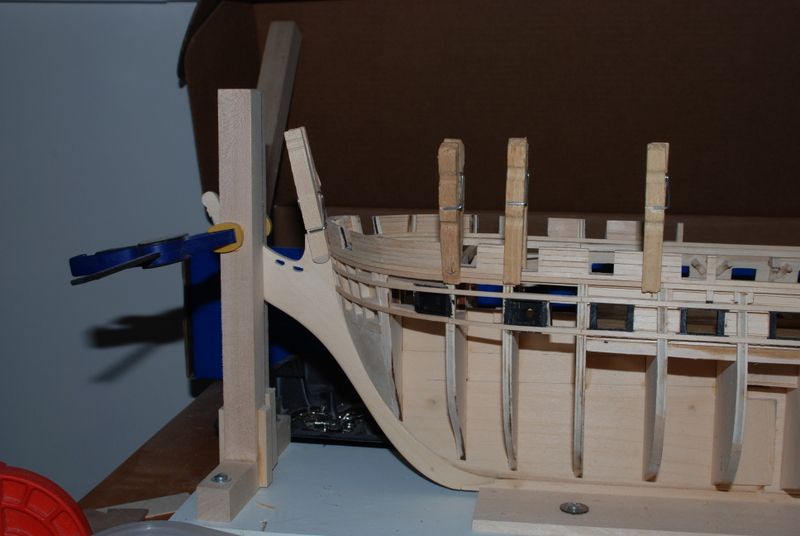
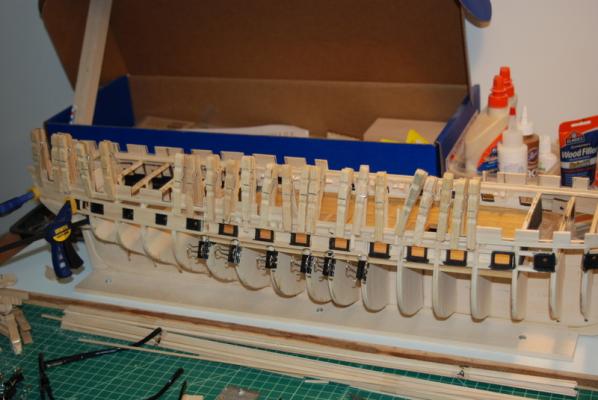
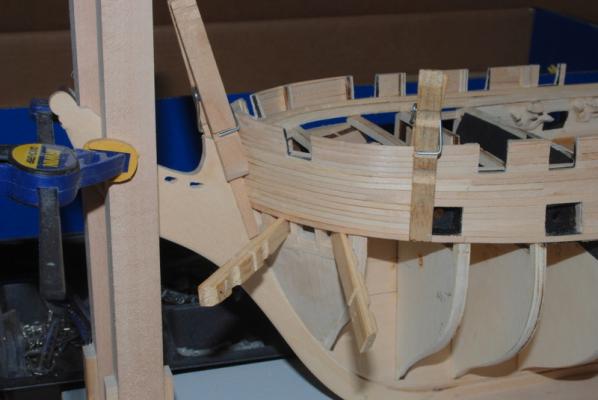
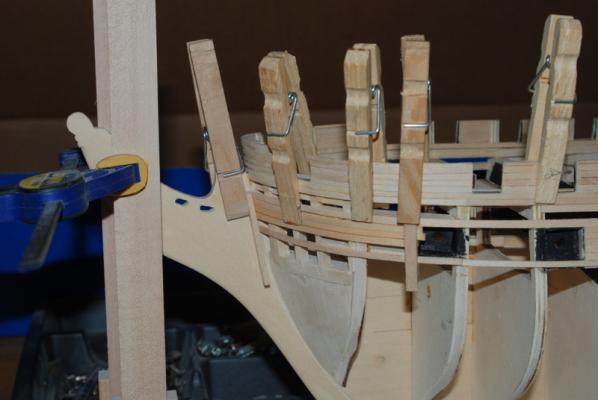
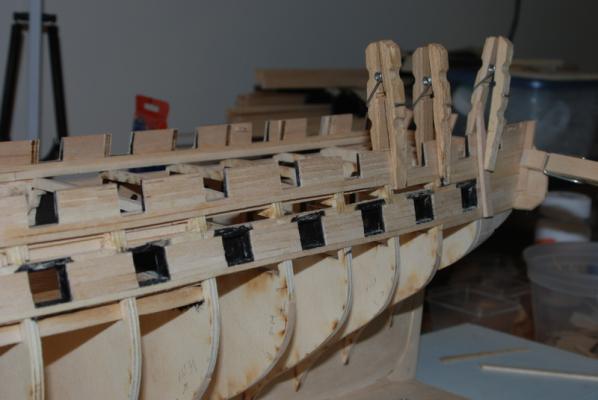
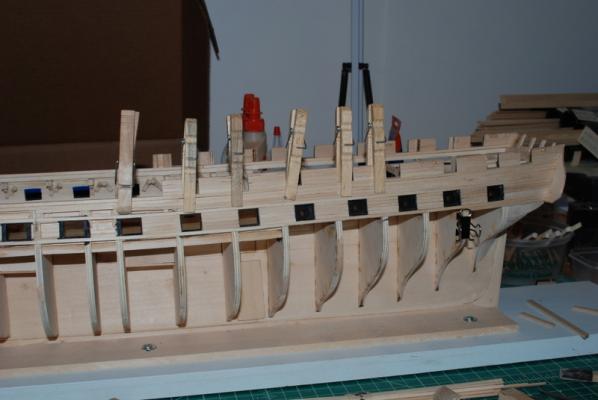
So, there has been some planking progress lately, although a lot of life has gotten in the way. I continued planking the port side around the gun ports, working toward the bow. I filled the gap between the top of the gun deck gun ports and the spar deck gun ports. Then filled in the areas around the forward gun ports. Here I have soaked three planks and clamped them in place to dry. And finally added the last two planks between the forward gun port and the stem. Now I will give this side a first sanding and repeat on the starboard side.
- 1,354 replies
-
- 7
-
-
- constitution
- model shipways
- (and 1 more)
-
Cutty Sark by NenadM
usedtosail replied to NenadM's topic in - Build logs for subjects built 1851 - 1900
Beautiful plating so far. You are making great progress.- 4,152 replies
-
- 1
-
-
- cutty sark
- tehnodidakta
- (and 1 more)
-
Nice work on those ballisters, Theo. I like your way of thinking.
-
Cutty Sark by NenadM
usedtosail replied to NenadM's topic in - Build logs for subjects built 1851 - 1900
Congratulations on your son's graduation. Feels good, doesn't it. Nice work on the coppering, too.- 4,152 replies
-
- 1
-
-
- cutty sark
- tehnodidakta
- (and 1 more)
-
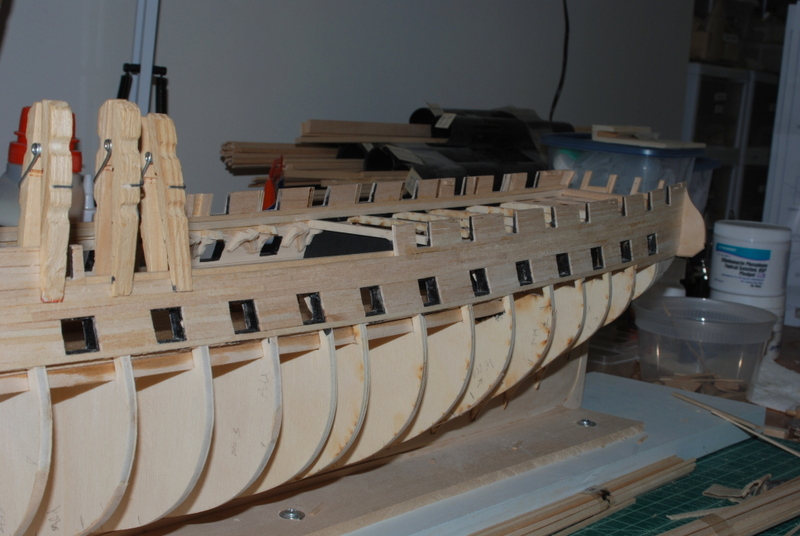
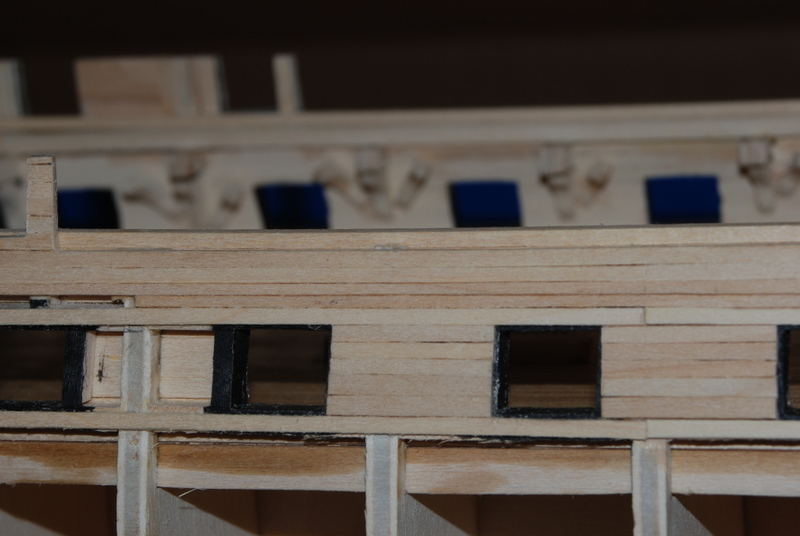
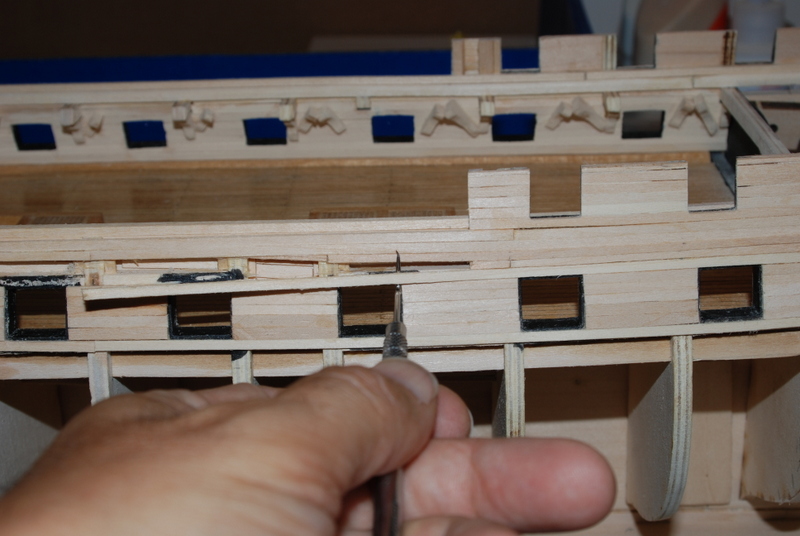
OK, more planking "progress", but in this case it is really taking a step back. I started by adding a plank above the gun deck gun ports and planking down from the plank sheer. As that gap closed, I was having to cut thinner and thinner planks, and it got to a point that the planks were getting too thin and didn't look good to me. Of course, I could have avoided all this if I had worked out a planking plan from the beginning as I should have, instead of just winging it like I did. I have to complain a bit about the instructions at this point too, because the plan sheet I was using had the planks between the plank sheer and the gun ports the same width as the plank sheer, but on the next sheet, they are the next width up, so the really thin planks I started with for this area were too thin to begin with. The planks on the bulwarks are also too thin according to this second plan sheet, but I am going to leave these as is and will have to repeat it on the starboard side too. Here is the area I didn't like, where the planks were getting to be less than 2mm wide. You can see the big difference between these thin planks and the plank above the gun ports. So, I used the trusty Isoproyl alcohol to loosen the glue, then gently (well, mostly gently) pried them up using a dental pick and a micro chisel. I did not have too much collateral damage, just a few places where a couple of upper planks needed to be reglued at the ends, and one of the dummy gun port sides had to be reinstalled. Here is a shot with some of the planks removed (I had originally planned to only pull out three planks, but I ended up pulling out four). I cleaned up the areas under the pulled up planks with some riffler files, to make sure they were flat again. I could now replank in the new gap using three wider planks instead of four planks, and I am planking them in groups of three so that I can thin them down to the same widths before gluing them in. To me this is looking much better. I love planking...I really do

- 1,354 replies
-
- 7
-
-

-
- constitution
- model shipways
- (and 1 more)
-
Markku, from that last picture it looks to me like your transom filler block may be rounded a little bit on top, so I would first make sure it was sanded flat. Then you could remove any excess at the top of the stern frames.I had to take some off the top of these so the deck didn't pitch up too high at the transom.
-
Looking good so far Mundie. For the waterways, I found the sides not too hard to make, but the curved area around the bow was a bit difficult. I cut the waterways for these areas from a larger sheet instead of trying to bend the strips laterally. But, I did not make them narrow enough and had to file and sand them narrower when they were in place, which was a pain. So, check the width before installing to save yourself a headache later.
-
Thanks Pete and others for the likes. I feel like an idiot this morning. As I writing the entry yesterday I was thinking - I know I have tools to make equal length strips, so why am I not using them? This morning I cut five strips the same length using a Chopper with a stop set for the length, and planked between a gun port in much less time. I only had to get the first strip to the correct length, them used it to set the stop. I guess I didn't think this would work at first because previous builds did not have perfectly square gun ports, but these seem to be much more precise. Oh well, I am always learning, and some times relearning, with this hobby. isn't it great?
- 1,354 replies
-
- 1
-
-
- constitution
- model shipways
- (and 1 more)
-
raster to vector conversion
usedtosail replied to captainbob's topic in CAD and 3D Modelling/Drafting Plans with Software
Bob, there is some freeware that I have been using that works pretty well. It is called Inkscape and is a lot like Adobe Illustrator. I have done a few raster to vector conversions, but not a whole lot. The output will also depend on the quality of the image. There is a companion freeware program called GIMP that I use to clean up the images after scanning them and before vectorizing them. The one caveat is that the vectorization makes a lot of points, so editing after vectorization is a pain. -
Nope, pouring like crazy here. Supposed to be dry over the weekend, though.
- 1,354 replies
-
- 1
-
-
- constitution
- model shipways
- (and 1 more)
-
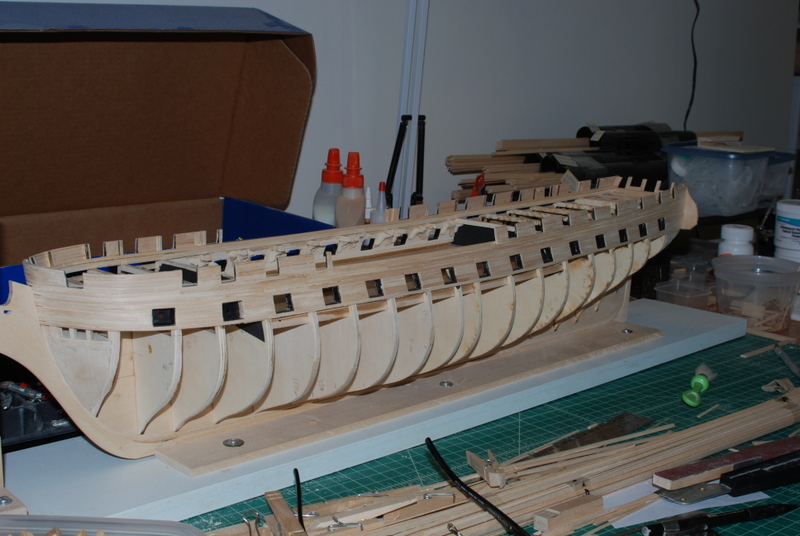
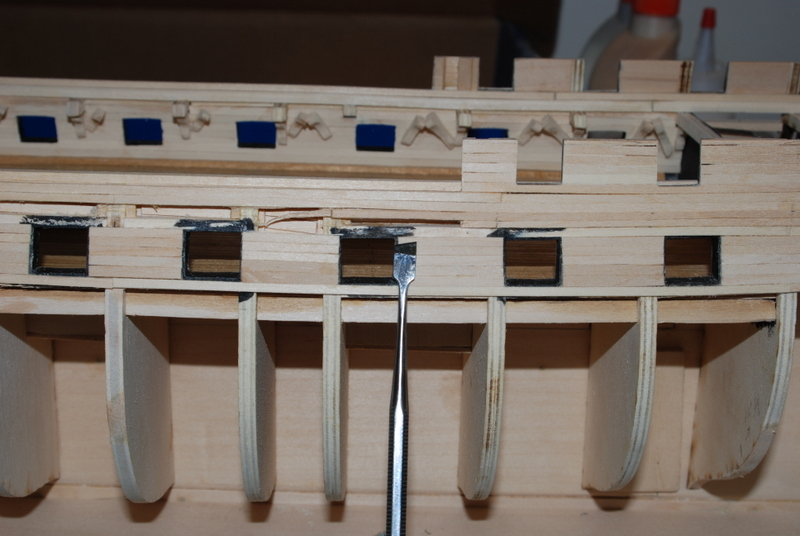
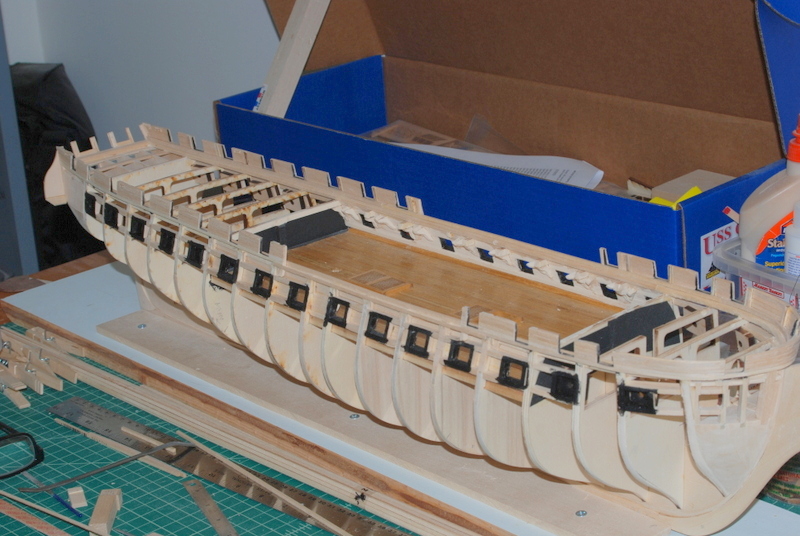
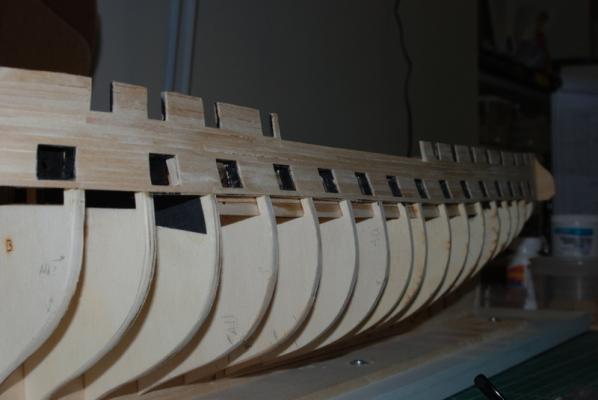
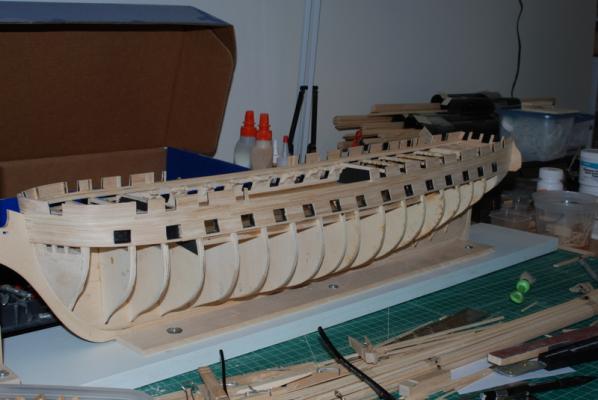
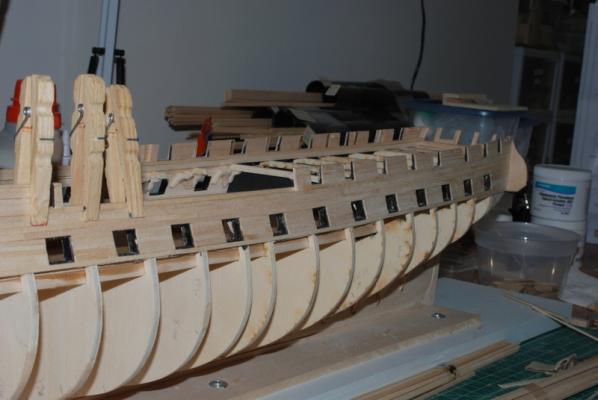
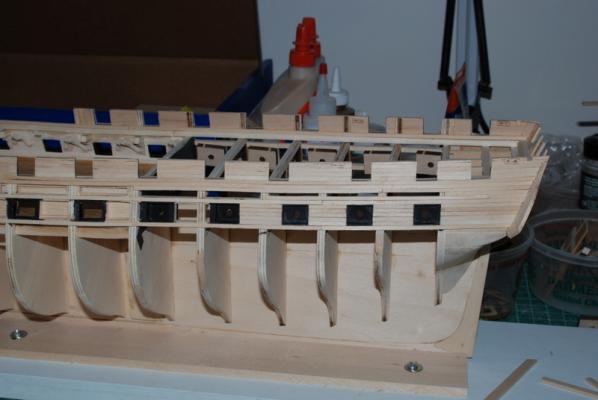
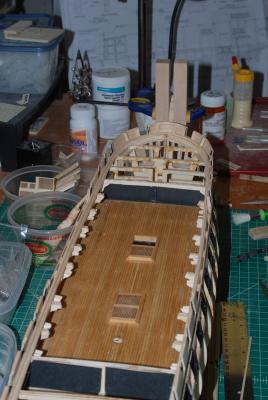
OK, I had to show some planking progress. I am taking my time as best as I can and have gone back and removed some planks I didn't like, but progress is being made. These are all raw planking - no sanding or filler (yet). I started by planking the rows above and below the gun deck gun ports, so that these would be full width planks and have been filling in between the upper gun port plank and the plank sheer, and between the gun ports. Most of the work has been in the stern but I am also soaking and bending the curved planks in the bow, but can only do a few a night in the bow. Those short planks between the gun ports take a lot of time because there is a 1/32" gap between their ends and the sides of the gun ports, which means I can't sand them to length in place, so they have to be exactly the same to line up vertically for the edges of the gun ports. I will be glad when they are done. I could add a couple more rows of planks under the gun ports, but I may wait until after the other side is planked like this side, so that I can use those two rows to adjust the height of the wales between the two sides, if I need to. I am having 10 yards of top soil delivered to the house today that my son and I will be spreading in the circle where the pool was that I took down earlier in the spring, so there won't be too much progress this weekend.


- 1,354 replies
-
- 9
-
-
- constitution
- model shipways
- (and 1 more)
-
Wow, that rear deck looks great. If you didn't say anything, I would have thought it was individual planks.
- 296 replies
-
- 1
-
-
- herreshoff
- buzzards bay
- (and 1 more)
-
Looks good, Mundie.
-
Nice job Markku. I also had problems with those plans at the bow which I modified as I went along. I still have to drill through the bow bulwark planking for the bow sprit, but I test fit before planking to make sure there was room for it, as you did here. I will enjoy following along with your build.
-
Cutty Sark by NenadM
usedtosail replied to NenadM's topic in - Build logs for subjects built 1851 - 1900
Nenad, I can just picture you taking a break, smoking a cigarette and looking at your lighter, thinking to yourself, Hey that might be just what I need! (And I see from your other post that is just what happened.) I love your build so far and your sense of humor. Nicely done. -
Rich, I learned that lesson when I tried using nails to bend wood, a few models ago. When I saw you using those thumb tacks, I thought it was brilliant.
-
BTW, Pete, I love the natural wood of your models. I hope to aspire to that level of craftsmanship someday.
- 1,354 replies
-
- 1
-
-
- constitution
- model shipways
- (and 1 more)
-
Don't get me wrong, I enjoy all aspects of building, including planking. This is just a bigger job than I have had so far. I'm just glad this is single planked and will be painted/coppered over.
- 1,354 replies
-
- 2
-
-
- constitution
- model shipways
- (and 1 more)
-
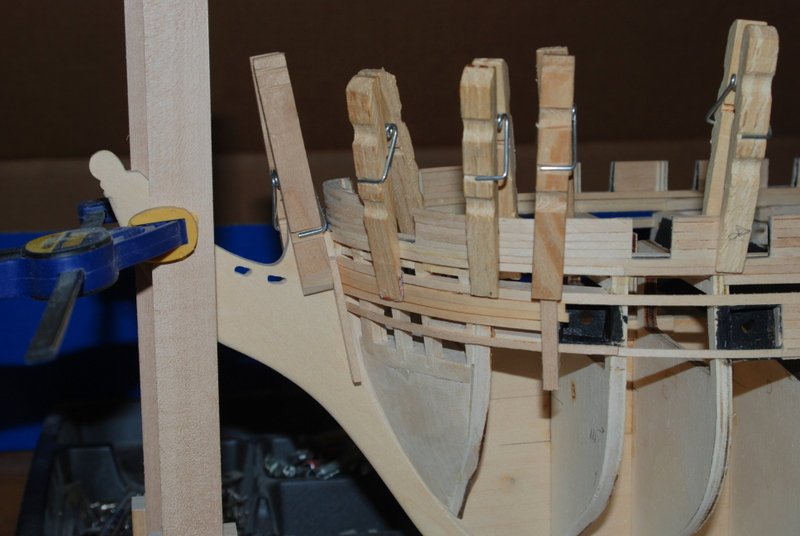
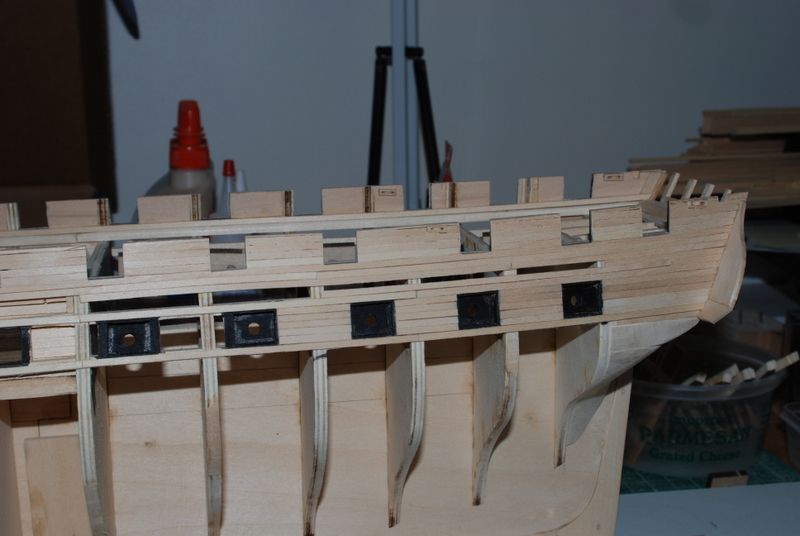
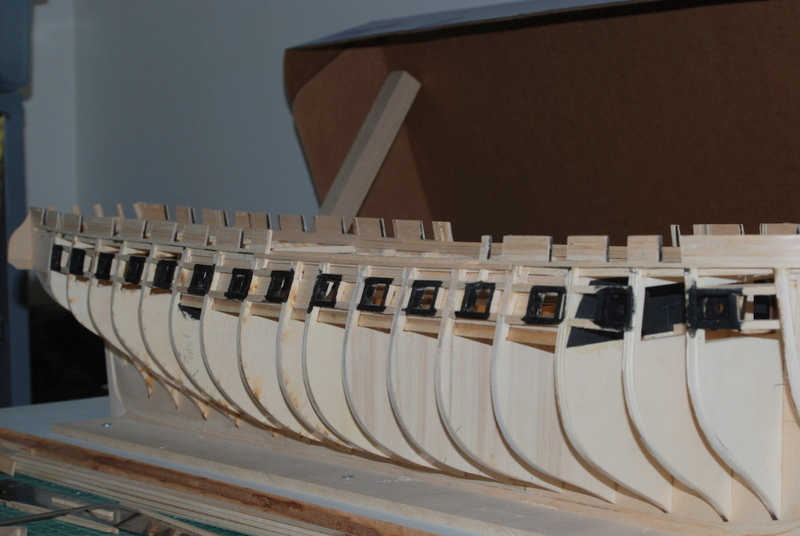
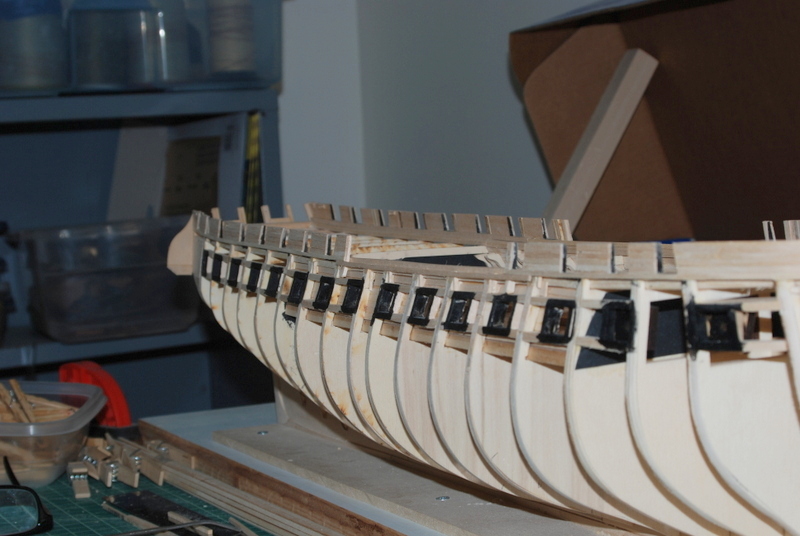
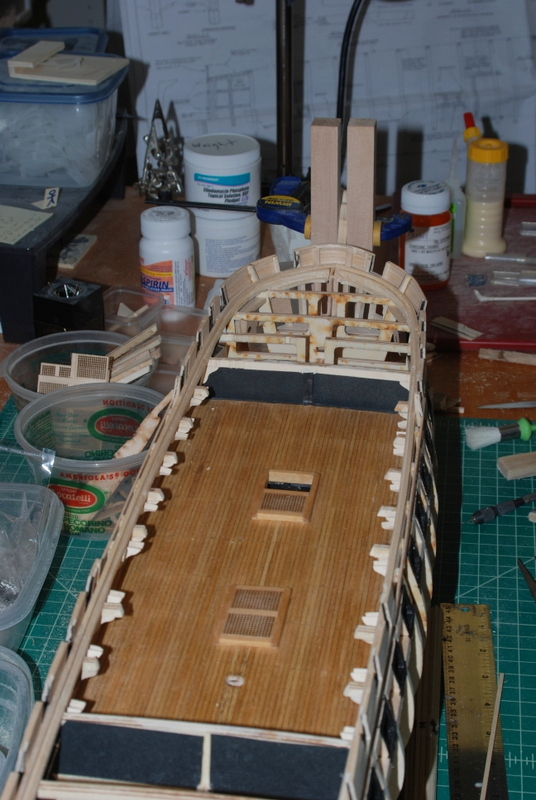
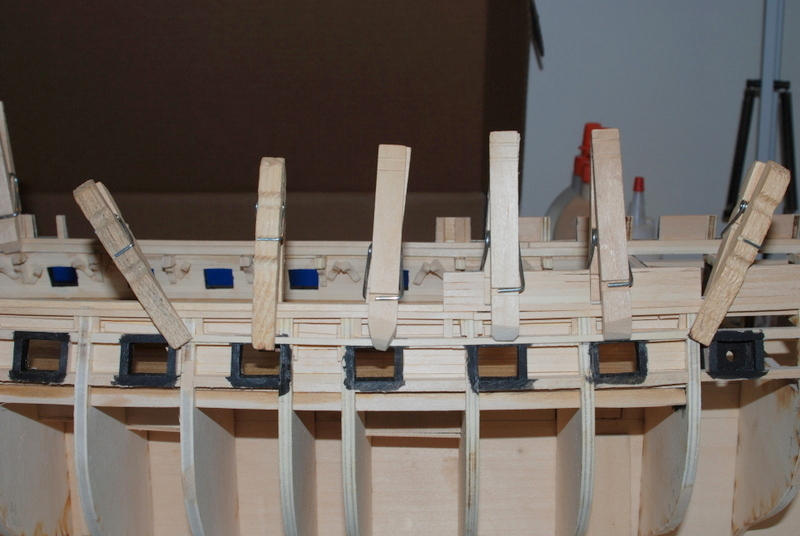
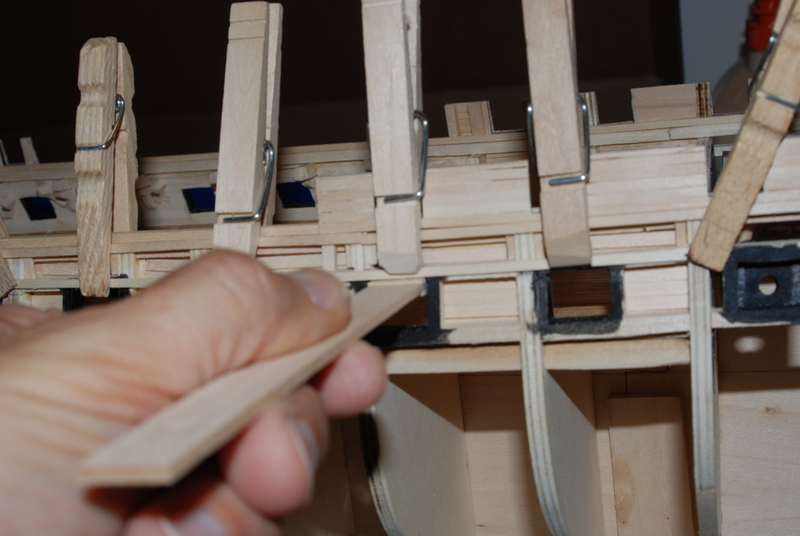
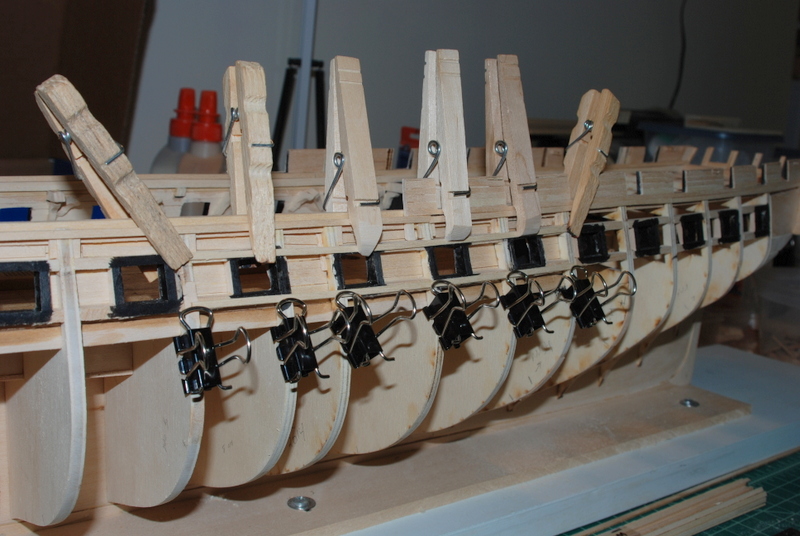
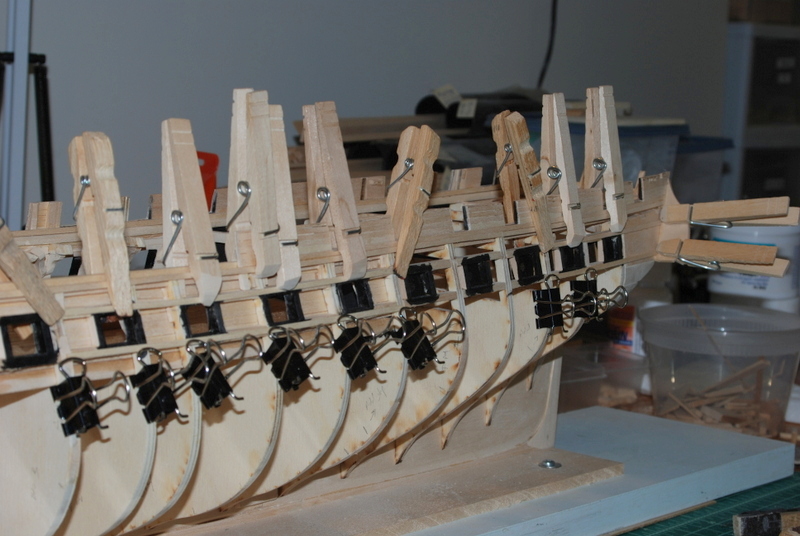
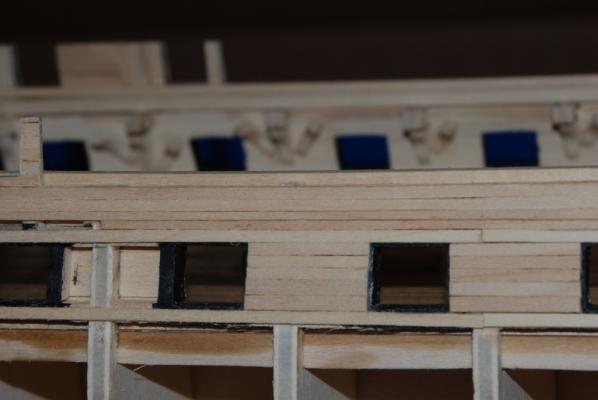
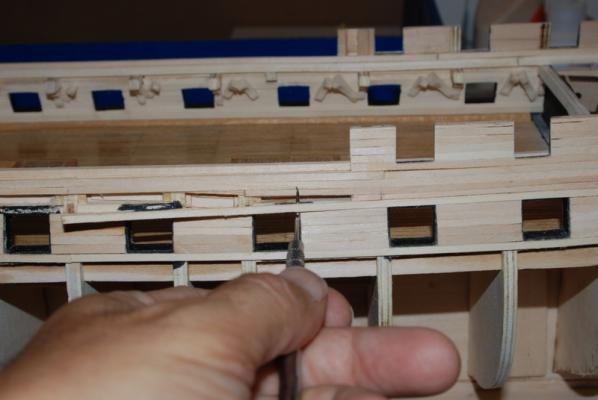
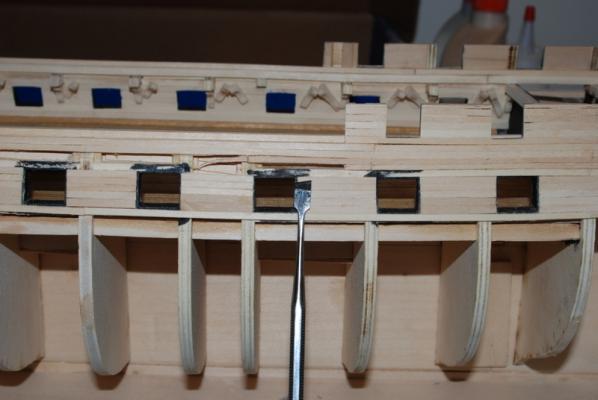
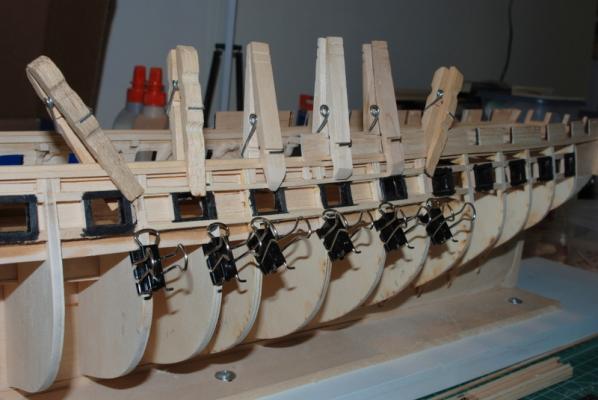
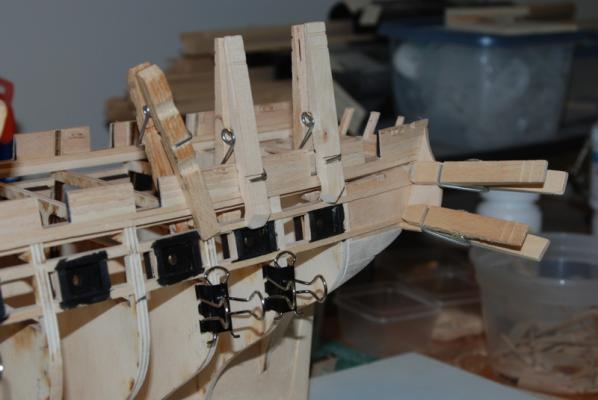
As promised, pictures of the completed outer bulwarks. The inside planking for these will come later. Here is a view of the reworked spar deck water ways and plank sheer. So now I have started planking around the gun deck gun ports. I first calculated how many planks would fit below the plank sheer to the plank above the gun ports, leaving a 1/32" space all the way around them. If I use all 3/32" wide planks, I will have about a half plank above the gun ports, but if I use 1/8" wide planks for two of them and sand them down to about 7/64", they will fit nicely and still look about even. So with that figured out, I was able to add a plank above some of the central gun ports. I found a group where I could place a plank of a good length without having the ends right at a gun port, which wouldn't seem right to me. I made a little tool to help get the gaps consistent, which is just a piece of wood that fits into the gun port with a piece of 1/32" wood glued to it. I measure one gun port at a time, starting in the center and work my way to the ends. As I measure each port, I clamp the plank at that port, then go back and check that the plank didn't move after all the clamps are on. I also made sure the ends were at the correct height so that the adjacent planks can line up with the adjacent gun ports with a smooth run of the planks. After the two upper planks were added, I added two planks below the gun ports, using the same method, just different style clamps. The planking material for this hull is so narrow, it is going to take a long time to plank it. I'll try not to bore you all with too many updates once I get into the more routine planking, if there is such a thing.


- 1,354 replies
-
- 6
-
-
- constitution
- model shipways
- (and 1 more)