usedtosail
-
Posts
2,421 -
Joined
-
Last visited
Content Type
Profiles
Forums
Gallery
Events
Everything posted by usedtosail
-
 I don't think so Mundie. I think that was just how they were drafted.
 -
Thanks Rich for the tips on the hammock nets. They look great. I will use that same method when I get to them (in a year or two or three).
- 1,756 replies
-
- 1
-

-
- constitution
- constructo
- (and 1 more)
-
You are welcome Richard. And if you ever need to loosen CA glue, acetone works well.
-
Oh my, that looks very delicate at this stage.
-
Thanks Wayne. That description fits the references.
-
The Age of Fighting Sail, C. S. Forester - War of 1812. One reference was to chopping the topgallant forcastle up with axes to lighten the ship, so I know it was not a stay. I don't have the book here with me, but I could find the specific reference later.
-
I saw this term referenced twice in a book I just finished. Is it a second level on the forecastle? The reference was to British ships in the 1814 era.
-
Did you try isopropyl alcohol? It should loosen the wood glue. But, wood filler works too. Nice progress so far.
-
Model Shipways provides one of the kits. You can get it in the US from Model Expo. I think they ship to Australia, too, but it is probably expensive. I think OcCre provides the other kit, and I know they are quite different. For instance, the OcCre kit has a bowsprit and the MS kit does not.
-
Glad you got it fixed, Sal. I won't tell you how I know to try that method...
- 139 replies
-
- 1
-
-
- phantom
- model shipways
- (and 1 more)
-
Sal, Nice idea with the compass to cut your boom rest. I remember having a lot of trouble with that step and ended up using a metal washer that was the right size. For your missing mast hoops, you might try making them around the top mast, using some masking tape wrapped around the topmast to get the right diameter and keep glue off the mast.
-
I'll be happy to send copies, but I realize that I can't attach an Excel spreadsheet to a PM, so whomever would like a copy, please PM me your email address and I will send it to you that way. Also, if you are using an older version of Excel, let me know and I will send you an version that will work with that version.
- 1,354 replies
-
- 1
-
-
- constitution
- model shipways
- (and 1 more)
-
Tim - your Pinky Schooner is really coming out nicely, so your Constitution should be great too when you can start on it in your new house. Richard - not sure design is the right word, but it is my own doing. As spreadsheets go, it is really very simple. I would be happy to make it available to anyone that wanted it, though. It would need some modification for each kit, though, based on number of bulkheads and planking bands, but that is simple cut and paste stuff.
- 1,354 replies
-
- 1
-
-
- constitution
- model shipways
- (and 1 more)
-
Thanks Tim and Richard, and all the likers. Richard, the spreadsheet looks like this. This is the start of one row representing the planking band between the top and bottom of the wales, so all the wale planks, and columns for the first three bulkheads. There are other rows for the other bands and other columns for the rest of bulkheads. I first establish each planking band, using a batten to check the run of the planks at the top and bottom of the band. I then mark the locations of the top and bottom of the band off the battens, and measure the gap between them at each bulkhead, which goes in the first row labeled "Gap". I then measure the width of the planks I want to use across that gap, and the number of planks to fill that gap, which go in the next two rows. The bottom row is calculated from the above information, which is the width of each of the planks to fill that gap using that number of planks. I can play with different starting widths and different # of planks to make sure I get all positive numbers in the bottom row and that I am not taking too much off each plank near the ends, which would call for stealers or dropped planks. It doesn't do all the work for me, but helps me visualize what the planking will look like before I start adding planks.

- 1,354 replies
-
- 3
-
-
- constitution
- model shipways
- (and 1 more)
-
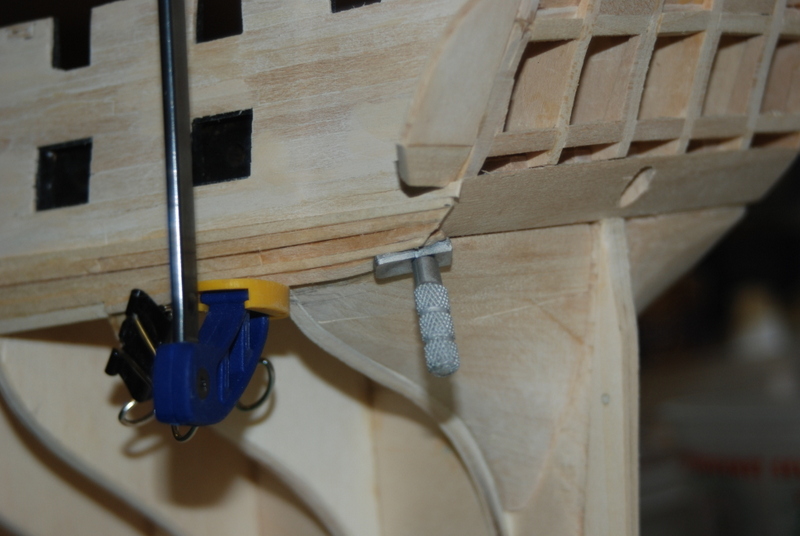
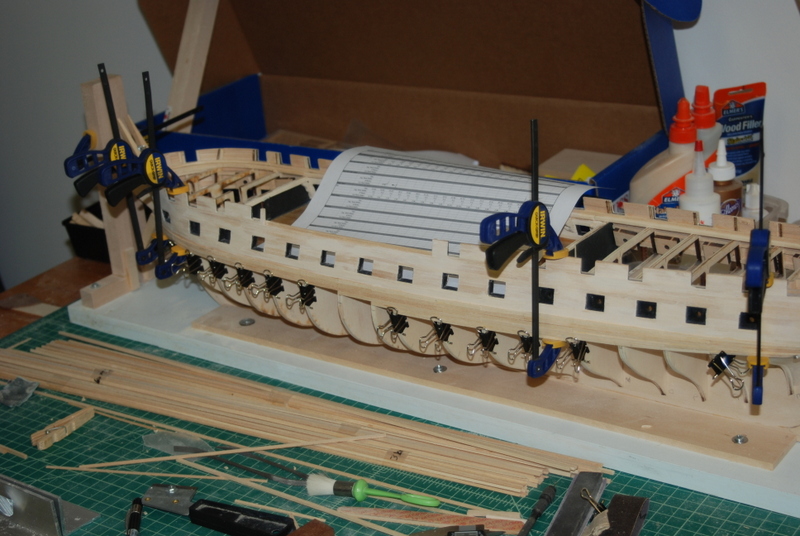
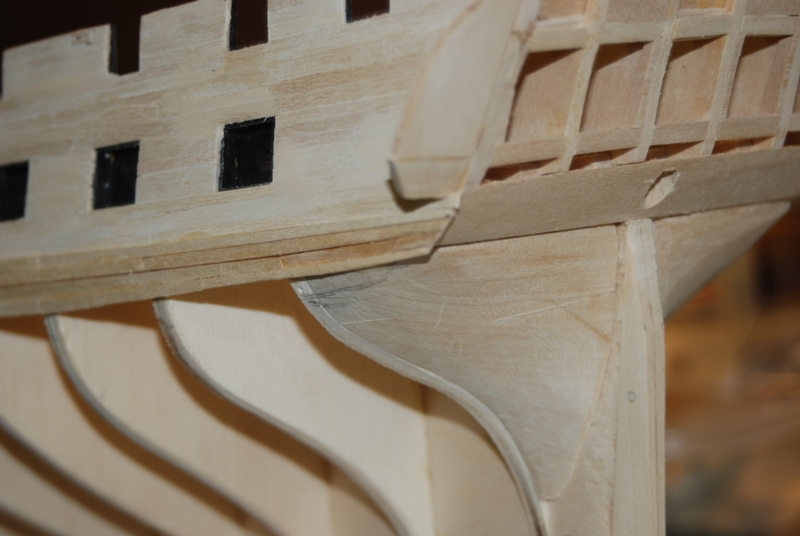
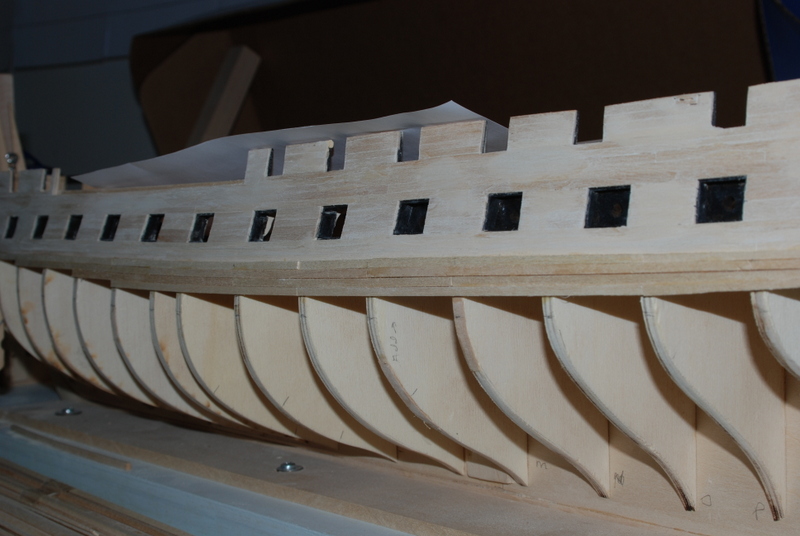
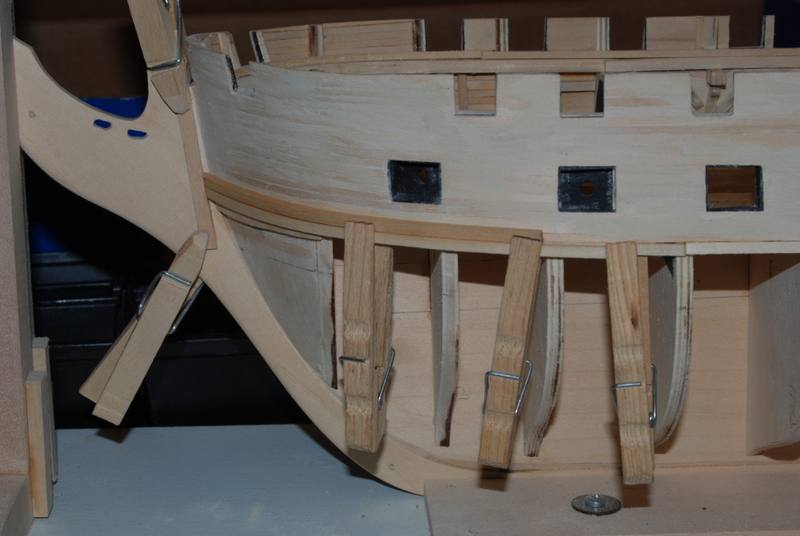
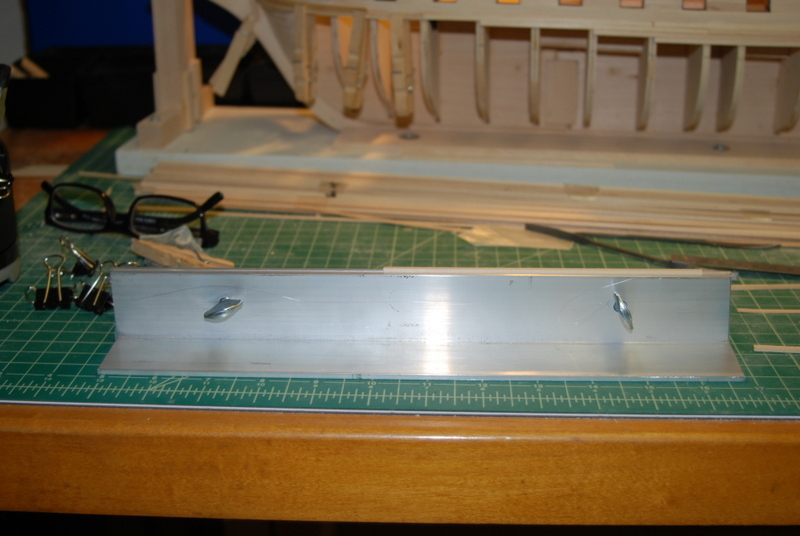
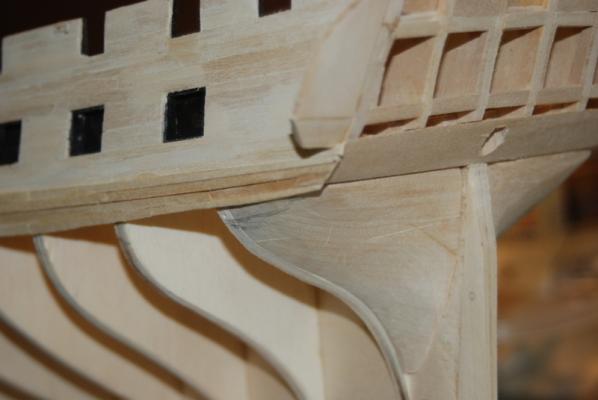
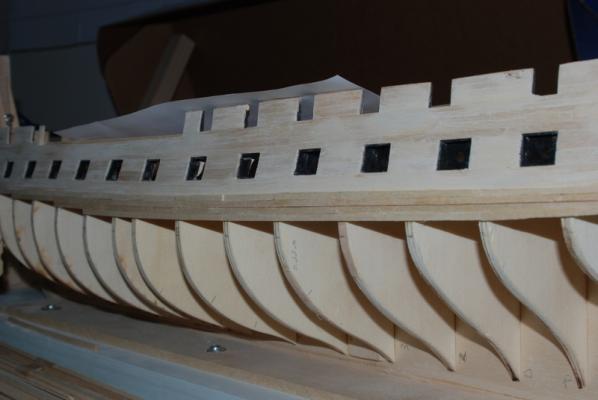
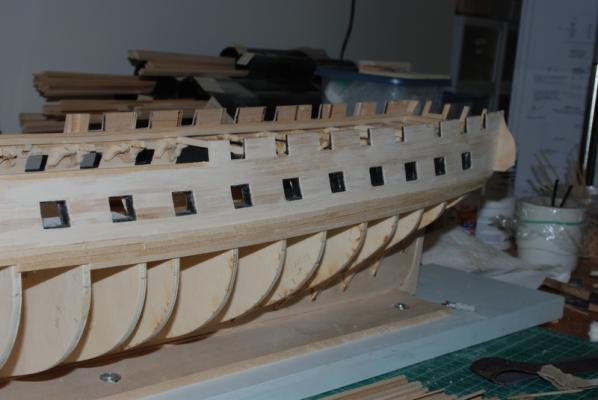
There she blows - the waling (whaling, wailing) continues... Here are some shots after a few of the wale planks were added to the port side. I started from the stern and worked my way forward. These first few planks were not too difficult, with just some tapering to do near the ends. At the bow, I just had to soak and bend the planks to the hull. Here are two planks being bent at the same time. I found that if I bent these just to the bulkheads, I was getting a flat spot right after the bow filler piece, so I wrapped these around the wale above to get continuous support along the length of the plank. Now things are getting more wonky. The rest of the stern wale planks bend up under the counter. I trimmed the ends of the stern planks so I could see what I was doing, then bent the next one under. I am going to need some filler here, don't you think. I have no idea how you guys that single plank and leave your wood natural do it. Someday, someday... And here are some of the center planks being glued in. I used the larger clamps to butt the new planks up against the previous planks. These wale planks are pretty thick, so I also beveled the back edges to get a better fit along the front edges. In that last picture you can see the Excel spreadsheet I made up to calculate and keep track of the plank widths at each bulkhead for each belt. I also made this jig to hep hold the planks while tapering them, out of some aluminum angle: I should be able to finish this side in a few days and give it an initial sanding. I'll have more pictures then.


- 1,354 replies
-
- 10
-
-
- constitution
- model shipways
- (and 1 more)
-
Yes, I sanded with the frames for the final fairing, testing with a batten as I went.
-
Those frames look fantastic. Nice job.
-
To make Hans' (rottger) point, check out this video, especially right at the end...
- 220 replies
-
- 4
-
-
- finished
- volvo open 70
- (and 1 more)
-
Thanks for the plan, Bill. I might try building one for my Connie.
-
Oh thanks for showing those, Steve. Another product to avoid.
- 1,354 replies
-
- 2
-
-
- constitution
- model shipways
- (and 1 more)
-
Captain Steve, I am not sure what the MS planking clamps are, but I have a bunch of stuff that I bought that is pretty useless to me too. Live and learn, I guess, but it is pretty amazing how many times the answer is simpler than we think. I will try to not steer you down the wrong path for your build, but at least it should be pretty obvious if it happens.
- 1,354 replies
-
- 1
-
-
- constitution
- model shipways
- (and 1 more)
-
Geoff, you are so right I had forgotten the rubber bands that I also use. I have a few surgical clamps that I use for rigging, but hadn't thought to use them when planking. But, your post got me thinking about surgical tubing as a clamp, which would be sort of an open ended rubber band. I may have to experiment with it and see if it might work for wrapping around the whole hull, instead of trying to thread a rubber band around the hull. Hmm.
- 1,354 replies
-
- 3
-
-
- constitution
- model shipways
- (and 1 more)
-
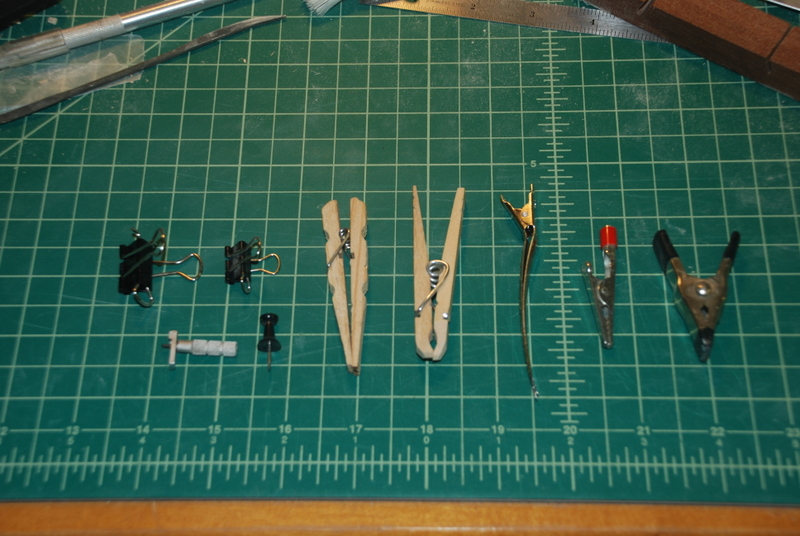
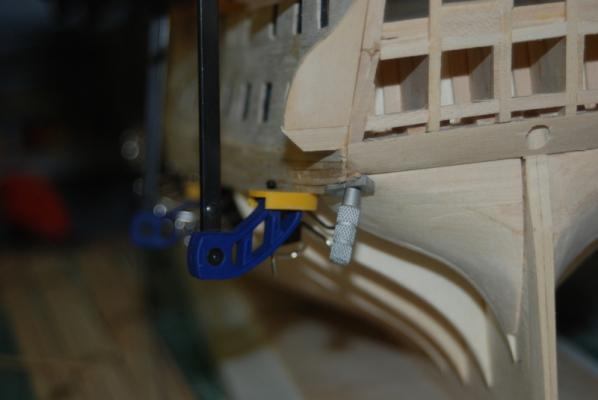
Thanks Pete, Geoff and Ulli ,and the likes. I was thinking about clamps last night and decided to take a picture of all the different types of clamps that I use, especially for planking: I think all of these clamps came off build logs on this site and they all have their uses. The office clip clamps I made in two sizes, with the small ones used when the gap between planks gets too small for the bigger ones. The hair clips came from Danny's build log and come in very handy when there is a long span to clamp over. The flipped clothes pins are great for planking the bulwarks, as you can see from my previous posts. The regular clothes pins have been sanded down to more of a point at the tips and are good for putting pressure on a specific point, but they are pretty shallow. The screw in clamps and push pins are good when there is absolutely no room between planks to get a clamp in, although just using a little CA on the planks works too. The others have been useful around the stem and transom. I also have bigger clamps that can clamp across both sides of the hull, but I use these very rarely. As they say, you can't have enough clamps and I say you can't have enough kinds of clamps.

- 1,354 replies
-
- 4
-
-
- constitution
- model shipways
- (and 1 more)
-
I am going to enjoy following this build too. Plus, I love those racing photos you include in your posts.
- 220 replies
-
- 1
-
-
- finished
- volvo open 70
- (and 1 more)