
HOLIDAY DONATION DRIVE - SUPPORT MSW - DO YOUR PART TO KEEP THIS GREAT FORUM GOING! (Only 75 donations so far out of 49,000 members - C'mon guys!)
×
.JPG.ca33079f5815b861e67b9c2cccd37982.JPG)

Blue Ensign
-
Posts
4,565 -
Joined
-
Last visited
Content Type
Profiles
Forums
Gallery
Events
Everything posted by Blue Ensign
-
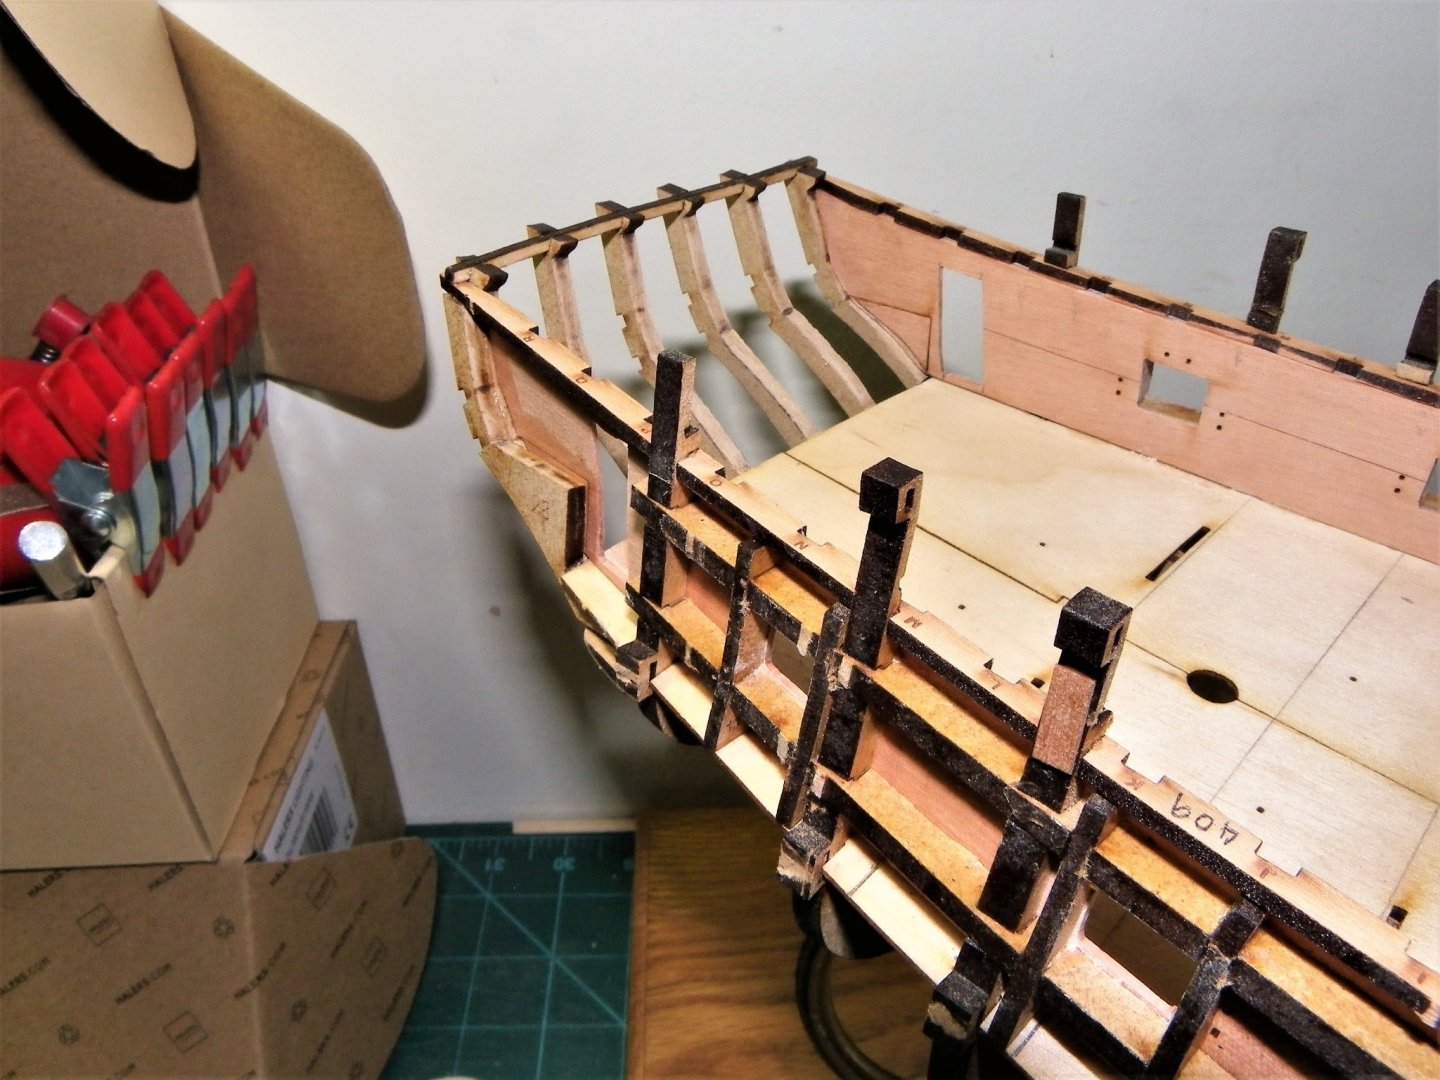
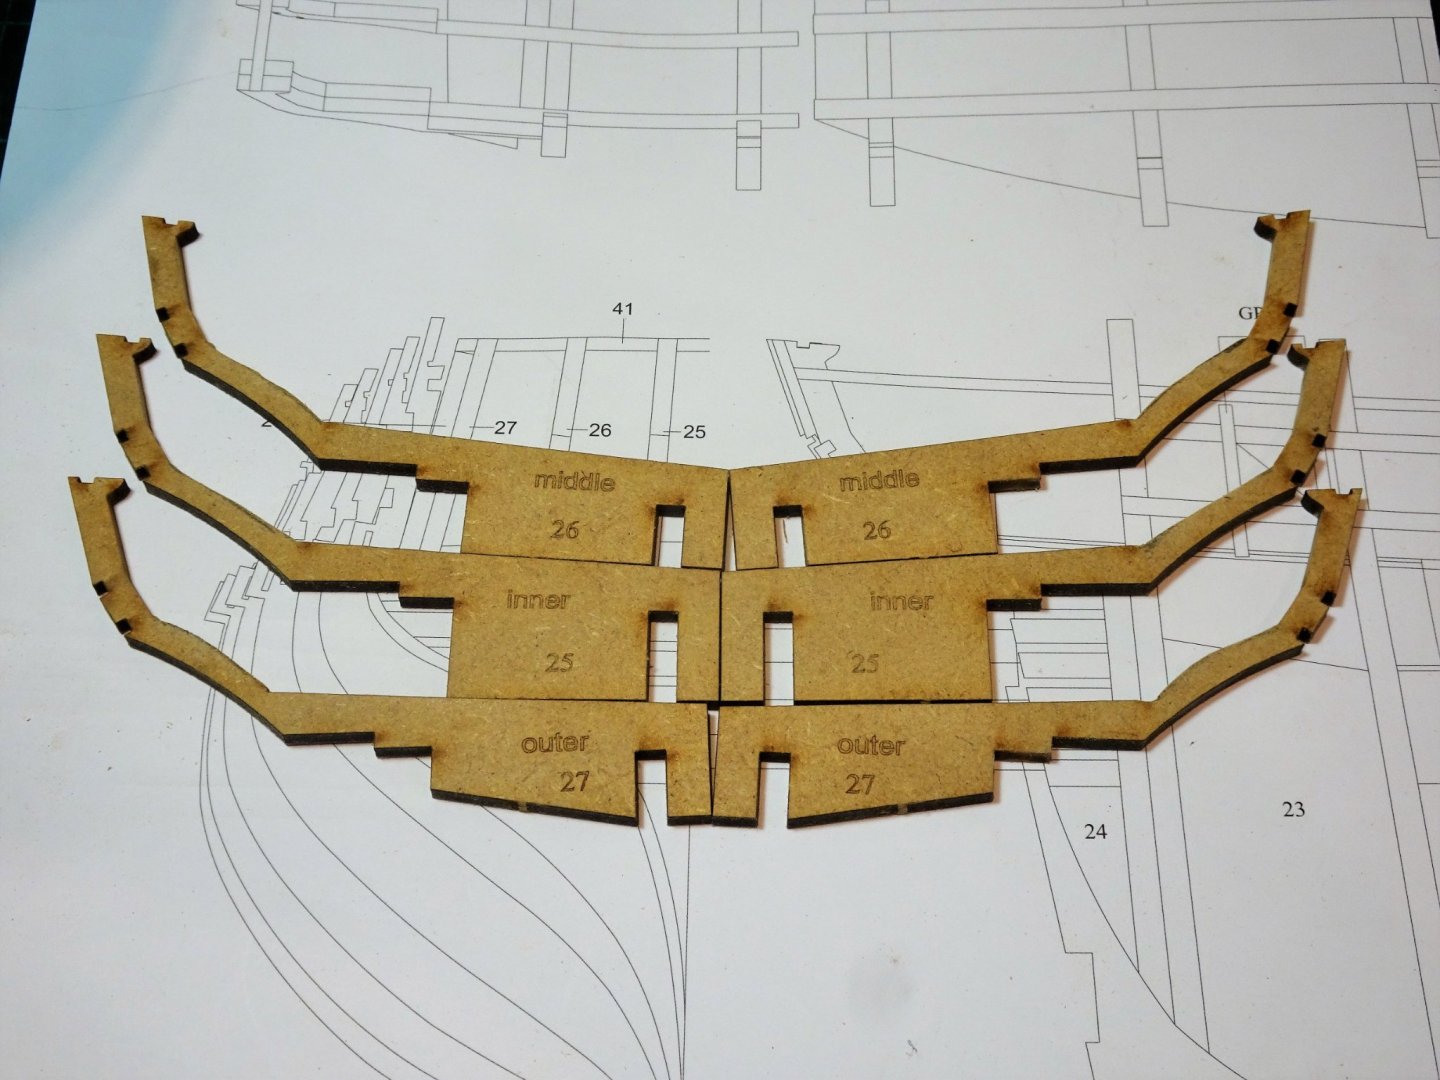
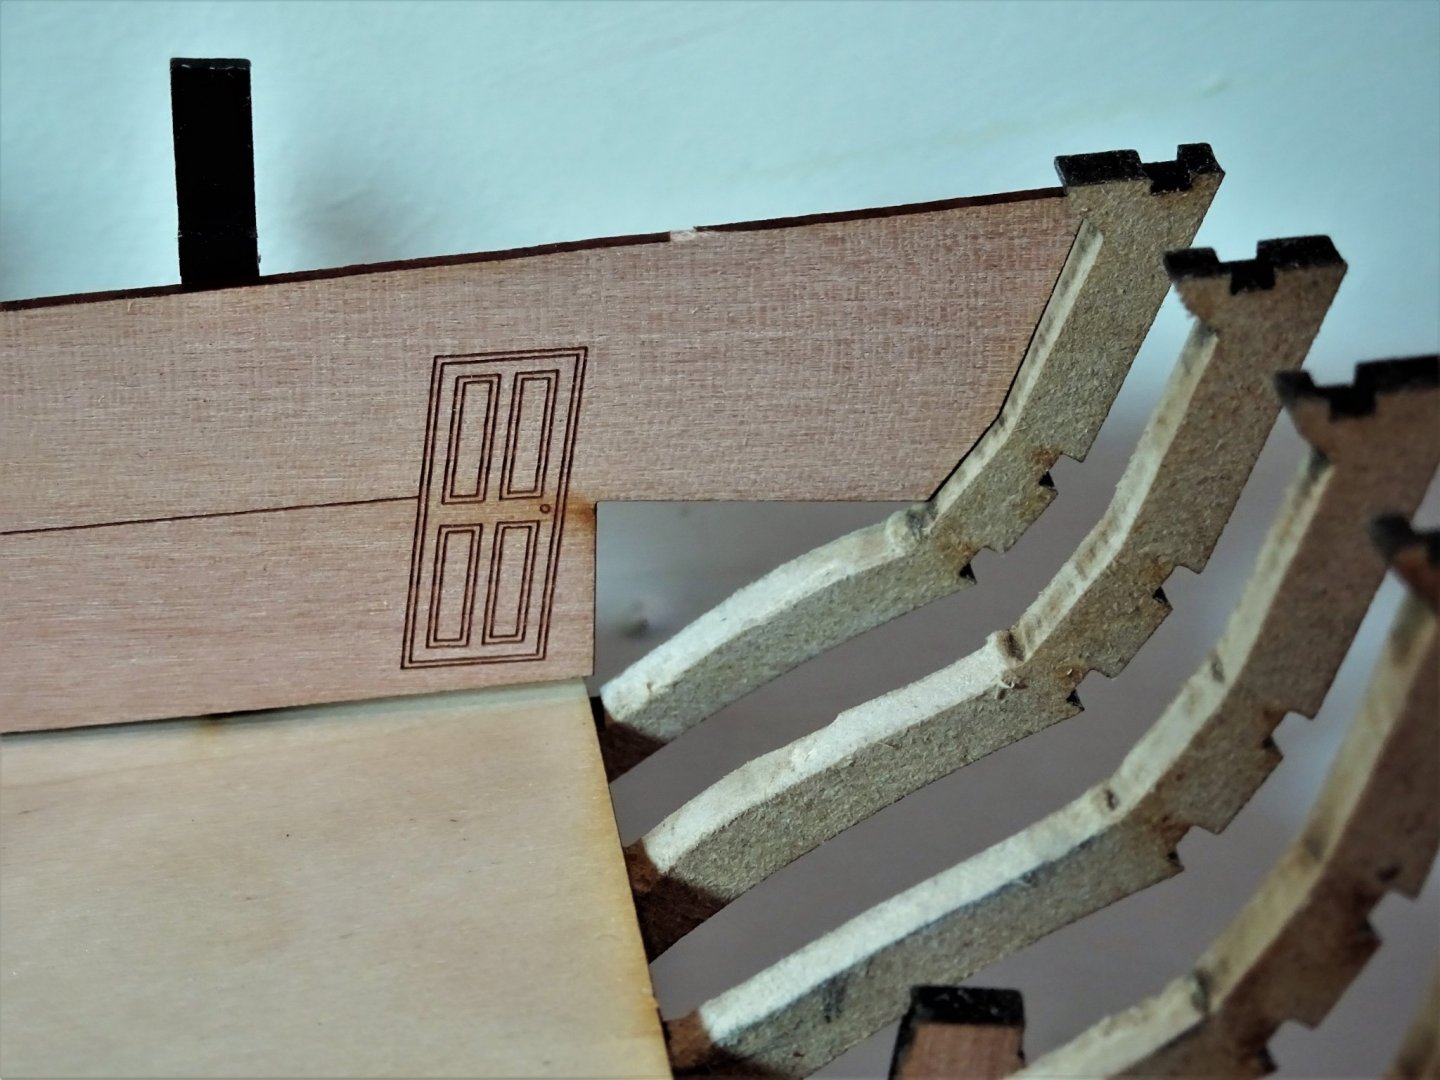
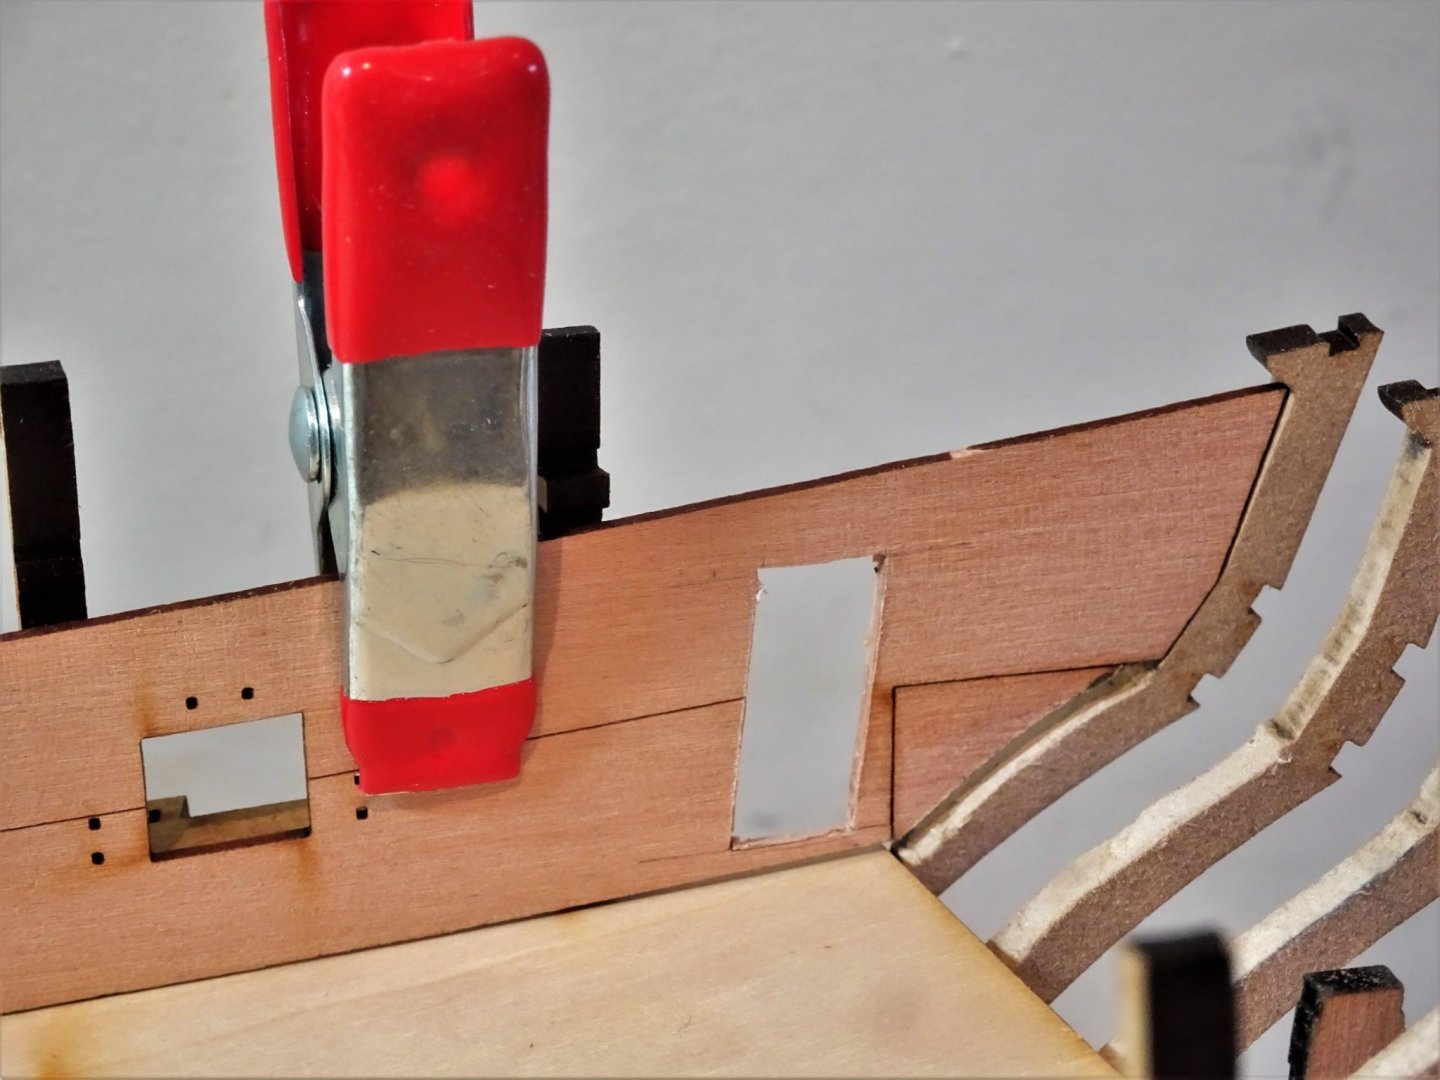
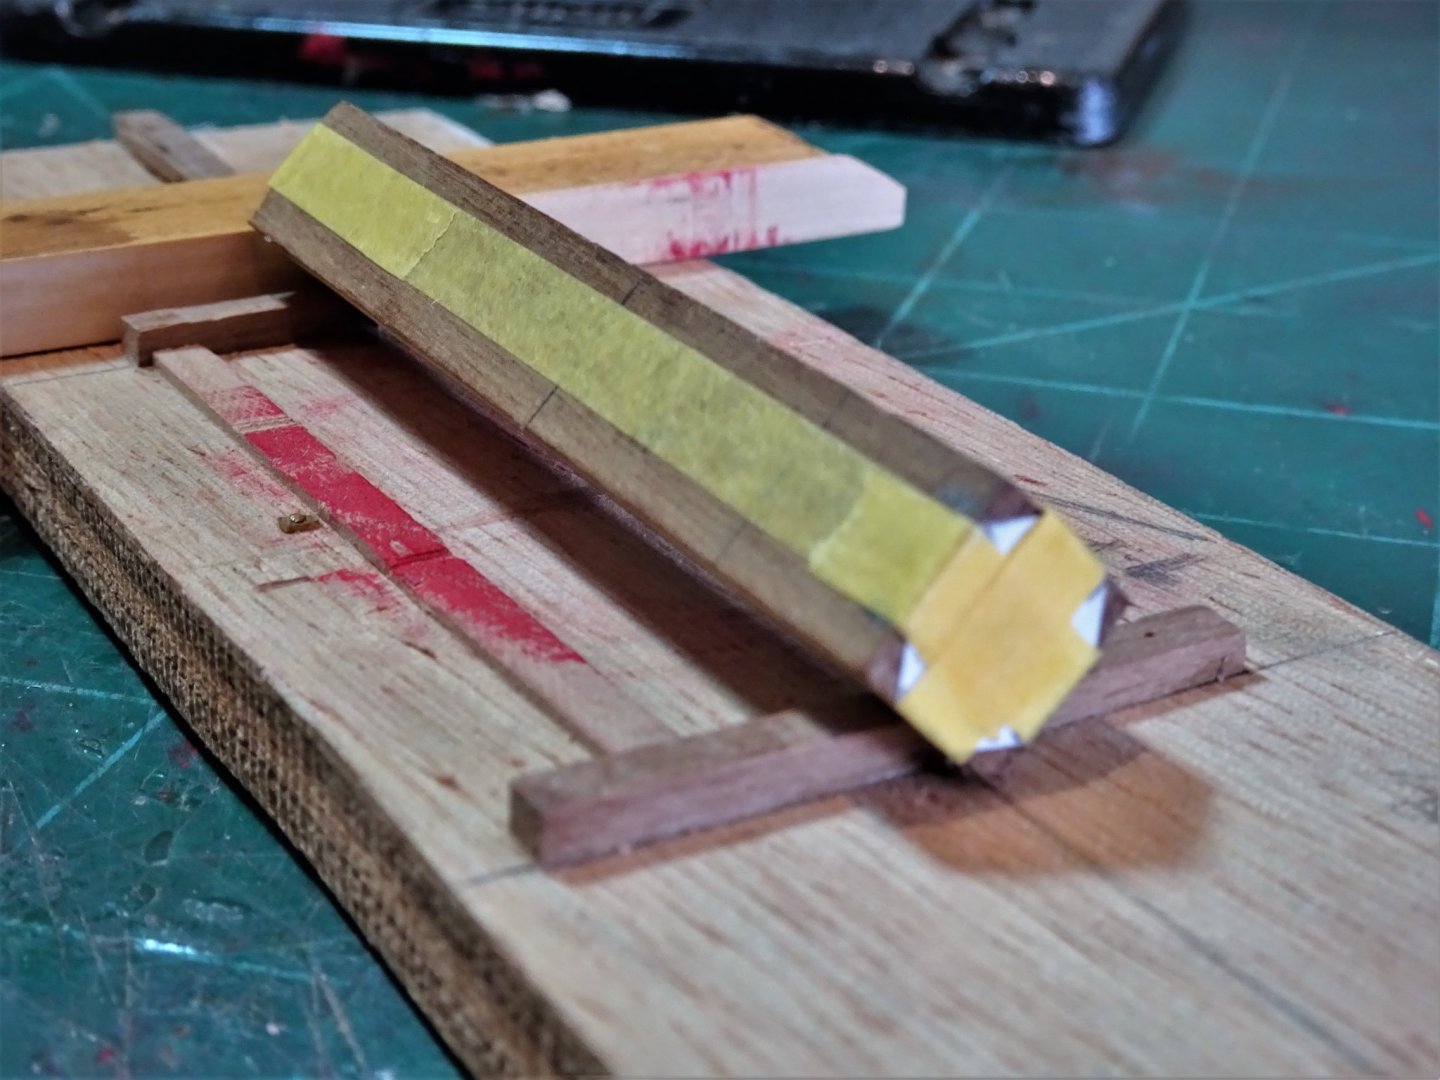
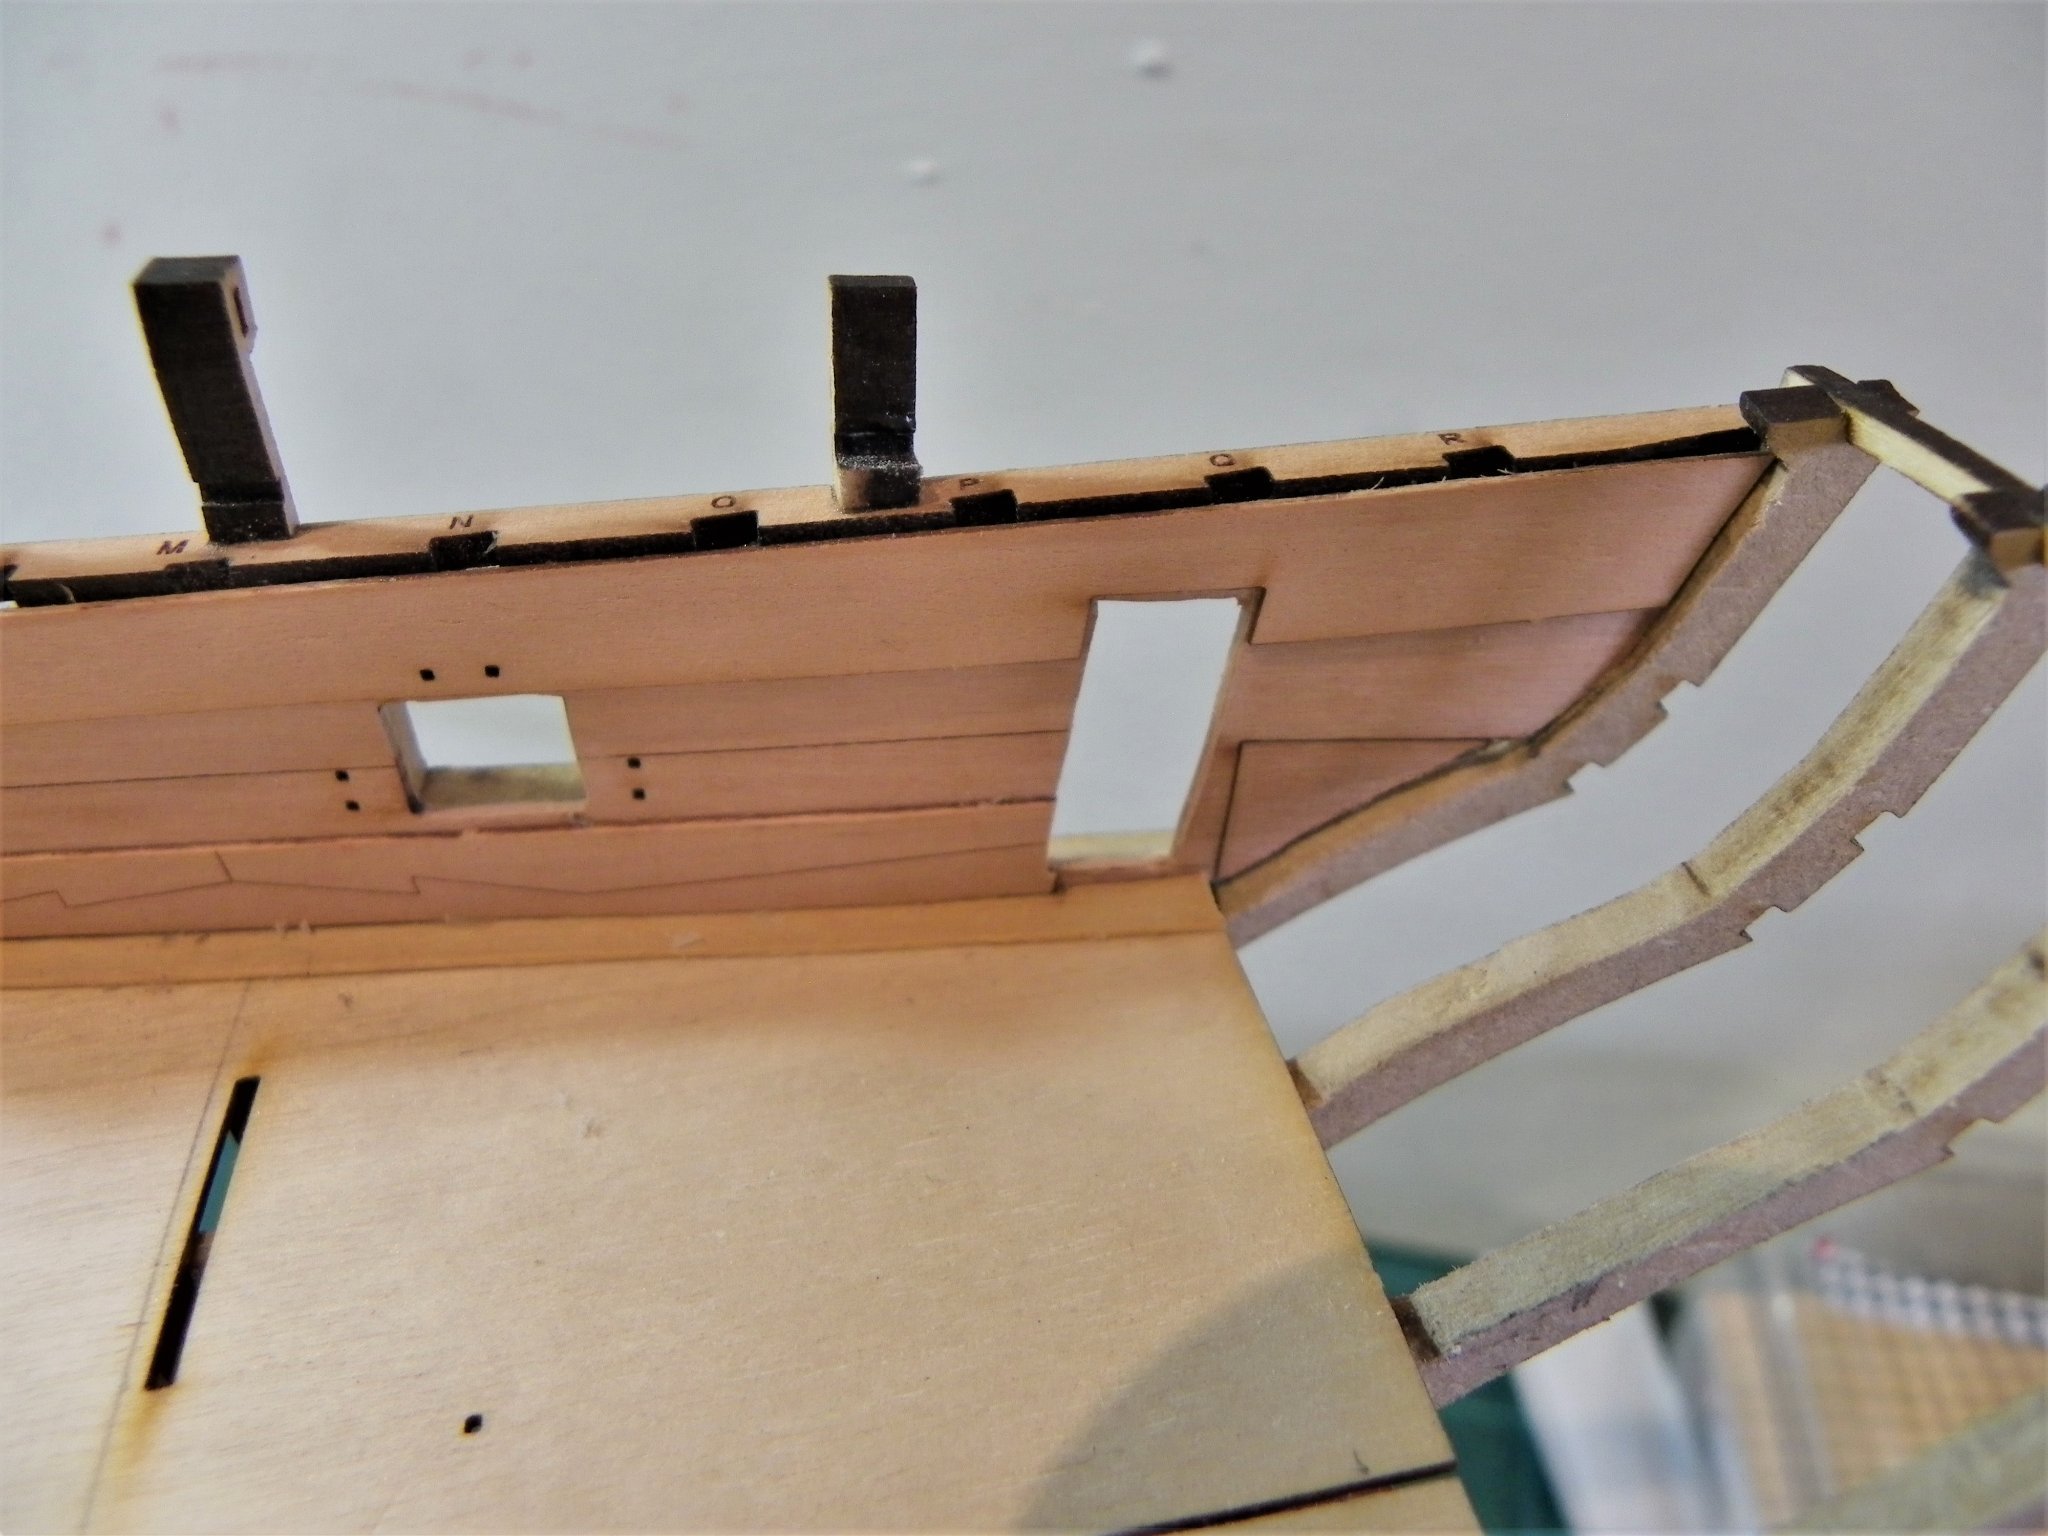
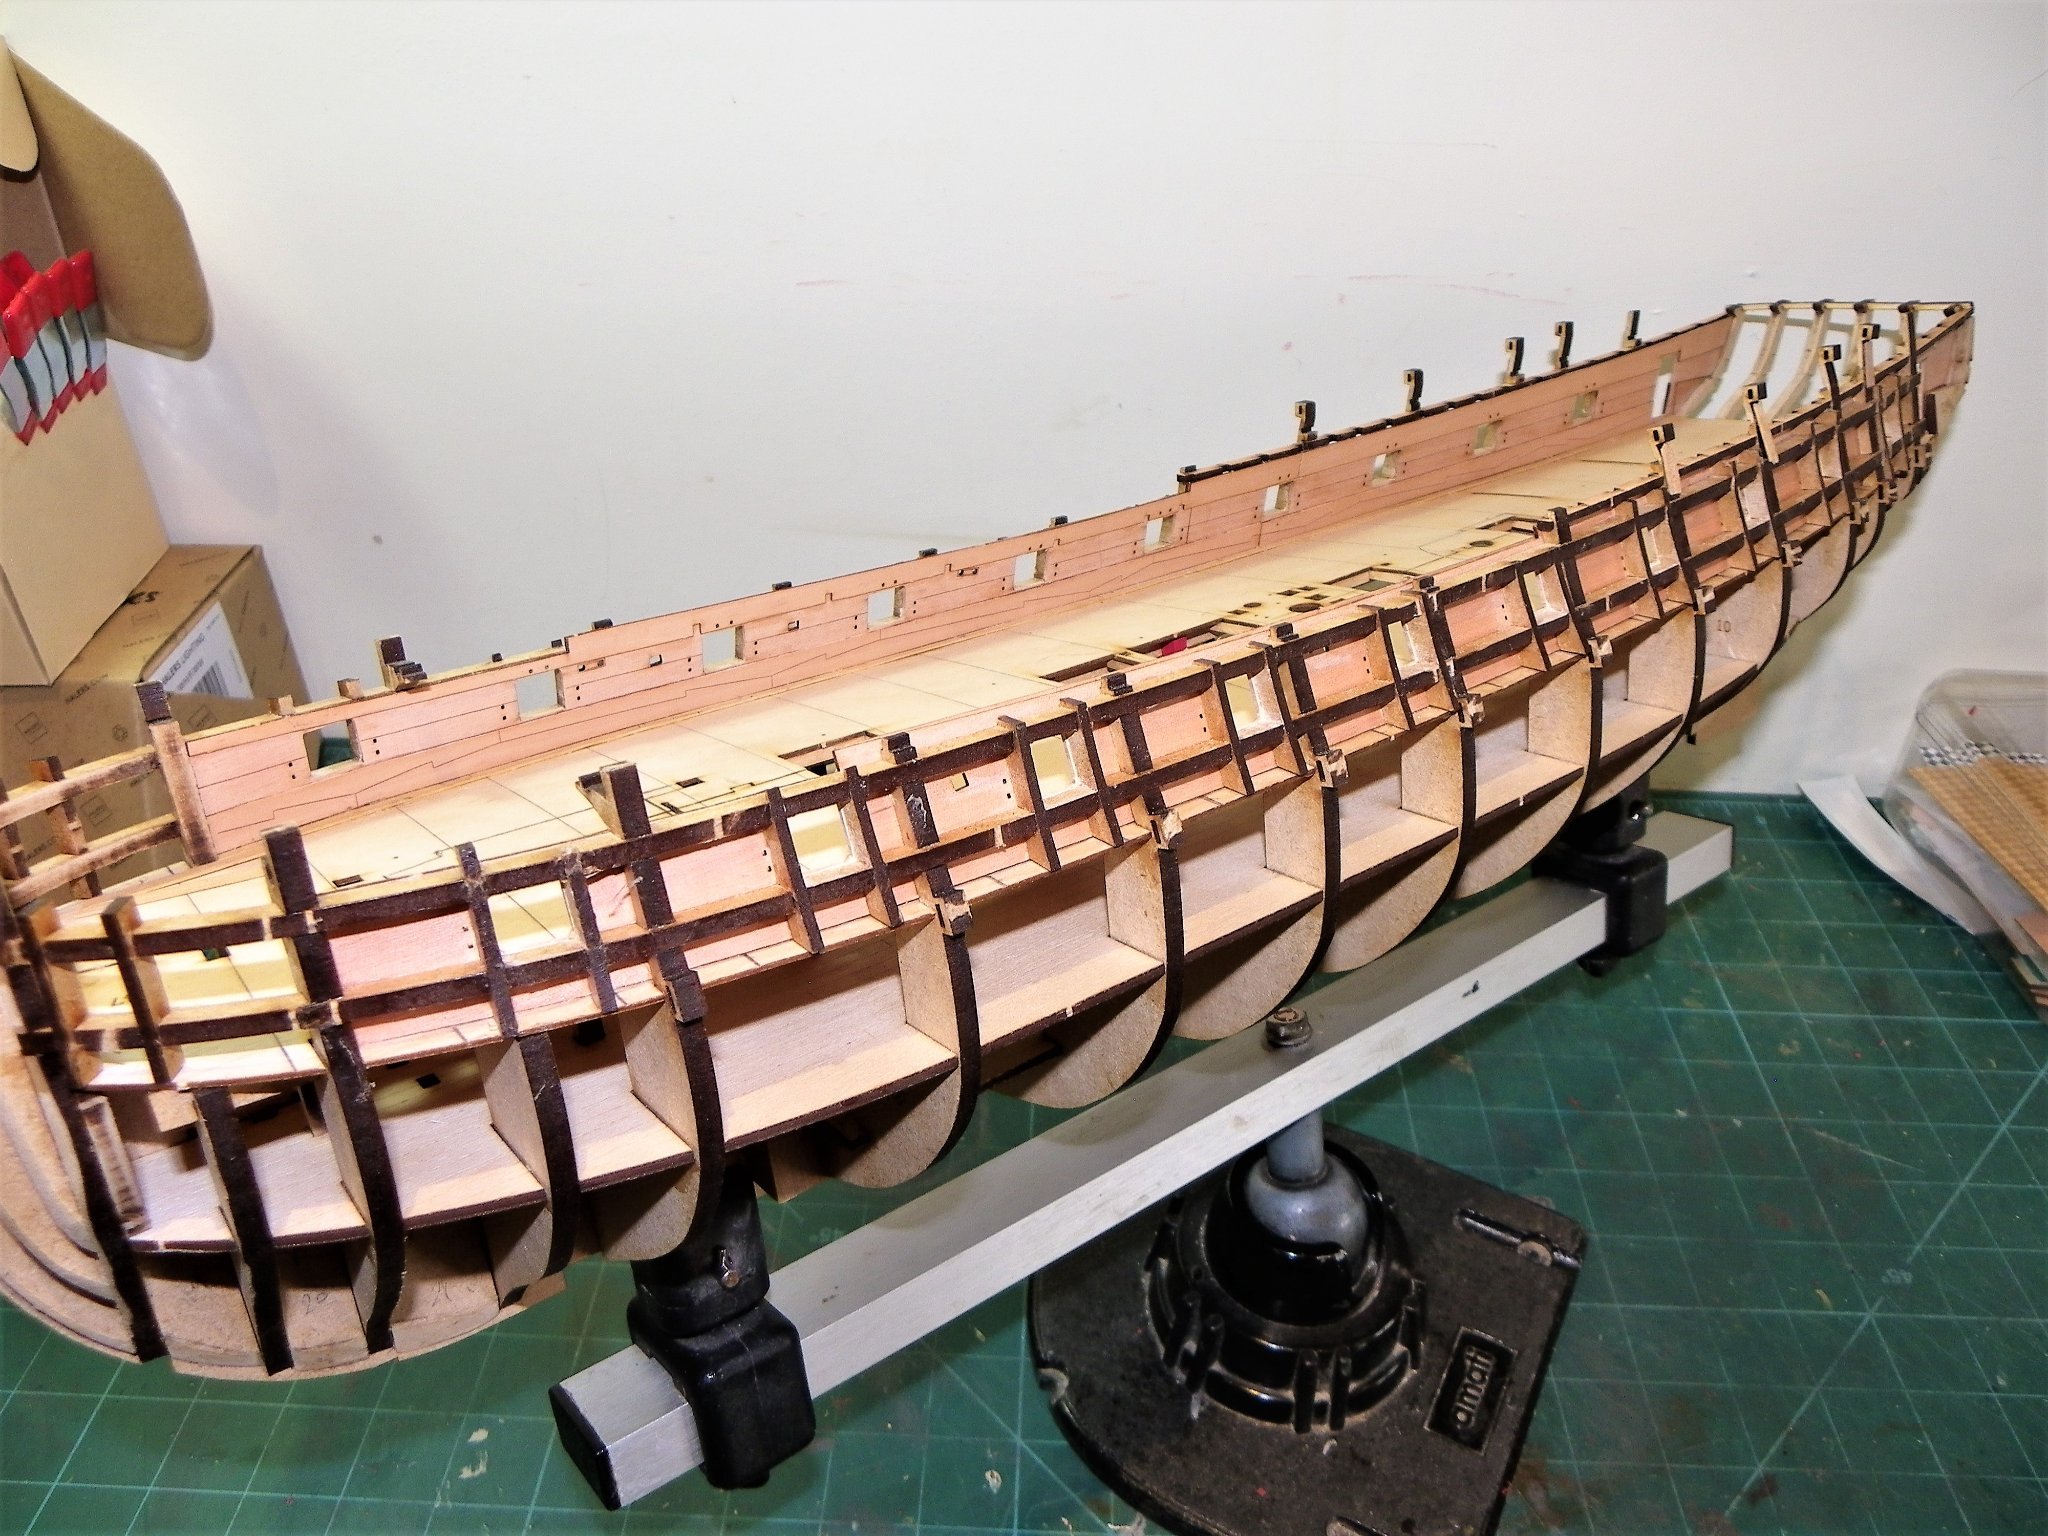
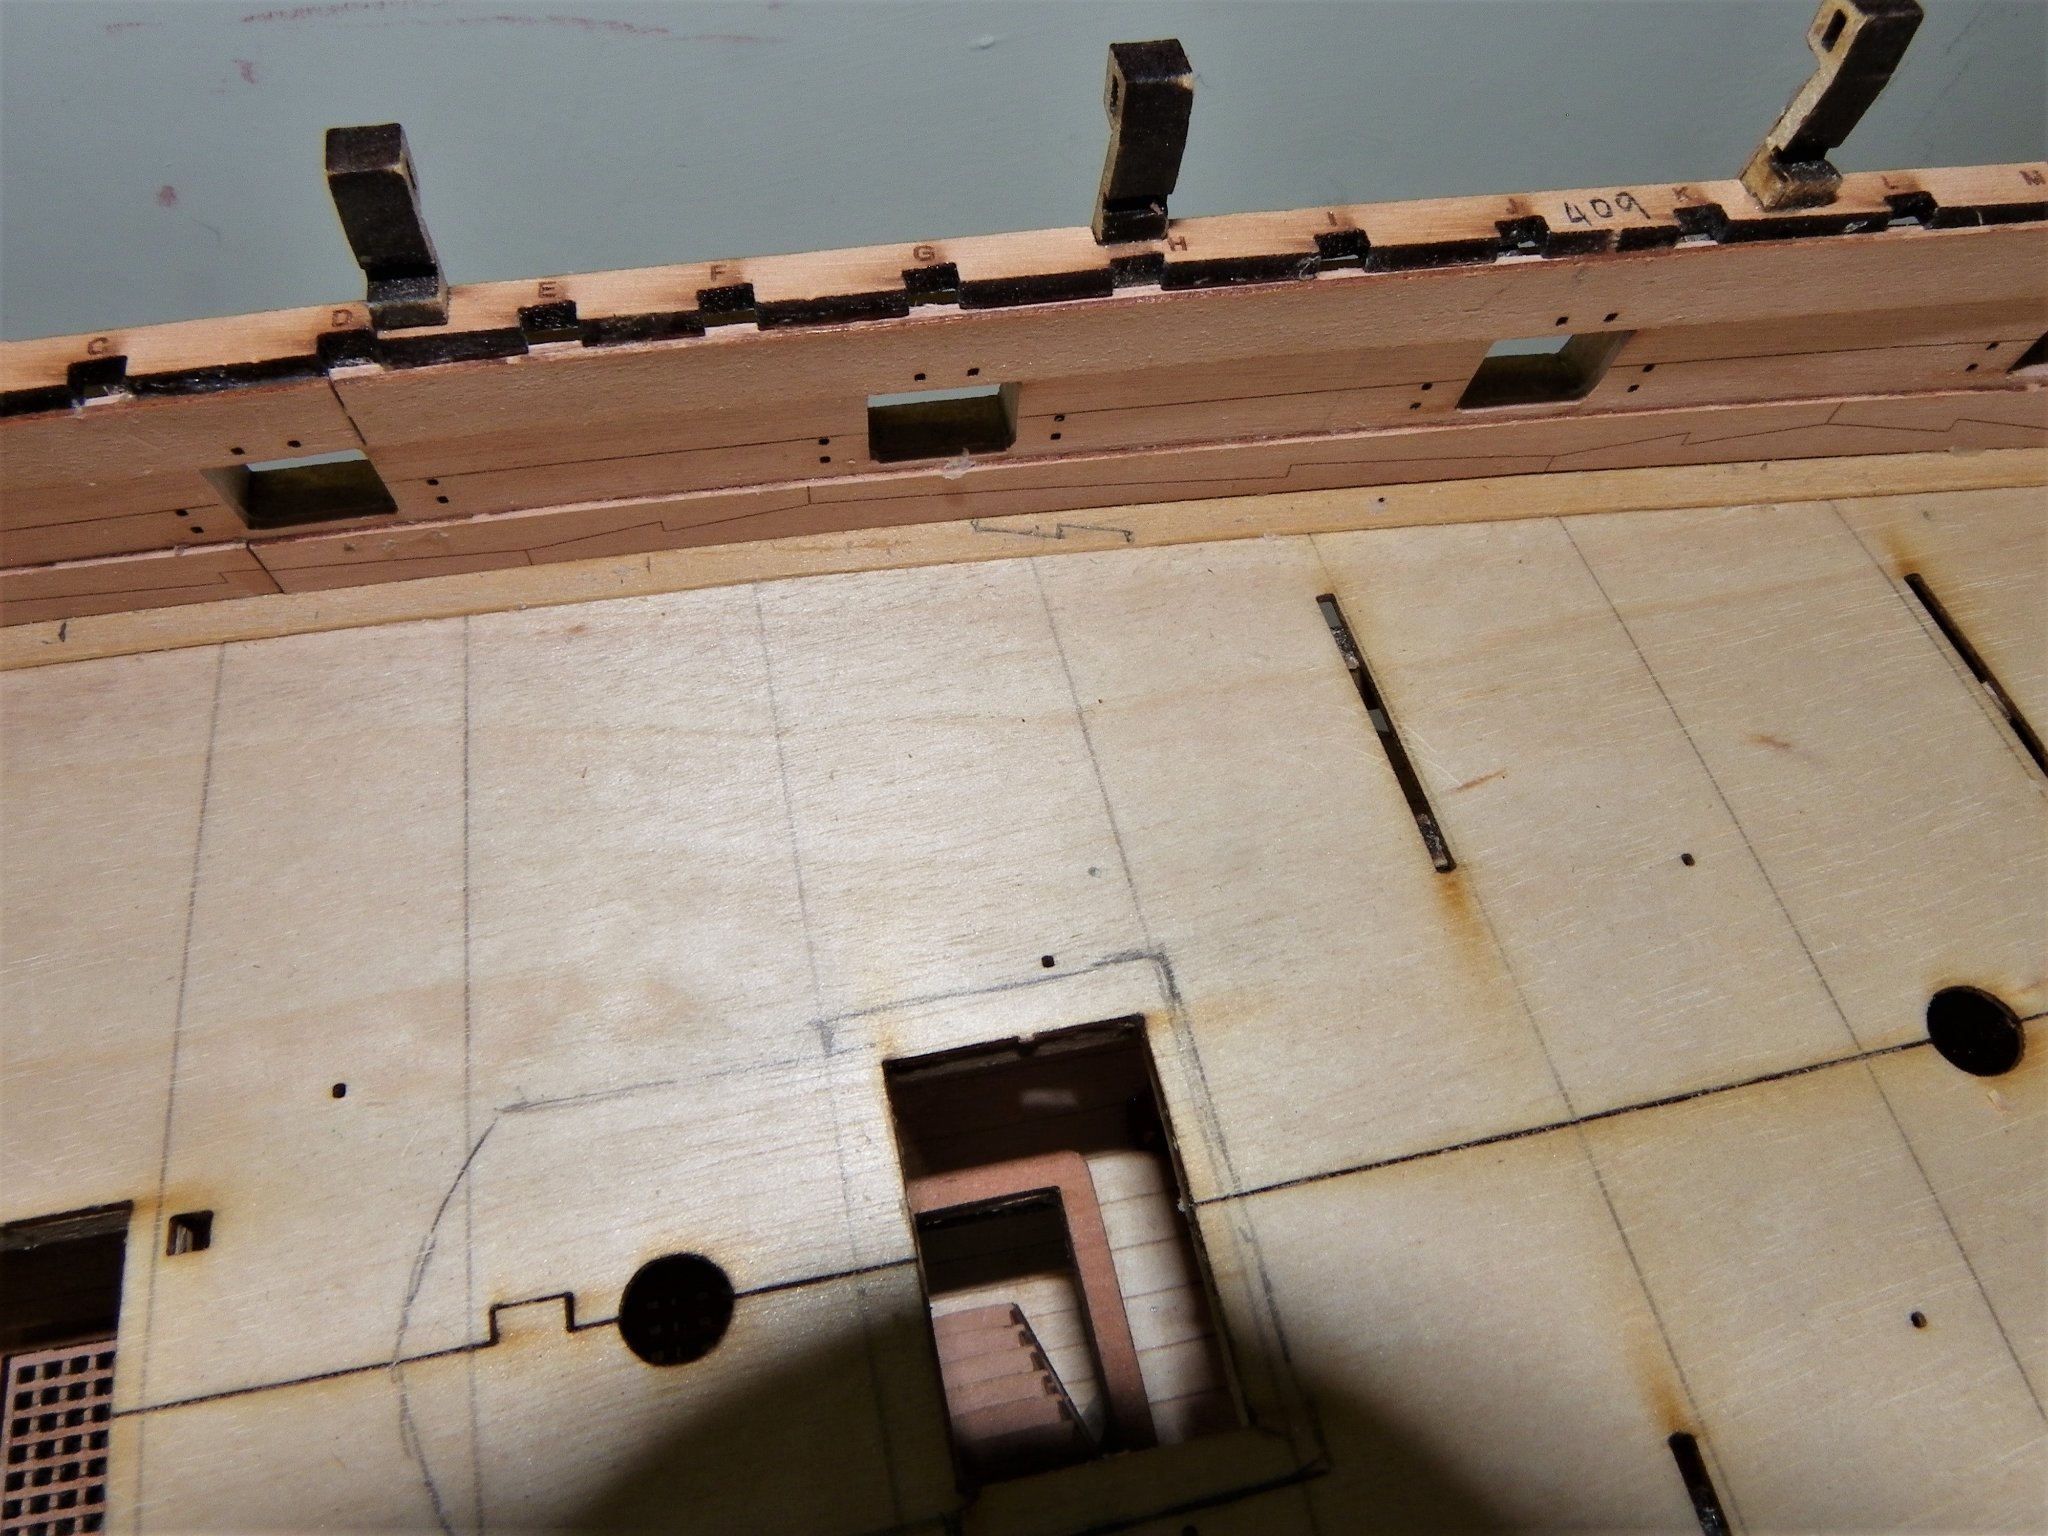
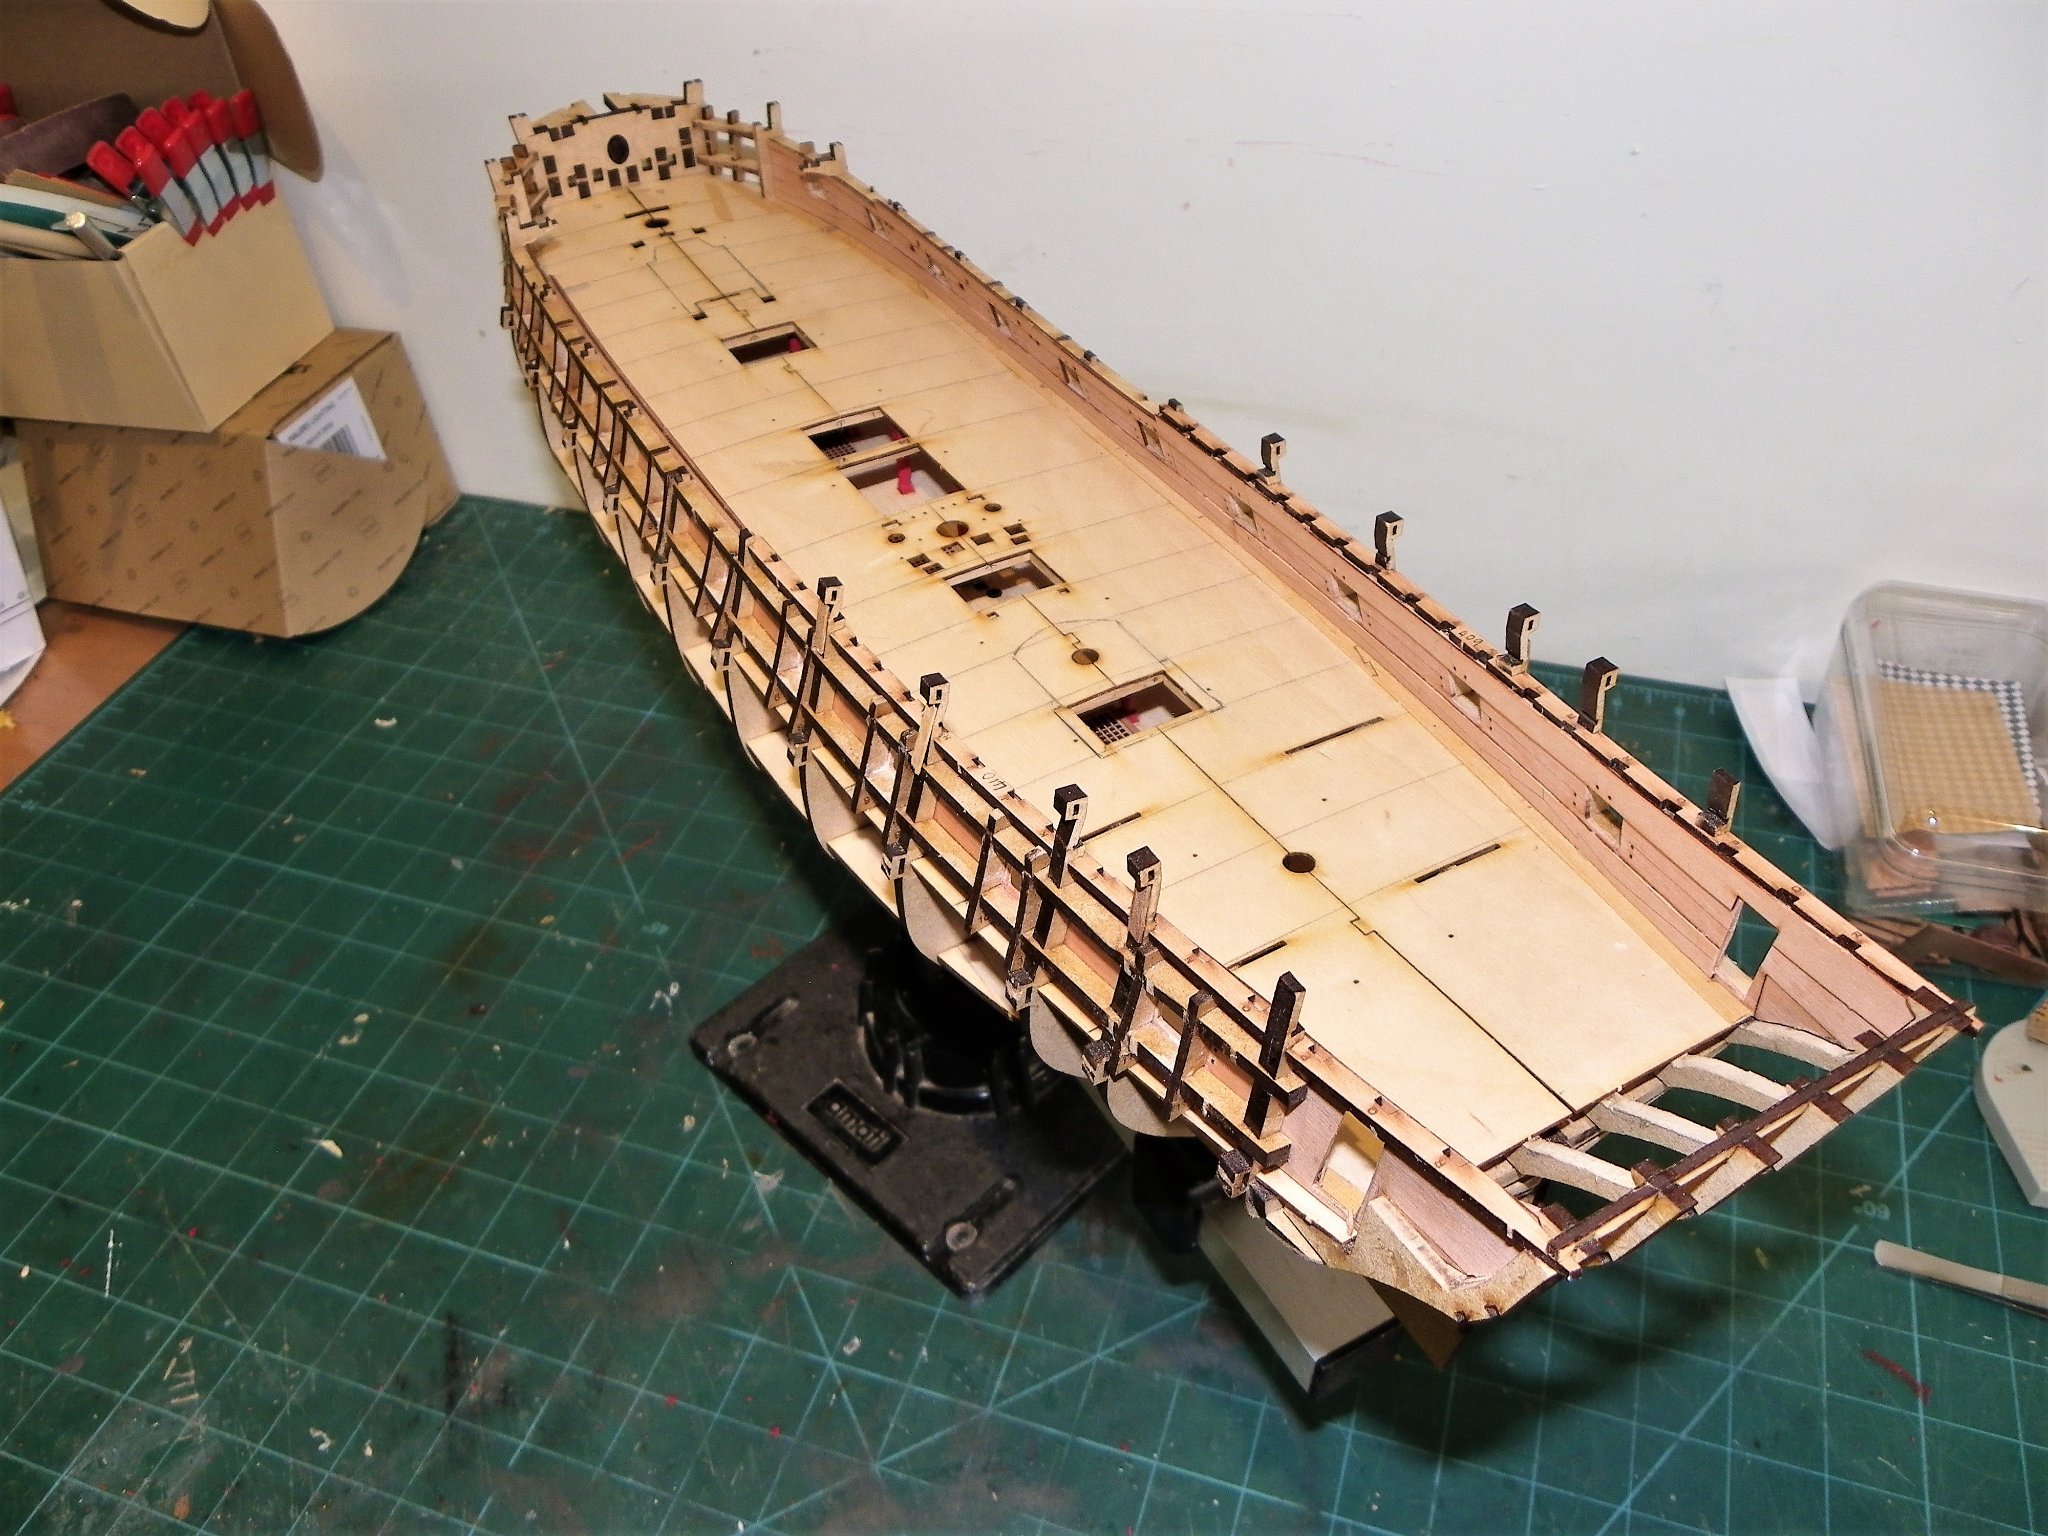
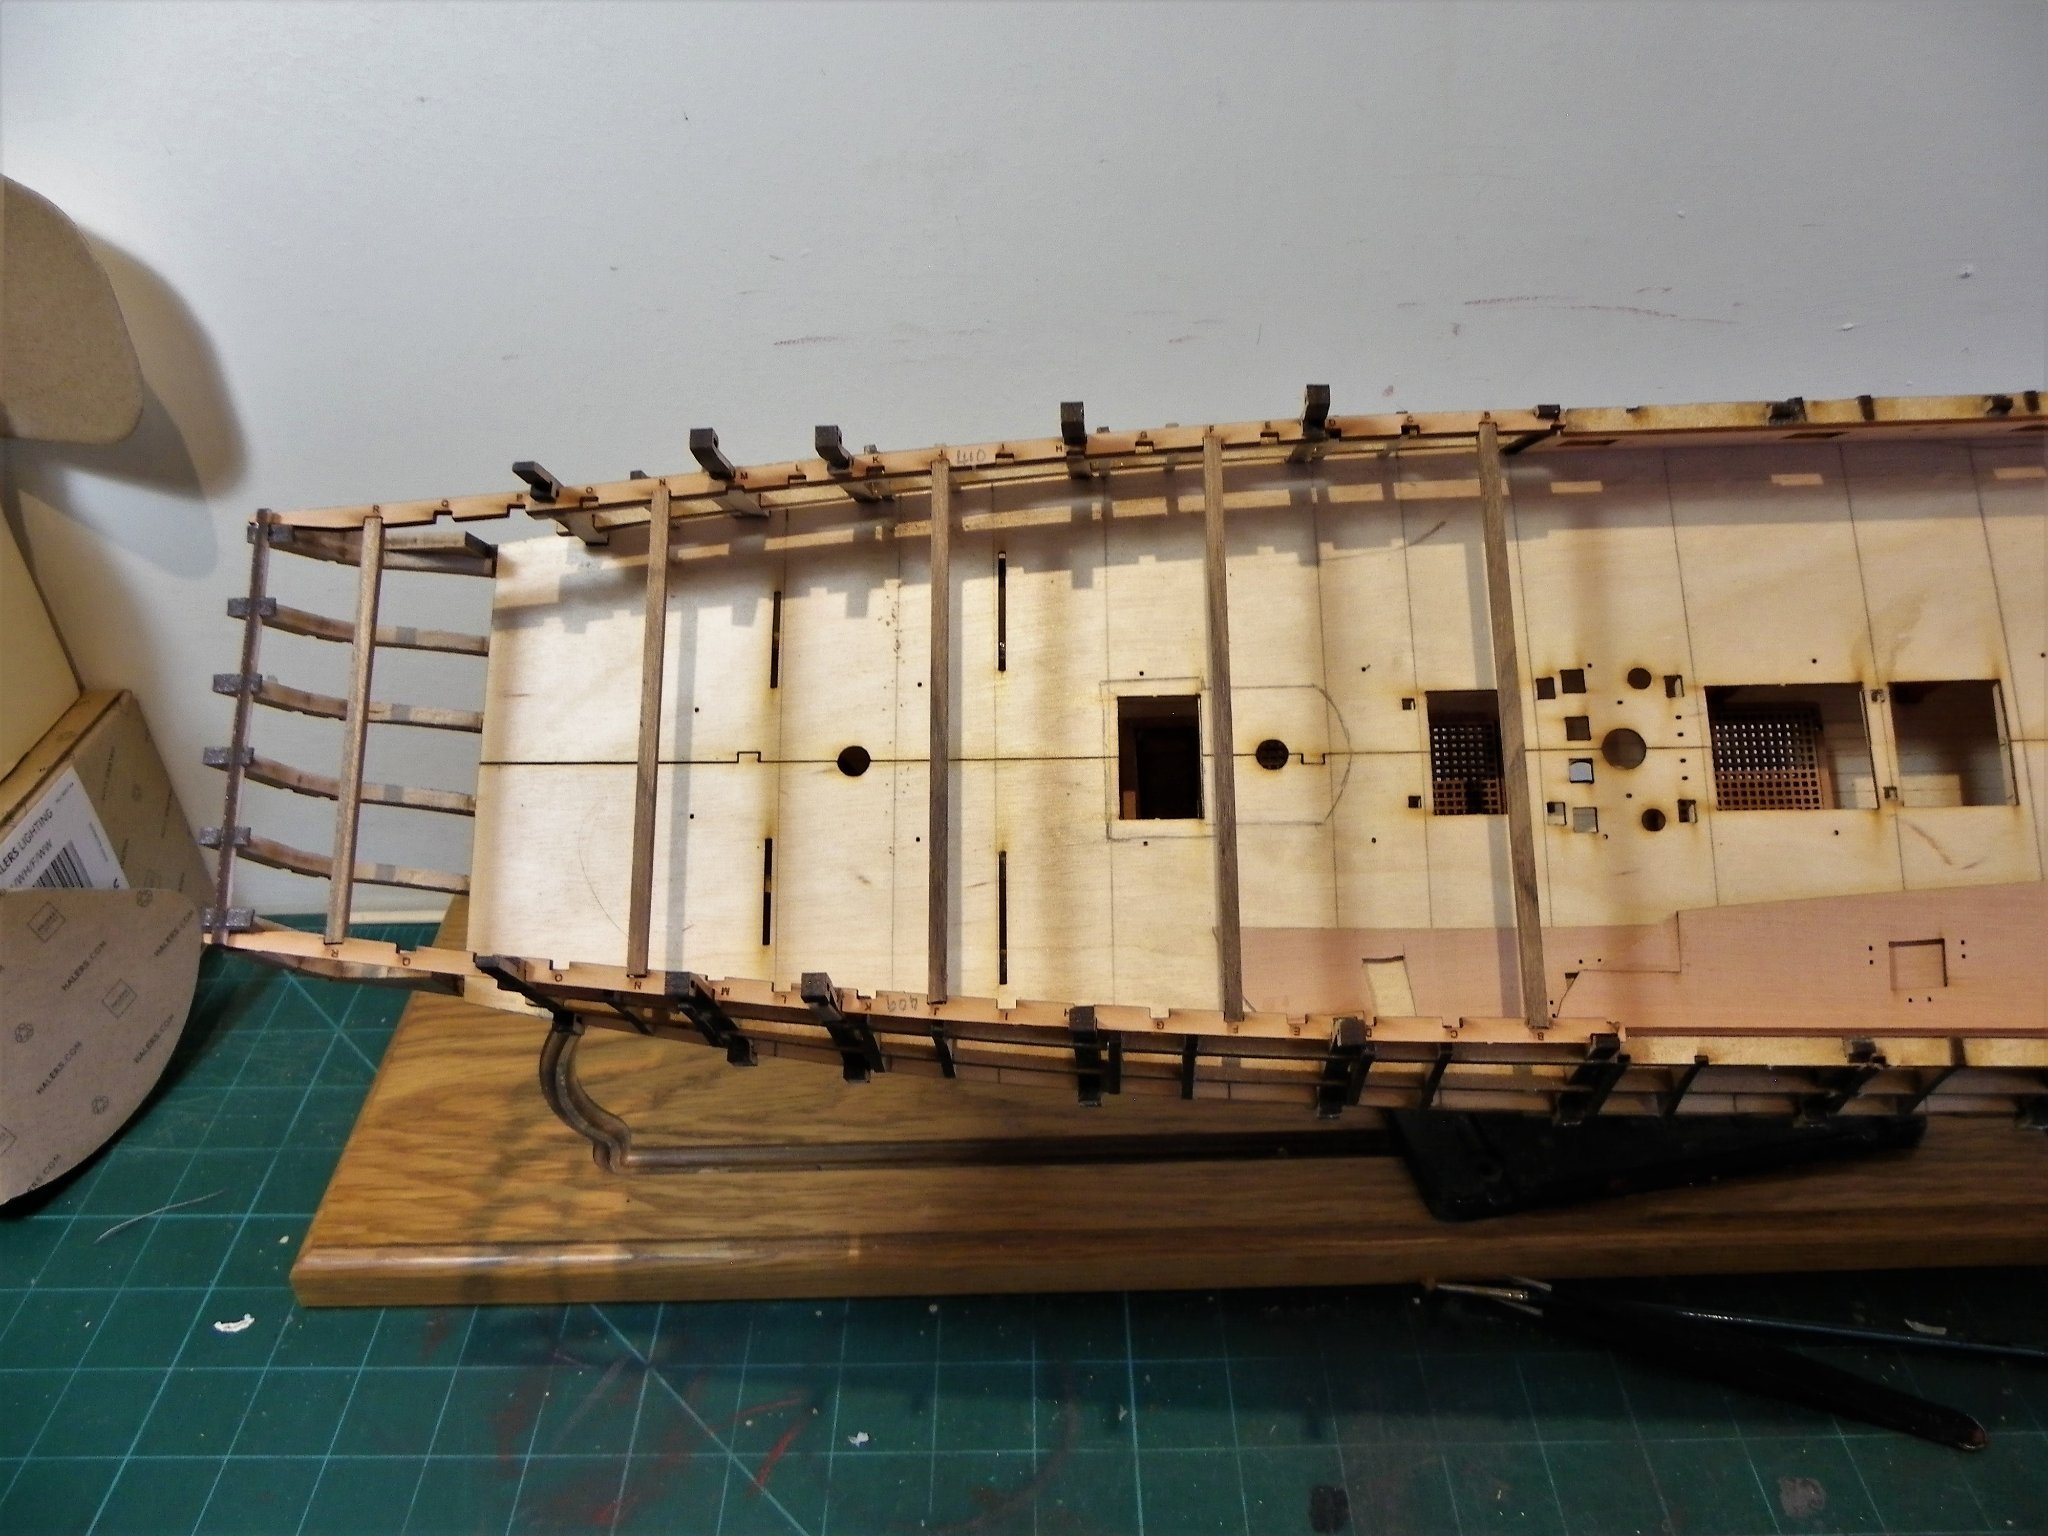
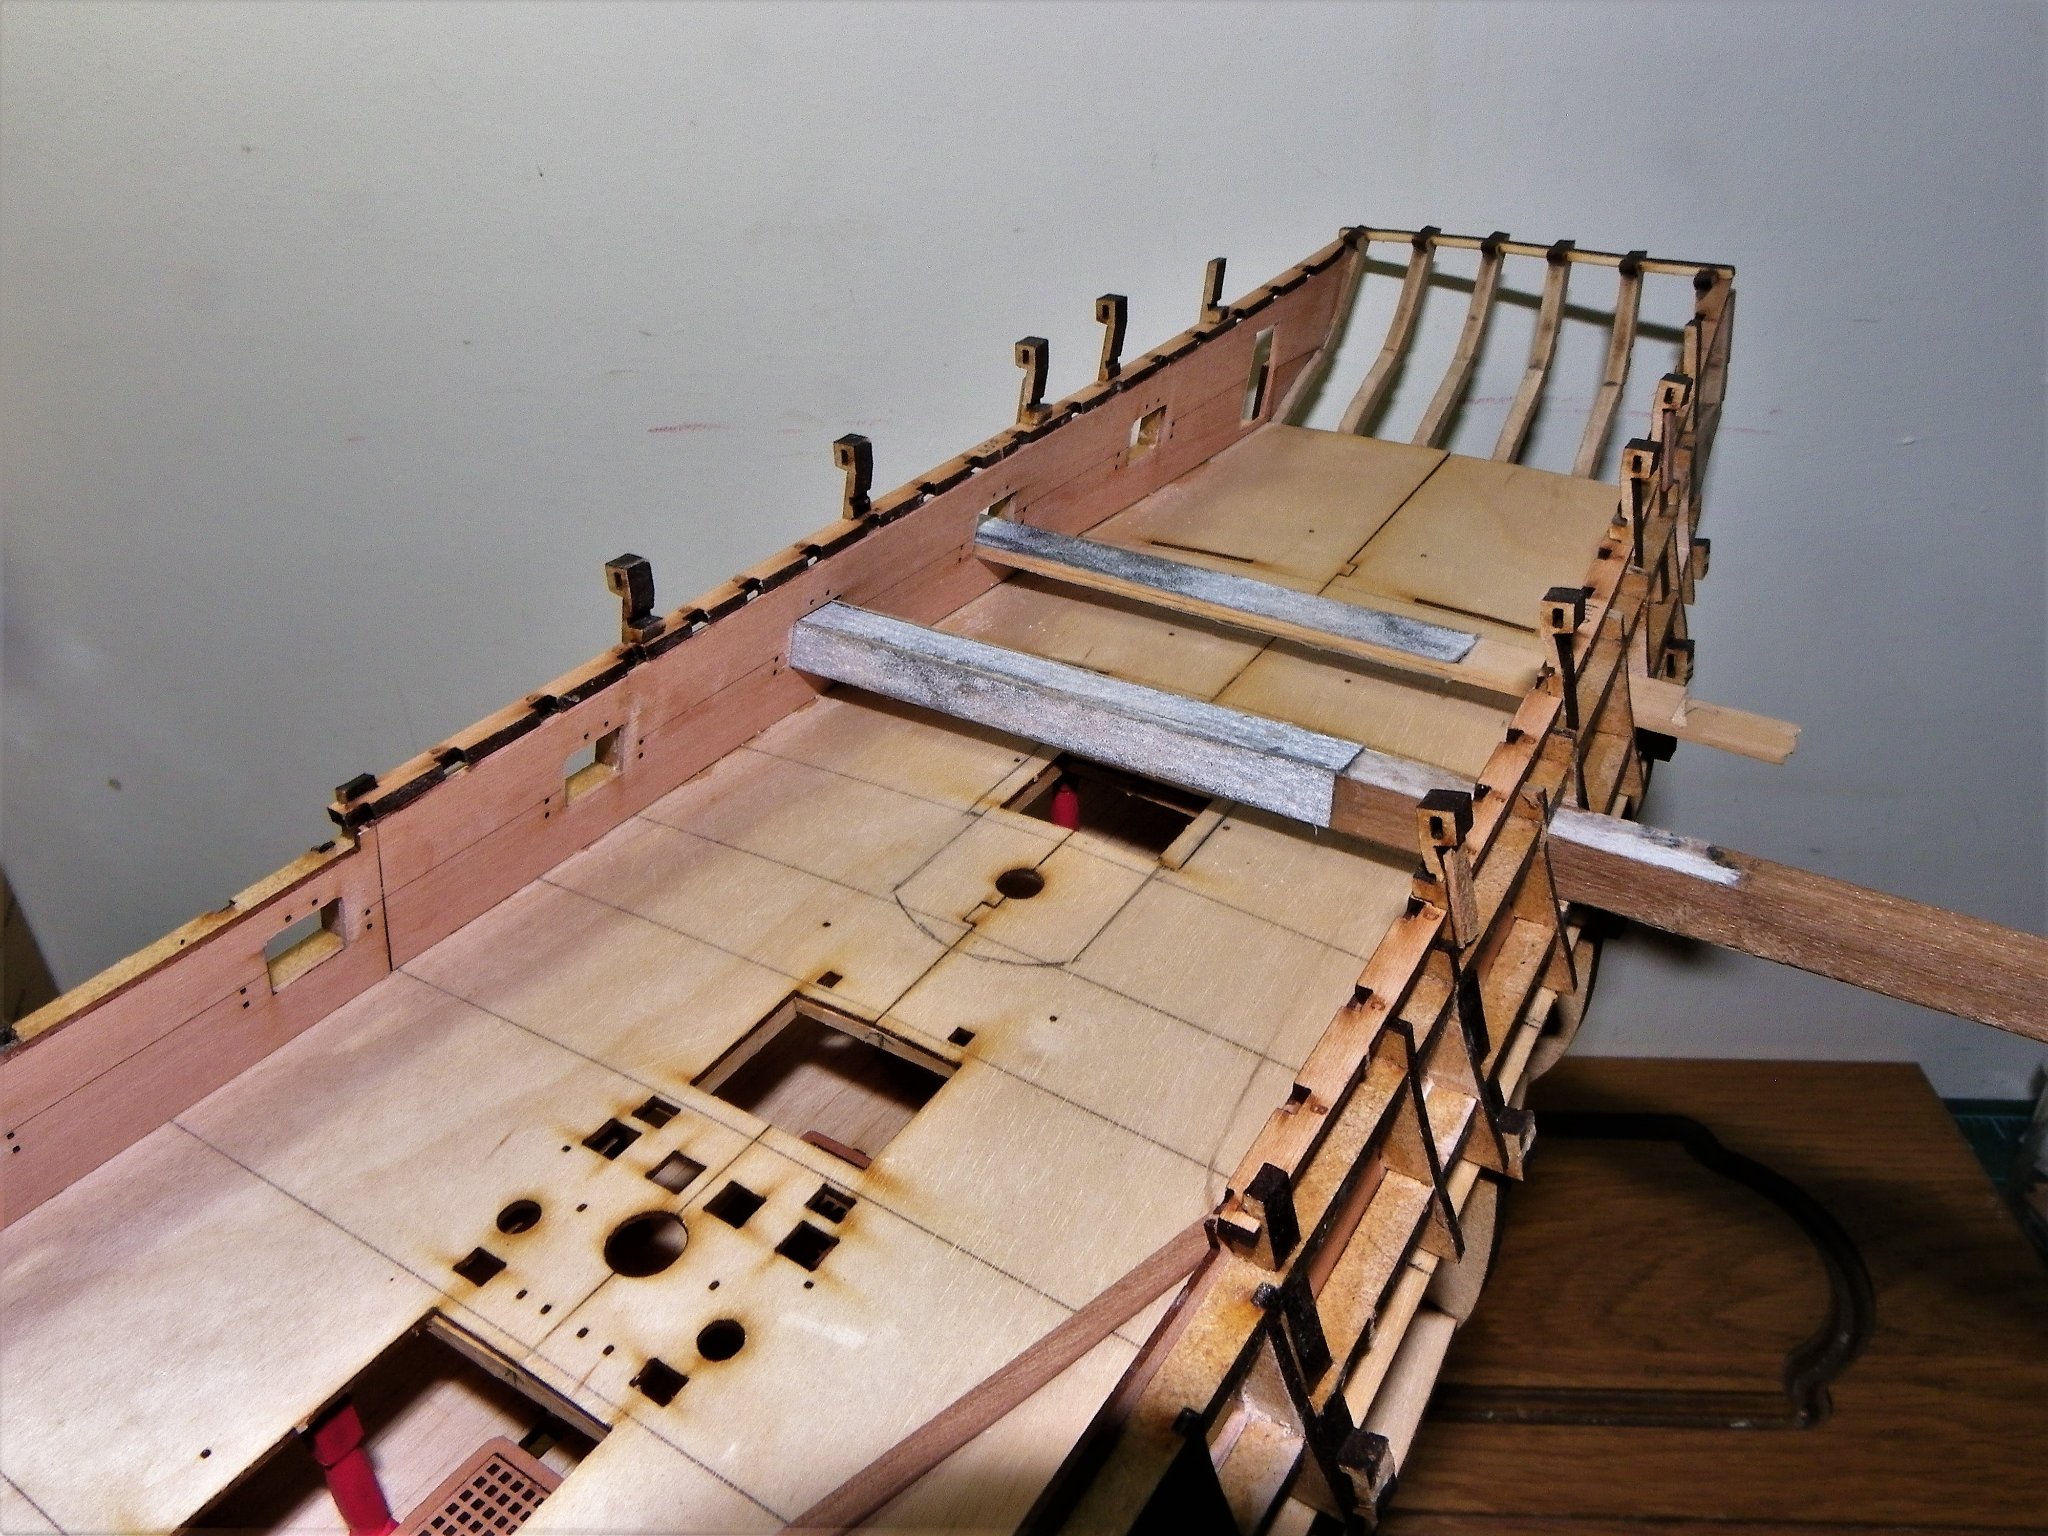
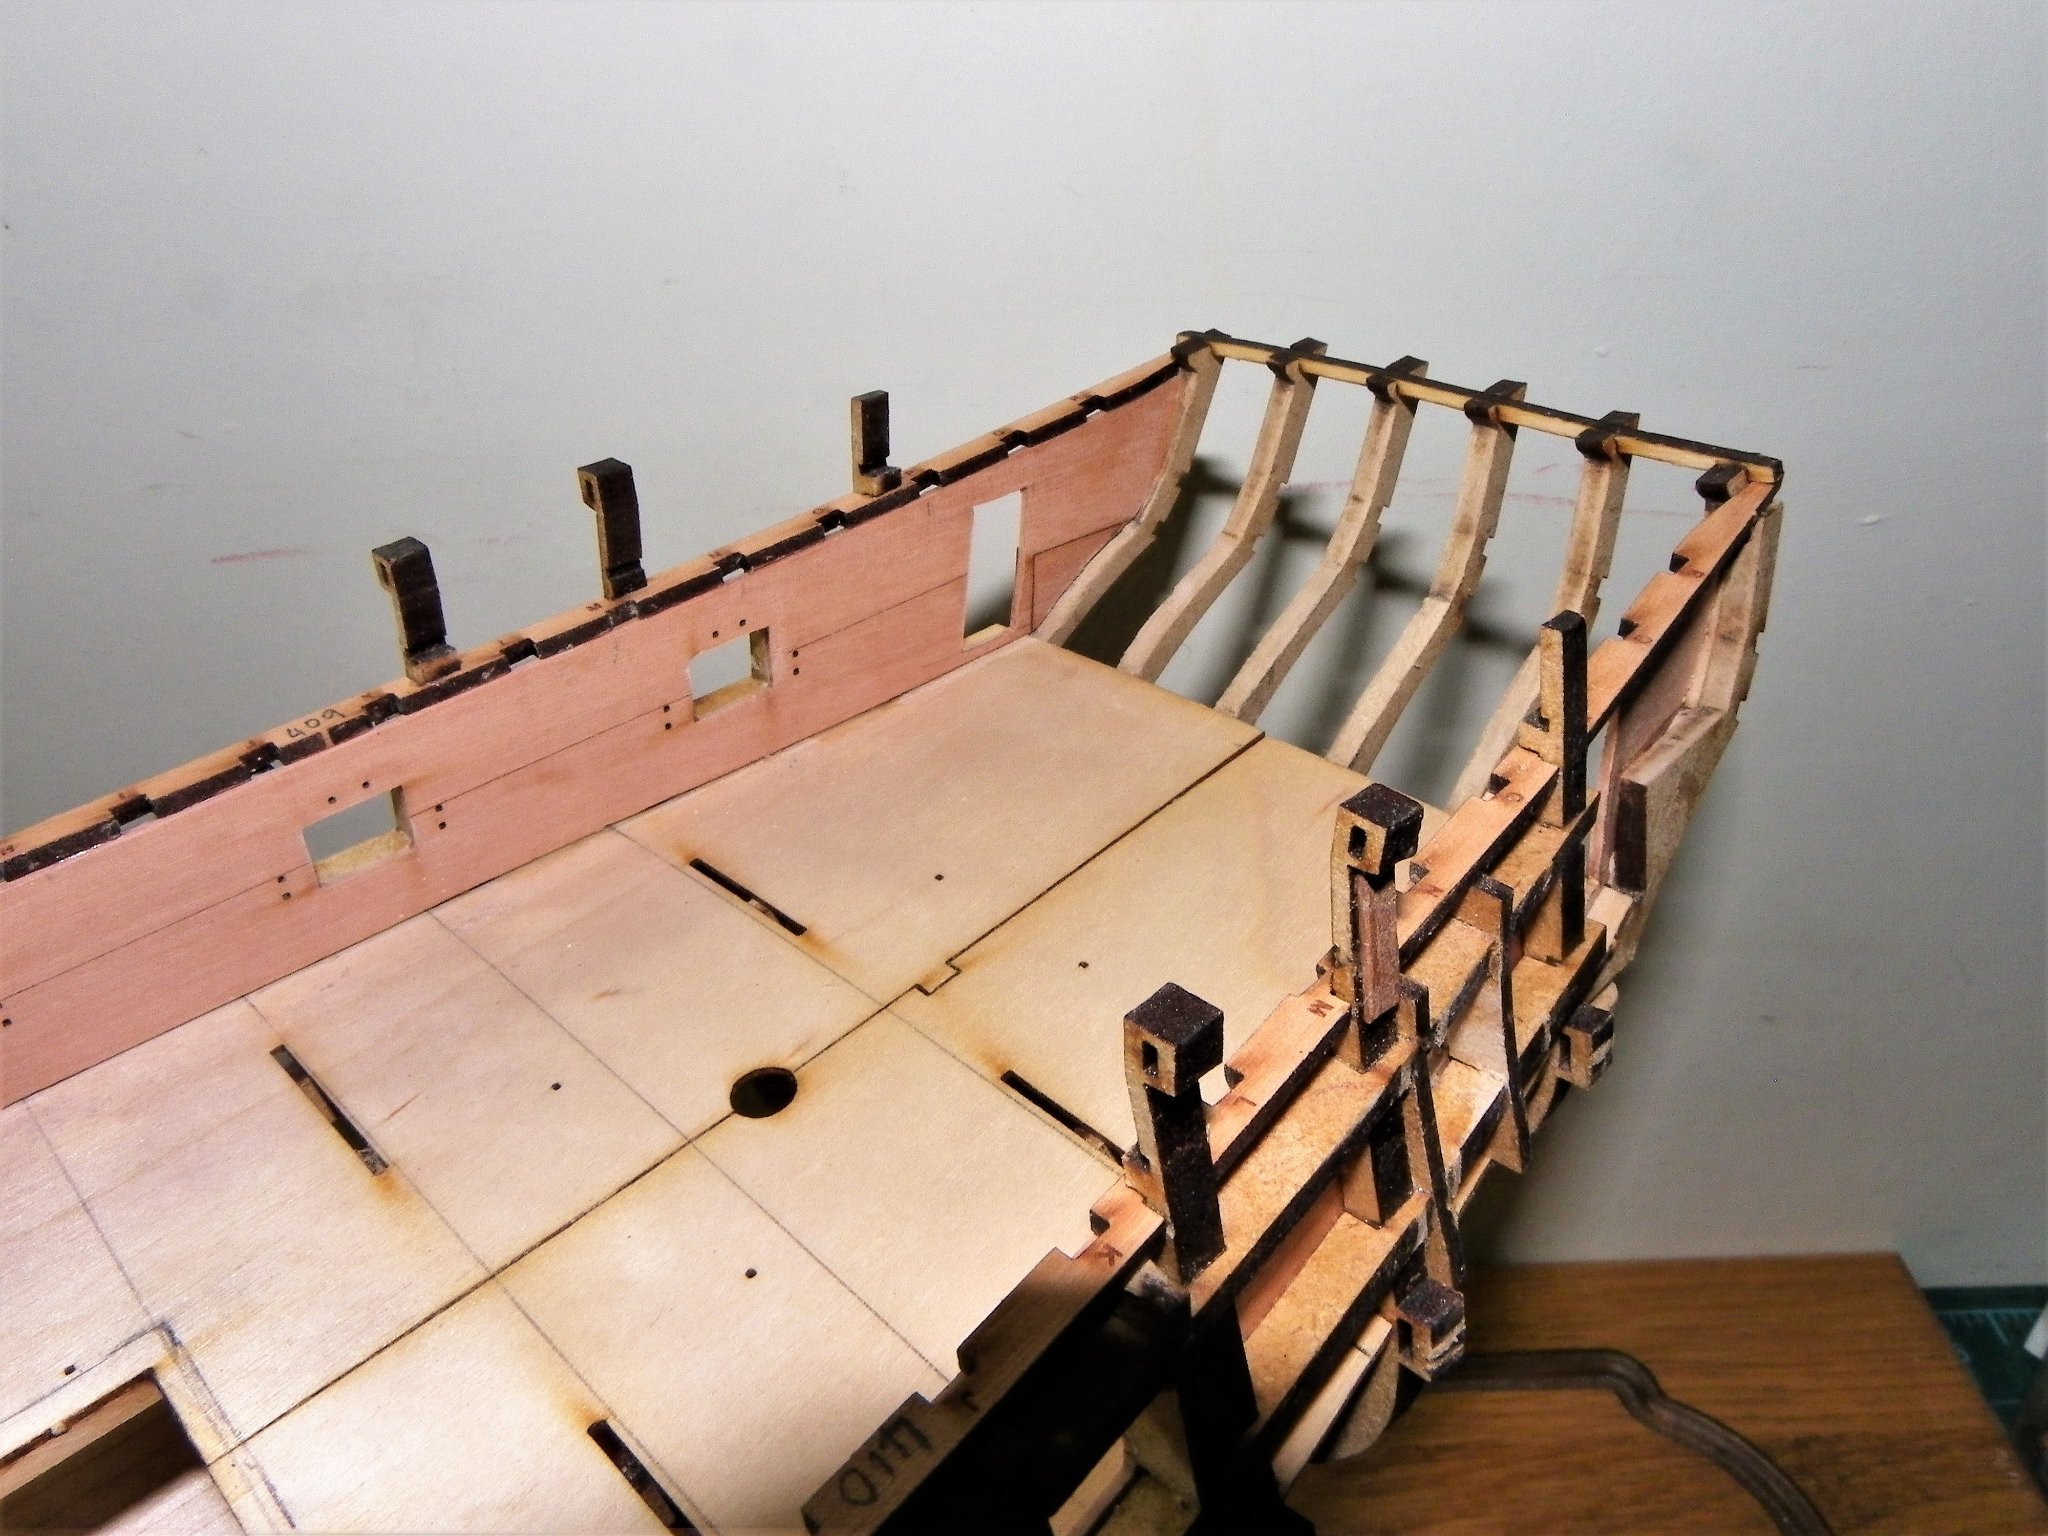
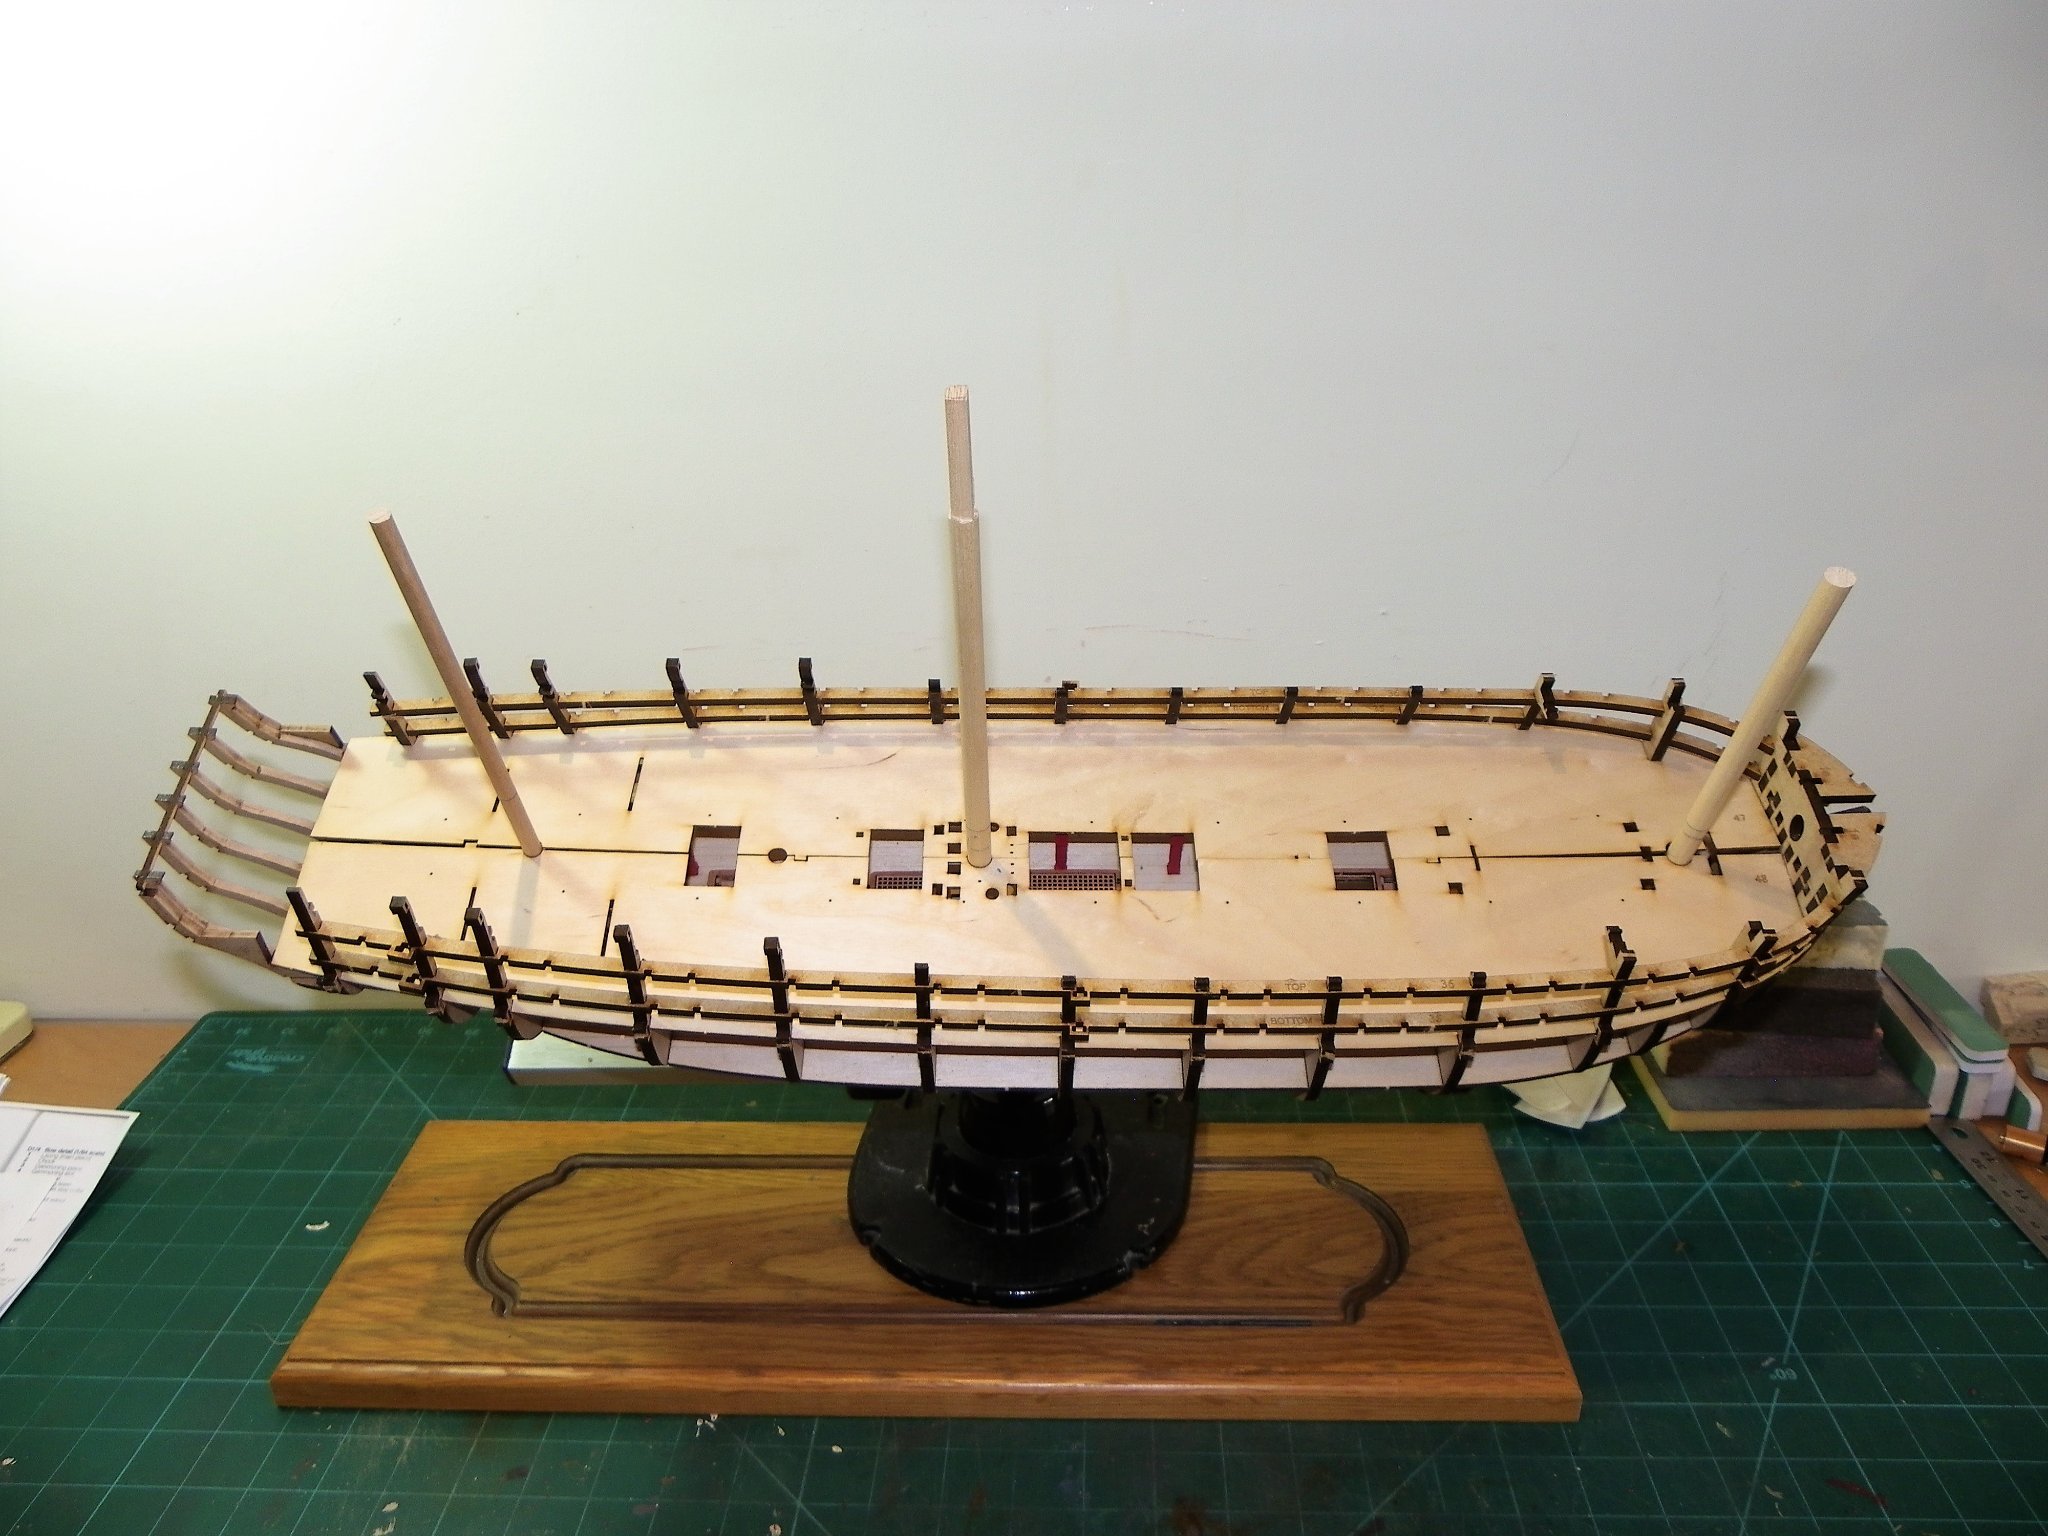
 Post Eighteen Modifications, Modest and Middling. Waterways I fitted waterways and scuppers to Pegasus, so there’s no reason not to do so on the larger Sphinx. Rooting around my timber stock I found some 1mm Pearwood square stock, probably also supplied by Chris with one of his other kits. The tricky bit is chamfering an angled face on this tiny strip to take part of the scupper. I fitted the strip first and then used a micro chisel to cut the angle. 0400(2) Scuppers are 4”ø in the round, scaling to 1.5mm holes. The pre-cut scupper holes on the provided etched deck are around 1.2mm ø. 0402(1) The scupper is angled downward part thro’ the waterway and part on the Margin plank. That’s it for the present, I will need to represent the lead flanges at some time later in the build. What to do about the Bow space. As mine is a modification build my eyes are constantly being drawn to that area of the Upper deck below the Foc’sle. 0399 This is an unfinished area, no internal bulwark planking, unfaired frames, and an engraved closed bridle port lid on the outer planking pattern, which closes off any possible view of this area. What should be there is internal planking running to the stem and breast hooks with the hawse holes between. What is provided is the Bowsprit step, the Riding Bitts, and the Fore Jeer Bitts. Full modification is not possible because of the kit design but there is stuff that can be done that gives a more realistic impression. 0409(2) To get an idea I put into place those fittings in this area. Note: Stage 522/523 of the blurb covers the Fore Jeer Bitts(463) There is a note that the slot in the Gundeck on early batches of the kit needs easing to accept the shaft of the bitts which plugs into the lower deck. One of the arms of this ‘Y’ shaped piece broke along the grain line whilst trial fitting, Glued together using Aliphatic Resin glue, but it remains to be seen how strong the repaired piece will be. With the parts in place, I can see how to proceed. The bulwarks will be faired, planked and spirketted with the intention of leaving the Bridle ports open. Manger boards will be installed between the Bowsprit step and the forward side of the Bridle Port. The Foc’sle will be planked to the extent that the forward Bulkhead is covered and obscured from view. Better get on with it then. B.E. 23/09/21
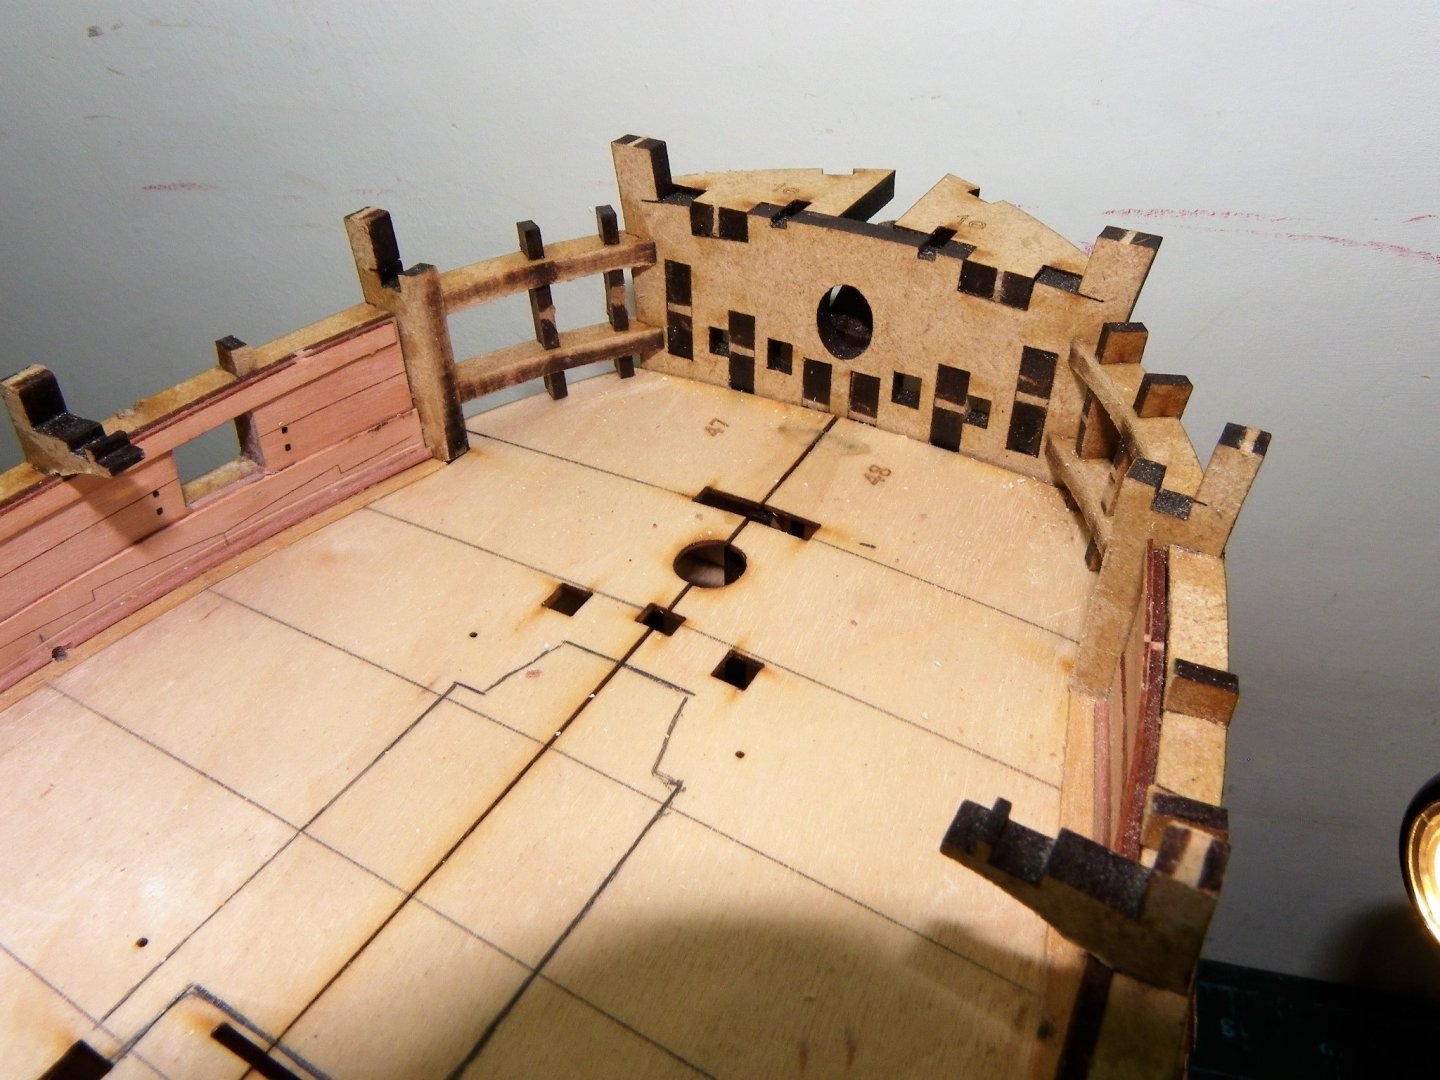
.thumb.JPG.0a1d16fbaa703d5122014897552a4c38.JPG)
.thumb.JPG.51f2ae675f45061efb4fc2ce66c18655.JPG)
.thumb.JPG.7dee0cc859043a24130e7c138af1a410.JPG)
- 857 replies
-
- 15
-

-
- Sphinx
- Vanguard Models
- (and 1 more)
-
Thanks for looking in Malcolm, I don't know about skill and experience, I'm making it up as I go along most of the time.🙄 B.E.
- 857 replies
-
- 1
-
-
- Sphinx
- Vanguard Models
- (and 1 more)
-
Well done Jacek, that looks impressive. 👍 B.E.
-
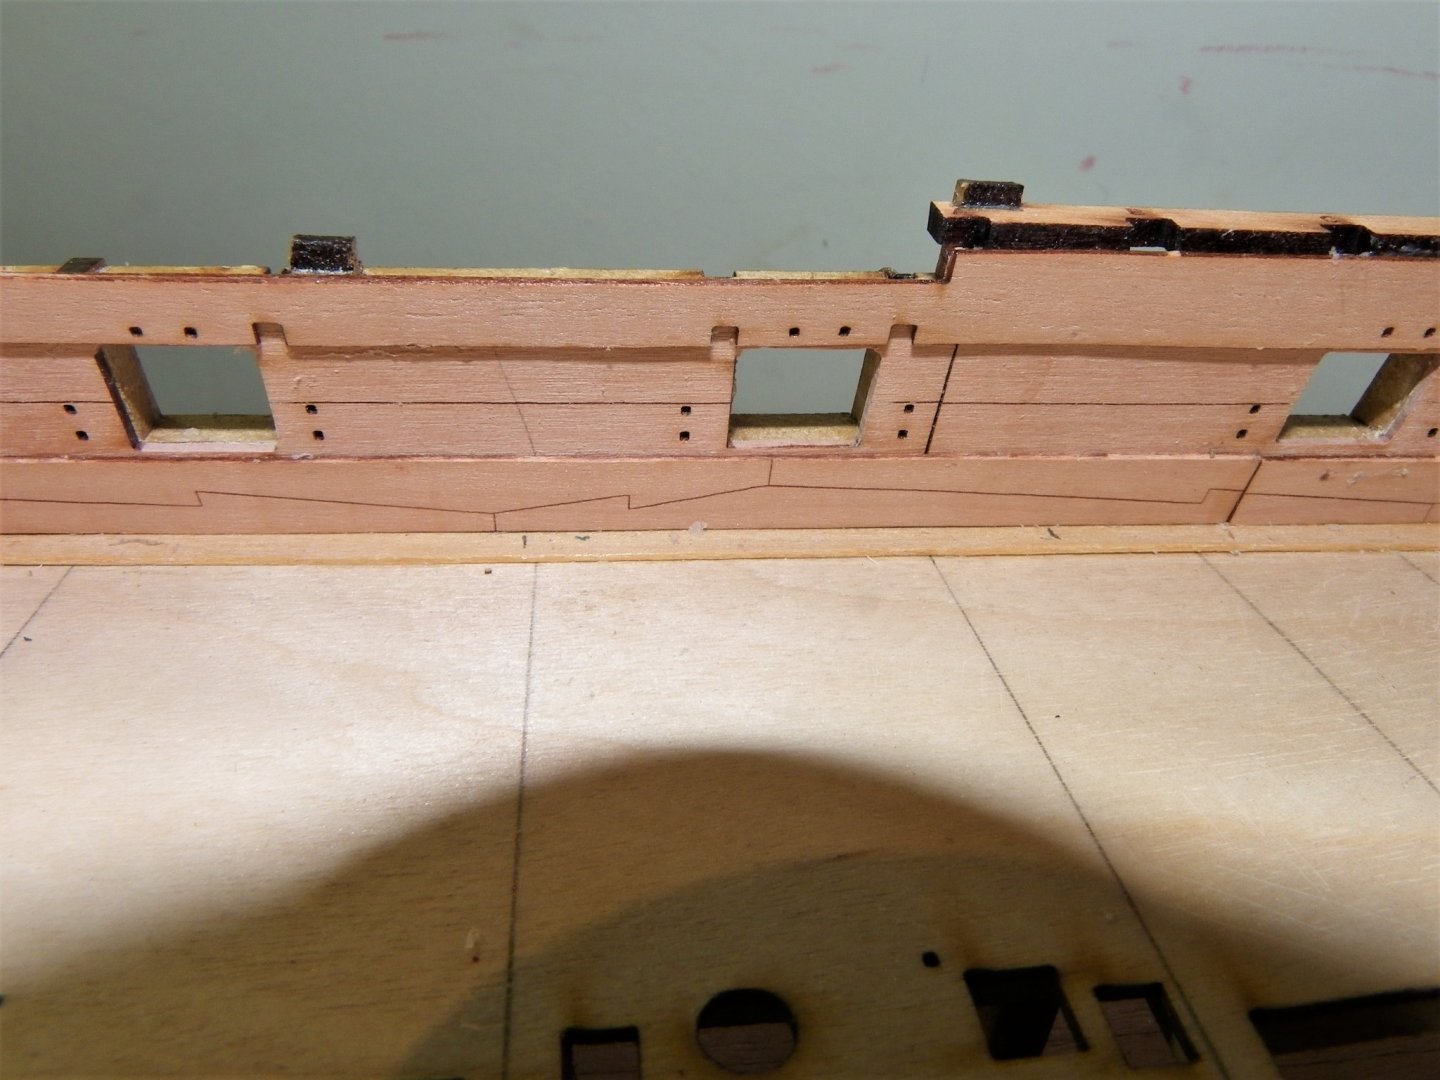
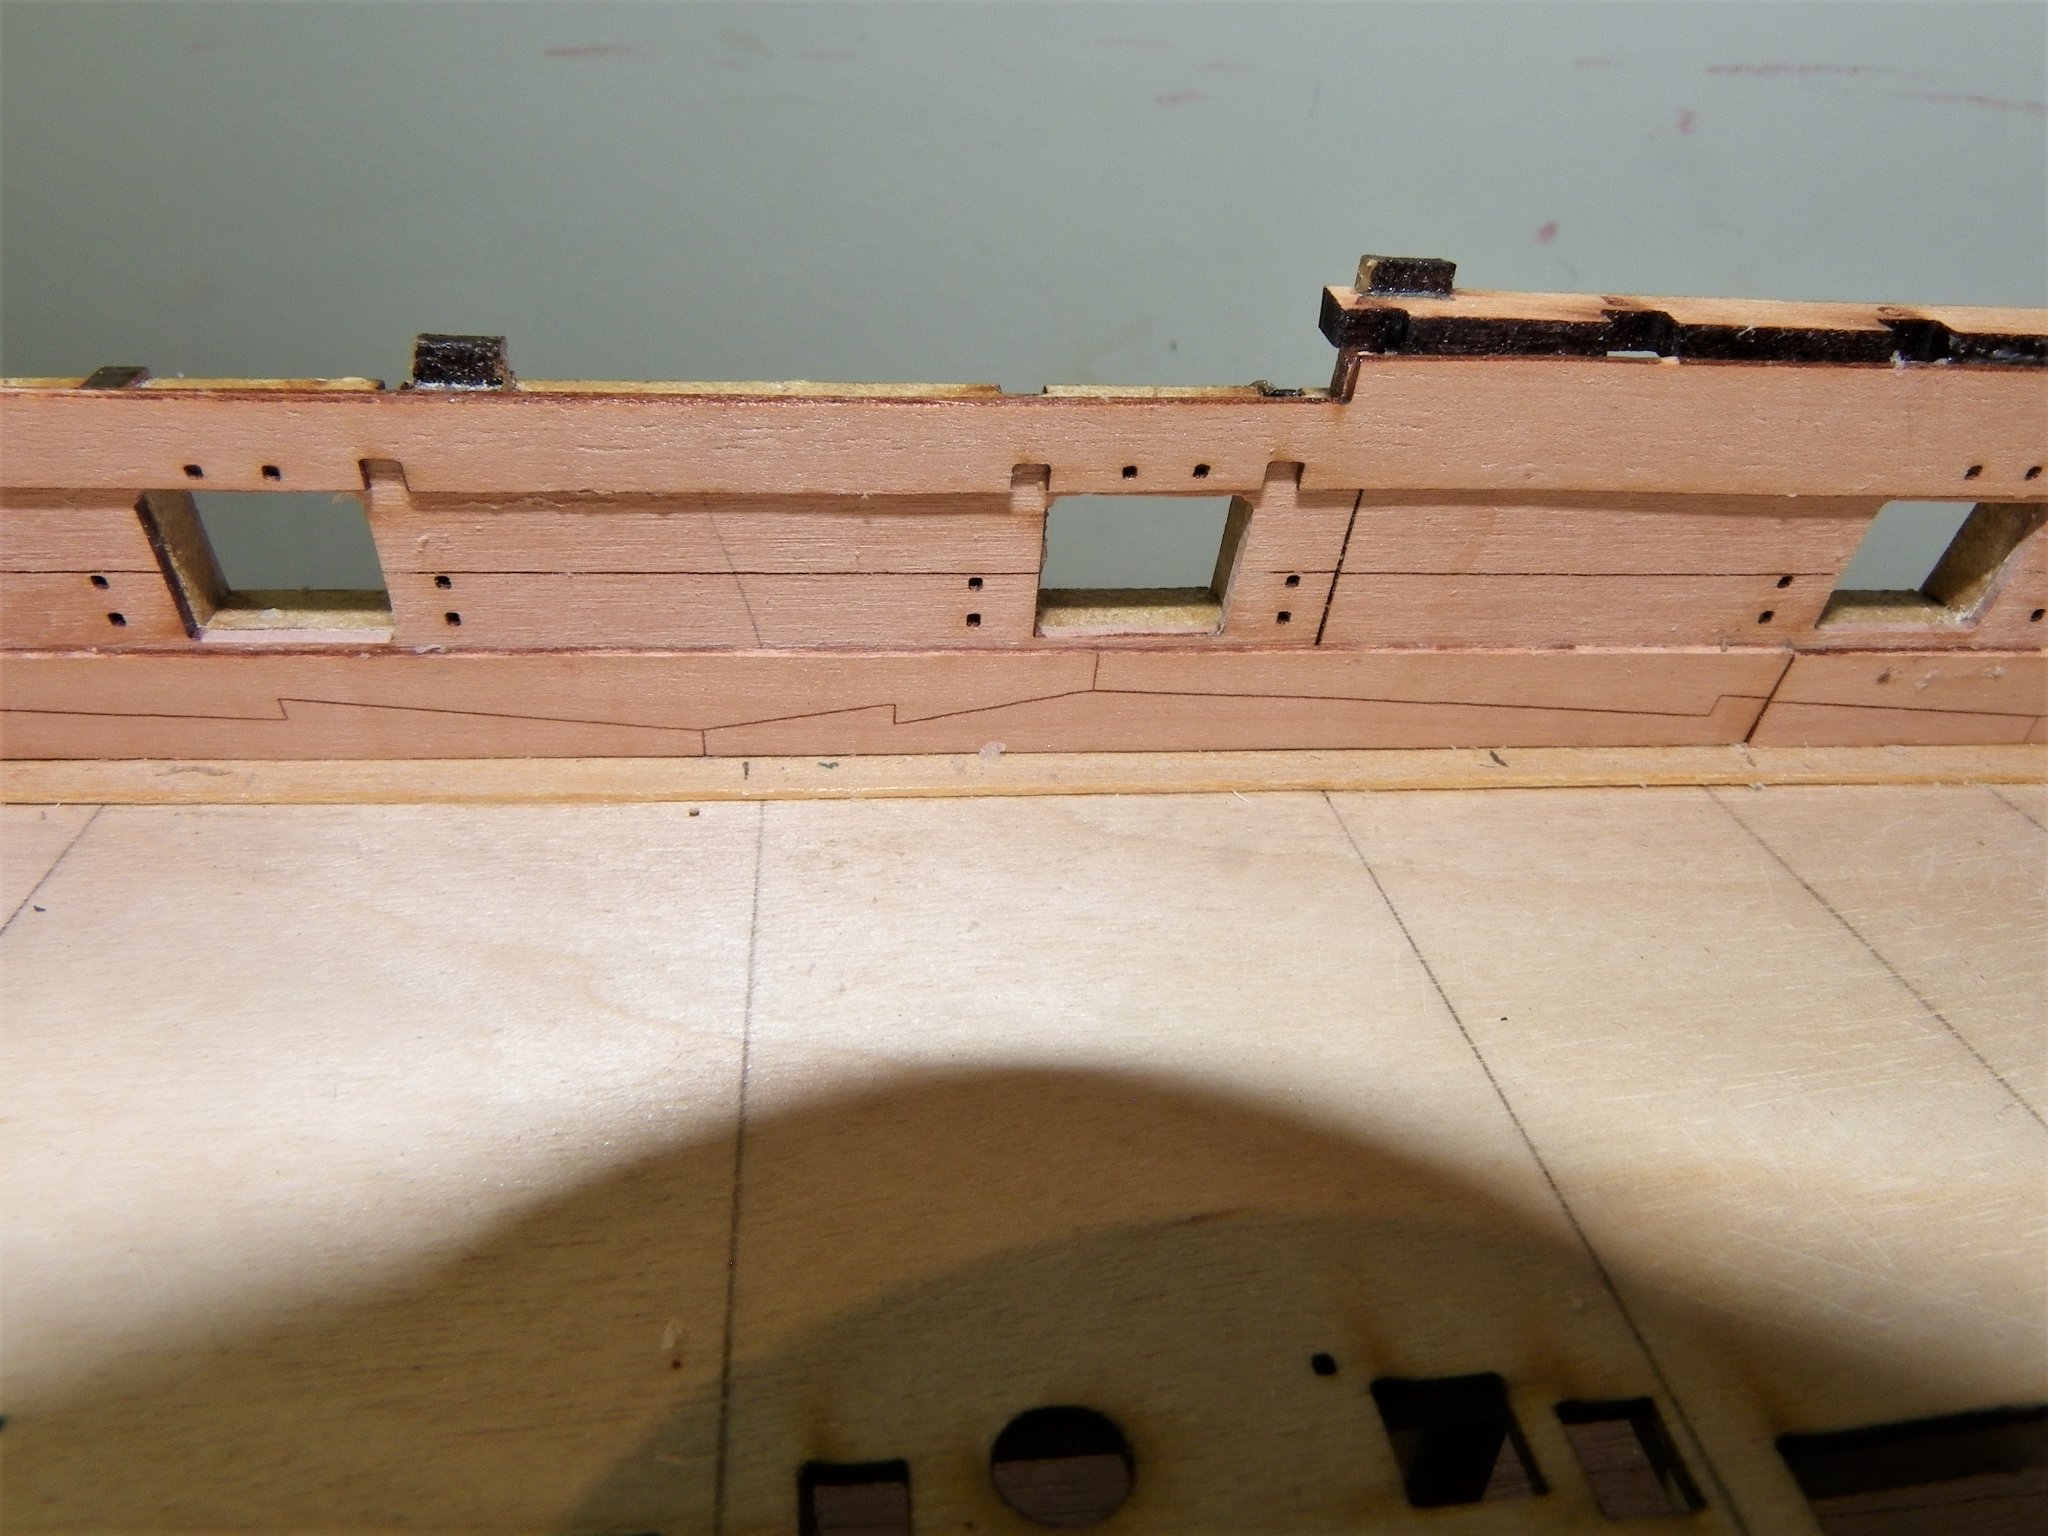
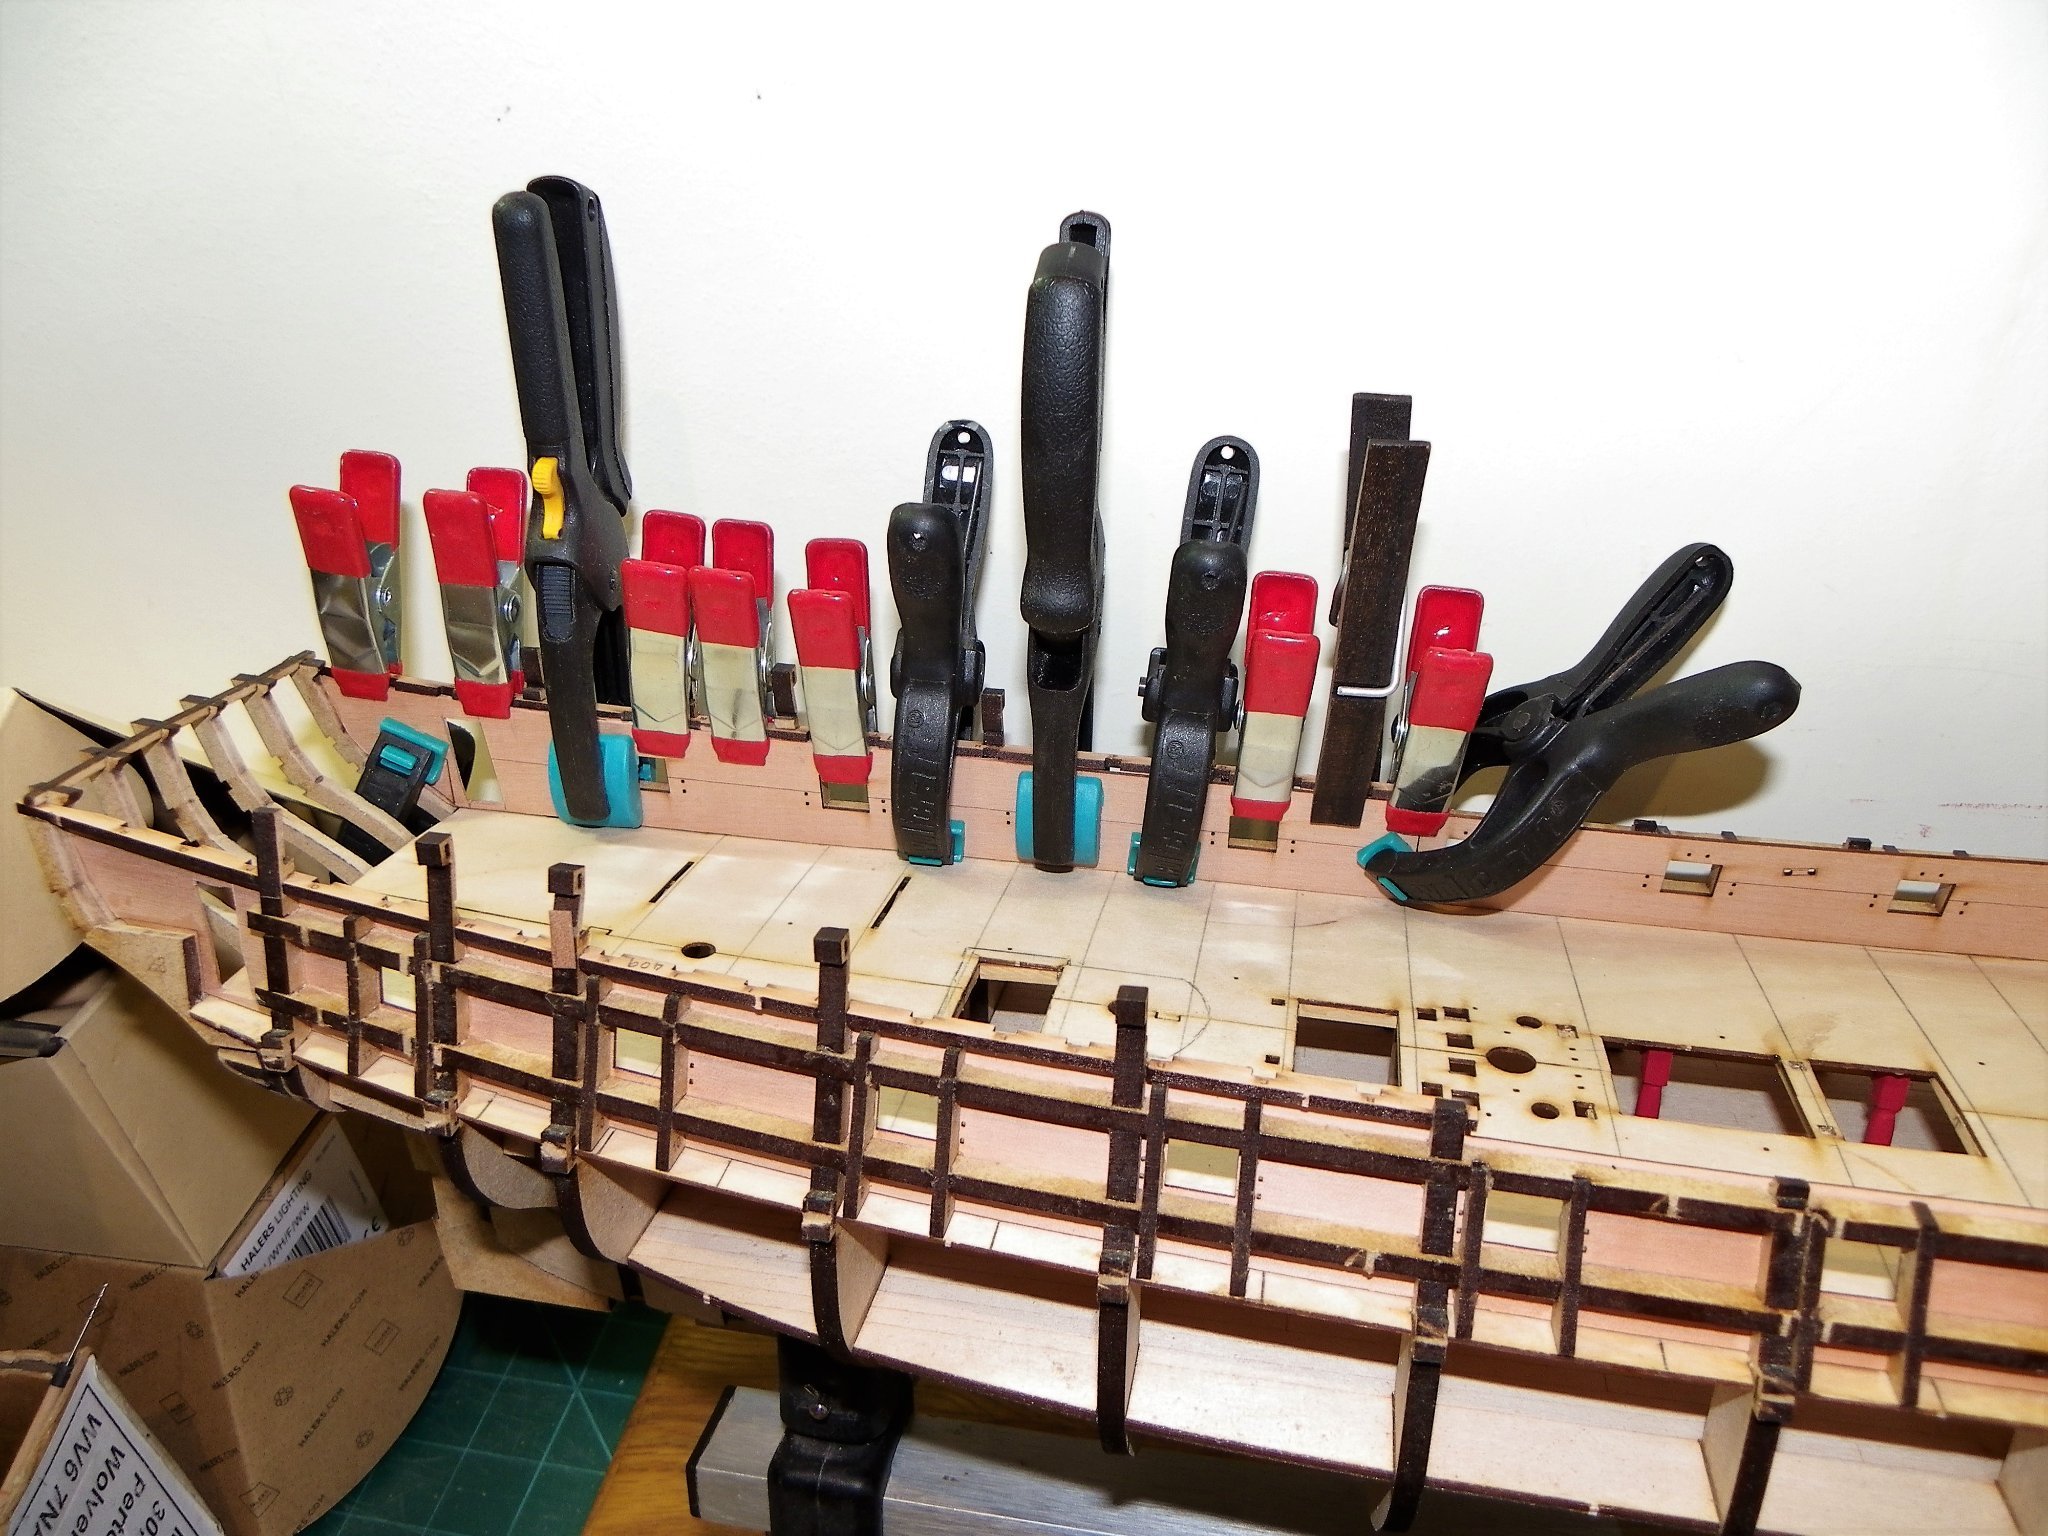
Post Seventeen Bulwarks and Margin planks. For the Margin planks I am using 4.5mm wide Boxwood strip. Nothing too severe in edge bending requirements, and I use the etched deck as a template to form the curve. 0355(2) Using the water/heat edge bending treatment, there is no need to pre-cut the margin. The Spirketting is handed Port and Starboard, fore and rear; it is nicely etched with Top and Butt planking, and I added a slight bevel to the top where it meets the quickwork planking above. Strictly speaking a waterway should be fitted before the spirketting into which the scuppers are fitted. Unless the spirketting is reduced in width to allow the fitment of a waterway,(not a good idea) the waterway would need to fit on the deck in front of it, which would cover some of the Top and Butt planking, altho’ only to the extent of around 1mm. Without this fitting the scupper holes drilled in the margin plank make no sense and are probably best not drawn attention to. On a practical level very little of this will be seen on a model fully built to the kit specification so not really an issue. The deck clamps are fitted above the quickworks, again laser cut parts. A bit of a puzzlement here, the blurb indicates that the top edge should be slightly higher than the adjacent bulwark. There are a series of pre-drilled holes in both the spirketting and deck clamp pieces above the gunports, which would suggest are to be aligned. These are described as being for gunport tackle eyebolts, presumably for muzzle lashing when the guns are run-in and stowed. However, if they are aligned the deck clamp pieces encroach on the top of the gunports. 0356(2) 0359(2) Plan 11 does show the forward deck clamp strip positioned between 0.6mm and <1mm above the ports, the aft sectioned following the top line of the ports. 0364 Along the bottom of the deck clamp strips are a series of notches. These are for the support brackets for the Gangboards. (many steps ahead) They need to be carefully positioned to neither encroach on gunport or tackle eyebolt slots either side. 0366 The aft deck clamp strips are less complicated only need to ensure that the gallery doorway slot is nicely positioned. A slight trimming of the forward end to meet the fore part is required to fit. I fitted the deck clamp strips without concern for aligning the drilled holes, my main objective to avoid fouling either the gunports or side tackle drill holes. 0370 Internal planking of the bulwarks now completed. 0382 The fairly easy run of the Margin planks can be seen in this shot. 0371 The ‘false’ scarph joint is marked with a scalpel and lined with a pencil. 0376 Before I progress further I will think about adding the waterway because my eye expects to see it and I doubt very much will be seen of the fine top and butt beneath even a light coat of paint. B.E. 22/09/21
.thumb.JPG.490111914f9b7a52db04105422232dab.JPG)
.thumb.JPG.3f2d8d45330a1cec63fa6de77bbf6c7f.JPG)
.thumb.JPG.da78d7aedd31b3753923fefd09256e94.JPG)


.thumb.JPG.efbbdcd5abfdbb27af6354ae84d59446.JPG)

- 857 replies
-
- 17
-
-
- Sphinx
- Vanguard Models
- (and 1 more)
-
Thanks for looking in Kirby. Painted 'Floor cloths' were provided by the Admiralty for high ranking officers of prestige ships, wealthy ones sometimes added carpet at their own expense. Low rated ships such as Sphinx probably had nothing at all unless provided by the Captain, who may have used the crew to create some minimal furnishings from what was to hand. Still, such adornments do look nice on a model and create interest particularly when viewed thro' open deck beams. Regards, B.E.
- 857 replies
-
- 2
-
-
- Sphinx
- Vanguard Models
- (and 1 more)
-
Looking good Glenn, 👍 B.E.
-
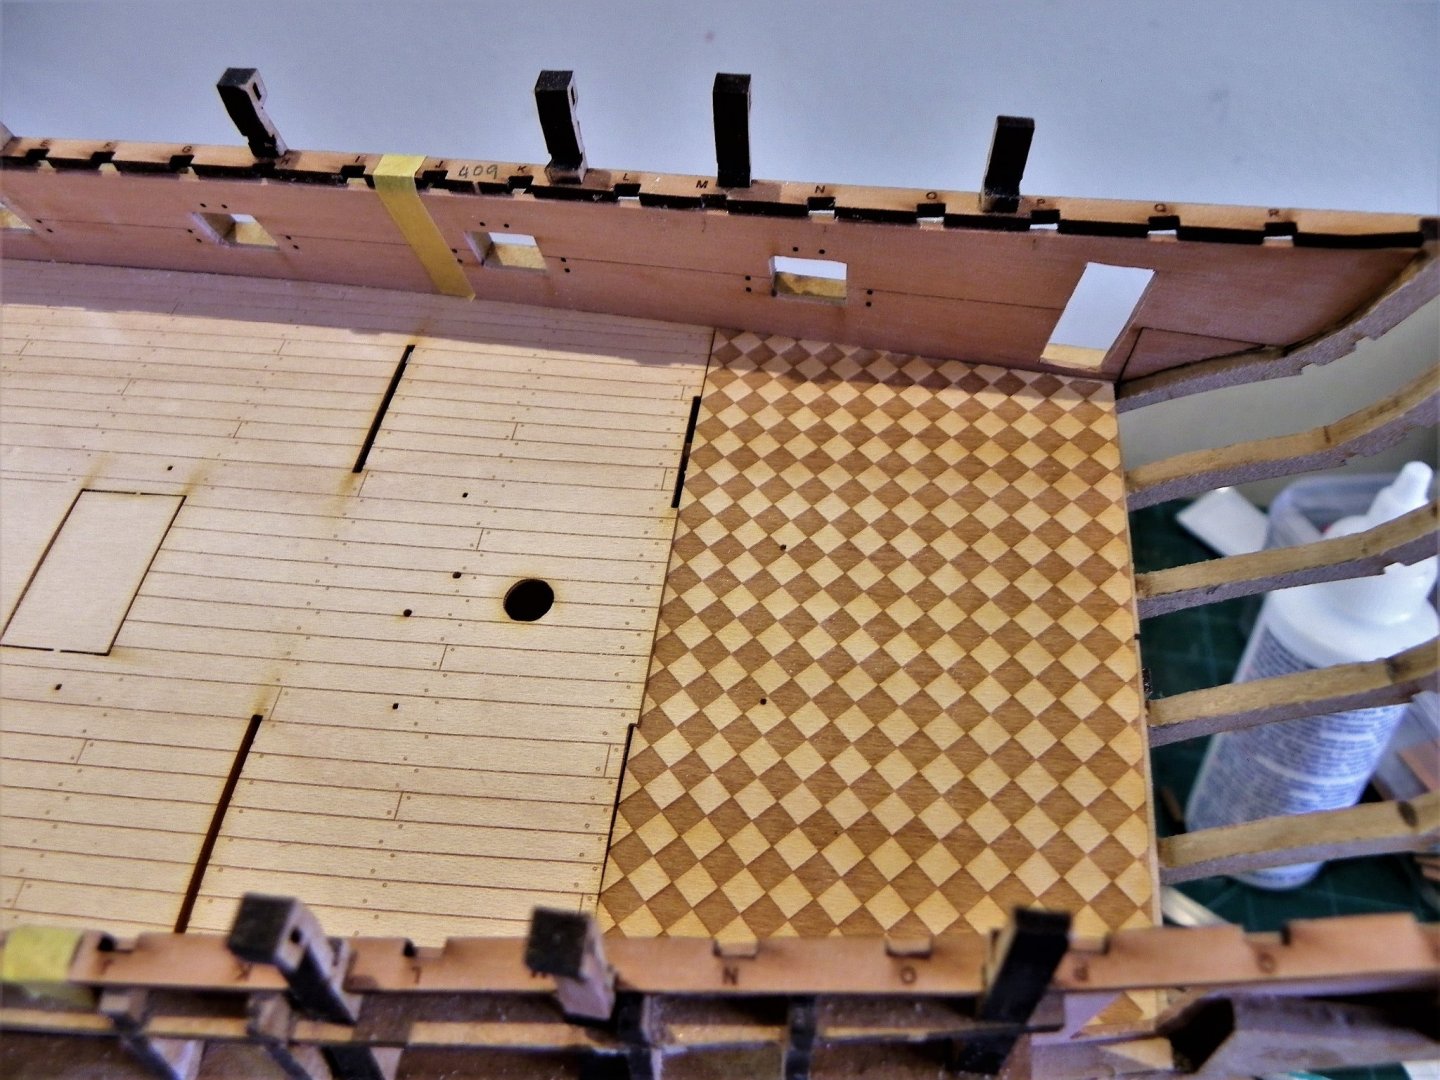
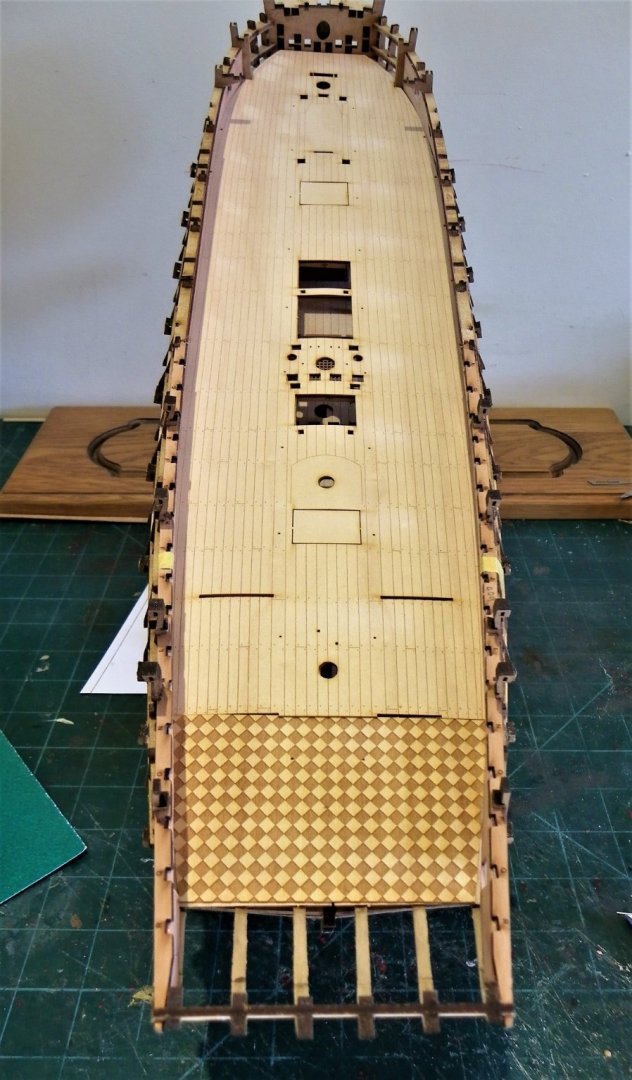
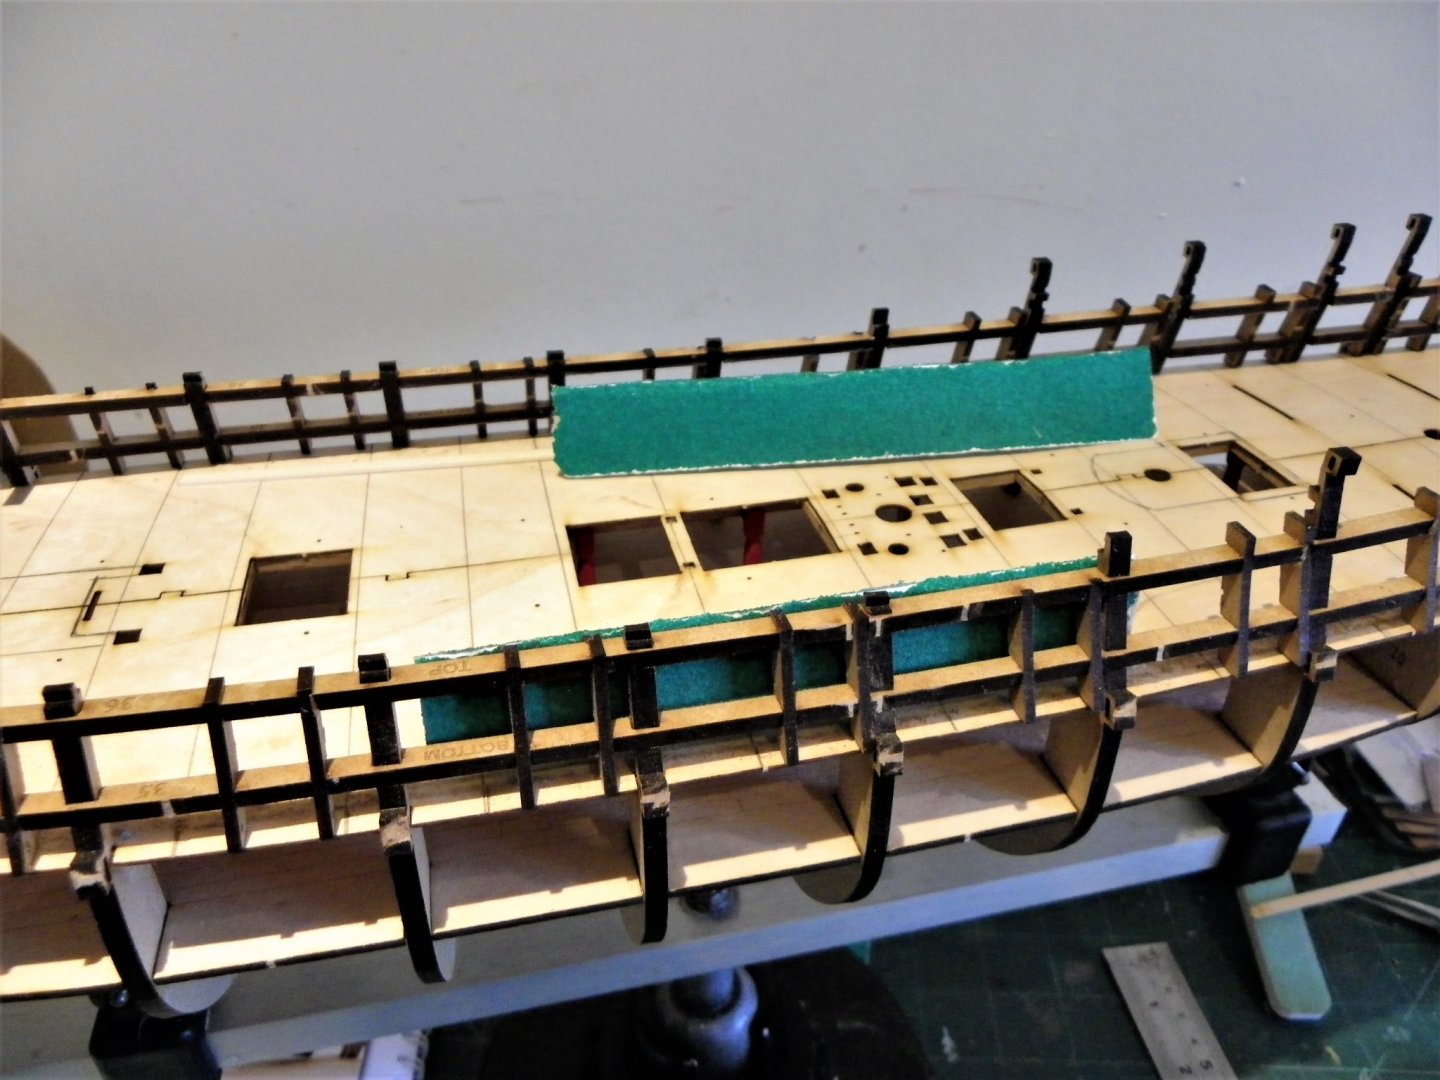
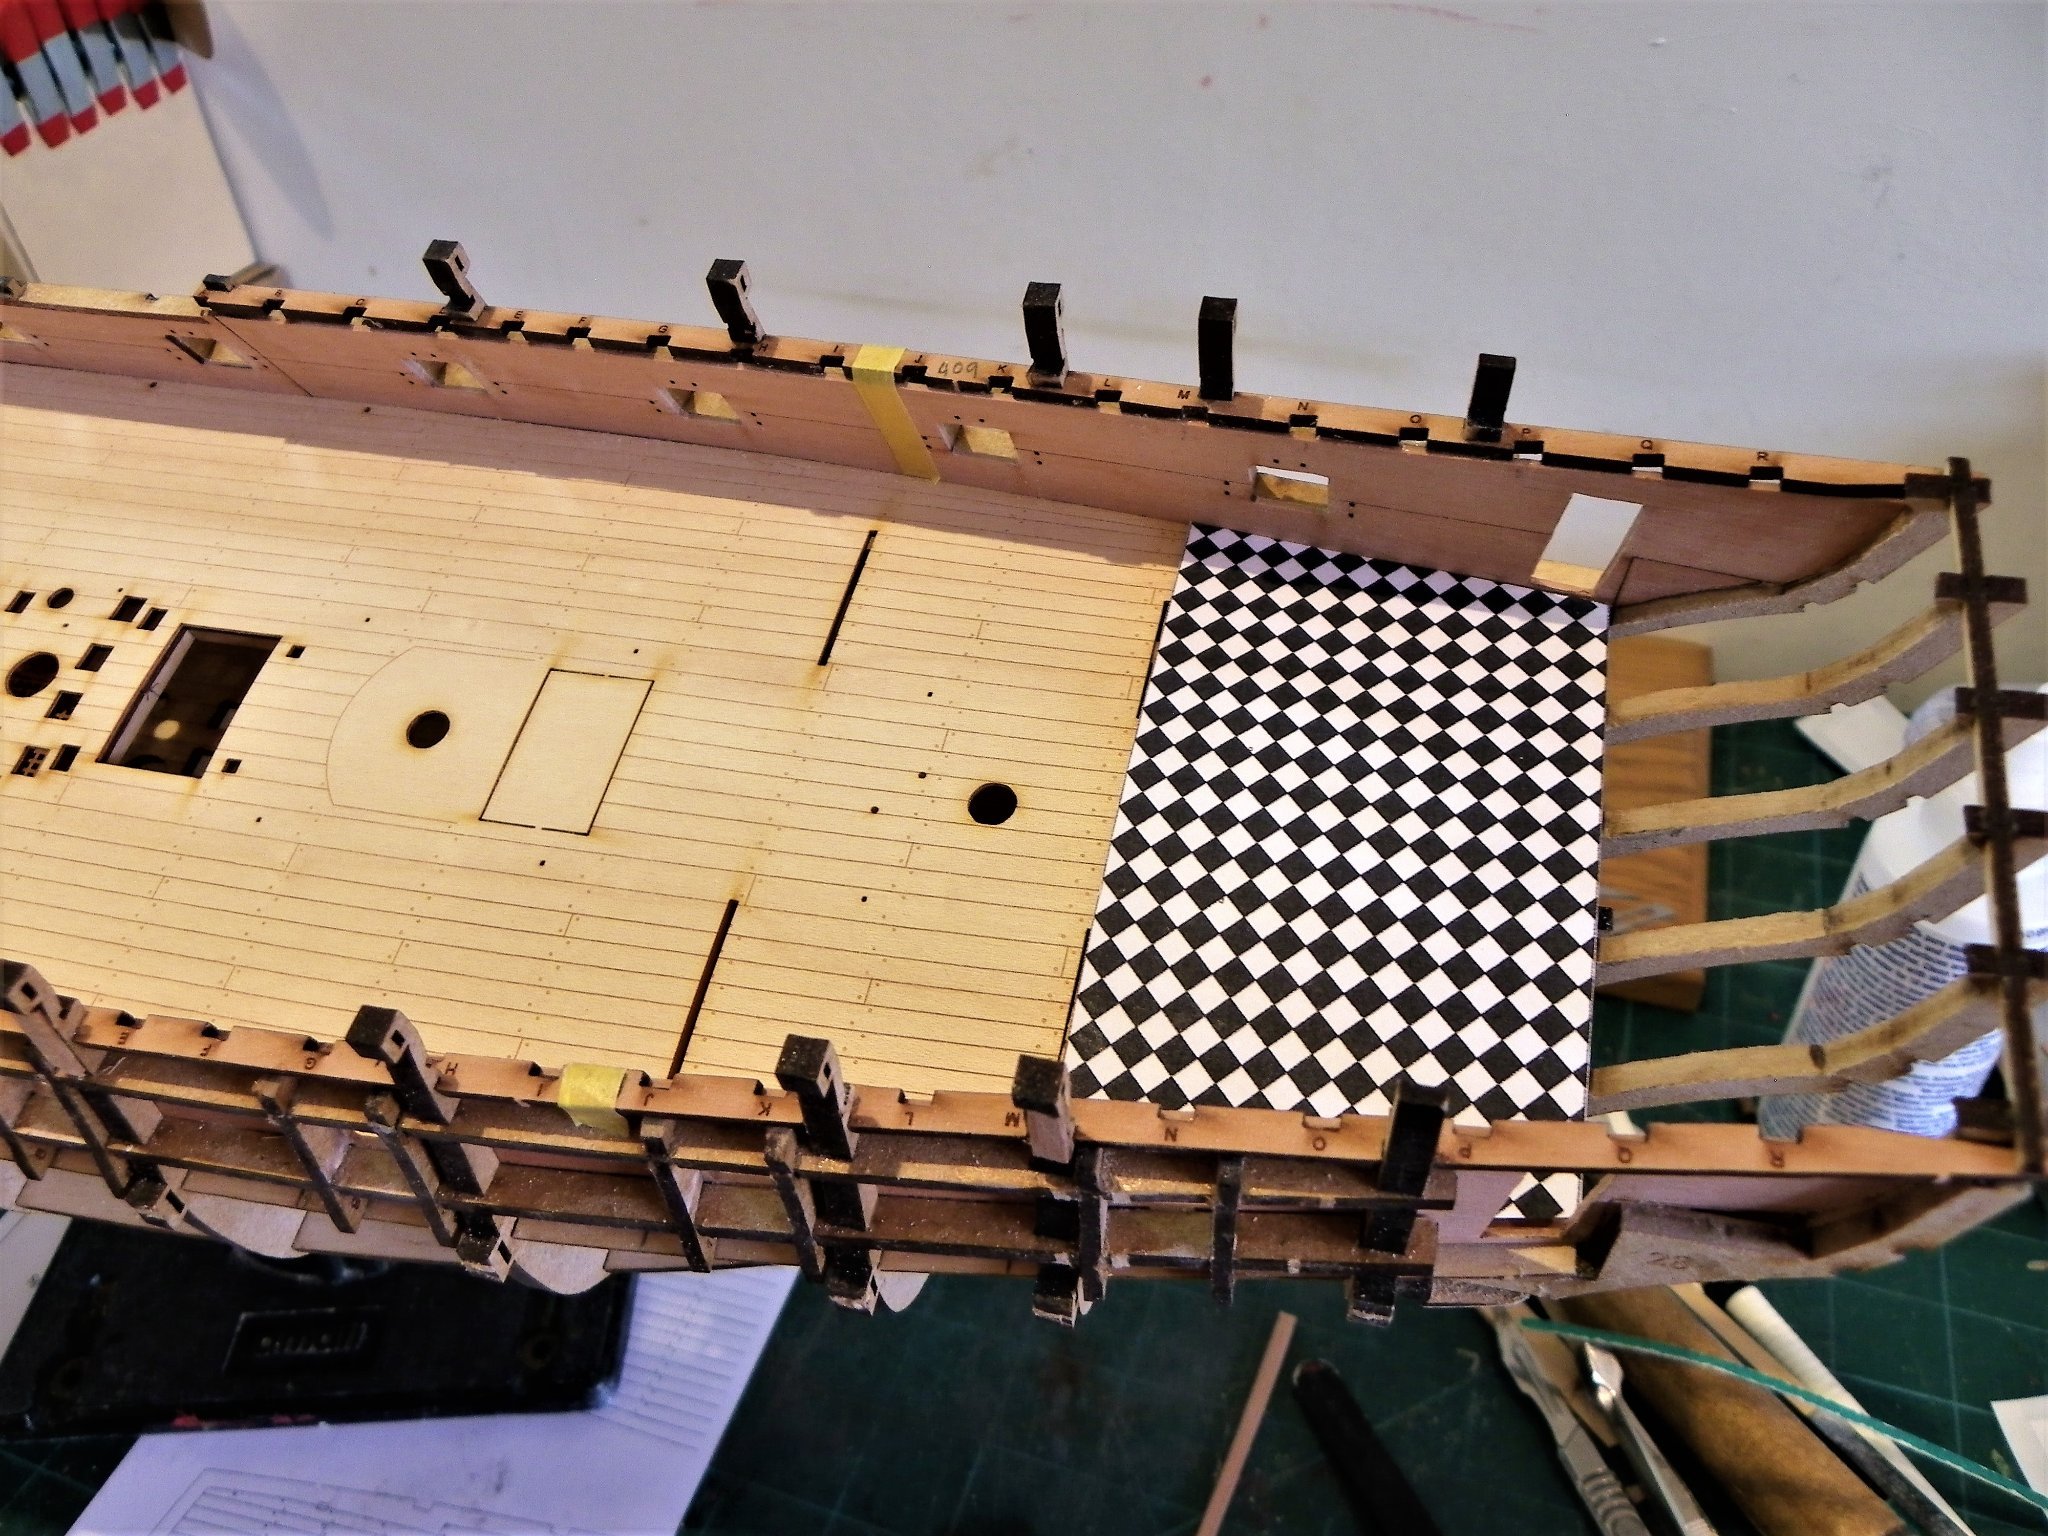
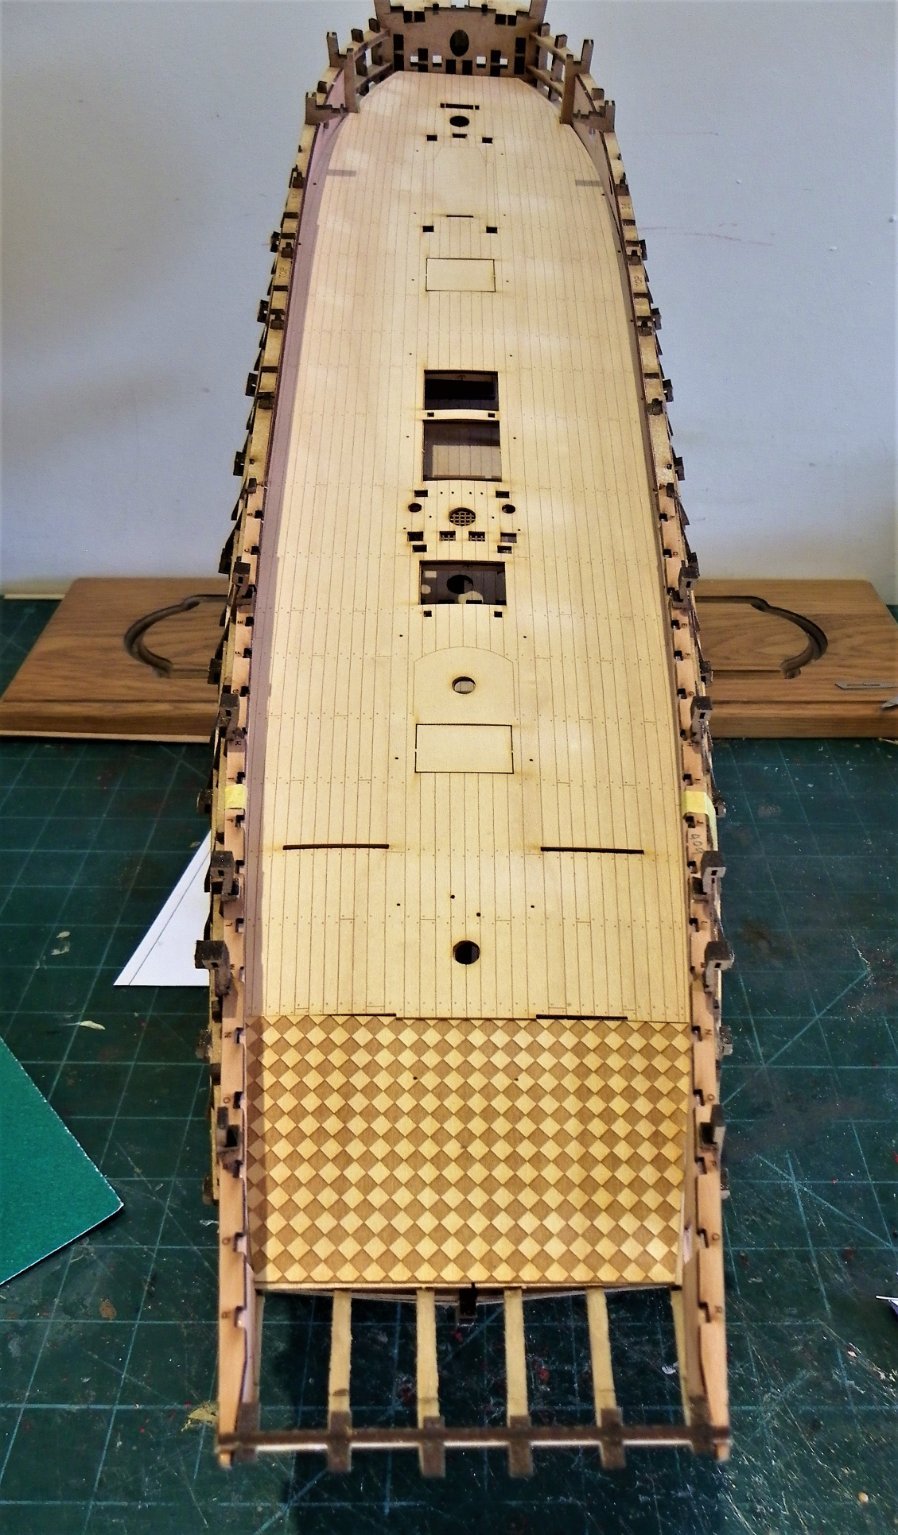
Post Sixteen Dressing the bulwarks This is the point where some paint is laid down on the Inner bulwarks, and I need to decide the shade of ochre to use. I will be hand painting the model, I prefer the look to the spray paint effect, and I simply can’t be bothered with all that masking. The cabin area will also be painted a shade of white, altho’ the Rudder head cover and bench will be varnished. Initially I couldn’t see any reason why the spirketting and deck clamp patterns should not be fixed before painting the Bulwarks but looking ahead the spirketting is fitted atop the etched deck pattern. As I’m not using the deck pattern it seems I need to fit at least the margin plank at this point. Out of curiosity I thought I would fit the etched deck just to see how it looked. 0343(2) It took a fair bit of sanding of the edges to get a flat lie, but I have to admit it looks ok. Chris is to be complimented on the flexibility and strength of the deck. It took me a while to figure out what the series of holes were running along the deck edges – doh they’re scupper positions.🤔 This will also have implications for the spirketting on which scuppers generally impact, so, I’m glad I spotted it now. 0348 At the rear there is a rather smart chequer pattern flooring in shades of brown and beige. Chuck has something similar on his Winchelsea build. This sort of floor pattern was very popular in Georgian England, usually in Black and White and can be seen in the Great cabin of HMS Victory where it is represented by painted sailcloth. I recall that we had something similar in our kitchen in the 1950’s but we used lino rather than sailcloth.😃 The kit coverings remind me of the parquet flooring evident in French ships, but I’ve not previously seen it in British ships. There was a feeling against anything smacking of Frenchification in the British Navy during the 18th century, but many officers succumbed (initially unofficially) to the fashion of the Epaulettes worn on the uniform shoulder as the century progressed. The Navy regulation didn’t cover such fancy additions until 1795. Even Nelson who originally sneered at such adornments eventually succumbed to this growing fashion. Still, I digress. Not sure I will use it on the model, nice as it looks. 0351 0347 0350(2) No need to rush to decision and I may change my mind yet, the muted shades also have appeal. Tomorrow I will be making margin planks. B.E. 20/09/21
.thumb.JPG.c1d4d79e2a6e25d71a3d1585a79a3762.JPG)

.thumb.JPG.c7405eac15249cdf8e842c6f632078b9.JPG)
- 857 replies
-
- 18
-
-
- Sphinx
- Vanguard Models
- (and 1 more)
-
Thanks for looking in Kevin and Gregory. @ Gregory - true, cleaned up char doesn't usually present gluing issues, but as Jacek notes above the blurb indicated that removal of char from the inside frames was a fairing indicator prior to installation of the Gunport patterns. Cheers, B.E.
- 857 replies
-
- 1
-
-
- Sphinx
- Vanguard Models
- (and 1 more)
-
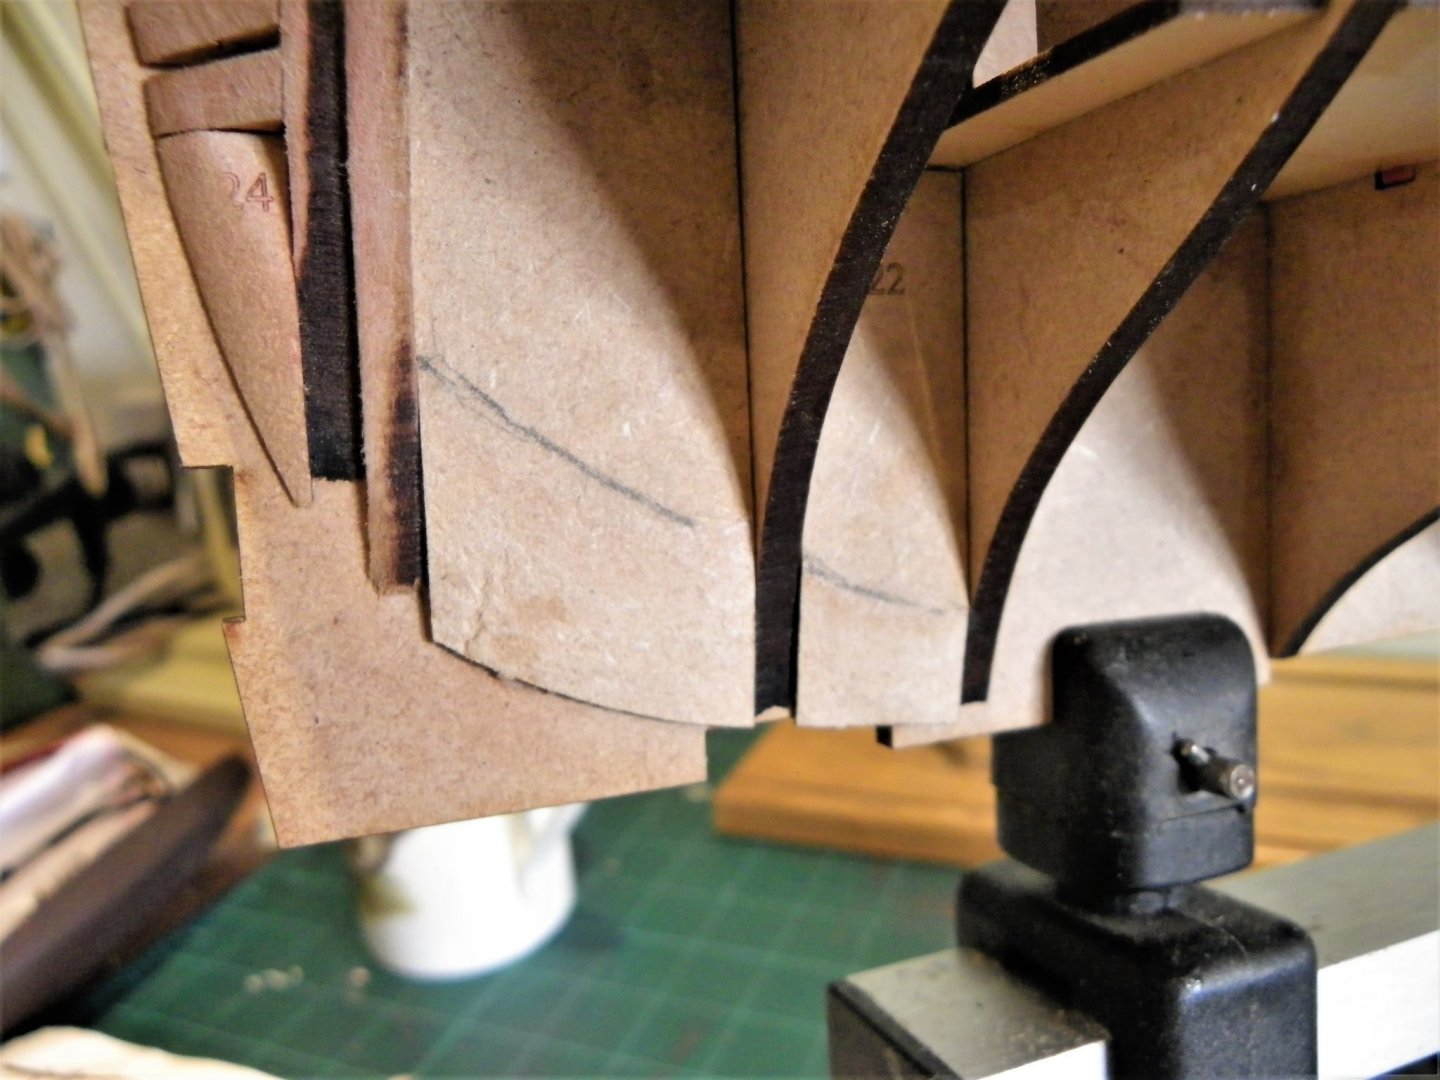
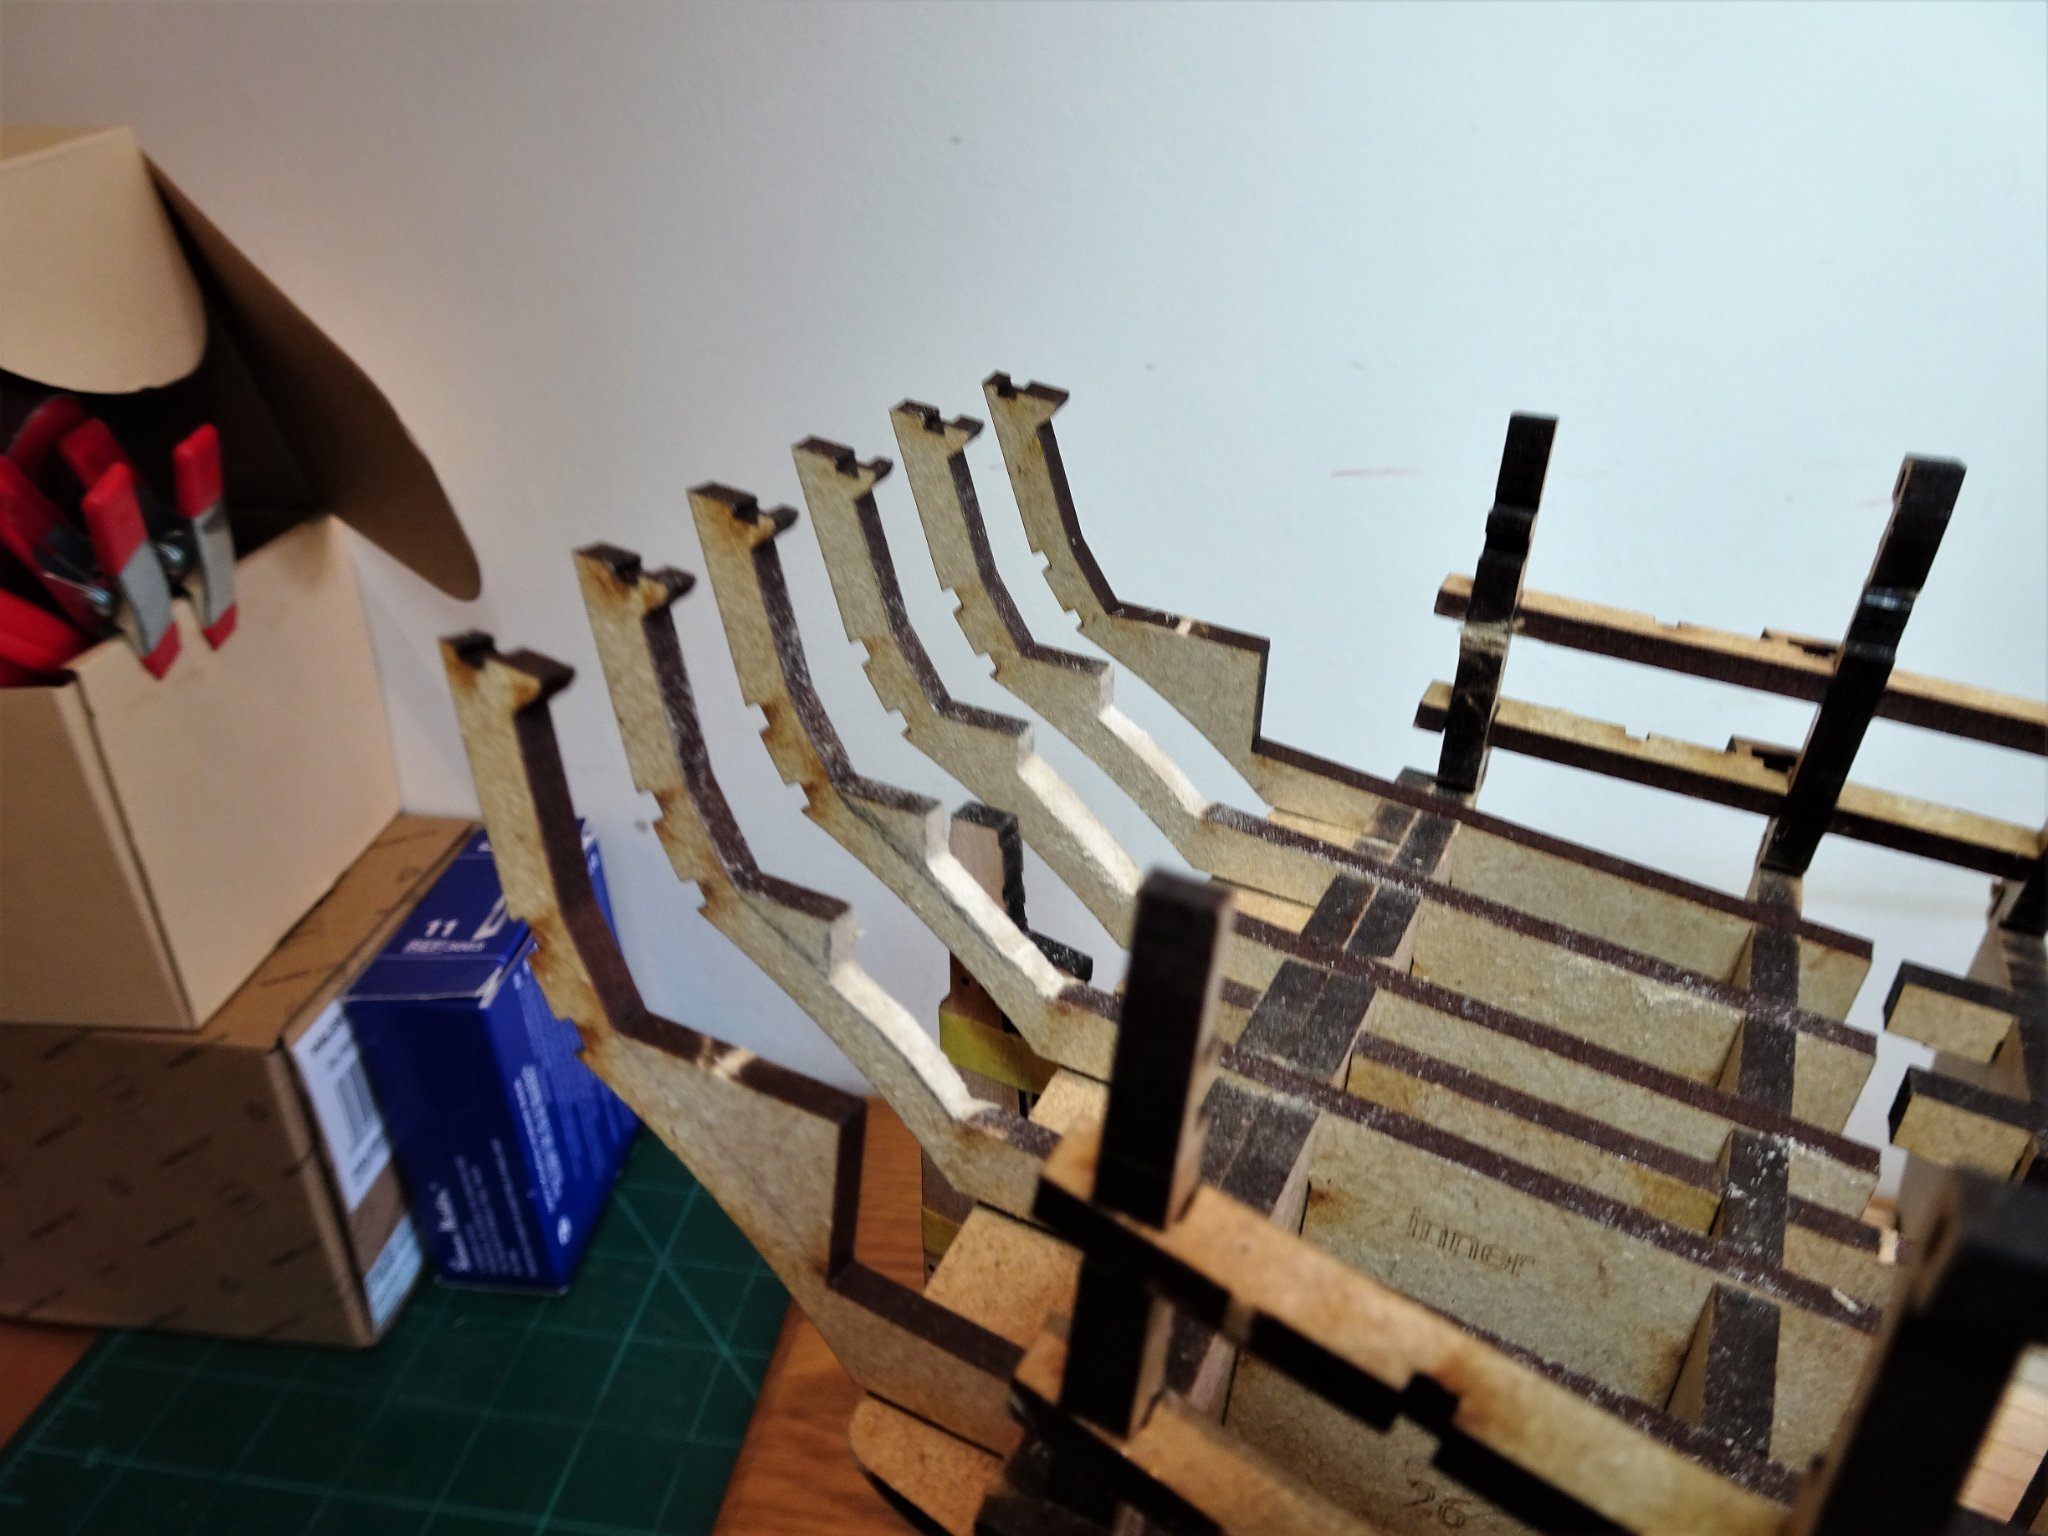
Post Fifteen The routine stages Once the false deck is in place the next stage is to add the vertical gunport frames. I like this idea of Chris’s, together with the longitudinal frames the ports are formed in a manner that reflects a traditional way of making them. 0315(2) I found that some of the frames benefitted from a pass with the sanding stick to fit smoothly into the notches; they are quite delicate at the extremes and some of the tips broke off. 0311 The filler pieces at the bow and stern were bevelled. No need to sand these, a scalpel blade cuts thro’ the mdf like butter, and no sanding dust. Sanding the internal framing is a pain, I always find that removing char seems to take forever. 0318 I start with P80 grade paper to get the rough off and then proceed to finer stuff. The char on the inner faces of the bulkhead tabs was particularly stubborn to remove. 0320 That done, the inner bulwark patterns fitted beautifully; I did apply pva to the faces of the framing to ensure a strong bond, rather than rely on the diluted glue to the rear approach. 0322 The bulkhead extensions designed to take hull support jigs seem very weak All but two of them have supporting splints and I can’t quite get my head around how they would have any effect on preventing hull spread. The Quarterdeck beam spacing patterns are fitted before the rear bulwarks. 0323 Delicate items these that require gentle handling. I found that the aftermost slot above the stern frames required easing to allow fitting. 0327 Before I glued them into place, I fitted some dummy deck beams to check the athwartships line-up. With a mostly open deck I didn’t want anything looking askew. 0329 The rear panels took a little fettlin’ to fit beneath the beam spacers, together with a little more tweaking of the internal framing. 0334 At the rear panel you can see the first modification to the Quarter gallery; the doors have been removed. How this will all tie in with modifications to the Quarter gallery fitting to come, I haven’t worked out as yet. 0333 The final action on this part is to sand the pattern gunport openings flush to the framing. For this I make up size specific sanding sticks with P240 paper. 0336 Moving on… B.E 20/09/21
.thumb.JPG.bd452623aa3ba4b5b4039aa90c003e56.JPG)
.thumb.JPG.7675cd90c724f7be92c8abf74831519c.JPG)


- 857 replies
-
- 14
-
-
- Sphinx
- Vanguard Models
- (and 1 more)
-
It has always felt alien to me fitting the stem and stern posts after planking, but it seems to be the current trend with kits. Hope the fix holds hard for you Glenn, but that is the beauty of working with wood there isn't much that can't be rectified. Your hull is looking great. 👍 B.E.
-
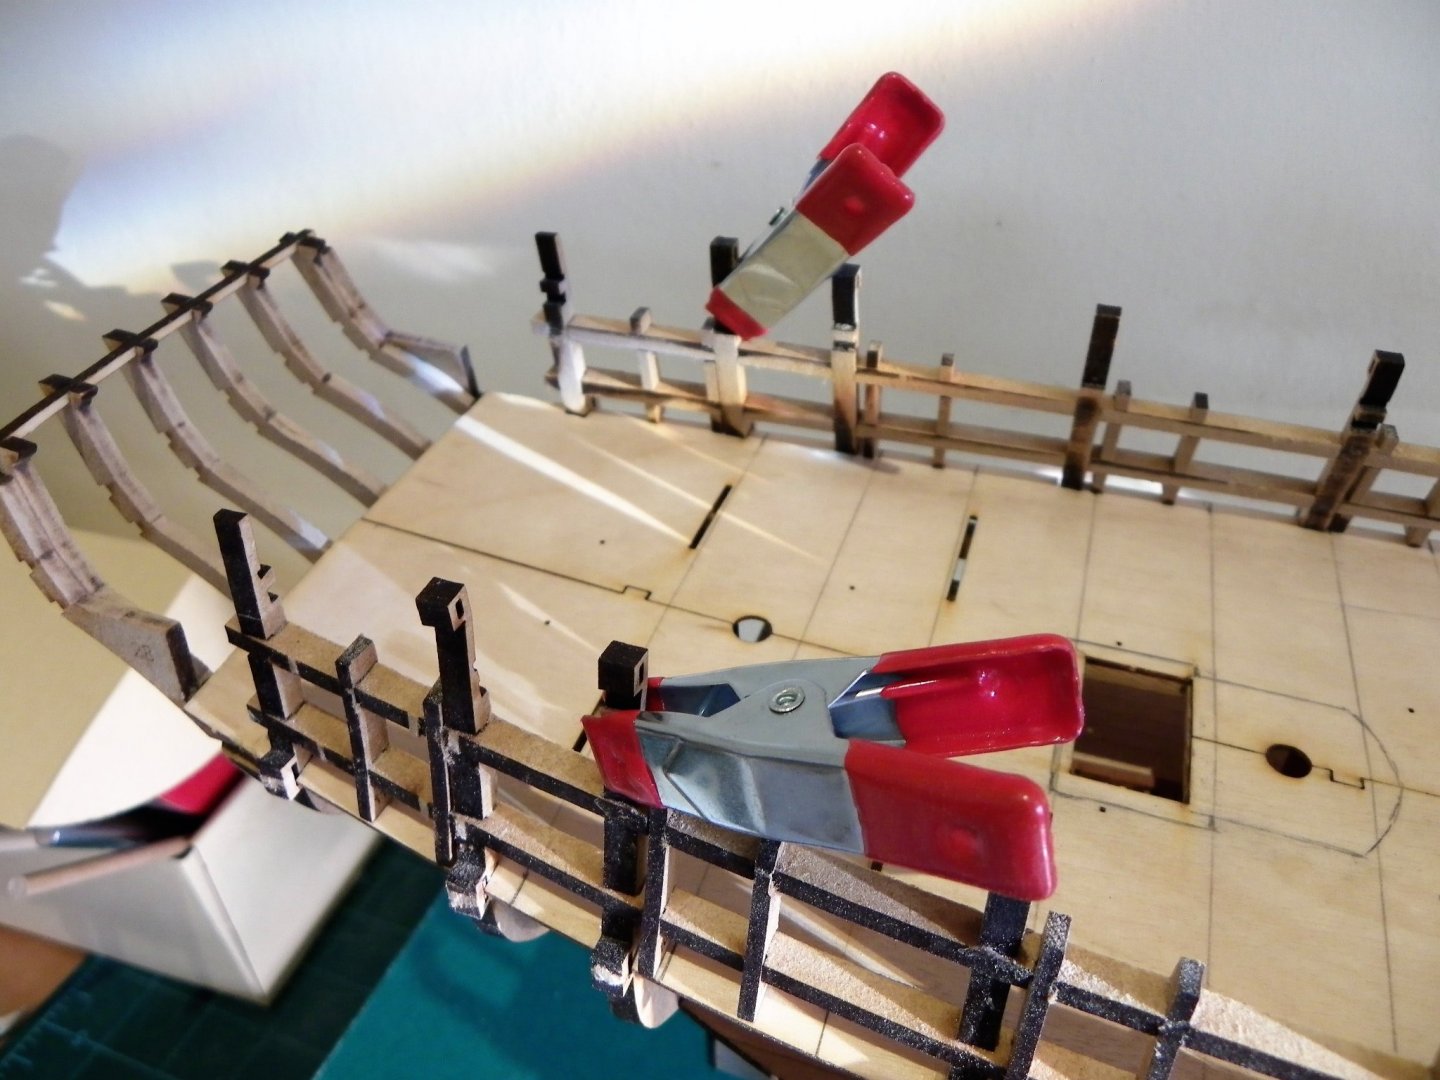
Now there's a scary thought. 😨 Post Fourteen The sub deck fits in without issue, I’m pleased to say. 0275(2) Only weights were used to secure the deck centre line. 0296 Framing was then installed beneath the deck openings both for visual effect and more importantly to support the weak areas along the centre line of the deck. 0299 This particularly applies to the tabs that separate the Main Hatch and Ladderway. 0286 2.7mm square section Boxwood was used for the purpose. 0305(2) 0306(2) That’s it for the modifications at the moment, I will now return to follow the basic constructions as per the manual. B.E. 16/09/21
.thumb.JPG.2b0ace9dfcd883920e81af72c9ef2f82.JPG)

.thumb.JPG.b0a94c06e69d9dc8f4c75764a2688134.JPG)
.thumb.JPG.ad260a34e05647524f106e78b1d1869a.JPG)
- 857 replies
-
- 11
-
-
- Sphinx
- Vanguard Models
- (and 1 more)
-
Wouldn’t like To start now would you Glenn so I can follow your planking example ? 😀 B.E.
- 857 replies
-
- 4
-

-
- Sphinx
- Vanguard Models
- (and 1 more)
-
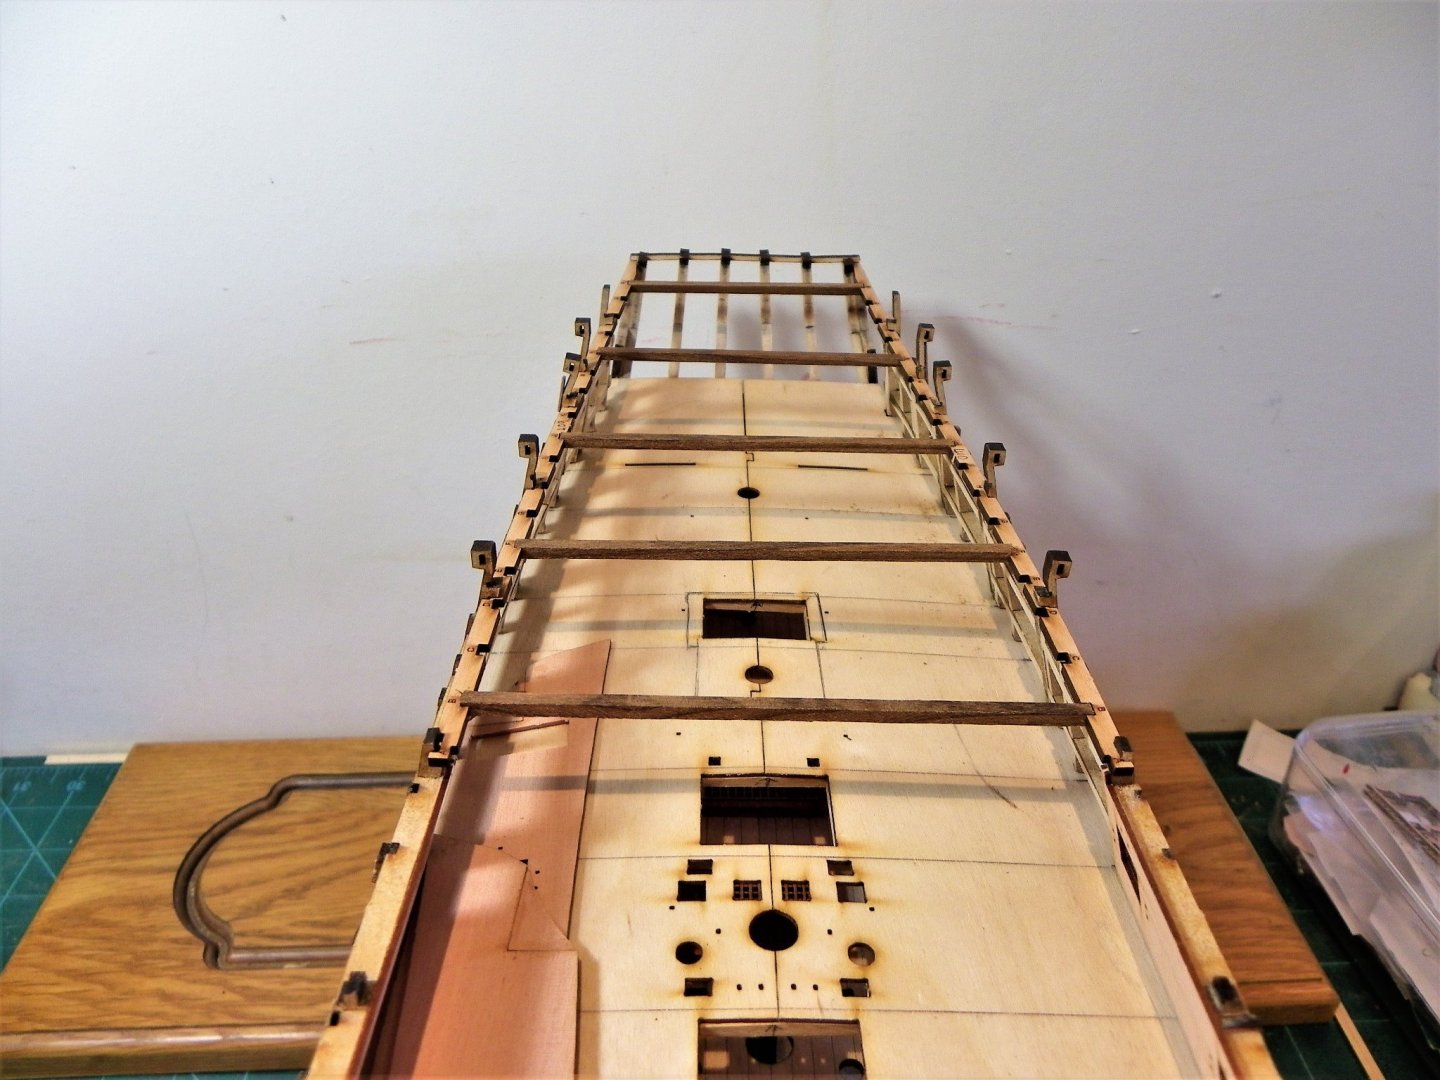
Cheers, Mugje and Rusty, on an unmasted and unrigged model the deck takes on a greater prominence. Post Thirteen Preparing the deck I had a look at modifying the etched decking to suit my purpose but decided to pass in favour of individual planking, deep down I probably always knew I would. 0263(2) Firstly, I need to mark the presumed deck beam positions before I glue the deck patterns into place. Once in place, areas of the centre line will need shoring up by the addition of carlings beneath the hatch openings. 0267(2) The assembled hatchway coamings are designed to fit atop the planking, but I intend to fit prior to planking. This will entail fixing strips of deck planking to the underside of the fittings to maintain the height of the coamings. Some other modification will be required; 0272 Extra strip wood will be applied to the head ledges to form a round up, and I am looking at using Chuck’s Curved Boxwood grating sets. The Shot garlands will be removed as they are an unnecessary incumbrance to the deck planking. So that’s the plan, but a few steps along the way. Firstly the false deck can at last be glued into place. B.E. 15/09/21
.thumb.JPG.8a1af1ee743549202a58b4254041acee.JPG)
.thumb.JPG.864aa699044fbb46418aef1740af8086.JPG)
- 857 replies
-
- 17
-
-
- Sphinx
- Vanguard Models
- (and 1 more)
-
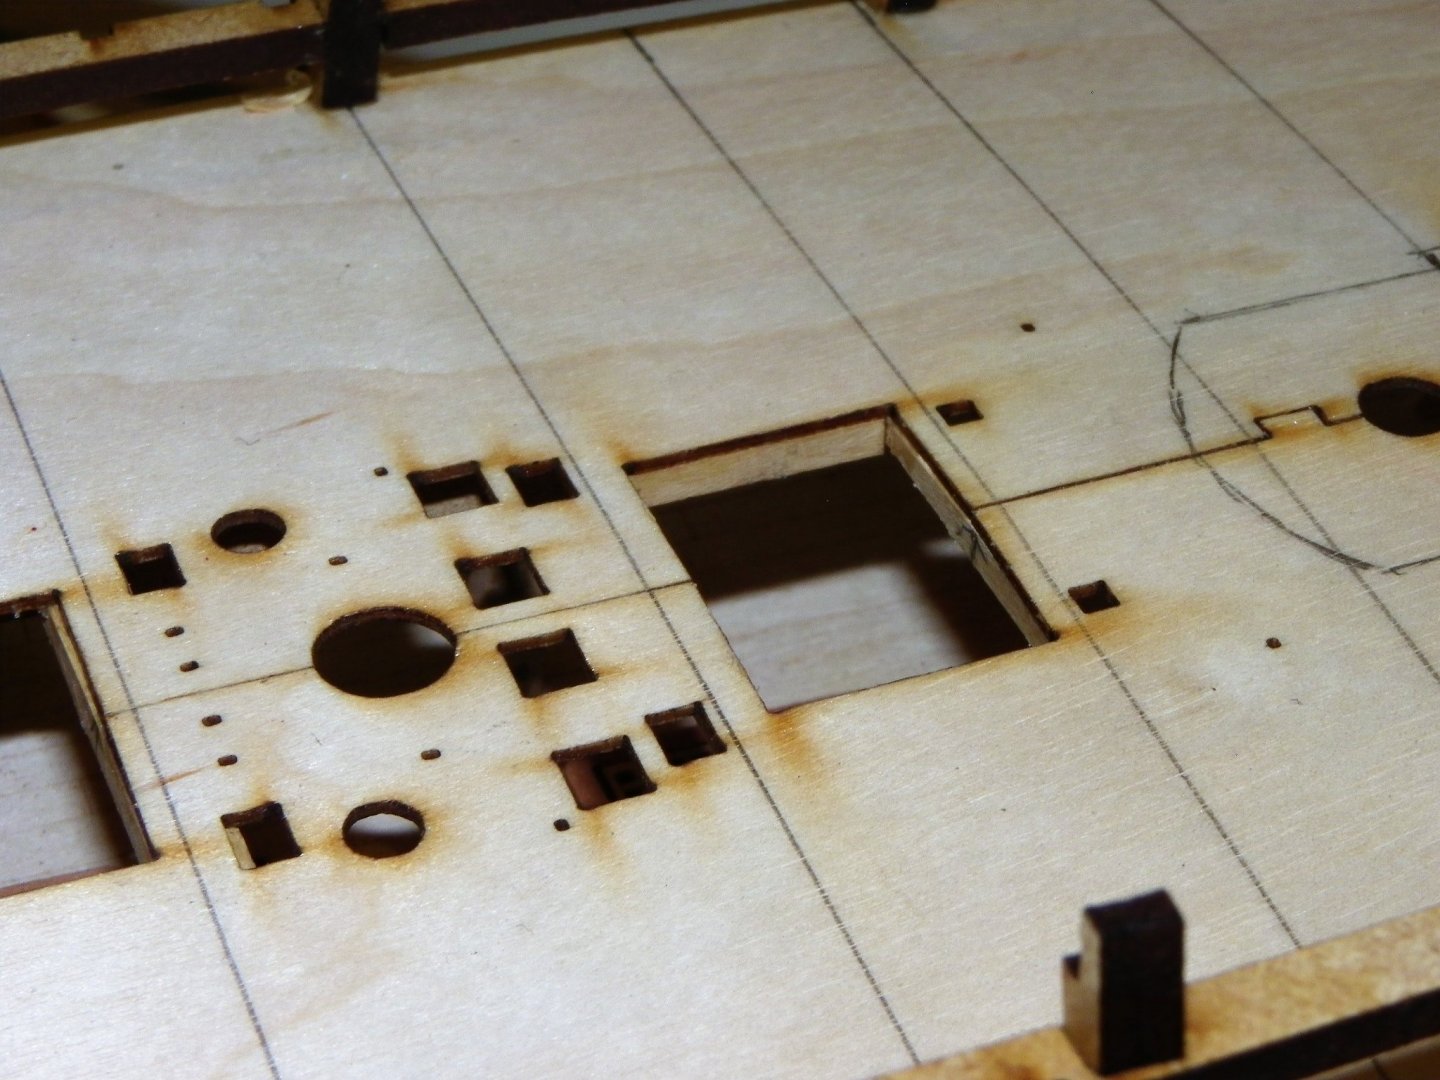
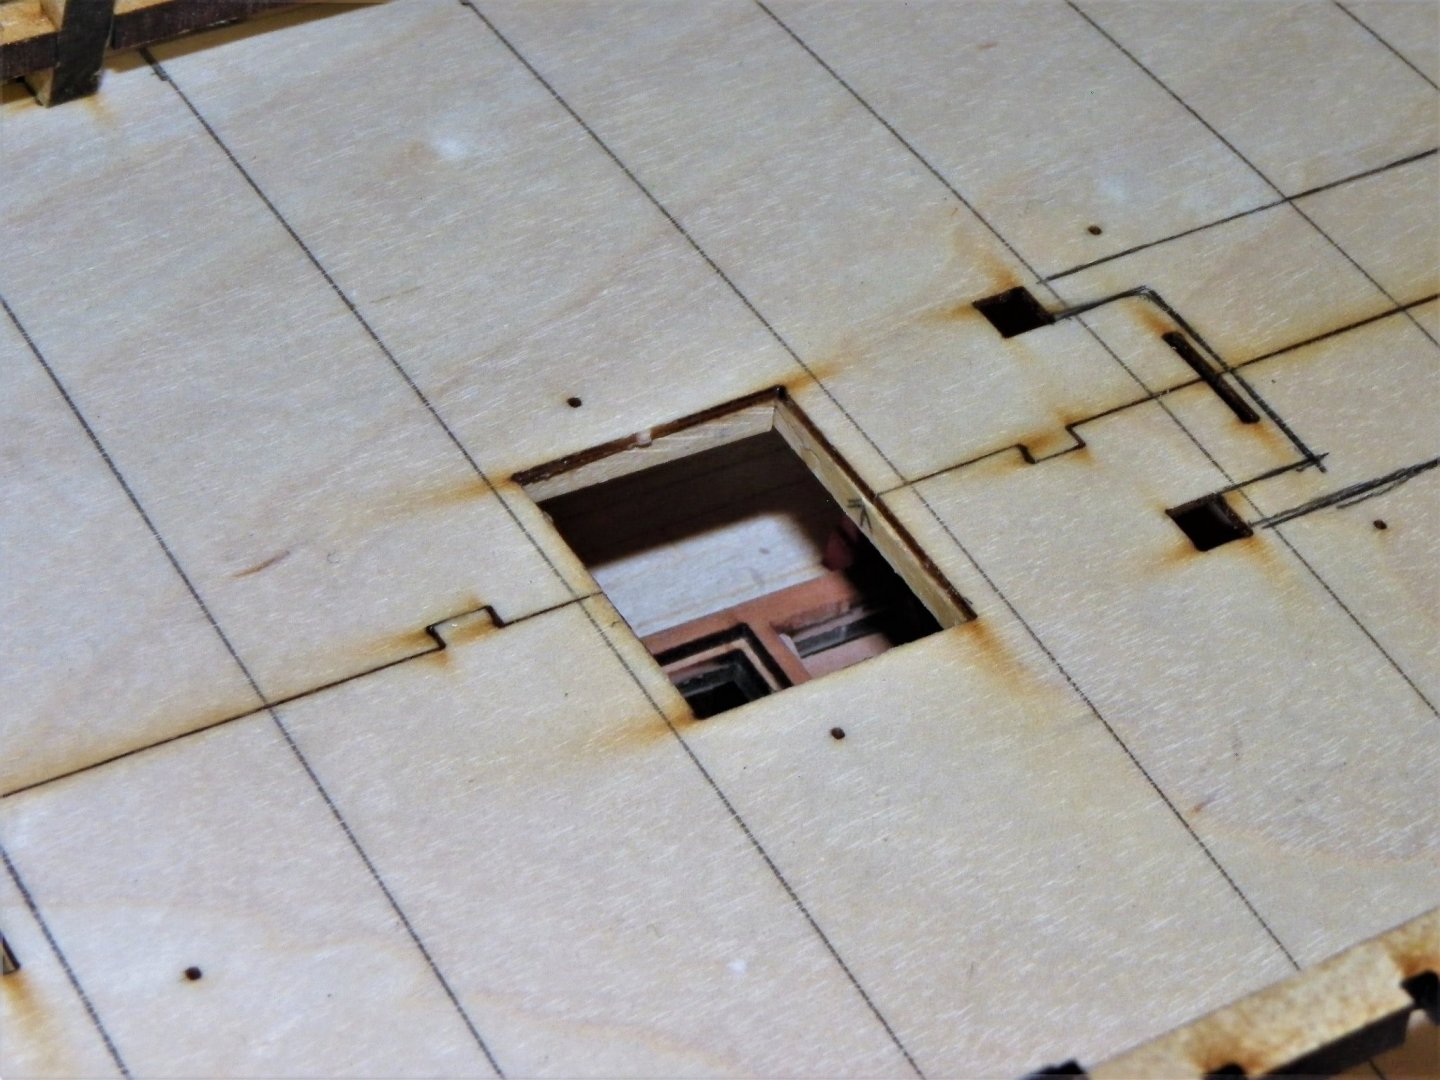
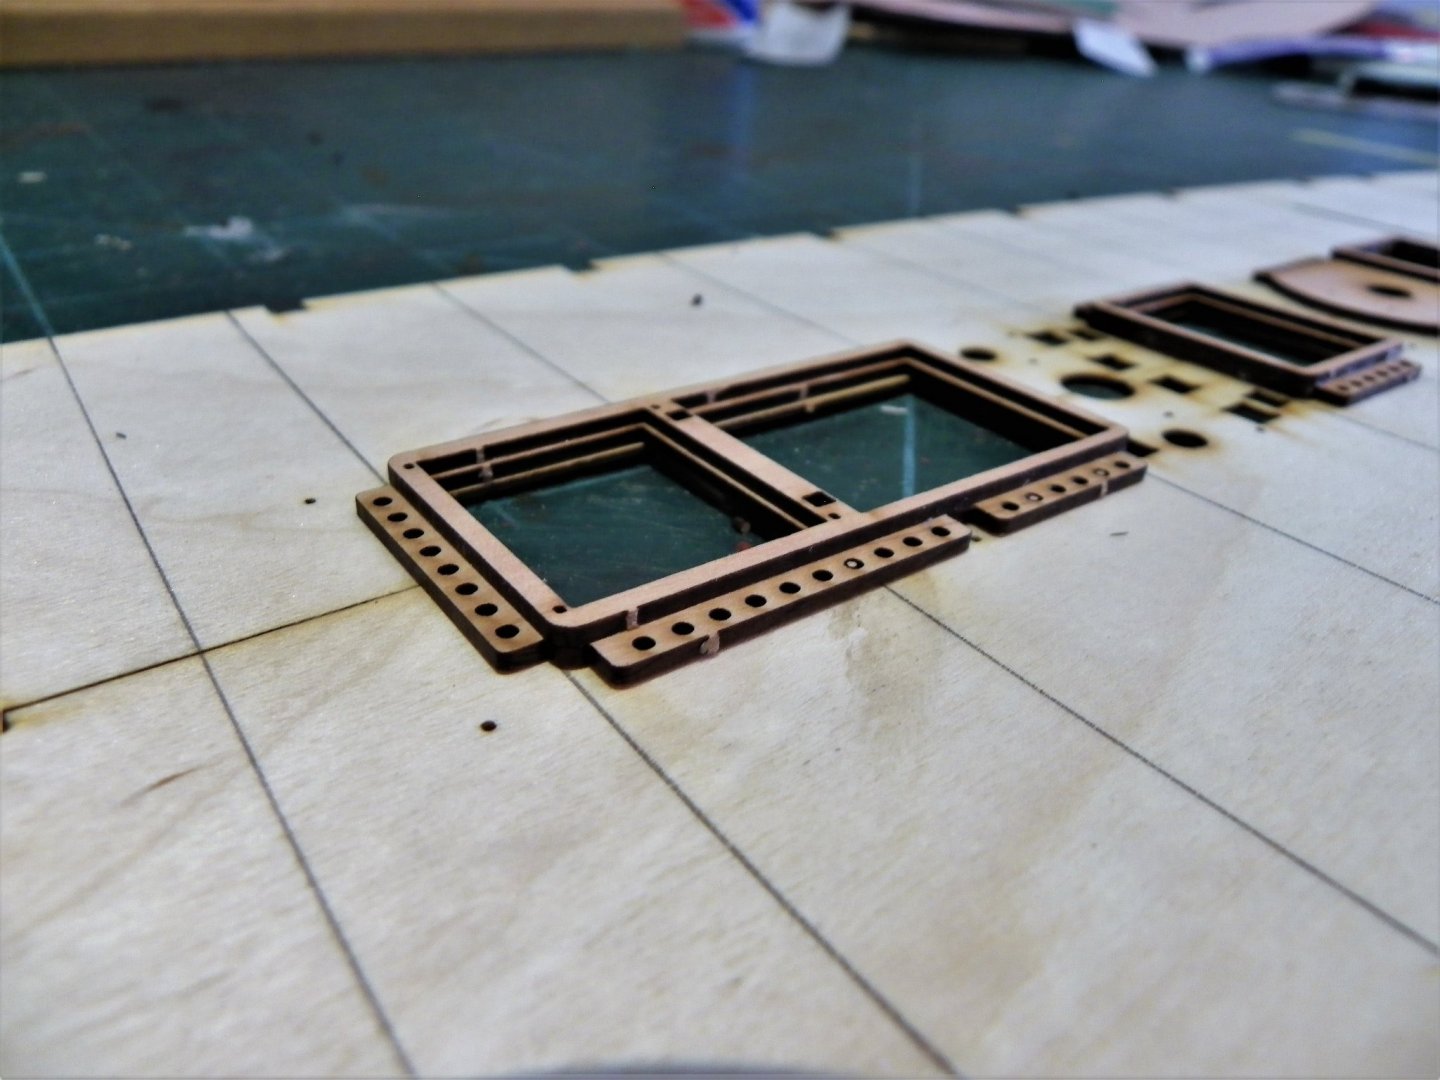
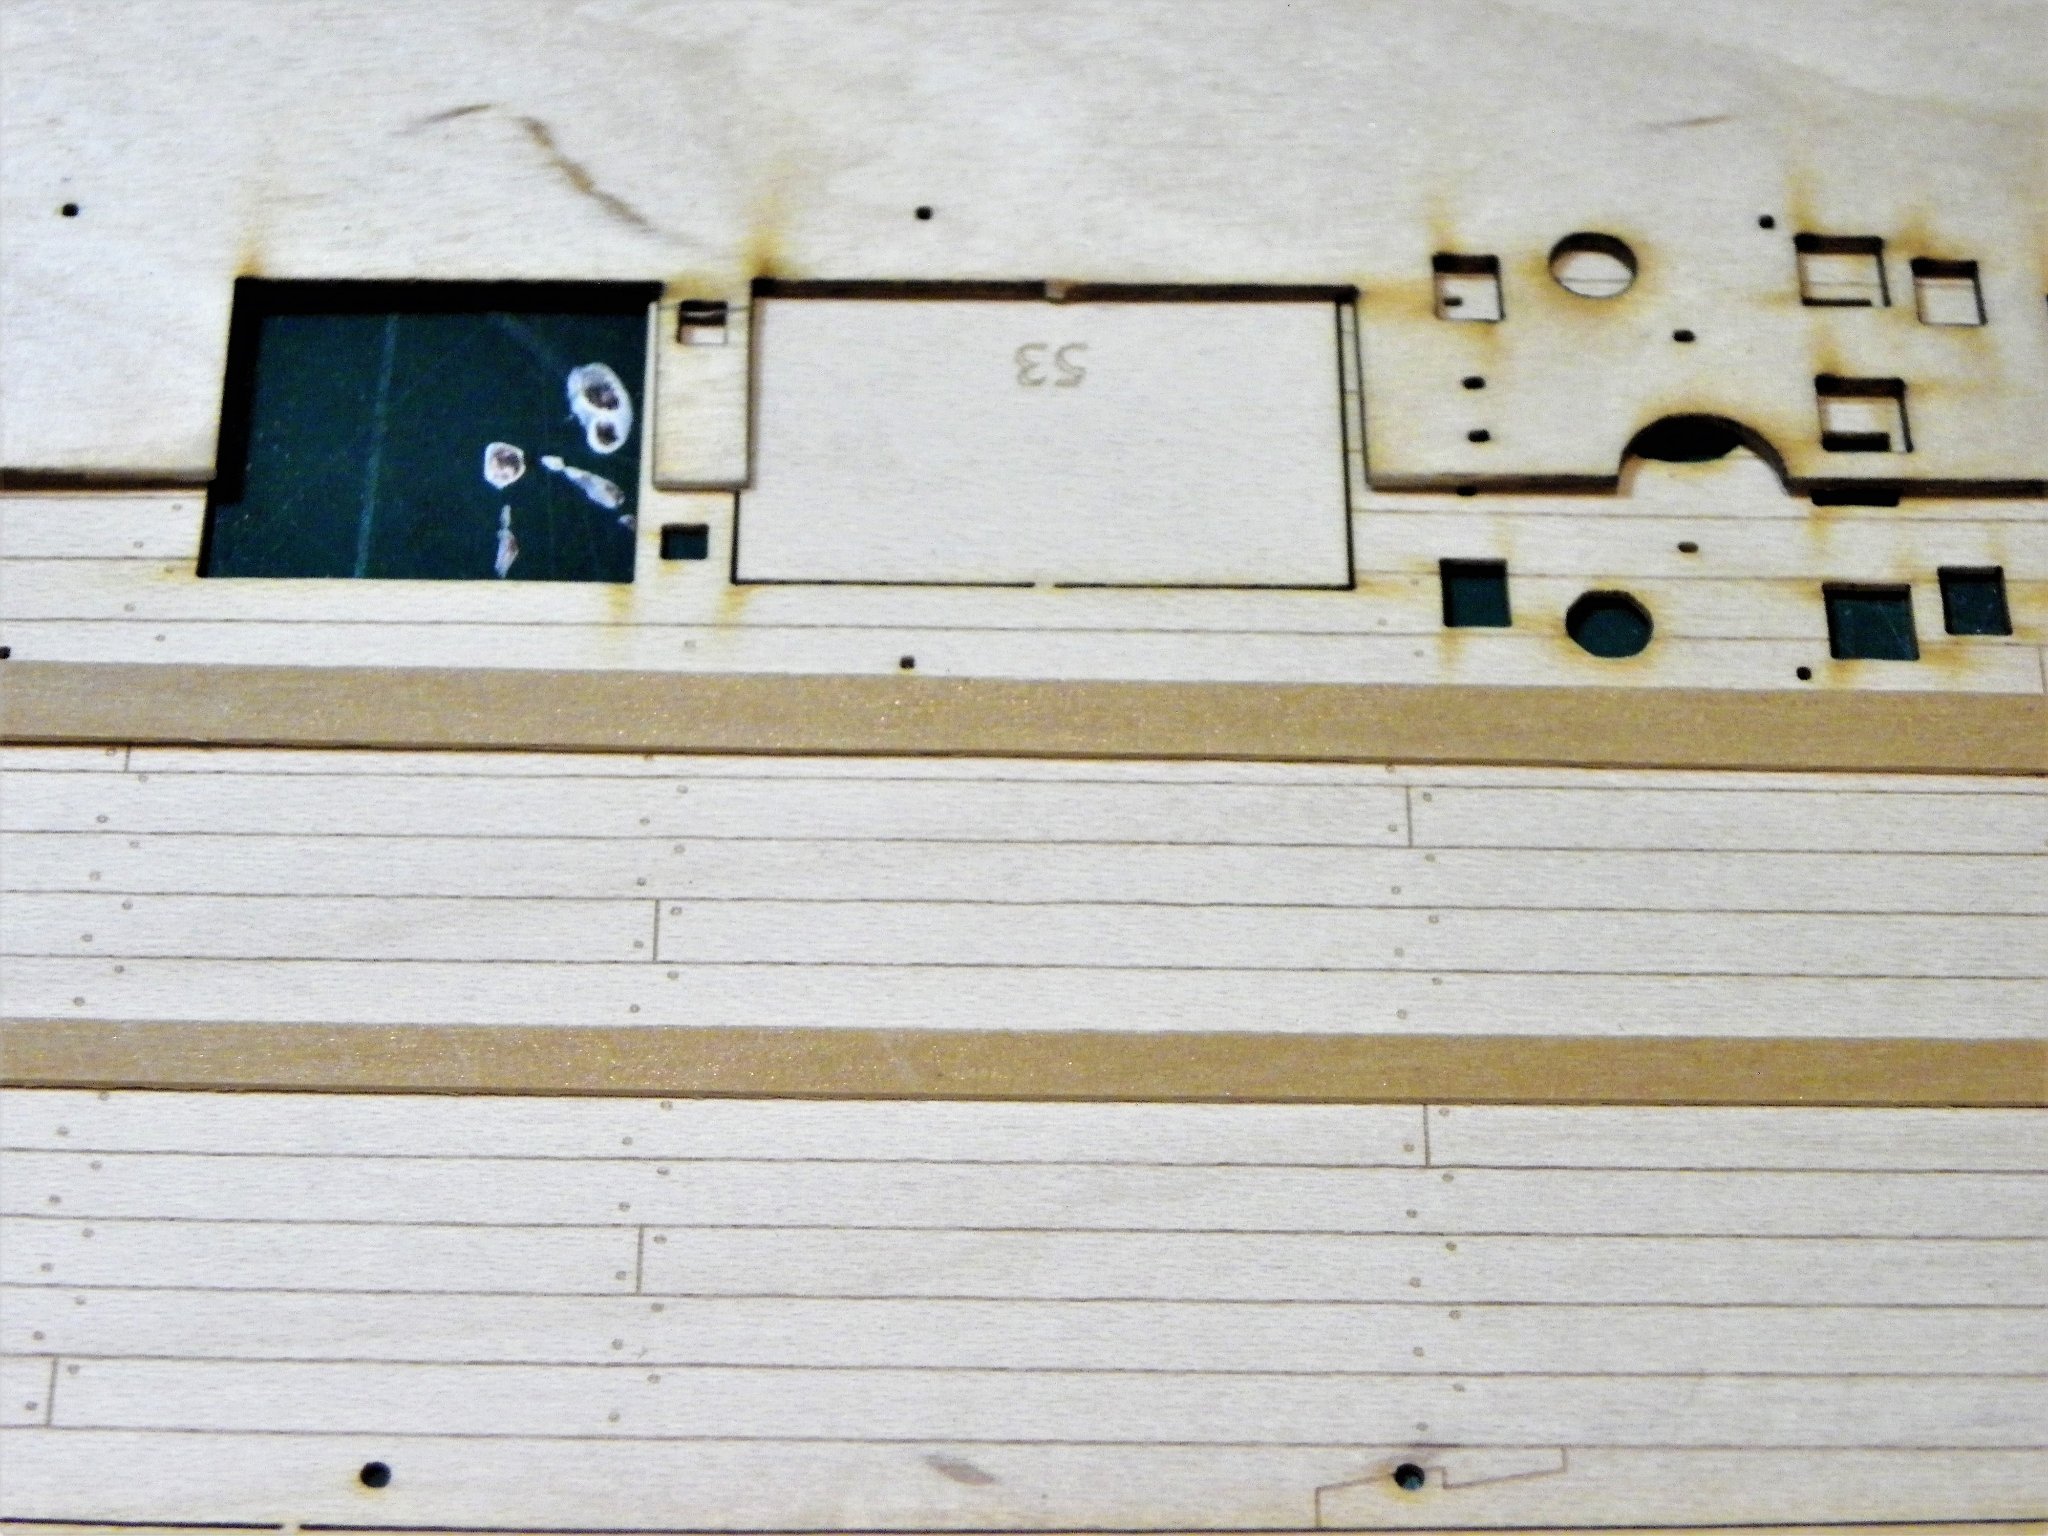
Post Twelve Upper gun deck considerations I spent some time getting the gundeck patterns to slip smoothly into place. I found a light sanding of the bulkhead slots was necessary, followed by many dry fits, until I was happy I could fit them quickly. When the time comes I need to get them in place before the glue starts to dry on the bulkhead tops. 0251 I use dummy masts to help ensure a correct fit. At this point I need consider whether I will use the provided etched deck or plank it myself. This deck will be fully planked but I need to check how the thickness of the deck pattern plus the etched deck compare with the deck pattern plus any intended planking strips. 0255(2) The comparison passes muster. 0257 The strips will be 0.6mm thick Boxwood of 3.4 and 4.5mm widths which are a perfect match to the etched design planks. The kit is designed for the hatchway coamings etc; to be fitted atop of the deck. No doubt a boon to those who don’t fancy deck planking, and a great kit selling point, but I’ve not been persuaded to use the provided etched decks on three previous builds. 0260(2) I can’t quite put my finger on it, is it that they are almost too perfect, does my eye catch the subtle grain shading angled across the deck? Whatever, a decision has to be made, I can’t mix and match etched and individual planking on the model. Before I make that final decision I am going to experiment with unused etched decking from earlier builds to see if it can be successfully chopped about to create larger unplanked areas. B.E. 14/09/21

.thumb.JPG.c7d8d35e07bdb6c69b0e25ea507a13f7.JPG)

.thumb.JPG.6eb19d013363b5fd0d0122698d311469.JPG)
- 857 replies
-
- 16
-
-
- Sphinx
- Vanguard Models
- (and 1 more)
-
The unplanked areas on the Quarter and Fore decks designed by Chris, are reflected in many contemporary models. I will have even larger unplanked areas to afford a greater view of the decks below. To this end I welcome the provision of the cabin bulkheads, but the arrangement of the ordnance is something I have yet to decide. B.E.
- 857 replies
-
- 3
-
-
- Sphinx
- Vanguard Models
- (and 1 more)
-
Hi Jacek, I think your stern area up to the counter around the top end need more fairing. There should be a smooth transition without any hint of an angle, those split planks are a sign of trouble ahead. B.E.
-
If you're going to plank over the Quarter deck very little will be seen of the cabin area, so probably not worth the effort and risk of modification. B.E.
- 857 replies
-
- 2
-
-
- Sphinx
- Vanguard Models
- (and 1 more)
-
Cheers Guys, @ Glenn, Bob, Tom, and Jacek Blame Chris, for how he designed the kit, providing the scale Quarter deck beams which gave me the idea for a Navy Board style model.😄 It was the possibilities of enhancing the kit that persuaded me to buy it, hours of extra fun for the money. I’m surprised Chris hasn’t charged me extra for the kit.😉 @Richard, A case of stuff happens Richard, James and the team do a great job of providing the means for us all to record our work, and MSW were let down by the previous host. I write all my logs on word and copy and paste to MSW The words docs and photo files are all backed up from my system. The problem with the lost Pegasus log was reconstructing the photo inserts which took all the time. You will note that I now add the reference below each photo, so I can quickly identify them. B.E.
- 857 replies
-
- 4
-
-
- Sphinx
- Vanguard Models
- (and 1 more)
-
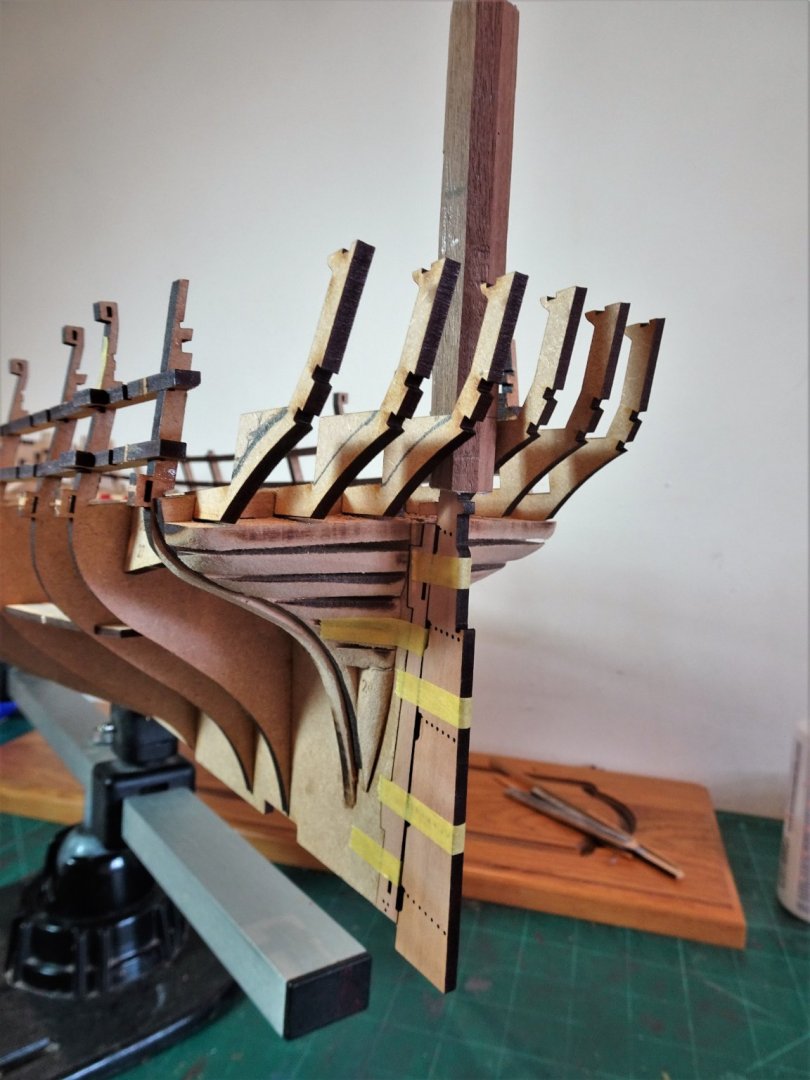
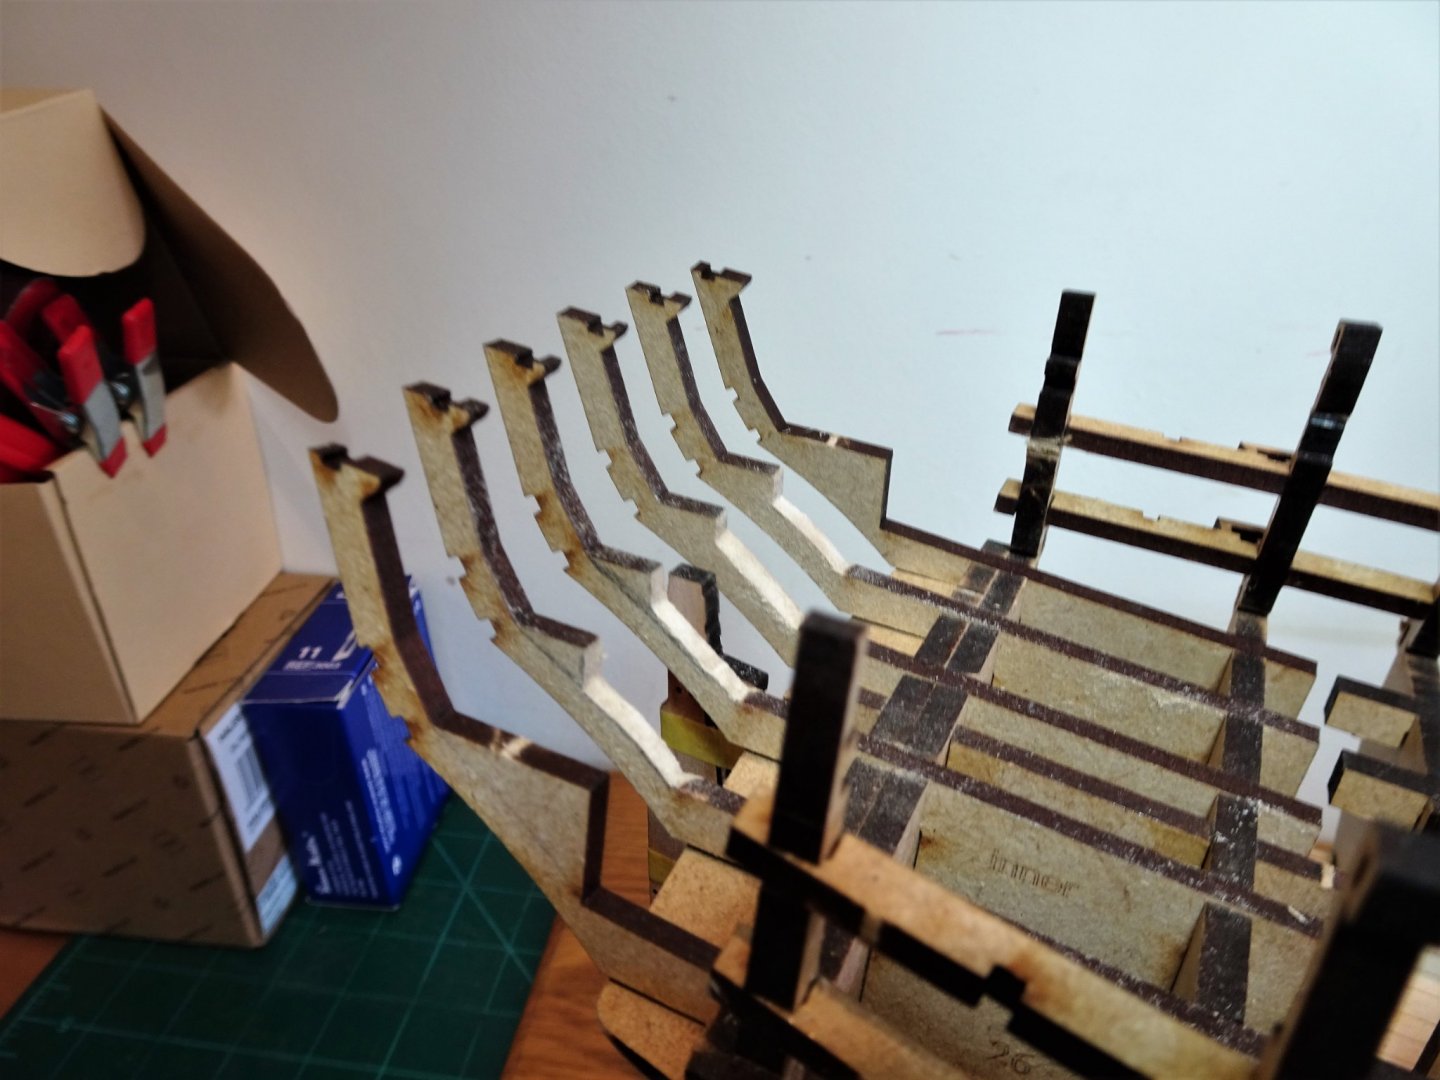
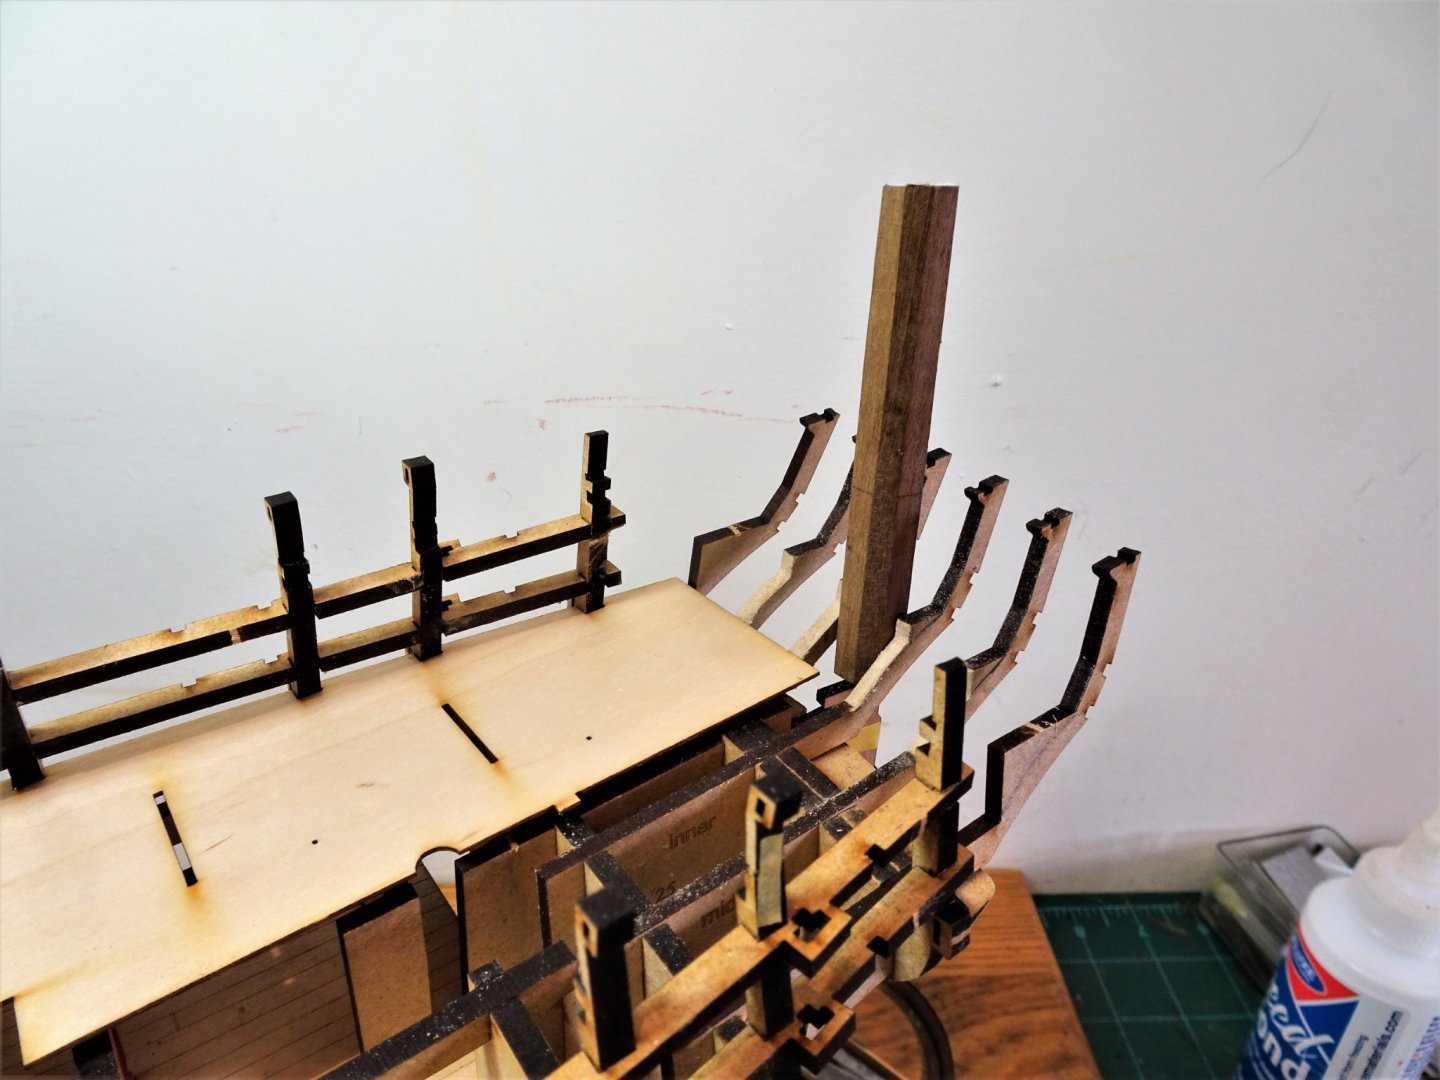
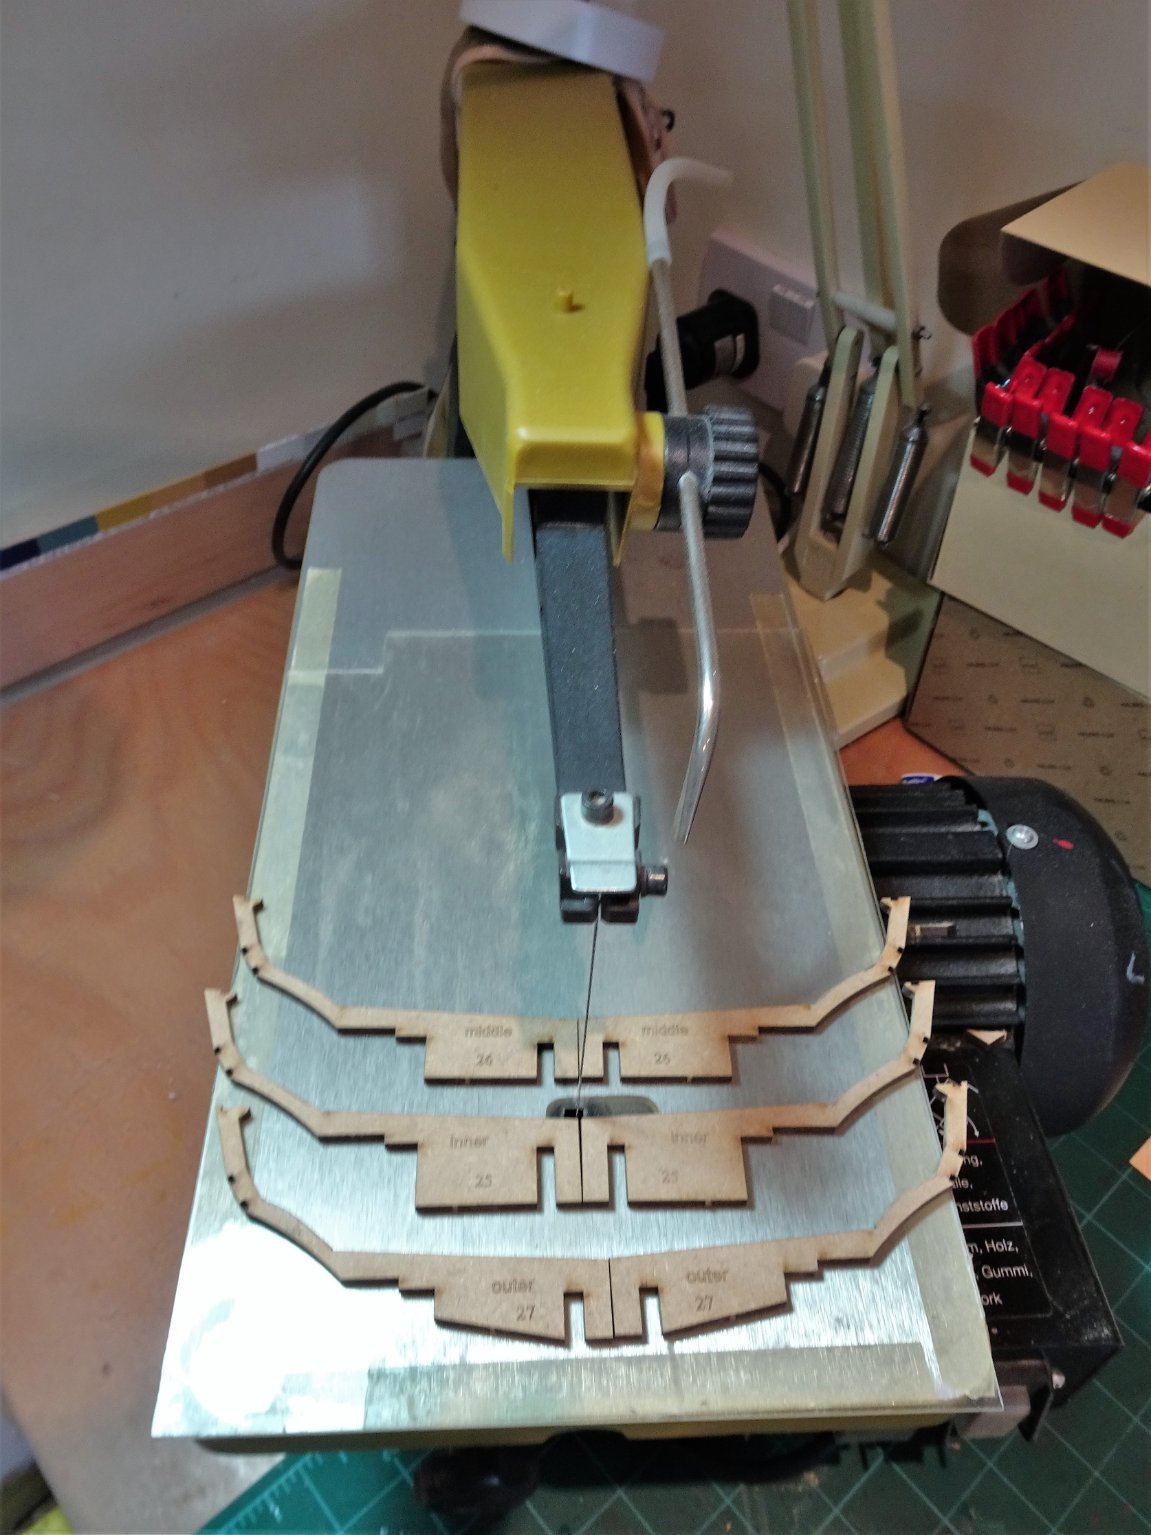
Post Eleven Stern mods continued. Having studied Chuck’s Winchelsea build which is acting as a sort of proxy plan, I can see where I am going. 01429 All the stern frames have now been adjusted including the two outer frames. 01428 My Proxxon scroll saw is my most used machine, would hate to be without it. 01431(2) 04141(2) Fully modified stern frames in place. 04131 This results in a gap where the kit rear inner bulwark pattern (214/215) is designed to fit over the original layout. No matter this is easily rectified. 01432 I have also removed the door as I hope to open up the Quarter gallery. A little more cleaning up and the frames can be glued into place. B.E. 12/09/21

.thumb.JPG.c64f402f57275e0605fa484044bc61c0.JPG)
.thumb.JPG.a5022b06f5a00300f95c5b167c318a48.JPG)
- 857 replies
-
- 22
-
-
- Sphinx
- Vanguard Models
- (and 1 more)
-
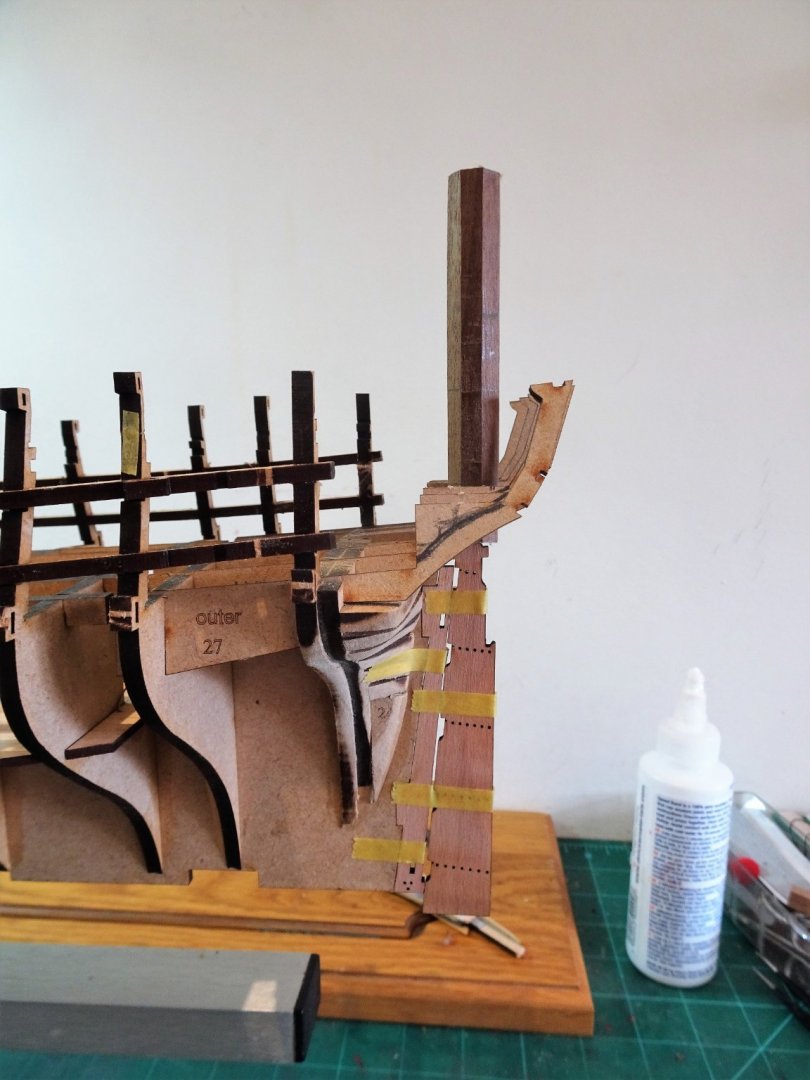
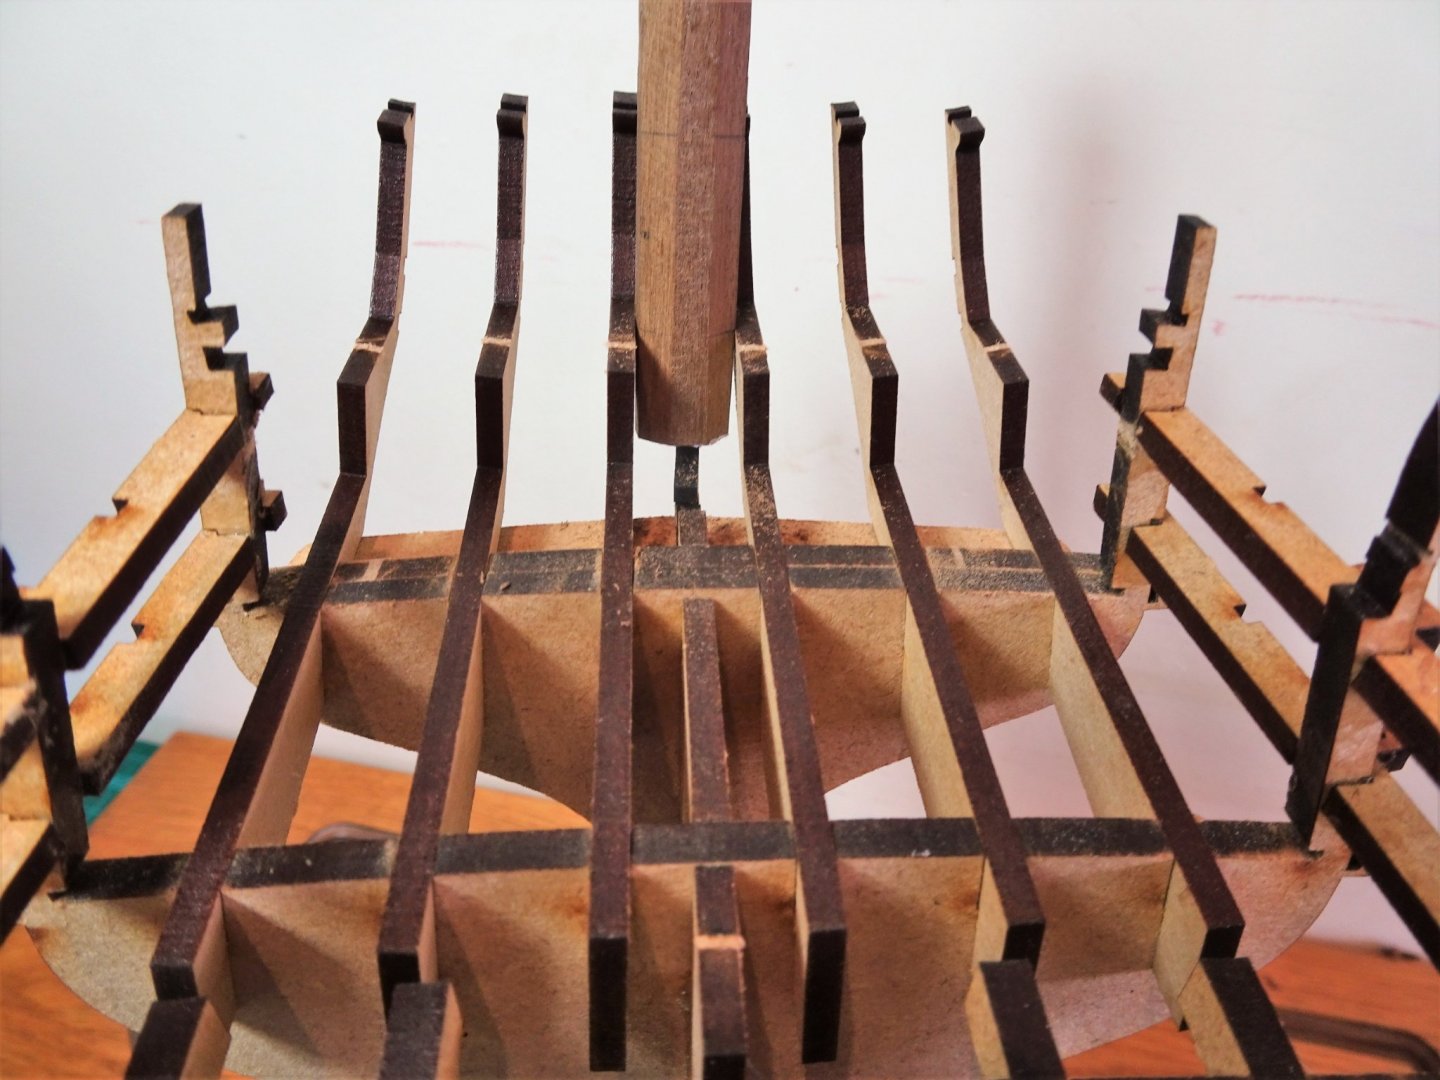
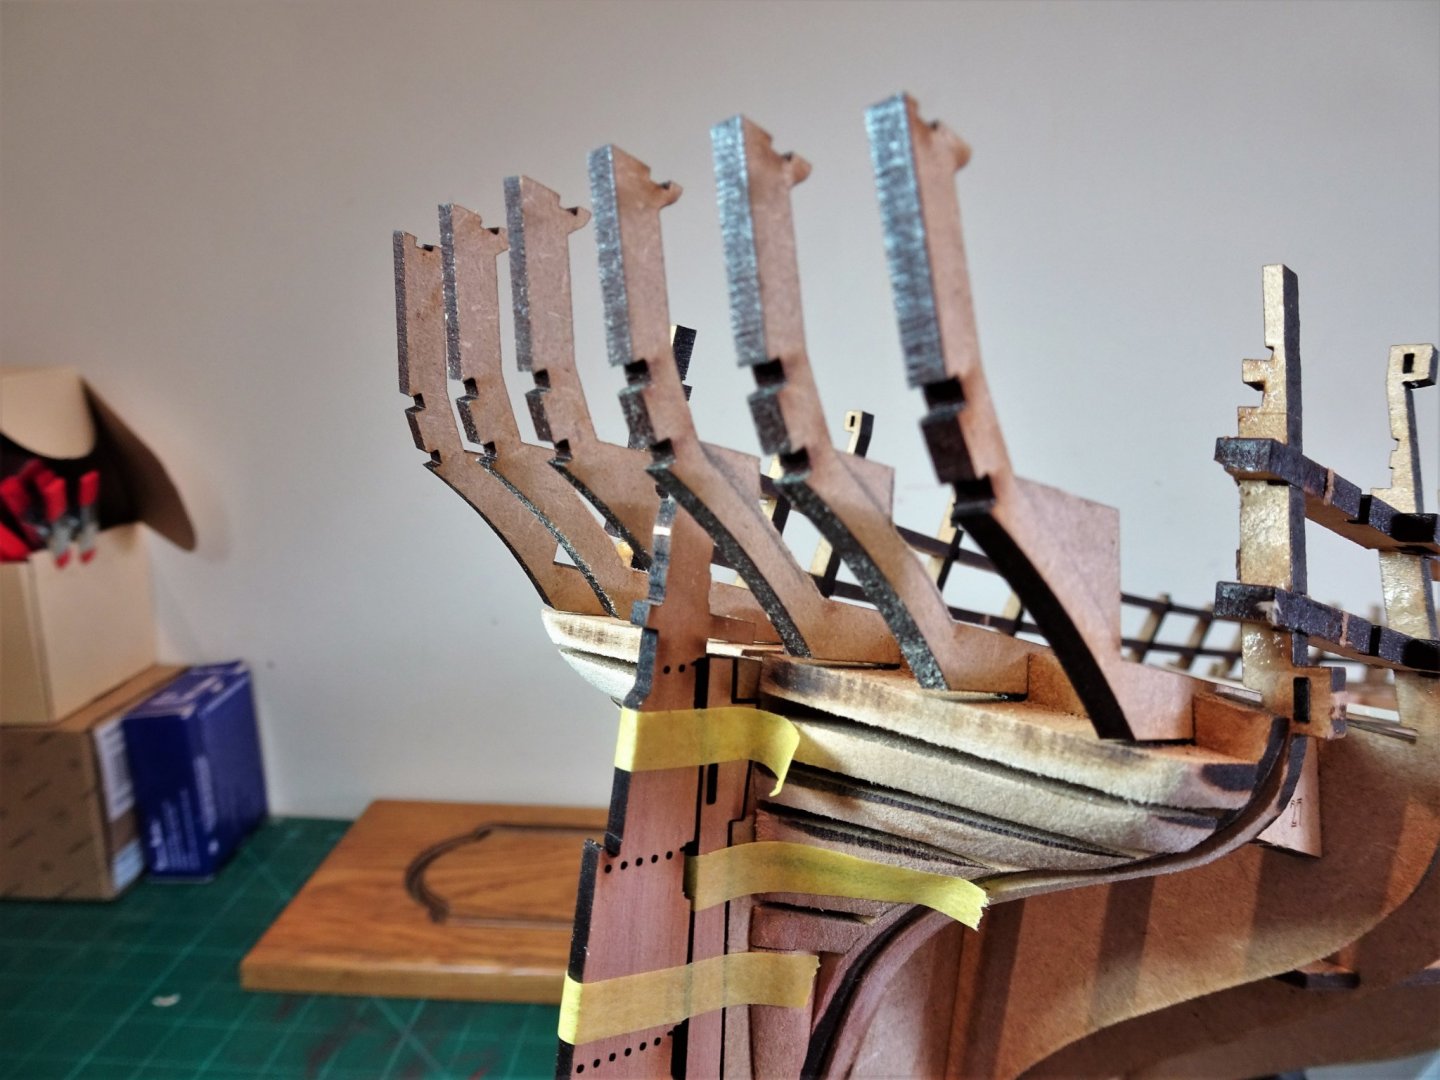
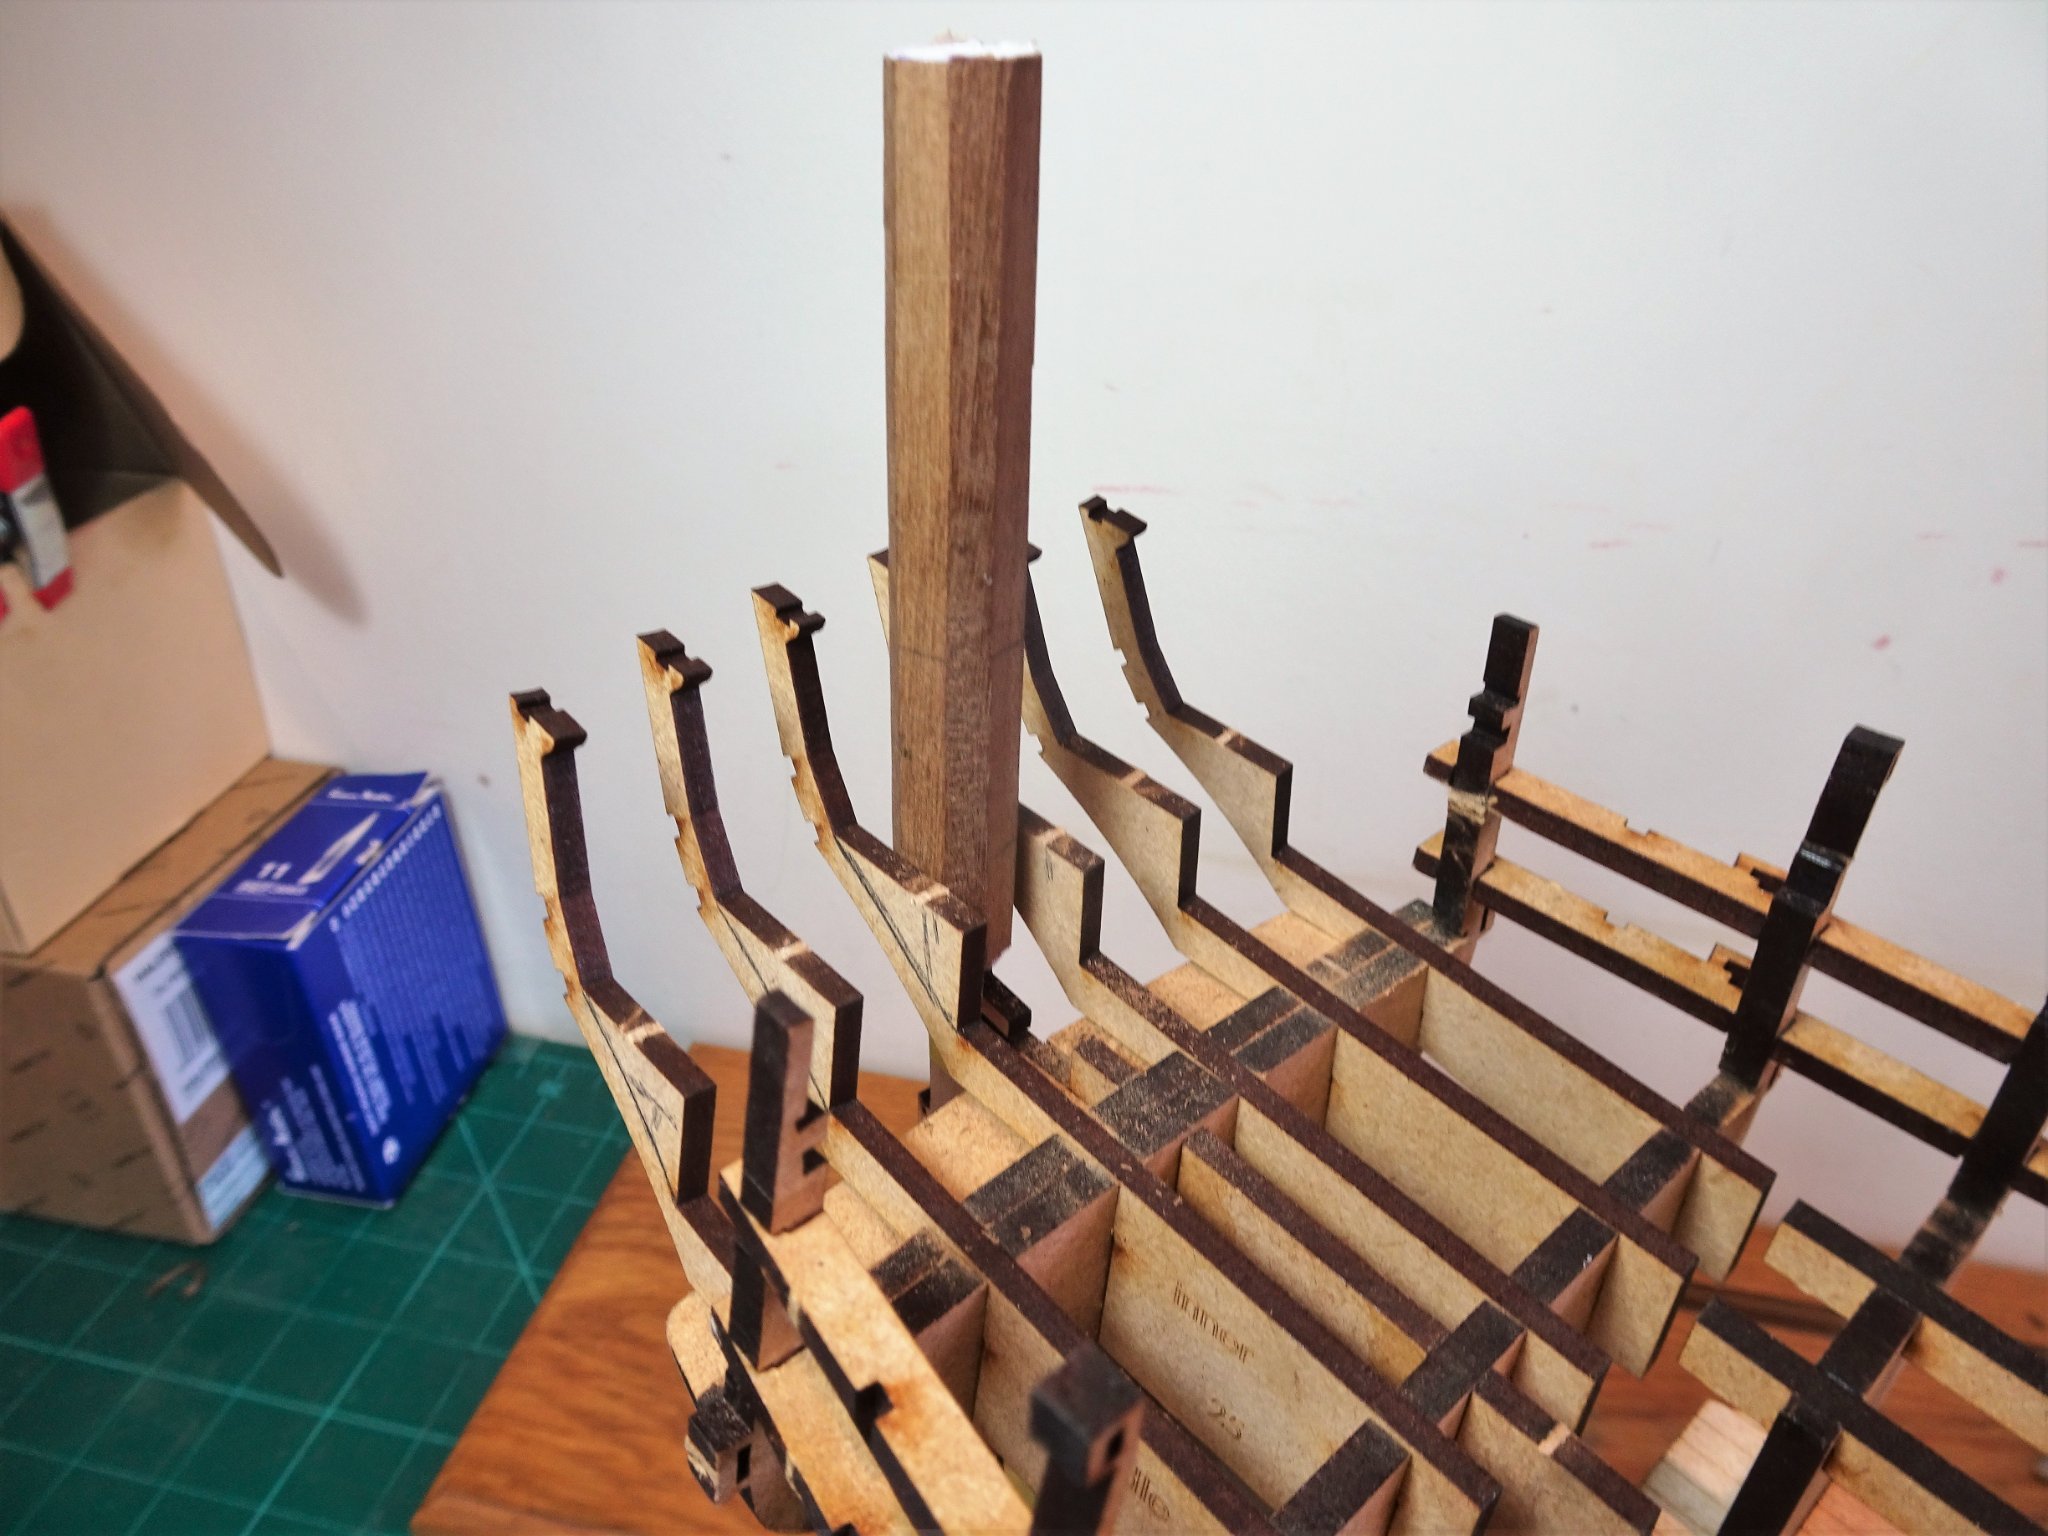
Post Ten Starting the stern modification The first job is to establish where the Rudder head cover will sit. 04410 To this end it is necessary to temporarily fit the stern post and rudder. 04107 A piece of 12mm Walnut square stock is shaped into an octagon. 04111 The piece is then hollowed out to fit over the Rudder head. 04115 By design or accident, the scale cover fits between the central kit stern frames. 04113 This is purely to assess the position. 04118 The cover will not sit this low in the framing. 04116 This will enable me to work out the height and line of the bench which butts to the cover. 04121 Here the shaping of the inner four frames has begun. 04124 Not sure at present whether the two outer frames will require shaping, I am conscious that the aft internal bulwarks are cut to fit above them. 04122 I am taking things slowly as I’m basically making it up as I go along, having no plans to work to. I need to keep looking ahead to see how the mods impact on stages further along the build. That’s enough headache for one day. B.E. 11/09/21


- 857 replies
-
- 18
-
-
- Sphinx
- Vanguard Models
- (and 1 more)
-
Thanks Bob, I’ve not really considered internal lighting, a lot to do without bringing wiring into the mix. Who knows tho’ it’s early days yet. 😉 Cheers, B.E.
- 857 replies
-
- 2
-
-
- Sphinx
- Vanguard Models
- (and 1 more)
-
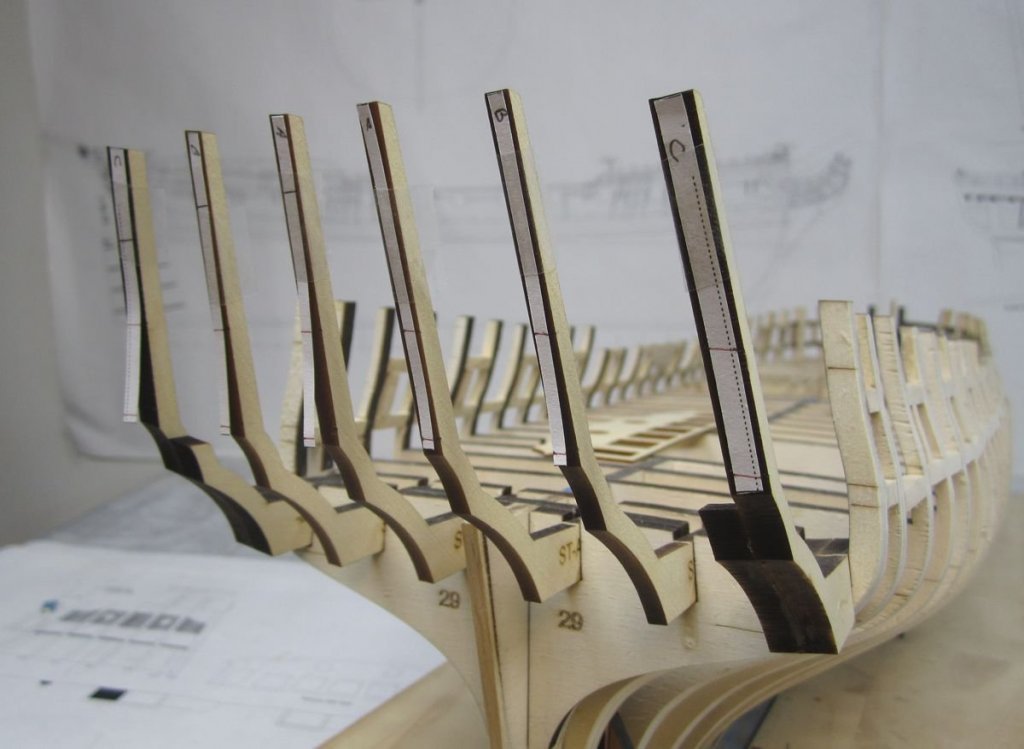
Post Nine Mulling over a Stern modification. With the deck beams now completed I need to consider the first major departure from the kit. 0244(2) Those longitudinal deck beams slotted into place perfectly, beautifully accurate laser cutting. The stern frames have a direct relationship to the internal fittings of the Great Cabin. 0242(2) With the kit arrangement the inboard horizontal extensions form what will be the seat pattern extending from the stern lights. (instr114) I suspect this is a simplification, but one which under normal circumstances would not be of great concern. However, as I intend to have very little of the Quarter deck planking in place, this simplification becomes an issue. The bench seat should be narrower, a little lower, and, in the centre, should be the Rudder head cover. This shot from Chuck’s wonderful Winchelsea build shows a typical arrangement altho’ with Sphinx the head is octagonal and of smaller proportions. 0240(2) This means that a quite drastic re-shaping of the stern frames is required, removing the sections that form the bench top and front. It would then look as it would on a plank on frame set-up. This photo of Chuck’s Winchelsea build demonstrates the change required. There are drawings of the Rudder cover and bench arrangements in the Pandora book, one internal profile at 1:64 scale, and a plan at 1:128 scale. I will use these as a guide for my modification. The octagonal Rudder Head cover, which scales to a diameter of 30” (12mm) and a height of 35.3” (14mm) sits between the central stern frames and butts against the back edge of the kit upper deck. The bench seat scales to a depth of 15” (6mm) and a height of 20” (8mm) Stage one will be to modify the stern frames, stage two, extend the deck, stage three, create the Rudder head cover, and stage four, form the bench. I also intend to open up the doorways to the Quarter galleries. I did something similar with the Quarter Badges on Pegasus. With light being able to penetrate thro’ the gallery and stern lights, the appearance is far more natural in my opinion, and gives a view of the Great Cabin with its chequer sailcloth covering, and Rudder head trunk. In the case of Sphinx the cabin area will also be open thro’ the deck beams of the Quarter deck. It is likely to be some time before I actually get the Upper deck in place, and then it will have to be manually planked to match the part planking of the Foc’sle and Quarterdecks. I will record my progress with this modification in the posts to follow. B.E. 10/09/21

.thumb.JPG.c40992d8f92deb8acbba3a354ec78a48.JPG)
.thumb.JPG.d7af55009c7eedbc2feb913ffbfd4541.JPG)
.thumb.JPG.0cf995968207af5a341d4c3fd4598176.JPG)
- 857 replies
-
- 21
-
-

-
- Sphinx
- Vanguard Models
- (and 1 more)
-
I would be a happy man to achieve that level of completed planking Glenn, very well done. B.E.

.JPG.d0918e20052f26457334d8bf4e9f968c.JPG)
.JPG.95b5454e6c2f3c21830cd9e414b0fd9b.JPG)
.JPG.306bc7323bb8ce0642481ec2bdb24e6e.JPG)
.JPG.daef42ce0318d3cd066ee70667b76fd1.JPG)
.JPG.e166c855e1cab66933f0e33816f1ea5d.JPG)
.JPG.e176beca98238fd36817020da3cef2af.JPG)
.JPG.b63212cc7cce43627bcc294ae1ccc098.JPG)

.JPG.a539820d008c2e562a57d027c7e4e07e.JPG)

.JPG.f242ccd9f46081874e16f574859f2a15.JPG)

.JPG.5668b5de4ac7ed6b24e78485ffd3e803.JPG)

.JPG.2be96670480159bf9011897b6d217a1f.JPG)


.JPG.e6b7b6c205ac69988b586c17bb76b927.JPG)

.JPG.826b66bf6fd5e8b765e365df25e07cf3.JPG)
.JPG.f561734450868d65cb00f8eb84fb8fde.JPG)
.JPG.b89face45fab3d14074db3478a718a03.JPG)
.JPG.3c4751386d735a2754ee78ef3625aeb5.JPG)

.JPG.3f01a933590b6f58d3e3dbbf6bf00521.JPG)
.JPG.fe2078a73b0dd10e1ee82d2e570aa01e.JPG)


.JPG.71df9e80085d96628822e87bc7919836.JPG)
.JPG.1391569b5d0b258c946cad39ee58987b.JPG)


.JPG.a7bf578427a5f090ebf62679c4950f88.JPG)
.JPG.1a81dc83511e9690b08d03ceb65e6e83.JPG)
.JPG.97e3666d9b205d7b7c861307aa25733b.JPG)