Supplies of the Ship Modeler's Handbook are running out. Get your copy NOW before they are gone! Click on photo to order.
×


jwvolz
-
Posts
979 -
Joined
-
Last visited
Content Type
Profiles
Forums
Gallery
Events
Everything posted by jwvolz
-
 Well, a nice package from HobbyMill was waiting for me when I got home today. Jeff went above and beyond when I added extra planking strips to my order late in the game, when I realized there was no using the walnut planking in the kit. Tremendous customer service, and the wood looks beautiful!
- 302 replies
-
- 6
-

-
- granado
- caldercraft
- (and 1 more)
-
Thanks Jason. I like that blue because it's more muted, and to my eye is more "period-like" to coin a phrase. You can still find some of the Polly Scale RR colors out there, and for my taste they have always been some of the nicest acrylic paints to be had. I'm still not sure why Testor's in their infinite wisdom discontinued them.
-
Thanks Timmo, Mike, Robert and the "likes".
-
Jason, I do that. Just trim them close so that any remaining tail doesn't interfere with the coil later on. Looking good.
-
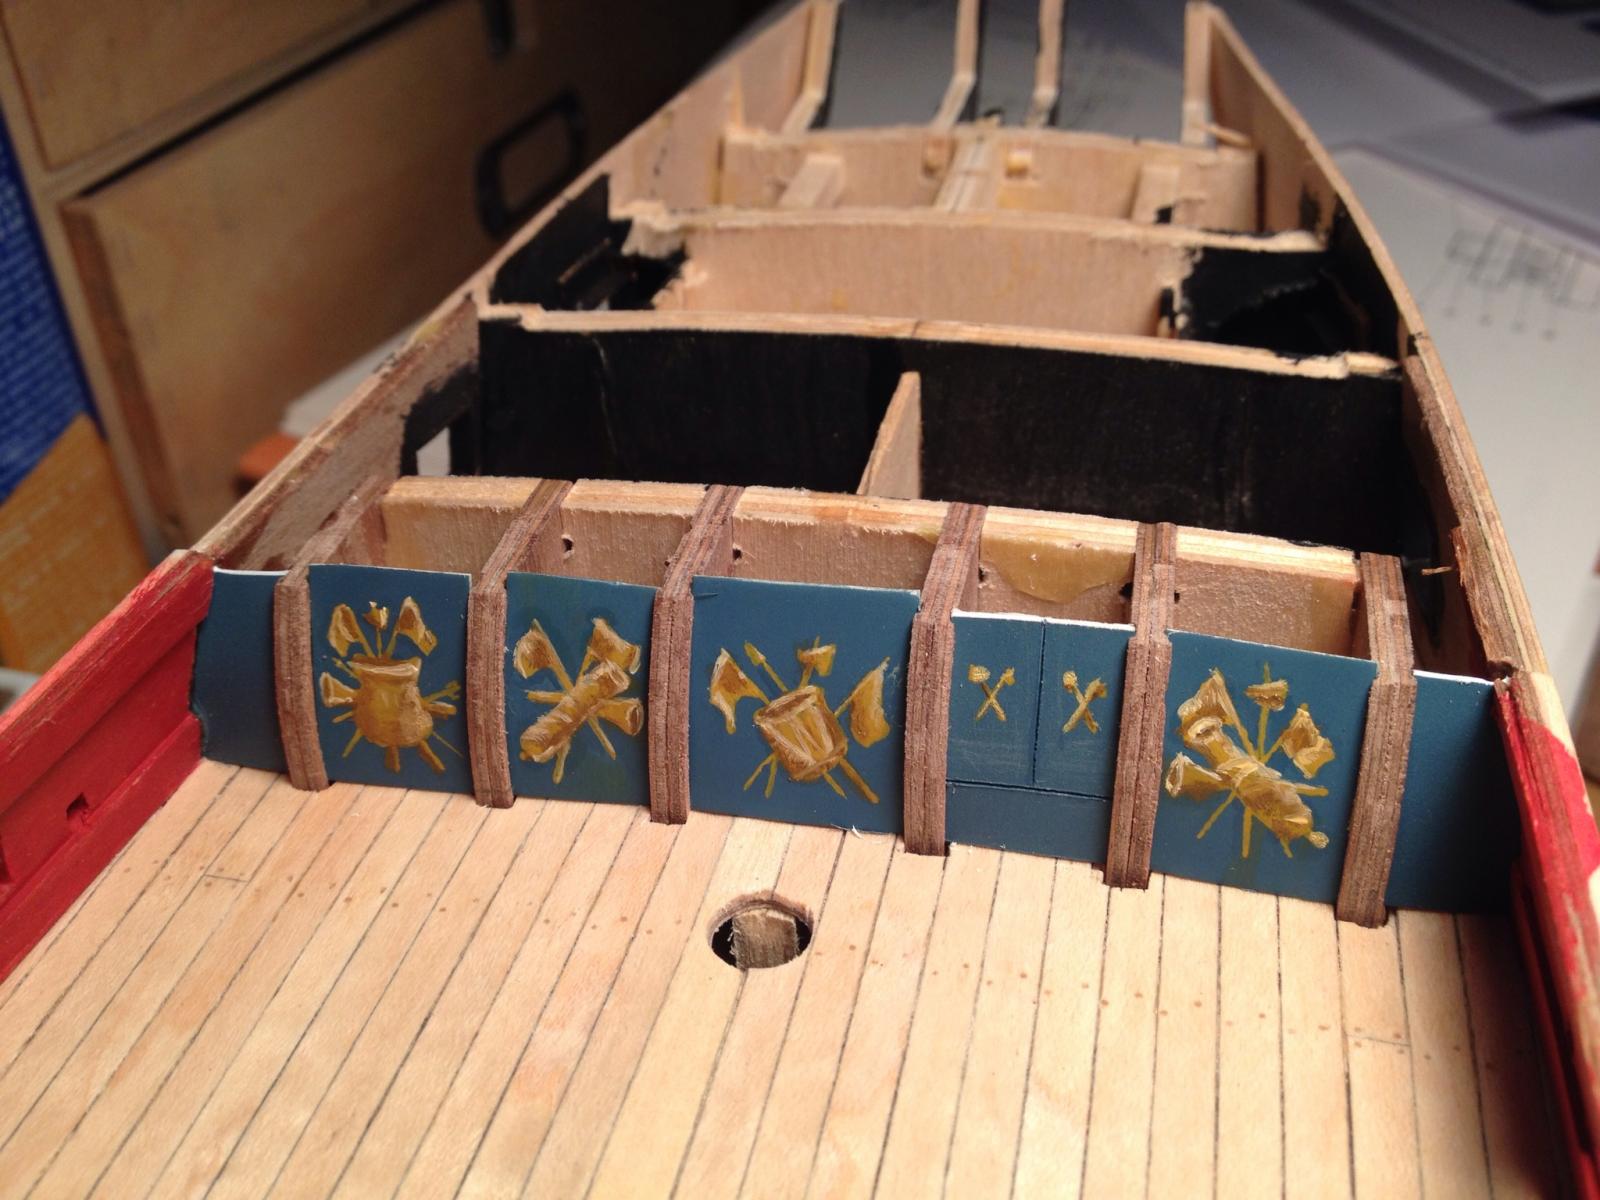
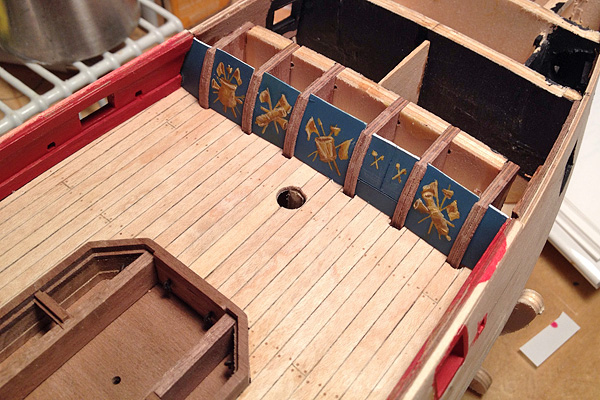
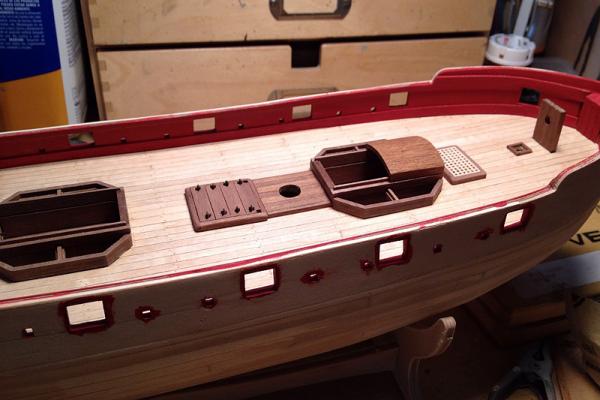
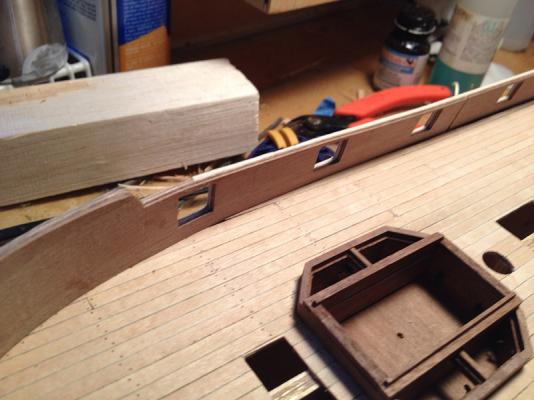
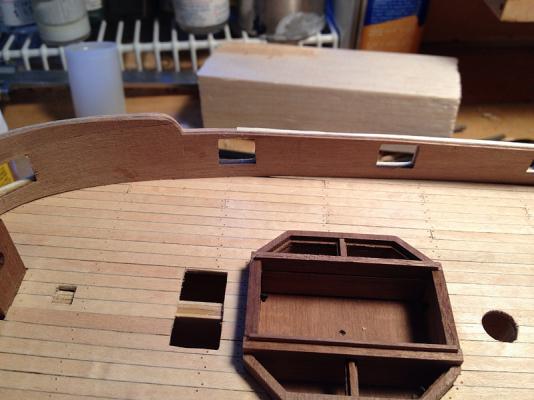
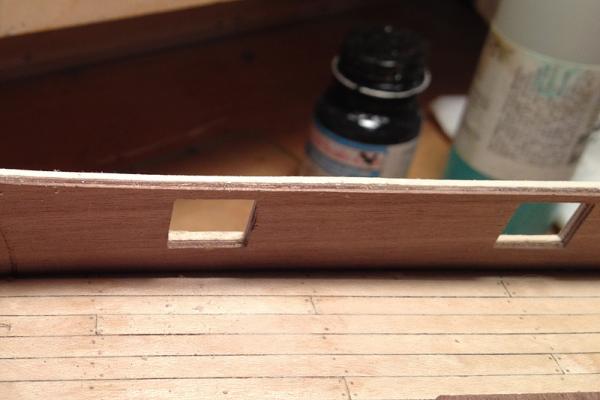
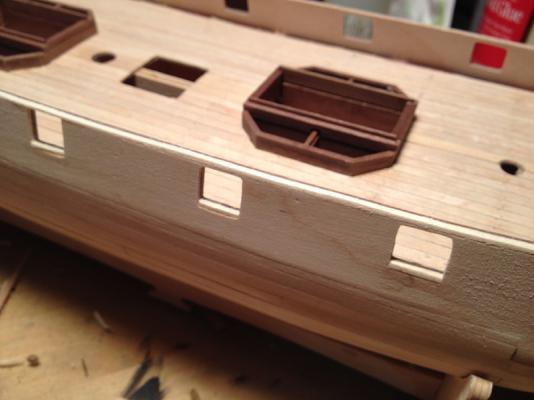
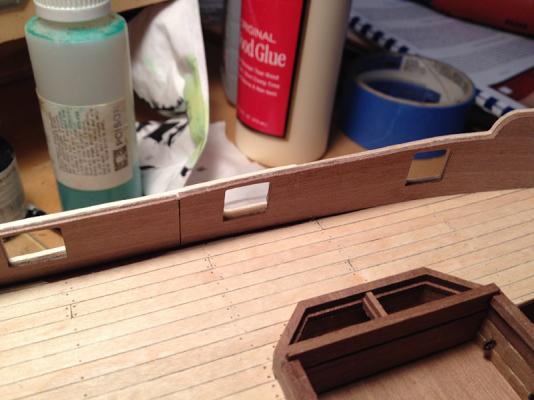
As I wait patiently for my HobbyMill order to arrive to complete my outer planking, I continue with some detail and deck work. I completed the quarterdeck bulkhead/screens which is a very fiddly little assembly with number of components that need to be dry-fitted and all squared up. I think it is a bit over-engineered, but so be it... Instead of the fragile ply provided for the actual screens I instead used styrene (oh, the horrors, plastic!!). It flexs better in the curved frames and provides a nice smooth surface for paint. After an initial coat of blue (Polly Scale B&M Railroad Blue) I decided to try my hand at hand painting the designs in more "period like" colors, as opposed to the black decals provided in the kit. I shamelessly took the method from Timmo's wonderful effort to hand paint them. Thanks for the brilliant example! I started with a base coat of Polly Scale CP Yellow (the railroad colors are very useful...) and then once fully dry used mixes of white, yellow ochre and raw umber oil paints to shade and highlight the designs. Although I'm no artist, and these are attempt number three, I think they pass the test, though I may do a little touch-up here and there. I did some slight modification to designs for aesthetics and to better fit the design on the panel. The panels still need their final trimming to shape at the top, and are merely dry-fitted in these photos. It will probably be a week before the oil paints fully dry.

- 302 replies
-
- 11
-
-
- granado
- caldercraft
- (and 1 more)
-
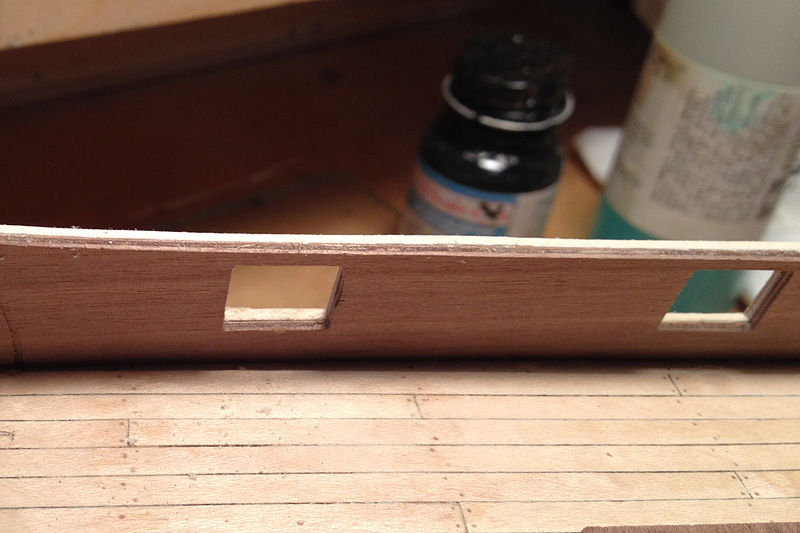
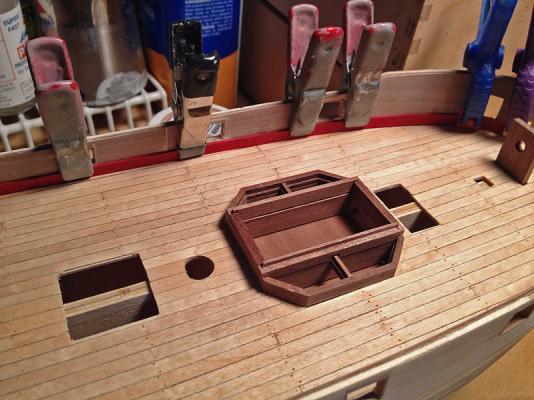
Mike/Jason, It's odd, because the only wood that is an issue really seems confined to the 1x4mm outer planking walnut strip wood.When you sand it it just flakes and splinters and just won't take a nice finish at all. On the other hand as an example, the 2x3mm walnut that makes up the hatch coamings finishes up just fine, and looks good as you can see in the photos. I can't see how I'm going to get acceptable hull planking out of it in any way shape or form. I think I'll have to get more boxwood ordered from Jeff for below the wales. It really does get frustrating having to toss what you paid good money for. Thanks all for the "likes".
-
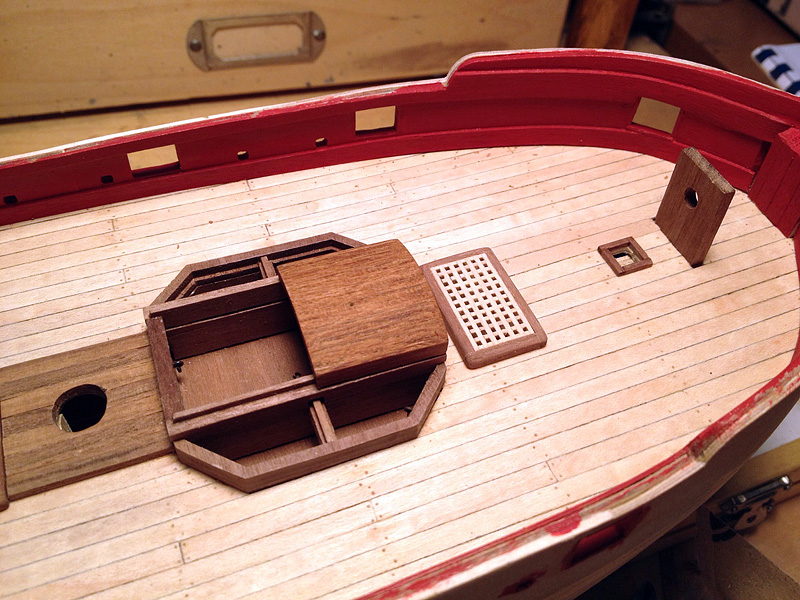
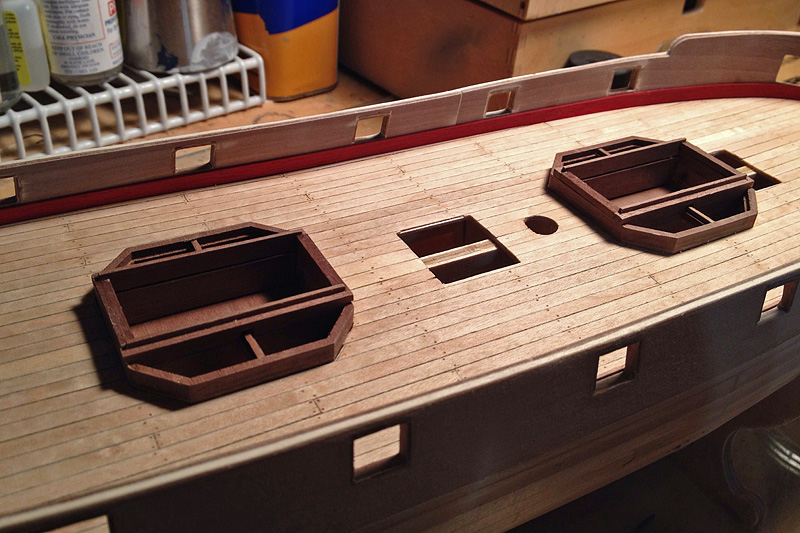
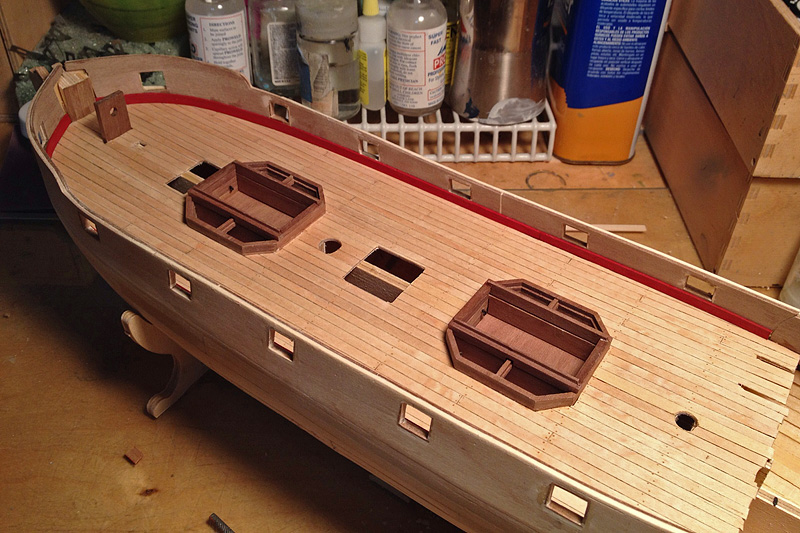
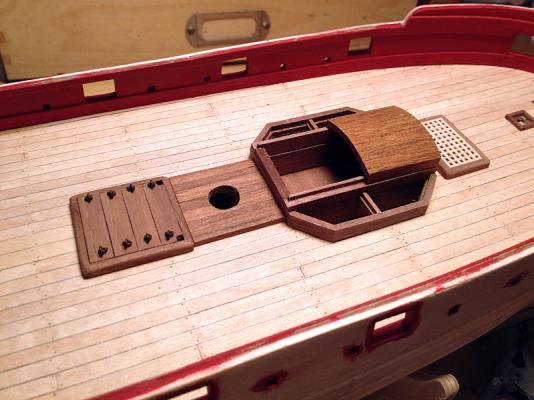
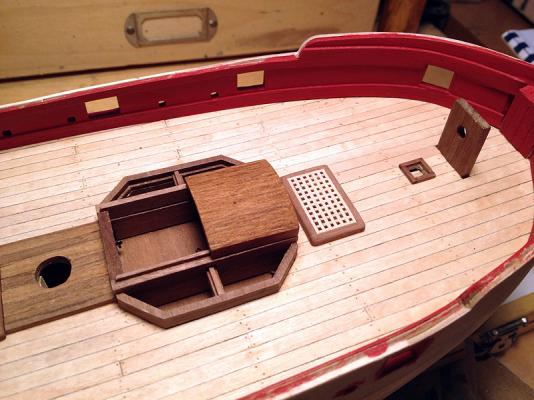
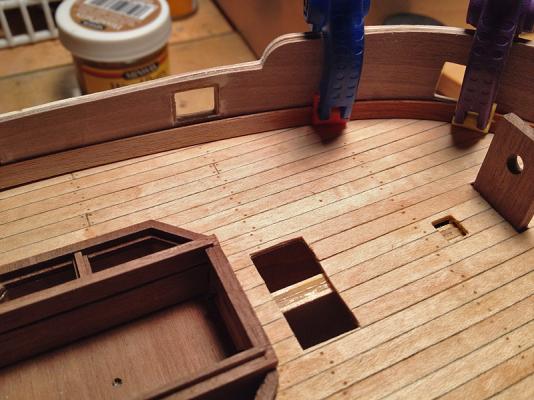
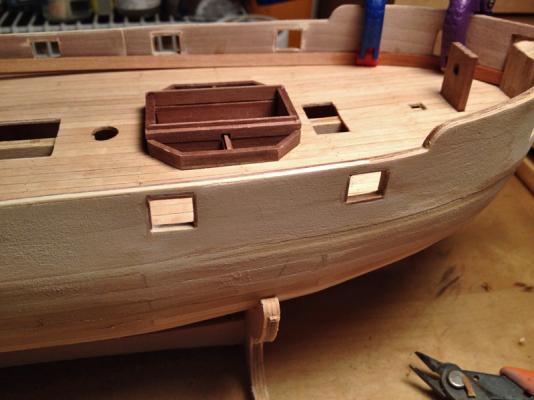
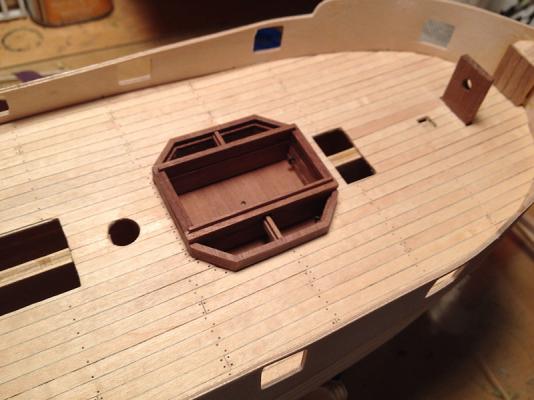
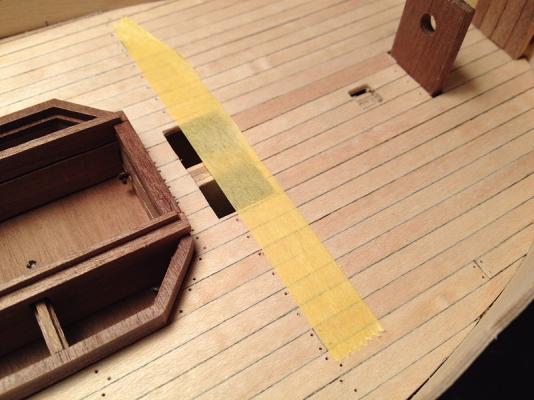
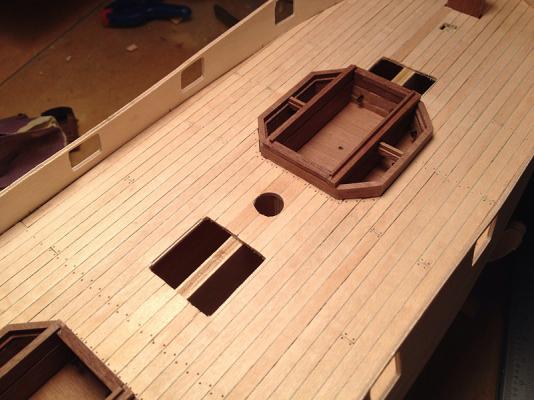
I got a lot done over the past two weeks and am just getting around to posting some pictures. Latest developments: Inner bulwark sheer rail and spirketting installed and trimmed to shape Sweep ports drilled, filed and shaped Bulwarks painted red ochre Trim for galley flue installed Forward hatch constructed Main hatch constructed Deck reinforcement planks installed on stern side of forward mortar housing First mortar housing cover constructed I am not at all pleased with the walnut strip that makes up the top of the mortar housing cover; it is very flaky and splinters easily and no amount of sanding will leave it smooth.It is also not the same color as the rest of the walnut in the kit, being much redder, as you can see in the pictures. I will likely re-make that with some spare walnut strip I have from a previous build. The bigger issue is this is the same strip material used to plank the hull. My plan was to only use below the wales, and my pending HobbyMill order of boxwood above. I will need to re-think below the wales as this garbage wood will never be acceptable. Luckily most of the other strip wood and all of the CNC-cut material is much smoother and looks fine.
- 302 replies
-
- 11
-
-
- granado
- caldercraft
- (and 1 more)
-
Great choice Mike. Looking forward to watching the build!
-
I'm also looking forward to the build Jason, you've made a great subject choice. Wise move replacing the walnut. That really is about the only thing I am disappointed in with my Granado kit. Can't wait for my Hobbymill boxwood to arrive so I can get to my outer hull planking. Interestingly, the Granado kit came with Maple for the decking, which was quite good and I've gone ahead and used it. I understand most of the CC kits have Tankanyika for decking.
-
Glad to see an update Timmo. Very nice work on the guns.
-
Thanks for the likes all. I'm glad I took the time to treenail Timmo, and I'm pretty pleased with the putty method. I'm looking forward to my Hobbymill order to get to it on the outboard planking. I pre-painted and installed both the port and starboard spirkeiting. Easy job that went without issue. Next up will be the inboard sheer rail.


- 302 replies
-
- 7
-
-
- granado
- caldercraft
- (and 1 more)
-
I lined gun ports 2-6 per the instructions with the 1x4mm walnut strip and trimmed it back even with the gunport template over the weekend. I had to make minor adjustments to a couple of them height wise and all looks good. I also got the treenailing of the deck done using the filler method and I'm pretty pleased with how it came out. I did put down two coats of matte varnish before hand to keep it from getting into the wood grain and that seems to have done the trick nicely. The spirketing is dry-fitted and clamped in place after wetting to take the curve at the bow.
- 302 replies
-
- 11
-
-
- granado
- caldercraft
- (and 1 more)
-
Such beautiful, clean work. Very well done Gerald. I'm looking forward to seeing more.
-
Thanks Mike. Glad to be past the gunport pattern phase... When I did my test pieces of the deck off the model I did see the paste/filler get into the grain a bit. That's why I think I'm going to varnish before I apply it. I'll likely put another coat on top as well. I did try the toothpick method as well in my testing and it also looked good, however I worried about sanding everything flush with the many treenails hard up against the mortar surrounds.
- 302 replies
-
- 1
-
-
- granado
- caldercraft
- (and 1 more)
-
Floyd, the holes are drilled but not yet filled. I found a putty similar to yours that I'm going to use. Testing off the model showed it to end up in the wood grain just a bit when scraped level, so I think I'm going to seal the deck first before applying the putty.
-
Finished the starboard side inner bulwarks and my thinking as to which way to trim where things didn't match up looks good now. All of the ports on both sides are within .5mm of being the same consistent height above the deck. I still need to do some minor shaping and filing where I filled and shimmed the outer gunport pattern. Lining the ports, and the second outer planking will clean that all up. I also replaced the couple of deck planks I had to pull up to accommodate the inner gunport pattern installation. That'll be it for the week as I'm traveling for work until Friday. I'll likely get to the treenails and then the spirketing this weekend.
- 302 replies
-
- 2
-
-
- granado
- caldercraft
- (and 1 more)
-
I installed the port-side inner bulwark piece, and it was not without issue. There was no way I was going to get all of the ports lined up with the outer gunport strip if I followed the deck line. So...I allowed the inner piece to lay across the deck evenly, and the ports appear to all be about the same height doing it that way. It did match up well for the first, second and last two, so I made sure it followed the sheer properly. I also had to rip out the outermost row of deck planking on both sides to get everything situated evenly, but that is no problem to replace. Therefore I had to trim three of the outer ports to shape to match the inner piece and fill the bottom edge with some spare planking. I also had to run a narrow piece across the top to match them up properly. You can see all of this clearly in the third photo in this post. Dry fitting of the starboard side showed a very consistent similar situation, which is actually good, since the same correction there should make things even when complete. I also cut the inner piece in two to make installation easier. No big deal to fill and sand, and this will all be painted so it should look just fine. I really do have mixed feelings on the pre-cut strips. They certainly save time framing out ports, but since they are stiff and don't like to bend in multiple planes, they certainly are prone to introducing errors like this, even though I did my utmost to make sure they hit the bulkhead extensions properly when I installed them.

- 302 replies
-
- 6
-
-
- granado
- caldercraft
- (and 1 more)
-
Very nice work on one of the toughest parts of any build. Excellent job Bob.
-
Thanks Floyd. I'll check that out. Looks like I've got some testing to do.
-
Thanks Alistair. I'll do a little digging around the home improvement store this weekend.
-
Thanks all for the likes and the nice comments. Having never done treenails using the wood paste method does anyone have any specific product recommendations? Is this product an option: http://www.homedepot.com/p/Minwax-3-75-oz-Golden-Oak-Wood-Putty-13611/100376127?N=5yc1vZc5d1Z1z0sv1t I know some on MSW have used a material and melted and then applied. I'm also wondering as to steps in the process. Varnish before the filler to prevent staining of the deck?
-
I made some progress over the last week and got the main deck laid. I used the very nice maple strips supplied by Caldercraft and am very happy with the way they look. After getting all of the planks laid and scraped smooth I drilled the holes for the treenails per the AOTS book. I'm still debating how to represent the treenails, but am leaning toward using regular old birch toothpicks sharpened to a point and glued in the holes. I'm still doing a little mock-up testing but I like the very subtle contrast they provide with the maple. Still thinking about it...
- 302 replies
-
- 13
-
-
- granado
- caldercraft
- (and 1 more)
-
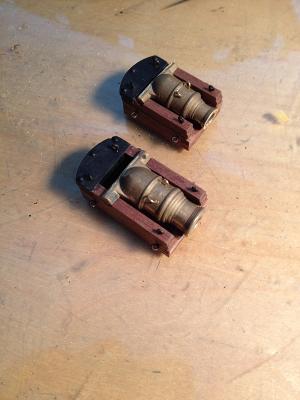
Thanks guys. No way Mike! I'm definitely going to be slowing down over the summer... I did get the mortar beds assembled and the eye bolts installed. I also removed the mortars themselves from the thick brass pour stub, cleaned them up and added a few handles per the AOTS book. They are not attached yet.
- 302 replies
-
- 7
-
-
- granado
- caldercraft
- (and 1 more)
-
Minor update. I'm going to move on to some detail work, and then plank the deck as i wait for my Hobbymill order in about 7 weeks. The false deck has been glued in place and the mortar surrounds completed and installed.

- 302 replies
-
- 8
-
-
- granado
- caldercraft
- (and 1 more)
-
Good advice from Russ. From the looks of things you did a good job with the tapering as every row has full-length, smooth runs. I think it looks just fine, nice work.