jwvolz
-
Posts
979 -
Joined
-
Last visited
Content Type
Profiles
Forums
Gallery
Events
Everything posted by jwvolz
-
 Maple wins on all accounts.
 -
Very nice clean work Jason. Maybe I missed it somewhere, what wood are you using for your deck planks?
-
Thanks all, much appreciated. I'm really glad I'm taking these little extra steps in the build, it's all worth it, and it helps challenge me to come up with a solution whenever presented by the something in the kit I don't like.
- 302 replies
-
- 1
-

-
- granado
- caldercraft
- (and 1 more)
-
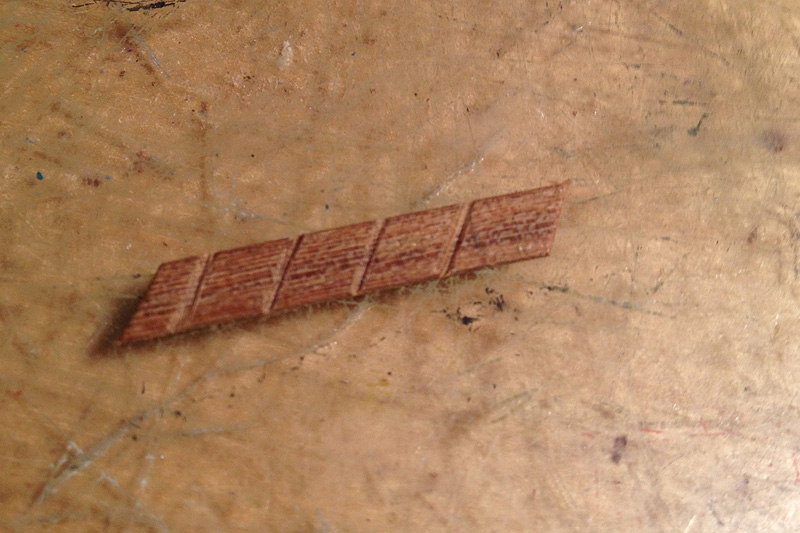
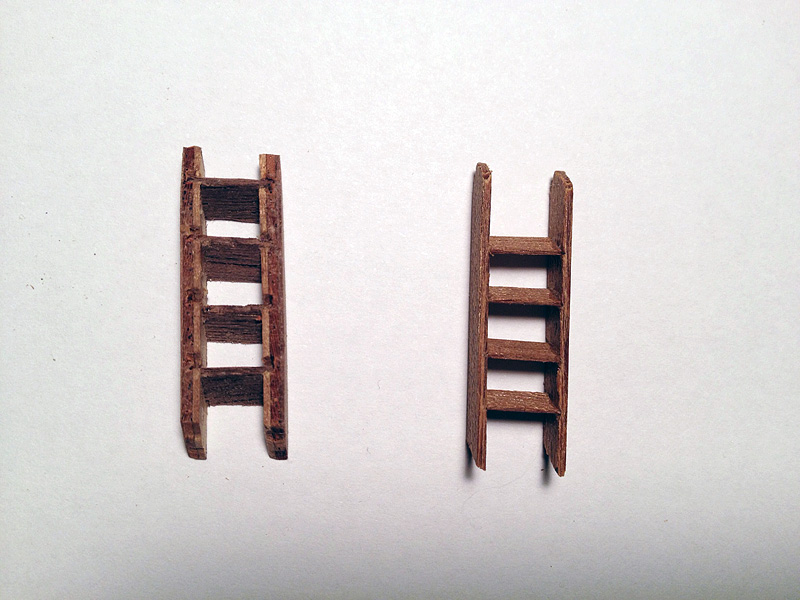
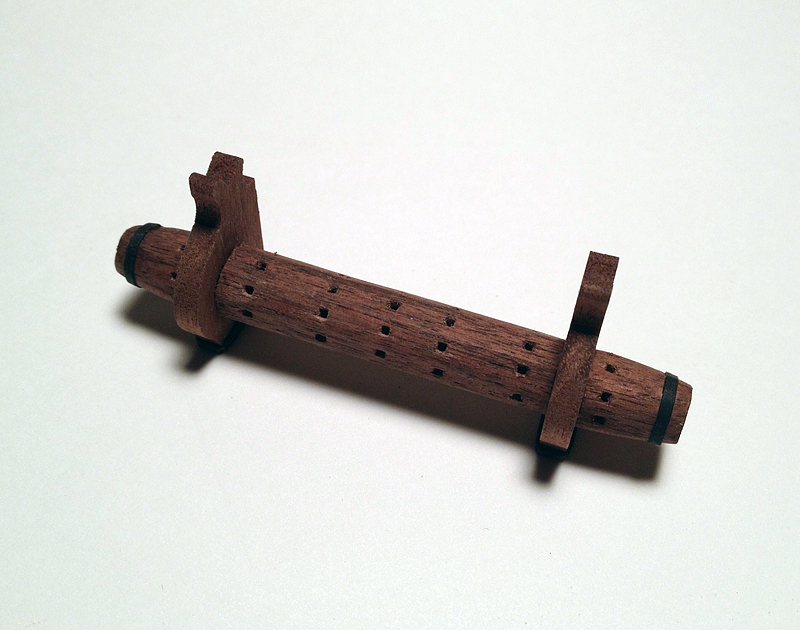
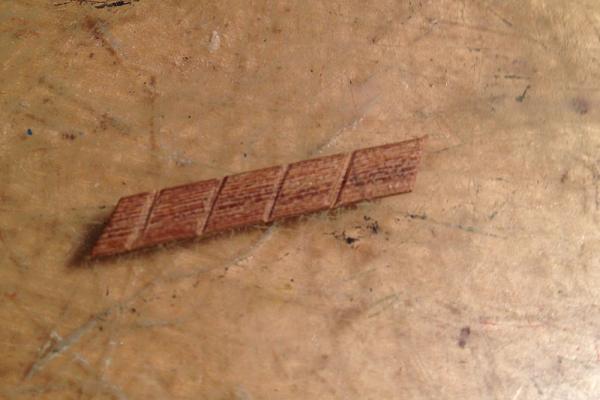
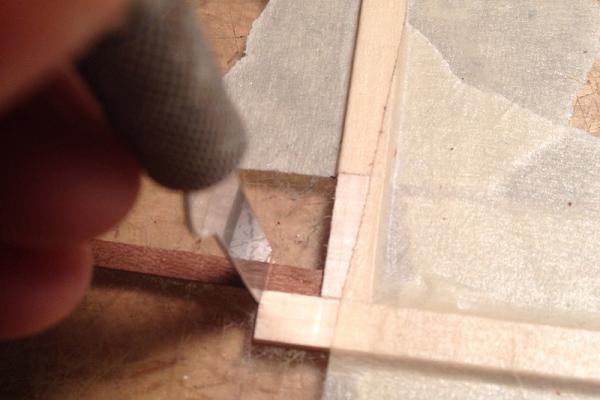
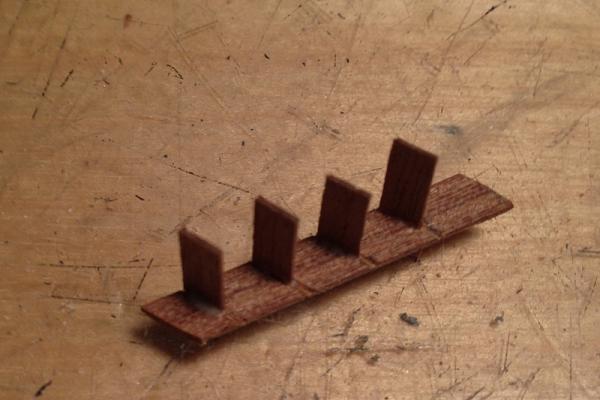
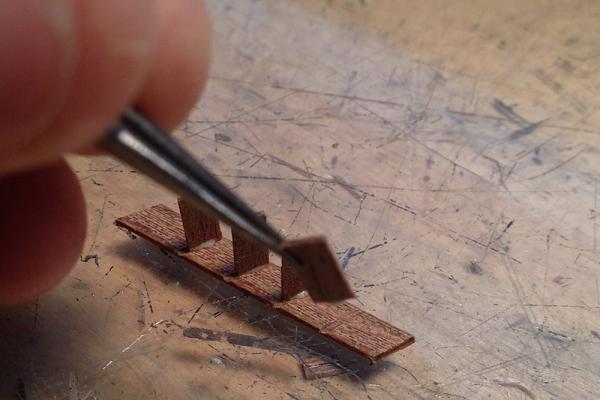
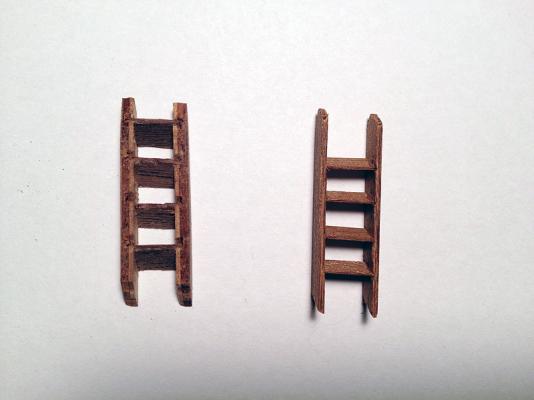
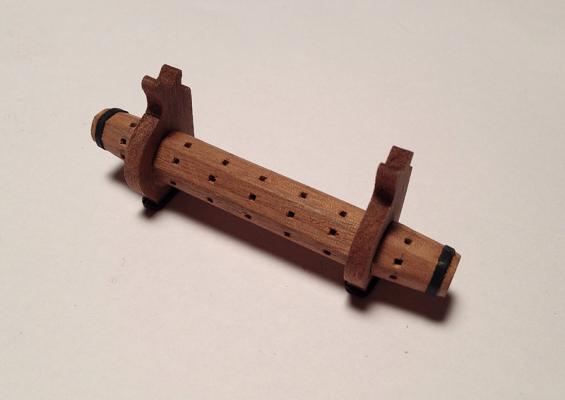
Thanks everyone for all of the "likes" I've started working on the ladders. There are a total of six to build and I am not at all pleased with the kit CNC parts, as it is way out of scale and the ply is visible on the edge and would need to be painted. I came up with the method below and am pretty pleased with the results. I started with 1mmx4mm walnut to match most of the inboard fittings. I measured out 5mm gaps between treads on one side, and then offset those by 2mm on the other side, to get the right angle. I drew a line connecting the two marks and filed a shallow groove with a triangular file to accommodate the tread. Some .5mmx3mm stock was cut with a simple jig to be sure the length was equal and glued into the slots on the one side, and when thoroughly dry, the other side was glued in place. As these strips were a bit narrower I made sure they were flush with the front face of the sides. They were then finished to final length through fitting on the model. I think they look much better. Still a few more to make.
- 302 replies
-
- 11
-
-
- granado
- caldercraft
- (and 1 more)
-
Awesome, thanks Dave.
-
I can't help you with your question Dave, but was curious about the plans since she's likely next on my to-build list. How many sheets do they include? How much did they charge for the plans, and do you have a link for them? Thanks!
-
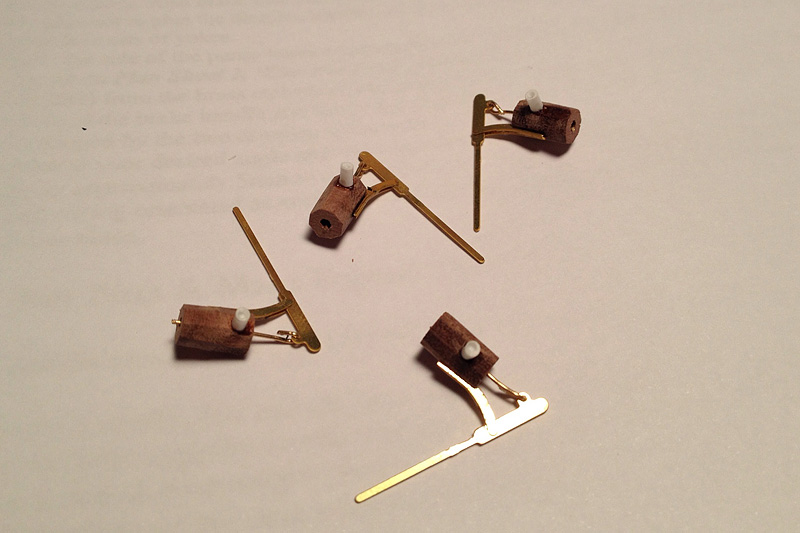
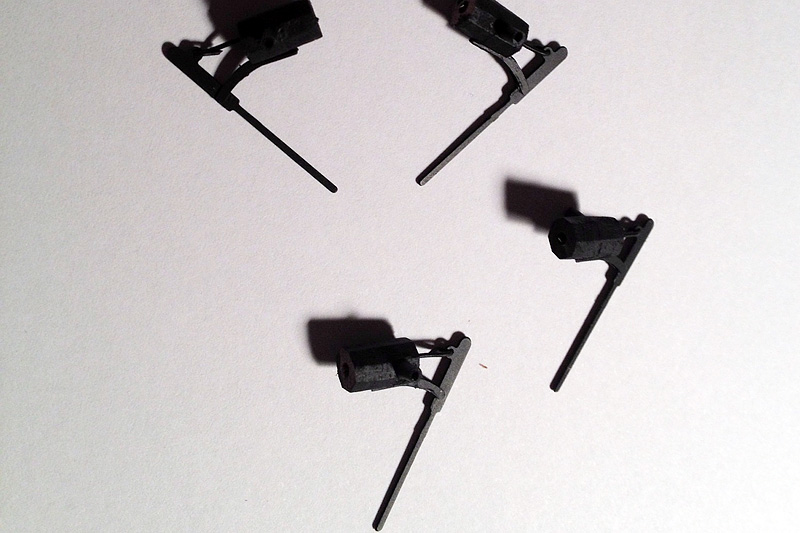
Minor update. Elm tree pumps are built. Caldercraft suggests a dowel for the outlet, but I used a piece of styrene rod that I hollowed out slightly to give it some depth. They also say to paint everything black, except the handle (brass) and to paint that "wood". Since that never looks very realistic, I painted the whole thing black. Not the best photo of the painted ones...

- 302 replies
-
- 8
-
-
- granado
- caldercraft
- (and 1 more)
-
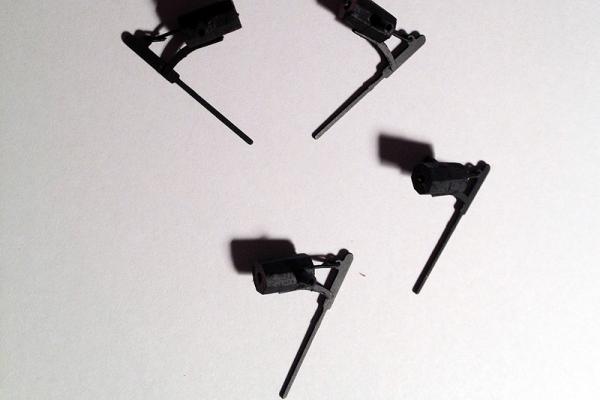
Tim, Those are the kit ones. I flipped them 90 degrees, after installing the brass rod that was to be the trunnion I filed it flush on what was now the top and left a bit sticking out on the bottom to pin to the sled. I made breeching rings from brass wire. They're not 100% right, as there is no actual pivot point on bottom, but I also didn't want to replace them $ wise, and they were nice brass, so it would have been a shame to just toss them.
-
Tim, As you may recall I went with sleds on my PDN build. Whatever you do I wouldn't use the MS supplied carriages. They just don't look right at all to my eye. The carriages Chapelle shows as a possibility in Search for Speed Under Sail would to my eye look much better.
-
Wow, what an incredible haul Brian. That amount of wood alone should have made the trip worthwhile. Do you think you'll try to complete the Hannah build at some point? It looks to be beautifully started. I'm sure it was great to visit so such a talented modeler. I would have loved to have seen the Morgan model...
-
Very nice work on the cannon rigging Max, and nice save on the anchor stocks!
- 153 replies
-
- 1
-
-
- royal caroline
- panart
- (and 1 more)
-
Thanks guys, much appreciated. Yep, great week Mike. Fall golf is the best with cooler weather and smaller crowds. Oh, and the scenery can't beat this time of year either...

- 302 replies
-
- 5
-
-
- granado
- caldercraft
- (and 1 more)
-
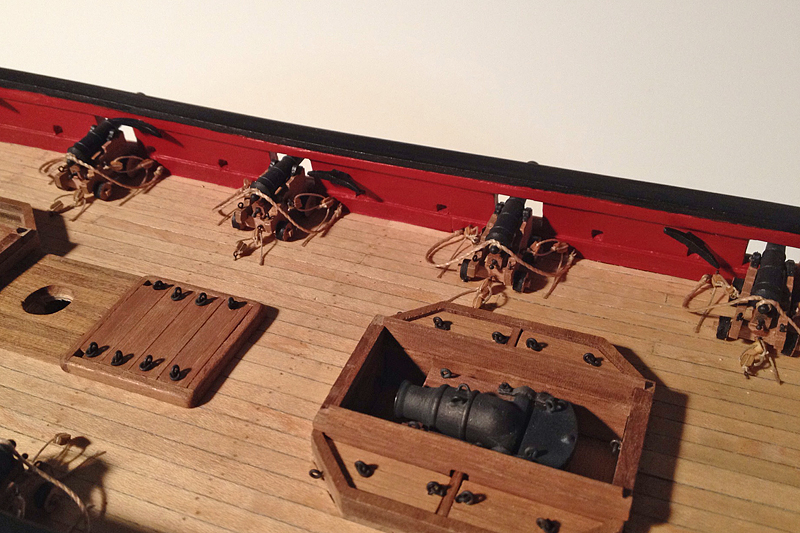
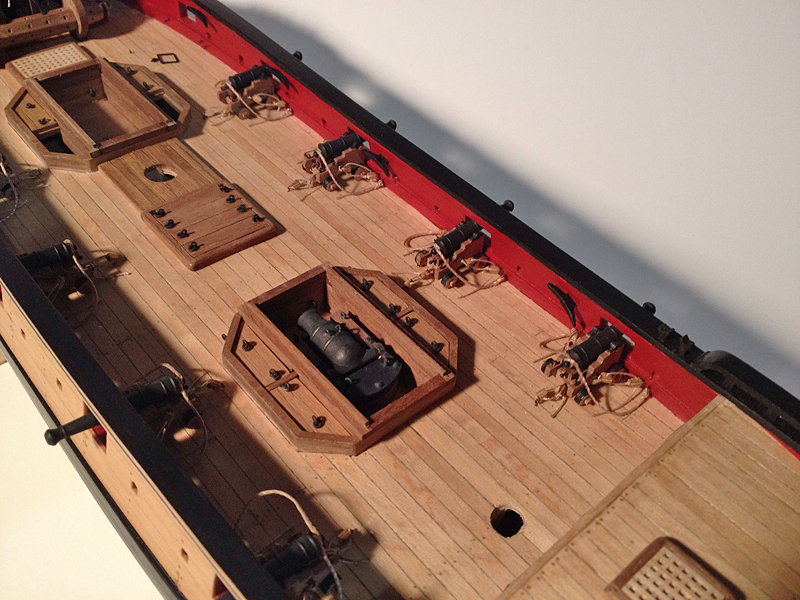
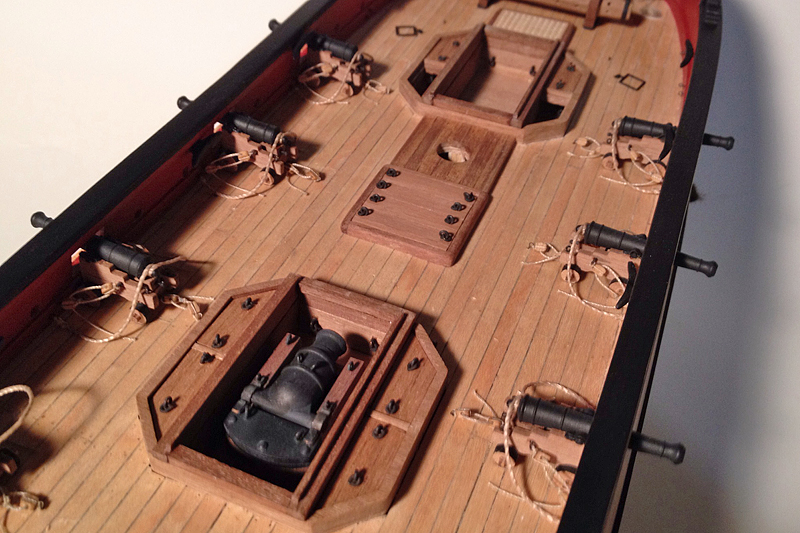
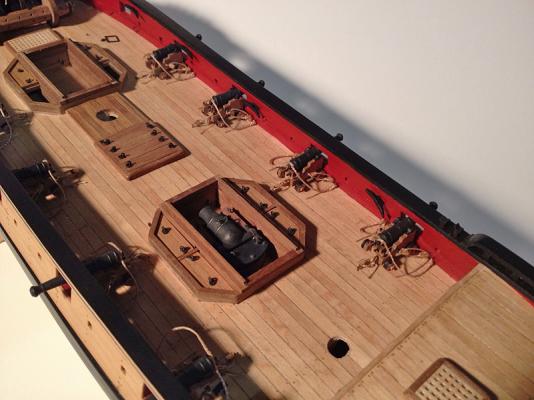
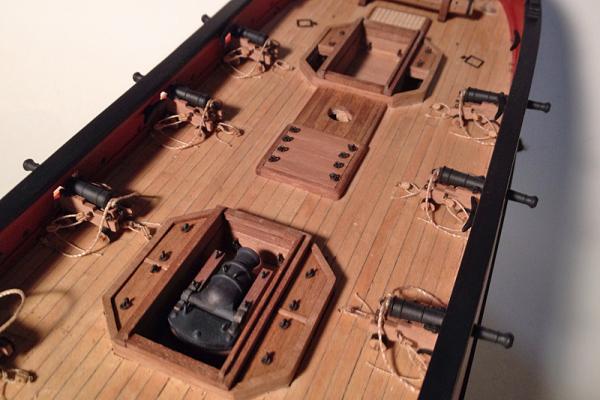
Thanks again everyone. Well, being on vacation this week as enabled me to get in lots of golf and lots of ship modeling. The cannons have all been installed and rigged. Although it is always a tedious process, I think it went quite well. Caldercraft supplies some decently small blocks to rig the guns and they were quite usable. I still need to make up the rope coils, but I'll do that in a few days.

- 302 replies
-
- 13
-
-
- granado
- caldercraft
- (and 1 more)
-
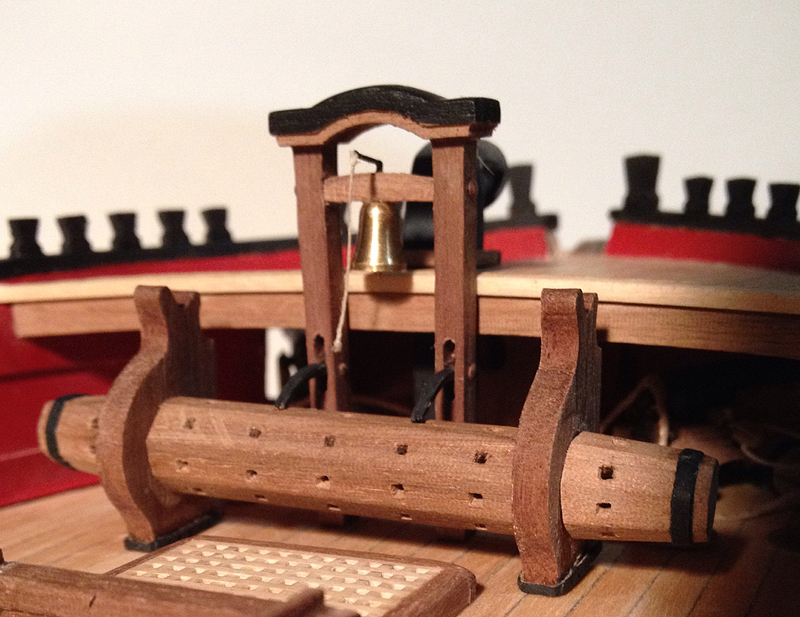
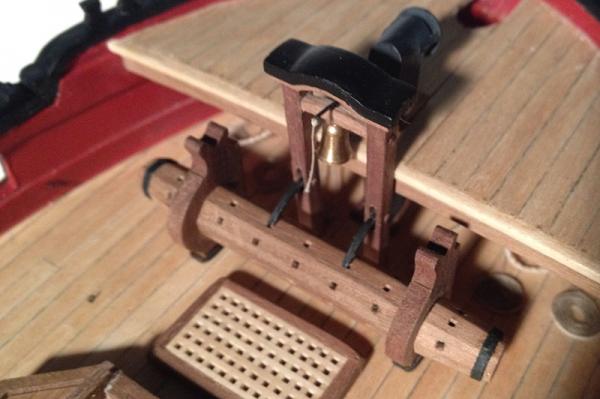
The windlass and the completed belfry have been installed. Caldercraft supplies a cast metal bell, but I had this extra brass one in my fittings stash. There's no way I could have painted the cast one to look this nice

- 302 replies
-
- 11
-
-
- granado
- caldercraft
- (and 1 more)
-
Thanks guys. I've reached the point where I will take the time to re-make any part I end up unhappy with. I invest too many hours to have a something I'm not happy with compromise the whole build. Next up I'm going to complete the windlass/belfry assembly.
- 302 replies
-
- 2
-
-
- granado
- caldercraft
- (and 1 more)
-
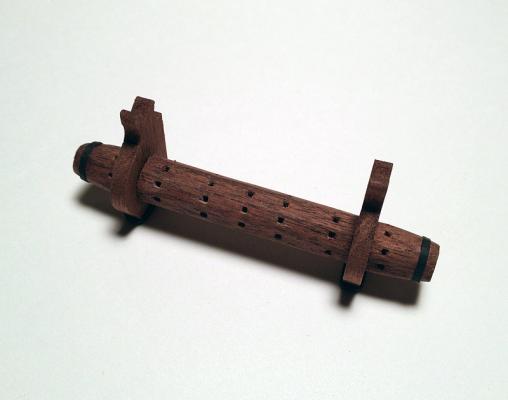
Well my dissatisfaction with the windlass got the best of me and I obtained some lighter, less grainy walnut from the hobby store. Four 5x5mm strips were glued into a square, sanded octagonal, tapered and then cut to fit around the uprights. I am MUCH happier with this one, both color and finish. I hope it is clear that the second picture is the good one...
- 302 replies
-
- 11
-
-
- granado
- caldercraft
- (and 1 more)
-
Very nice Mike.
-
I've only ever used hot water and have never felt it wasn't sufficient to do the job.
-
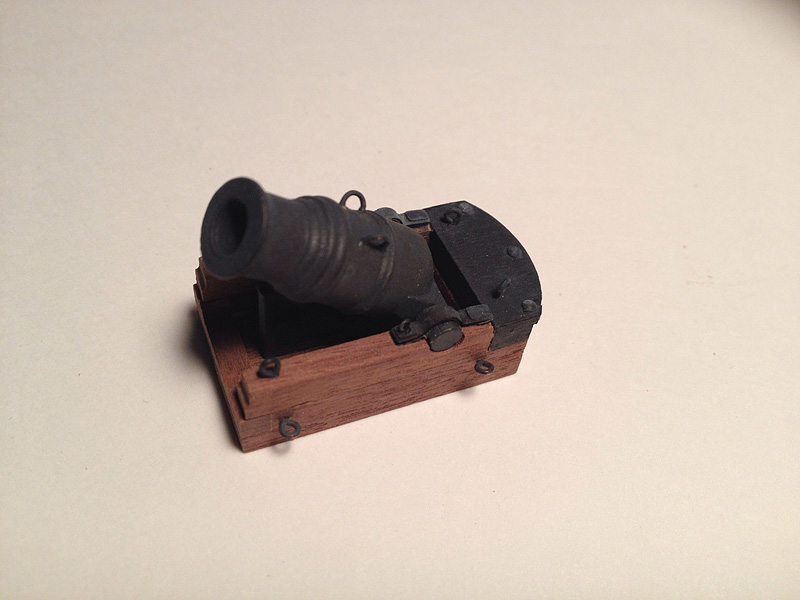
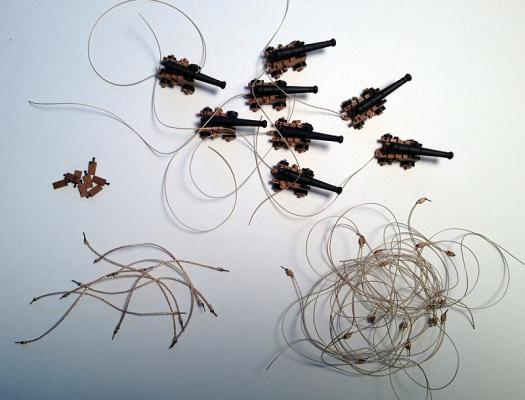
I assembled the eight remaining long guns and made up the side tackles, train tackles and breeching ropes. Just doesn't look like much even if it is a bit of work. Installation to follow. I airbrushed the cannons with a mix of gray and black Polly Scale paints and they have a matte coat applied over them to protect the finish.
- 302 replies
-
- 7
-
-
- granado
- caldercraft
- (and 1 more)
-
I paint most of my brass, eyebolts generally being the exception. If you can't get the Tamiya iron black Nigel mentioned you can always add a little bit of gray or white to straight flat black to make it a little less stark.
-
I guess the first question is what do you have available? Beech or hardwood dowels are a good economical choice and walnut would work well also. Basswood would not be the best choice for the smaller yards as it may bend under rigging strain, but it can be used in larger diameters.
-
Thanks guys. I don't think this windlass will be the final one... I'm going to start scrounging around for other options, and possibly staining something to match most of the other kit walnut. I have cannon rigging and construction to keep me occupied for a bit. When I get to the masts I think I'm going to copy the CNC cut bibs, cheeks etc... in another wood that I can also make the masts out of. I don't think I'll ever be able to match the kit pieces up with the doweling supplied for the masts. At least the spars, tops and doublings are black!
-
Does anyone have any experience with this serving machine sold by Flagship Models? It's very reasonably priced, and I just don't feel like trying to make one myself. http://www.flagshipmodels.com/zencart/index.php?main_page=product_info&cPath=13&products_id=112
-
Fred, Surprisingly the rabbet is not in the Caldercraft instructions, although the bearding line is. I just knew from experience that it needed to be done, particularly with double planking. I just bevel back on an angle from the false keel with a chisel enough to get both layers of planking to lay flay against the bulkheads and keel, and fit properly at the stem. If you remove the equivalent of both layers of planking at the stem you should be fine there.
- 302 replies
-
- 1
-
-
- granado
- caldercraft
- (and 1 more)
-
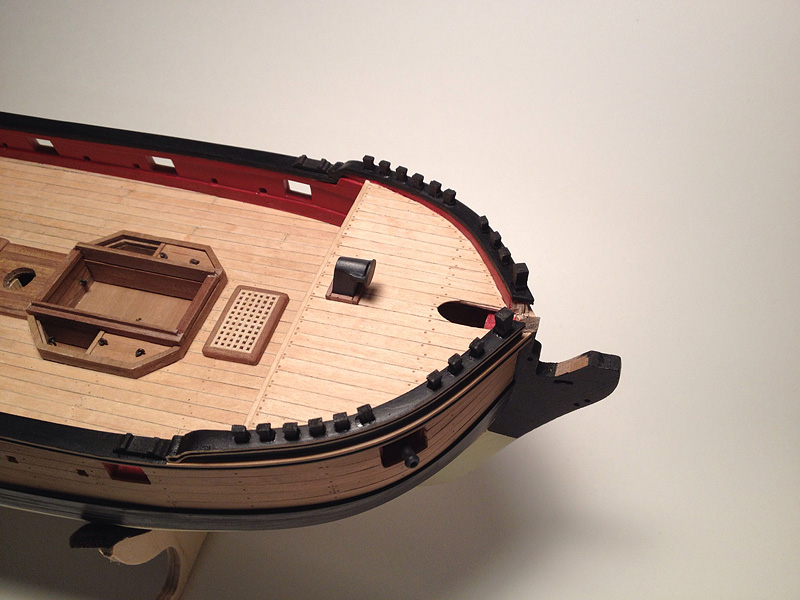
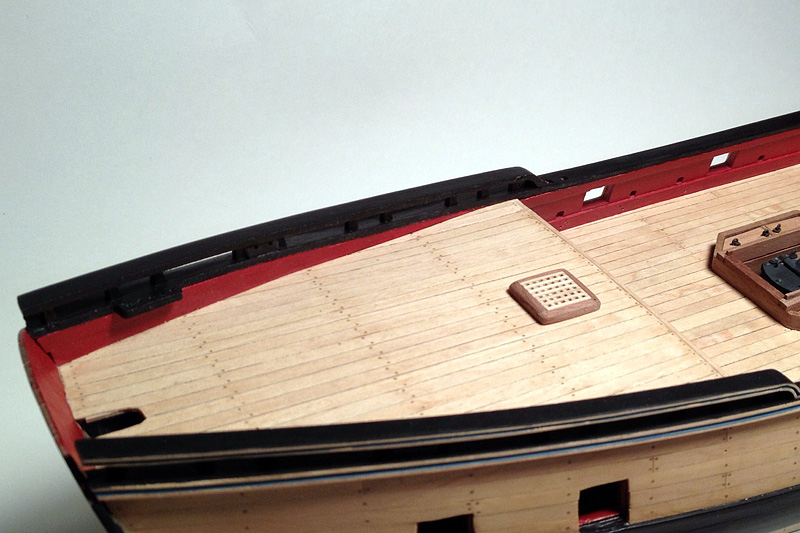
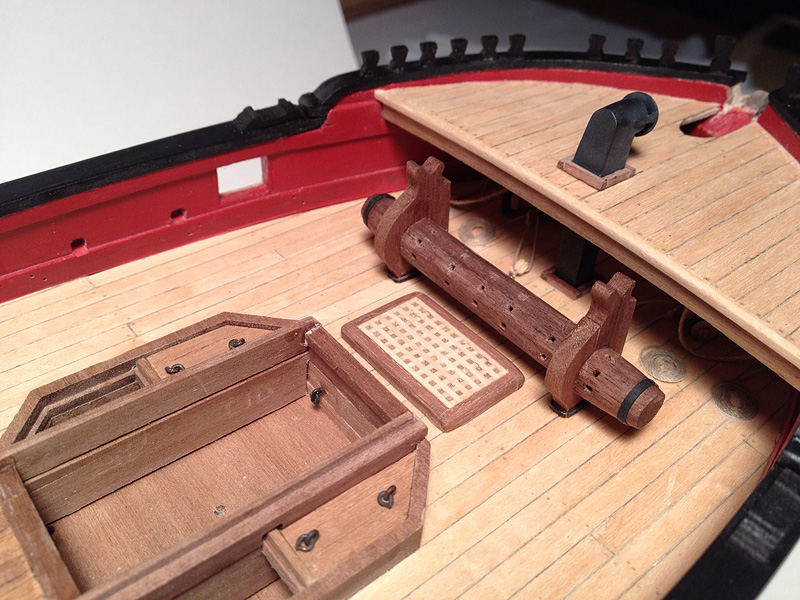
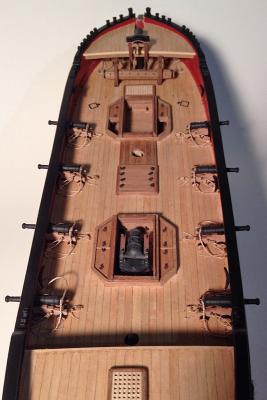
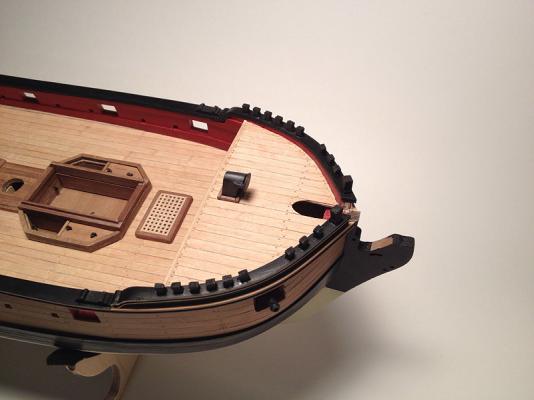
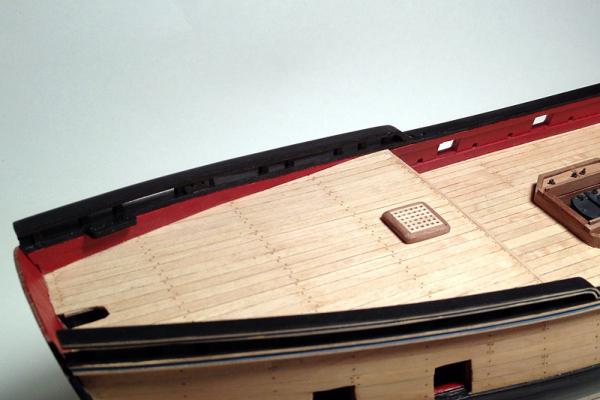
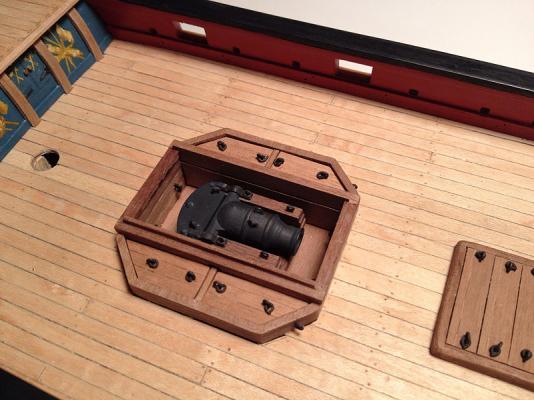
Well, I've made some nice progress since the last update, and am just now getting caught up with the photos. Quarterdeck rail installed, including the addition of the decorative molded strip that is not in the kit. This was done the same way as the forecastle rail. Forecastle knights and timberheads installed and painted. Galley flue painted and installed. A simple styrene disc and a few pieces of styrene strip were used to scratch build the deflector. Mortar surround side panels installed. Stern 10" mortar glued in place. This was completed a while ago. I've left the 13" forward mortar off for now, since I'm displaying that one in an elevated position and don't want it in the way while installing the cannons. I scratch built the windlass from walnut, rather than use the ply parts, but am not 100% happy with it. The walnut I used is a good bit darker than the rest of what Caldercraft supplies, and I may have to get some other walnut that's a bit lighter (and has less grain) and try again, which is unfortunate because it was a bit of work. That being said I'm not pleased with how the color of the supplied Caldercraft walnut varies extensively. At least I don't have that issue with the planking, but the CNC sheets are all over the map.


- 302 replies
-
- 15
-
-
- granado
- caldercraft
- (and 1 more)