HOLIDAY DONATION DRIVE - SUPPORT MSW - DO YOUR PART TO KEEP THIS GREAT FORUM GOING! (Only 13 donations so far - C'mon guys!)
×


FrankWouts
-
Posts
535 -
Joined
-
Last visited
Content Type
Profiles
Forums
Gallery
Events
Everything posted by FrankWouts
-
 Thanks for the tip Mike.
 -
Thanks Tom, I’ll do my utmost best on this one!
-
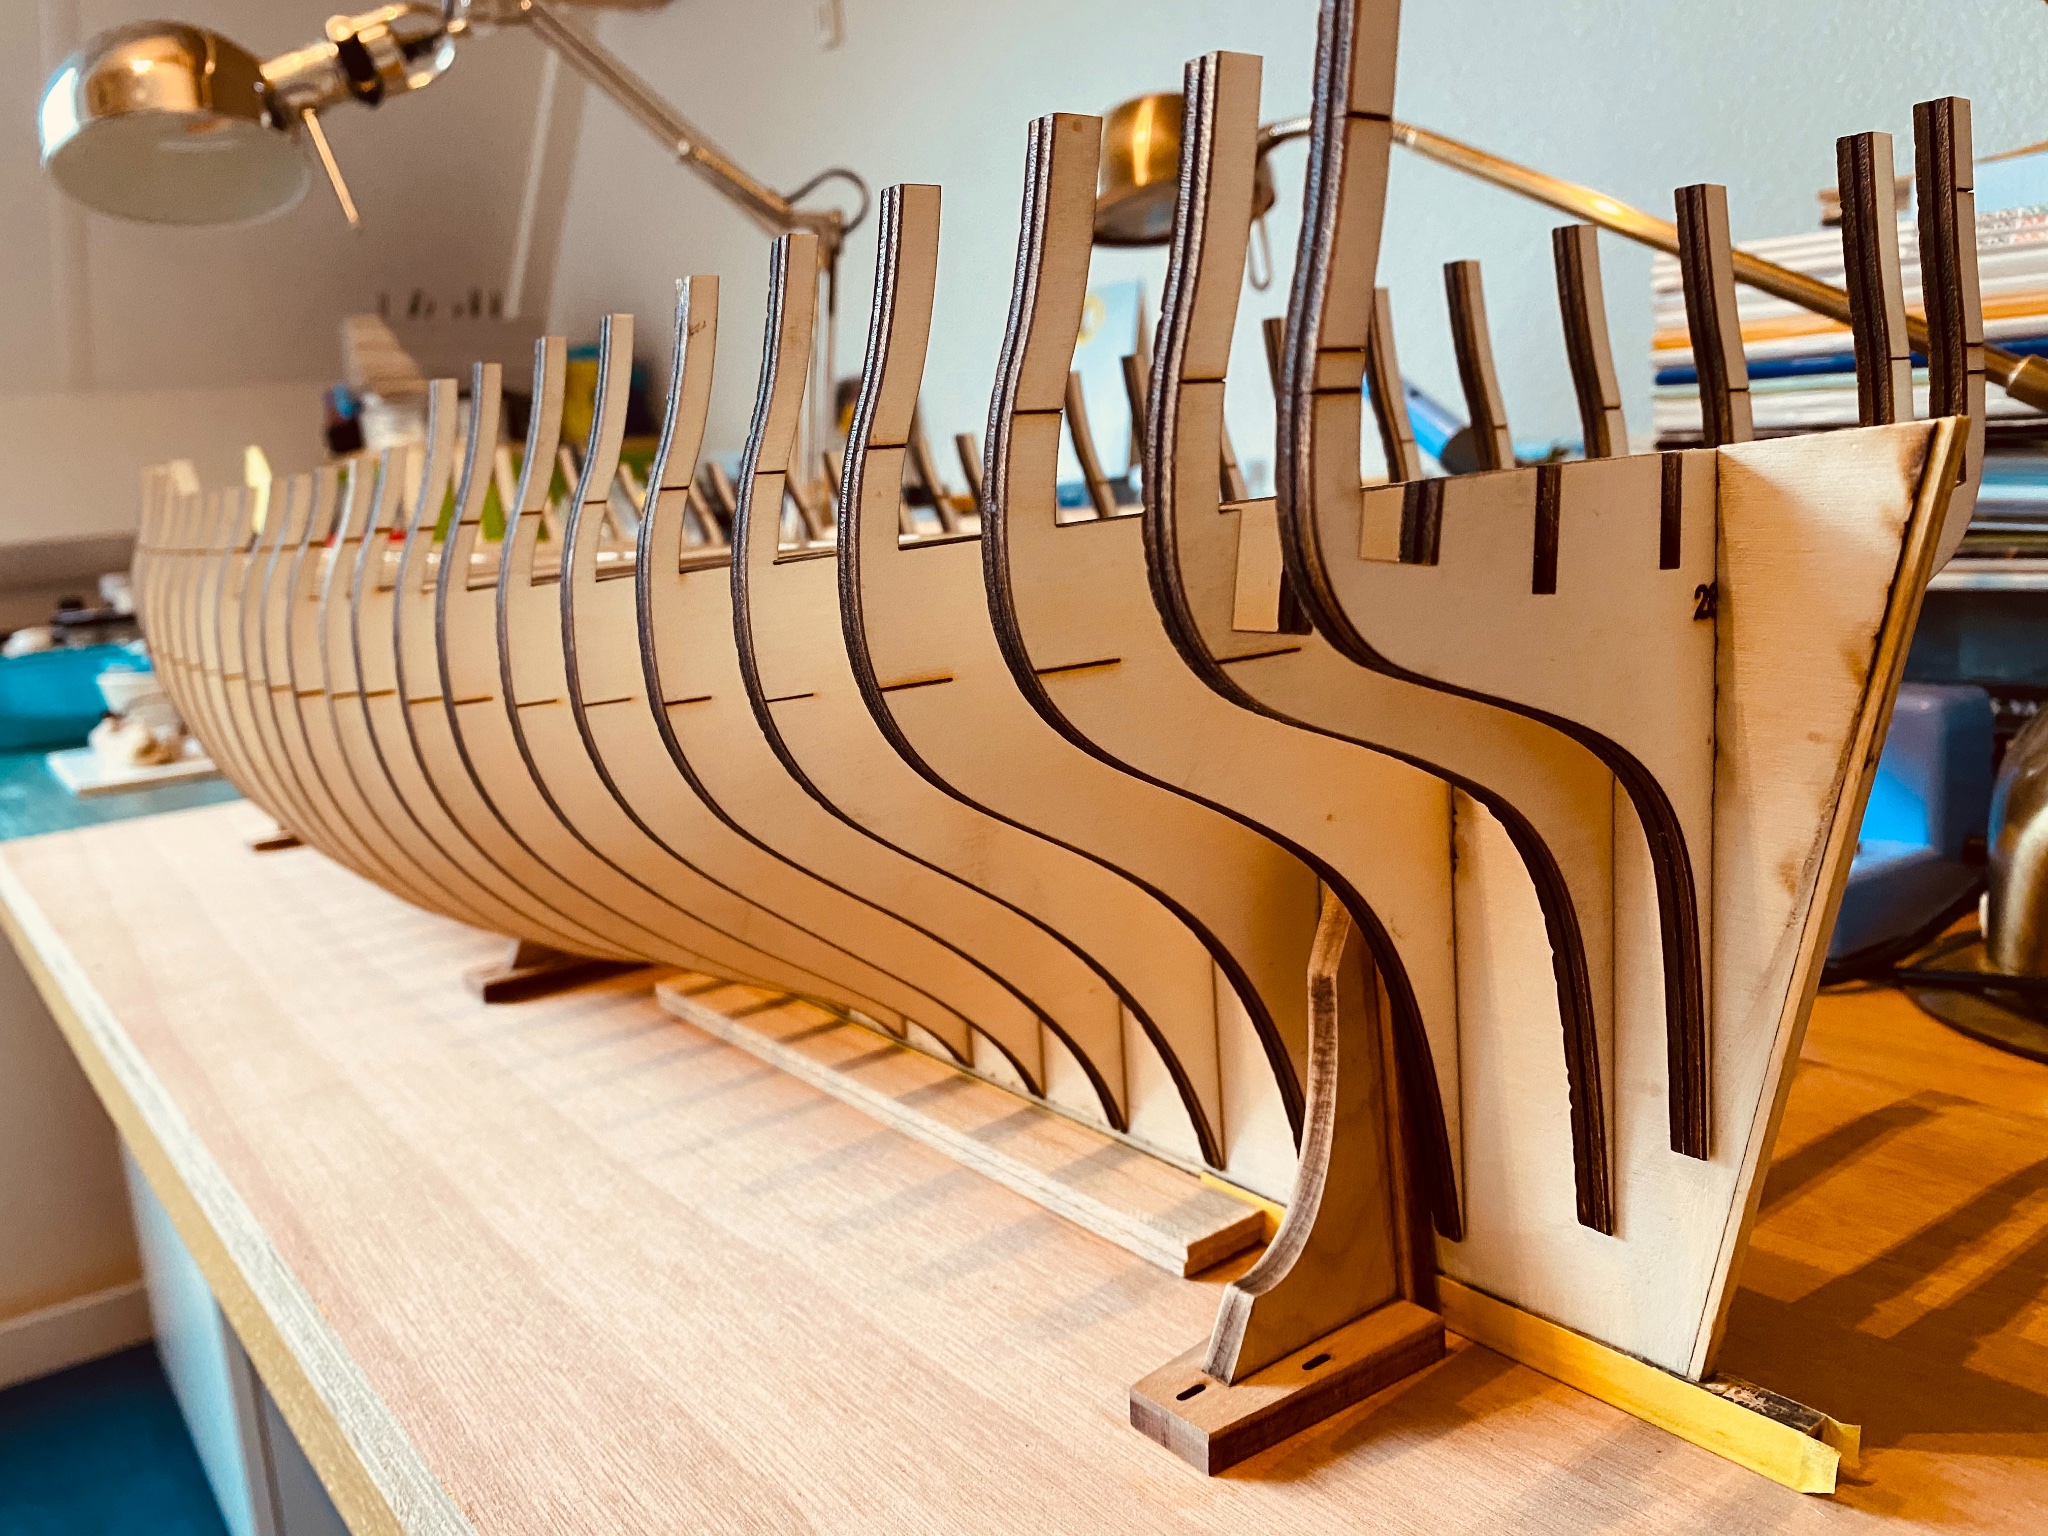
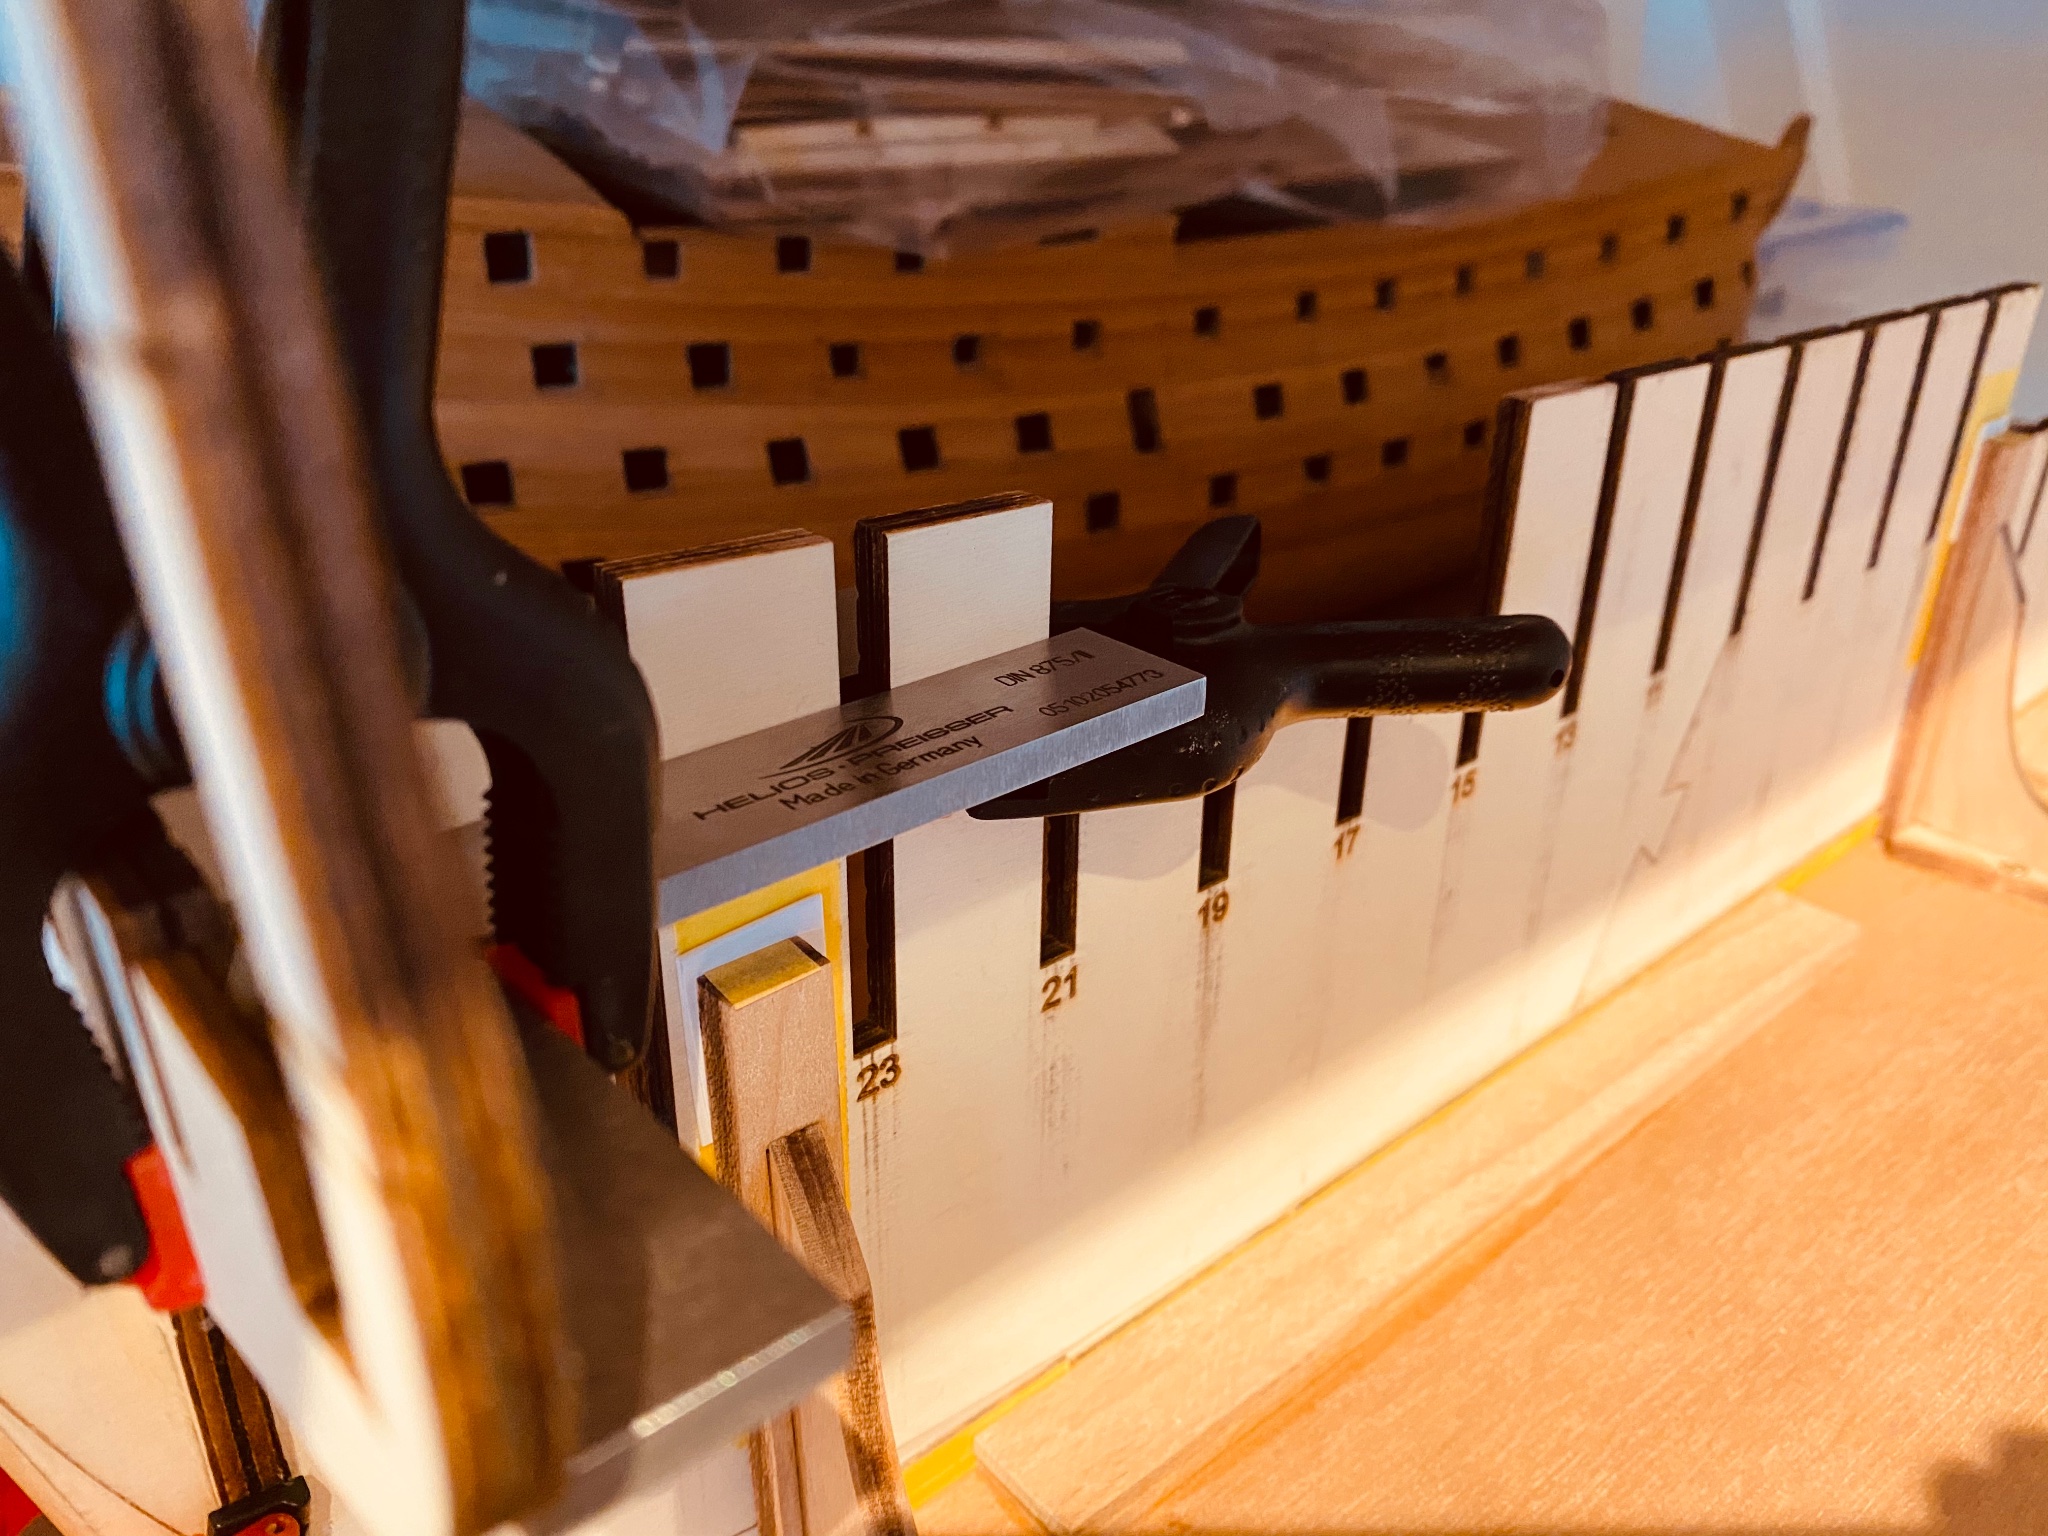
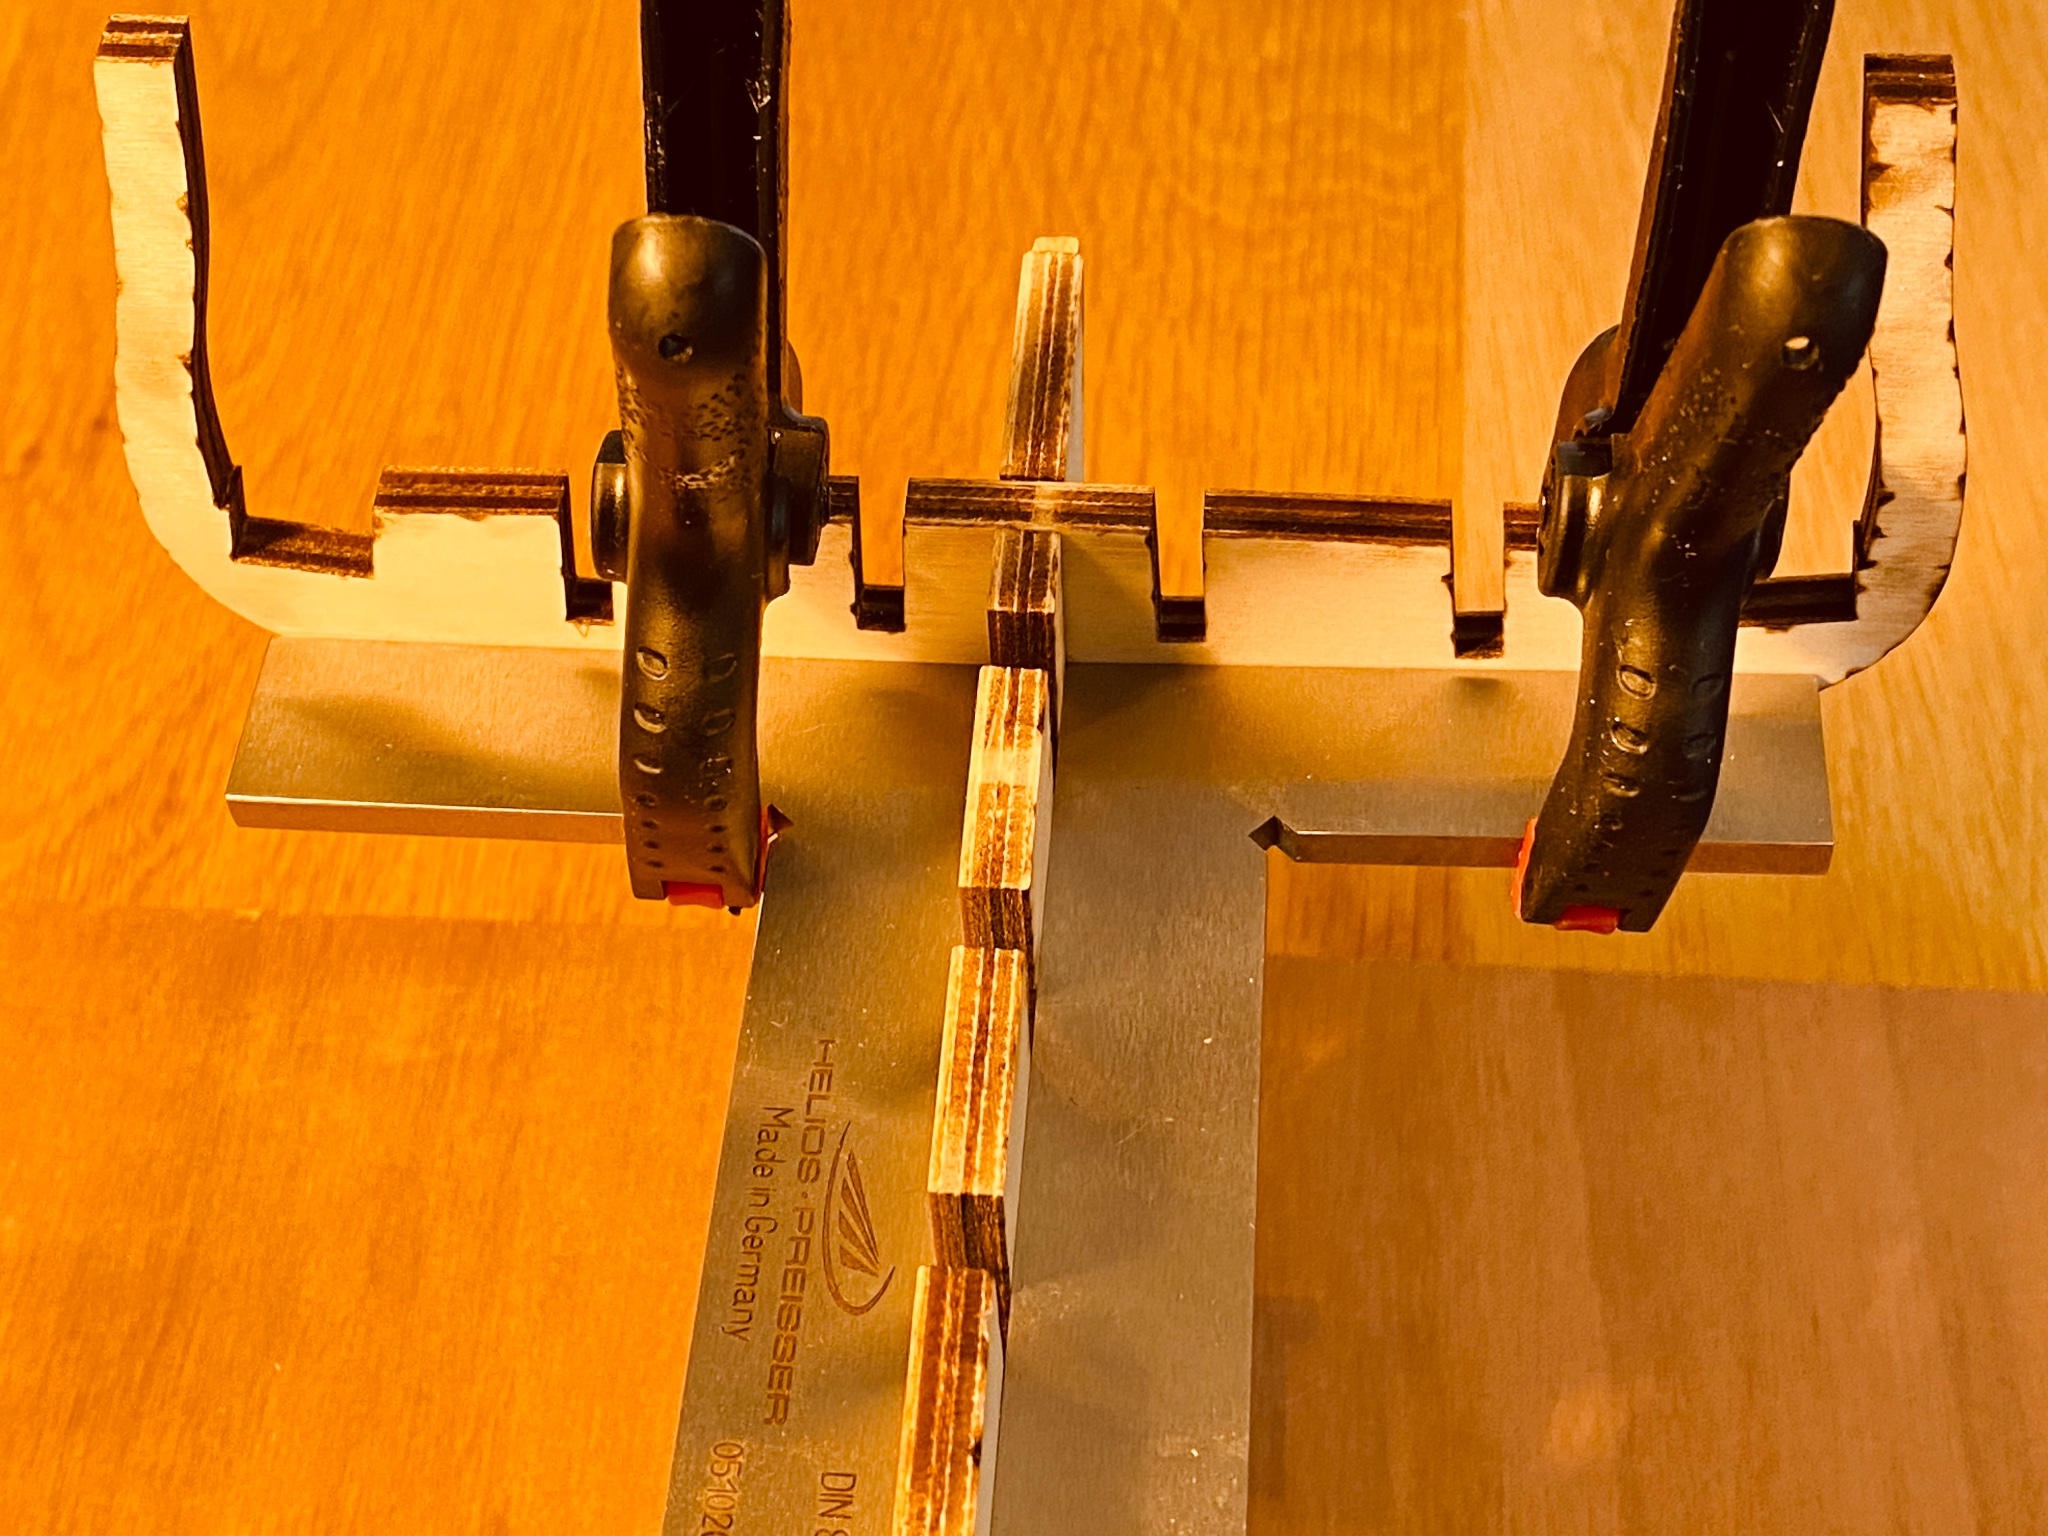
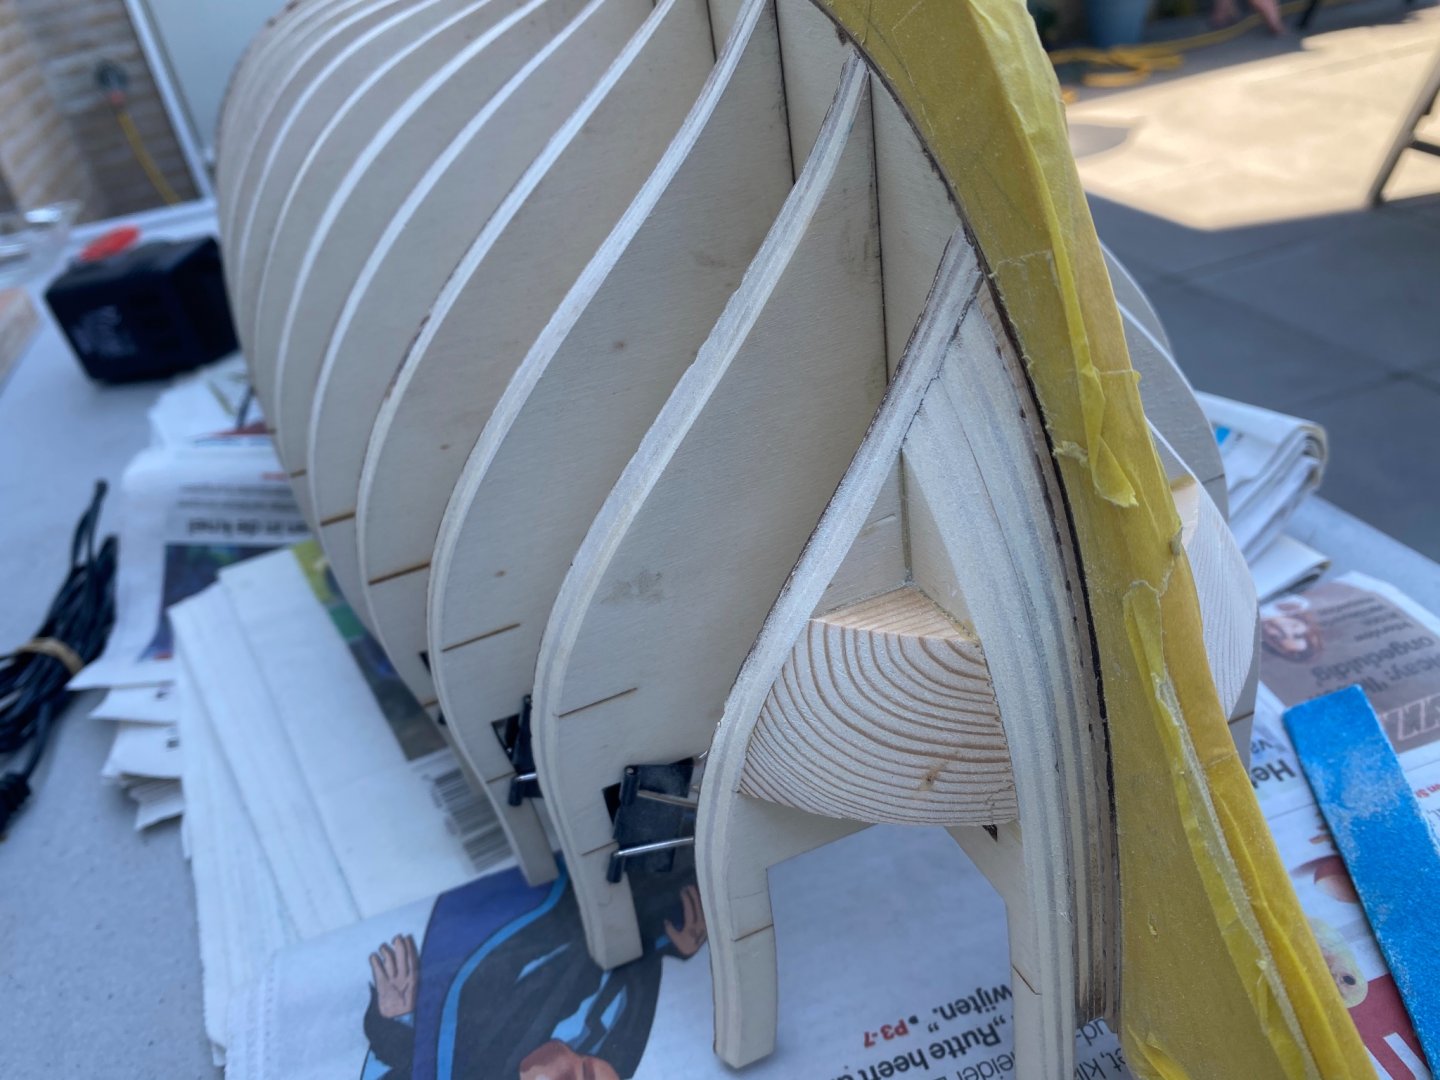
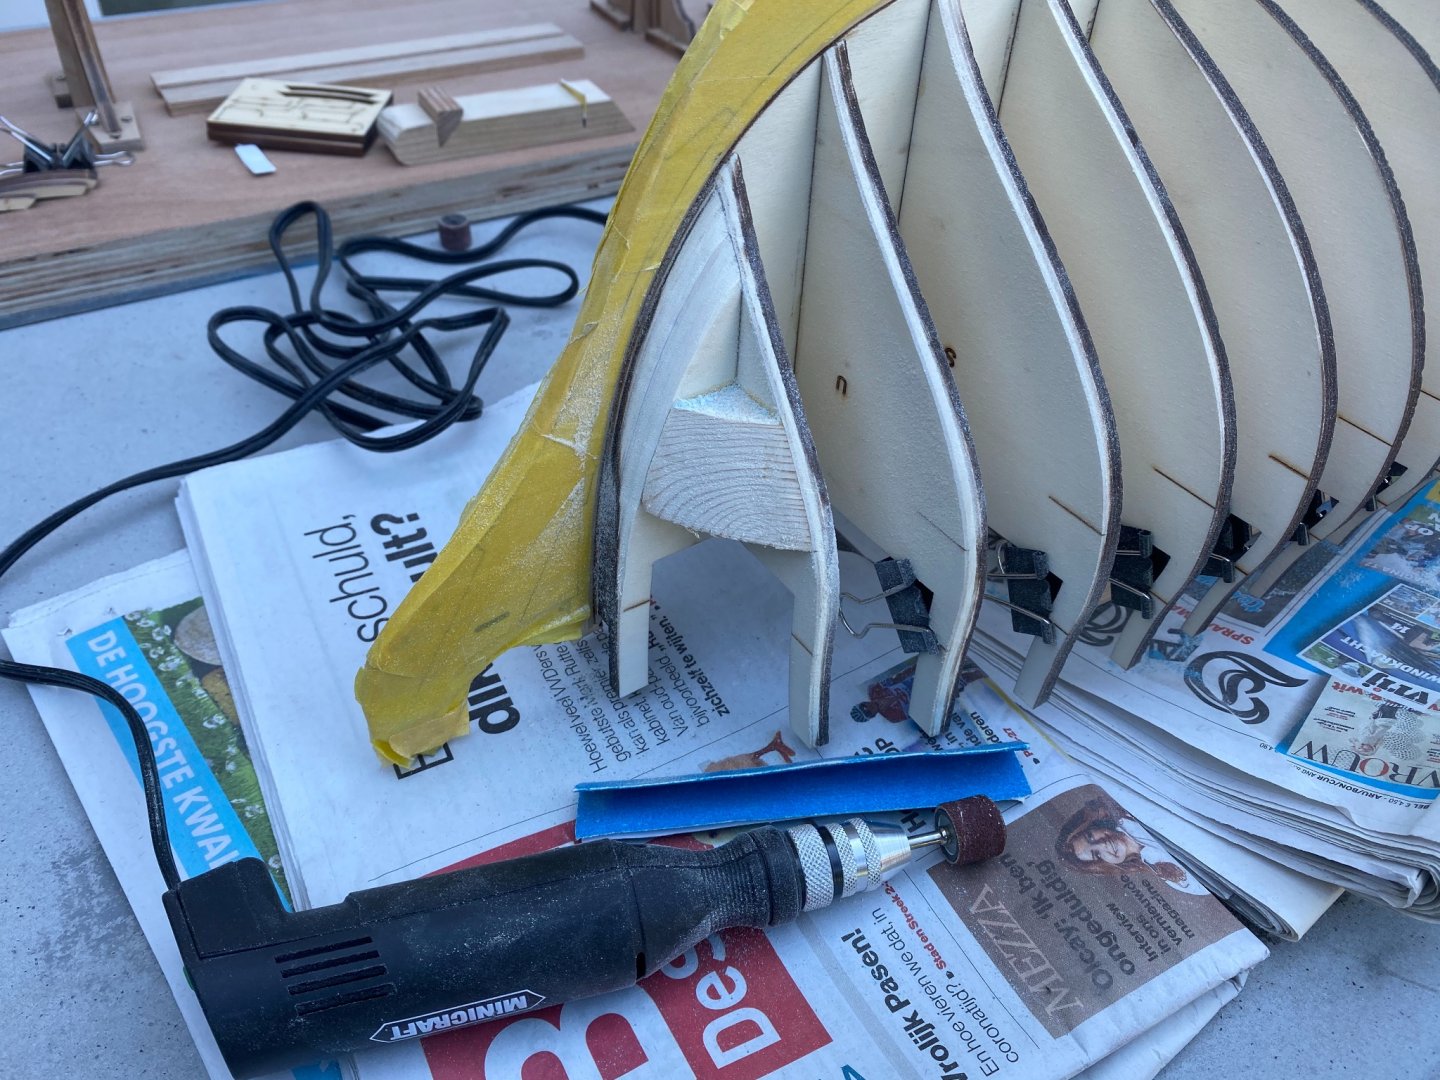
What kind of advice do you mean exactly? I simply use two wooden tools from Occre and keep it flat against the surface of two or more bulkheads and start sanding. I use 80, 120 and 150 grid for this. Also for hard to reach corners or curves, I simple fold the sanding paper and move it in the ‘layer’ or surface parallel to where the planking will come. Also for the forming of the stem at first I use a little motor tool which you can see in the pictures. As I’m getting lame enough using only muscle and sandpaper...
-
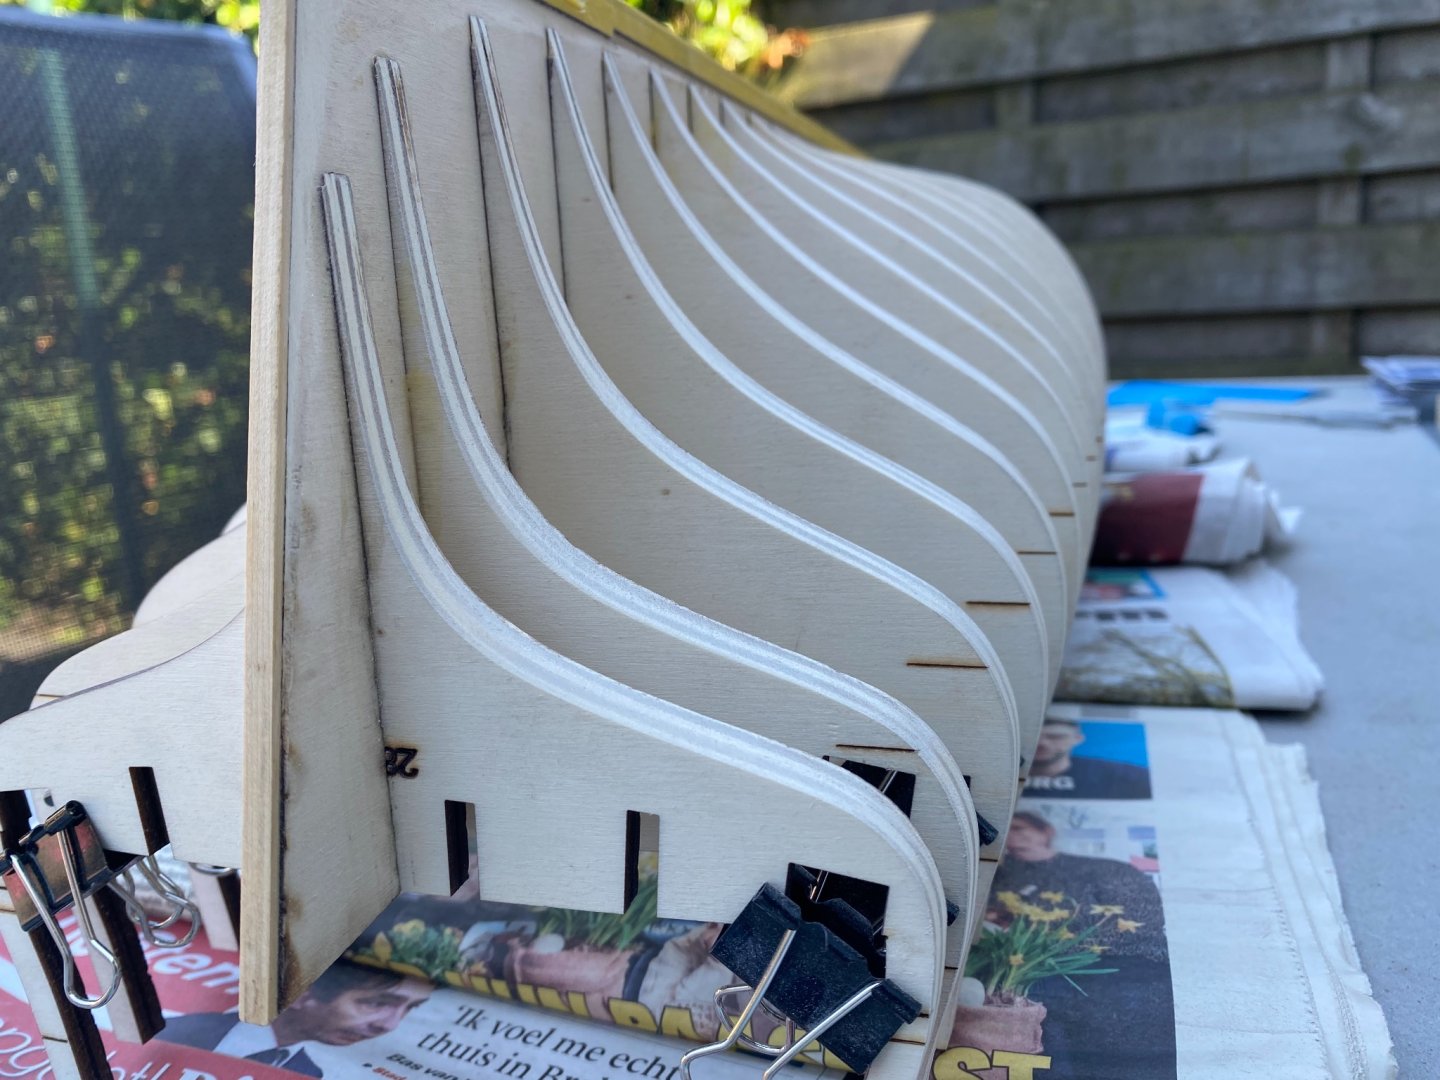
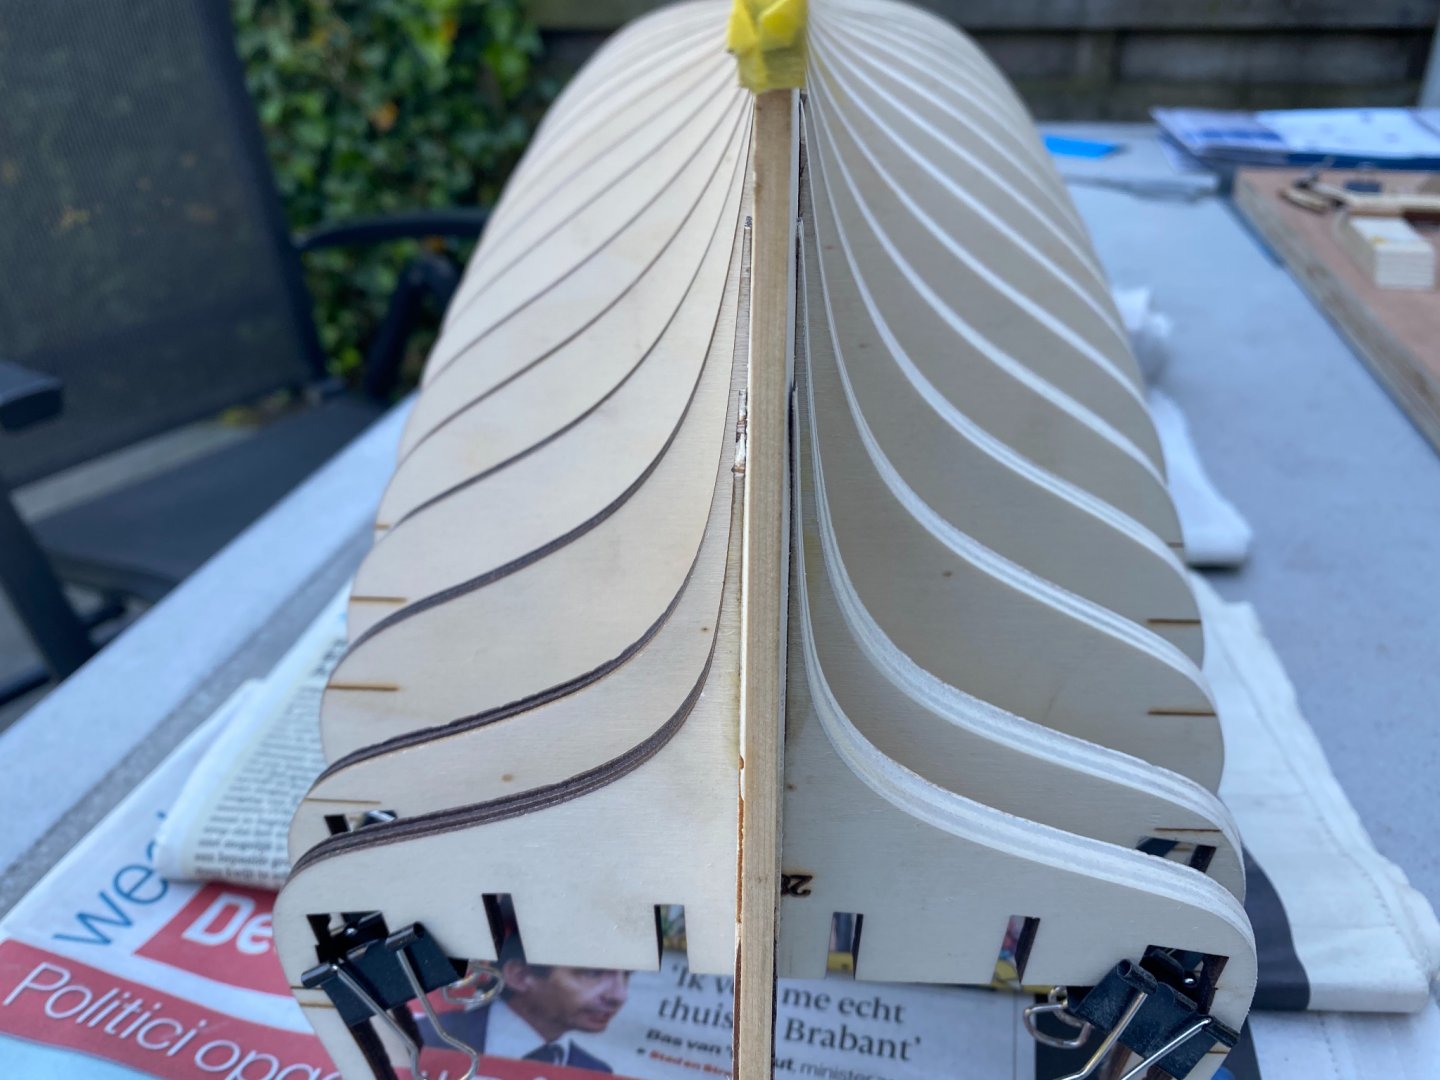
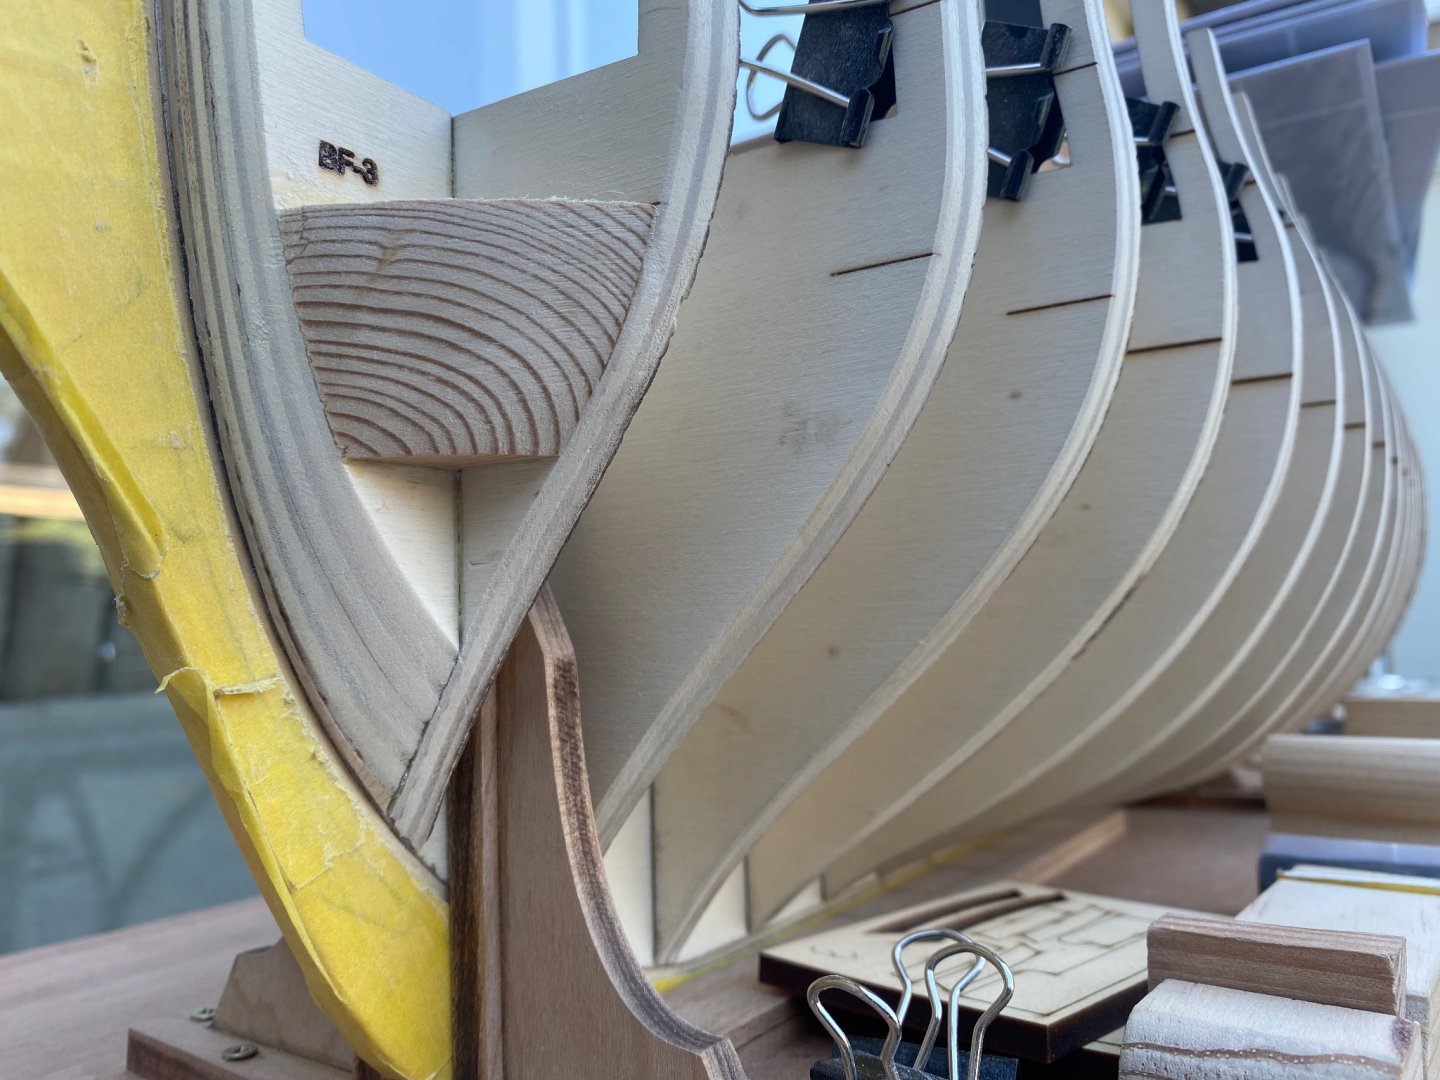
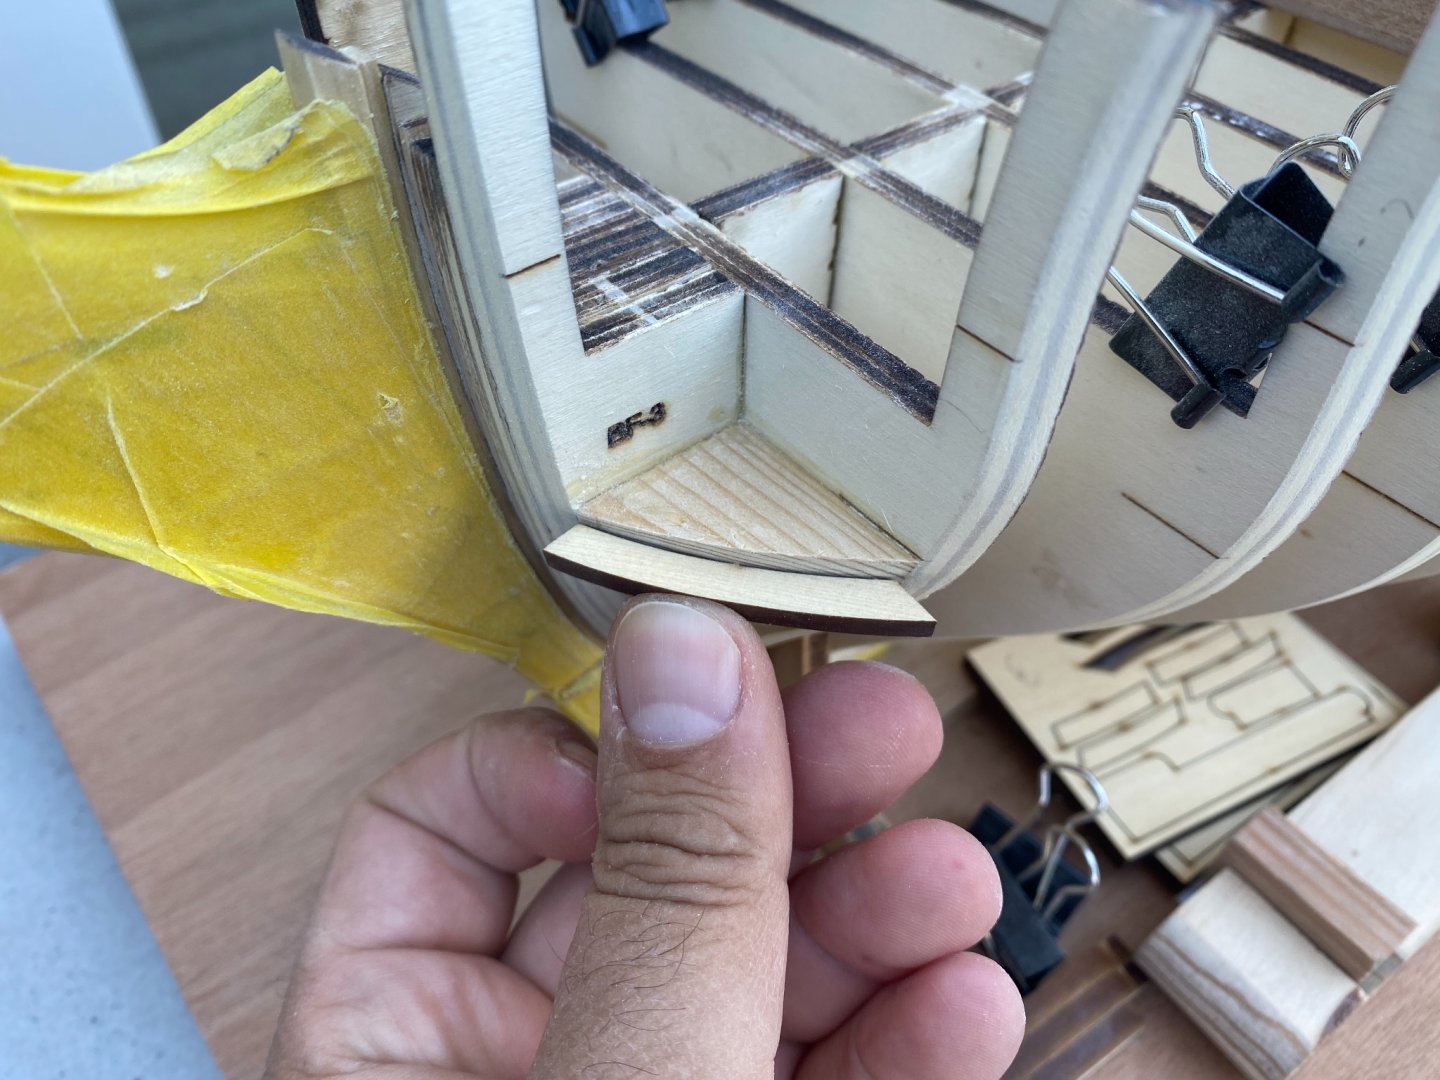
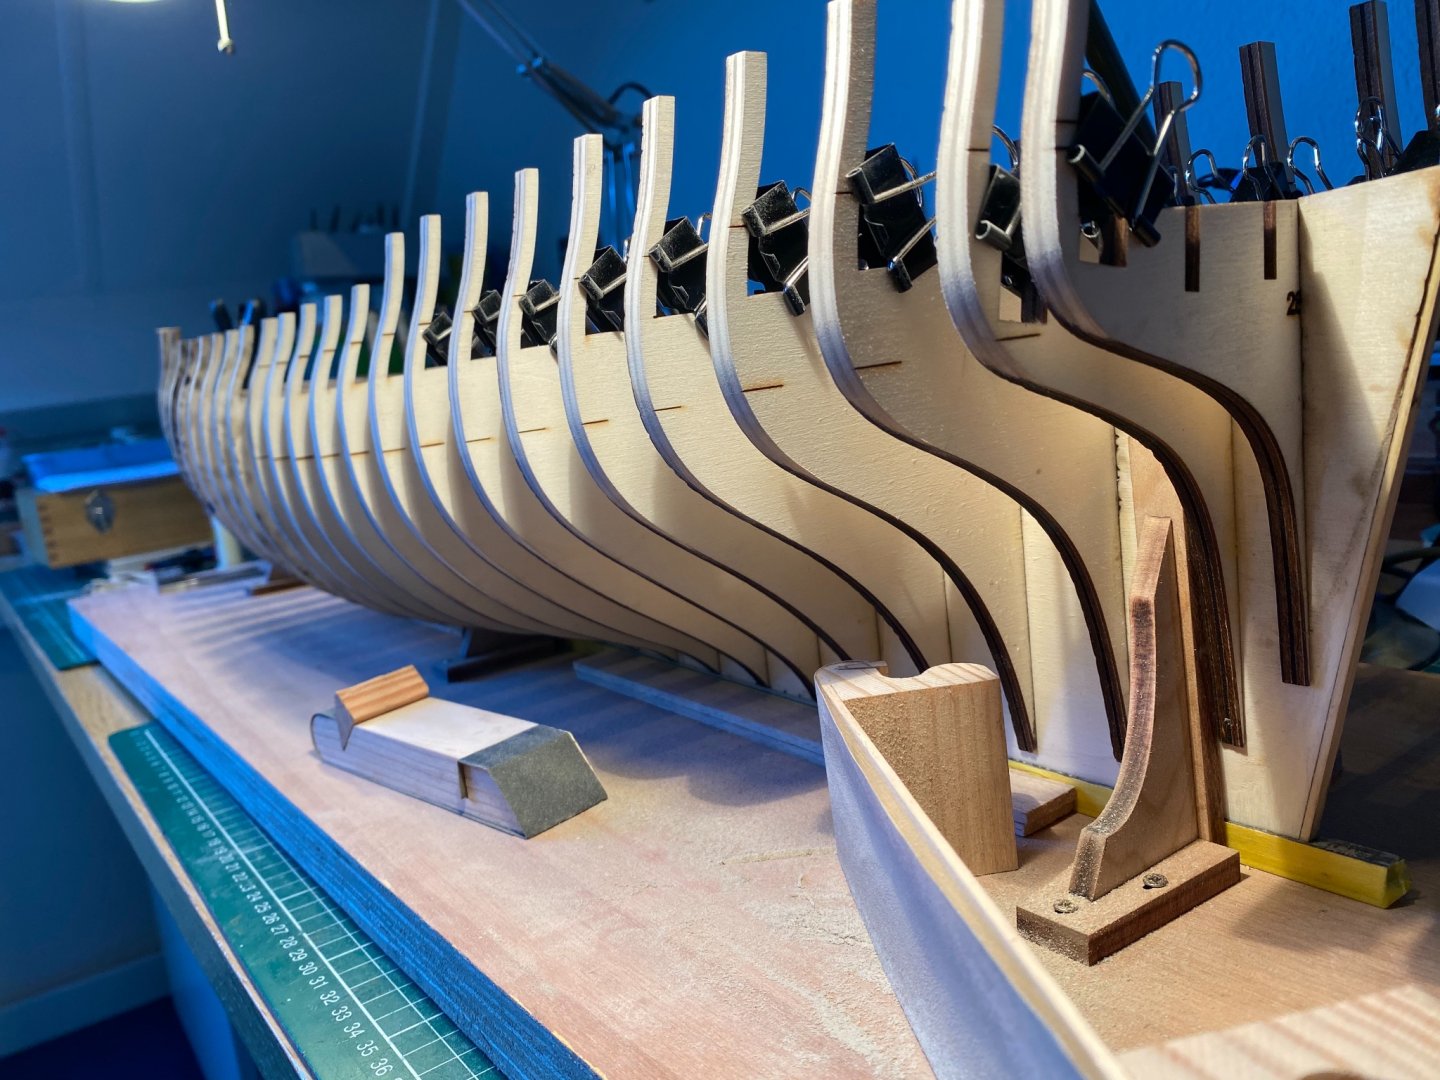
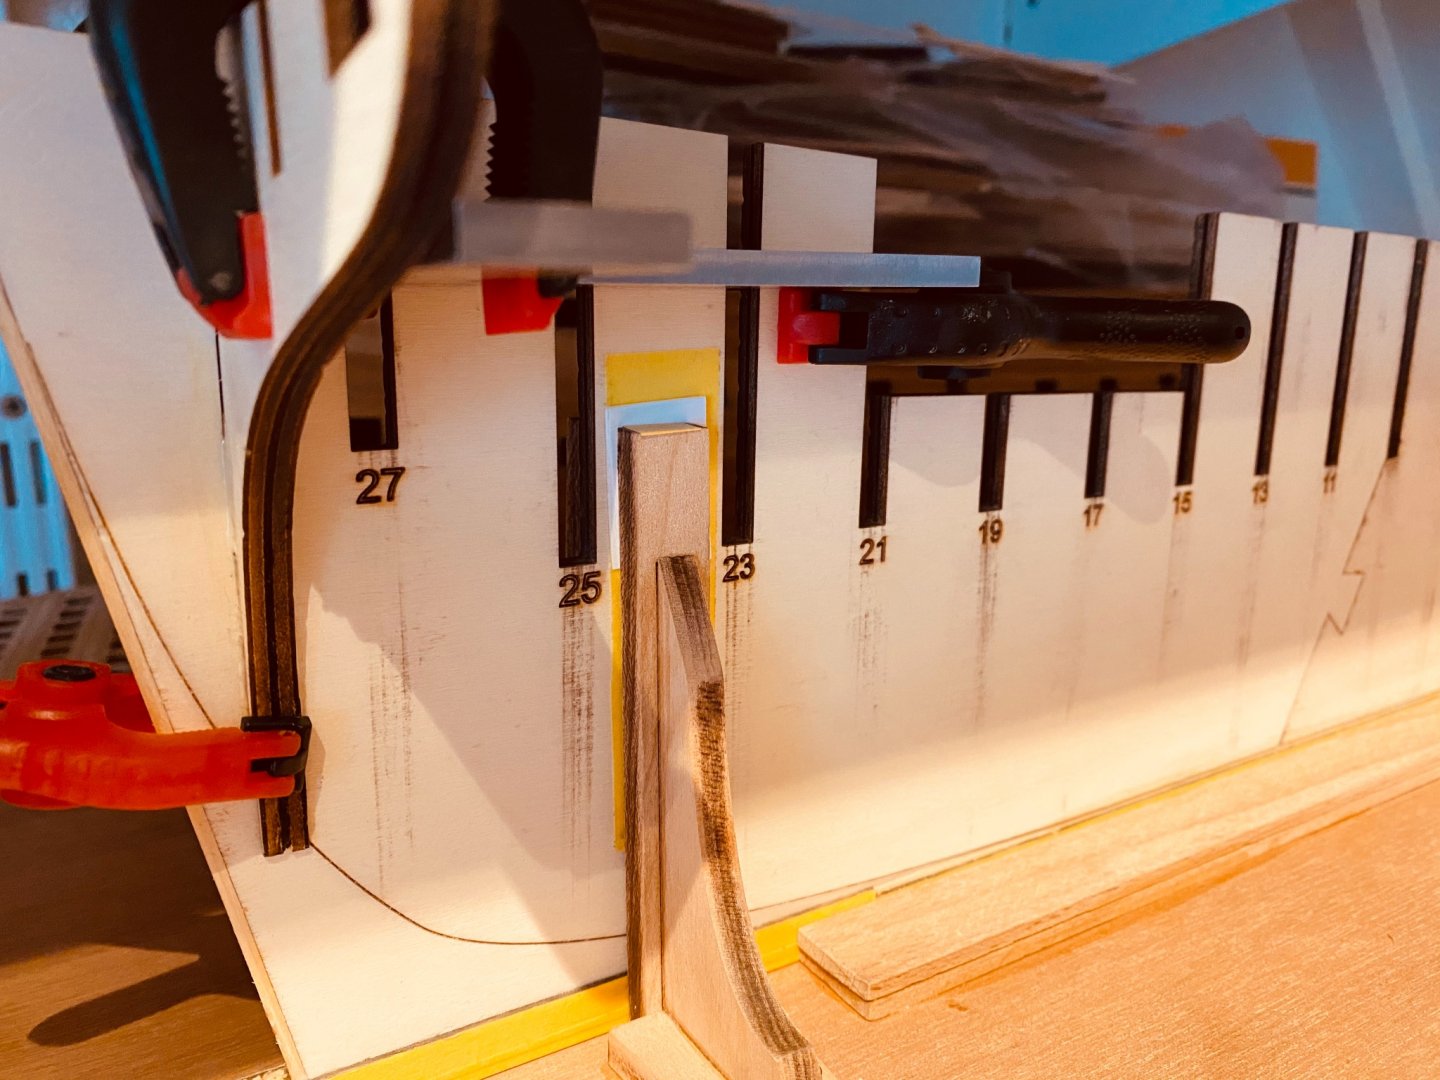
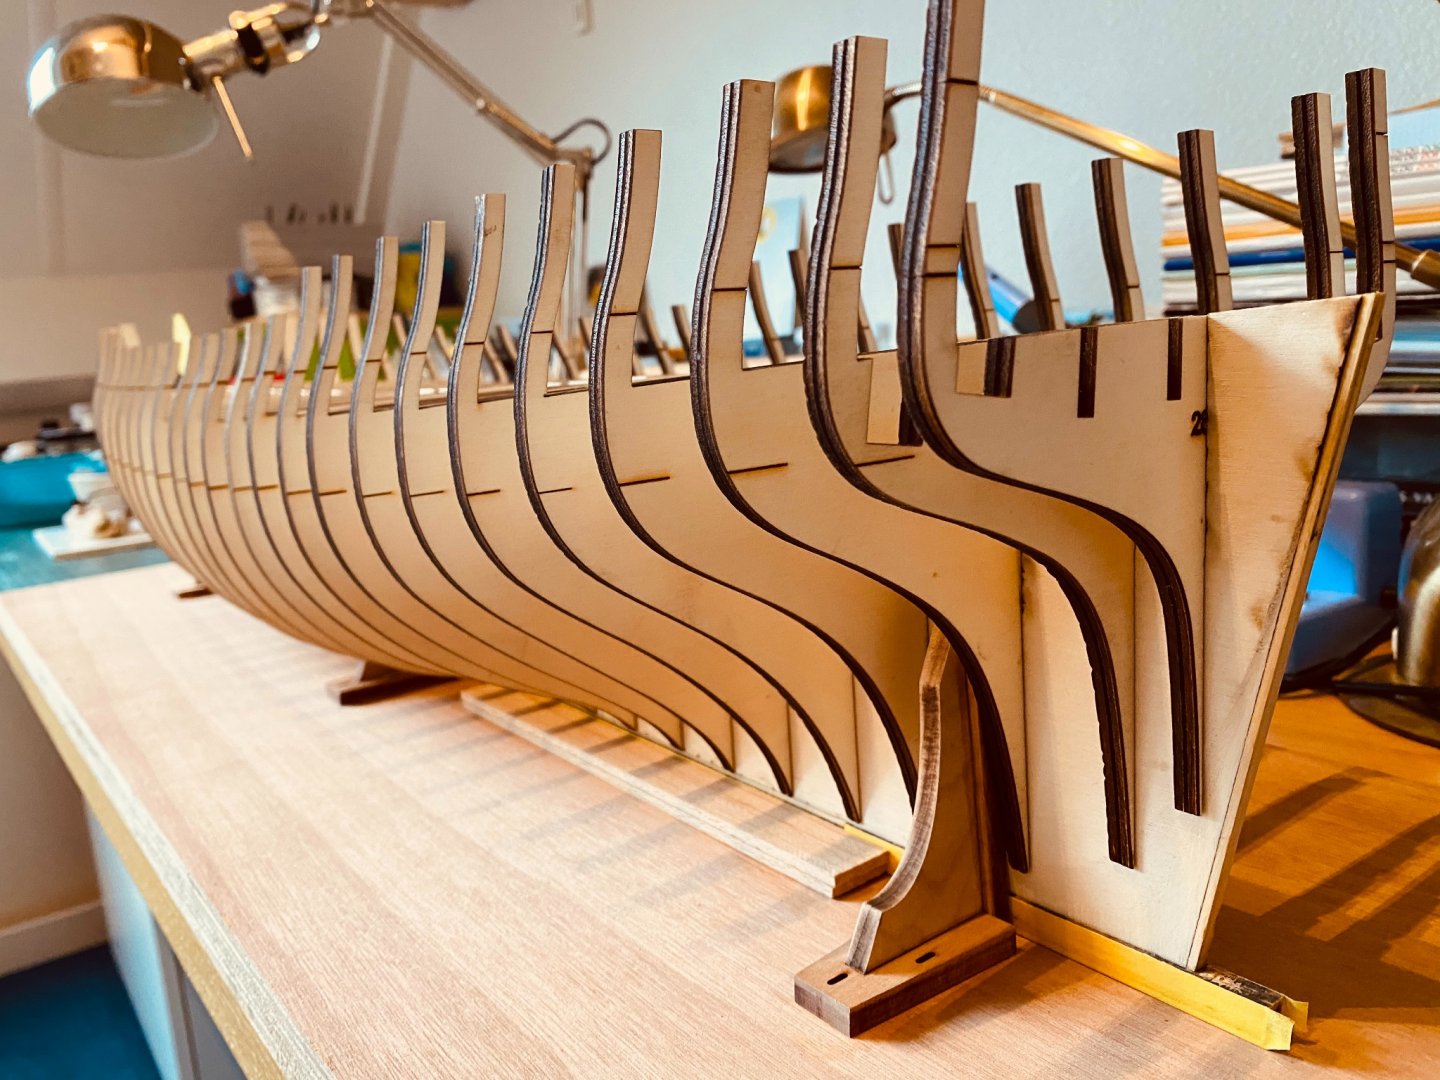
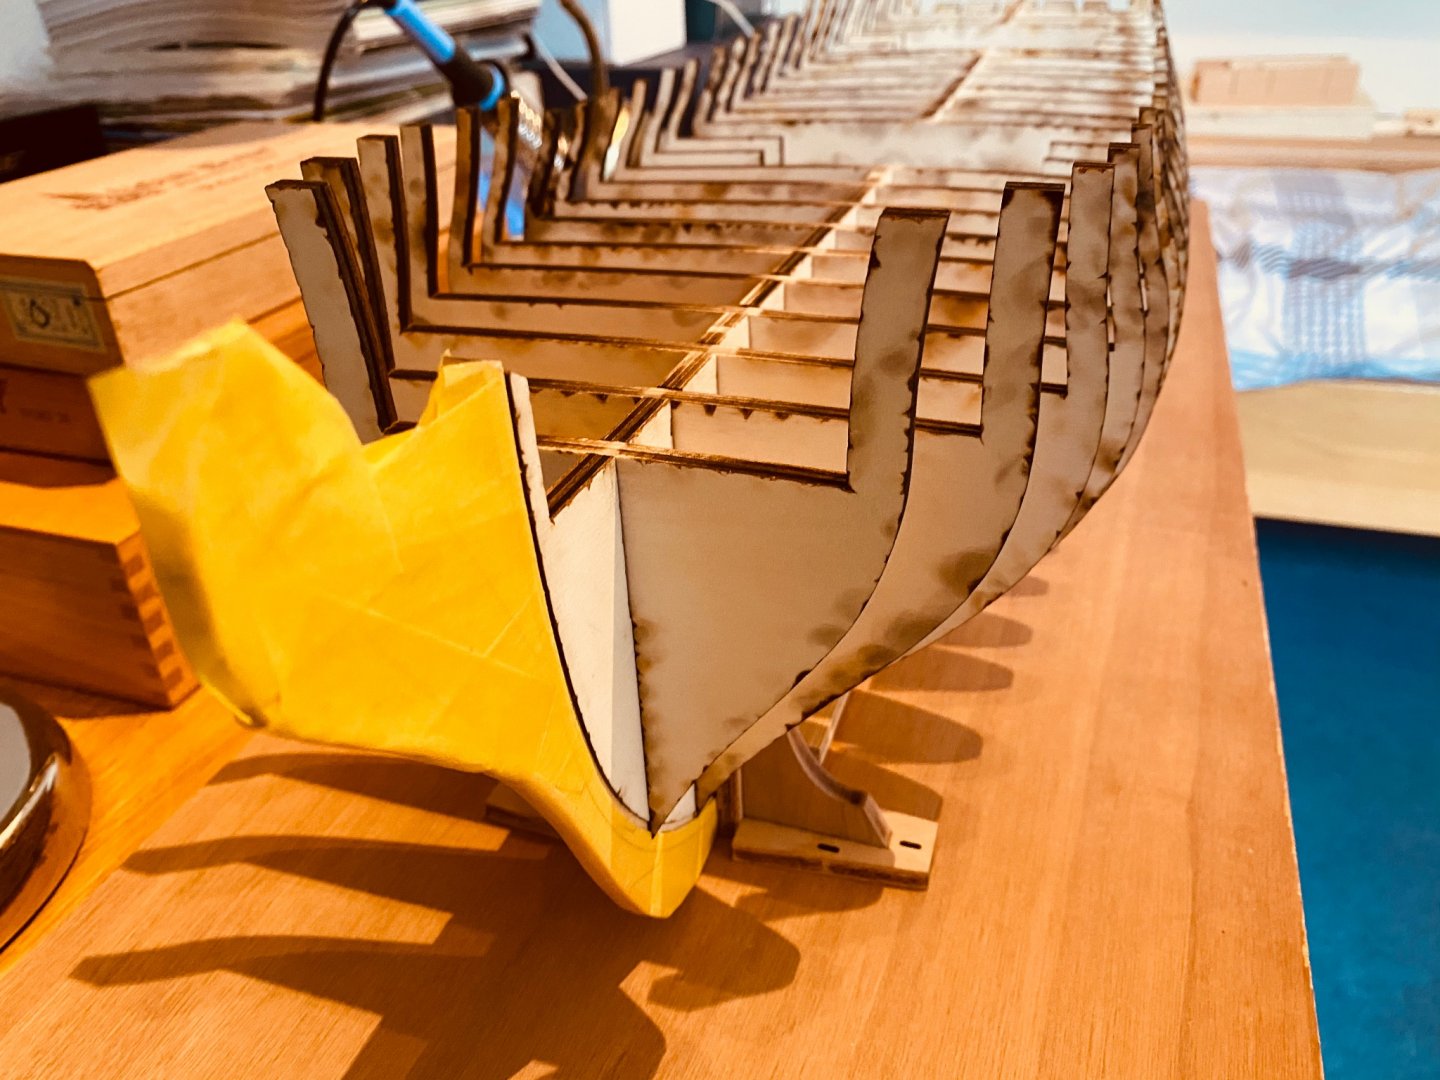
A small update to show I’m still committed to make progress on my Winnie and to let you all know I’m not dead or something after, what was it, 4 weeks...? I was so busy working past weeks and help my daughter study maths and history for her gymnasium exams in the weekends that it was not untill now I was able to work on the Winnie. Spring weather is finally improving in the Netherlands, so I took her outside sanding for fairing the hull. Thank you all for the likes and tips. Yes, I will use the laser markers only as a reference and use my critical timbermans eye when my batten is on and look to it multiple days from every possible corners (with coffee breaks and intervals ofcourse). With modeling and also when looking at art, paintings, drawings or sculptures, I always keep in mind that every curve has a certain ‘tension’. It should not be too much, and ofcourse also not too little. Also ugly bumps or nods in curves break that ‘tension’, so that’s something to avoid above all, no matter if the tension is too much, or too little. One often sees very skillfully build models, but with the wrong or broken ‘tension’ in the sheer, the absolute beauty is gone. One side faired, and before evening falls, started on the other one and hoping to finnish it before 12, though I’m almost a member of the club of the lame right arm people. So maybe better to continue tomorrow evening. I used and extra piece of wood to determine the angle at which BF-3 has to be sanded. I took the curvature of the curved laserparts as a guide, as my guess is that it has to be about the same curvature. This helped me a lot, I hope this will not be in the way later? From all your beautiful build stories it does not seem it does? Otherwise I can still take it away carefully with my motor tool, chisel and sandpaper if necessary.
-
And I'm sure everyone visiting your house and taking a look at your Winnie will find a beautiful model!
-
That's the problem with all of us as rather authistic perfectionists I think. Looking at your own work, you have an attachment with every little part that was difficult or did not come out 100% as you anticipated. I found a method for avoiding that: don't look at it from a very close distance for a few years, work on a few other models and maybe then you can look at it unbiased and without prejudice because maybe the lesser spots will be forgotten by then...
-
Simply stunning and beautiful Mike, your model as well as your findings and tips, these ones included on the rudder trunk and benches, are a reference for us all.
- 607 replies
-
- 1
-

-
- winchelsea
- Syren Ship Model Company
- (and 1 more)
-
With plastic aircraft modeling this wouldn't be a problem Jan, but a frigate doesn't make any loopings I'm afraid... You're makeing nice and steady progress! I'm already offically lame in my right arm form sanding the bulkheads..
-
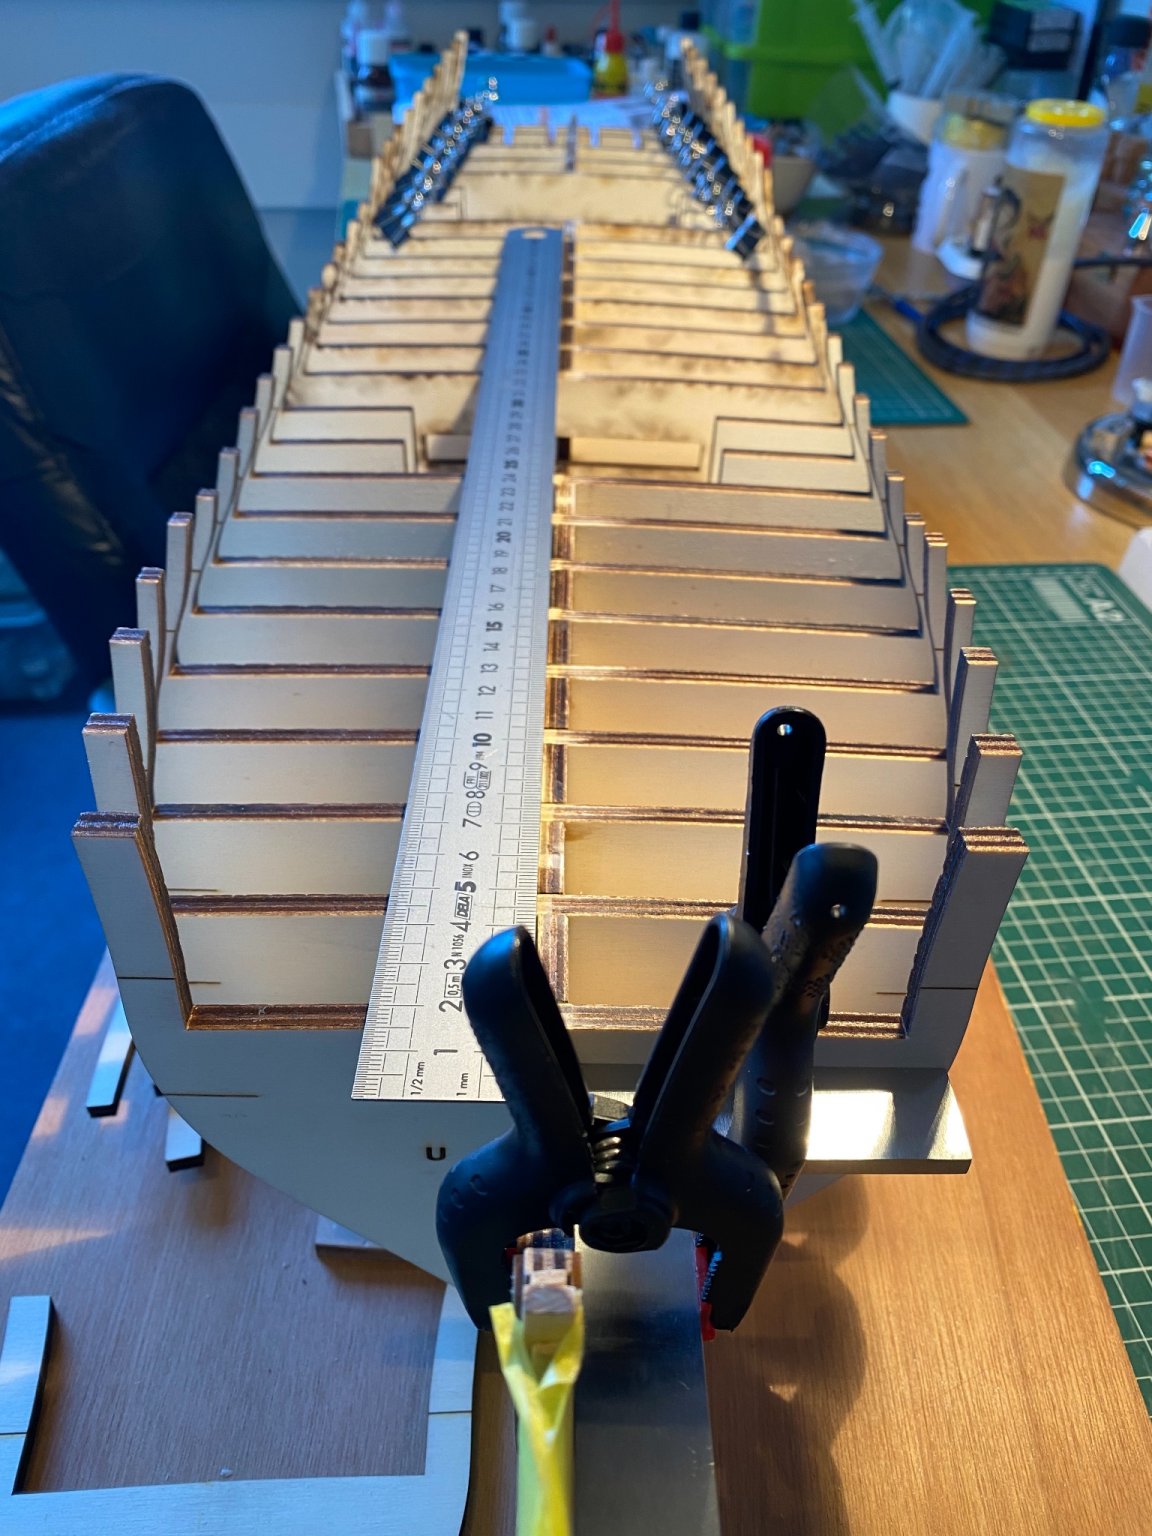
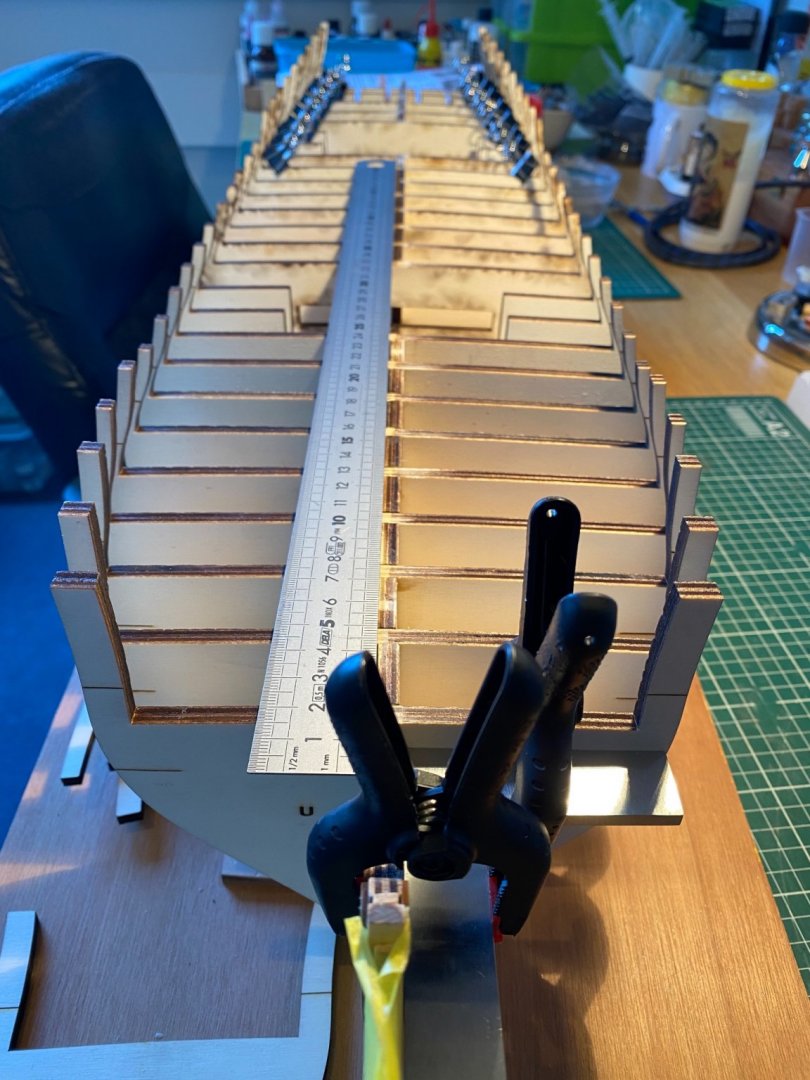
I’ve started sanding now after checking for a straight keel and ship again and square bulkheads. I think next update will be next weekend after fairing and sanding the bulkheads of the hull. And after sanding the bulkheads and after more sanding and sanding...
-
Thanks for the tip Fred and Mike. This is very much appreciated! Luckily the pictures with all bulkheads in position were taken only in a dryfit session without having read Chucks instructions yet. The bulkheads are now glued on in the correct positions and 100% square. I don’t even dare glueing anything on without having read Chucks instructions and checking all of your build logs again and again. Thanks, Frank.
-
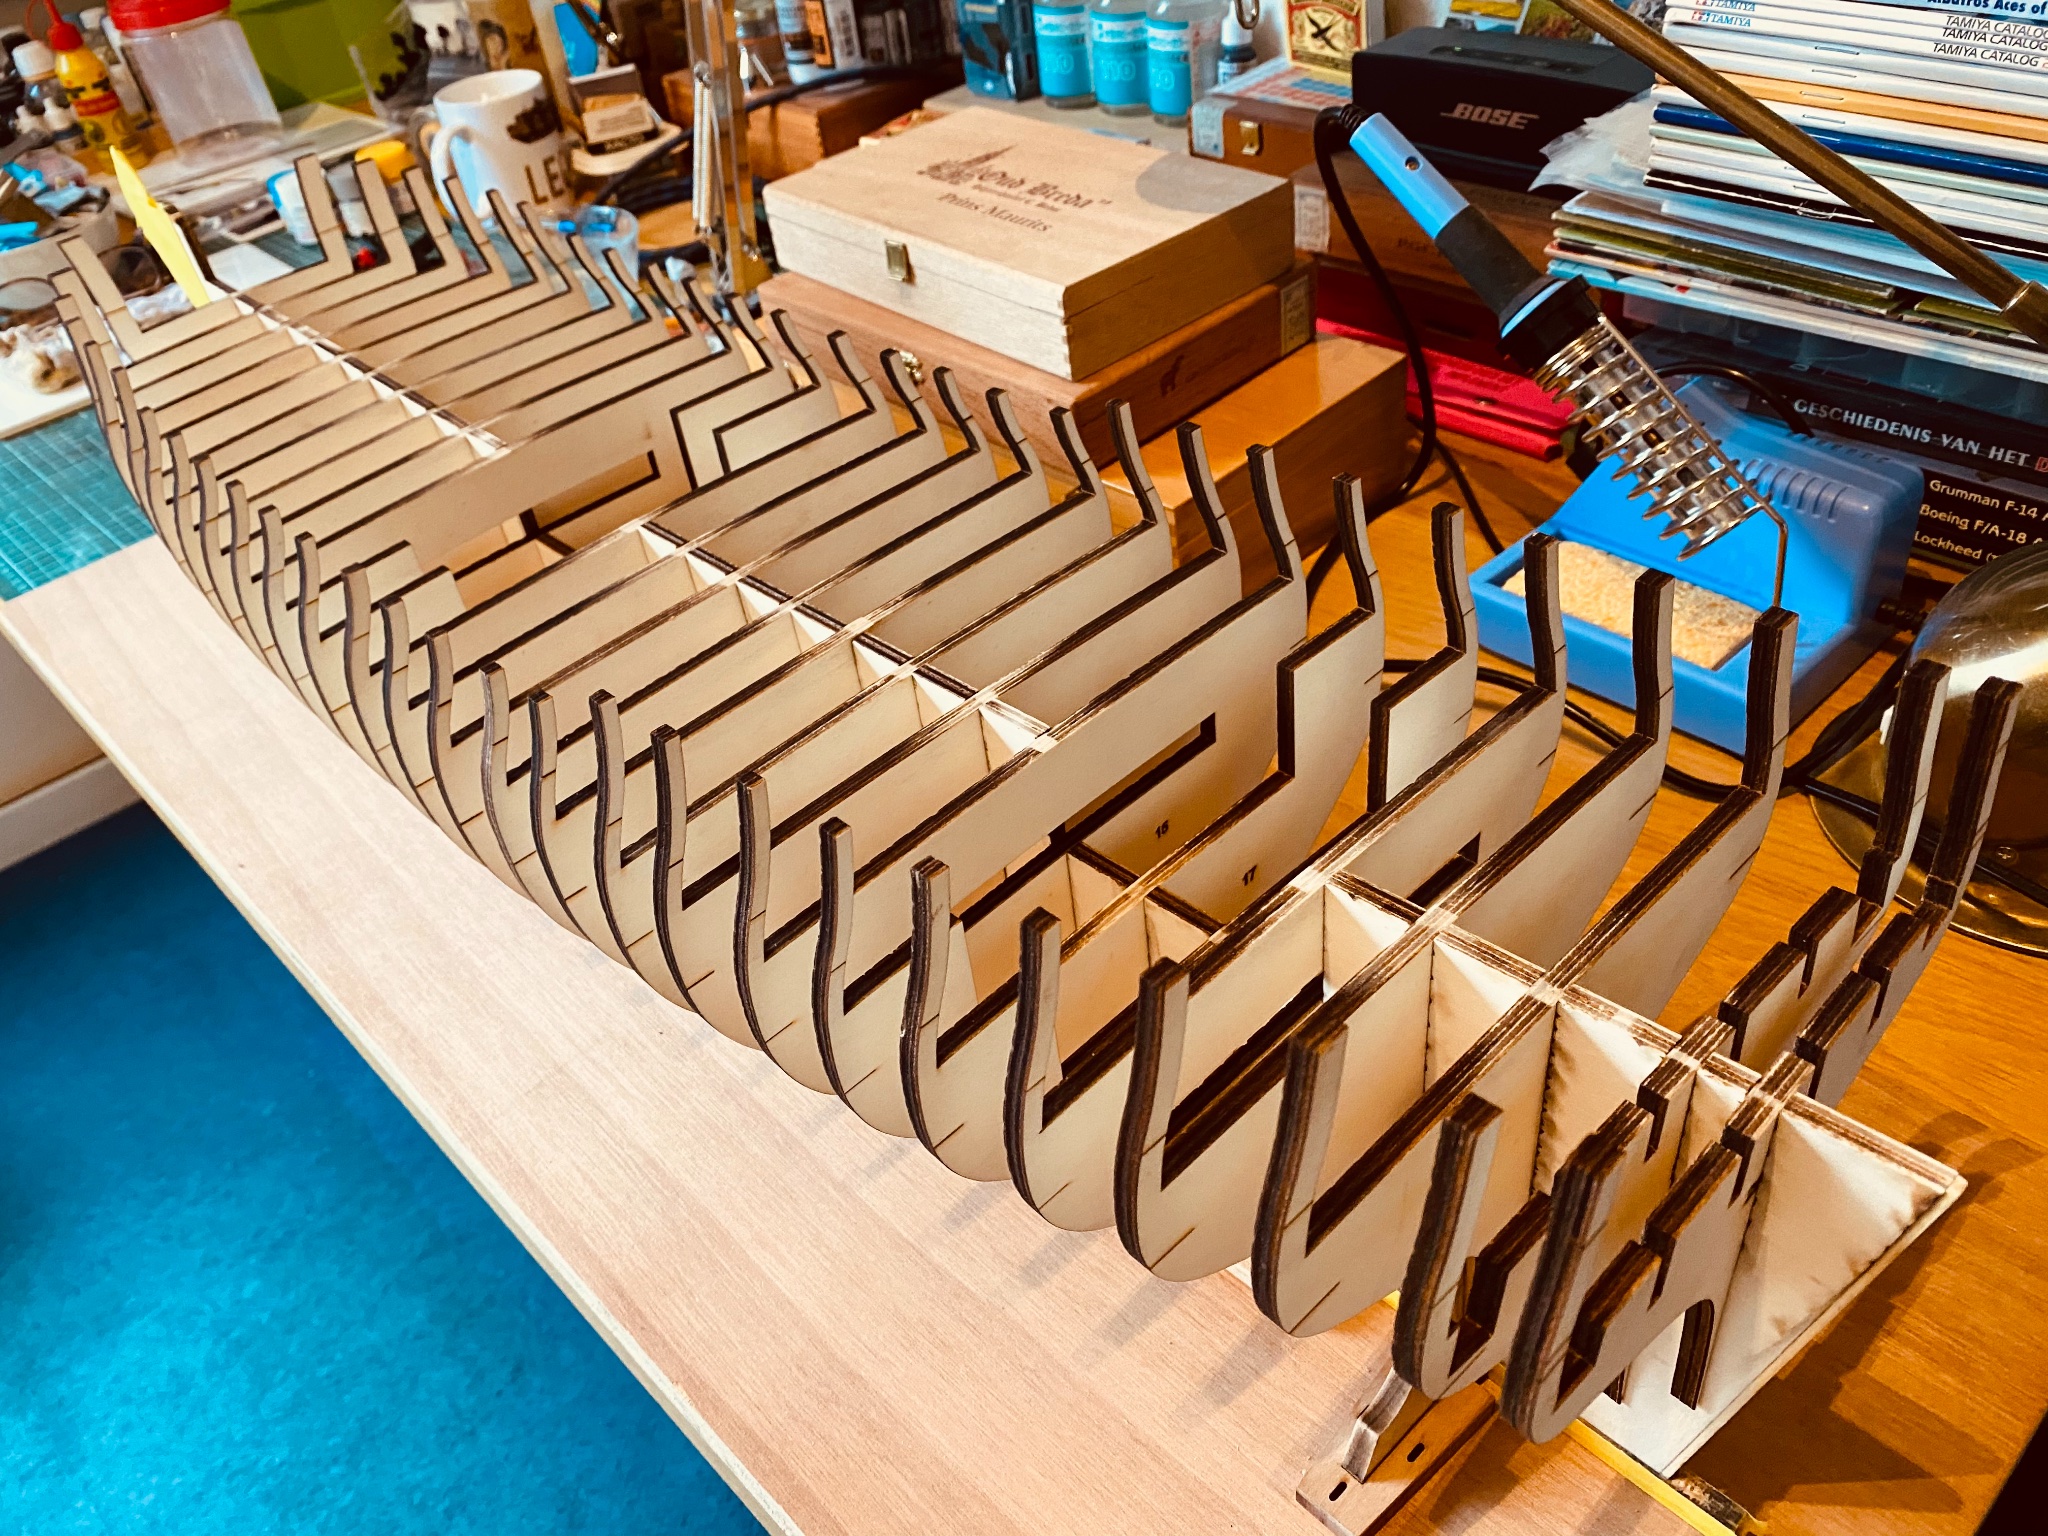
Everyone thanks for the likes and encouragements Edwards, JJ and Greg! What you see is only the test fit of the bulkheads: I'm now glueing the frames on at a rate of two per day, one in the morning, one in the evening to not only giving the glue sufficient drying but also hardening time. Always with the squares in place, wood will always work and do its own thing and I just want to be sure to have done everything I can to minimize this. Yes, I'm very pleased with the laser cut bulkheads, the sanding job ahead seems enormous, so no need having to do that on baltic birch or other very hard woods. Maybe they'll make the model more durable, but a model like this doesn't have to last a thousand years I guess :-).
-
This model is becoming so beautiful!
- 1,784 replies
-
- 1
-
-
- winchelsea
- Syren Ship Model Company
- (and 1 more)
-
Wow, that's a very nice set! I'll have to check it out myself!
-
Rigging? I thought Winnie was going to be a contemporary model when finished? Or do we have the possibility to take it further with masts and rigging if one wishes to do so? But not under guidance of Chuck and other experienced builders I guess?
-
Better repair and do it better righr now, than looking it from your lazy armchair in a few years from now and thinking you should have corrected it back then... She's looking very nice to my eyes Greg!
-
Your cabin will be very nice I think and is very inspiring!
-
Thanks Matt, good to know that in advance!
-
I fear that part of the built already, but you've come out very nicely Bob.
-
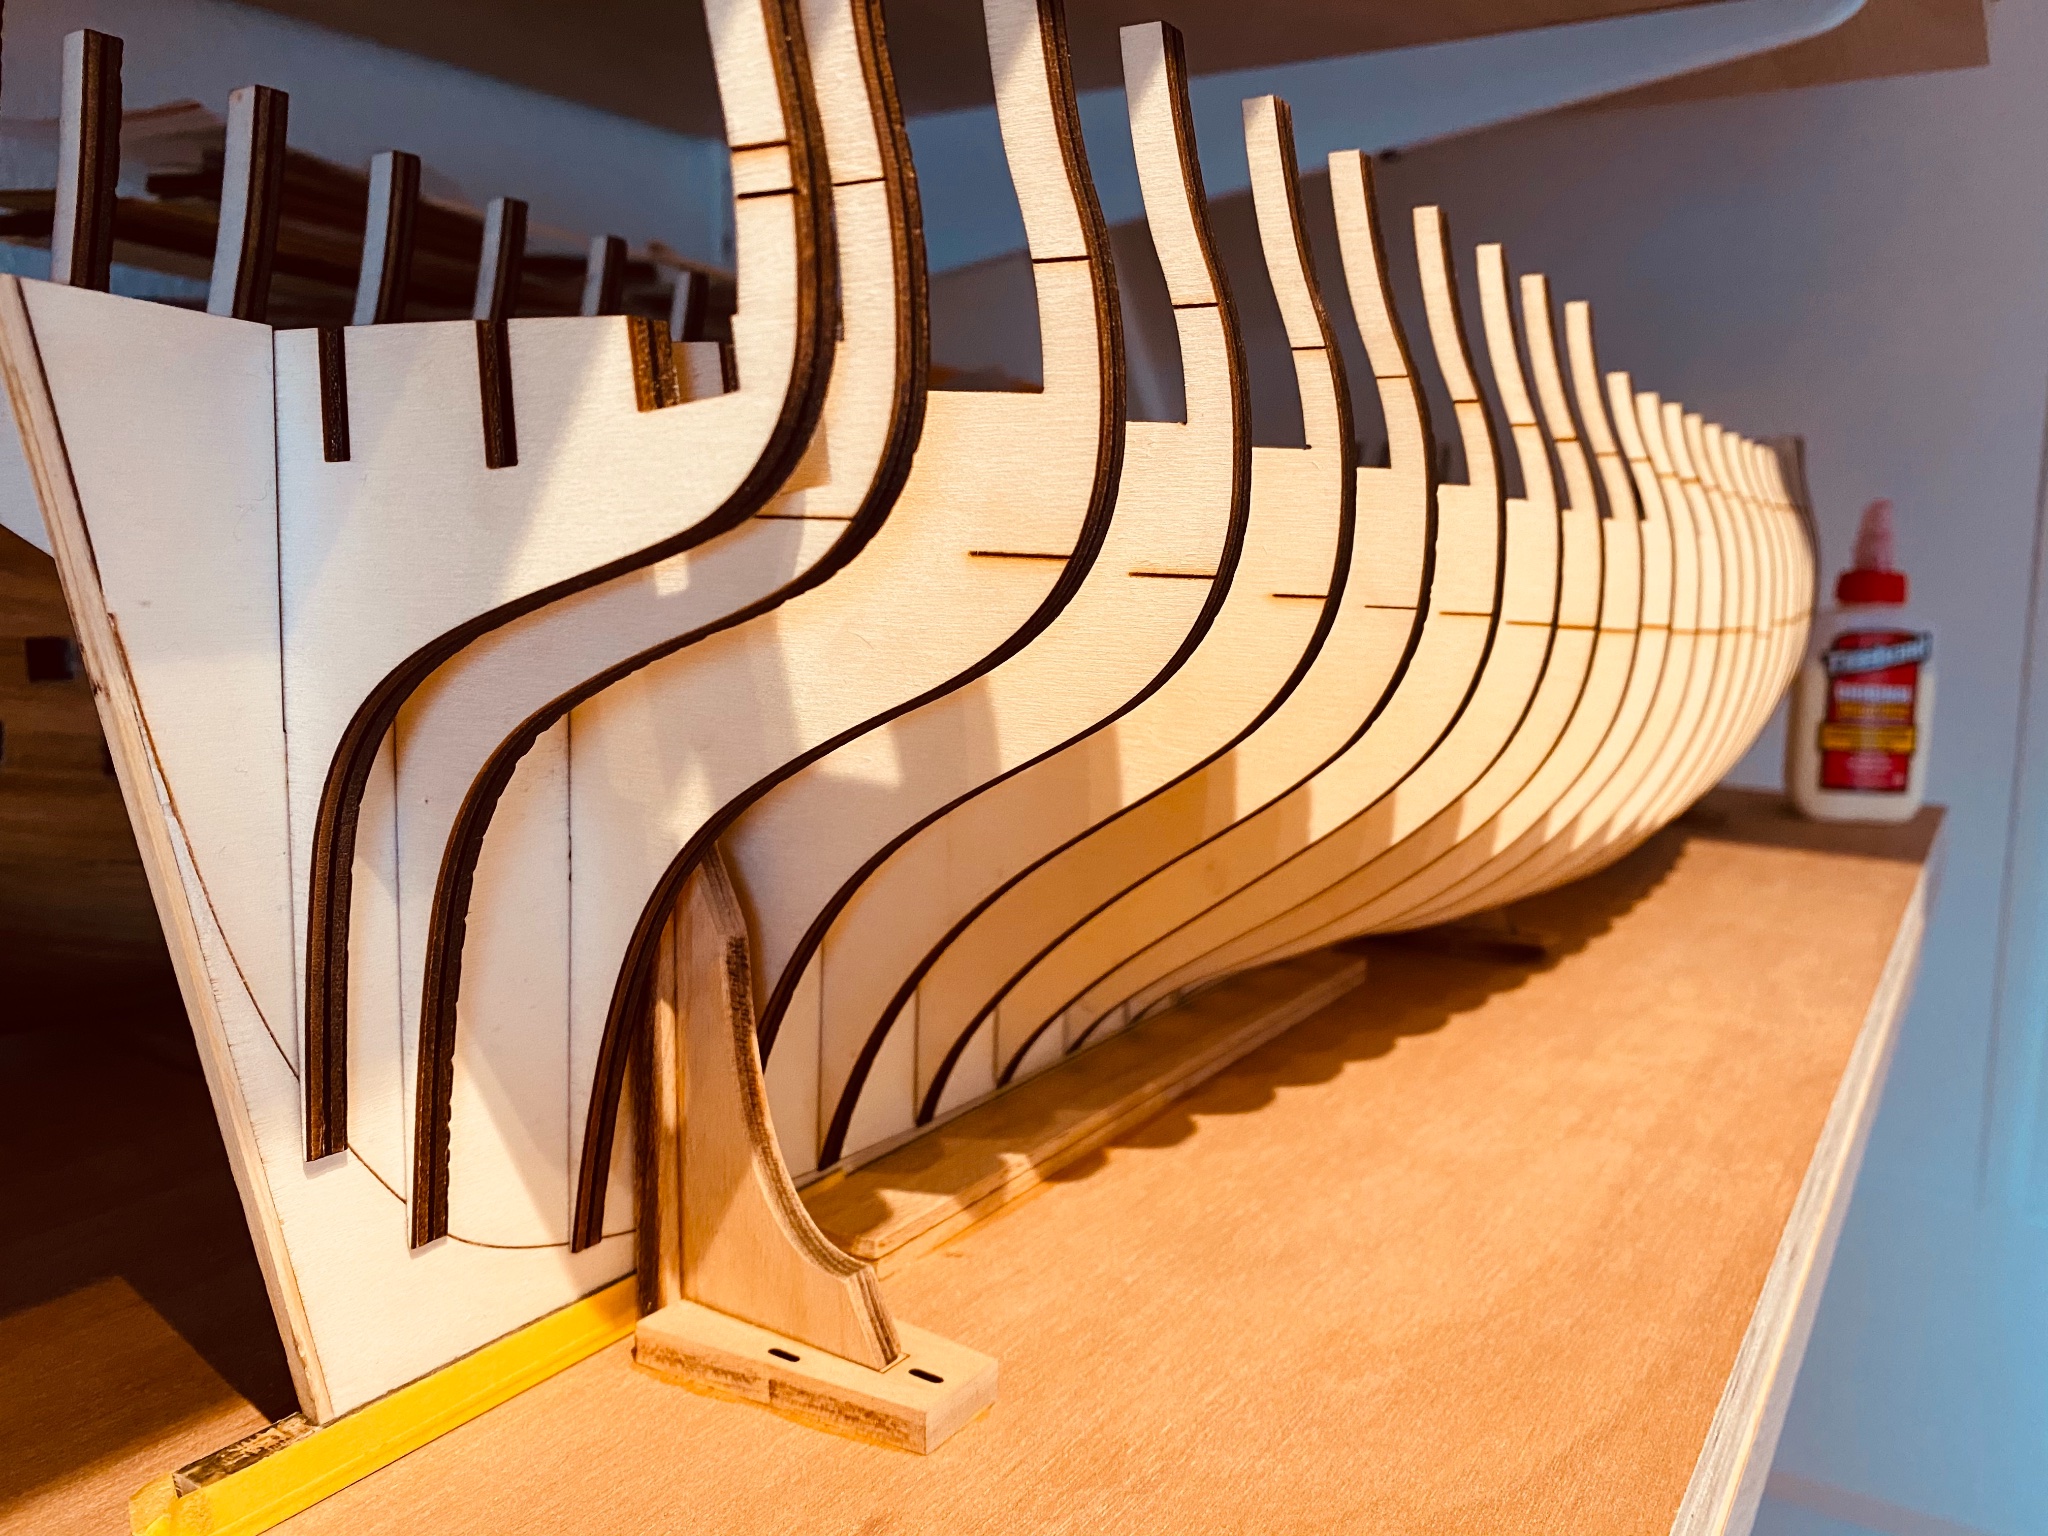
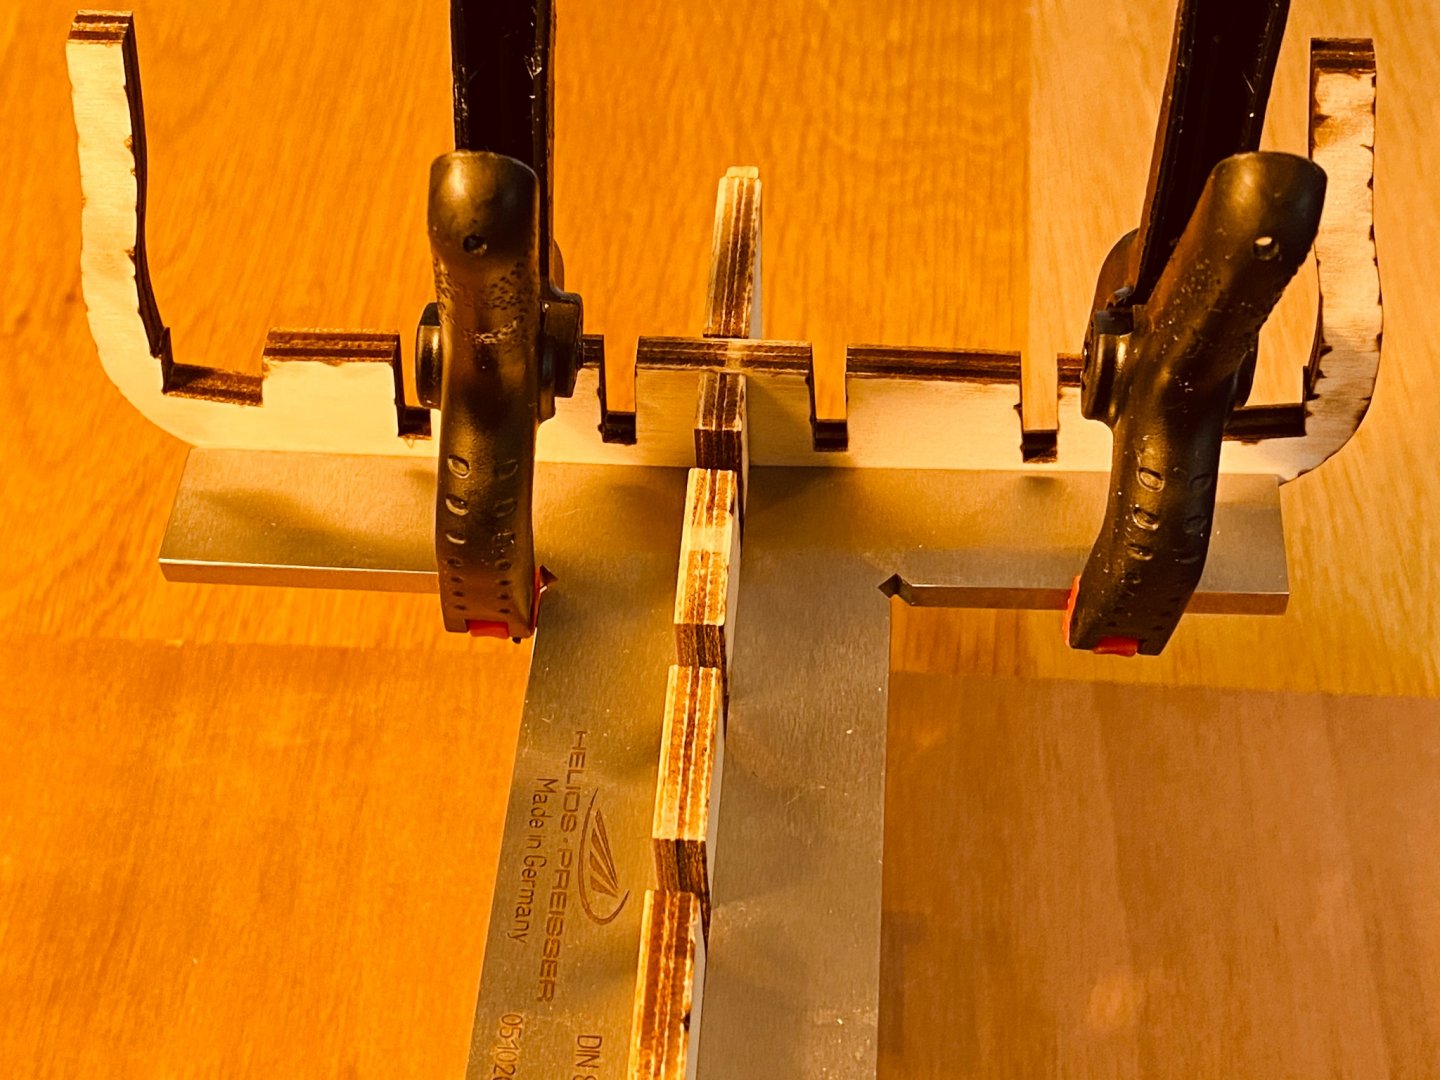
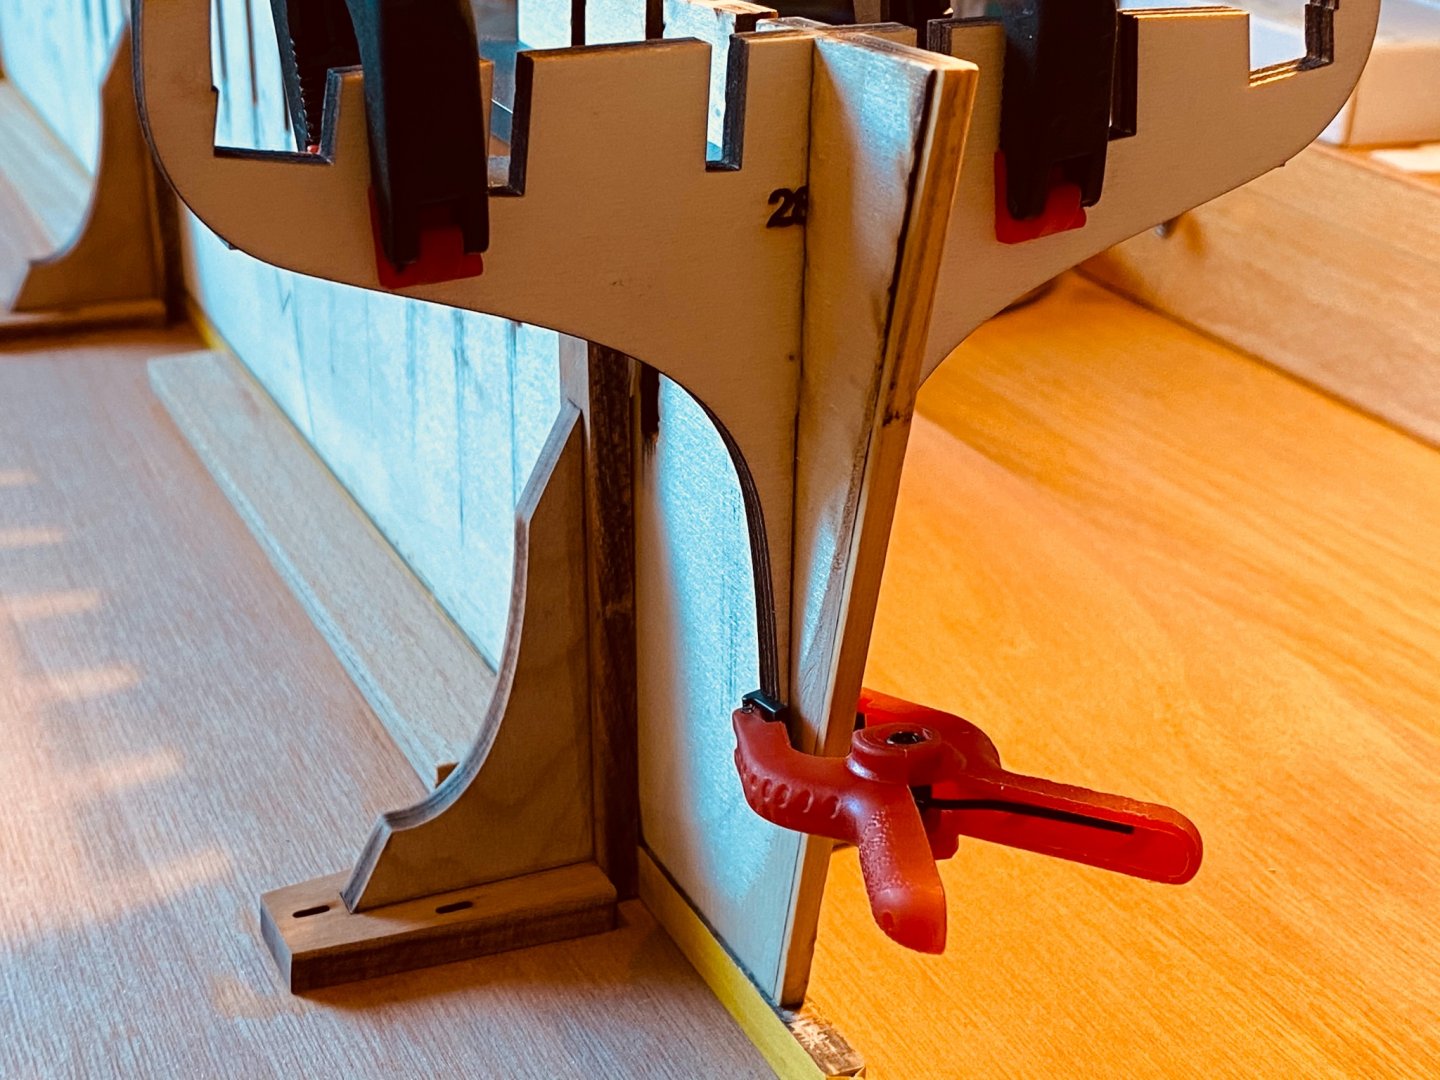
This Easter weekend, inbetween visits, church and dinners and after the house was nice and quiet again, I was able to finish the keel and the working plank. Unlike the instructions, I first glued and then screwed the t-squares in a straight line in the middle of the plank against the keel (and checked and double checked with my straight steel ruler) on the working board for extra rigidity. Also, I test fitted and minimally adjusted a few frames and glued on my first frame nr. 28 under 90 degrees. Happy Easter to you all!


-
Thanks Mike! Your beautiful Winnie is still one of my inspirations.
-
Thanks and yes, in this video every plank is a project of its own as well. But let’s first finish Chuck’s chapter 1...😂👍🏻
-
Hi Tom, If possible I would mill it out completely whatever it is. It’s better to get rid off it so the rest of the wood cannot be inflicted, whatever it may be, I have no idea what if might be precisely, but it looks like simple wood rot to me...Sorry for your extra setback and delay, but I’m sure you have the qualities and expertise to solve this as well.
-
That's indeed a sharp, crisp cut and clean and beautifully built rudder! Compliments to both Chuck and you Mike.
- 607 replies
-
- 2
-
-
- winchelsea
- Syren Ship Model Company
- (and 1 more)
-
Looking great Matt! Very nicely done!
-
Good plan tenderfoot, I'll do the same, hopefully we can do things 'first time right' this way :-).