
FrankWouts
-
Posts
541 -
Joined
-
Last visited
Content Type
Profiles
Forums
Gallery
Events
Everything posted by FrankWouts
-
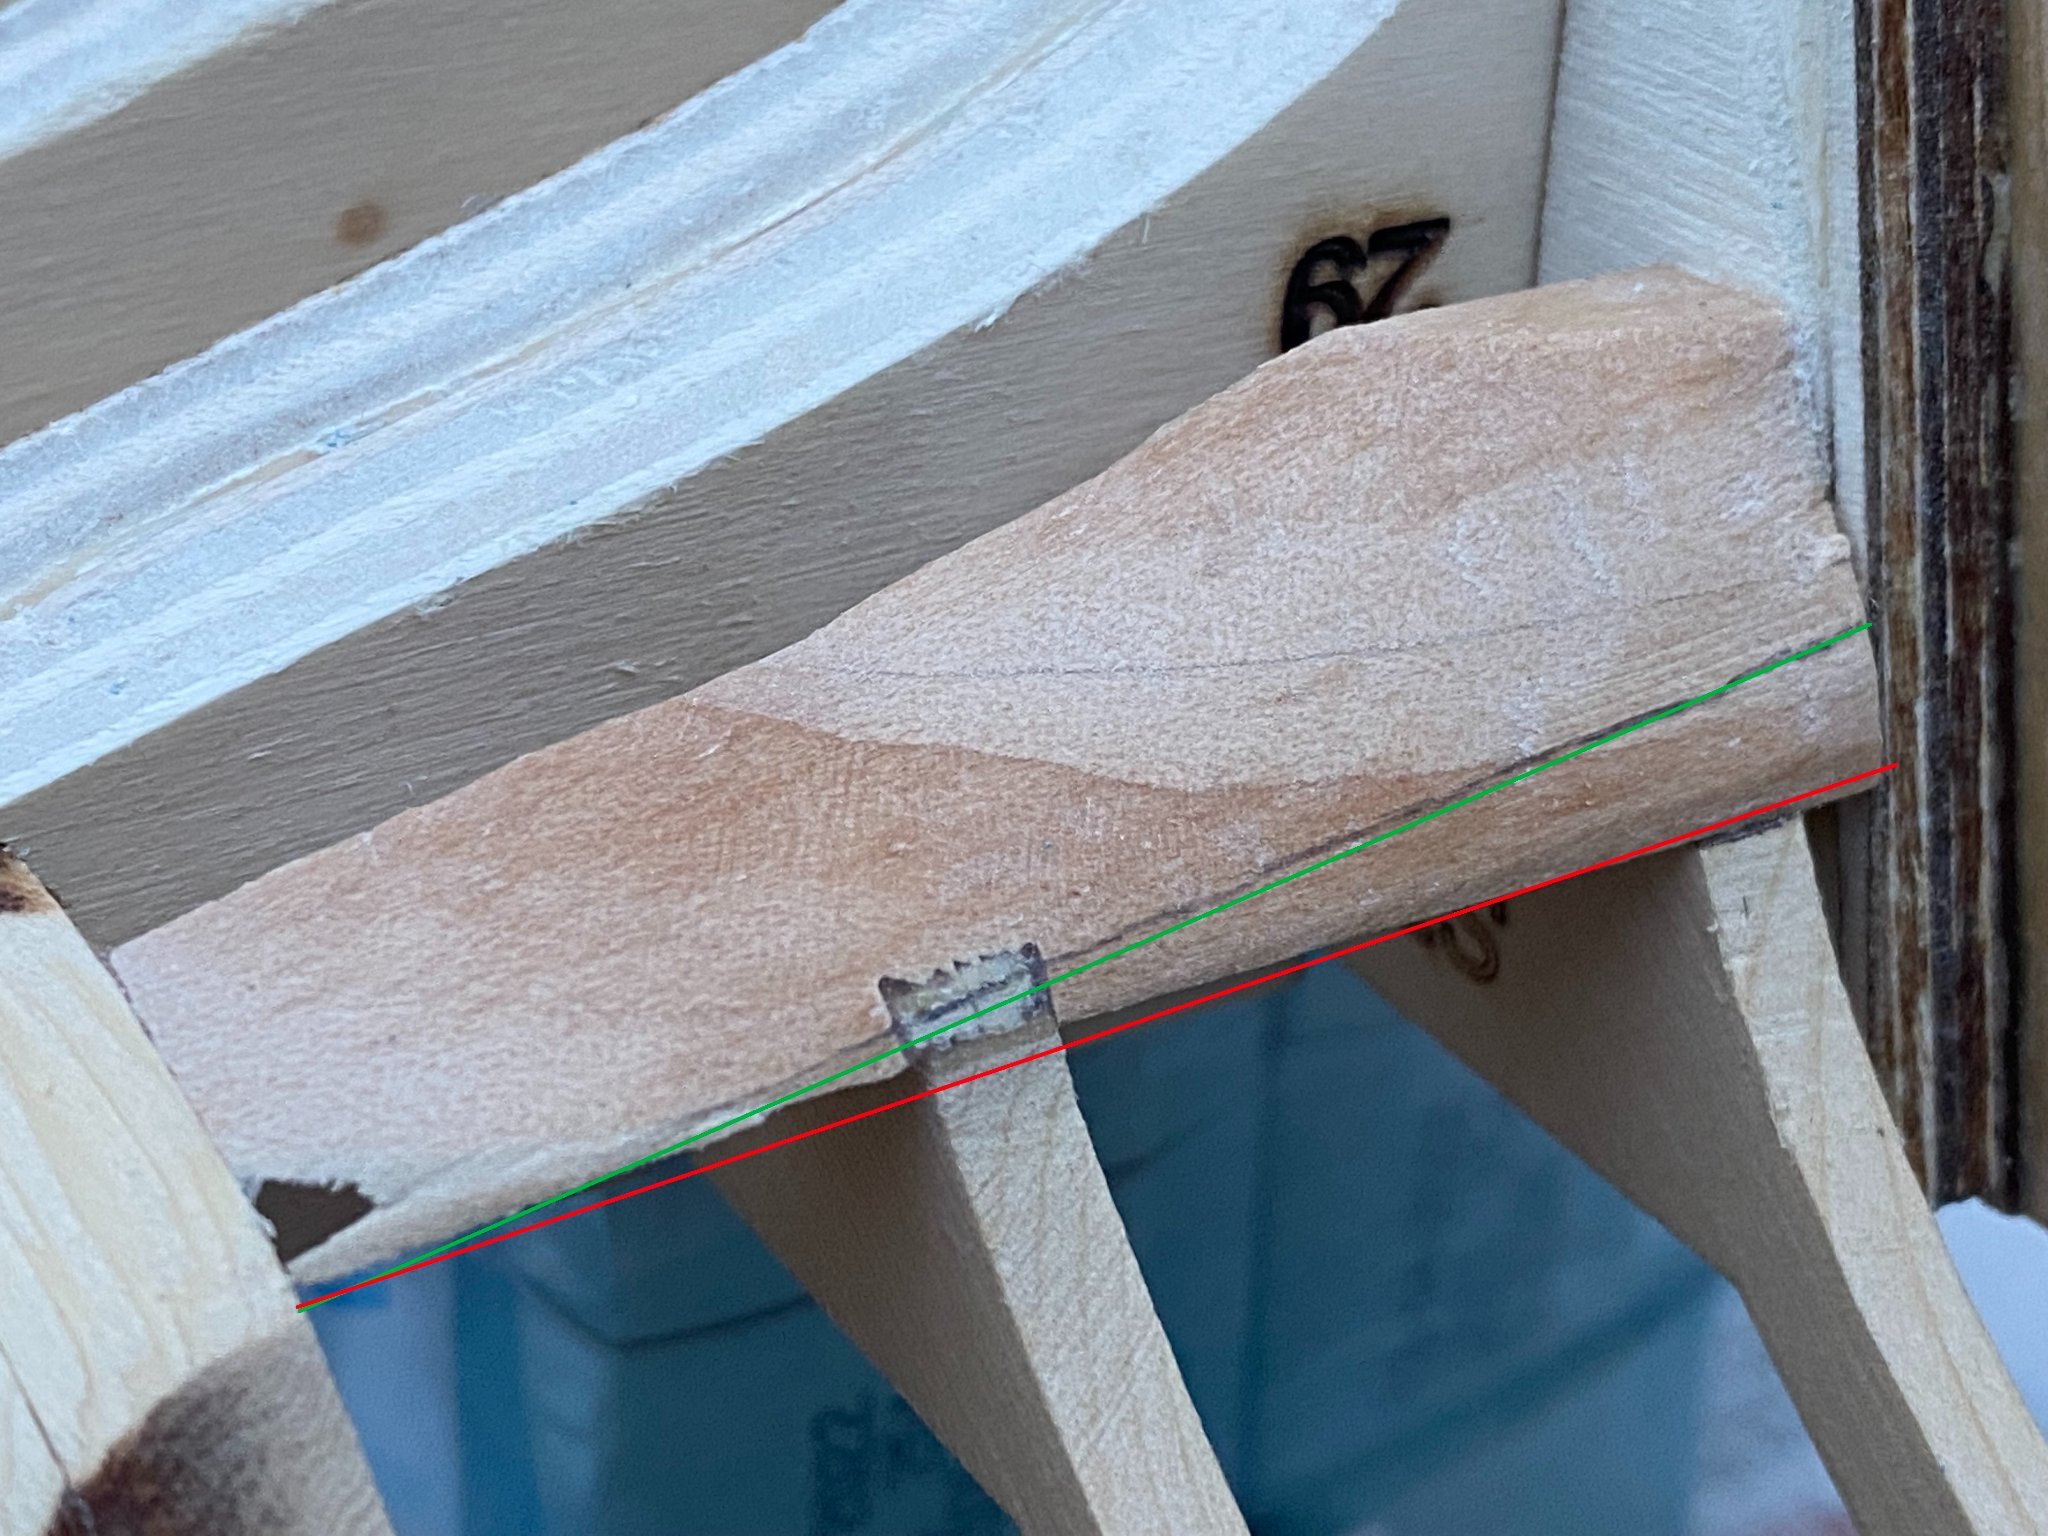
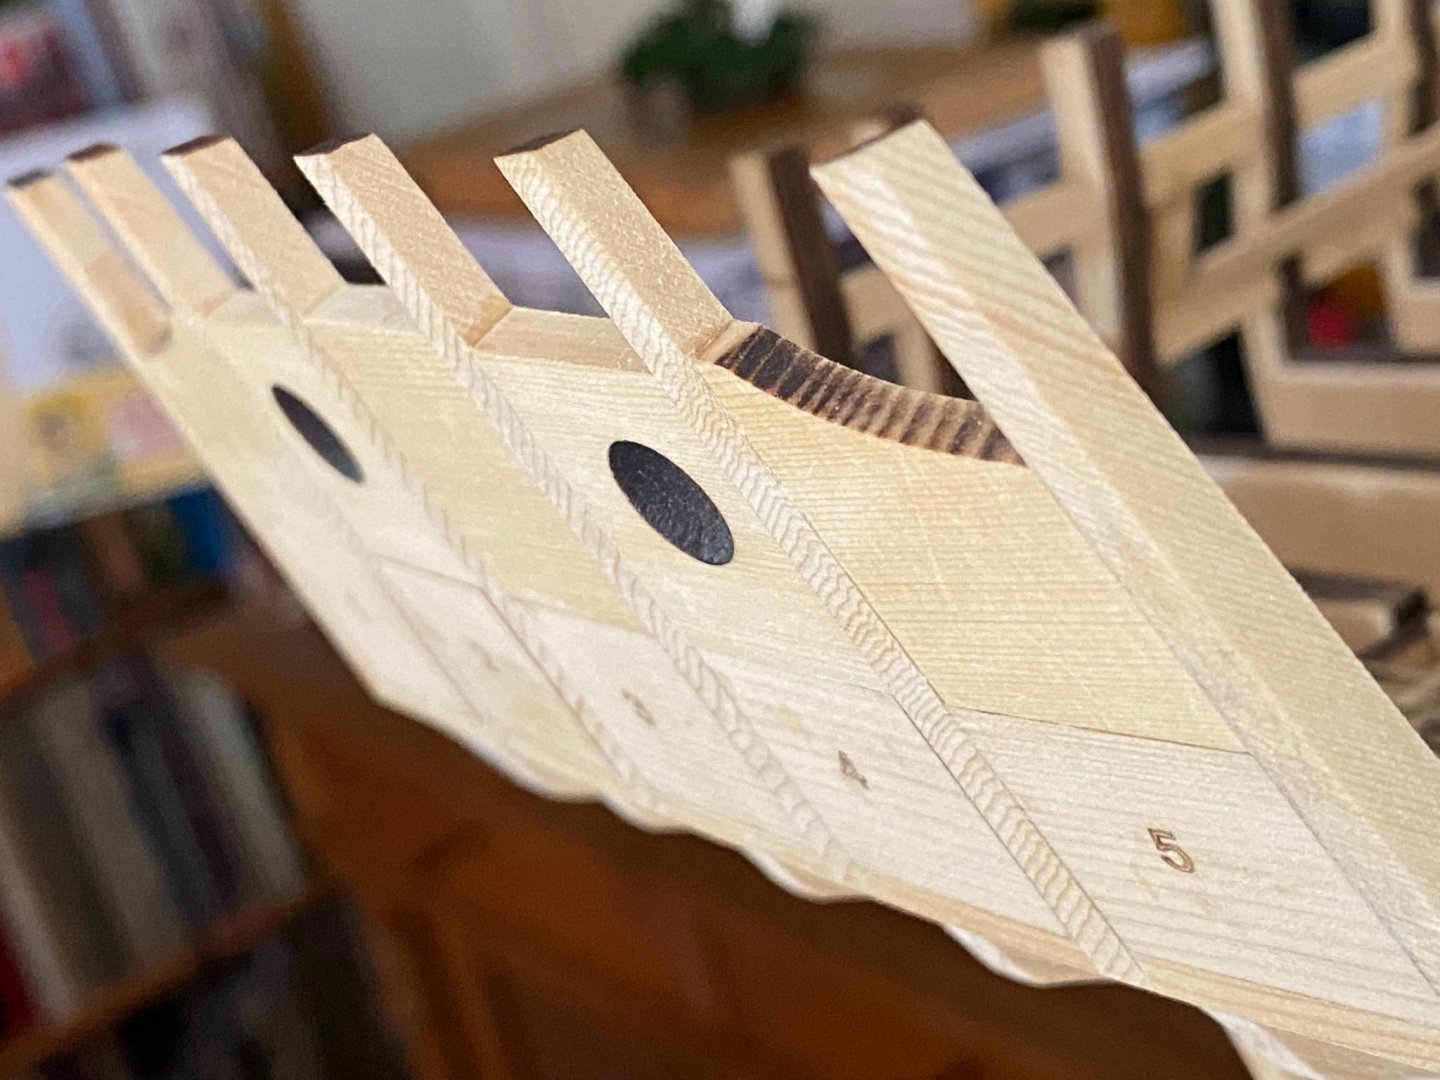
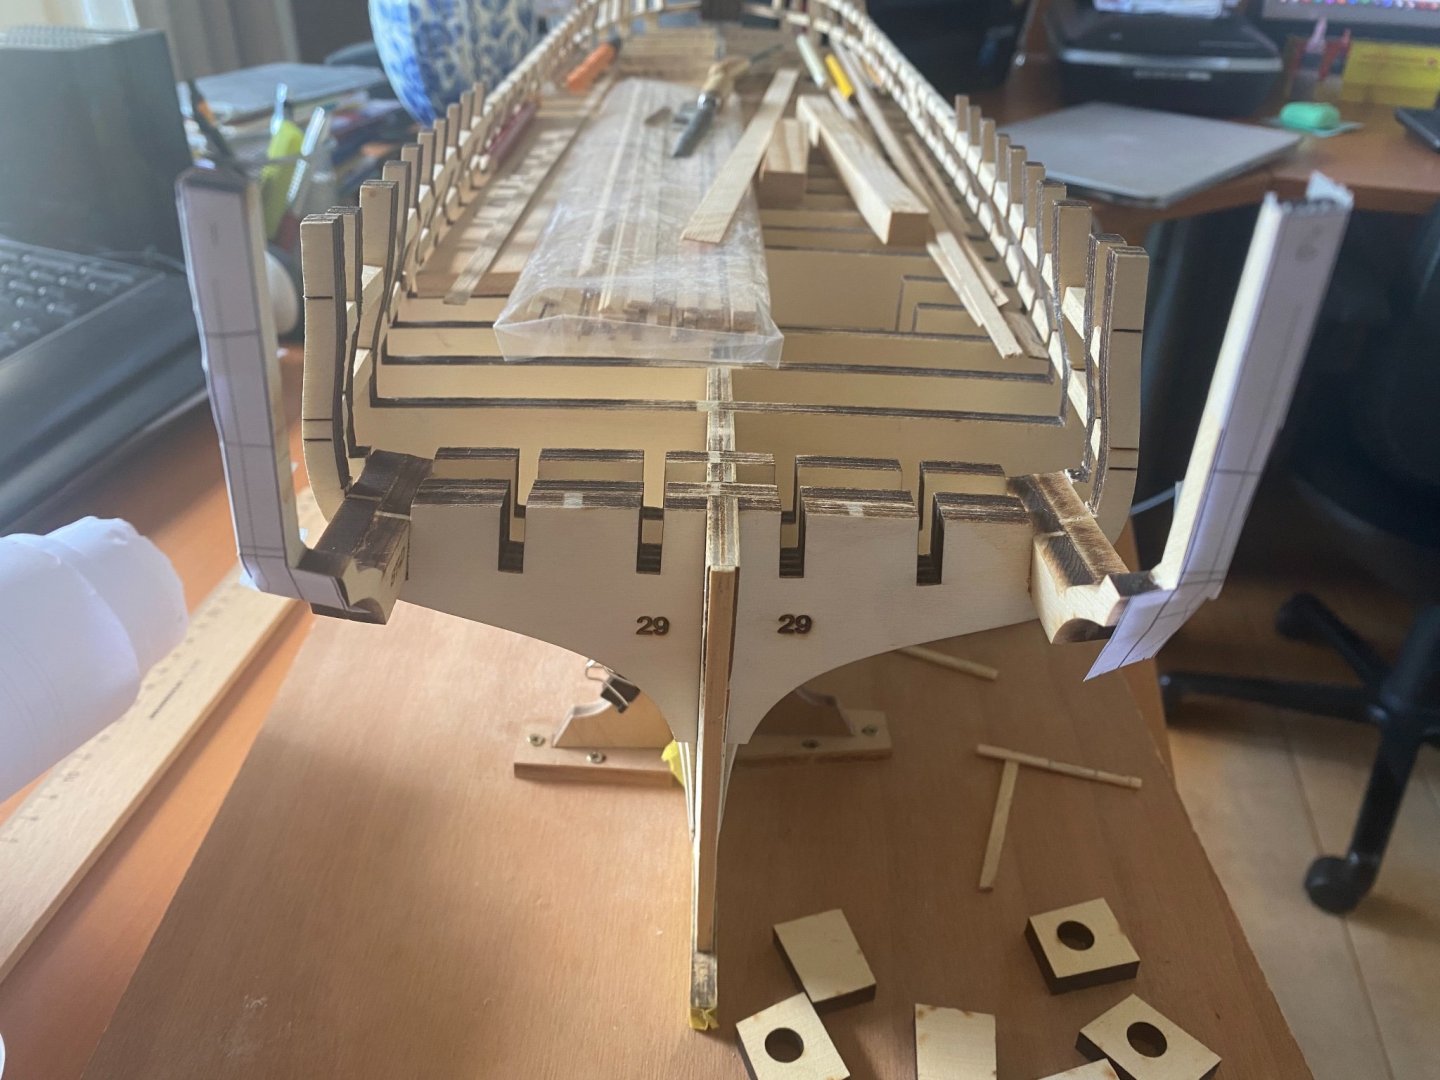
 Hi all, I was finally able to do some work on my Winnie this weekend after being very, very busy working long hours past weeks. I think I made a beginner's error or perhaps not, thus I have a question before I proceed and maybe not being able to correct. The bottom lowest corners of the stern frames don't line up in an exact straight line from the outer stern frame to the inside line between the filler piece and vertical rabbit strip. The area between the red and green line on the picture comes out almost 1,5 mm from the back end of the filler piece and is as far out as the rabbit strip itself... This is obviously not correct, I think it should be in a straight line, or not? Should I chisel the area between the red ( probably wrong line) and green line (probably right line?) away into a straight line? In that case, I also must sand the rounded holow curves of the stern frames some more...
-
Looking very good Bob! What, chapter nine? I'm only about to finish chapter one soon... I should work more and harder! 🙂
-
What a beautiful and different approach! It takes guts to dare doing it like that! Following with great interest Jorge! Keep your updates coming! Frank.
-
That doesn’t only look great, it’s unbelievable: I thought there was going to be a little metal kit as well… I’ll put away my soldering iron for now then. Frank.
-
Yes exactly the width till the dotted line on the plans.
-
Hi Chuck, Mike, okay, I’ll check and do both!
-
Thanks Chuck!
-
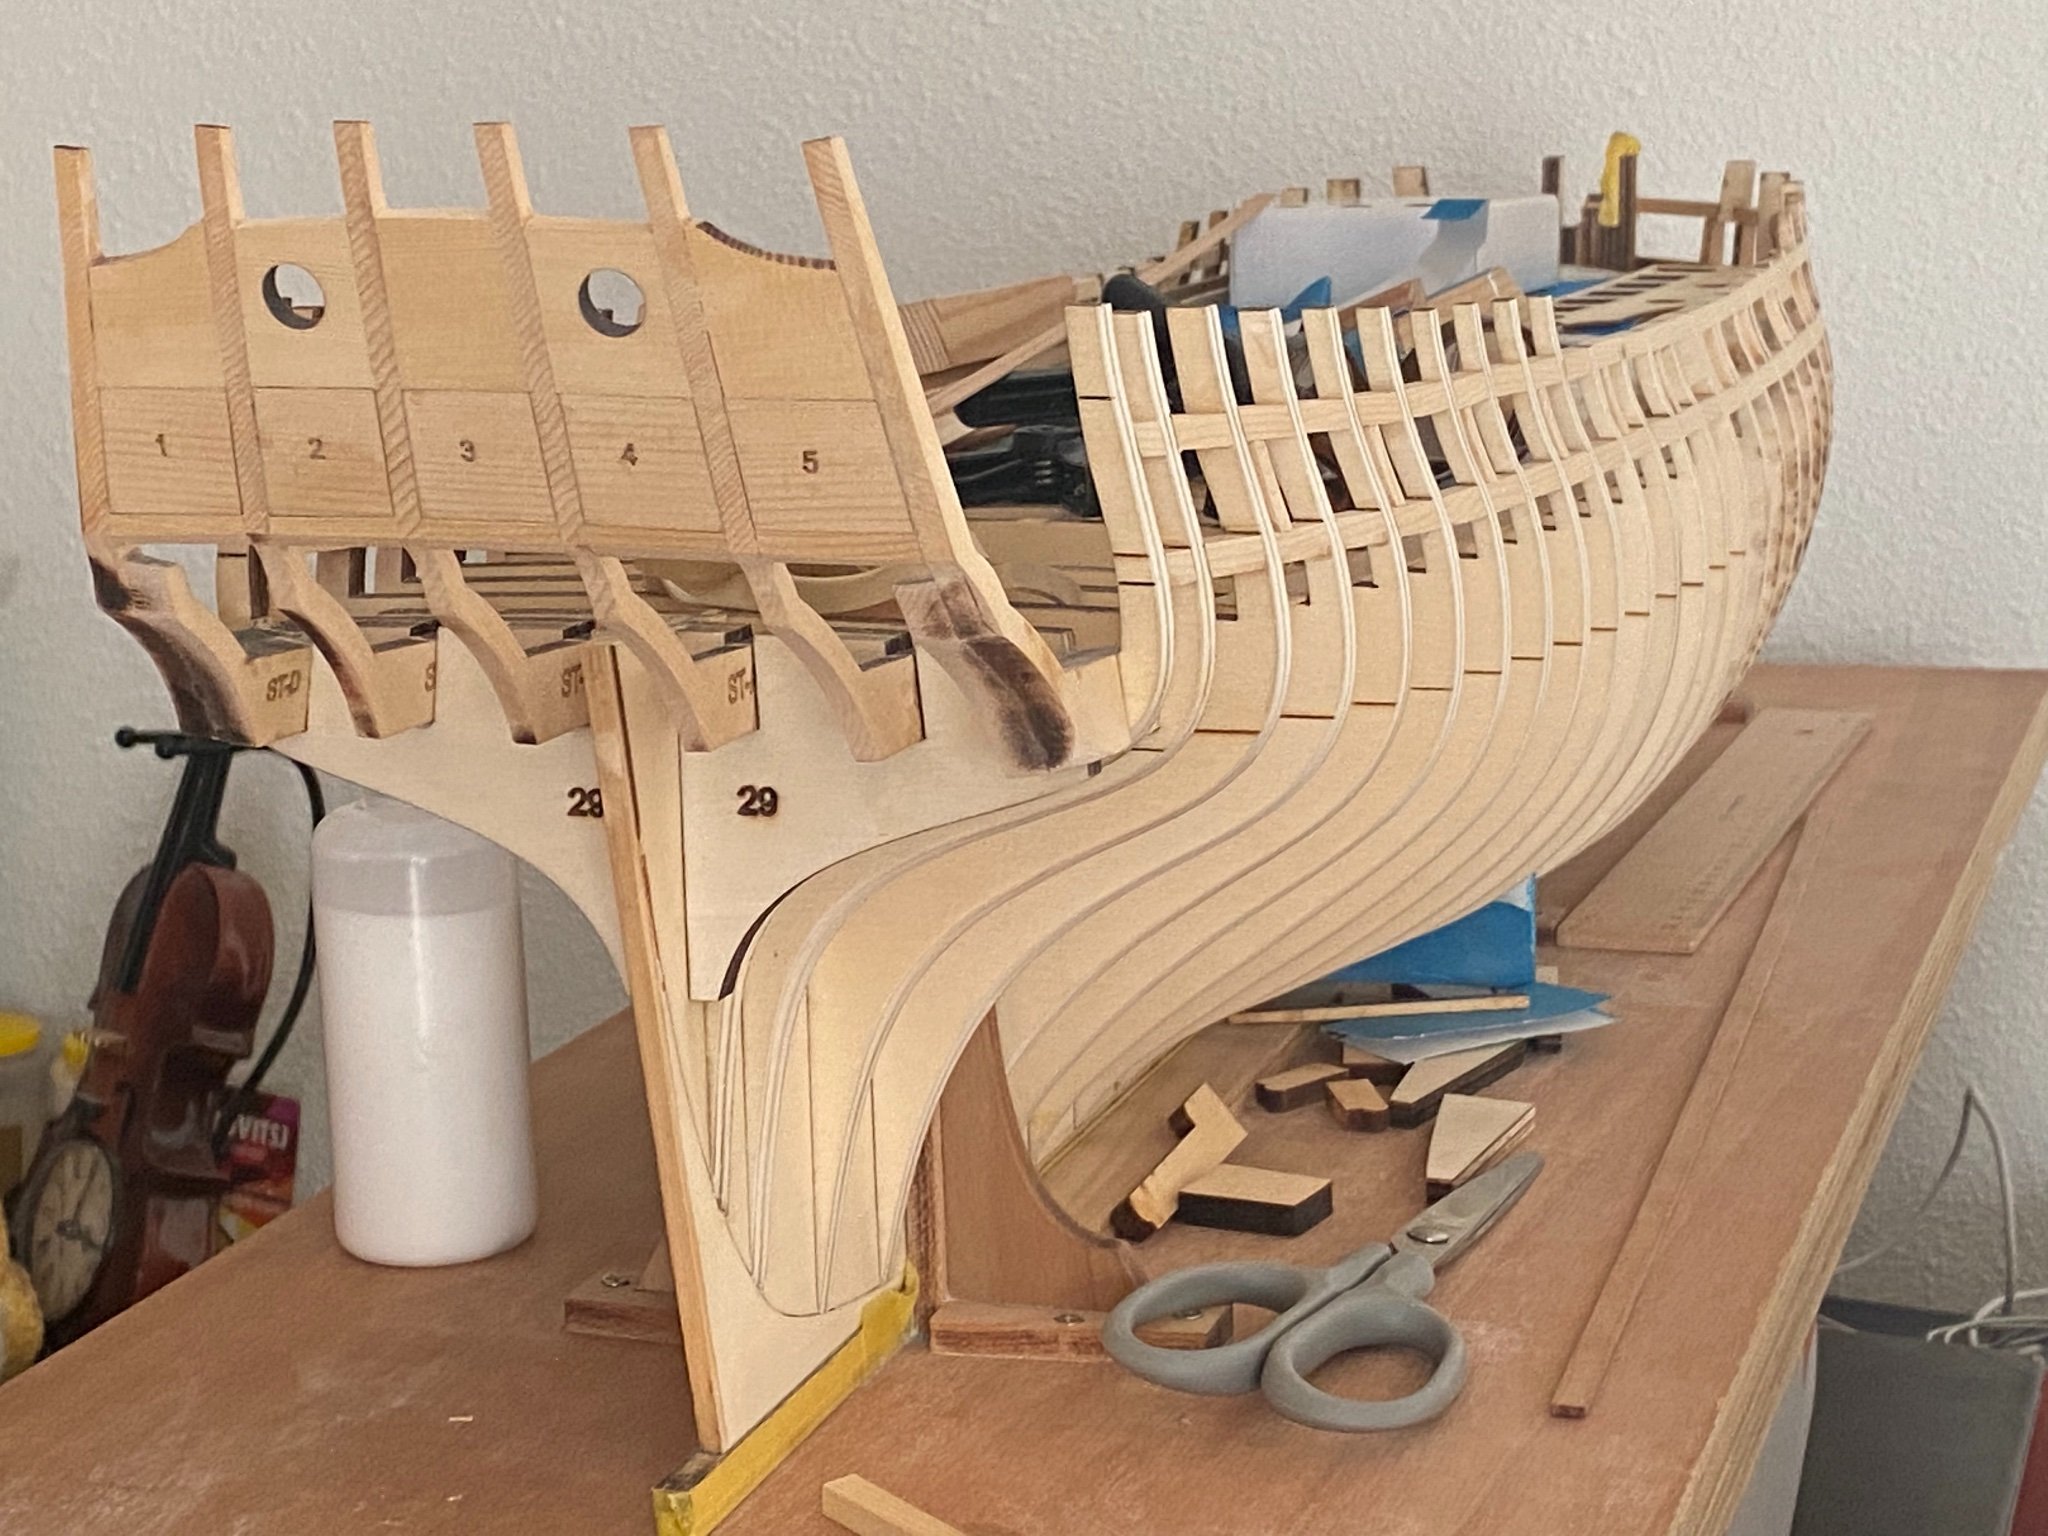
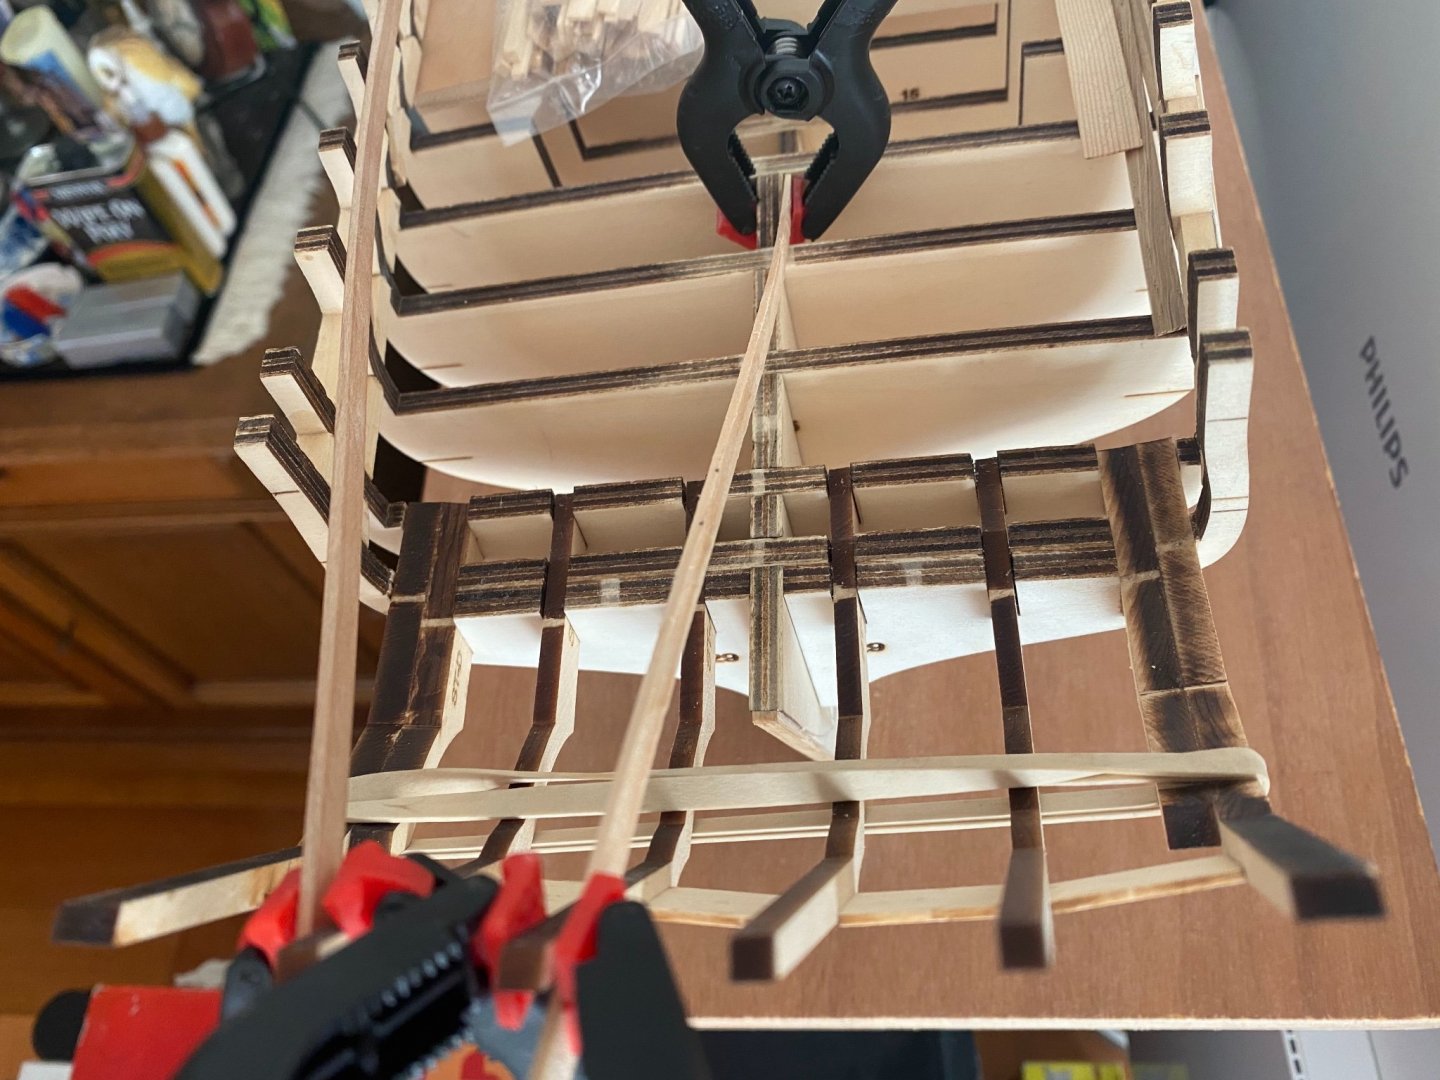
A small update before I’m off for a week Holidays at Lago di Garda, Italy. I finished fairing the transom. I managed to get the rounding in it on Chuck’s advice and everything came out equally heightwise starboard and portside. Except for fairing the underside, which seems a bit more complex and which I have to look at again. Hopefully this afternoon I can still finish the q-gallery framing.


-
In fact that was all that was needed exactly, I just got rid of the laser char on the tops and bottoms and then it fitted exactly on both the plans and my transom. Yes, I’m afraid to make mistakes in this early stage that cannot or are very difficult to correct later Thanks, Frank.
-
I first formed every filler as an exact copy from the ‘picture’ in the paper plans, and still on the real transom the ‘drawing’ is different than on paper: mysterious! 😀
-
Gluing the transom fillers now, hopefully everything allright…
-
Hahaha Matt, brilliant! You make me laugh early in he morning!
-
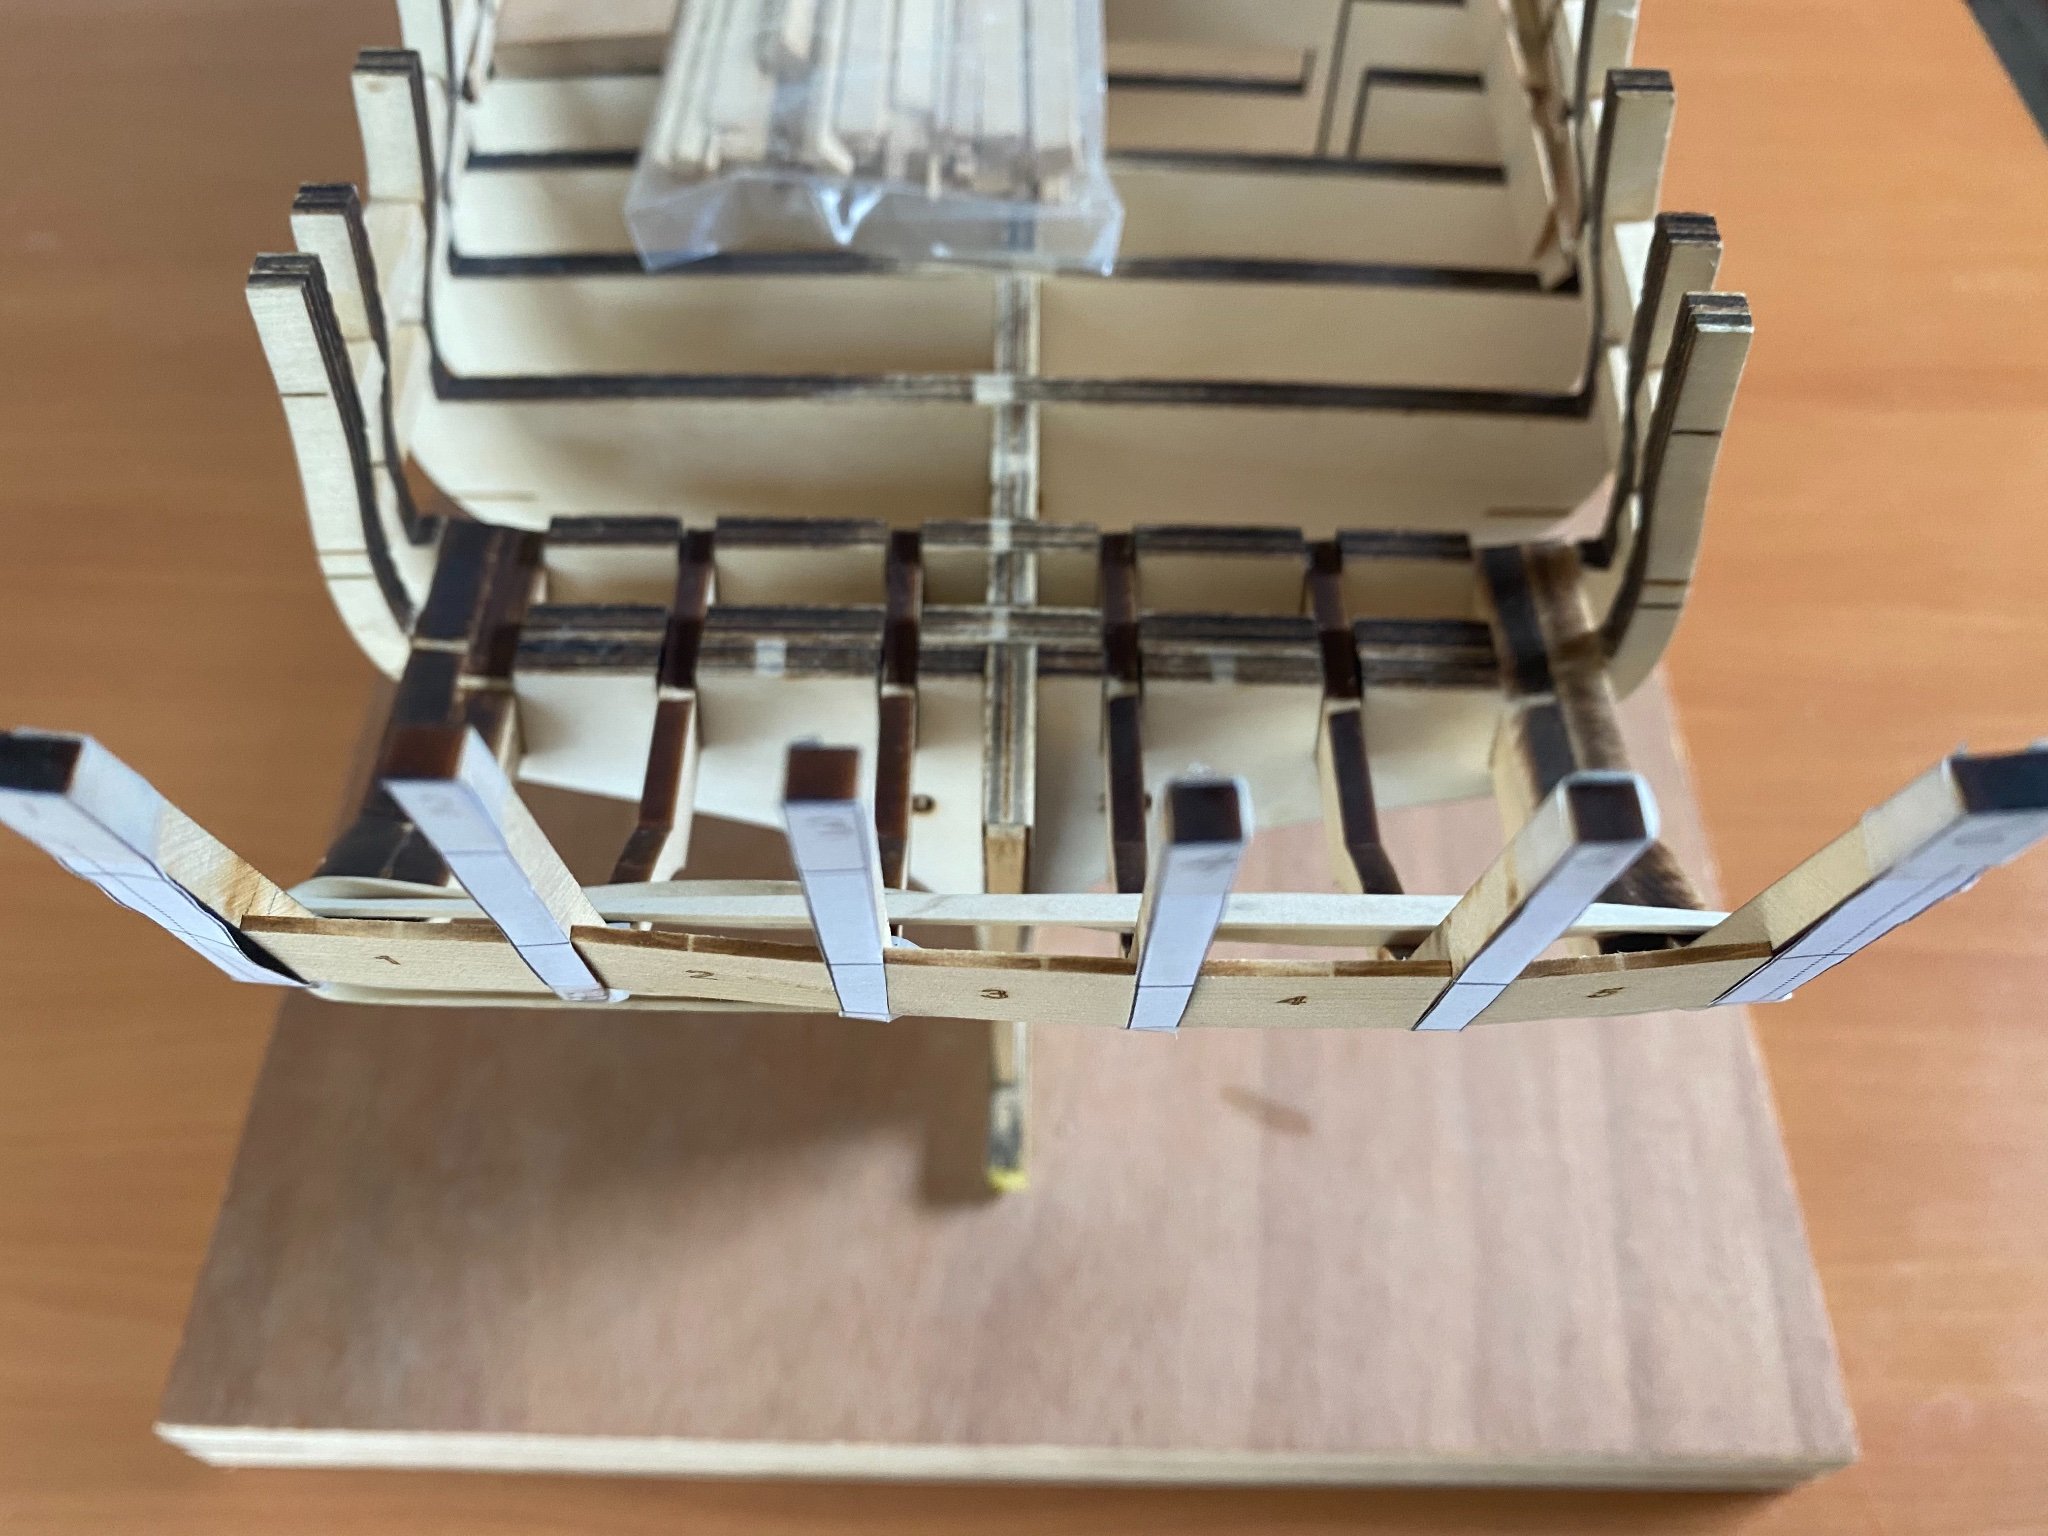
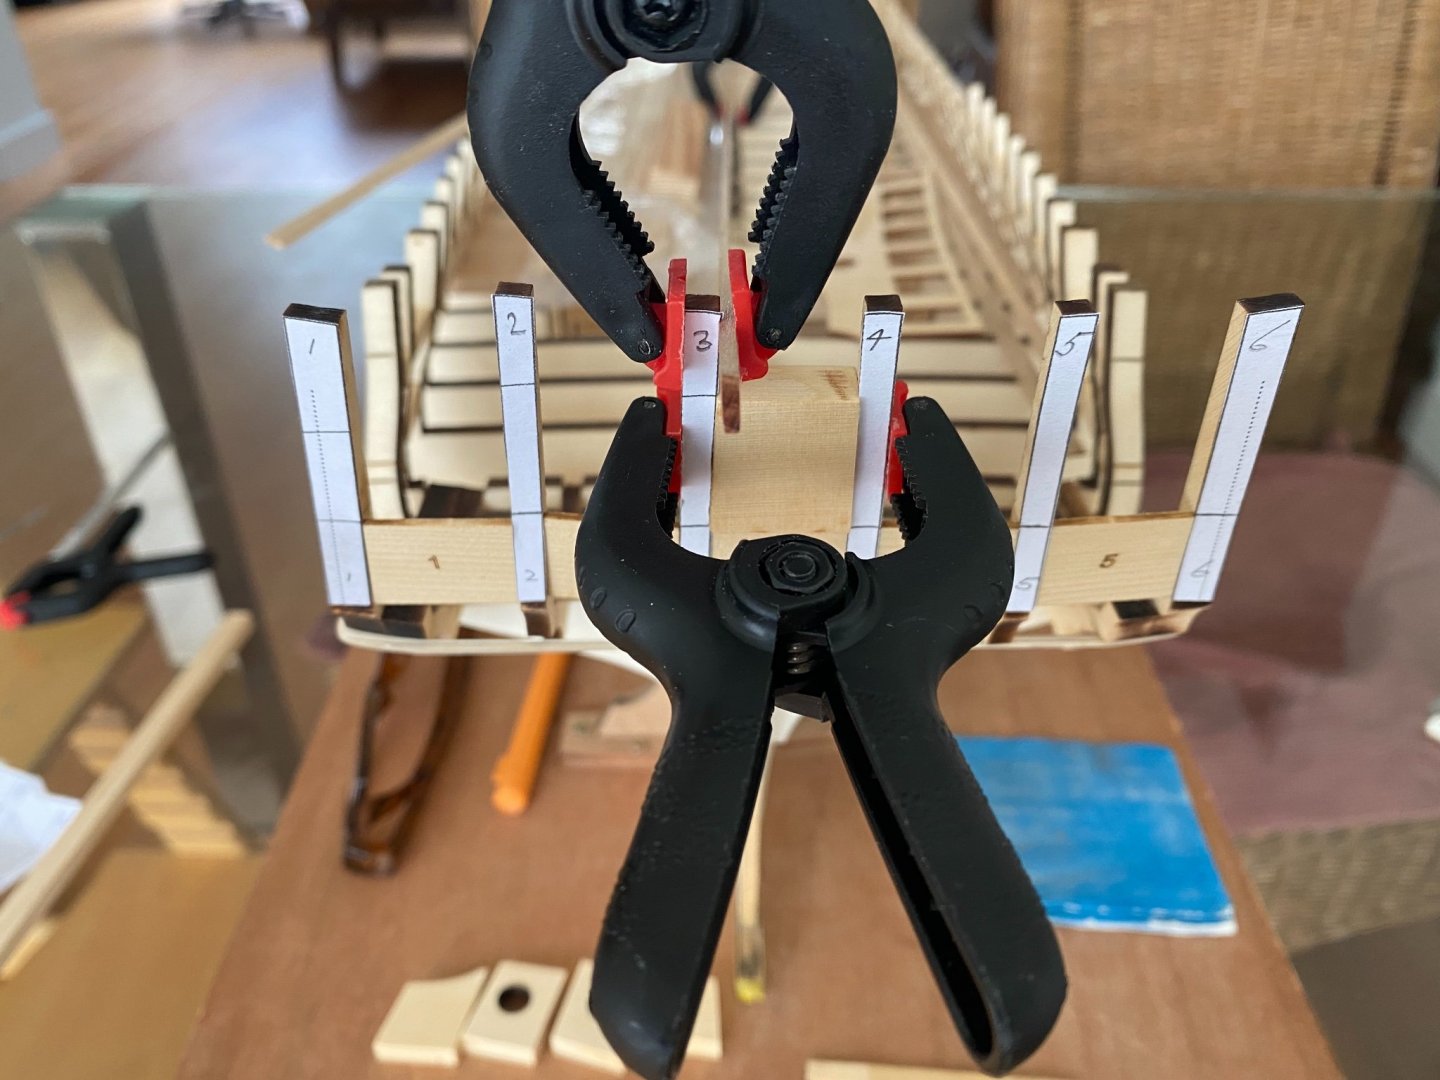
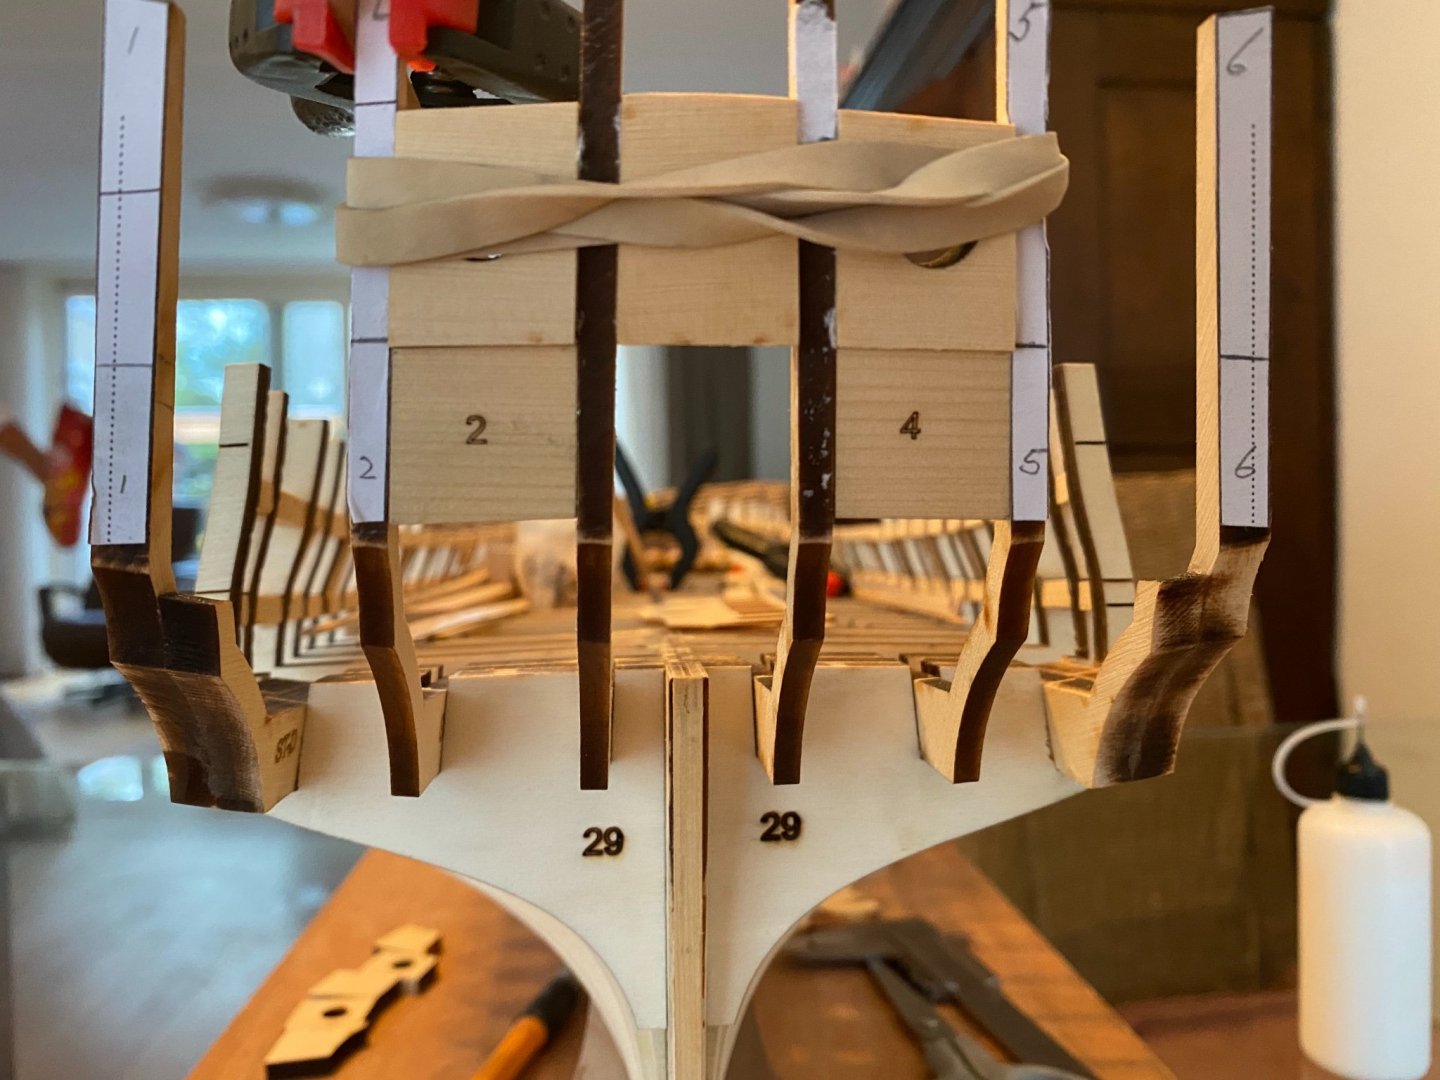
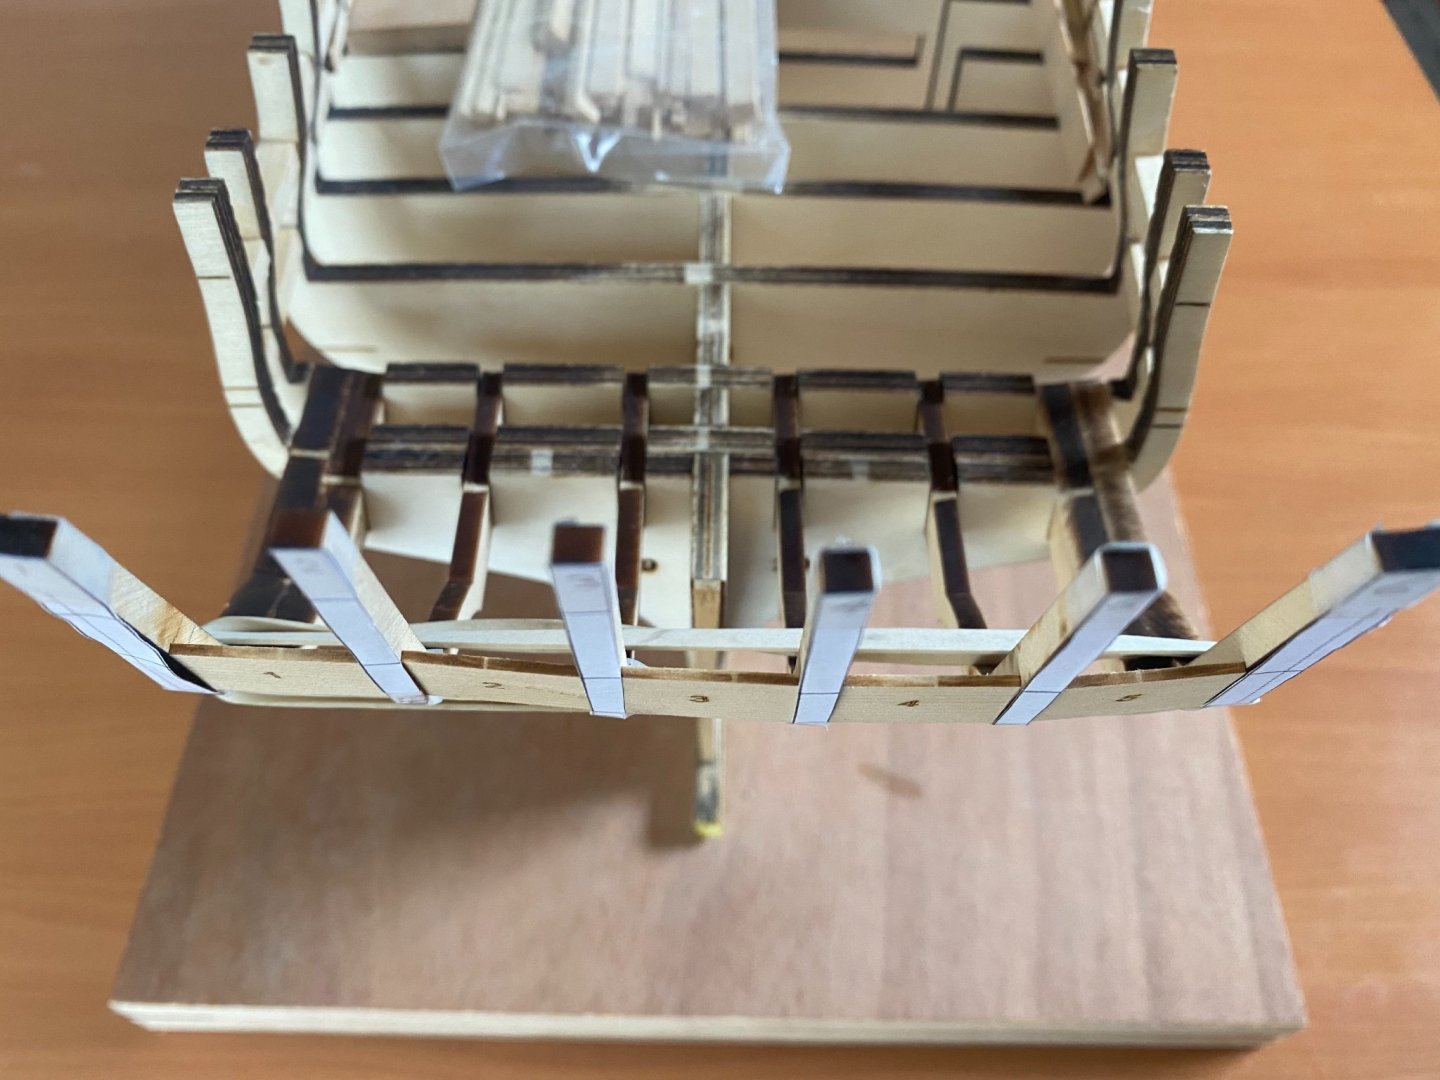
Not exactly how I want it to be outlined yet, but is this roughly what you tried to tell me Chuck? My plan is to start with the center pair, line them up and glue the filler piece inbetween (while again checking the lining up of the (two) stern frames and window sills/fillers). Ofcourse try to twist the stern framing as little as possible, so the second strip on the second photo for the third stern frame should better be clamped on the left side of the false keel, for less twist. Then the next pair and glue the next two filler pieces, then the outermost pair. I see in other builds people use the stern outline piece also to line up, check the window outlining.


-
Beautiful progress Bob, keep that beautiness and ofcourse the updates going, always a real pleasure to watch and read! By the way, I took a sneak peak on google maps at Delray Beach and those are some nice surroundings! Any Dutch immigrants there?
-
Thanks, yes that’s a clear explanation Chuck. I’ll try this tomorrow by first daylight as it’s already dark now here (21:37h local CET).
-
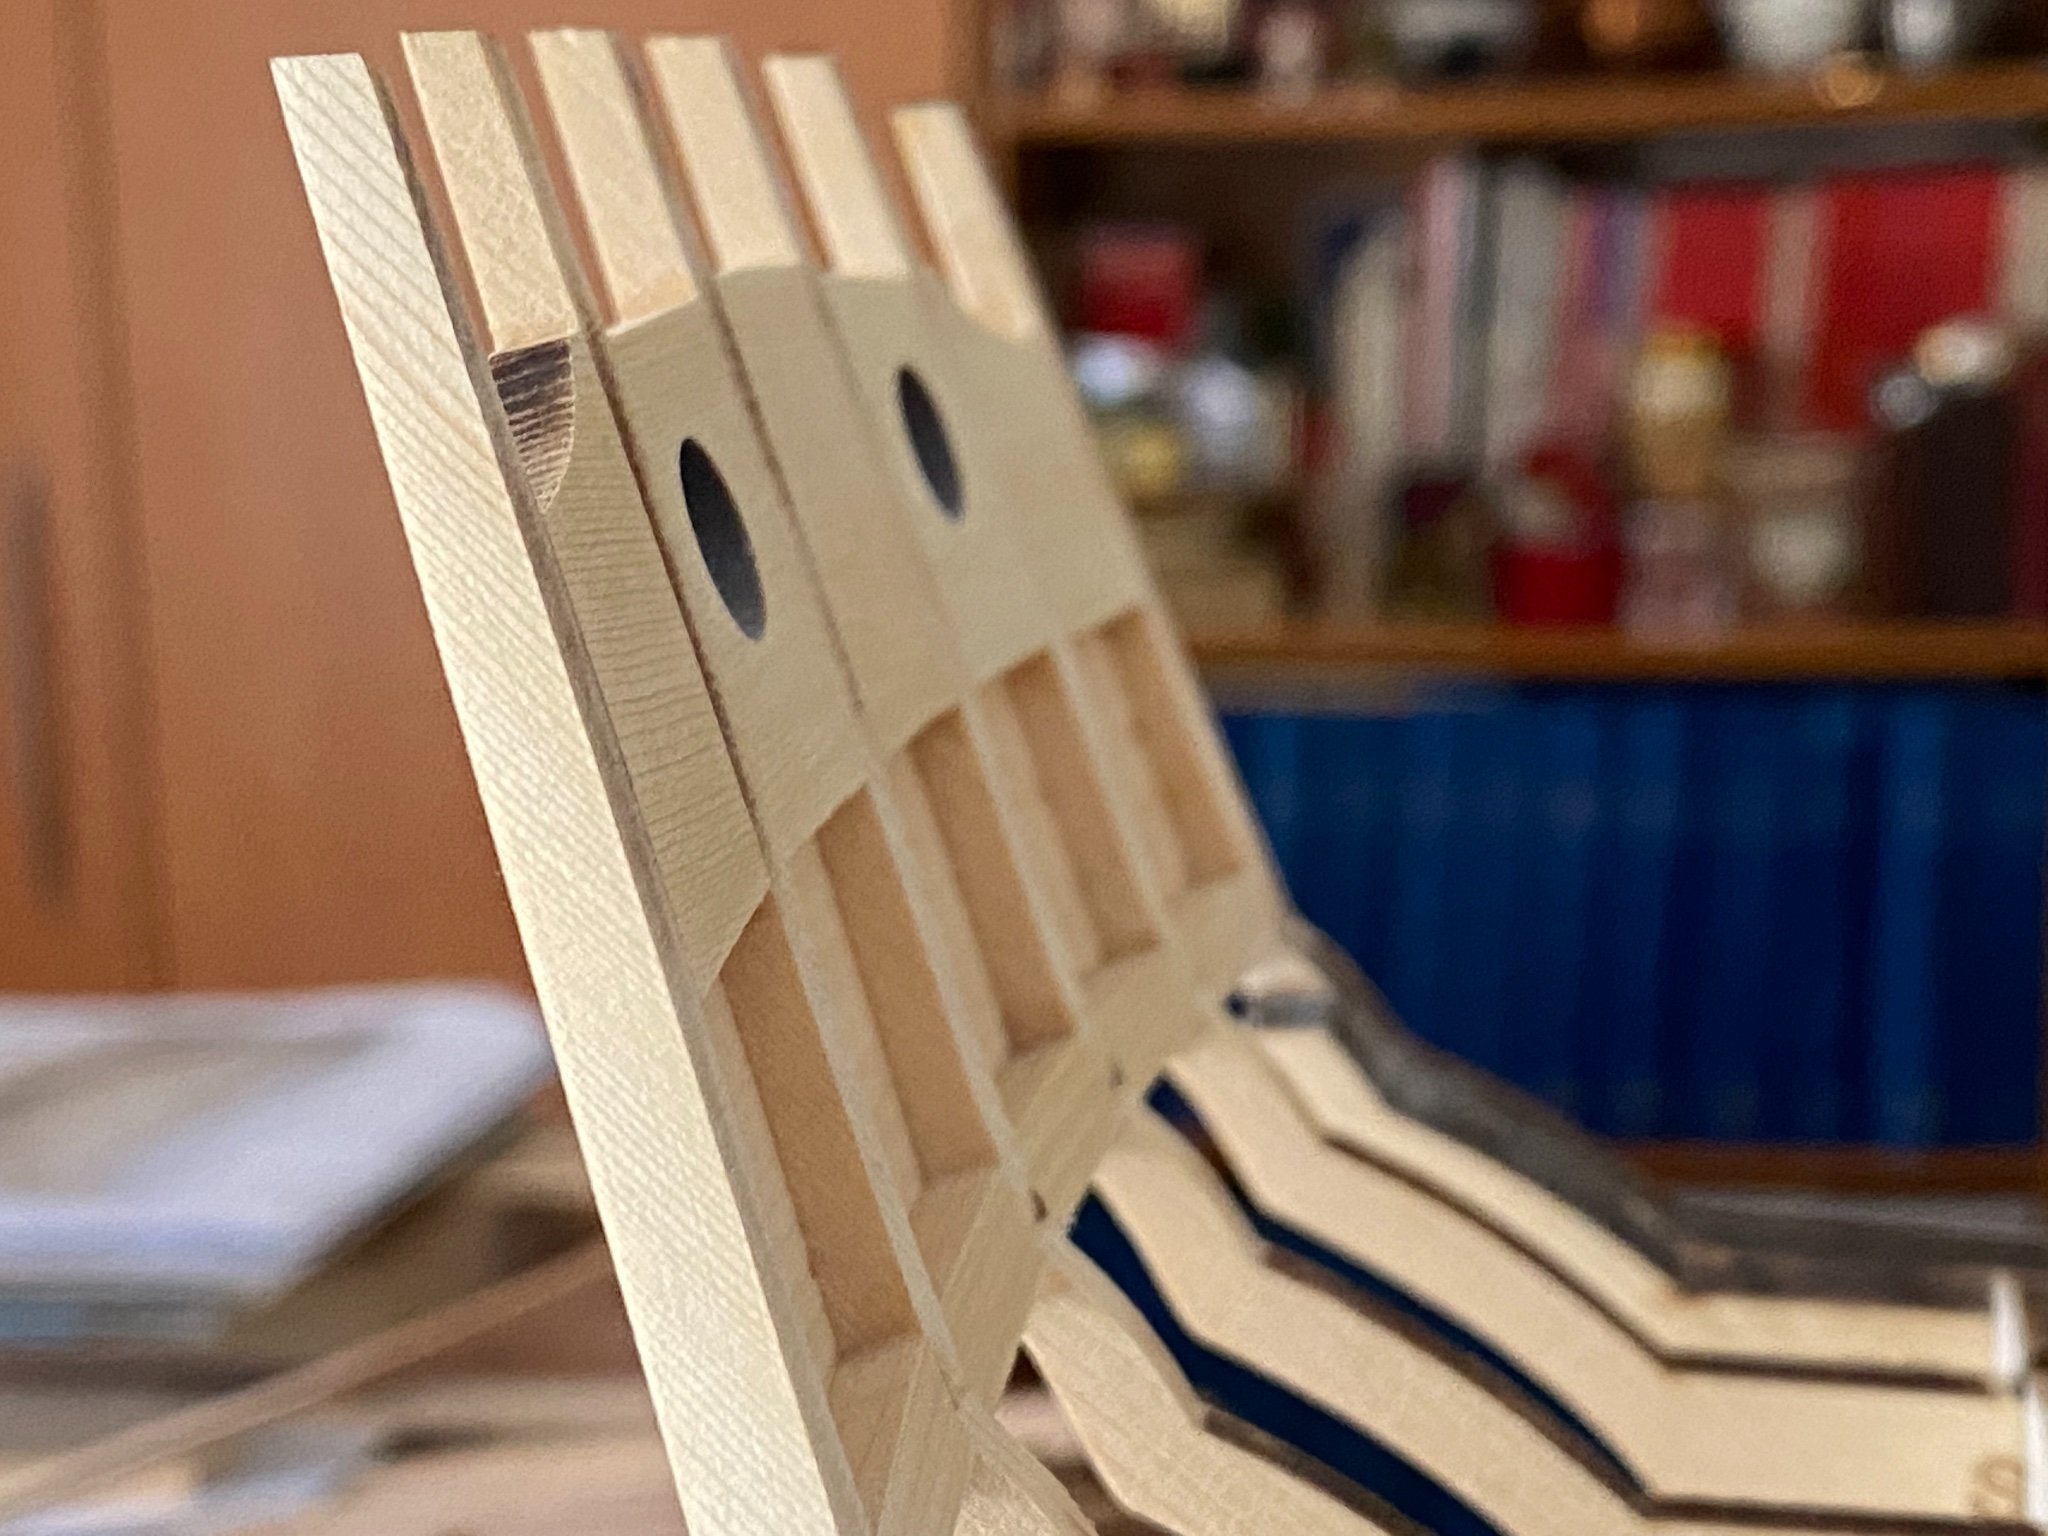
No it’s not pushed back, it’s shadow working in the picture due to some residual laser char… Thanks for the tip however when in fact they would have been pushed back by a 32nd. But luckily all is flush from bow to stern…
-
Thanks JJ, yes, I sure hope so!!!
-
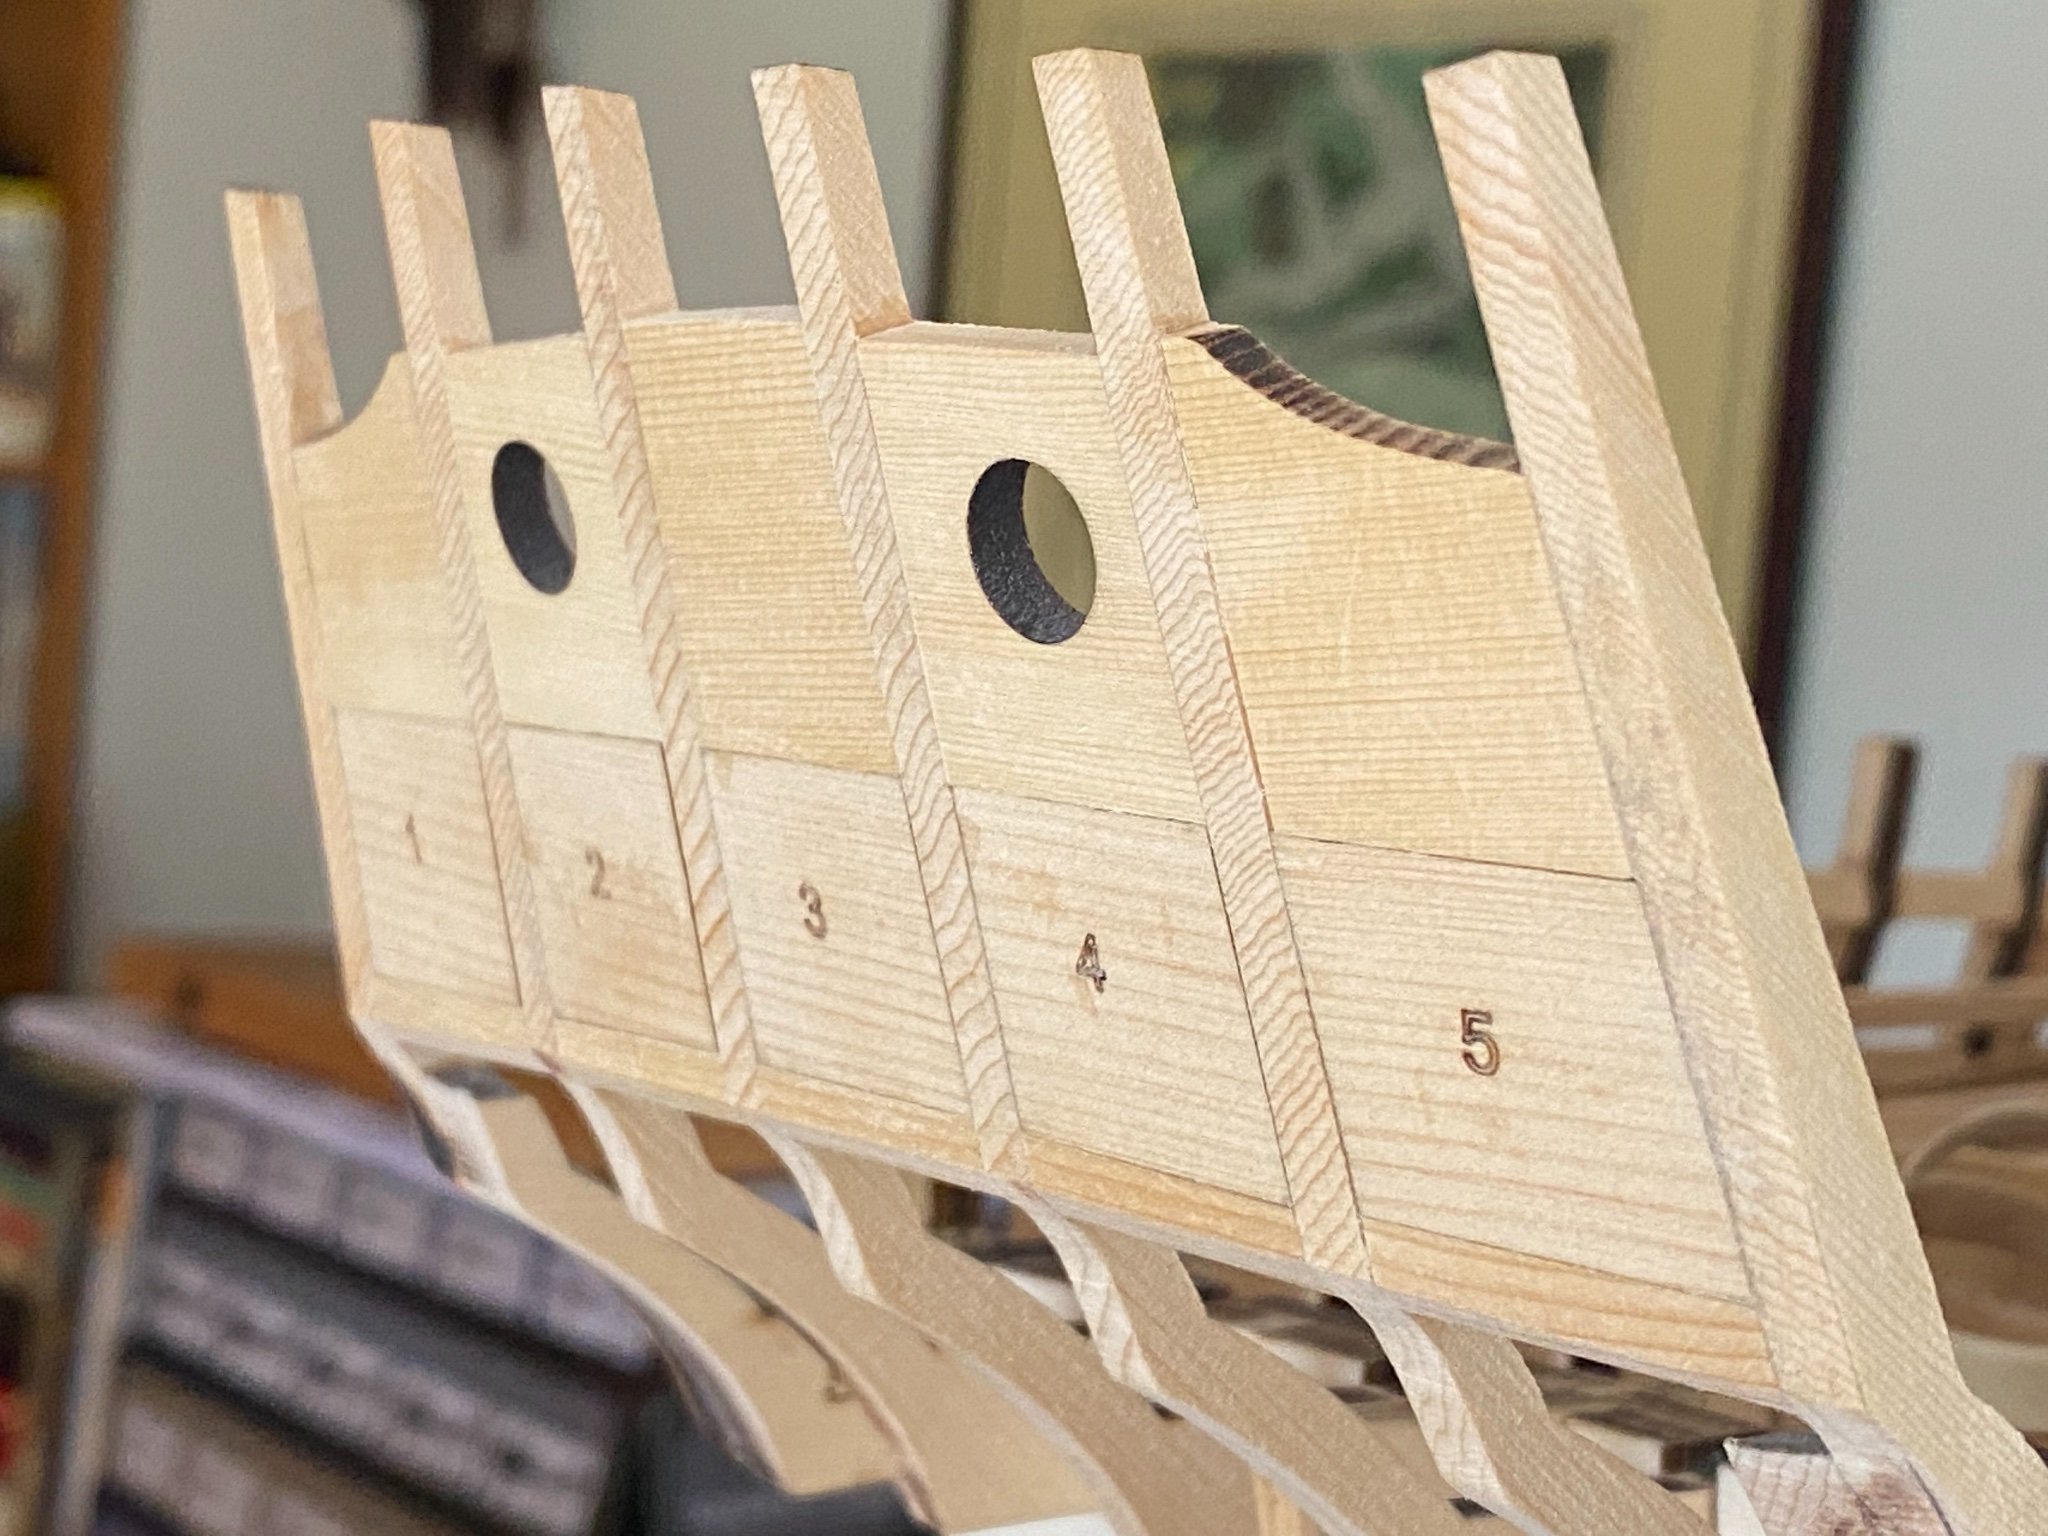
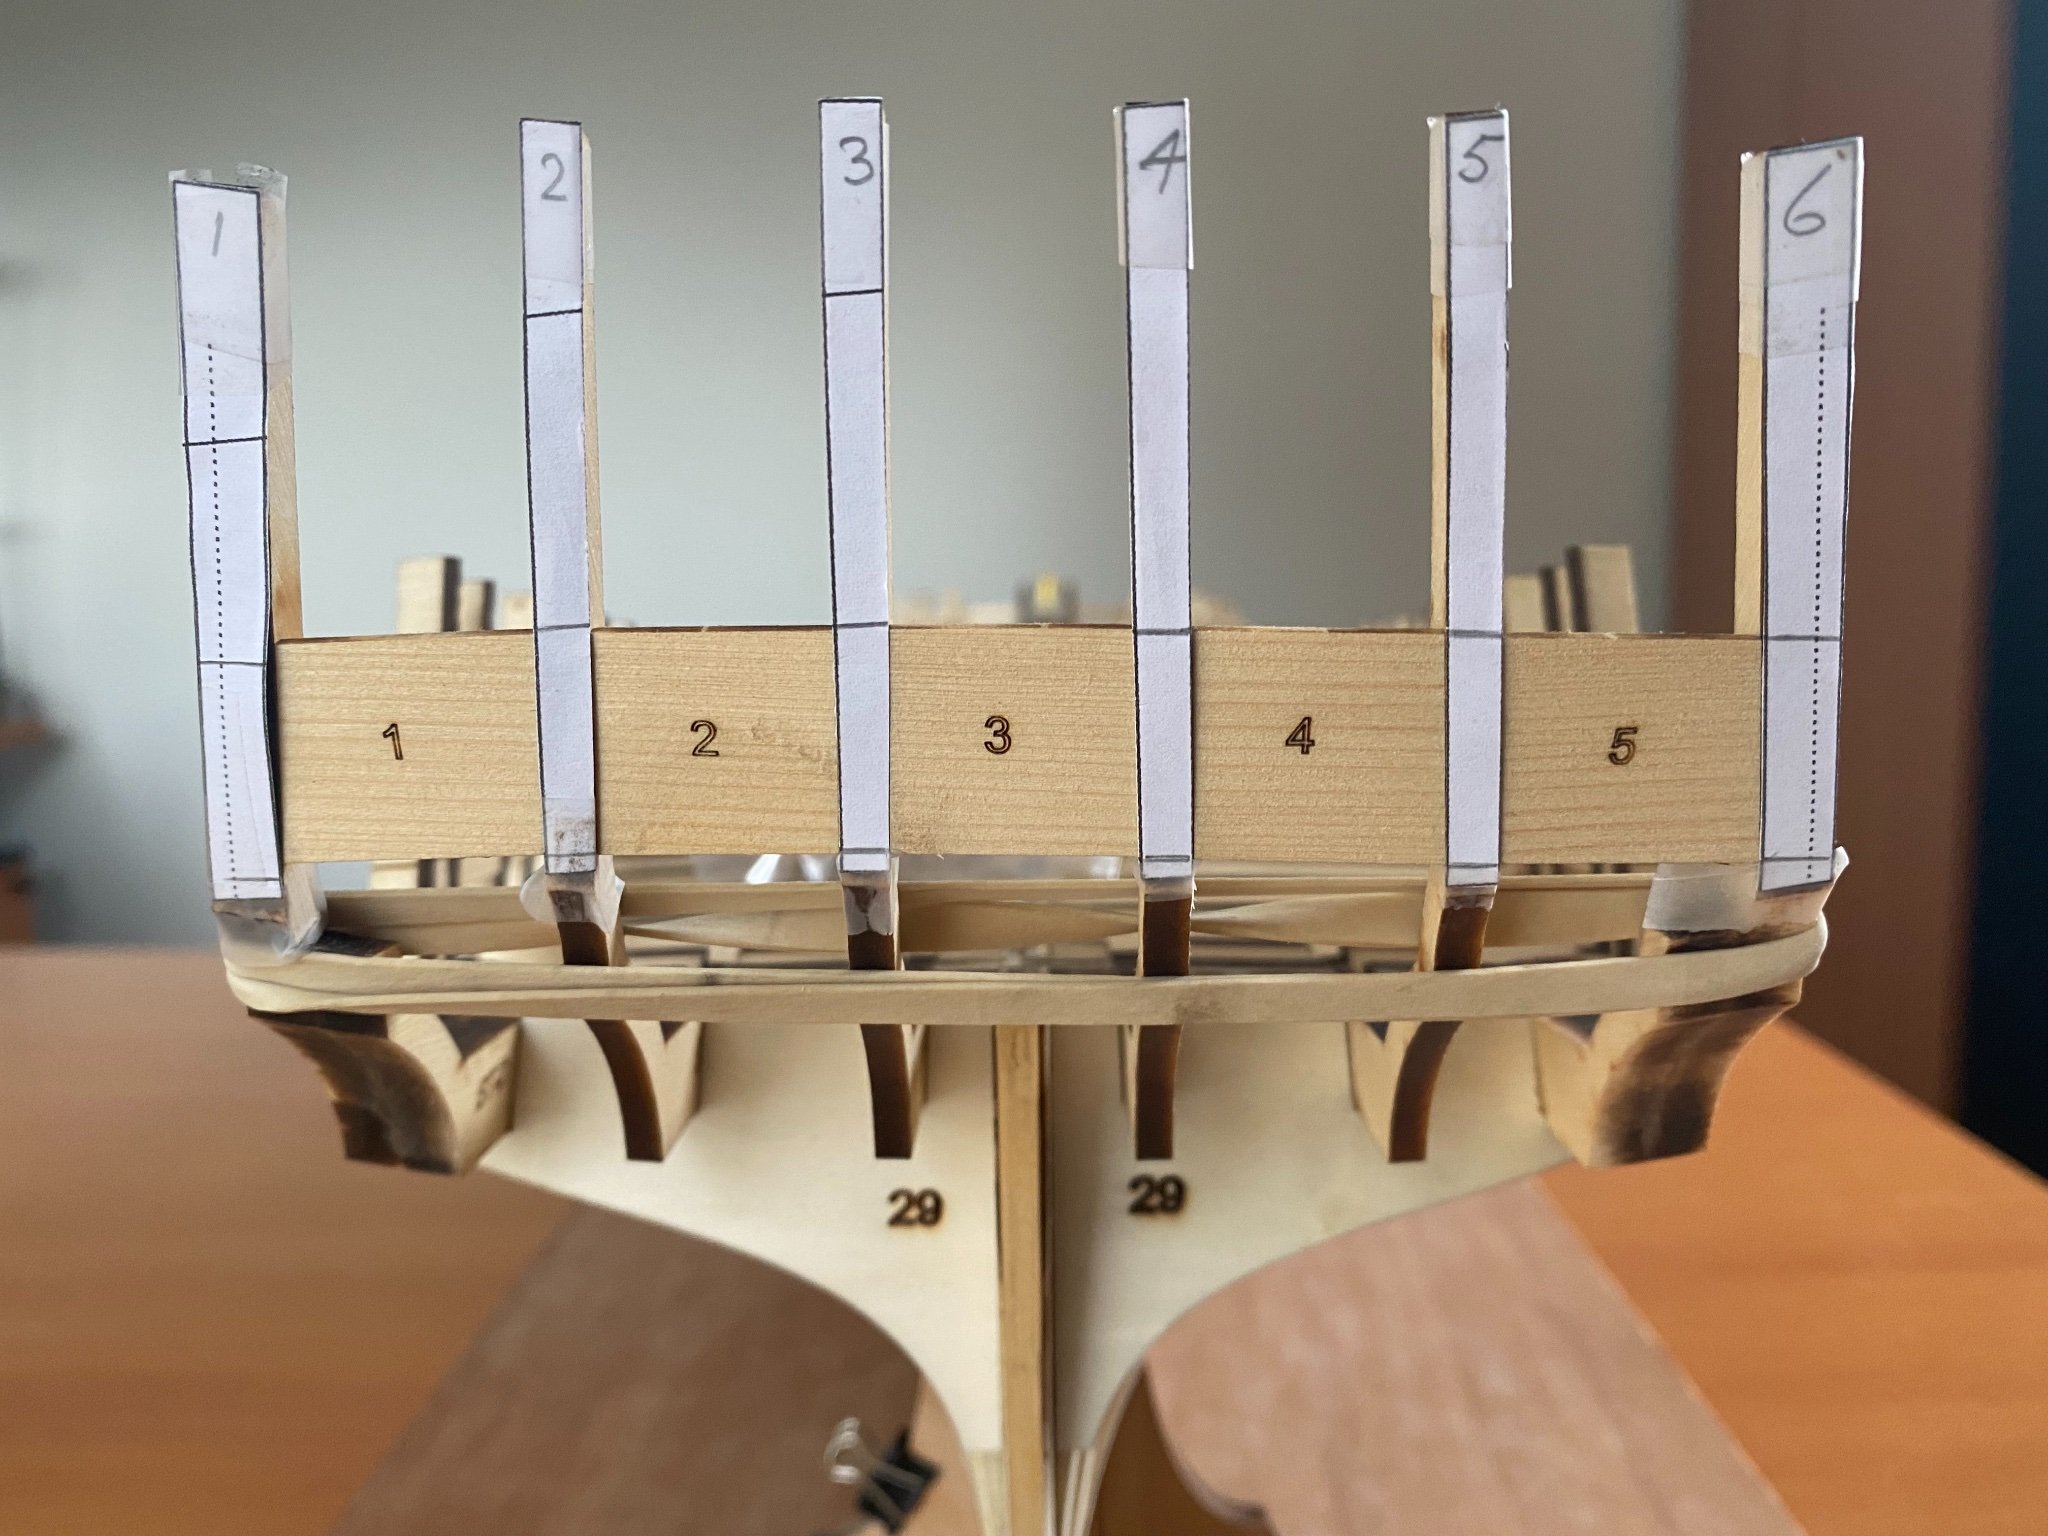
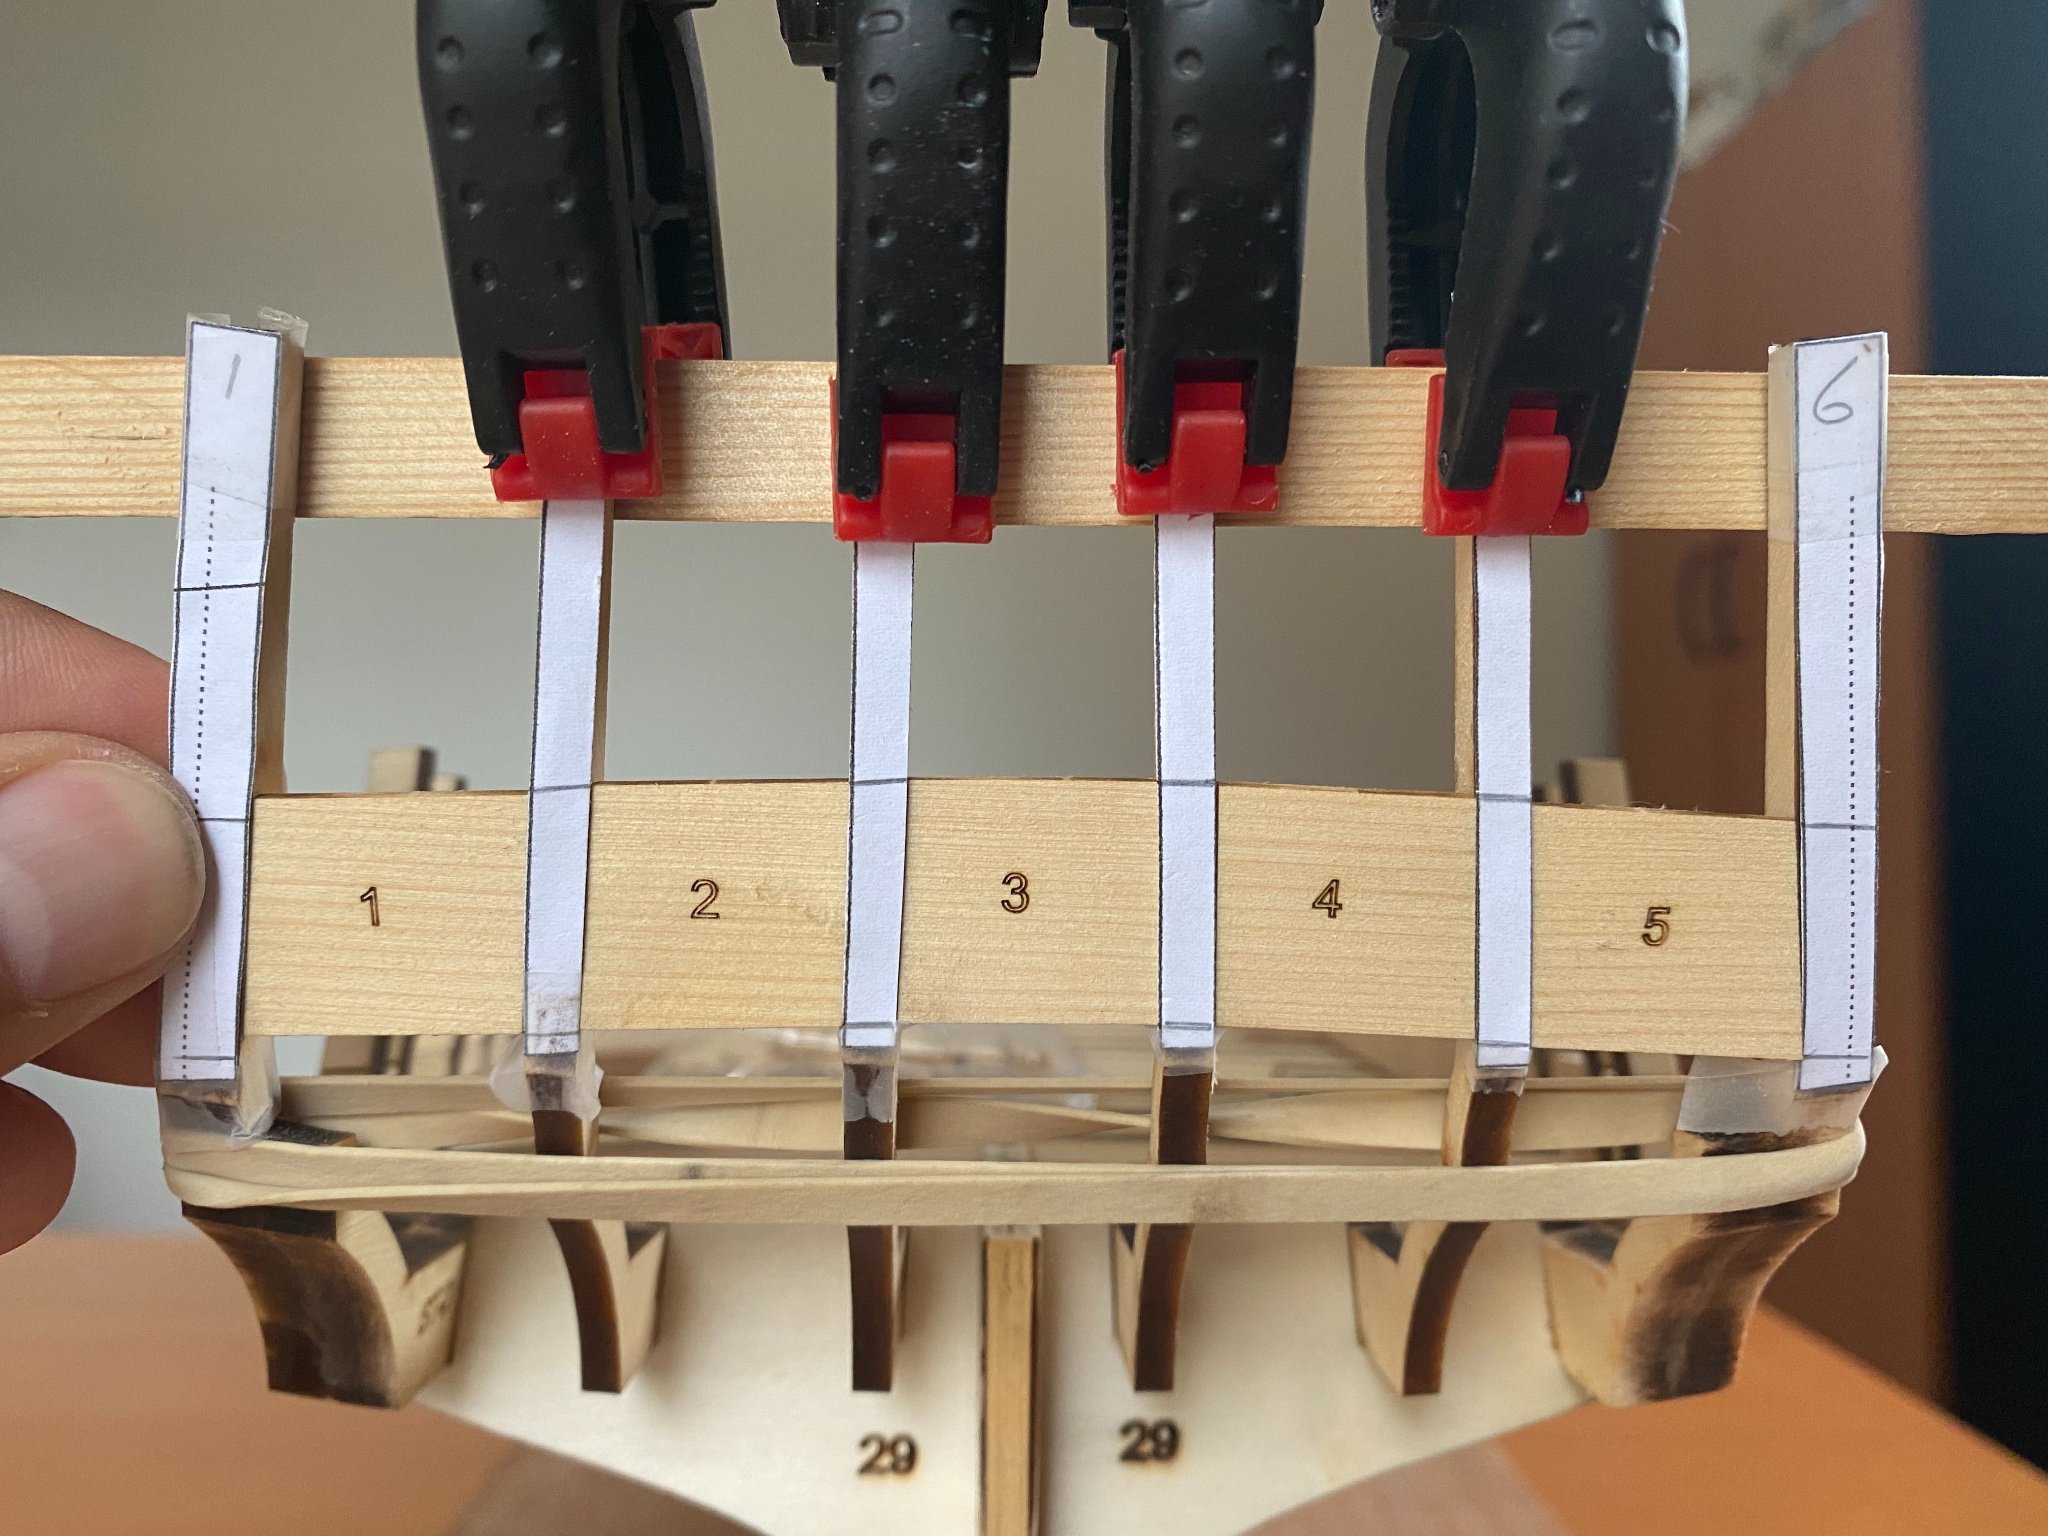
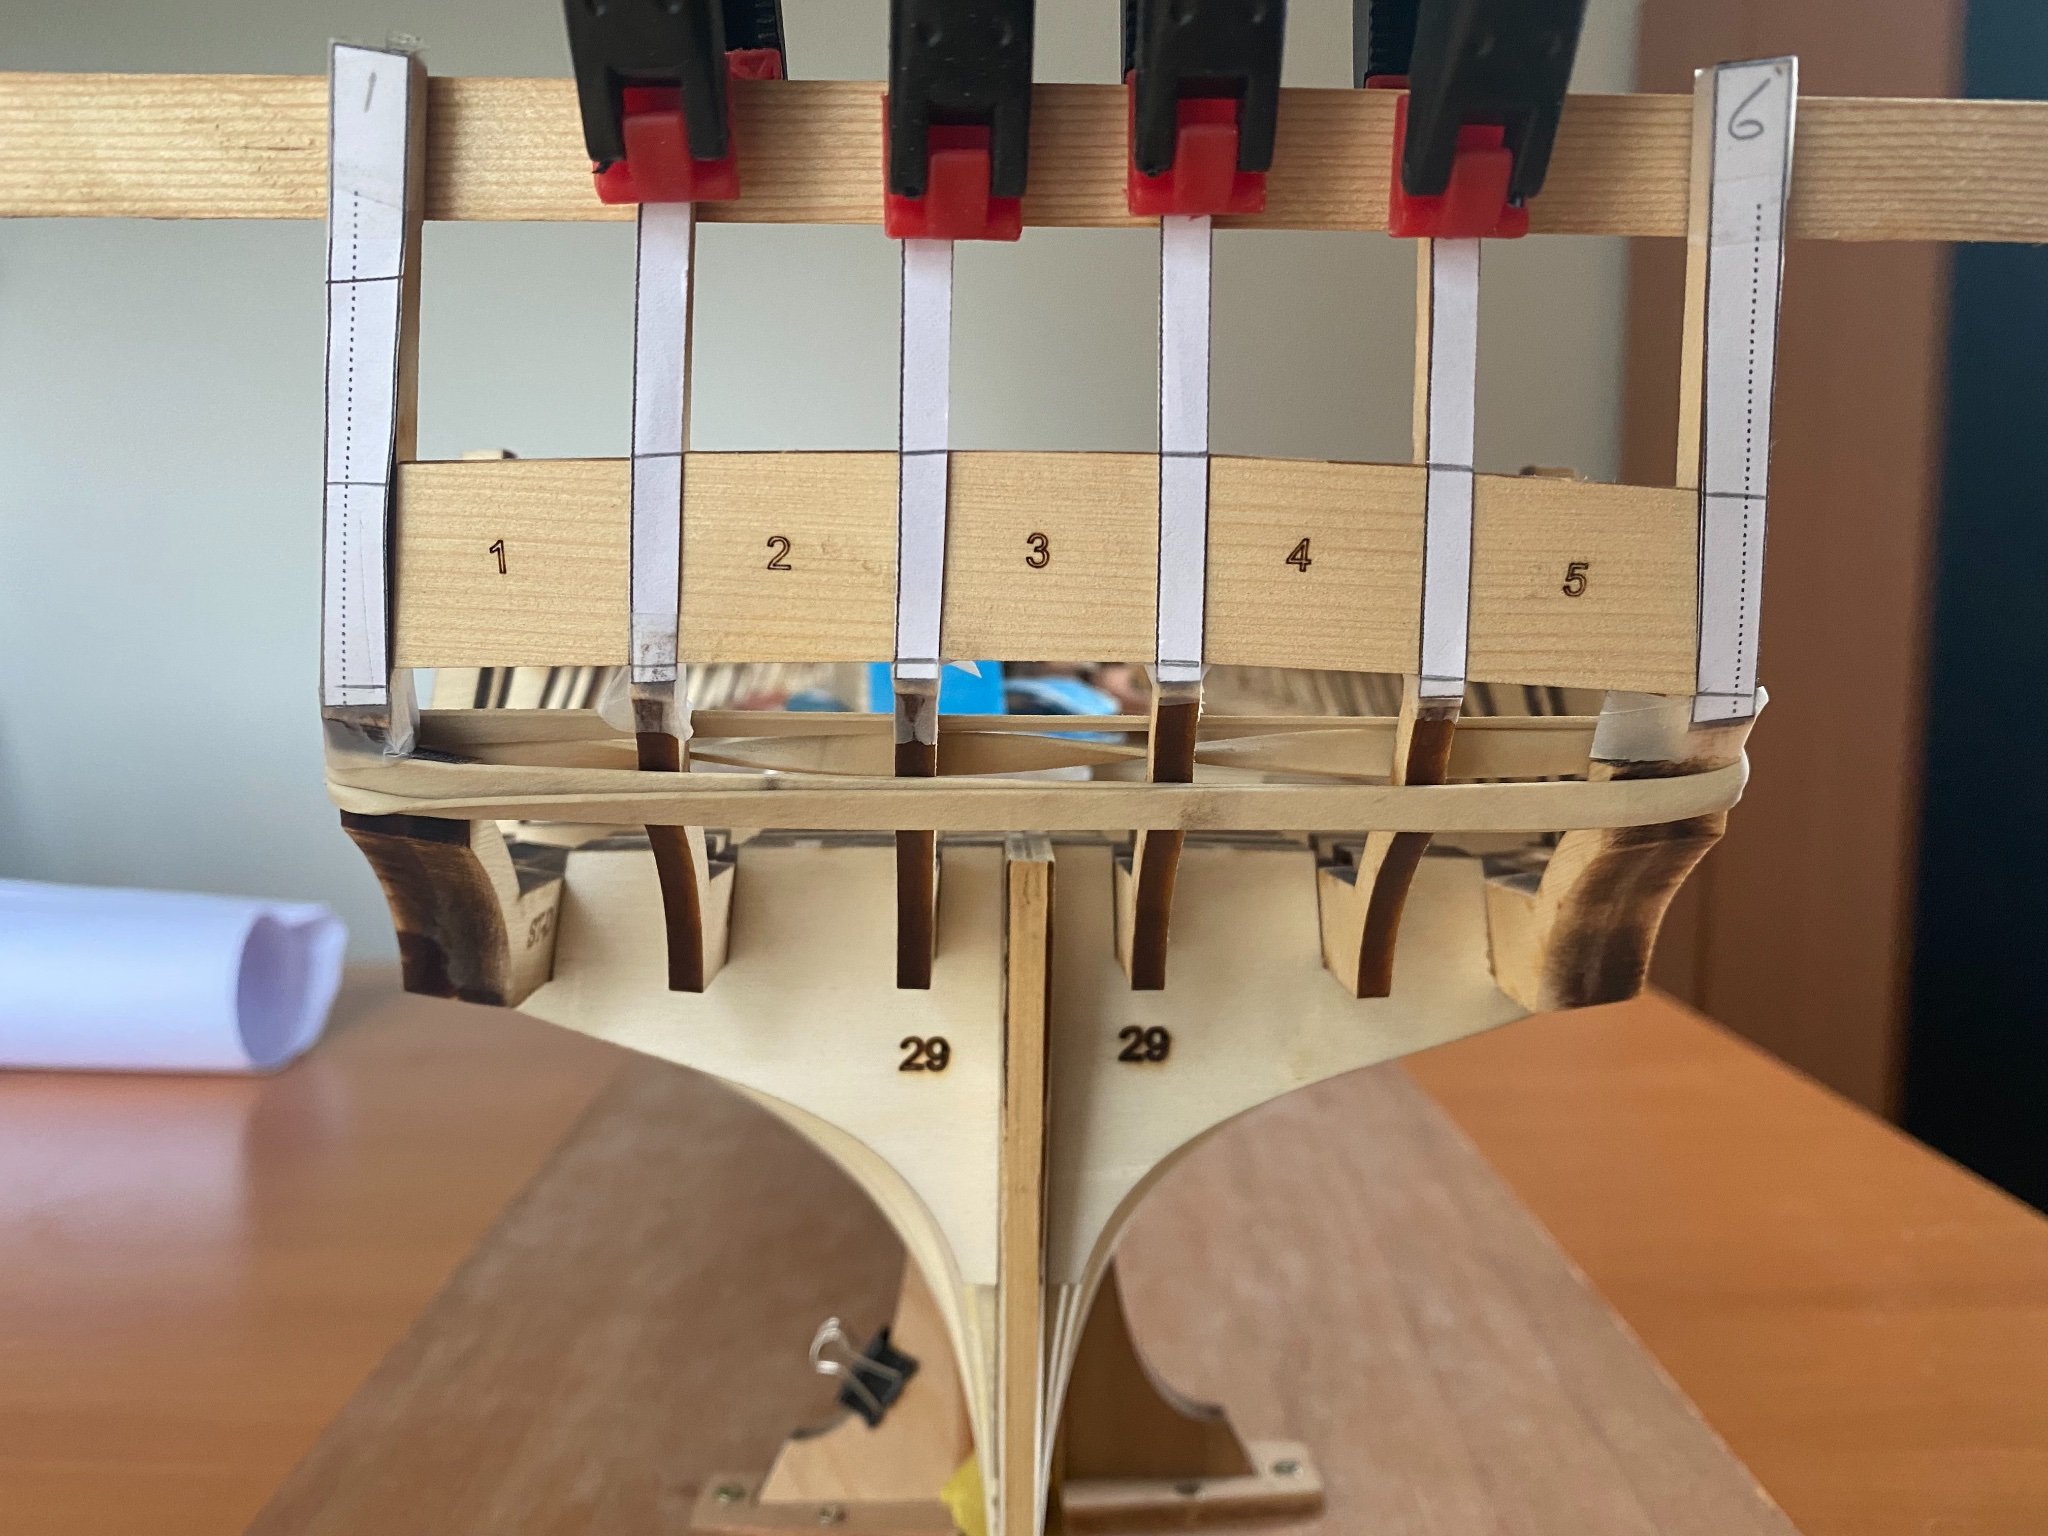
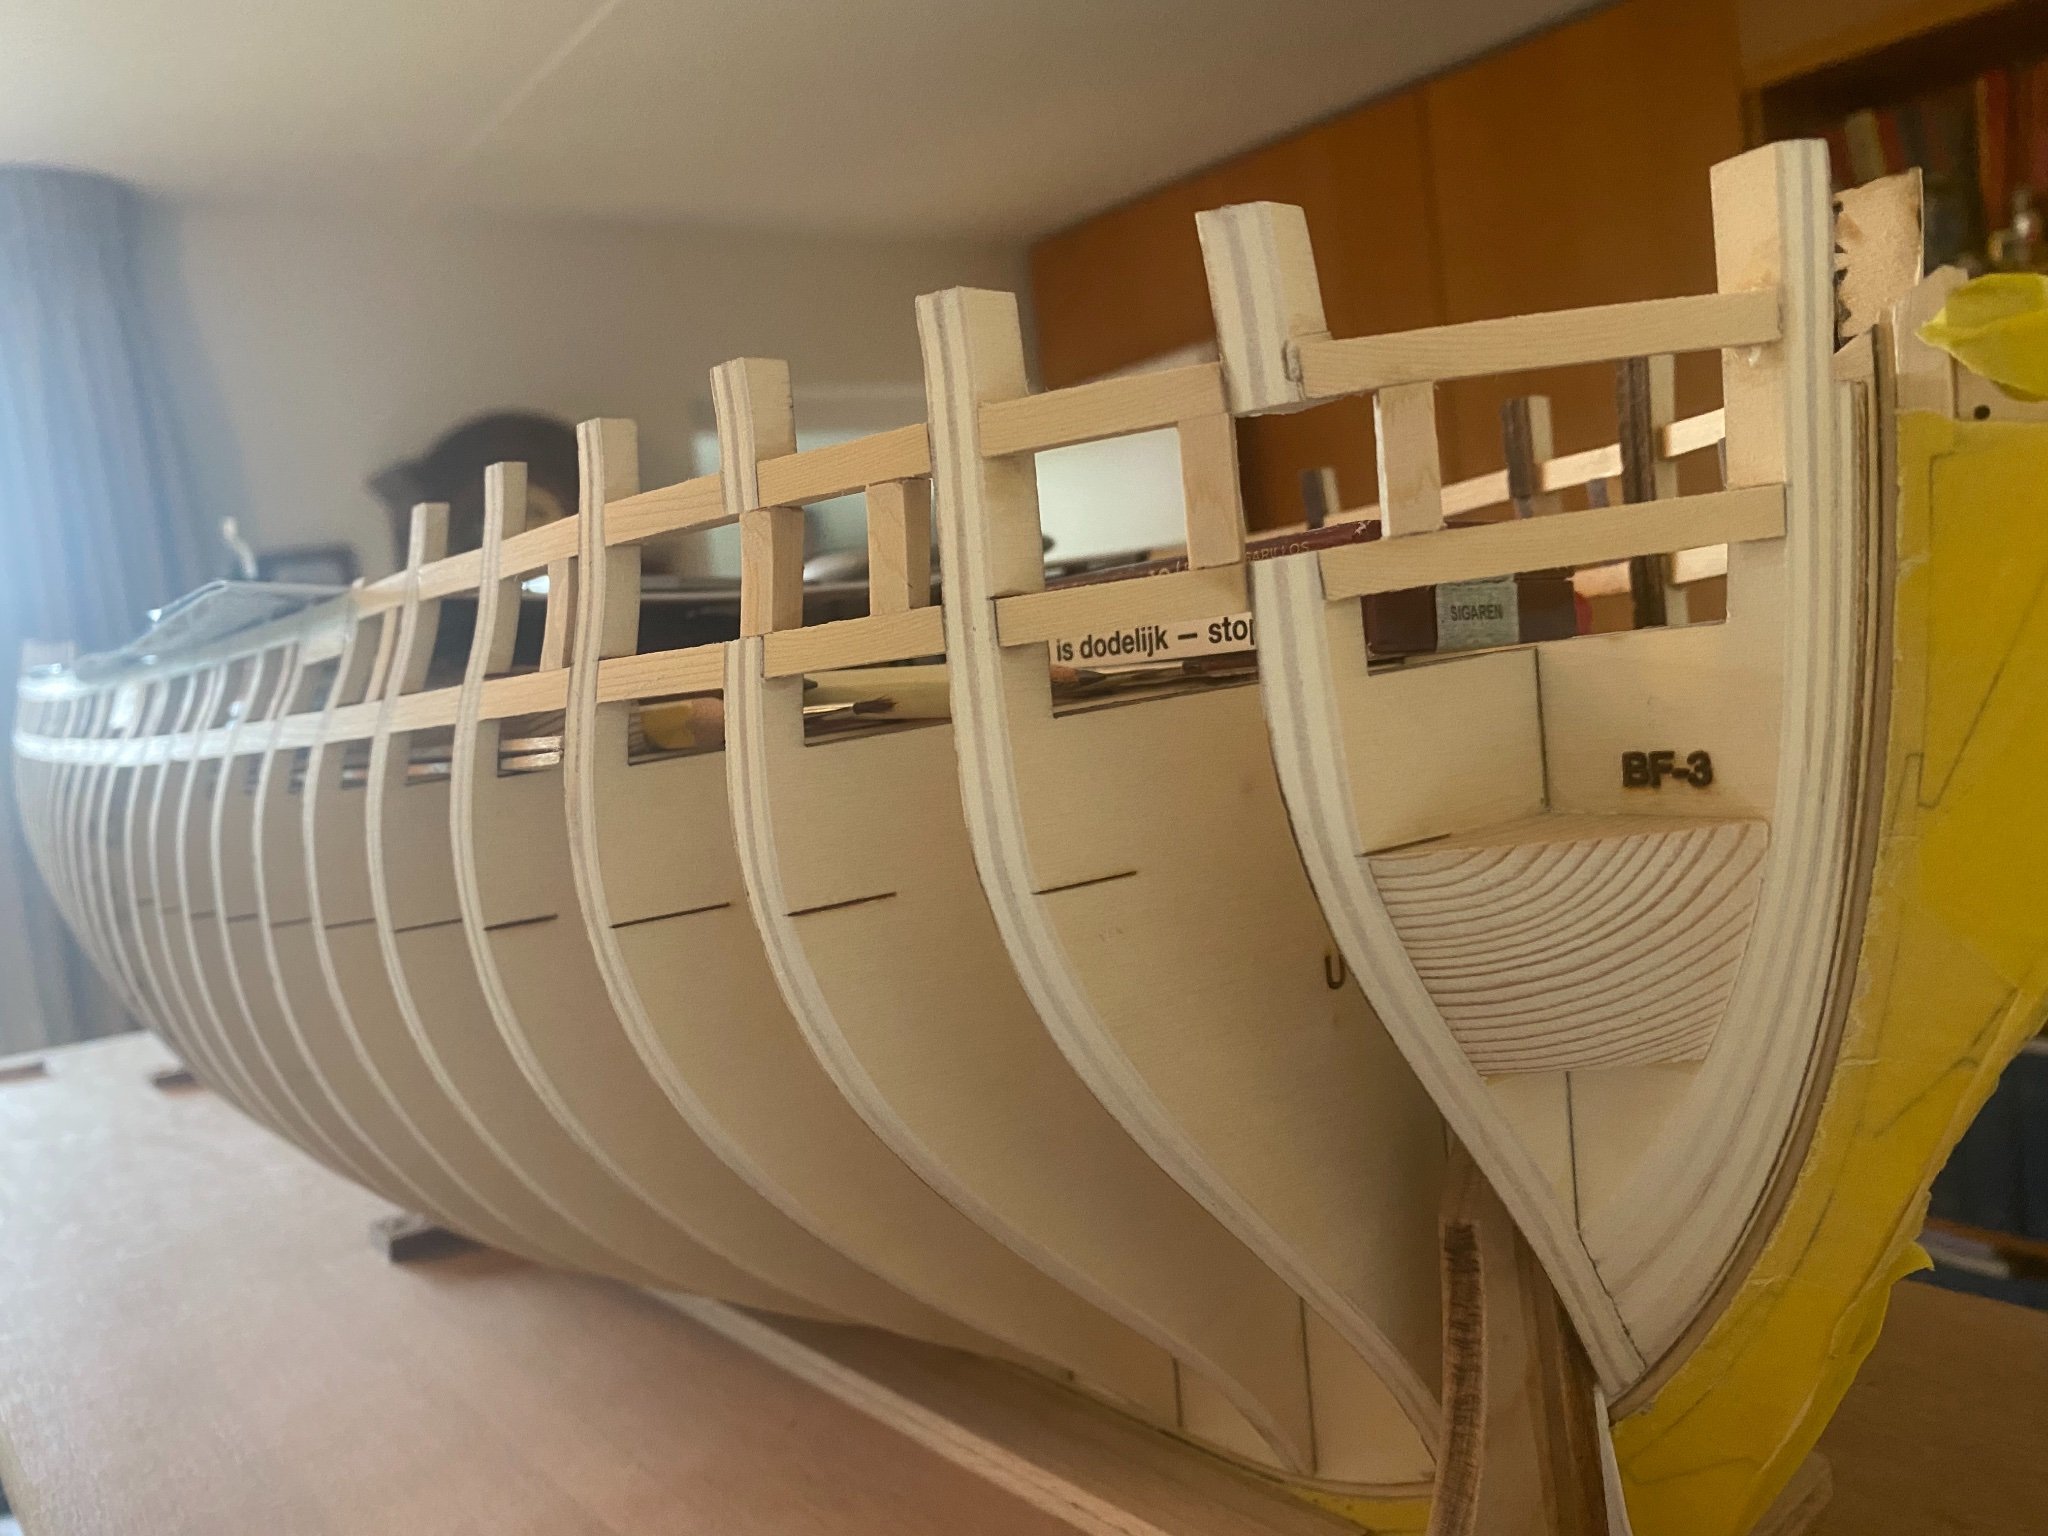
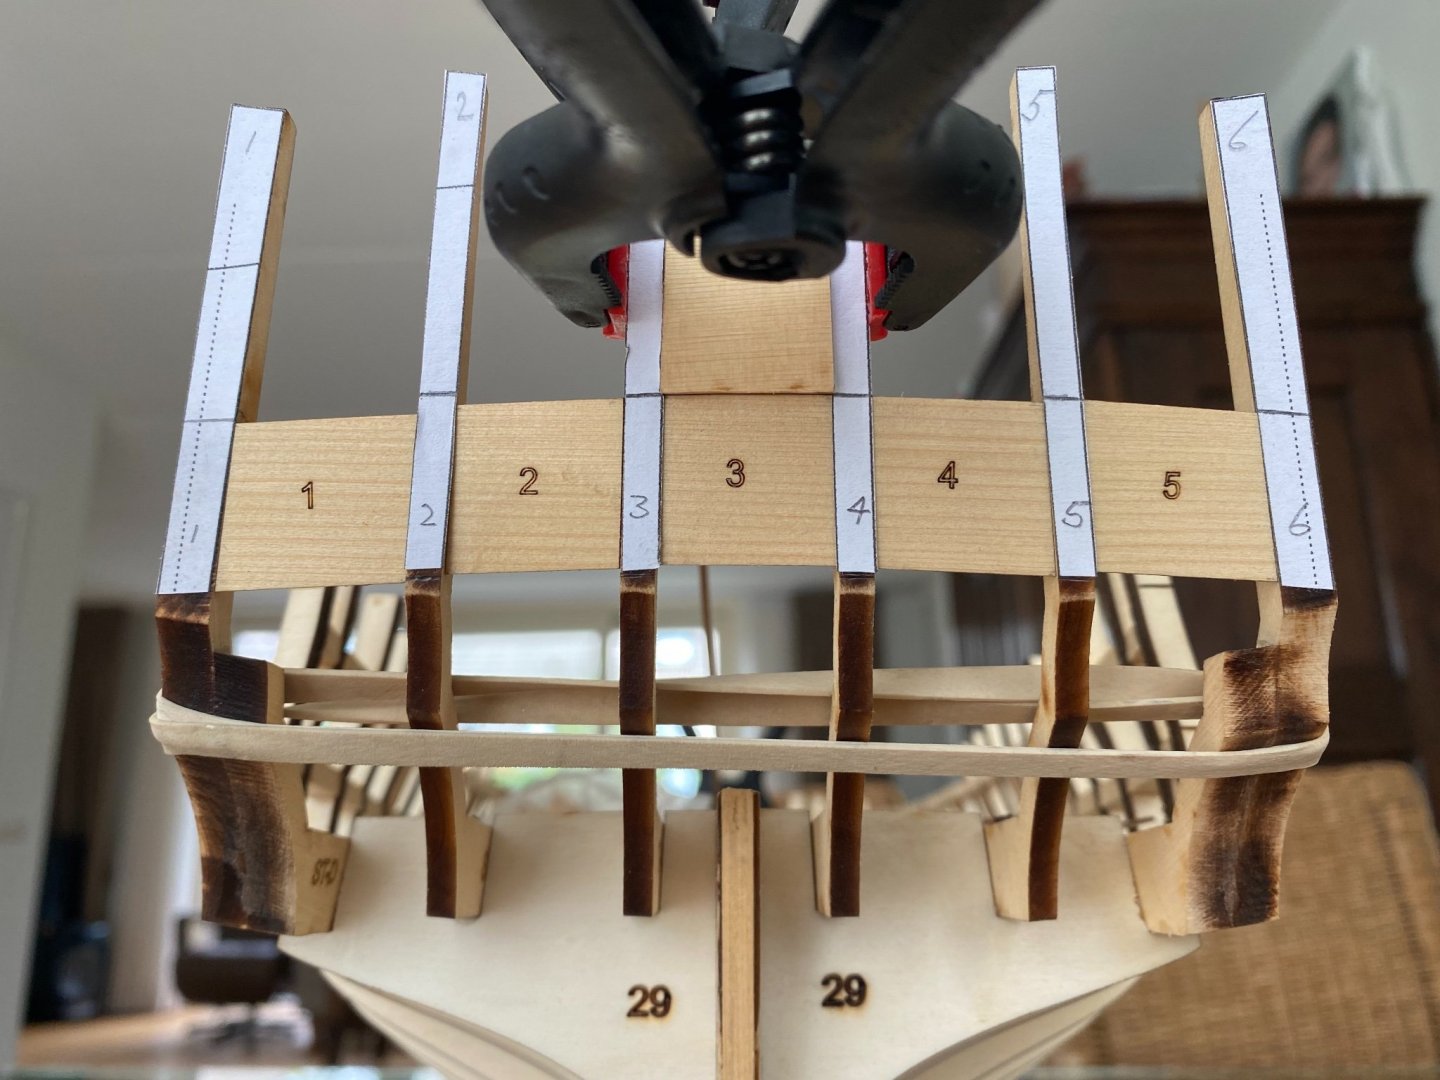
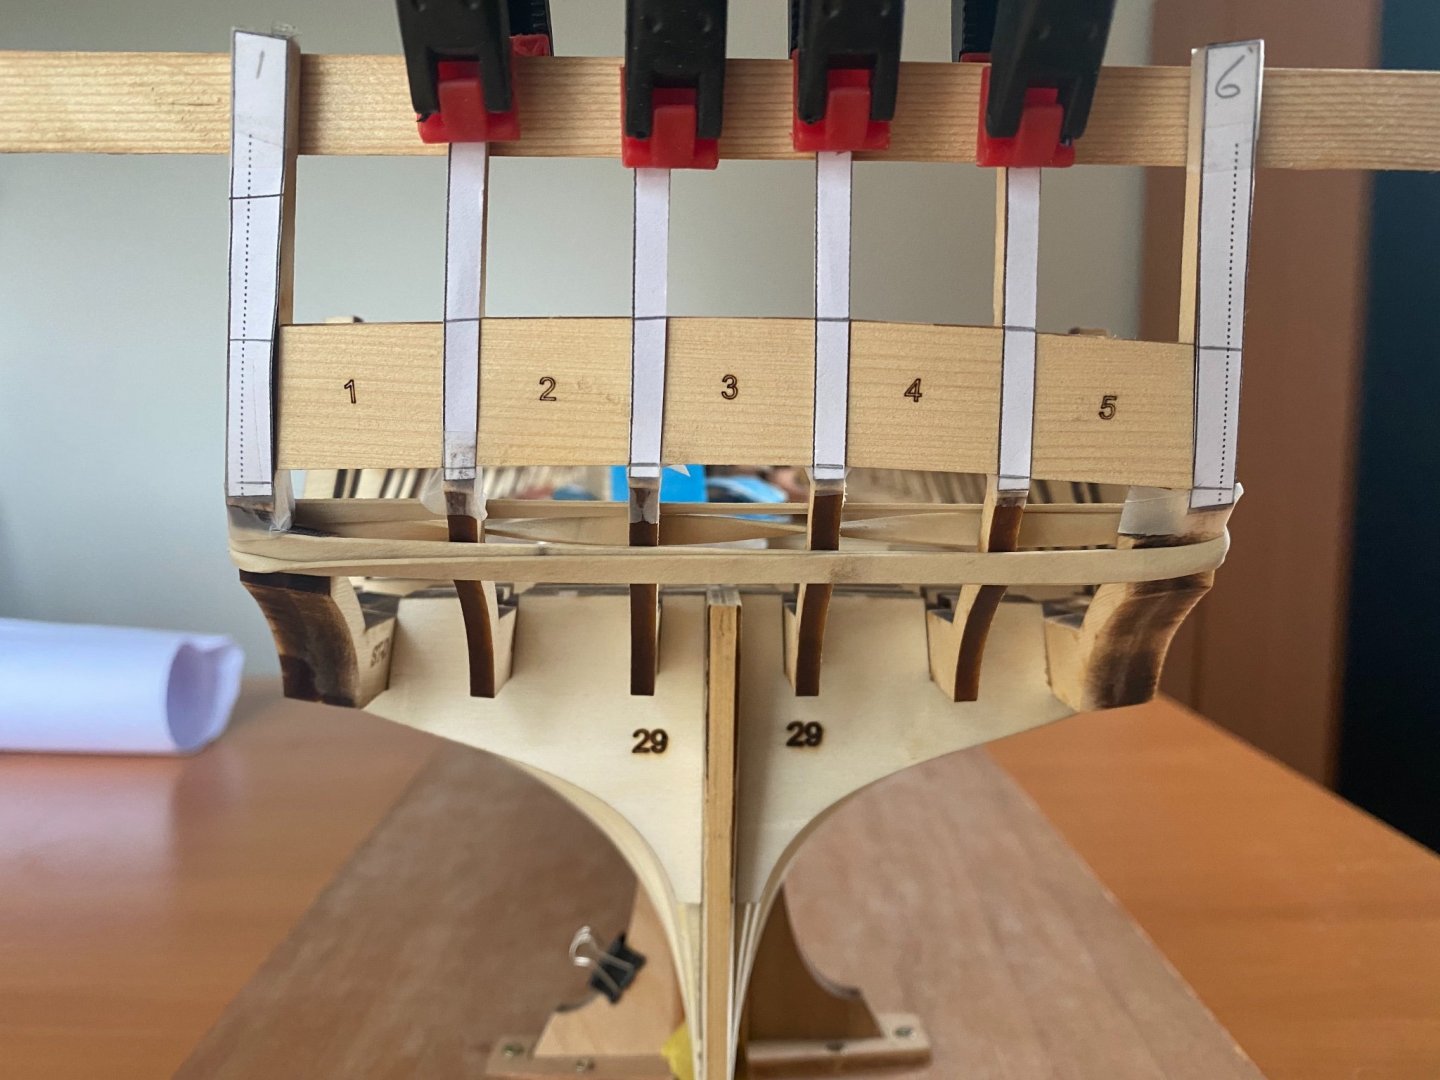
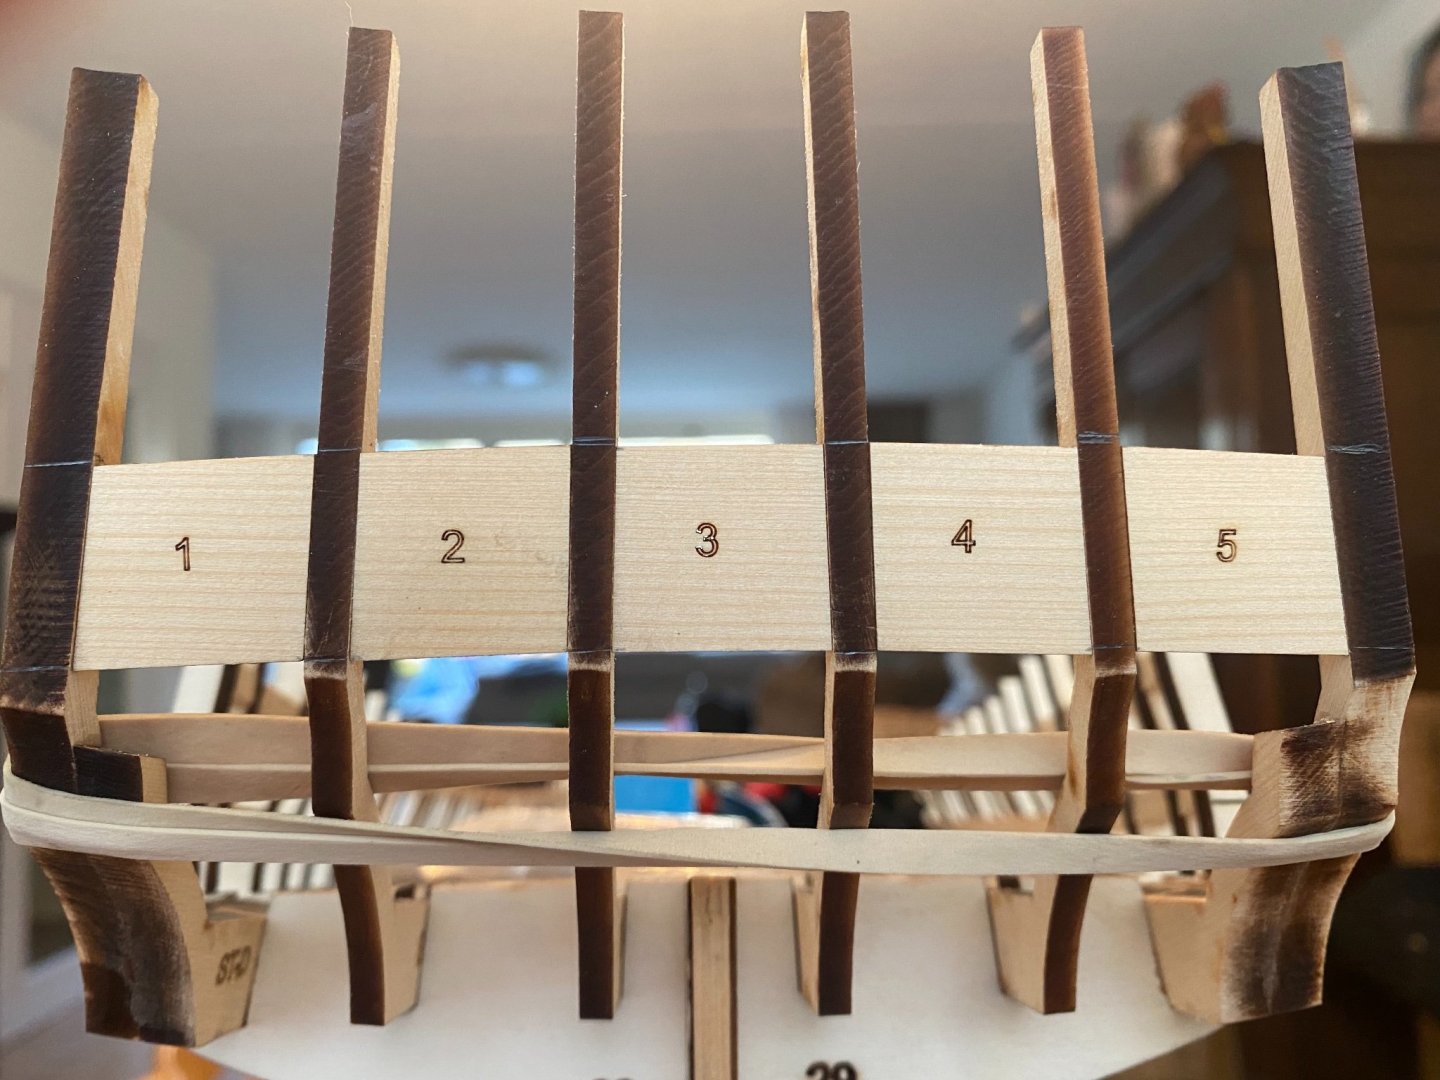
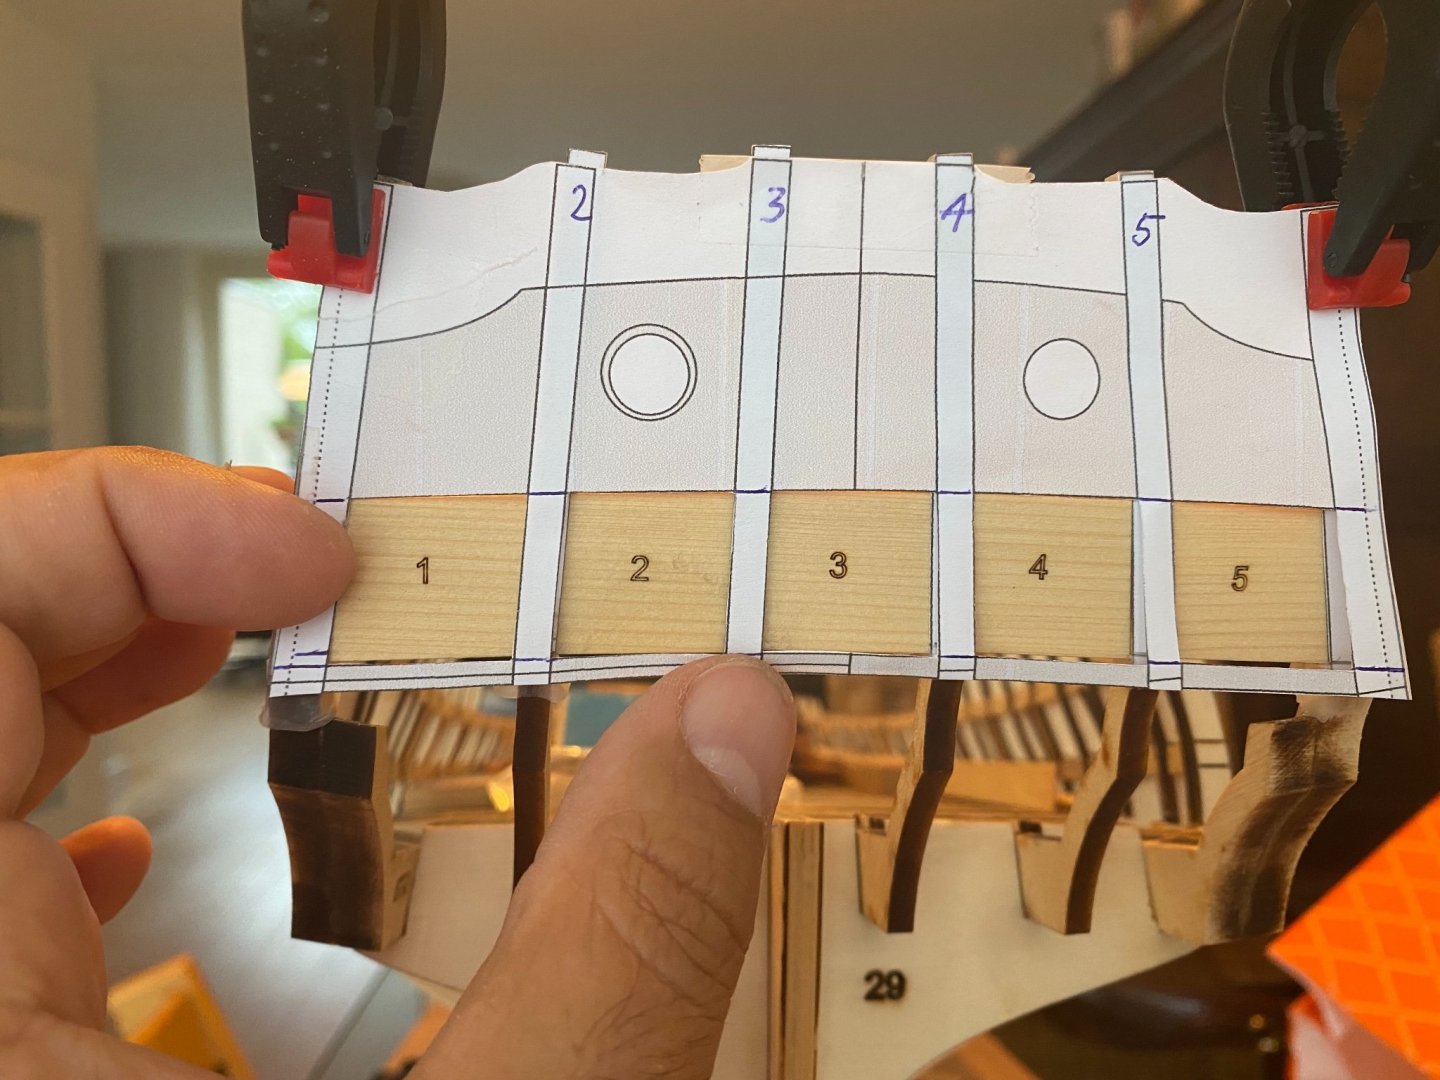
I have a question, or two before I start gluing the fillers … The vertical stern pieces are glued on and dry now. They’re level and symmetrical from the vertical heartline, they have the correct angle viewed from both sides and total width when viewed from the back, as I checked with a cardboard template with a level print glued on it from the drawings (no.2). However, the tops of all two pairs of middle pieces A and B are not exactly in one line when viewed from the top, which would be a coïncidence if they were I think. When clamped with a straight piece of wood, they can easily be forced in one line when glueing in the fillers later. But should they be in a straight line right now, or should they be in a gentle bow when viewed from the top? And then the window spacers 1 to 5… What’s the best reference line to get the window fillers 1 to 5 in the exact position? (They’re not glued on, ofcourse.) I managed to get them right I think with the six cutout prints from drawing 2. I drew a wrong reference line on vertical stern piece print no.1, the most left one as you can see. Checking with a cutout it seems all correct, but a hair too low or too high can spoil a nice clean flow of the horizontal (and vertical) line over all window sills later…


-
Looking good and beautiful colourful and warm wood tones in an evenso beautiful build! Frank.
-
I'm sure I would order all types of figures!
-
Looking good! You sure have a good building temp, lots quicker that mine! I'm measuring everything three times, reading again and again as a beginner...you must have a lot of experience? Cheers, Frank.
-
Hi Jorge, Great to see you finally sharing your build with us! I will sure follow your build! First of all, I have the greatest and deepest respect for people like you who saw everything themselves! I see you also make the connections in the keel etc. as they actualy should be, wow! Keep the updates coming! Cheers, Frank.
-
Here a better picture that shows the starboard forward gunport frames are flush and not placed backward some. Now I’m going to spend my Sunday on the stern parts.

-
Thanks Matt! Steady towards the end of chapter 1, no rush…though it feels like miles and miles behind, looking at the chapter 6 and 7 stuff in other beautiful builds. Okay, I’ll try that later on my PC. Cheers, Frank.
-
Hi Mike, you’re right, it looks strange in the picture indeed, it’s straight and flat in real life though. It looks as if some left over laser char or shadow plays tricks with the eye here. The vertical piece of the gun port touches the upper cut off frame piece right in the middle like it does below. Together with some laser char that throws a shadow in the upper area of the vertical piece, it looks as if it falls back a little, but in fact it doesn’t… Thanks for looking and checking Mike!