DONATION DRIVE - SUPPORT MSW - DO YOUR PART TO KEEP THIS GREAT FORUM GOING! (91 donations so far out of 49,000 members - C'mon guys!)
×


Chuck Seiler
-
Posts
1,878 -
Joined
-
Last visited
Content Type
Profiles
Forums
Gallery
Events
Everything posted by Chuck Seiler
-
 I am curious to see how you manage the lee-boards. It seems to me that there is nothing holding them in place except for that chain running over the gunn'l to the support. I am also perplexed by how it is rigged. The lines, blocks and sheaves appear to be used to retract the lee-boards, but there is nothing to deploy them or keep them from being forced up by the water flow. Perhaps I am missing something(s).
- 36 replies
-
- 2
-

-
- Shallop
- Pavel Nitikin
- (and 1 more)
-
I didn't name it, I just reported what was on the tube.
-
How about just unbleached titanium?
-
I look at your build with great envy. I had a number of problems, mostly due to my own foibles. I started the model while working at our club's shipmodeling booth at the county fair. Somewhere along the line some things got separated and misplaced. I never did find the upper strakes. I couldn't even find them on the part sheet. 😞 I was able to put the caprails on fine. but later realized I had them backwards (DOH!) At any rate, I will start rigging after Christmas and will post finish pic when done. I did not do a build log because I realized awhile ago that I can build the model or I can document it, but not both. I hope mine compares well with yours.
- 36 replies
-
- 1
-
-
- Shallop
- Pavel Nitikin
- (and 1 more)
-
I have read similar info about the Mayflower shallop. It seems to me that the only way they could do this is have a pointy end and a flat end for each half. When bolted together there would be a double bulkhead athwartship (athwartboat?) At any rate, Richard's model looks top notch.
- 36 replies
-
- 4
-
-
- Shallop
- Pavel Nitikin
- (and 1 more)
-
Most white stuff I see is too stark white in my opinion. I think holly would do nicely.
-
The description specifically references a figurehead. The ship in the print has no figurehead.
-
Wow! Looks really good. You seem to have mastered those pesky cant frames. The idea of disassembling the jig to remove the completed framed hull is interesting.
-
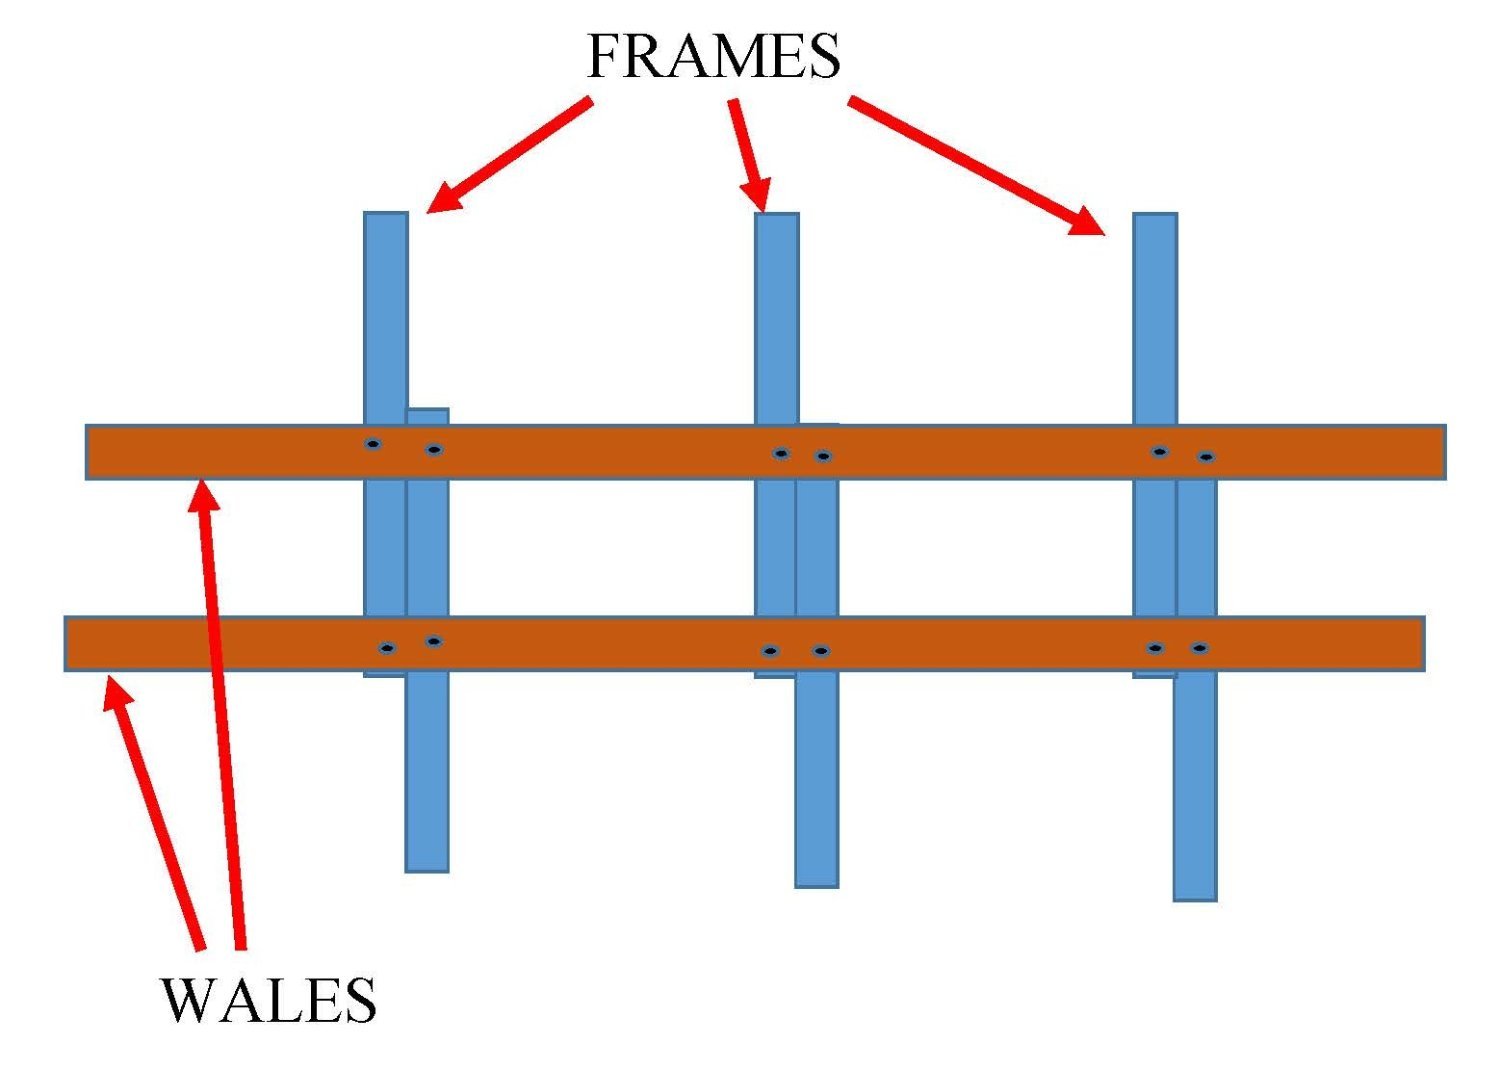
Allan, I don't know where I got that info from. Maybe an actual quote or I merely deduced it from looking at plans. My memory on the subject of galleons is that the frame futtocks were not fastened together as they were in the 18th and early 19th century. Rather, they were fastened to a pair of wales and envisioned in the attached diagram. Keith, I find it hard to believe they are more 'rub rails'. As Allan pointed out, in the multi deck SOLs of the 18th/19th century you have wales well above where any other ship or pier would contact, If they don't serve as a place to anchor the knees, they are at least longitudinal structural members designed to strengthen the hull... along with internal stringers. Of course Joshua Humphries took the internal strengthening to a whole new level with CONSTITUTION.

-
It was my understanding that the wale(s) is/are a longitudinal structural member. Thicker than a normal strake, it provides heft for the knees to be bolted to. Larger ships had multiple wales. If the wale does not follow the deck sheer, this must not be true. What IS the purpose of the wale?
-
Good job!!
-
Very nice. What wood are you using for planking and doors, etc?
- 38 replies
-
- 1
-
-
- Santa Maria
- Nao
- (and 1 more)
-
My experience is kind of a blend of KGSTAKES and Jacques. I went with the pen because I thought it would be easier touching up small parts rather than applying stain-from-the-can with a toothpick. The color is not bad, but as I said, my experience is that it is different from the can. Also, as pointed out, if you press too hard it comes out too much. I had to press down off-work to get it flowing, then go to the piece. Whatever works.
-
I have used them. The one I used was not wax, but indeed stain. The problem was the stain in the pen was not the same color as the stain in the can, even though they had the same name (golden oak). I agree with Gregory, go with the original 'in the can' stain.
-
I see, the inaccuracies are within the plan itself. Very true. It is very frustrating when you have what appears to be a good set of plans, but AFTER you start working on it you find the various parts of the plan are not reconciled with each other. I guess learning that, and learning what things you need to verify early on are part of the 'gaining experience' process. Looking good so far.
- 38 replies
-
- 2
-
-
- Santa Maria
- Nao
- (and 1 more)
-
Gusar, Please define 'inaccuracies'. Since there is no record of the details of the Santa Maria, there is alot of leeway in the building process. The build looks good so far. What other builds have you done?
- 38 replies
-
- 1
-
-
- Santa Maria
- Nao
- (and 1 more)
-
Many thanks. Camber is currently the correct term for the transverse curve (down on the sides) of the deck, correct? I seem to remember that from my navy days as well.
-
Is this correct? I've long understood camber to be the transversal curve of the deck, while the longitudinal curve is sheer.
-
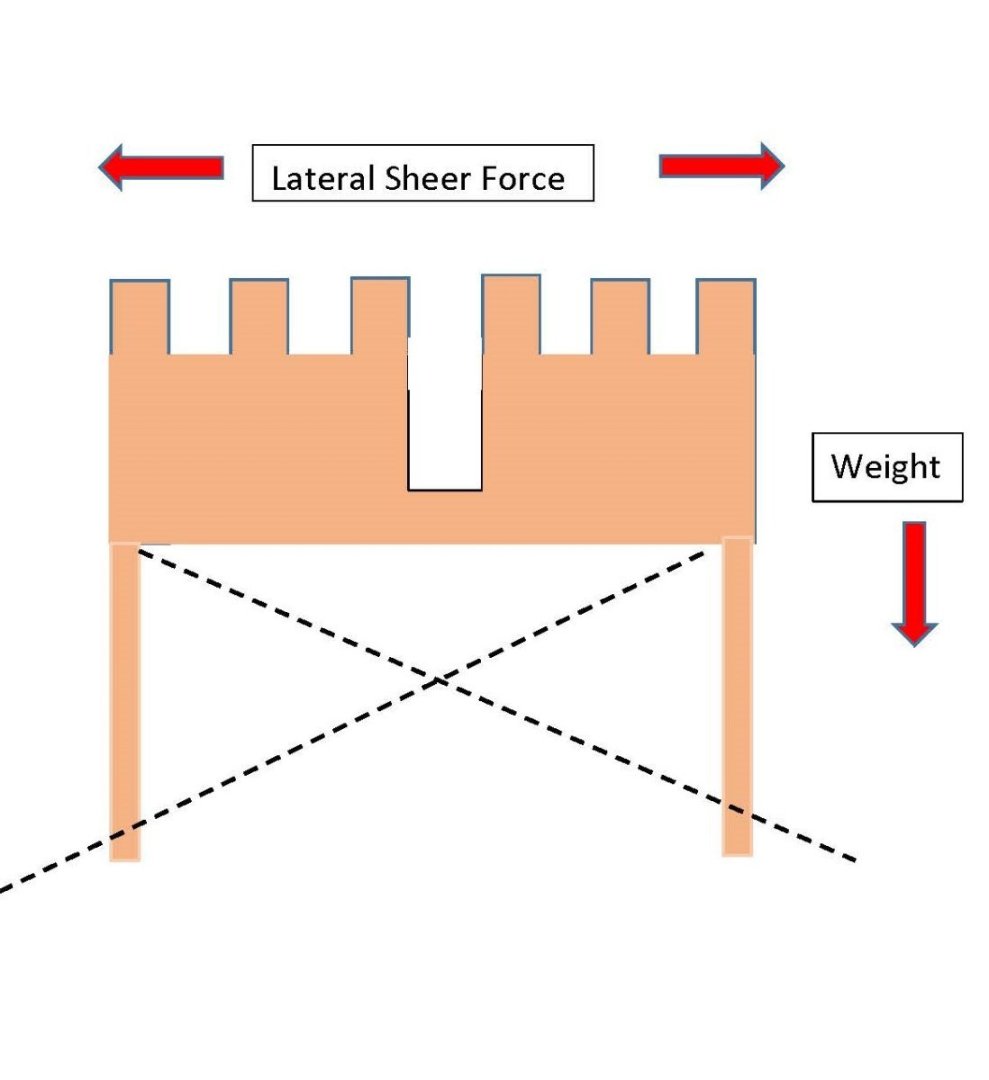
I partially agree. The supports would have to hold the weight of the men and the structure. The supports shown, while spindly, are still sufficient to support that weight and more if the weight is bearing straight down. Lateral sheering forces come into play when the ship rolls. The English Channel can be rough at times and I don't know if sailing was suspended during heavy seas. I would think a roll of more than 30 degrees would put quite a lateral strain on the supports if not braced. ...on the other hand, as I said before, with one exception I have never seen these braced.
-
I remember seeing somewhere, I don't recall if it was in ZIMMERMAN or FIRSCH...or maybe a model, where there was crossbracing of the castles using line. I have only seen it in the one place, but given the flimsy nature of the supports this makes sense to avoid collapsing when the ship rolled. Thoughts?
-
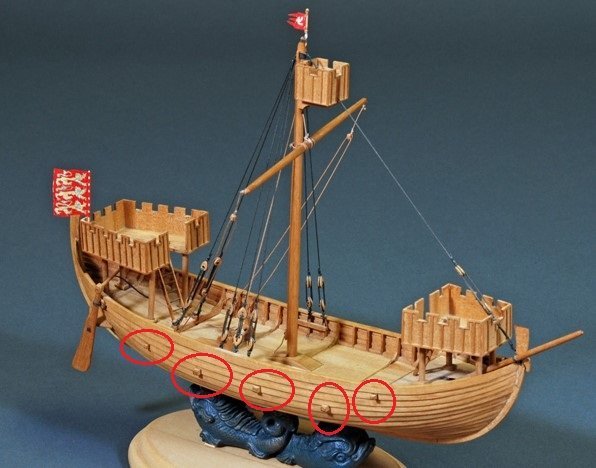
Evergreen also makes styrene strips. However, if I was going to do what you are doing, I would use wood. You will get better compound curves. As Steven mentioned, the deck of a nef is higher than that of a longship. The nef is a cargo ship whereas the longship is not. Even the Viking knarr, which the nef is closer to than the longship, has a lower deck. Checking my Werner Zimmerman nef plans against a knarr, I find the deck is almost at the top of the gunwale. Also as Steven mentioned, you would want to put some under deck thru-beams to support the deck. The attached photo shows the thru-beams better than Steven's photo. I don't know where I got the pic, so I cannot properly credit it, but I believe it is of the Zimmerman model. The thru-beams are circled. The curve of the bow and stern would have to be altered to reflect the proper nef angle and probably to raise it up high enough to accomodate the additional freeboard,
-
My plan was similar to yours-general fairing (faring?) before assembling, then fine tuning once assembled. IIRC, you have to do some fairing or else the frame will not fit into the jig.
-
Rob, Welcome to the Shallop Build. I have planked the hull and fine tuning before working the interior. I have not started a buildlog because........ anywho A couple recommendos: 1. Be careful with the cant frames. Several people (including myself) had problems with those. I found that, while the frame building jigs for the square frames worked great, the jigs for the cants had alot to be desired. I ended up building the cant frames onto the hull, using the framing jig as an aid. Hard to explain but once I started it, it made sense. 2. When you fair your frames, be sure to take it to the line...and maybe a few sandpaper swipes beyond. I was not as observant and when I planked, many of my planks ended up being a millimeter too short. 😪 Good luck. I look forward to your build.