HOLIDAY DONATION DRIVE - SUPPORT MSW - DO YOUR PART TO KEEP THIS GREAT FORUM GOING! (Only 13 donations so far - C'mon guys!)
×


Moonbug
-
Posts
1,028 -
Joined
-
Last visited
Content Type
Profiles
Forums
Gallery
Events
Everything posted by Moonbug
-
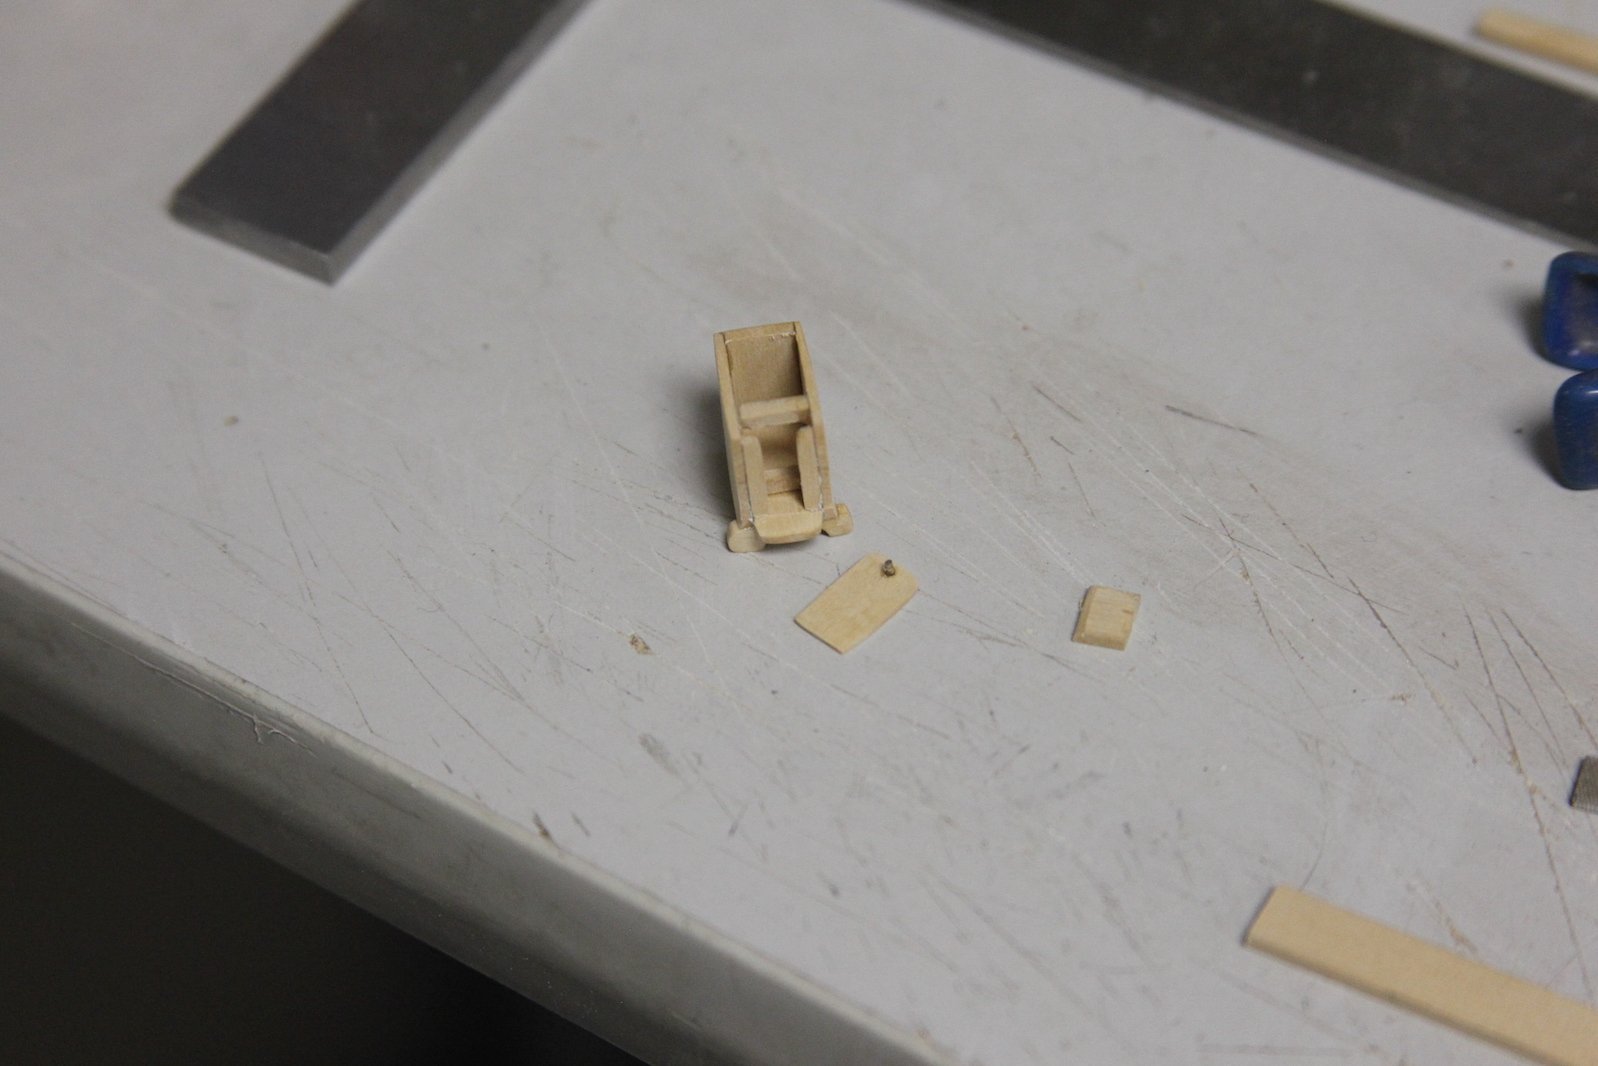
 More to come in the log Drux - but here’s a tease of my interpretation of the binnacle:
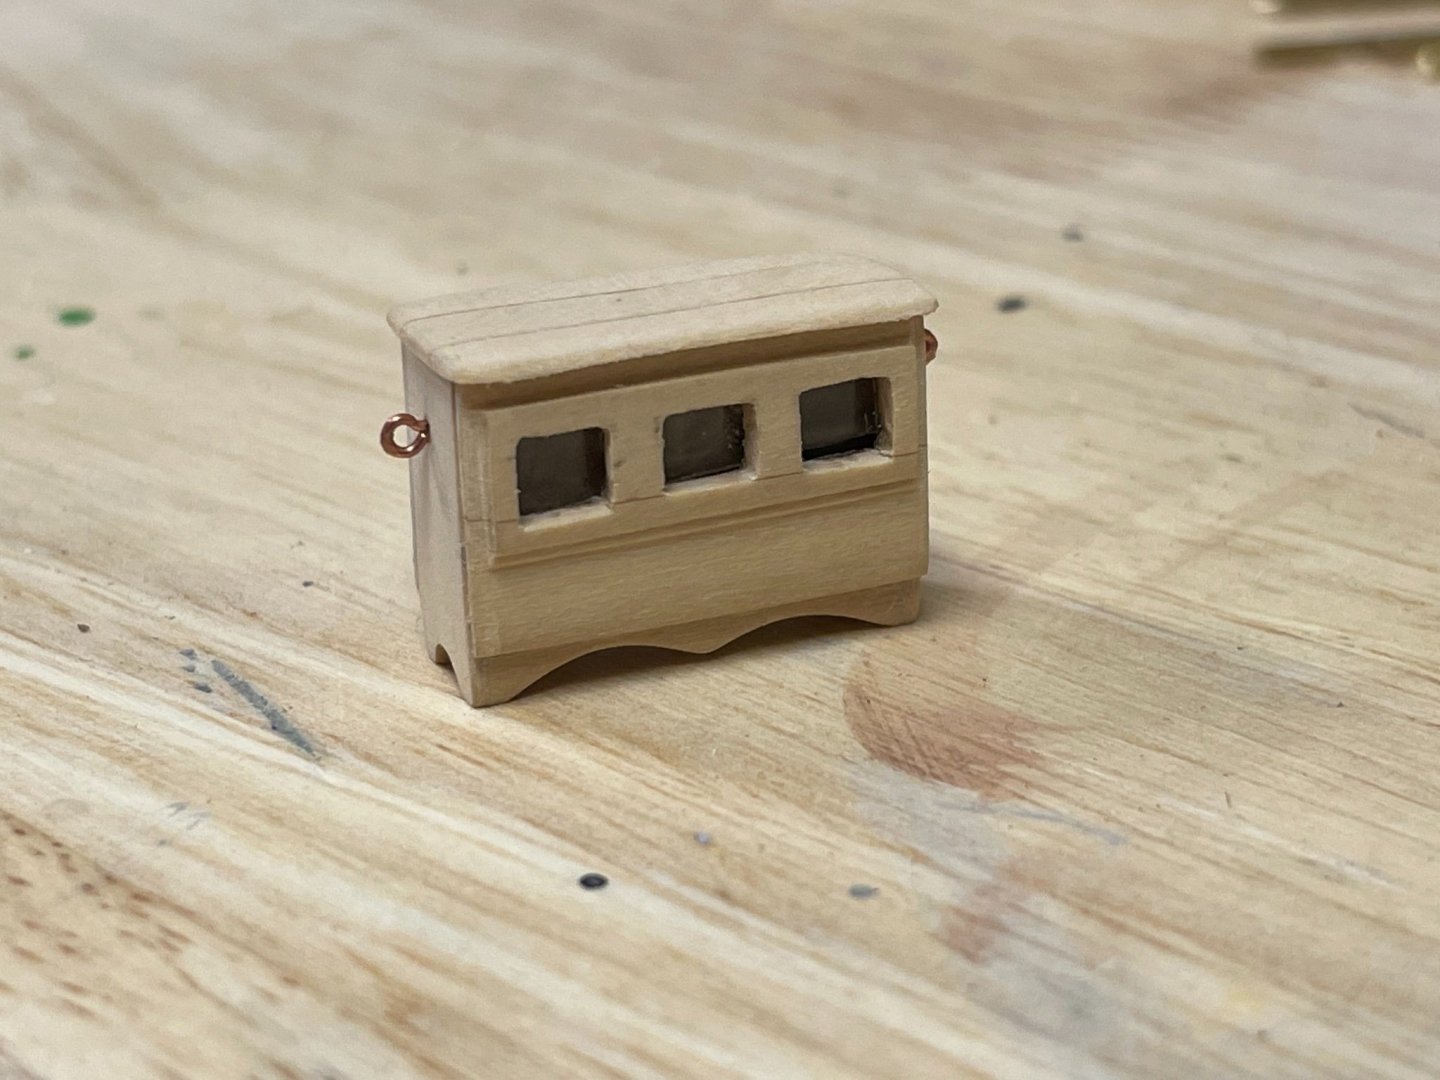
-
It's all about the 5 P's - Preplanning prevents **** poor performance. I know the feeling of anxiety right before you start planking. Just remember - go with the flow - even though you've got it all planned out, there are always imperfections and variations. Don;'t sweat it - you're going to do great!
-
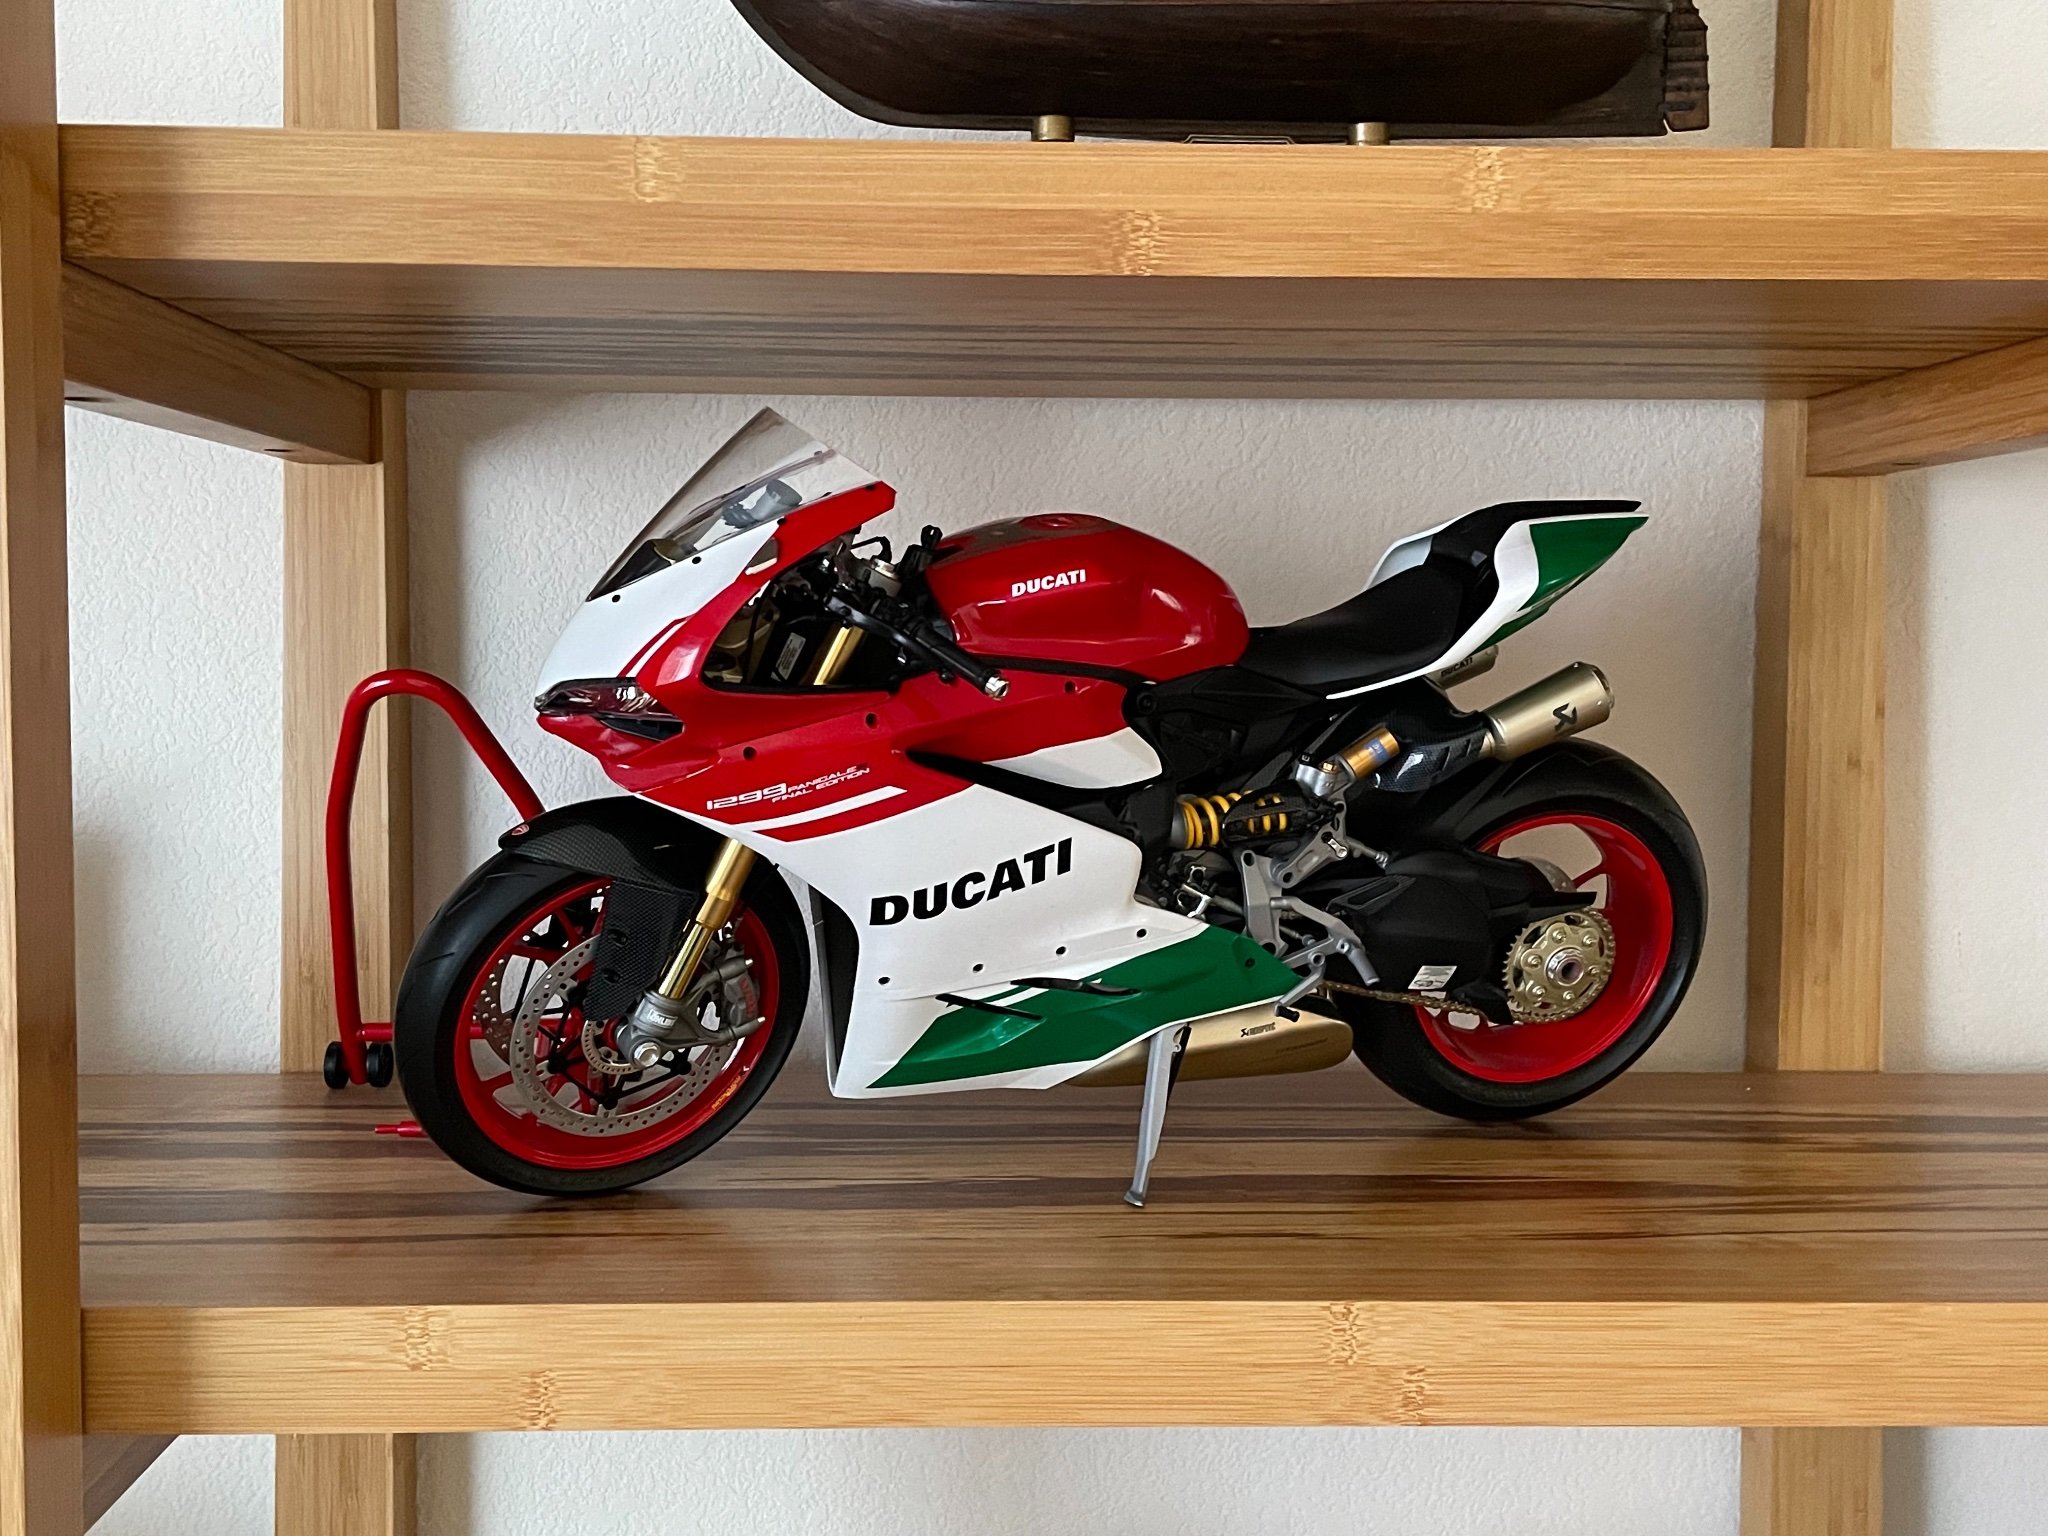
Ducati 1299 by Moonbug - Pocher - 1/4 Scale
Moonbug replied to Moonbug's topic in Completed non-ship models
Ha! That’s amazing! Is this one of those “Sorry, not sorry” kind of situations? 😆 Gotta show us all that display when you get her done. -
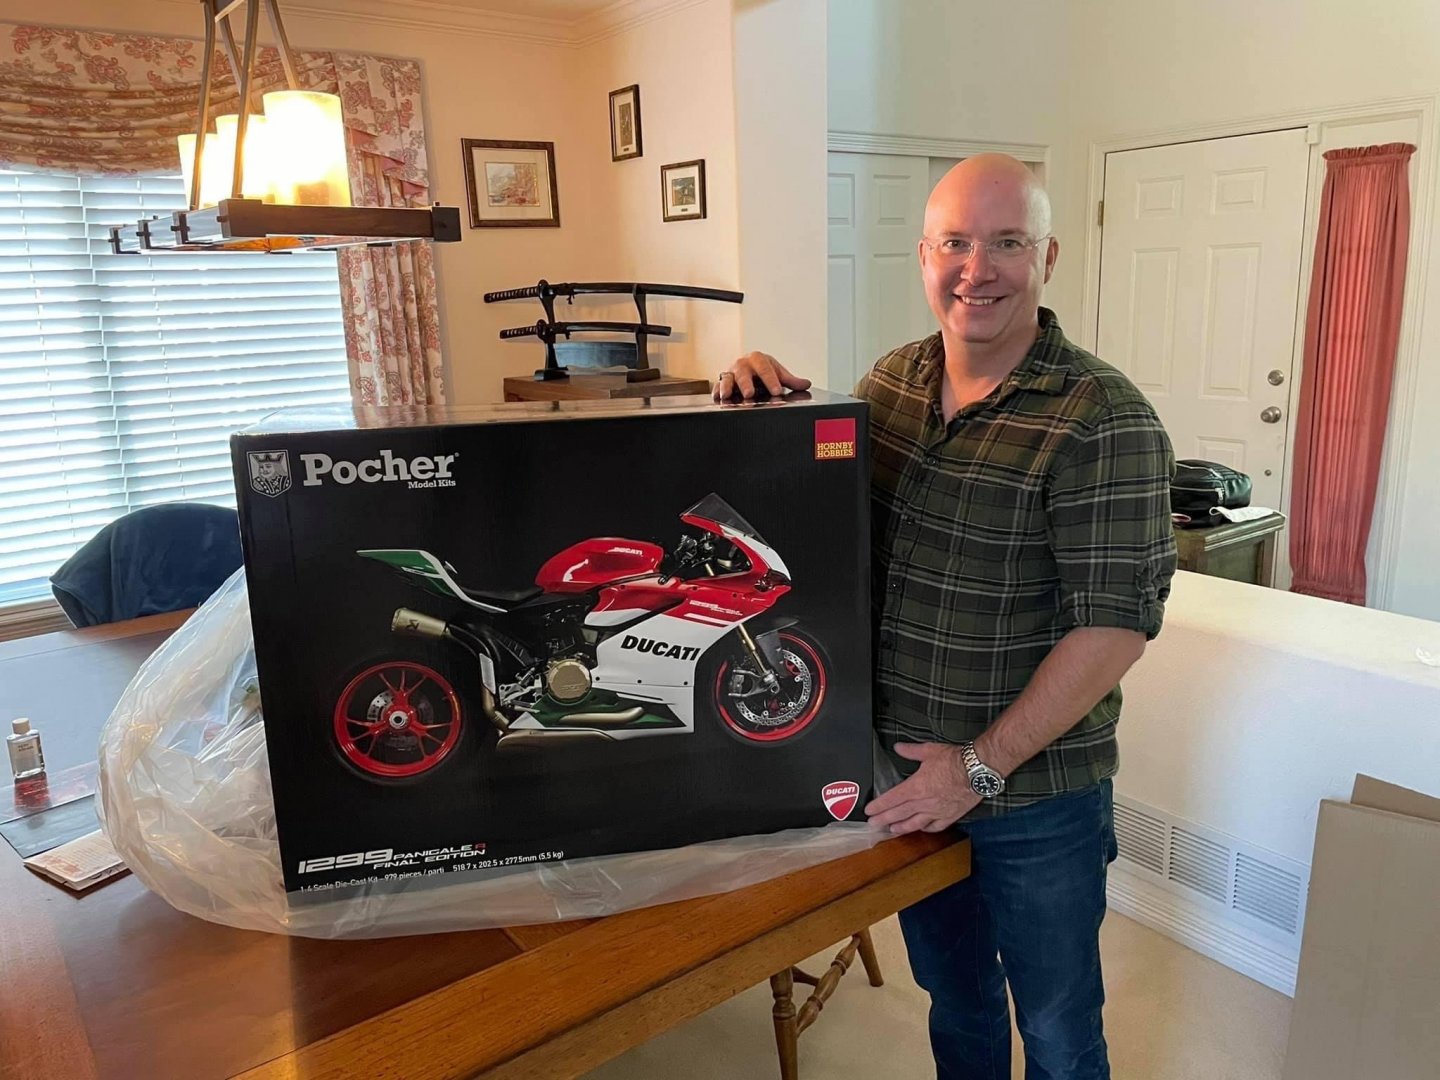
Not sure how many Pocher fans are out there, but I ordered this 1/4 scale Ducati abut a year ago. I put it together a month or so ago. First production run so a few errors on the instructions, etc - but all in all pretty sweet. The box gives you an idea of the size of the thing.

- 25 replies
-
- 21
-

-

-
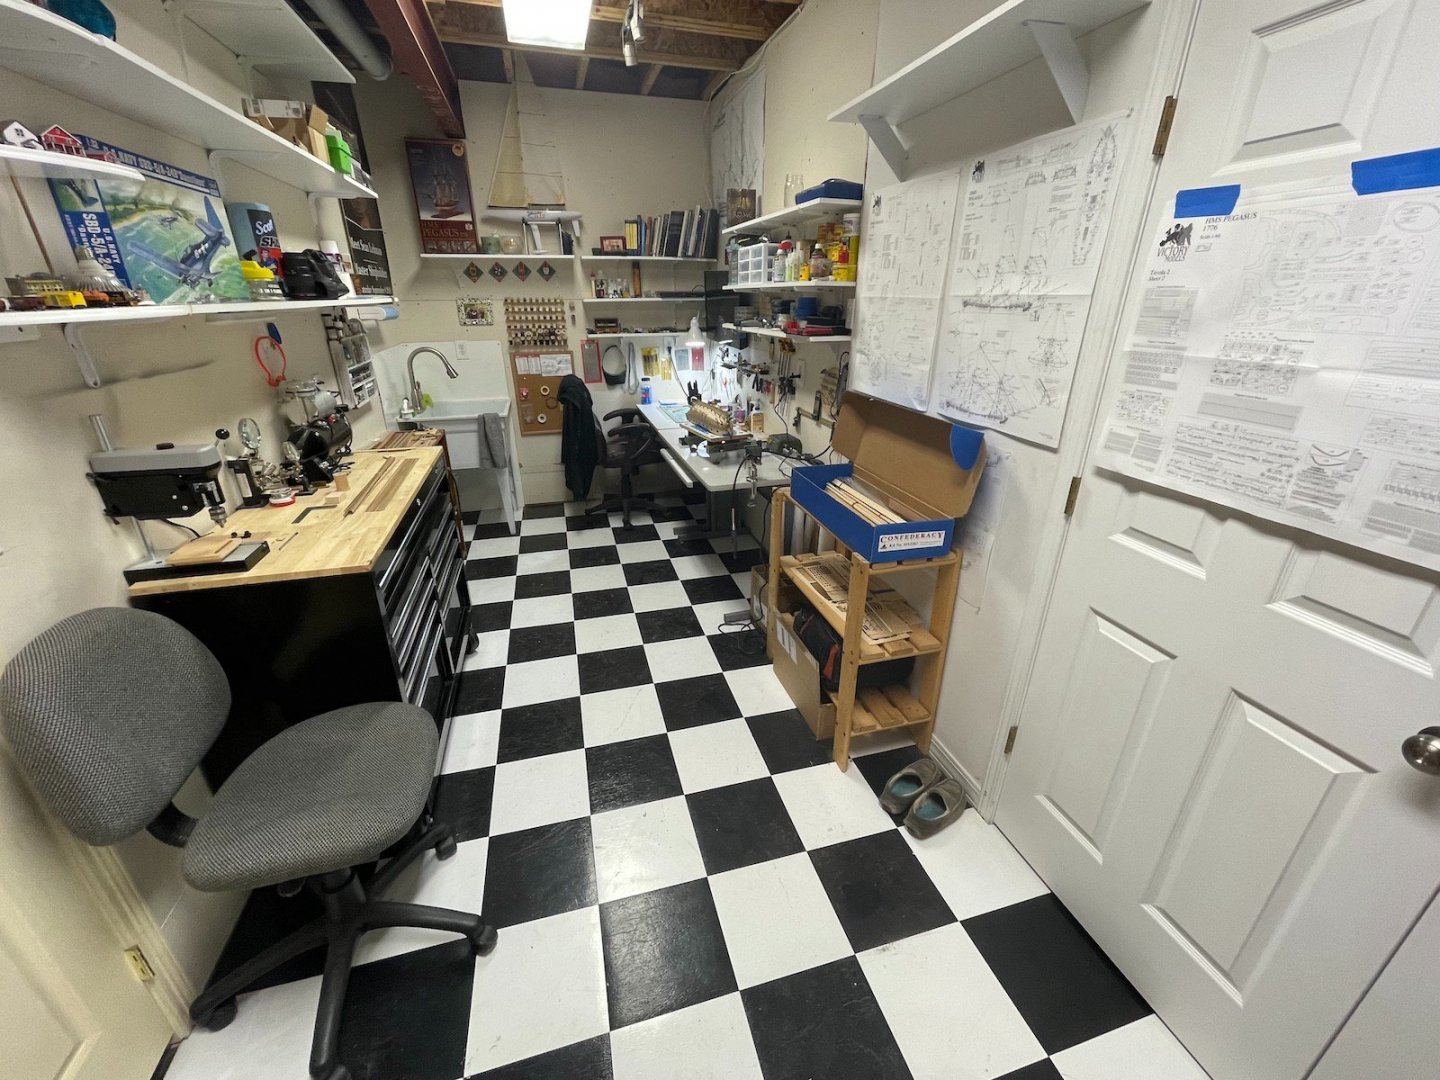
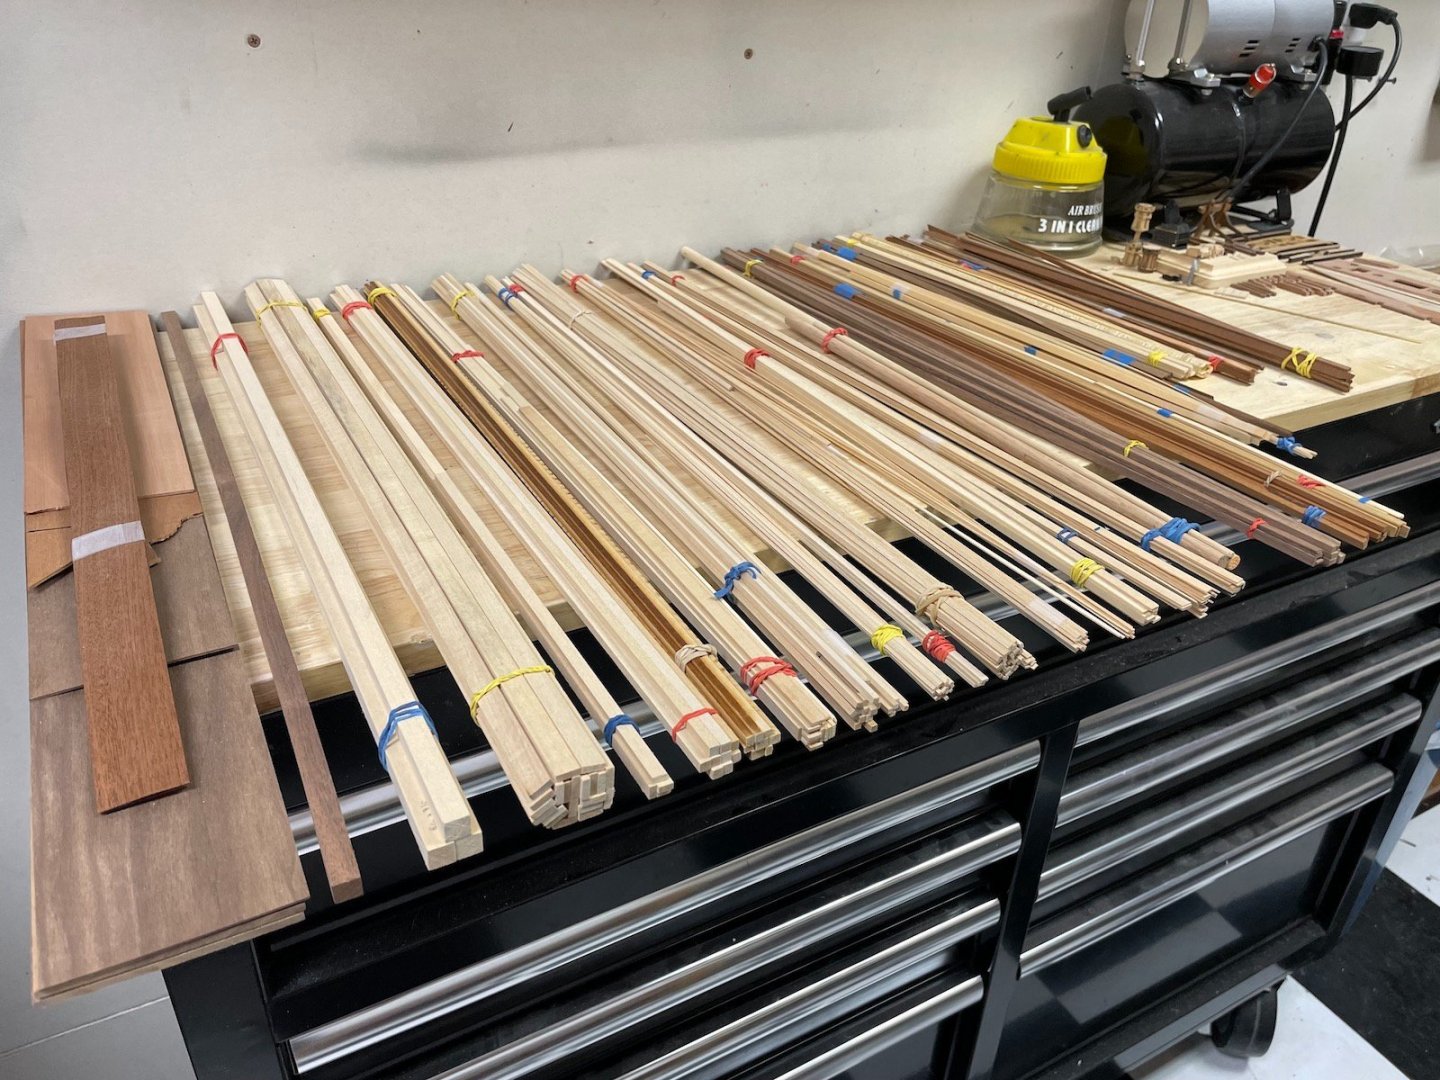
I wanted to post a short update since it's been almost a week. Last week I had laser eye surgery, so time in the hobby room has been limited. The surgery went fabulous; a little weird having to wear reading glasses to do the work as I'm using being able to see up close and that's it. Anyway - the big thing is not being able to get dust or anything in your eyes for a week or so; not conducive to woodwork... In the interim, I have been able to do some second layer planking - taking it very slowly. I'll have a more detailed post on second layer planking forthcoming. But I also took the opportunity to do a little bit of inventory of wood and some general tidying up in the hobby room. Thought it might be interesting to see the cave.
- 419 replies
-
- 12
-
-
- Victory Models
- Pegasus
- (and 2 more)
-
Thanks Drux for digging up the resource. Given a peripheral discussion in another forum, I'm pretty tempted to chastise you and sulk for providing me with information that differs from my expectation - but I'll resist. 😆
-
New Member from waaaaay South of the Border
Moonbug replied to Smokeyr67's topic in New member Introductions
Welcome aboard Smokey - my guess is; if you can't find it here, you'll at least find where to find it. -
Hello all - I've rooted around a bit in both my books and here and I think I've got a decent idea of what I'd like to do for the binnacle on Peg. My question is this - When and in what cases did the vent start to appear on binnacles to account for the lamp? Was this more regional than dated?
-
Beautiful planking job.
-
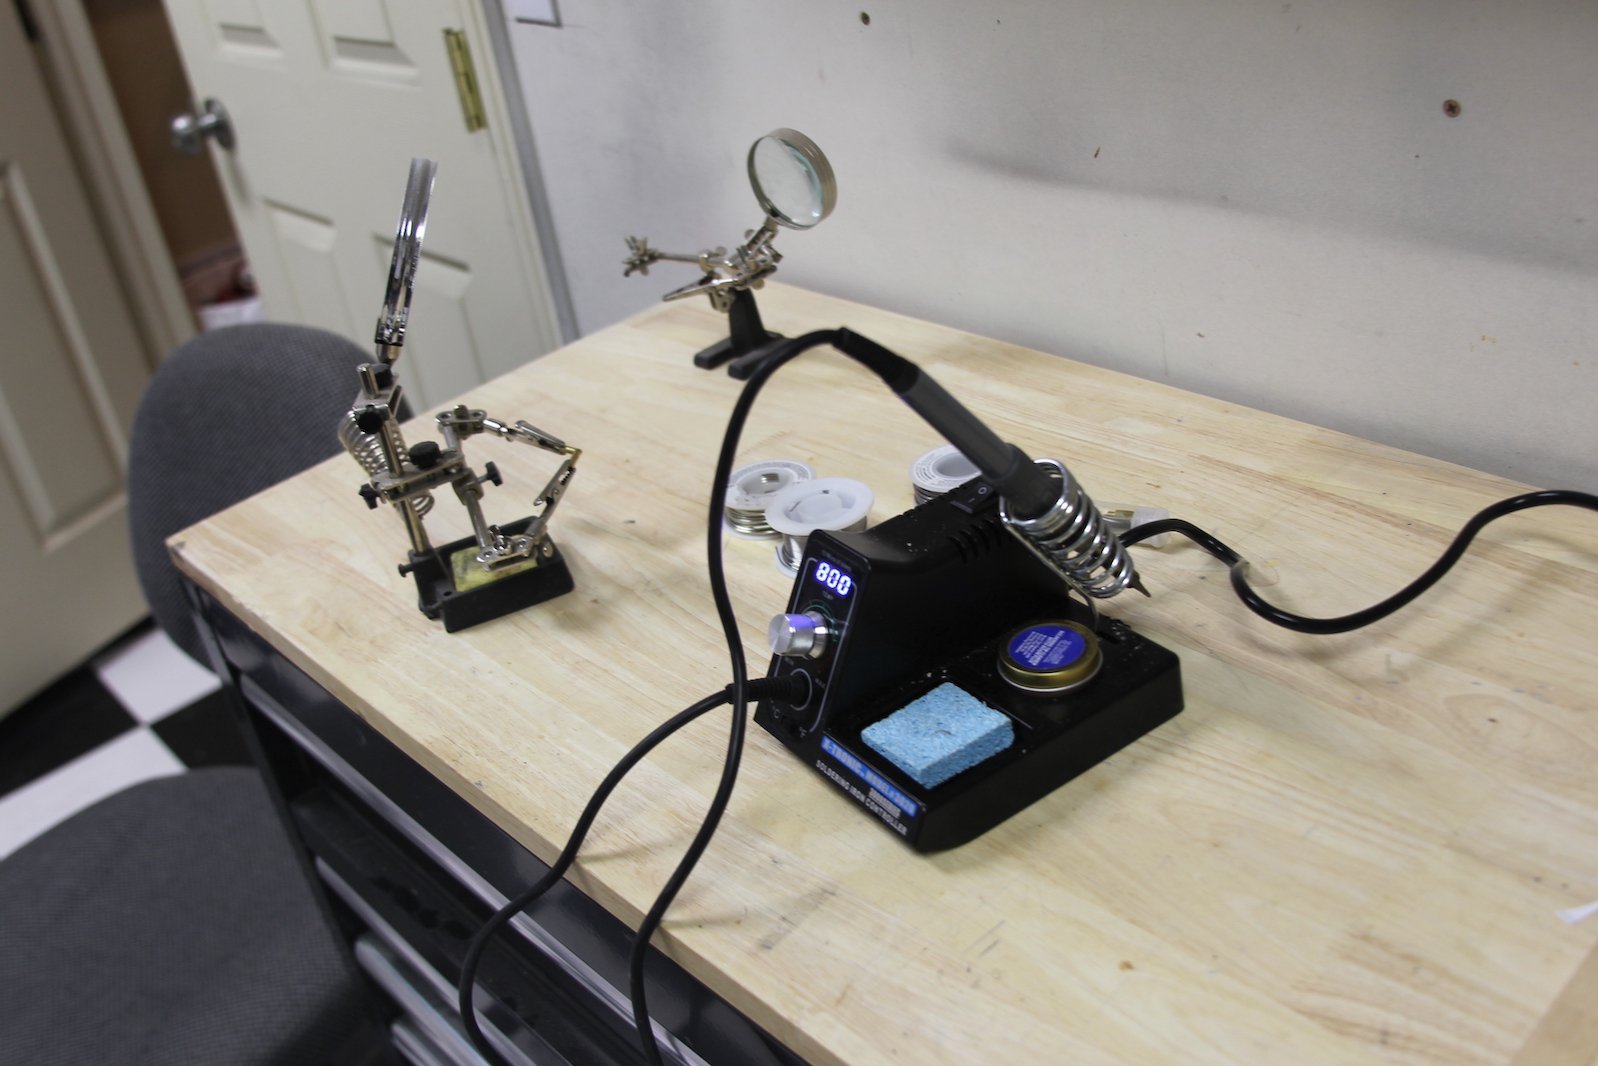
Thanks for the comments gents. And thanks for the info BE - I already have a micro burner and some pretty decent setups for "holding" small parts in pace. Here I was trying to use a traditional soldering iron and roll of solder. I'll definitely order some tube style soldering and give it some practice! I've got a handful of swivel guns to create coming up - so this will be very helpful.
- 419 replies
-
- 3
-
-
- Victory Models
- Pegasus
- (and 2 more)
-
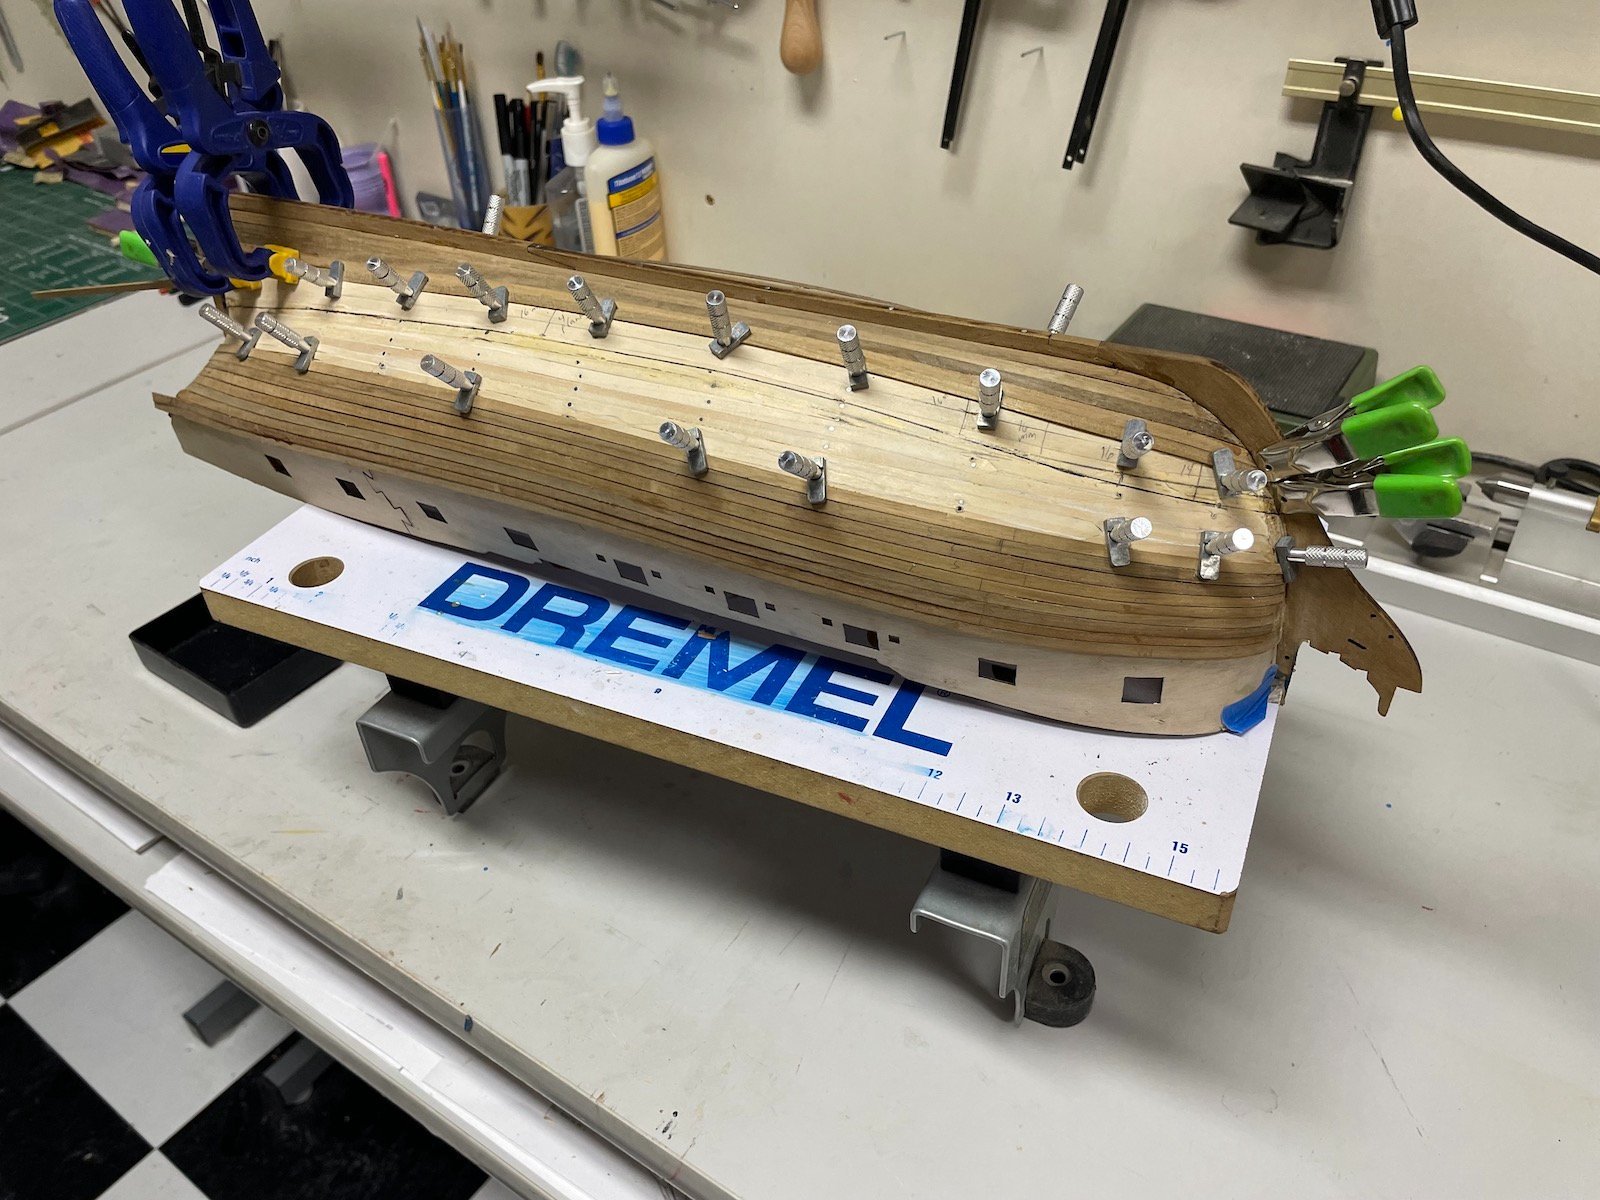
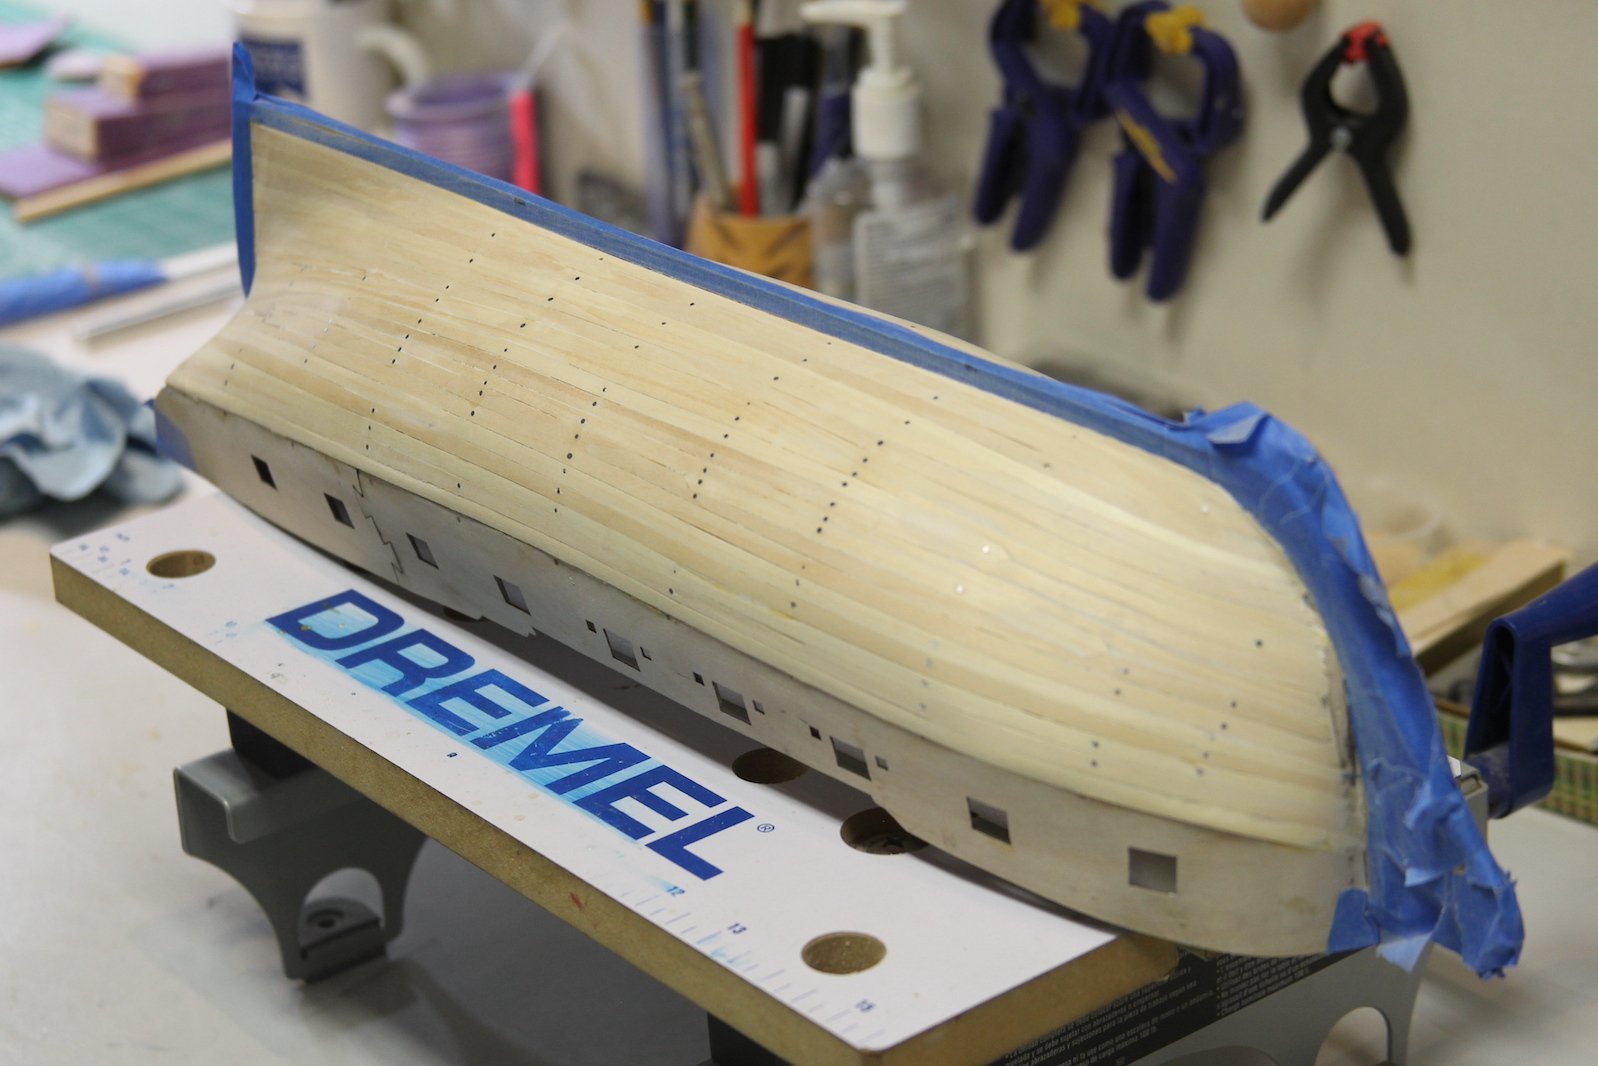
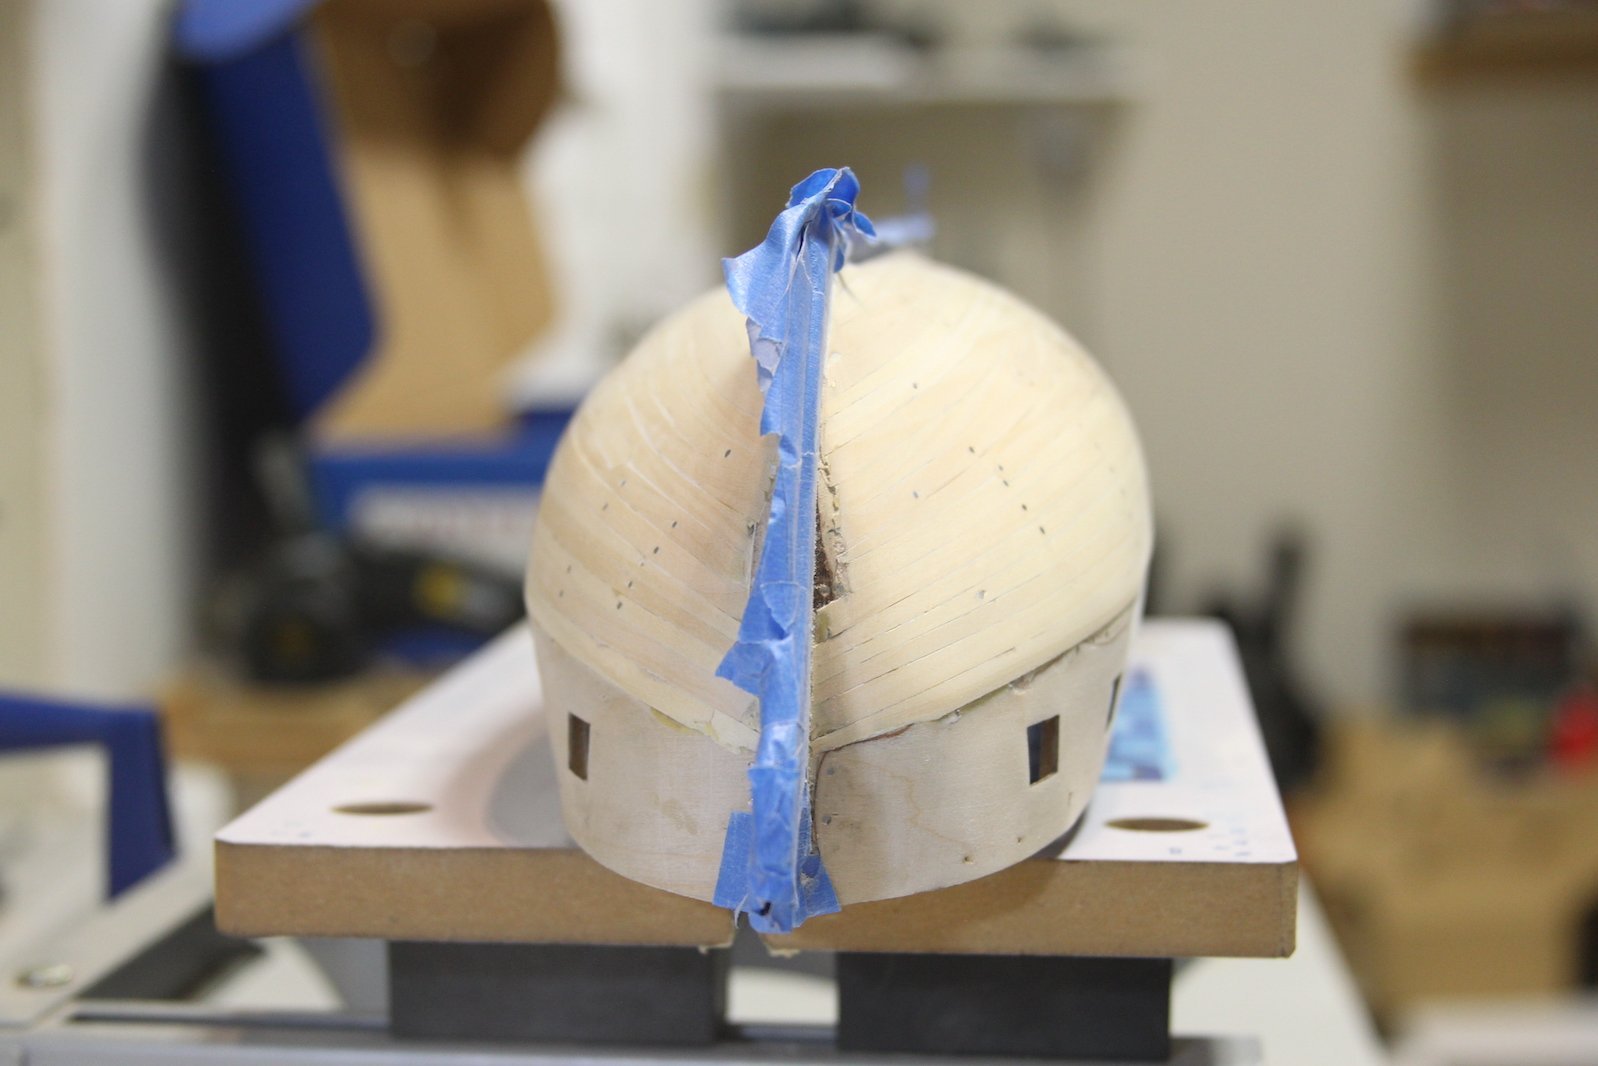
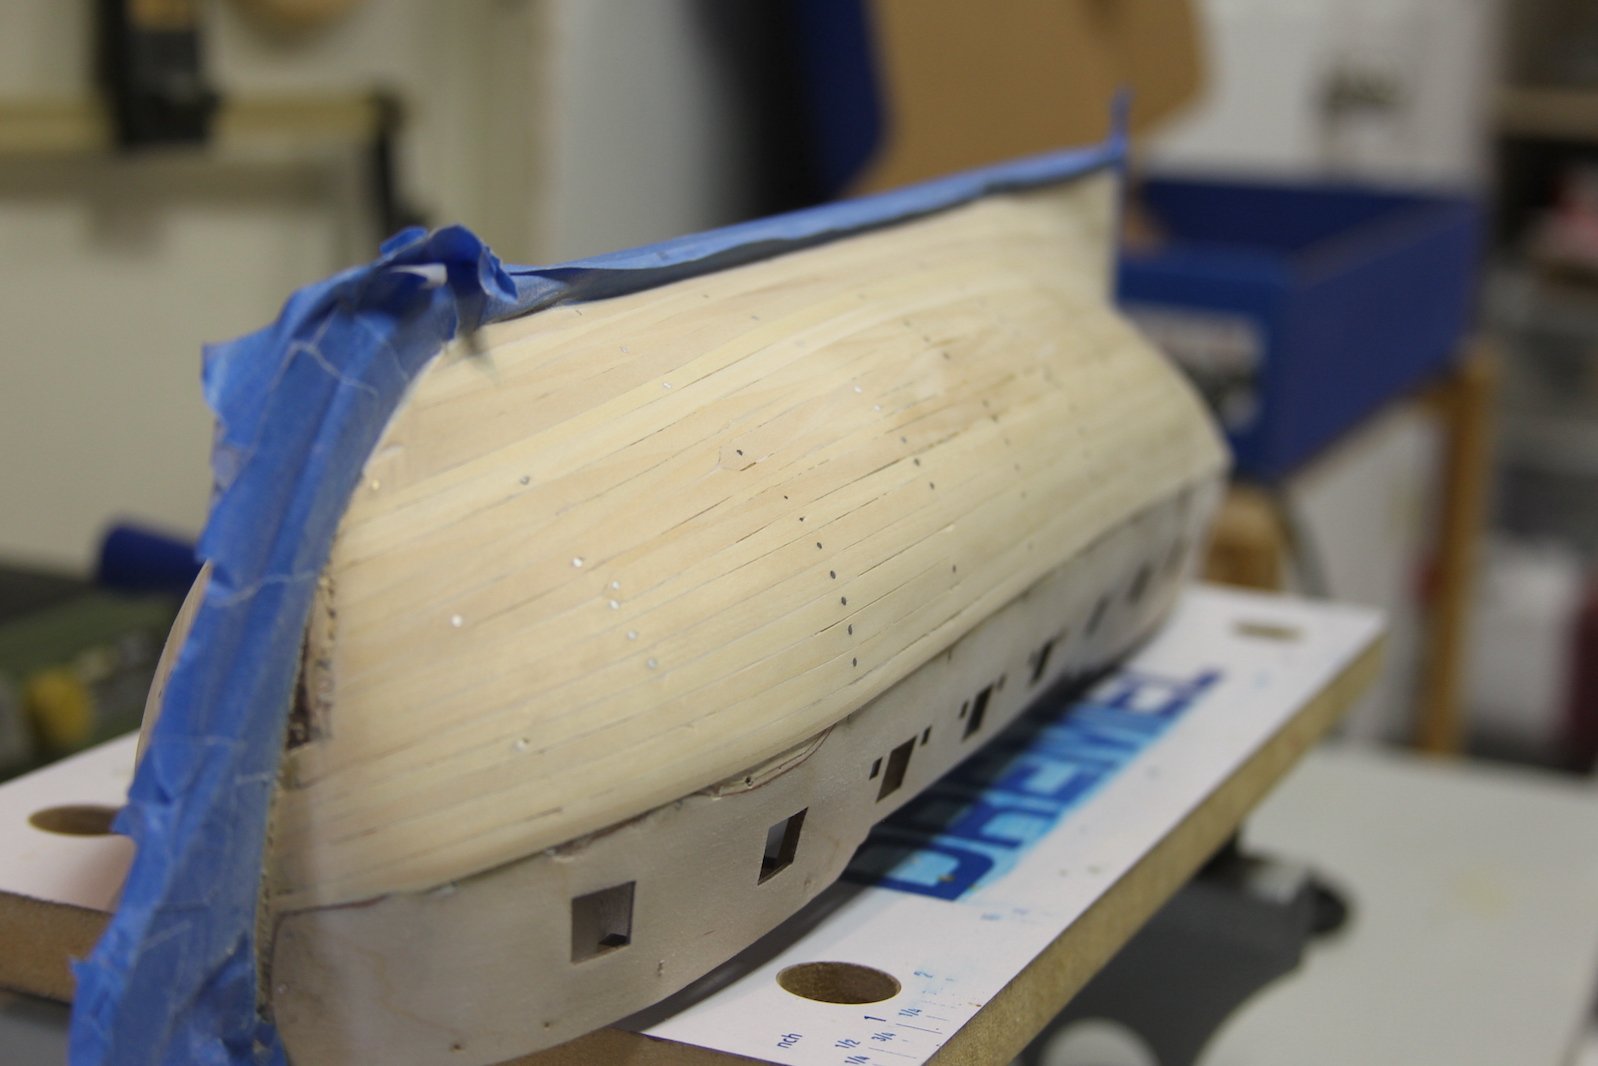
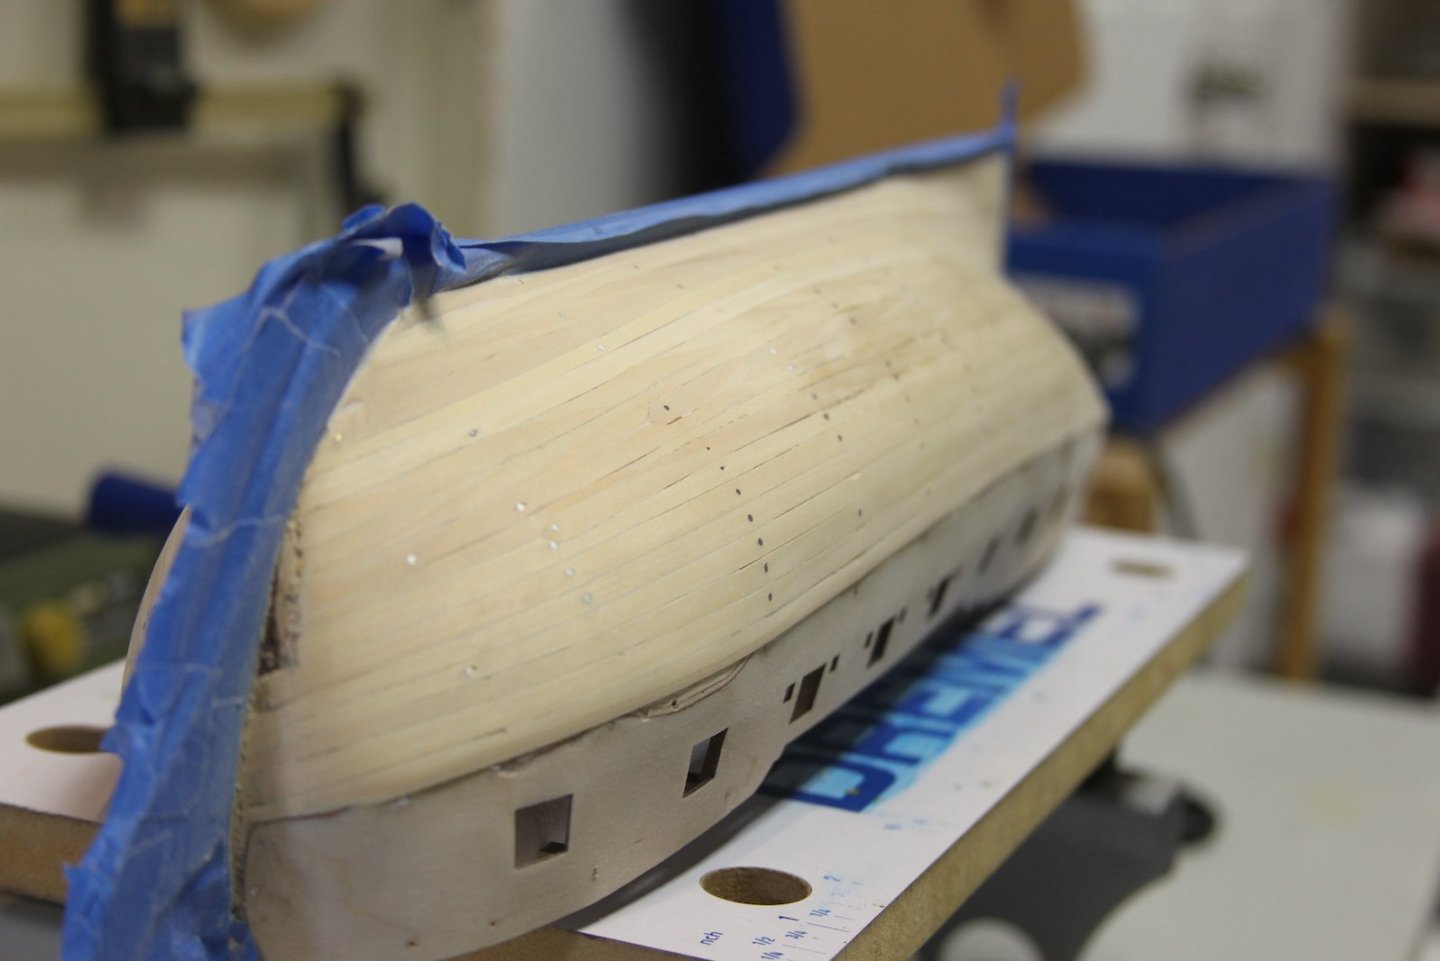
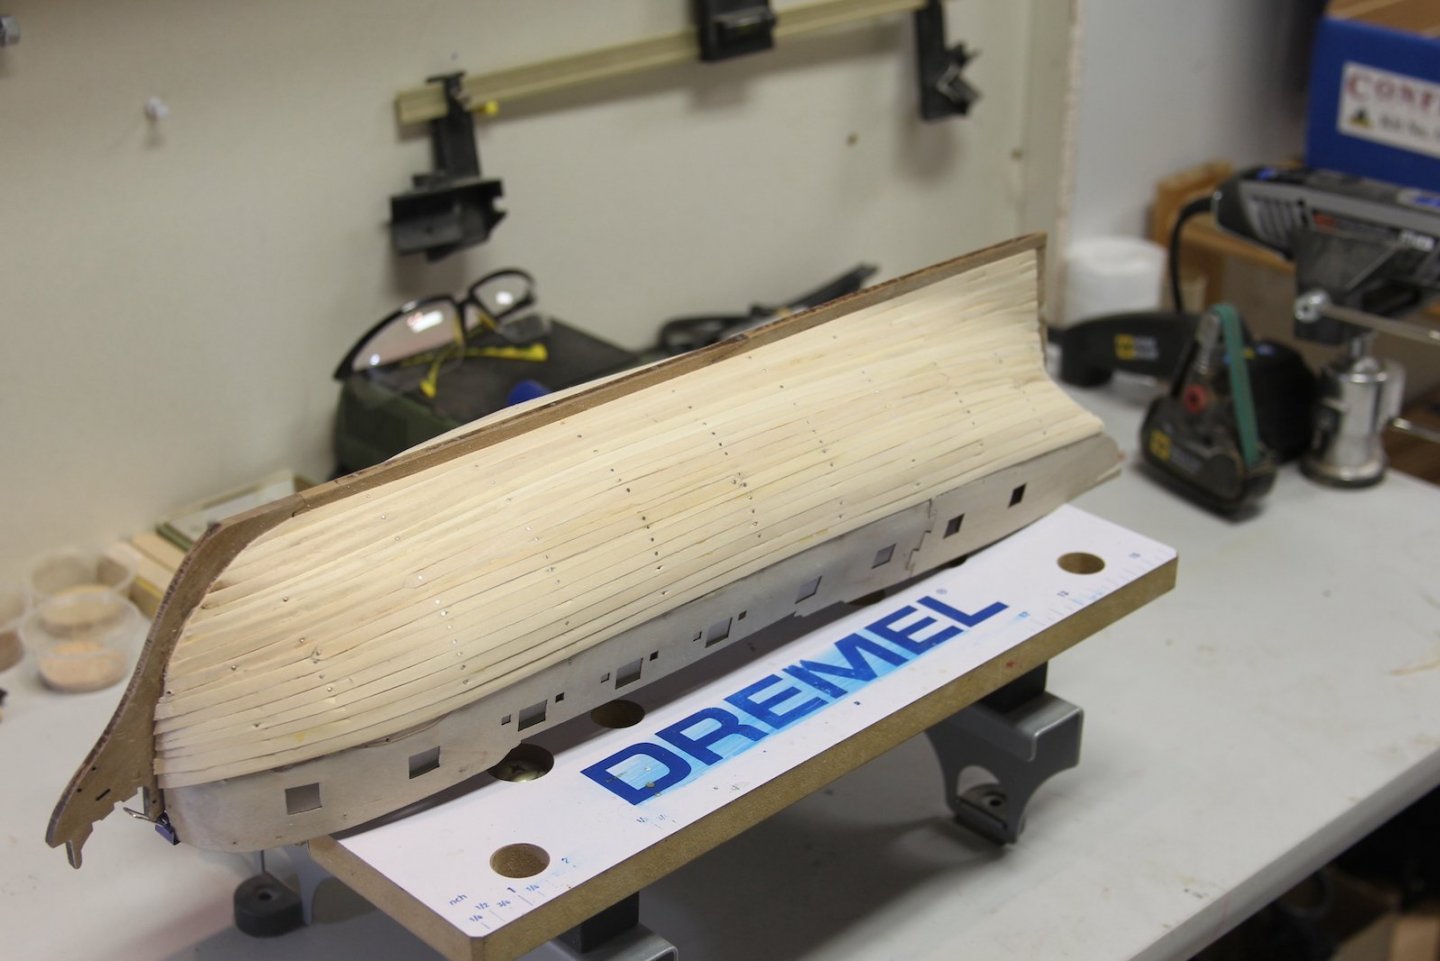
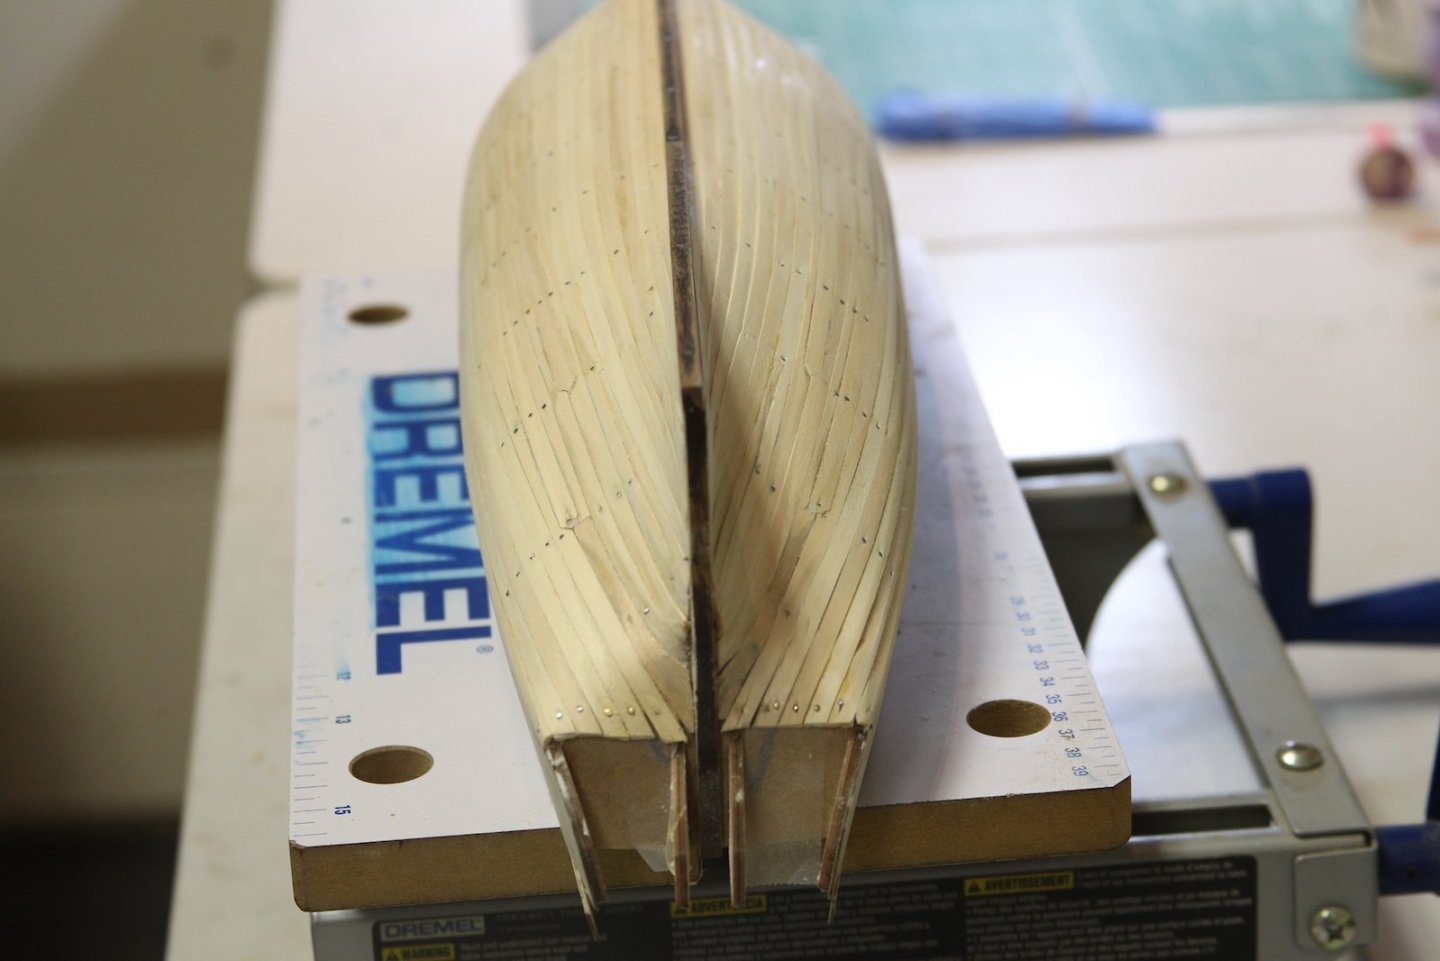
Here are the post sanding picks. I know this borders on sacrilege to the purists out there... but I gave it a first pass using my really cool Dremel/rotary tool extension and a 60 grit tip on slow speed. The extension allows you to hold it like a pencil and really lightly and specifically cover areas. After I evened out the hull in general terms, I gave it more traditional sanding with 150, 220, 400, and 600 grit. There are a few slight gaps that I filled in with glue/sawdust (which is why they show up a little darker) or "Wonderfill". Next steps are to carve out a new rabbet line for the second planking layer, then I'm going to draw out the planking plans with pencil onto the light wood so I can scale out the necessary tapering and (possibly) stealers.


- 419 replies
-
- 11
-
-
- Victory Models
- Pegasus
- (and 2 more)
-
Good morning @BobG, Thanks for the comments. My soldering iron is a K-Tronic 3020. I do like it quite a bit. Honestly - I didn't put too much effort into research, I just looked for a reasonably priced model, but a variable temperature was a must. It heats up quickly and works well - so I'm pleased.
- 419 replies
-
- 3
-

-
-
- Victory Models
- Pegasus
- (and 2 more)
-
Hey Mark - as someone who struggles with planking, I still admire your work here. Also understanding we are rightfully our own strictest critics.
- 505 replies
-
- 4
-
-
- vanguard models
- Sphinx
- (and 1 more)
-
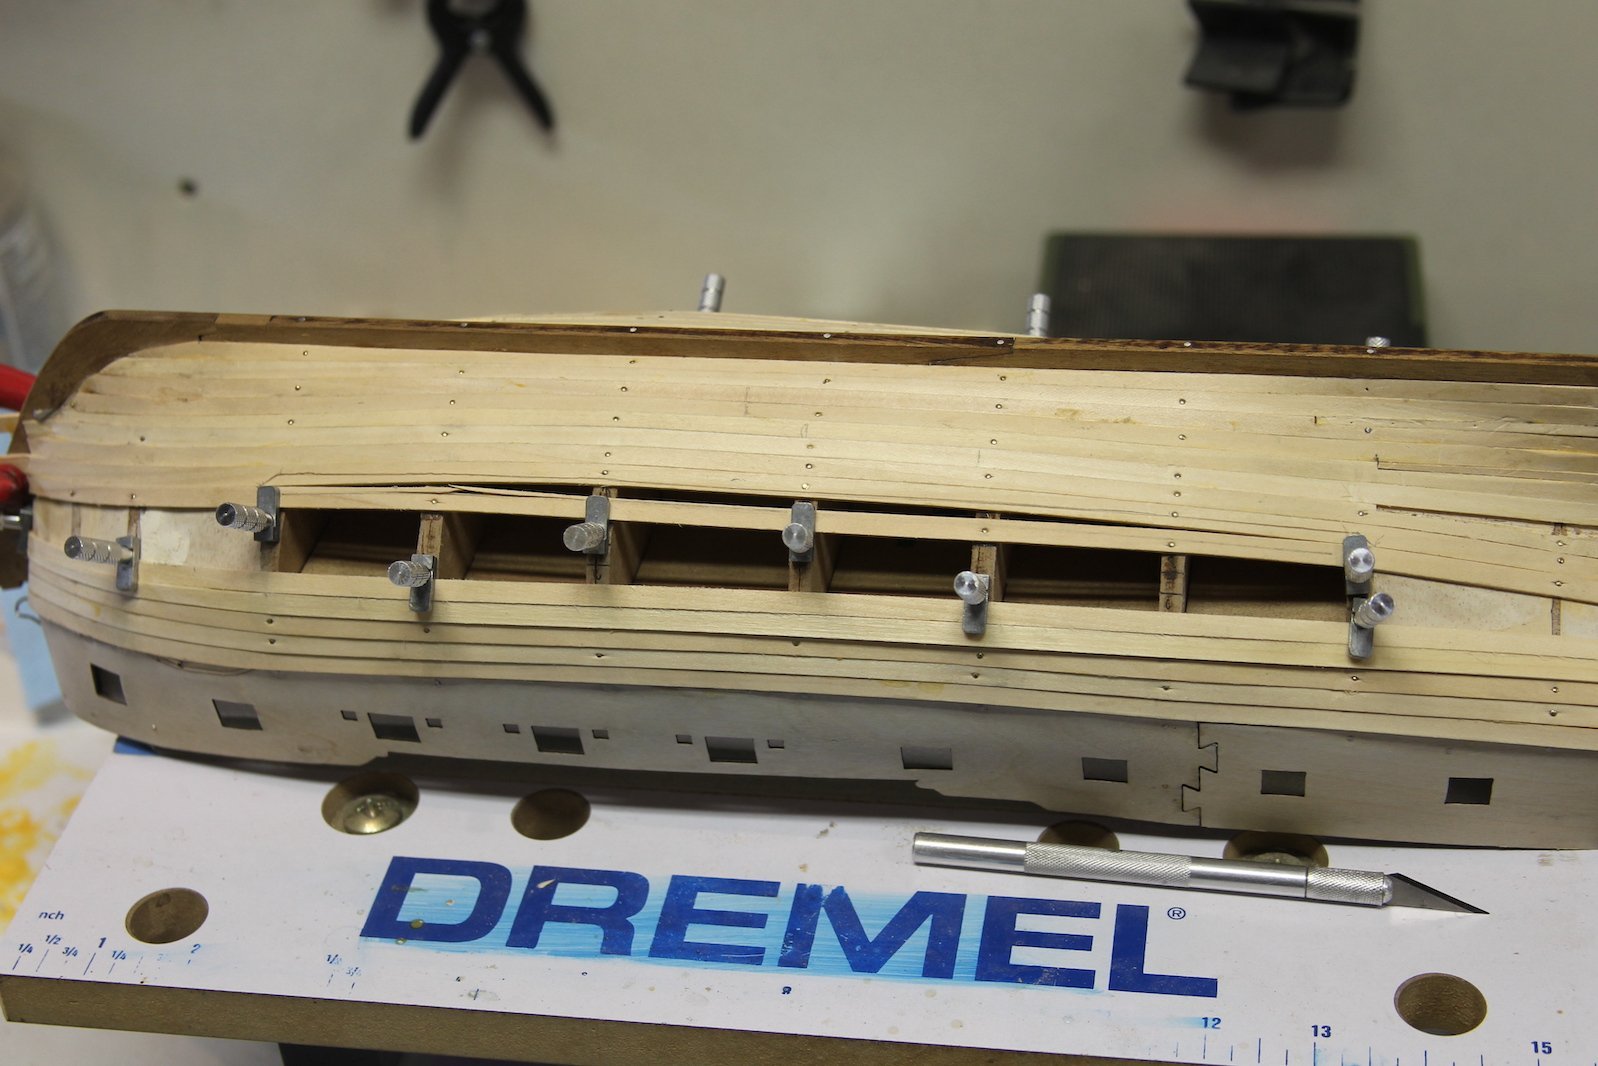
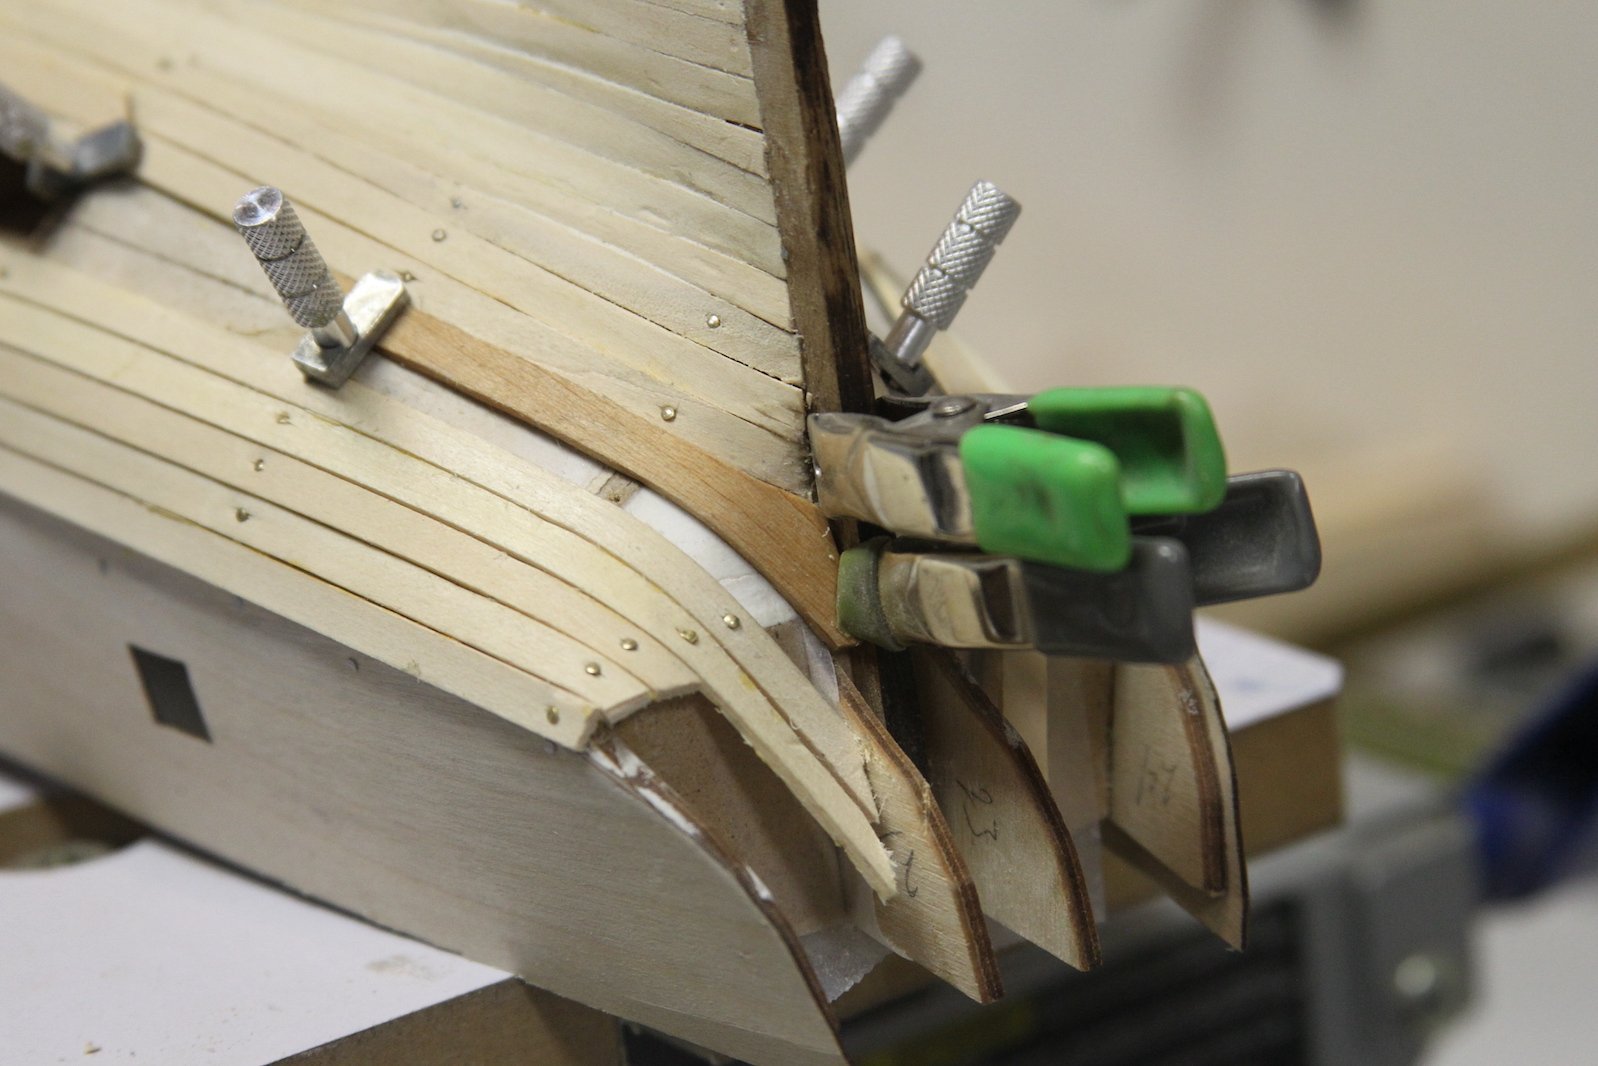
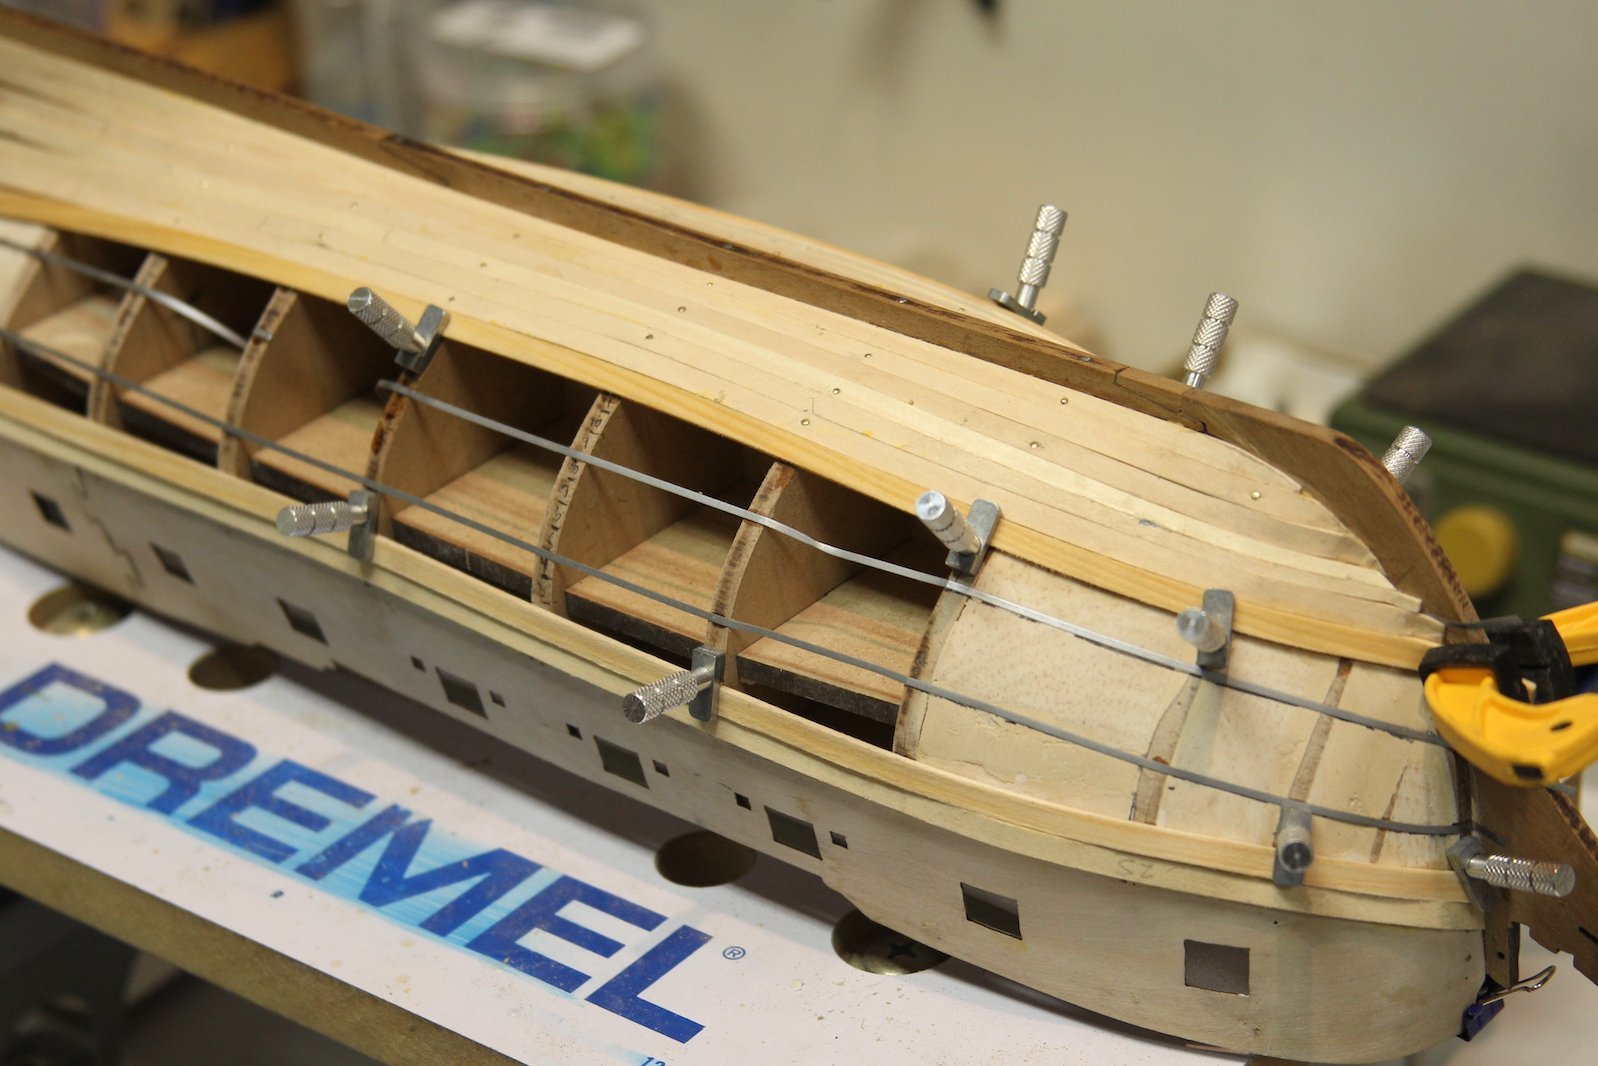
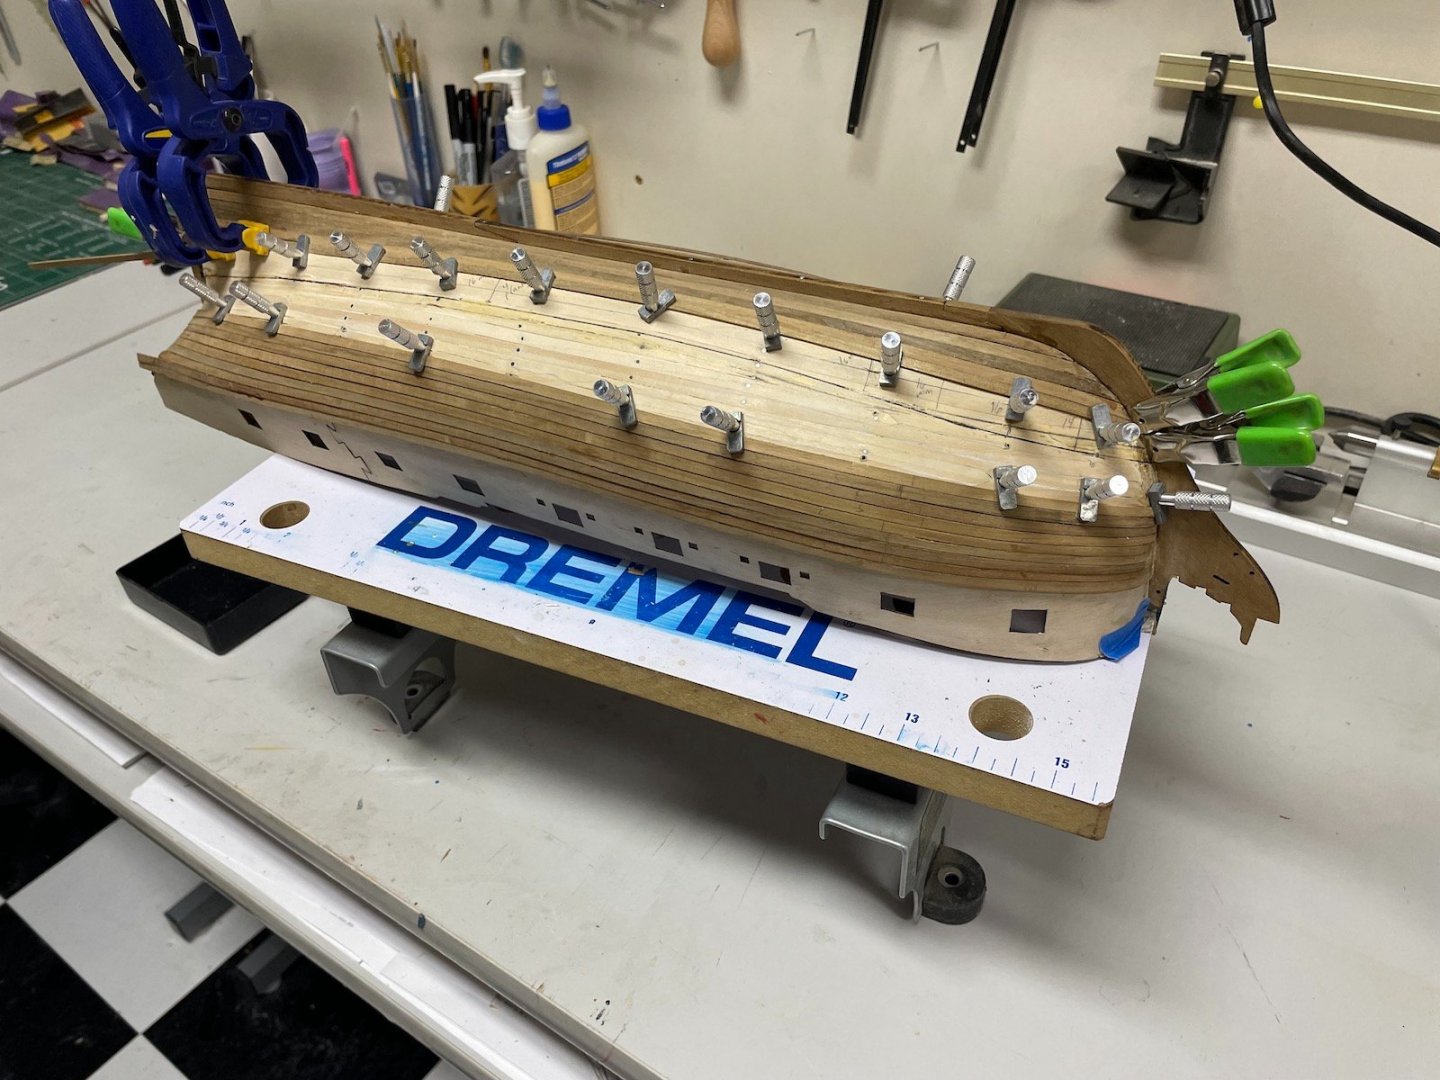
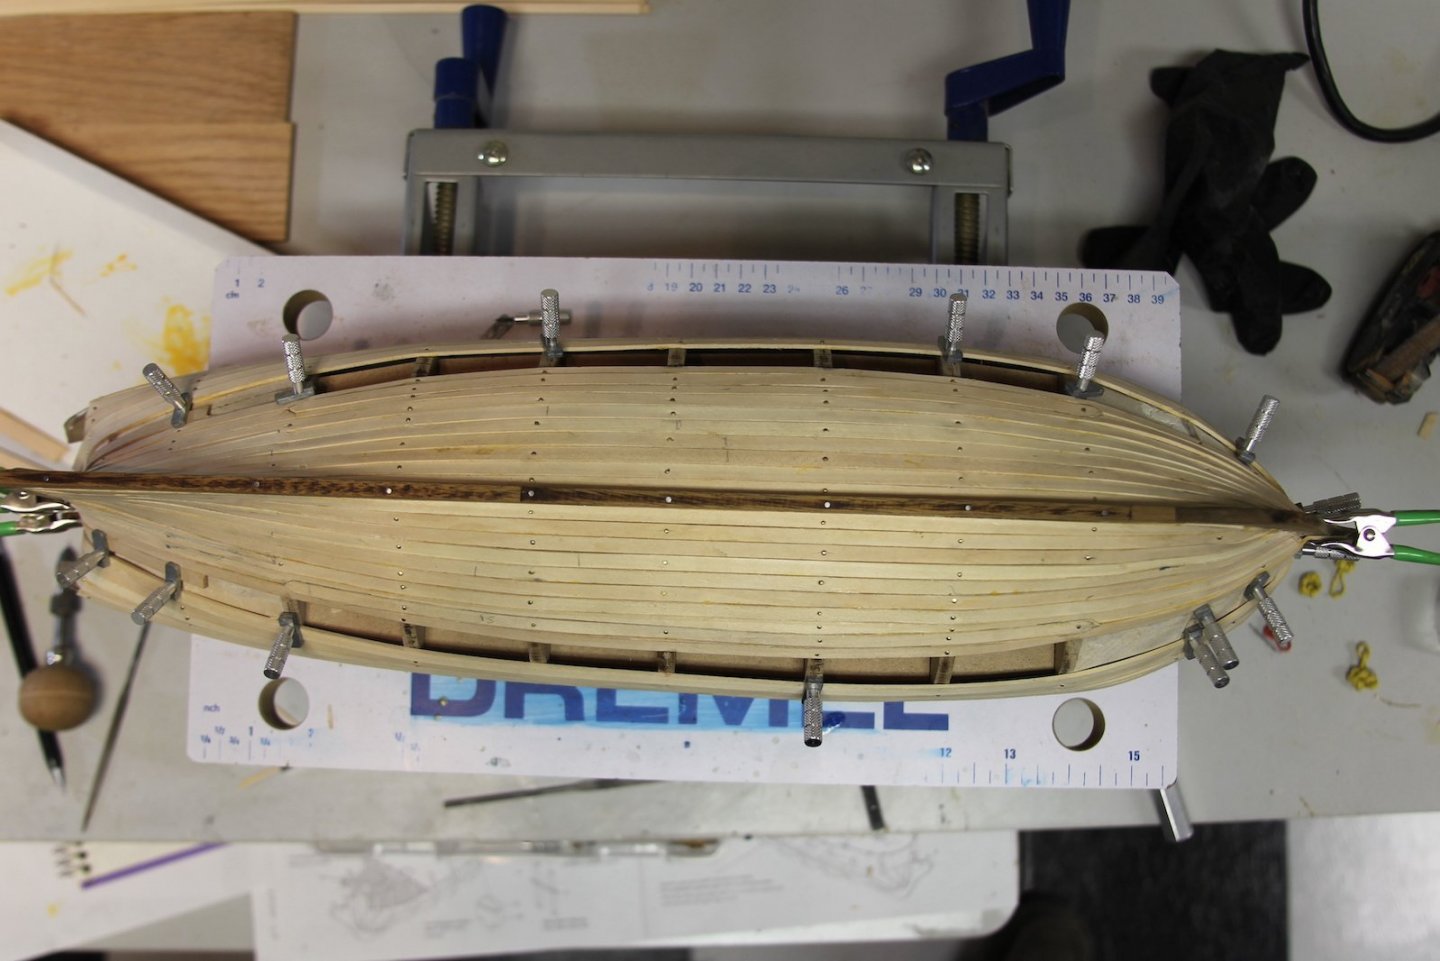
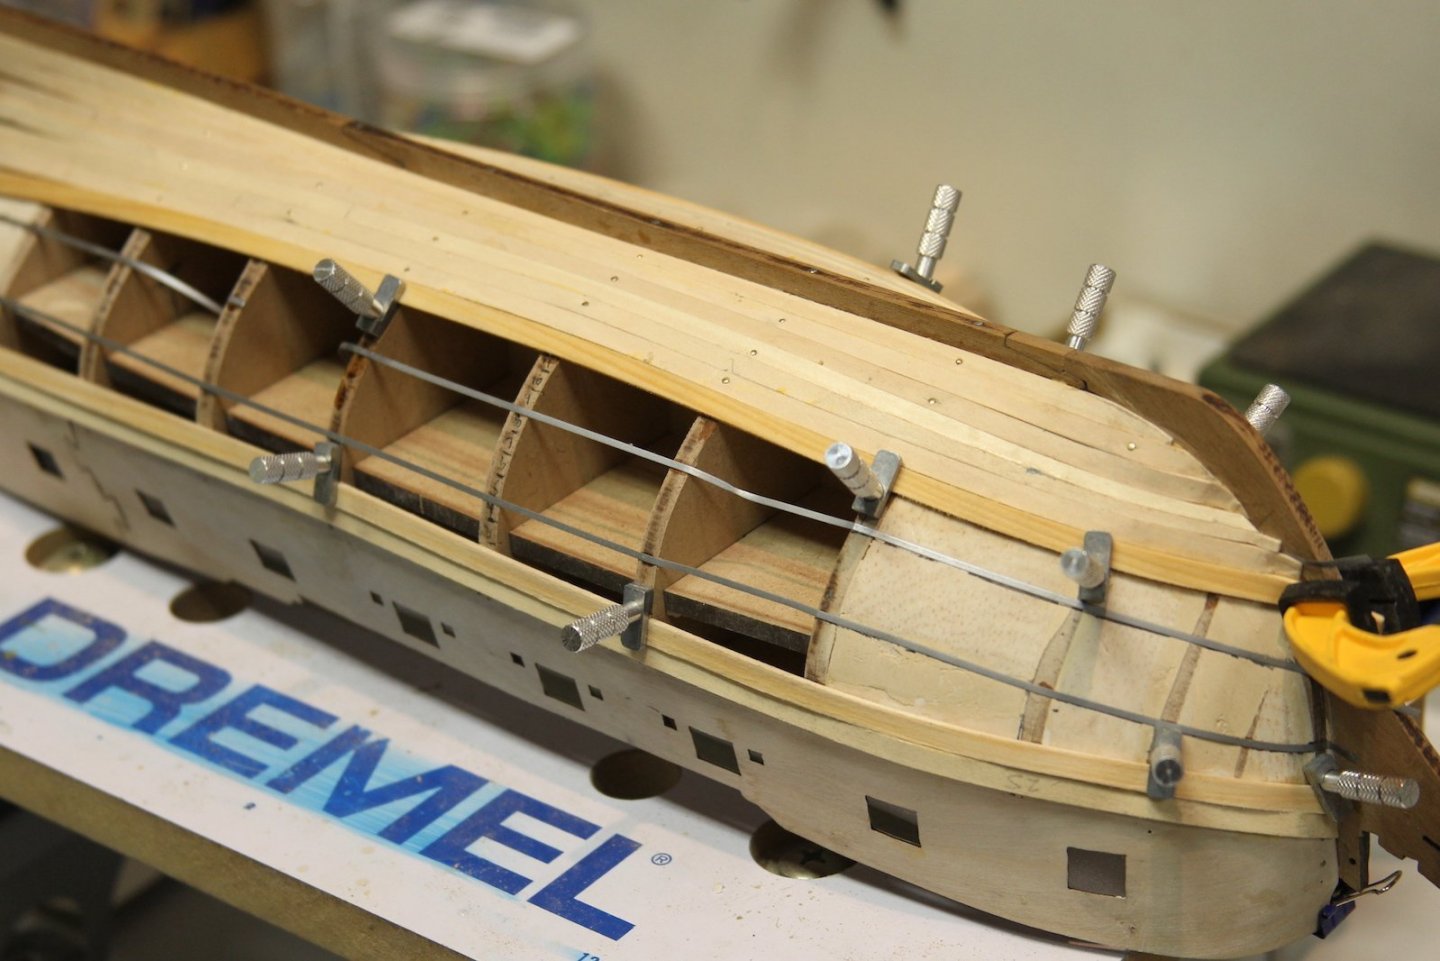
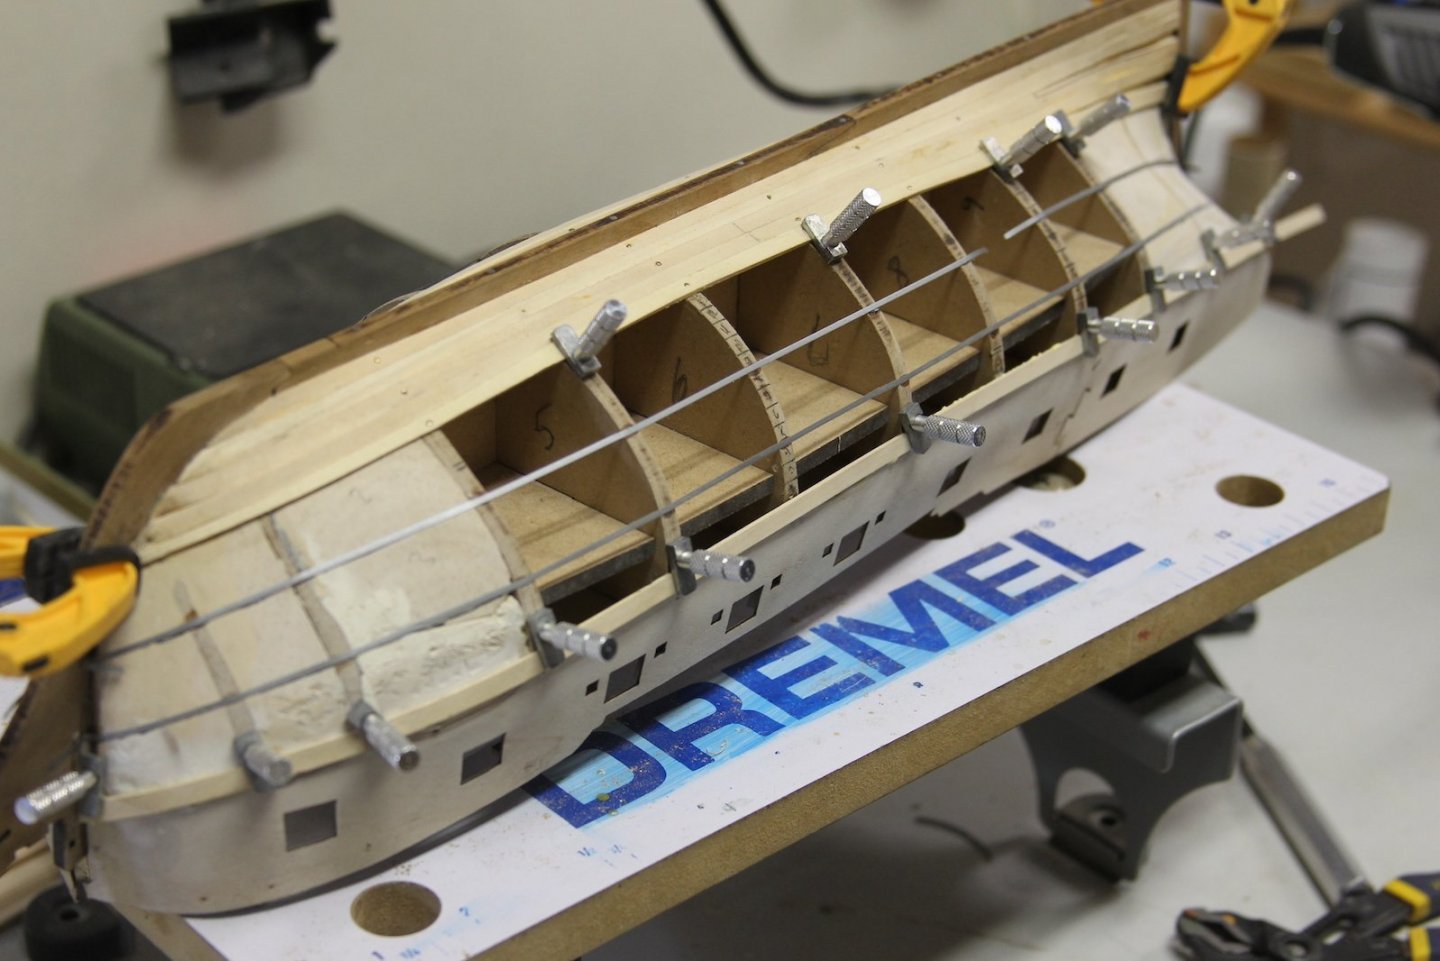
Meanwhile, the planking has progressed pretty nicely. As I mentioned before, I've decided to go with stealers so that I can just use the planks from the kit rather than cut wider ones for the stern. Honestly, I'm not that confident in my ability to get them perfectly straight along the length of the hull and don't want too many gaps to fill. Here's my exercise in stealers at the stern - cutting card stock to measure and use as a template, then fill in the plank. Meanwhile, this little plank that meets the transom and the stern post is pretty tricky. It took me several tries to get the card stock measured, then another couple of tries to translate it to wood. From there it was filling in the hull from the keel and the gun ports. Of course by the time I got to the middle my measurements were off and I needed a couple more stealers. Despite not having a completely cleanly planked hull, I'm pretty happy with way it turned out. This is all pre-sanding of course, and I'll also need to thin out the area near the keel and stern to create a new beard line and rabbet.


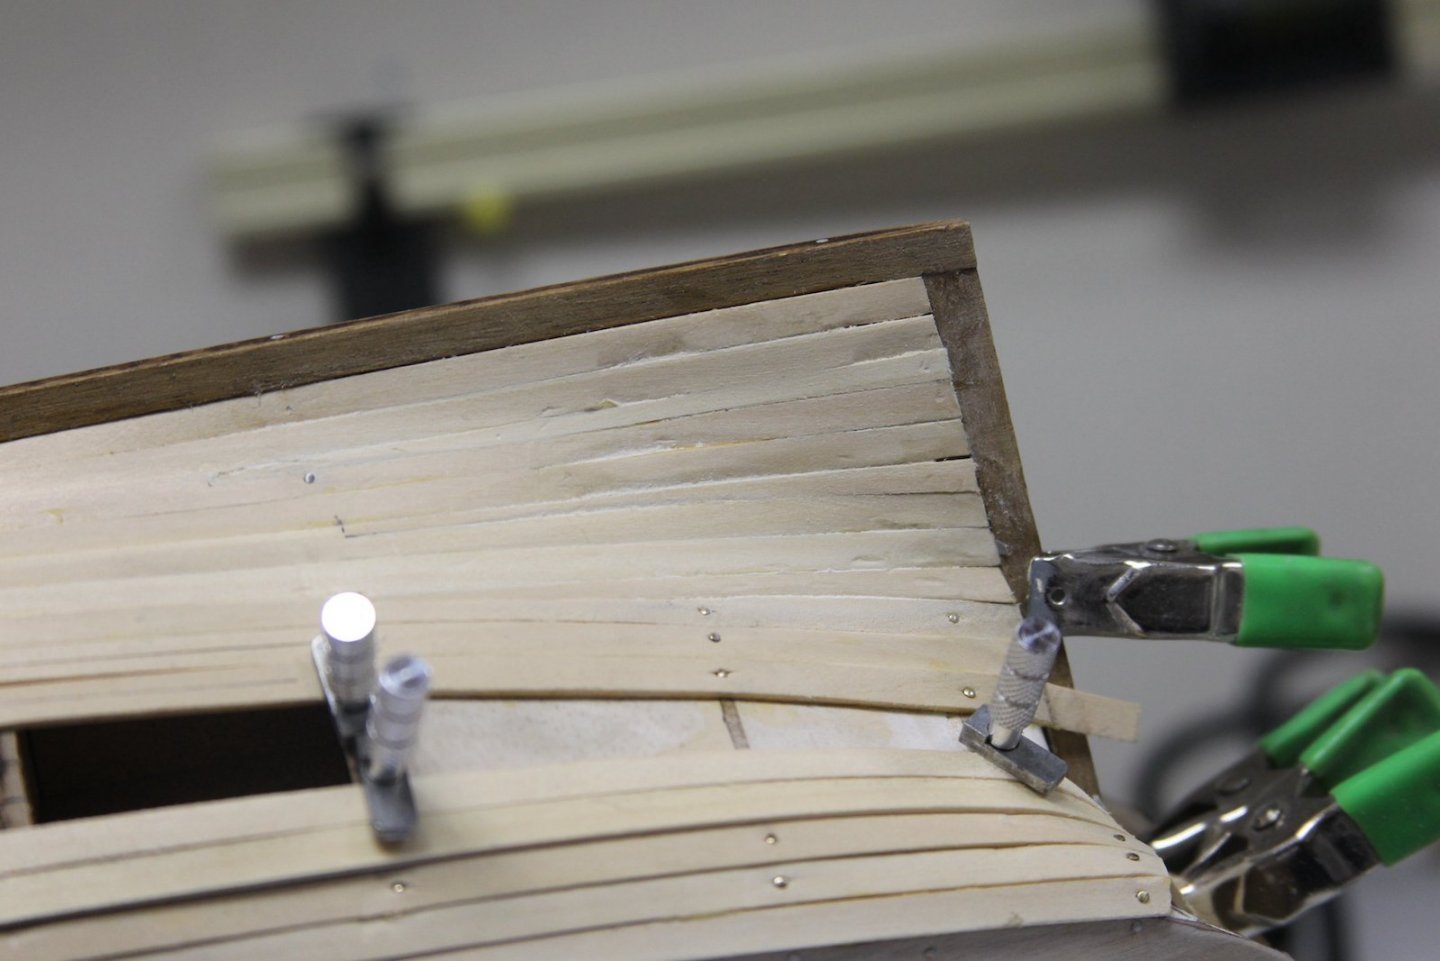


- 419 replies
-
- 12
-
-
- Victory Models
- Pegasus
- (and 2 more)
-
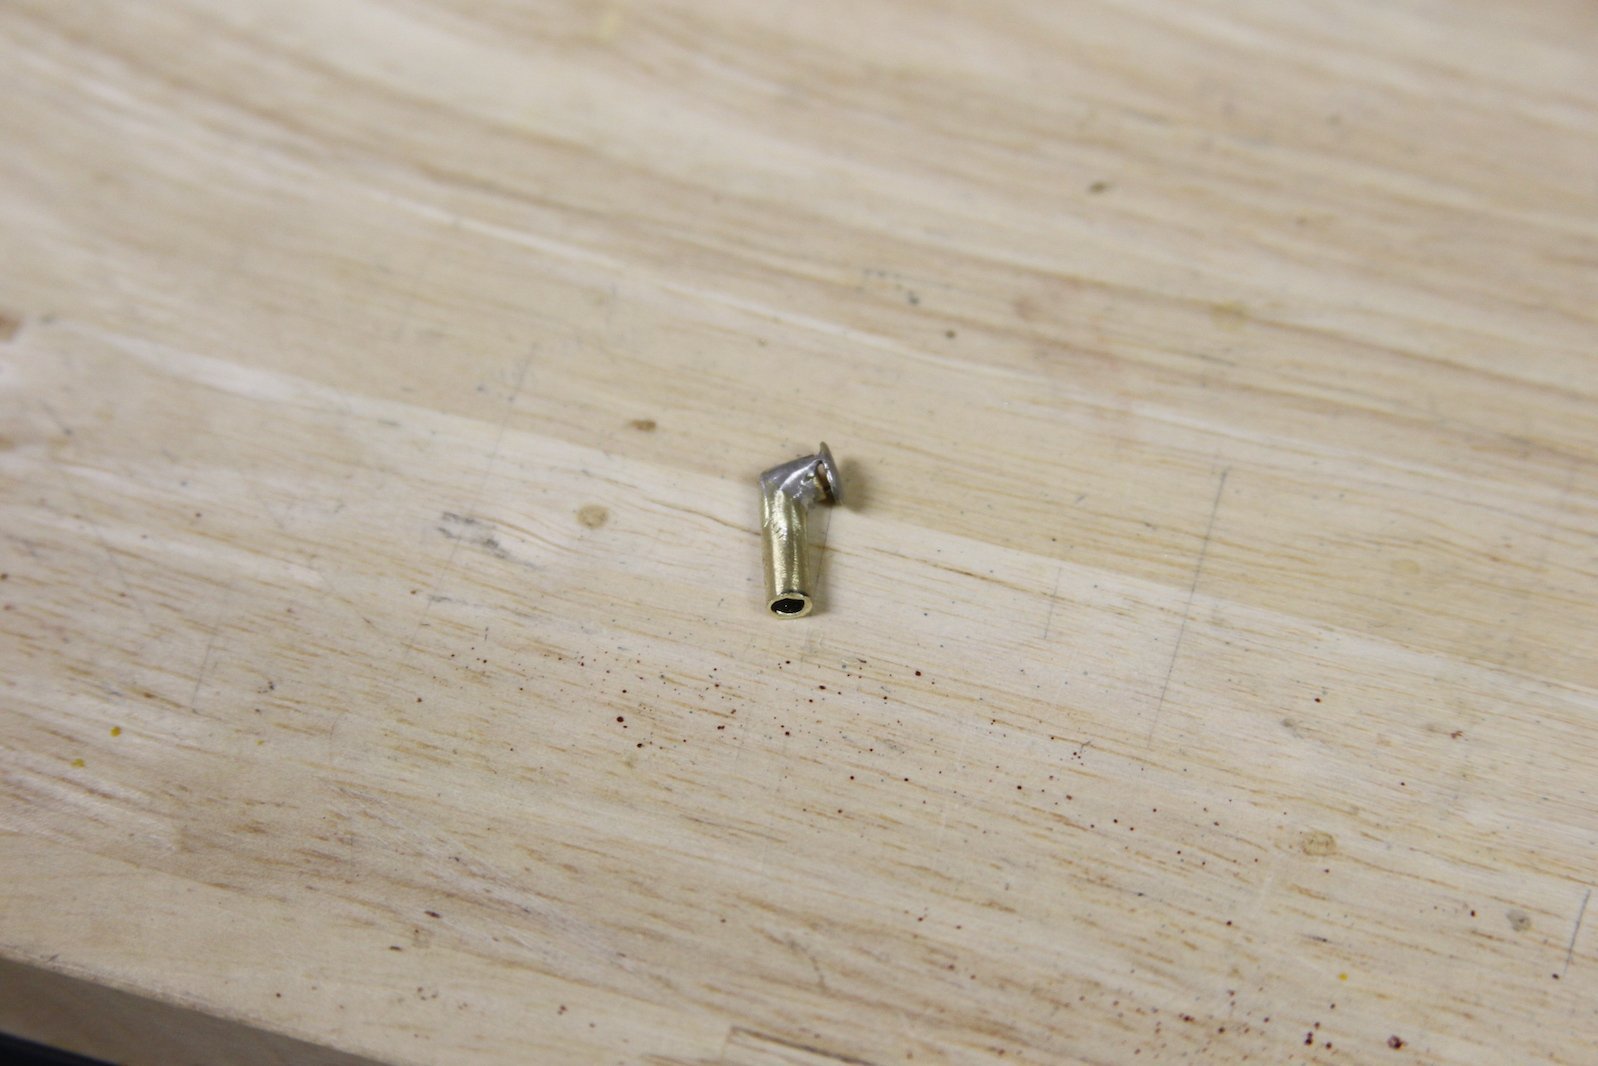
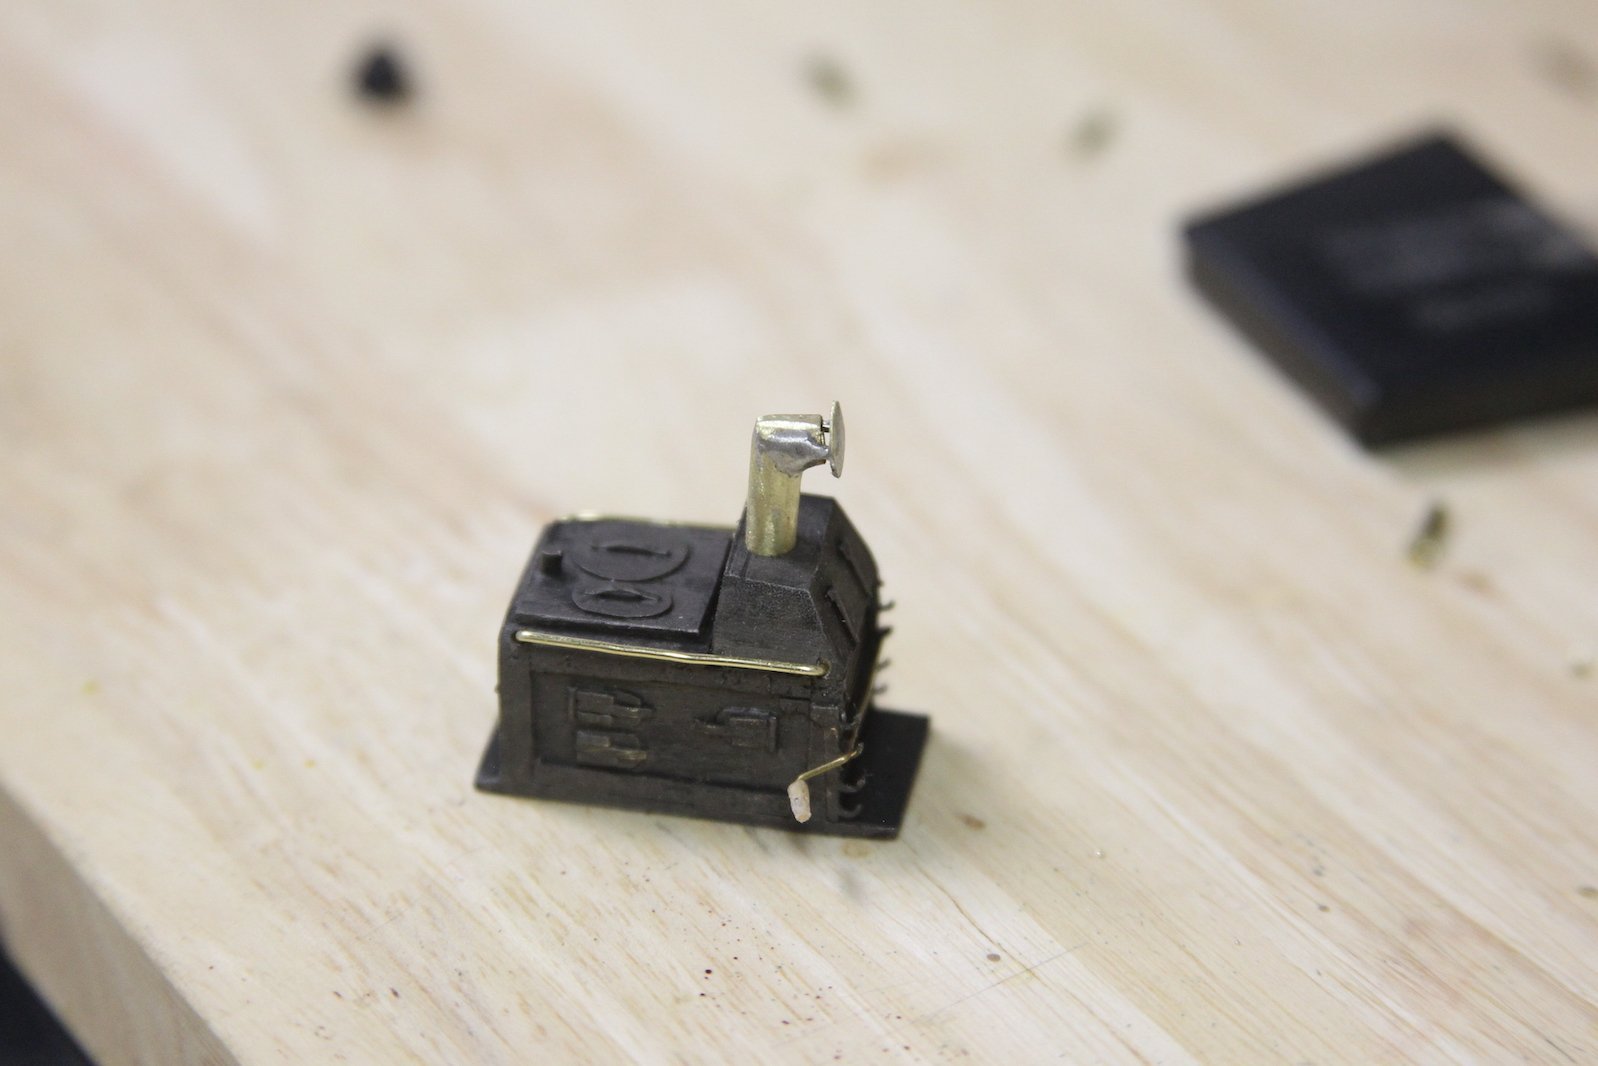
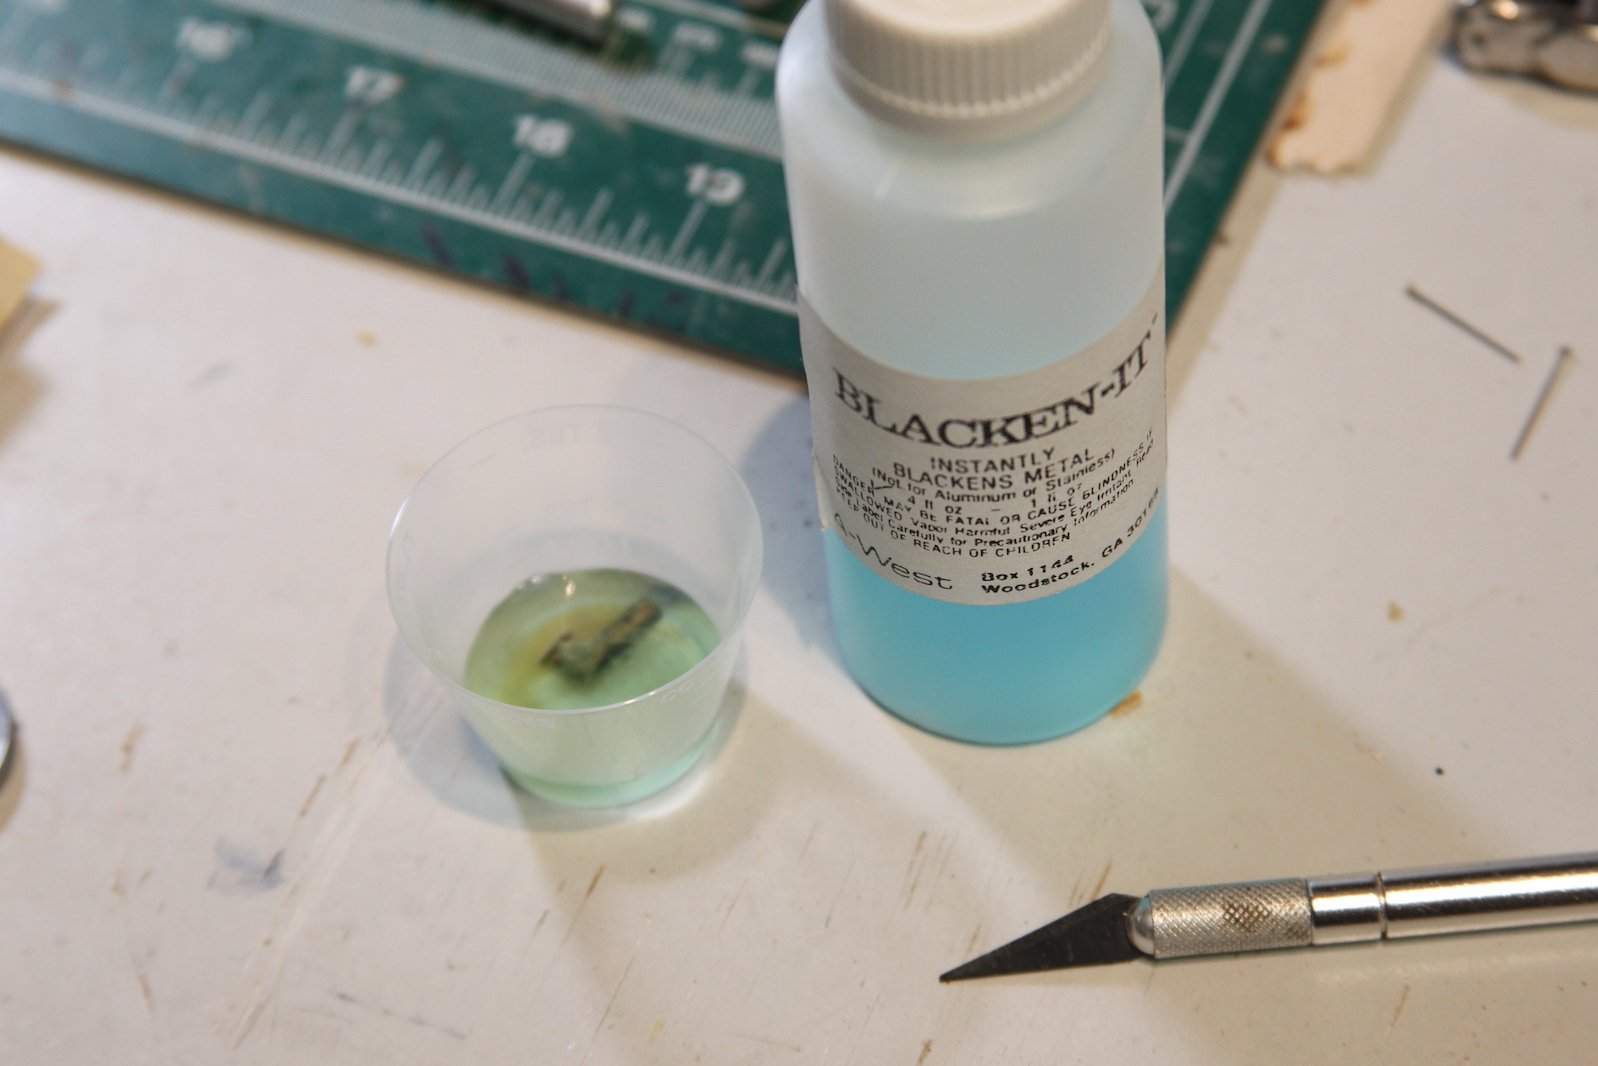
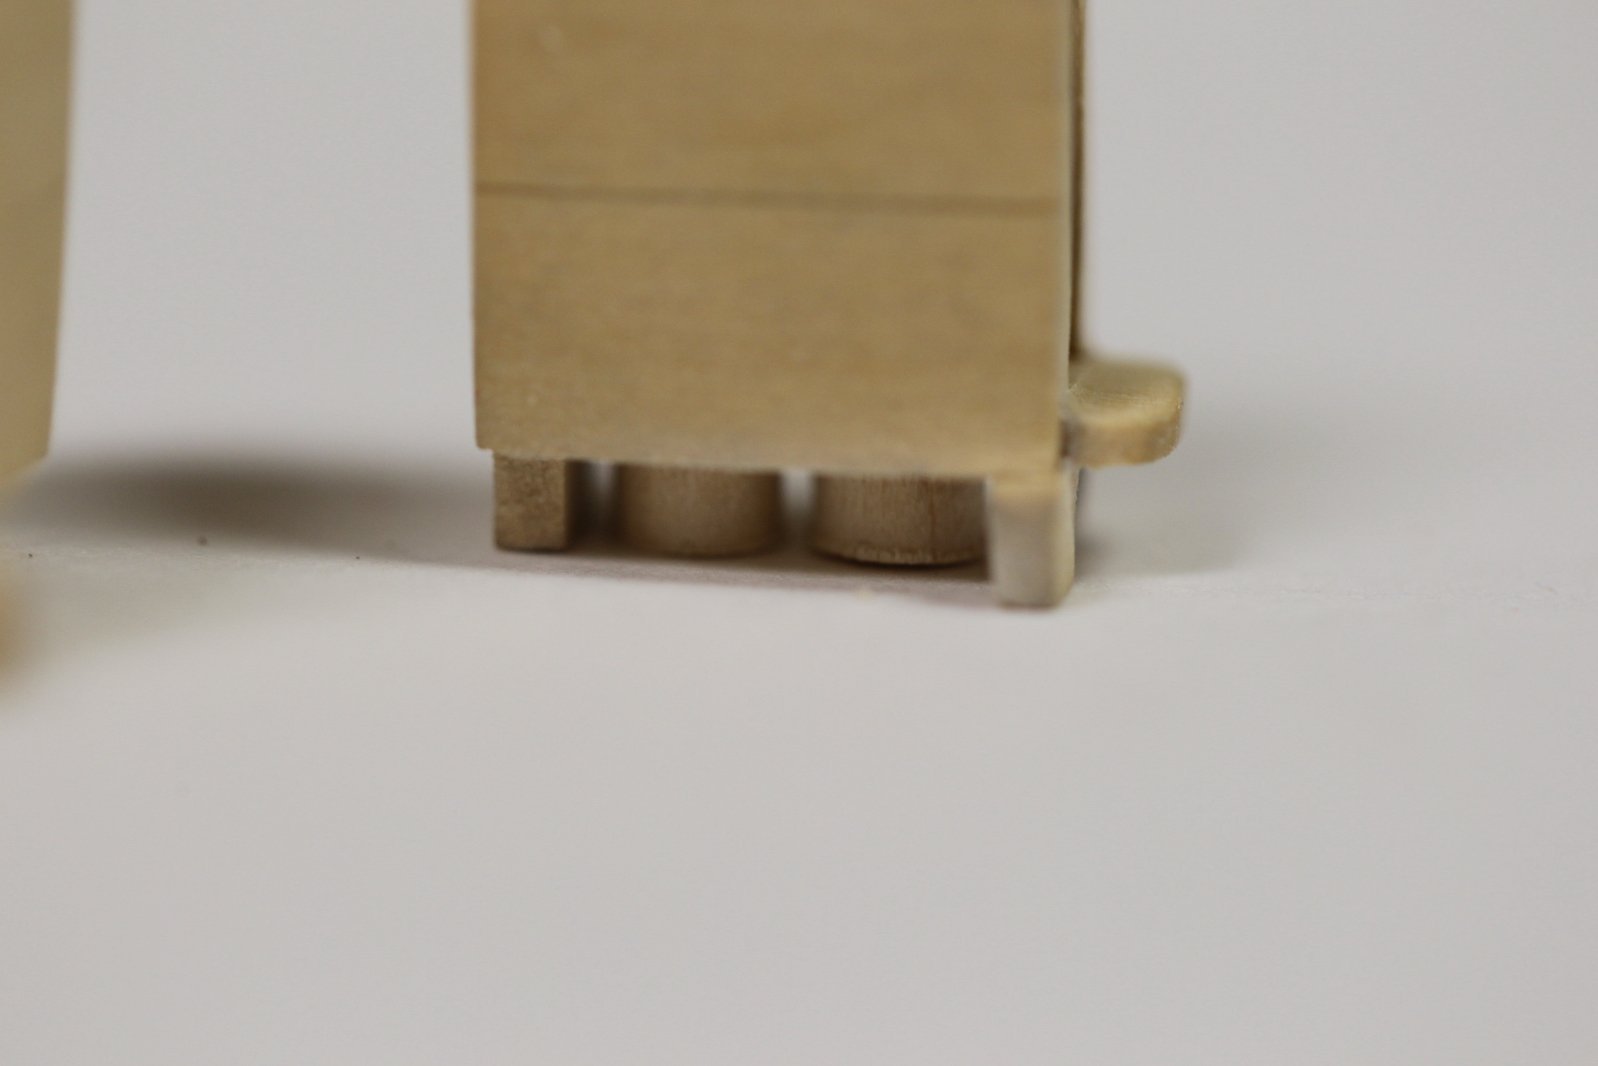
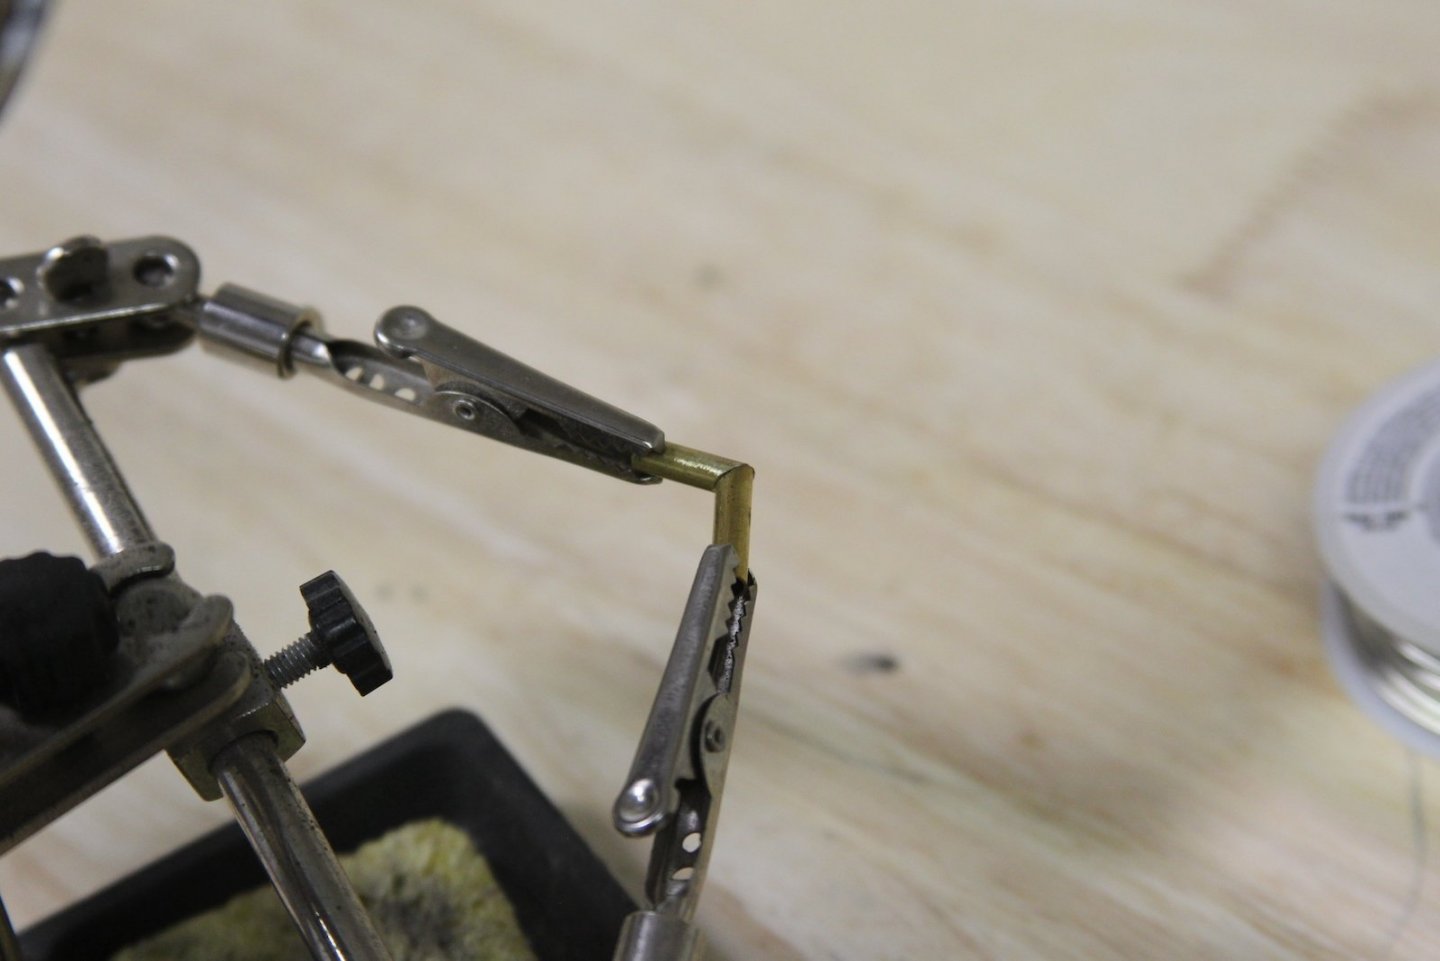
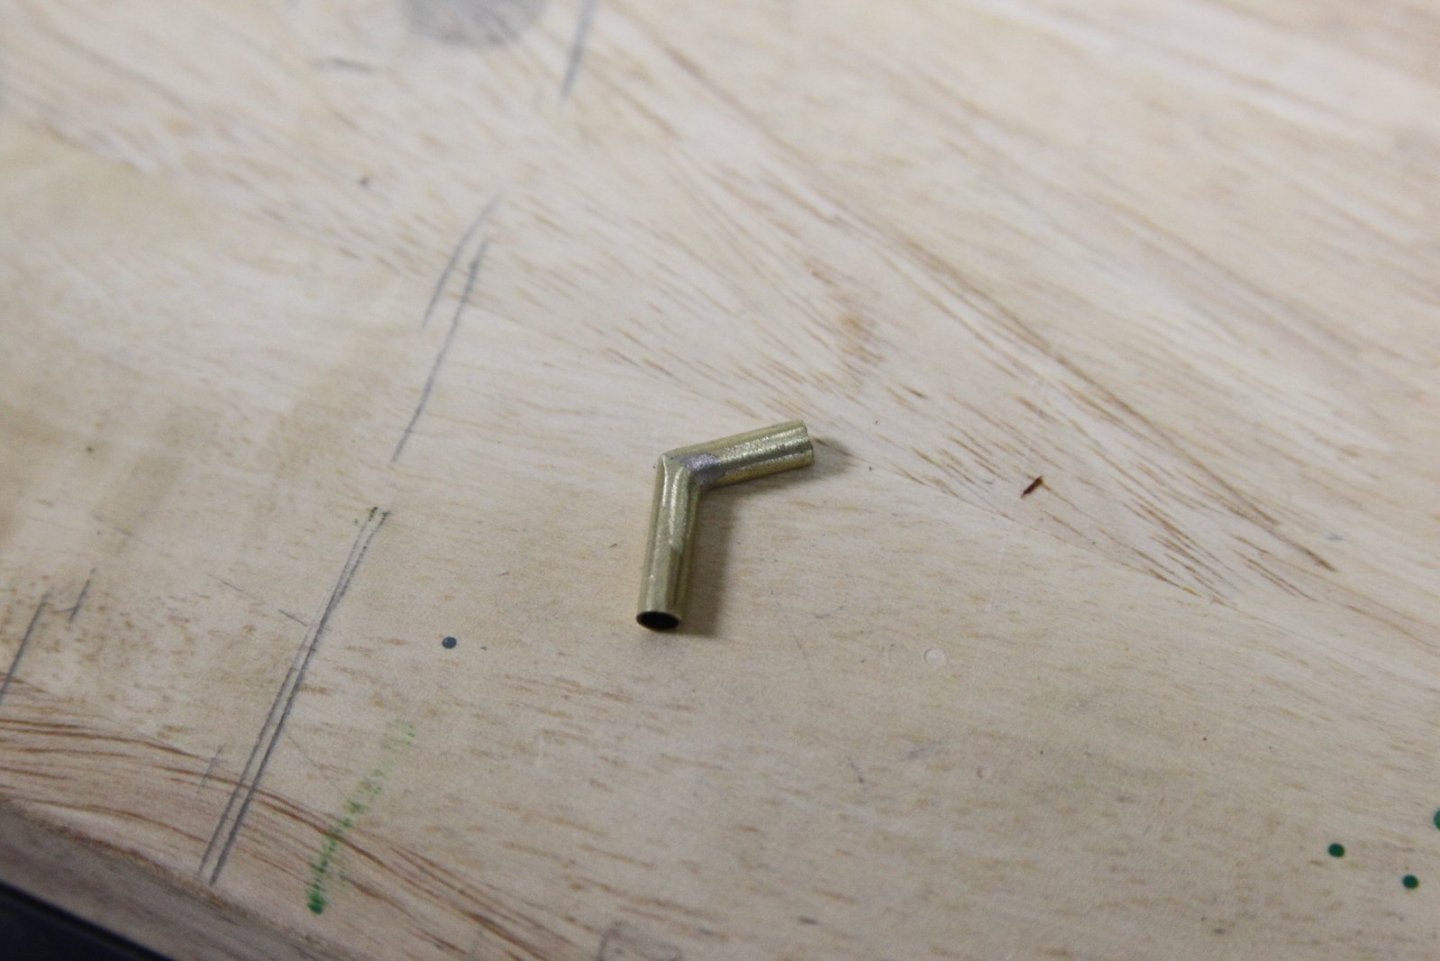
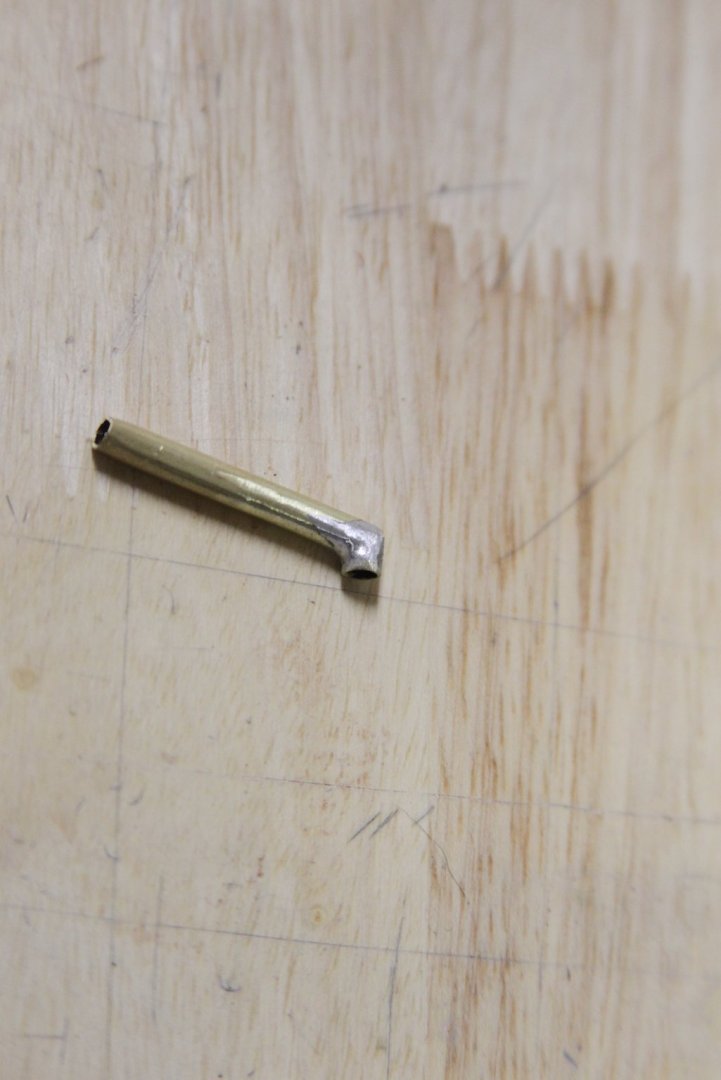
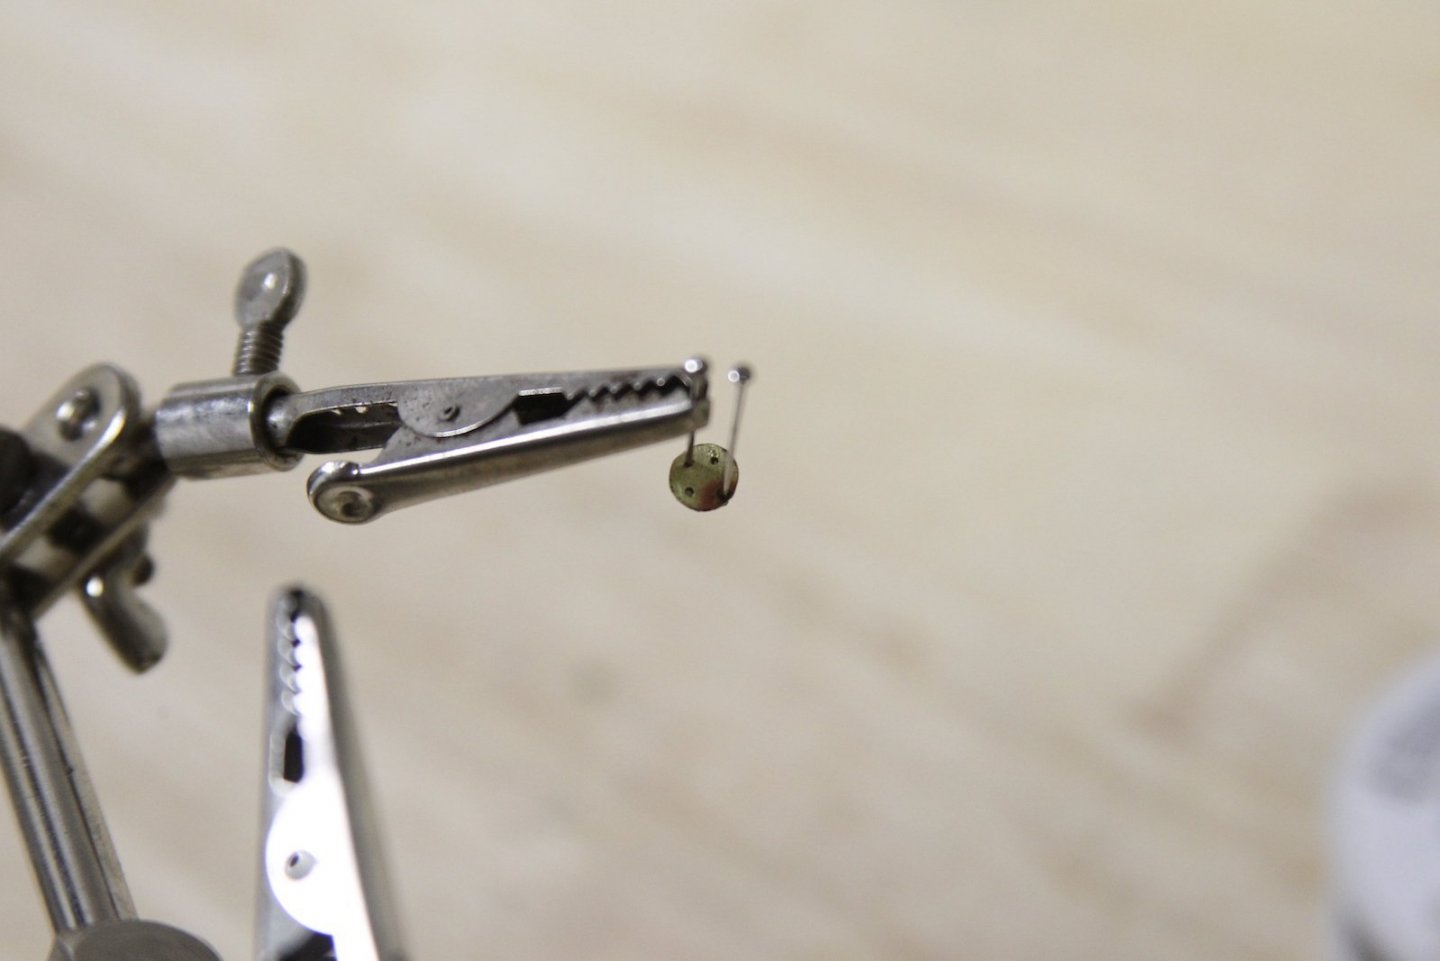
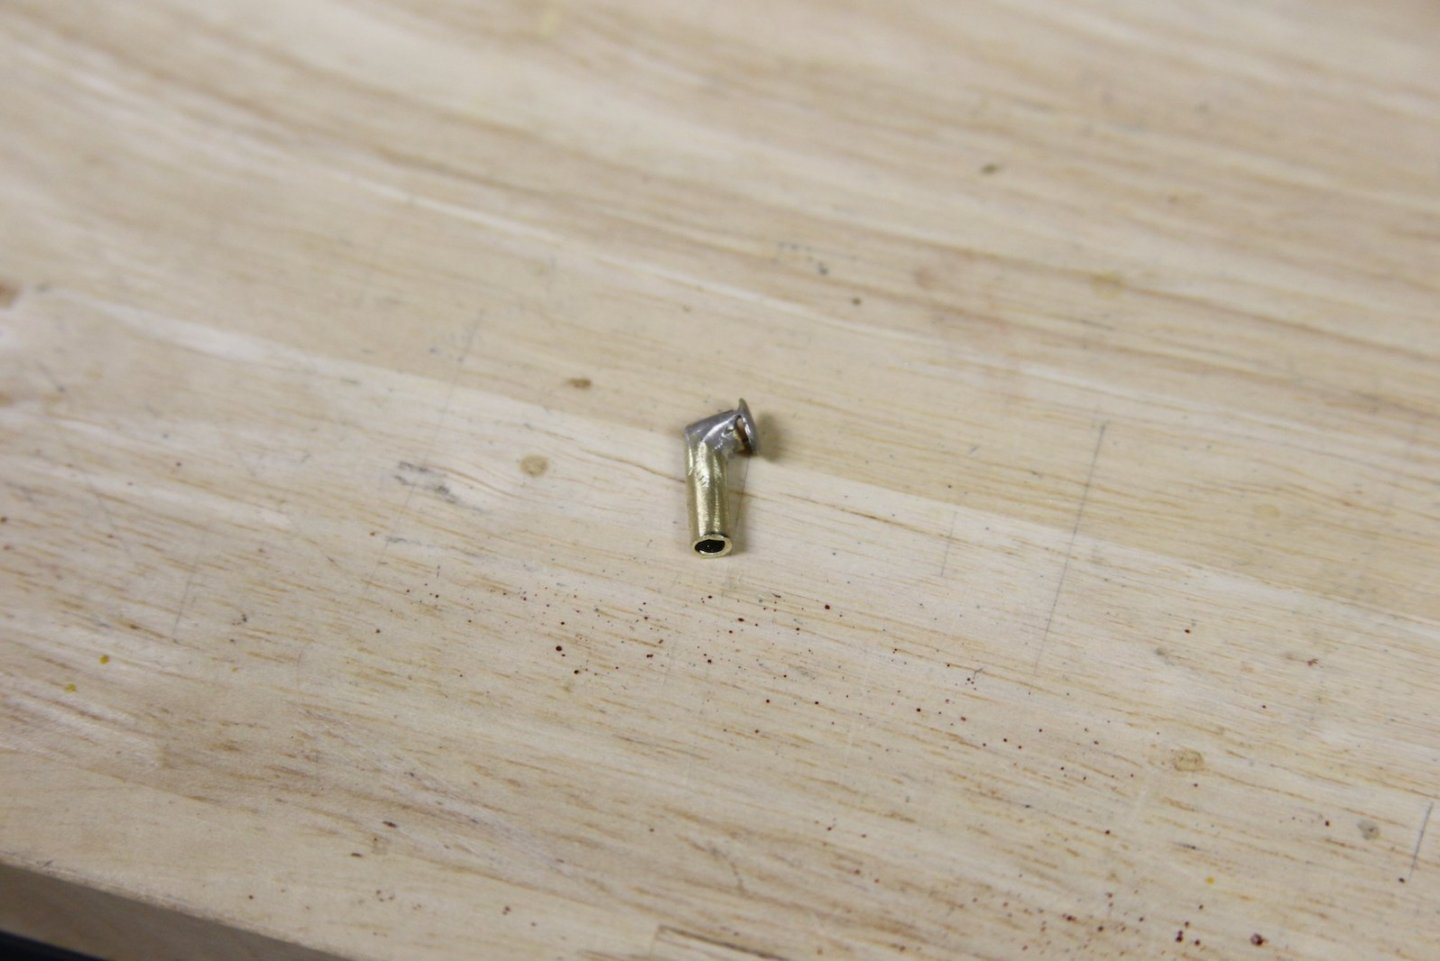
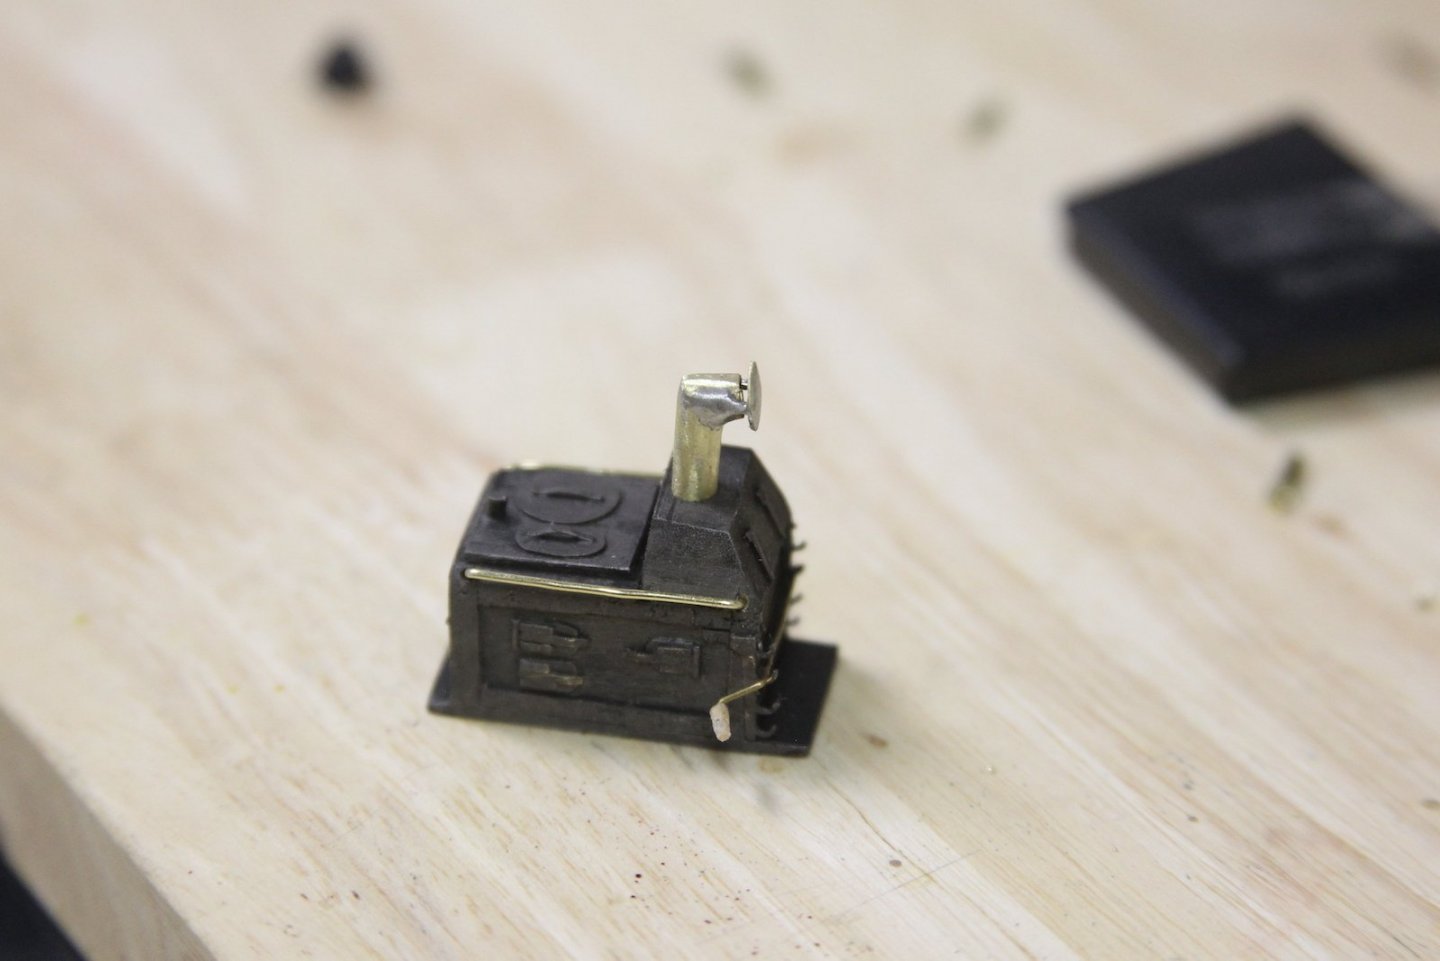
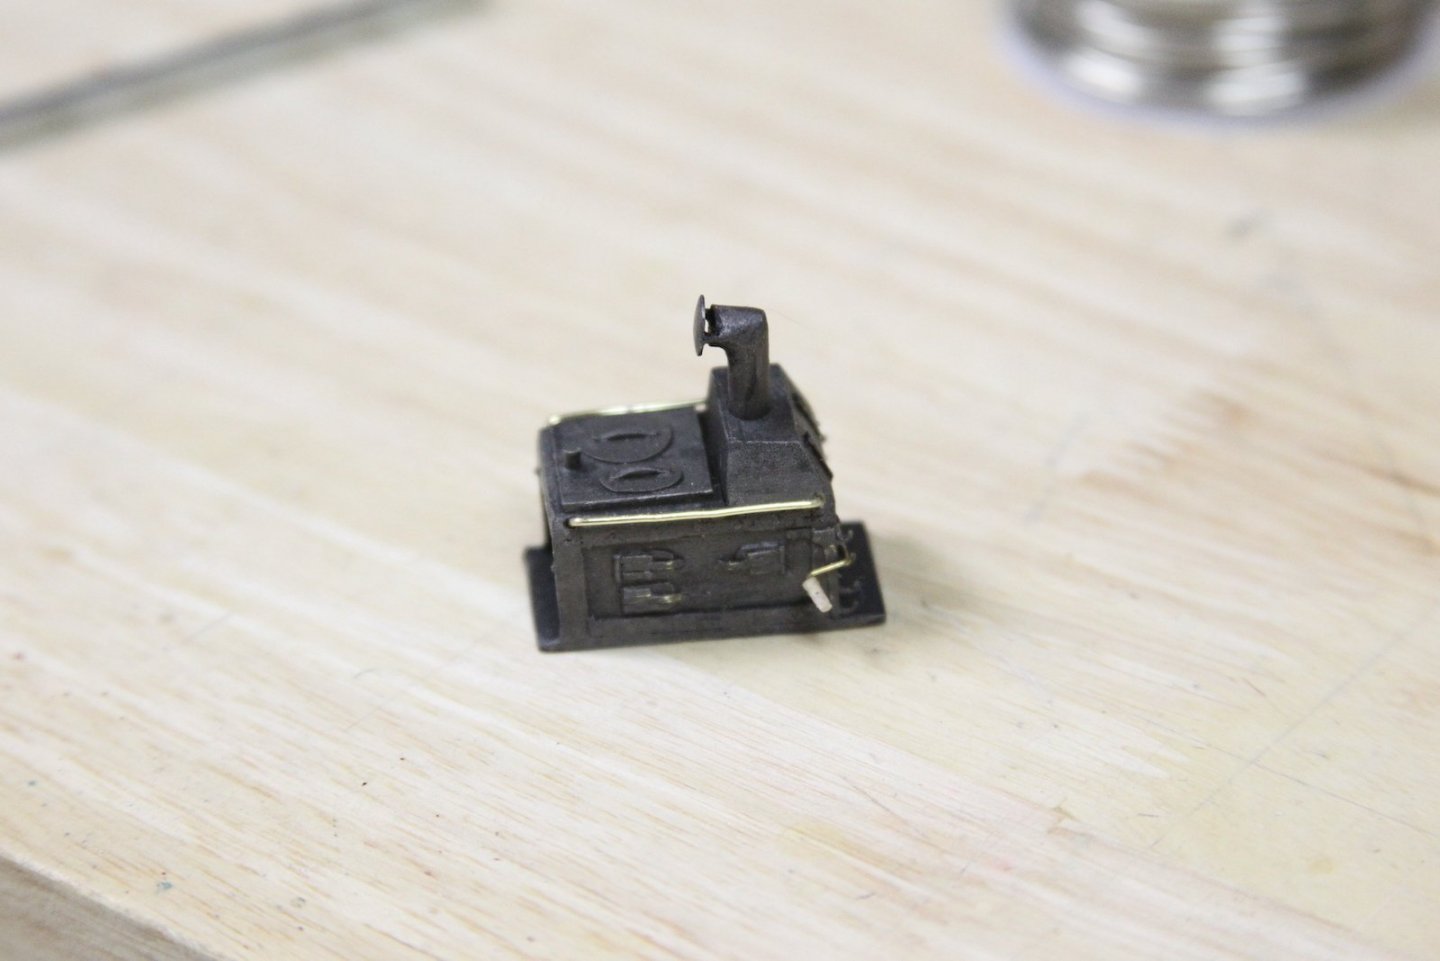
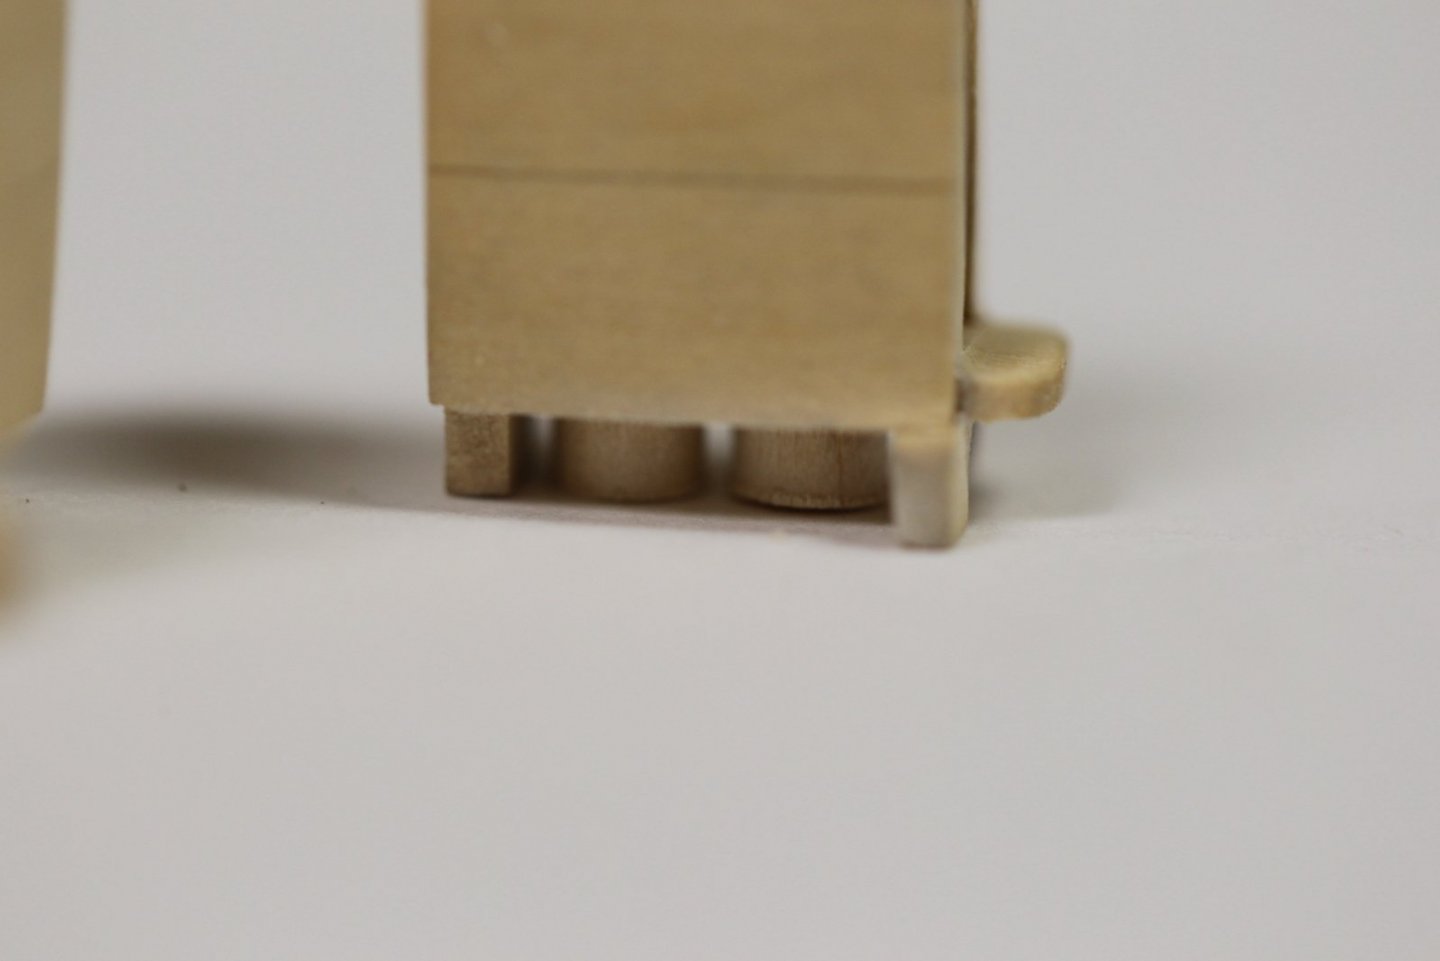
When I put together the ship stove I added a temporary vent that is removable. The actual vent needs to be measured and inserted through the quarterdeck into the stove after assembly. The realistic vent caused me quite a bit of consternation in determining exactly how to make it happen. It's a very visible piece, so needs to be a good representation. I'm not particularly adept at silver soldering, but that was pretty much the only way to go here. There really isn't any kind of glue that works well for small metal bits - and JB weld or other epoxy is just super messy. At any rate, I cut a small brass tube at a 45 degree angle, then reassembled it 'backward' to create a 90 degree vent. This took me a few tries before I got it right, and got it to stick. Each time I tried to either sand down the newly soldered vent parts or cut the vent to size, it would break off and I'd have to start again. The vent cover was a really tricky little bit. I drilled to small holes into a circular piece of brass and used cut off straight pins as mounts. After measuring to the quarterdeck I sized out the brass vent, then blackened it (which only partially worked). I ended up having to give it a light coat of matte black paint, then the same metalizer as used on the stove.


- 419 replies
-
- 10
-
-
- Victory Models
- Pegasus
- (and 2 more)
-
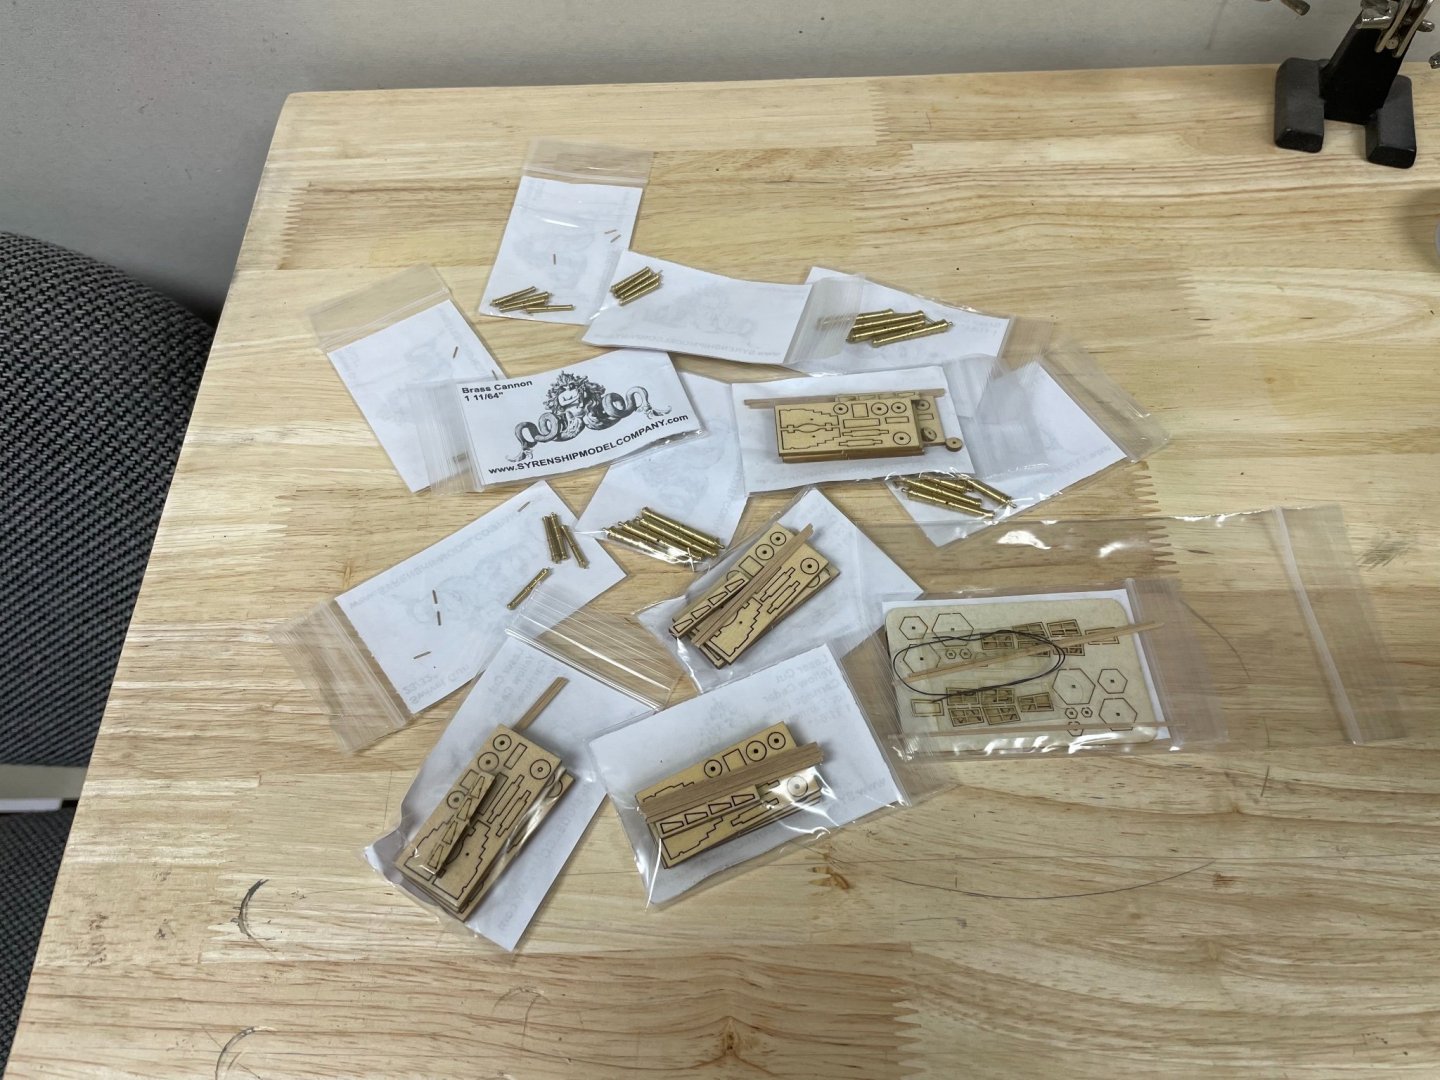
New bounty just in: guns, carriages and a stern lantern kit from Syren. Thanks @Chuck!
- 419 replies
-
- 5
-
-
- Victory Models
- Pegasus
- (and 2 more)
-
Hey @SpyGlass - you’re 100% correct. My intention is to lay this layer out as a practicum illustrating number of planks and methodology - then I’ll create second rabbet line and thin it down for the second layer. A bit of extra work, but will help me plan out my second layer. I’ll also be able to thin it down the exact amount of thickness based on the second layer planks. (It makes sense in my head). 😛
- 419 replies
-
- 3
-
-
- Victory Models
- Pegasus
- (and 2 more)
-
Thanks everyone for your feedback and likes. I've been plugging away slowly at planking. One or two strips from the keel, one or two strips from the bulkhead - measuring each where it needs to be spiled or tapered then letting it dry in place before it's glued. Still working on some deck fixtures while the planking goes on, some more cistern updates are one the way soon. I'm trying to keep the stealers consistent and not random; using a card to measure - making sure that they don't end in a point and are not randomly placed.

- 419 replies
-
- 6
-
-
- Victory Models
- Pegasus
- (and 2 more)
-
Other than your nice build work - I've always also enjoyed your innovation when it comes to make-shift tools. Always a great source of ideas B.E.
- 857 replies
-
- 3
-
-
-
- Sphinx
- Vanguard Models
- (and 1 more)
-
Thanks Richard - all input is greatly appreciated - I’ll check it out.
- 419 replies
-
- 3
-
-
- Victory Models
- Pegasus
- (and 2 more)
-
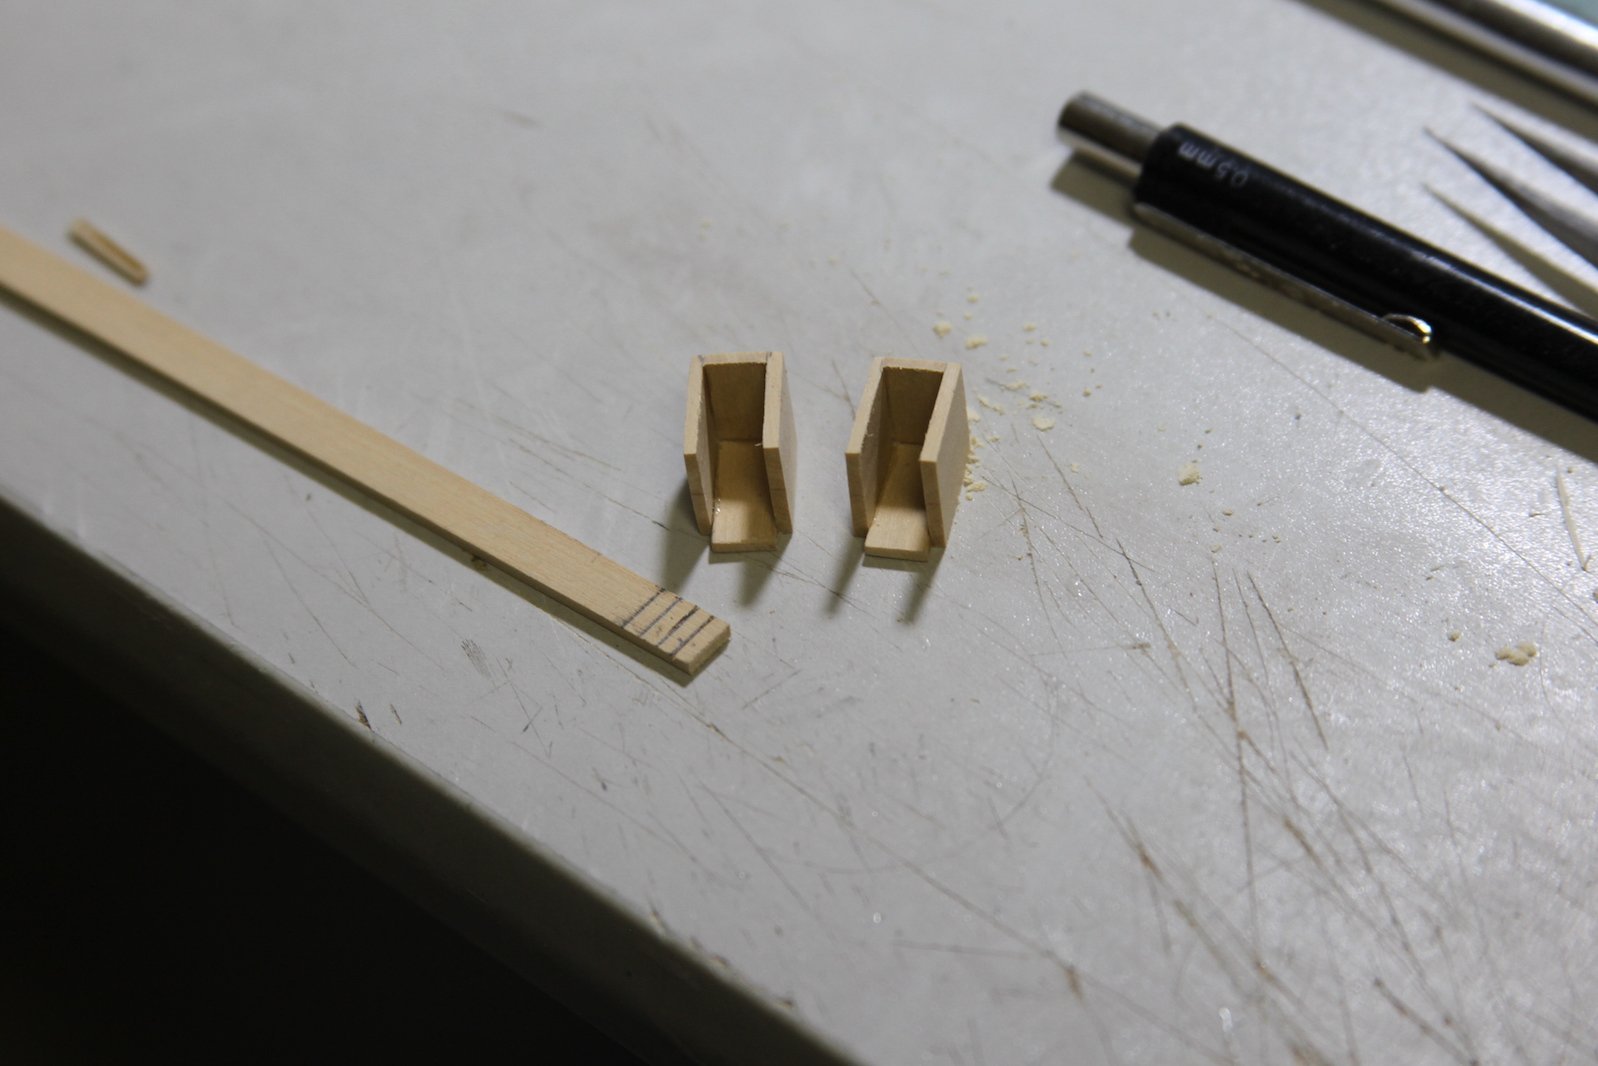
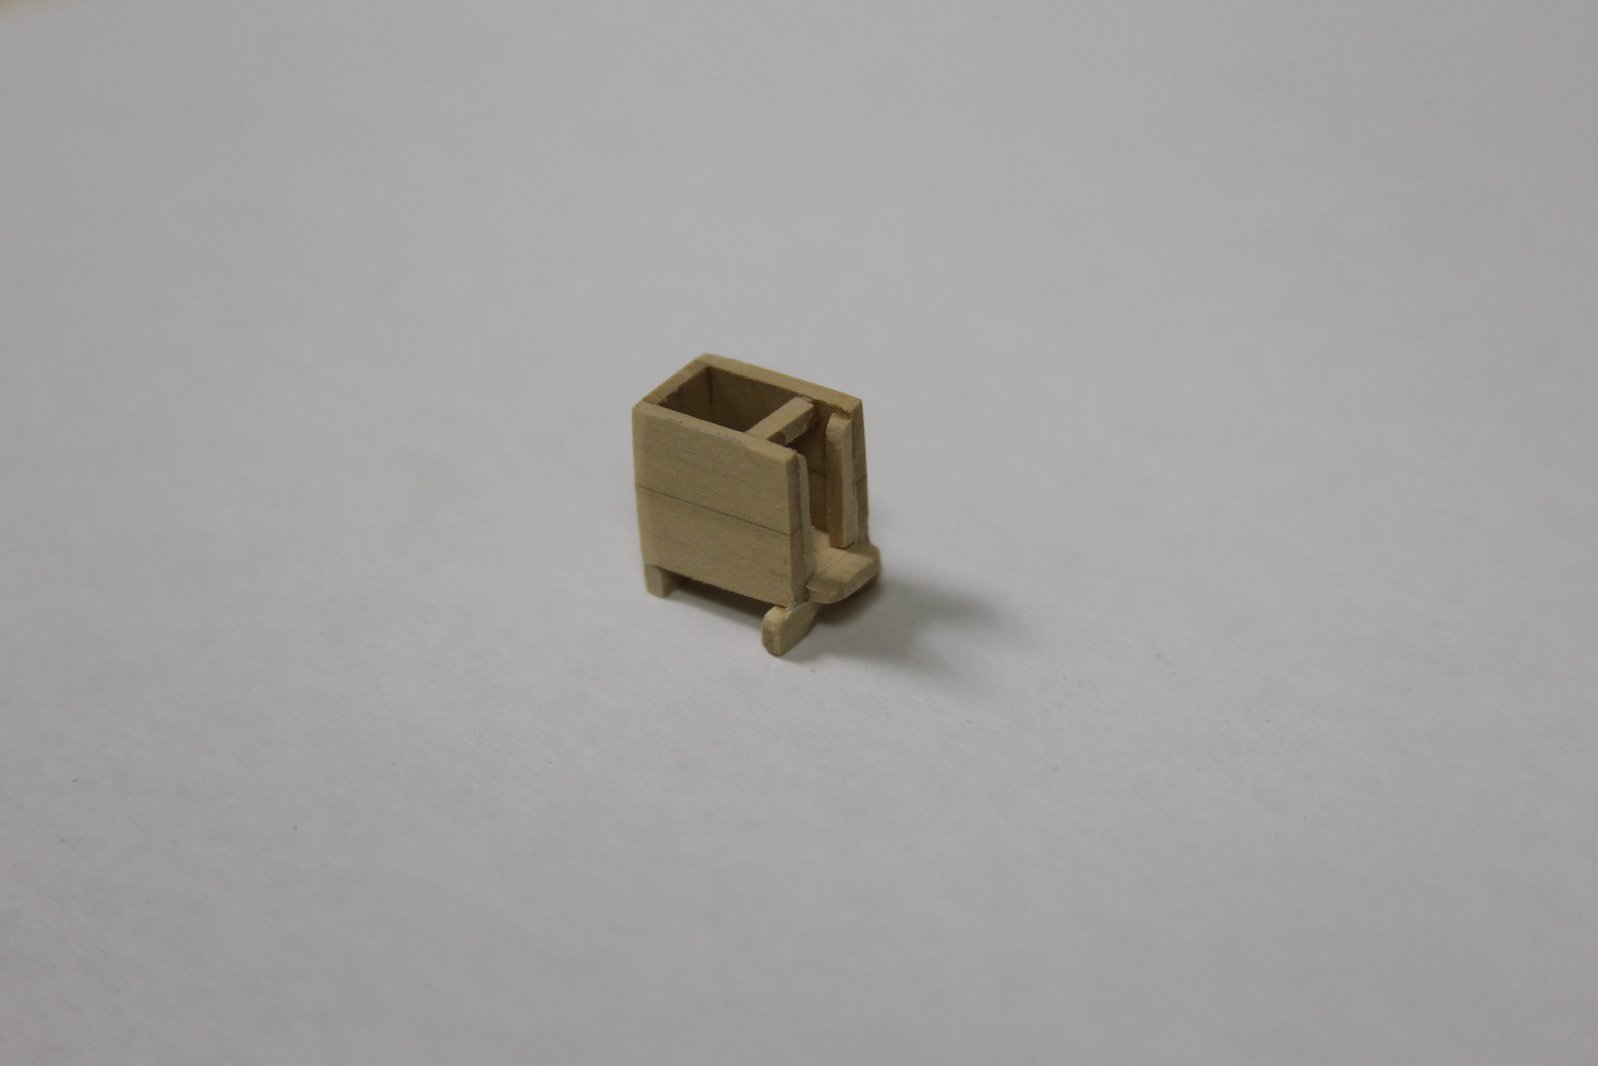
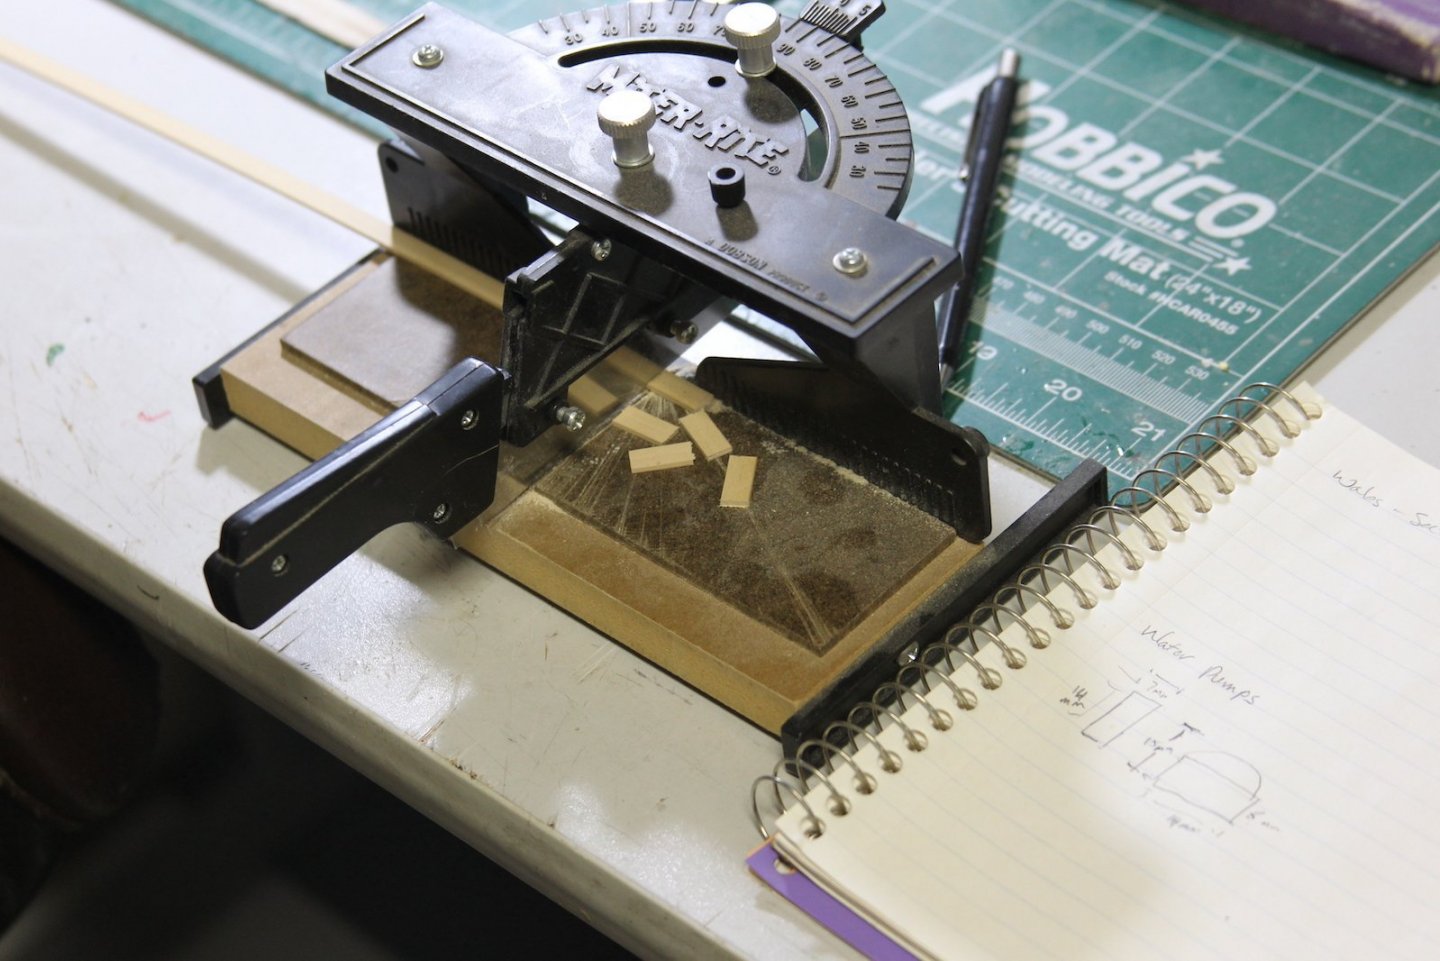
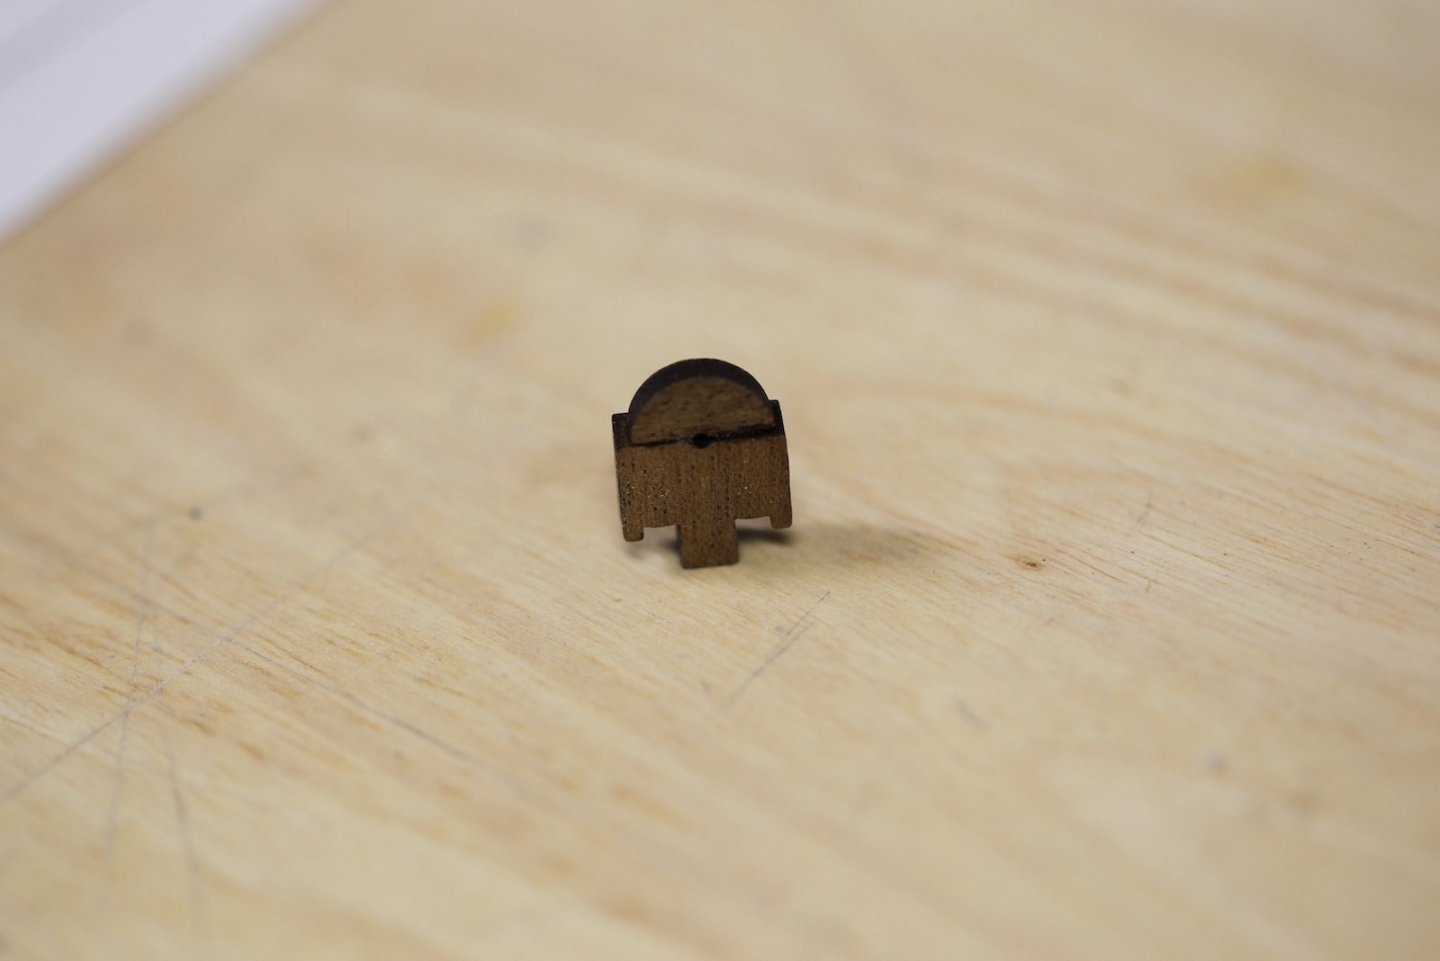
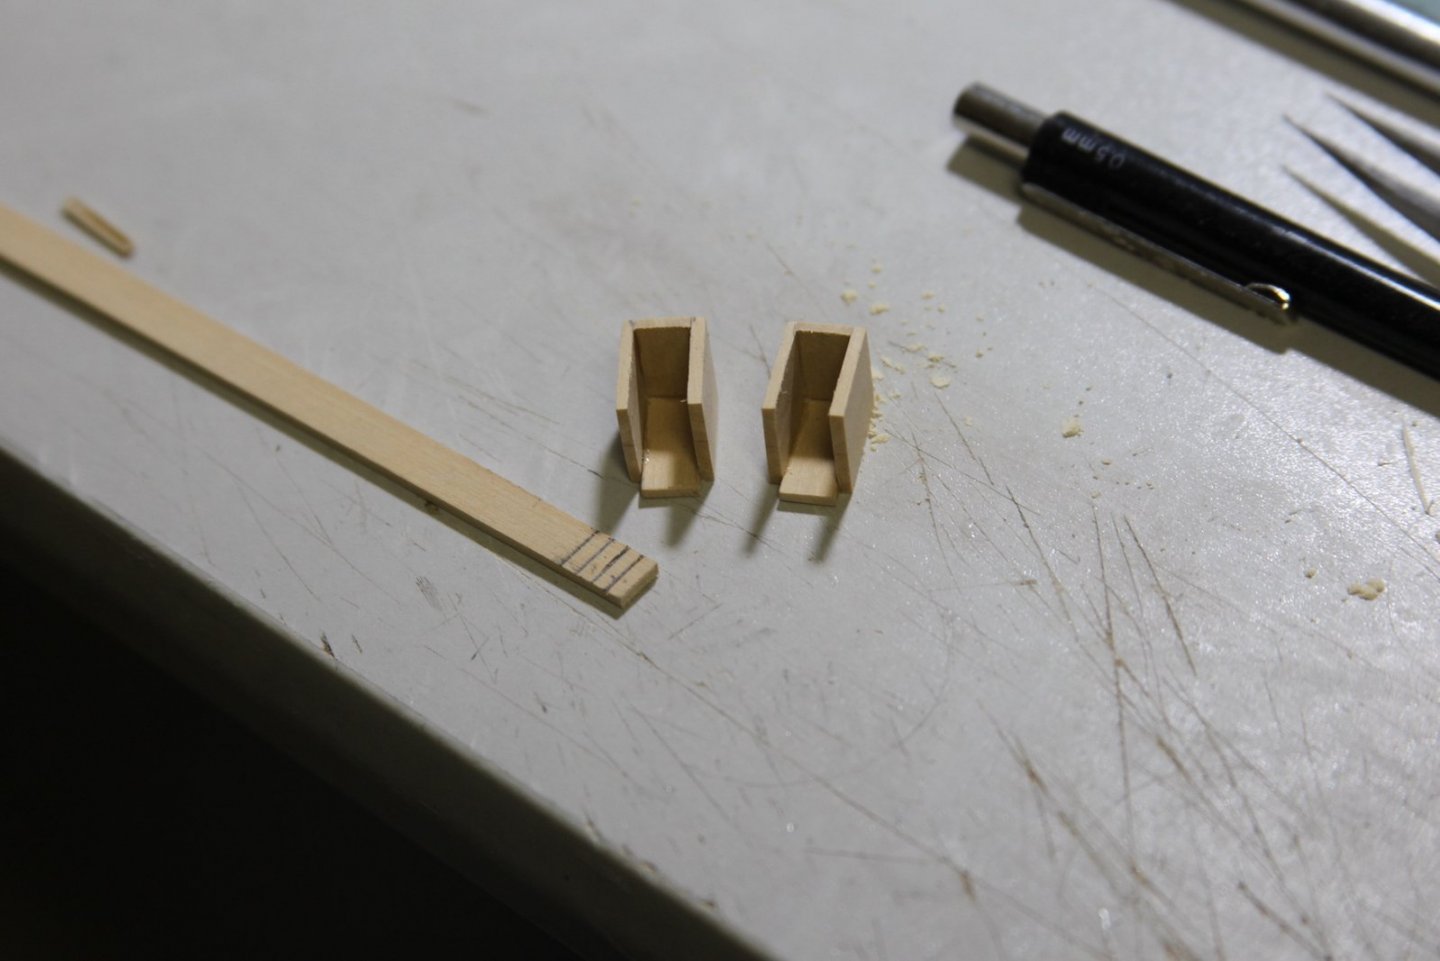
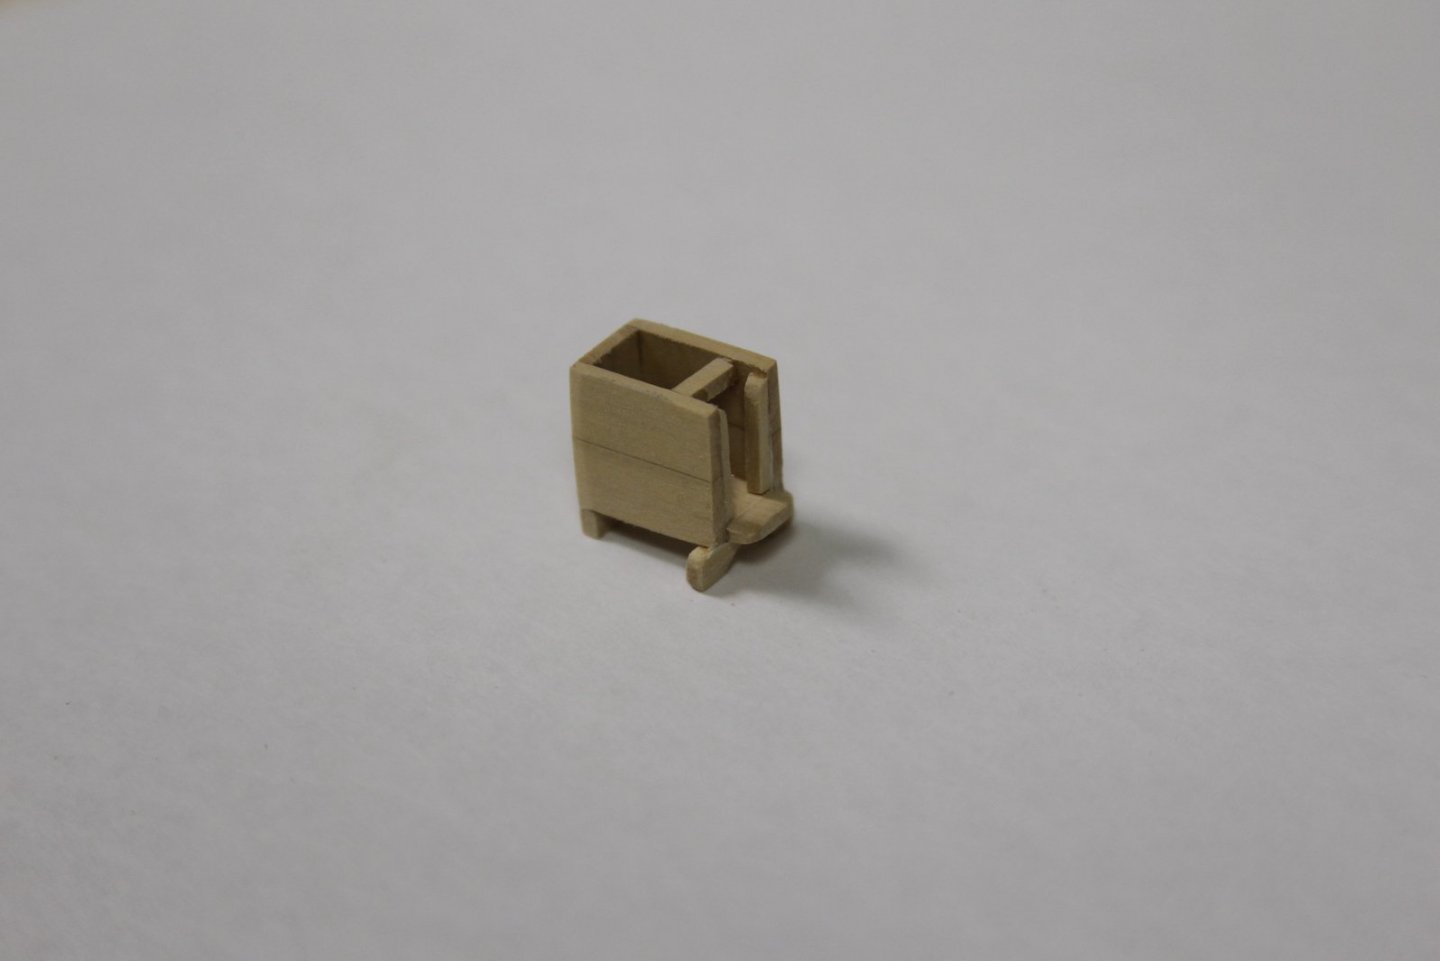
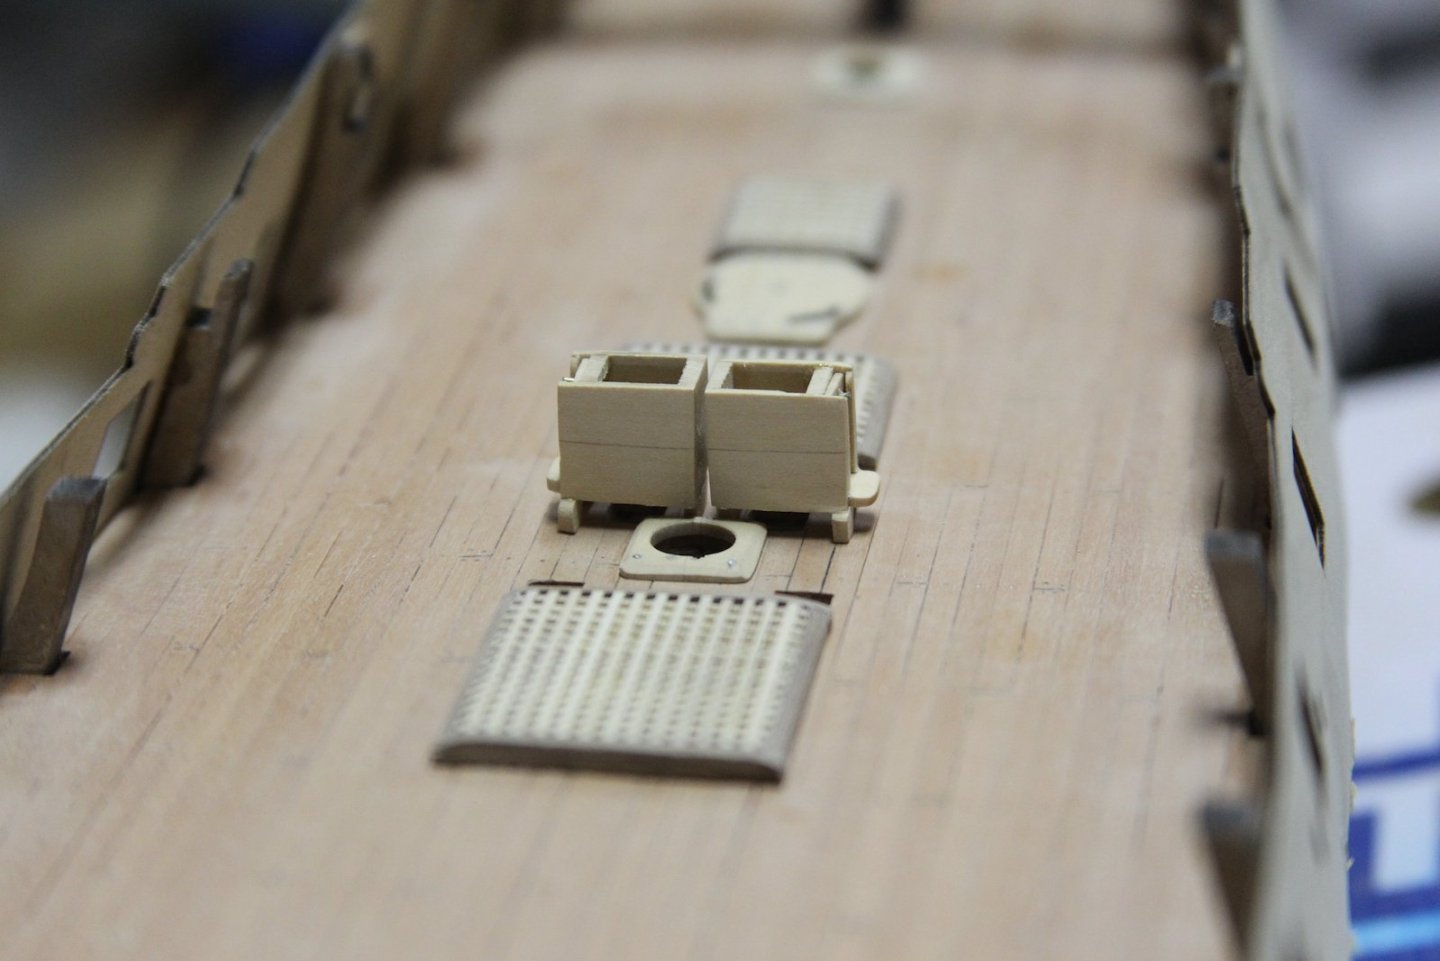
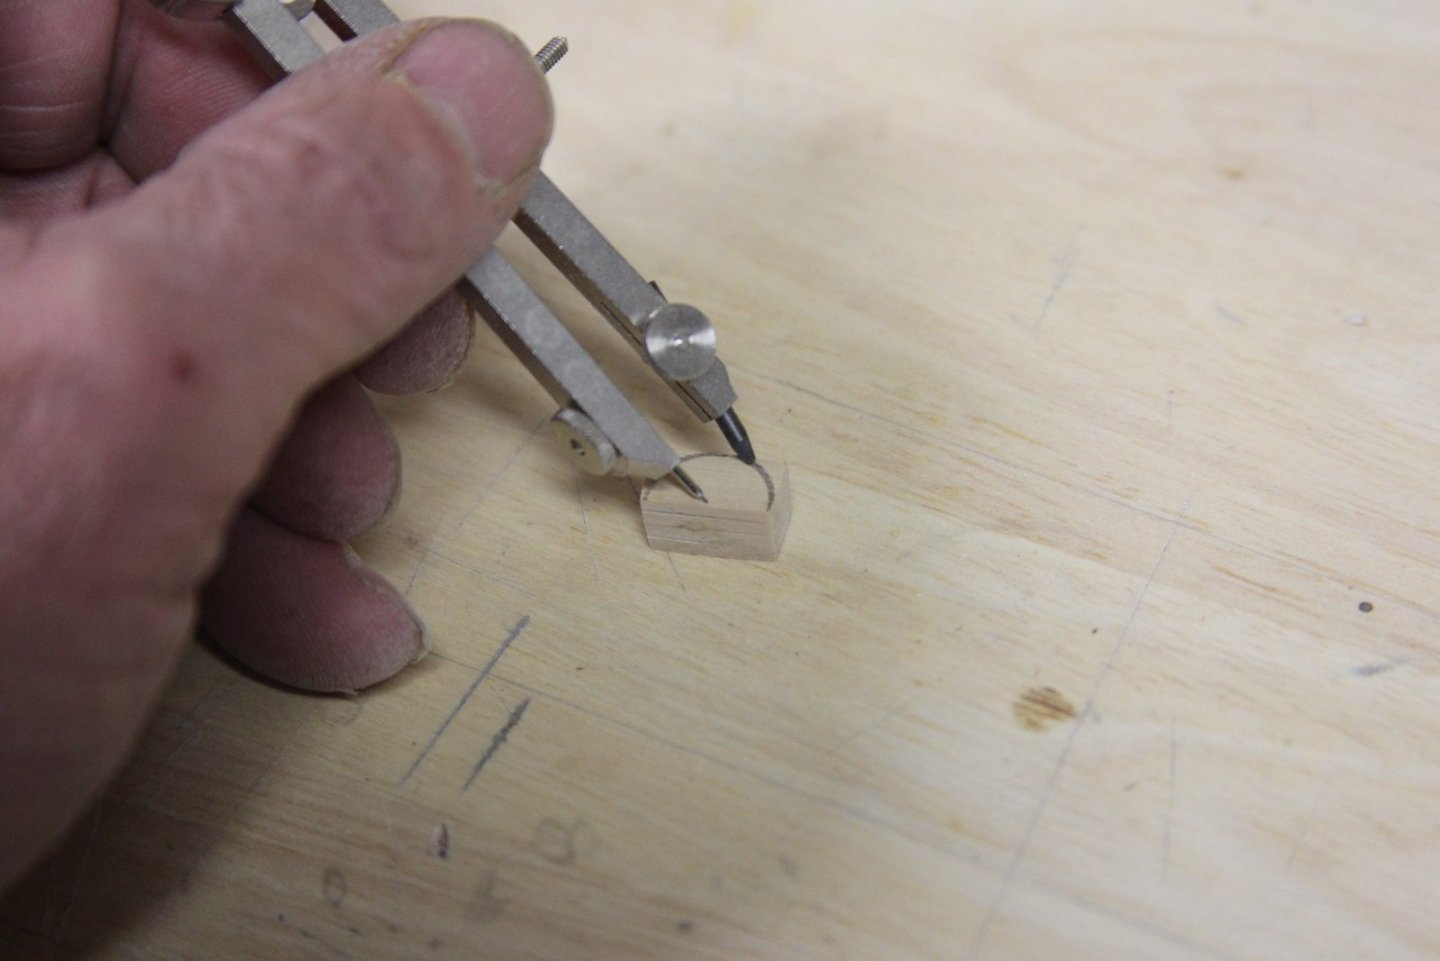
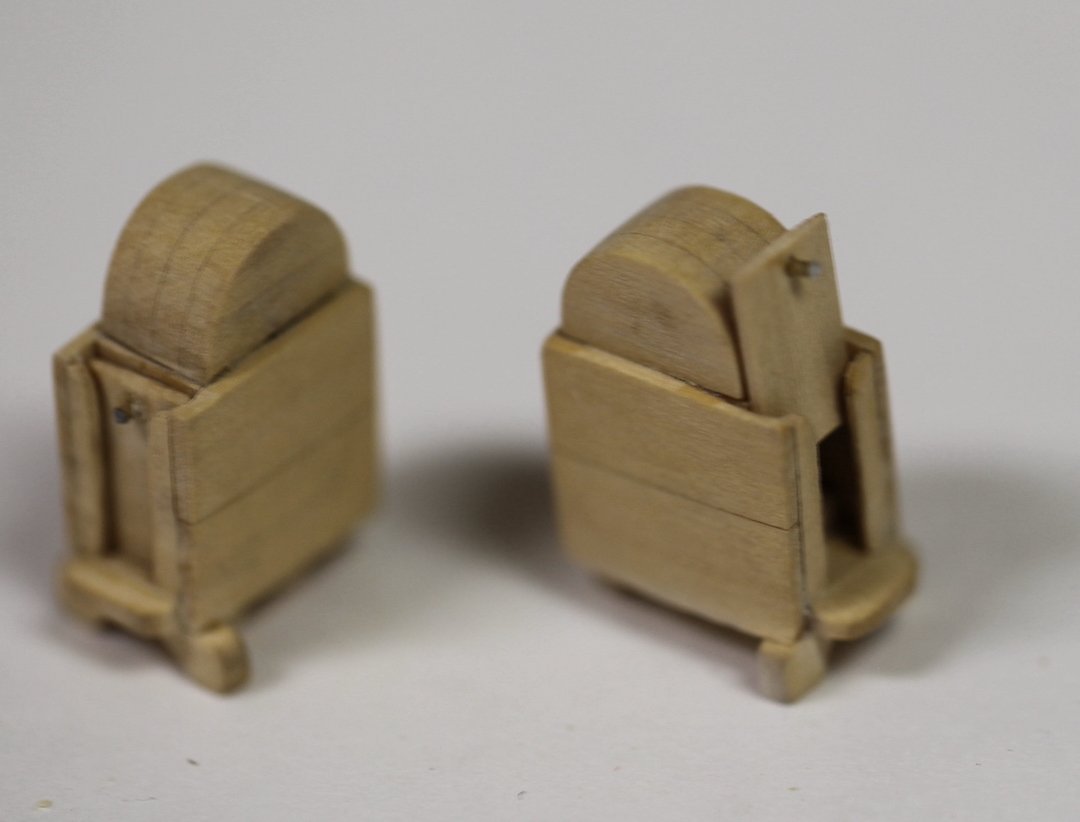
Meanwhile, while in between planking and waiting for planks to soak and then waiting for planks to dry - I've continued to work on the lower deck fittings. I started on the pumps. Now... I think it's safe to say that the Cistern that comes with the Peg kit leaves something to be desired in terms of appearance... So - back to the FFM reference to get some inspiration for the pump. I measured out the amount of space that we have between the mast and the grate and it's limited at best. Not much room to play with there. I started with my leftover boxwood strips to frame out the basic boxes. I added some framing and feet, leaving a little extra space in the front of the pump for the doorway that opens up for the pump dale. Once again - in addition to the FFM, Dan's Vulture build served as a great reference for these details. This angle doesn't show it, but I failed in the "measure twice, cut once" lesson this time around and the pumps were just a smidge (a mm and a half) two wide to fit between everything. Fortunately I was able to solve this problem by sanding all sides of the pumps thinner - giving me just enough room if I notched out the inside legs of the pump to make room for the mast partner. I cheated a little bit on the cistern hoods - and instead of making them hollowed out, I piled the boxwood strips to create the right amount of depth, then used a compass to create a rounded template. From there it was a matter of sanding them down. As an additional touch I cut off the ends of a 2mm dowel to simulate the pump tubes that run through the deck. There is much more to do with the Cisterns. The pillars need to be crafted and I'm still noodling through how to do the pump cranks. Honestly, I'm not great at soldering this kind of thing. I can solder the heck out of wiring (I'm completely rewired my Camaro by hand), but silver soldering often leaves me frustrated.

- 419 replies
-
- 10
-
-
- Victory Models
- Pegasus
- (and 2 more)
-
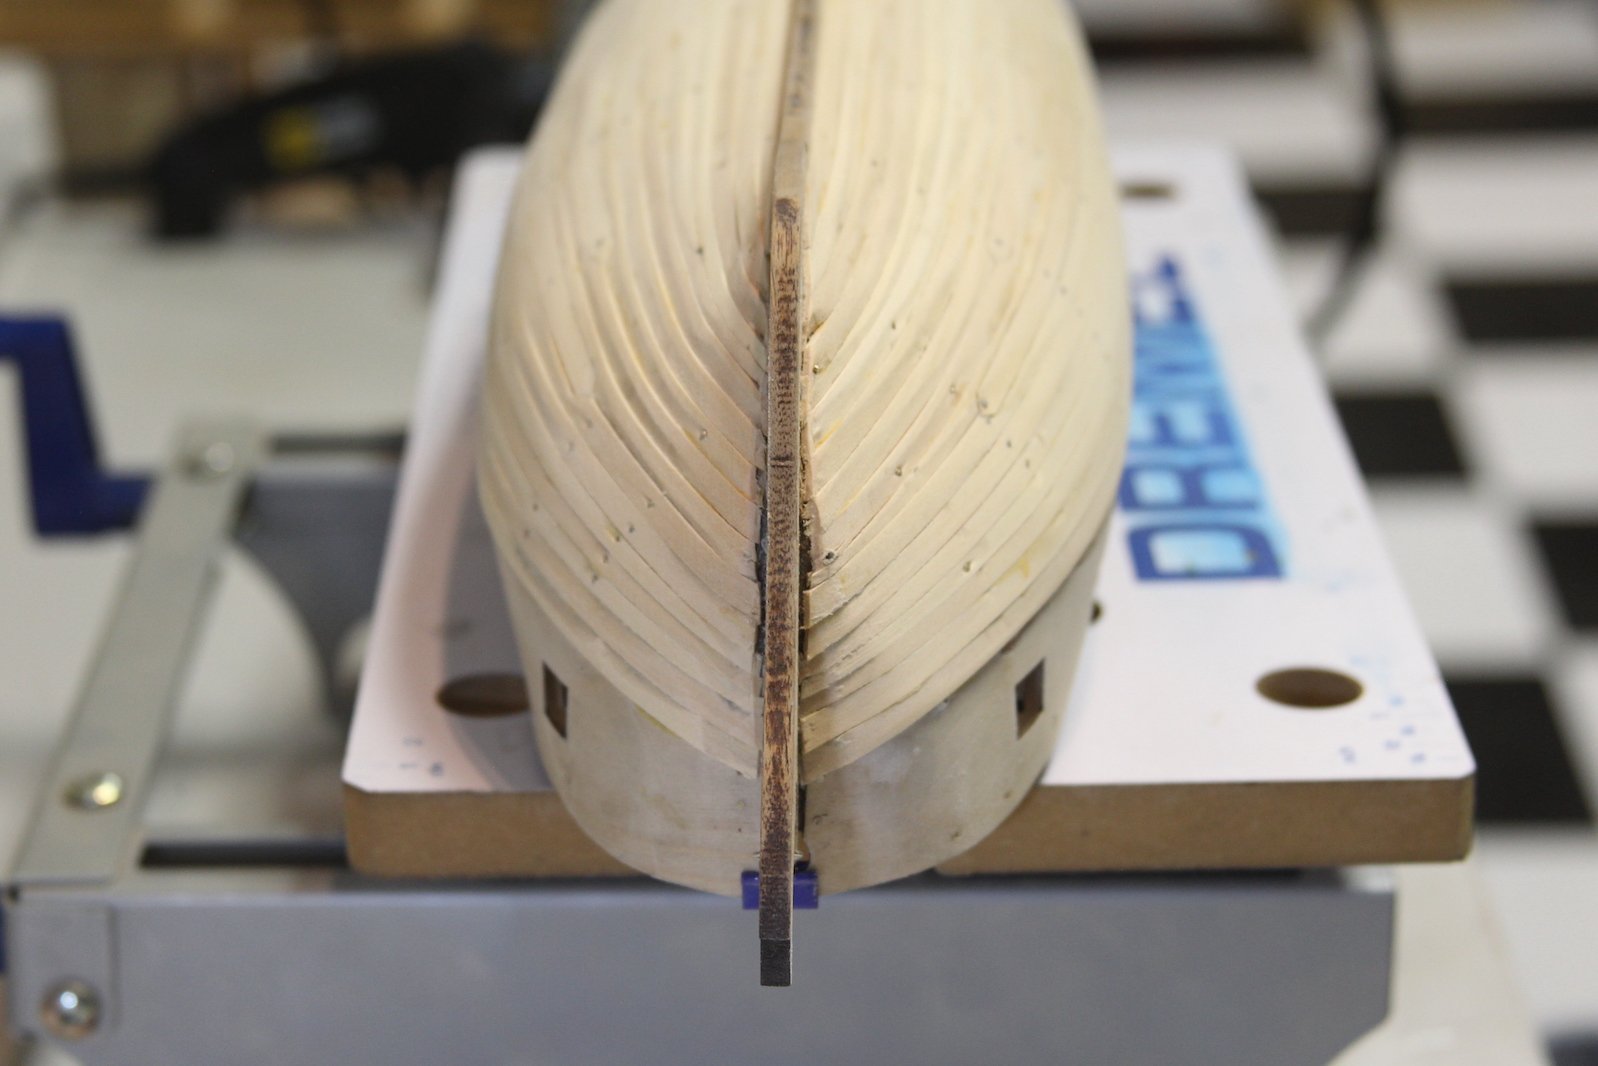
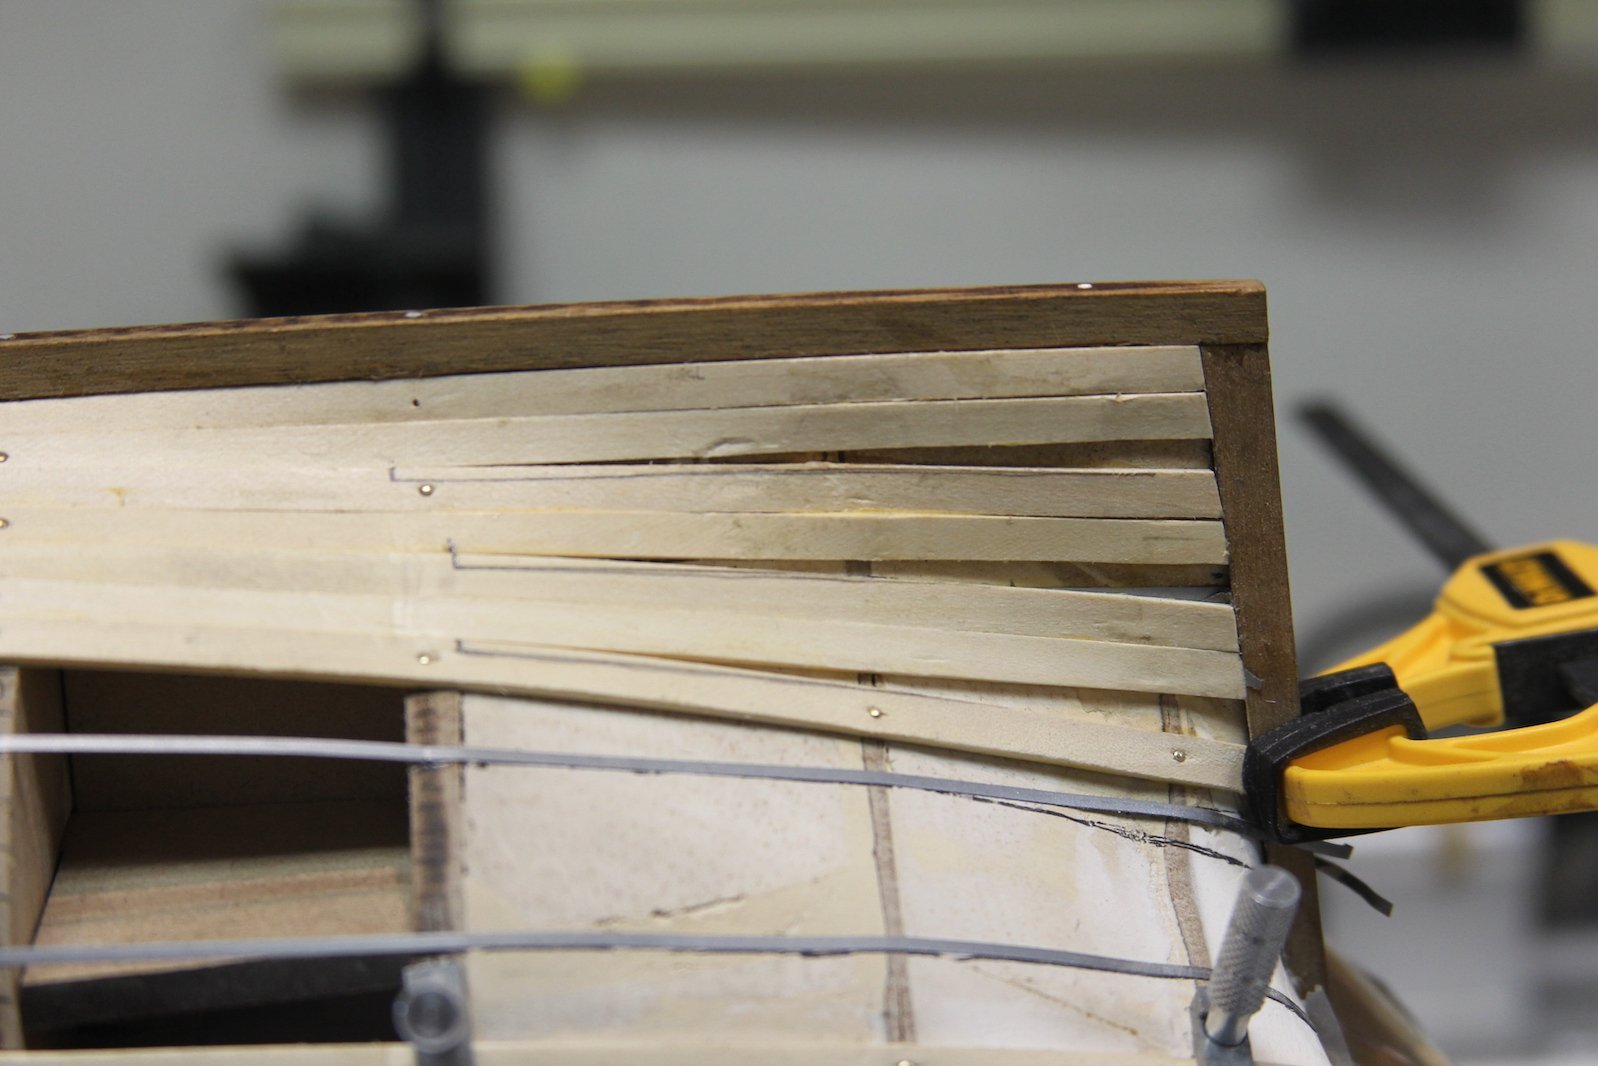
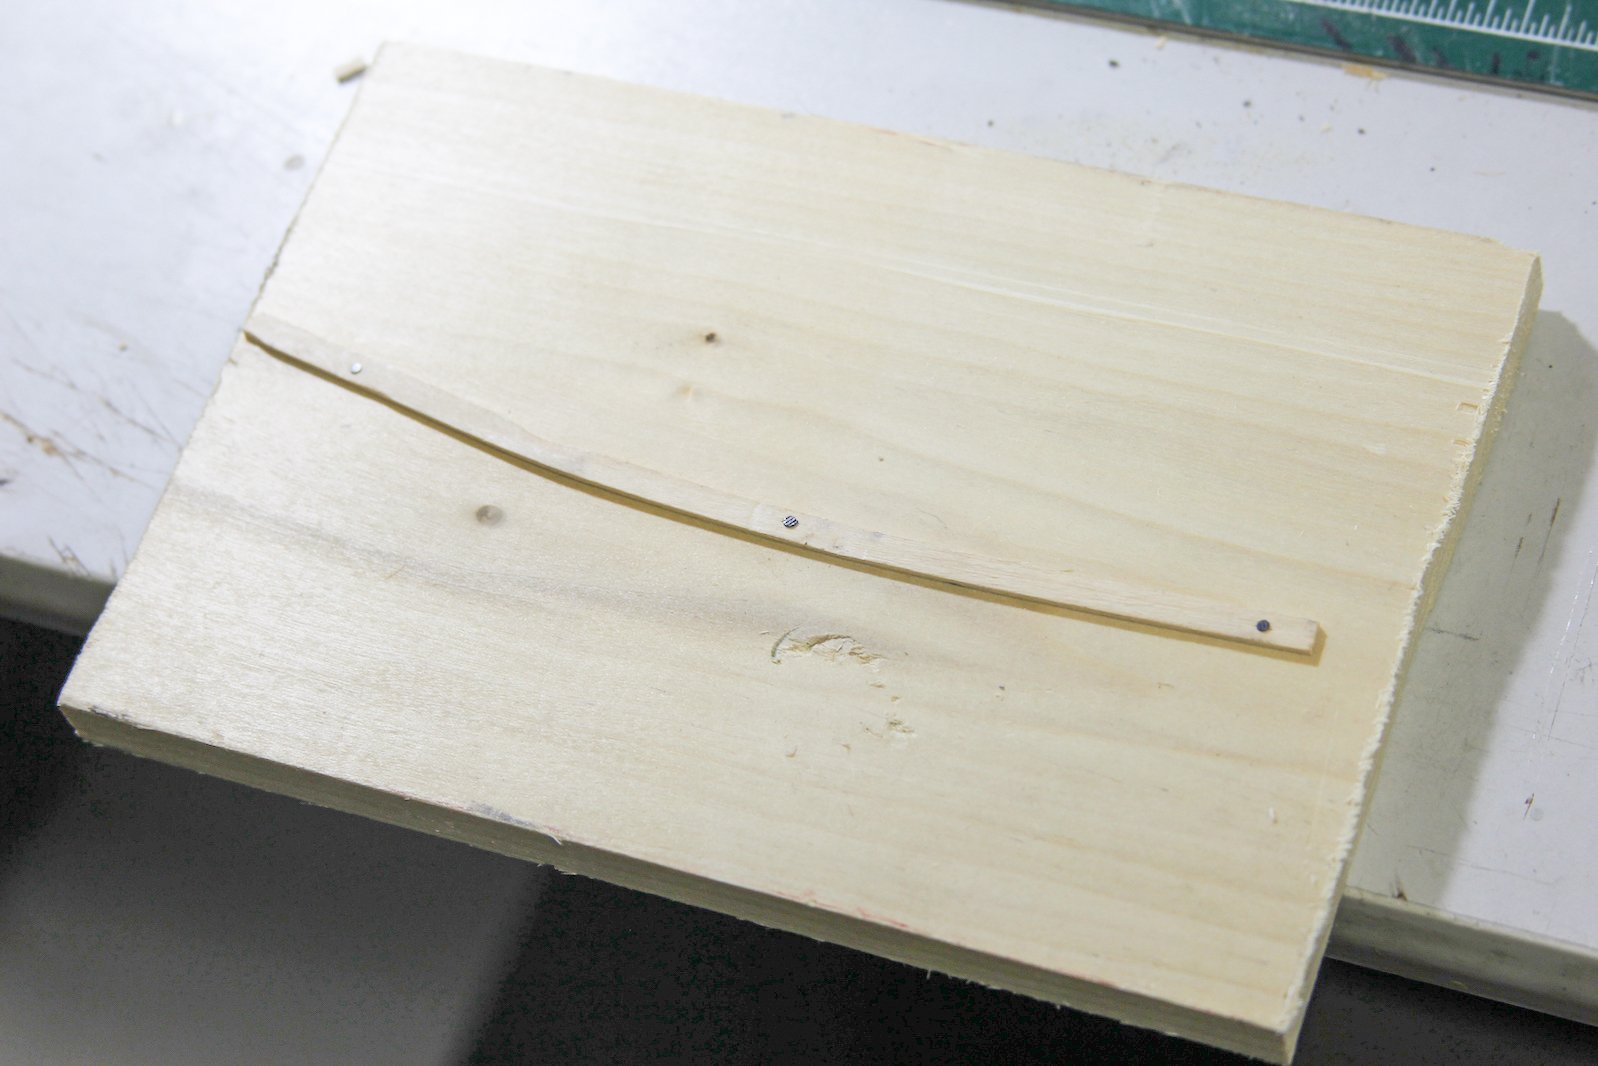
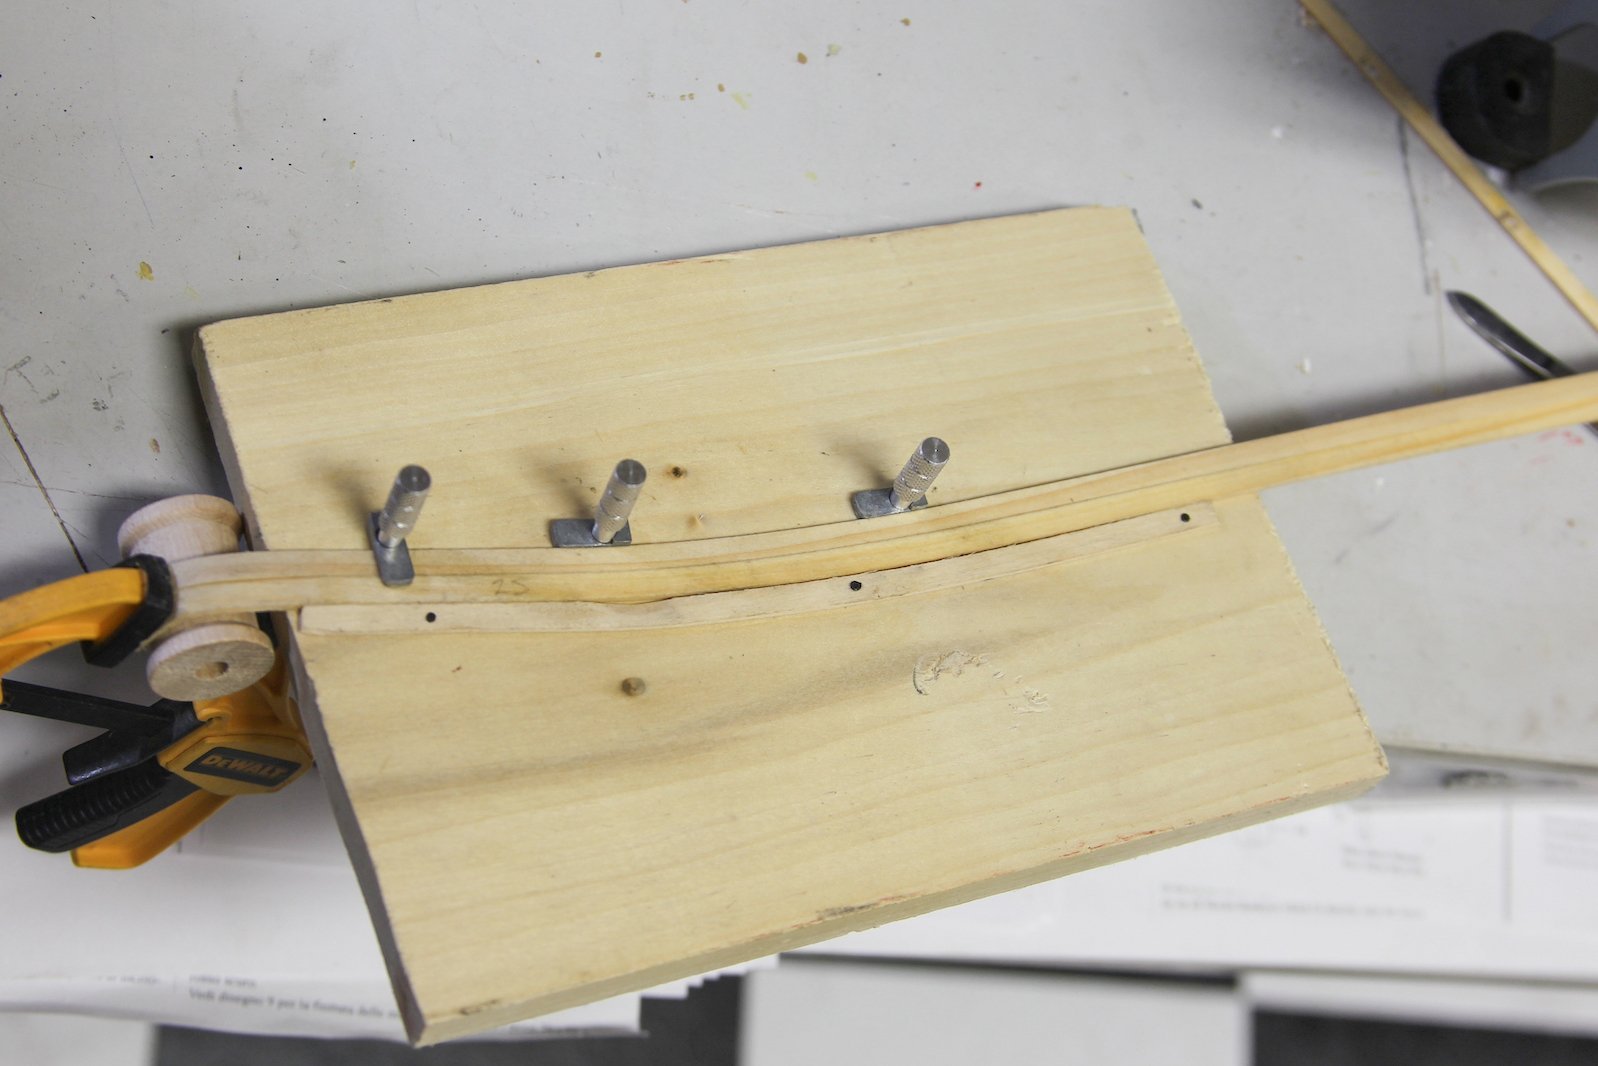
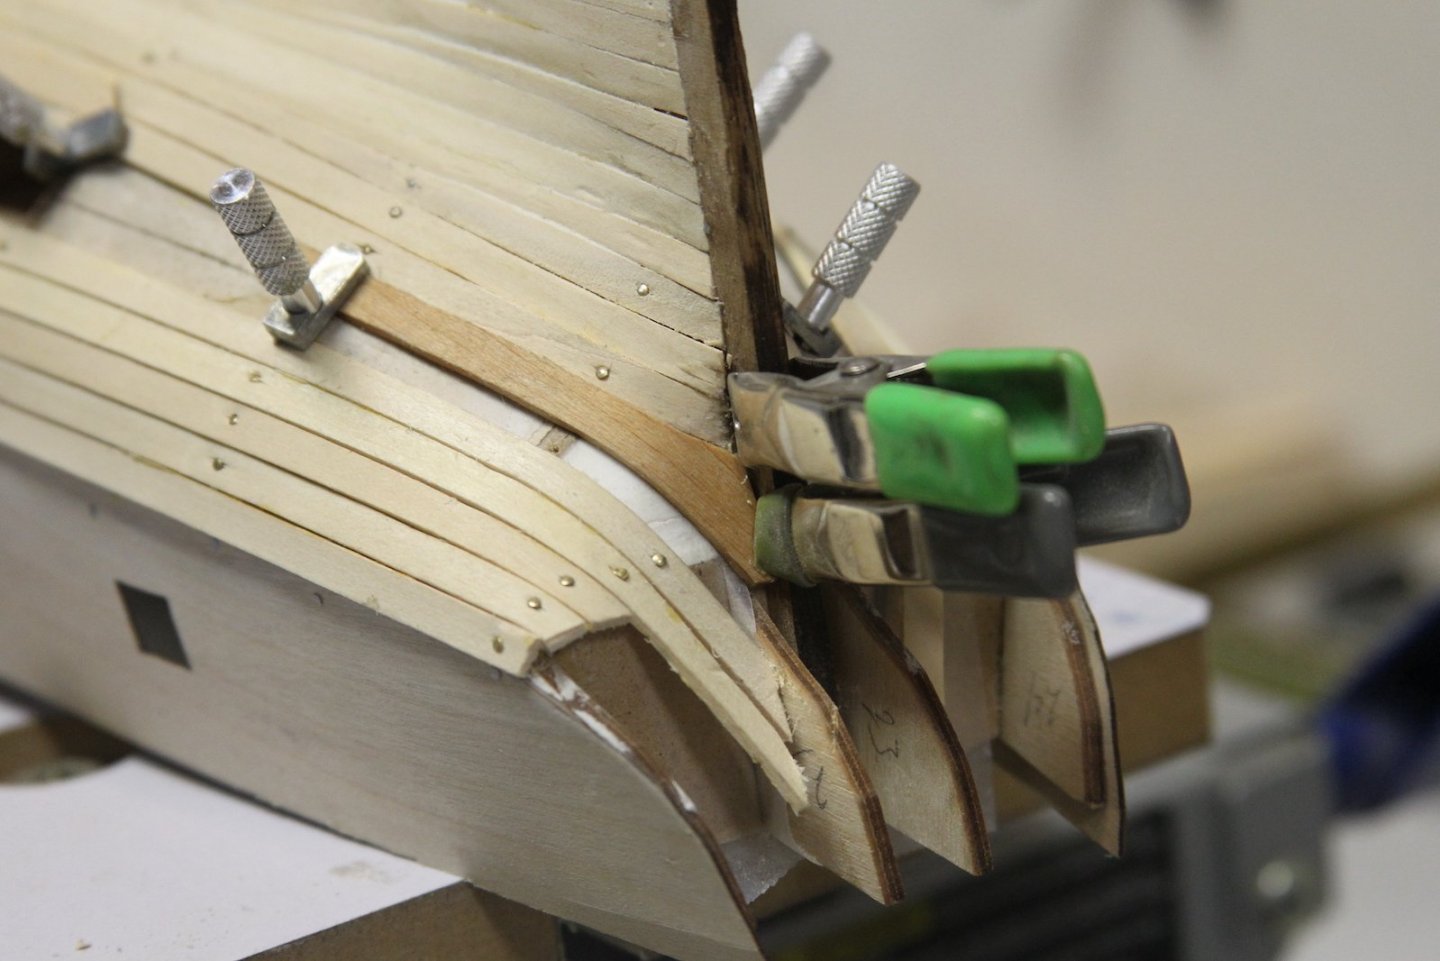
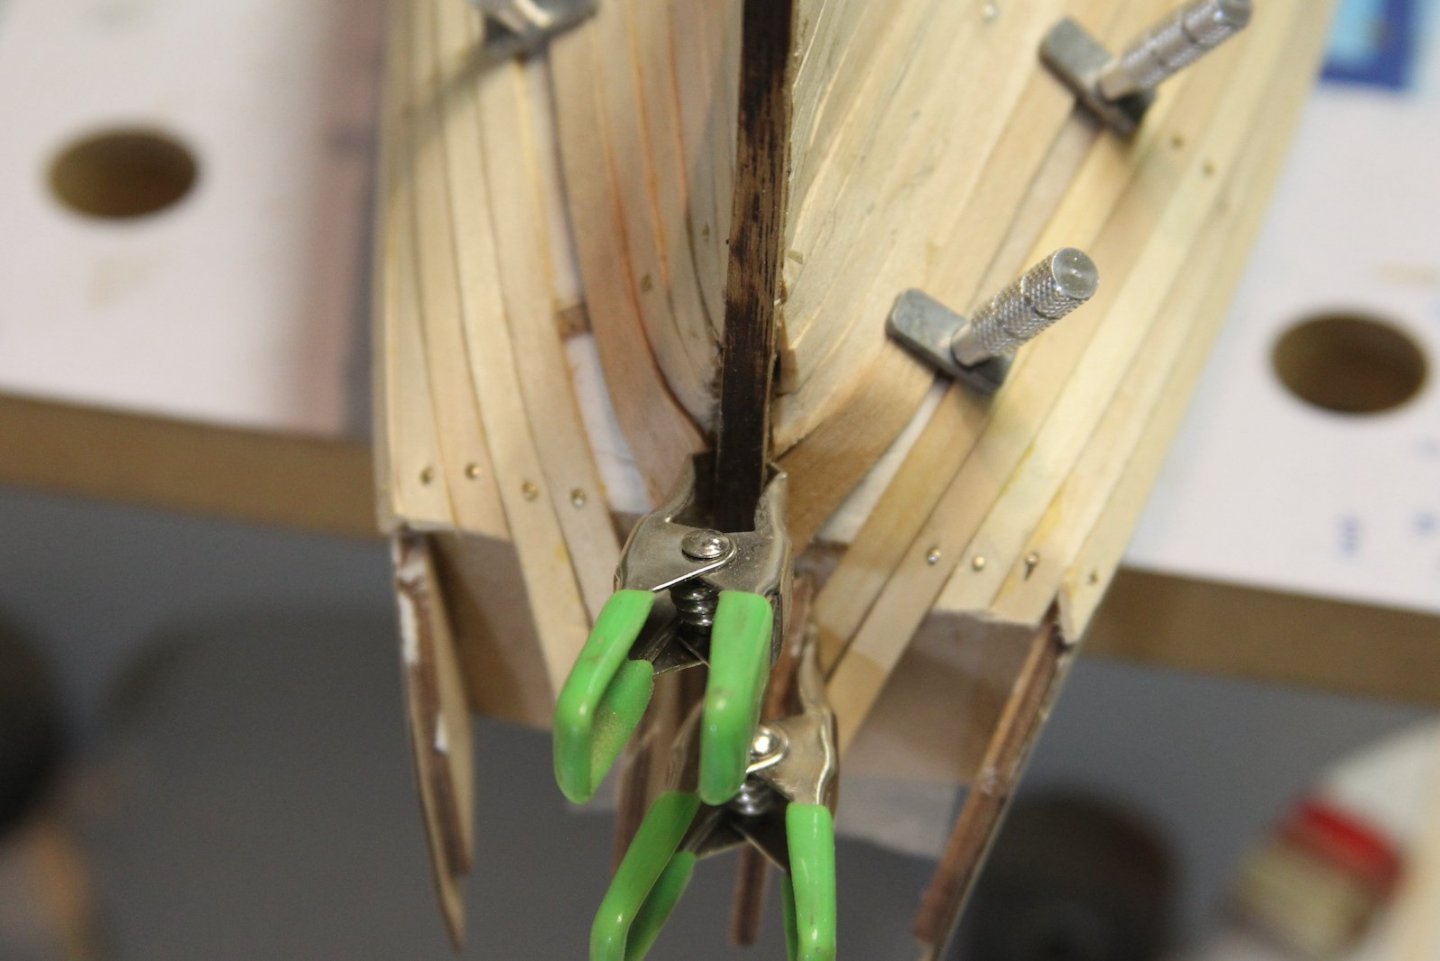
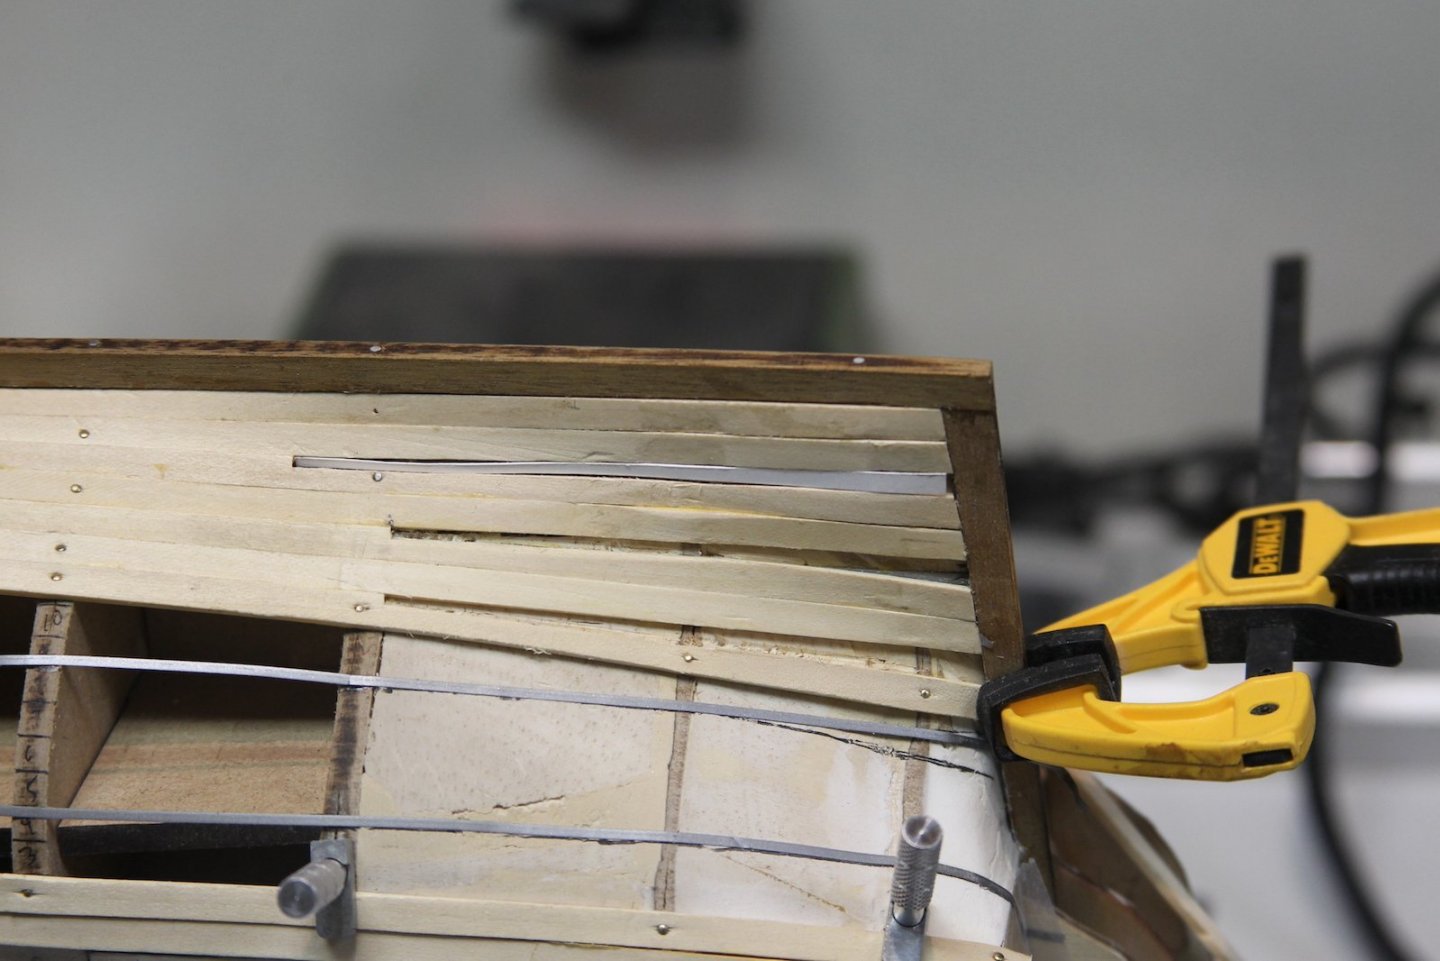
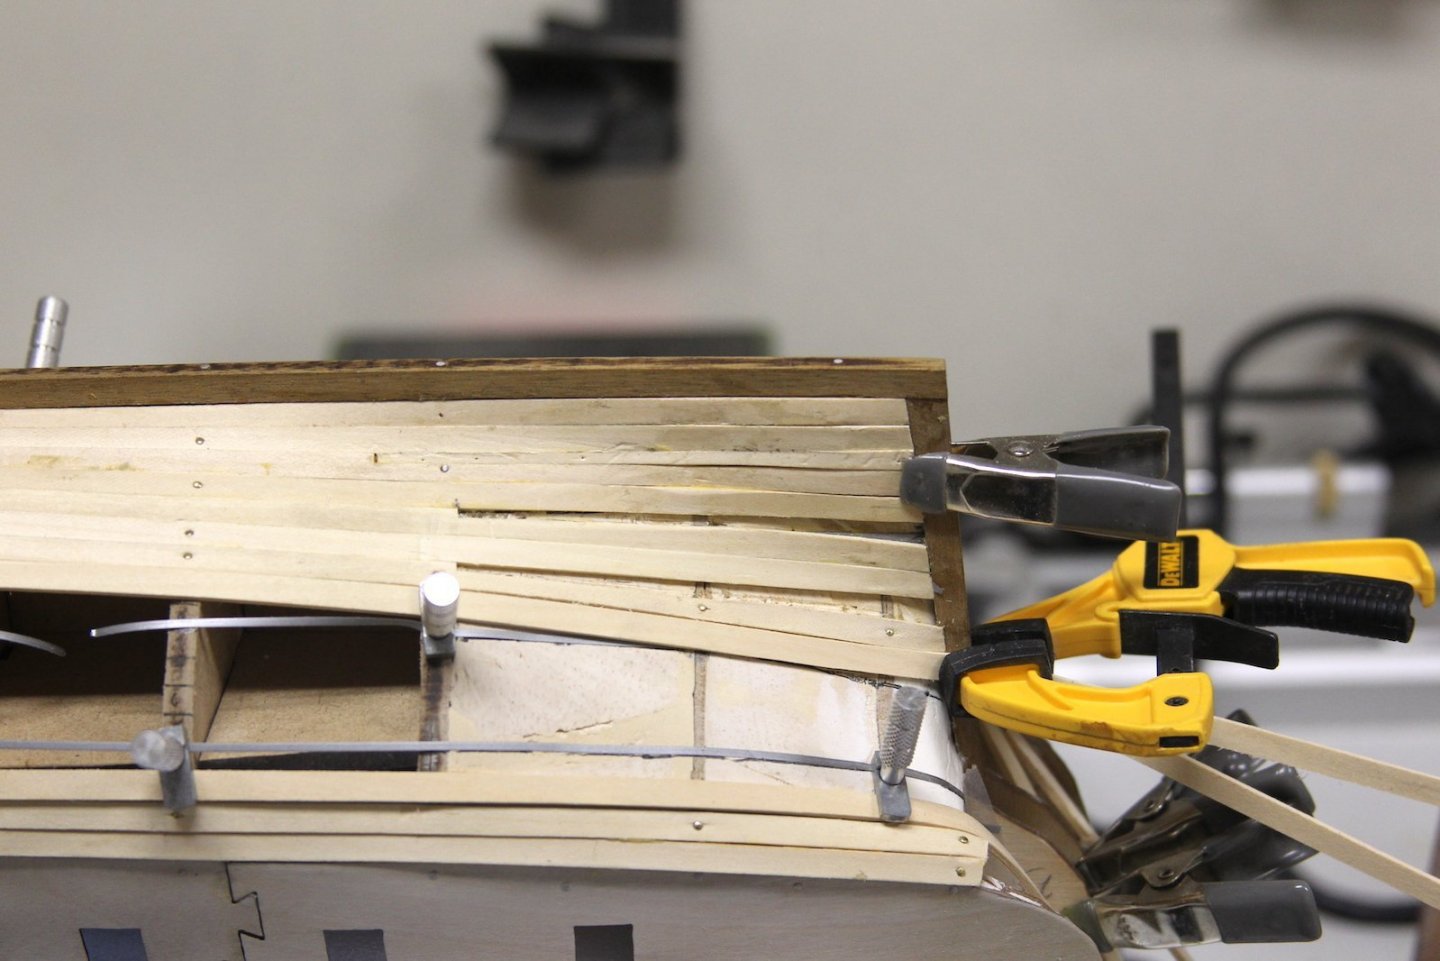
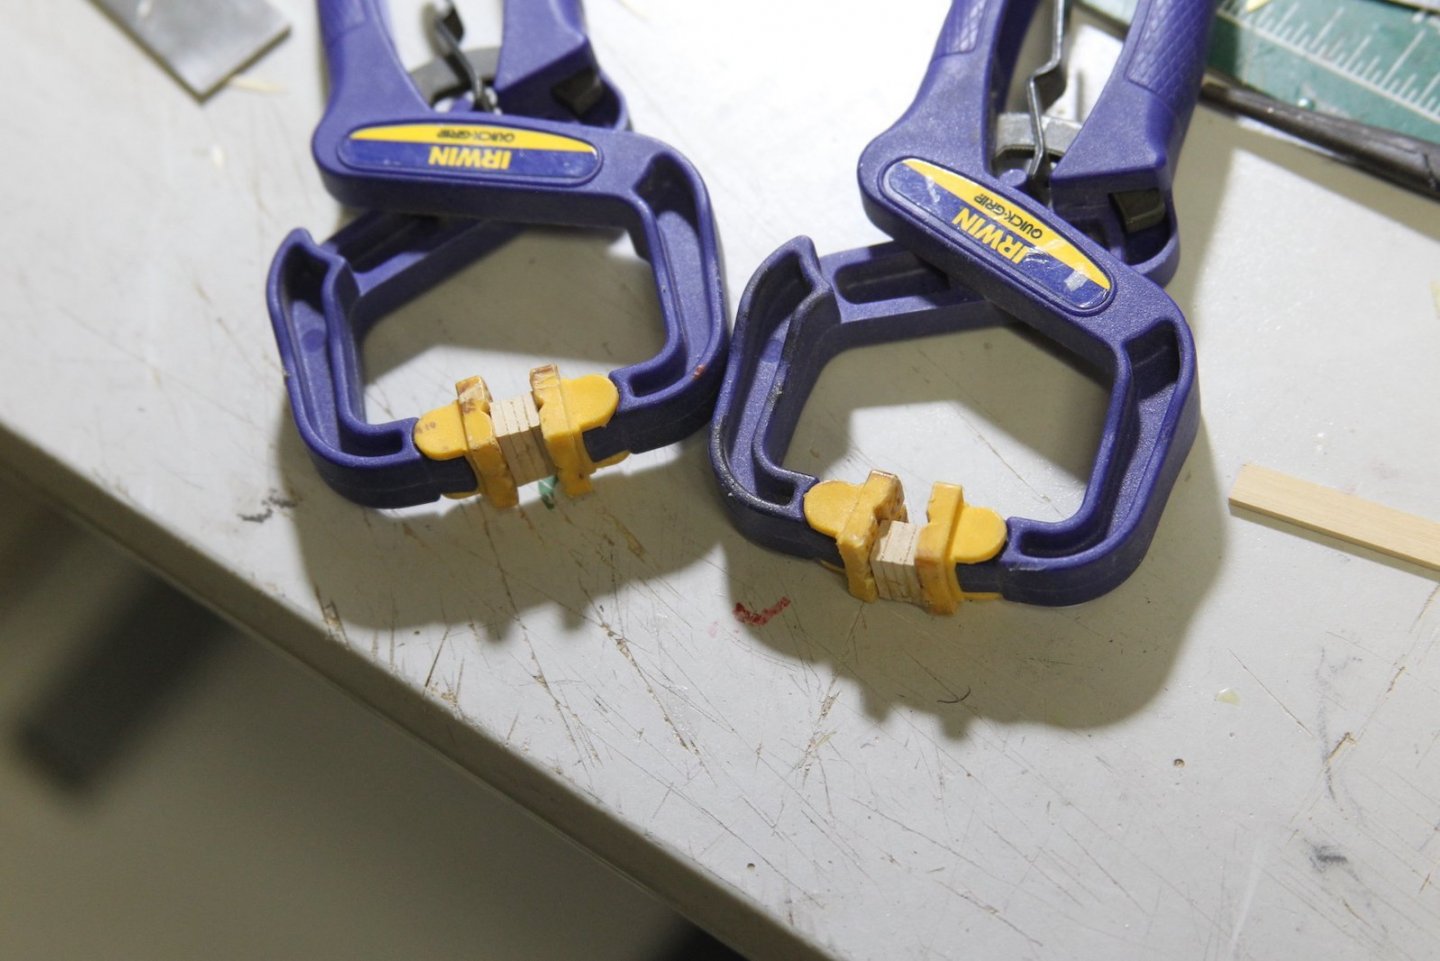
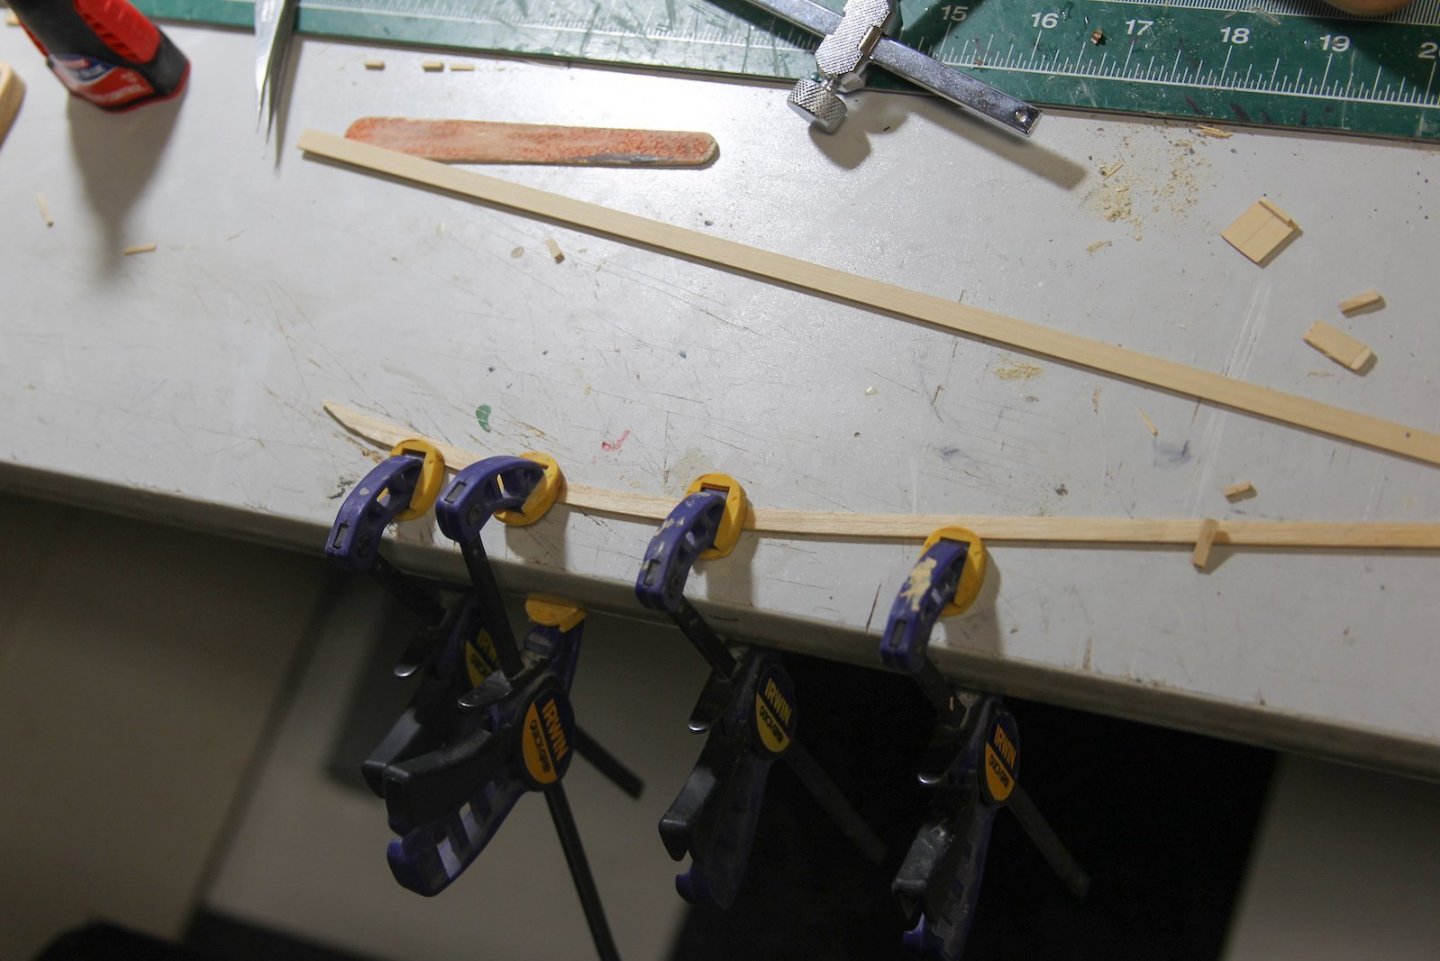
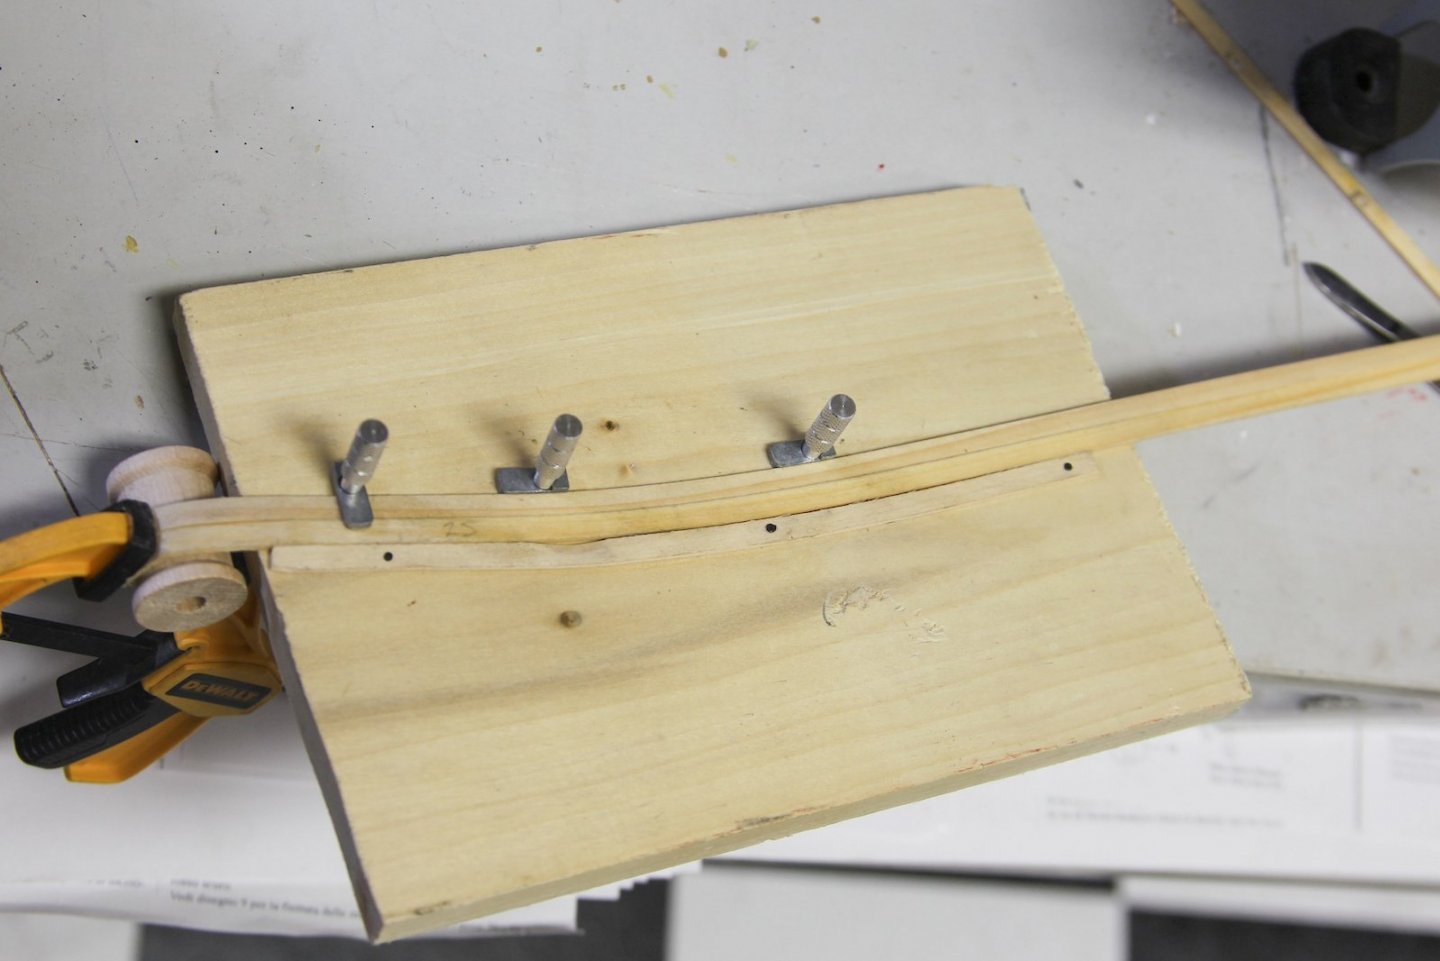
I'm continuing to chip away at the planking nice and slow - following the tutorials and pdfs. As I said, I'm going to add stealers a little later as I go with this first layer. I'm trying really hard to not let the fact that it's double planked give me an excuse to take too many shortcuts on the first planking. Not only because I'm obviously trying to avoid the "filler & sanding" pitfalls that make the second layer sketchy, but because it's giving me good practice for the second layer. I practiced some spiling by soaking the plank then holding it in place with clamps on my desk. But then I decided to use that practice plank as a jig for some forthcoming planks. I can adjust the severity of the curve by adjusting where I place the plank holders. The exercise proved fruitful and I got the first plank below the canon ports in place. I originally just tried to get it in place without spiling, but it turned out funky so I pulled it off and did it again.


- 419 replies
-
- 5
-
-
- Victory Models
- Pegasus
- (and 2 more)
-
Hey Mike - I just visited Chuck's place for a few cannons and he has quite a few new goodies since I'd been there last. The lantern (which I got for my Pegasus as well) is pretty sweet. The down side of course is that the more I look around the more it ends up becoming pretty easy to fund Chuck's Roth IRA. 😛 Really nice work on this Fly Tim - I concur with the others, this is impressive on its own, but especially as a first model.
- 164 replies
-
- 2
-
-
-
- fly
- Victory Models
- (and 4 more)
-
Here's a bit of my experience when I made the shift from plastic modeling kits to wood. I had build the revel Constitution and a couple of other three mast ships in plastic, so when I made the shift to wood I went with something that looked "cool" - the San Juan Nepomuceno. Ooof. Steep learning curve to be sure, and of course made a lot of mistakes. My advice is to pick up something relatively inexpensive, so that when you DO make mistakes (which is inevitable) it's not a huge deal. For me, I spent a fair amount so not 'getting it right' made me feel a little guilty. Since then, I've also built the Swift twice - which I see as a great little ship that lends itself to practice when it comes to planking but also with enough rigging and deck fixtures to get the hang of it. Just my two cents.