Landlubber Mike
-
Posts
4,547 -
Joined
-
Last visited
Content Type
Profiles
Forums
Gallery
Events
Everything posted by Landlubber Mike
-
 Glad you got that figured out Alan. I would have been tempted to throw it out the window Parts are looking fantastic! This gives me flashbacks to when @mtaylor had to show his Death Star who was boss...
- 460 replies
-
- 4
-

-

-
- Finished
- Flower-class
- (and 1 more)
-
On my current 1/350 build, I struggled with that question as well. Mostly because I hate taping, I tried to order assembly versus painting to avoid having to tape. For things like ammo lockers, I painted them separately then attached them. I was worried that I wouldn't be able to get the airbrush in tiny nooks, and would try too hard and get globs of paint. For things like the bridge and other structures, I find it easier to assemble off model and then attach. The problem is sometimes the attaching part can give you difficulties like gaps, etc. I had some problems with my bridge and had to take it off and re-glue it, and knocked off some of the PE details that I had to re-attach. Sometimes it's best to just go with your gut and figure it out as you go along. Can only plan so much!
-
Nice job OC! Alan, I completely agree. There has to be a lot of planning, I think particularly when working in this scale. I haven't built a Flyhawk 1/700 kit before, but the multiple sets of instructions (one for base kit, one for PE and other details) doesn't have me exactly excited.
-
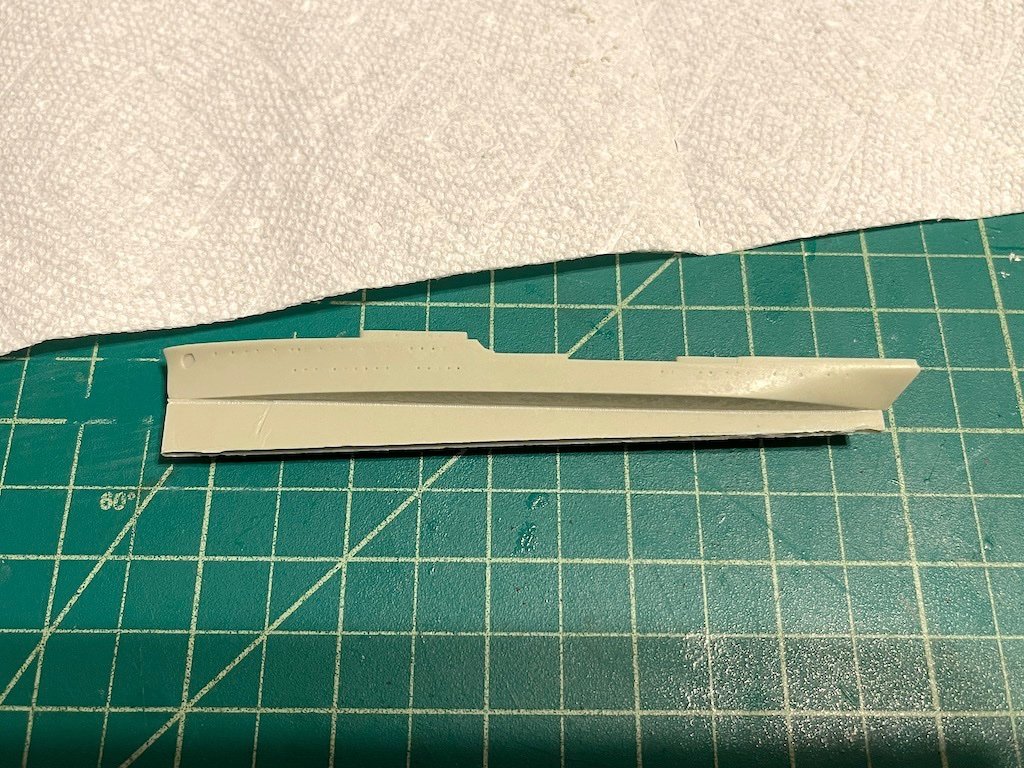
Thanks guys! Lou, I find with my big sausage fingers and other clumsiness that I need to do the more physical work early on or off model, otherwise I end up breaking things faster than I can build 😕. The skeg was quite thick, ended up using a scriber to cut through both sides and then cleaned up with a hobby knife.
-
Magnifiers and glasses
Landlubber Mike replied to Dave_E's topic in Modeling tools and Workshop Equipment
I use the Optivisor with LED light frame as well and love it. I thought my eyes had gotten much worse the past month, but turned out the lights weren't as strong. I replaced the batteries and voila! Could see tiny PE again. -
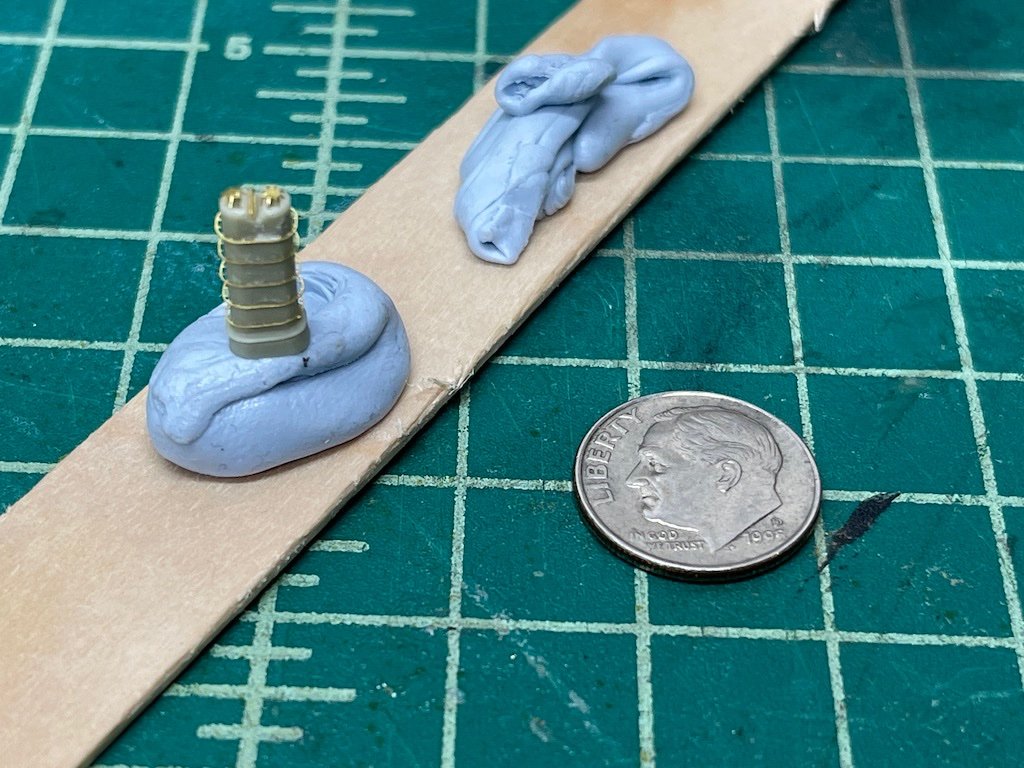
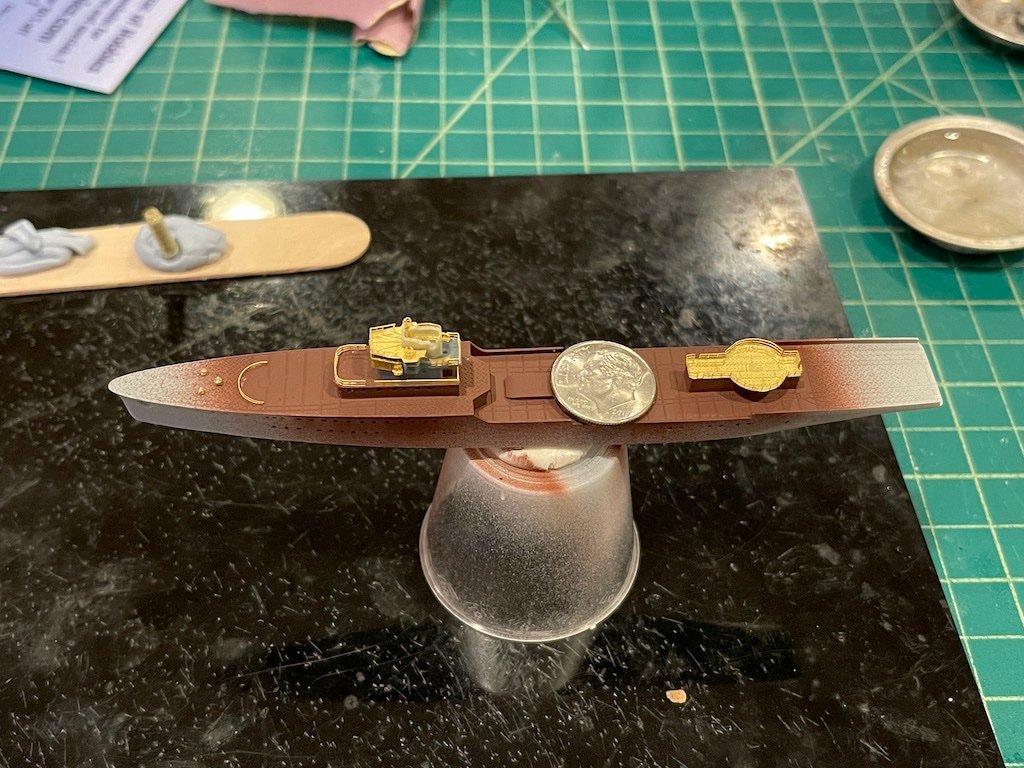
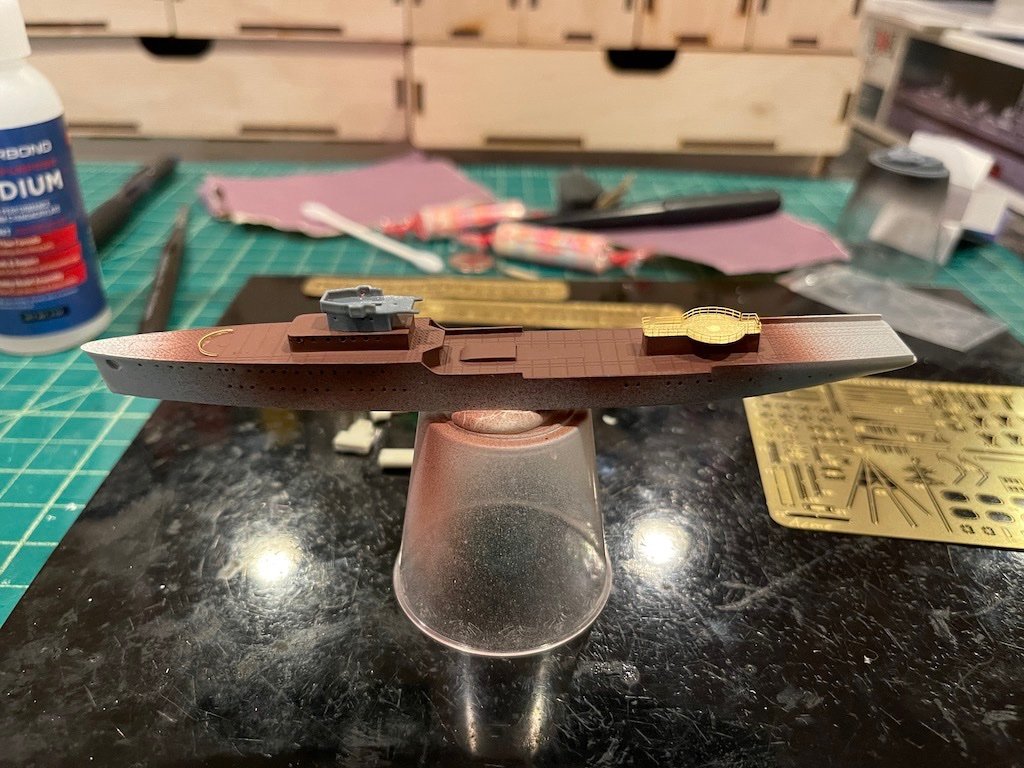
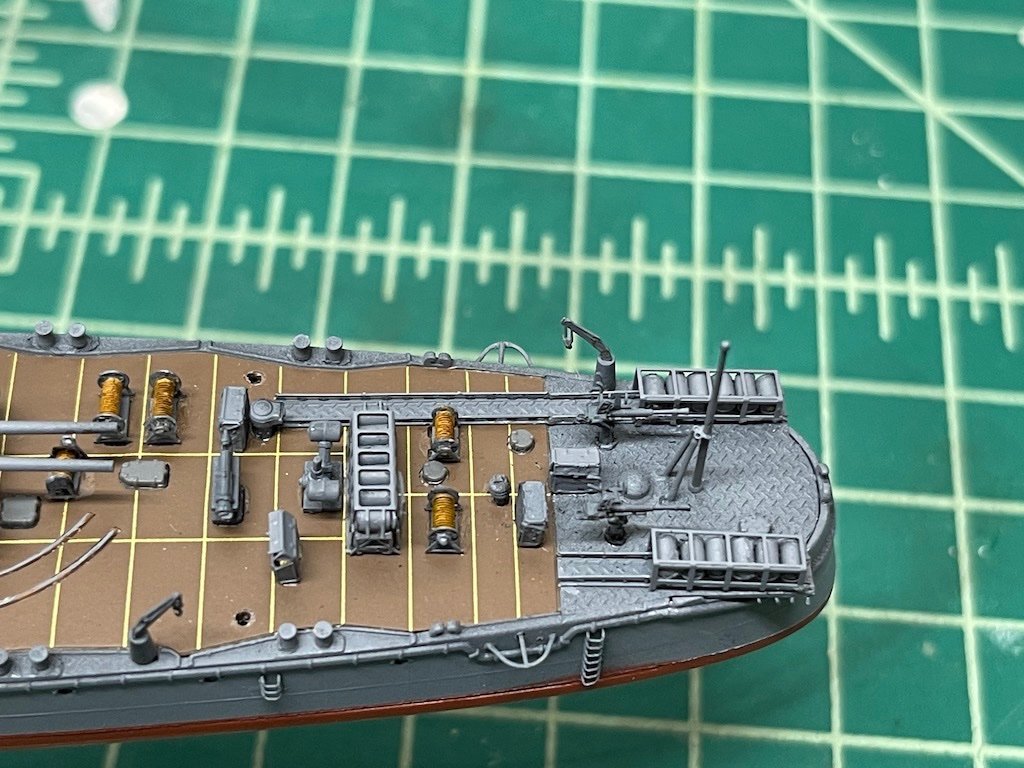
Last night I worked on the funnel to add the five rings, as well as PE components at the top. Sorry for the bad picture, hard to get a good picture at high magnification on my phone. Funny thing is to the naked eye the rings, etc. look perfect, but on high magnification it looks a bit rough! I also added the vents/windlass on the bow deck - these are super tiny turned brass components from Five Star and Rainbow. You could just use a cut off piece of plastic rod, but you get crisper definition with the brass, and not to mention, it's not very easy to cut tiny pieces of plastic rod. I also added the rangefinder to the bridge. The kit includes a single PE piece that you fold in half. Instead I used an upgrade kit from Five Star which allows you to make it in a more three-dimensional fashion from five pieces - one you fold for the main box on top, a rod for the handle, a turned rod for the pedestal, and then two PE pieces to make the base. Really put the Optivisor to the test on that one! While I think it's a nice improvement over the kit rangefinder, I have to say that given how small it is, I'm not sure that most people would notice or appreciate the extra 30 minutes it took me to put this together over the simple fold and glue for the kit part.
- 47 replies
-
- 11
-
-

-
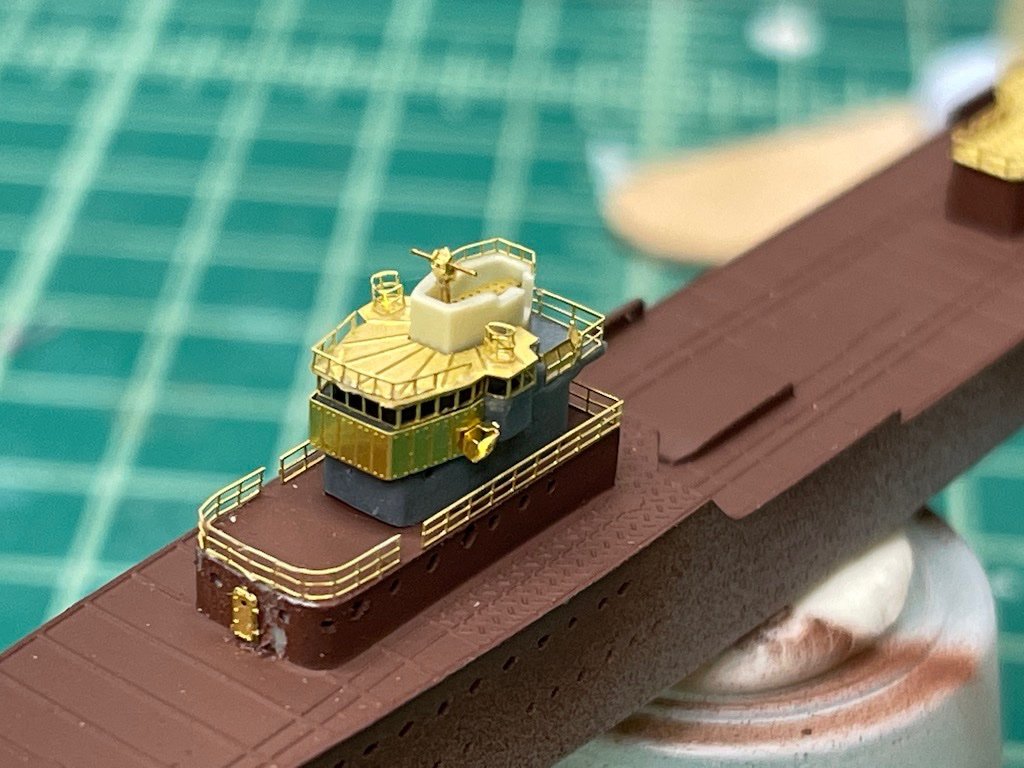
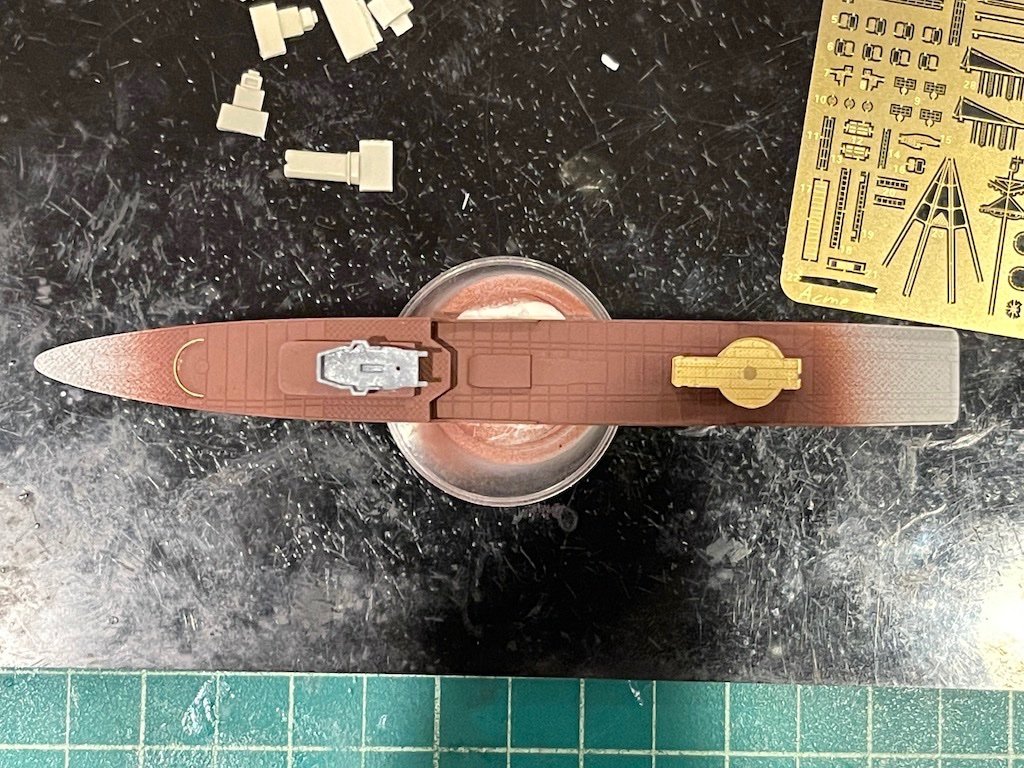
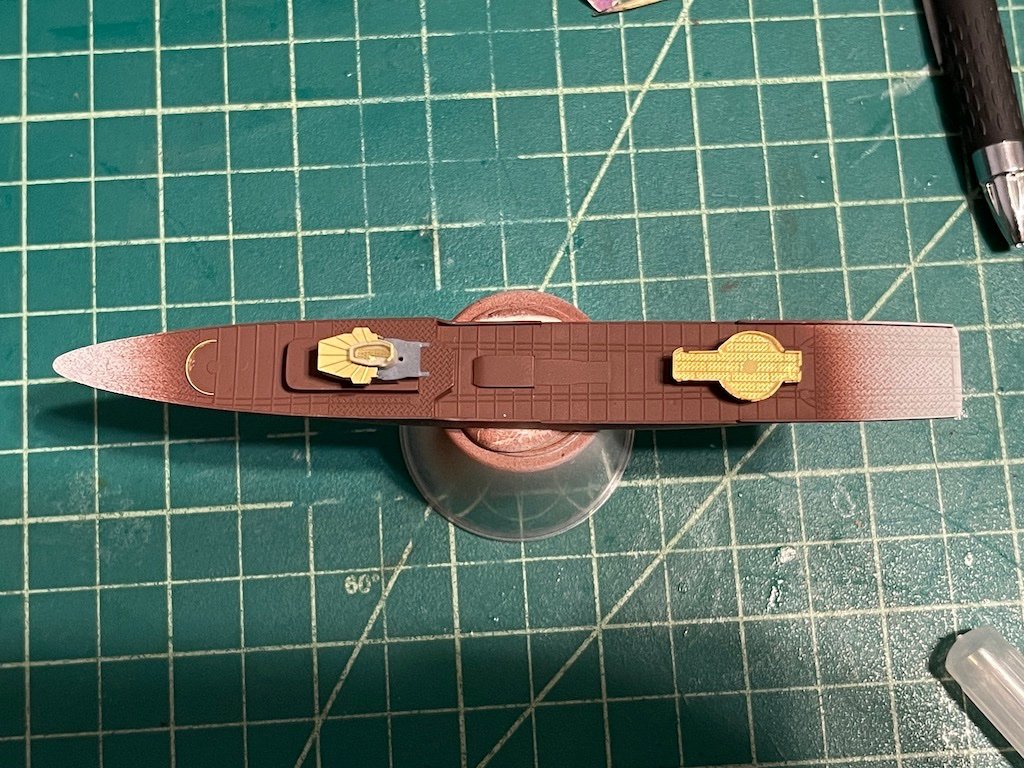
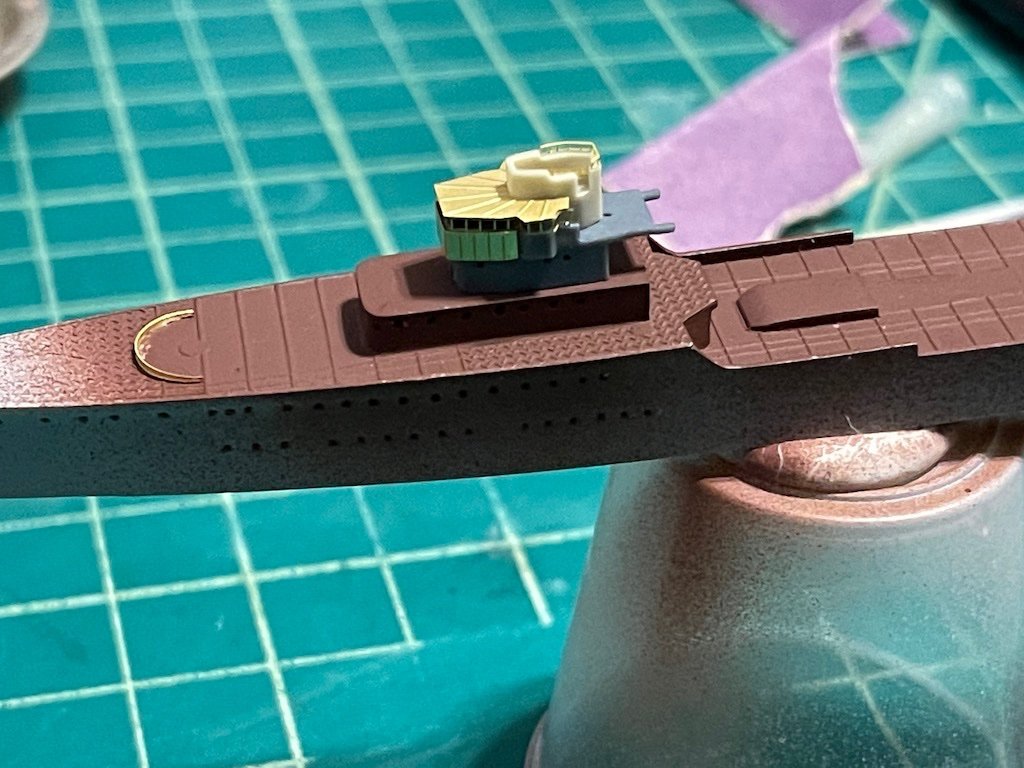
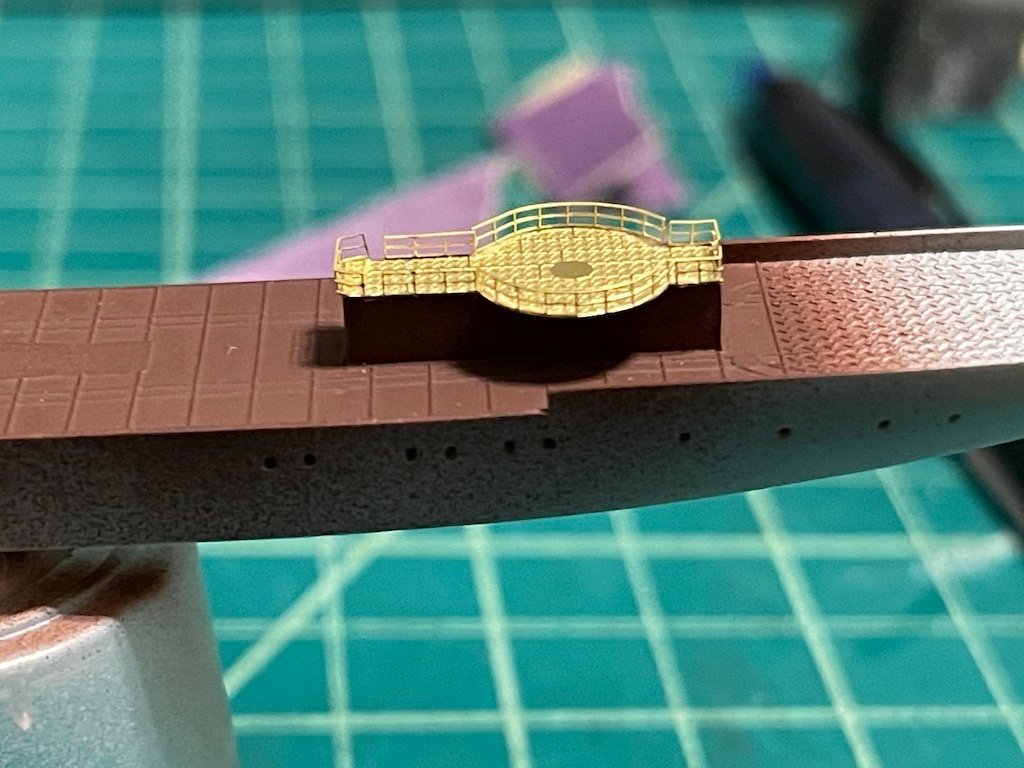
Here are some early build pictures. After drilling out the port holes and priming with Mr. Surfacer 1500, I painted the linoleum sections of the deck with Tamiya linoleum brown. Then I started building up the bridge as well as the rear platform which supports the Type 99 AA gun.
- 47 replies
-
- 10
-
-
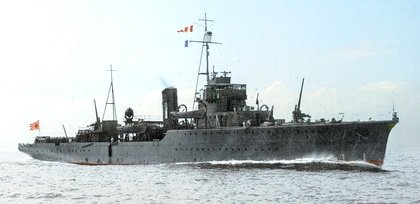
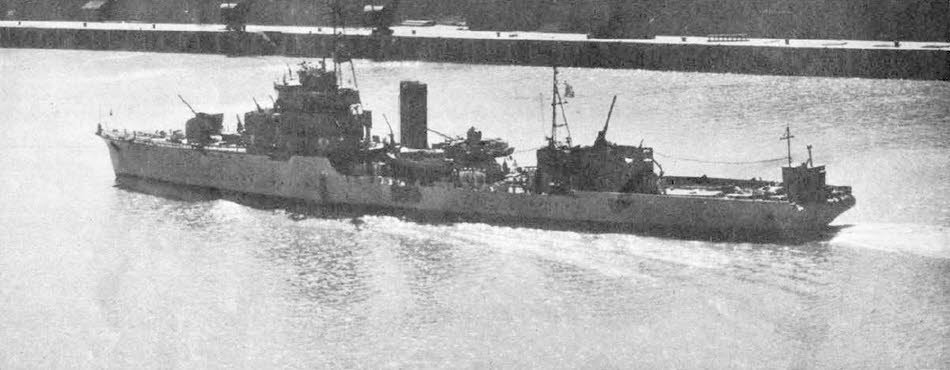
Laid down in 1930 and completed in 1932, one of its claims to fame is that the Yaeyama was the first Japanese warship to feature an all-welded hull. Here's a colorized picture of the Yaeyama during its 1932 trials, alone with a black and white picture from the other side. You can see that huge Type 99 10th year AA gun in the back. The Yaeyama saw service in the second Sino-Japanese War, and later mined the Suritago Strait in the Philippines after Pearl Harbor. In December 1943, its minelaying rails were removed and replaced with depth charges as part of a refit to an anti-submarine convoy escort ship. While in February 1942 it had survived an encounter with the US PT-32 motor torpedo boat, it wasn't so lucky in September 1944 when it was hit by at least 10 bombs off the Philippines.
-
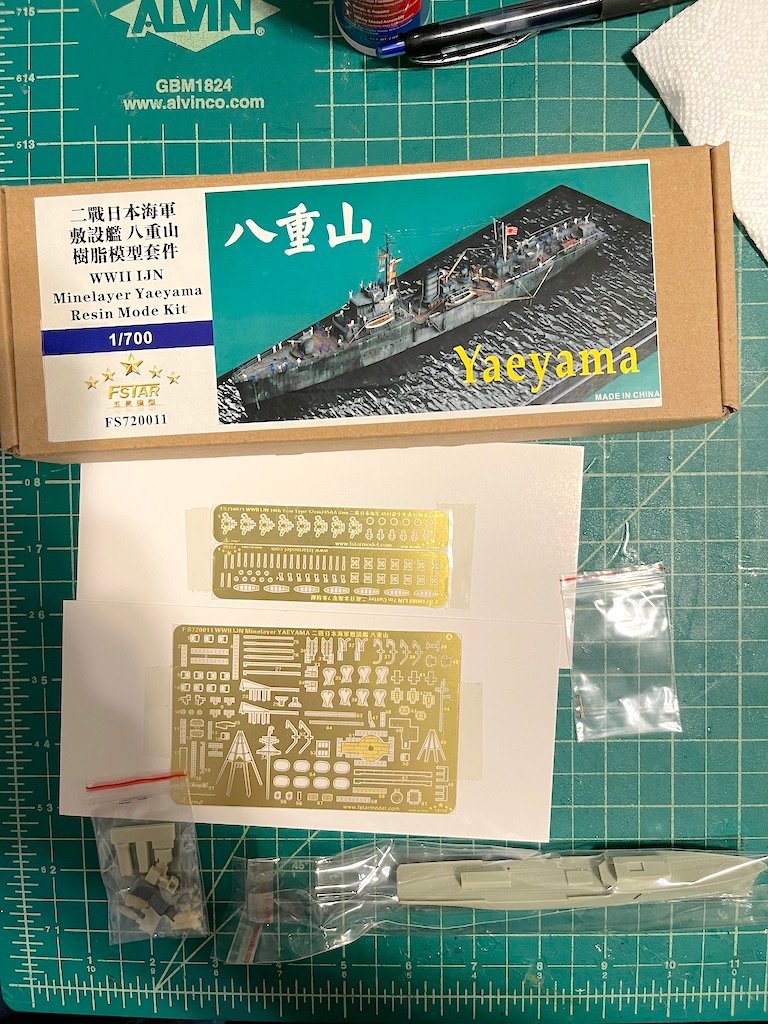
While waiting for paints, etc. to dry on my 1/350 Shimakaze build, I pulled another 1/700 kit out of the stash. It's the 1/700 IJN Yaeyama by Five Star: I was interested in this kit as it's an all-in-one resin kit with PE upgrade built in the kit box. Five Star makes a lot of PE upgrade sets for other kit manufacturers, but this is one of their newer line of in-house kits with upgrades. I loved the completed model diorama pictures on the box cover, so added it to the stash. I'm planning to push myself to try to model it in a similar diorama setting as the box cover, but include add a small boat or two in the water for added interest. In the box you have the resin hull along with a few resin components for the bridge, funnel, and other structural items. Also comes with four PE sheets: a medium sized fret for detailing the structures and the deck items, two smaller frets for adding railing and small boat details, and another fret to make the Type 99 10th year AA gun. The hull is really nice, just need to separate it off the plug: The resin parts and PE frets are very nice. The one disappointing thing with this kit is that it doesn't come with everything shown on the box cover, importantly, it doesn't include the searchlight as well as the vent and windlass on the deck at the bow. It also doesn't include the pipe or whatever that vertical structure is on the hull sides even with the bridge. Five Star and others (Rainbow Models, Veteran, etc.) make various add-ons which I had picked up to detail my upcoming builds, so it wasn't too big of a deal for me in the end. Still disappointing though. As a reference guide, I'm using Maru 42, an issue that was dedicated to IJN minelayers (happened to come across it on eBay a few weeks ago for a good price). It's actually got about 10 pages with lots of pictures on the Yaeyama, along with line plans for it. The pictures are mostly the usual grainy black and white, but you can make out some nice details in it. The publication is in Japanese, and it's been a long time since I studied the language back in college, plus, I was never very good with the Chinese characters (you needed to know 2000 "kanji" to be literate enough to read a newspaper!). But Google has a translation app that you can download that enables you to point the camera on your phone at text and the translation shows up on your screen. Cool tech!


- 47 replies
-
- 10
-
-
-
Standards? I have no standards. I just fumble along with the PE like everyone else. Your stairs came out really nice. Do you have a hold and fold? On my first build I tried doing stairs using tweezers and never could get them looking right. With my 1/350 current build, I used the hold and fold and the stairs came out much much better. For what it's worth, I use the "Bug" from Small Shop: https://thesmallshop.com/products/sms002-the-bug-hold-fold
-
When I went to purchase it a few months ago, I didn't get that warning. This time around I did. If I recall correctly I did the transaction through PayPal which adds a layer of security, but if I got that warning message a few months ago I certainly would not have placed the order. Guess I was lucky with the timing. Your Tiger is fantastic by the way! Love the sea!!
- 542 replies
-
- 2
-
-
- Sphinx
- Vanguard Models
- (and 3 more)
-
Great start OC! I recently picked up a few Flyhawk kits. Can't tell if I like the instructions or hate them. What's complicated is when you buy the "Deluxe" or similar upgraded sets, you get a set of instructions for the base kit and a separate set for the upgrades. Would be nice if they were all in one. I wonder if the Pontos sets are all in one? I have their Soya, but haven't opened it.
-
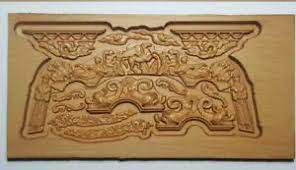
Your Swan came out great! Love the effect! Did you paint the frieze? I'm thinking of free-hand painting the freeze as opposed to using the PE. Not sure if you are aware, but a Russian model outfit (www.v-hobby.com) put together a carved wood set for the decorative Pegasus elements. I ordered it mostly for the quarter galleries, and it is fantastic. I'll probably use more from it.
- 542 replies
-
- 5
-
-
- Sphinx
- Vanguard Models
- (and 3 more)
-
Looking great Ron! i haven’t tried Vallejo’s Liquid Gold line, but I’ve used some of their other Metal Colours and really like them. Another thing to consider is using gilding wax. It’s a paste like wax that people use to give an antique metal look to furniture, etc. I used it when I turned some wooden magic wands for my kids and i really liked the effect. I was thinking of using it on my Renommee build. I also like your approach on using gesso to build up the multi-layer PE. One reason I was looking into scratch building the ornamentation on my Pegasus was I wasn’t exactly thrilled with the look of layered PE. Using gesso to build it up is a great idea. Happy Thanksgiving!
- 542 replies
-
- 4
-
-
- Sphinx
- Vanguard Models
- (and 3 more)
-
I ordered mine around the same time and it came last week. It's a very solid tool that should last a lifetime.
-
Hi Mark, even though we've never met I felt crushed reading your post after all the kind exchanges we have had over the years. I'm at a loss for words right now, but wanted to send my best wishes to you and your family.
-
Wow! Looks awesome!!!
-
Great job Glen! I love how it turned out, including with the wood base and the cork knot. Very cool!
- 71 replies
-
- 1
-
-
- Charles W Morgan
- bottle
- (and 1 more)
-
Such great work, all the more impressive being in card. Nice job!
-
Photo Etch Bender
Landlubber Mike replied to John Allen's topic in Modeling tools and Workshop Equipment
I have this, but haven't used it much. I usually just try to cut the tabs as closely as possible, or use the knife to trim off any extras. I found that at 1/700 scale, attempts to clean up parts could do more harm than good given the thin brass. For 1/350 maybe a little less risk, but you have to ask yourself if you will be able to see the little tab, and weigh the risk of cleanup versus the risk of ruining the part or even losing it if it happens to ping off the tweezers. One place I found, however, that you want to remove the tabs is when building box-type structures as tabs will interfere with having clean joins. -
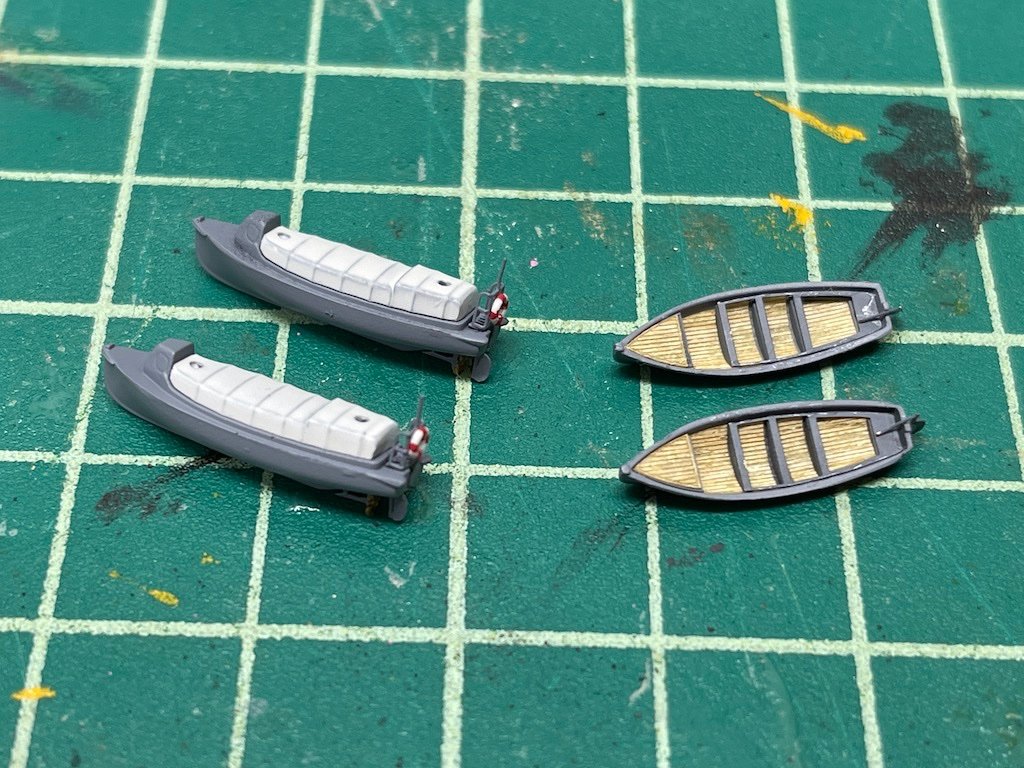
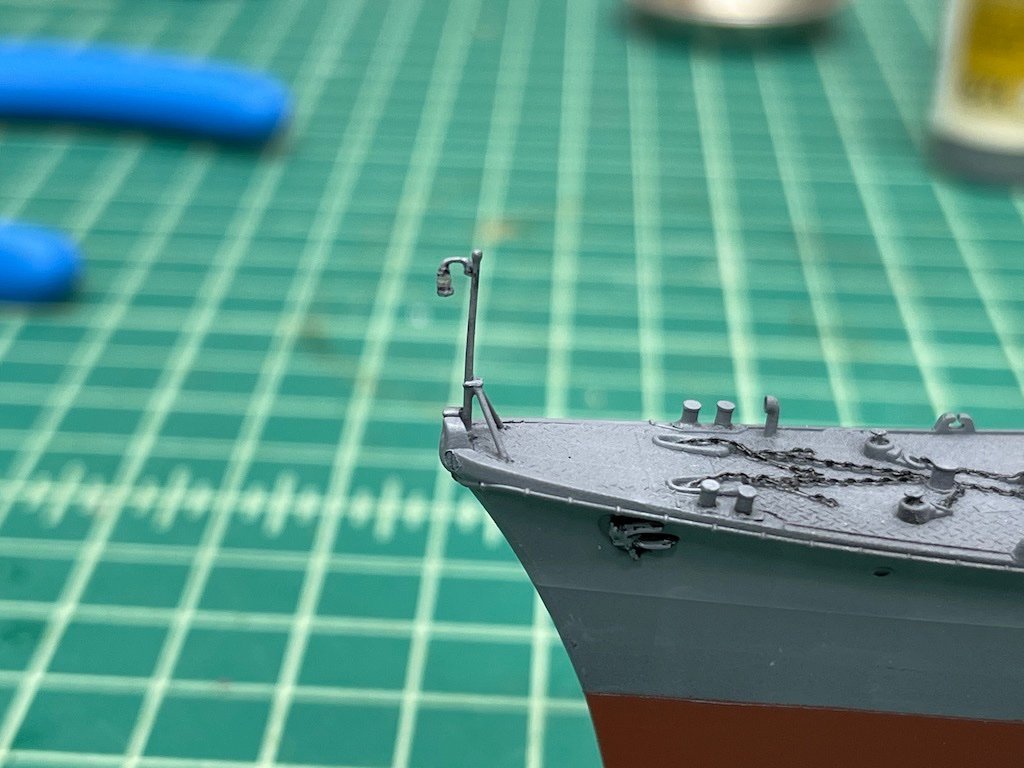
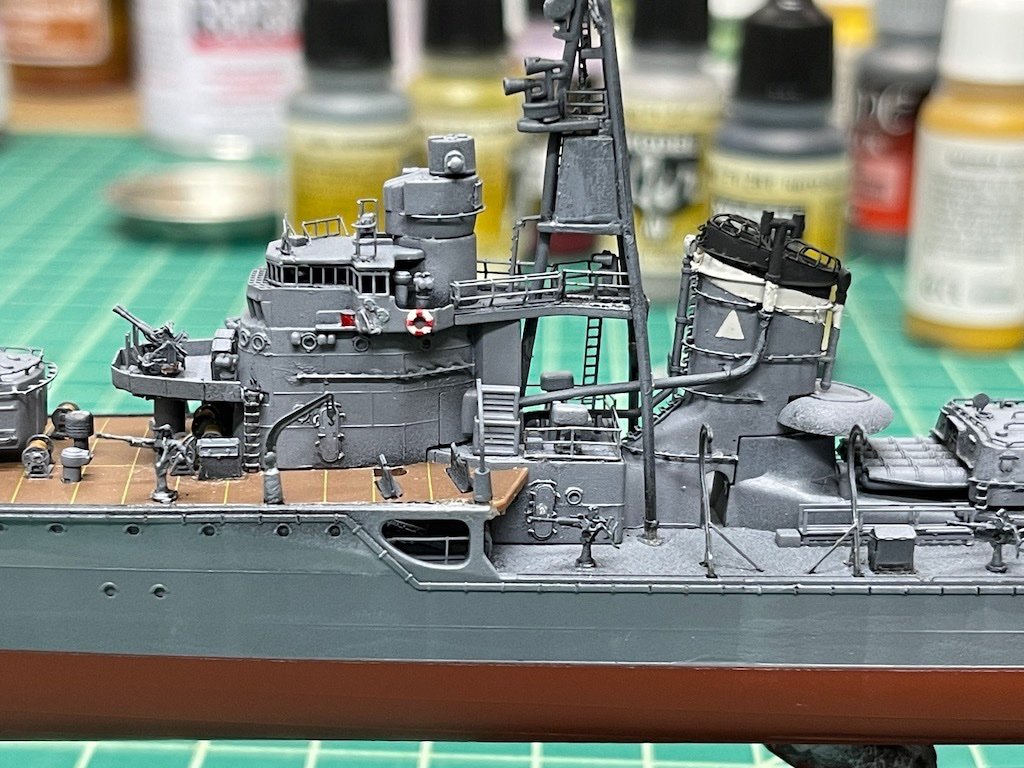
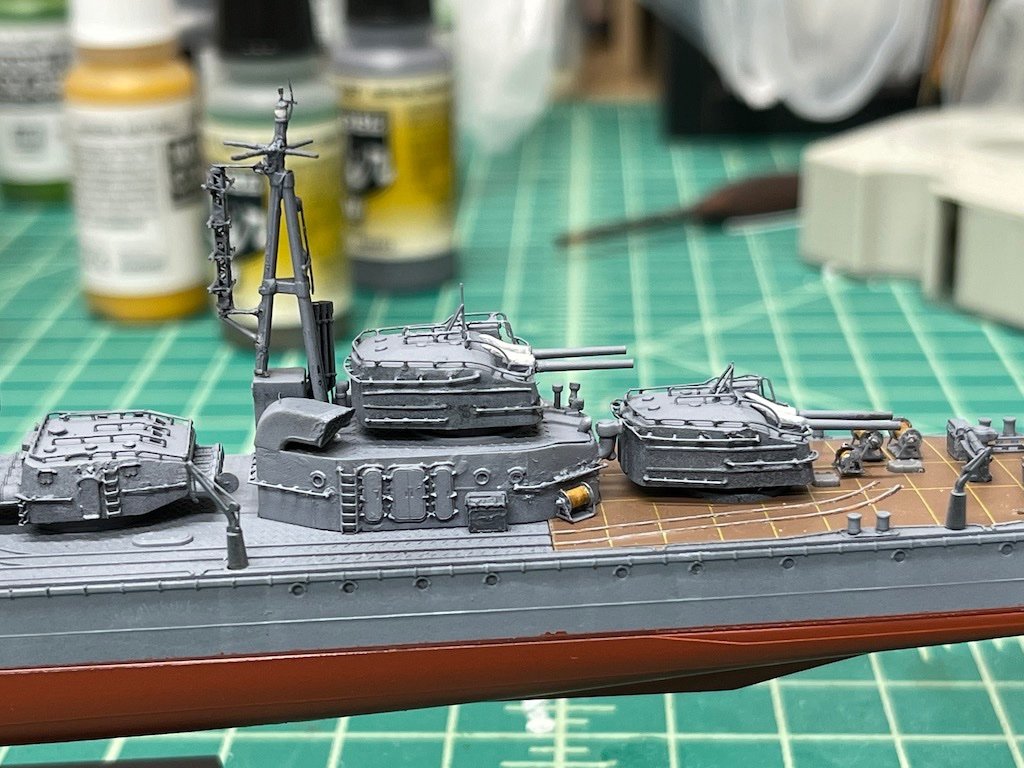
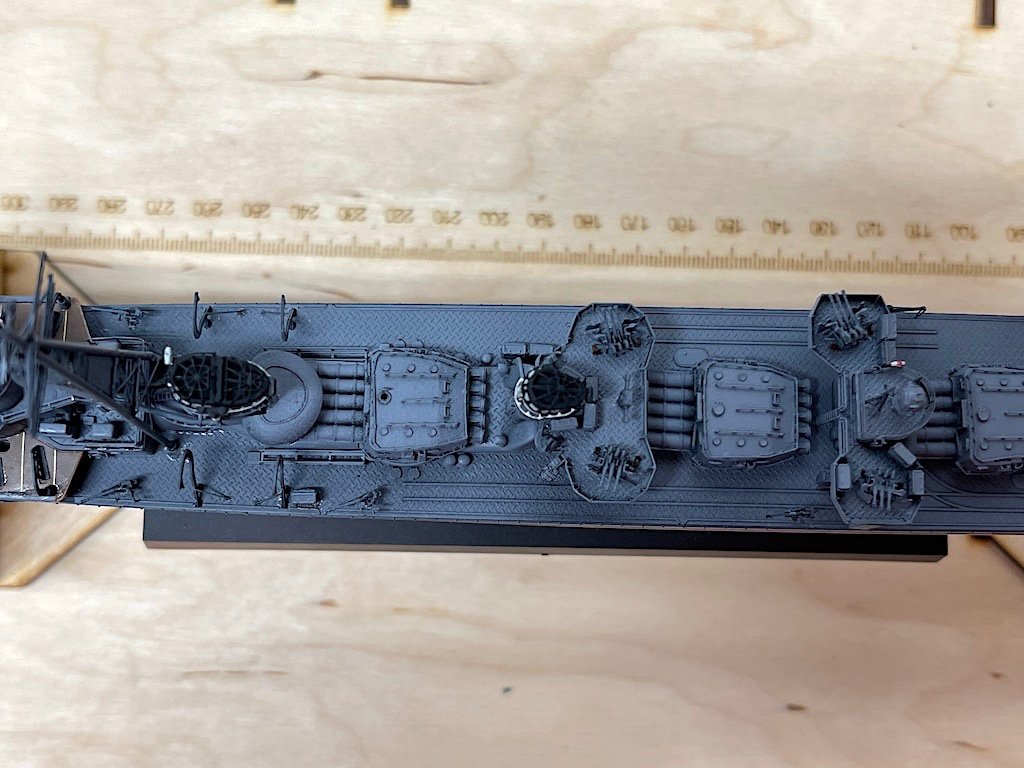
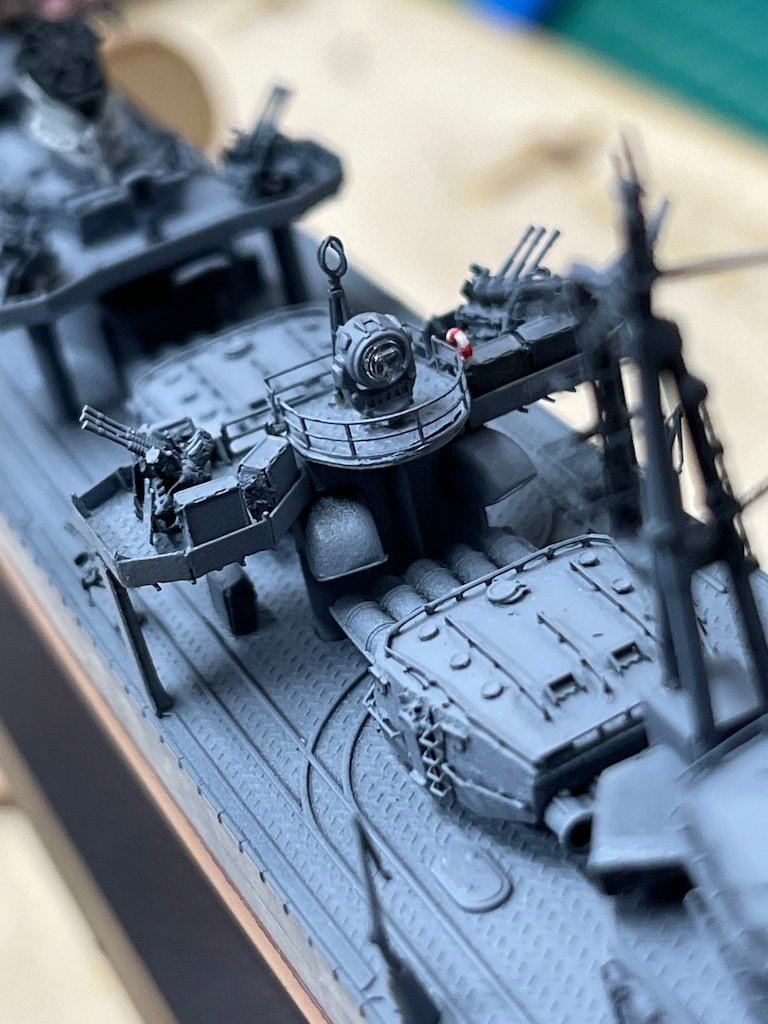
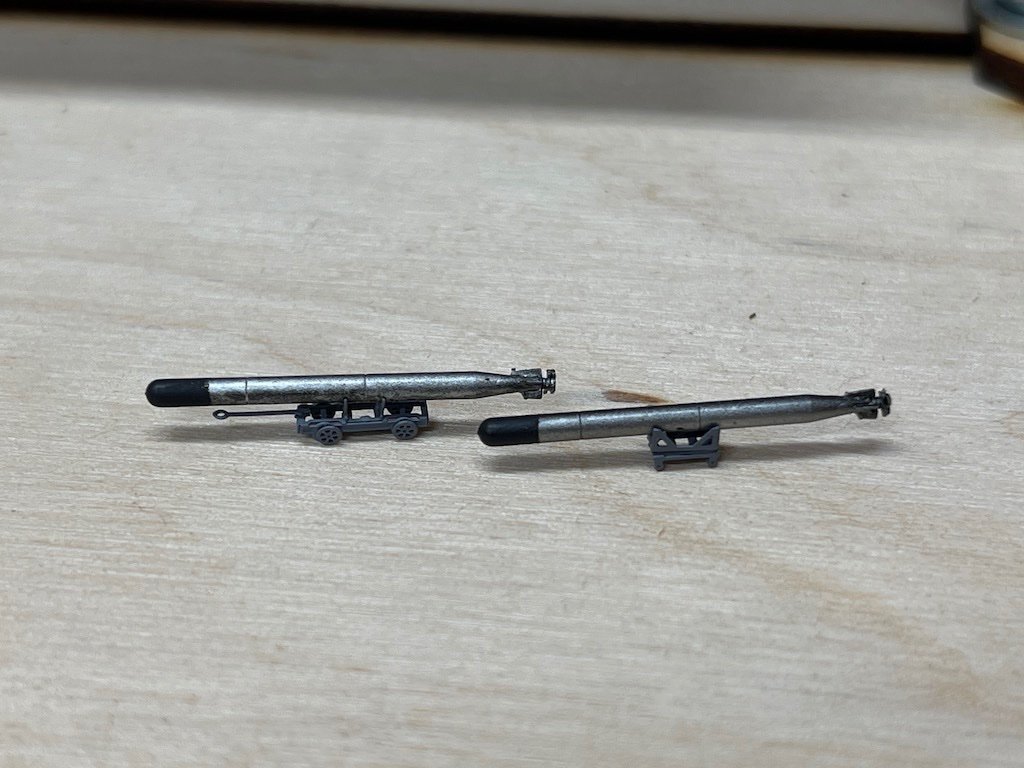
Finally got most of the details onto the hull and will spray gloss clear tonight in preparation for the weathering, etc. process. I have a few more things to add like a few more AA guns and the small boats, but I wanted to make sure I had access to areas for adding washes and other treatments. I used some other sets to get a little more detail to the kit. FiveStar sells resin life buoys which are nice because they are 3D and don't have to be folded like PE buoys, and you can paint them right off the plug. The kit searchlight was ok, but I ended up using a FineMolds 90cm searchlight which I thought gave better detail: Here are the torpedos and their carriages - great little details from the Infini upgrade set: Small boats - lots of little details from Infini, including the wood bottoms for the cutters: The resource books I posted at the beginning of the log showed a small lantern hanging from the pole at the bow. The FineMolds set with the searchlight included small lanterns, so after trimming to size, I added it to the bow. Nice little touch I think: After the weathering, I'll put together the seascape, add the rigging and flags, and add figures to the model. I've left a few little details here and there for added interest, including an open torpedo hatch, a hatch at the top of one of the other torpedo launchers, an open ammo box, etc. Thanks for looking in!

- 154 replies
-
- 18
-
-
-
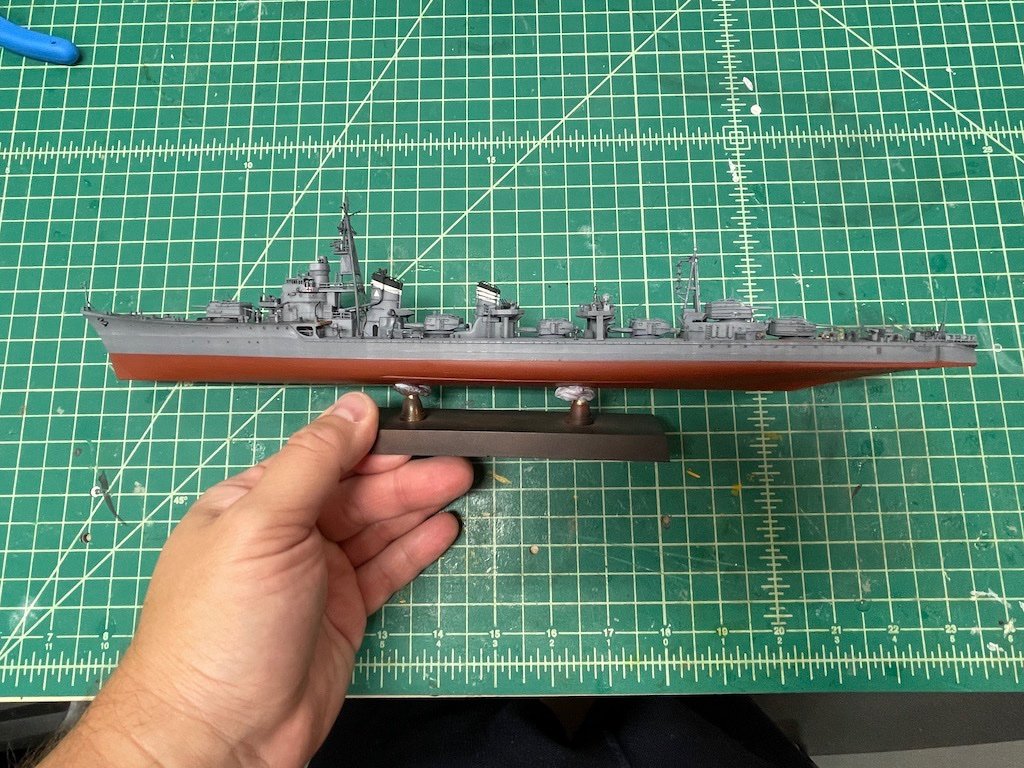
Thanks Gary, really appreciate it! Roger, thanks very much for the kind words. I'm pretty pleased with how this is coming out, but I have to say, Hasegawa did a really nice job with this kit and the Infini upgrade set is spectacular. So, all I can really do is screw things up and go down from there This is actually 1/350 scale. I don't know if there is all that much more detail than 1/700 scale - the Five Star upgrade set for my 1/700 Hatsuzakura had a lot of these details! The only difference I would say is that at 1/700, a lot of the details are in fewer PE parts that just need more folds (e.g., the guns) or that use more three-dimensional parts like the bases for things like the davits and the guns. These days, both scales give you the opportunity to really add a lot of more defined details to the model though. I was originally going to start my plastic ship collection with this model, but started with the 1/700 destroyer to get a little more experience before tackling this one. I learned a lot from that kit, especially on how to manipulate PE, using an airbrush, etc. I still have a ways to go on getting better though.
-
Oh man Glen, it was going so well that when I got to the last post, my heart sank. Good luck on the repair, sounds like you’ve got a good plan for it. Fingers still crossed over here!
- 71 replies
-
- 3
-
-
- Charles W Morgan
- bottle
- (and 1 more)