rjones726
-
Posts
55 -
Joined
-
Last visited
Content Type
Profiles
Forums
Gallery
Events
Posts posted by rjones726
-
-
Hi Chuck,
Thanks for the advice on the cant frames. I am filing and sanding the forward frames this week and saved the cant frames for last. Did you do all your fairing prior to attaching the frames to the keel? My plan is to fine tune it after they are attached.
v/r,
Rob
-
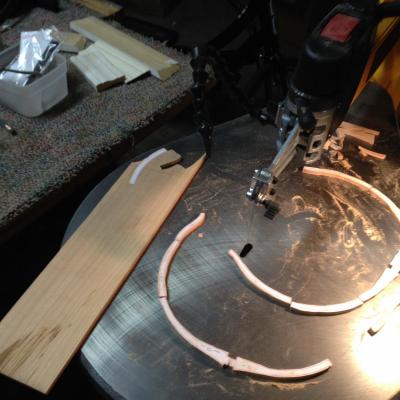
Good day all,
After watching a you tube build series of the shallop (Thank you Olha)I decided that this was the kit for me. It seems to be challenging, but not so difficult that I'll give up in disgust (time will tell)
I posted a photo in the "At a glance" topic this morning and then decided, "What the heck, I might as well start a build log as well".
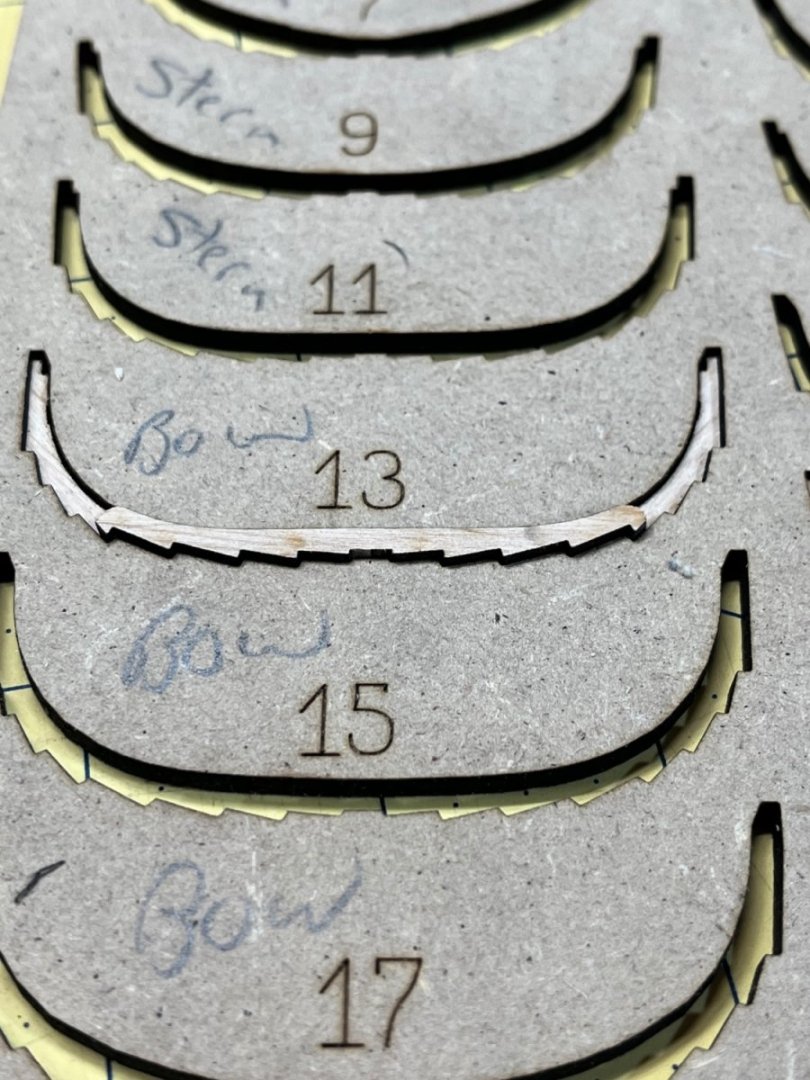
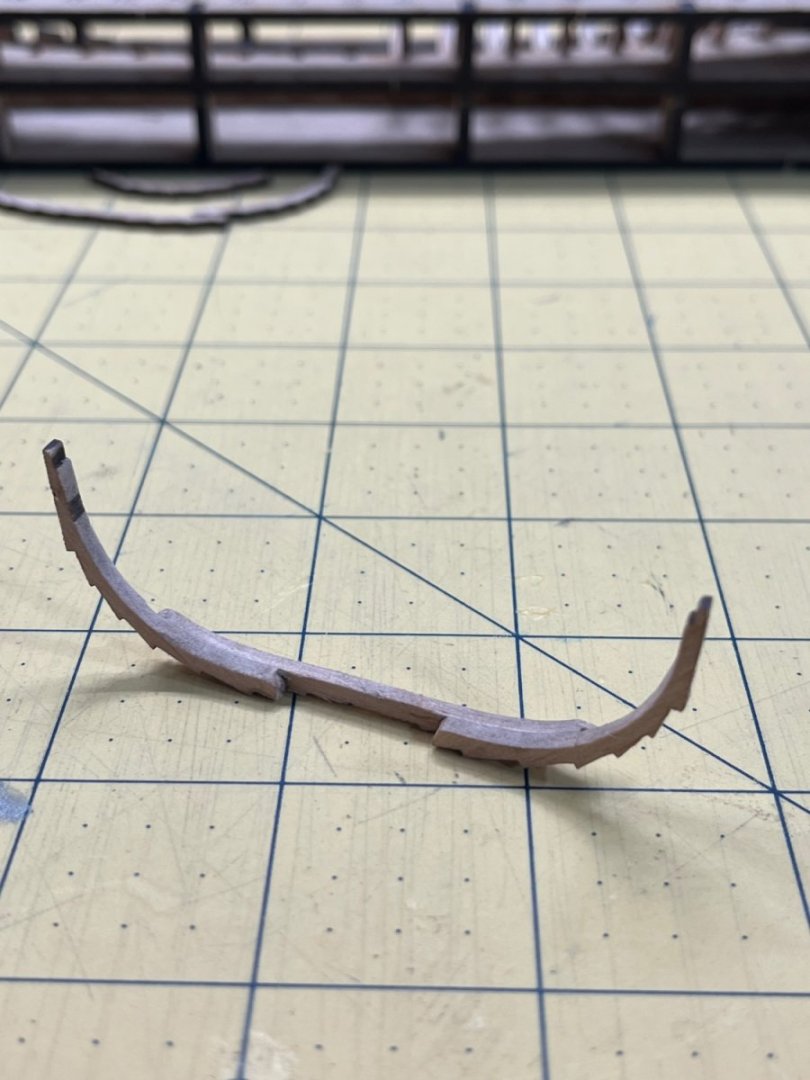
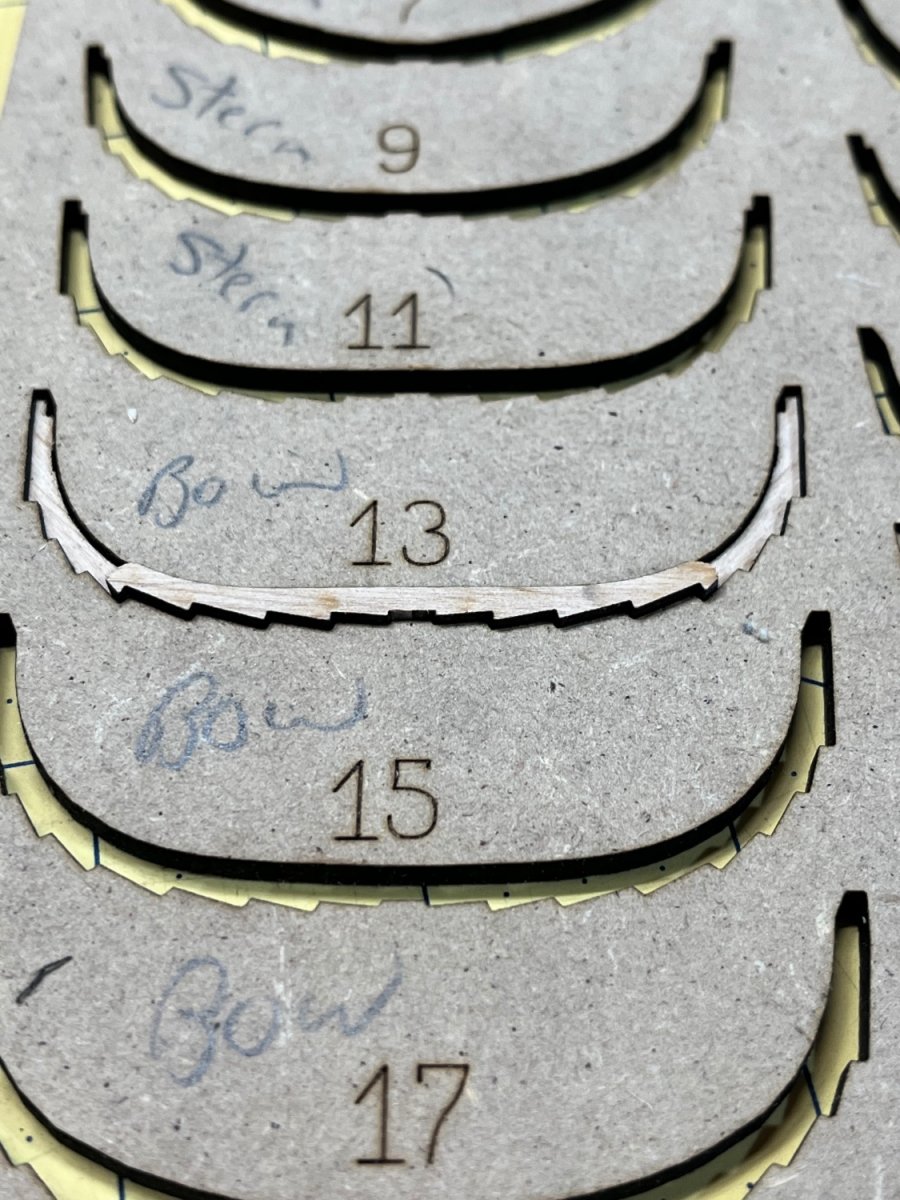
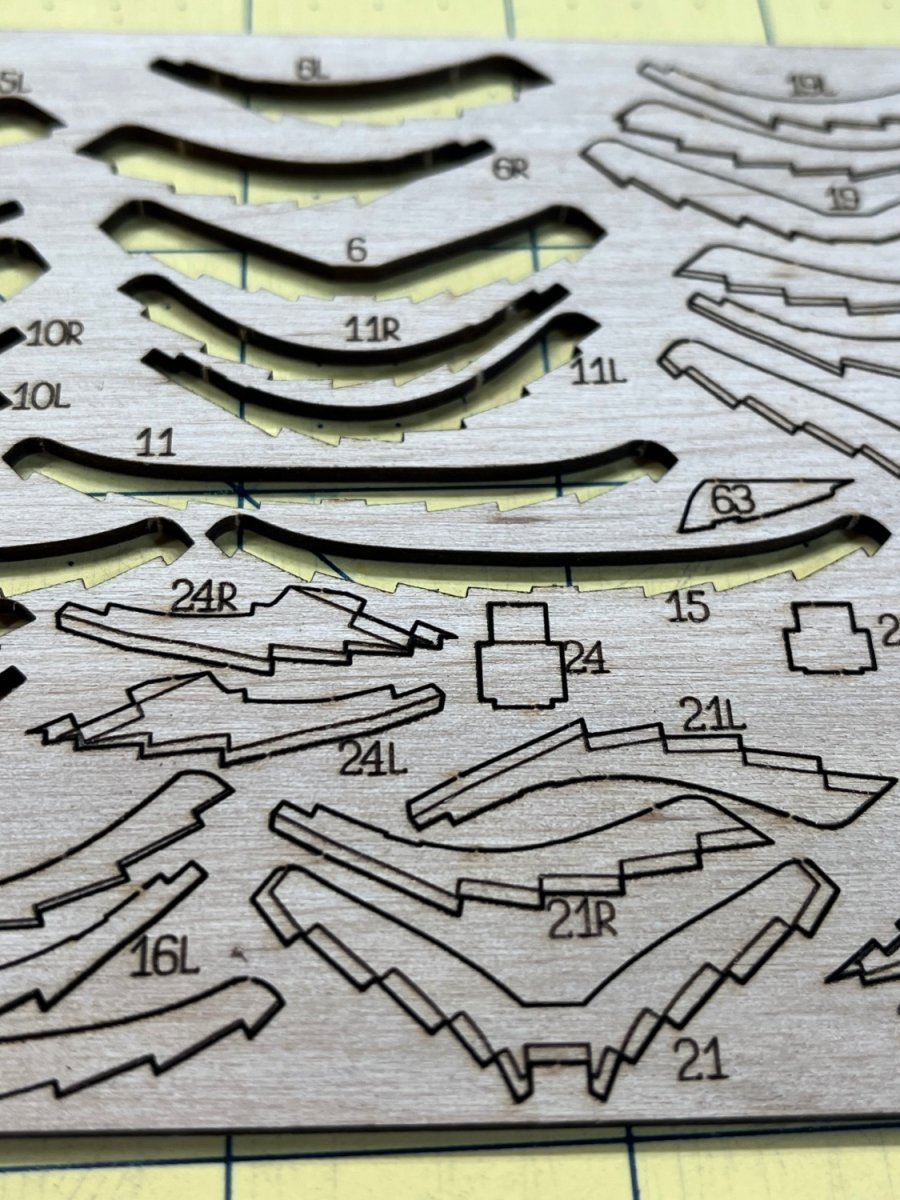
As you can see, construction is already underway. One of the things that drew me in was the use of jigs. Keeping things in alignment is critical and has caused me fits in the past. Once the jig was built and the 3 piece keel was together I began working on the frames. another jig is provided to ensure proper alignment during their construction. The pieces have a laser line that shows how much fairing is needed. I took my time to look at the instructions and to rewatch the video to ensure the pieces were placed correctly in the jig before gluing with PVA. I wrote "bow" and "stern" on the jig to remind me which way to insert the pieces. The instructions, while very clear, contain no text. Once the glue had dried I removed them and used files and sandpaper to remove the char and begin fairing. I stopped a bit short of the mark and will finish the fairing once the frames are glues and I can check them with a plank.
Looking forward to your comments and questions,
v/r,
Rob

- GrandpaPhil, ccoyle, Chuck Seiler and 1 other
-
 4
4
-
-
51 minutes ago, Chuck said:
You can actually still use the first version. It doesnt matter a whole lot that it doesnt fit snug. The inboard side will be painted red. It will be fine.
Chuck
Thanks Chuck. Lesson learned.
-
Hi Chuck. It is the new keel. I sanded the center keel piece (with notches) after it was glued on to match the stern pieces. I took the photo before I did it.
v/r,
Rob
-
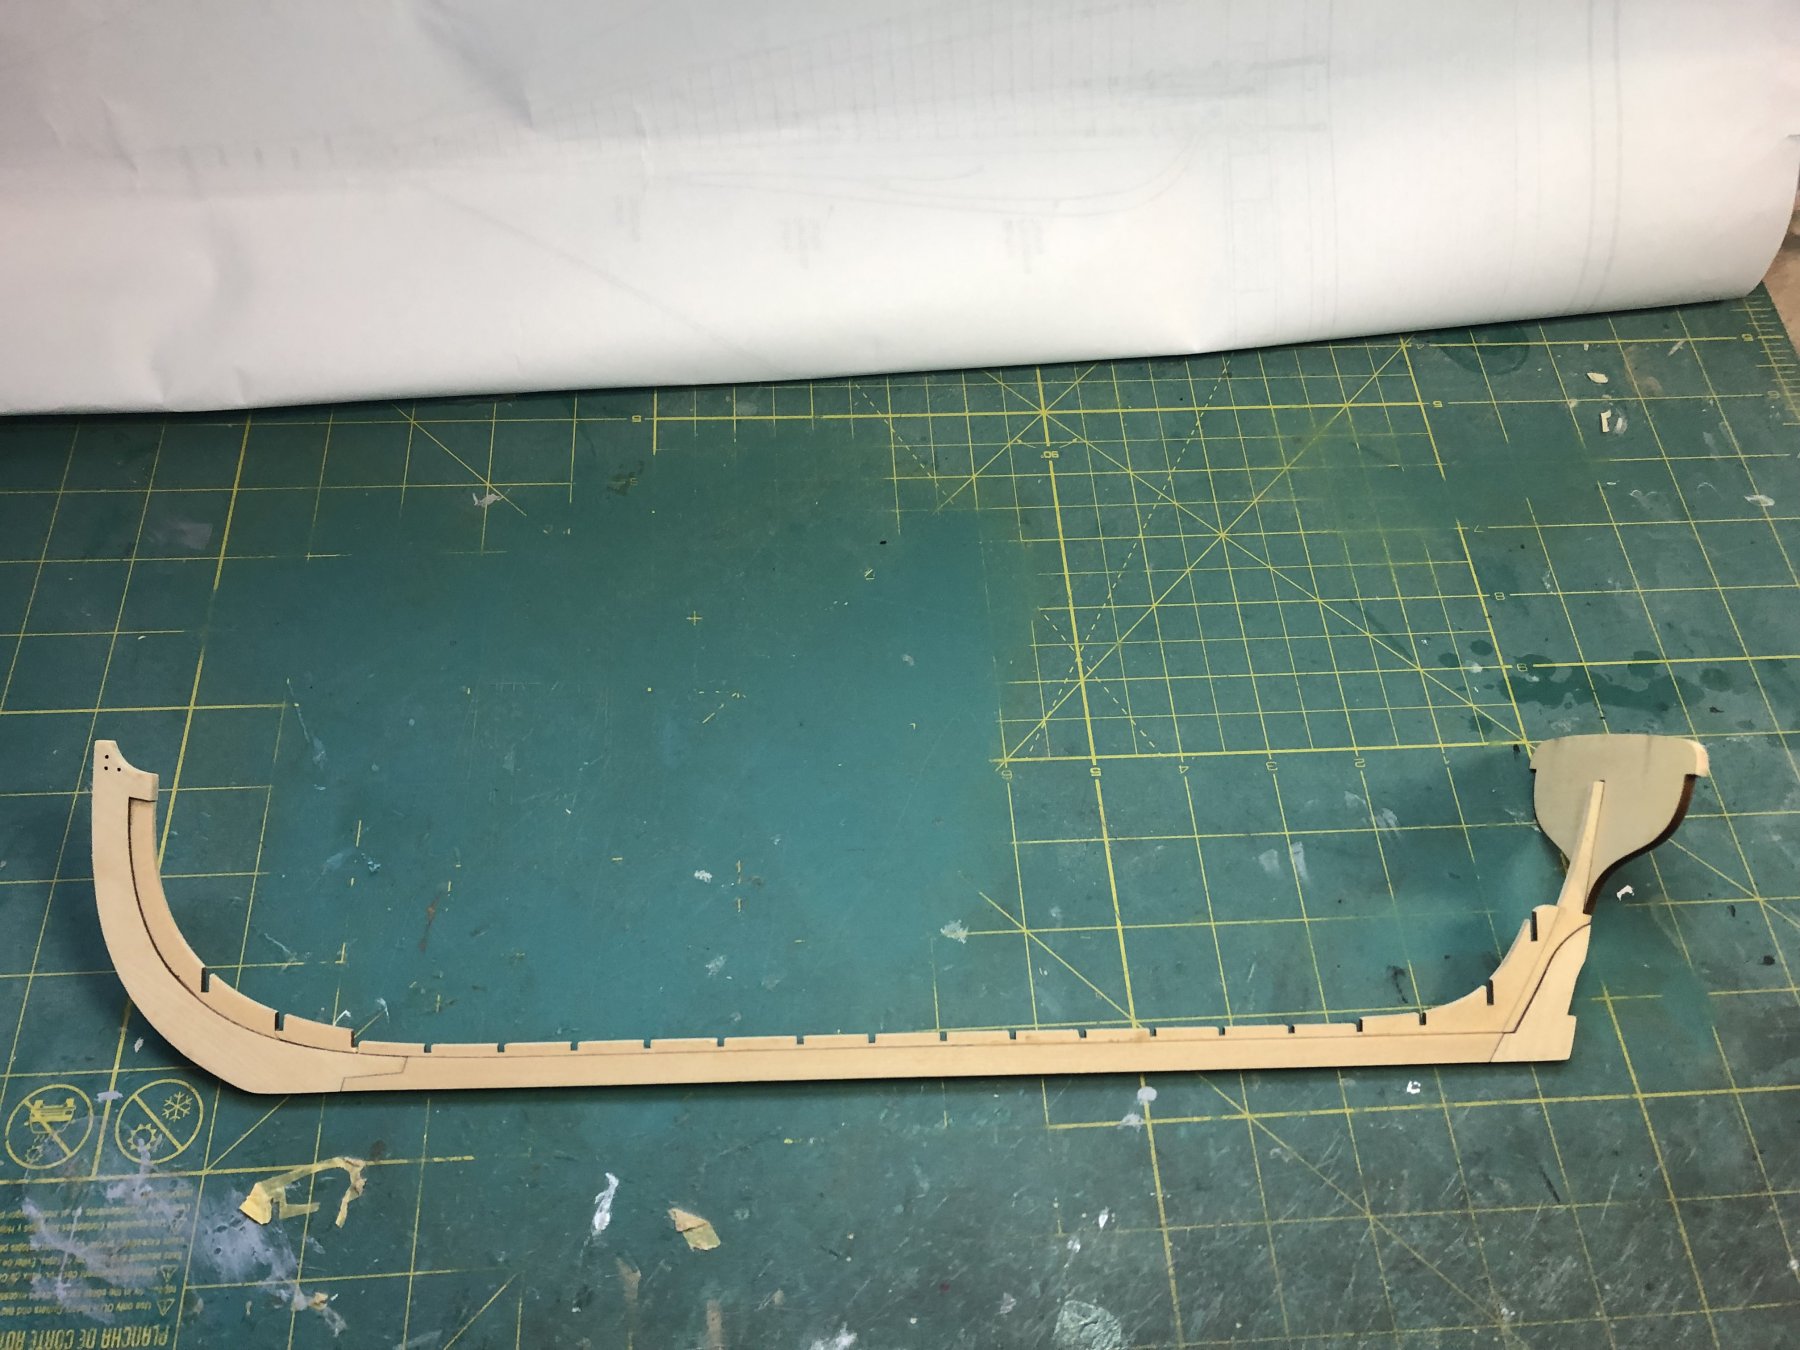
I haven't posted in a week or so- it's time for an update. I sanded the stern keel sections to achieve a 1/32" rabbit to accommodate the width of the planks, Everything went great until I decided to dry fit the transom. I sanded the entire stern keel section such that it didn't fit snugly in the laser notch of the transom any more. Of course I waited to check this until after I had glued the stern keel section onto the keel. I debated trying to use alcohol or some other method to try to get it off but in the end I decided to start over using the simplified keel. This time I was careful to only sand the lower portion and leave the upper part alone.
The transom fit the way it was supposed to and I am pretty happy with the result.

I have been taking my time assembling the frames and working on getting them to fit snugly into the build board. Next task is to get a good fit of all frames in the keel notches. I am sure there are other folks here who are as inexperienced as I am. Hopefully by talking about my mistake, someone reading this will avoid my error.
v/r,
Rob

-
Jeff,
I have had the same problems you describe. I used an exact with a sharp #11 blade and a file. The key for me was to take a little off with the blade, file it smooth, and repeat until I removed enough material. I took my time and it came out better than I expected. Having a plan B really took the pressure off. I knew that if I screwed it up I would still be able to complete the project. Have fun!!!
v/r,
Rob
- Ryland Craze, JpR62, JeffT and 1 other
-
4
-
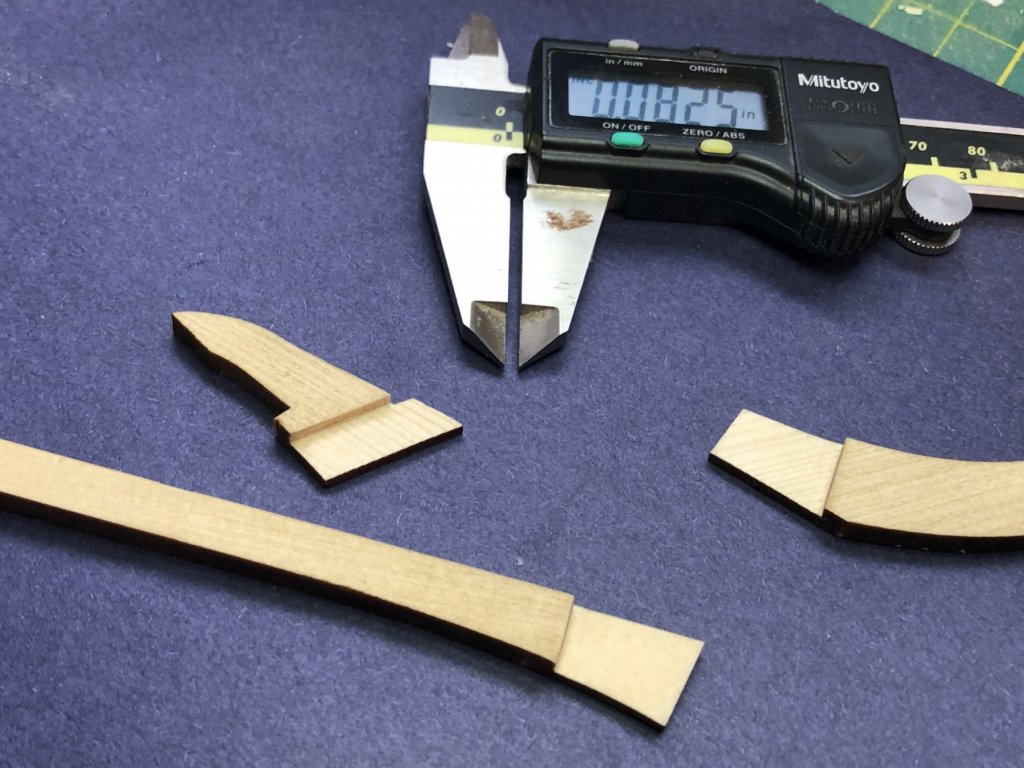
Well I guess my build is underway. I began by using a set of digital calipers to measure the width of the keel. I then divided by 2, set the calipers and made a faint mark on the charred sides of the keel pieces at the scarf joints. Using those marks as a gage I began to cut and file my way down. As I got close I began using the calipers themselves to check for high spots. I'll glue them up once I run to the store and grab some titebond. I followed Chucks advice to take my time and not settle-make it fit. I'm pretty happy with the way they turned out. For anyone following along I'll warn you, my photography skills are rudimentary at best and all I have is an iPhone. Maybe that's another area I can improve as the build progresses. Any and all comments and critique is welcome.
v/r,
Rob
-
My kit arrived yesterday. I had already committed to working on a repair project at my church but I did have time to gaze lovingly at the contents and conduct an inventory. Everything was there and it looks (and smells) great. I hope to get started today after work.
v/r,
Rob
- JeffT, Rustyj, Ryland Craze and 1 other
-
4
-
-
8 minutes ago, Rustyj said:
Hi rjones726, I feel like I'm writing to myself. LOL.
There are probably as many ways to do this as there are people building her. Seeing that the dimensions are all 1/32'" I'll try to explain how I will approach it. Seeing that there is a gap of 1/32" on each side I temporarily attach some 1/32" scrap to what would be the "bottom" side of the 3/32" piece when laid on its side. I use some temporary craft glue like rubber cement. The piece with the strip wood is now 4/32" (1/16") thick so when slid up to the keel you should have your 1/32" spacing on each side. I use a hard surface like a thick piece of glass or some such item that is perfectly flat to assemble the pieces on.
I hope this makes sense.
Rusty
It makes perfect sense Rusty. My idea was similar-to take a piece of 1/32" scrap attach it to something thicker/longer and set it against the keel as a gage to set the correct spacing. The 1/32" piece will set the rabbit and the thicker piece will rests against the keel. I hadn't thought of using rubber cement to hold it in place. I will probably make a couple and space them out. I need to find a piece of glass or marble as well.
Thanks,
Rob
- Canute, Obormotov, pythagoras and 1 other
-
4
-
While waiting for my kit to arrive out here in the Pacific NW I've been reading Chucks build log and thinking about how I intend on assembling the keel. I am curious as to how you insure the keel has a 1/32" rabbit on each side (i.e. centering the four 3/32" pieces). I have some ideas but I'd like to hear what more experienced builders have to say.
-
This group build seems to be a great way to build and learn. I've already (mentally) reserved a spot on the mantle for the finished product.
- Ryland Craze, jml1083 and Rustyj
-
3
-
-
Thanks Ken for taking a look and for your advice. A chisel or #11 blade will definitely give me a sharper corner than a file.
Matrim thanks for your observation as well. I think I'll start working on the "inner" frames and by the time I get to the "outer" frames that will be more visible they should look better.
v/r,
Rob
-
Well I've had a bit of a setback. I began laying out the pieces to assemble a frame and the pieces weren't lining up right. I checked the scale on the frame component sheet and found it was not 1:48 scale, more like 1:50. I gathered all the frame assembly sheets and frame component sheets and found some of each. I remember printing some of the files at home and some at work. The ones I did at home were the correct scale. Good thing I was sitting down when I figured it out. I'd be lying if I said I wasn't angry but I'm going to chalk it up to experience and move on. I reprinted all the sheets using my home printer and checked that they are correct. I'm in the process of cutting out all the frame patterns. Once that is done I'll try to reuse any of the undersize pieces with the correct sized pattern and redo the rest. I've only got $20.00 in the wood so the only real loss is my time. And even that wasn't wasted because I know this next set will be better.
This scratch building sure is an adventure !
v/r,
Rob
-
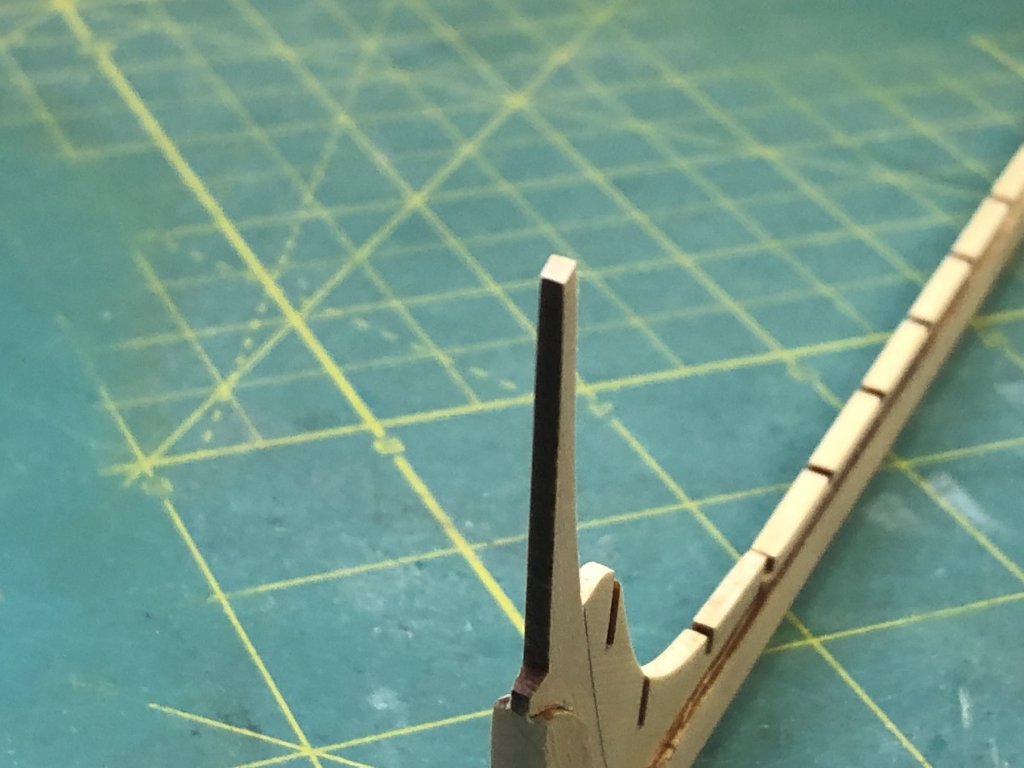
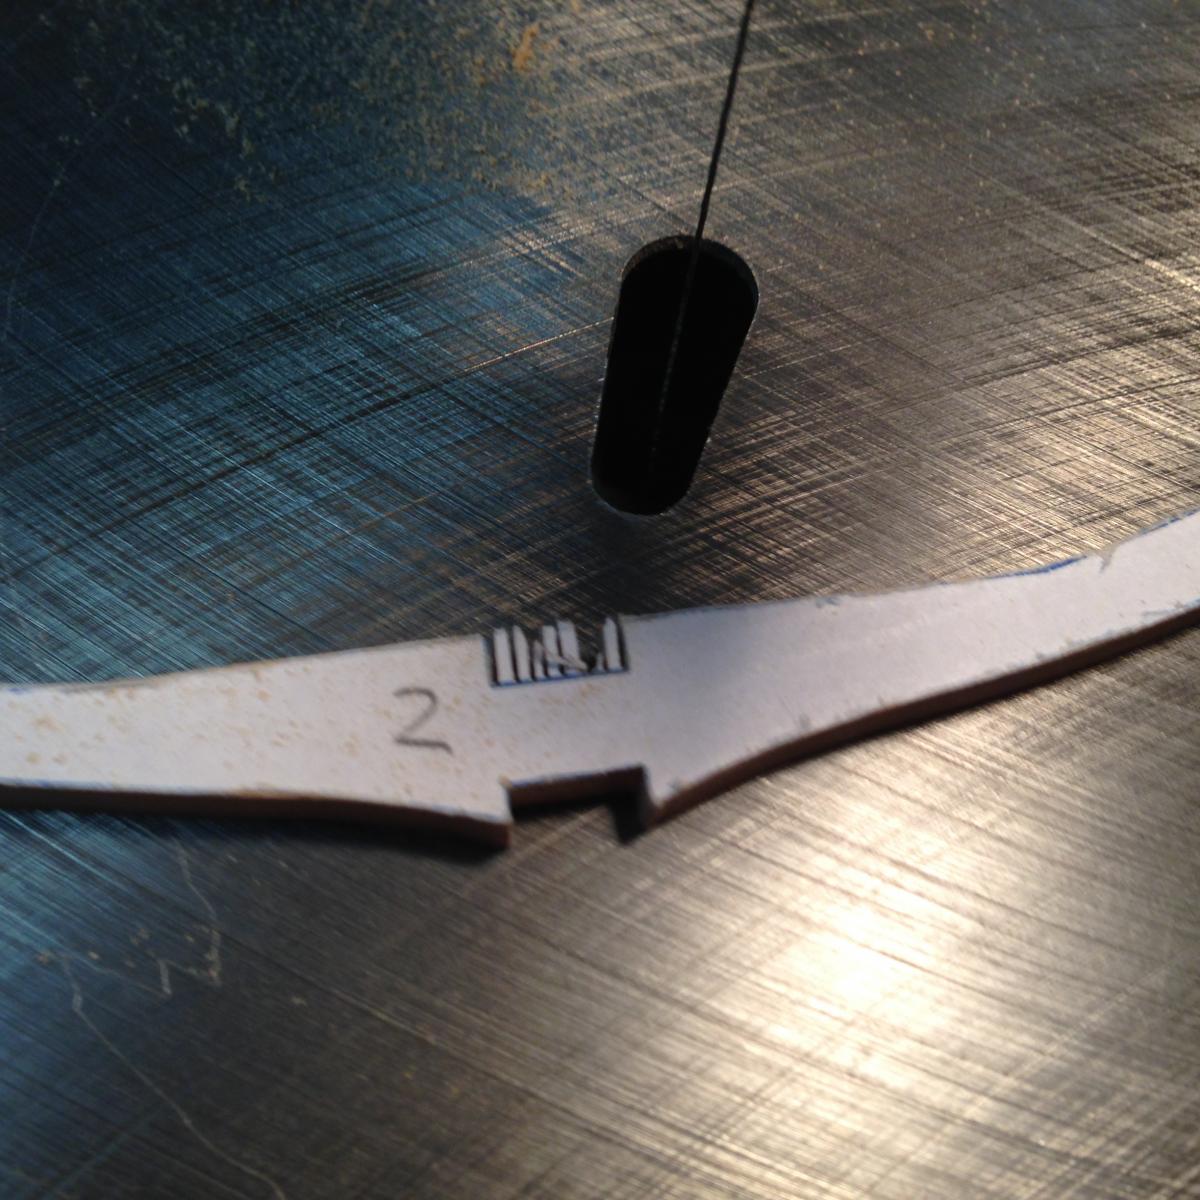
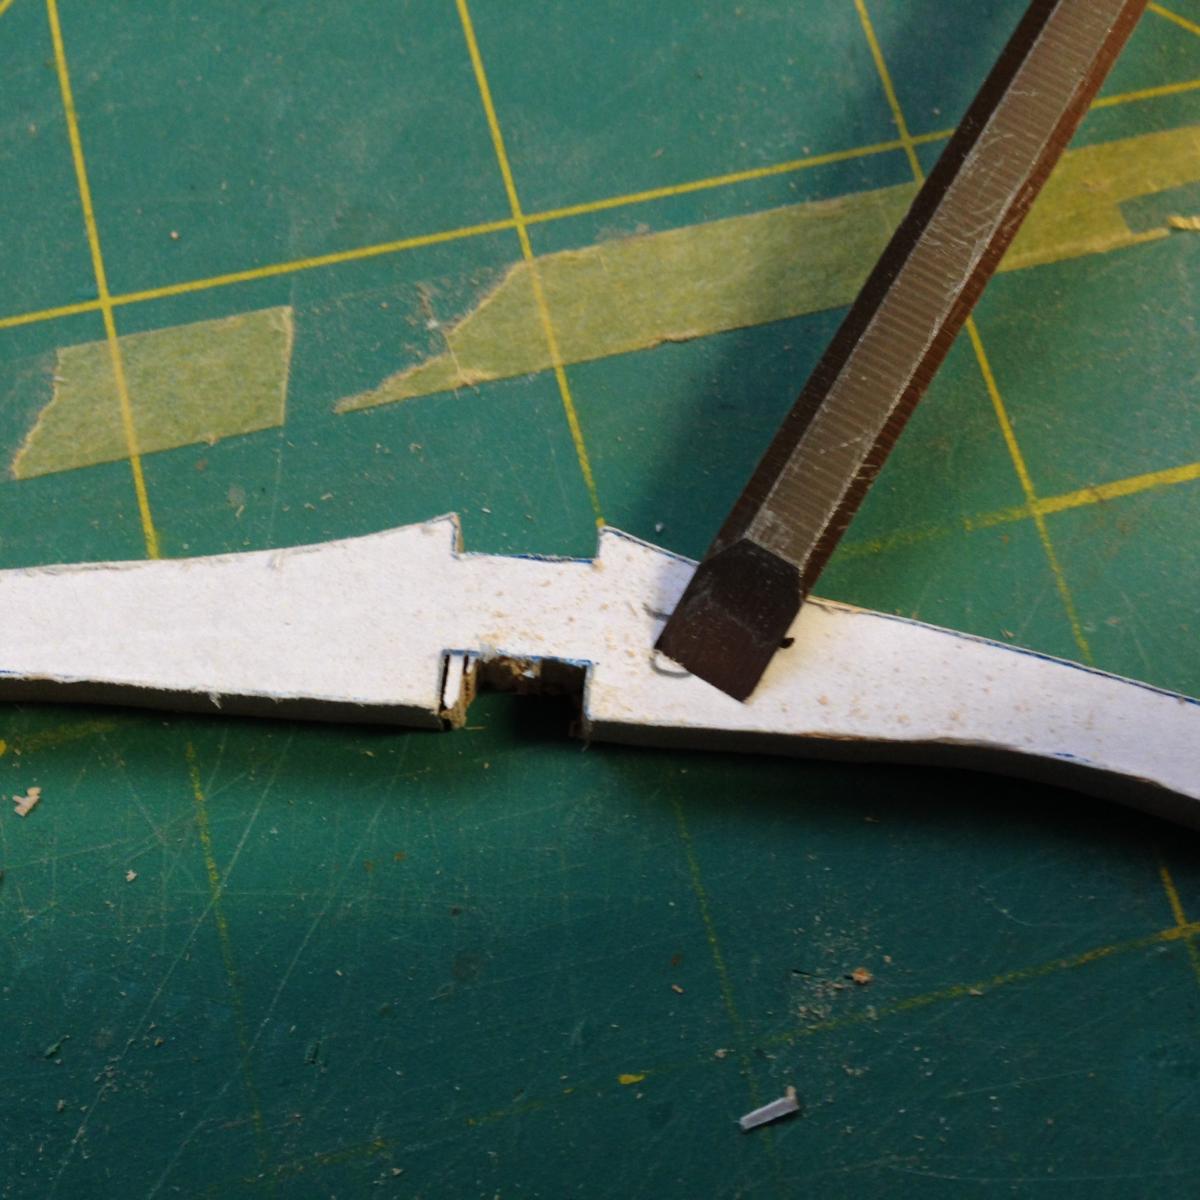
Before I begin assembling the frame, I need to cut the slot in the floor futtock for the keel and keelson.
First step is to make two cuts on the lines defining the width of the slot using my scroll saw. Then I made several more cuts in between being careful to stop at the line marking the depth of the slot.

Next I used a 1/4" chisel to remove all the waste wood in the slot.

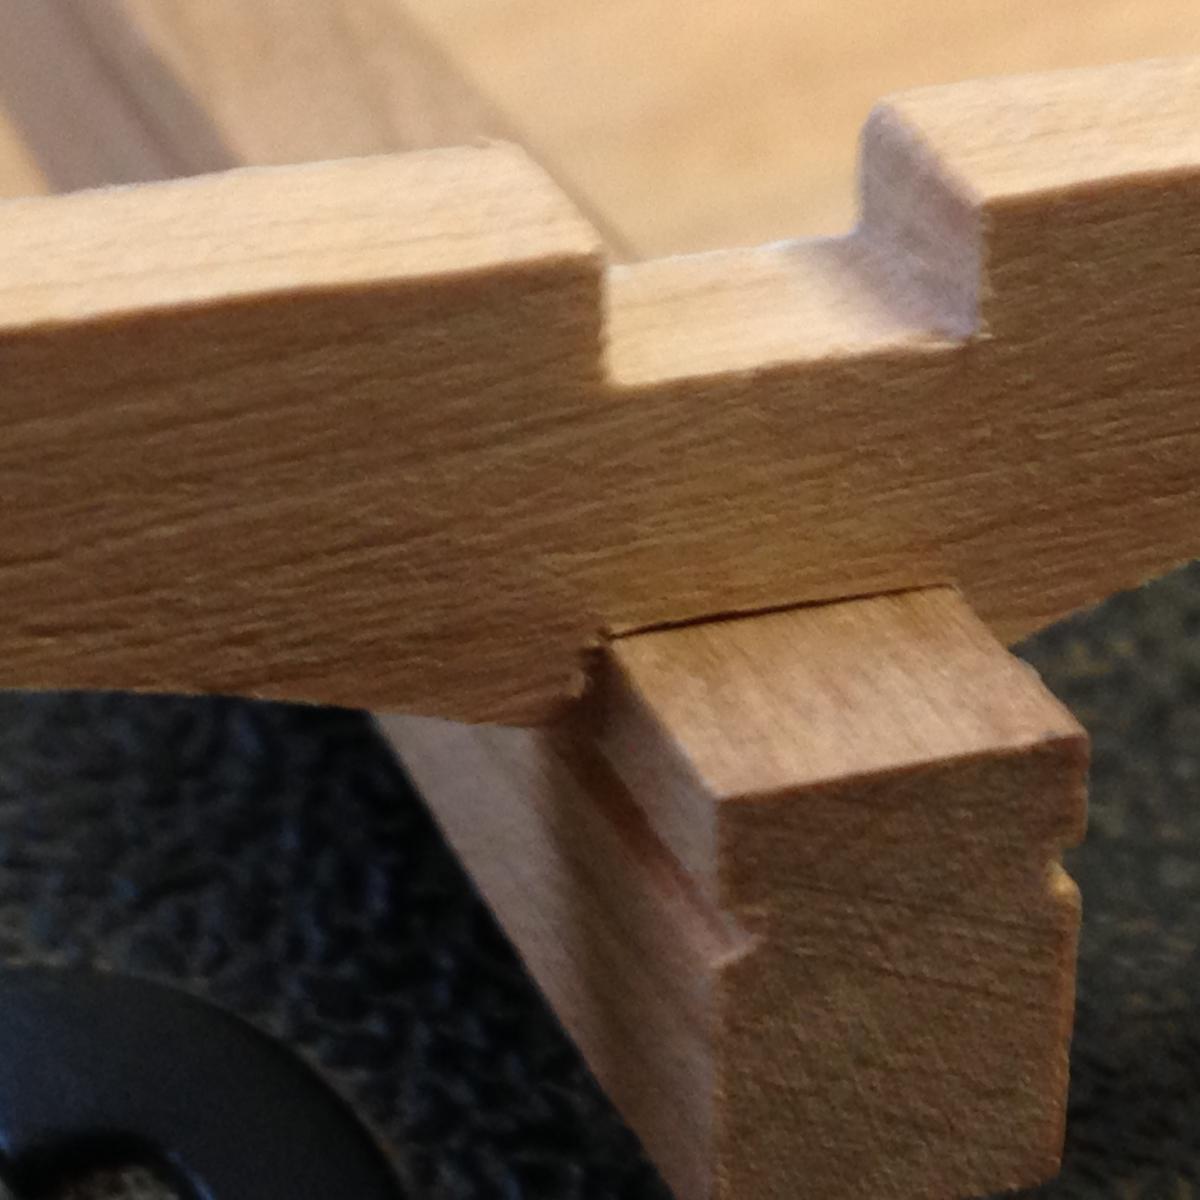
Finally I used a small file to clean it up and fit it on the keel.

Hmmmm. It looks a lot better without the close-up lens. Looks like I need to work on the fit a bit more.
I'm welcome to any and all critique and suggestions any of you might be willing to share.
v/r,
Rob
-
No pictures tonight but I do have an update. I've been spending what time I can spare sanding and shaping all those frame pieces. Ken provided some good advice which is to take it slow and have fun. Mission accomplished (so far!) With the Thanksgiving holiday coming up I see an opportunity to get some quality time in the shipyard. Next update I'll include some pictures of frame assembly.
v/r,
Rob
-
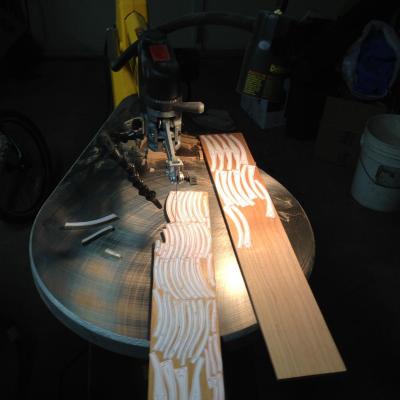
Thanks for looking Ken.
I've already built two frames to figure out how to do it - this time I'm cutting out and preparing the pieces for 7 frames at once (hence the mass production). After that I'll assemble them one at a time using my normal building pace: slow, plodding and not too fast

v/r,
Rob
-
It's Friday and thanks to my work schedule I've got the day off. The Admiral has assigned no major tasks which means I'm going to spend some time in the shipyard. I've assembled a couple of frames and have come up with a process I think will work. I'm going to take a cue from our friend Henry Ford and try to get a little mass production going on the remaining 7. While I want to be more efficient, I need to be careful not to confuse speed with quality.
By the end of the day I'd like to have the frame pieces cut out and sanded.
v/r,
Rob
p.s. I also note that I need to spend a little more time on focus and lighting.
- harvey1847, rtropp and jaerschen
-
3
-
Hi Mark,
Thanks for sharing your technique. I'm a first time scratch-builder working on a Triton cross section. I've been using a disc sander as you describe to true the end joints. It is working but you really need a gentle touch and it takes several tries to get it right. I'm going to borrow your idea and use my table saw with sled. Sounds like a much better way to get the job done right.
v/r,
Rob
-
Thanks Mick.
I'll take your advice. The more I use the scroll saw, the better my control gets. Amazing how that repetition/experience thing works.

v/r,
Rob
-
Kevin,
Nice to see a fellow submariner building a Triton too. This is my first attempt as well. I'm working on my first frame and I've already had to remake two pieces. I'm sure there are more to come. As others have said there is a learning curve to this and we need to be patient...much easier said than done
. Anyway have fun on your build.v/r,
Rob
-
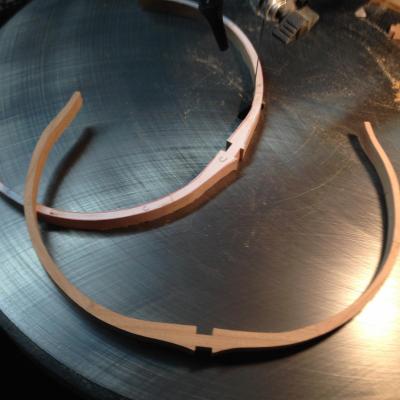
I've got the pieces for one frame cut and sanded. I got pretty close to the line in some spots and may redo this one. I'll still assemble and glue it up. I need to start thinking about how that's going to happen. I guess the next step is to read through some of the other logs and get some frame glue-up/assembly jig ideas.
v/r,
Rob
- jaerschen, rtropp, harvey1847 and 1 other
-
4
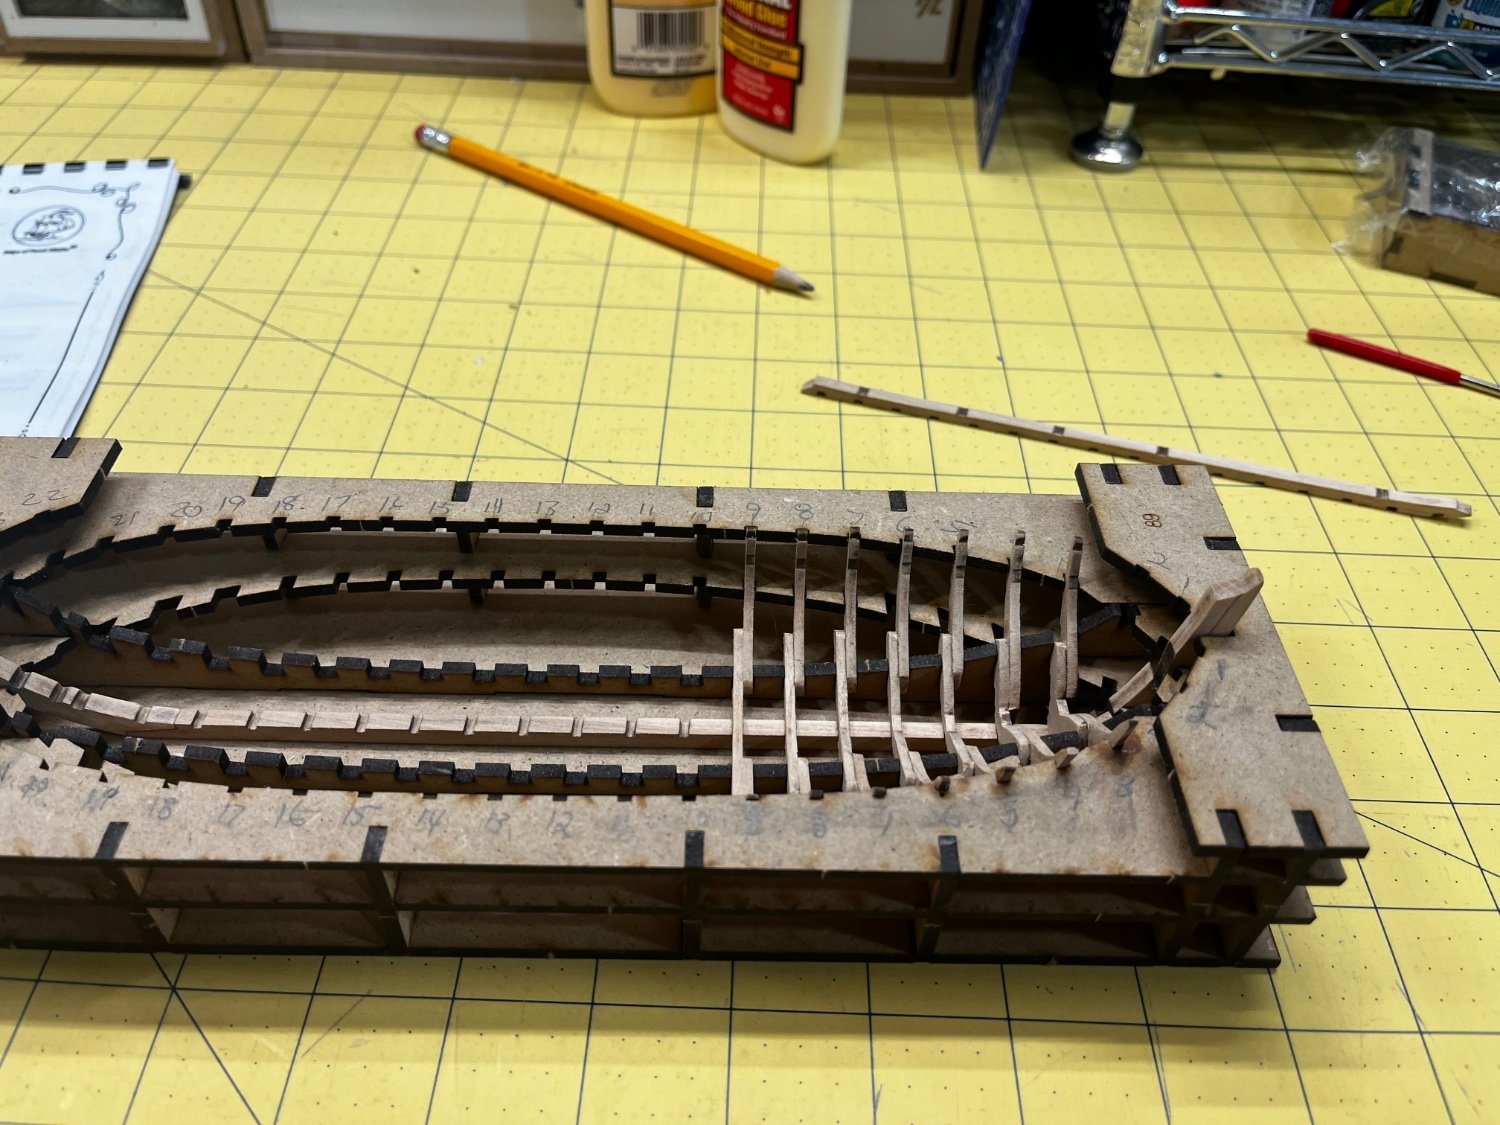


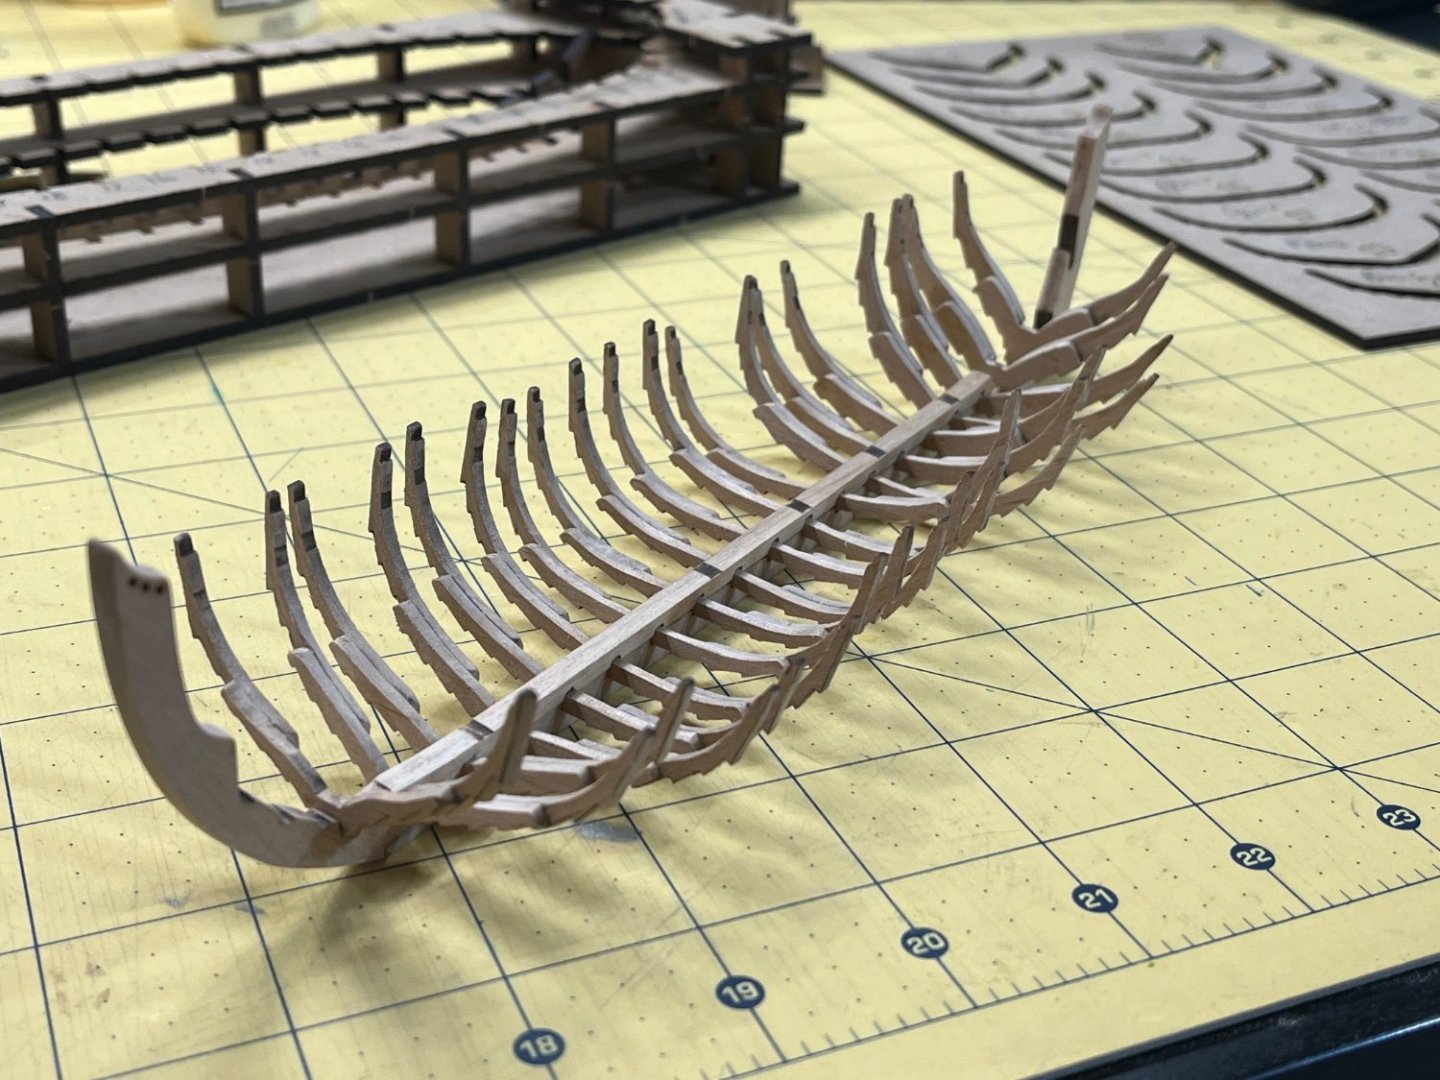
Captain John Smiths shallop 1608 by rjones726 - Ships of Pavel Nikitin - 1:32
in - Kit build logs for subjects built from 1501 - 1750
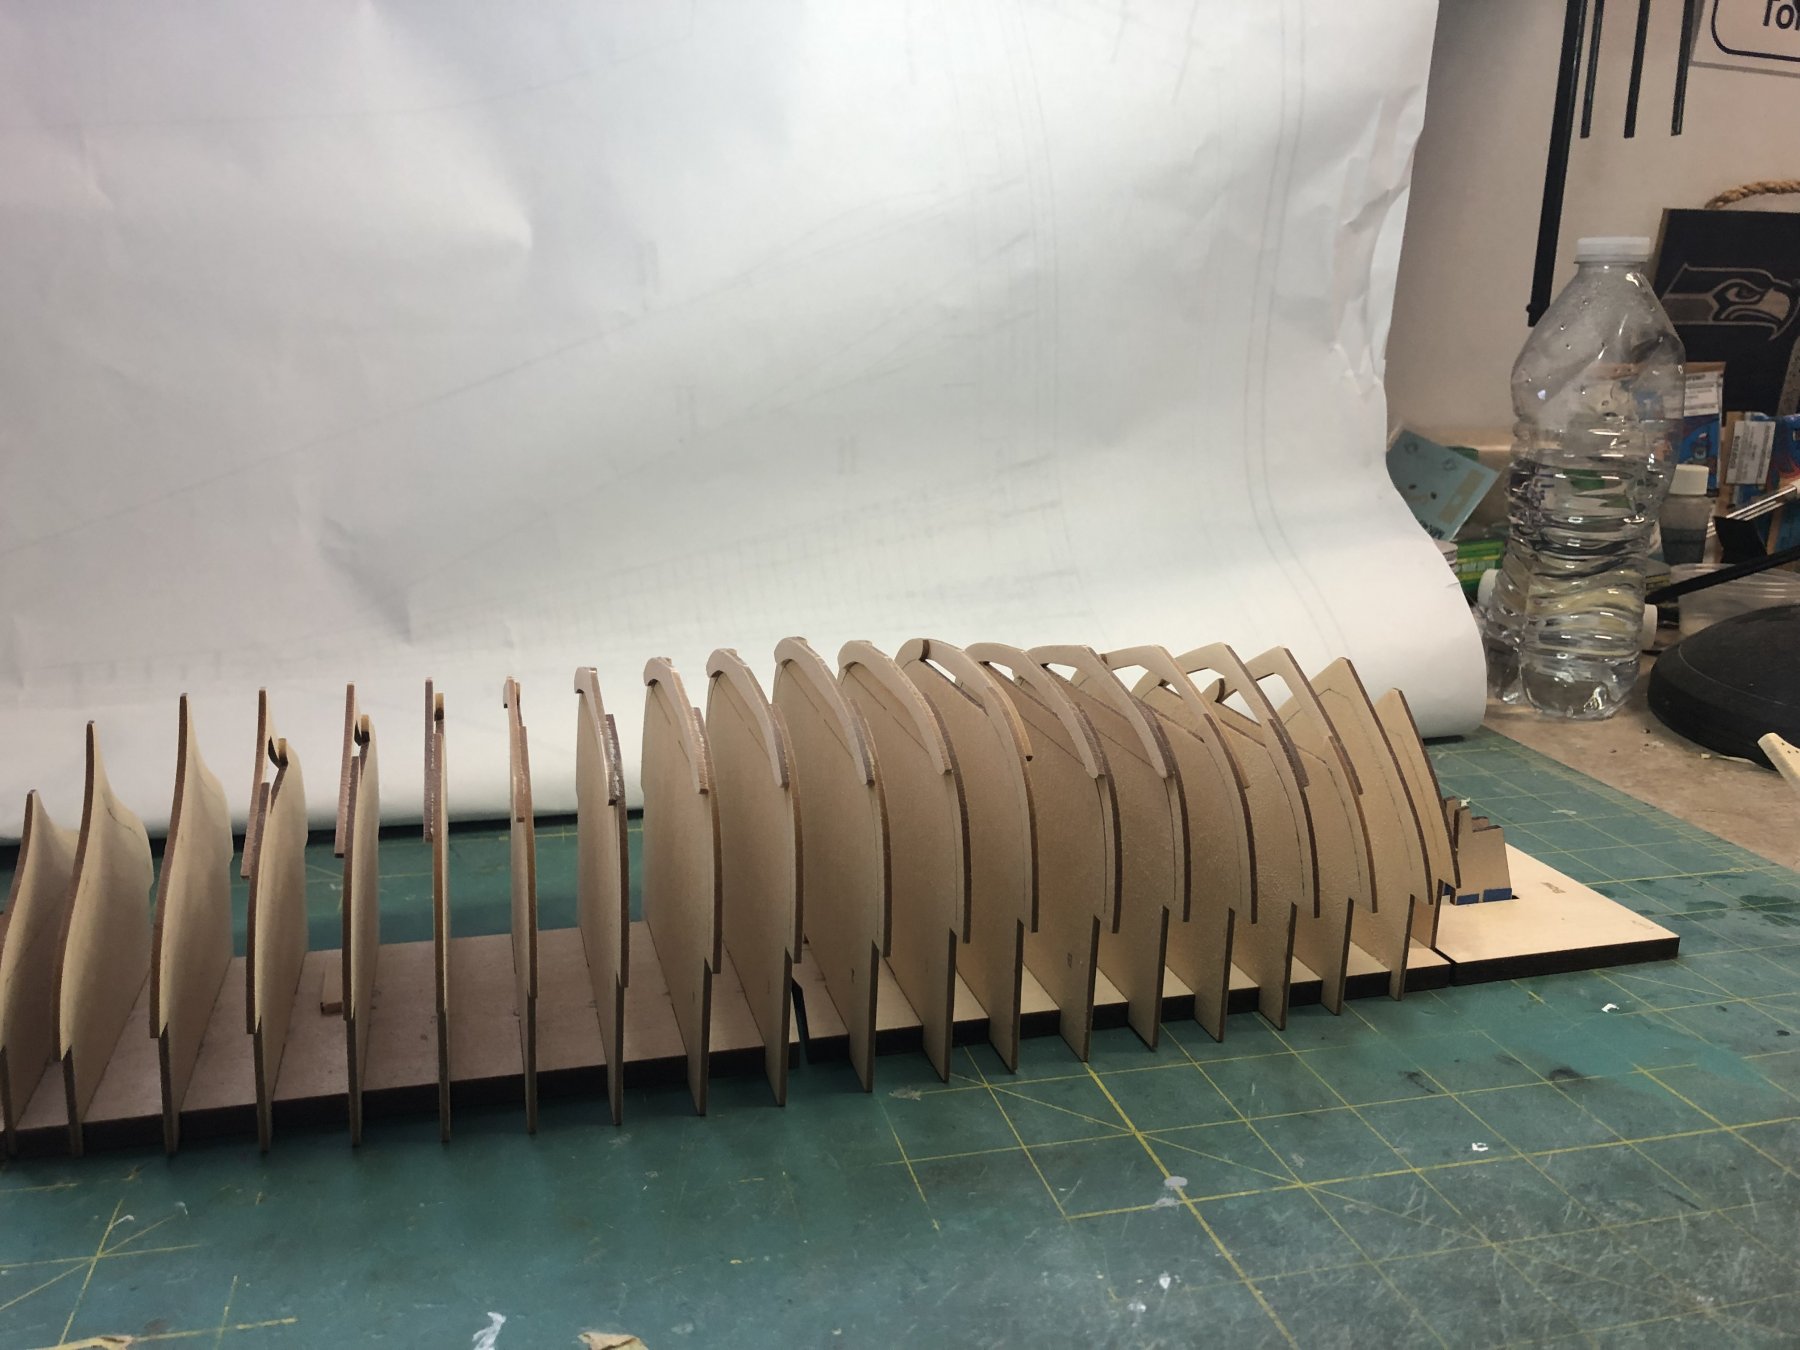
Posted
Today I completed the initial fairing of the frames ( minus the fore/aft cant frames). I took it out of the building jig to admire my work and realized how difficult it would be (for me) to properly align everything without it. I'm going to fine tune the fairing and remove any remaining char, then on Friday my lovely wife and I will be boarding a cruise ship in Seattle and heading to Alaska for a week of relaxation. Sort of like shore leave but...not ashore")