HOLIDAY DONATION DRIVE - SUPPORT MSW - DO YOUR PART TO KEEP THIS GREAT FORUM GOING! (Only 20 donations so far - C'mon guys!)
×


Shazmira
-
Posts
1,303 -
Joined
-
Last visited
Content Type
Profiles
Forums
Gallery
Events
Everything posted by Shazmira
-
 Looking very nice Randy, keep it up and I know you will be proud of her!
 -
Gee a go away for a couple of days and you all forget everything you have learned ! I would say you all need a bit of an English refresher course . There appears to be way to many split in infinitives and dangling modifiers for my liking . However, as I am set to begin my summer break in a couple of days you will just have to find another English teacher who is willing to take up your cause BTW Andy the work you are doing on your masts looks awesome!

-
do either of you have a picture or diagram to explain this better, I seem to understand better when I can see it in practice. I am having a heck of a time with my shroud lines around the deadeyes and then the excess lanyard line. I tried the serving technique but it seems I end up with a huge unsightly clump of thread.
-
looks very neat and tidy Andy, I will have to try your trick to tame the fuzzies...beeswax just doesn't seem to suffice for me, I think I handle it too much.
-
I am satisfied, for a day or two at most...you know women, we are never truly satisfied lol. Looks dang nice Andy, workspace mess and all, my focus was still on Peggy...I think she will be a real beauty! Sjors, don't panic , no one can take your place . I just didn't want Andy to think he was going to get off easy just because you are going on vacation
-
Since Sjors is away for vaca....I will take over in his stead. WHERE ARE THE PICS? I WANNA SEE SOME PICS!
-
Last night when I completed the lanyards on my first shroud, I let out a whoop and a fist pump. Other half just looked at me from the recliner and asked me if I was hurt Some people just don't get it Randy , good thing we have MSW The deadeyes and chainplates are looking good. When I got my masts and the shroud lines up, then I could see the angle the chainplates needed to go. I was also at that time able to see where they would fall in regards to the gun ports. I had a couple that would have extended right over the center of those ports, so I just shortened the chain. I did this by sticking one of the brass nails between the twist above the port and nailing it to the ship. a spot of CA to keep it all together and an unceremonious snip of the excess chainplate. I know, I know, NOT historically accurate, but without a magnifying glass you can't see that the nail is not driven through a "loop" at the end of the chainplate anyway. I only had a tiny channel between the rubbing strake and the port frame anyway.
- 384 replies
-
- 2
-

-
- san francisco ii
- artesania latina
- (and 1 more)
-
Warsteiner...mmmm good. Although, personally I prefer an nice German Hefeweizen, Dunkel if you have it
-
WAYNE!!!!!!!! Shame on you!!! She just has to wait!!! I know I have this tickling in the back of my mind saying, come on, you could start putting the bulkheads in the keel. But I keep reminding myself I just don't have room on my little drafting table for that and the SF....hmm, a second table perhaps Okay, a call out to the Syren builders. I have a stupid Keel Clamper....I hate it. I have seen some logs where peeps just use a table saw and cut a grove into a piece of plywood and use that to keep the keel straight. My question is this...how deep should I make that groove so the bulkheads will be at the proper depth, and how wide does it need to be? I don't want to get in the box and touch the pieces to measure it...I am afraid it won't go back in the box if I do.
- 773 replies
-
- 2
-
-
- san francisco ii
- artesania latina
- (and 1 more)
-
Keith, The far right deadeye, is still "up" it has just turned on me, so the angle makes it look wonky. Sjors, I beeswaxed the heck out of all the lines, but I think my initial slowness at doing this correctly has worn some of the wax off and the result is fuzzies. I am not going to stress over the fuzziness at this point. I may try melting some of the beeswax and "painting" it on later, when I am sure I am done handling these. Keith, yep, end of term is busy and stressful, but I left all papers behind in my office last night, figured my head needed a break, and I actually found working on the rigging to be quite the stress reliever! I do have summer classes, I am teaching a 4 week class of Composition June 3-27th. We only meet Monday-Thursday from 8-10:30, so I expect to make some major headway on builds this summer. I am also teaching a 5 week class of Composition II in July, but it is strictly on-line, so other than checking in daily and grading papers it will not take up too much of my summer. Mark, I did attempt your little trick, but it did not seem to work at keeping all the deadeyes facing forward. I think my problem is the lower deadeyes, since the chainplates are nothing but twisted wire, it appears to be pulling them away from facing front and this then pulls the uppers out of square as well. I am debating on pulling the nail holding the chainplate and easing the twist in the wire, or taking the build OUTSIDE and using some CA on the channel to hopefully hold it in the face-front position. Steve, creative editing there with that quote Eric and Randy, the jig worked brilliantly and was easy as pie. I made 6, one for each of the channels. Grant, thanks for the info on the build and the jig, it made things much easier!
- 773 replies
-
- 4
-
-
- san francisco ii
- artesania latina
- (and 1 more)
-
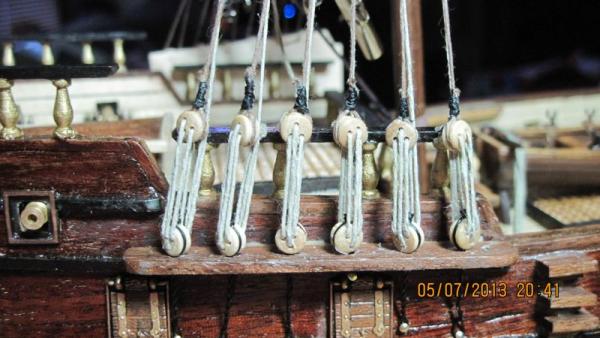
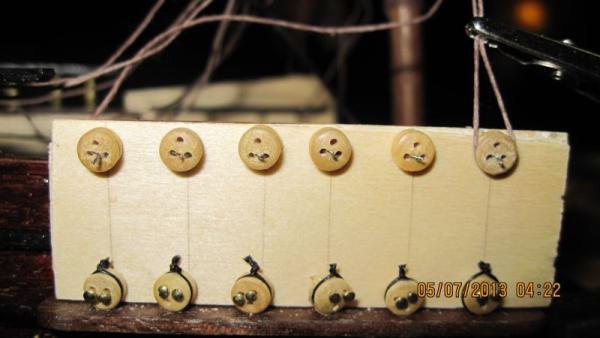
Doing the happy dance, have my first shroud up!!! I have not served the lanyards (see I did learn a new word ) yet, I want to pass this by you guys and make sure I have things done...close enough to correctly, before I make them permanent. On another note, does not look like I will make my end of May deadline...never dreamed this rigging part would be so time consuming. But I will get her done. No, Sjors, the Syren is still packed safely away

- 773 replies
-
- 3
-
-
- san francisco ii
- artesania latina
- (and 1 more)
-
Sjors, join me in the bar...I need a drink, then we can go for a stroll along the decks and climb those beautiful spiral staircases.
-
Again something for me to be in awe of, dang it Danny you put me to shame! But it is such a joy to watch and learn, I just keep coming back for more punishment lol....I guess I must be a masochist at heart...no, I am a teacher, therefore I never tire of learning something new! My hat off to you again!!!
-
Very nice, can't wait to see how you alter the decorative pieces!
-
Rocker, you know it is ALL your fault. You are the one who convinced me to start with the battle station! Now if I could just convince the other half that I really NEED that Byrnes table saw for my birthday.....
-
Steve, now you tell me lol. I may still do this...ME did not have the size deadeyes I needed in anything but walnut, mine are boxwood. Although the dowels I have on hand are of beech, at least they are a more blonde wood like the boxwood and wont look near as bad. Can tell I still was a bit fuzzy in the head last night, as it never even crossed my mind to make them myself, which is something my mind usually jumps to first! Grant, thanks That info you sent me was very helpful, I appreciate it. Although I am still debating on the shroud color. I had decided to leave them as they are since they are already attached to the masts and I don't want to take them down and start over (I am pretty much over this kit and want to move on), and I fear shoe polish will make a mess, and stain or paint will just end up on my wood; but last night the idea of using a sharpie brand pen popped into my head. So maybe they will end up black yet....need to test the sharpie on some of the scraps of thread and see how badly it bleeds or not first.
-
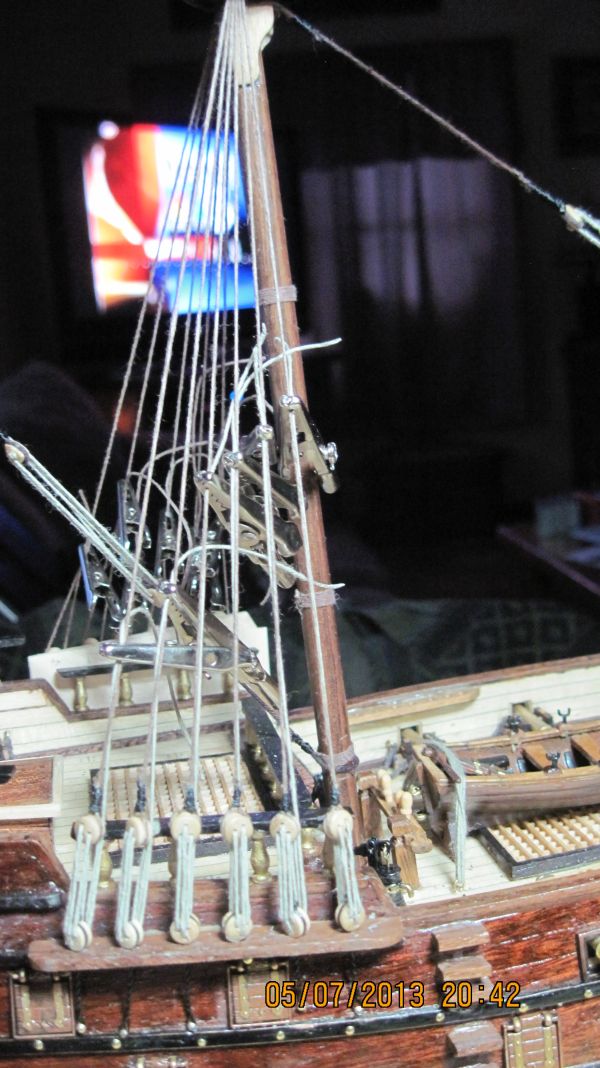
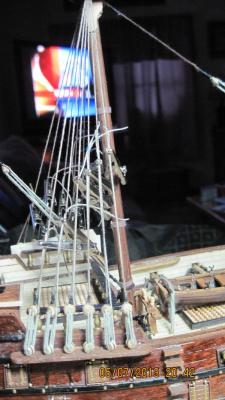
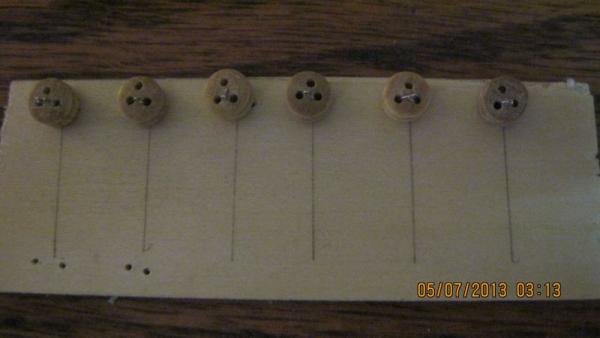
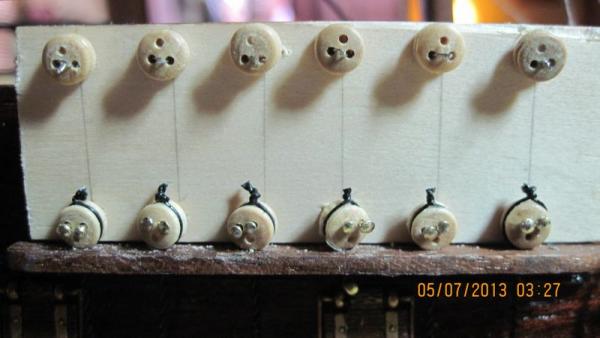
Very little progress today, spent most of my night grading research papers. However, a bit of forward movement to report. I created a jig to hold my deadeyes at each channel at the same distance. This is the jig with the deadeyes for the shroud lines attached to the jig. I just used the steel wire that came with the kit to attach these to the jig. The jig placed behind the deadeyes on the channel. I used the brass nails to hold these where I need them. I figured this would make it more stable to take the strain I will put on the upper deadeyes when the shroud lines are attached. First shroud line being pulled around the deadeye. The jig seems to be holding well so far, I am alternating sides so the mast does not get pulled out of position. Using pva to help secure the shroud line to the deadeye itself, and will let that dry overnight and then serve the lines tomorrow. I still have a long way to go, but I have time as well. Turns out I am short 2 of the required deadeyes, so I just had to place an order from ME for some replacements. Cost me 3 times as much for the shipping than the $2.30 for the package of deadeyes, go figure!! I am feeling much better tonight, nose is mostly clear now but still a bit swollen and uncomfortable. I WILL NOT be using any CA indoors anymore!!!
- 773 replies
-
- 3
-
-
- san francisco ii
- artesania latina
- (and 1 more)
-
Good morning everyone. I am feeling better today, at least my head is much less fuzzy. Nose is still swollen and uncomfortable, but I did make up a saline solution and used several drops from an eye dropper. The saline did seem to sooth some of the irritation. I am just amazed at the reaction I had to the CA. It's not like I was working in an enclosed space, I am in a fairly large open living room area. But, there was no fan running at the time, and I am betting I had my face pretty close to the bits I was working on while I was applying the CA. Well lesson learned. Tonight after work, I will get back to work on these shrouds. I found a piece of scrap wood, the portion the bulkheads came out of, and I plan to use it to make my deadeye jig so I can get the proper spacing. I tried a piece of basswood I had, but it was too thin to hold. I know when the shroud lines are attached to the deadeyes they will put quite a bit of strain on the jig, so I need something more solid to tolerate the strain.
- 773 replies
-
- 1
-
-
- san francisco ii
- artesania latina
- (and 1 more)
-
Thanks for the advice on the CA. I am so absolutely miserable today, I can't do anything but sleep. No appetite, and as much as I want to sit down and work on the ship, I can't focus to do it. I think you are right, put the CA away until I can get a respirator mask like painters use with filters in them. In the meantime I will just have to use the PVA and have patience for the drying time. Just wish I could find something to bring the swelling down in those nasal passages, I think I would feel better, but antihistamines aren't doing a thing for me.
-
Looking good, I like that you took the time to rig your guns and add the coils of rope and cannonballs. I would have liked to, but don't have the supplies, and don't want to spend the money.
-
Boy, I am really having a bad reaction to the CA glue I was using to close the serving around the shroud lines, and attach them to the masts. My sinuses are so swollen, I can't breath through my nose at all I have heard people recommend using a mask of some sort, but I don't see how a doctors mask will keep the fumes out. Think I need a respirator mask or something hooked to an oxygen supply lol.
-
Thanks for the link Randy, going to take a look at it now. I don't know....trying to decide if I care what color the shrouds are. Brown is what the kit provided...why does it have to be black? This kit is so non-historic as it is, then all the tweaking we all do it makes it even less so, I get that the ratlines are supposed to be black, because the sailors would tar them so they could climb up them, the kit does provide black thread for ratlines. I don't want to take down all the work I did yesterday to stain the threads, and I really worry about shoe polish when I know my fingers will have to be all over these lines in order to do the ratlines. I think I will just leave things as they are, take in the knowledge, and use it to prepare the next kit better. Knowing about the lines now, means on the next one, I can spend time dyeing the strings long before I get to that stage so they will be dry and ready to go when the times coms.
-
That close up view makes her look so realistic and life like. I can imagine myself walking along the deck and going down those stairs. She is looking Great!
-
Sport, does it soak into the thread and "dry" I don't want to be trying to run my ratlines later and running into shoe polish that is rubbing off on my fingers and being transferred to other places on the ship? Grant pm sent
-
First pair is to starboard..if starboard is the right side of the ship IF standing on the deck facing the bow. You just can't see them, because I haven't served them yet, and atm they are clipped up the mast and held out of the way.Honestly, that just happened to be the side facing me when I started...had no idea it made a difference lol. I am making a jig like the one from your log for when I have to attach the deadeyes to the shrouds. Just haven't gotten that far yet. I find I seem to be all thumbs trying to get fat fingers around tiny pieces of string. As for color. I only have what the kit supplied right now. They have me do shrouds in brown, and ratlines in black...probably because that was the cheapest way I could use shoe polish to make the shroud lines black, but I am a bit worried about the possible mess. perhaps black paint as that will dry?