Jack12477
-
Posts
5,674 -
Joined
-
Last visited
Content Type
Profiles
Forums
Gallery
Events
Everything posted by Jack12477
-

The "Trucker's Hitch" knot-tying video
Jack12477 replied to uss frolick's topic in Masting, rigging and sails
Nice video ! Nice music ! Nice choreography ! But I still don't know how to tie a trucker's hitch -
Thanks, Denis. Yes there were two - People's Choice award (1st, 2nd, 3rd place) and the Jim Roberts Award . Everyone who registered got a ballot to vote for the People's Choice award. The Jim Roberts award is a more formally judged award based on a set of criteria - panel of 5 judges did that judging. It's present by the New Jersey Club. Don't know much else about it since I'm new to all this. The winner of both awards is in the NE Joint Clubs forum see this post https://modelshipworld.com/index.php?/topic/15240-35th-annual-northeast-ship-model-conference-and-show/&do=findComment&comment=496528 The rest of the models are a post or two prior to this one. The Admiral won one of the door prizes - the MS Sultana kit - so I guess I'll be building that for her sometime down the line.
- 250 replies
-
- 2
-

-
- willie l bennett
- model shipways
- (and 1 more)
-
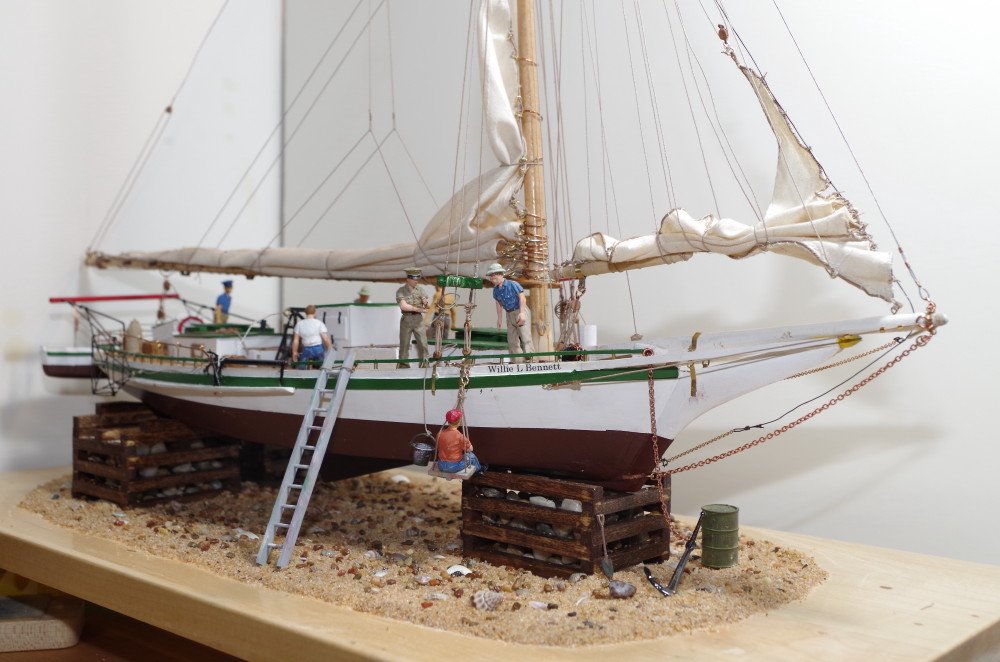
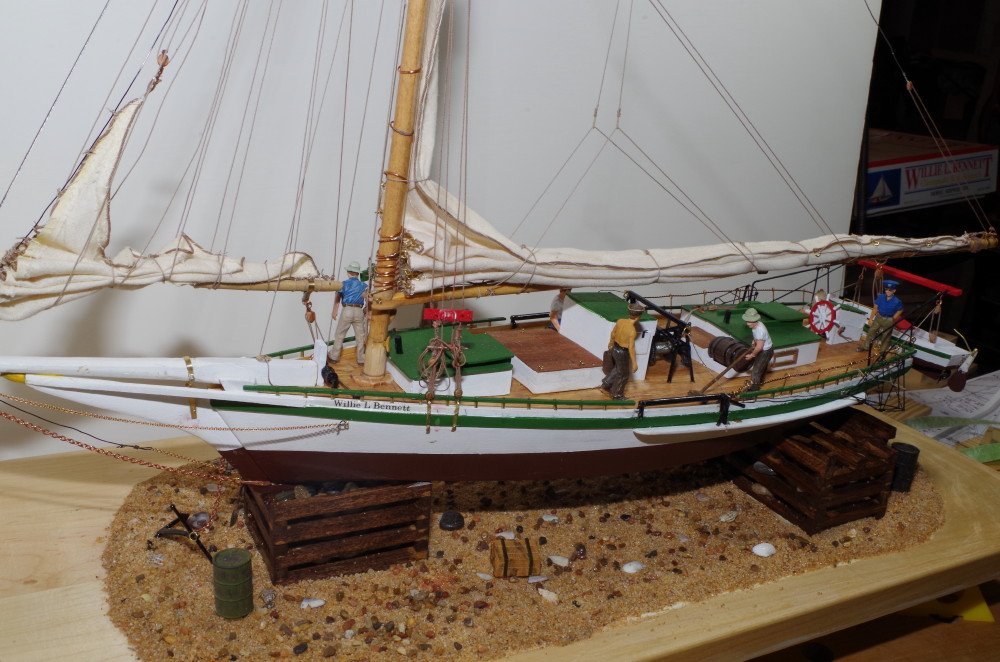
We did make it to the Northeast Joint Clubs Conference in New London CT and displayed the Willie Bennett. So to finish off the build log, here's a photo of her at the show. Great show; great models; enjoyed meeting members of MSW.

- 250 replies
-
- 7
-
-
- willie l bennett
- model shipways
- (and 1 more)
-
Ah yes, the little "Budgies or Budgees" - had 3 or 4 of them when my kids were young. Enjoying your build immensely, Frank. Nice work.
-
David, down here in the lower 48 your "whatcamacallit" is called a line level - very useful for leveling small projects like ship's keels - I have a couple of them
-
Thanks, Gerty ! Good to see you back at the shipyard, looking forward to following your skipjack build.
- 250 replies
-
- 2
-
-
- willie l bennett
- model shipways
- (and 1 more)
-
Mark, try Army Air Corps (WWII)
-
Artesania Latina's main website lists it as out of stock price 149.99 Euros. No mention of it being discontinued. https://www.artesanialatina.net/en/108-advanced
-
Tower Hobbies has it listed as available Late June for $126.49 Latina 1/90 San Francisco II Wooden Model Ship Kit
-
Denis, if you have a Lowes box store close by, check in their Molding aisle for 1/8 square poplar; I know they have 1/4" sq poplar because that's what I used to build the timber cribs for my Skipjack base. They cost about 99 cents for a 3 ft strip. But it is NOT in with their dimension lumber, it's in the back of store with the molding pieces. Since these big box stores all have pretty much the same layout try aisle 47 crib G 13 H bottom shelf. That's where my Lowes store has them.
- 453 replies
-
- 6
-
-
- thermopylae
- sergal
- (and 1 more)
-
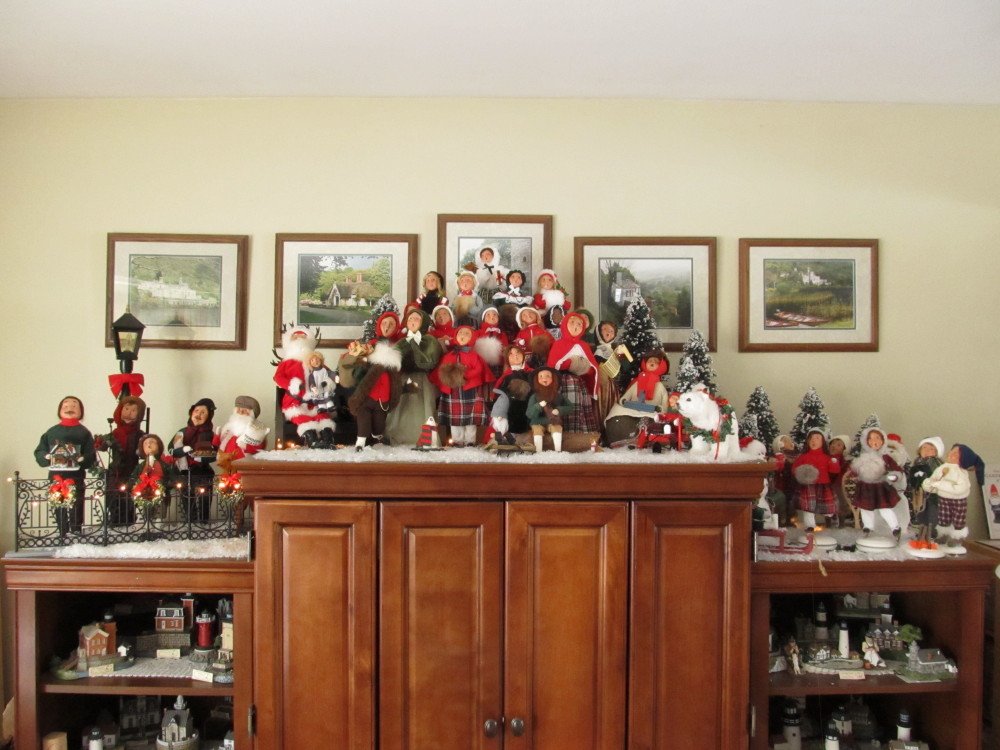
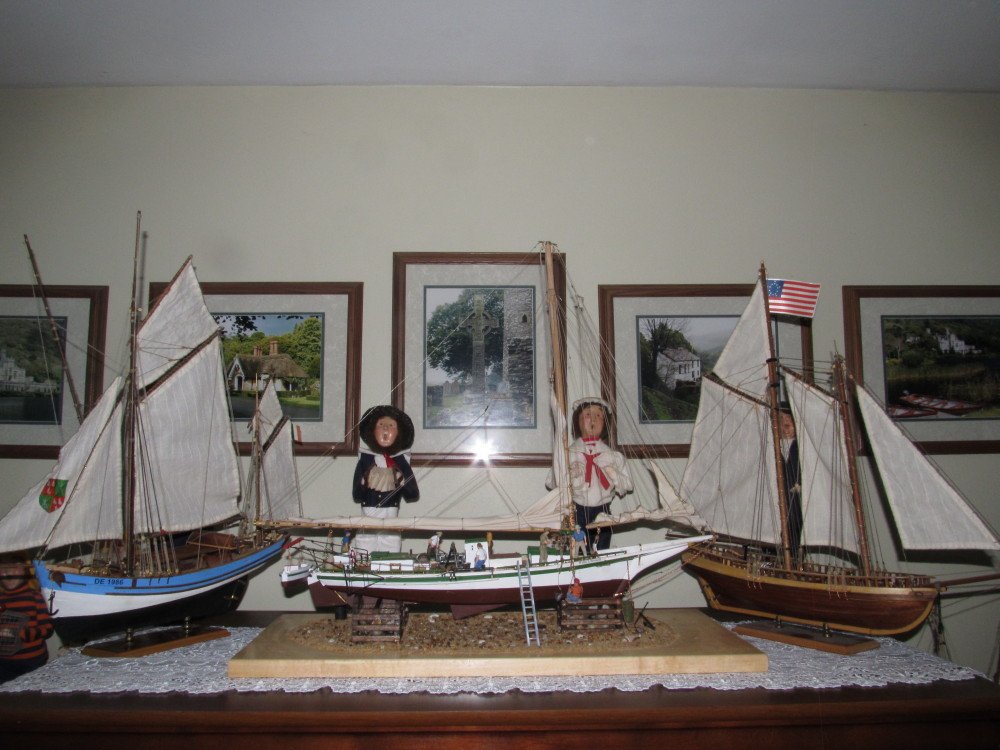
Good catch Carl ! Good one also Popeye, but he's not sitting. You missed the gent hiding behind the Marie Jeanne, Carl. And you all missed the Blue Crab picnic taking place right next door, altho Popeye did spot one of the picnicers. Actually these are the wife's Byer's Choice Christmas Carolers, the Nautically attired figures stay up year round to augment the boat display. But the entire shipyard disappears from Thanksgiving to about the Epiphany for the Caroler display. The Picnic (2 Santas flanking the Sailors) The Christmas Caroler display Thanks for the compliments, guys.

- 250 replies
-
- 6
-
-
- willie l bennett
- model shipways
- (and 1 more)
-
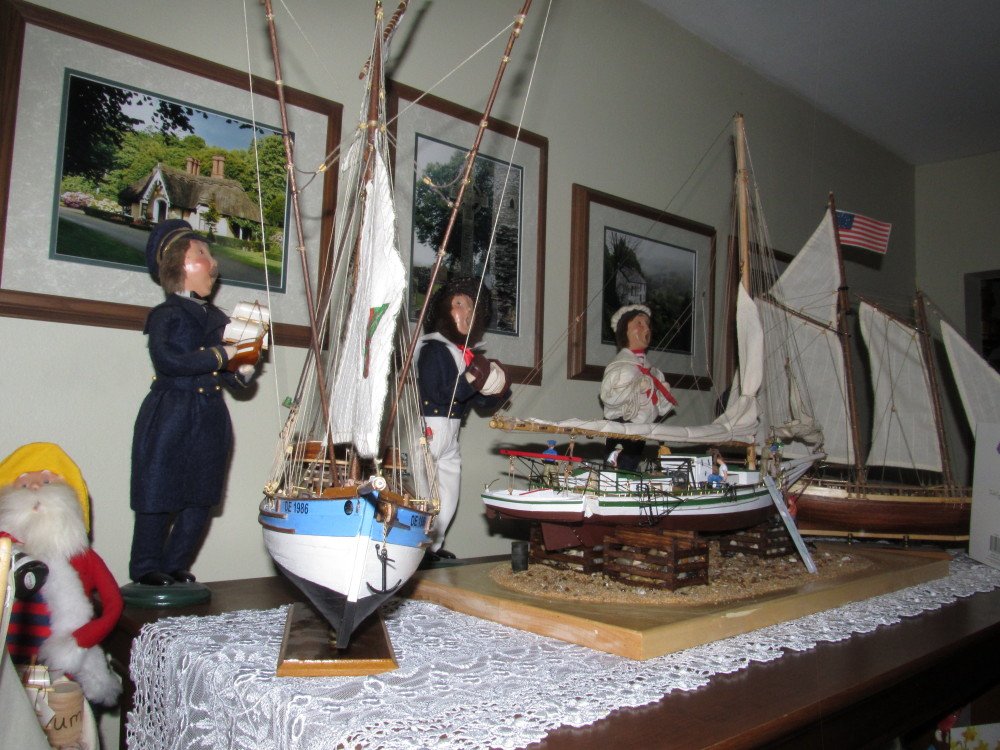
On display atop the TV armoire with the other two ships Marie Jeanne (L) and Virginia (R).
- 250 replies
-
- 10
-
-
- willie l bennett
- model shipways
- (and 1 more)
-
It says something about their quality control inspection BEFORE the kit is prepared for shipment. LACK of inspection
-
Steve, my grandfather was born and raised not far from there in Port Leyden. His parents were lock tenders on the Black River Canal. You are definitely in the real "Upstate NY" right near or on the Tug Hill Plateau. Did you make that jig you are using for the hull frame or was it included in the kit? It's looks like a pretty useful jig. Nice progress on the model and congrats on the new grandchild.
-
I hope you sent them a photo of that in your email to them.
-
We have Hannaford here also, but they don't carry that particular style toothpick, only found them in grocery section of Target. Don't have Marketbasket here.
- 453 replies
-
- 6
-
-
- thermopylae
- sergal
- (and 1 more)
-
Denis, nice railing ! I see you found my favorite toothpick - Target I presume !?!? - use them for spreading glue - Hadn't thought of using them as railings. Thanks for the idea.
- 453 replies
-
- 9
-
-
- thermopylae
- sergal
- (and 1 more)
-
Tigersteve (Steve), CaptainSteve (Steve), Mark, Popeye (Denis), Ryland, Russ, thanks for the compliments and for following the build. Ryland, looking forward to seeing you again in New London. Mark, don't know about "knocking them dead" but thanks for the vote of confidence. And thanks to all who have followed along silently and clicked the LIKE button. Now to take a short break and do some rearranging of the cellar so I can have more elbow room in the work shop before I decide what model to build next.
- 250 replies
-
- 9
-
-
- willie l bennett
- model shipways
- (and 1 more)
-
Denis, go to your first post, select it, then click EDIT, this will put you into full editor and allow you to edit the title.
- 453 replies
-
- 4
-
-
- thermopylae
- sergal
- (and 1 more)
-
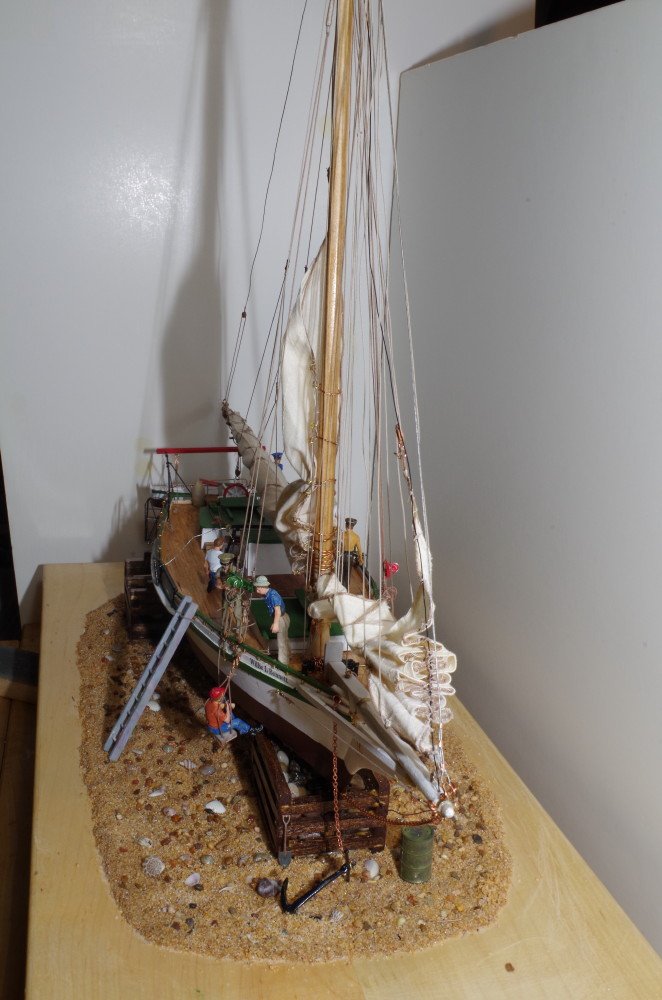
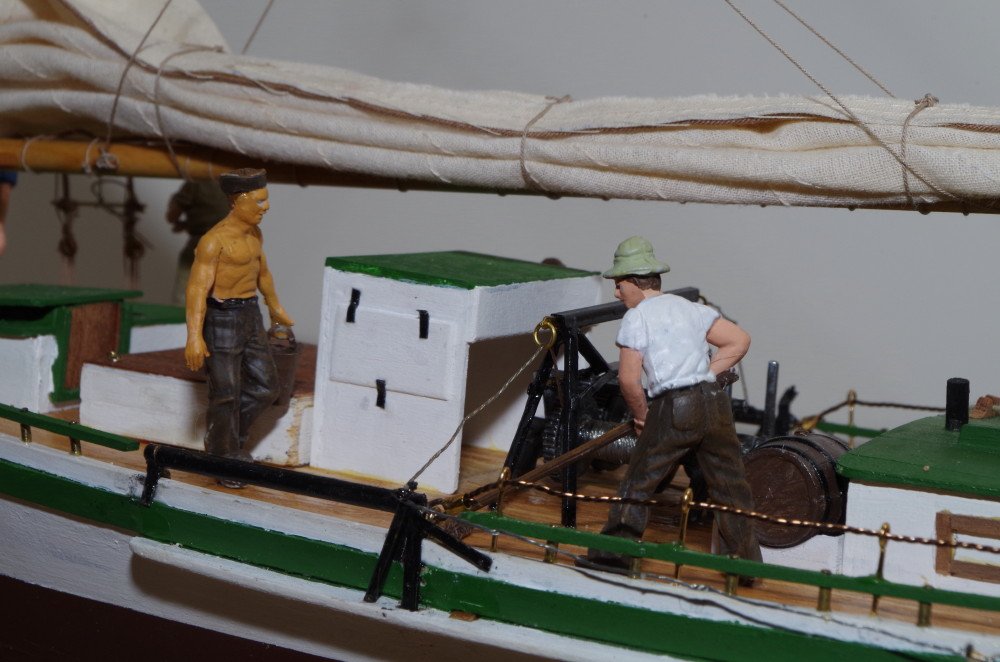
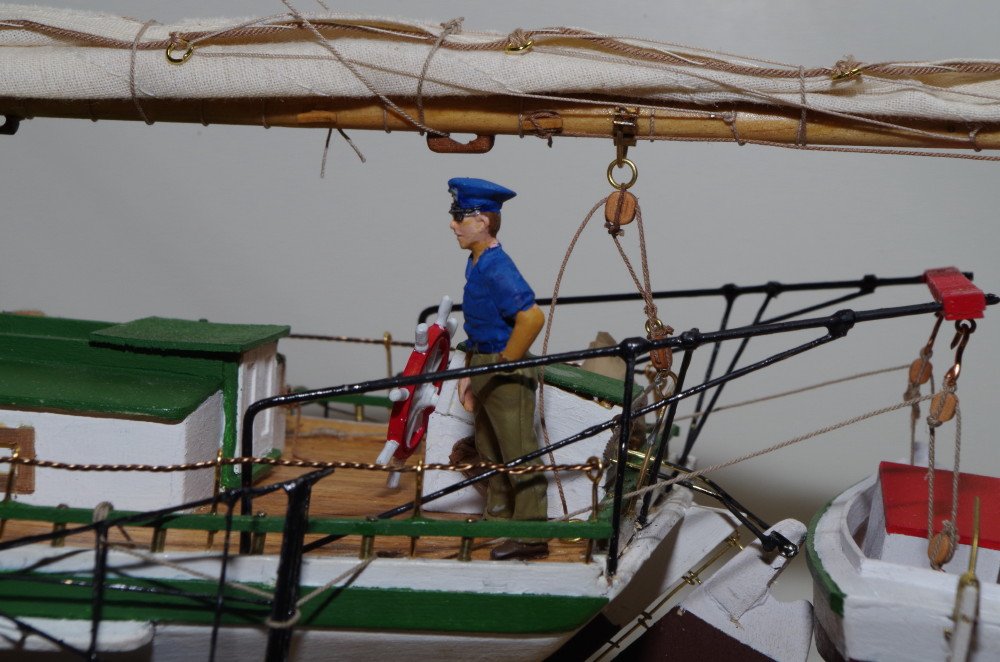
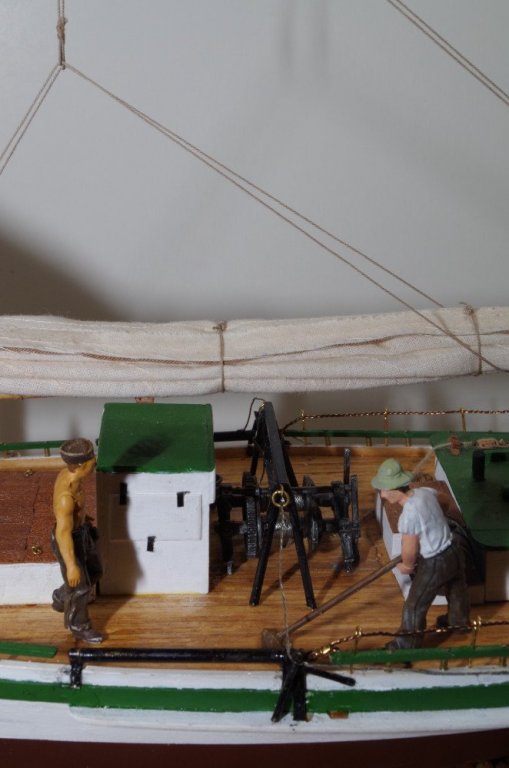
Okay, the boat is finally complete. As promised the surprise is unveiled. The CREW ! The ship's motley crew has finally returned from their Blue Crab Fest (read orgy, pig-out on Blue crab) and is getting the ship spruced up and ready for her re-certification inspection by the USCG..... (yeah, right !!! - for a model ??!?!?!) Pardon the poor quality of the photos, my workshop is not conducive to photography and I'm fighting all the little icons, menus, et al on this new fangled Digital SLR (sure wish I had the old 35 mm film camera - only 5 secs to change settings). When I can get her outdoors in the daylight I will update this log with better photos. For those who are curious about the figures and where I got them. They are the PT-109 crew figures from Italeri. I didn't want them to look too military so I took great liberties with their clothing's paint scheme except for one figure. I will be taking her to New London to the NE Joint Clubs conference the end of this month.

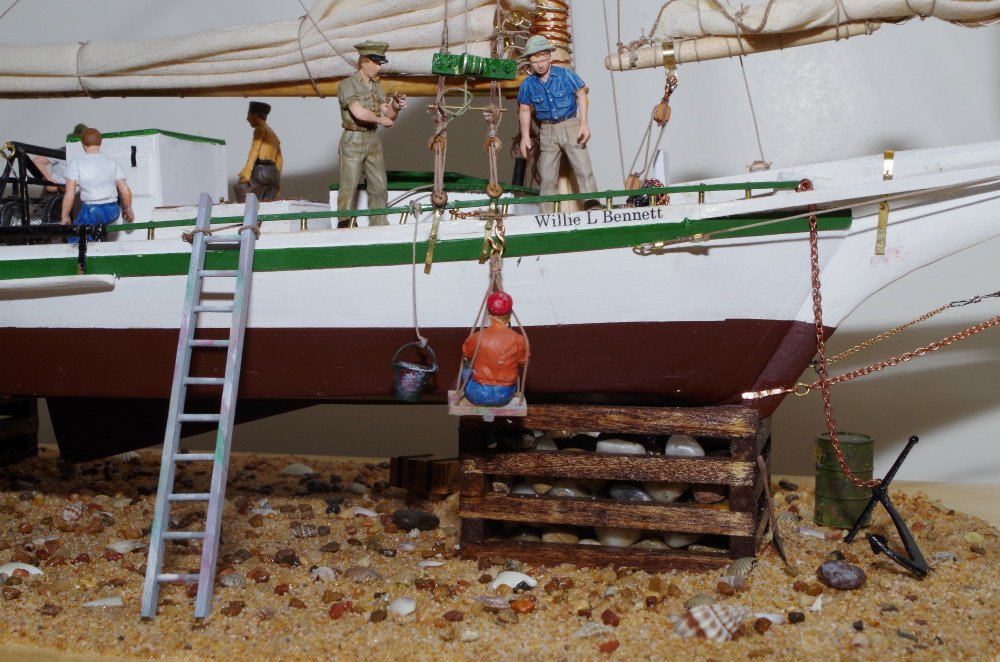
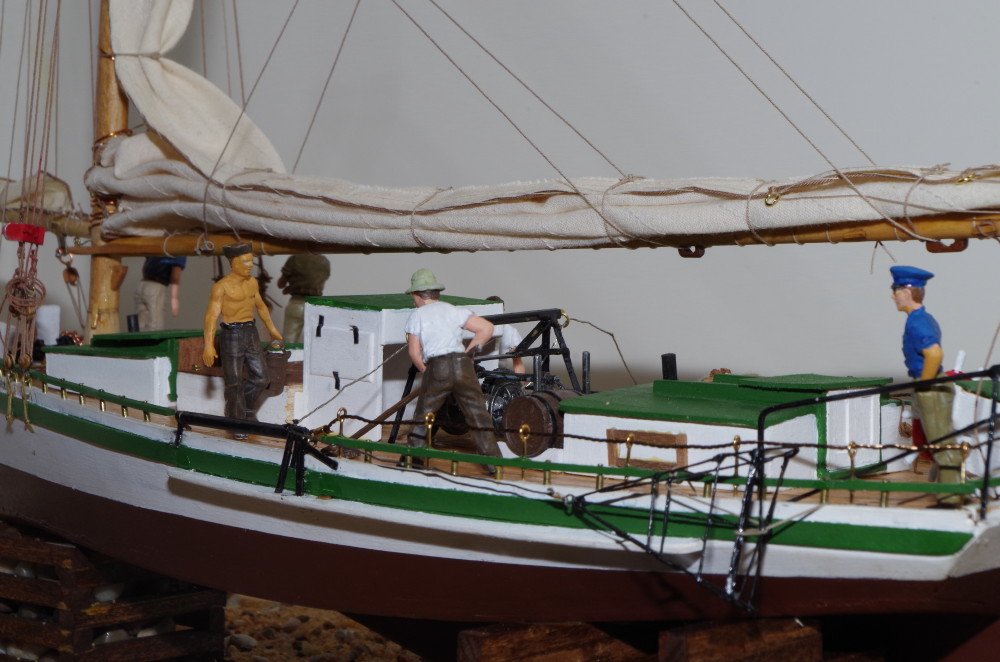

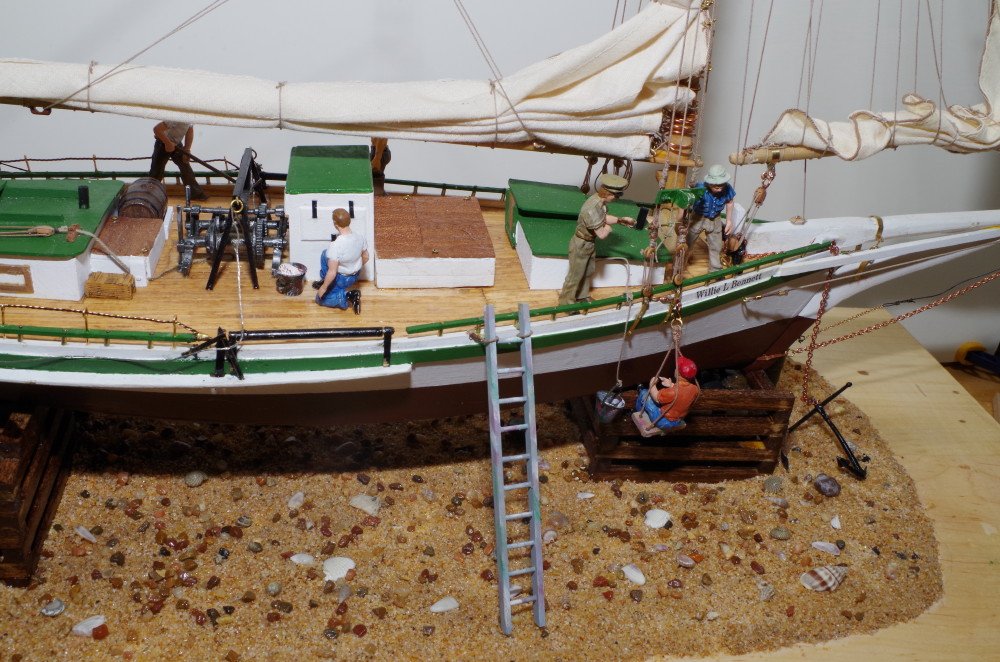

- 250 replies
-
- 11
-
-
- willie l bennett
- model shipways
- (and 1 more)
-
I whole heartedly agree with Allan. I'm silently following and learning much from your build. Thanks.
- 3,618 replies
-
- 5
-
-
- young america
- clipper
- (and 1 more)
-
Glad to see you back also, Danny ! Missed your build logs. Pulling up a seat.
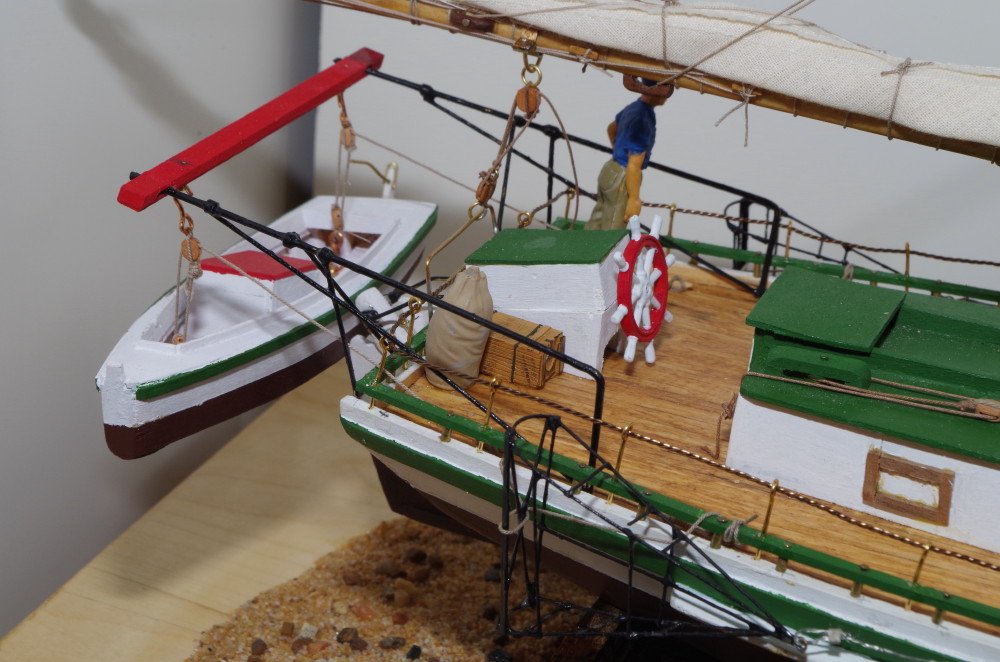
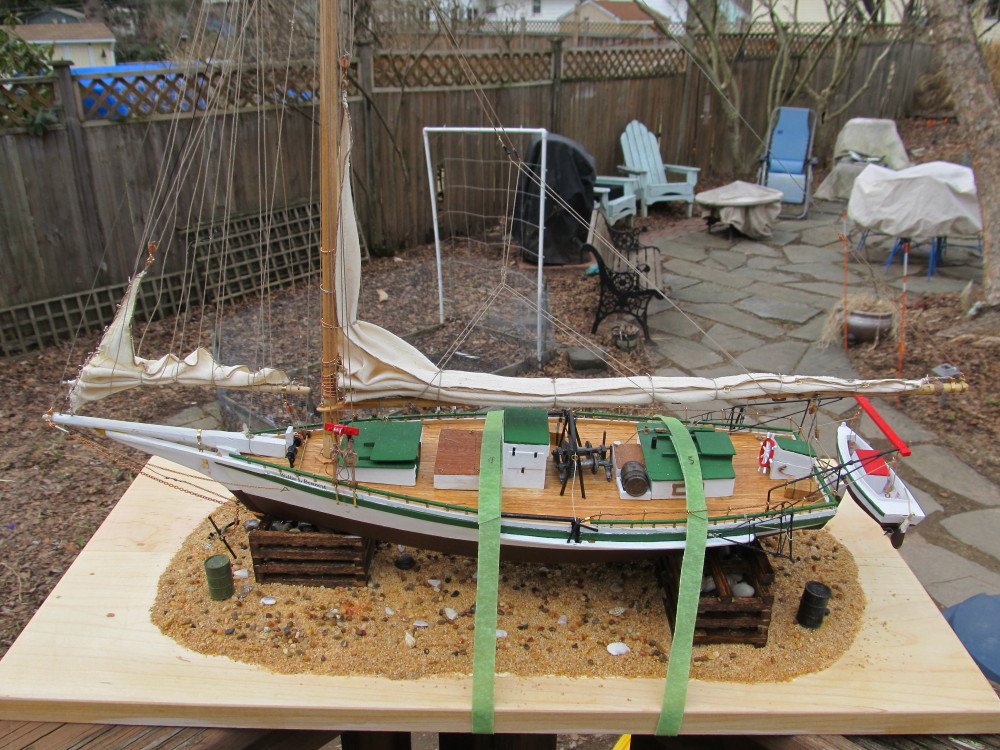
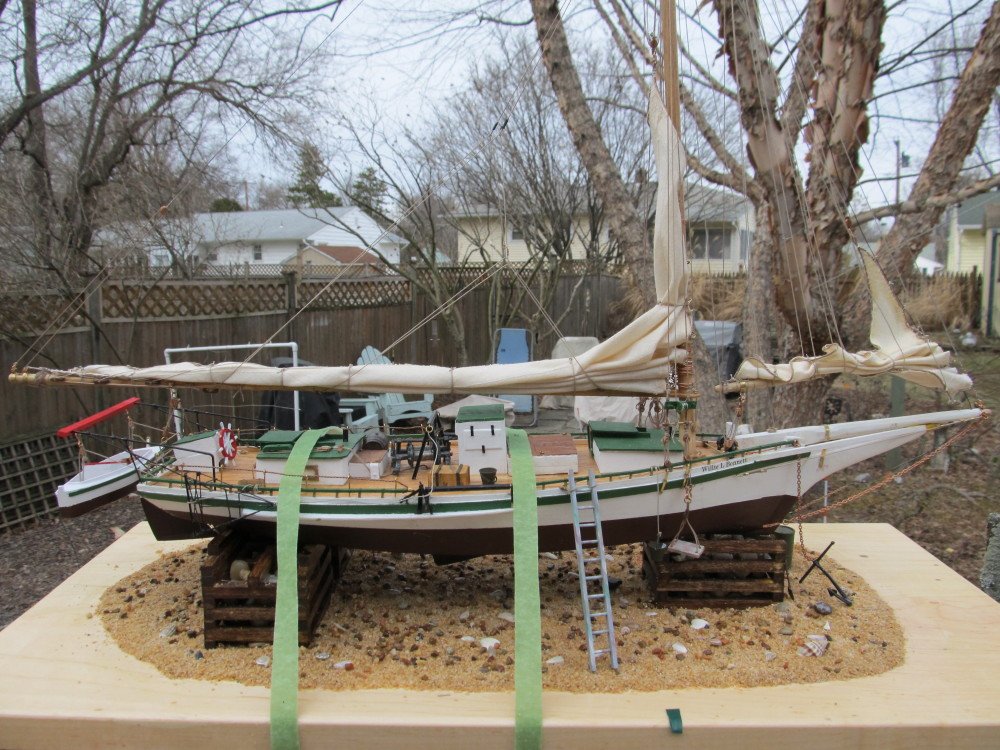
-
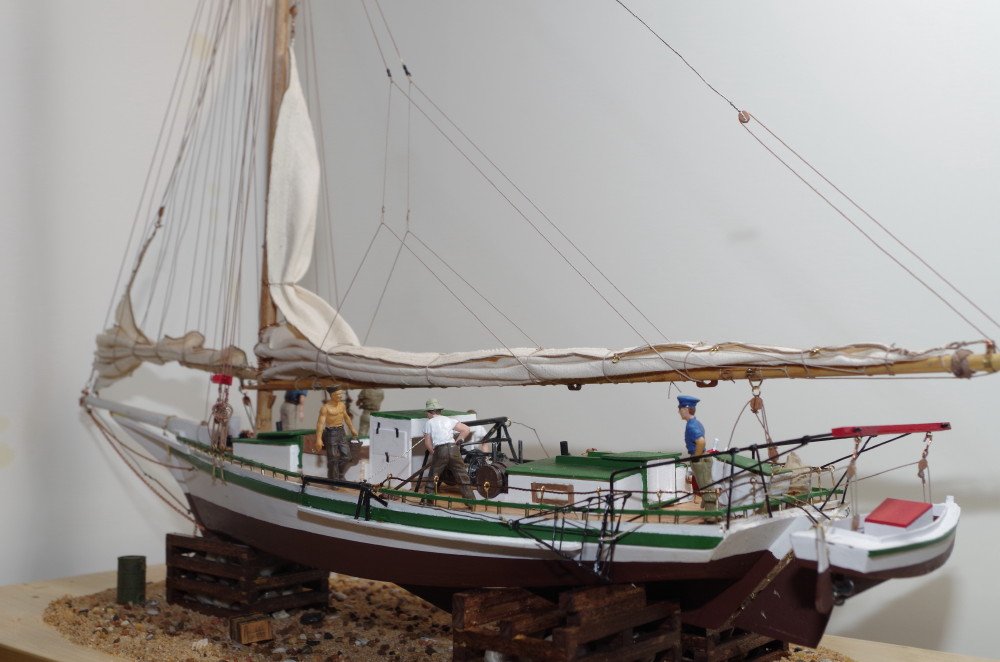
Denis, thanks for the compliment. Installed the jib and secured it; also installed the Lazy Jacks. The Lazy Jacks were not as hard to rig as I had thought. I have to re-review the plans and double check everything. Now to work on the surprise feature(s). Almost finished. Photos as of today (outside before tomorrow's pending big heavy wet snow storm)
- 250 replies
-
- 8
-
-
- willie l bennett
- model shipways
- (and 1 more)