Jack12477
-
Posts
5,674 -
Joined
-
Last visited
Content Type
Profiles
Forums
Gallery
Events
Everything posted by Jack12477
-
 I just tried it. Works great, Chuck. Thanks.
 -
Thanks, Chuck, very helpful.
-
Thanks. I think I kept my old AL instructions and parts lists, I'll have to double check them, but I don't recall ever seeing a greyish wood in any of my kits.
-
Can't open the attached PDF file - get a message it is not available "to your account". Is this a protected file? What's the issue with mansonia? Health issue? or ??? I've built a lot of Artesania Latina kits over the years and never encountered any obvious issues with any wood they supplied. But then I'm not sure which kits contained mansonia and which did not.
-
Chuck is there any way with this new feature to force a "Confirm Delete" pop-up if the member accidentally (or on purpose) deletes a topic. It would ONLY have to apply to topic deletes not post deletes.? If the member had to "press Delete" twice, it might stop some of the accidental deletes. Once the "Confirm Delete" is pressed then it's bye-bye topic and it goes into this new trash can you described.
-
Nice model, Derek, and great photos as well. Wish I had studio lights like yours. I was more the outdoors photographer than studio so never infested in them.
- 134 replies
-
- 1
-

-
- artesania latina
- mare nostrum
- (and 1 more)
-
I agree with Per, very nice setup. BTW, I gave up on ME line a long time ago and switched to Chuck's line (Syren), much much better.
- 165 replies
-
- 3
-
-
- finished
- model shipways
- (and 1 more)
-
My copy arrived in yesterday's mail.
-
I second Ken's, Per's and Sjors' remarks. Great job, Bug, you did Augie proud. Thanks!
- 2,191 replies
-
- 8
-
-
- confederacy
- Model Shipways
- (and 1 more)
-
Airbrush
Jack12477 replied to Mike Dowling's topic in Painting, finishing and weathering products and techniques
Very impressive models and magazine covers, James. -
Very nice, Marc. Decals look great. Finish on the boat is clean, crisp. Excellent job. Your sister will enjoy it.
- 165 replies
-
- 5
-
-
- cape cod catboat
- Finished
- (and 1 more)
-
Just catching up with your build. Beautiful stand, Steve. Very nice presentation.
- 165 replies
-
- 2
-
-
- finished
- model shipways
- (and 1 more)
-
Model Shipway's Paints
Jack12477 replied to Worldway's topic in Painting, finishing and weathering products and techniques
Do you ever do your own research ? Or do you expect us to do it for you? ModelExpo - Vallejo paints Hobby Lobby - Vallejo paints -
When you load the photos in using the Choose Files function, they load somewhat randomly. To get them added to the post in the order you want, just click the + (plus sign) symbol in the photo preview, click each photo in the order you want and wait for the system to add it before clicking on the next one. I just added photos to my Skipjack build without any problem.
-
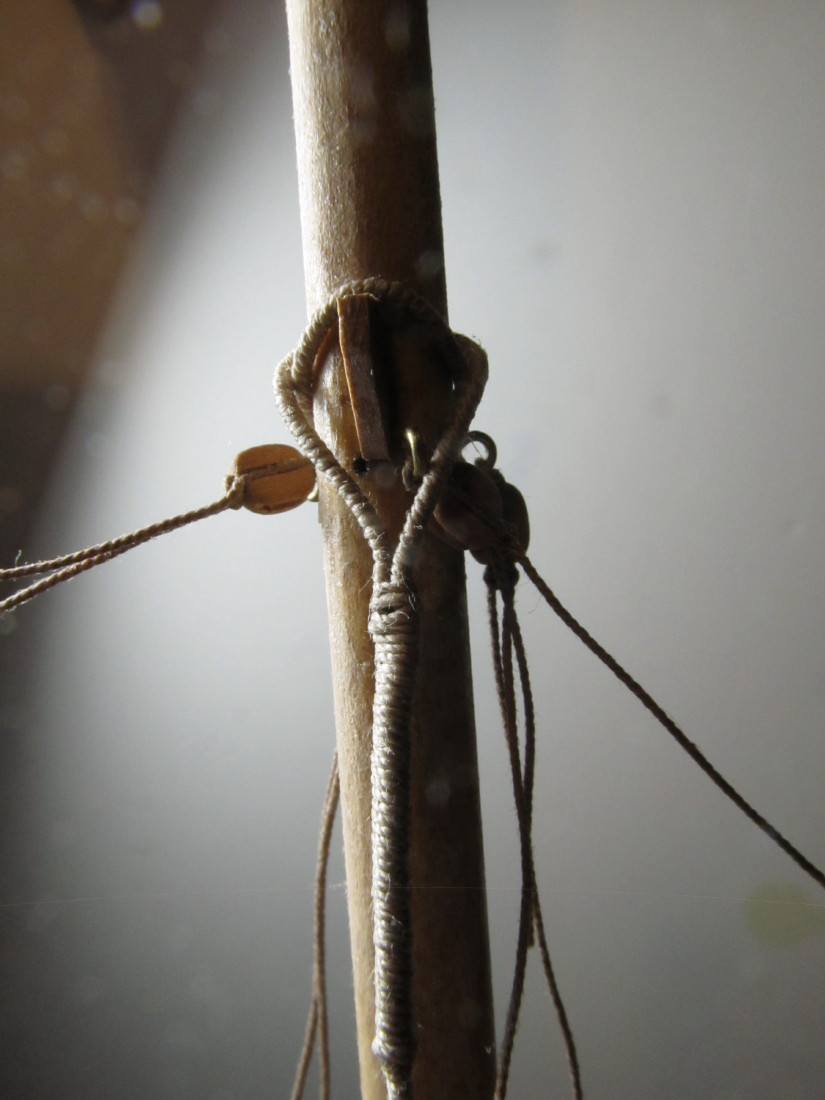
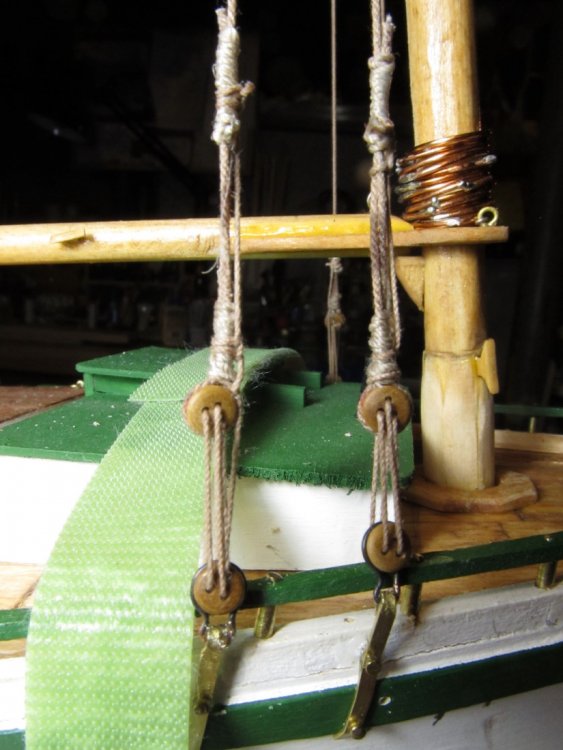
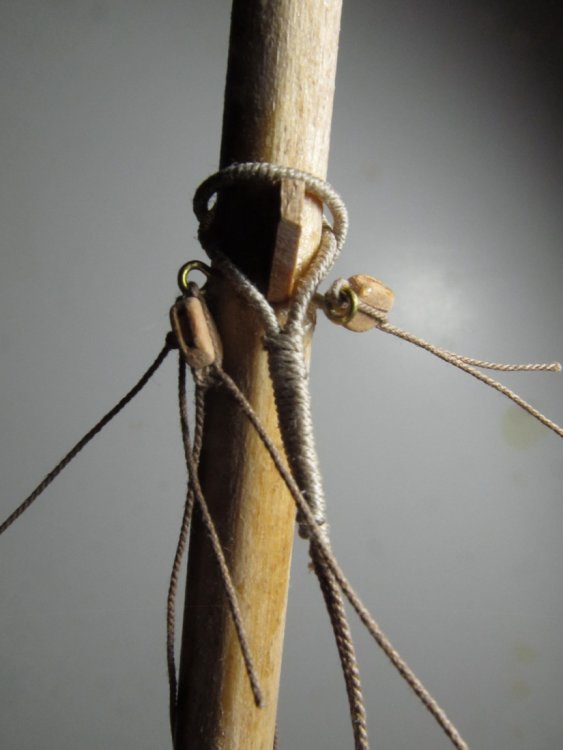
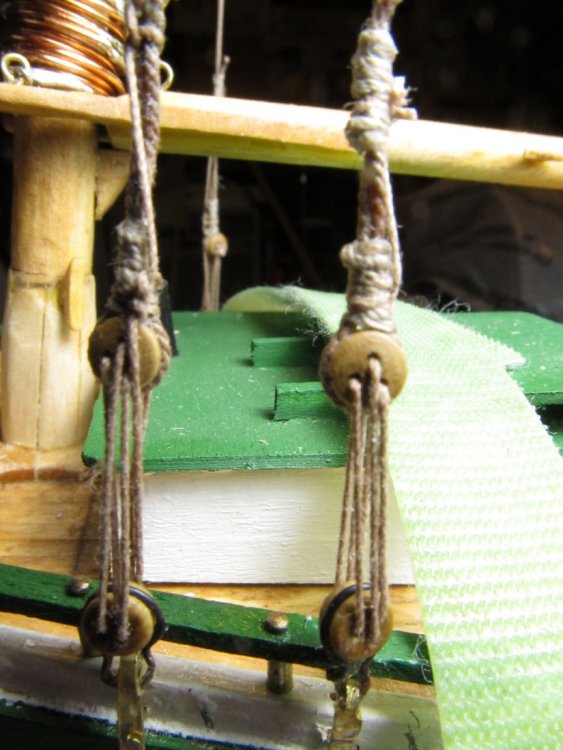
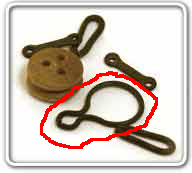
Small Update/Progress Report: I installed the shrouds around the main mast and lashed the deadeyes in place. Had a lot of trouble with the deadeye rings supplied by MS - they spread open too easily and pull out of the chainplates. Spent a lot of time using medium CA getting the "glued" back into the chainplate. They are the ones circled in red in the last photo below.

- 250 replies
-
- 8
-
-
- willie l bennett
- model shipways
- (and 1 more)
-
Bug, are you using Chuck's Longboat kit to make these boats ?
- 2,191 replies
-
- 5
-
-
- confederacy
- Model Shipways
- (and 1 more)
-
Model Shipway's Paints
Jack12477 replied to Worldway's topic in Painting, finishing and weathering products and techniques
Vallejo makes a paint specifically formulated for airbrushing straight from the bottle - no mixing or dilution required. They also make a formulation for applying with a brush. Both are available from Hobby Lobby or Micro-Mark (in NJ) mail order. -
Model Shipway's Paints
Jack12477 replied to Worldway's topic in Painting, finishing and weathering products and techniques
Did you read Brian's (GuntherMT) post above ? He answered your question. -
Nasty stuff Denis. My Admiral had that and came down with a bad C.Diff infection that landed her in hospital for a week. Keep on the probiotics for at least 2 months to be safe.
-
Derek, if you have any 1/4 x 1/4 inch square stock you could glue it into the 4 corners of that bulkhead and false keel to strengthen that repair.
-
Just checking to see if everything is still viewable. Still working on the Lazy Jacks and other rigging
- 250 replies
-
- 4
-
-
- willie l bennett
- model shipways
- (and 1 more)
-
Model Shipway's Paints
Jack12477 replied to Worldway's topic in Painting, finishing and weathering products and techniques
Derek, they are water soluble so just thin them down to the consistency you want and brush them on - they go on okay and cover well. I personally find them a tad thick but they are okay to use. Don't throw them out.