DaveRow
-
Posts
691 -
Joined
-
Last visited
Content Type
Profiles
Forums
Gallery
Events
Everything posted by DaveRow
-
 Hello Mindi, You are about where I was on my Endeavour a couple of months ago. Great news you are getting back into the build. Will pull up a swivel chair and watch your progress. Actually, the more I look, you and I have had similar thoughts as to what items look like and bottom waterline. Dave R
 -
Hi Dashi, You have successfully navigated your way through a lot of fiddly work their. All the channels look really well presented. Dave R
-
Once I got past the hull construction(I was using the Corel plans) I realized with all the changes I had made, I did not trust the authenticity/accuracy of the Corel plans at all. I bought the AOTS, got into reading the MSW logs of several other Endeavour builds, this convinced me I was into a kit bash. Corel plans put aside. I've since tried to follow the AOTS, retro to the hull I made. That said, my Endeavour has a longer bowsprit, so I have gone out on a limb ! Masts... I think Dashi's separate log about the mast lengths covered it all in depth. But I got lost in all the long discussions. Dave R
-
The AMM Endeavour Replica in Sydney, lowered the Mizzen Mast Top recently. Here it is on the deck. There is a short video on the Facebook Page of it coming down. Good timing I say, when I am making them for my model. Dave R
-
Hello Dashi and Ca.shipwright, I have seen and read quiet a bit of discussion about the Endeavour mast heights in this forum. I've used the dimensions from the "Woolwich Yard 16 October 1771" draft. But using the taller Mizzen as per Shardlow Report. I calculated what the mast heights above deck would be, as it depends on where each rests on the model structure below(my model). I scaled the AOTS page 84 to match the above deck lengths for each mast. I don't know what the Caldercraft deck heights are. The Corel were a little different to the AOTS. Dashi, I did a check/comparison to what I had come up with, against what you came up with in the log you posted. Pretty close, and any slight mm difference, be hard to pick. If I have stuffed it up, can raise/lower the mast bottoms. Dave R
-
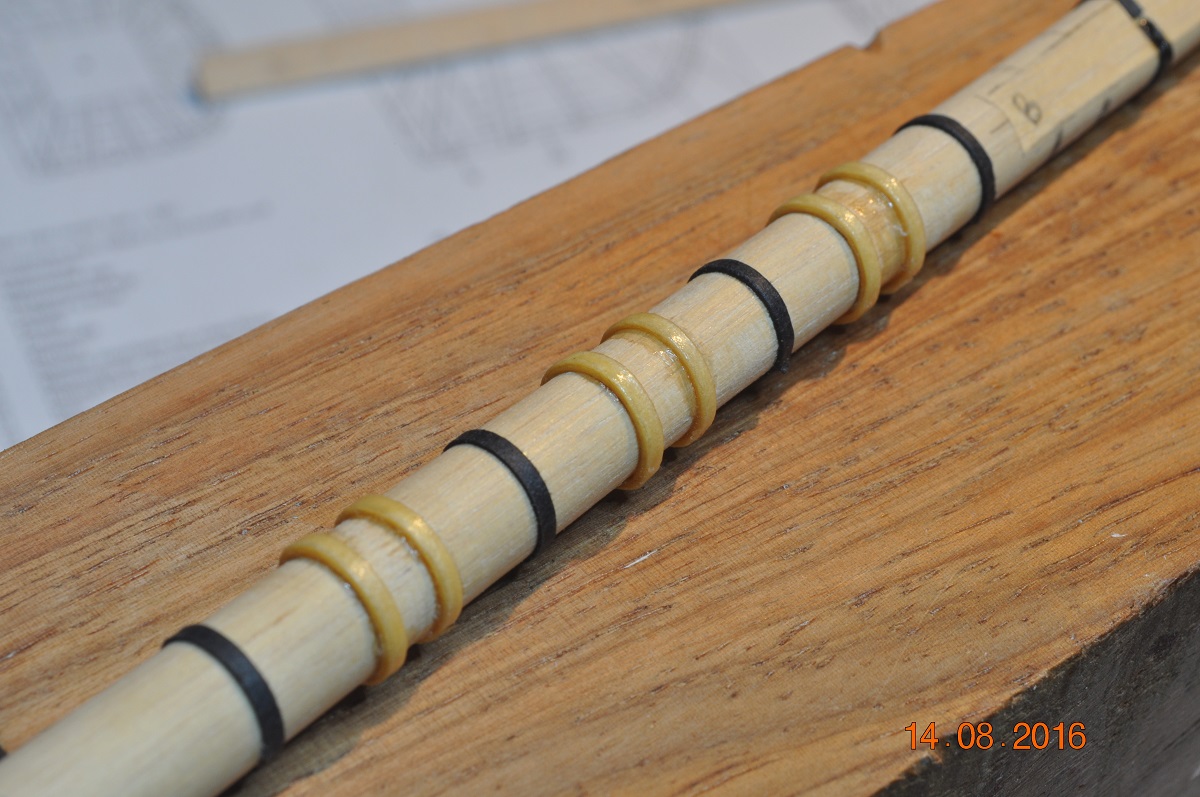
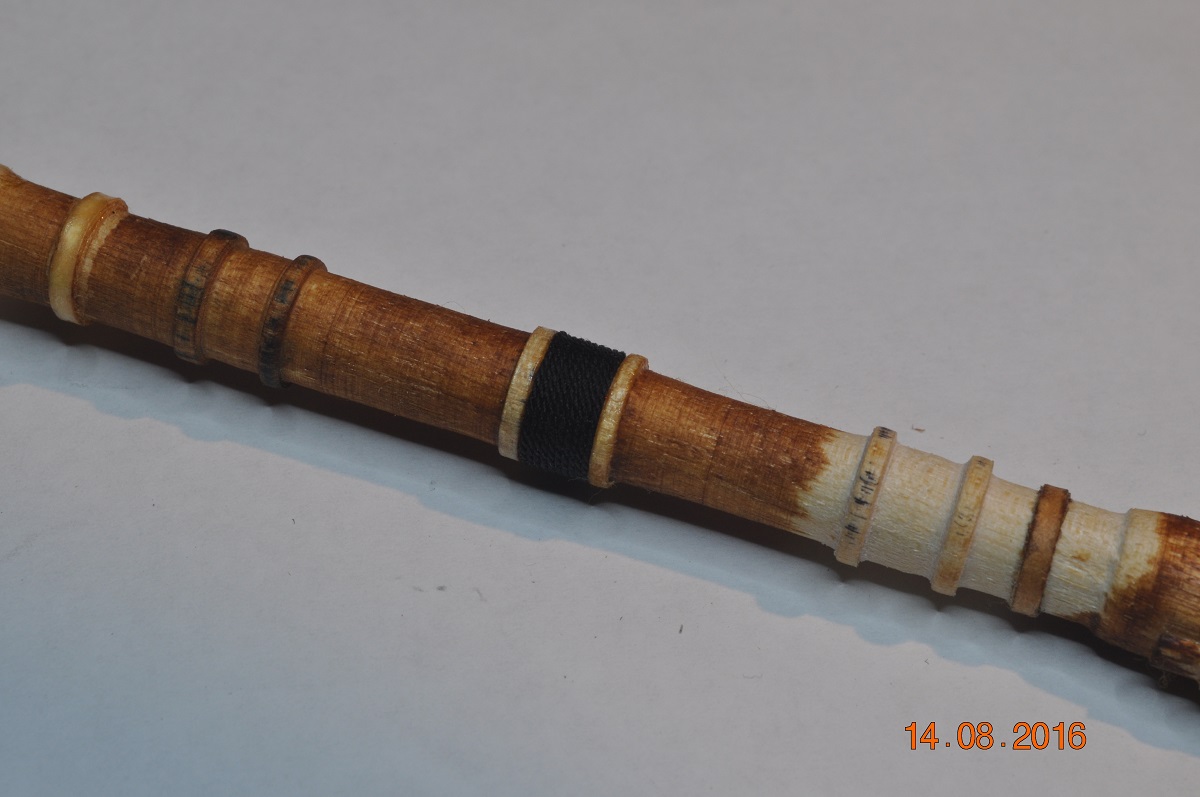
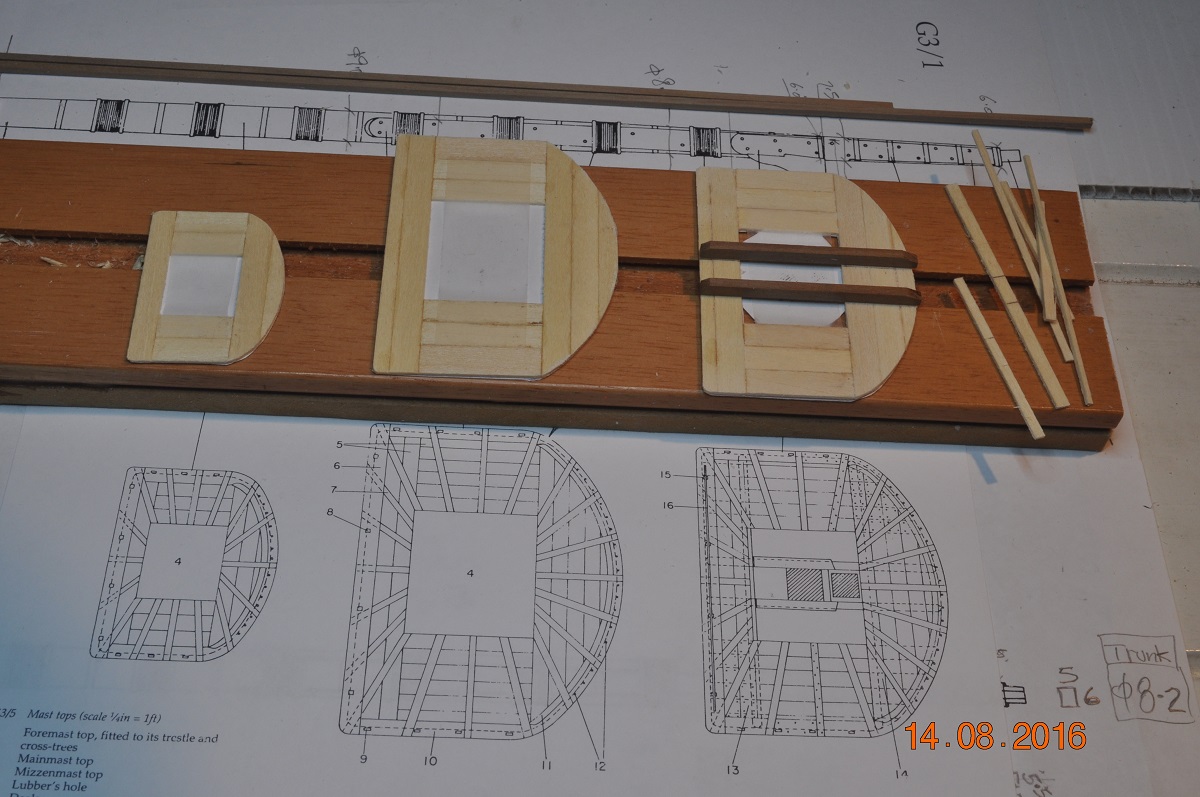
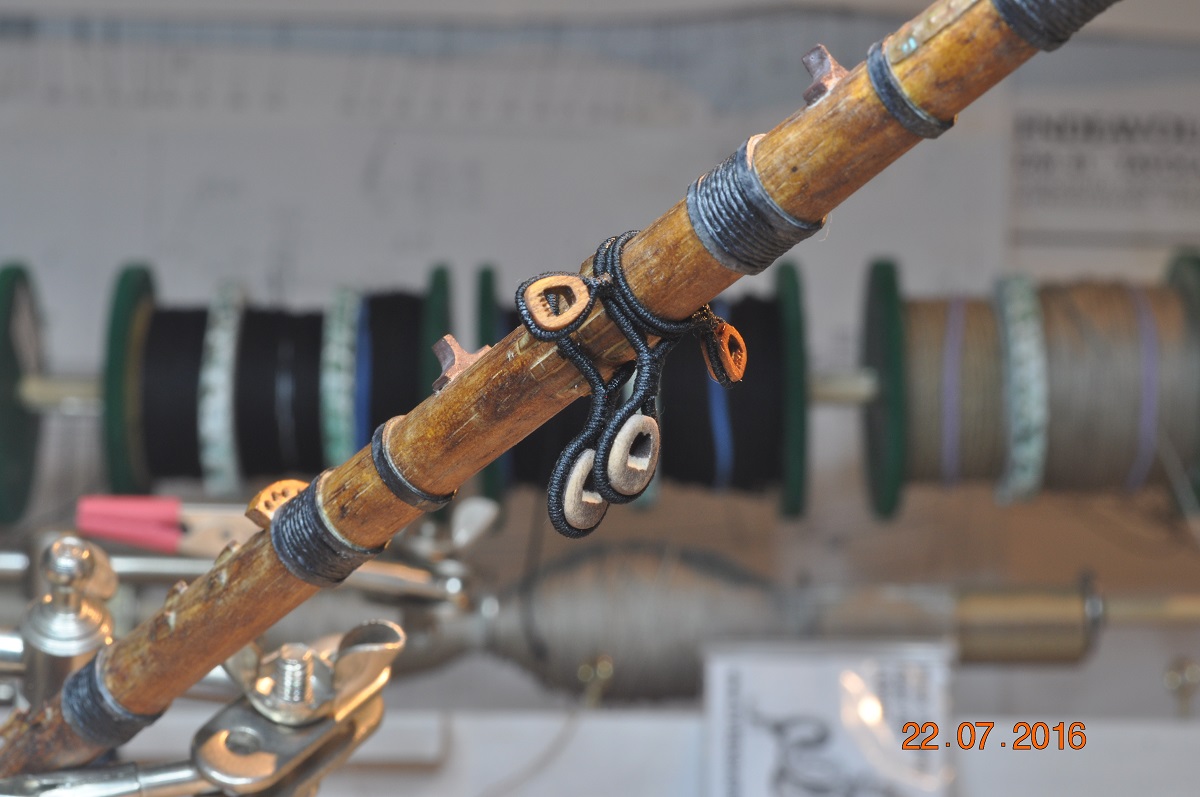
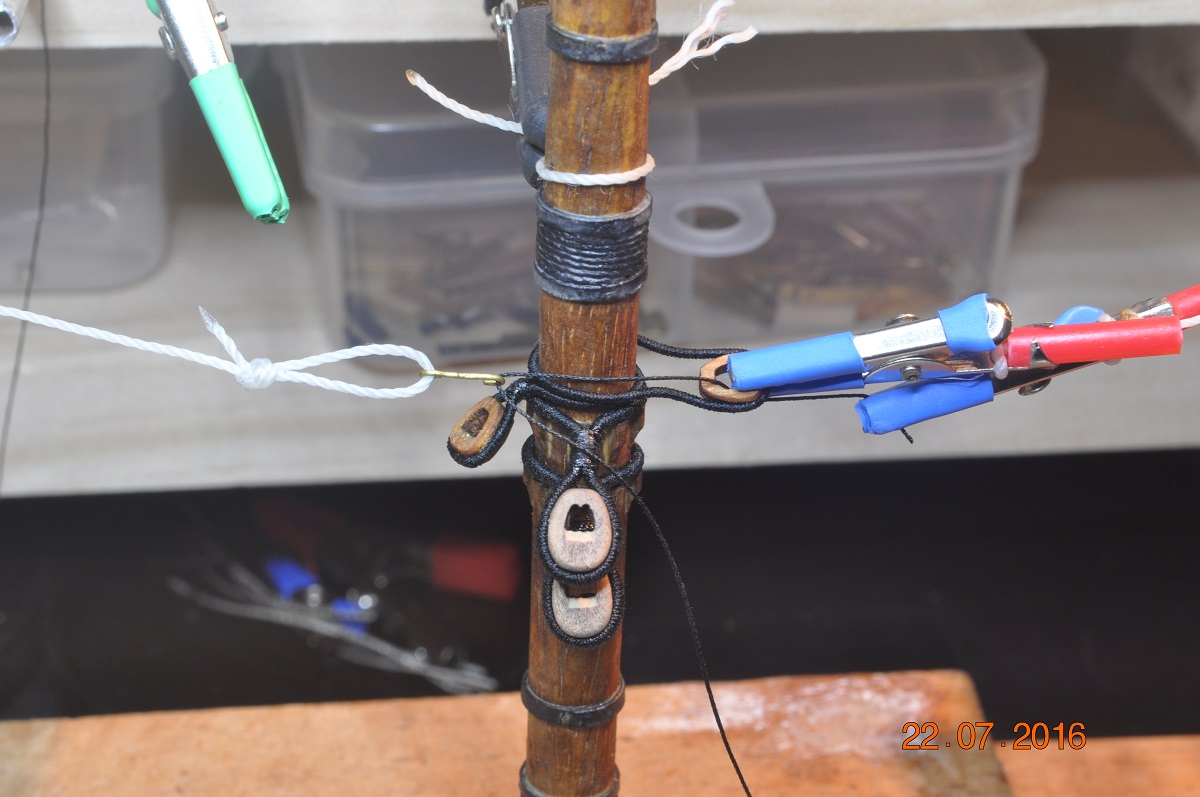
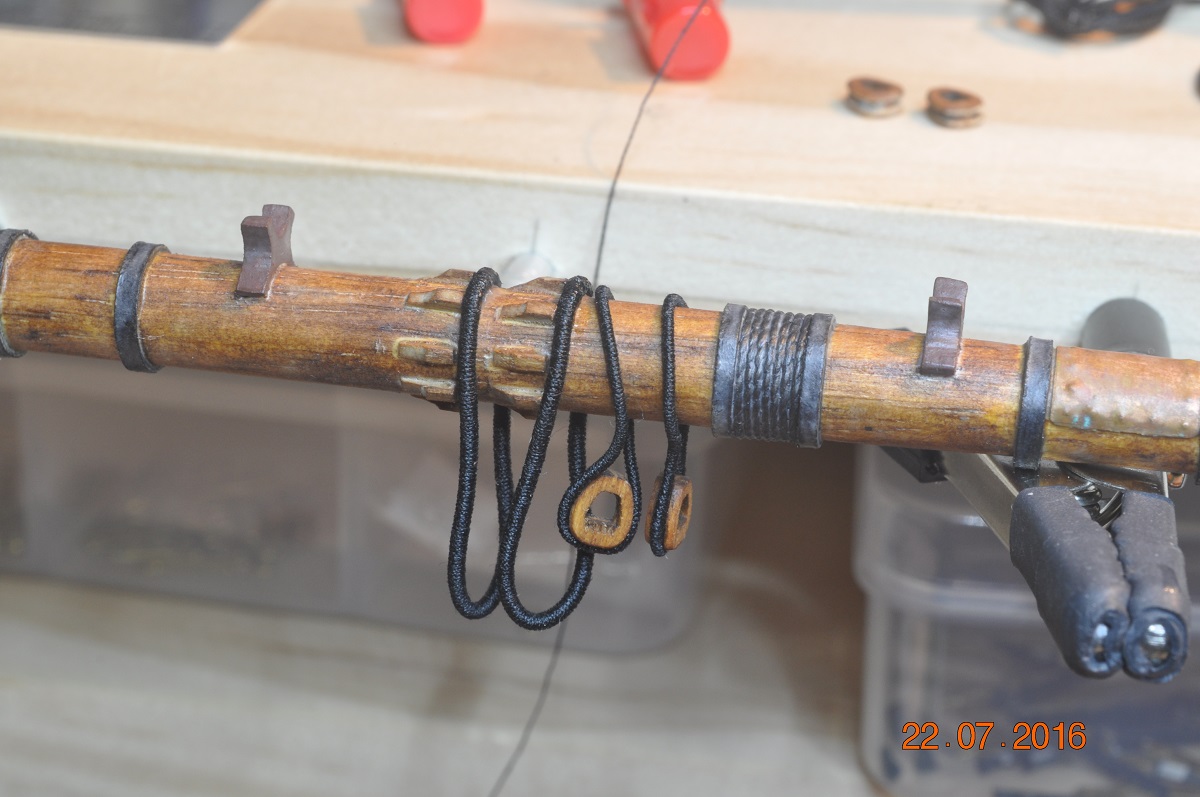
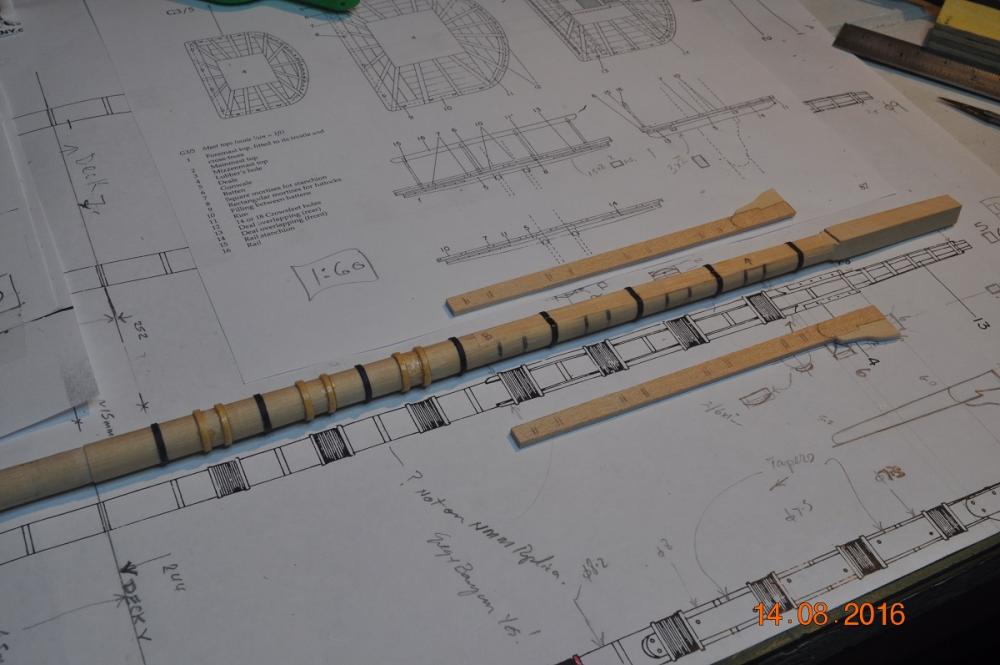
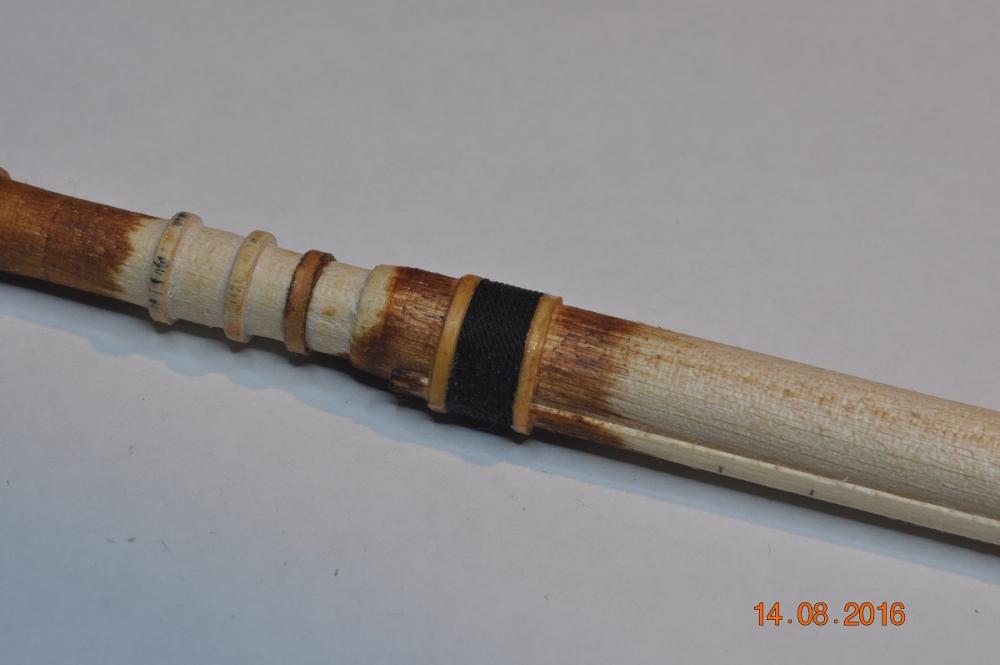
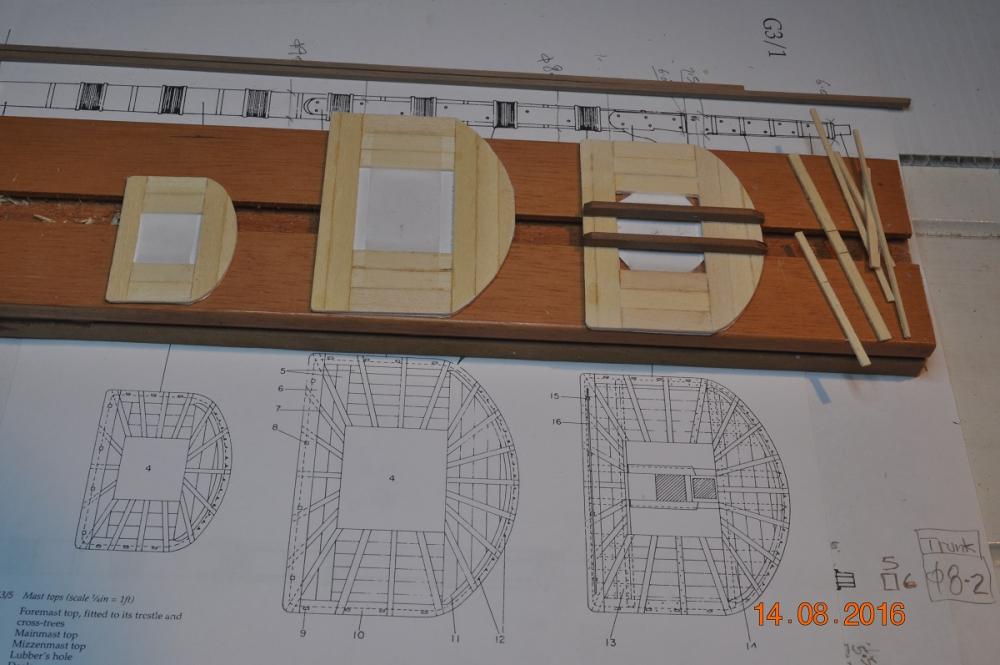
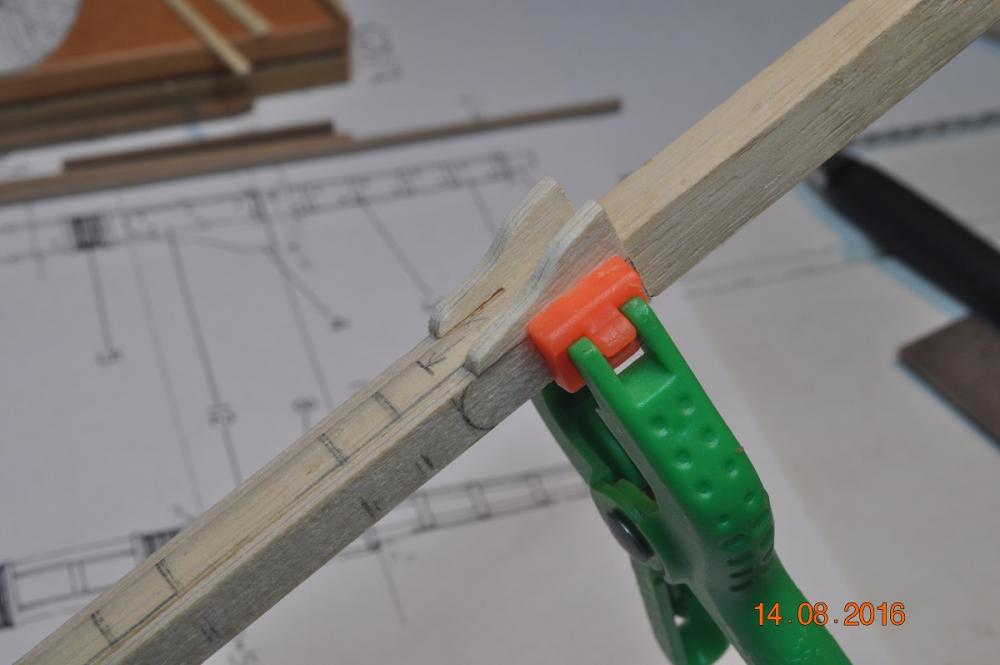
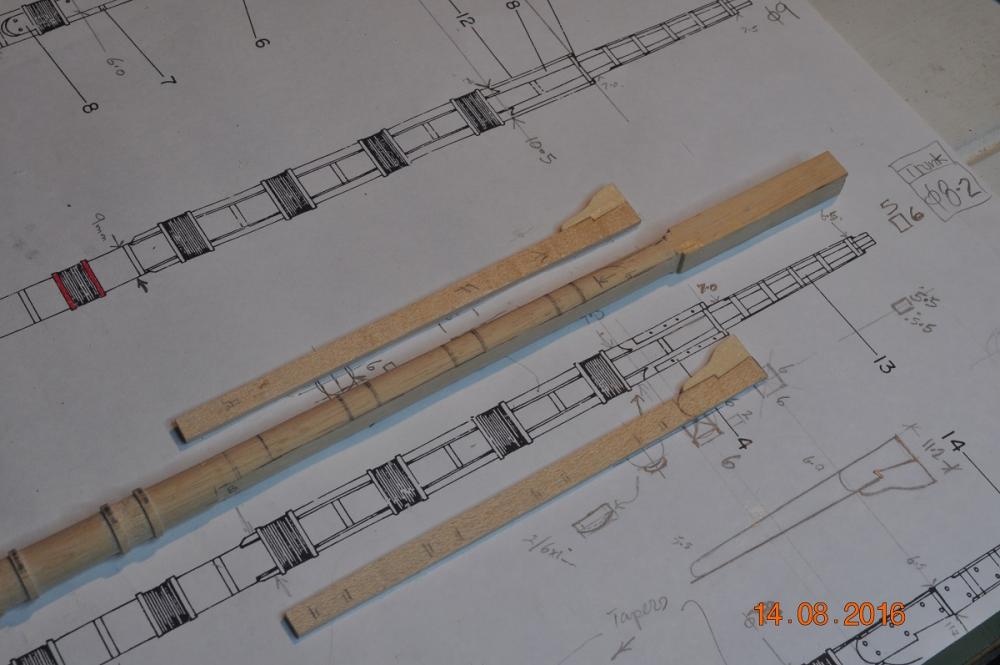
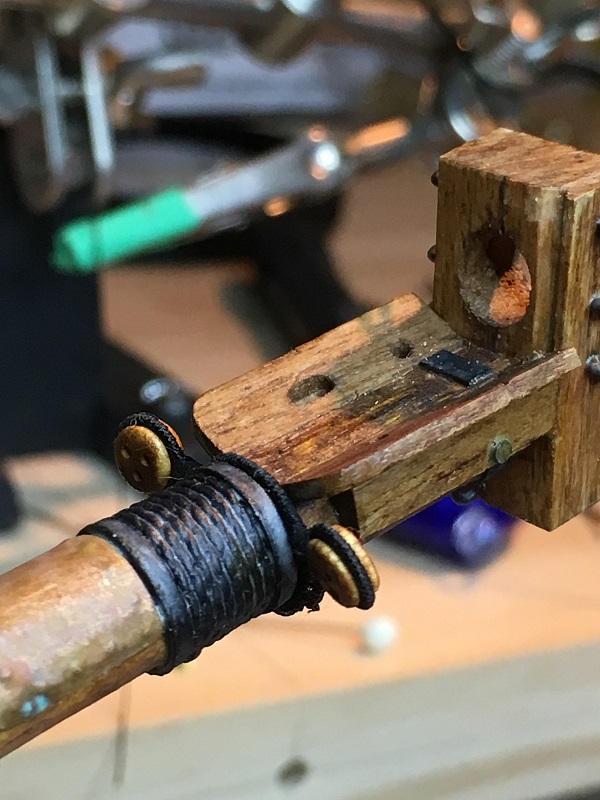
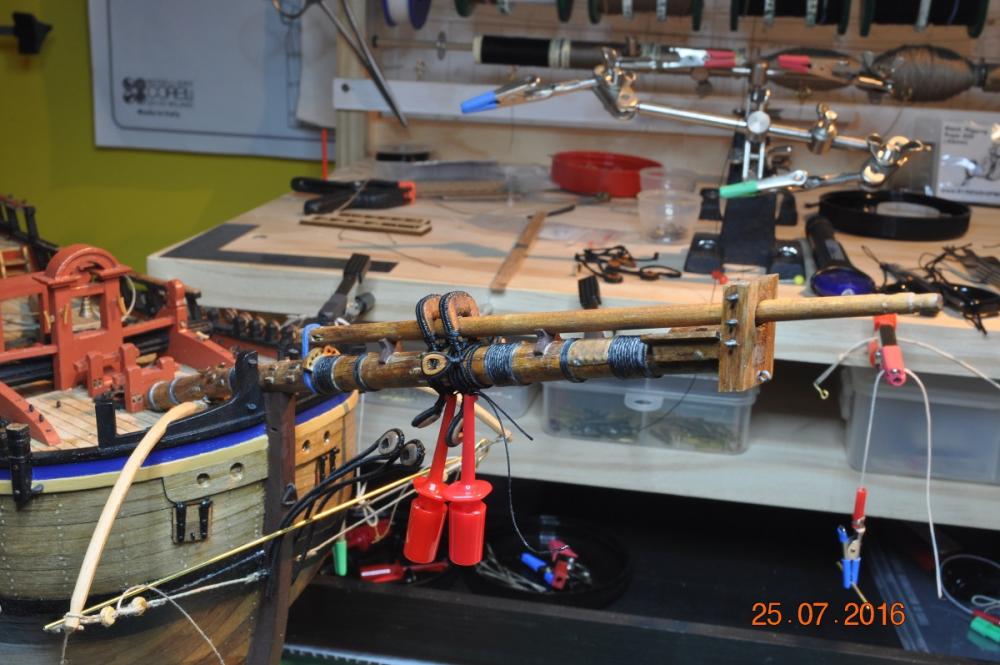
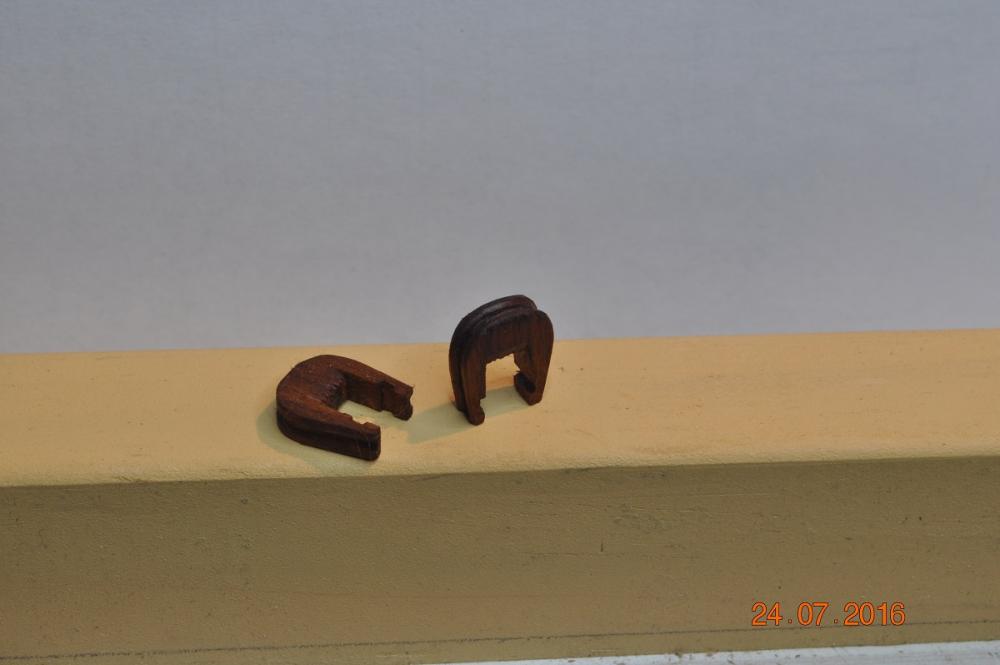
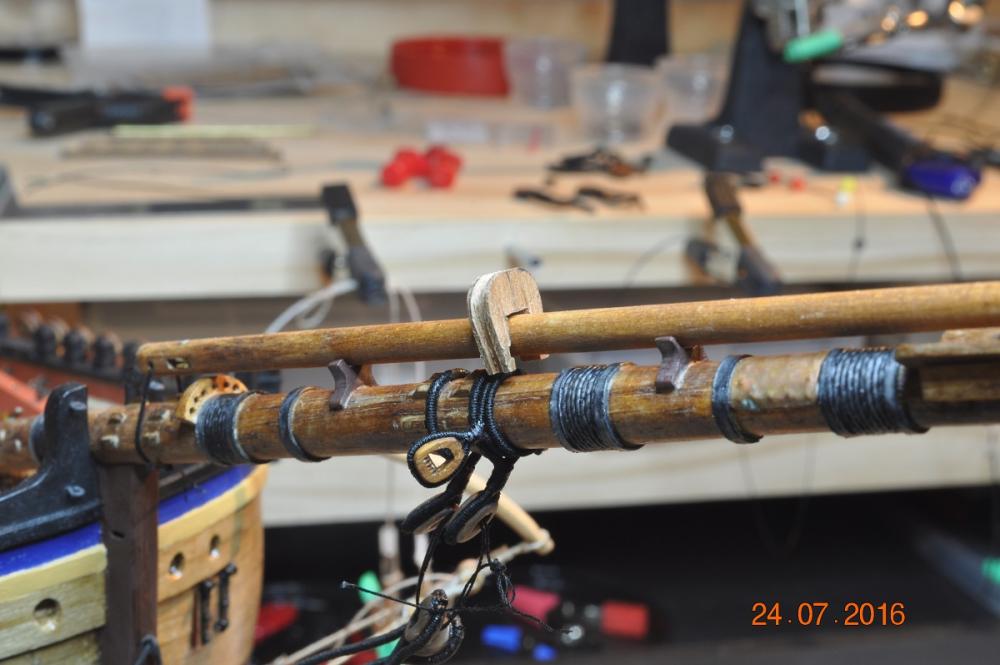
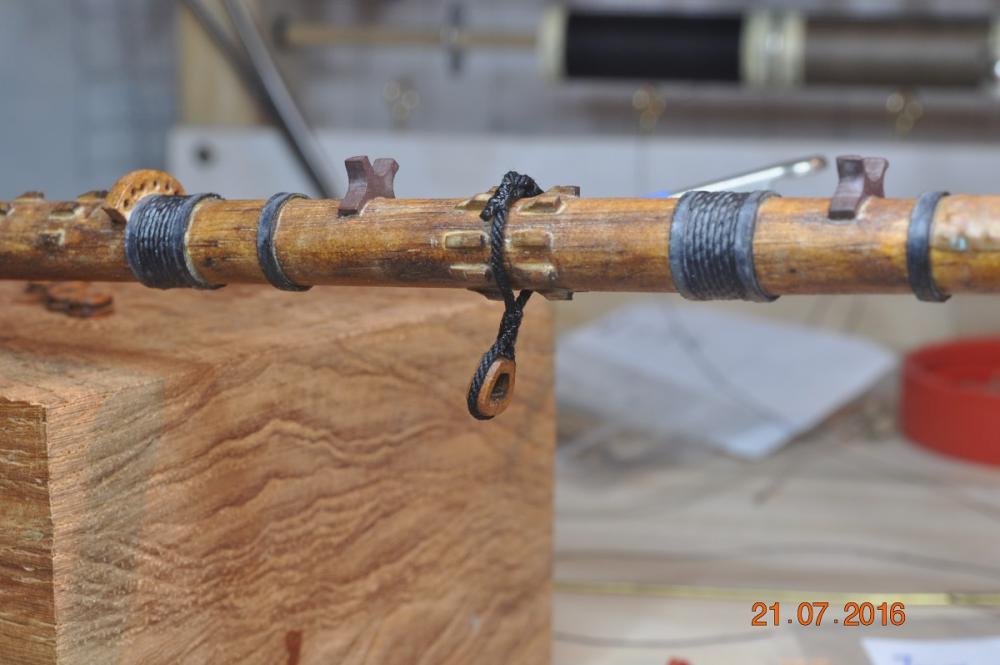
Back at last in the Shipyard. Slight delay with my daughter's 21 preparations and event. All good, happy daughter, happy captain. After some hours and hours of reviewing the materials I gathered for the masts, I finally got underway some days ago on the ForeMast and Mast Tops. Along the way I tested 2 ways to show the Hoops and Wooldings: This hoop version is turned from the mast shaft on the lathe, and whilst pretty happy with the outcome, I have not worked out a way the replicate it about the upper hoops/wooldings. So... This hoop version is card wrapped twice about the shaft and held with CA glue(it soaks in) and I am happy, it comes up good enough to run with for the masts. Lets get started: So a few Pics of the startup process for preparing the Foremast with the hounds(I call them cheeks) and bibs. You can see the "turned" hoops to the bottom of the mast. These were removed and replaced wiht the standard card version. Added the lower timber hoop pairs(for woolding) and single hoops Card wrapped to simulate the timber hoops. Single ones I used black(same as other masts fomr other builds) which I suspect were metal. ? Masthead I cut in Grooves for the hoops to lay in, so the mast battens lay flat on the stub. Not sure if hoops up at the top were timber of metal. I am using Black card(for metal) strips to sit in the grooves. Mast Tops - three made at once. Lots of work to go. Next Update: Working on the Fore Mast Top, Trestles & Cross Trees. Cheers Dave R


-
Howdy Hof. Chin up for the deck to turn out good for you. Better to redo now than lament down the track that it should of been replaced earlier. Look forward to the deck fit-out ahead. Dave R
-
Hi Michael, Thanks for looking in on my build. You comments are too generous. I reckon I'm slowly loosing my sight working on the details on my build. So much close up work, all through a large magnifying lens with leds to light up the area. I spend a lot of time sketching what and how to do something, research the topic, mainly look through the build logs of others and AOTS. The build time is just about always less than the research time. PS Clint is my favorite actor of films a while ago, and now a great director. Dave R
-
Thanks for the complements Michael, Chris and Ron. I look what others have done, see if I can do the same or a bit different if it makes sense. I do enjoy the challenge in trying to make things look real. Cheers Dave R
-
Bizi, 11 months ! but all worth it I am sure. Took me a good 12 months to do the double planking over the frames alone, but I did not use filler blocks. Wish I had. Dave R
-
Thanks Steve, I know the stores, will drop in next time pass one of them in Brisbane. Should ask the misses, might have some. Looks like a mat for doing some sort of pattern work ? Cheers Dave R
-
So I asked the shipwrights in the yard, what do we do next fellas ? They thought the hull is a bit bare without masts ! This may take some time..... Dave R
-
Steps done, what's cooking in the shipyard next Dashi ? Dave R
-
HI Steve, Coming along very nice. And the netting is super. I have to ask what did you use ?, as I have to do this soon. Dave R
-
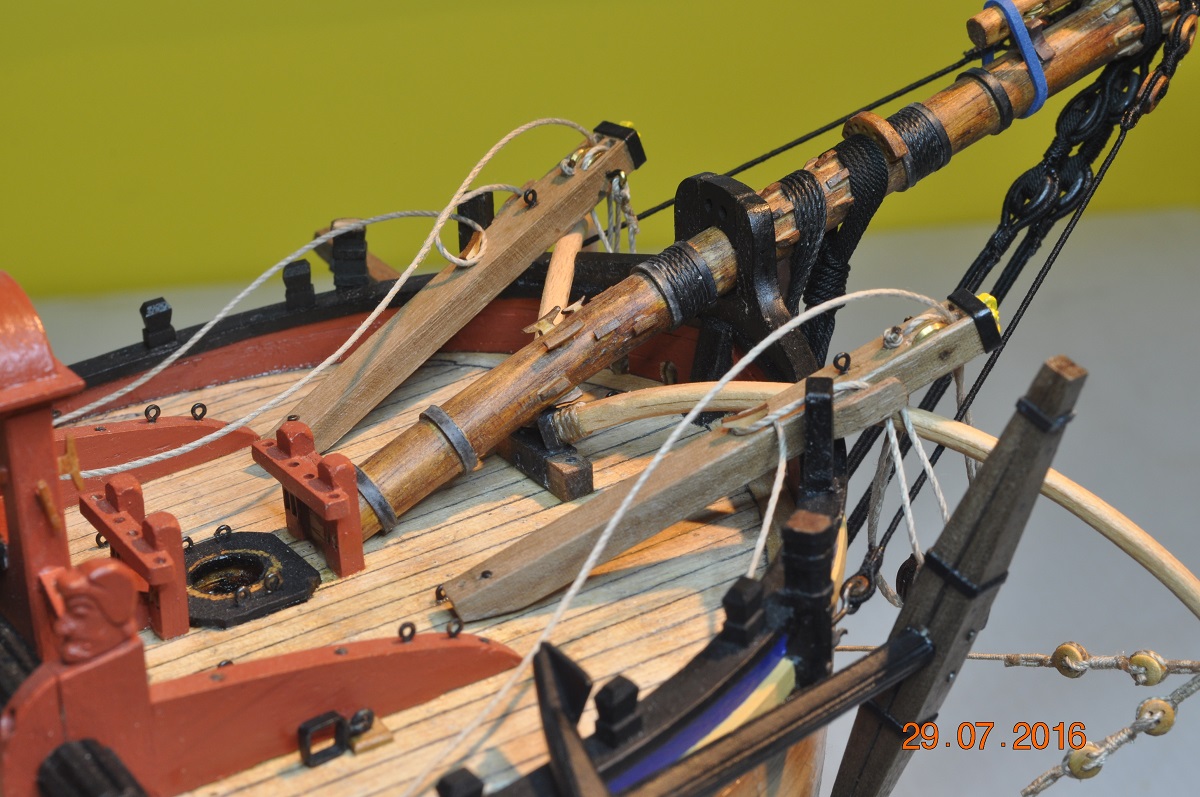
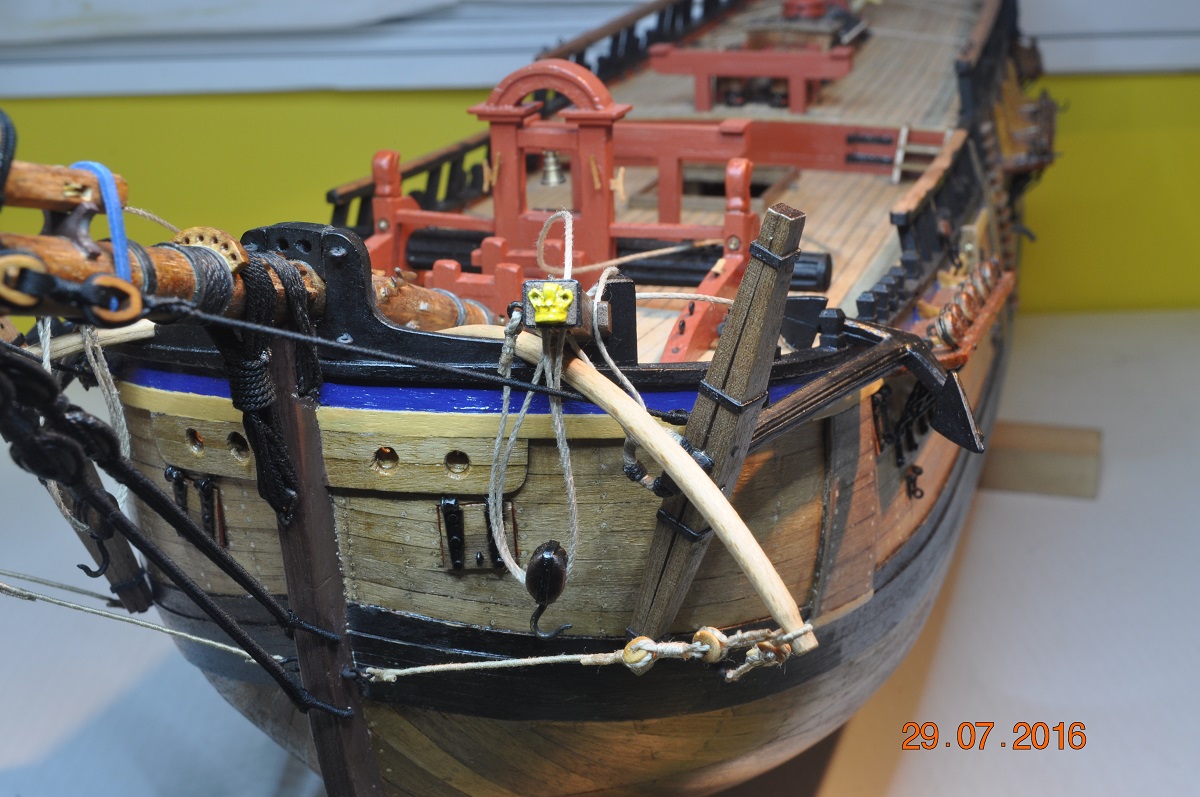
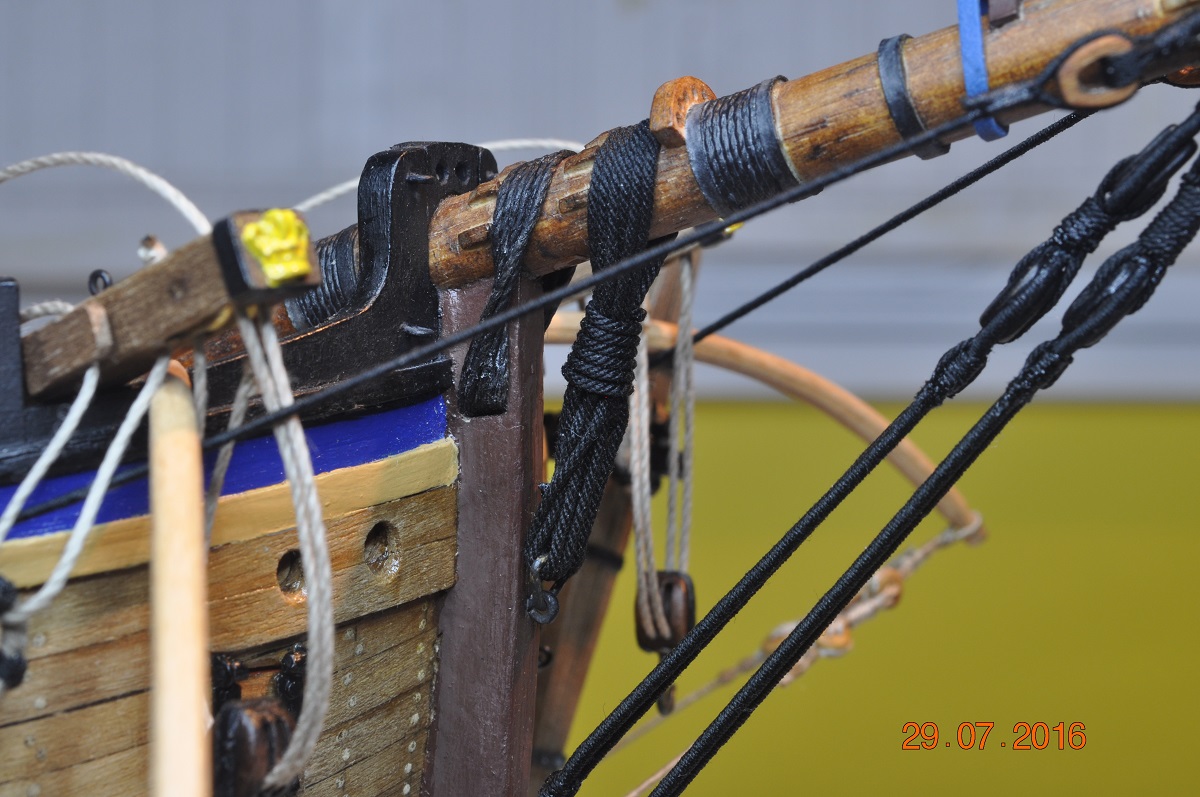
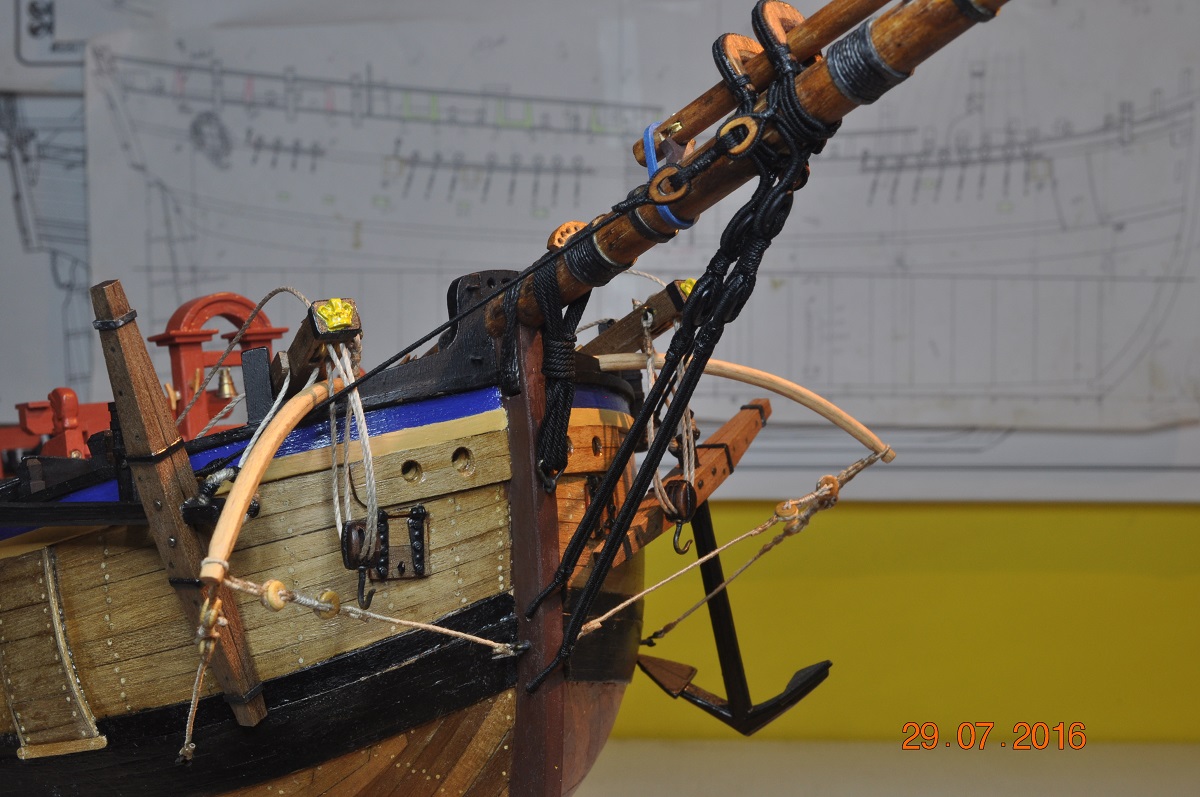
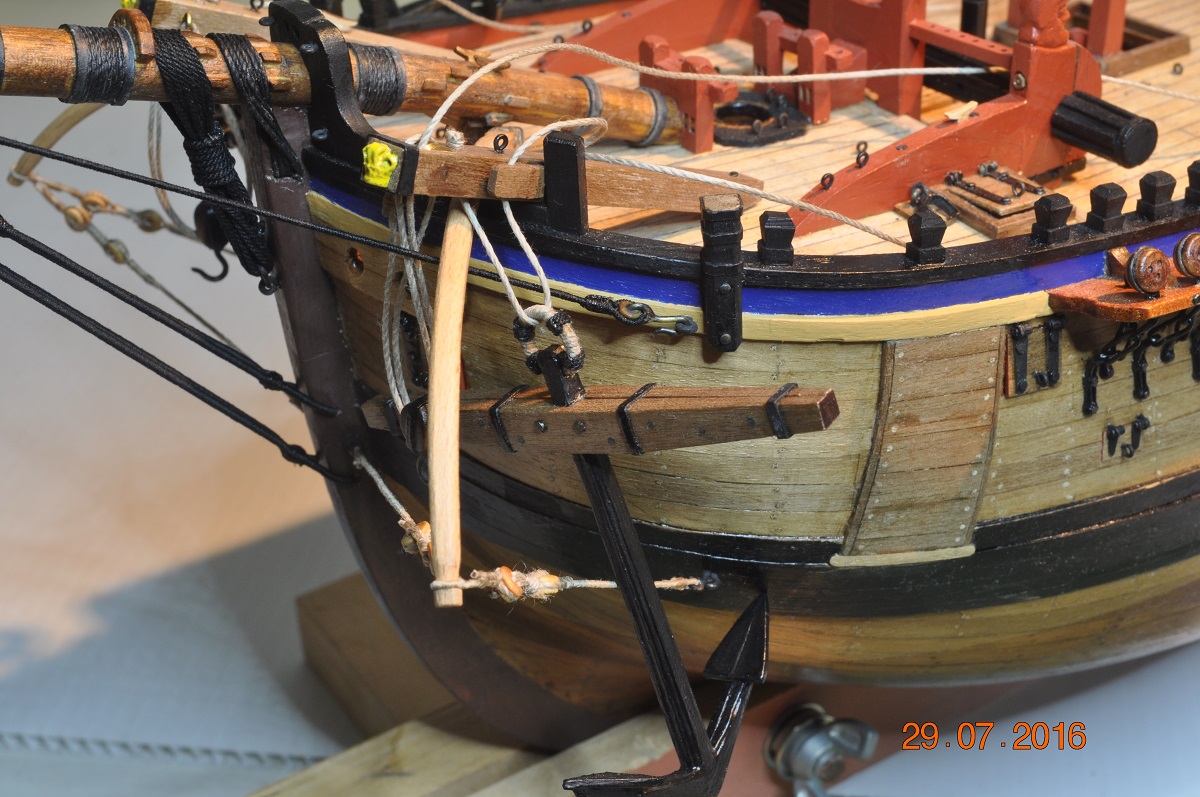
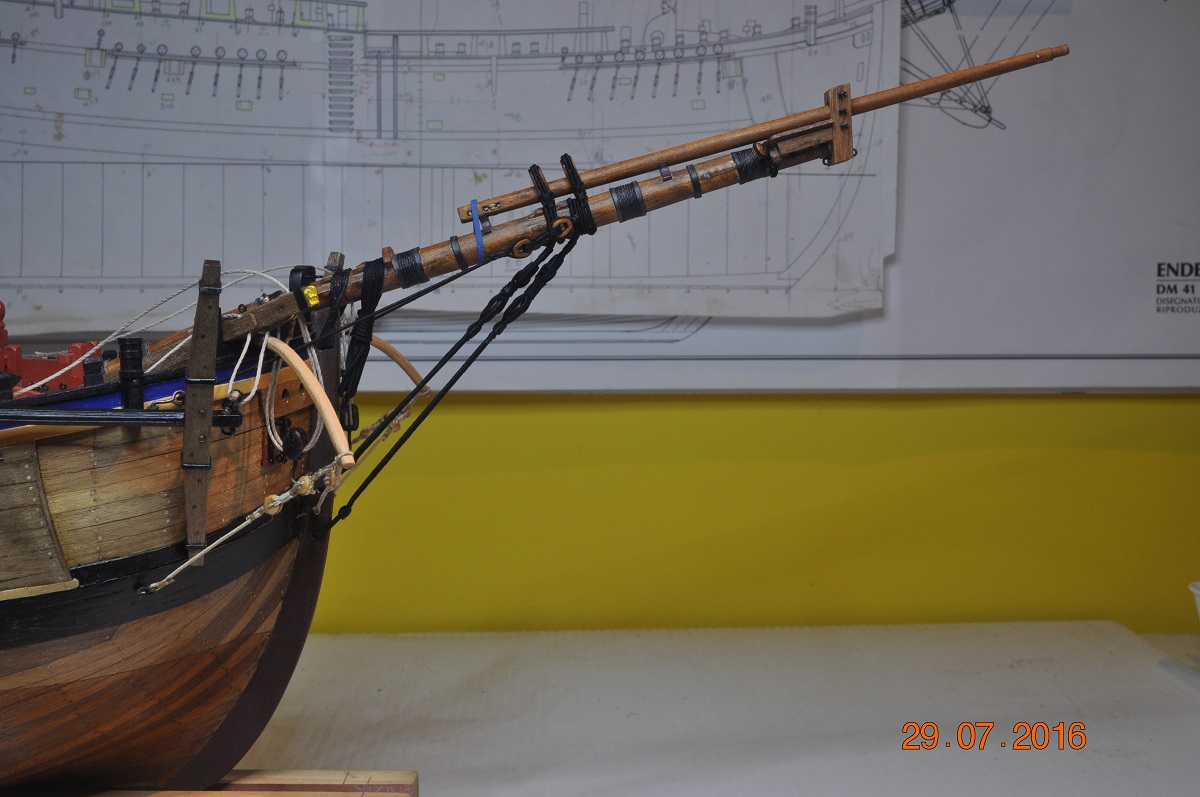
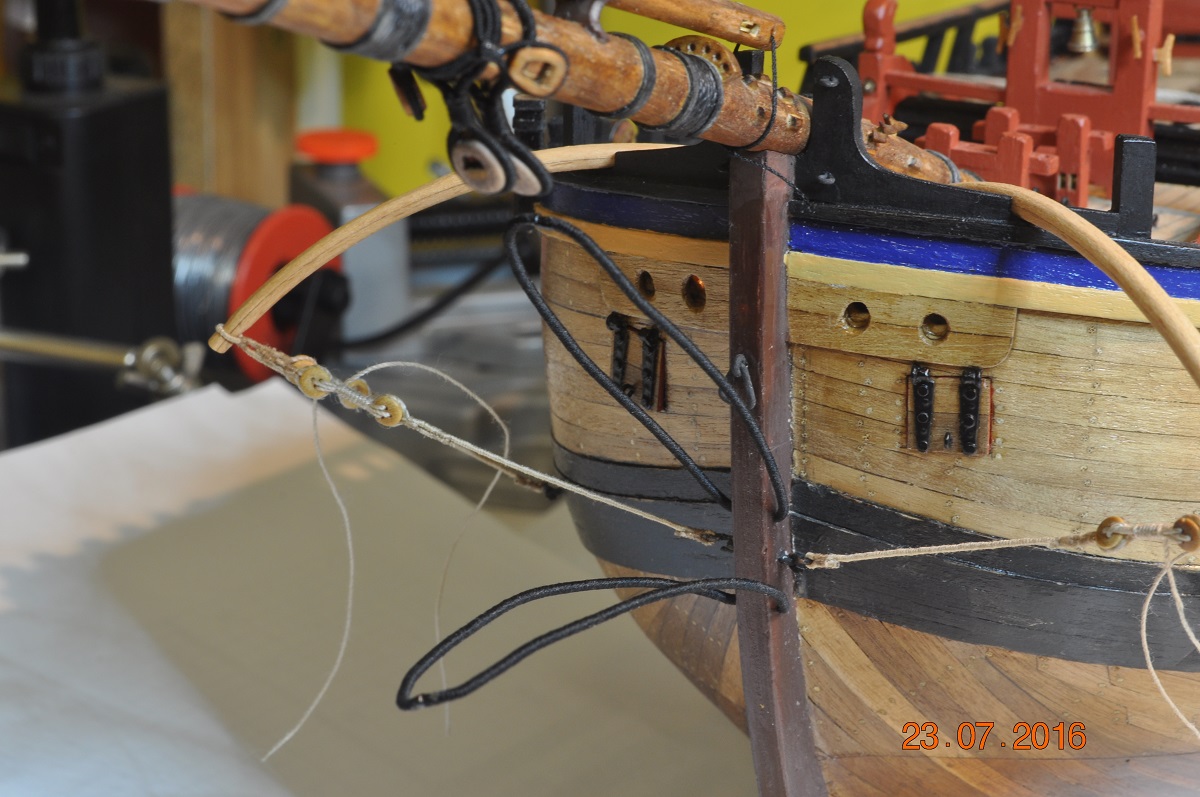
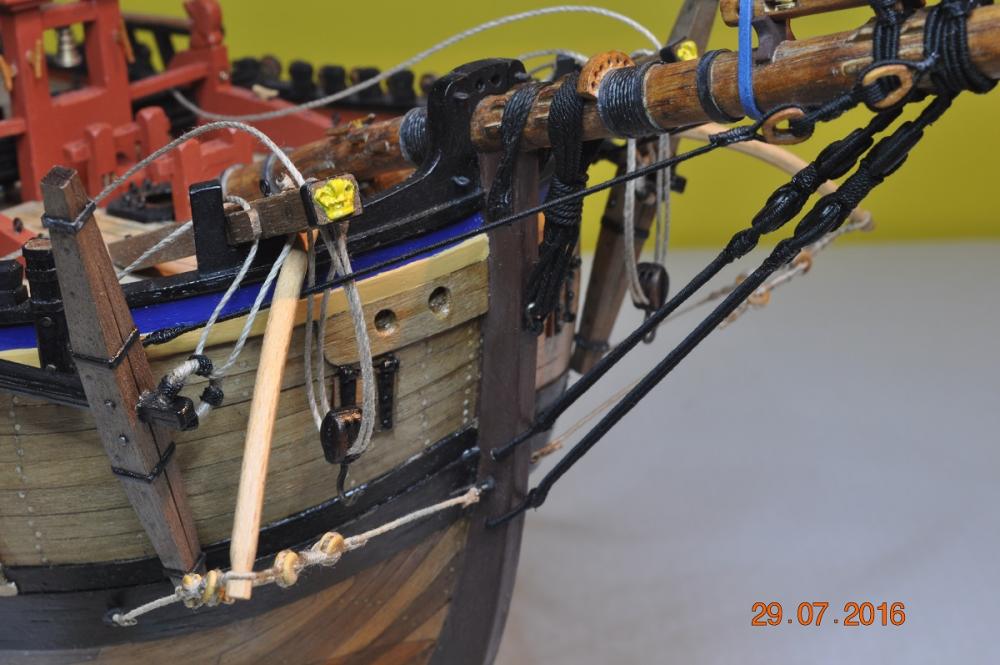
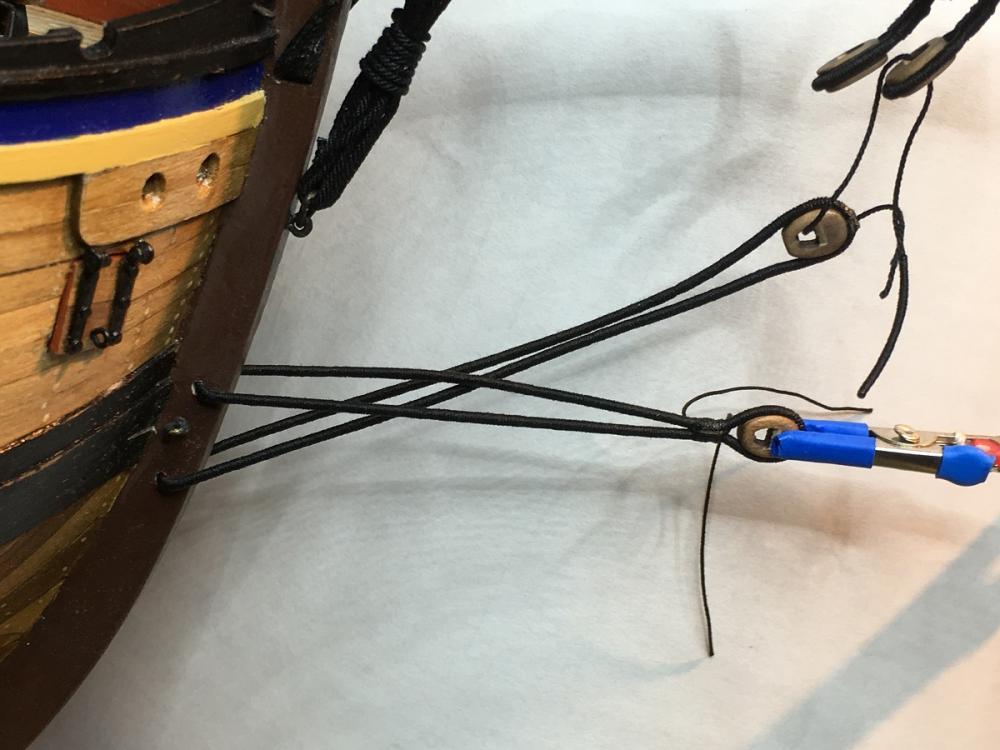
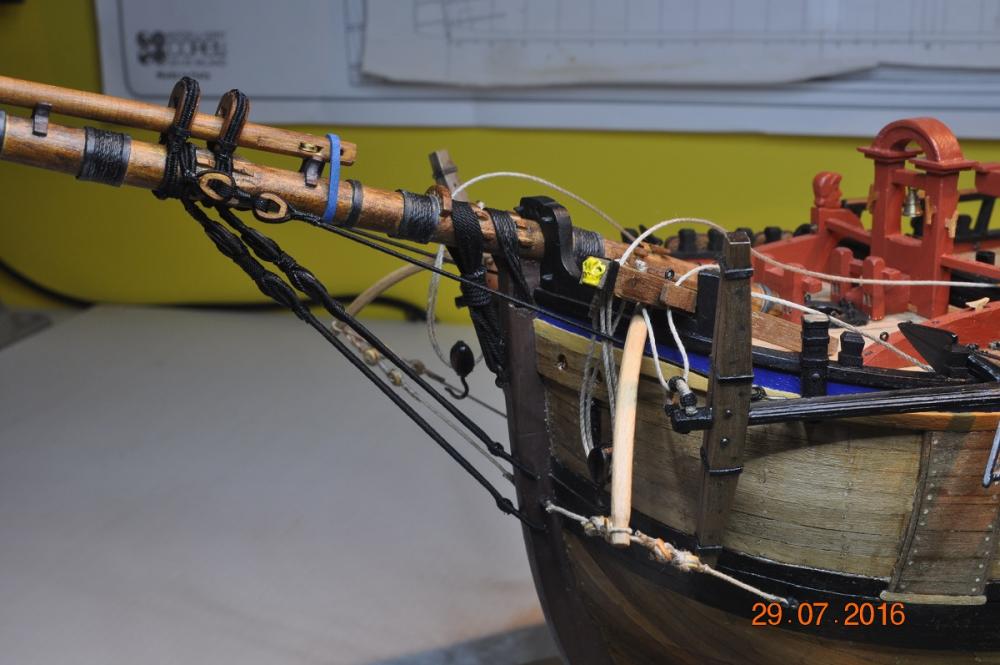
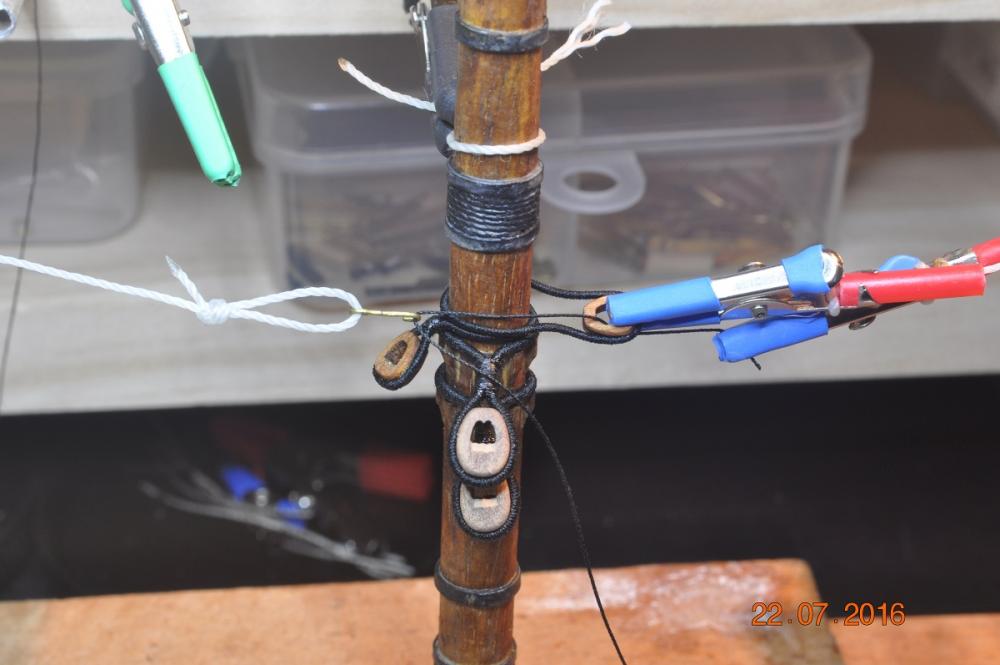
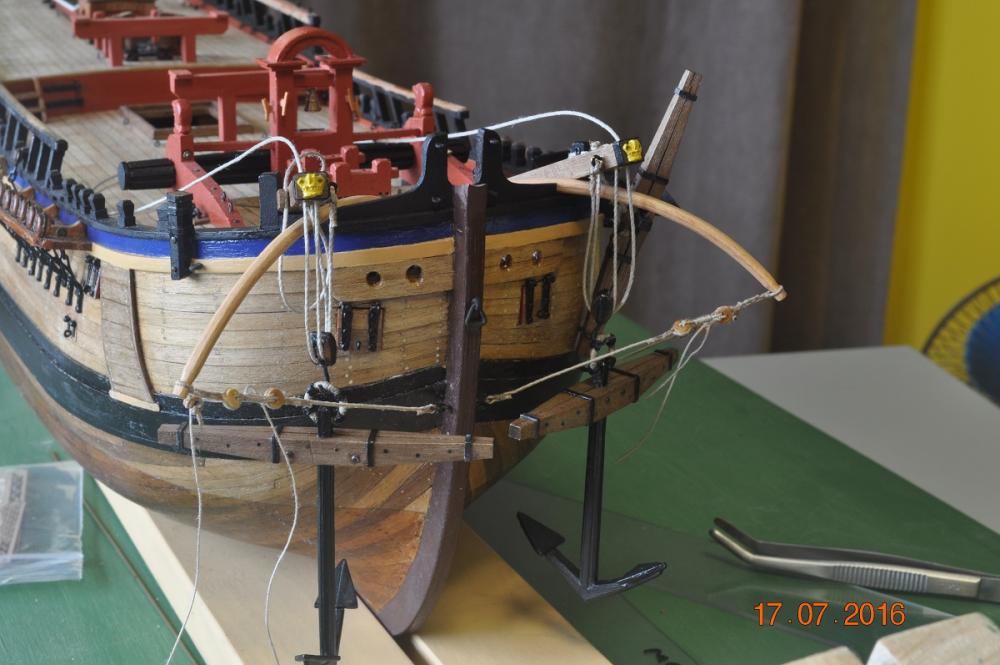
Thanks for looking in fellas to the progress. Pat, I agree, be very careful of the Bowsprit - I have knocked it a few times before I glued it in place. I was considering extending my board and add a post either side about the end to protect it ! The fellas in the shipyard fitted the Bowsprit in place a few days ago. Following this, the Inner and Outer Gammoning, Bobstays and Shrouds were made and fitted in place. Side view of the longer(than AOTS) Bowsprit, some 10ft(50mm at 1:60 scale) with Jib Boom retraced. More by good luck, the bumpkin, shroud, cats_head junction worked out fairly well. Shroud thimble and hood fabrication: Bobstays underway: Cats-eyes for the spirit yard support: Close ups to follow..... Dave R
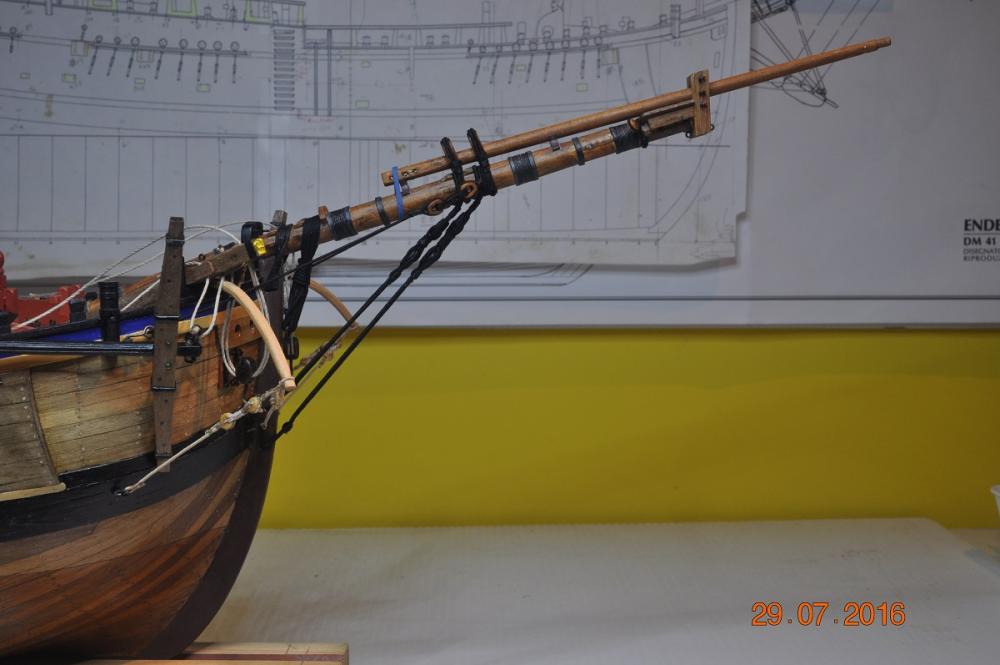

-
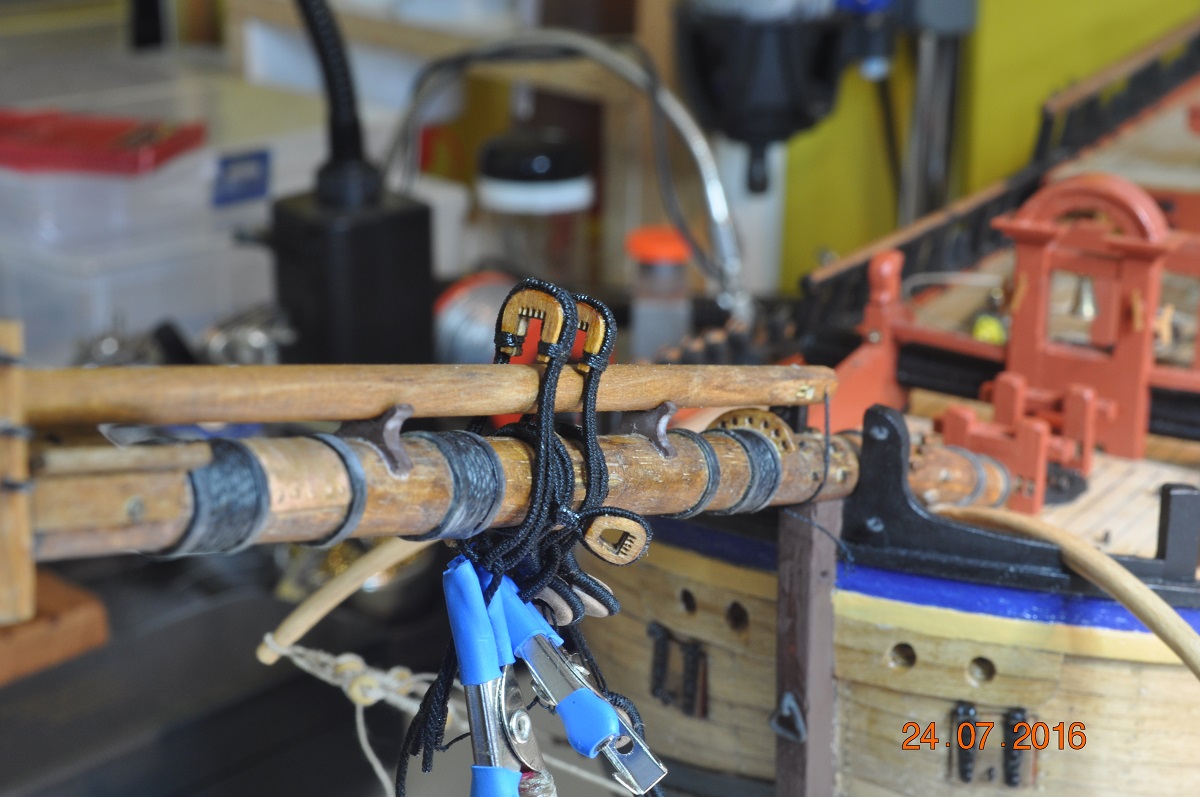
More Bowsprit Collar work: So I made up the Fore Stay and Fore Preventer Stay Collars with 7mm hearts. I have the Jib Boom retracted well back down the Bowsprit, with the 2 stay hearts over the Jib Boom. So bit of an error(ok a big one) here, need bigger hearts as they will look out of place(very high) when boom extended. I hand crafted new wider hearts so each will sit over the Jib Boom, which will allow it to slide through the heart cheeks, from the outer to retracted position. Test fitting a new heart. Stained and I'm pretty happy after a few hours work in making the special hearts. The Fore Stay and Fore Preventer Stay Collars fitted with hearts, ropes, seizing in place over the retracted Jib Boom. It gets pretty busy where all the collars go. I suppose it is about time I bite the bullet and permanently fix the Bowsprit to the bow, 2 x gammoning to hold and rope off the 2 x Shrouds, 2 x Bobstays. Dave R


-
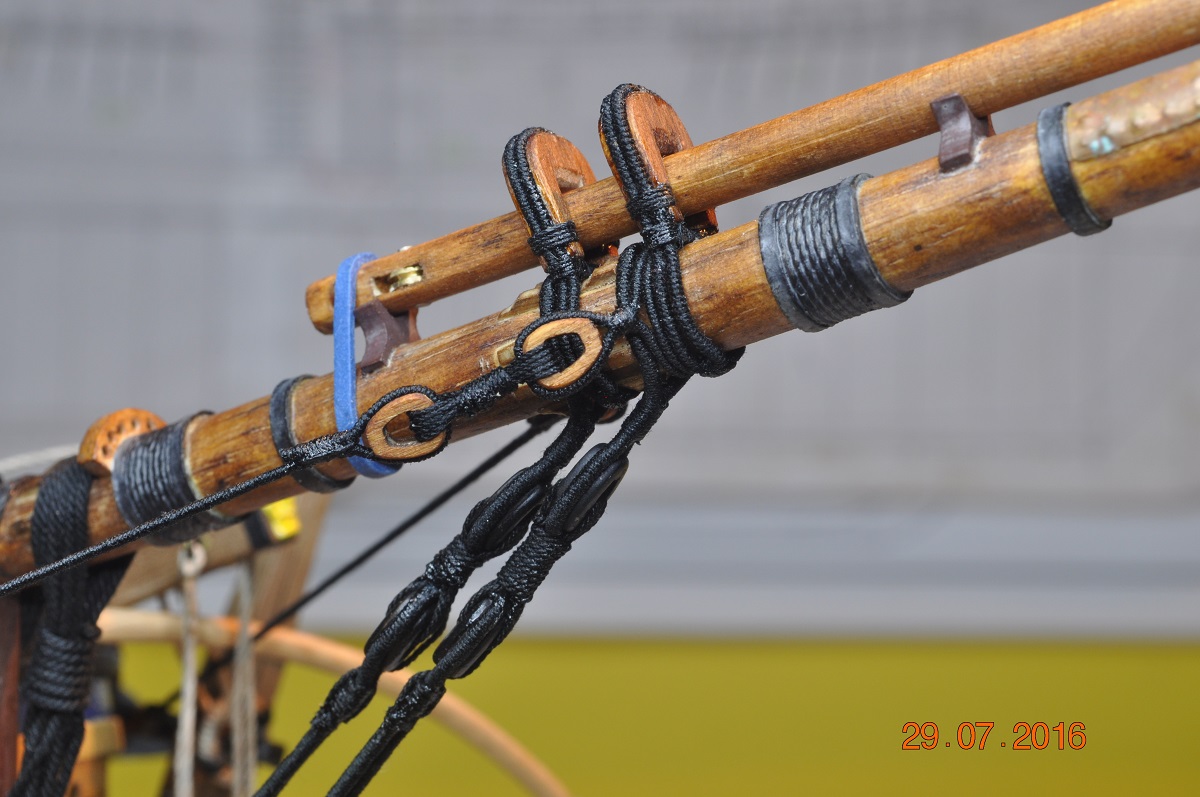
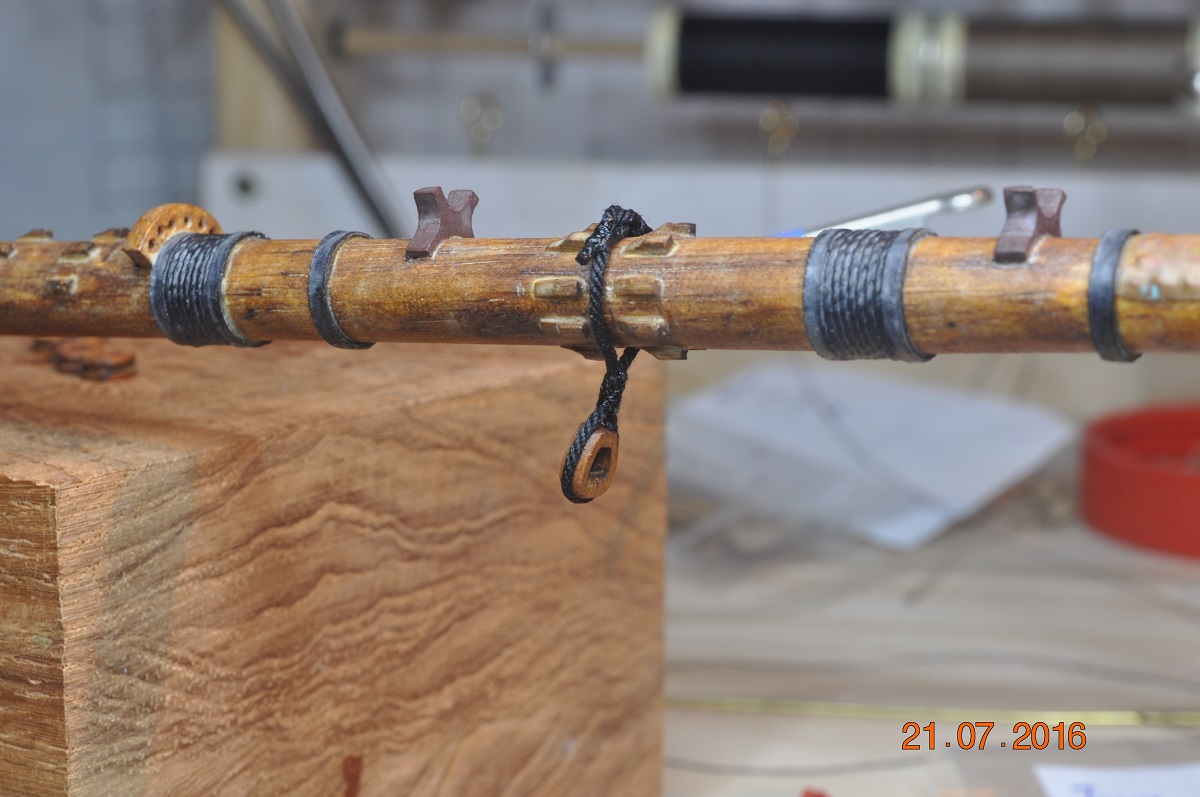
BowSprit Collars Had the boys in the shipyard turn their talents to the collars on the Bowsprit. We tried a few types of collar joints at first to see how they would work to the scale and in the confined spaces on the Bowsprit. From left: splice joint; which at the rope size didn't come together too well, scrap this one. butt joint with seizing cover, join too bulky for my liking double loop join(with heart, & loop) takes up a lot of room on the Bowsprit A trial heart collar on the Bowsprit. Not quiet happy with the room the join takes up. The rope from Chuck works well, and wraps around very neat when serving. I decided to butt joint the rope ends for most of the collars. Each joint will be hidden by the Lashings. 2 x Bobstay Collars & 2 x Shroud Collars fitted loosly on the Bowsprit The supporting gadgets I use to hold blocks, rope etc. so I have hands free to do the important bits. Bobstay & Shrouds in place, taking shape. 2 x Bobstay served and in place, fixed to stem and ready for hearts. If you look carefully you will see the joint at the end, in the loop on the end. This will be covered by the lashings. More on next post. Dave R


-
Looking good Mr Shipcarpenter. Welcome to the Endeavour Build Group. If you haven't already, can I suggest go though and find the recent logs of Endeavours under build. Great builds to have a look at for ideas and details to confirm to your kit plans are up to scratch. So many differ. I agree with ca. shipwright, work out now how the masts are to be stepped now. Will be watching with interest your progress. Dave R
-
Must feel good getting the ports out of the way Dashi. Keep the shipwrights on their game. Dave R
-
Enjoy the weeks travelling. She will be waiting in the shipyard to be worked on again soon enough. Dave R
- 517 replies
-
- 2
-

-
- Endeavour
- Artesania Latina
- (and 1 more)
-
Taking Pictures, My photographer brother in-law told be about depth of field, to get more in focus. Two things you need to have: Tripod Camera to adjust the shutter Speed and Aperture I hope I explain it right and it makes sense. By increasing the Aperture(F), this increases the depth of field, allowing more of the subject area(main and background) into focus(included in the picture). Commonly called increasing the "F" Stop - you may of heard this term ? On the camera I use(Nikon D5000) I set the "Mode Dial" to the "A" for Aperture mode. So your going to manually adjust the Aperture and the camera automatically compensates(adjusts) the shutter speed. I use the "command dial" to increase the Aperture Number between F16 to F22(it actually decreases the aperture size). The larger the number the more depth(in focus). However there is downside.....(isn't there always) The higher the "F" stop the slower the shutter speed("S" for Speed), to let more light in through the small aperture hole. Therefore I set the camera on a tripod to steady the camera for the slow shutter speeds. The camera needs a tripod as the shutter speeds drop way down to like 1.3 seconds. Near impossible to holding a camera steady whilst the shutter stays open for that long. Apart from manually setting up the above. First is to Frame the Photo(zoom in/out) to include what you want in the picture, then focus(usually by pressing the shutter release halfway) on the main point/s you wish to highlight. My camera beeps when it finds the focus. Do we want to get into when a flash is needed ? I set my camera to Auto-Flash. Dave R
-
OMG, WOW, WT.... Great work there Greg. The level of detail is reeeealy up there. Dave R
- 342 replies
-
- 7
-
-
- dreadnought
- zvezda
- (and 2 more)
-
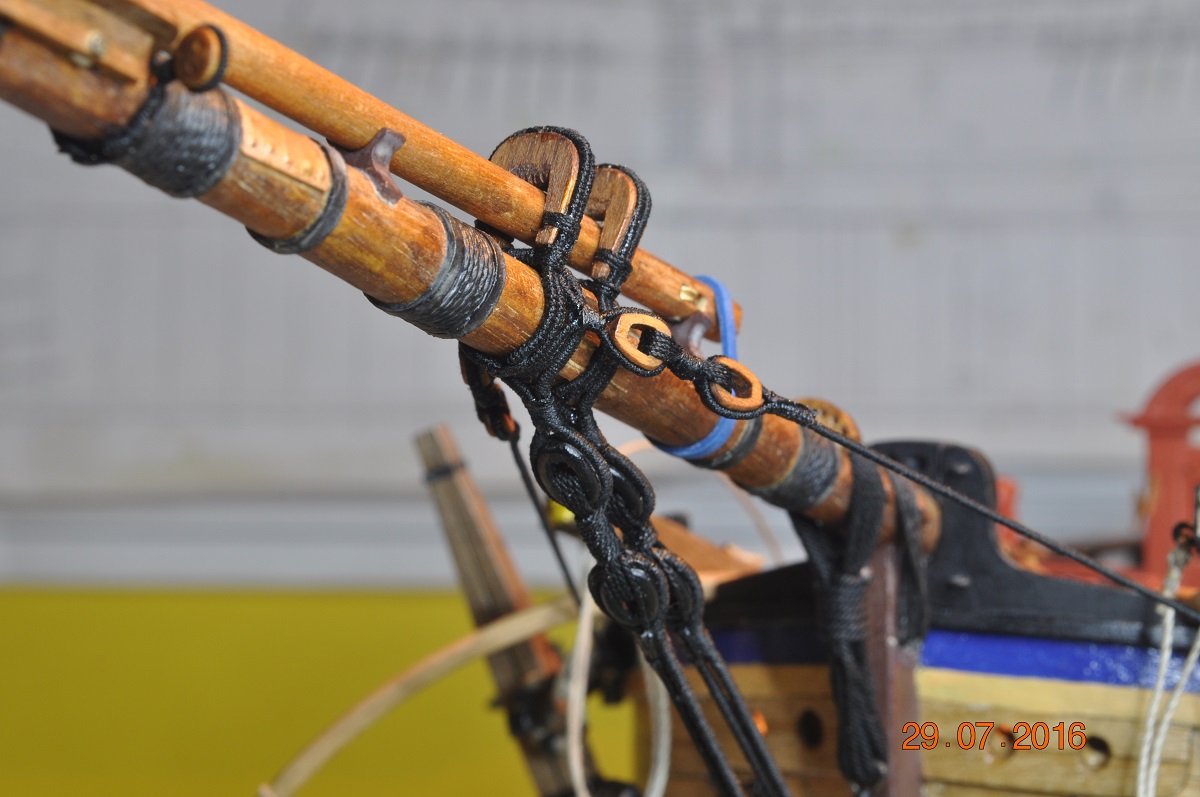
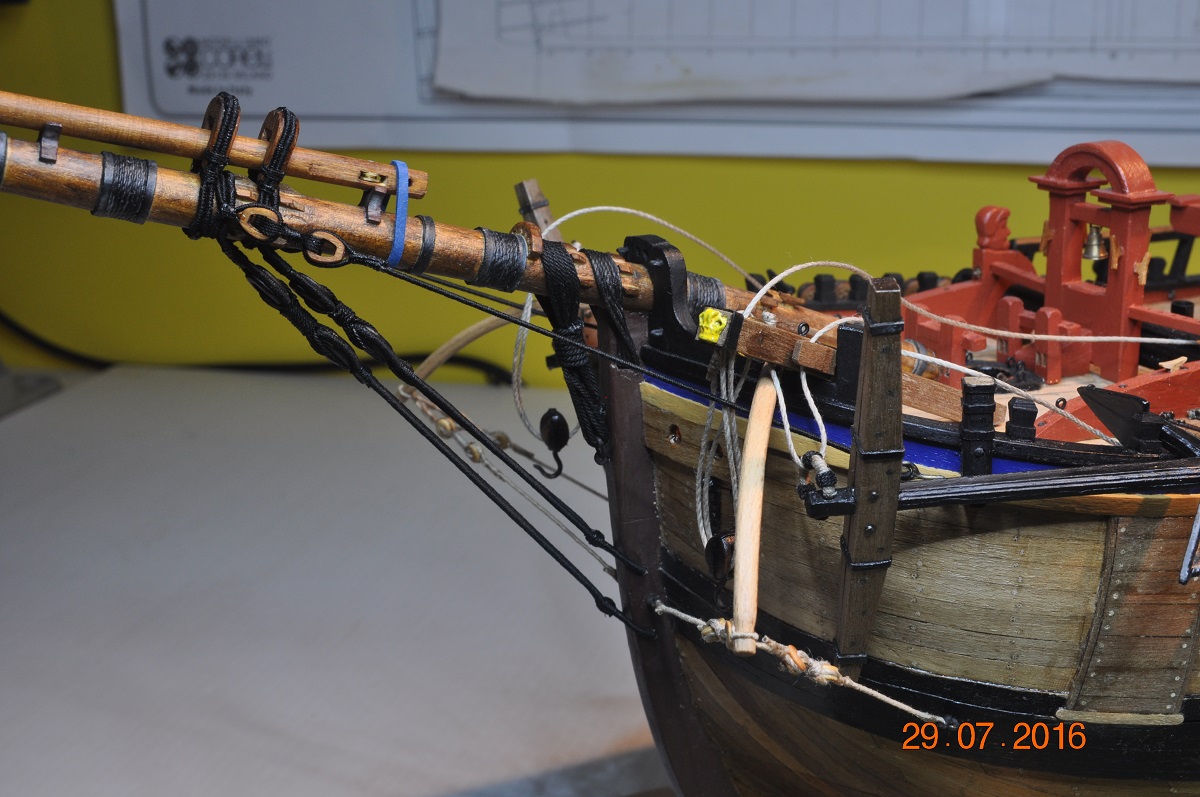
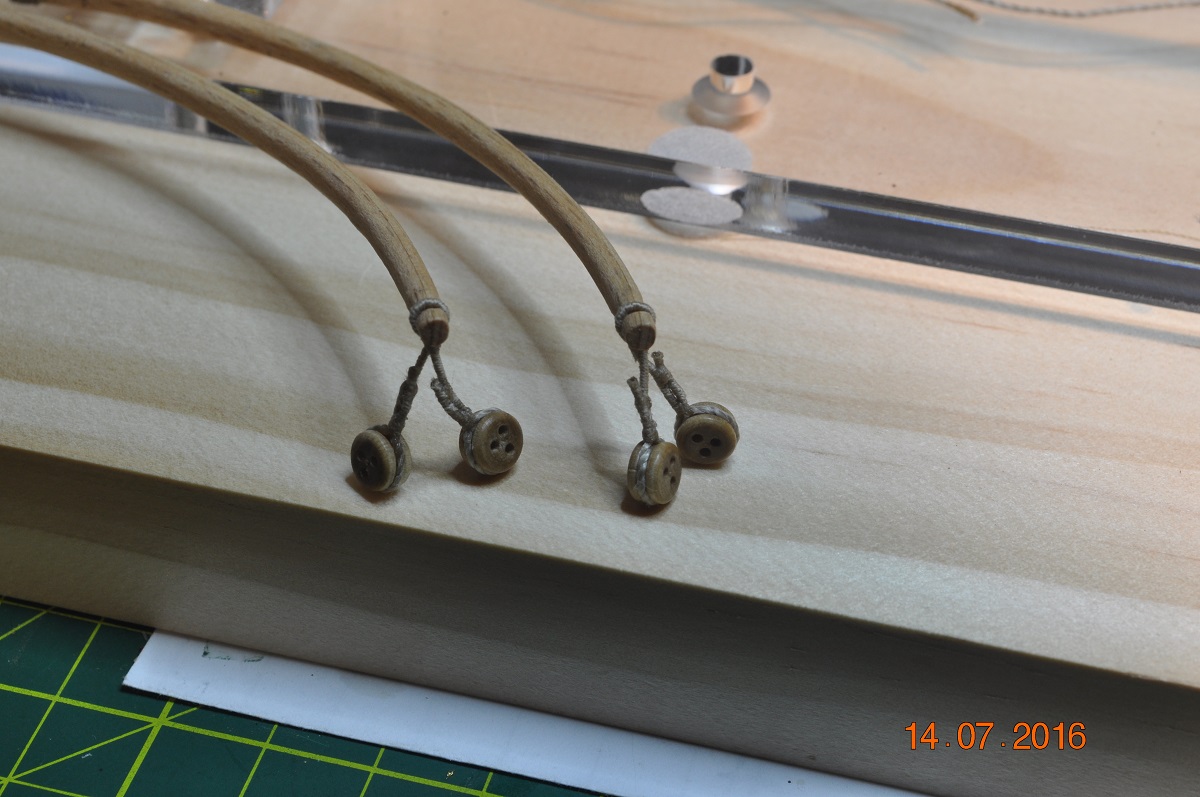
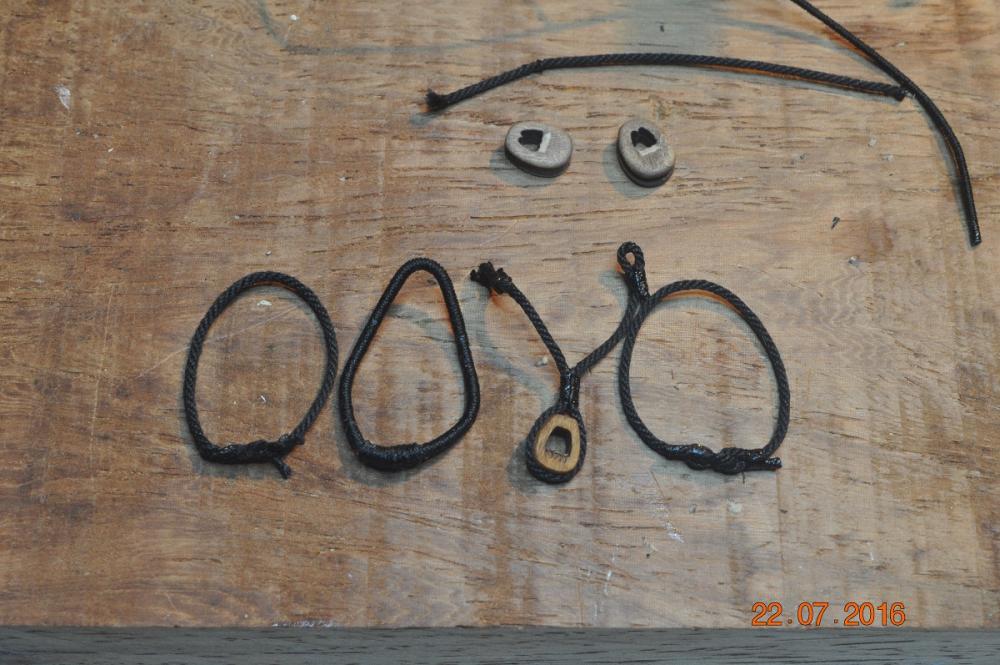
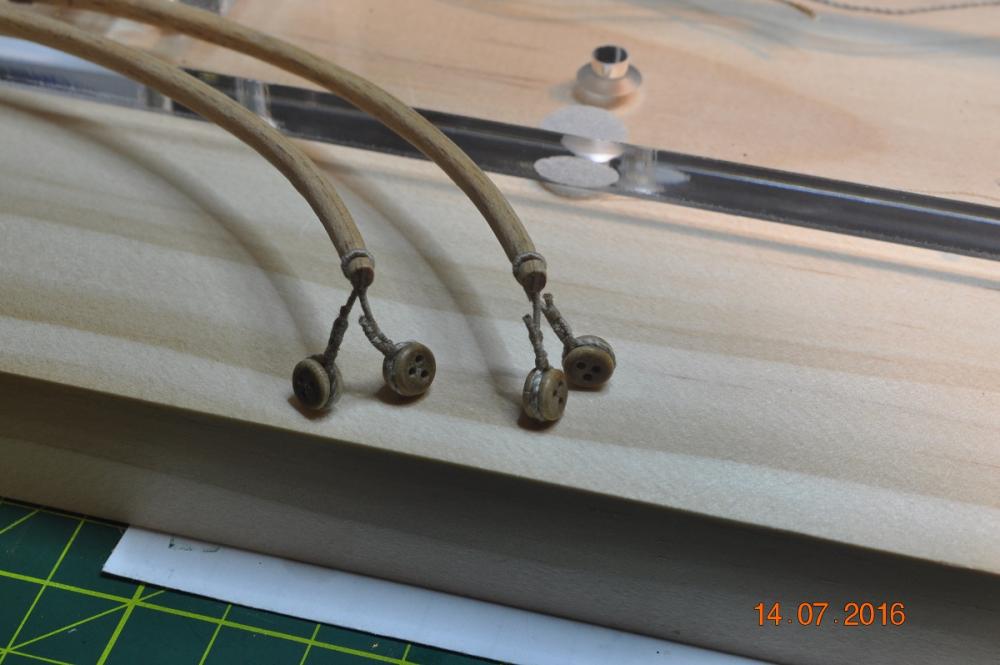
Bumping around the Bow in the Shipyard Some time ago I bought a Serving Machine from Domanoff's Workshop. After assembling it, I was unsure how it would go using it. It is the manual version, mounted on a block of pine so it doesn't move about so much. After some adjustments, it served it purpose(bit of a pun their) guiet well. I got the hang of tensioning the serving twine and letting it wind around the main rope. I finally got to put it to use by making the bumpkin shrouds and tackle. These are the first attempts for the double strops at the end of the bumpkins. I initially used the larger 5.5mm cats eye blocks first, which after making the whole 4 sets of shrouds, were way to big. I pulled them off and used 4mm cats eye blocks and remade the lot. This rope work is a craft by itself I reckon. I enjoy doing it, and can see it is going to take many long ours to complete the whole rig - in for the long haul(just hope my eyes last that long) Bow with Anchors, Cats Heads and Bumpkins. Dave R
-
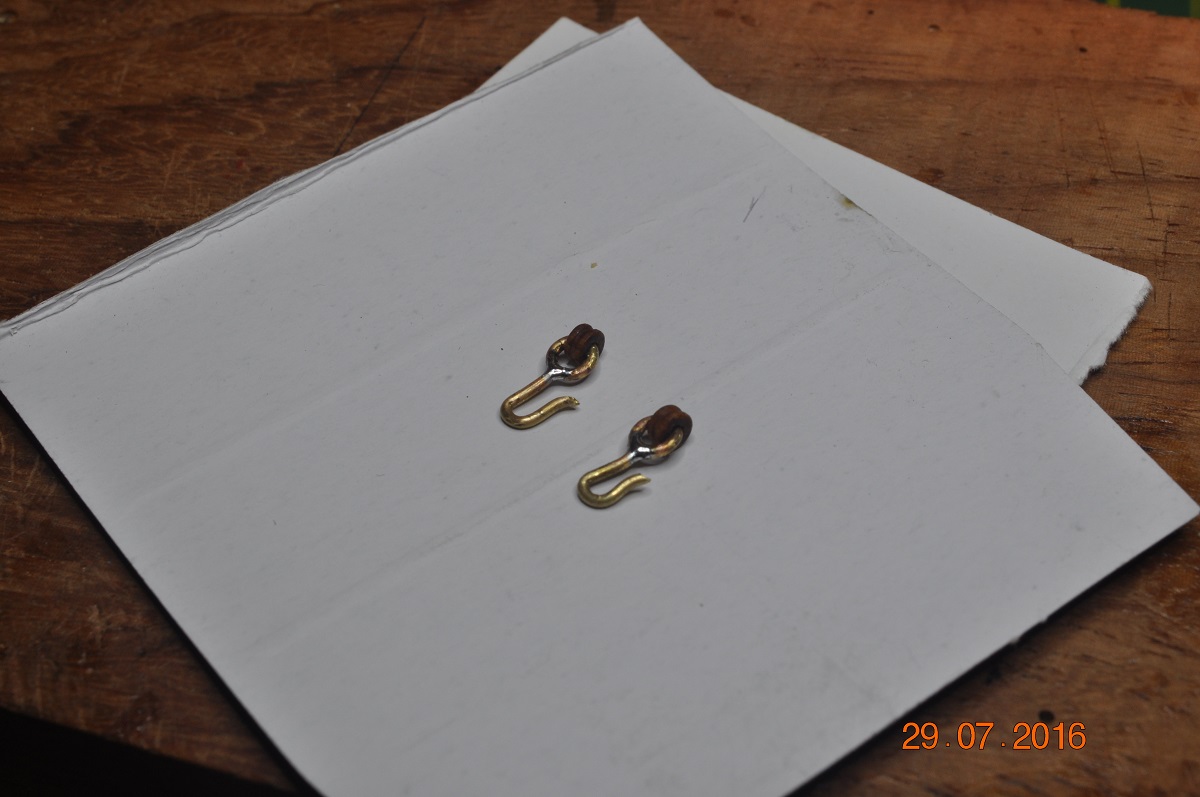
Hi Pat, The 2 x Cathead I found at: Cornwall Model Boats CB2326 Cathead 'Crown' (2) 1 £0.73 Come in Pkt of 2. I saw them when I bought the extra Anchors. The shipping cost from UK isn't too bad either > £2.20 for a small packet. Lot more from USA. Dave R