Supplies of the Ship Modeler's Handbook are running out. Get your copy NOW before they are gone! Click here to order
×
MORE HANDBOOKS ARE ON THEIR WAY! We will let you know when they get here.
×


DaveRow
-
Posts
690 -
Joined
-
Last visited
Content Type
Profiles
Forums
Gallery
Events
Everything posted by DaveRow
-
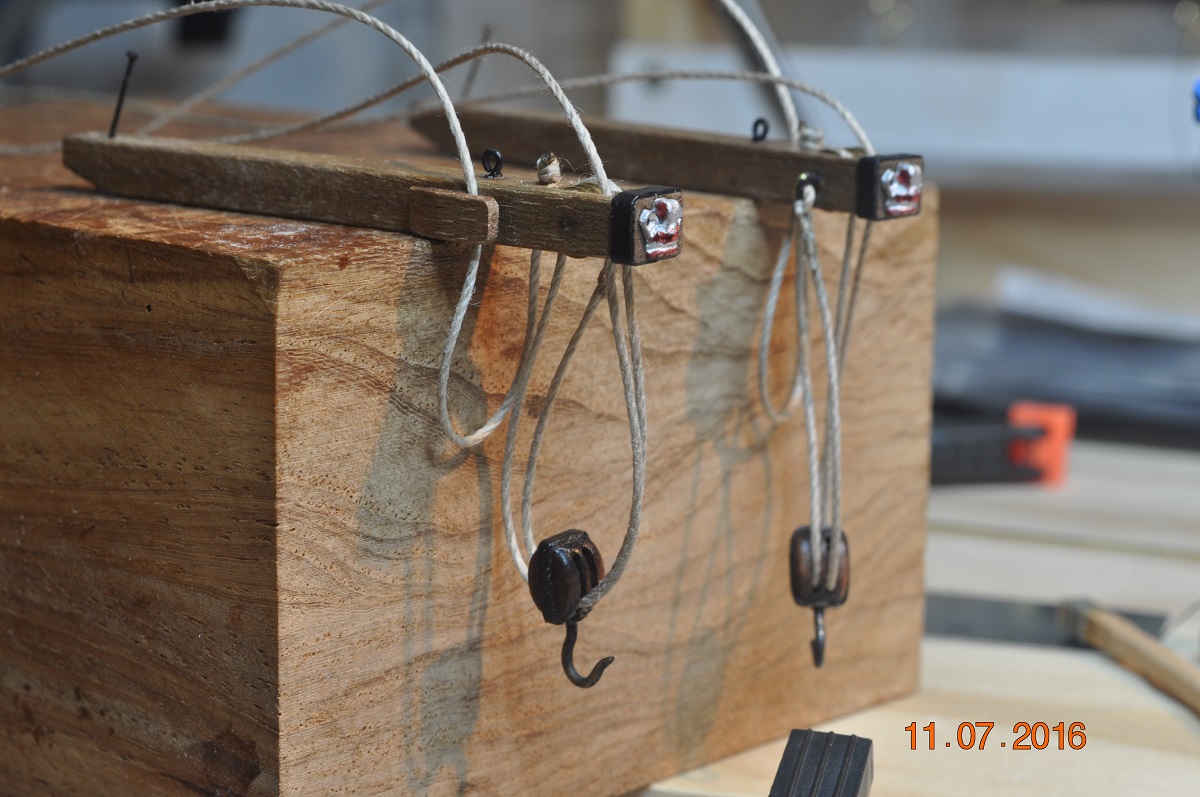
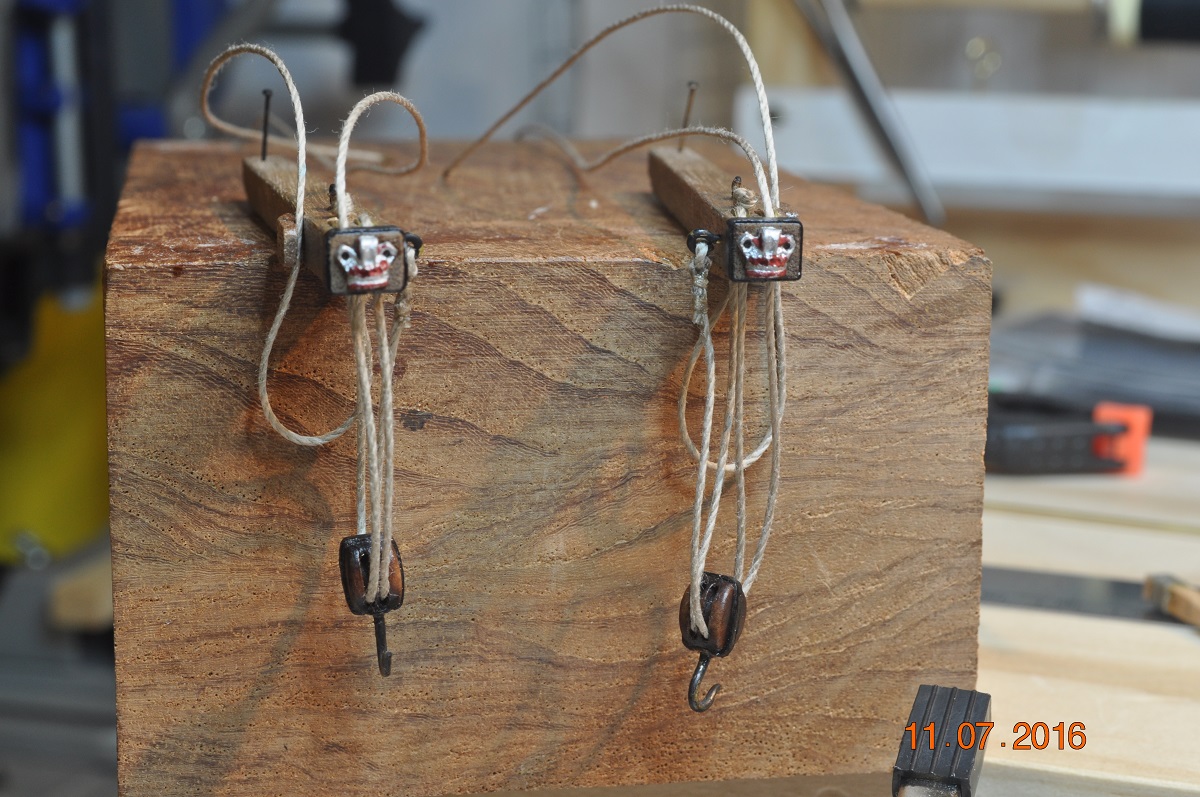
 Anchor Tackle: Made the lifting tackle for the Anchors; attached to the Cats, ready for placement to the bow. I hand fabricated the hooks and used black card around the block to replicate a metal strap around it. I'll have to chase up some gold paint to touch up the end decals. My crude red highlights are not up to scratch. Dave R

-
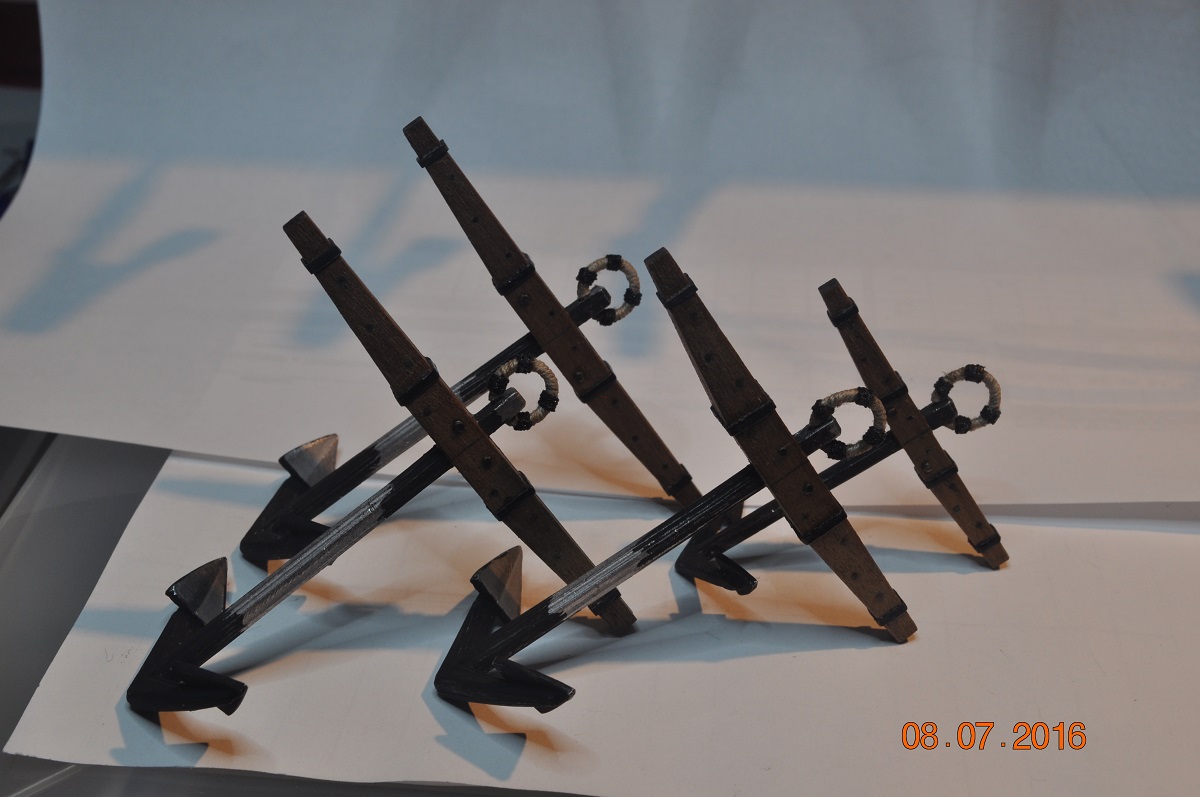
Anchor Update # 3 ? Finally after some re-work of the ring Puddening, we''ll ship these anchors aboard after the painters wrap things up. Update: 10 July 2016: Painted: I applied a coat of clear over the whole anchor for protection. Dave R


-
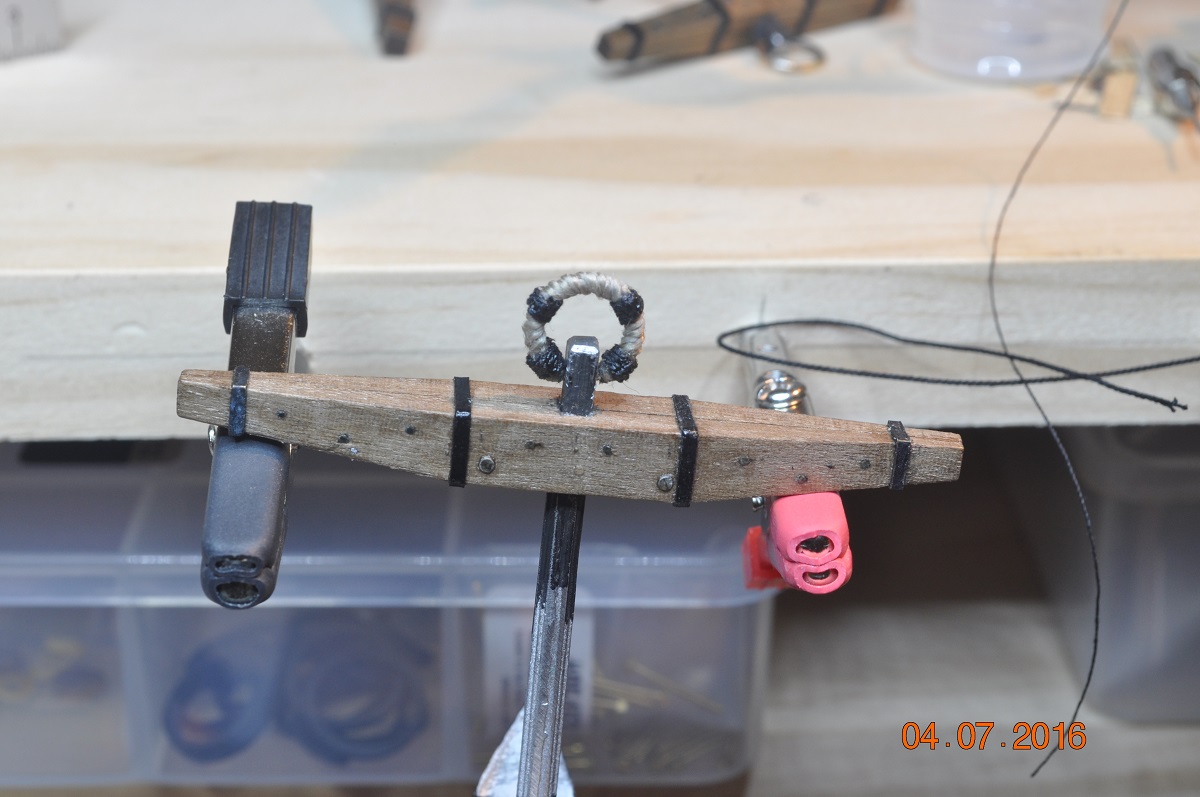
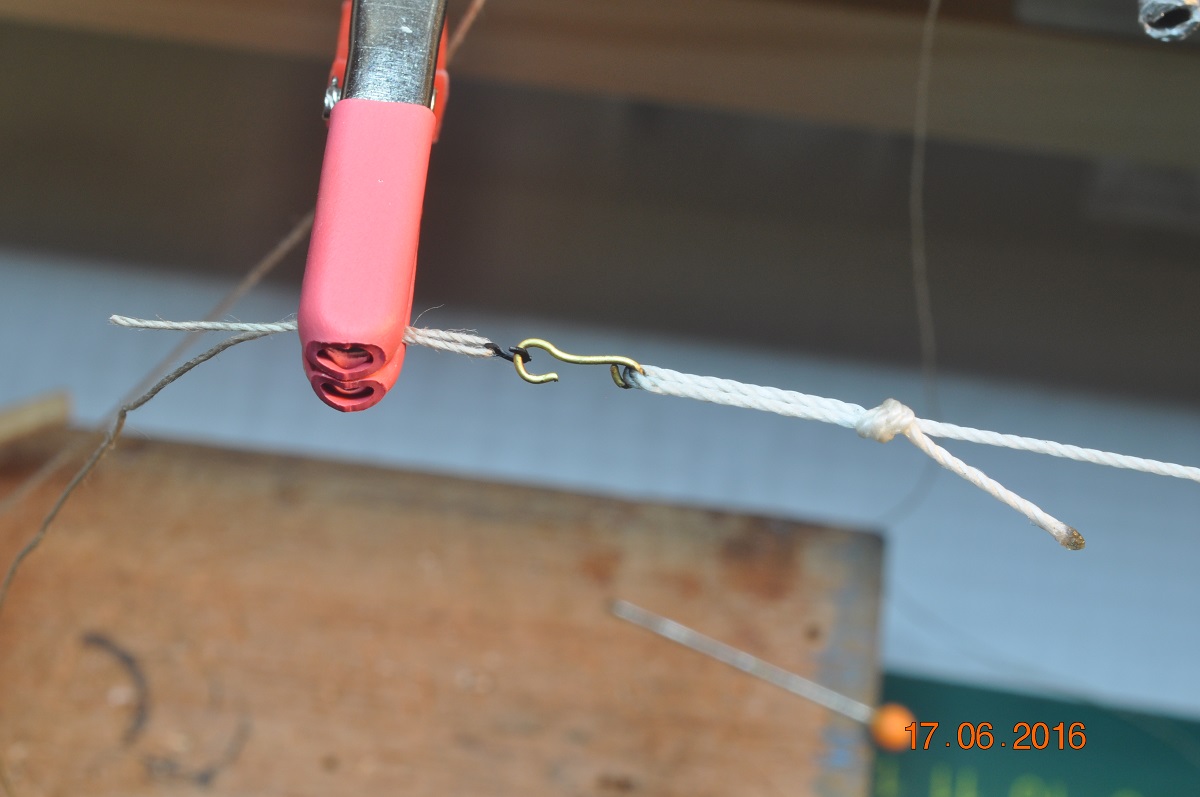
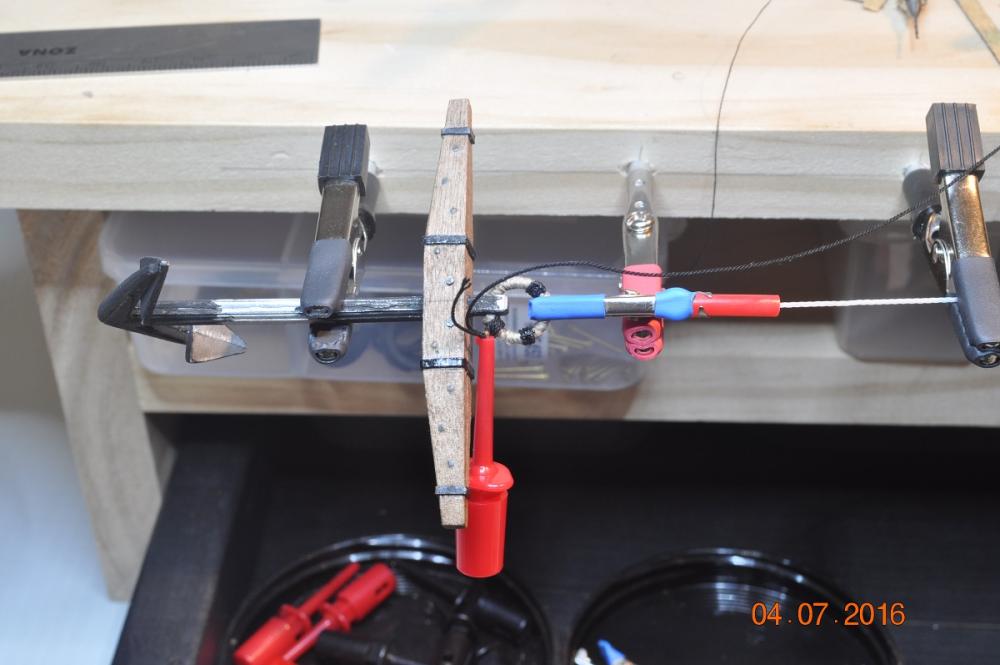
I might try the next Anchor Ring with 0.25mm or close too this. It seemed a bit too thick. Hi Pat, Version #2 Updated this post with thinner twin/rope for the wrapping. I paid more attention to the wrapping > neater. Dave R
-
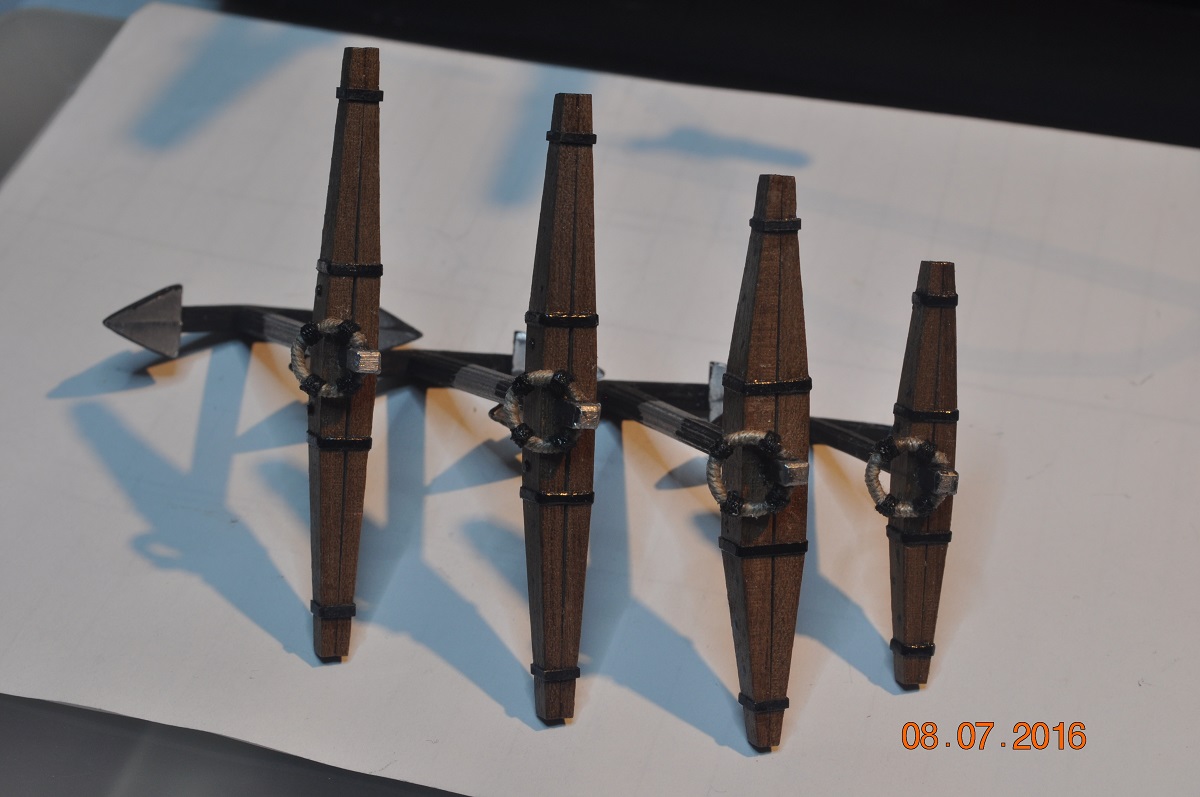
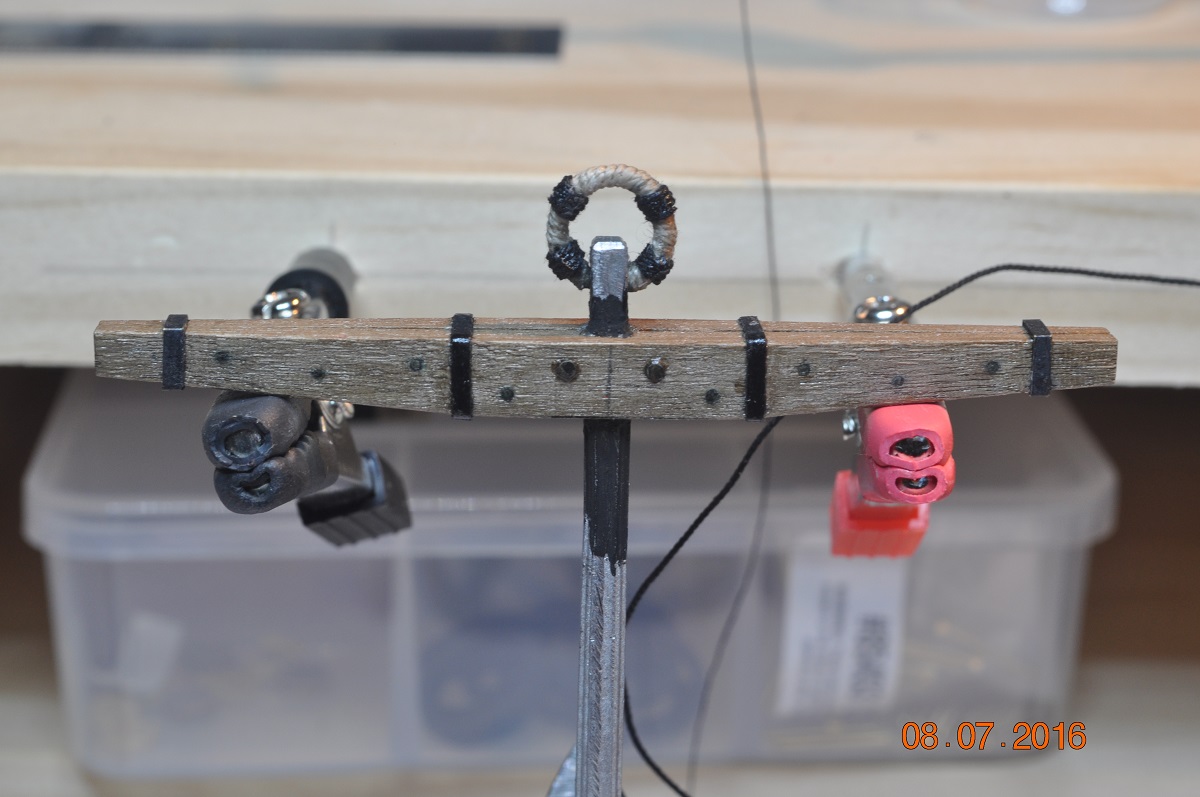
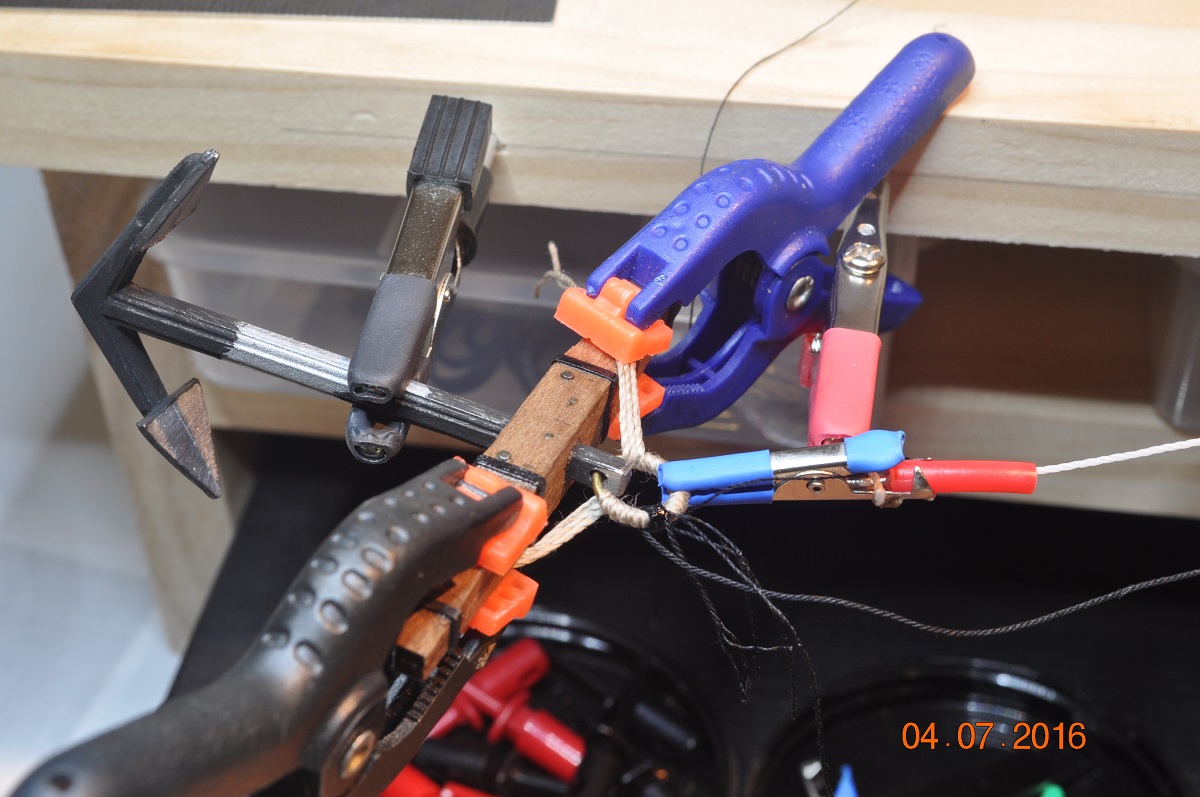
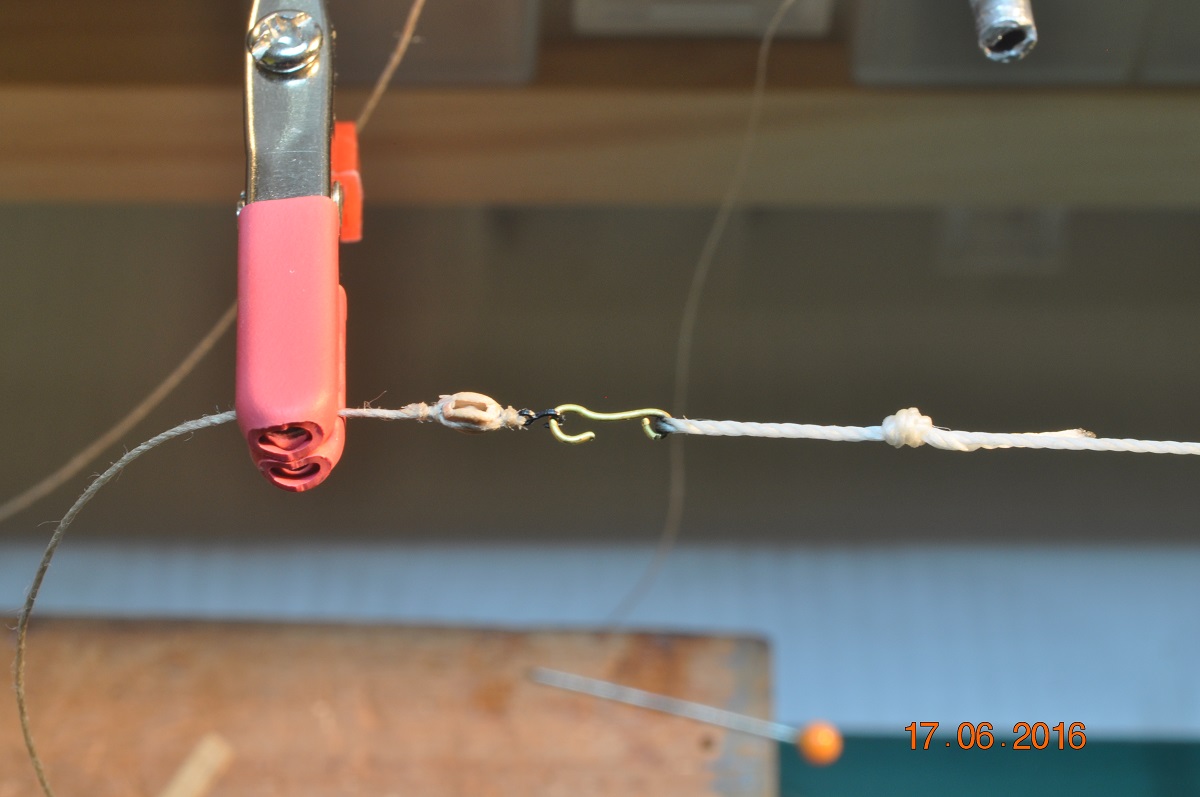
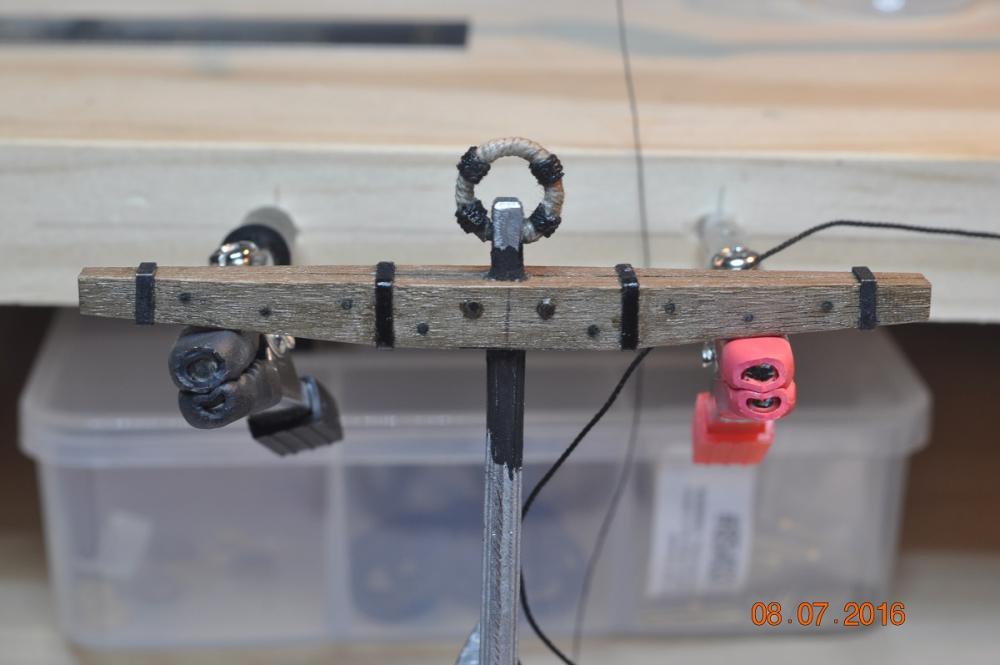
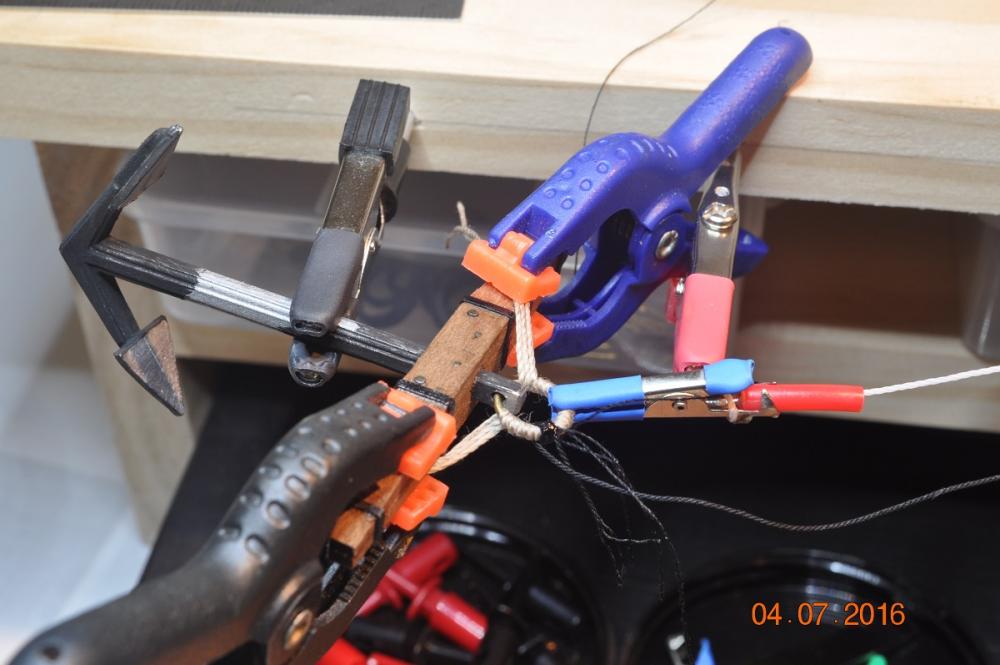
Back in the Shipyard - Anchor Update. The 4 anchors have had the ring added to each. I used 1mm brass rod to fashion the 4 rings(8mm dia), welded closed on the shaft end. First attempt of the wrapping, "Puddening" - where I used 3 lengths of rope wound at an angle about the ring. Difficult to keep it close and tight about the ring. 1st "black" wrapping "seizing" added as well. 3 "black" seizings added. I even managed to use some fine sewing twine around each each seizing to hold the 4 wraps close. If you zoom in you may just wee it. First Anchor with Ring and Puddening finished. The first rope(diameter) for the wrapping may be too big ? Supposed to be 0.4mm(3" circumference actual.) 3 more to do. Finish paintwork. Dave R

-
OMG Dashi, You must have trouble sleeping at night over the tiller design, and fixes cook instructed during the voyage. I'll stick with a conventional "as left the dock" version, ready to be tested on the high seas. However I do like the effort you go to. Dave R
-
Hi Mike, Your going fine. A few errors along the way, however Rome wasn't built in a day. I spend hours at times not producing a thing, just working out how to do something little, that may have a huge impact on something else. I constructed my Endeavour stern best I could at the time. It is different to others I know. One thing I did a long time ago was to photocopy to scale the deck and side views from the AOTS book. I have copies of these on the wall and loose to take dimensions from(lots of dimensions to check, double check, and so on). The Corel plans(mine are gathering dust) are no way near the AOTS details. For me(Shipyard), it has been 26 months and nearly completed the hull and fixtures. Enjoy, I do. Dave R
-
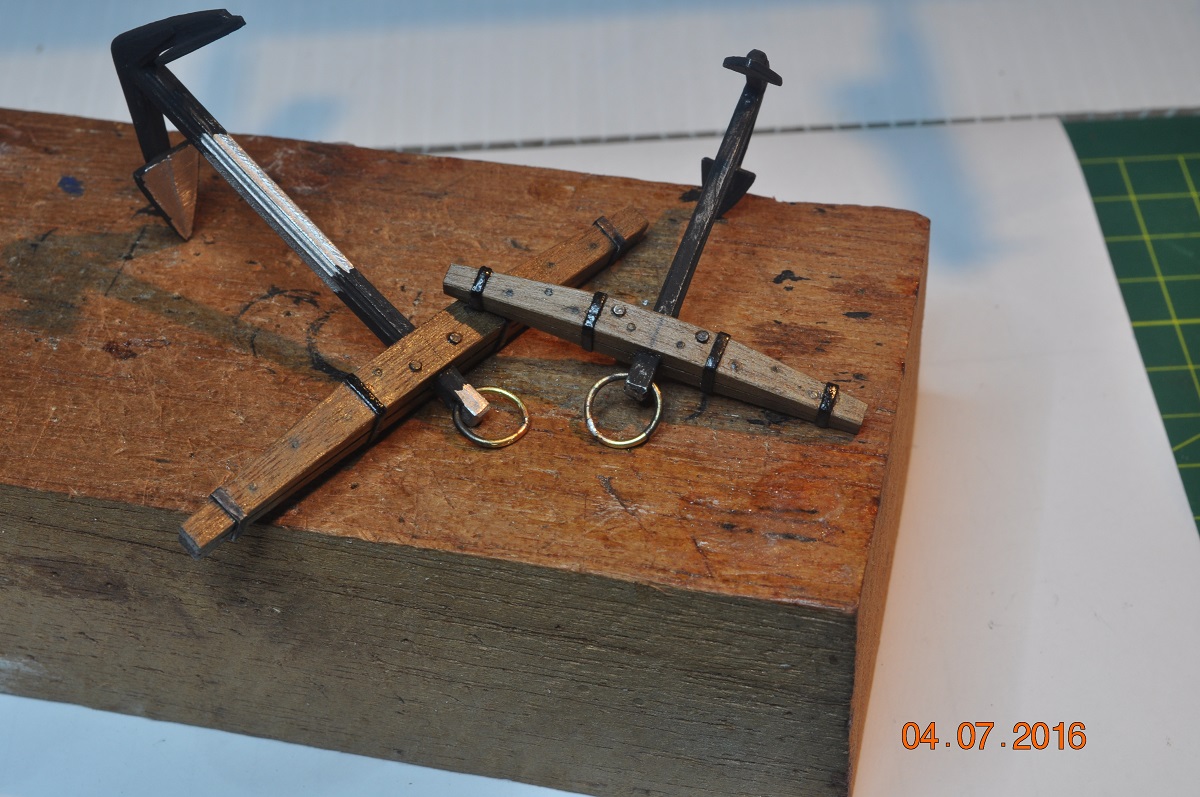
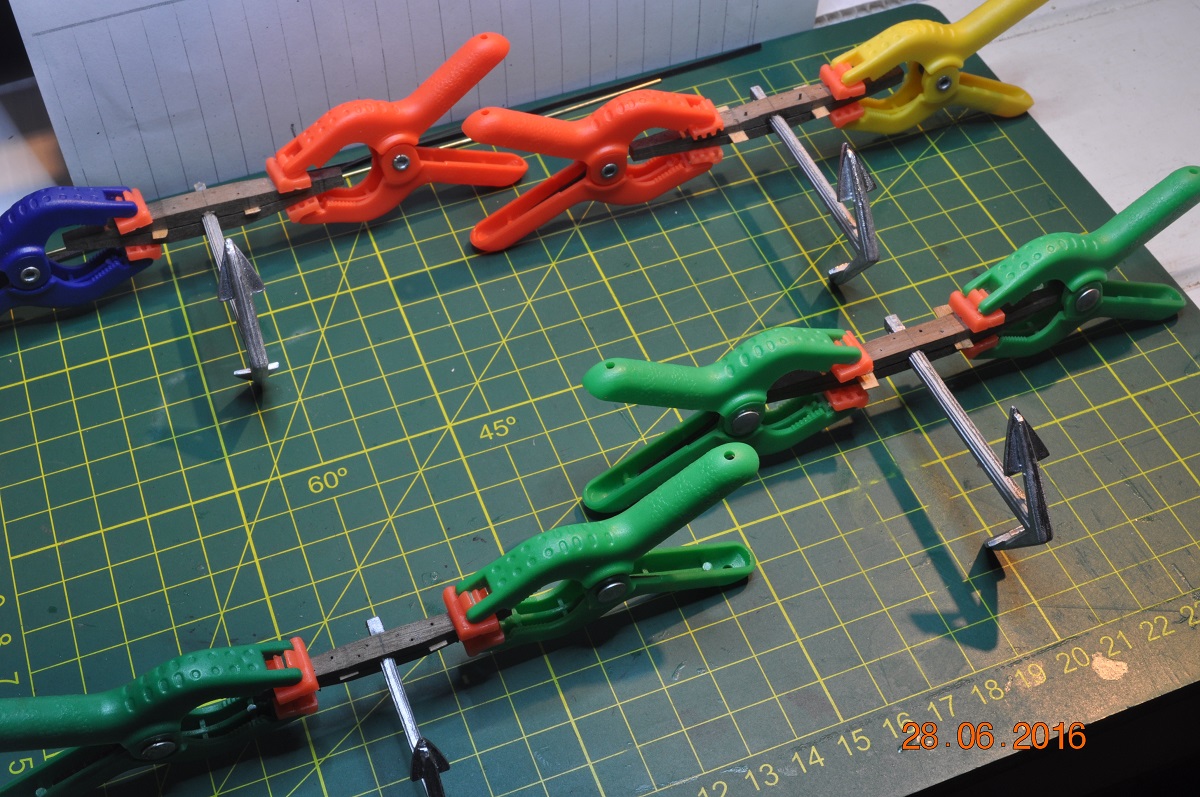
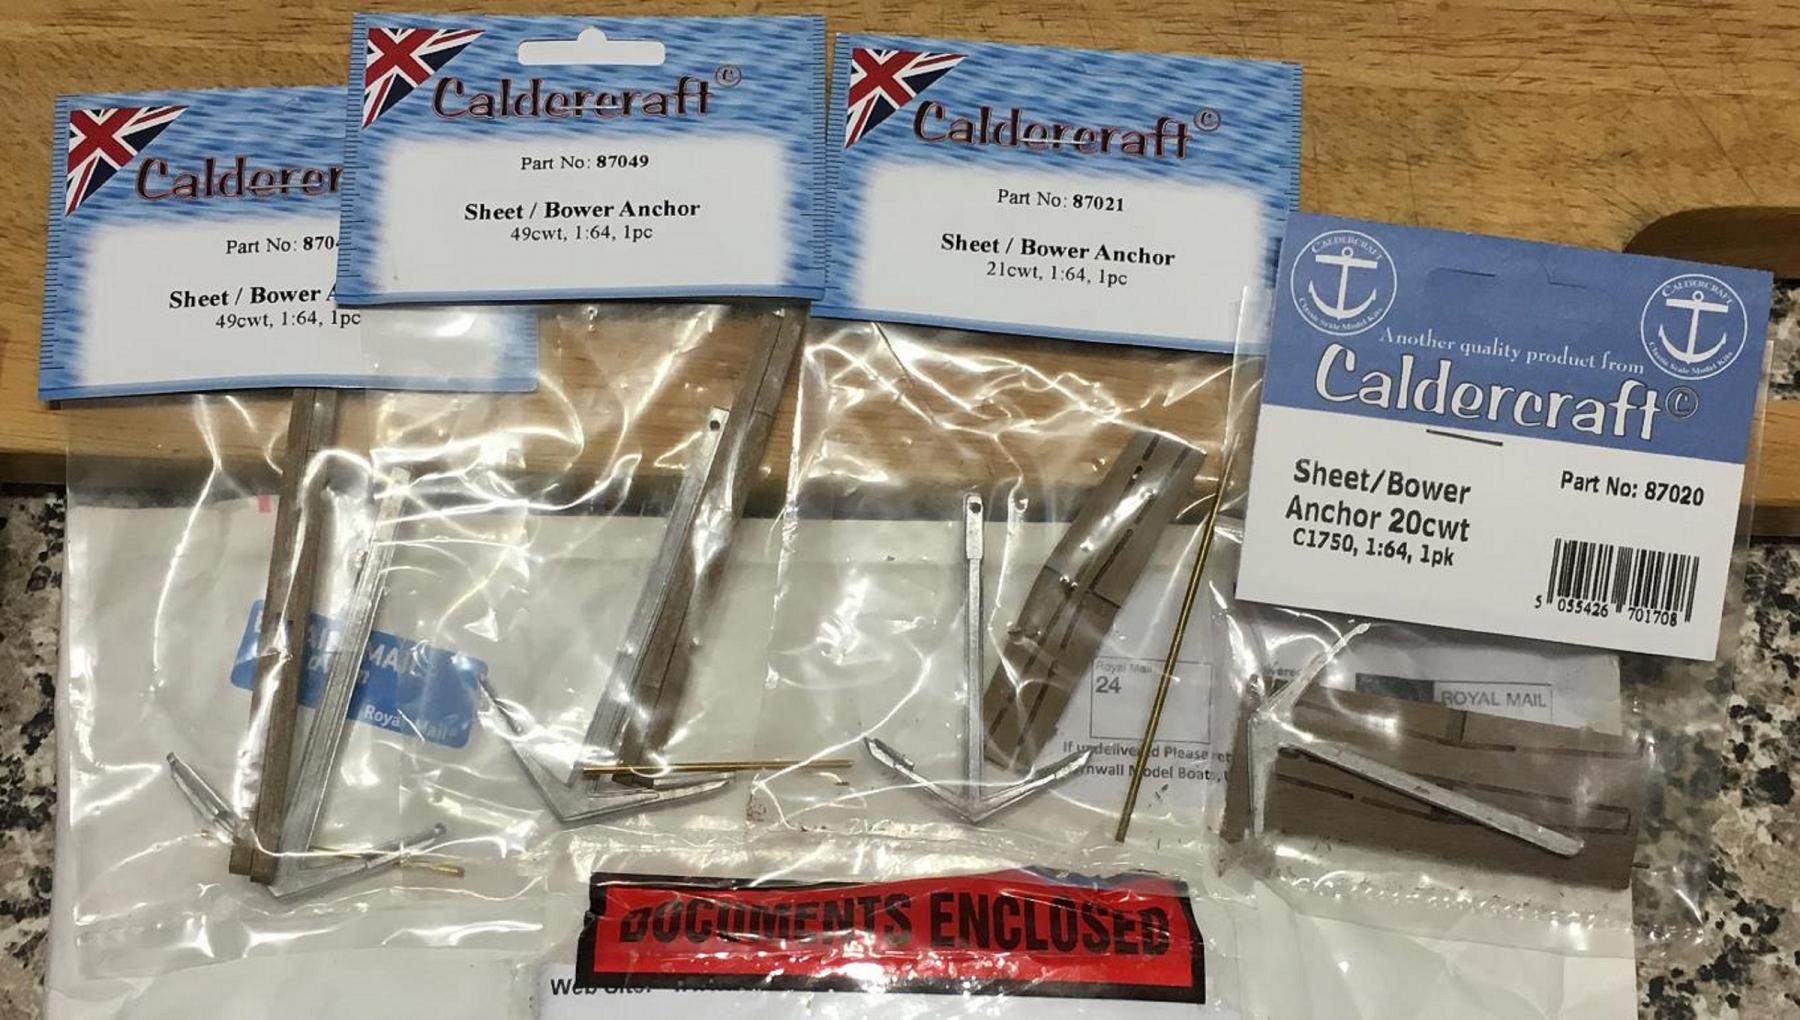
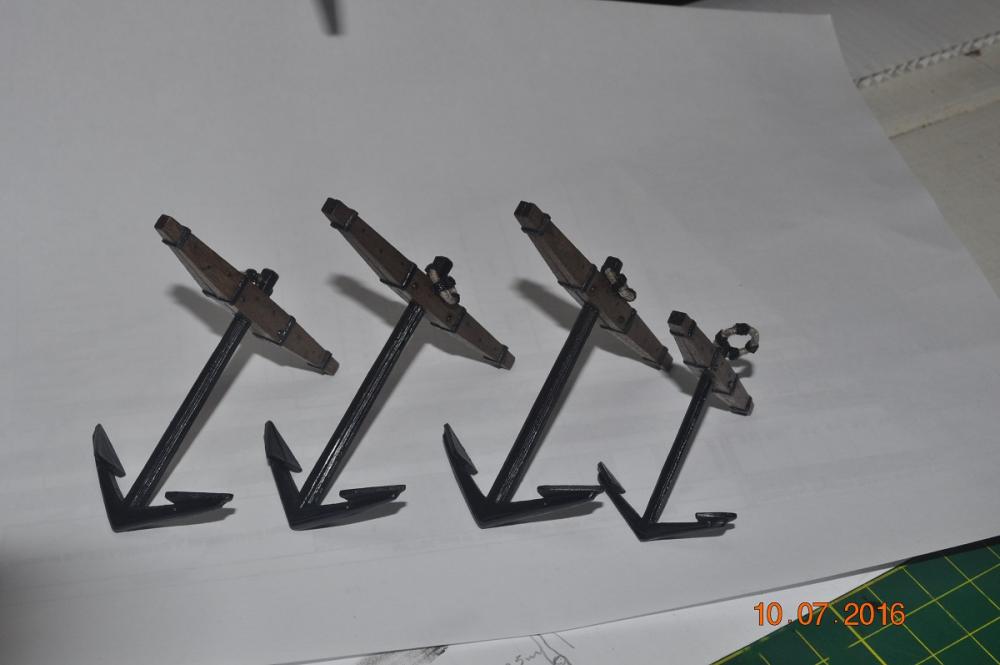
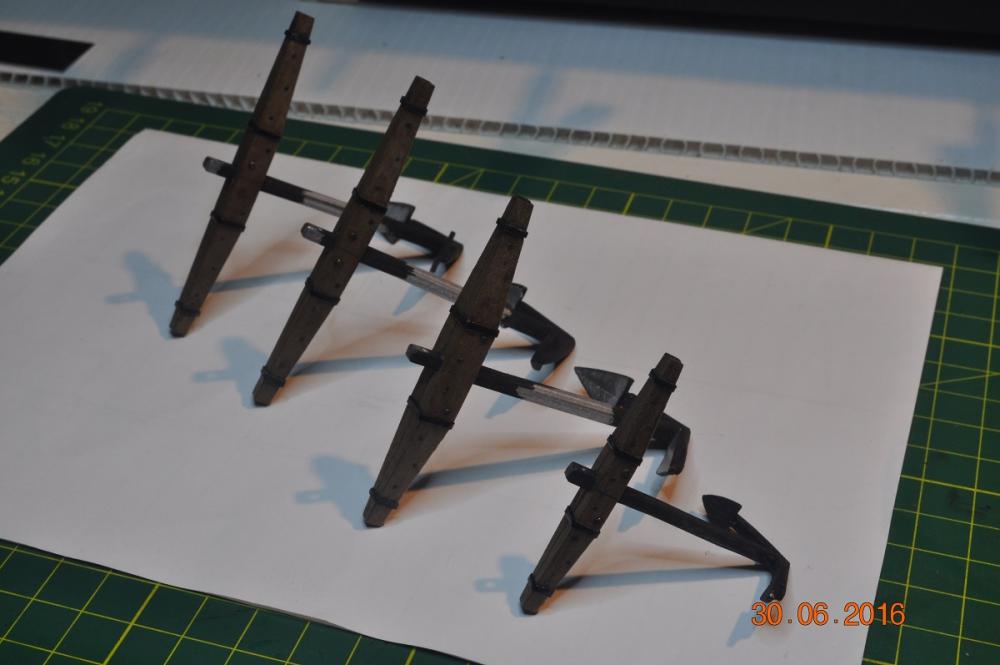
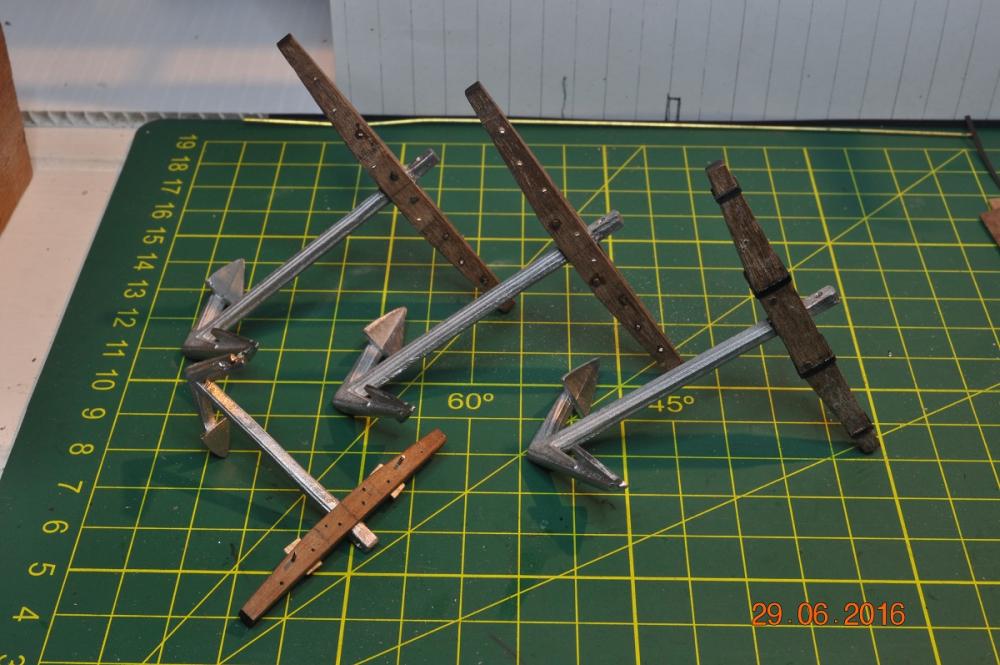
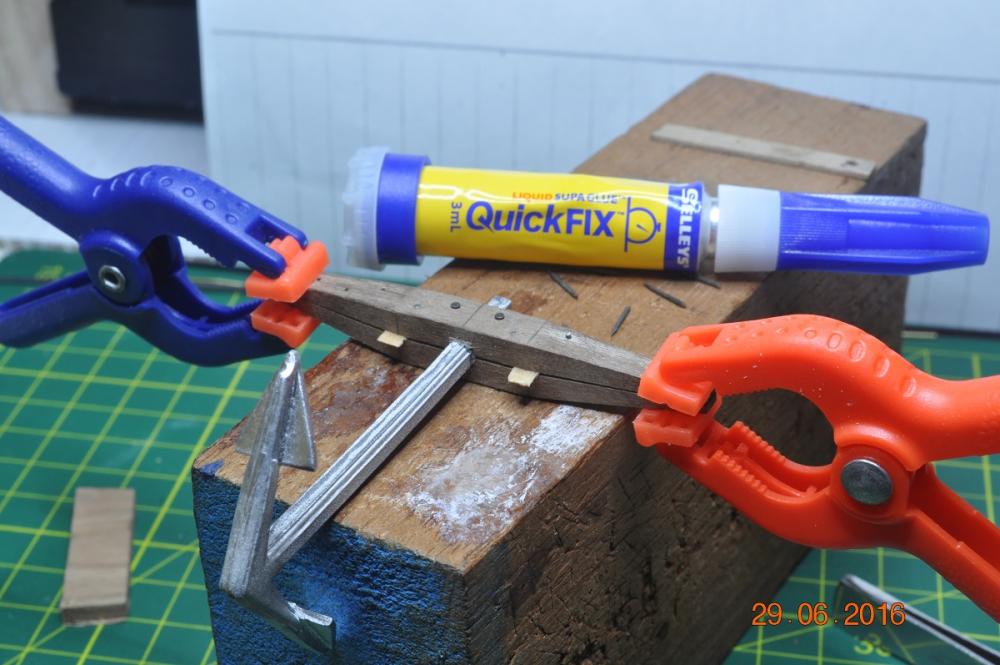
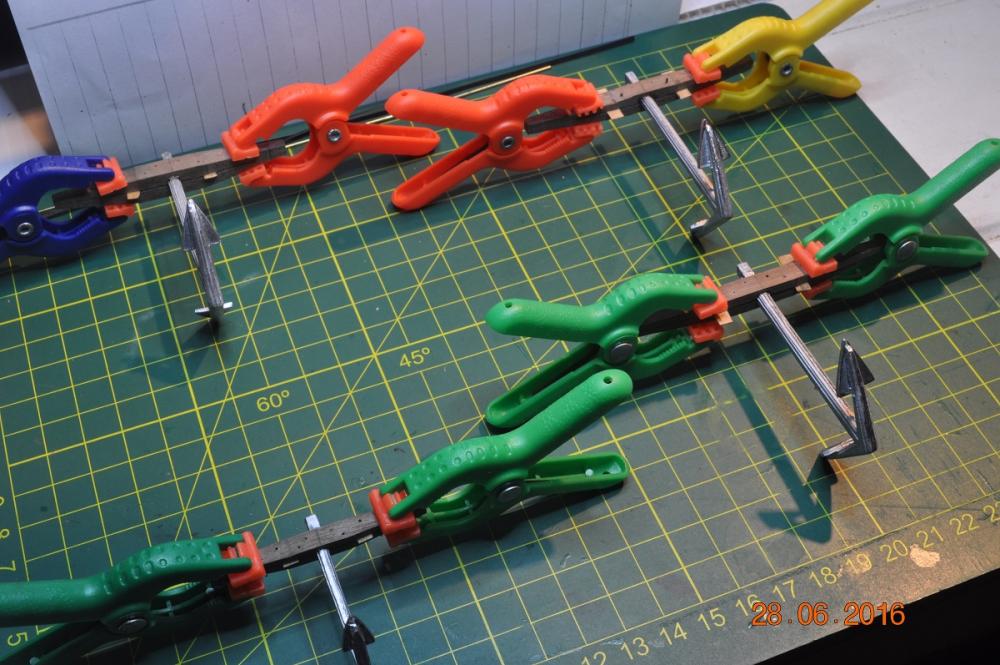
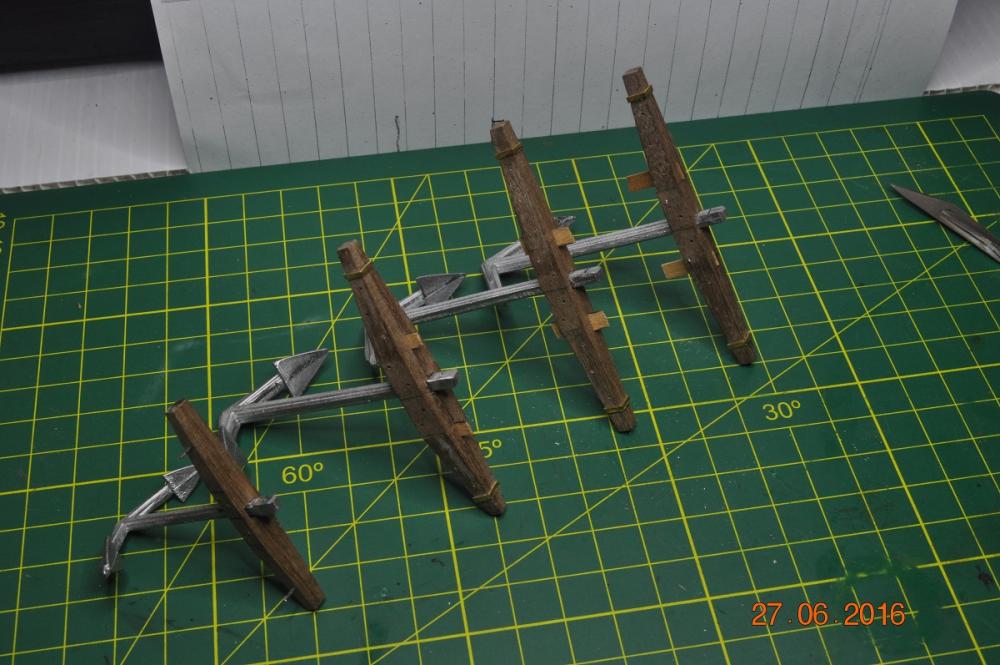
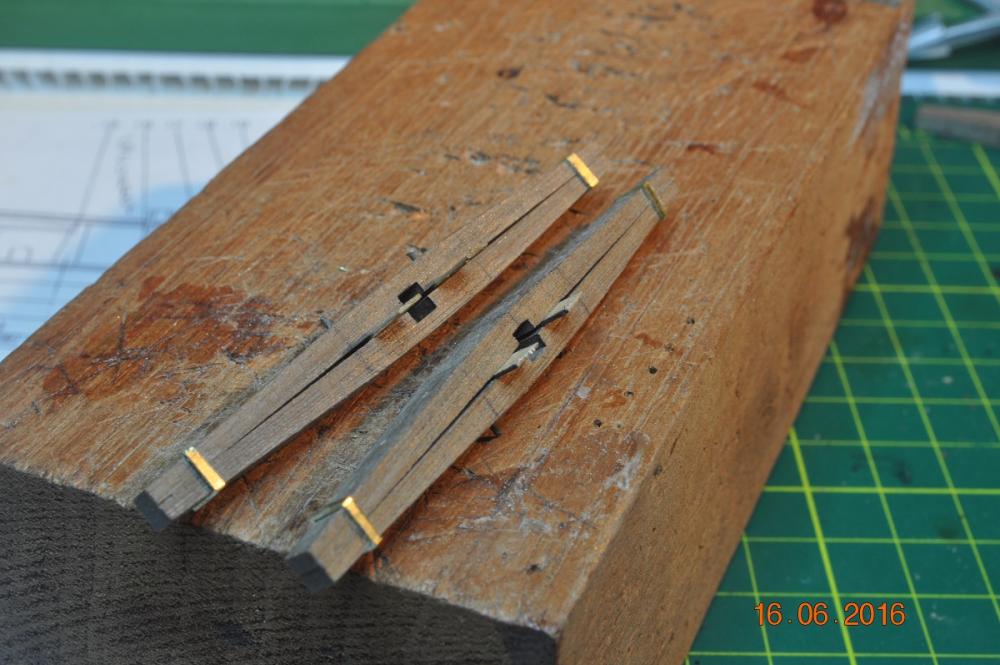
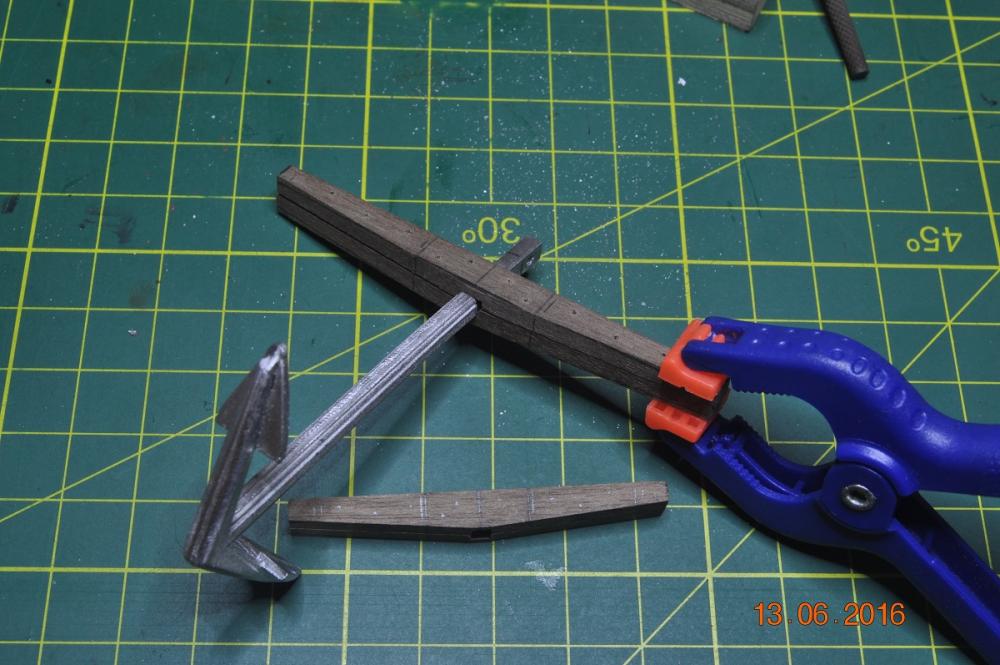
In the Shipyard - Anchor Update. Following on from post #431 I received the new anchors I ordered end of last week. What I ended up using(with modifications) for the 4 Anchors are: These are very similar to the style as depicted in the AOTS. Main difference being the flukes are not set back at the ends, thought I could live with this, however now that I am writing this piece, will modify the ends to a spike. I suppose the anchors had a spike to "dig" into the bottom. For the 2 Sheet/Best Bower Anchors: Caldercraft # 87049 Modified: 5mm off the shaft to give a 67mm shaft(13' 2") 71mm wide stock (14' 4") Fluke overall 45mm(4' 5") close enough For the Small Bower Anchor: Caldercraft # 87049 Modified: 7mm off the shaft to give a 65mm shaft(12' 10") 69mm wide stock (14' 0") Fluke overall 45mm(4' 4") close enough Stream Anchor: Caldercraft # 87021 Modified: 5mm off the shaft to give a 48mm shaft(9' 3") 52mm wide stock (10' 3") I filed the end of the flukes to reduce the overall width to 34mm, should of been 32mm but close enough(3" 1") So the lengths(n' n") are same as in the AOTS. The stock lengths are the Shaft Length plus 4"(half the ring diameter of 8"). These are slightly wider by 2mm. I forgot to trim them back, which I may still do(drop saw them off) Where did I derive this from ? Steel's - Anchor Rigging Section The length of the stock is the length of the shank and half the diameter of the ring. The depth and thickness in the middle is as many inches as the stock is feet in length. The ends to be kept square, half the depth or thickness in the middle. The upper-side next the ring is always kept straight, as is the lower-side half the depth on each side the middle; and thence it tapers to each end in the above proportion. It is necessary to leave an opening in the middle of one inch and a half, between the two pieces, that the hoops may be driven nearer the middle, in case the stock should shrink. Stocks rough fitted to the Shafts: Stock ends held whilst glue dries(just used CA) Gluing the stock half ends and onto the shaft. I had small 0.5mm spacers either side of the shaft to keep a gap between the 2 stock halves. ~1.2 inch gap(ref. above) Packing the stock rebates 2 of the shafts needed packing to the stocks, as the rebates were cut deep. Steel's description of the fixing of the stocks: "STOCK is composed of two long pieces of oak tapering from the middle, fastened together with iron hoops and tree-nails, and fixed on the shank transversely to the arms. " Tree-Nails and Hoops I added 4 small nails about the centre of the stocks/shaft, 2 per side, facing opp. The other 3 holes per end I used pin off-cuts driven through. Aim was to simulate the tree-nails. One(1) stock has the 4 "hoops" on it. The ends hoops are ex. 1mm wide square brass tubing and the middle 2 hoops ex. black card wrapped about. Nearly finished Started undercoat with satin black. May go for a gloss black final coat ? The rings are yet to go on, along with the Puddening. I am wanting to keep the stocks with the timber finish, with clear over them. When I was looking at the photos I noticed a huge ? minor ? mistake. The Small Bower Anchor stock is too wide. Should be more the same width as the 2 Sheet/Best Anchor stocks. Bla bla bla. May get away with it as it is. Not the energy to fix it at the moment. Well the shipyard is closing down for the weekend. All deck hands, shipwrights on shore leave. The Brother in-laws 60th in Newcastle-NSW. Dave R
-
Nice finishing touch there Ron with the case. Hope the house comes together for you and the family. Dave R
-
Thanks Dashi, I have made the 6 rear tackle sets for the carriage guns over this weekend. Good practice on the small blocks before the larger tasks ahead. Dave R
-
Double Rum rations yes, well deserved. And same for me Pat.! The rigging station is working out really well. I keep adding little extras along the way per each type of block/tackle I make. Mass production of similar tackle sets is quiet fast now. Last Friday I added a sliding tray to the bottom for the small bits'n pieces, clips etc. Your Main Yard was something else. Dave R
-
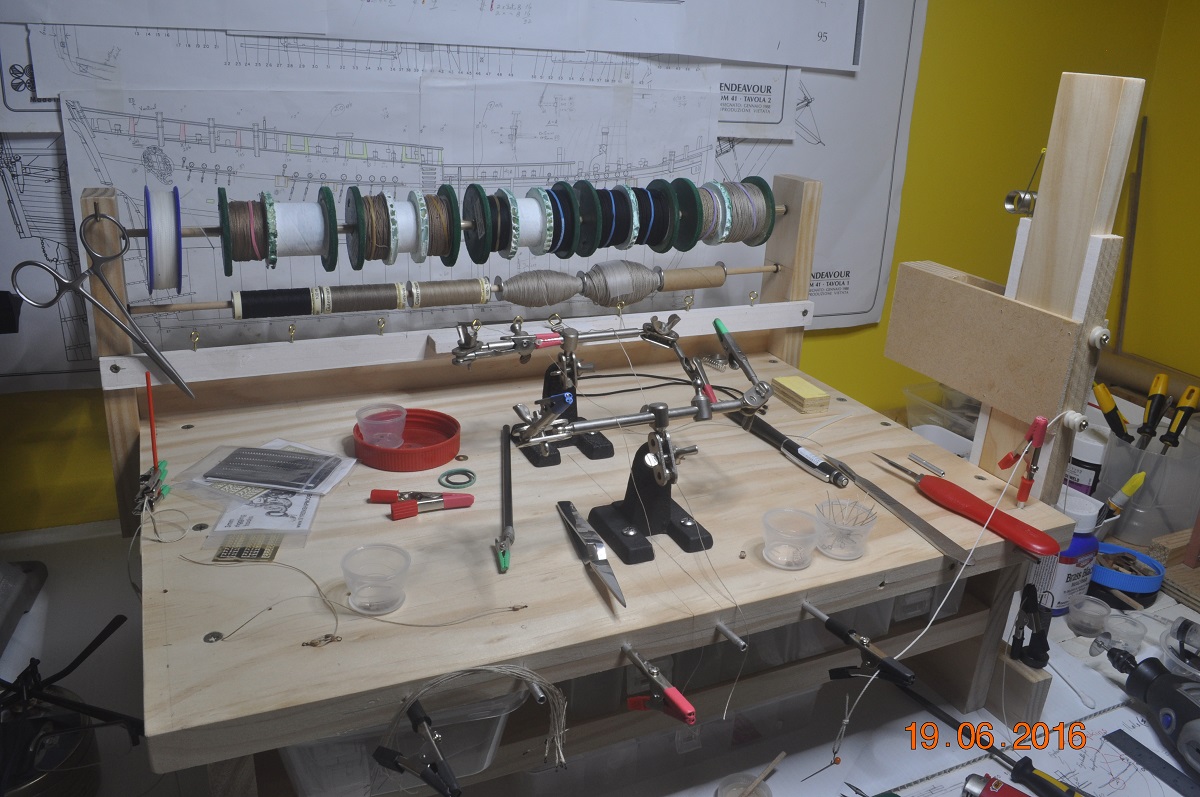
The Rigging Center is getting busier. Mounted the rope I received from Chuck recently on the top rail, ready for more serious rigging(to come). I made several spools from largish cardboard tubing, added ends and some dividers, wound the various sizes of 6m rope lengths onto the spools. Dave R

-
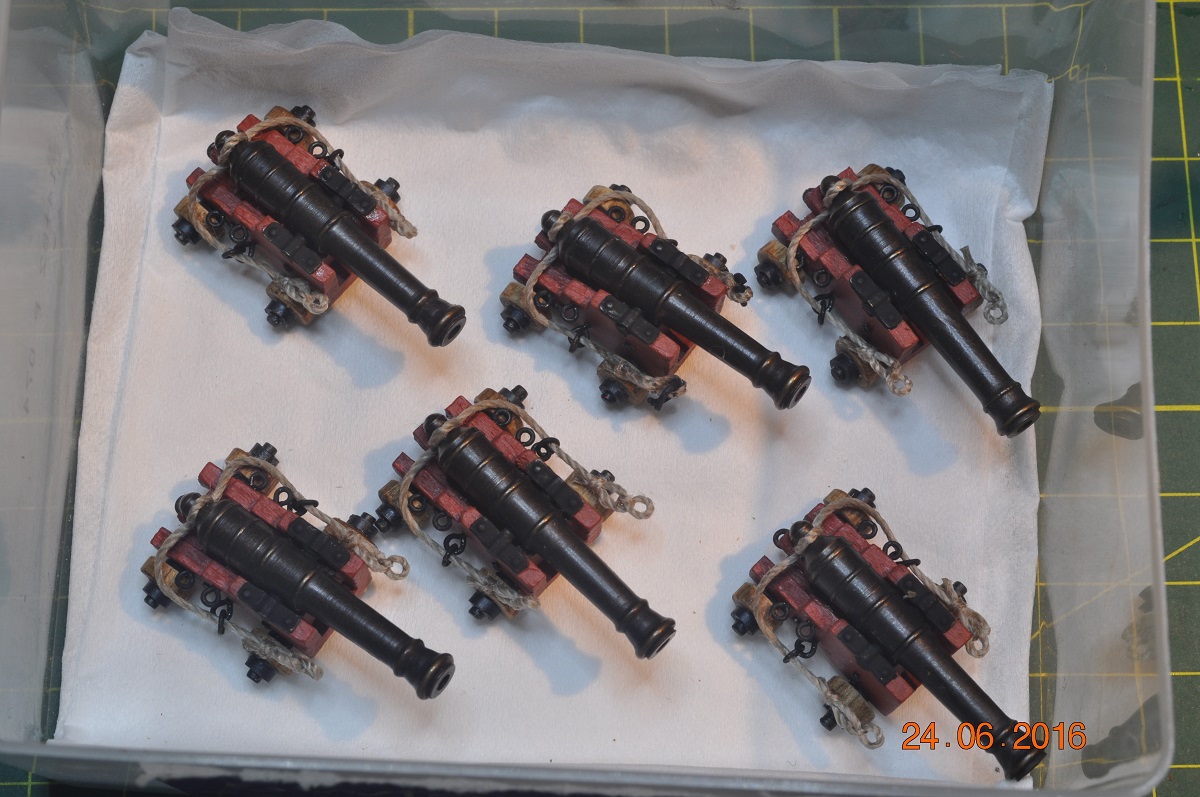
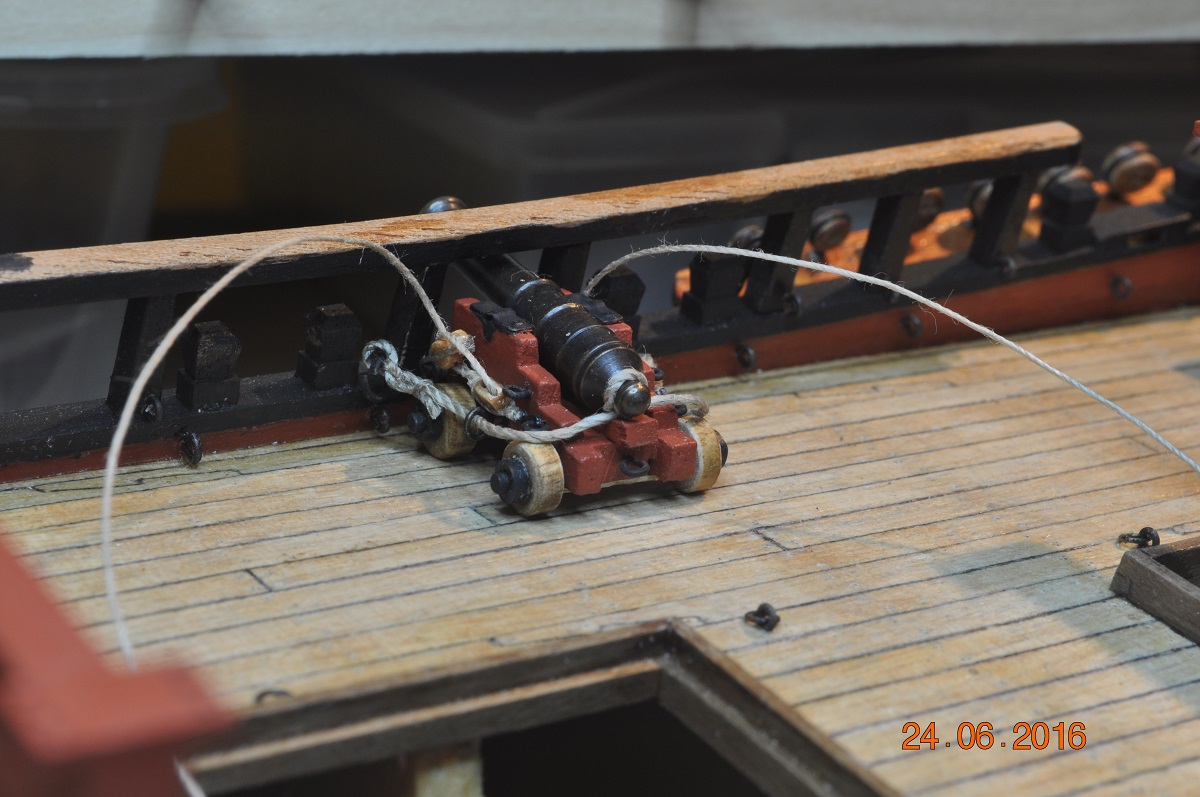
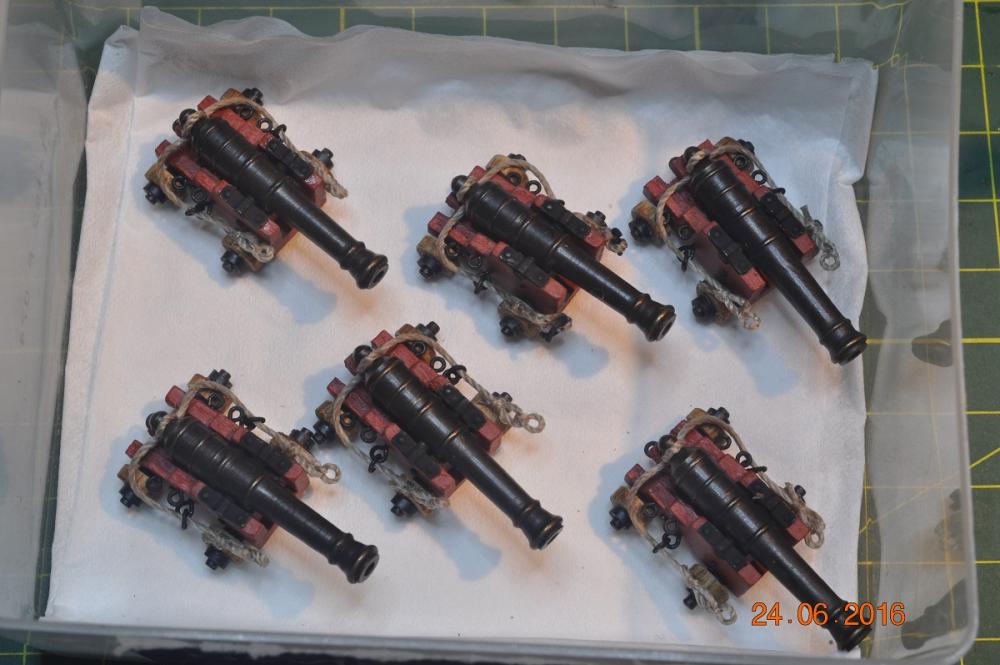
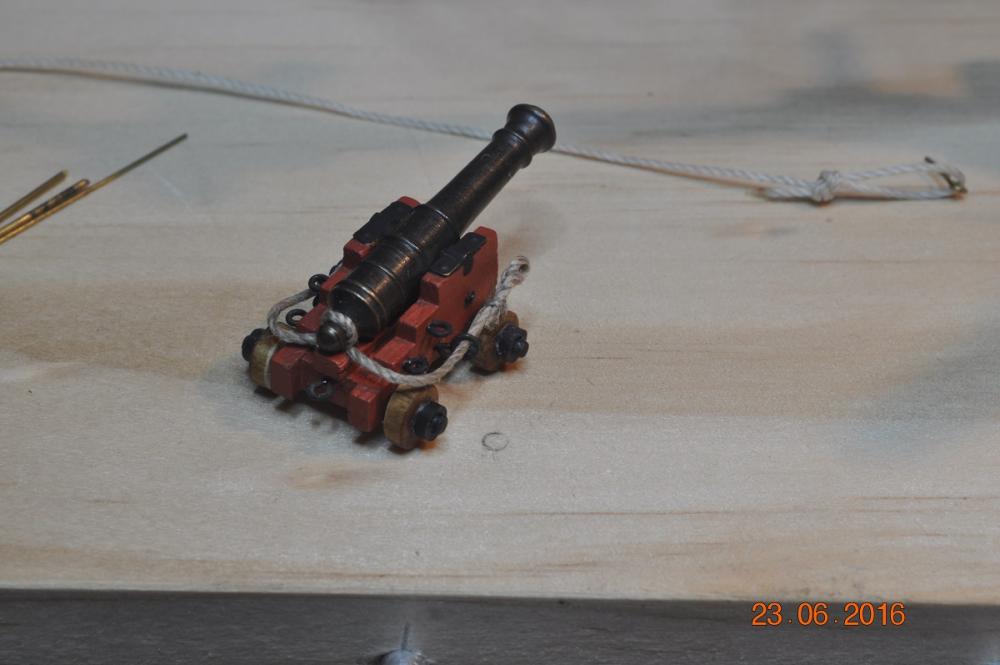
Adding the Gun Tackle and Breech cable to Cannons I decided for now to attach the Breech cable to each of the 6 cannons. All the 2 pairs of tackles completed: 6 left hand and 6 right hand. Mock up, how the cannon with tackle and breech cable will now look in place. The "pull rope"(that's what I call it), is set beside the cannon frame either side(if that makes sense) "In the box" tucked away. I have had enough for now, of small tedious eye blinking magnification work. Put all the parts aside for a later fixing session. Dave R

-
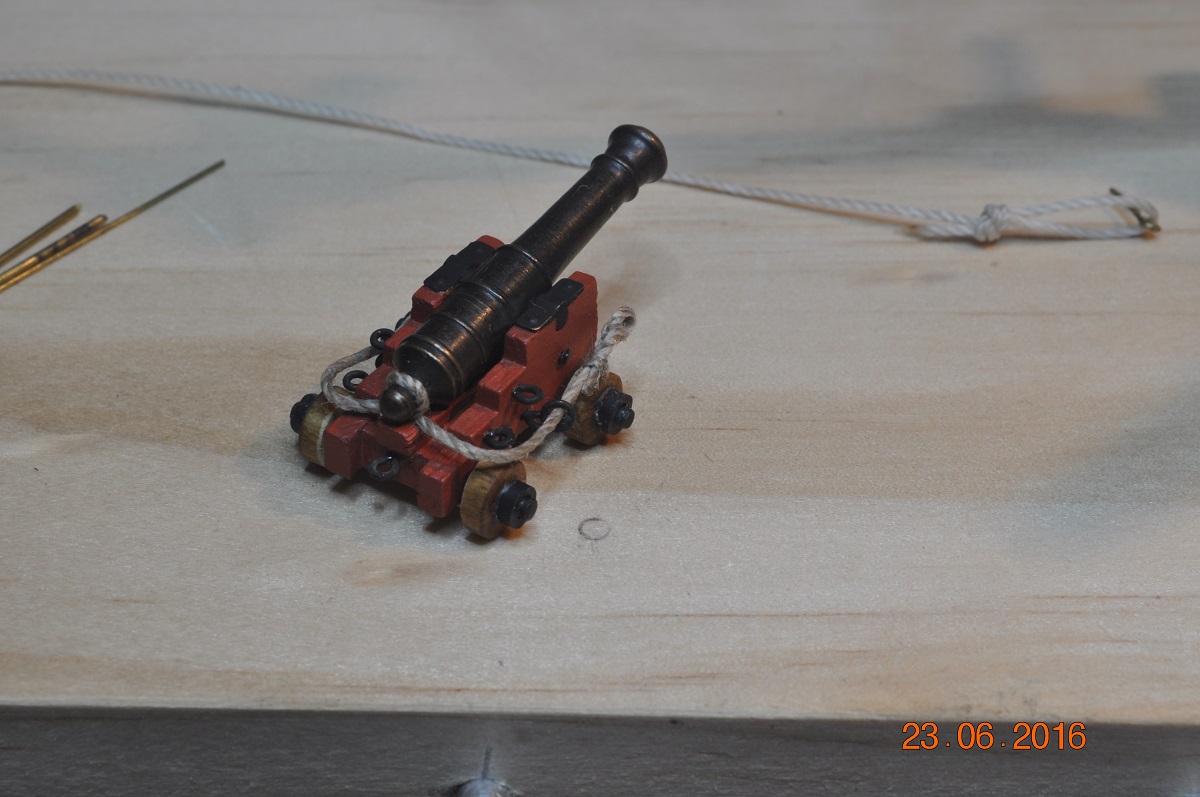
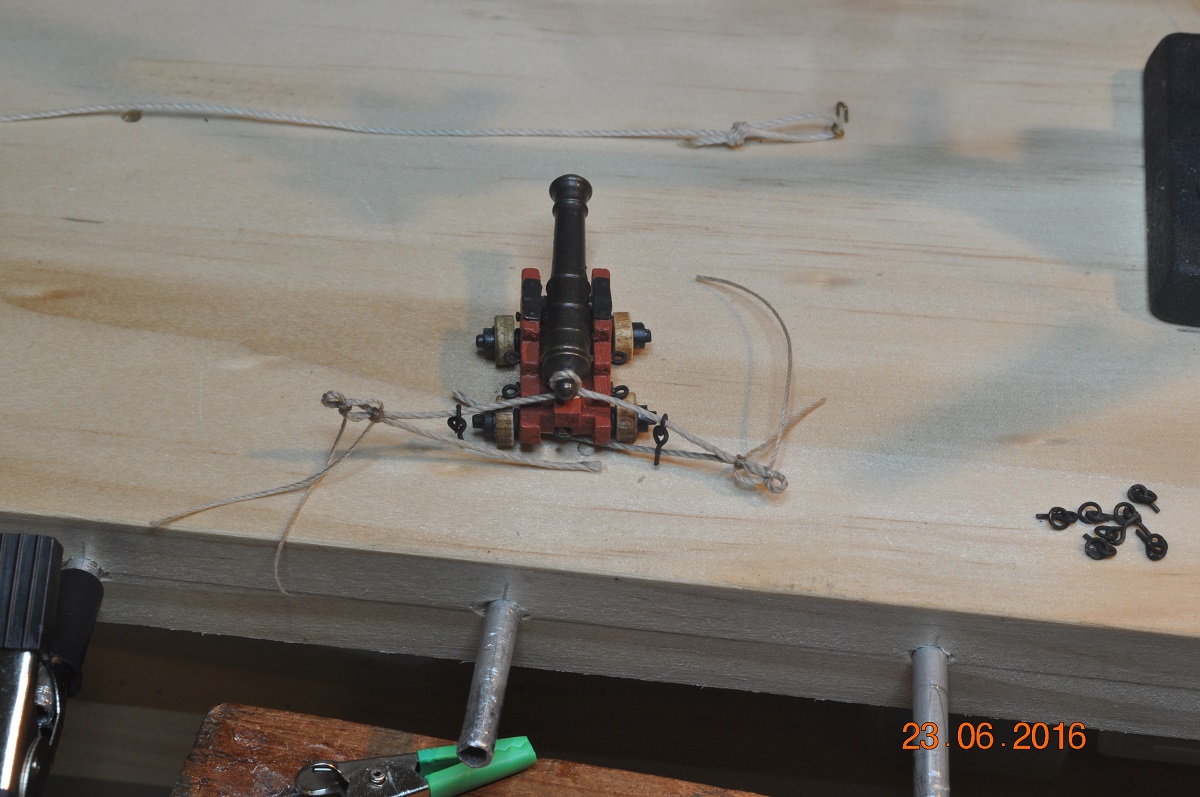
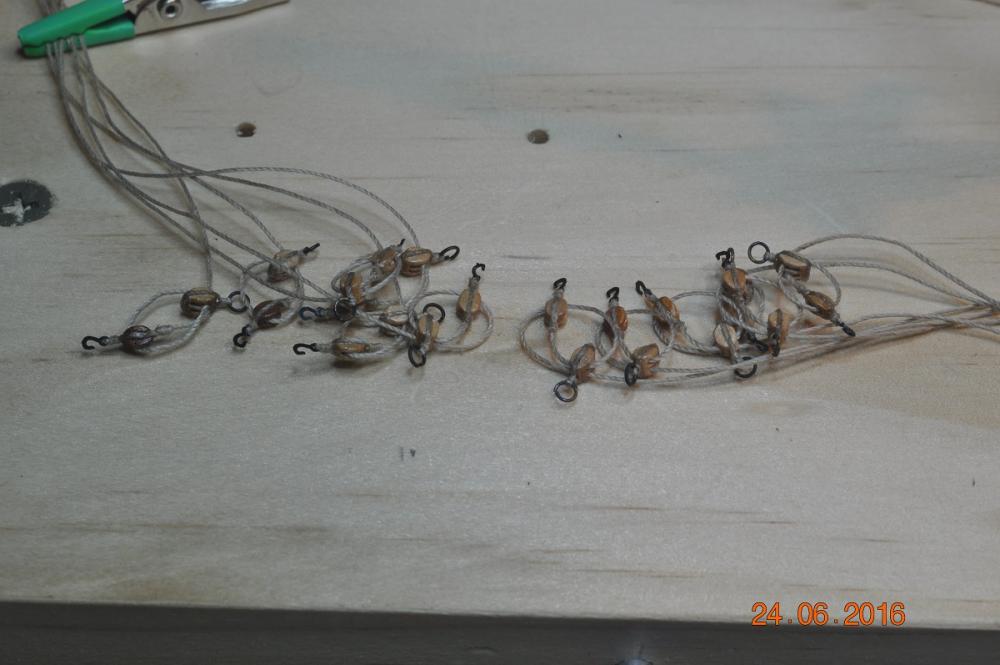
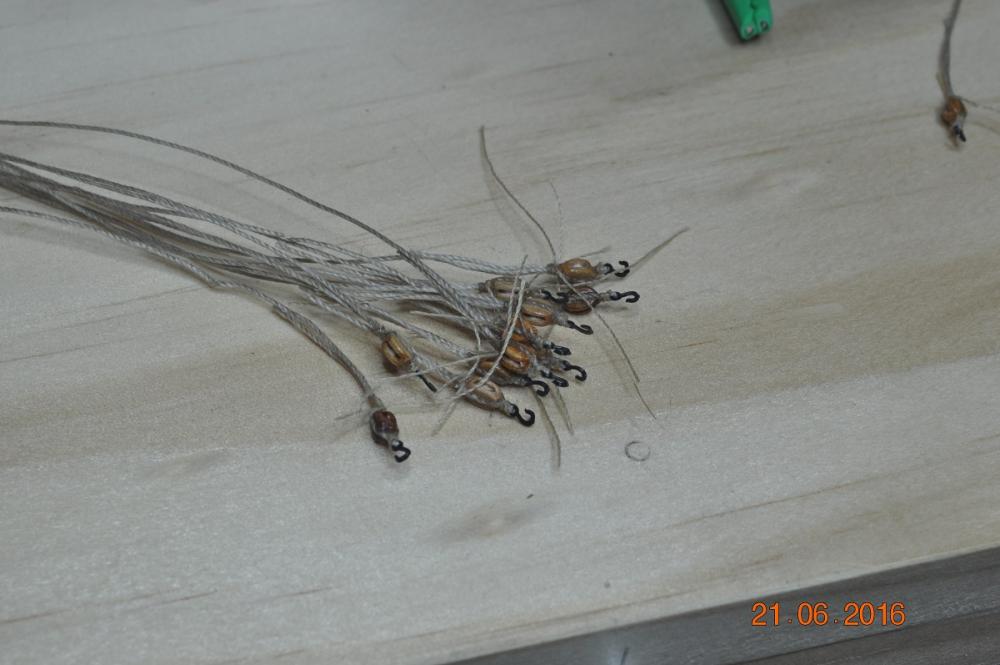
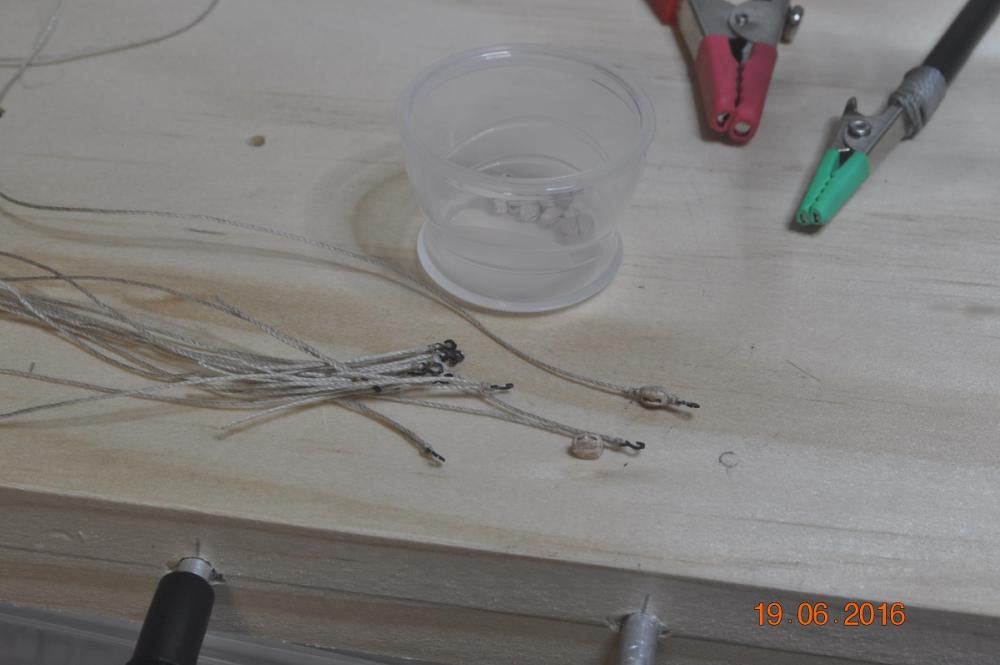
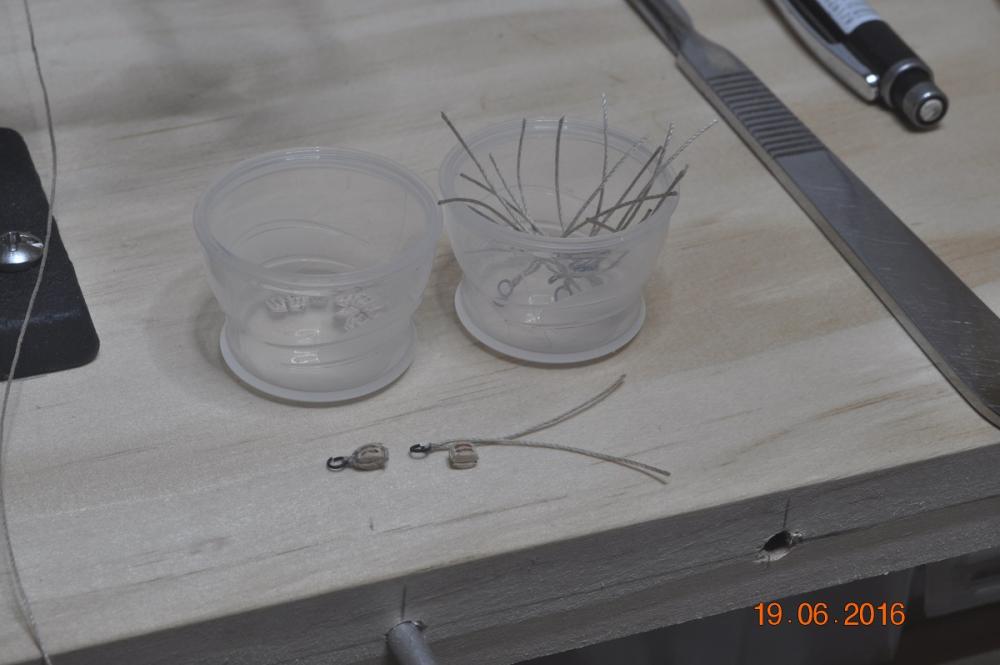
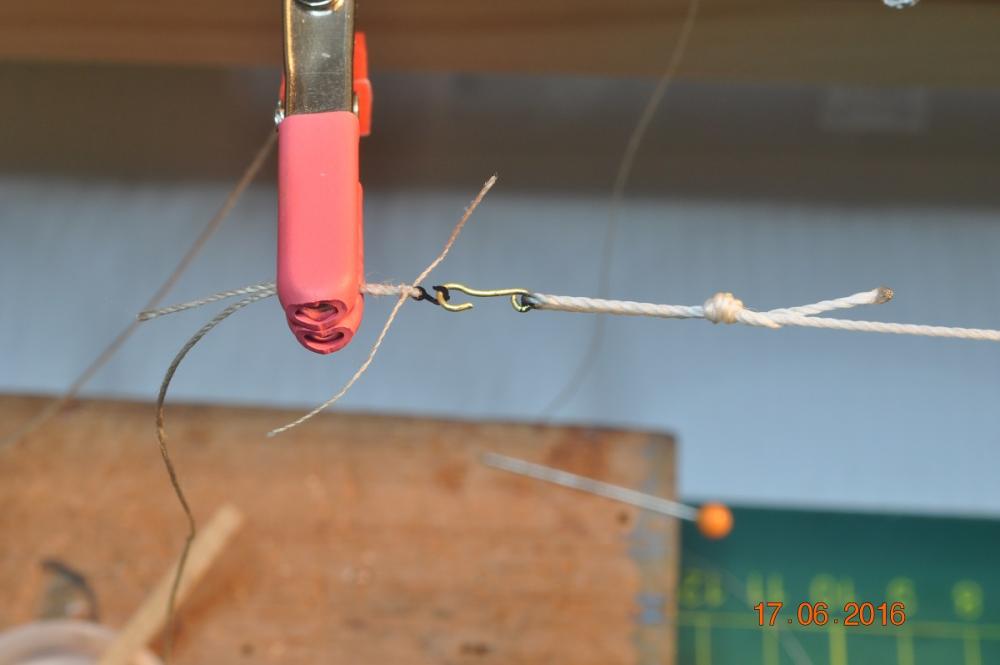
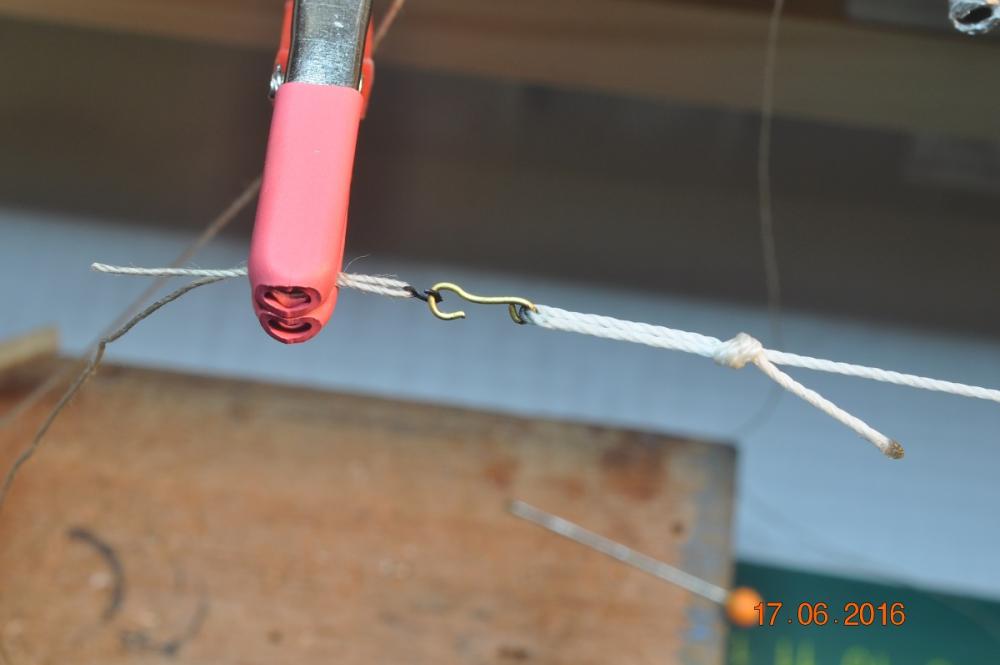
The shipwrights have been hard at work lately in the shipyard the last week. To quote Greg Lester "Took me forever and I still wasn't happy with mine. They're tiny and quite difficult." I totally agree. Following on from my previous post #363, been putting together the Gun Tackle sets and Breeching cable. Since their are 6 sets(2) of Gun Tackle and 6 Breeching cables I started a production line. My apologies for the number of pictures, but for those who are interested. Started with the single block, fixing the hook: Sets ready for the block to be added. Adding the block. Bit of trimming the excess, and ready for fitting. The double block and ring the same: Adding the rope to make each tackle set(6 left hand and 6 right hand): Breeching cable: Assembled these on a Jig of 3 posts to get each same size. Some trimming of the loose ends and ready to add to the Cannon. On the Cannons next Post. Dave R


-
Quicker than building a wooden model boat Greg. Nice work on the hull, looks good. Dave R
- 342 replies
-
- 3
-

-
- dreadnought
- zvezda
- (and 2 more)
-
Hi Dashi, Like the Bow layout. Good thought bringing the fair lead saddle back >> will allow the jib boom to run in further if that makes sense. Sure does. Lowering the knights looks better as well, like the Replica has. Dave R
-
Hi Pat, Day's not over yet, Happy Birthday. Day of achievements !. Raising a yard and ya BD. Pretty cool the Pics of the yard going up(heave ho!), I enjoyed looking at it several times. One day I'll get there. Dave R
- 517 replies
-
- 2
-
-
- Endeavour
- Artesania Latina
- (and 1 more)
-
Sure will be Greg. Stocks are soft fitted at the moment. Glue and pin when new Anchor arrives. Dave R
-
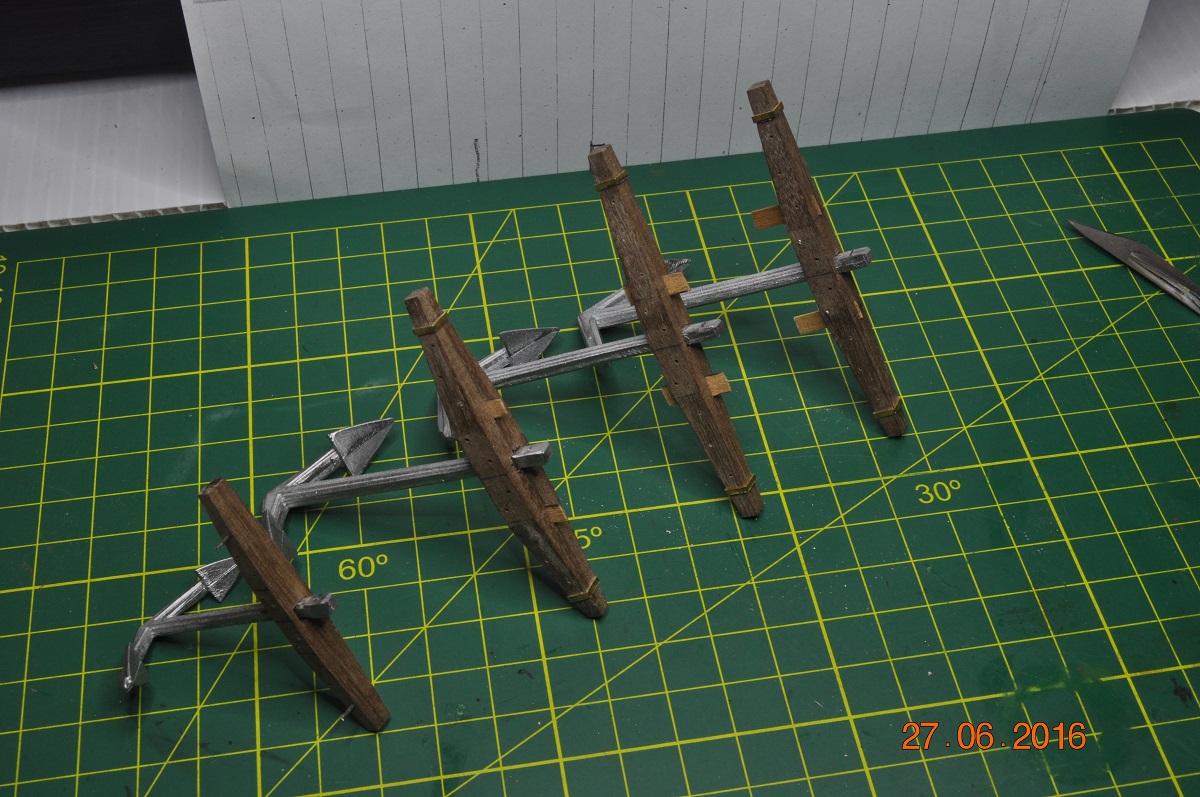
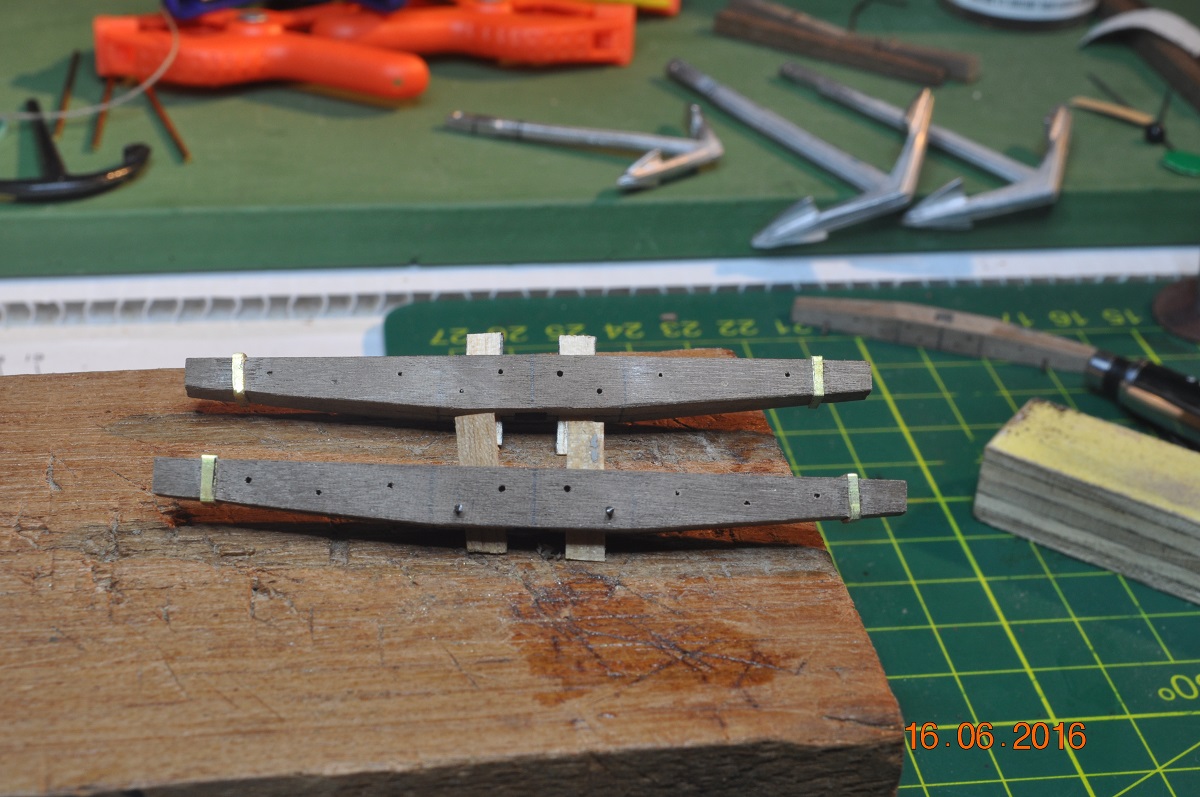
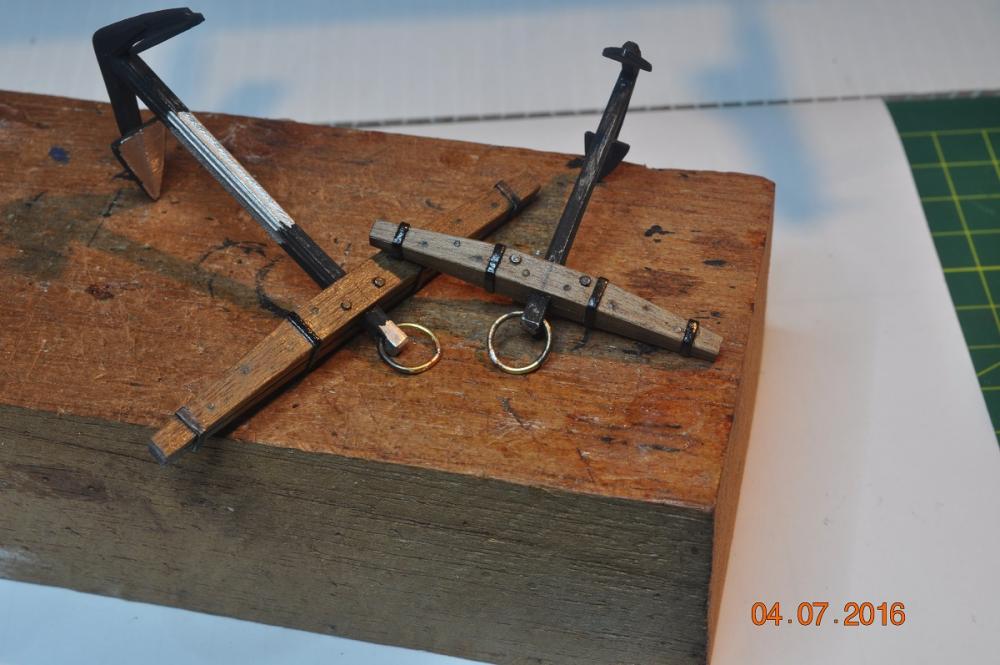
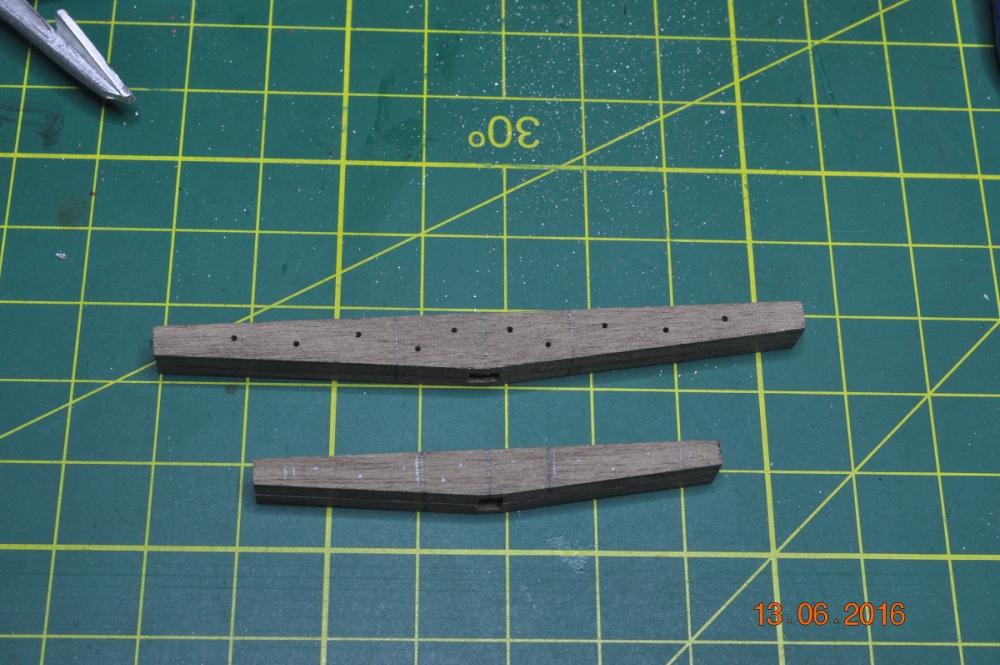
Whilst waiting for some new Anchors to arrive, I decided to do a bit of work on the Bower Anchor stocks. I marked out the hole pattern, for where the pins are to go: Bower Stock: drilled the pin holes. Stream, left marked as is for now. Slid in the Anchor Stock to see how it will look. Both Bower Anchors: tapered the stock ends, stock end hoops fitted. Will add 2 middle hoops later. The stock halves are parted with temporary packers. The stock halves should stay this way. According to "Steel's Anchor Making" It is necessary to leave an opening in the middle of one inch and a half, between the two pieces, that the hoops may be driven nearer the middle, in case the stock should shrink. That's all for now. Dave R

-
You have me interested Greg, I construction dozens of plastic models as a kid. My mother hated them(cleaning each), all gone. So keen to see how the details come up. Really well I suspect from what I already see. Dave R
- 342 replies
-
- 6
-
-
- dreadnought
- zvezda
- (and 2 more)
-
Marvelous details Pat. I am envious that you are that far ahead(of me/my build). However your work shows great patience and thought of process. Dave R
- 517 replies
-
- 3
-
-
- Endeavour
- Artesania Latina
- (and 1 more)
-
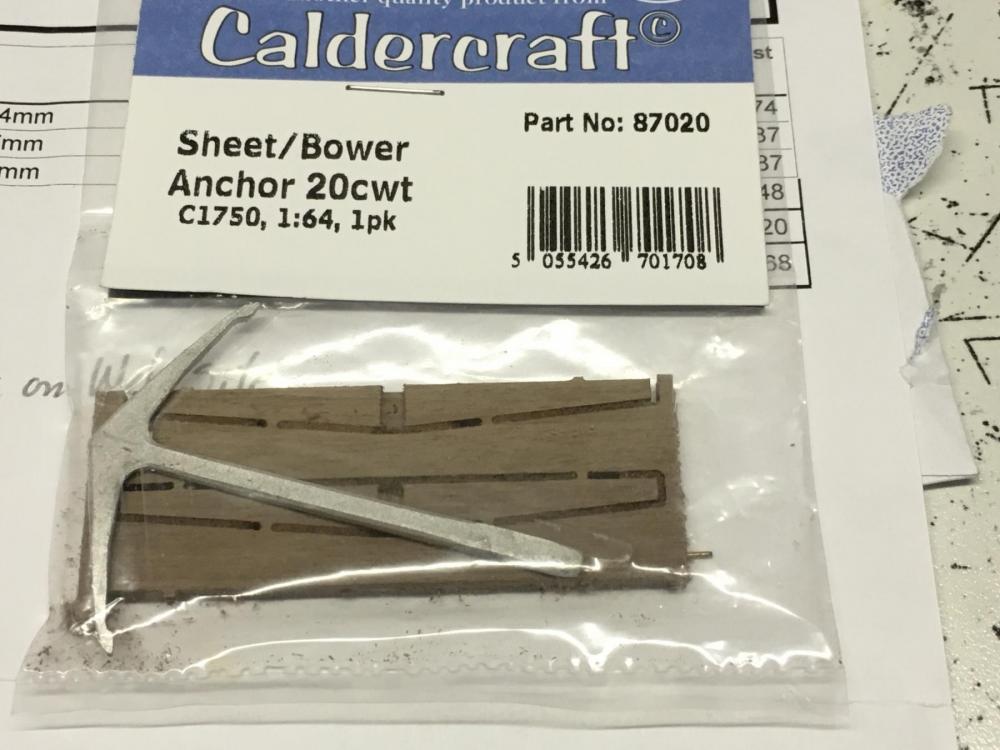
Hi Jason, The 20cwt, > no flukes inside the packet I received. My beef was that(beside the flukes) the main shank, and fluke arm cross sections are not the same style as the other 2 types I received. All 3 were indicated as the same style, used the same picture on the web site. I'm not really concerned about the cost, it is providing an item that is inconsistent with that advertised. And as Forest Gump said "and that is all I have to say on that" Dave R
-
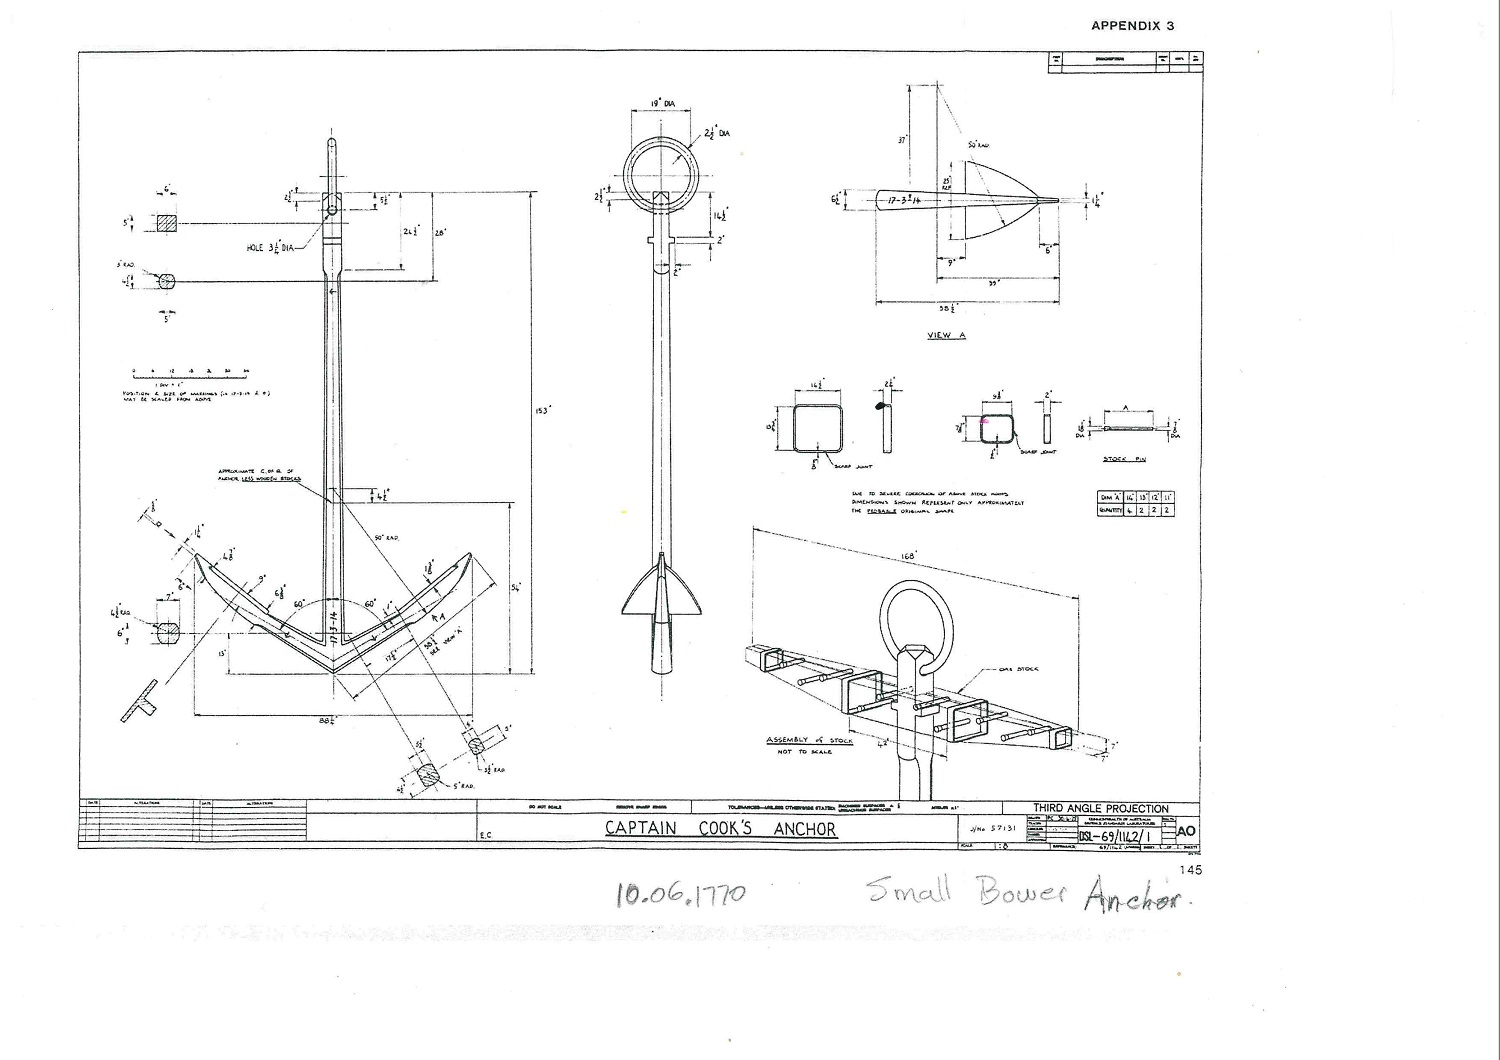
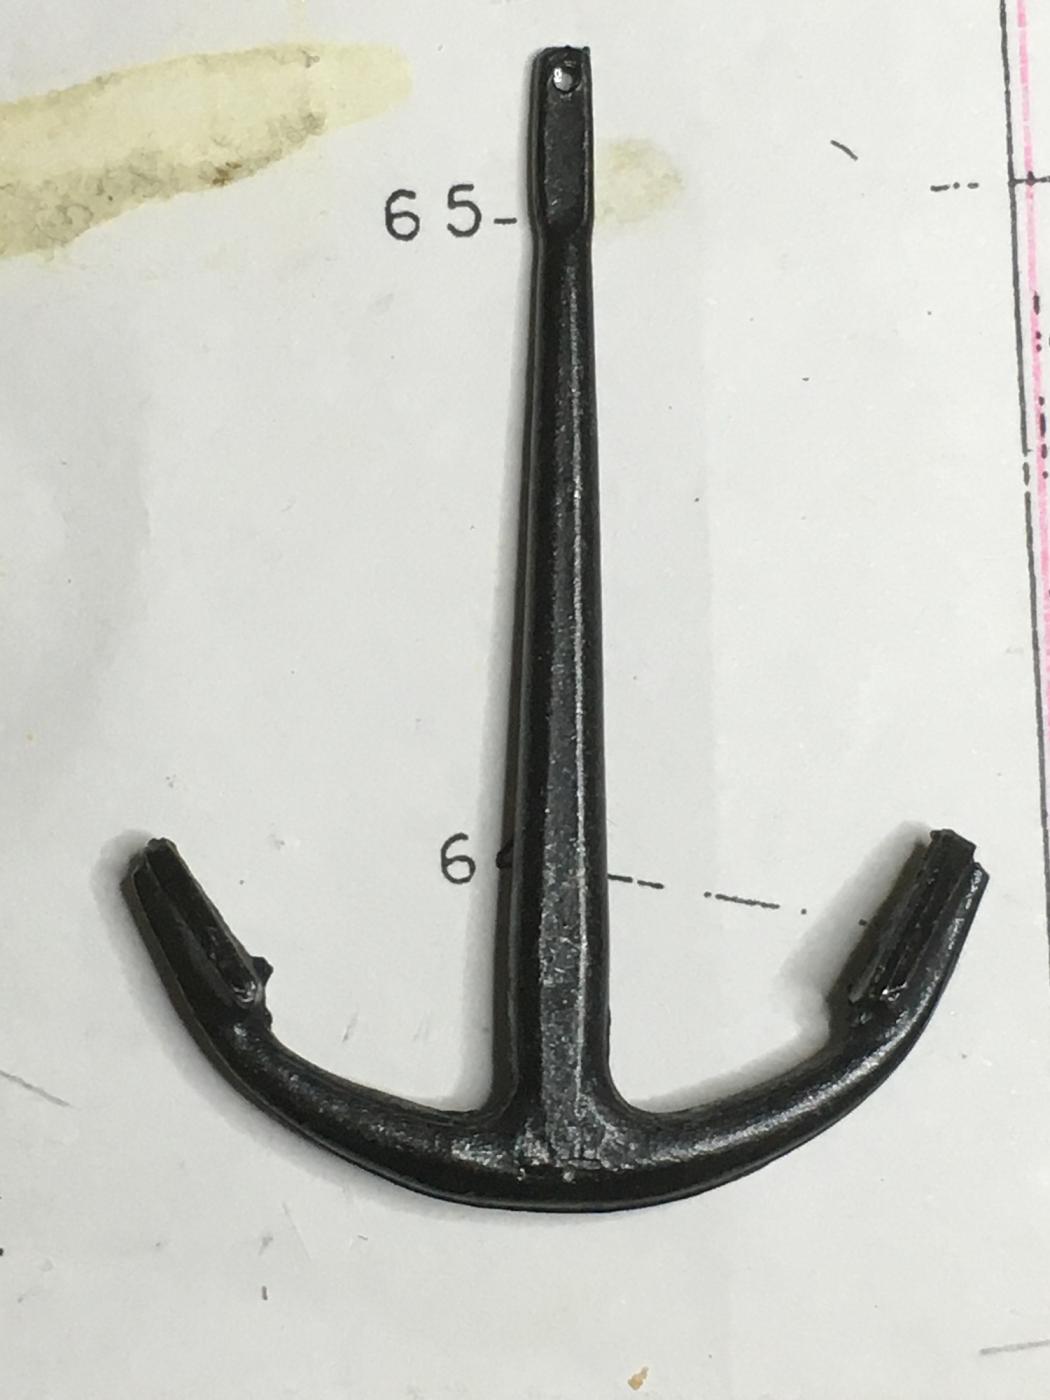
Anchors. The "story" so far. The Corel Kit of the Endeavour came with 2 Anchors. 2 of the same, hardly large enough, wrong shape(style) to be the main Sheet or Bower Anchors. Typical of this kit, throw something in, that will do. So I wish to show the type and size of Anchors that Cook had on the "Endeavour"(like many of other builds) on the model, . The AOTS indicates 4 types of anchors. Sheet Bower Stream Kedge Each looks of a similar style. Distinct features, shank, flukes. AOTS states "The standard compliment of anchors for a ship of 350 tons like Endeavour was 3 bower, 1 stream, and 1 kedge. However Cook's journal speaks of several spare Anchors were carried. Now I found with some research on the "Web" some time ago, the following drawing of "Captain Cook's Anchor"(and I am peeved as I cannot find the web address where I found it), found and retrieved from Endeavour Reef(Cape Tribulation, Queensland, where the ship went aground in 10 June 1770. The dimensions match the size for a Small Bower Anchor. The AOTS indicates the anchor arrangements of: Starboard: Sheet anchor forward with small bower astern(behind) Port: Best Bower anchor forward with Stream anchor. So the "kit" anchor is not the correct type. Has curved fluke arms. I sourced a fair match to type and size, of anchors from a reputable source. All were indicated to be the same style(shafts and flukes). 49cwt (74mm shaft) good enough with some mods for the Sheet and Best Bower Anchors up front. 21cwt (54mm shaft) good enough with some mods for the Stream anchor. However the 20cwt(for the Small Bower is different style) not happy. The 20cwt, wrong style(no flukes and shafts different), I was hoping to use as a Small Bower, no way I can use it. So no answer to my complaint from supplier. Ordered another 49cwt(which I reckon I can modify as a Small Bower), see what comes in 2 weeks time. In the mean time, move onto something else. Dave R


-
Going along very well Dashi. I am nearly convinced to add a "transom" under the tiller of my build. If I can get it under their now. Dave R
-
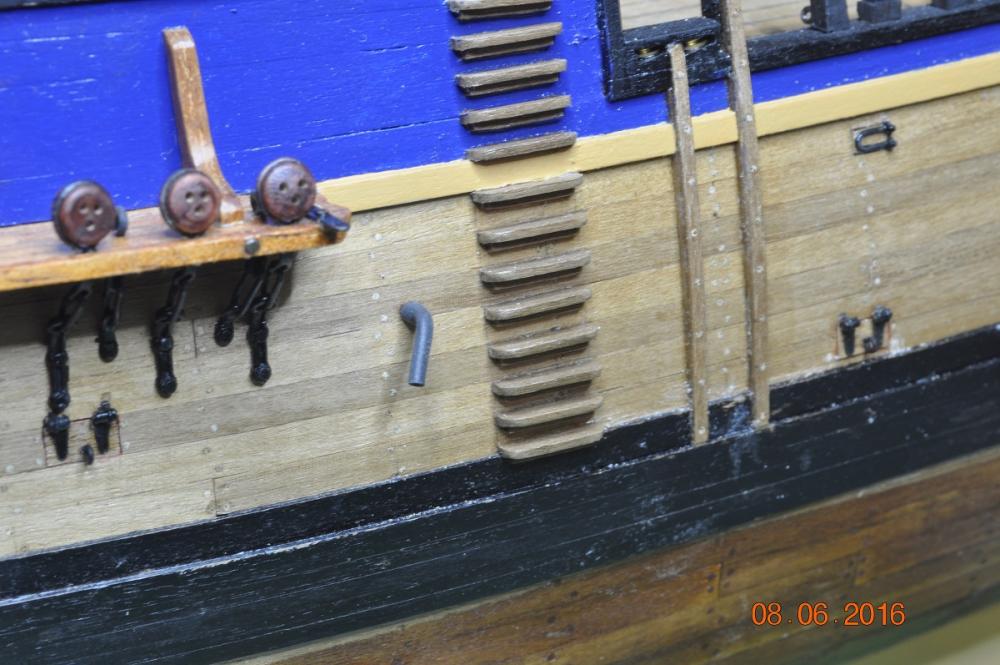
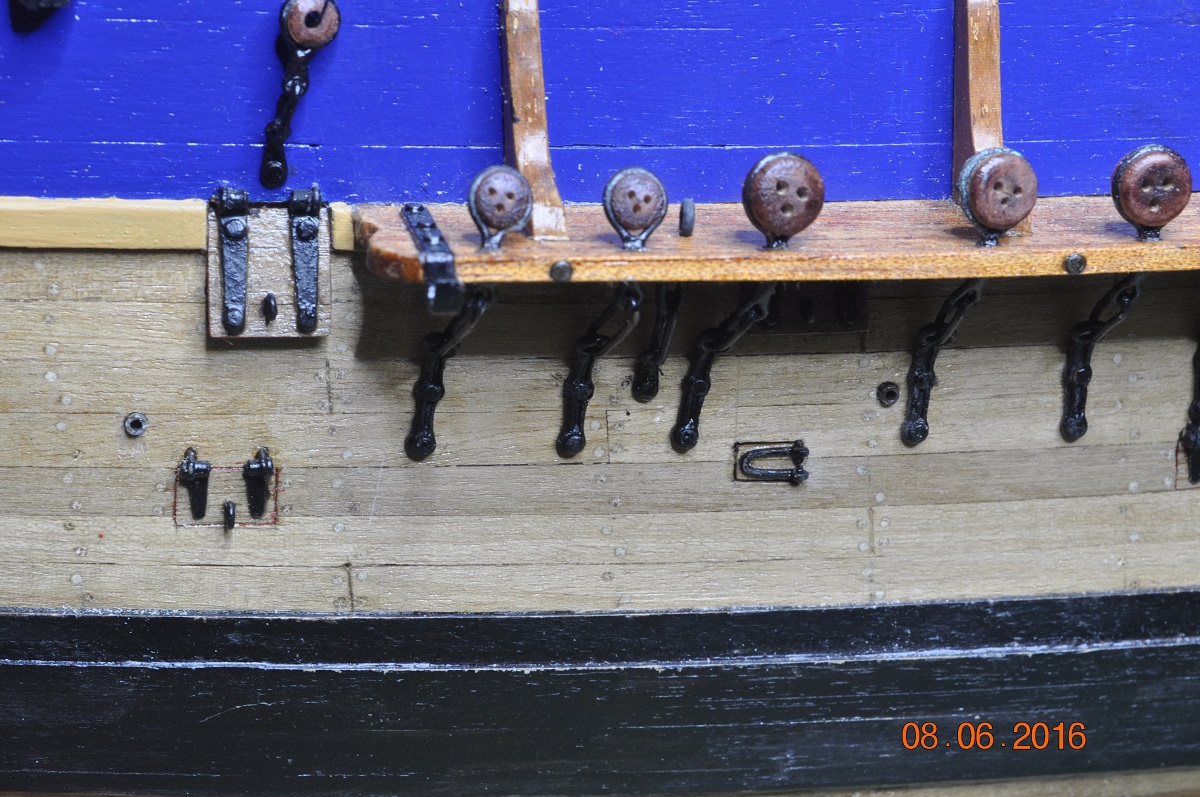
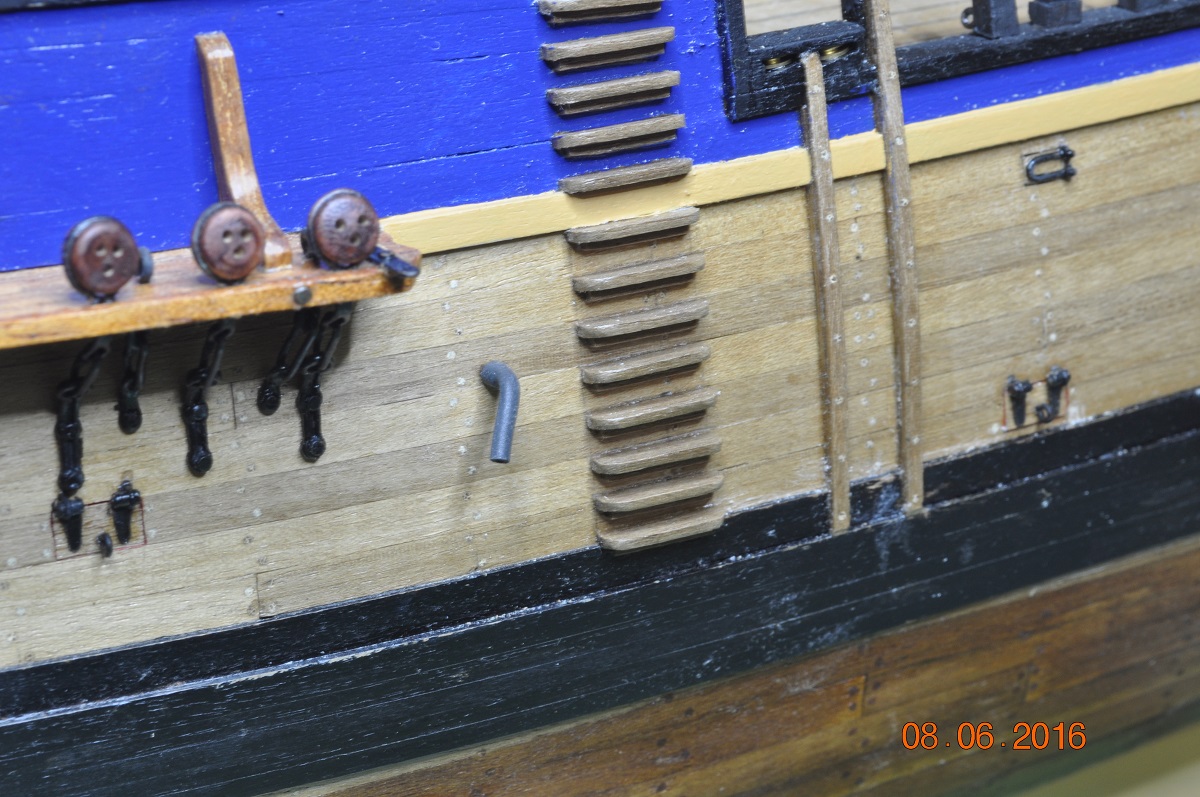
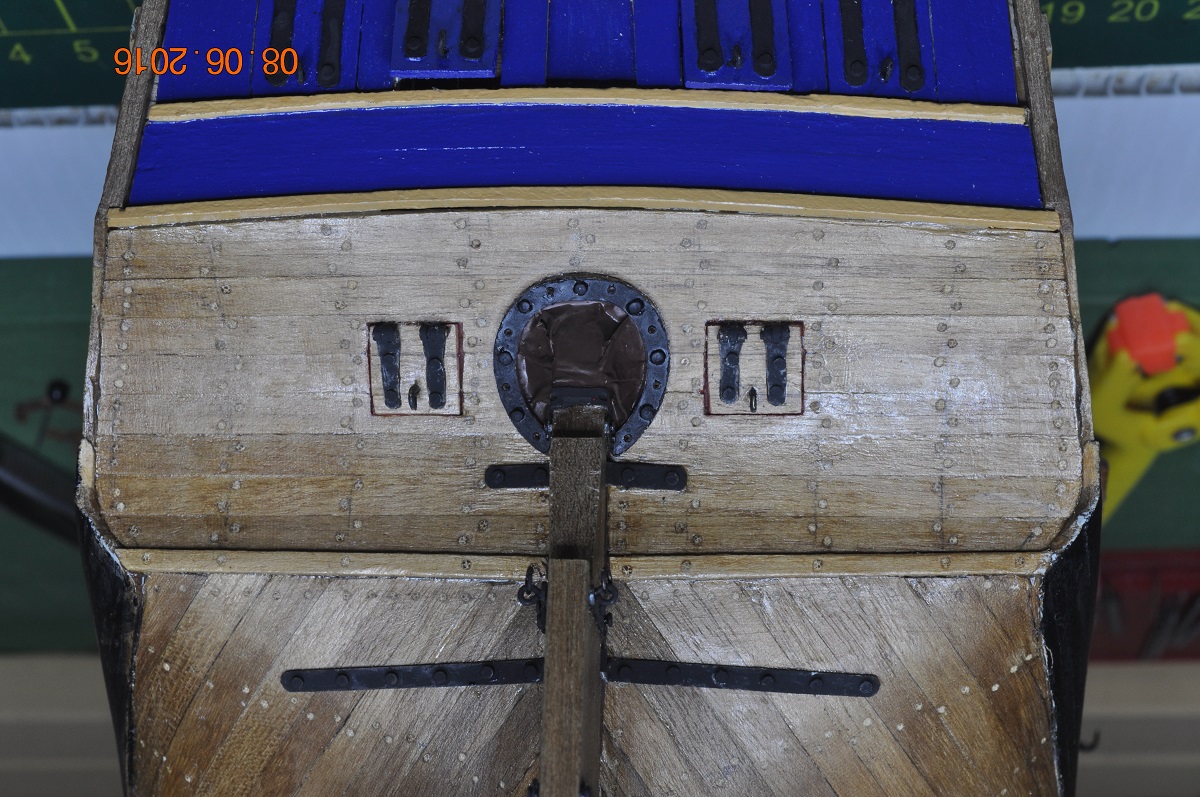
The shipyard has been taking care of a couple of small items. Scuppers: 3 per side, one with a hose so the AOTS indicates. The starboard side ones >> One with hose. 2 others, plain pipe Rudder Coat: The black flange(third one I made) is plastic with black paint over it. Thanks to Greg Lester, I used same foil wrap for the coat, painted brown. Close up photos show up all sorts of scratches, dint's, dirt, imperfections etc. Next > onto the Anchors. I ordered some anchors from Cornwall Model Boats, which have arrived. Another post another time.. Dave R