HOLIDAY DONATION DRIVE - SUPPORT MSW - DO YOUR PART TO KEEP THIS GREAT FORUM GOING! (Only 68 donations so far out of 49,000 members - Can we at least get 100? C'mon guys!)
×


DaveRow
-
Posts
691 -
Joined
-
Last visited
Content Type
Profiles
Forums
Gallery
Events
Everything posted by DaveRow
-
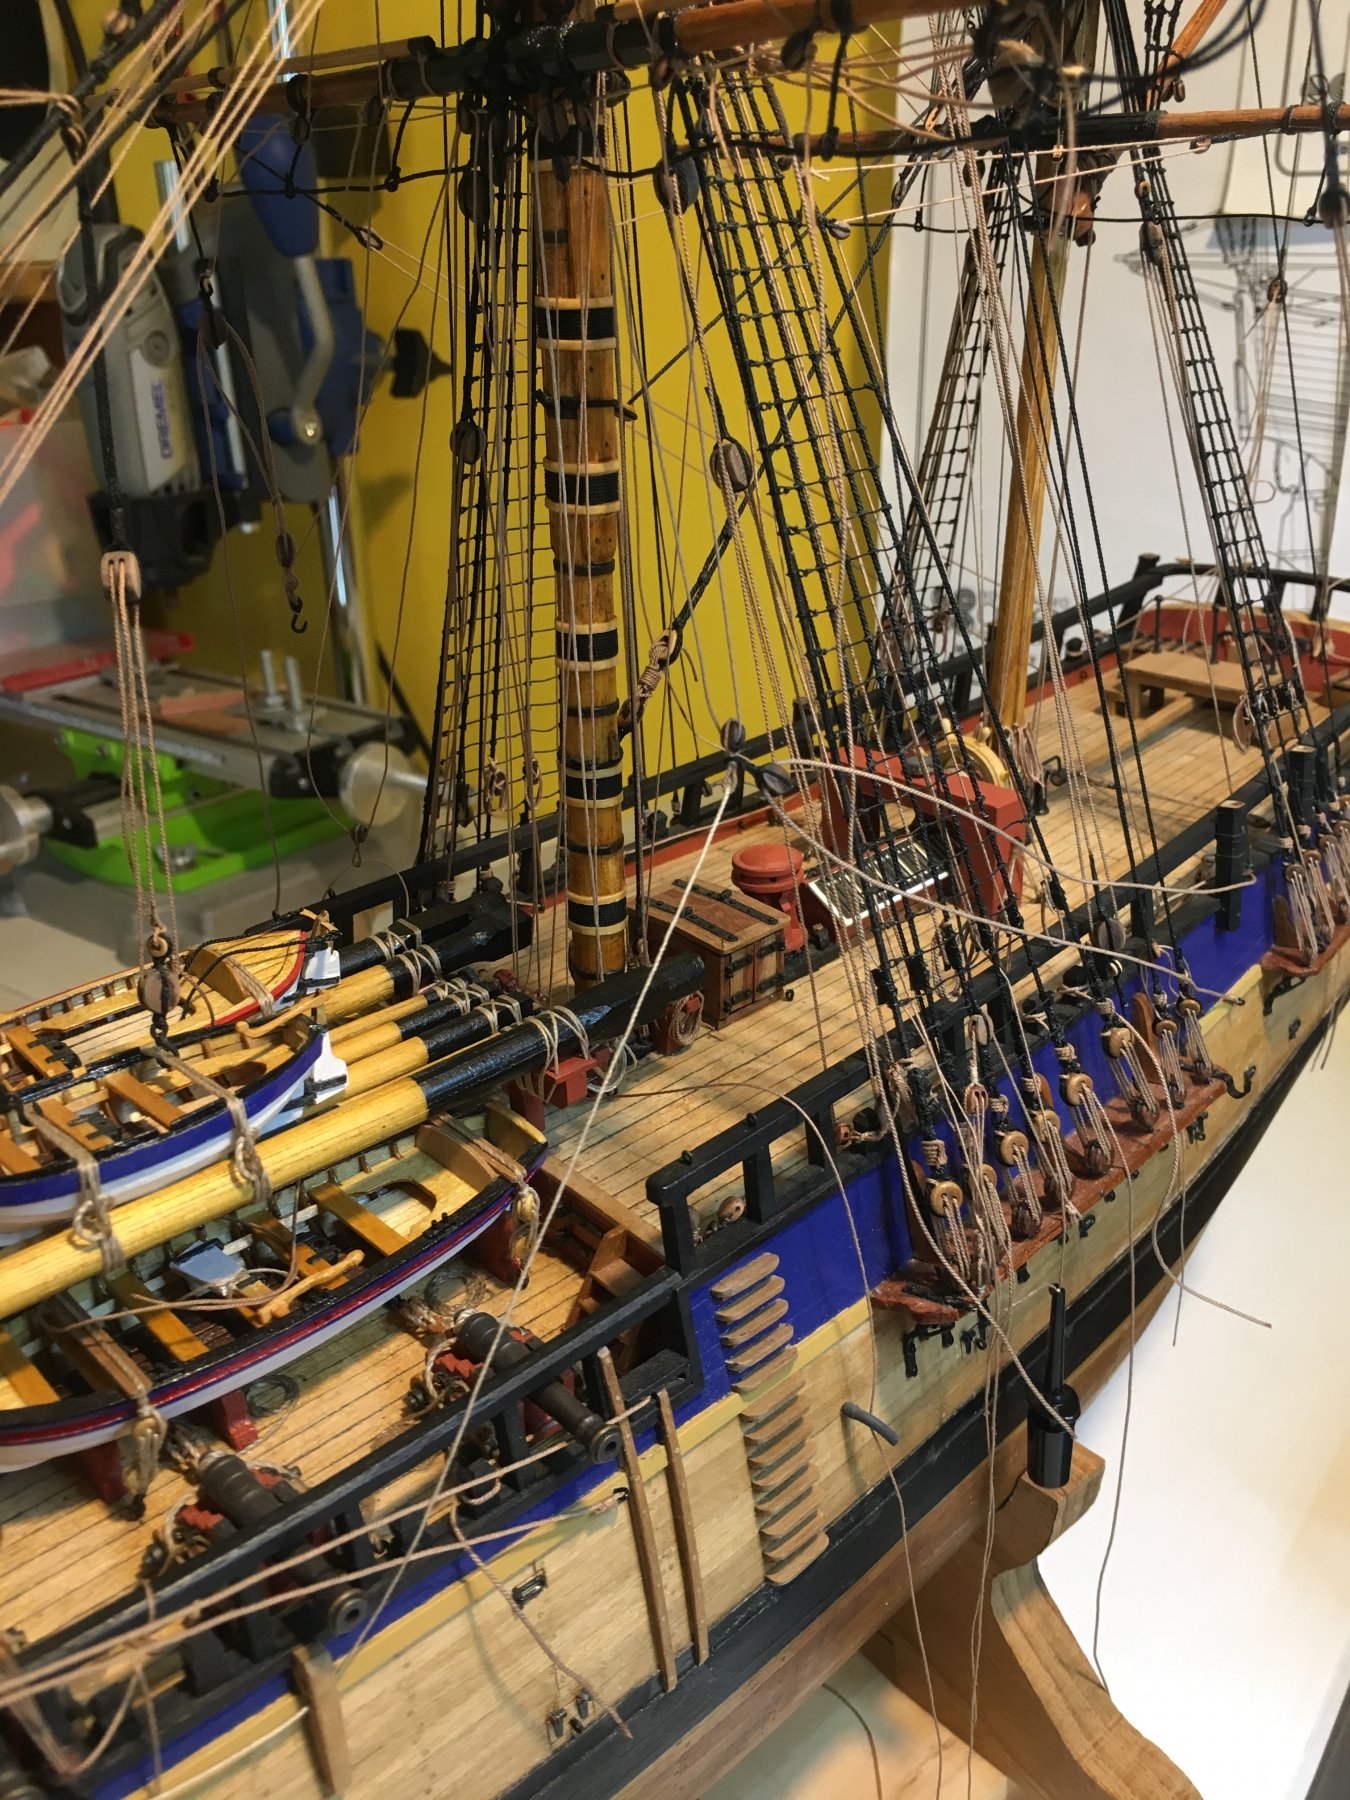
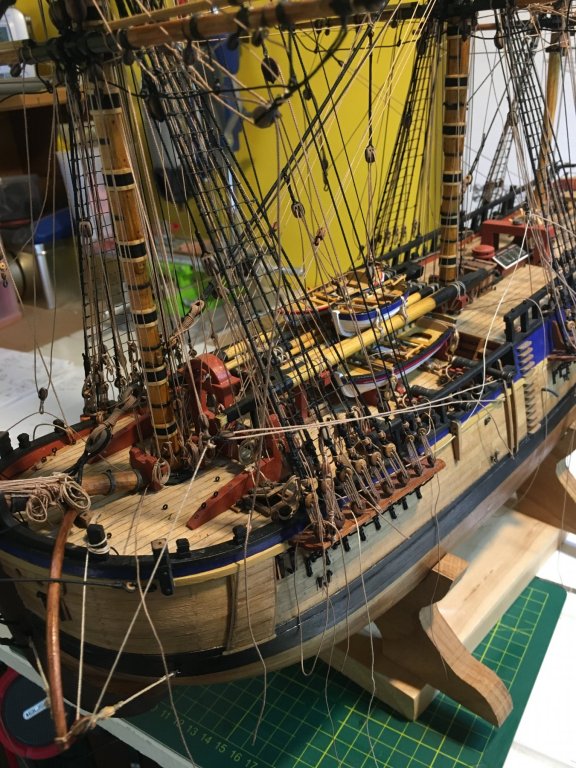
 Shipyard Update: The days then weeks seem to go by without knowing these past 12 days. The shipyard has spent many hours tidying up the halyards, sheets, many other rope ends on the deck and shrouds. I can now see the sides of the hull again, party time eh !!. The Anchors are taking their place on the P&S Bows. Below a closer view of the Port Anchors(Sheet and Kedge). I have the Sheet Anchor tied up in place with chain. The Kedge Anchor: - tied to the Fore Port Channel. - I need to source more chain for the smaller Kedge Anchor, to wrap around the shank, Arm end and tie off to the bollards. - The Port Anchor Buoy is attached to the front Fore Shroud, with buoy-rope below coiled and attached the Sheet Anchor. The Starboard of Bow(not shown here) has a Sheet(hanging down) and Stream Anchor up on the Channel. Working on that side now Below the Port Main and Mizzen Shrouds, Channel and deck area. All the current ropes, ends coiled all tied in place. Much more to go, but getting there. P.S. I took delivery of the Display Case(top cover), Acrylic Box 900L x 350W x 750H. Still wrapped up in bubble wrap. Another job to get the base made.

-
Hi Dashi, Nice work mate. Check and doublecheck. Lots of steps to consider eh! Just the beginning, to where I was, what seems a long time ago.
-
Dashi, I definitely have been at the high end of the learning curve for this build. My build probably comes out as a bit of this and a bit of that, between AoTS, the Replica, David Steel's, Shardlow, Parkin and a few other books on rigging etc. If I got something right, it made sense to me to do it that way.?
-
Great work there Dashi. The rate your going, you'll catch up to me before I finish ?
-
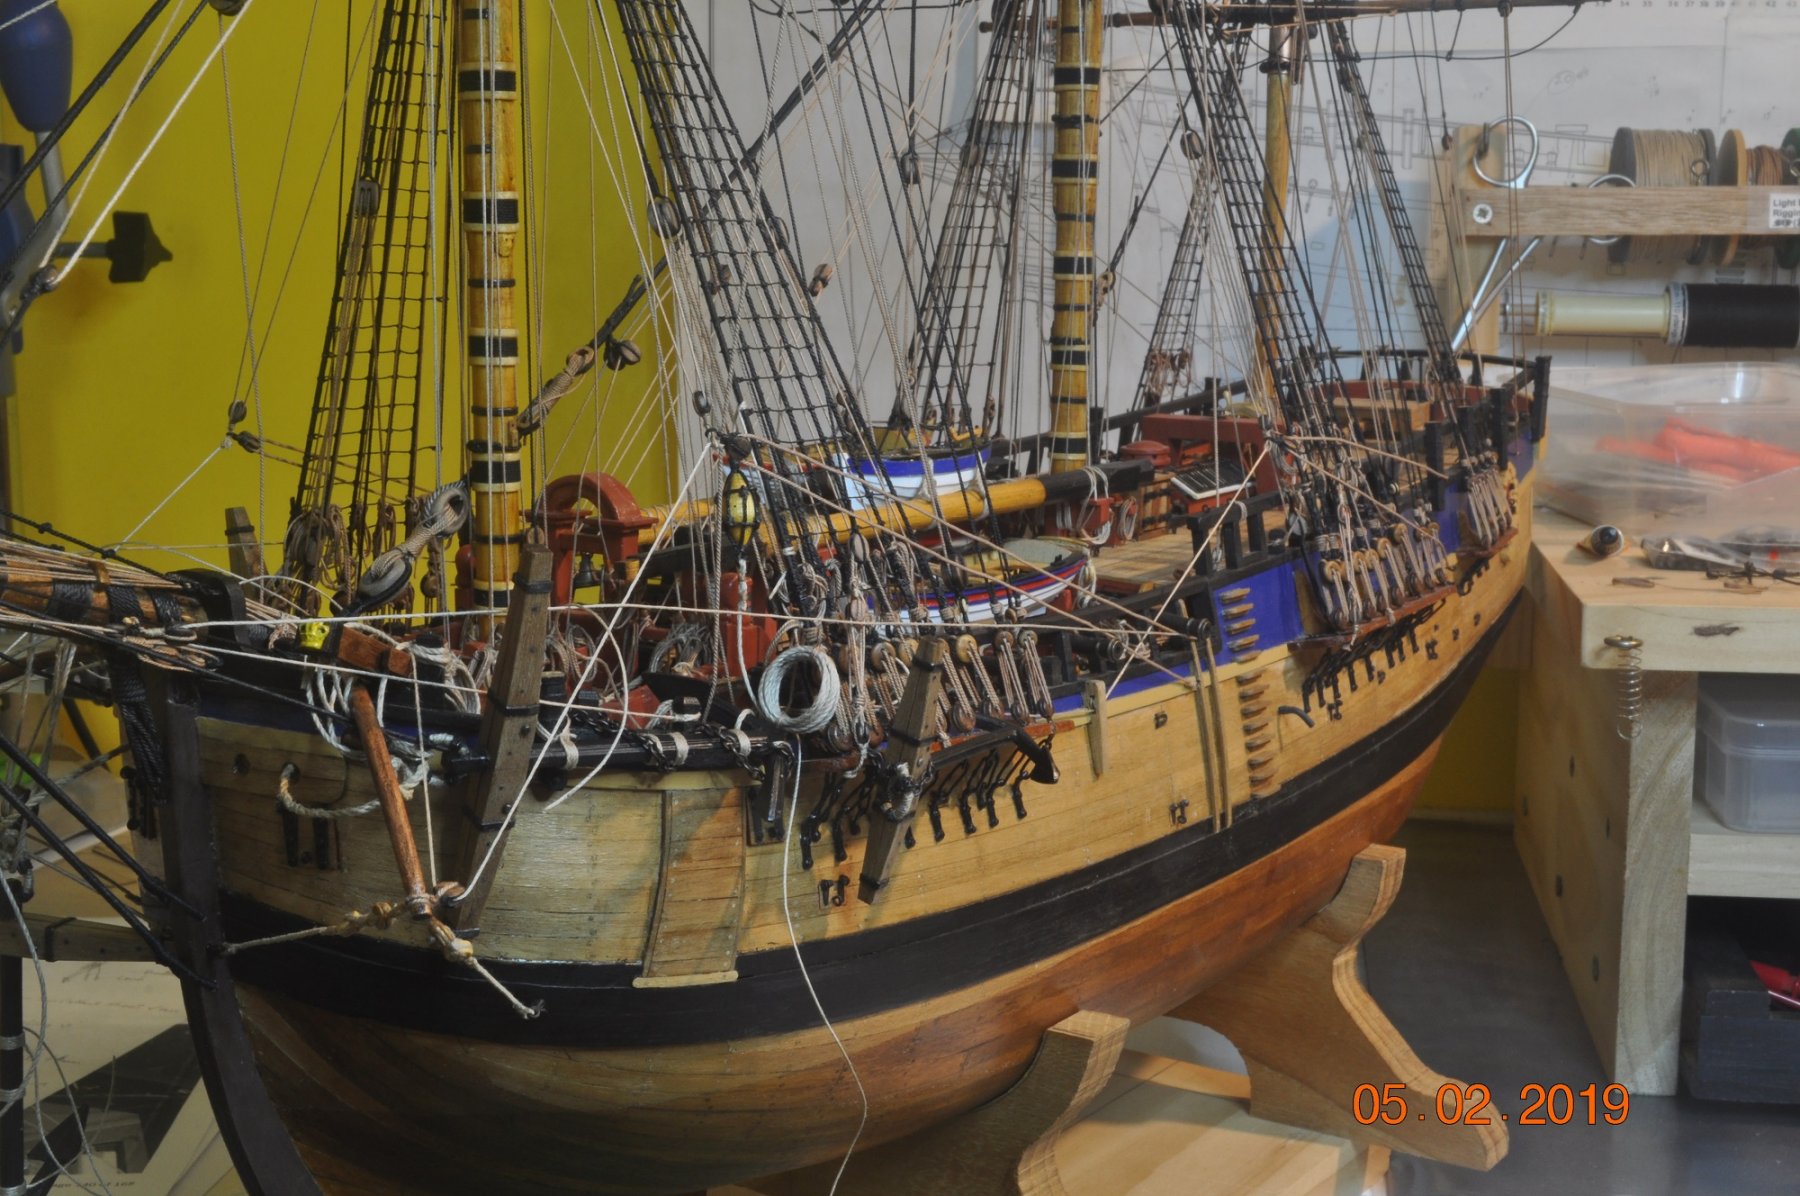
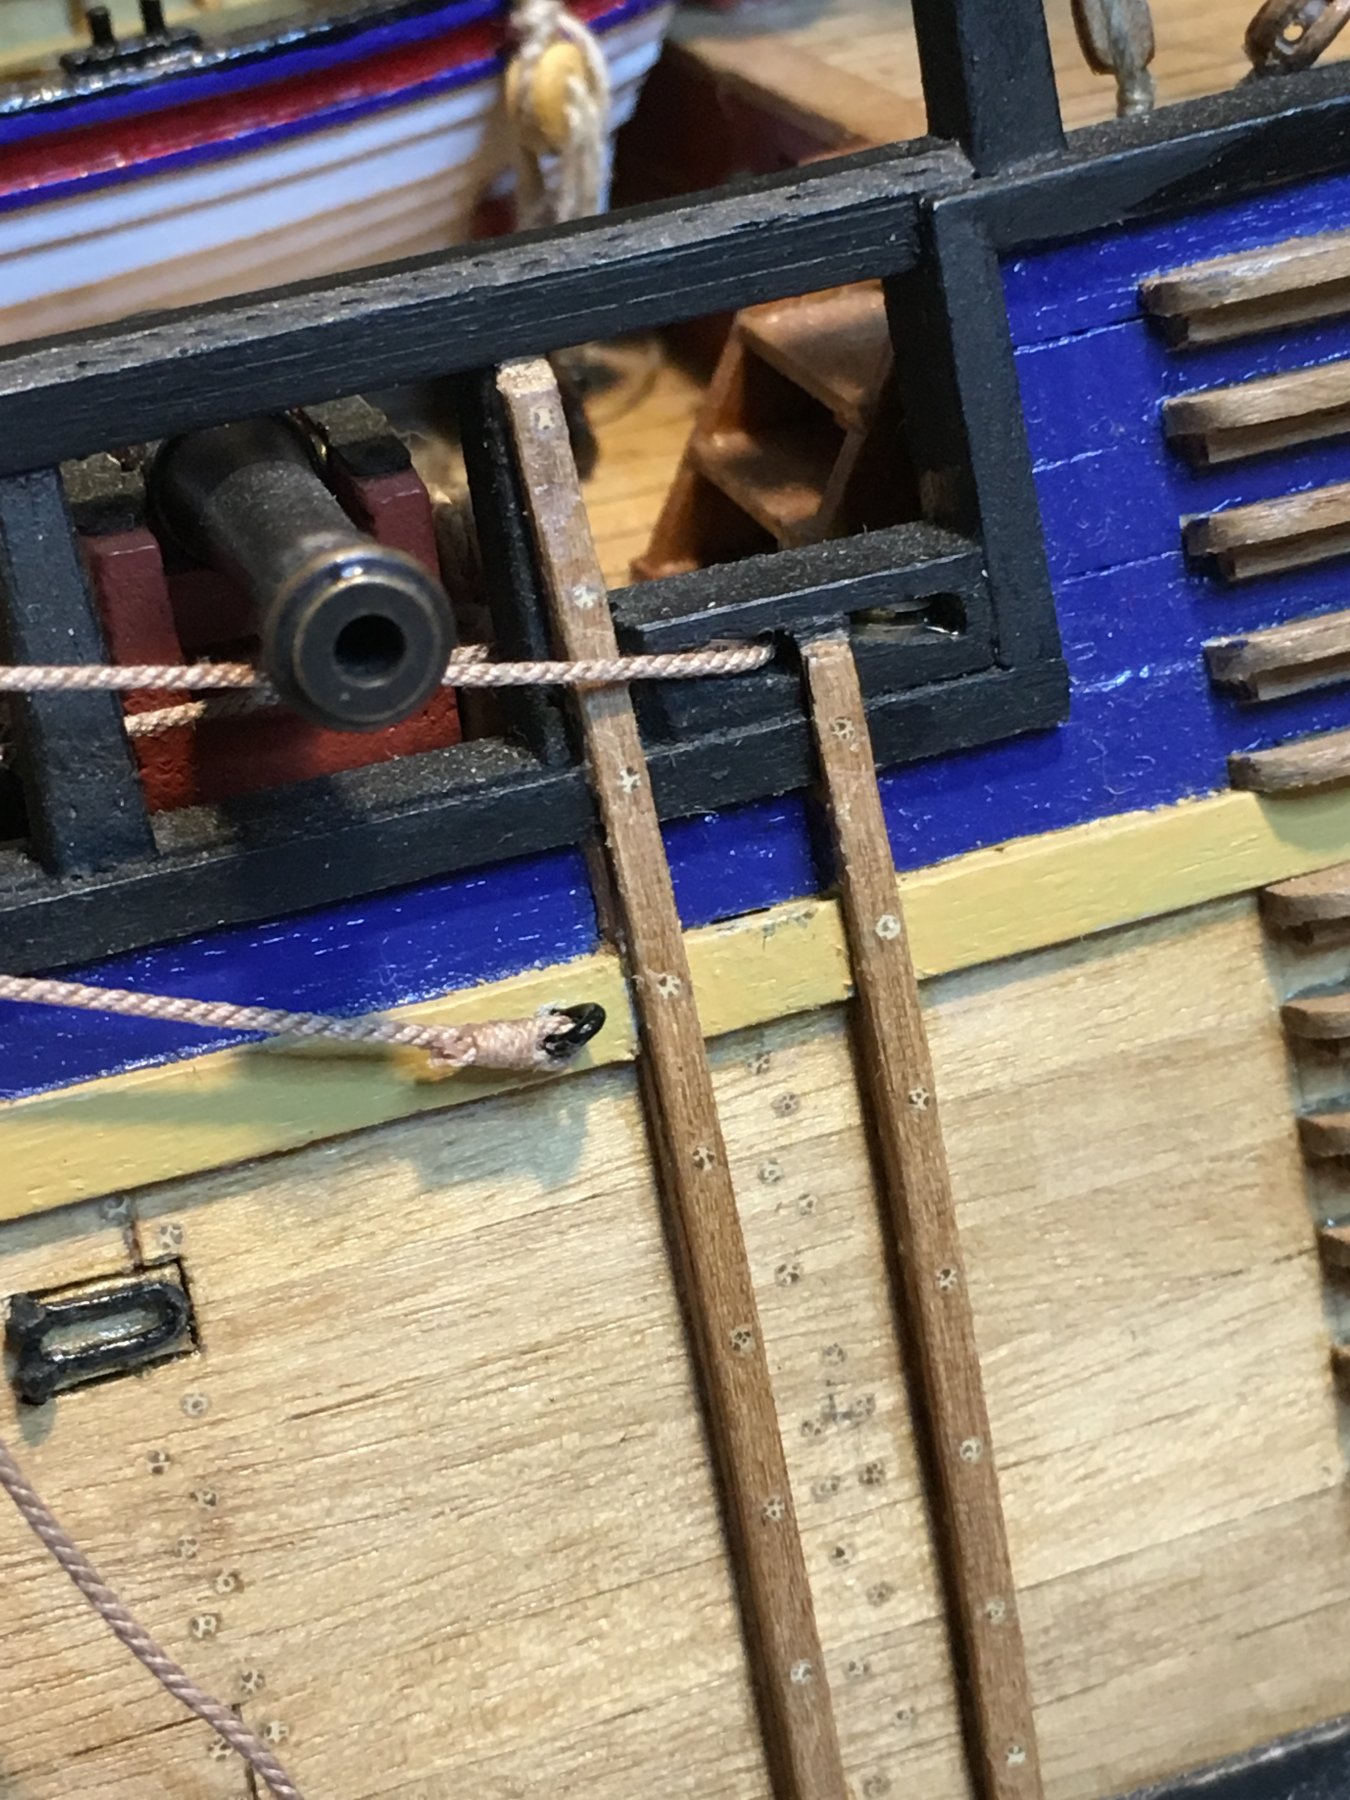
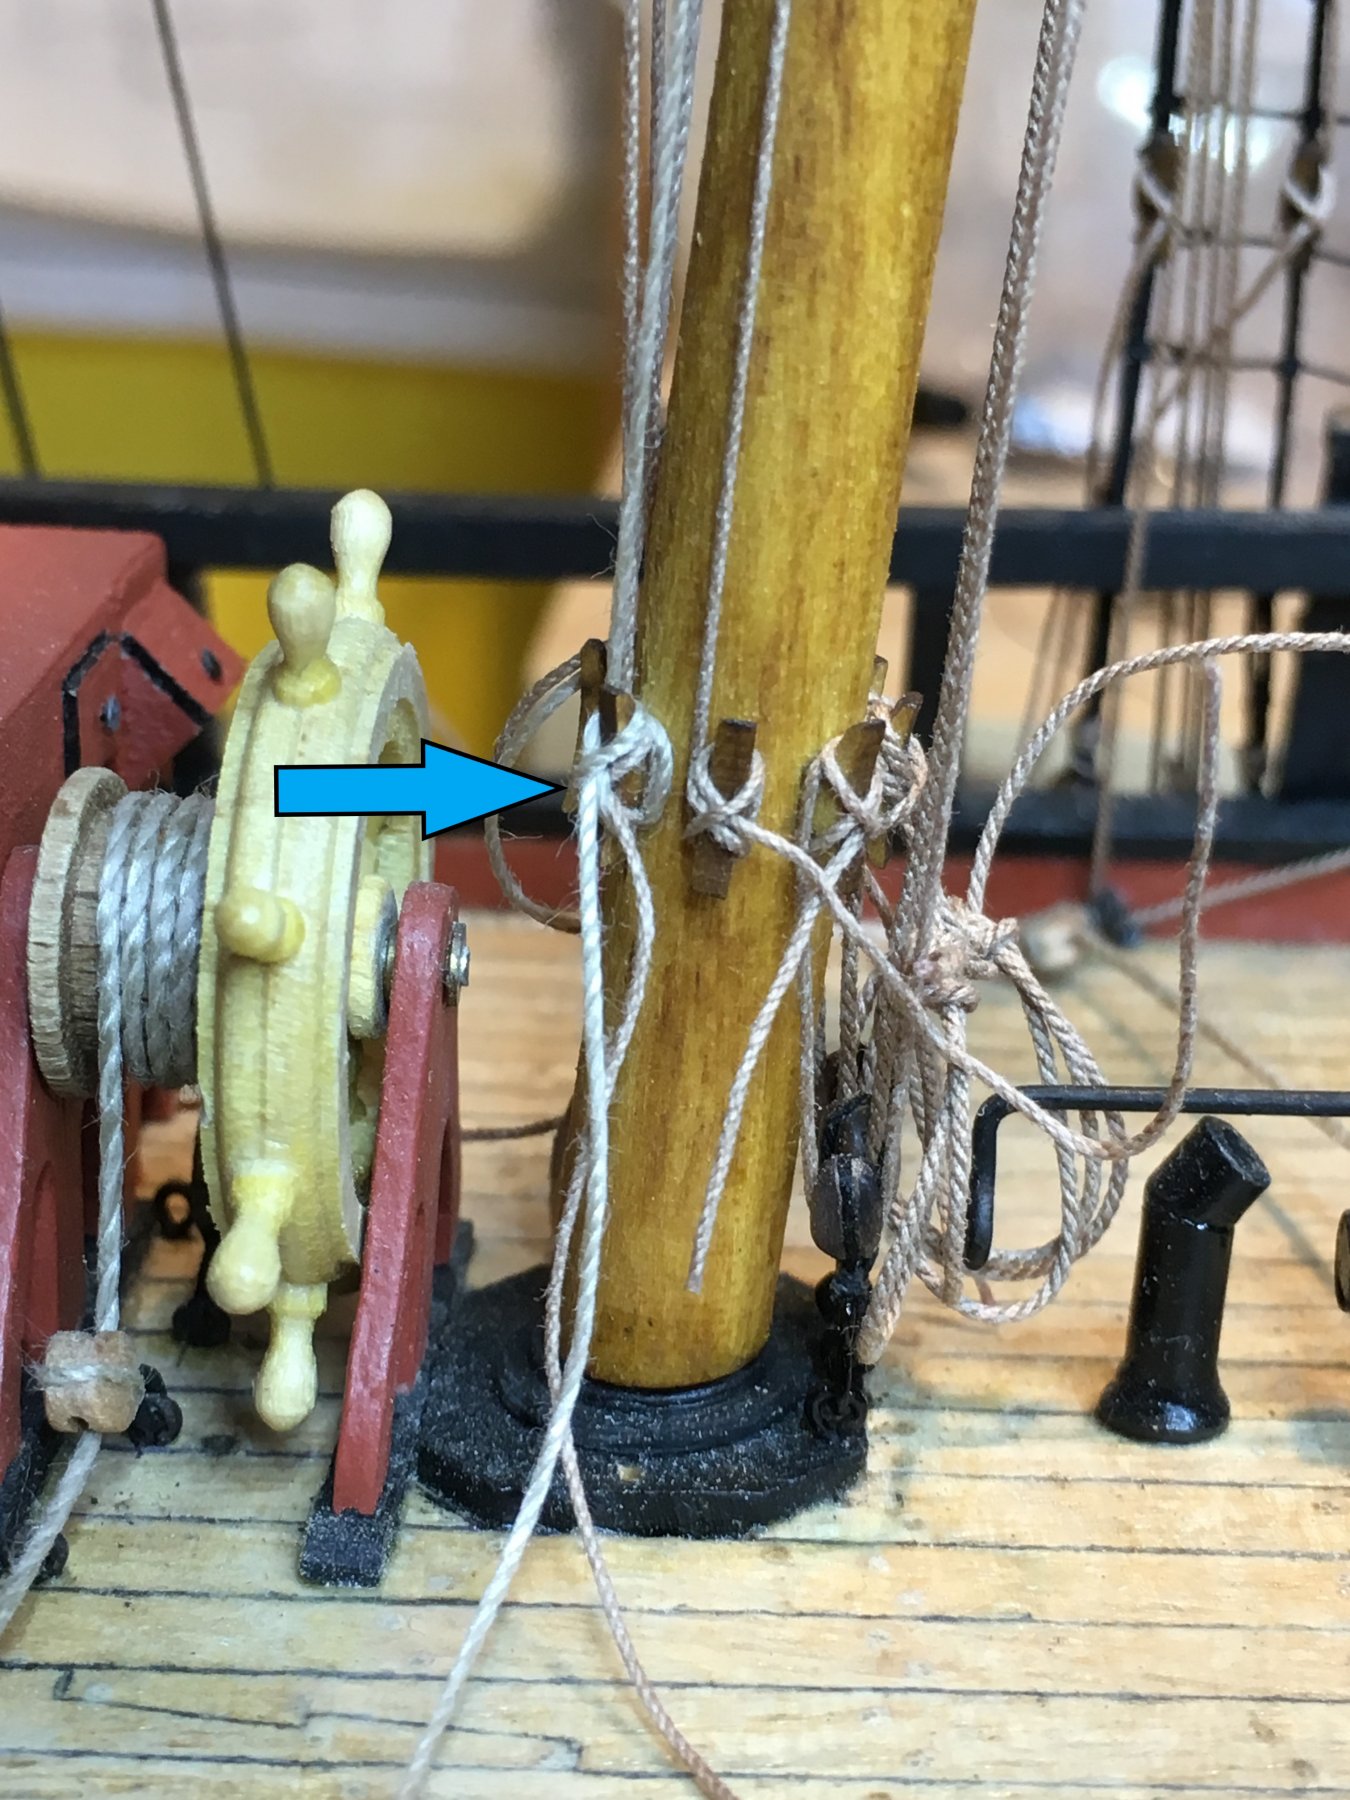
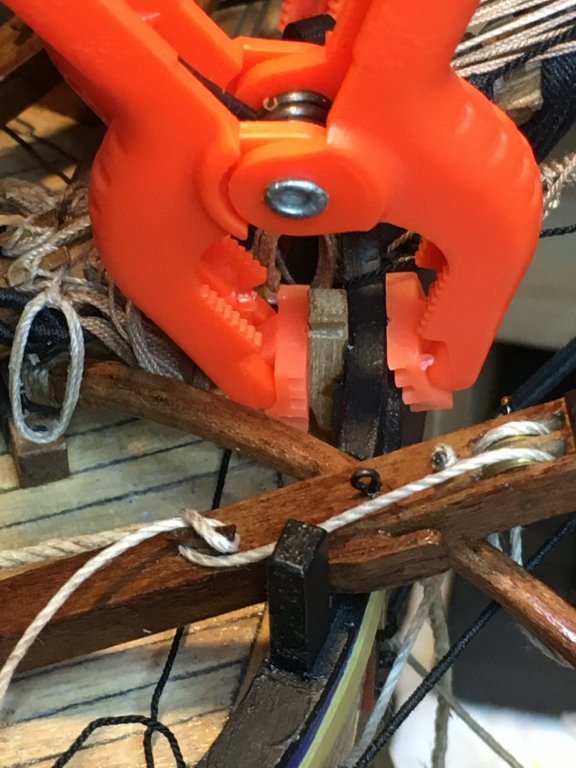
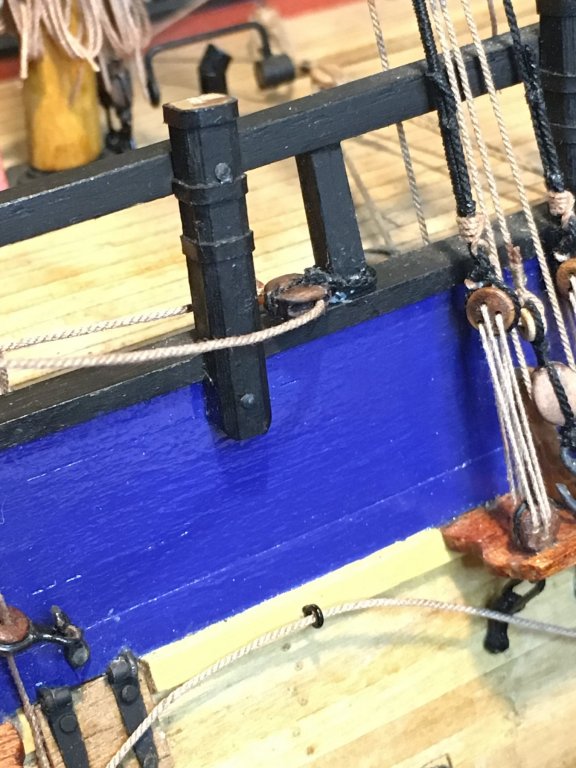
Shipyard Update Bow area: Bollards & Cleats for tying off. For a while I've not been happy with the number of rope ends, requiring tie points, just not enough. The NMM Endeavour Replica has this area on the Bow - Pic below, where 2 bollards and belay pins are located. I missed this on the early stages of the build, but makes sense for the multitude of ropes coming back from the bowsprit and yards, never ending. The AoTS does not indicate(that I have seen) any bollard or cleats in this "zone", but sure would come in handy. Bit late in the build to be adding in 2 bollards and belay pins, both sides of Bowsprit. Busy little area now and very tight. So I decided I could at least add 2 additional Bollards(below) to slip in behind bow and beside the Bowsprit. Extra Starboard Bollard(not painted yet) - clamp holding whilst glue drying. Another added to the Port side as well. Next, all going well to add the Anchors to the Bow area.

-
HMCSS Victoria 1855 by BANYAN - 1:72
DaveRow replied to BANYAN's topic in - Build logs for subjects built 1851 - 1900
Hi Pat, Deck fit-out looking seriously good man.- 1,013 replies
-
- 4
-

-
- gun dispatch vessel
- victoria
- (and 2 more)
-
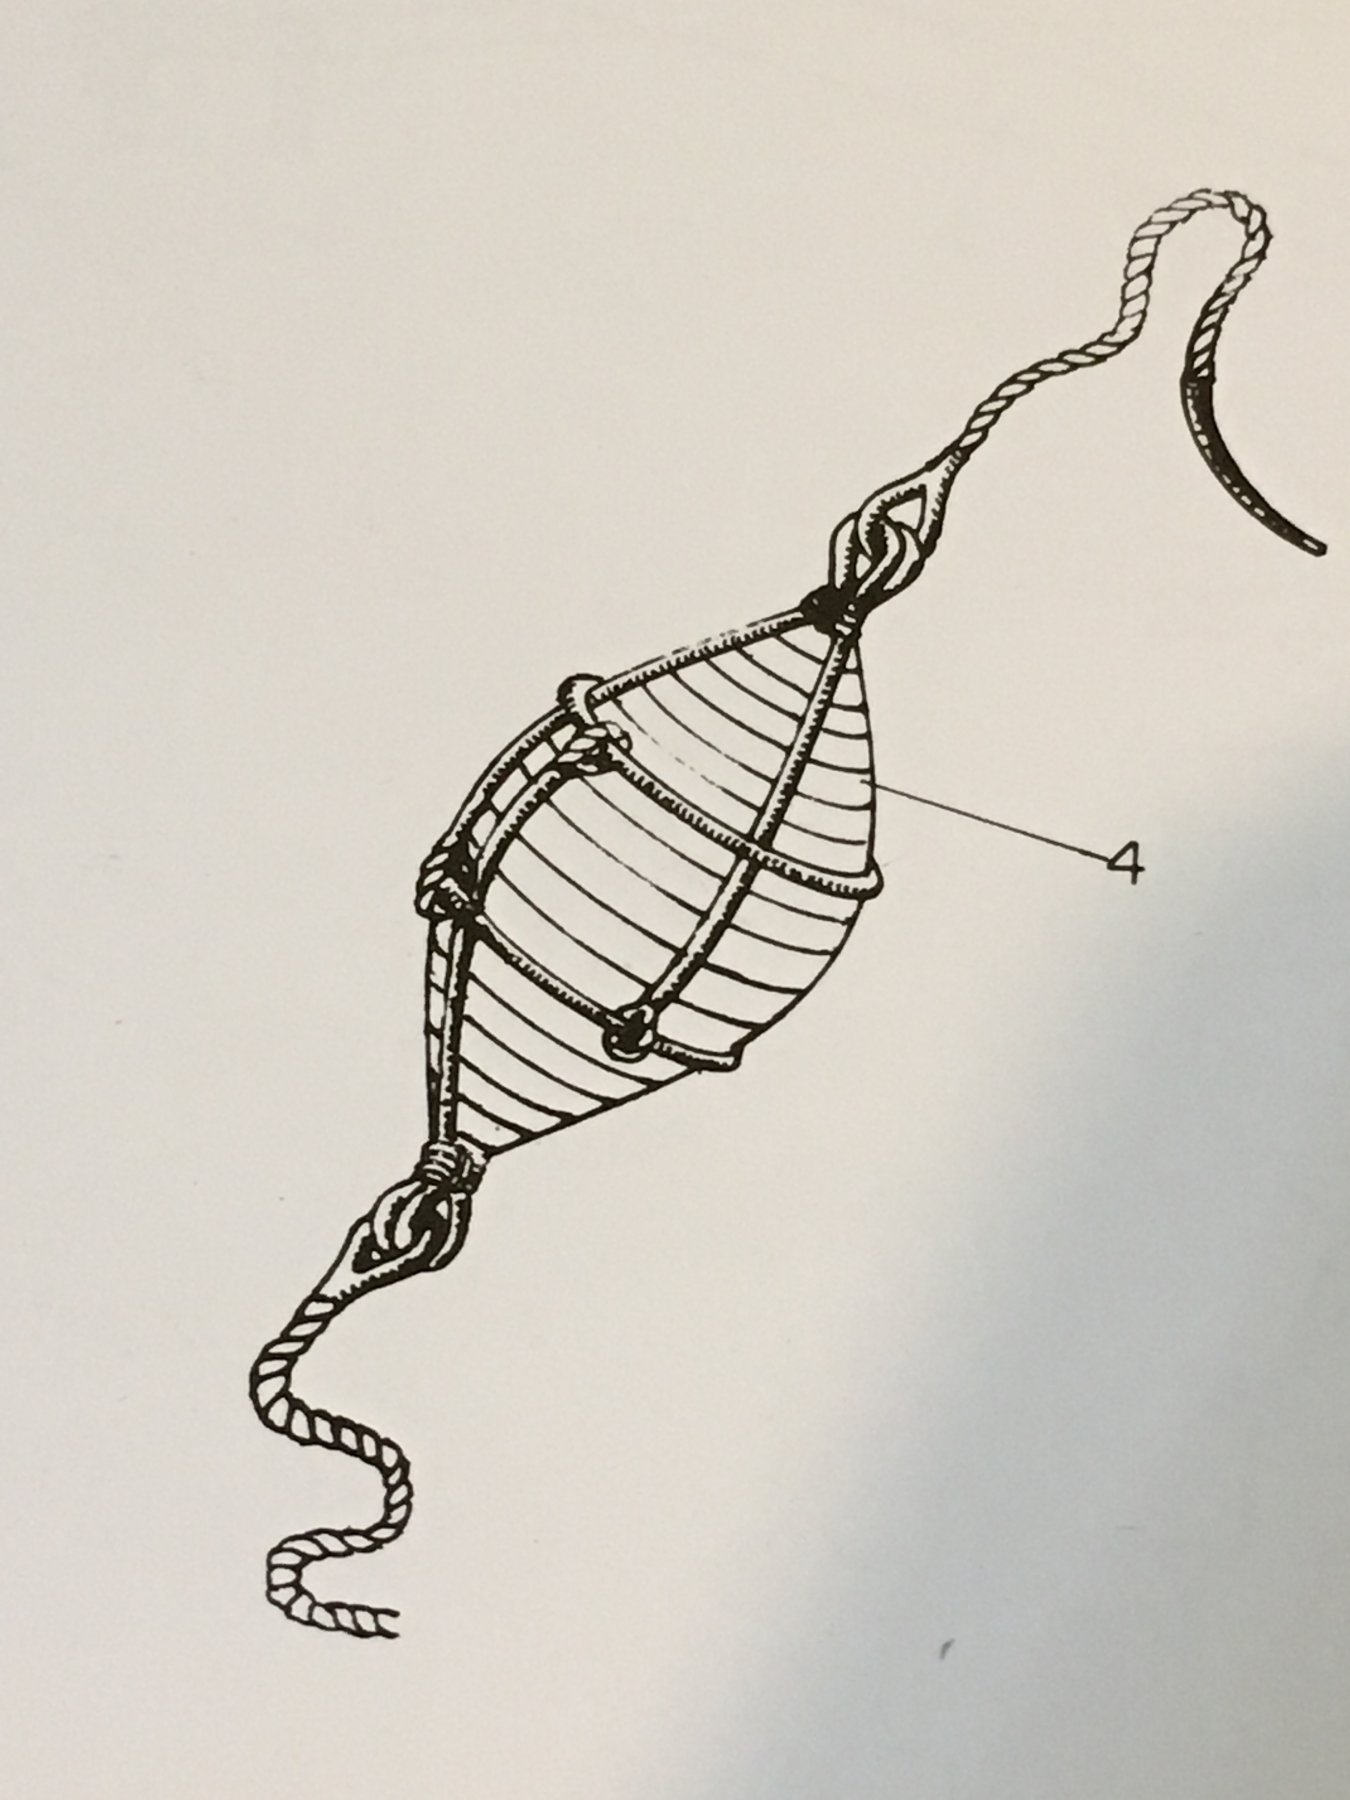
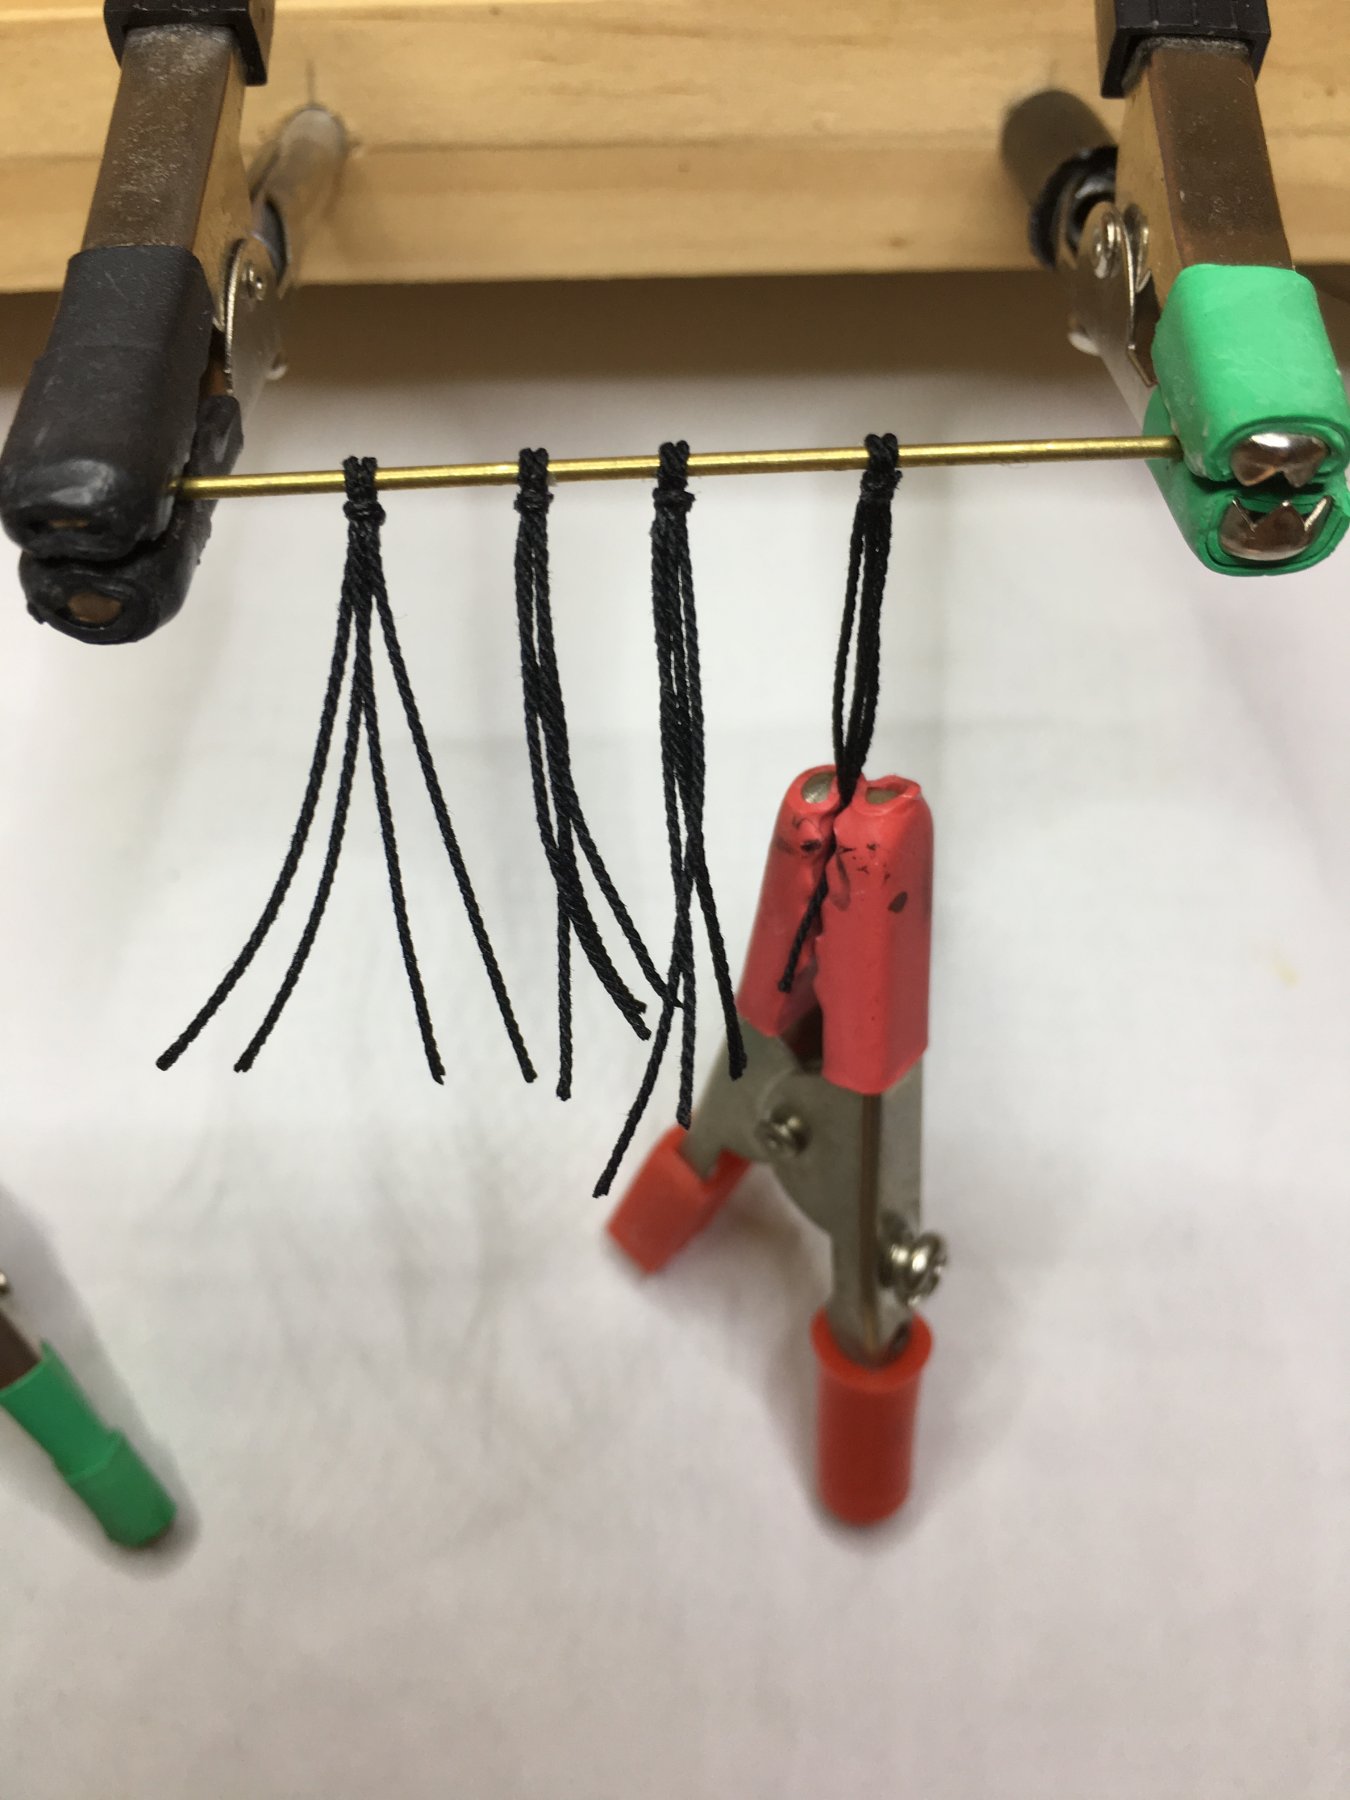
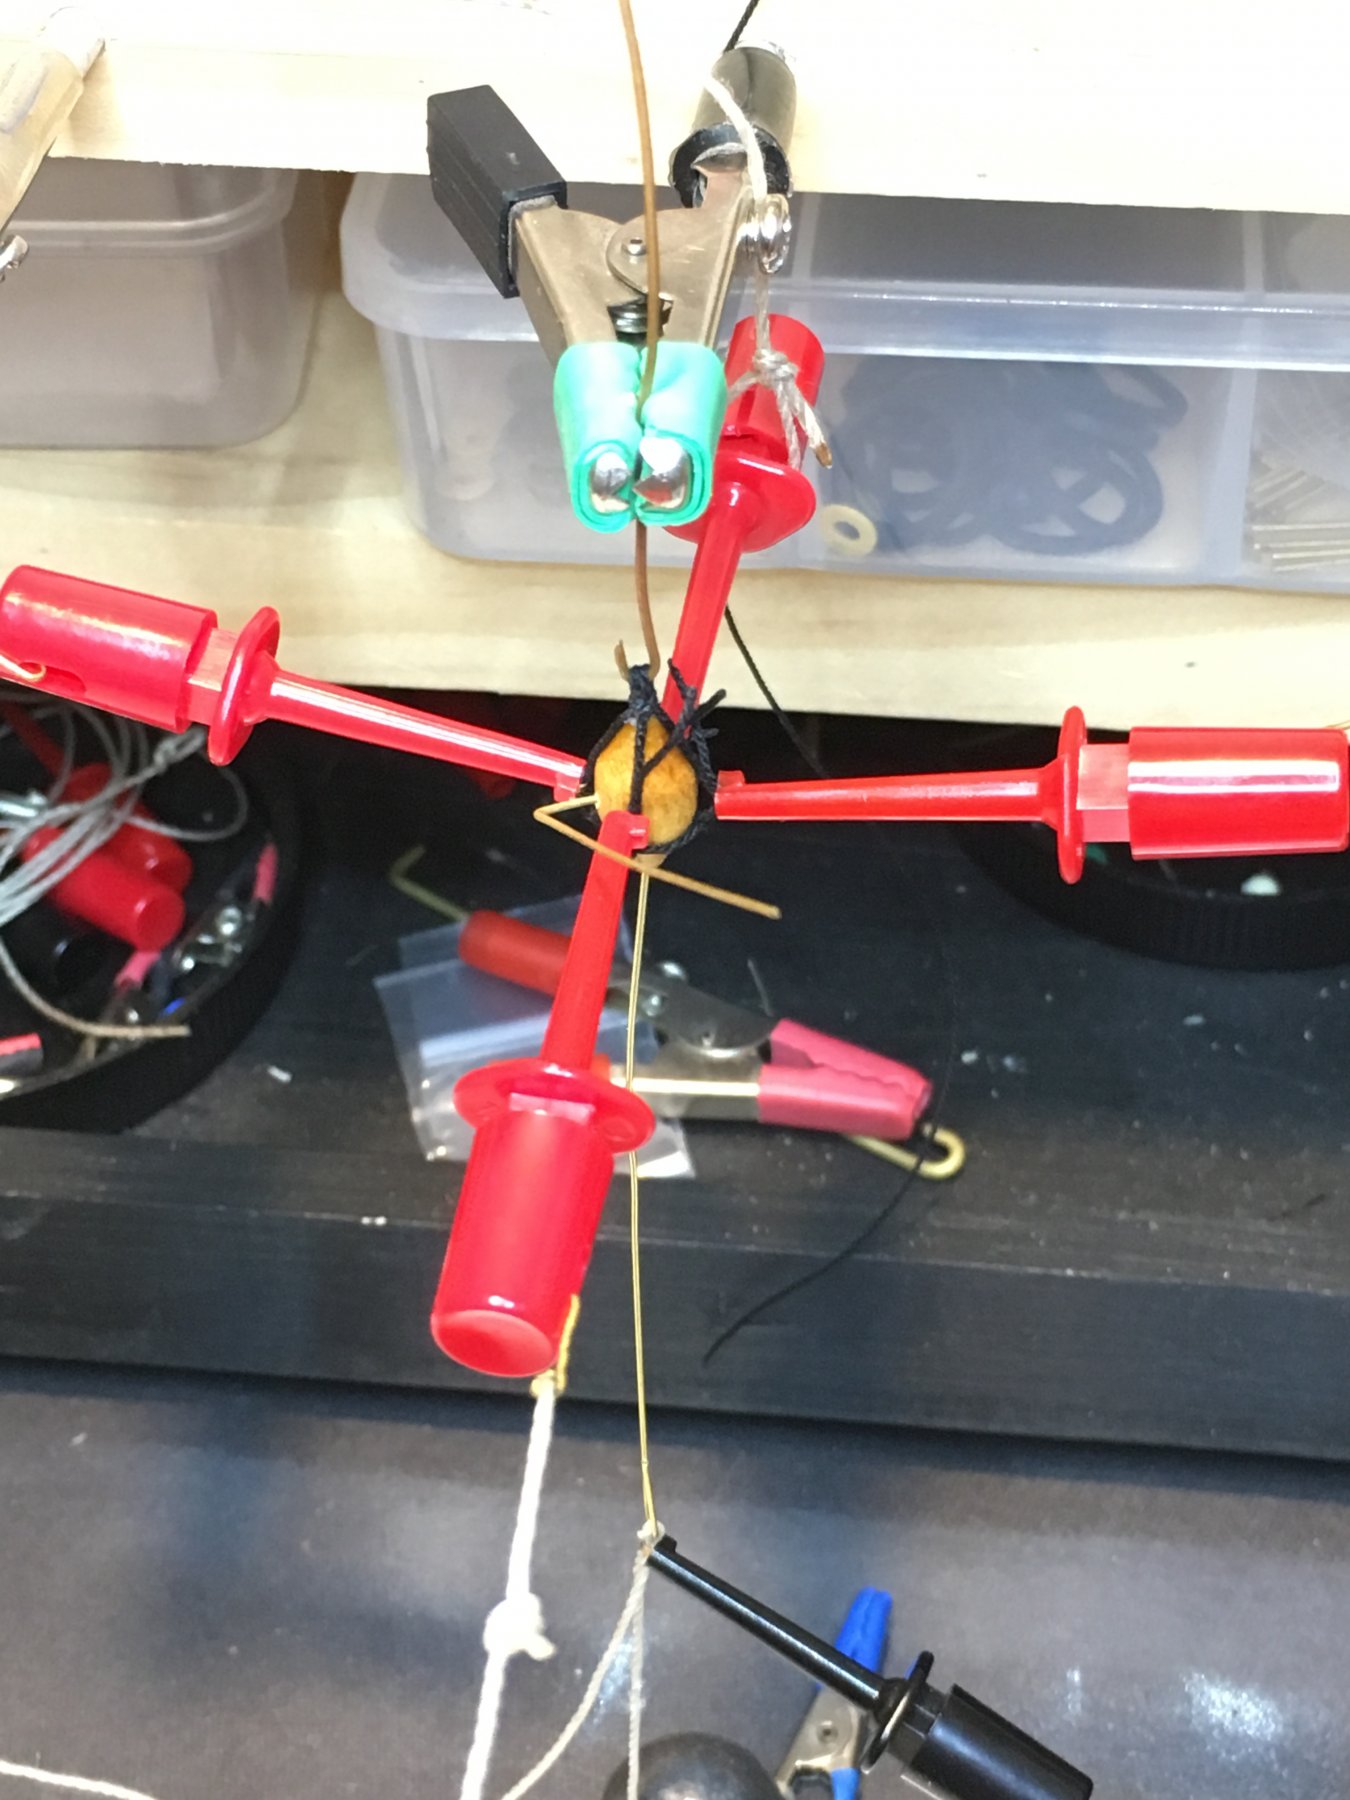
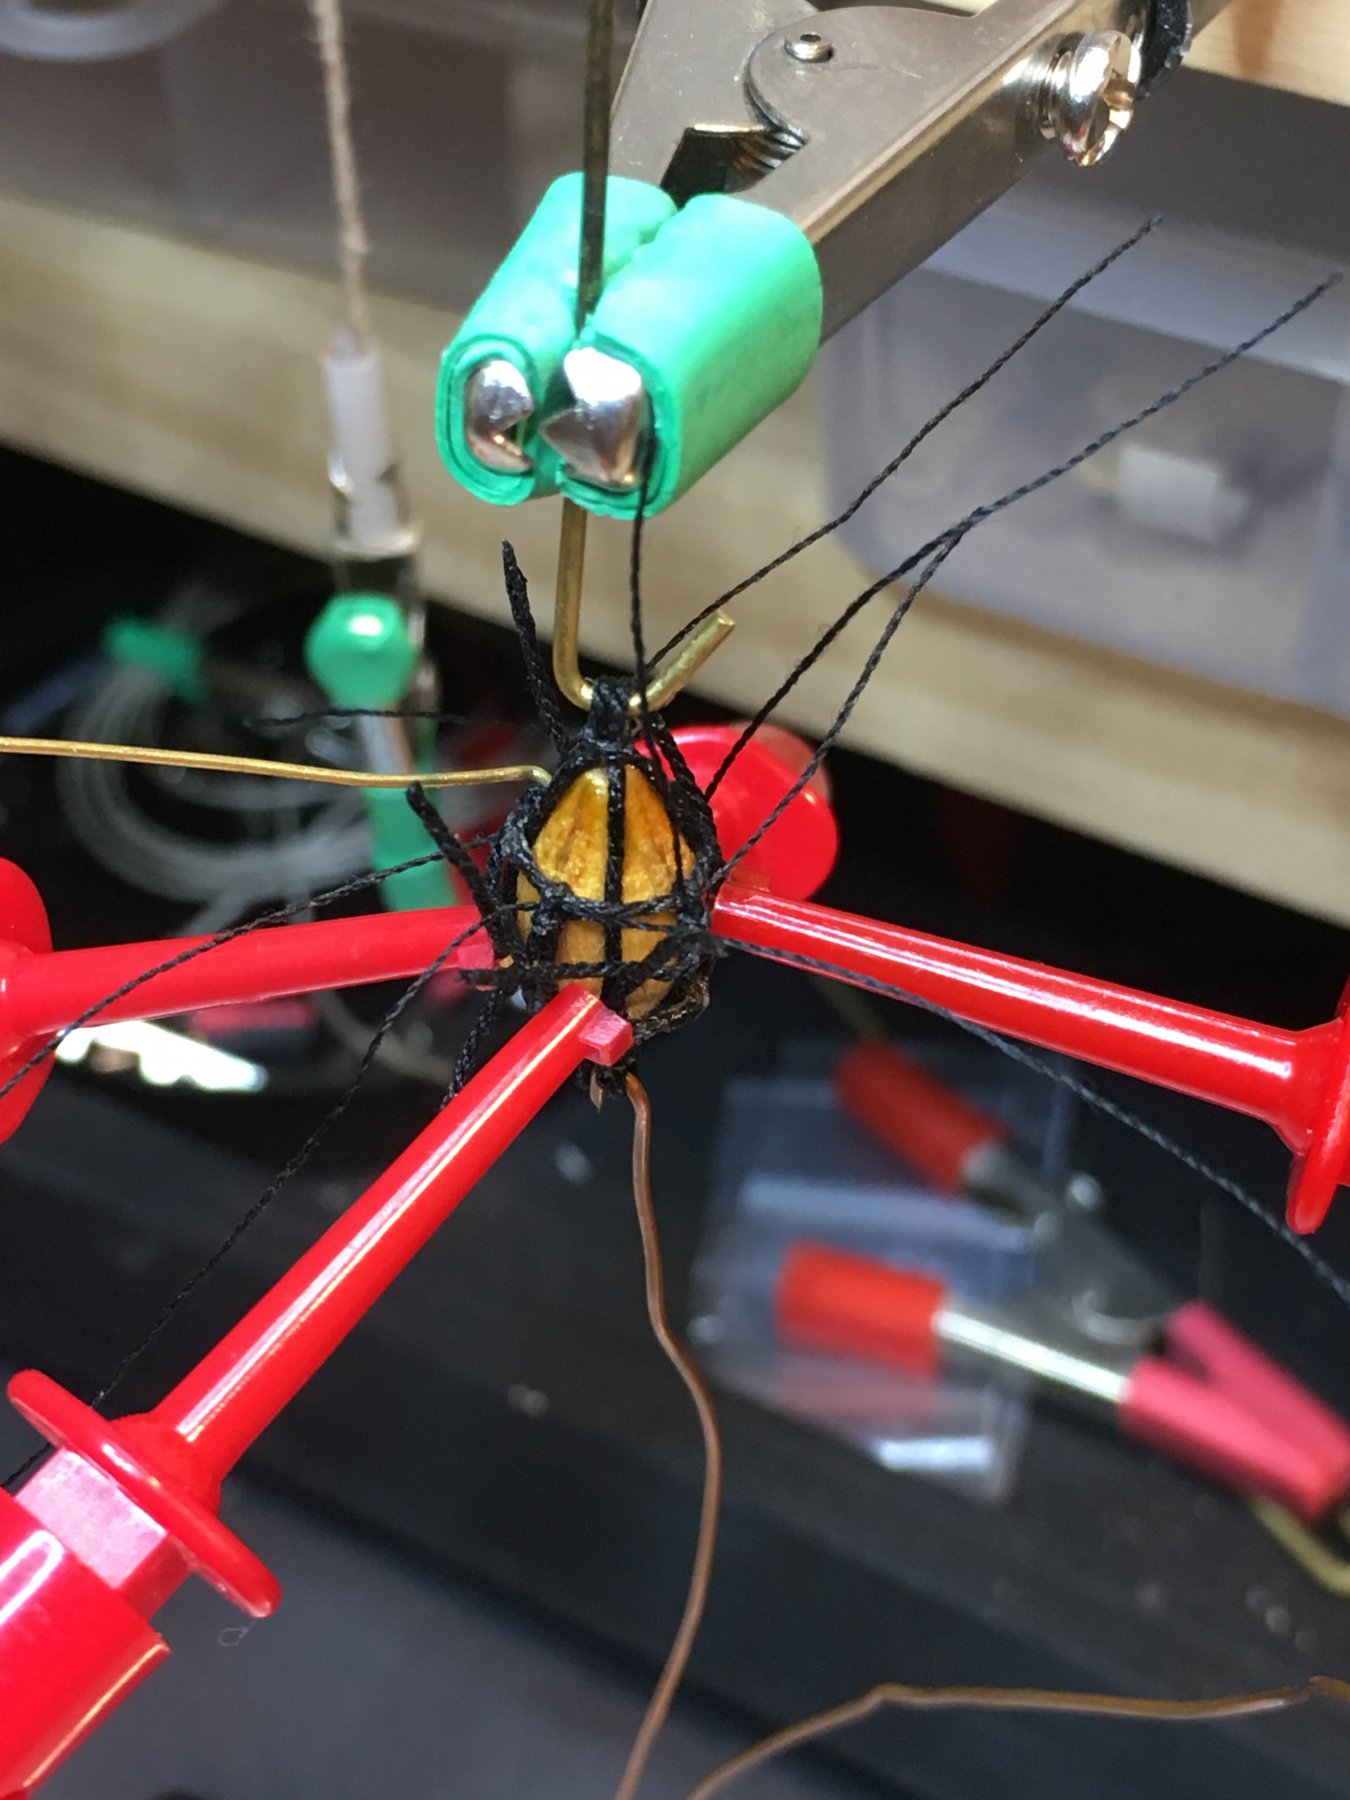
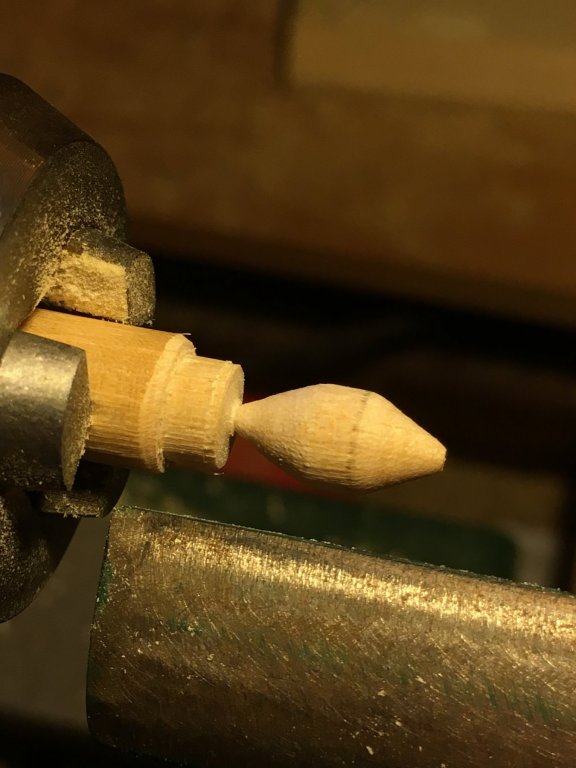
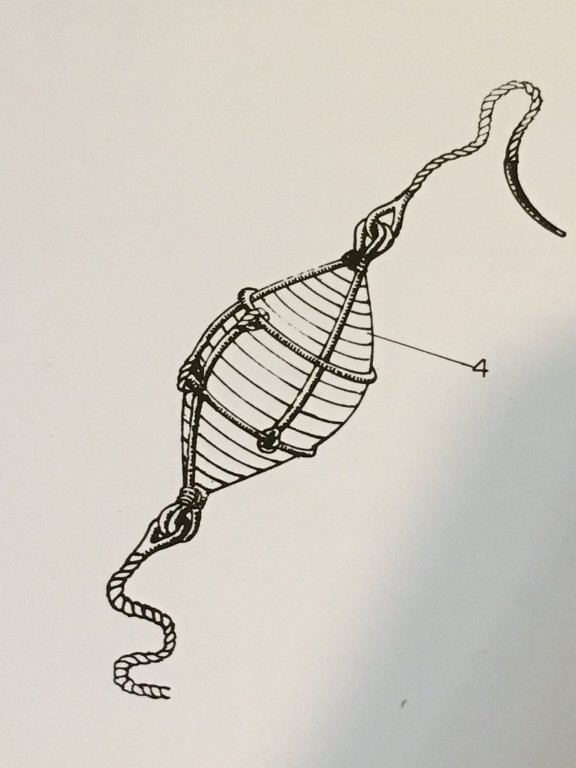
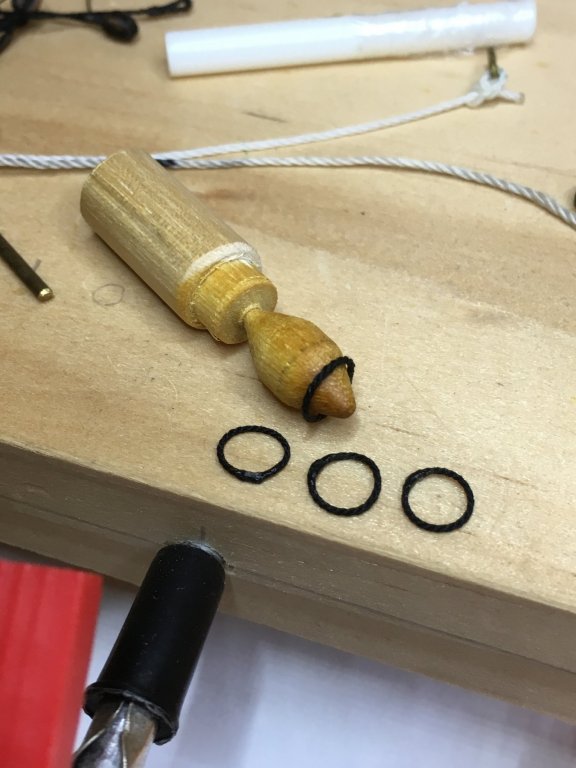
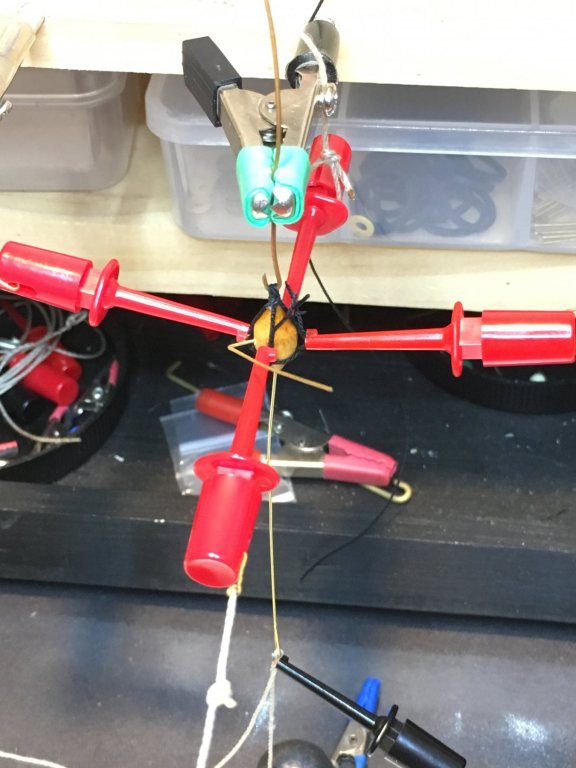
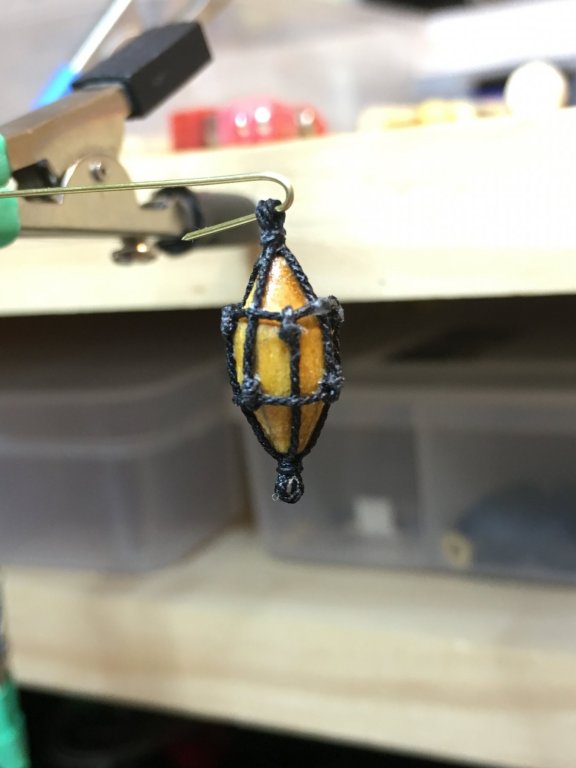
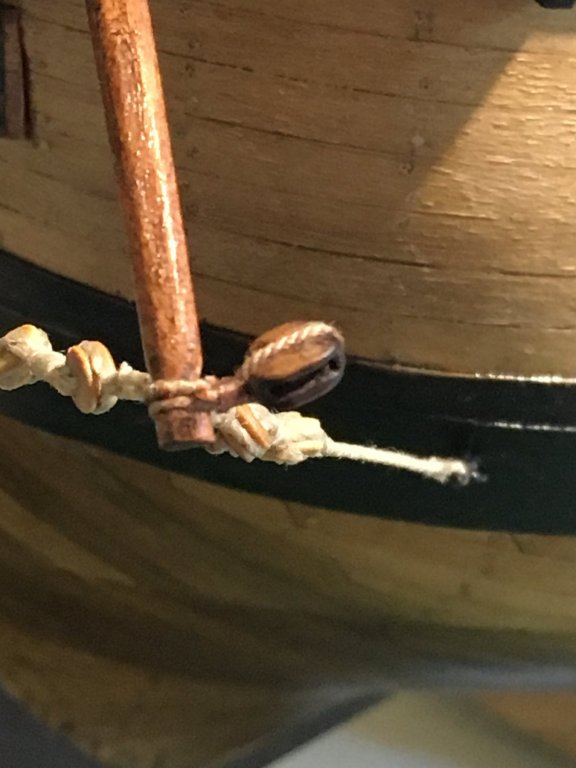
Hi Pat, Slowly getting there. Shipyard Update: I moved onto the Anchor Buoys. First up what it should look like and what to make it/them(2 off) from. Below pic from the AoTS. I turned up a 13mm long inner "cork" buoy, from a off-cut of dowel, then lightly stained it. Made hoops from 0.45mm dia rope(at 1:60 = 27mm dia full size) for top and bottom(to go tightly round the buoy, just on either side of its widest part). Slings from 4 pieces of rope cut and an eye spliced into the middle. Left Pic: With some clips and hooks, I managed to create a stable means to attach the sling to the top and tuck under the hoop. Right Pic: Then invert and same as above. First attempt: finished Anchor Buoy. In hindsight, maybe should of used a rope 1 size smaller. Onto making the 2nd one next.


-
Hi Blacky, Hull coming along very well indeed.
-
HMCSS Victoria 1855 by BANYAN - 1:72
DaveRow replied to BANYAN's topic in - Build logs for subjects built 1851 - 1900
Hi Pat, I don't know much about how the Etching works. However, if one can get metal items made from the drawing method, that conjures up a lot of applications. Thanks for sharing. PS I am looking forward to seeing the assembled Skylight.- 1,013 replies
-
- 2
-
-
- gun dispatch vessel
- victoria
- (and 2 more)
-
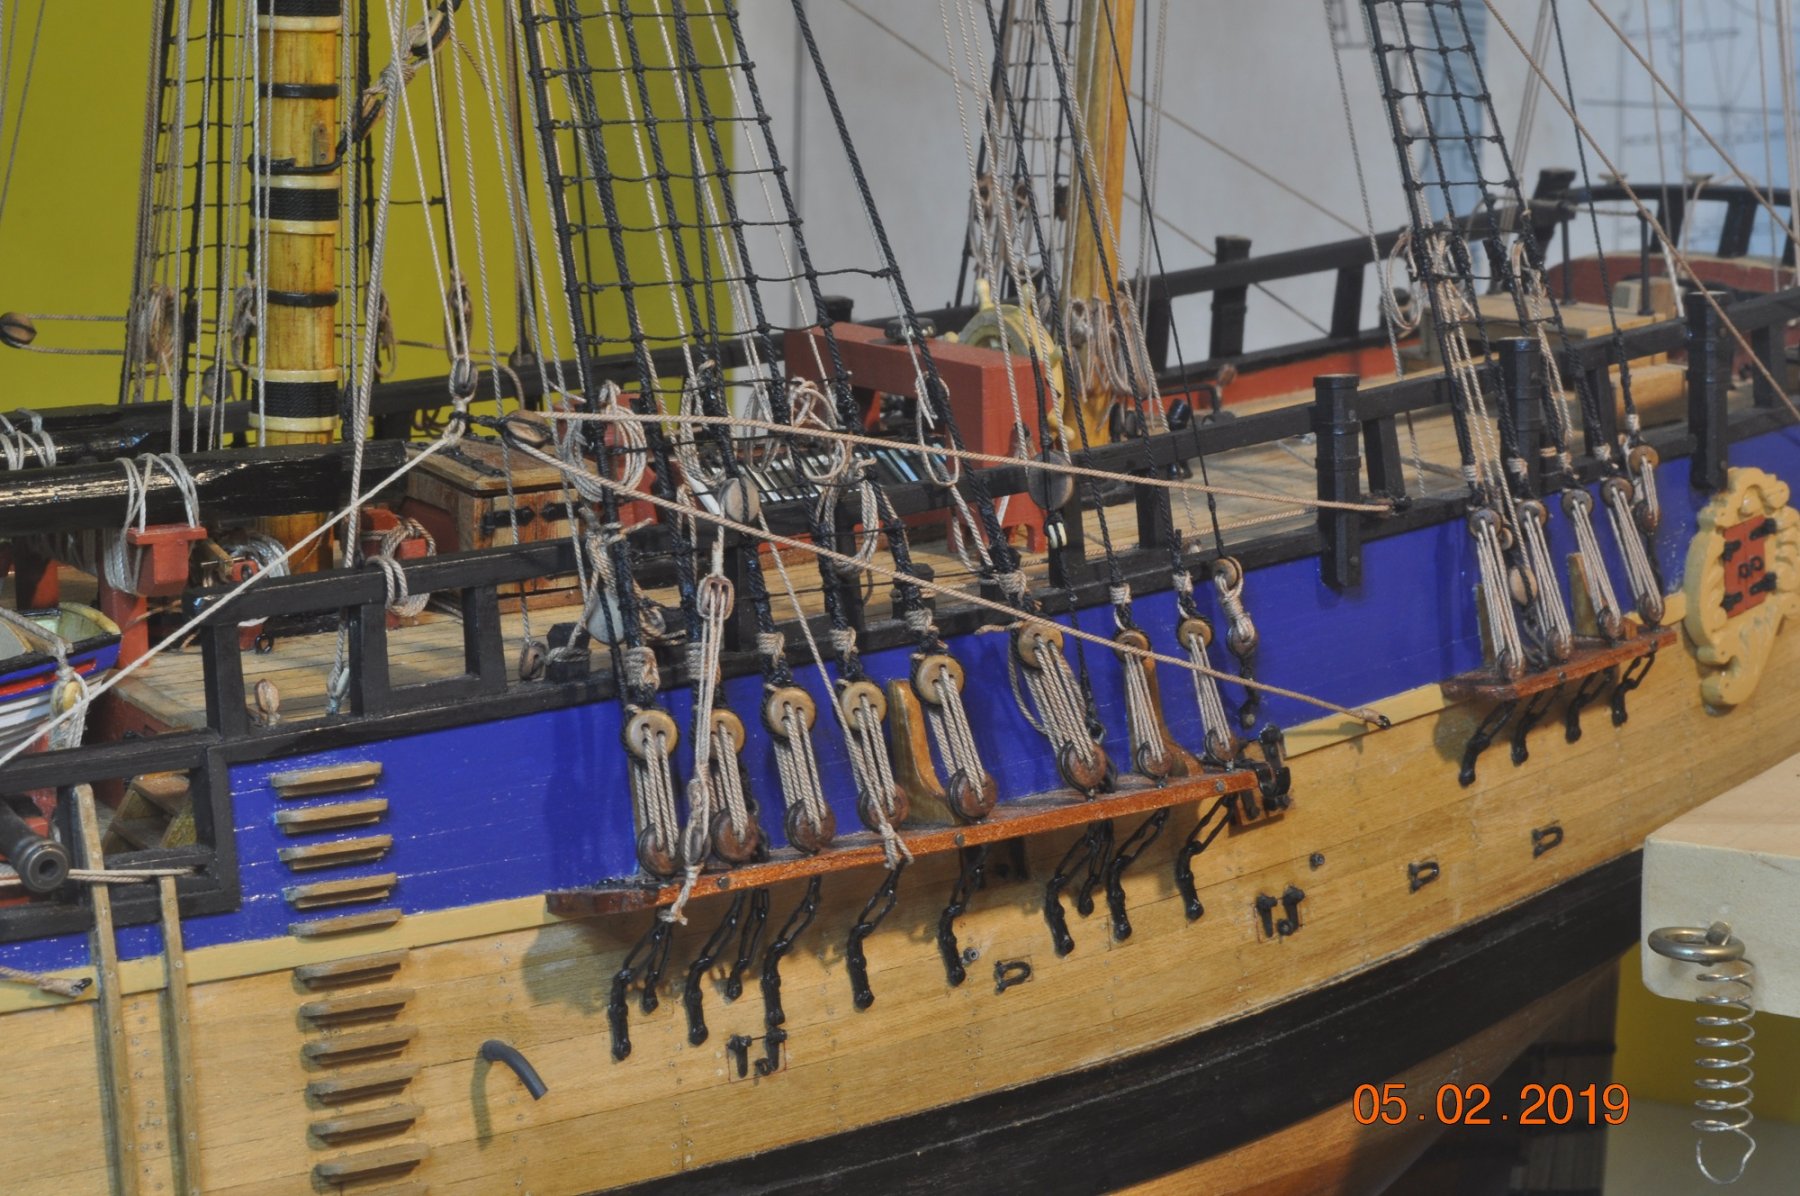
Thanks Rod, Dashi, Fernando, Pat and others recently looking in on the build log. Shipyard Update: Slowly been working away tidying up the loose rope ends, esp. the ones the deck. Main and Fore Course Sheets As a distraction, started on the Sheets and Tacks to the lower sails. Added them in loose to see how they run. Since I am not adding sails, will still show the sheets, tacks in place hoisted up with the the Clew Garnets. A couple of starter pics, details of the sheet ends and blocks(to EyeBolt, Bumkin, Main Corse Sheet return block): Sheet and Tack coupled to Fore Clew Garnet Block. Fore Sheet start from the EyeBolt back through the port fairlead/block Below: ForeMast Sheet and Tack to the Clew Garnet Below: MainMast Sheet and Tack to the Clew Garnet. Starboard side sheets I added on last night. Next is to add the Spiritsail Course Sheet to the 2 clew lines. Life in the shipyard is always busy, just have to make time to get in there.....


-
HMCSS Victoria 1855 by BANYAN - 1:72
DaveRow replied to BANYAN's topic in - Build logs for subjects built 1851 - 1900
Hi Pat, The Skylight looks like it will come up very nice. Did you draw the 2 sheets of brass pieces up ? Great details you are creating.- 1,013 replies
-
- 2
-
-
- gun dispatch vessel
- victoria
- (and 2 more)
-
Hi Dashi, I have caught up with your recent log entries, read through re: Driver Boom. I believe you are definitely onto something overlooked in AoTS. I am of 2 minds to add a Driver Boom in now, at this late stage or ???
-
Hi Fernando, Accidently found your new log. Have pulled up a chair to follow along.
-
Shipyard Update: I've ordered an Acrylic Display Case from a Plastics Company in Brisbane for the baby to reside under soon. A base needs to be made for the case to slot into and the cradle needs some touching up for the display. I'll post a picture when the case arrives in the shipyard.
-
Hi Rod, Fine job your model has turned out. Nice tip for the Flags. I received my set a couple of months ago, but not tried to attach, set yet. Another task on the list. Here's to a new year and modelling.
-
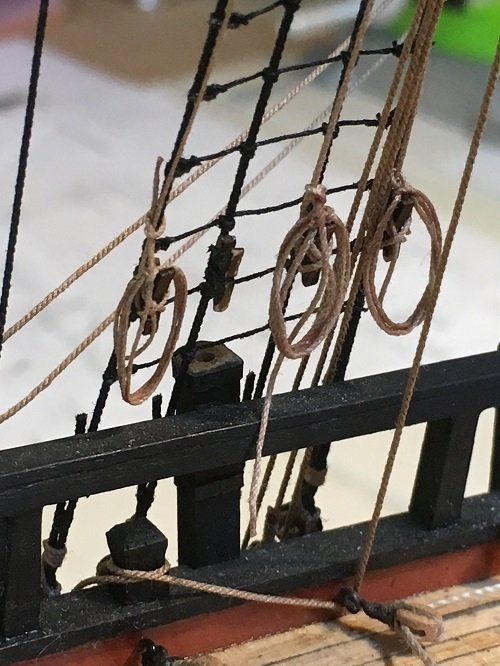
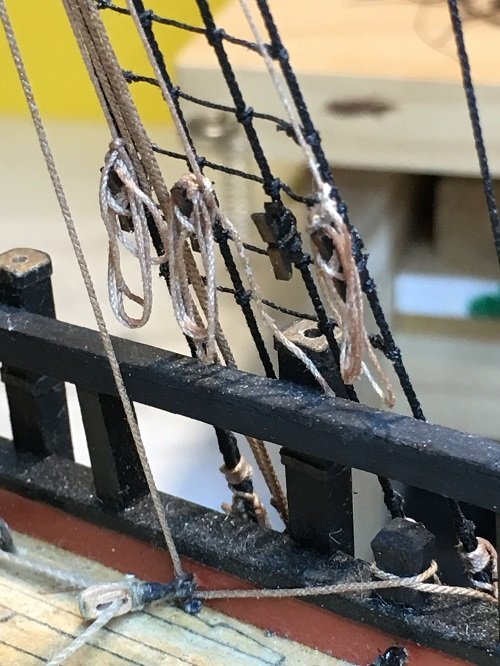
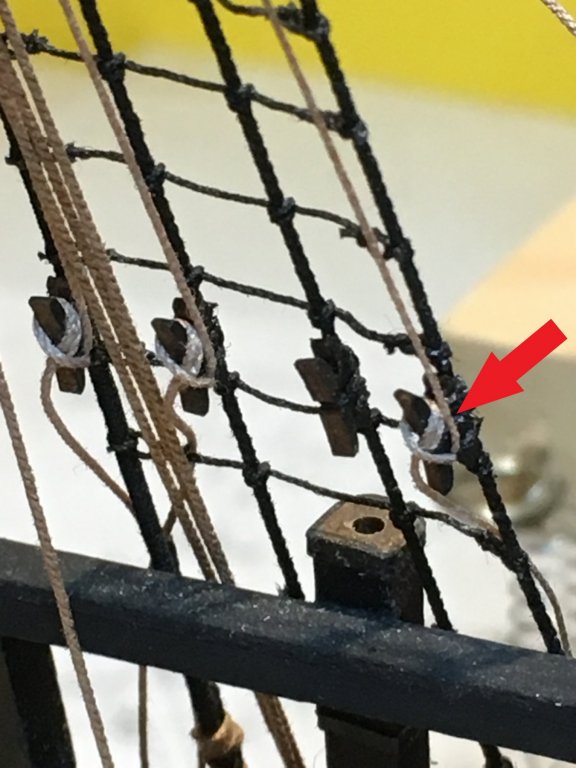
Shipyard Update: The ongoing rolling up of the Rope Ends. This task(s) is taking some time to get through. Below the Stb. Fore Mast area. 12 rope ends alone in this area. Below the Port ForeMast Shrouds area. Stb. ForeMast Shrouds. I use several ways to tie the rope ends into a loop. This way using a cranked set of tweezers, holds the rope loop(coated in 50/50 pva/water) whilst it dries to form the oval loop shape. After I tie it up onto the shroud, ratlines. Many more to move onto.


-
Shipyard Update: Mizzen Mast Starting to clear up the loose rope ends. Port Side: Starboard Side:
-
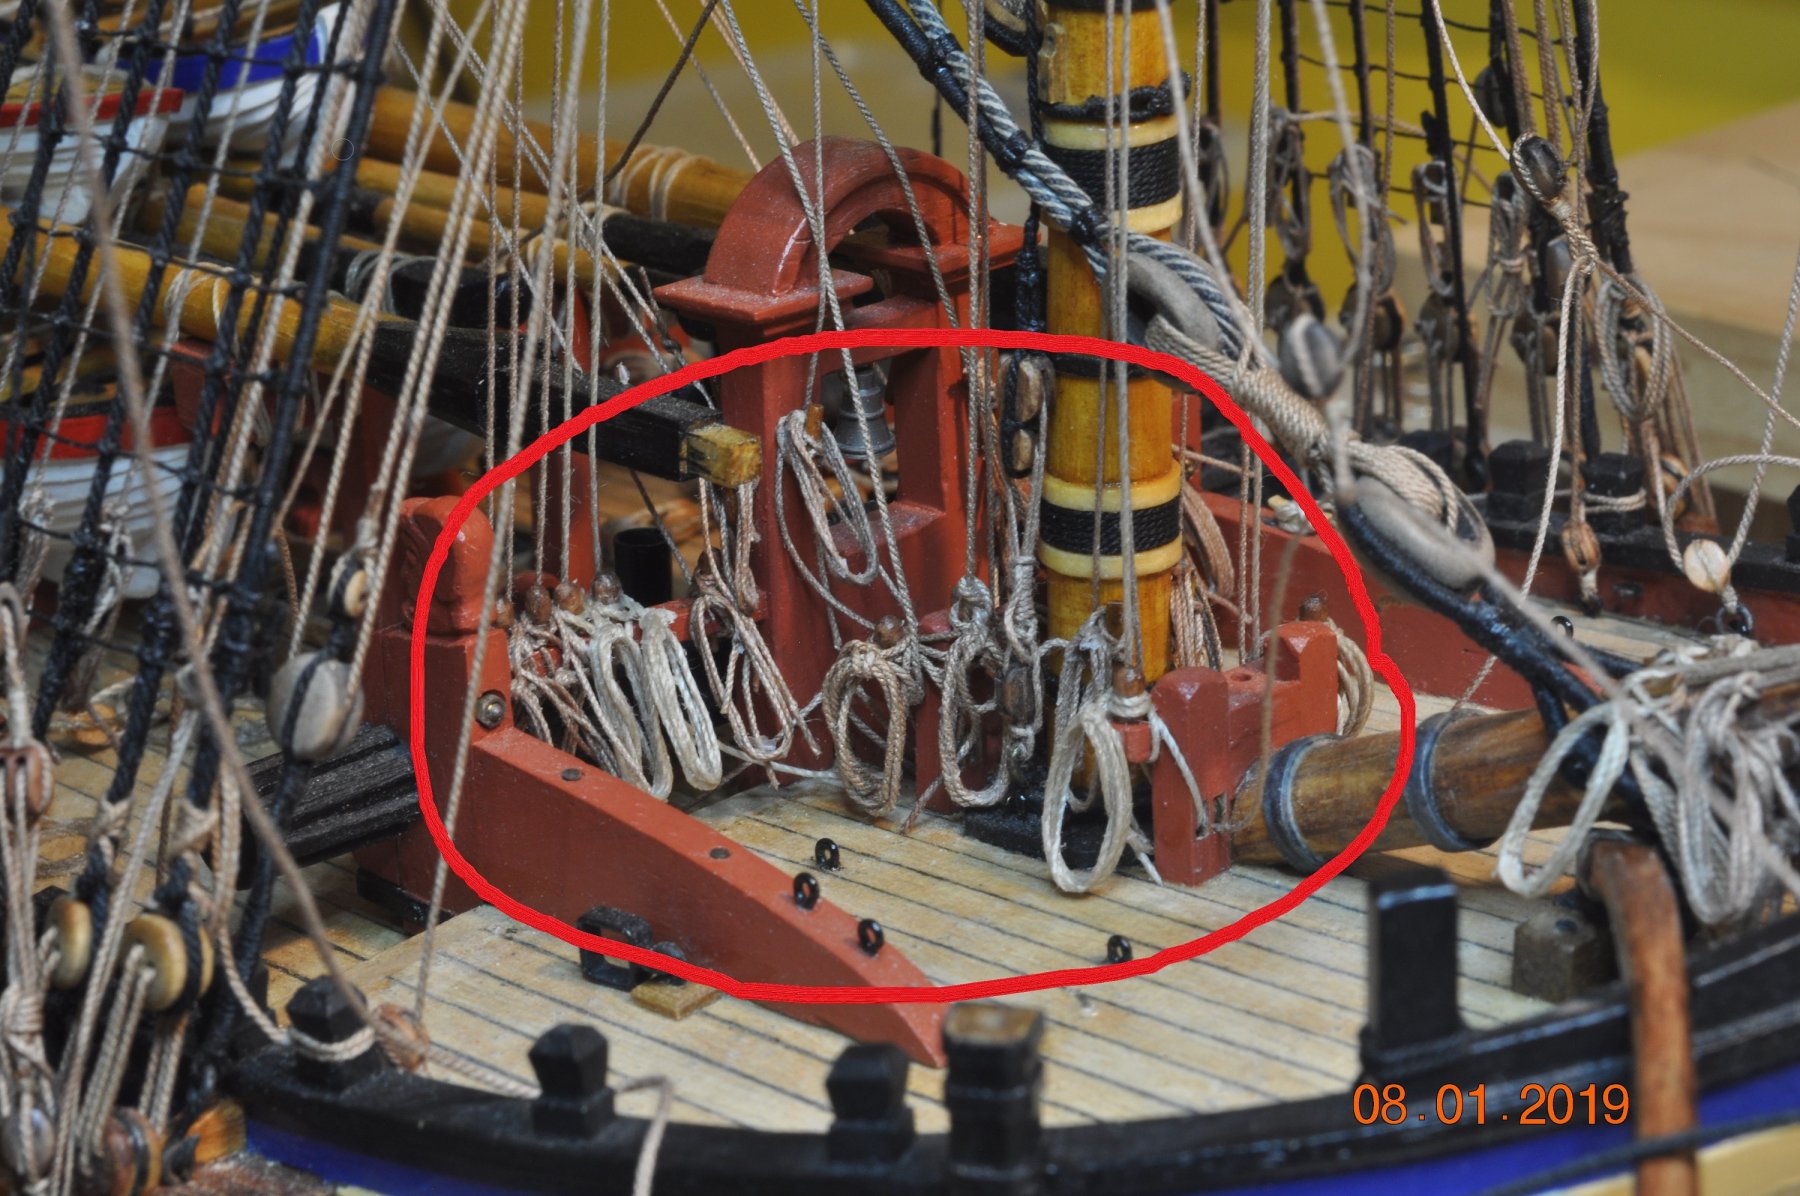
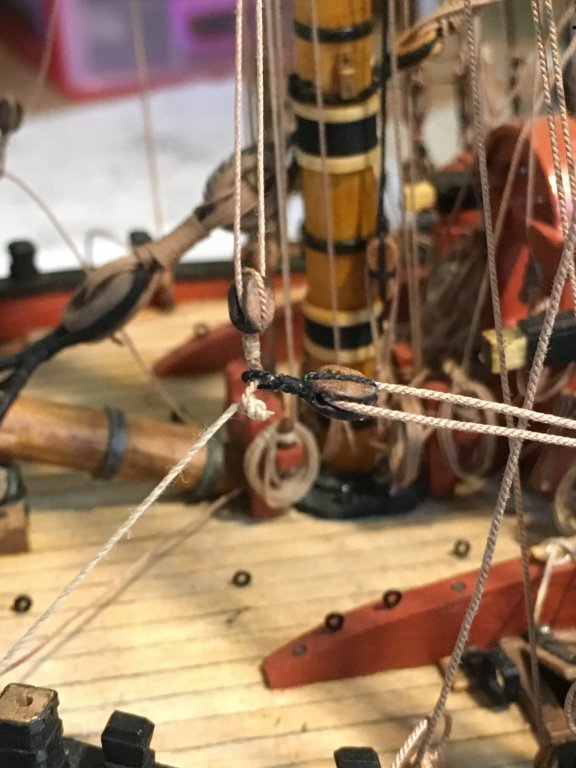
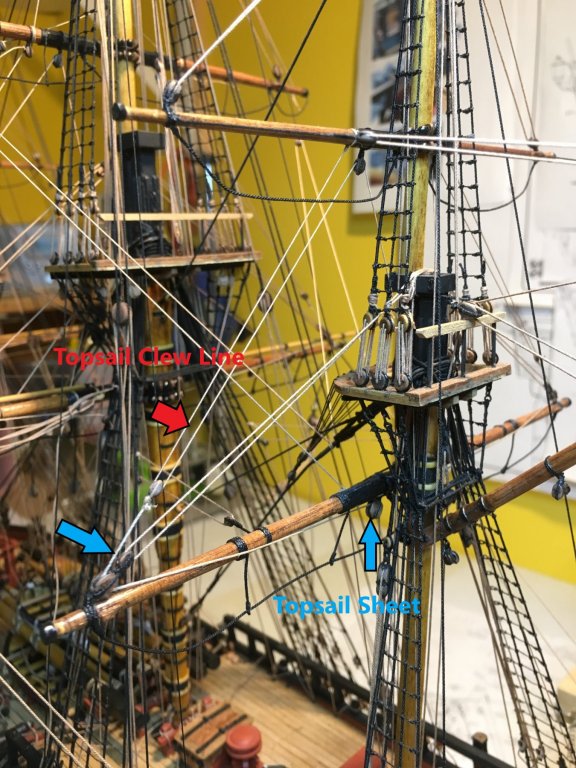
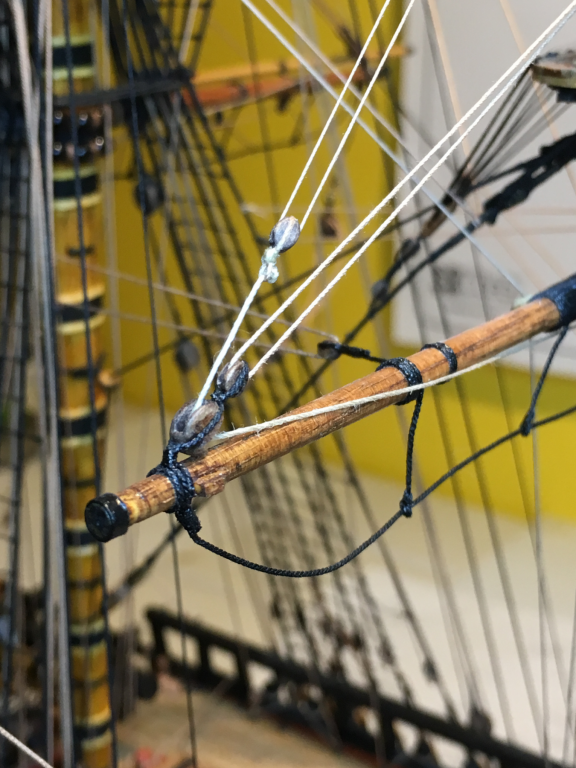
Shipyard Update: Mizzen Topsail Clew and Sheets A small step to get back into things for the shipyard. Took me a while to work out where I was at with the Rigging - after 2months away from the Yard. One rigging item I noticed was the Mizzen Topsail Clews and Sheets needed doing. So there is a set either side of the Mizzen for the Topsail Clew(bottom corner of the sail) to attach to, allowing the sail to be furled up(Clew) and pulled down(Sheet). Well I am nearly 99% that is how it works. Below is the Port side setup, notation in the picture folks. Top Yard being the Topsail Yard, lower the Crossjack Yard. A close up at the end of the Crossjack Yard. The Clew after coming down from the Topsail Yard - position "98" as per Mr Marquardt AoTS. page 120/121. And below the bottom of the mizzen, Sheet tied to a cleat. Position "102" as per Mr Marquardt AoTS. page 120/121. And now I notice I have not left much length in the tail ends of the ropes to roll up.

-
Rod, I PM you a pdf. booklet on the rigging.
-
Yards coming along very fine Dashi.
-
Shipyard Update: I am still alive. I have what some say, been on "Shore Leave". Our eldest son got married in late Sept, followed by a 2 week holiday. Then short stint back home, catching up on the home side of things, and some work. Then away again for my sister's 60th for a week in early Nov'. Then back home, where a whole lot of work and jobs to catch up on. So today I planned to get back into it. However a lot of dust in the air, so don't want to unwrap the boat and get dust over it. Then I realised, I need to work out where I am at anyhow. So this log (thank god for the build log) helped out in that regard. Thank you all for the recent look in's, comments and kind words. Much appreciated. I hope to shortly bring more pictures of the final end to my build. Still lots to do though. And Christmas is nearly upon us. !!🎅
-
Hi Dashi, Good to see you've crept back into the build log. I've been away a lot and not done much to cross the finish line with my build. Your build is coming along very nice I must say. Esp. the 4 small craft. Very impressive they all are.
-
Hi Rod, The rigging is coming along great guns. Keep focused captain
- 108 replies
-
- 2
-
-
- endeavour
- caldercraft
- (and 1 more)
-
Hi Greg, I hell of a model you have built their. Too much for my eyes to look at all that fine detail. I'd go blind from it all. Distinction Level. !!
- 405 replies
-
- 5
-
-
- tamiya
- king george v
- (and 2 more)
-
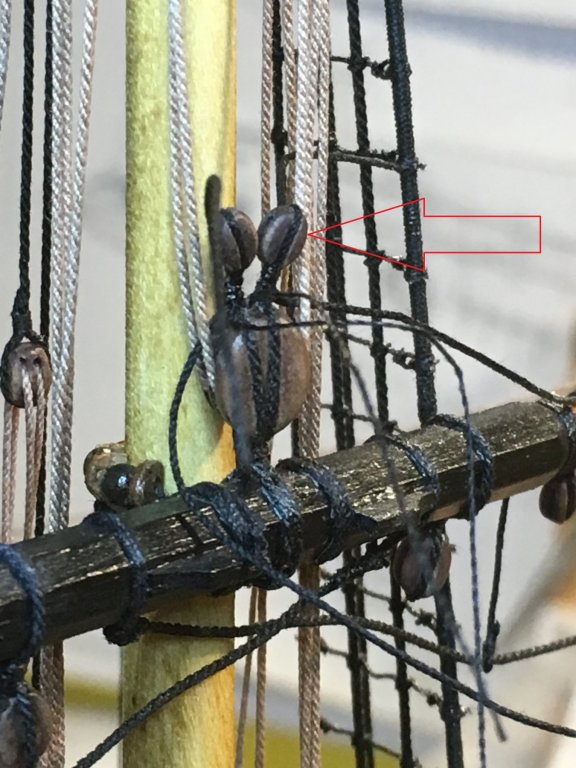
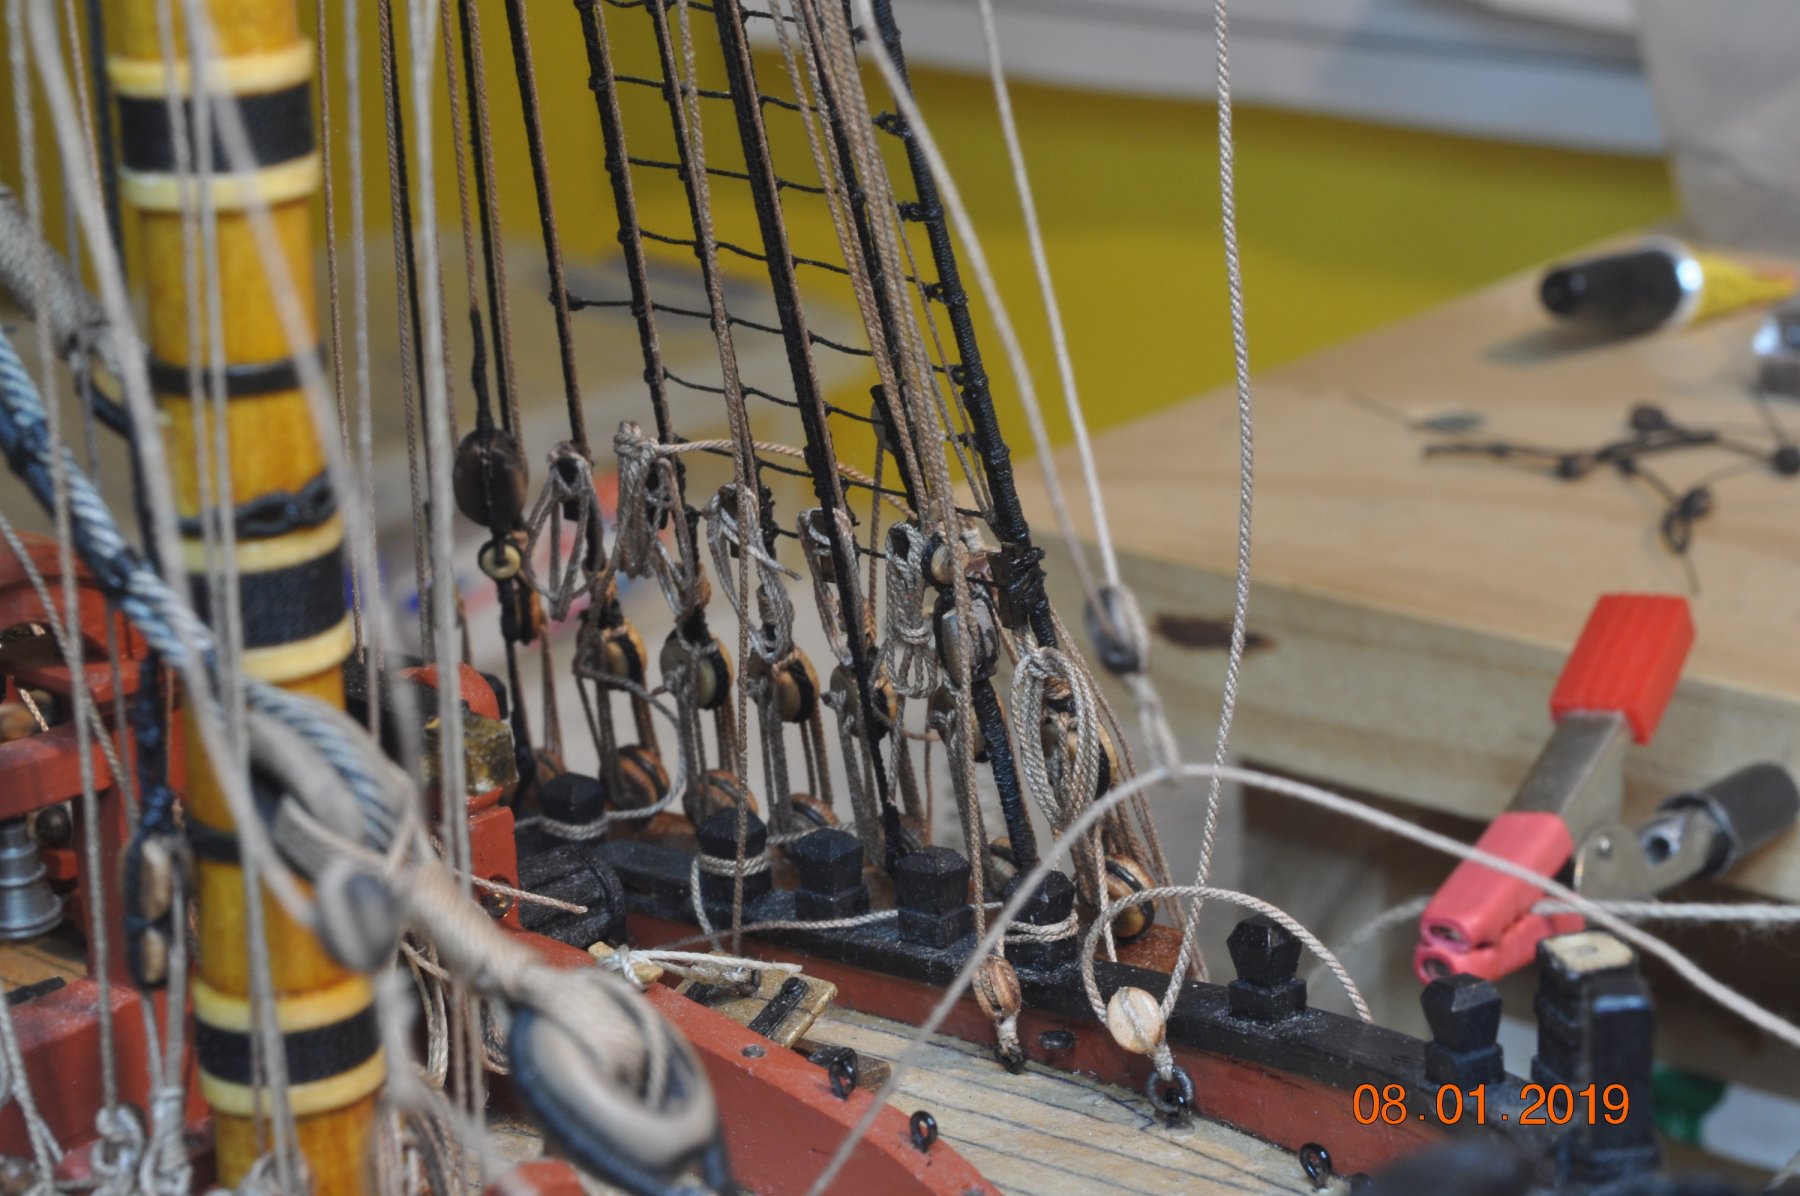
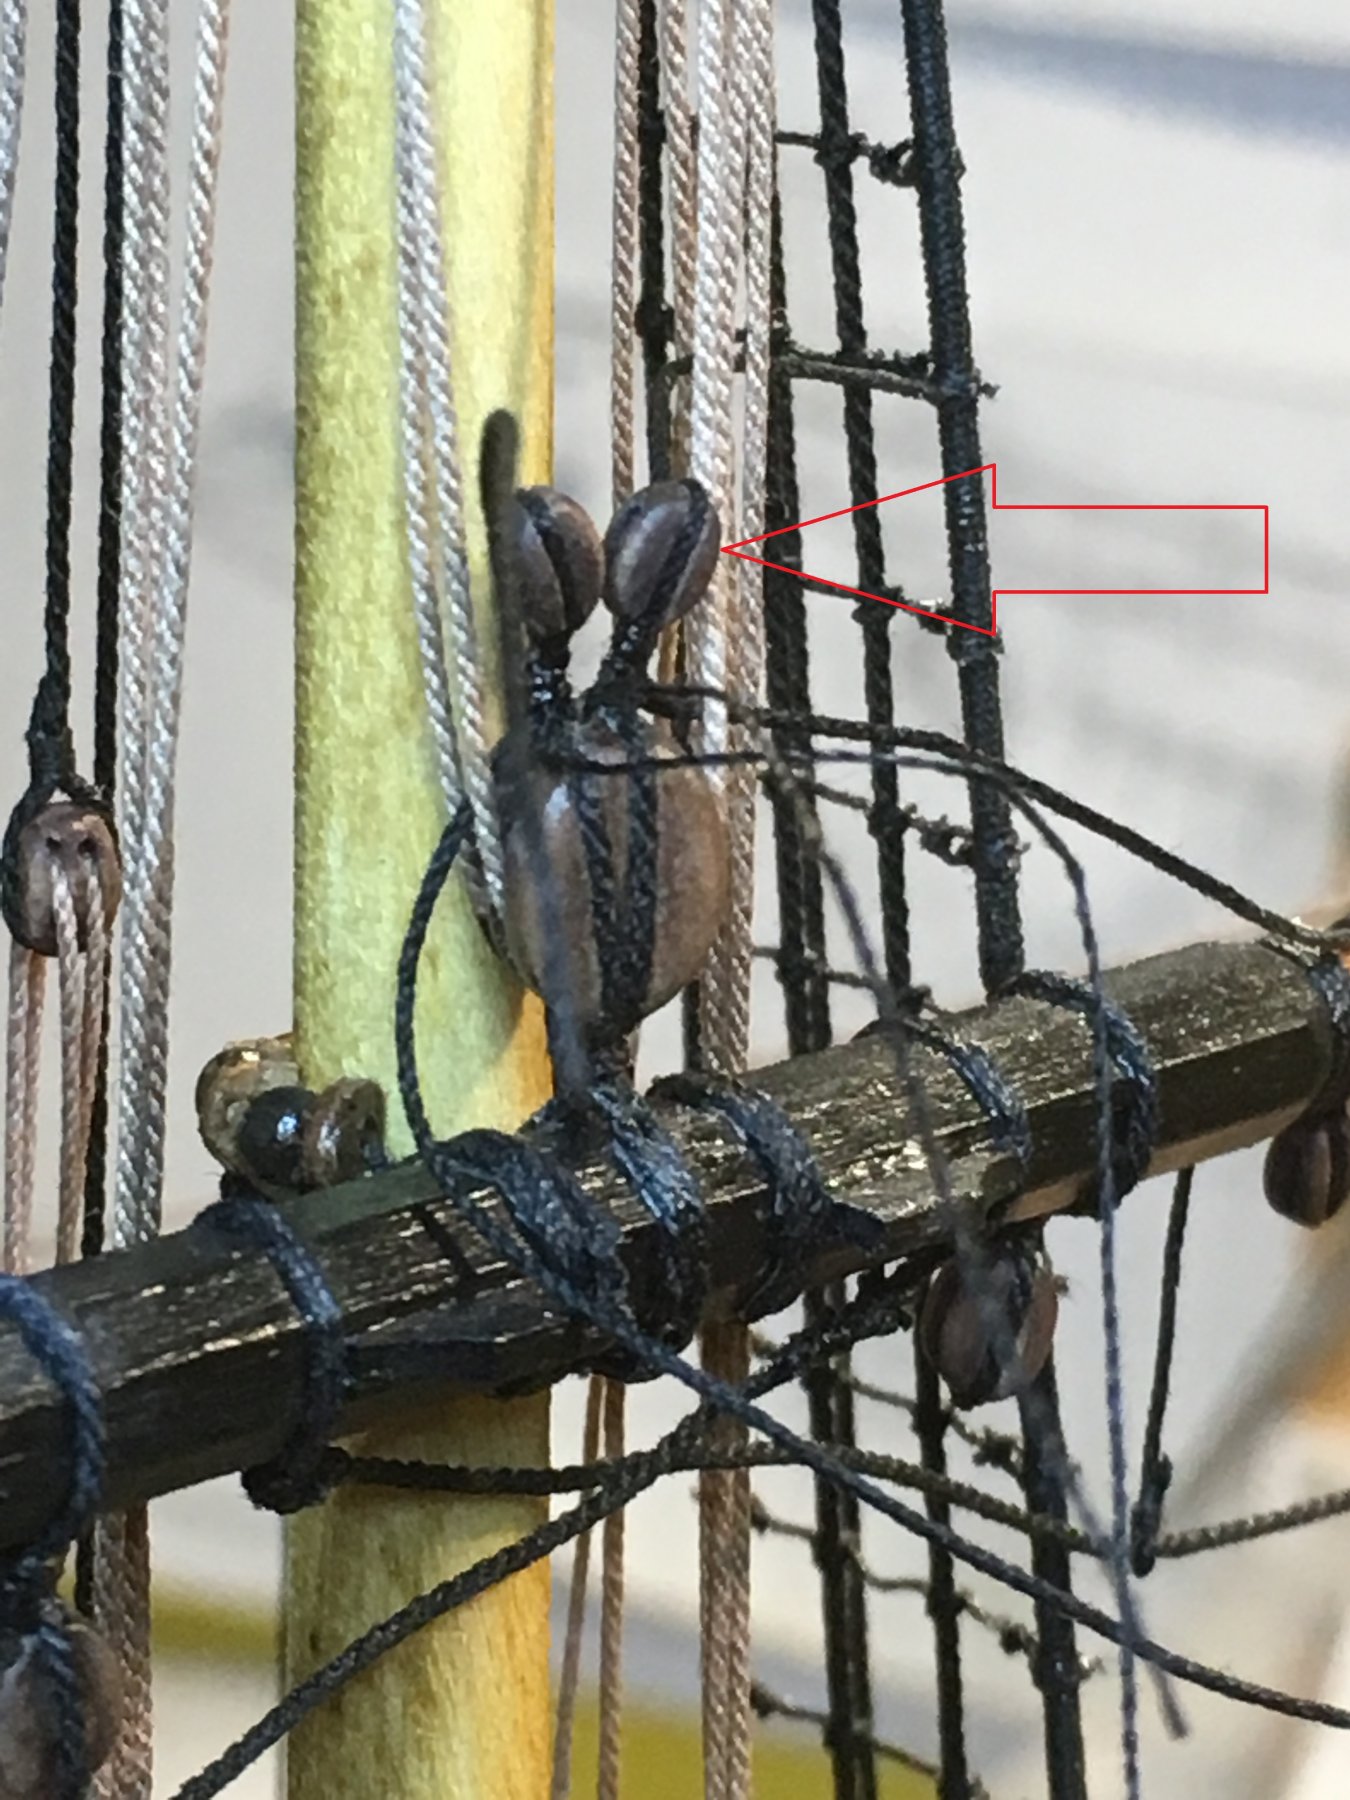
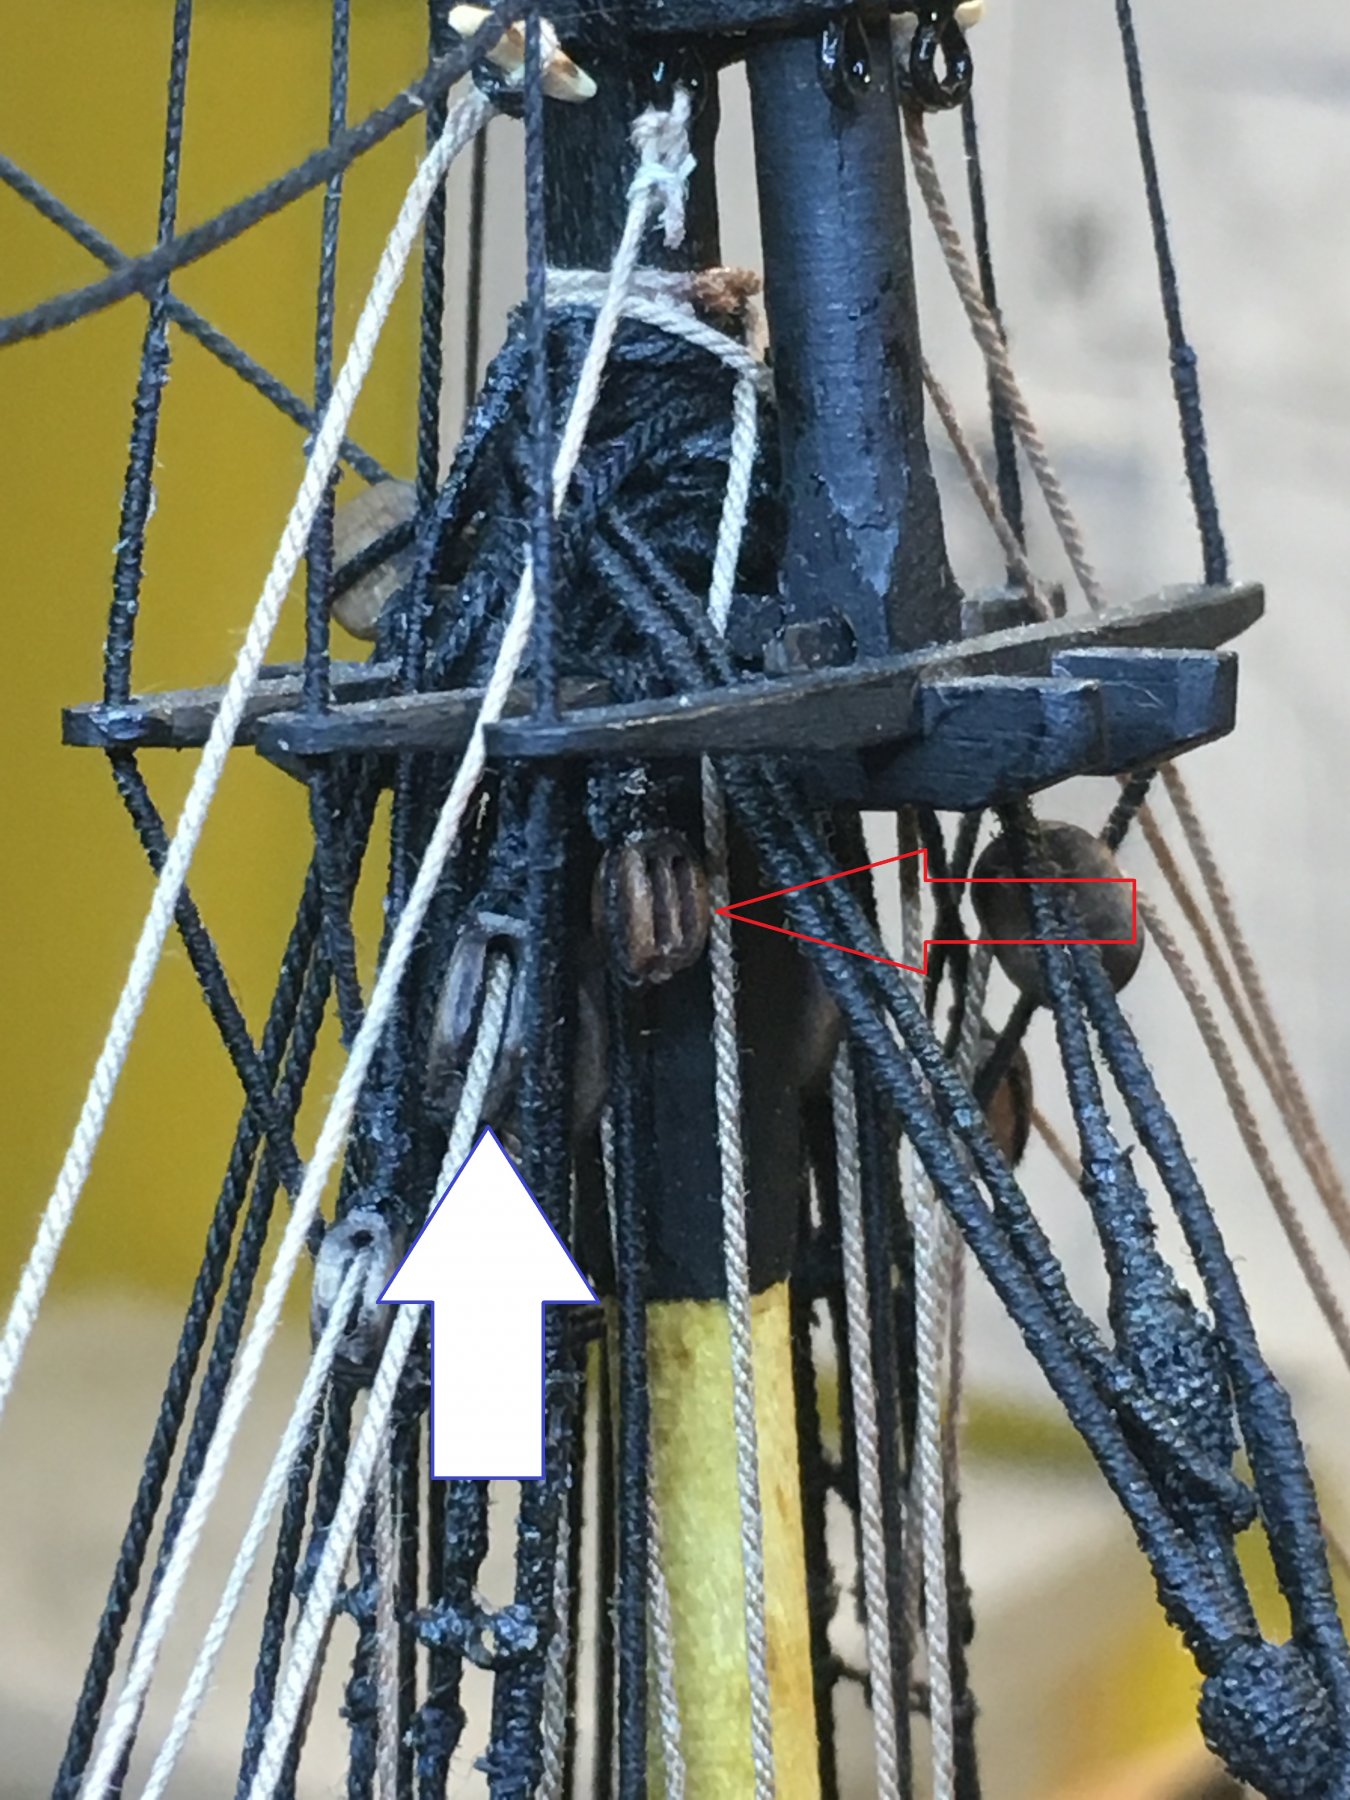
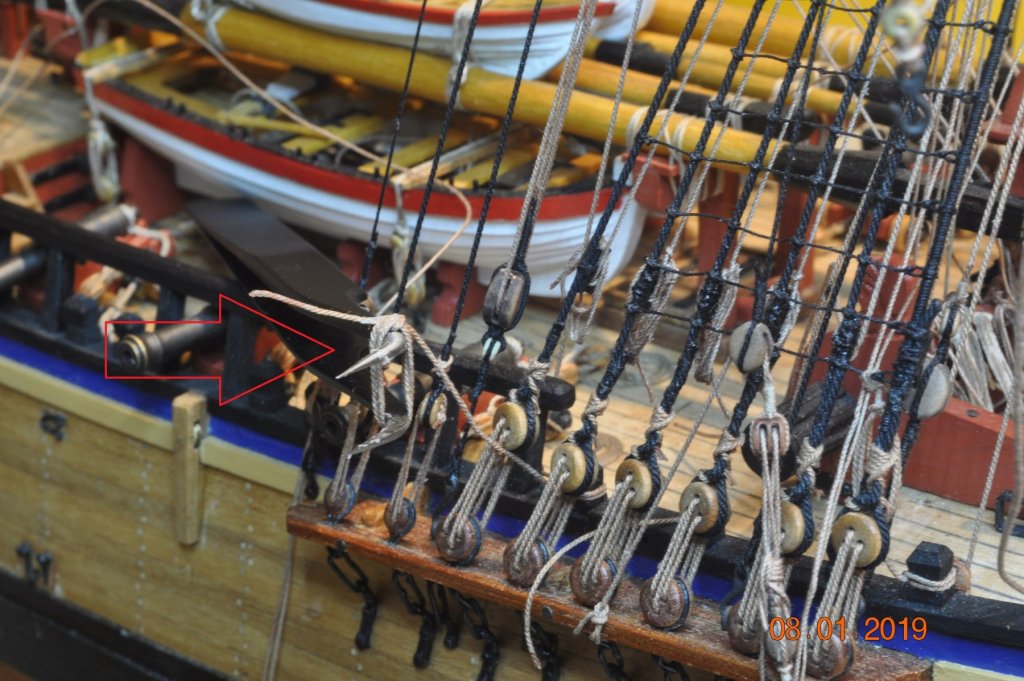
Shipyard Update: Leech and Buntline Blocks I have been slowly working on adding the Leech and Buntlines to the yards. For the Main & Fore TopSail lines. Somehow I(someone in the shipyard ?) missed adding the Leech line blocks to the TopSail Yard Double Tye Block. So instu, I drilled(tunneled) through the top of the block, under the ropes to fit the 2 missing blocks. Above: Red arrow points to the 2 x 3mm blocks added to each Tye Block(Fore & Main Topsail Yard) At the same time I found I'd missed the a 4mm double block(Red Arrow) under the Topmast Trestle which picks up the Leech & Buntline ropes from below. There is 1 per side under the Trestle. To add the above, I moved the Lift Block(white arrow) back behind the middle arm. The new run of the Lift rope is actually better. Getting very tight up under the Trestle.