


72Nova
-
Posts
514 -
Joined
-
Last visited
Content Type
Profiles
Forums
Gallery
Events
Posts posted by 72Nova
-
-
Marc I've found in most cases such as the part in question is soaking it in hot water, sometimes boiling will give the result you're looking for. I tried the flame method at first on my Victory's balconies, lucky I had two, the hot water did the trick. . Ship is looking phenomenal by the way!
Michael D,
- mtaylor, Hubac's Historian and FriedClams
-
 2
2
-
 1
1
-
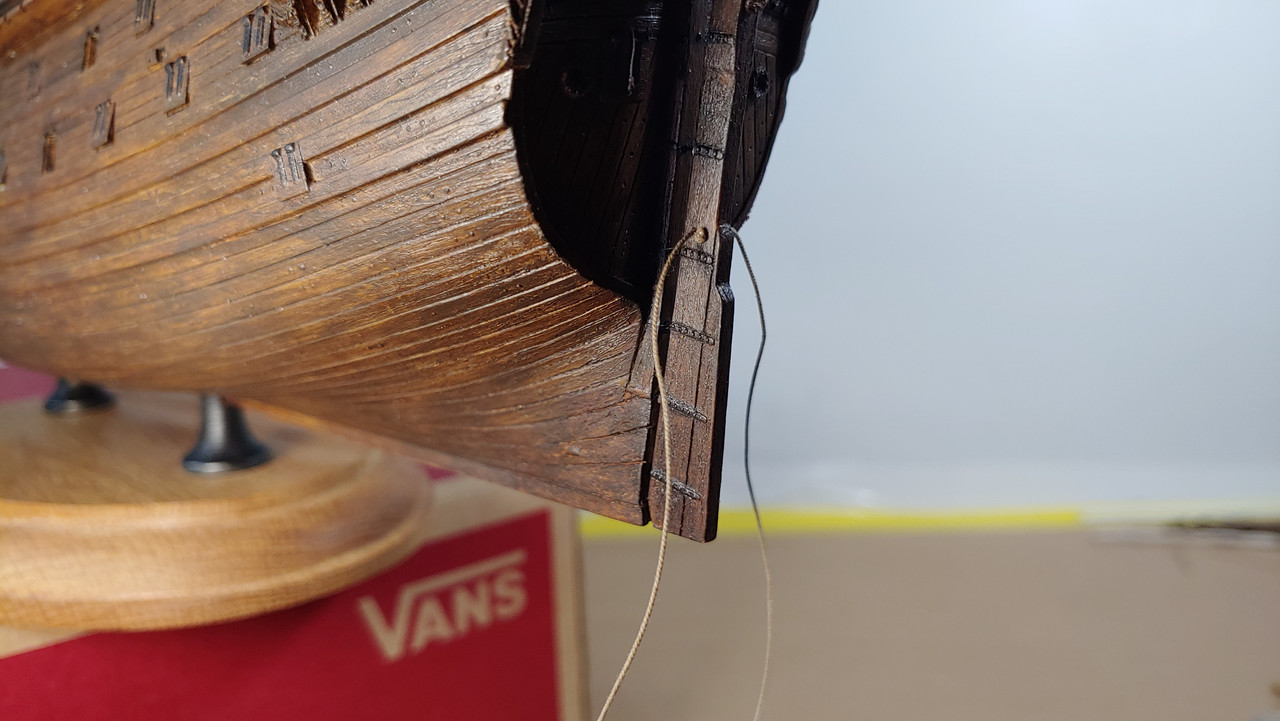
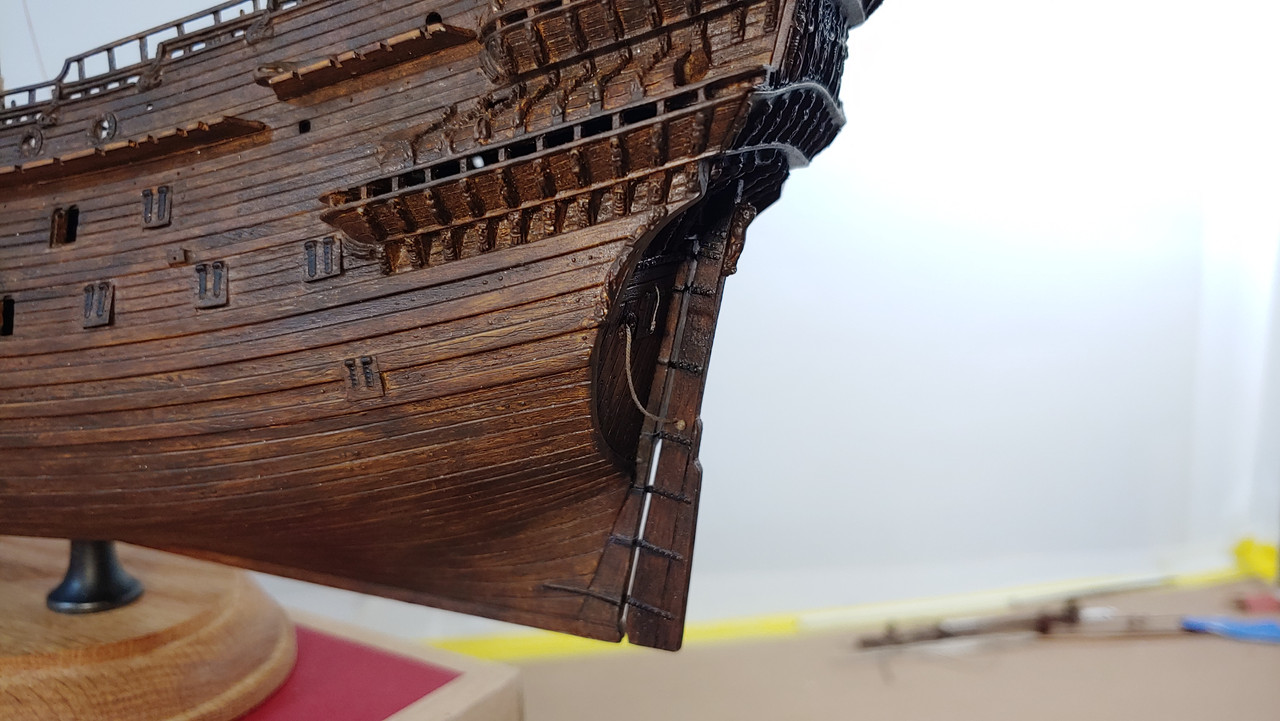
No worries Waldemar, realistically I know I will not be able replicate this even at 80% but this is one mod I could improve upon to make it that much closer and I think it looks ok so far with the hinges still left to do. What's your thoughts on the rudder rope arrangement?
Michael D.
-
Kirill,
Those holes are clearly visible on the original rudder, now according to Fred Hocker there's no evidence on exactly how their rigged since the ropes did survive and his thoughts are they were more than likely secured to the rudder rather then passing through and were led through the cat holes, they also could've been led up through the tiller opening as well. I search for Velde's drawings. Thanks.
Michael D
-
-
Marc I think you should do that diorama it would be interesting, no doubt there was some damage done when they attempted to raise her around that time frame, I believe they have a diorama of her salvage/raising in the museum? Glad you see some usefulness in that technique Kirill and is incredibly easy compared to transferring to fabric and amount of involved in that process, while I was quite pleased with flags the reality even the thinnest fabric out there is overscale even at 1:60 scale.
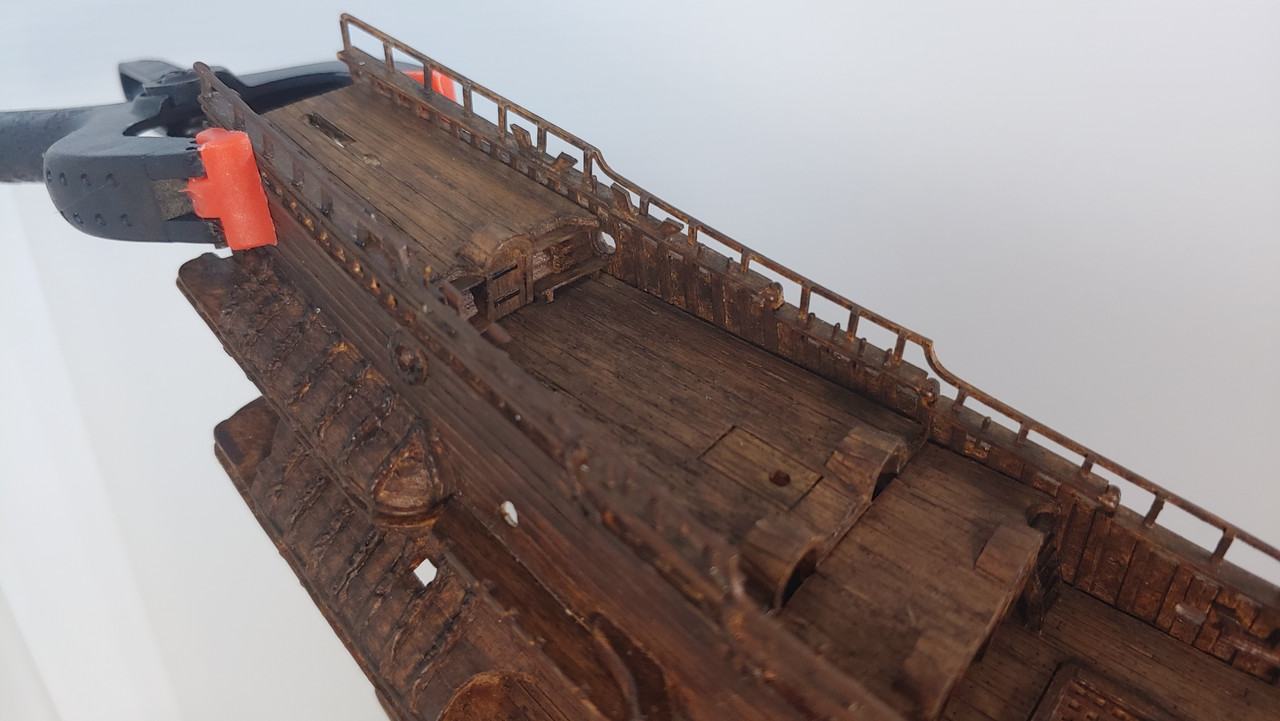
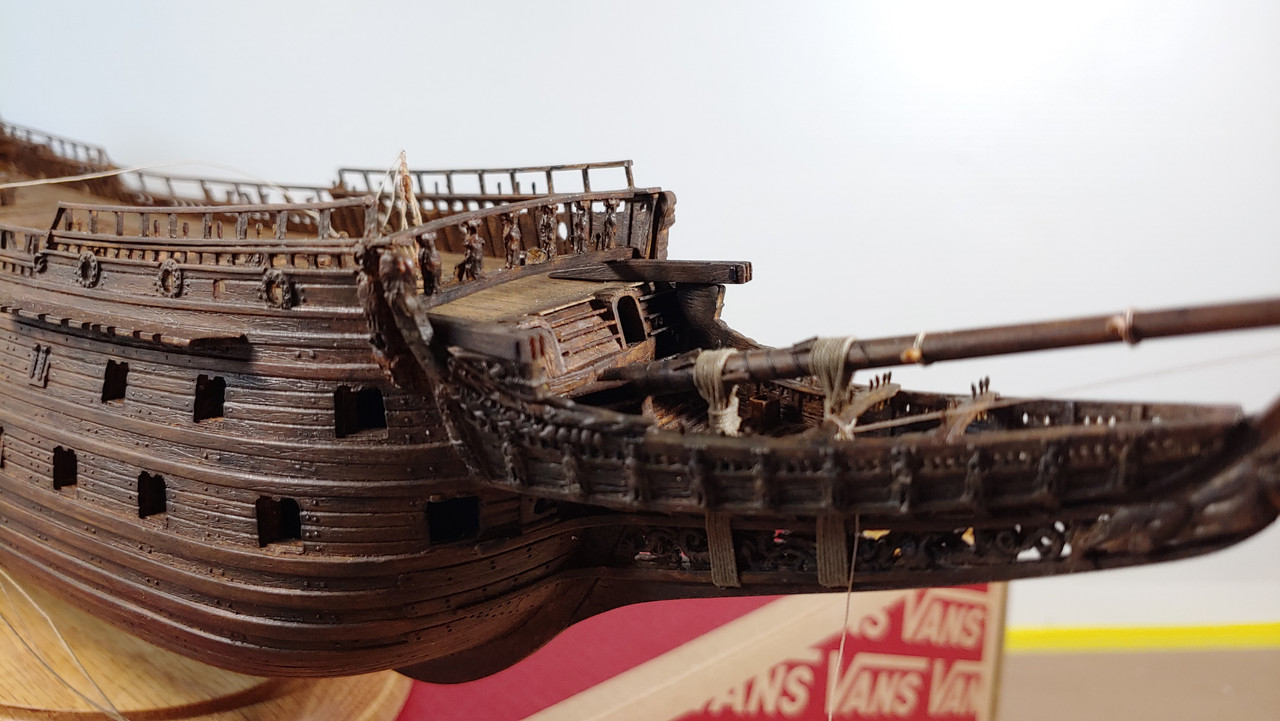
The rudder is pretty done minus the ropes, trying to produce the gudgeons and pintles at this scale was a challenge, I used .030" rod, tape and 28g brass wire to create them and while not perfect they turned out ok.
Michael D.
-
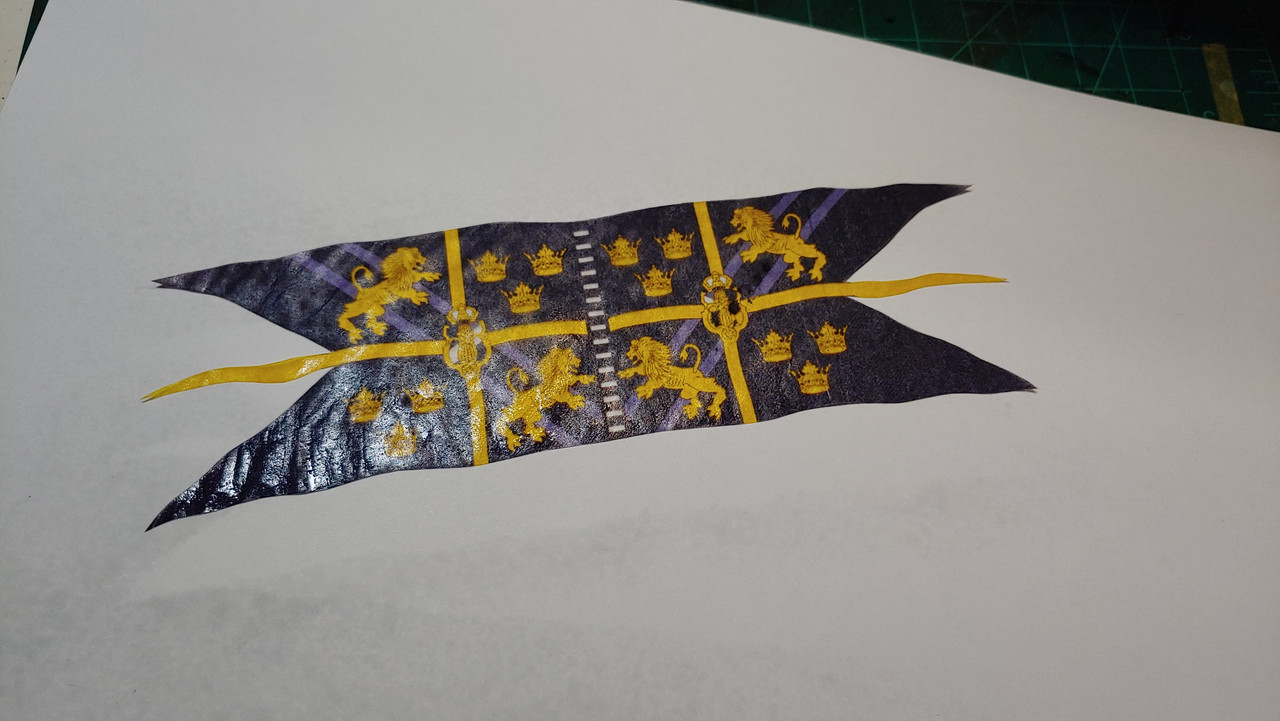
Thank you for compliments gentlemen. I just used regular tissue paper and the trick is to tape it as flat/wrinkle free as possible to the printer paper to avoid major blotting/ dark spots, you'll get some that can be touched up or be hidden when furling the flag, also some of it presents a somewhat weathered look that I'm after, not wanting any vibrant colors. After I cut out the flag I seal it with dulcoat lacquer to prevent color bleed when wetting it to shape.
Michael D.
-
Honestly Kirill I never paid that much attention to which way the scale rope is layed, the stuff I'm using is from Syren, I guess if one really wants to get technical then a rope walk would be the way to go but not for me as I'm fine with the commercially produced stuff. You got me on the double loops on stays as they are clearly smaller diameter ropes and if I remember right you rigged them on your Galleon?, but the first picture there looks to be the mouse on the stays. I know Anderson makes no mention of not using a mouse on the lower and topmast stays.
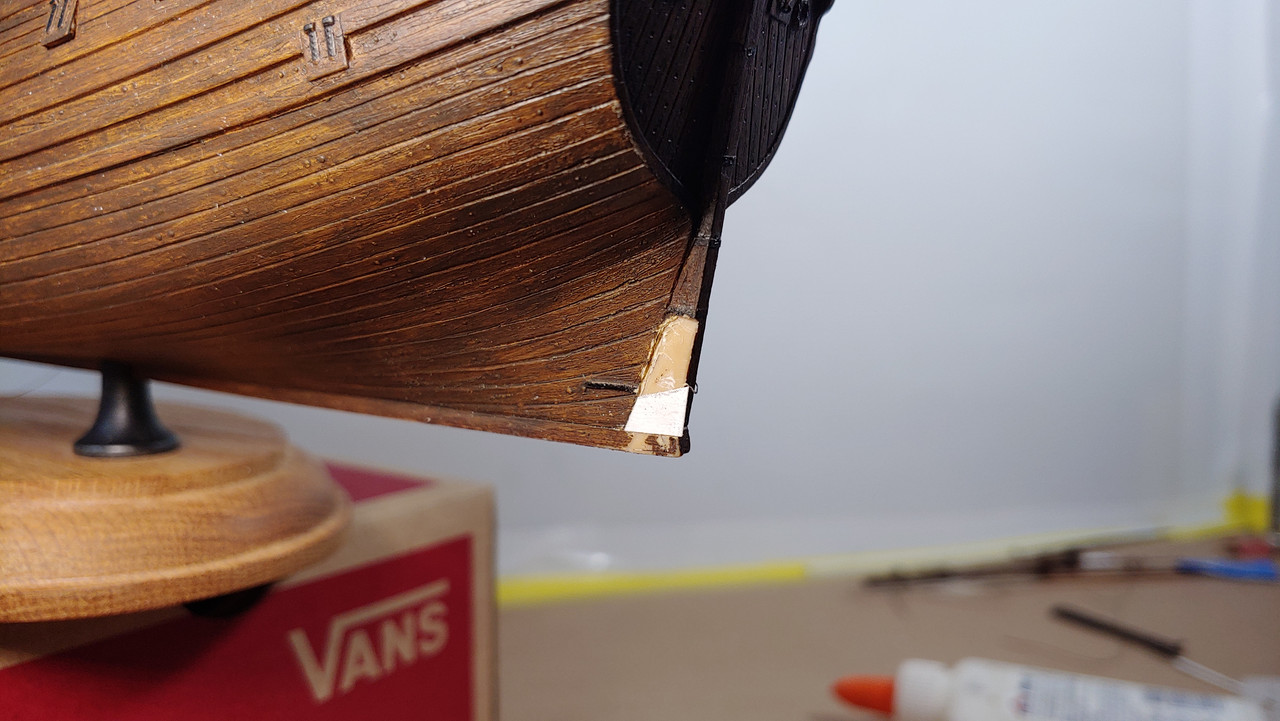
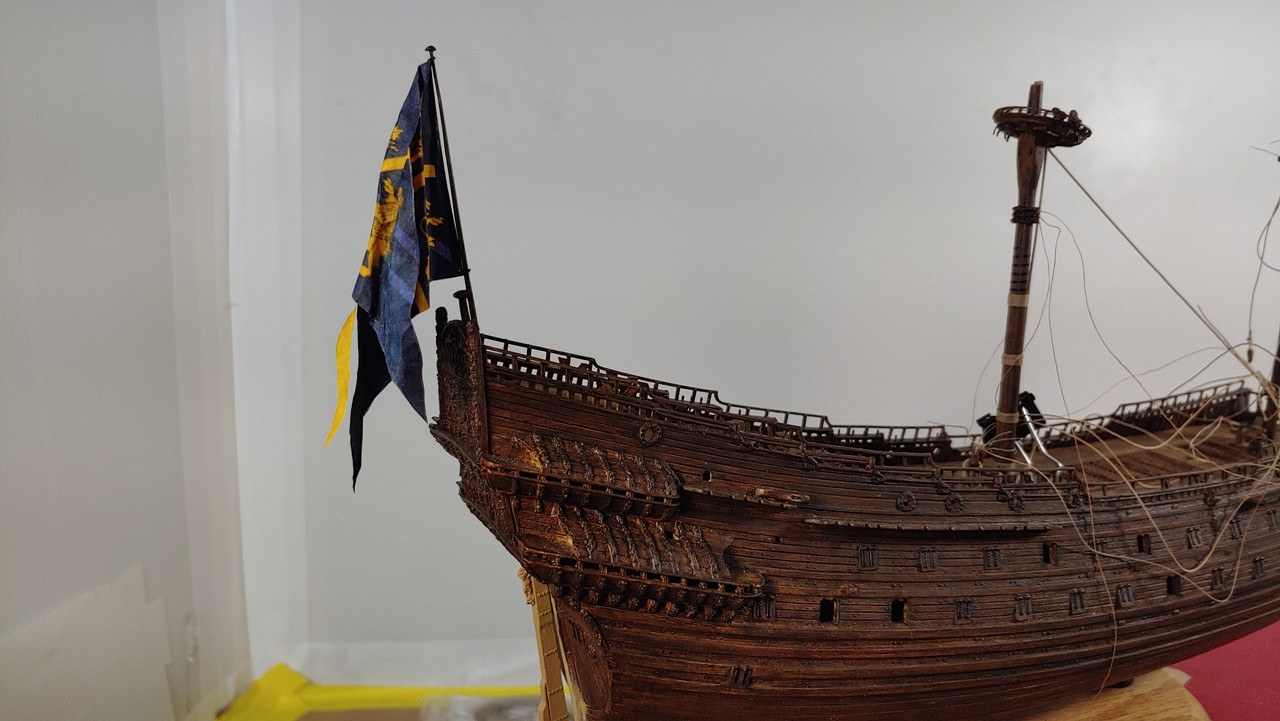
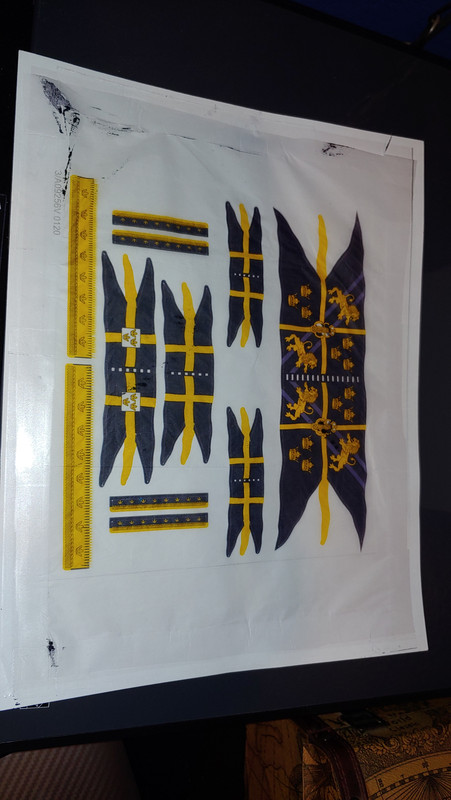
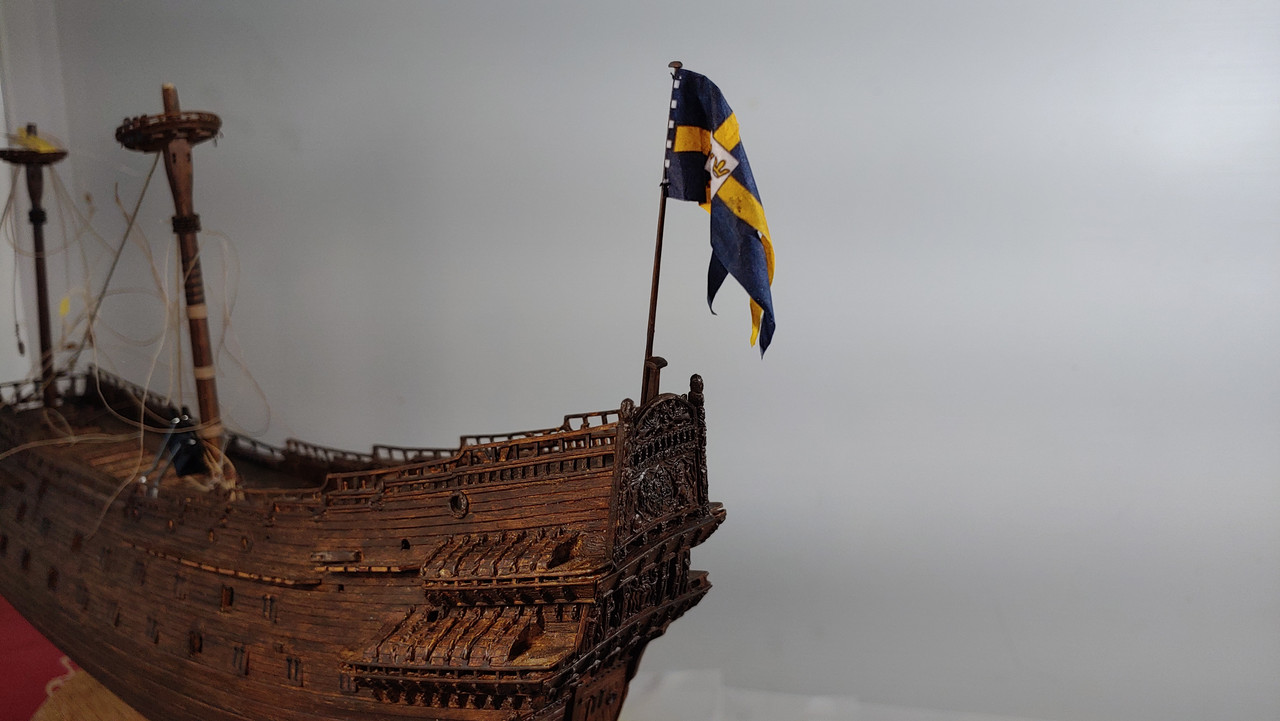
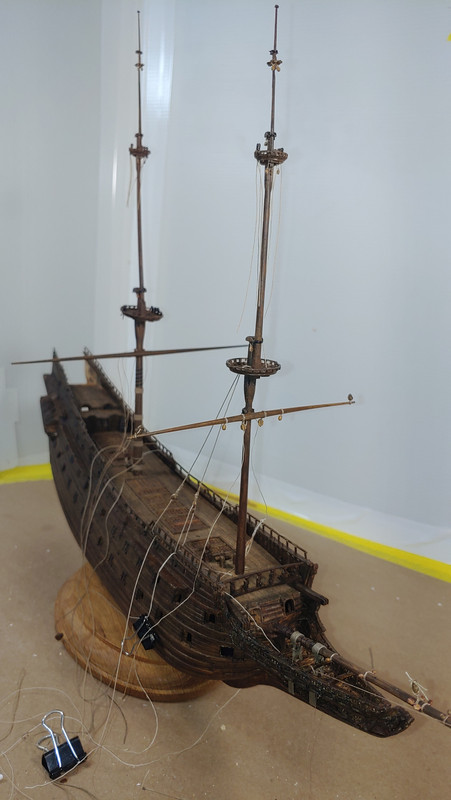
The stern is in place and will require very little filler at the bottom if any, also had this wild idea about reproducing the flags on tissue paper and was quite surprised how well it work for just a quick test run, I simply taped tissue paper to a sheet of printer paper and ran it through the printer.
Michael D.
-
Hi Krill,
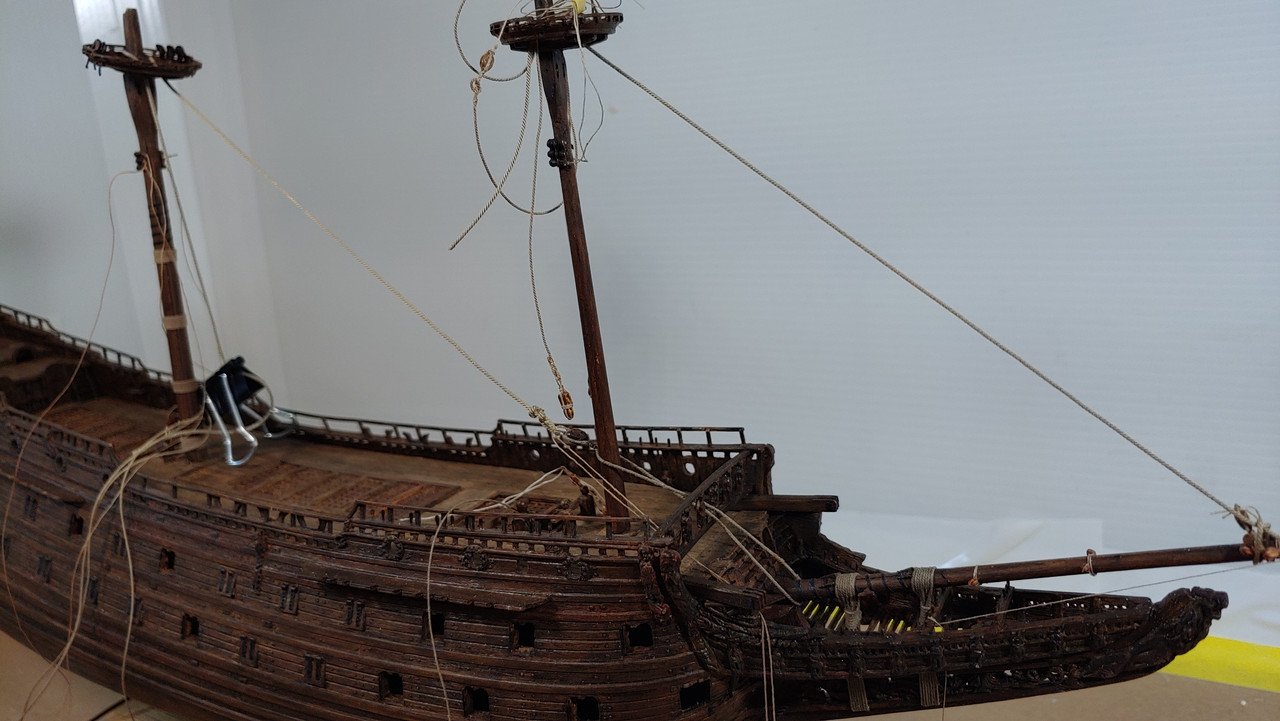
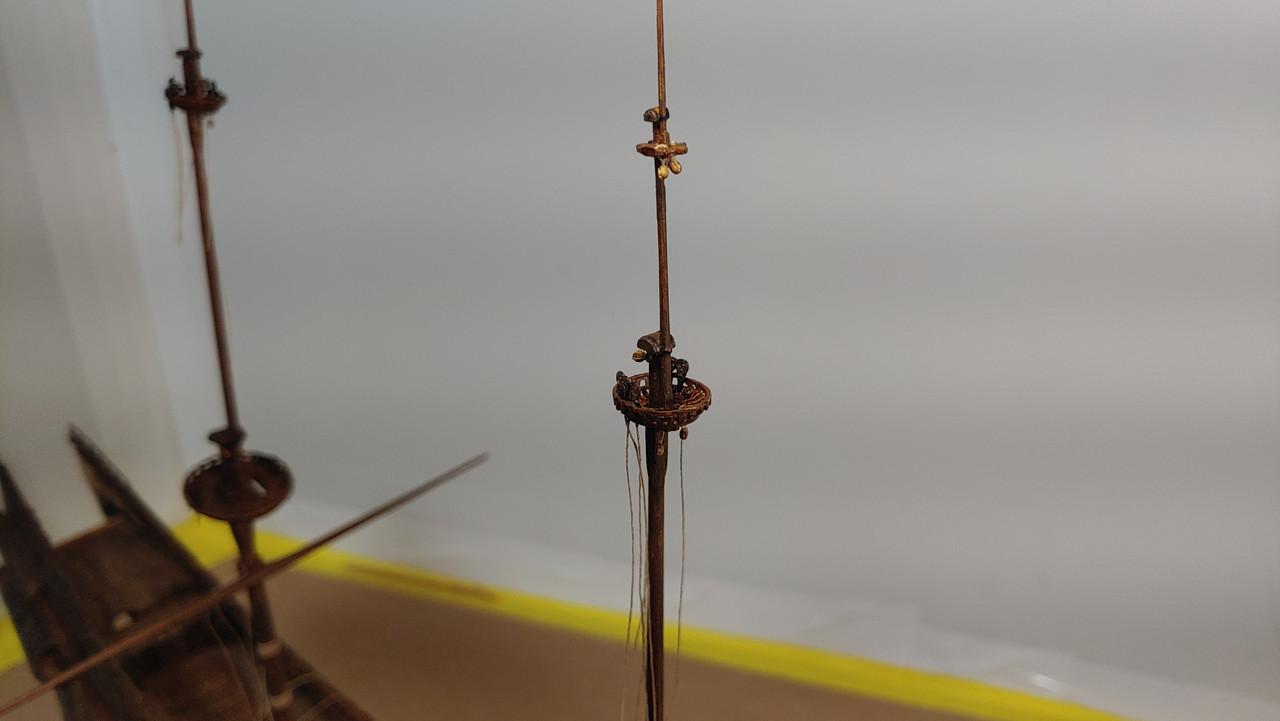
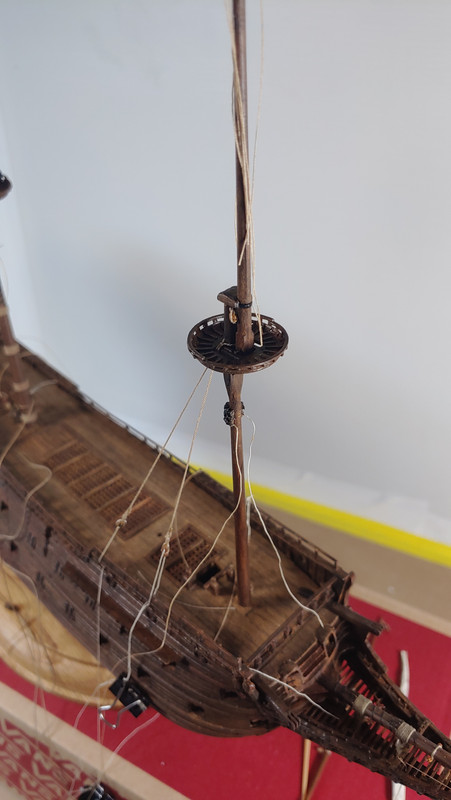
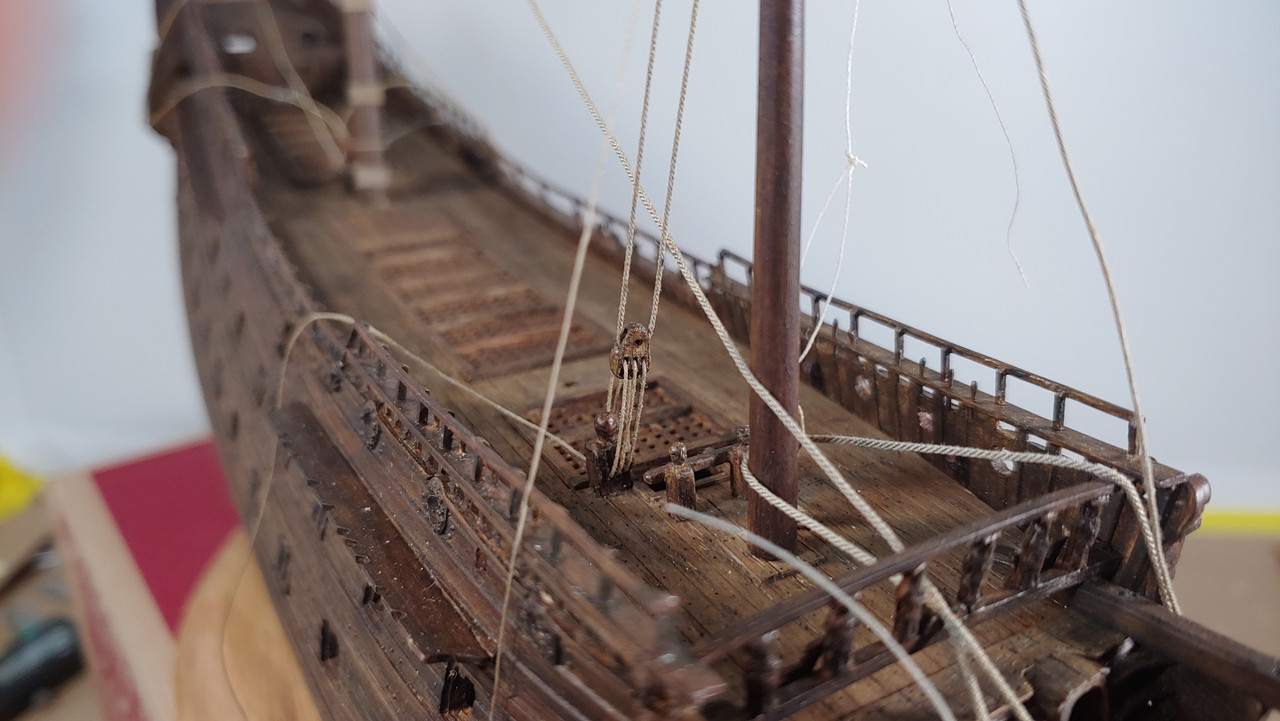
I appreciate your observation, I used .45mm line for the tackle pendants which will be the same as the fore and main shrouds and .35mm for the mizzen shrouds. The fore stay will be .76mm line and .88mm for the main, the stay collar is 3/4 of the stay so I think I'm close with the .63mm collar which is close to 4" in diameter. Here's a mock up of the aforementioned stay sizes I plan to use, given the available scale rope sizes we can only come close. As for the dead eye it measures approx 4mm x 3.5mm and indeed has 4 holes the upper dead eye will be slightly larger with 6 holes, this requires 2 lanyards to rig and those are the 2 lines you see tied to the top of the collar.
Michael D.

-
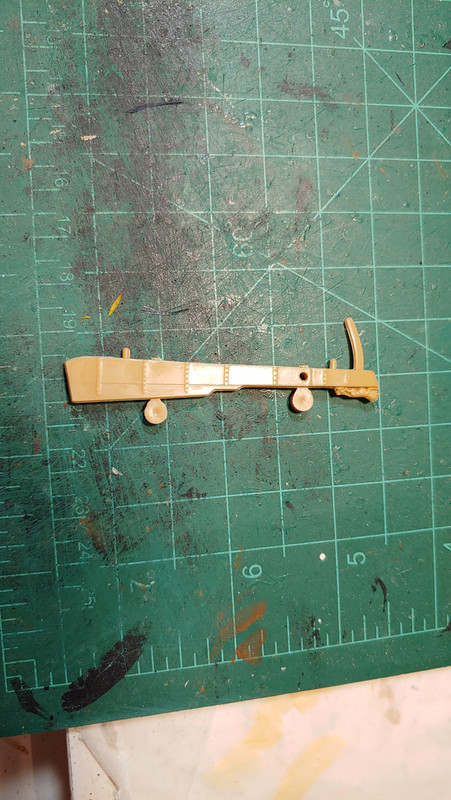
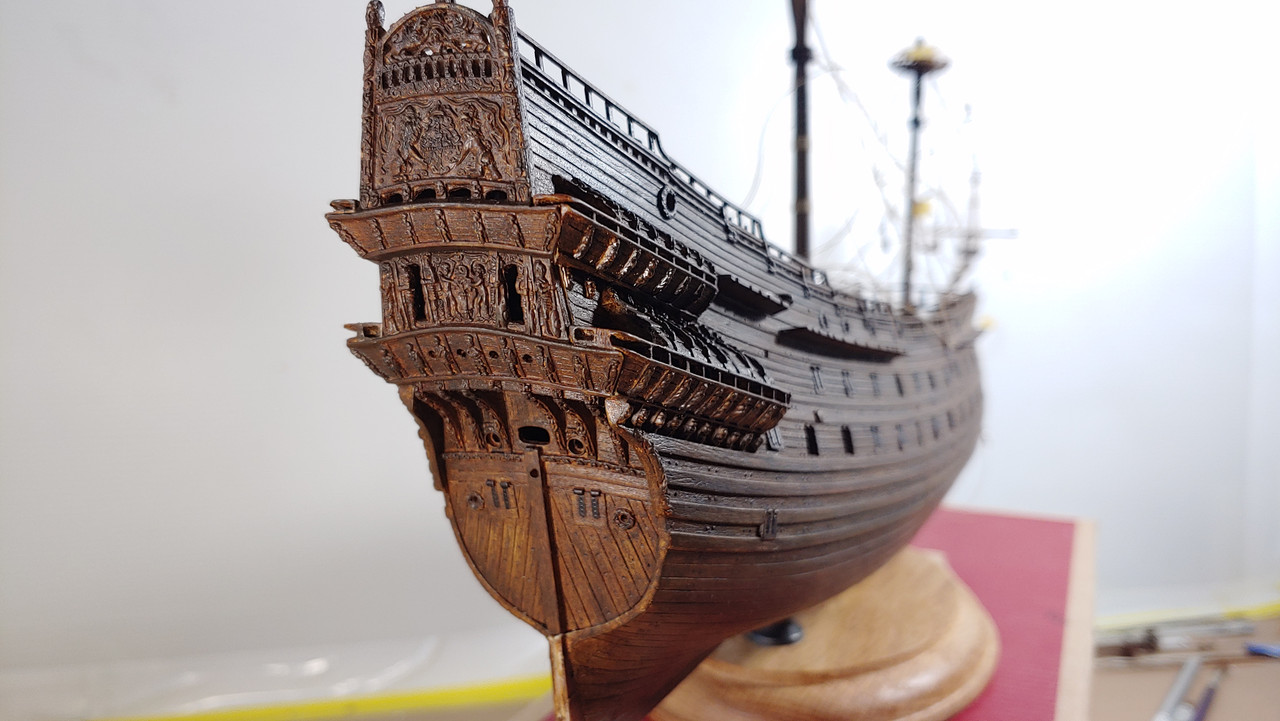
Thank you Frank. In my efforts to try to modify the stern as close as possible to the real ship I overlooked the Ensign staff configuration, the kit supplied staff has a knee at the base and a corresponding cut out in the deck that the original does not have...arrrrgggg!. I contemplated doing some patch work to the deck and staff but decided to move forward with this arraignment, in the end it will look acceptable. I installed the main stay collar using .063mm line, the main stay will be .088mm line when I reach that point, I believe at scale this stay measures out to 135mm diameter which would put it at .093mm at 1/144 scale, the 1.0mm line just looked too big and I find it looks better visually when the line is slightly undersized.
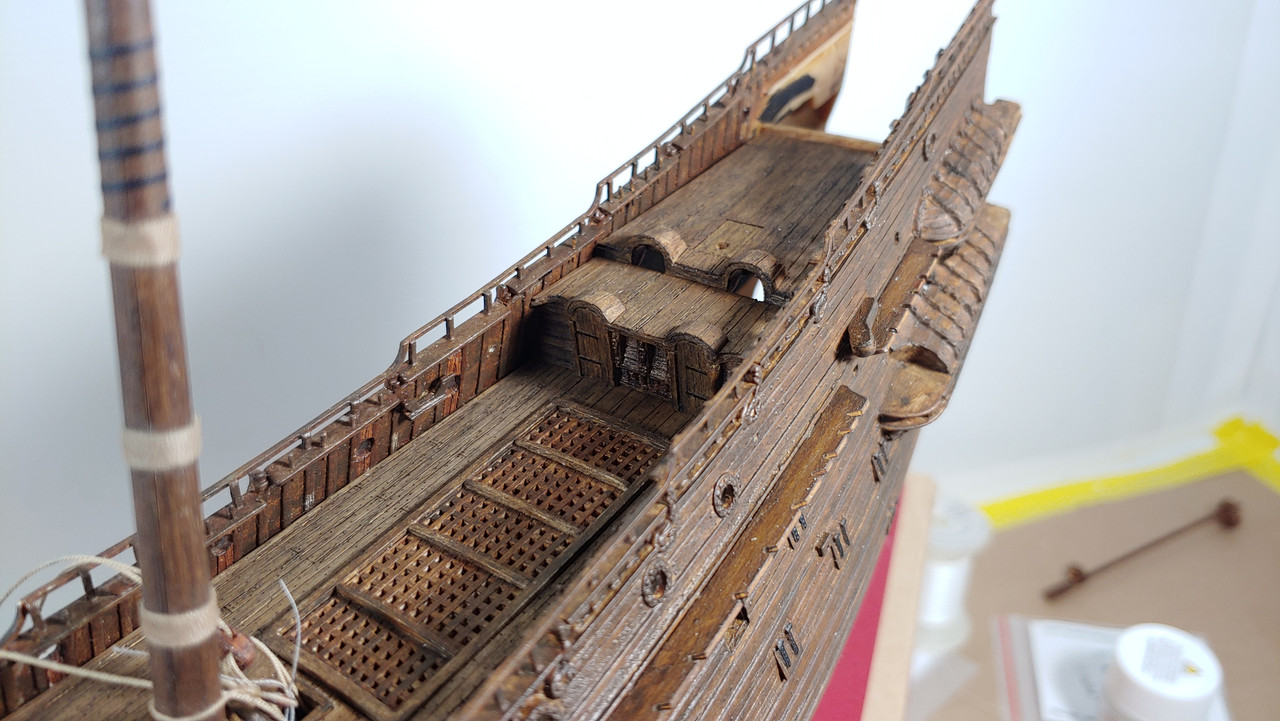
I also added the sheaves to the insides of the bulwarks. Today's goal will be to finally glue in the stern.
Michael D.

-
I finally completed all the decks with the gluing in of the poop deck, up next will the stern and modifying the rudder. As always thank you for stopping by and looking at my unorthodox build sequence.
Michael D.

- Old Collingwood, BLACK VIKING, kirill4 and 7 others
-
7
-
 3
3
-
The flags turned out great Frank! Personally I'd go with the partially rolled back canopy to expose the beautiful detail in that area.
Michael D.
-
Thanks Kirill, yes I did and while this may be a gamble for most, I feel confident I can rig this without issues as long as I don't run out of talent...Lol.
Michael D.
-
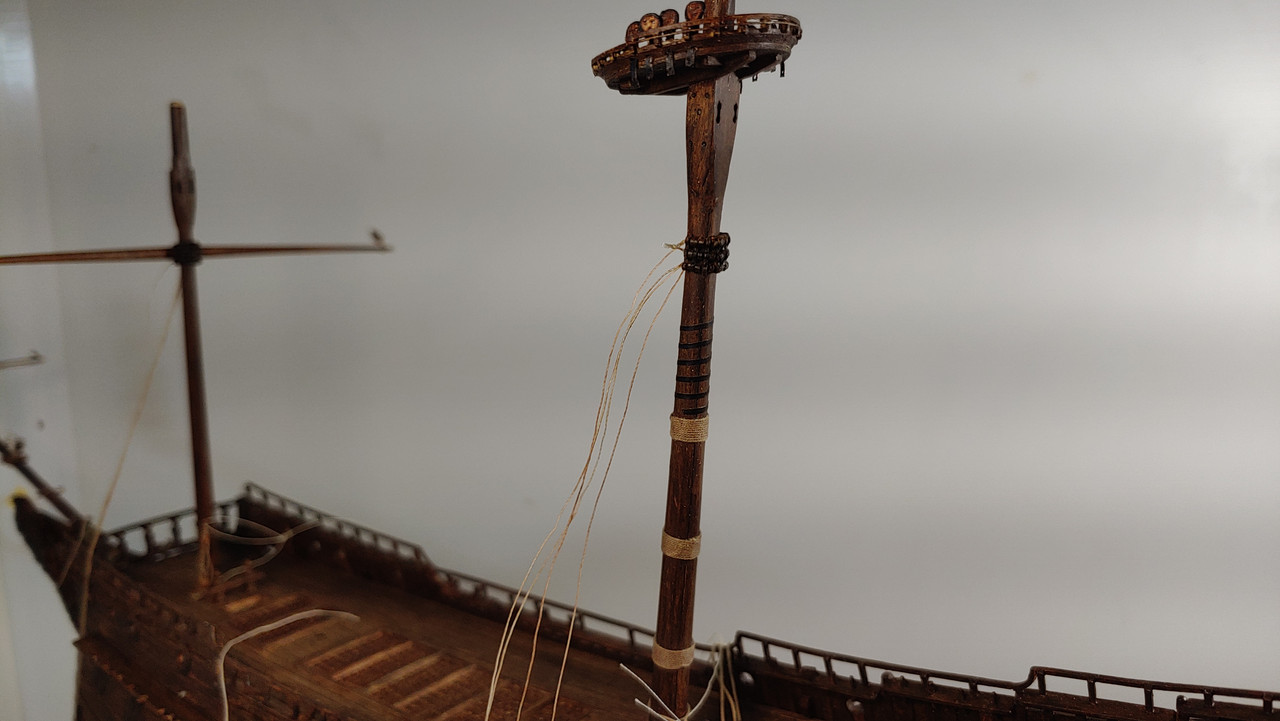
I started dressing out the masts and yards, the fore mast is just about complete with the martnet pendants still left to do. I used a 2.5mm block for the top rope, 2mm block for the main topgallant stay and 1.5mm blocks for the lifts. The fore tackle fiddle block is made up of 3mm and 2mm blocks, cut down some to reduce their size and the double block is a 3mm britannia metal block. Both masts are just set in place at the moment for a visual.
Michael D.

-
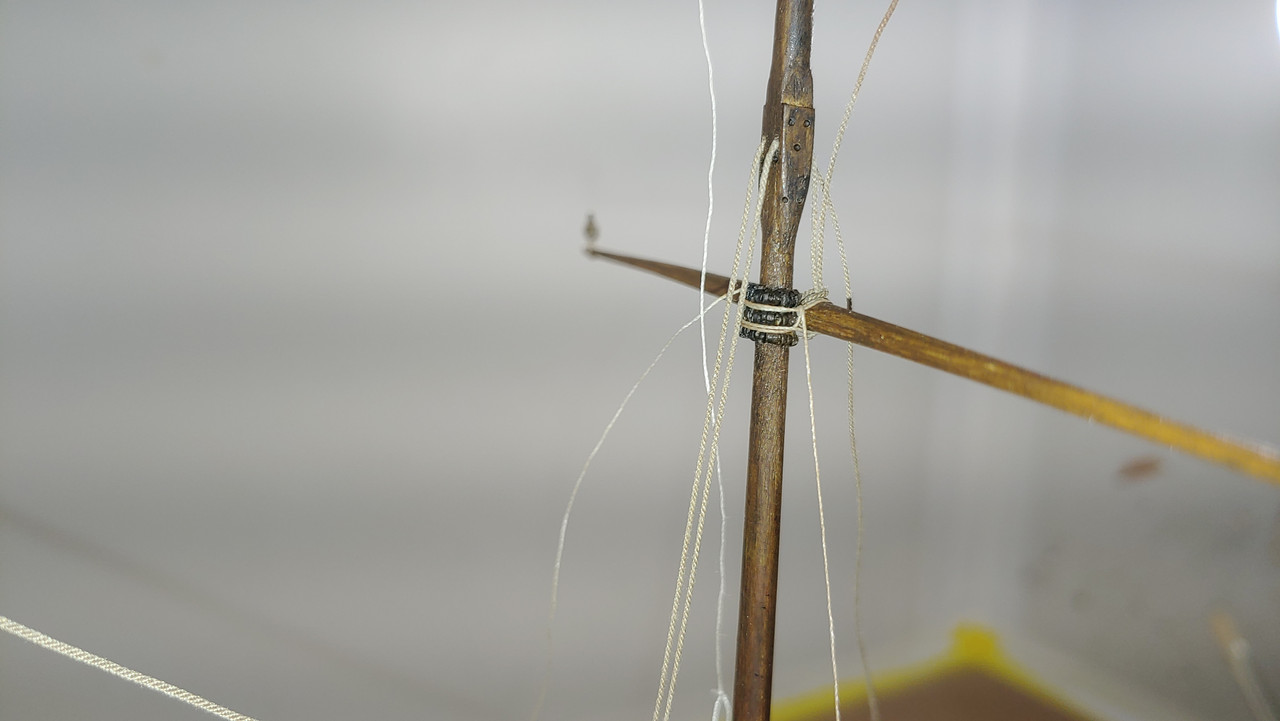
I had fabricated the parrels for the main and fore course yards that are glued to the masts and did a trial run of the parrel rope, the fall tackle will be reversed rigged with the end simply tucked in behind the parrel rope. The sheet blocks are about the size of the mid section of the yard with the sheave for the lifts at a right angle. The tie is .45mm line which will the same as the shroud and fall is .30mm which is rigged through a 4 sheave knight head, all of this is in the mock up stage at this point.
Michael D.


-
Thank you gentlemen, Shipman I did not know or rather wasn't paying attention to their advertising slogan but does make sense, since every build I've seen of this model does look more like a toy, except for one and that's Rex Stewart's fantastic build!!. Actually It's probably a blessing they omitted some details as they would more then likely be scratch built anyways.
Michael D.
-
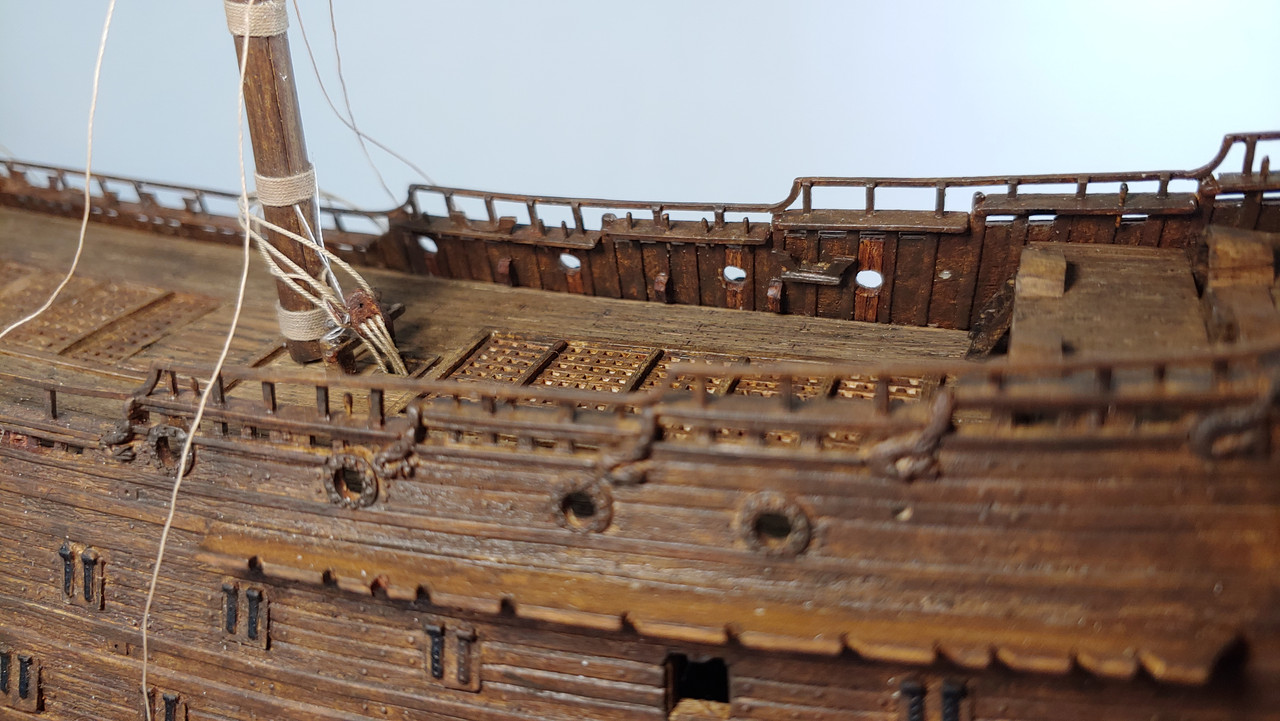
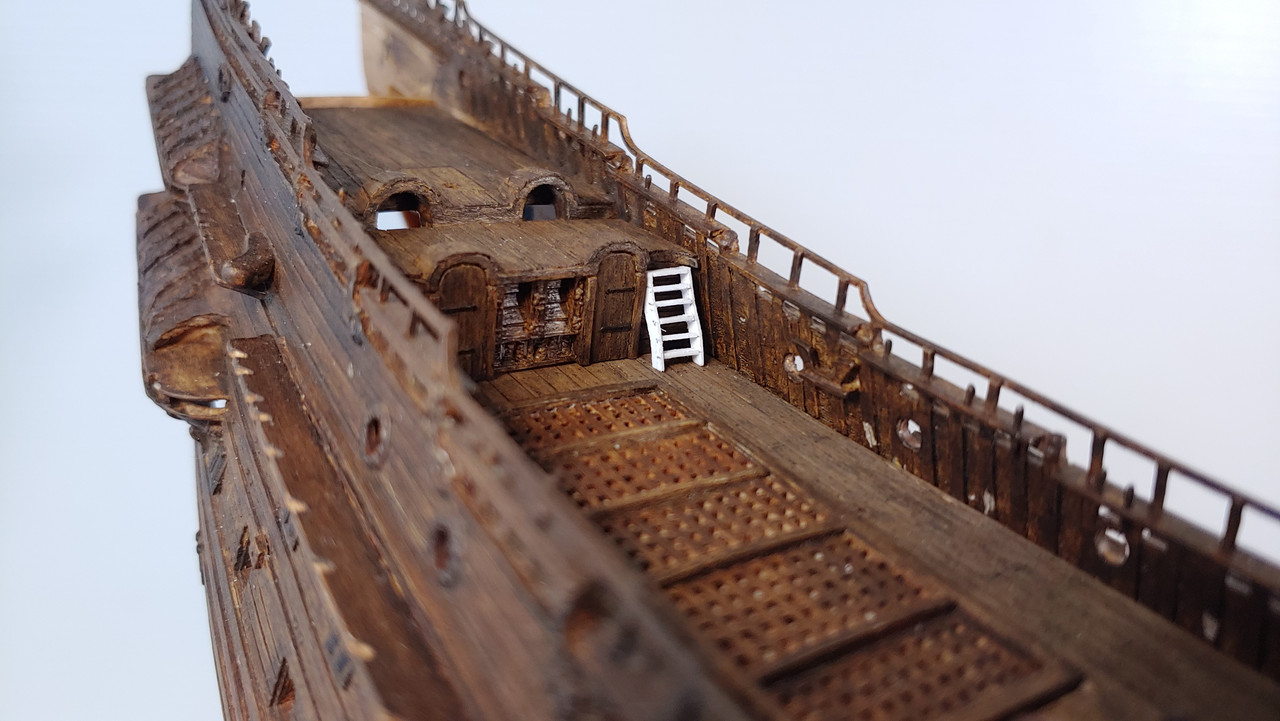
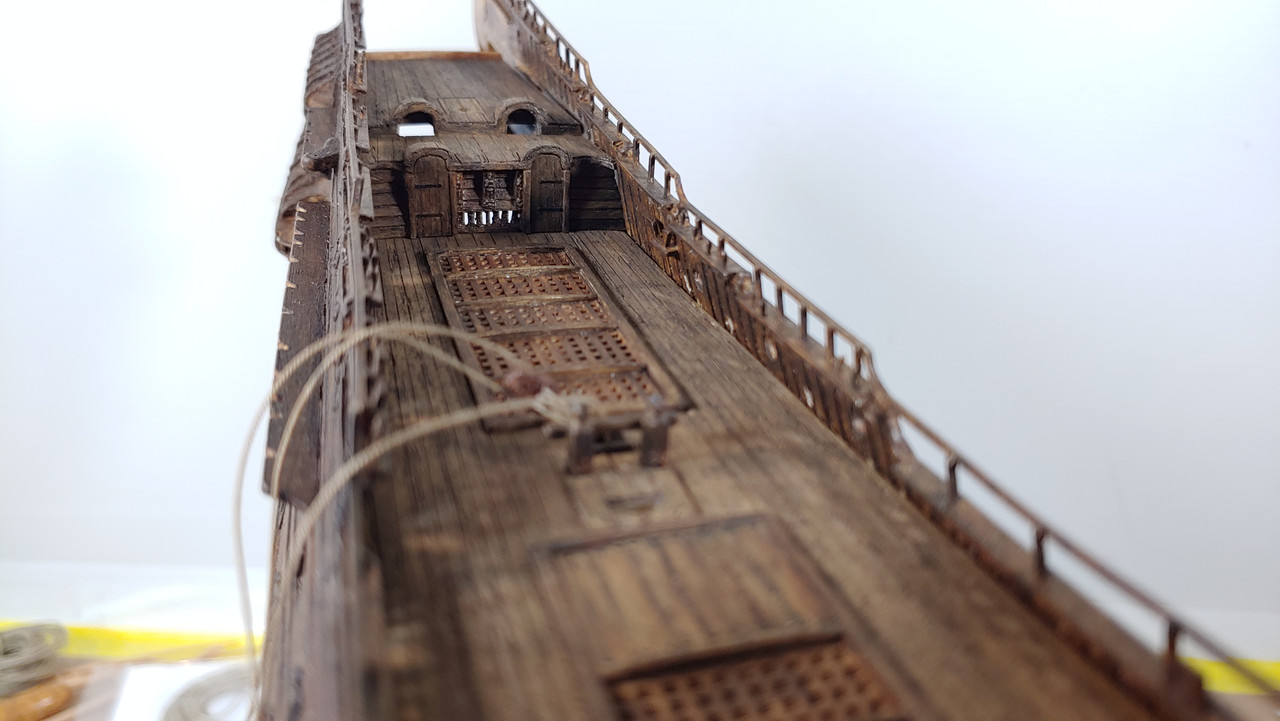
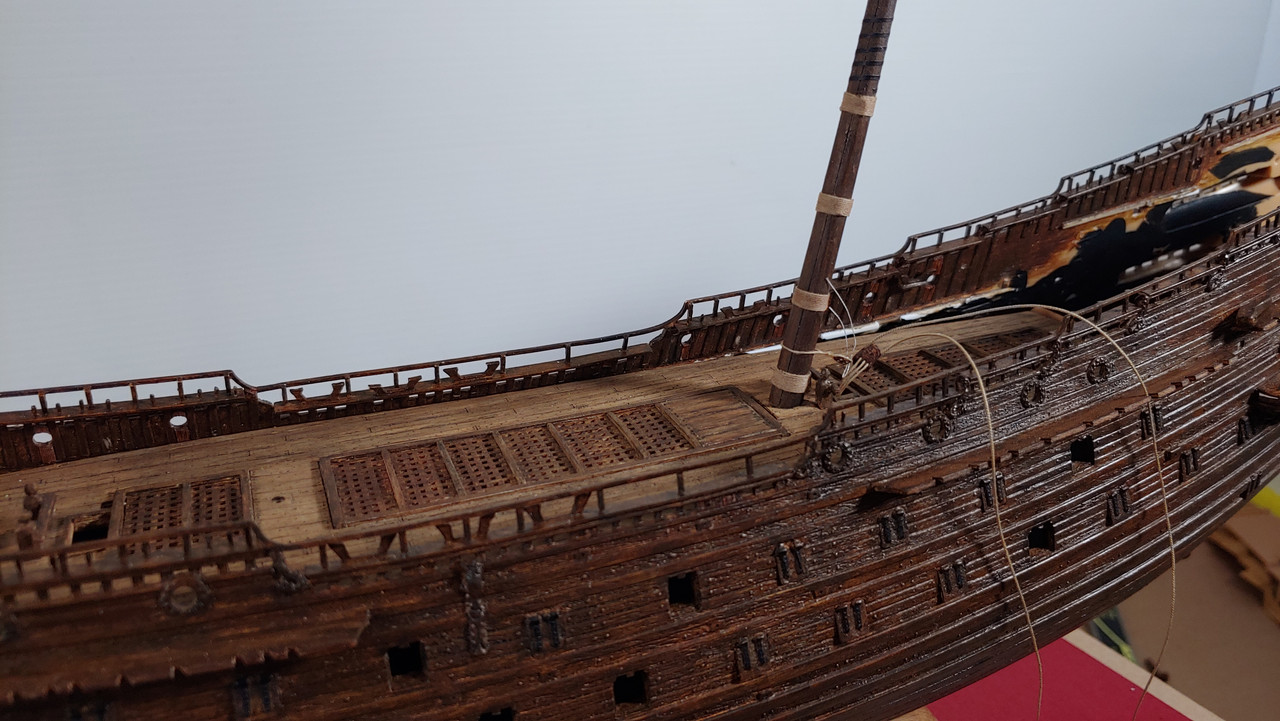
I've also seen drawings of the collar after going through the deck, passing through the bulkhead before going around the bowsprit and this was actually the route I was going to go with but there's just no evidence of this in their findings, so I just moved forward with how they rigged the real ship and I'm fine with that. Meanwhile the rail is complete and installed and working on the ladders leading up to the Qtr deck. Thanks for looking.
Michael D.

-
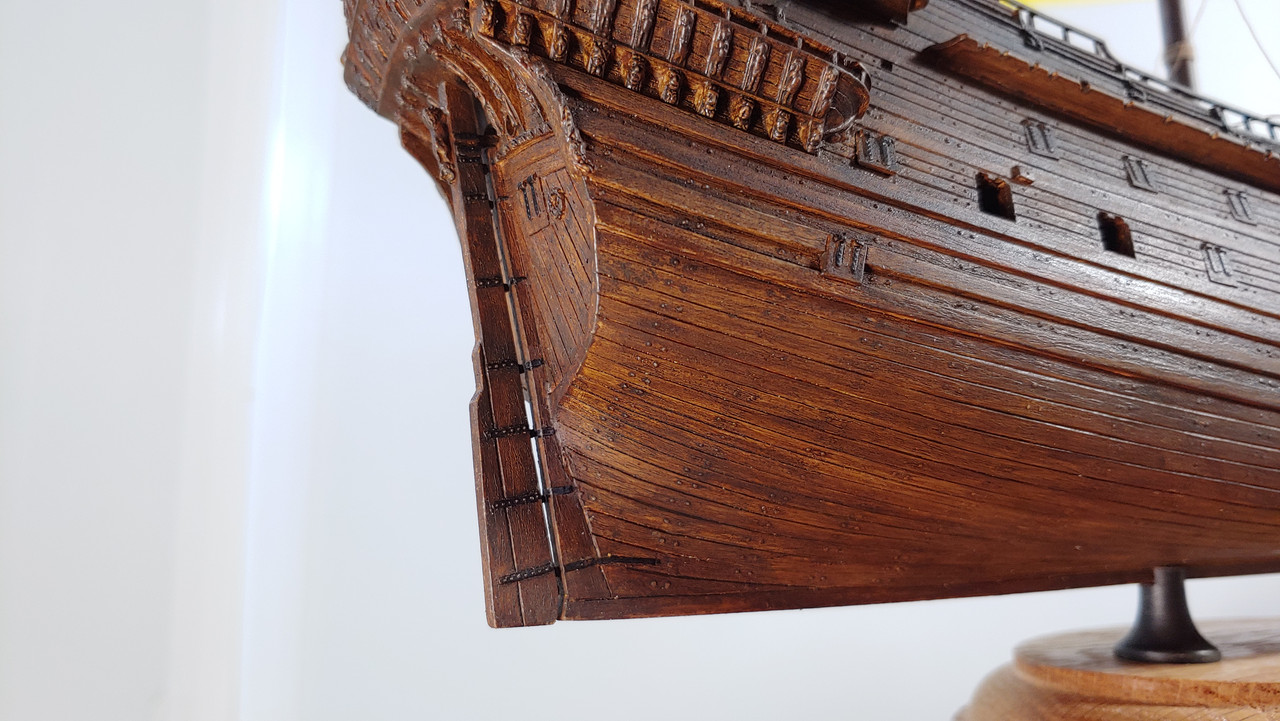
This photo really brings the stern to life, just superb craftsmanship Marc!!!
Michael D.
- Hubac's Historian and mtaylor
-
1
-
1
-
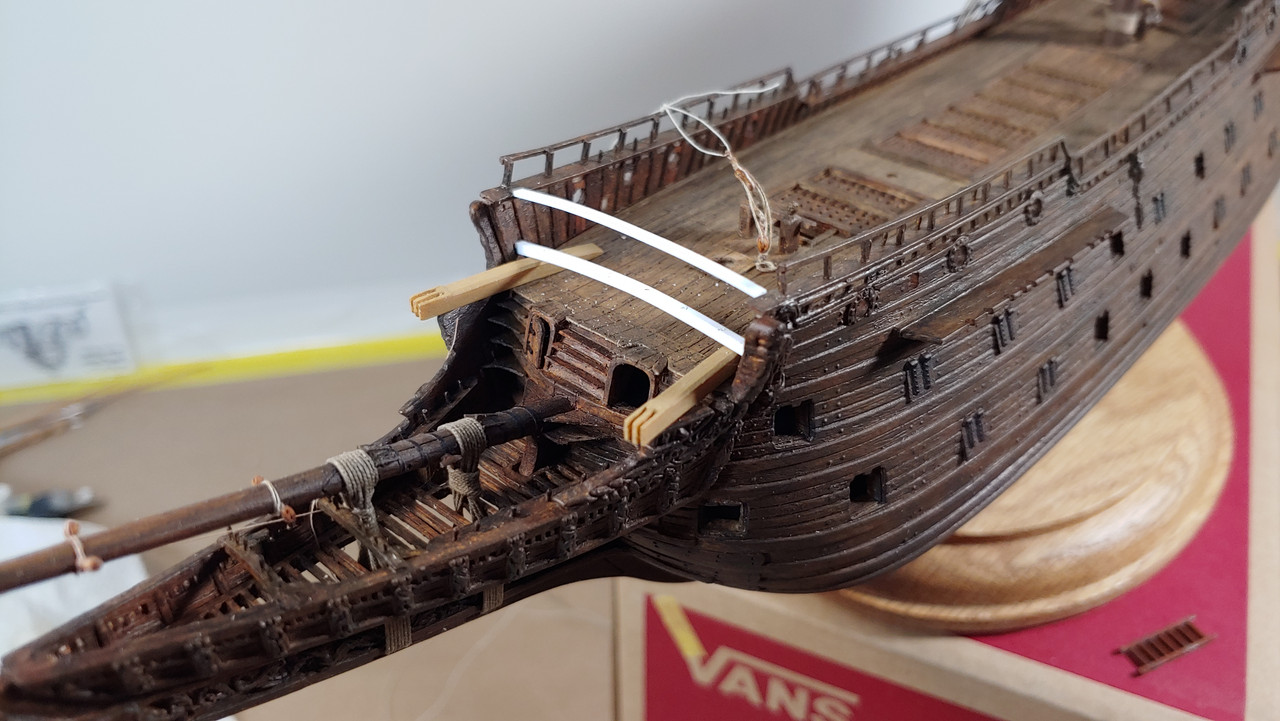
In response to your question Kirill about the paint, I went ahead and painted the rail before making the knees and the main stay collar rubbing block and with the repeated attempts at checking the fit you can see the piece withstood the handling pretty well with an occasional rub through here and there, on sharp corners sometimes and that is to be expected considering how thin the paint film is.
Michael D.

-
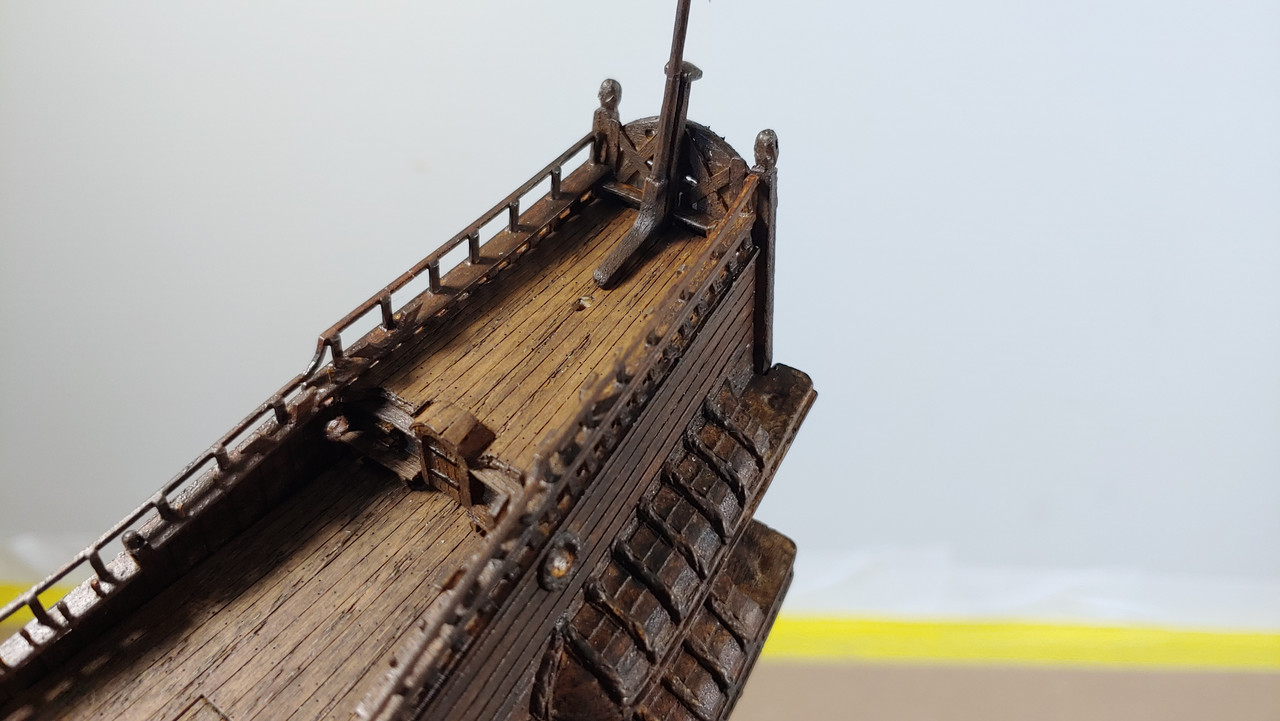
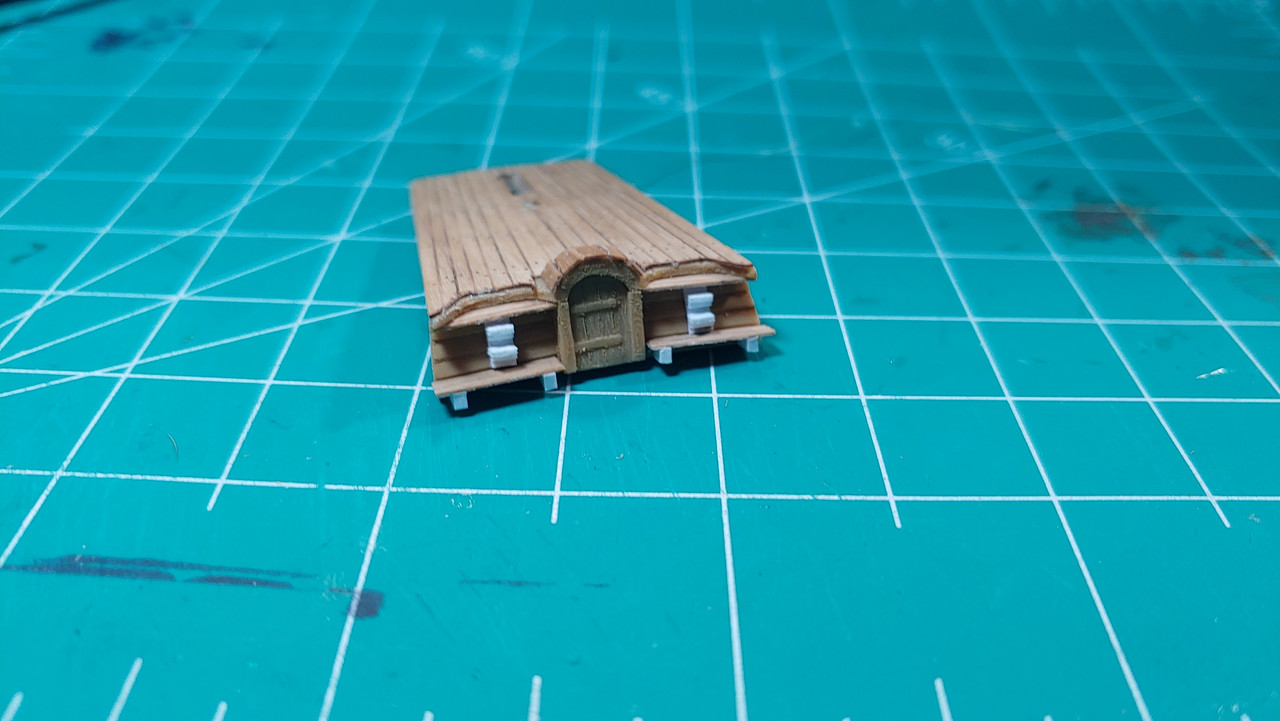
I was finally able to get the main deck glued in and the front portion of the Qtr deck, the toughest challenge modifying the Qtr deck was filling in the open space between the doors with 7 little carvings and I still have to build the ladders. Up front I'm doctoring up the supplied catheads and fabricating the bulkhead/fore castle rail using .60"x.60" styrene for the bottom and .30"x.60" for the top.
Michael D.
- Ryland Craze, Baker, Old Collingwood and 9 others
-
8
-
4
-
Thank you Marc and trying to achieve my goals at this scale has been fun!. Kirill my plan is fully masted and rigged, furled sails, no cannons although I will display her with the 3 recovered cannons on the base and no colors. Thank you for the compliment too.
Michael D.
-
Just jaw dropping paint work Marc and you're so right about the paint wearing while handling it until it's finally mounted.
Michael D.
- Hubac's Historian and mtaylor
-
1
-
1
-
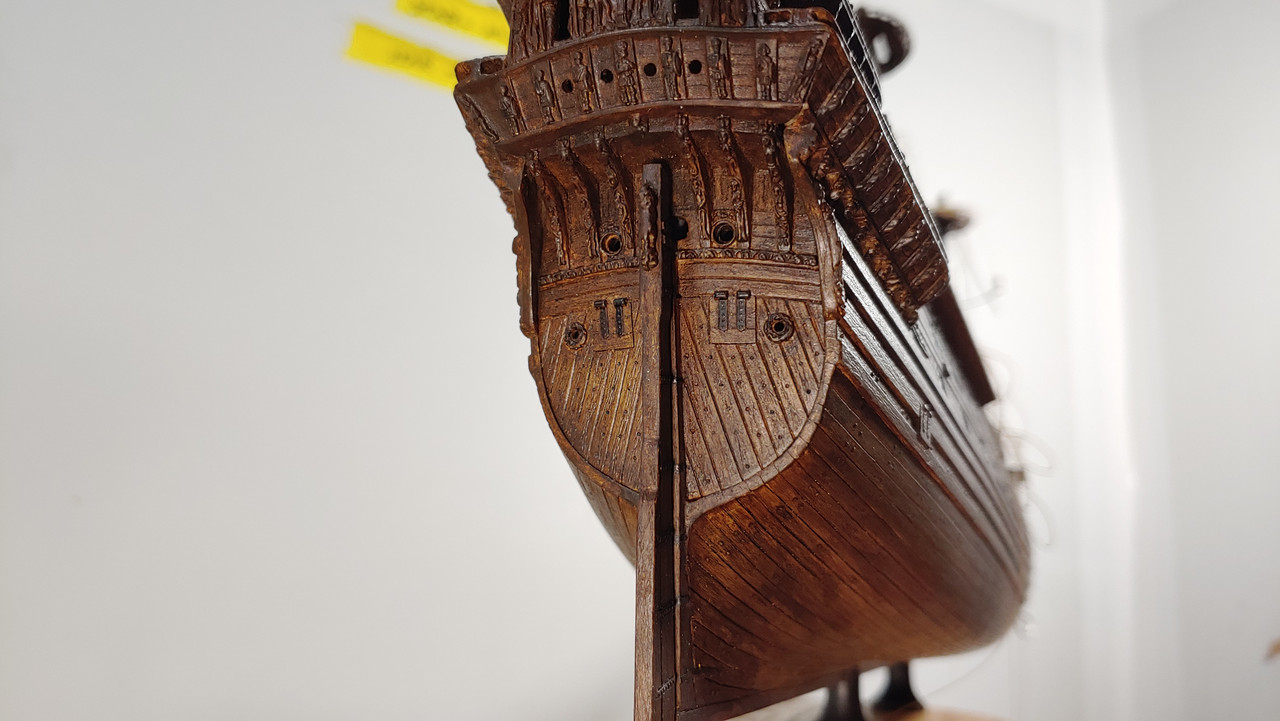
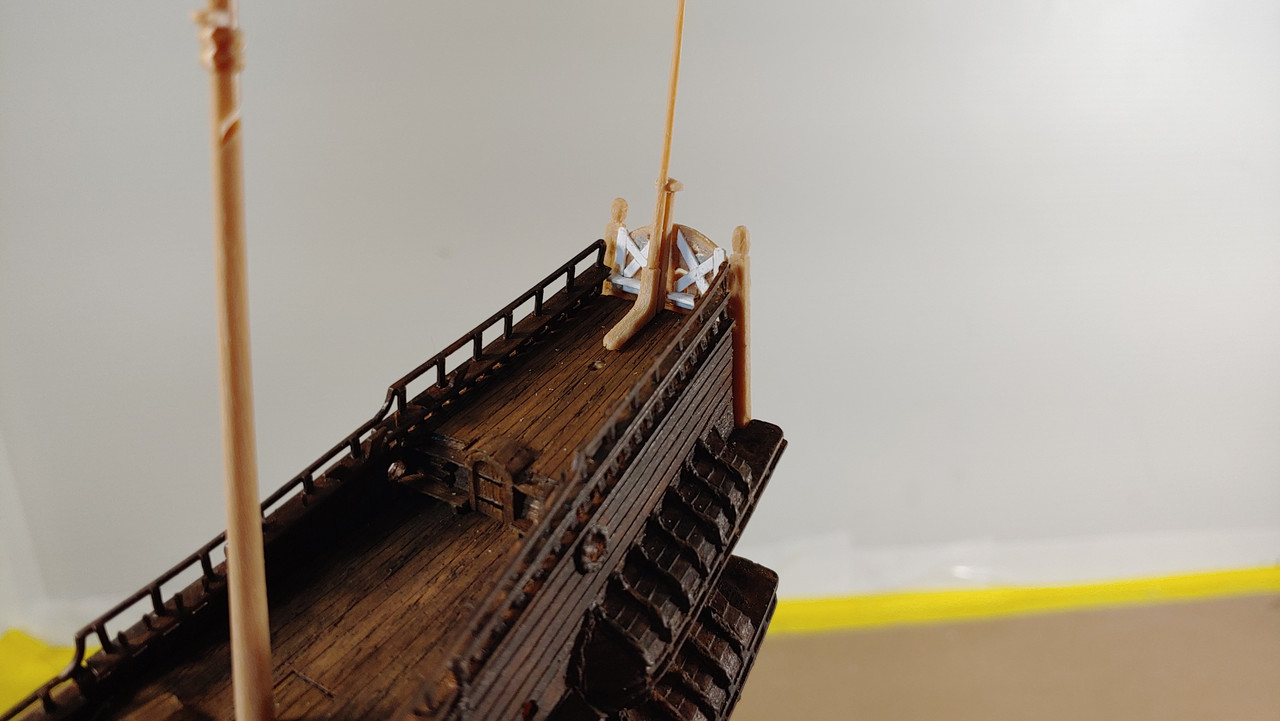
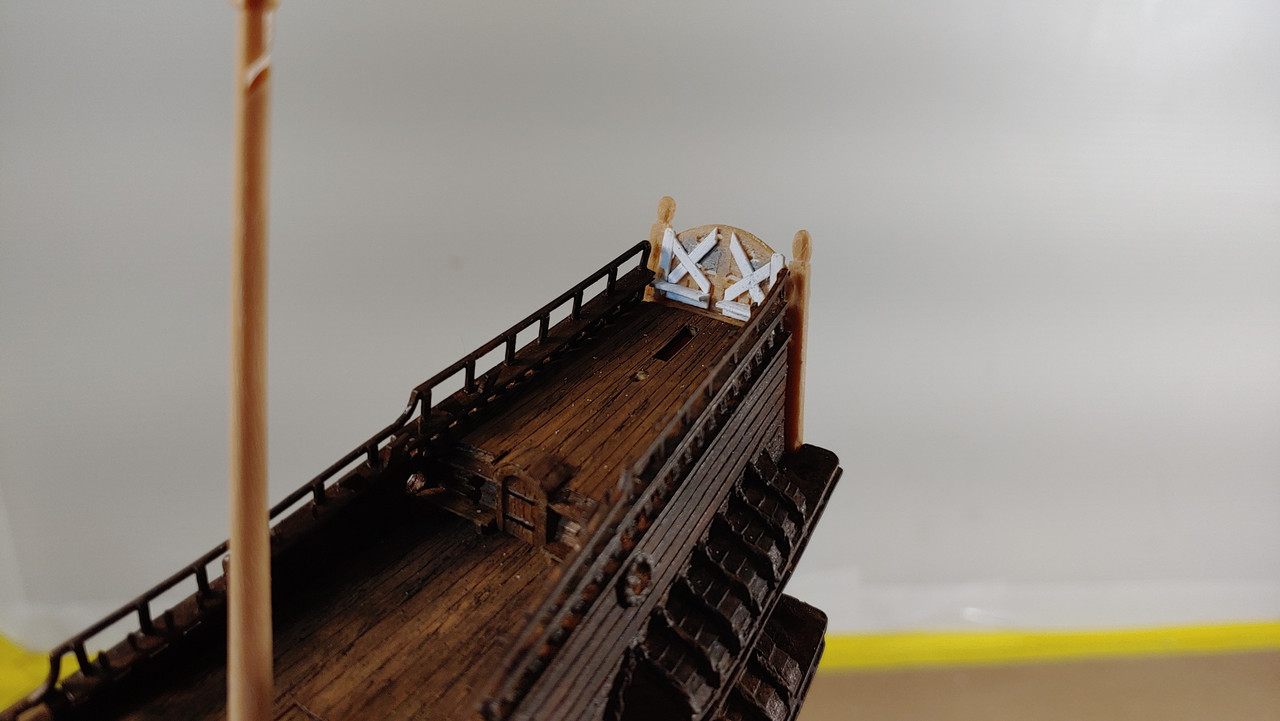
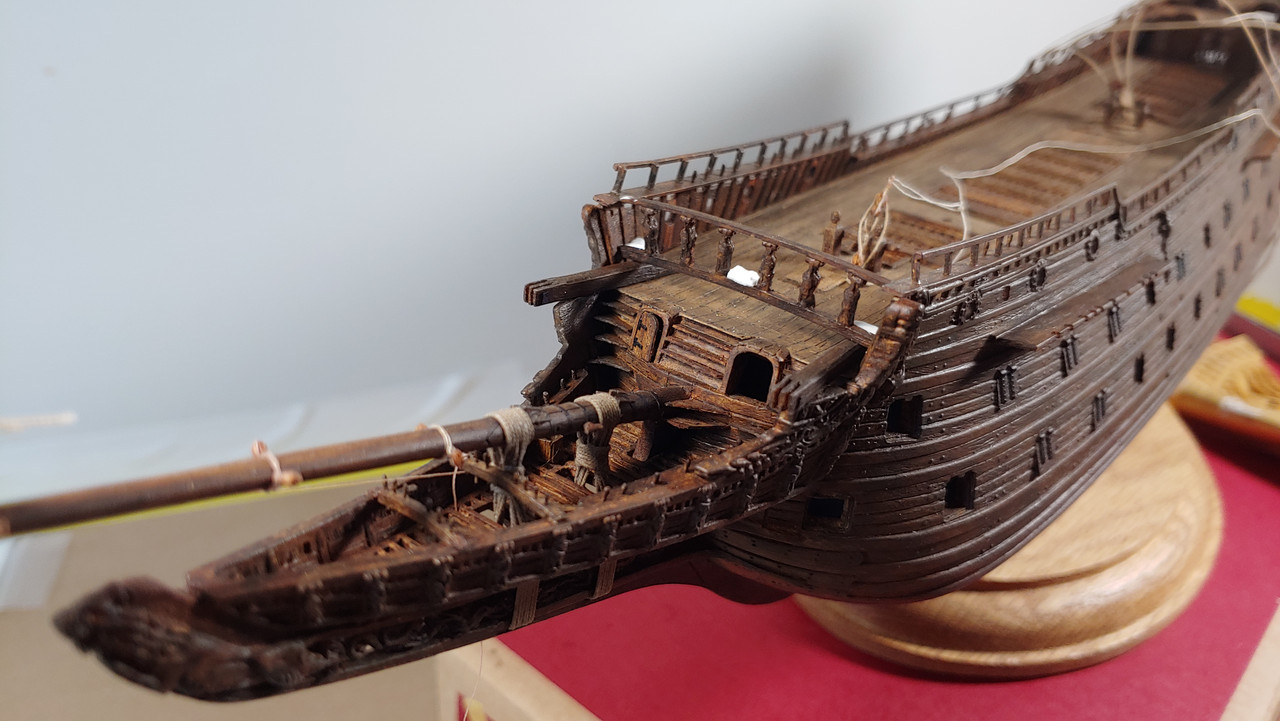
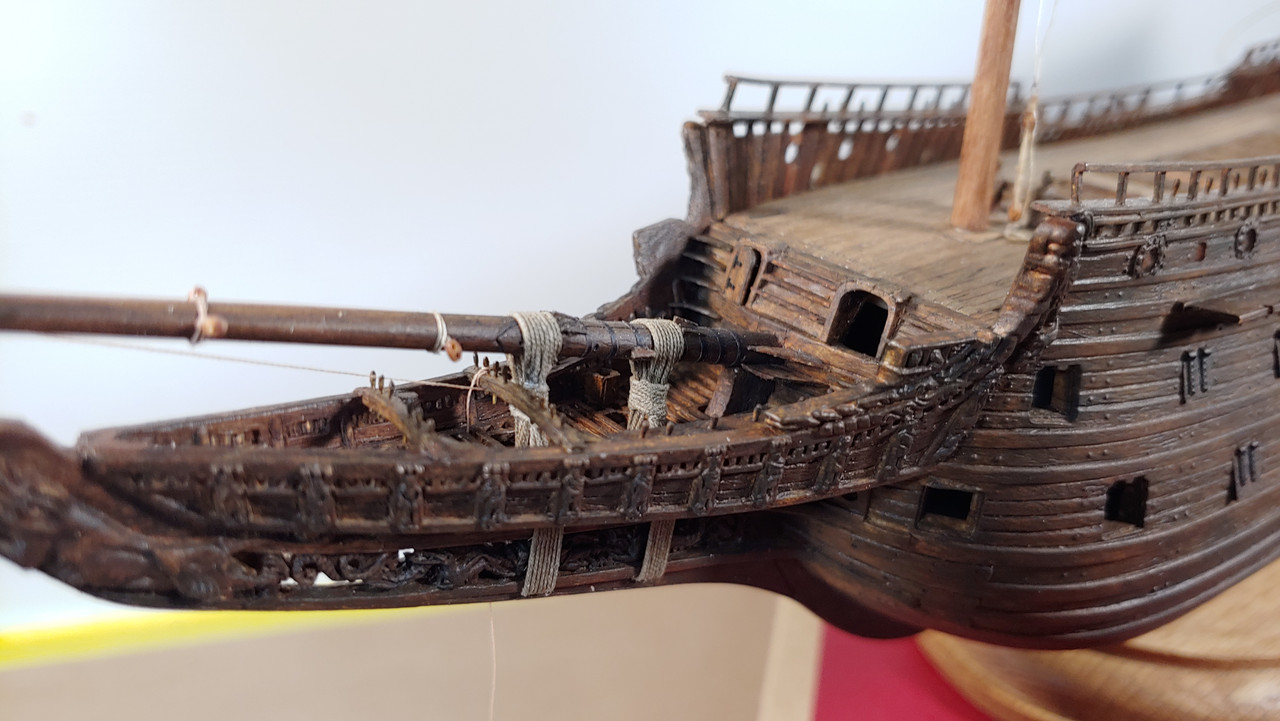
At this point I think I'm done with the modifications to the beakhead with the addition of the 2 pin rails using .60"x.60" styrene and 28g wire for the belaying pins, the toilets and the additional steps, overall I think it looks okay.
Michael D.


- fmodajr, Prowler901, Old Collingwood and 4 others
-
5
-
2
-
Thanks for compliments and likes, very much appreciated.
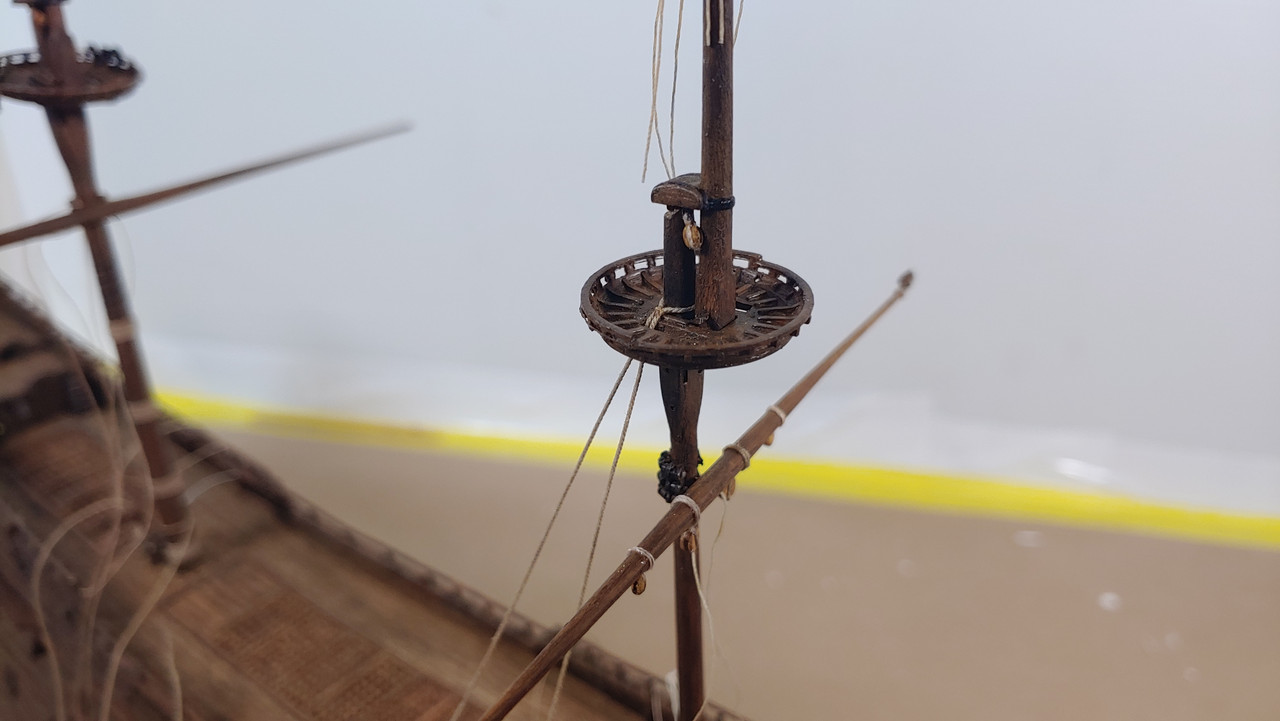
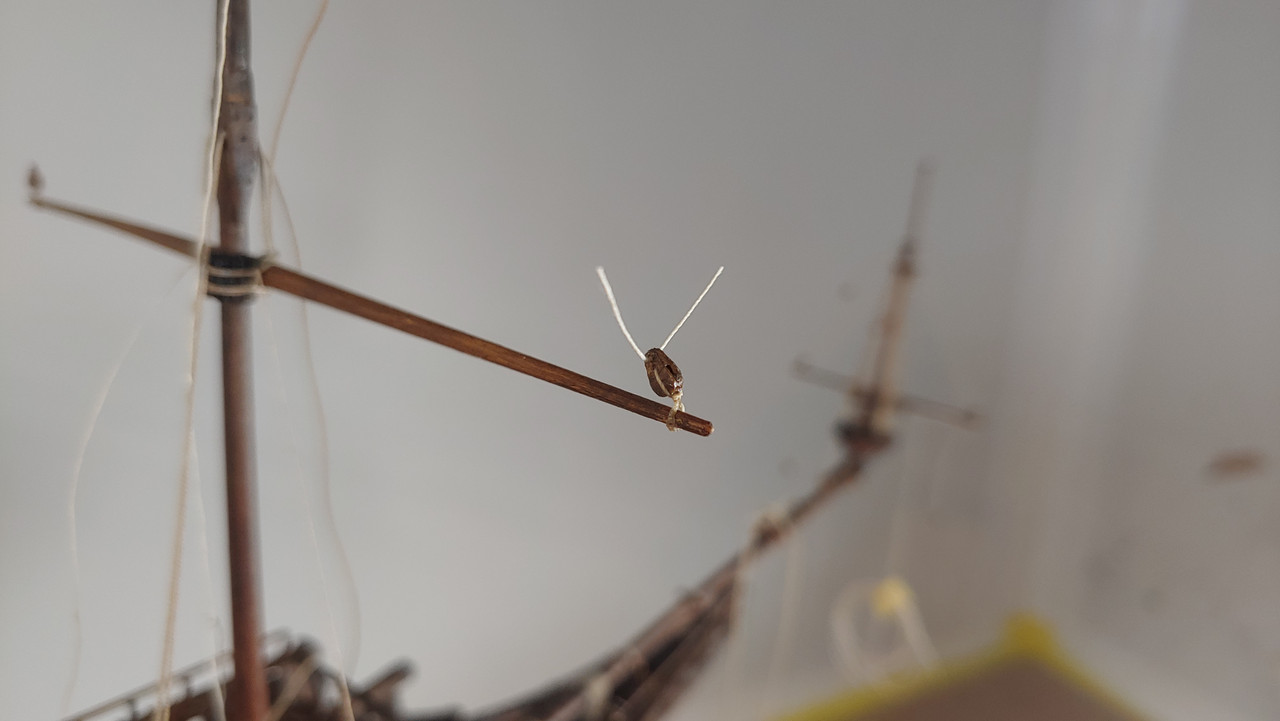
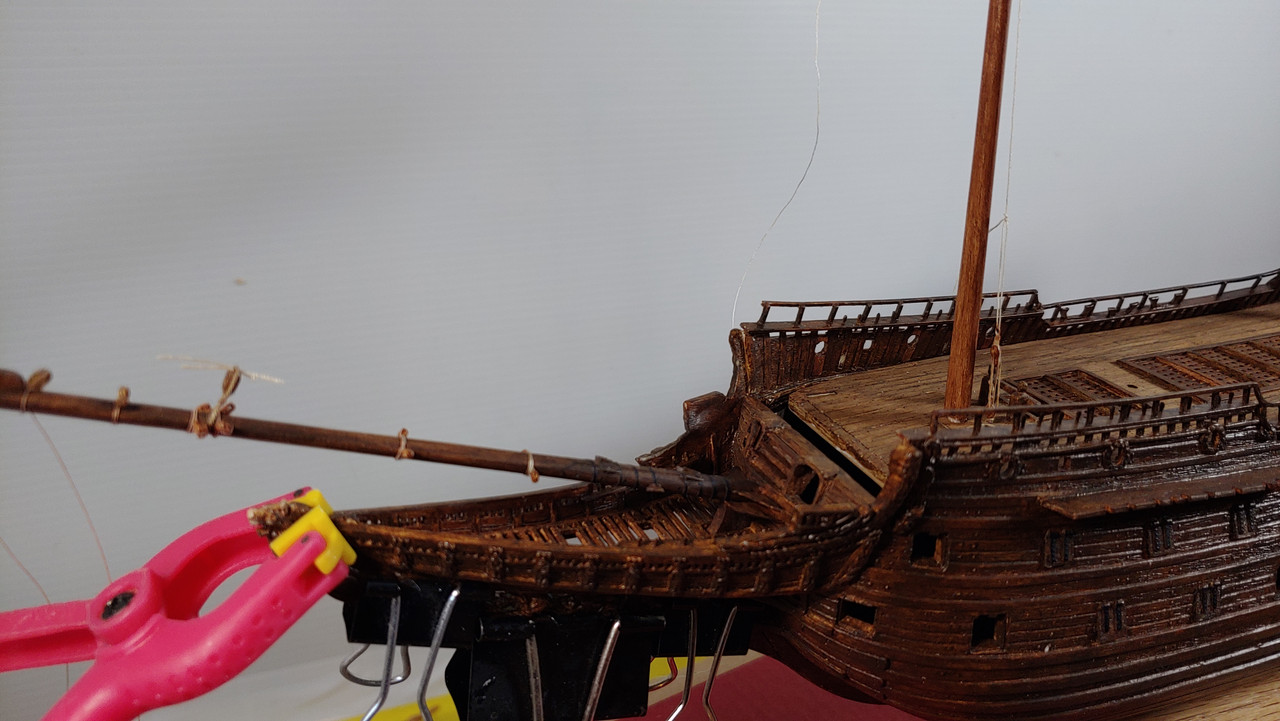
I finished the paint touch up for now anyway in the bow area and rigged the gammoning using .45mm rope which equates to around 2-2.5" at scale and looks pretty good. Up next I need to fabricate the two pin rails that span across the beakhead rails and rig the loose lines at the spritsail mast.
Michael D.

-
I totally agree with you Kirill, my objective is to have slight variations in tone of the ropes but the wooldings were a little stark and I toned them down a little, need to do a little more. The bowsprit is finally glued in along with gluing of the beakhead.
I made the cut outs for the fish davits, added the steps to the bulkhead and made up the tackle for the main topmast stay, I glued together a 2.5mm and a 1.5mm blocks to make up the fiddle block. Up next I be gluing in the decks one by one in phases, thanks for looking.
Michael D.


Vasa By 72Nova - FINISHED - Airfix - PLASTIC
in - Kit build logs for subjects built from 1501 - 1750
Posted
Thank you Waldemar for your valuable input that's always well received and posting those drawings, just what I needed. rerouting the rudder ropes is an easy fix since I left them long enough to pass through the tiller opening.
Michael D.