


72Nova
-
Posts
514 -
Joined
-
Last visited
Content Type
Profiles
Forums
Gallery
Events
Posts posted by 72Nova
-
-
-
-
Work on modifying the main top continues to somewhat resemble the original as much as possible. I had already opened up the space between the ribs, next I removed half of the top rail and filed down the ribs and reattached it then I used thread to simulate an additional rail on the aft end of the top.
The dead eyes measure out to around 2mm and are stropped with 28g brass wire that is hooked to flattened 24g copper wire to create the chain for the futtock shrouds to hook to and will be fun when the time comes to rig.
Michael D.

-
Those actually look really good Ian and 3/8" would've work well but I had already stopped by Home Depot today and found some oil rubbed bronze knobs, once I cut off the top and gave them a light dry brush of gold, they look pretty good. I'm thinking the 1/2" will work on the Cutty Sark when the time comes. Thank you for the link.
Michael D.
- Knocklouder, fmodajr, Prowler901 and 6 others
-
 7
7
-
 2
2
-
Hey it's all good Marc. I can take a constructive criticism punch! I do like contrast with the brass but I feel an oil rubbed bronze finish would be better suited and I agree they are a tad too big. I'll see if I can find some bronze knobs and cut them down before I cut/blacken the existing ones. I appreciate your honesty though.
Michael D.
- Old Collingwood, fmodajr, Cirdan and 2 others
-
5
-
-
-
-
Thanks gentlemen for the compliments, Kirill those pictures will be a huge asset moving forward with the build and as far as displaying the furled sails in an old fashioned style, do you mean with the top masts lowered?.
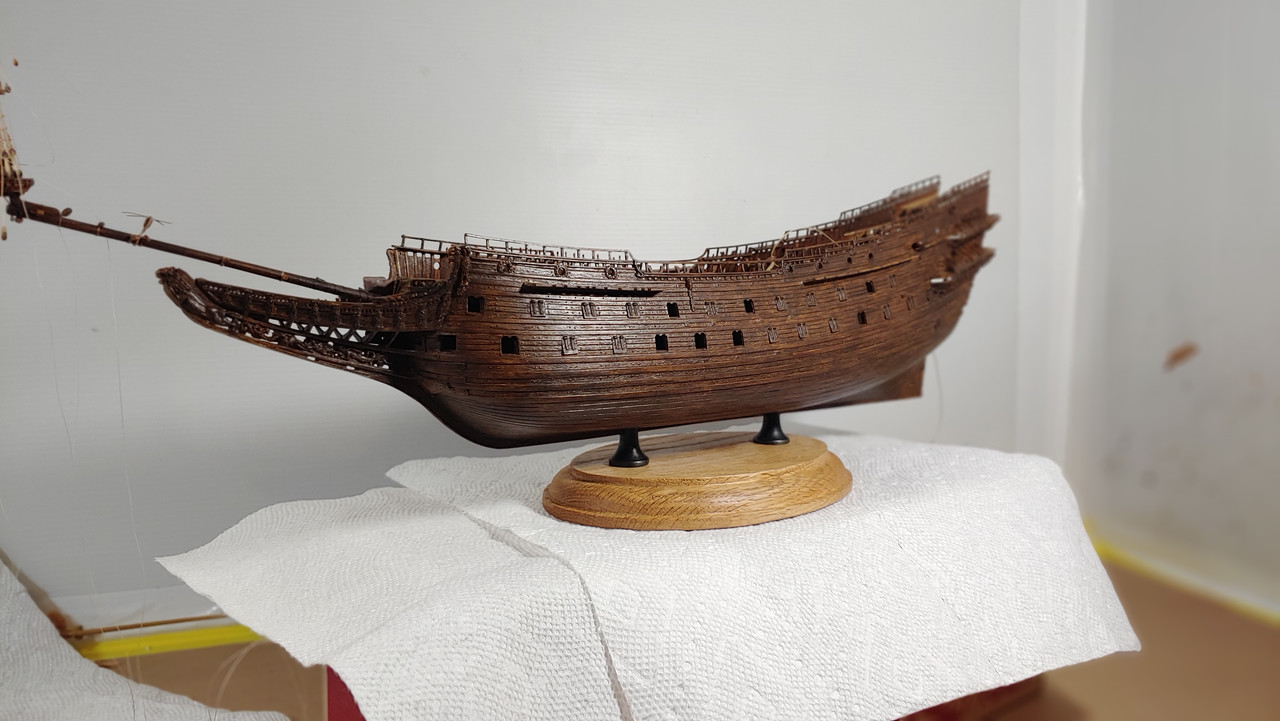
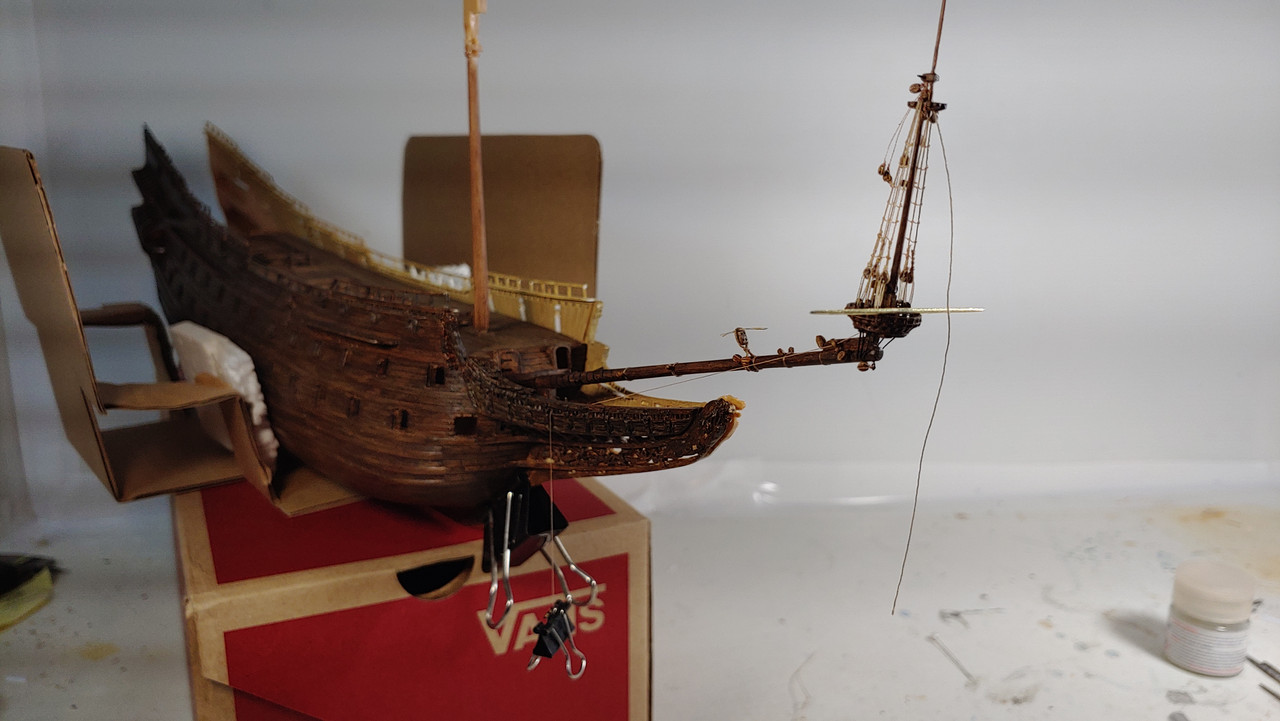
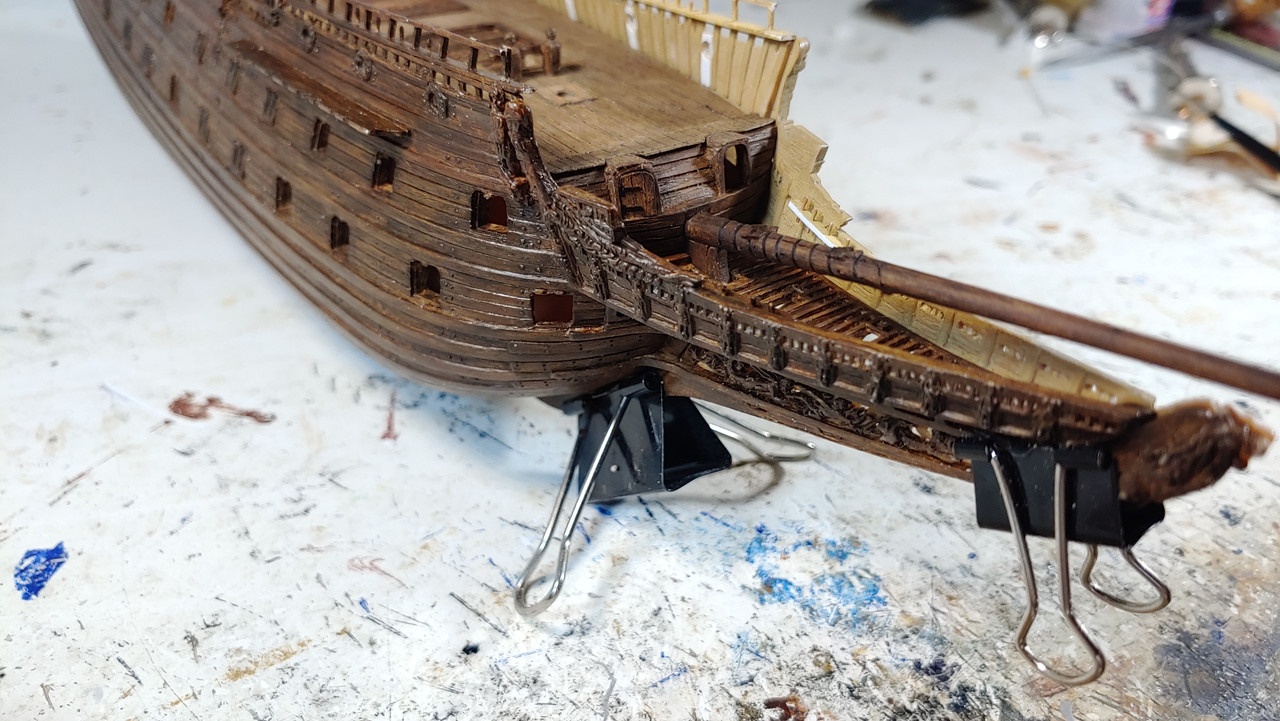
I finally glued the hull halves together and currently working on the main mast modifications, including rounding of the masthead, adding cheeks, sheeves etc, at this point the deck, beakhead bulkhead and masts are still in the dry fitting stage. The main course tie is .63mm line that will be same size as the shrouds and .30mm line is used for the halliard, the fabricated ramshead measures out to around 5.5mm in length and looks fairly close to scale, one of the main hatch gratings was made to be removable to hopefully attach the topsail yard top rope below the deck. Please excuse the makeshift stand, I'll be working on the final shortly. Thanks for looking.
Michael D.
- Old Collingwood, Jeff T, Prowler901 and 8 others
-
6
-
5
-
Very nice paint work Marc, I'm actually missing this type of detail painting on my build at the moment.
Michael D.
- mtaylor, Hubac's Historian, FriedClams and 1 other
-
3
-
 1
1
-
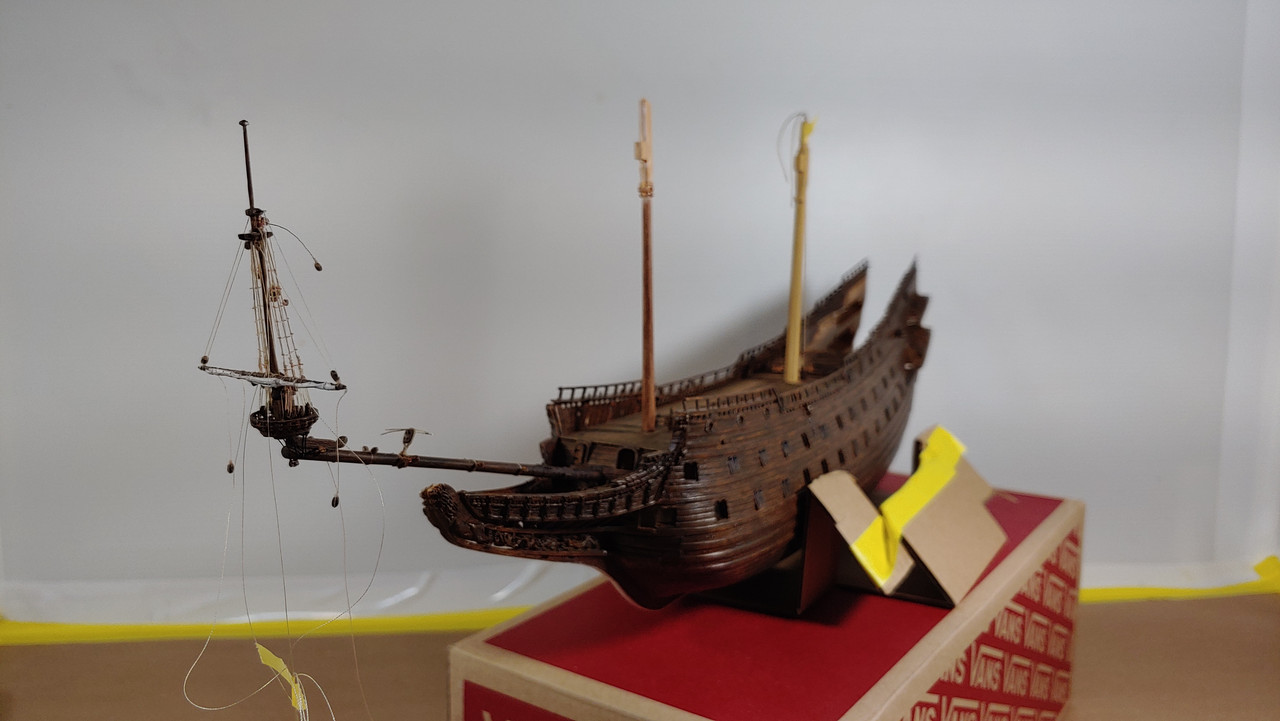
The spritsail topsail yard is finally mounted but not quite fully complete yet with the clews of the sail and associated blocks still left to do, with the parral being so ridiculously tiny, trying to furl a sail on a yard smaller than a toothpick and the 100wt thread is like rigging with human hair, this task challenged just about whatever skill set I've got left and in the end doesn't look too bad.
Michael D.

-
Hi Kirill,
Thanks for the compliment, yes working at this scale is very challenging to say the least. I will have the blocks, sheet lines, brace pendants and sail attached to the yard before I install it on the mast, then rig the lifts and belay them to the top before I glue the bowsprit to the beakhead then I'll have to wait to rig the sheets and braces until I fit the spritsail yard, stay and the rest of the pinrails at the beakhead. Your advice/thoughts are always well taken so no worries there. Just curious are you working on another master piece?.
Michael D.
-
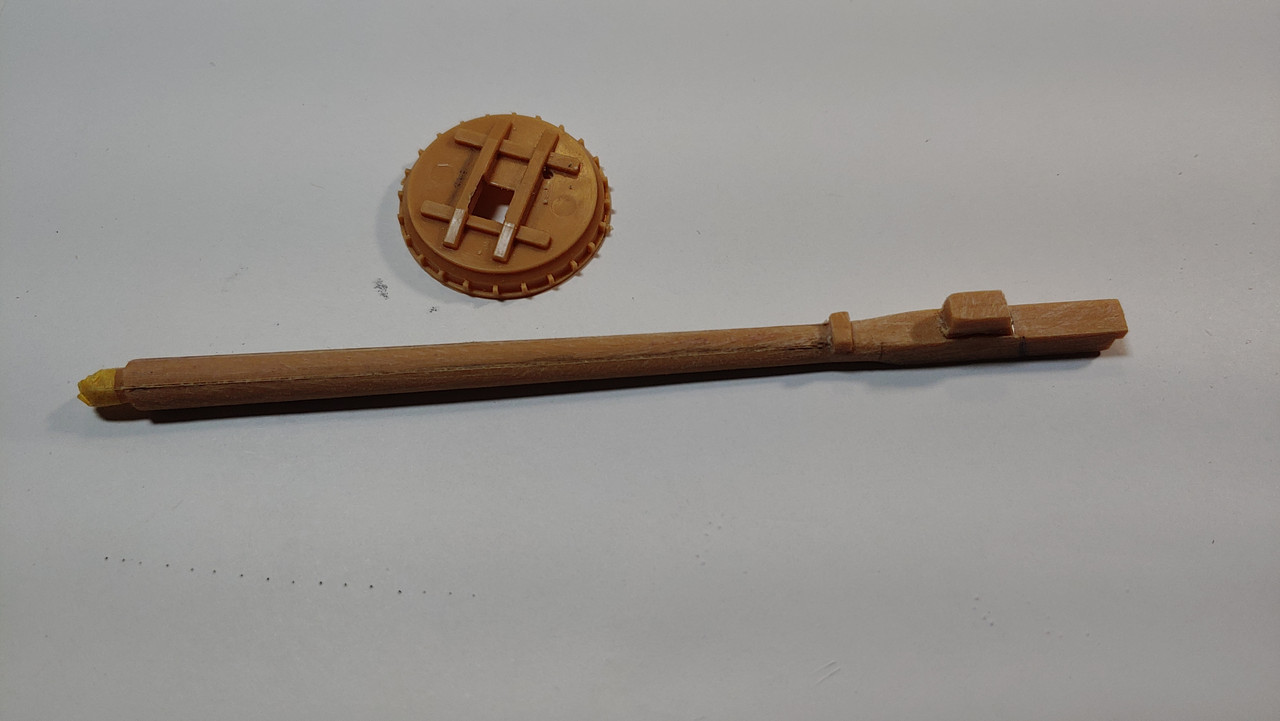
I was wondering about the misalignments myself, heck one can eyeball it closer than that, I'm certain it was damaged some in the first attempt to raise it back in the 17th century. I figured I'm just going to complete the rest of the work in spritsail mast area starting with making the parrals, using 0.0120" styrene for the ribs, cutting them to a height of around 0.101", for the trucks I used .025" rod and used a #80 drill bit to drill the hole for a total of 4 ribs and 6 trucks. Six more blocks and a furled sail should complete the work in this area minus the final rigging. Thanks for looking.
Michael D.
- Cirdan, scrubbyj427, Old Collingwood and 4 others
-
3
-
4
-
I spent some time finishing up rigging the rest of the blocks, cleats and fore stay collar 4 hole dead eye on the bowsprit, also using 1/16" brass rod for the spritsail top sail yard, not sure if I'm going to do all of them but this one was quite flimsy. Up next I need to finish painting the port side hull and start gluing it up.
Michael D.
'
-
Hi Kirill,
I've used the ole glue on the block to tighten up the line trick for awhile now as I too hate loose the line effect, now I'm not as prolific at it as you are.... I mean I can stare at that Galleon of yours all day long and just marvel at the detail. I will definitely put the tip regarding the crows feet to use, I actually can't wait to try it!
I hear what what you're saying about the spars Peter and still might consider doing them, heck I had to fashion up the Lateen yard out of wood using a cordless drill when I back dated my Heller Victory but I keep looking over at the Revell Connie I built under full saill 20 plus years ago and those royal masts and spars, which are about as spindly as the vasa spritsail mast, still look good. Your restoration project on other hand of the old Revell kit sounds really interesting!. As always I value everyone's input.
Michael D.
-
HI Marc,
I bought various sizes of Chucks scale rope, the smallest 0.20mm I used for the shrouds and the mock up fore stay is 0.76mm, the difference in the thread weight is clearly visible....the stay pendants are 60wt vs 100wt for the crows feet and honestly at this scale I will be using both of these for most of the rigging.
Michael D.
-
-
I like your thought process on this Marc! The fact this sail survived virtually intact is astonishing and I think makes perfect sense to incorporate it set into my build.
Nice to hear from you Kirill, your suggestions are valid, and I may end up having to fabricate them, although I hope not. I really hate to redo all my efforts I've invested into the as supplied bowsprit and spritsail mast thus far and as spindly as they look, they are quite up to the task...I think. I'm in the process of mocking up the aforementioned issues that the stays present and see how well the spritsail mast holds up....fingers crossed.
Michael D.
-
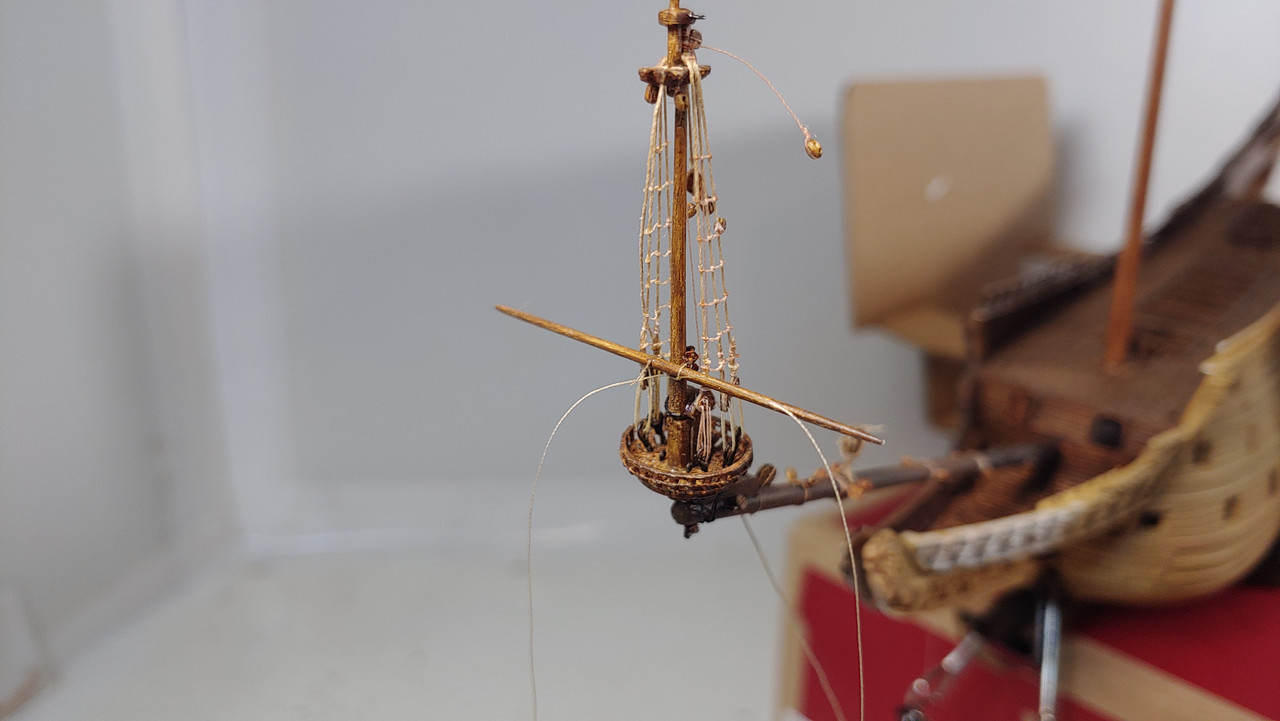
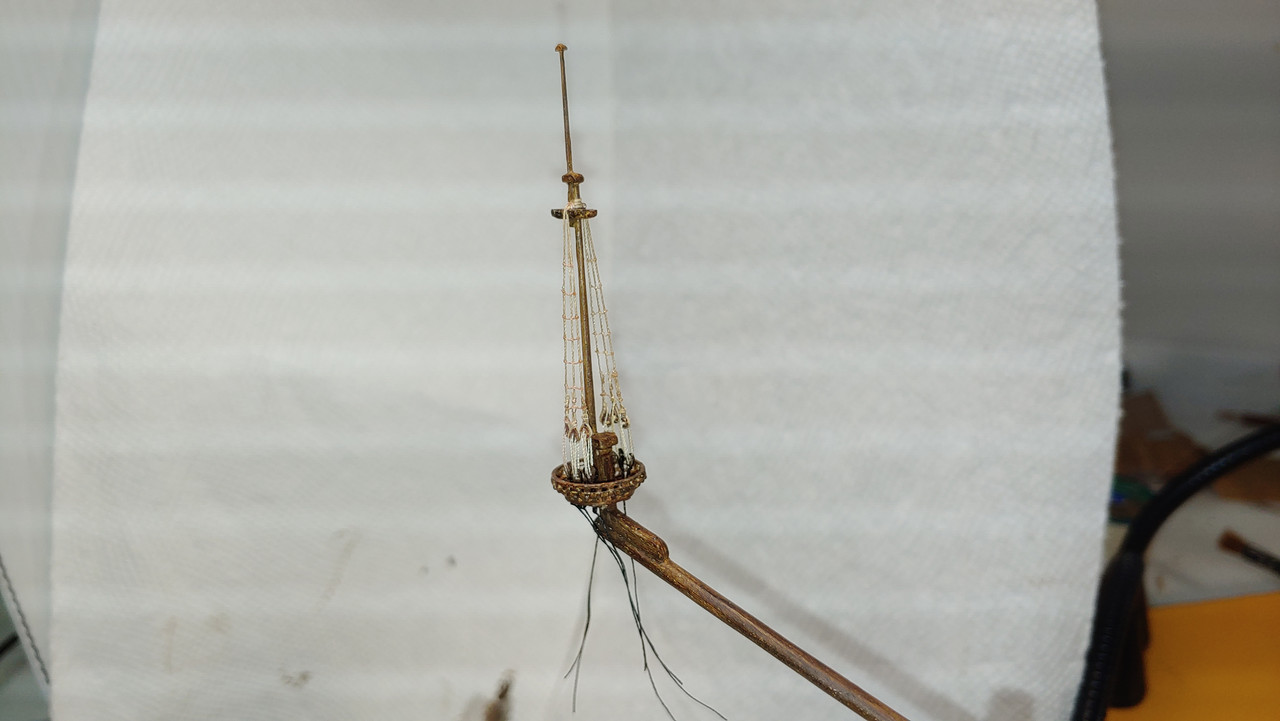
Thank you Marc, much appreciated! More eye straining work continues on the spritsail mast, I have the backstay pendants rigged using 100t thread and 1.5mm blocks, the top mast yard lift blocks using 1.5mm blocks, the tie using .20mm line with a 2mm single block stropped at one end and the halliard using 60wt thread passing through the top and a 2mm single block to be belayed later at the bowsprit. Lastly the fore top gallant bowline blocks attached to the shrouds. Up next will be the spritsail topsail yard and all it's necessary hardware, this will be interesting as my plan is to rig her with tightly furled sails.
Michael D.


-
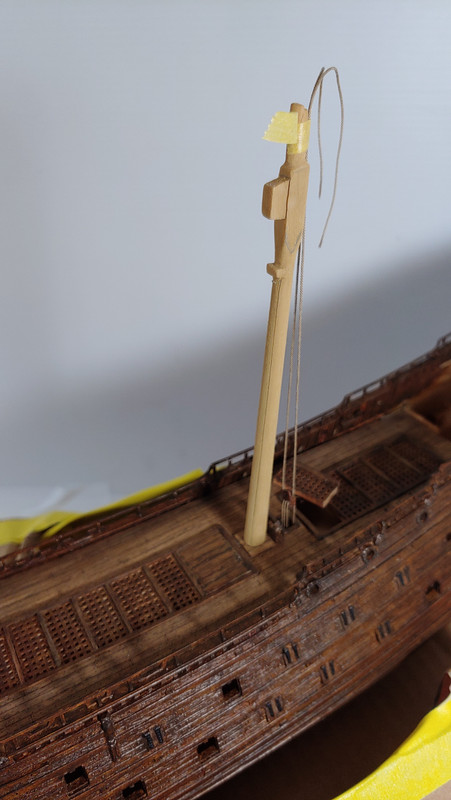
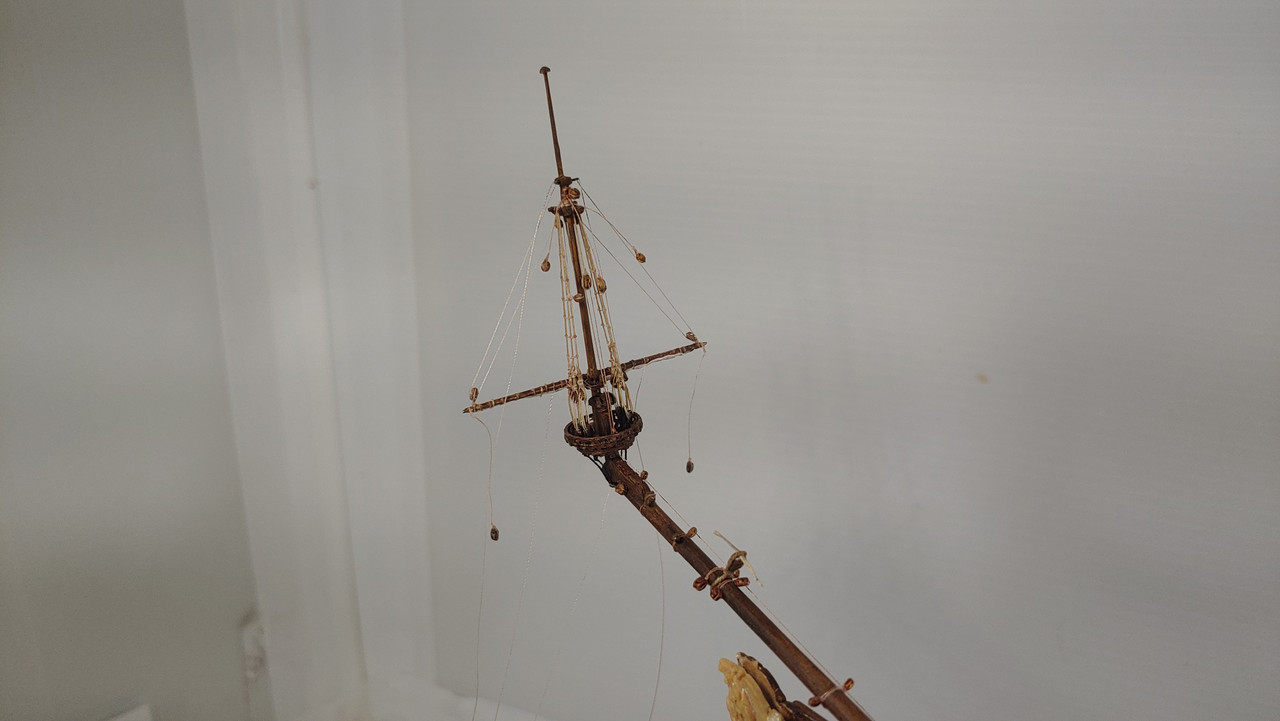
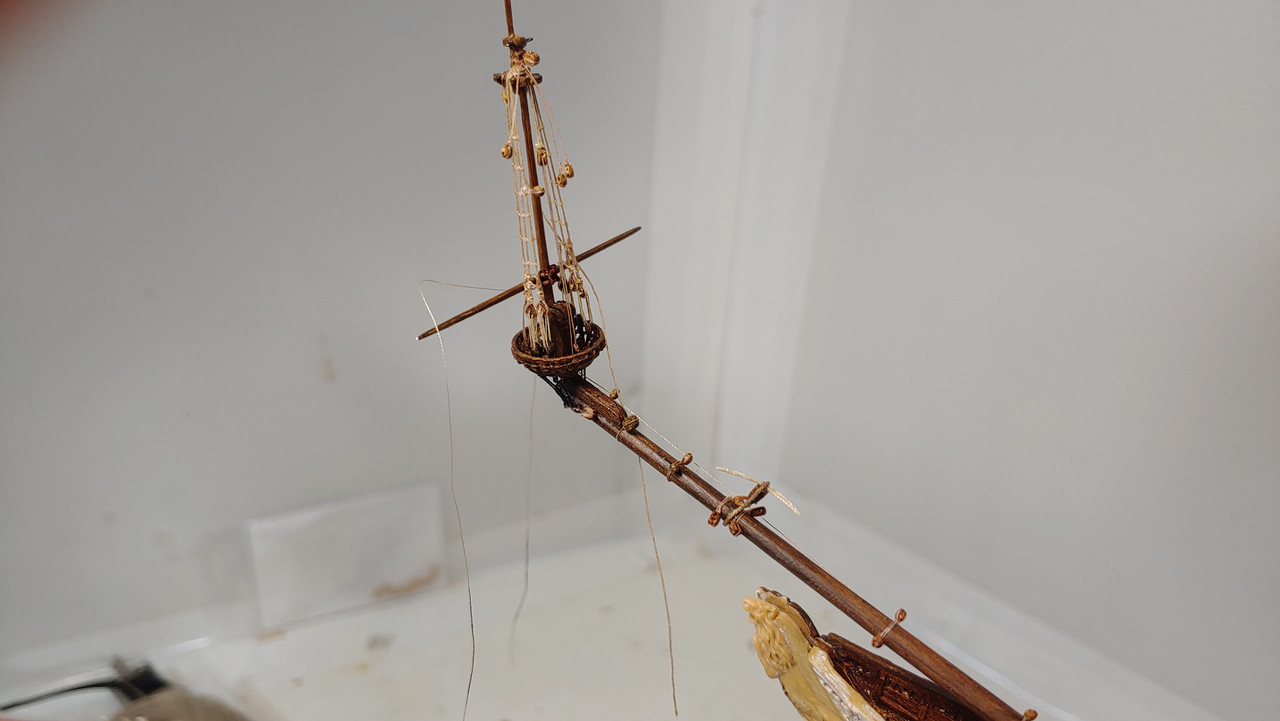
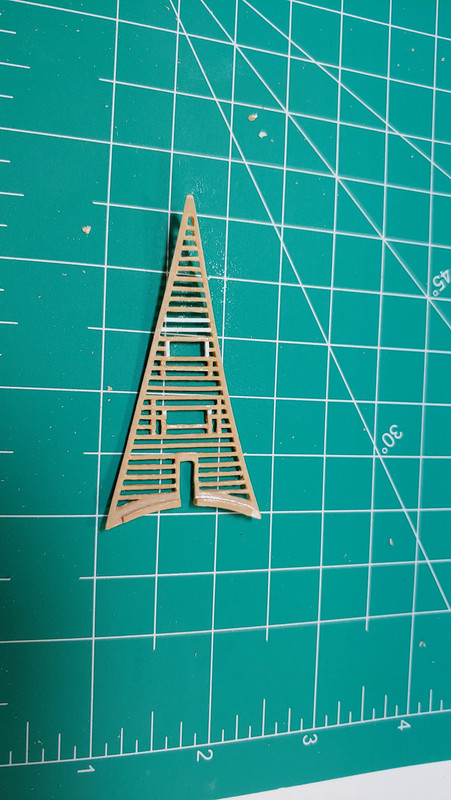
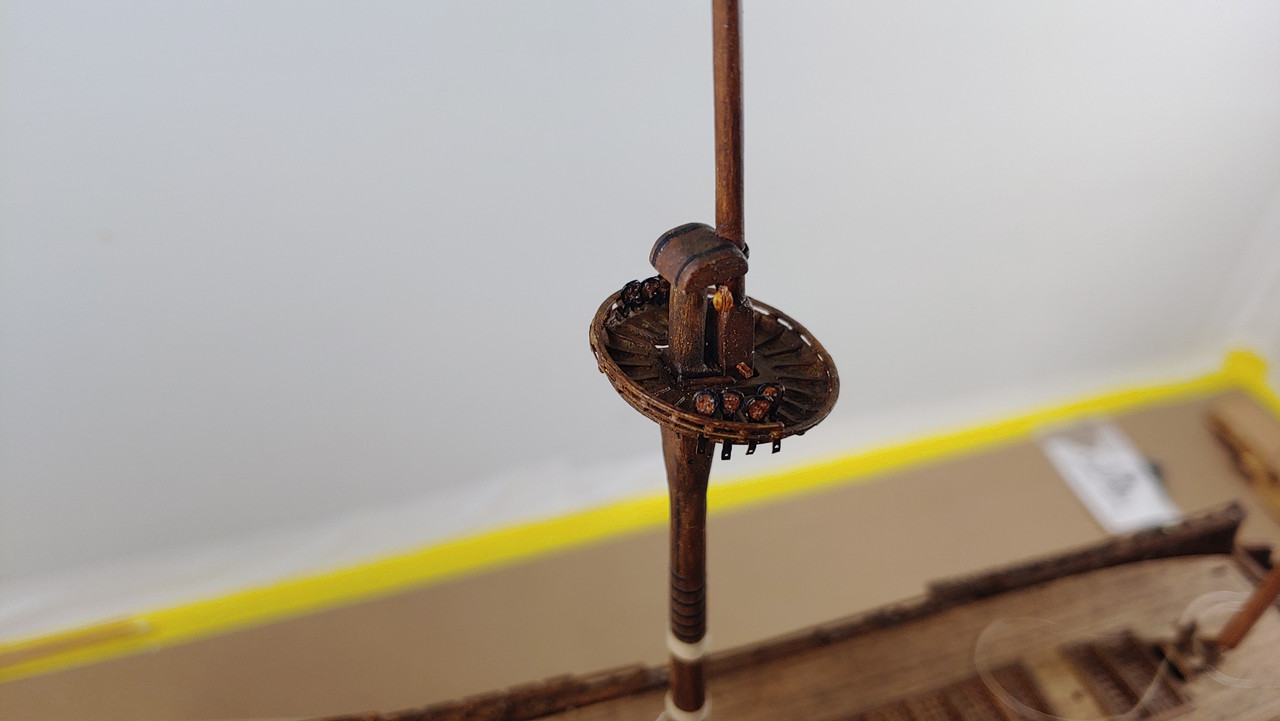
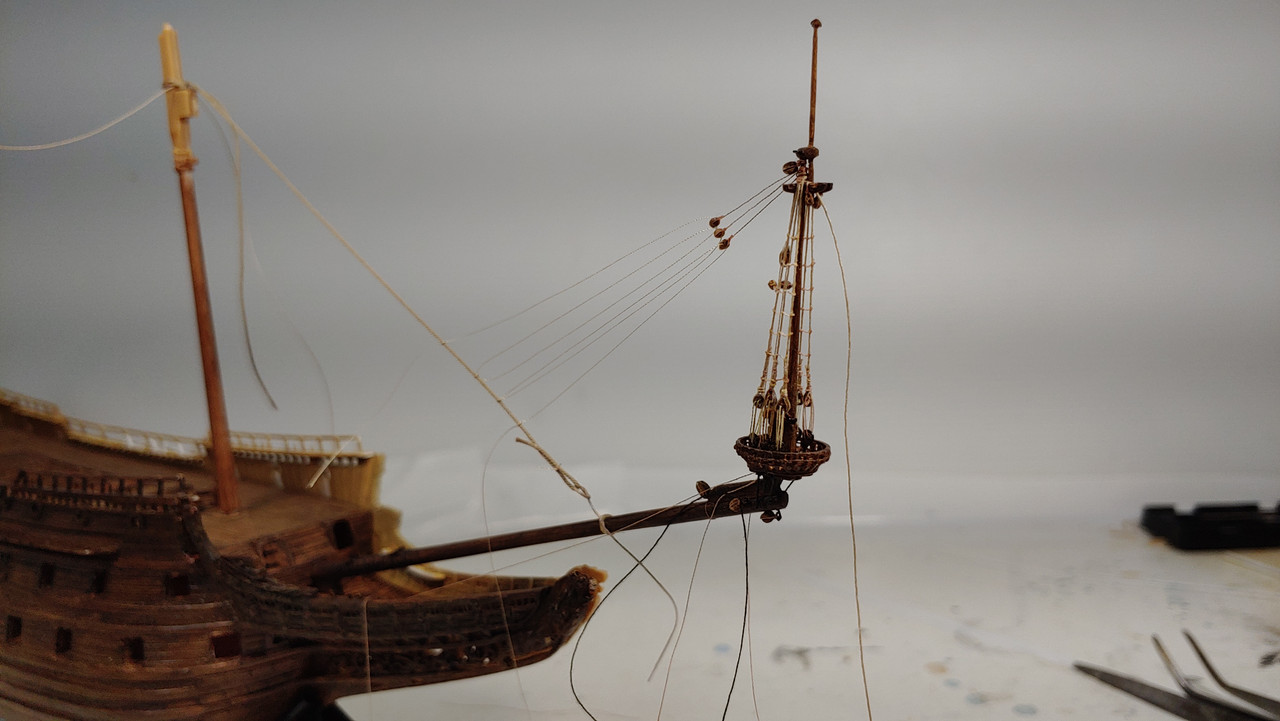
Thanks Jeff! I have the spritsail mast mounted and completed the shrouds, I ended up having to make the deadeyes and they measure out to be under 2mm to give it a somewhat proper scale, the shrouds I used .20mm line and 100wt thread for the ratlines and lanyards, I think overall the scale looks pretty good for this surgical procedure at this scale, also I modified the top by cutting out the lower sections and adding some banding for a little more detail. I still have much more to do in this area but thanks for looking and Happy Thanksgiving.
Michael D.


-
Thank you Jeff, the Revell Spanish Galleon is actually my favorite of their large ships and yours is looking fantastic. A small update focusing on the bowsprit area, I tried to simulate the joint, metal banding, fashioned a knee and added the starboard bulkhead door, once I mocked up the gammoning I fabricated the cleats. I think at this point I'm committed to finishing up the spritsail top, maybe even rig the shrouds before I install the assembly.
Michael D.
-
-
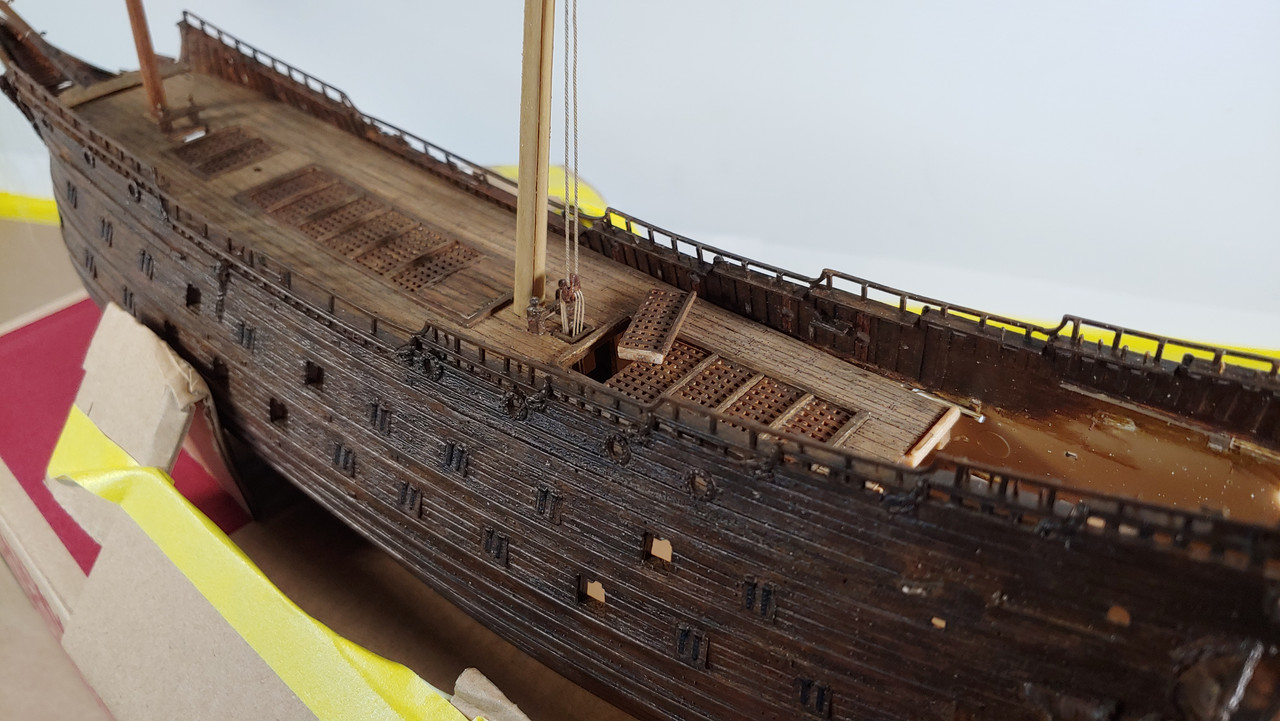
The beakhead grating modifications are completed by painstakingly cutting away unwanted areas and creating the openings for the gammoning, also added some deck detail to the bulkhead filler piece. Thanks for looking.
Michael D.

- Baker, Old Collingwood, fmodajr and 6 others
-
9
-
Hi Marc,
I used a thinned wash of acrylic raw umber followed by a thin wash of black then sprayed some flat clear.
I'd say that's a reasonable assumption regarding the doors and more then likely I'll fab some up.
Michael D.


Vasa By 72Nova - FINISHED - Airfix - PLASTIC
in - Kit build logs for subjects built from 1501 - 1750
Posted
I appreciate the compliment O.C
Michael D.