


72Nova
-
Posts
514 -
Joined
-
Last visited
Content Type
Profiles
Forums
Gallery
Events
Posts posted by 72Nova
-
-
Working on the channels and mocking up the chains, option A on the right is 28g brass wire with an eye formed on one end for the 2mm dead eye and fed thru the hull, option B on left using the same 28g wire with an eye formed on the end but flattened and a returned formed on the other end where a nail will be used to secure it to the hull, this option took considerably more time to fabricate and is more accurate but honestly they both look good at this scale, as with my Vasa build all the channels, chains and dead eyes with the exception of the Mizzen will be made up before hand and put away until after the hull is glued up, there is no Mizzen channel as the dead eyes are attached to the side of the hull.
Michael D.


-
Thanks Bill, I used a sheet of oak deck veneer from HisModel. This worked out great in forming the curved bulkheads also, thanks for stopping by.
Michael D.
-
The most striking Cutty Sark model I've seen!👍
Michael D.
- kirill4 and Keith Black
-
 2
2
-
It's good to see you're able to find some time to work on your masterpiece Marc. I've never noticed nor read about channels being raked like that, essentially a parallelogram, so I can't help there, it's such a subtle feature though that doesn't smack you in eye as it's only really noticeable from an overhead shot but I do like how you simulated the joints in the channels 👍
Michael D.
- Hubac's Historian, FriedClams, mtaylor and 1 other
-
3
-
 1
1
-
-
Thank you gentlemen, Marc adding another category does seem like a good idea and from I've seen, there really are a stagering amount of great modelers in each era, so how would one choose? plus the potential risk of over saturation of categories but certainly food for thought.
Ian it's a pity I do not remember you from the Victory website days, were building yours around that time frame? Happy Modeling!
Michael D
-
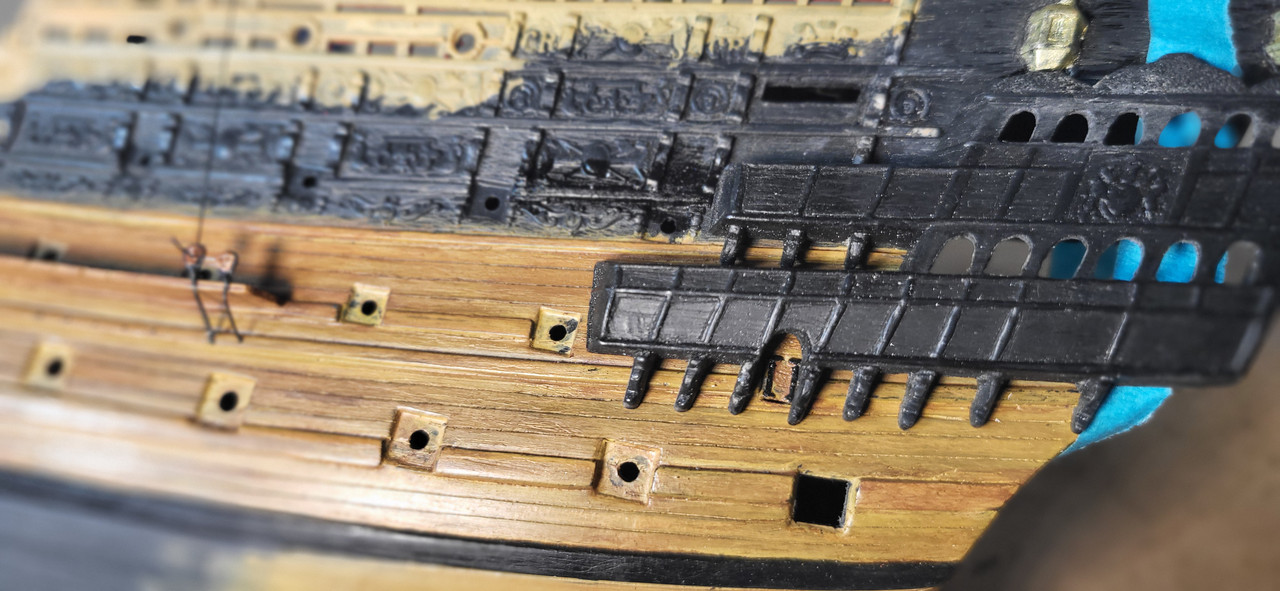
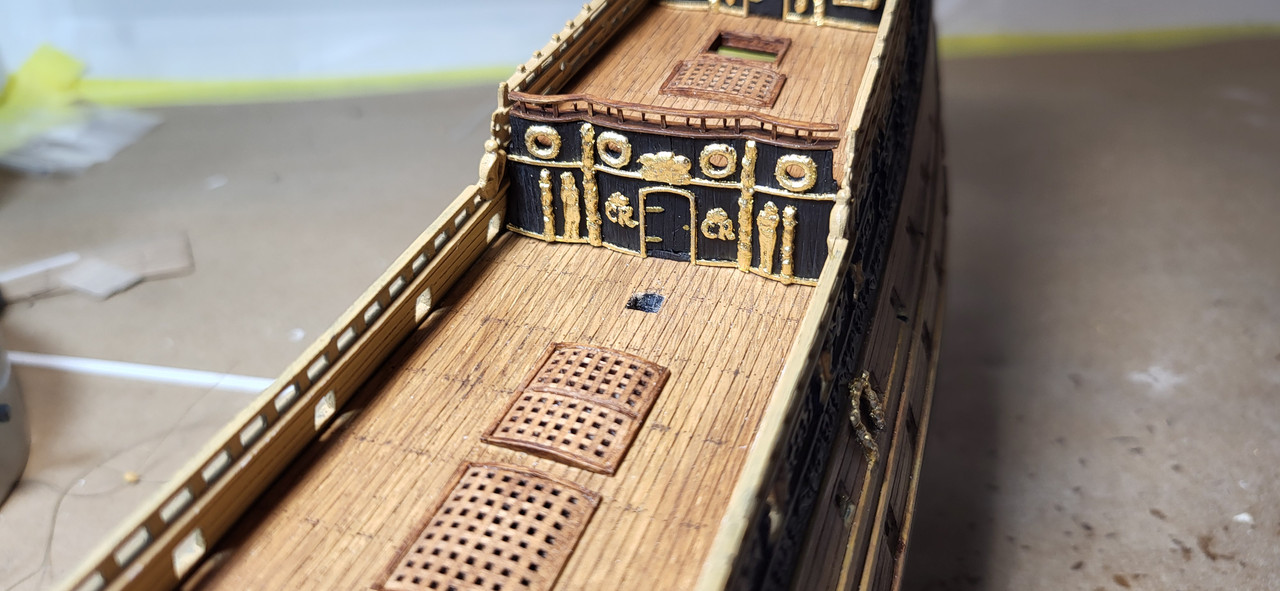
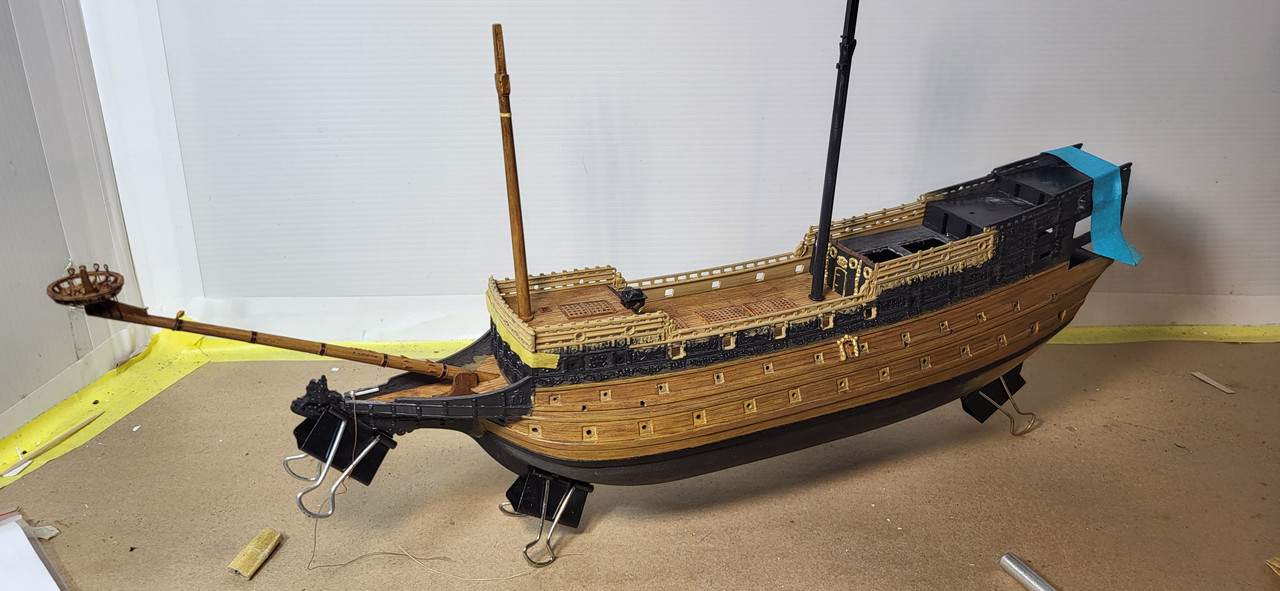
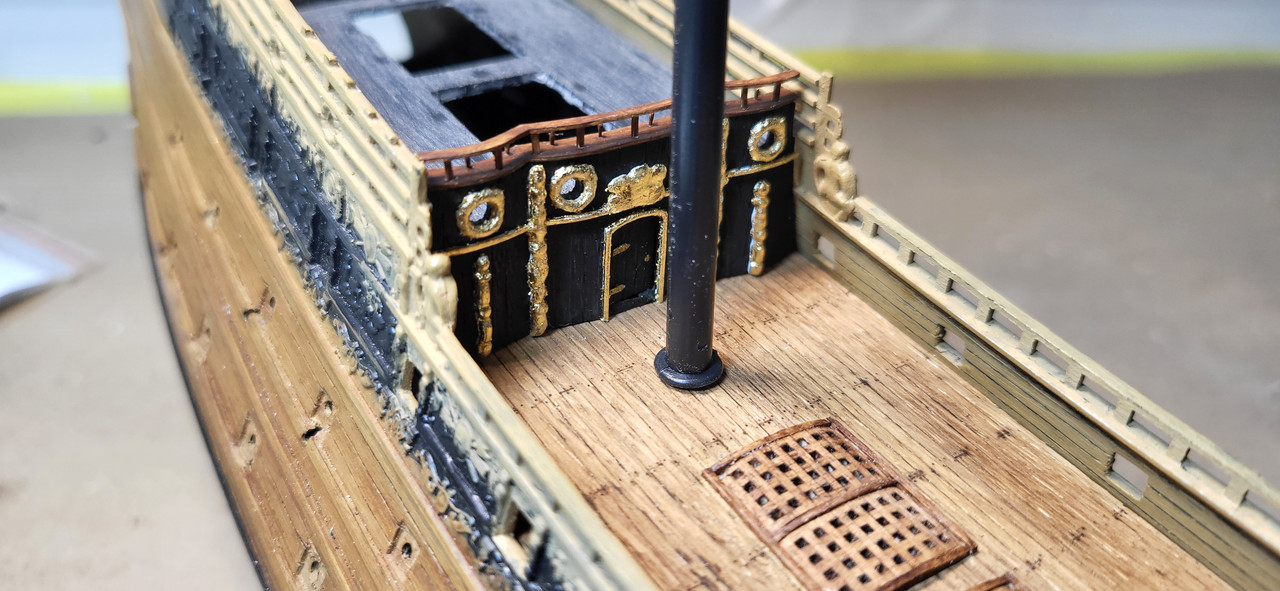
The detailing of the bulkheads is finally complete, obviously a lot of artistic license used here, but looks like a decent representation, now I can get back to work on the hull prior to glueing it up then finally set the decks in place.
Michael D.

-
Thank you so much for the kind words, OC they are much appreciated.
Michael D.
-
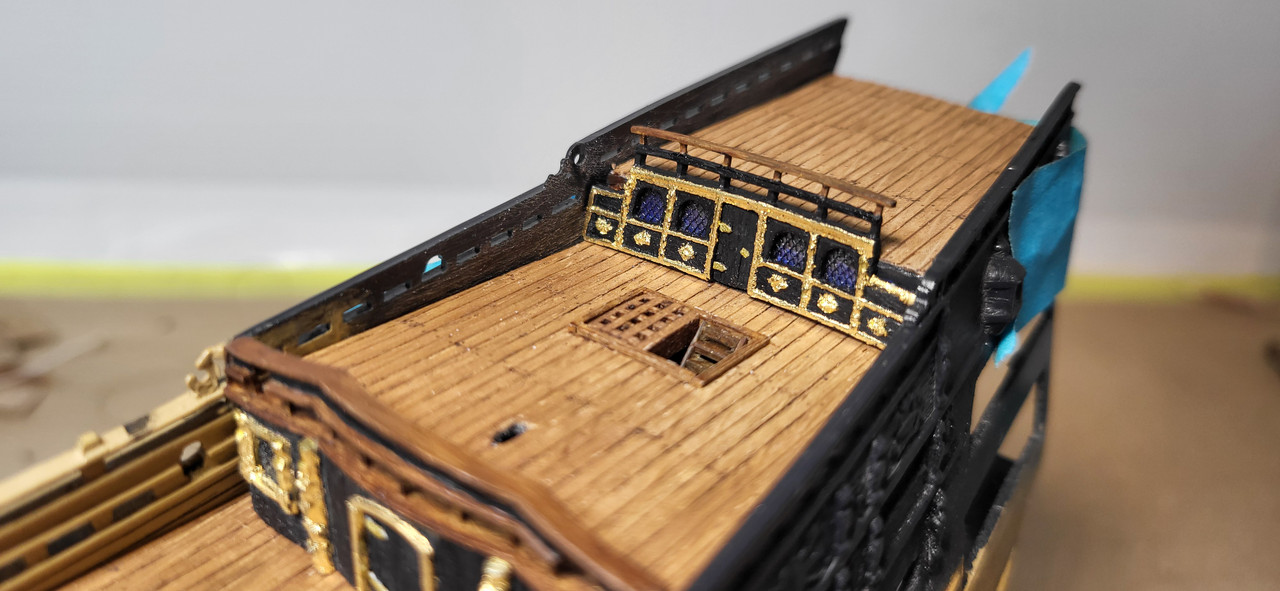
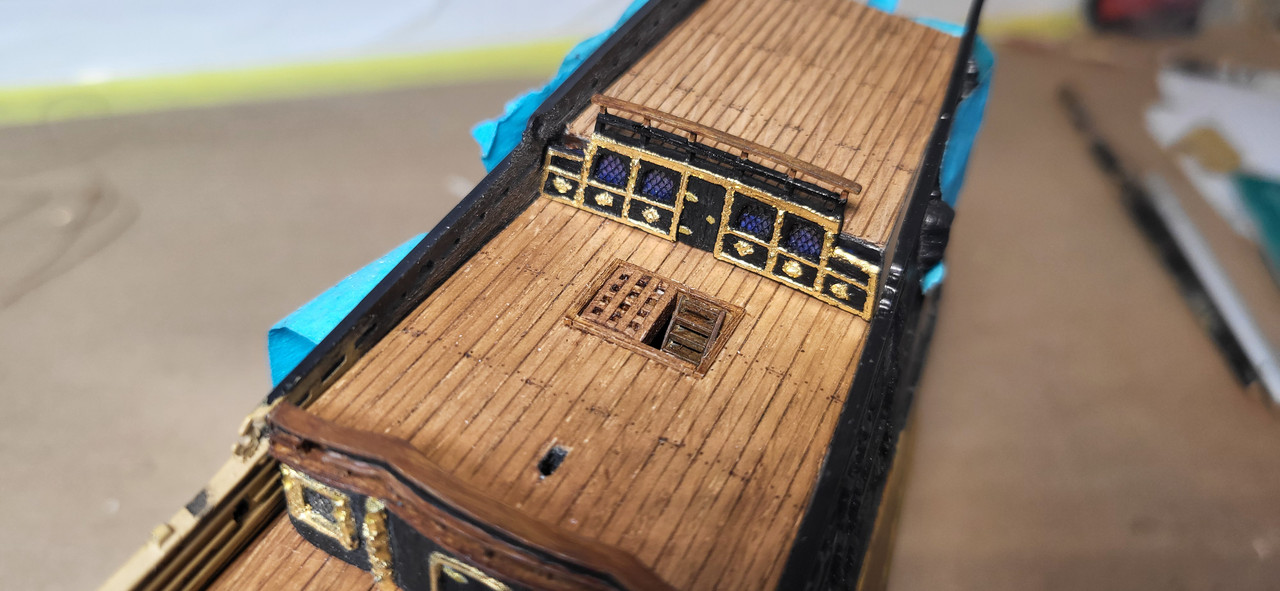
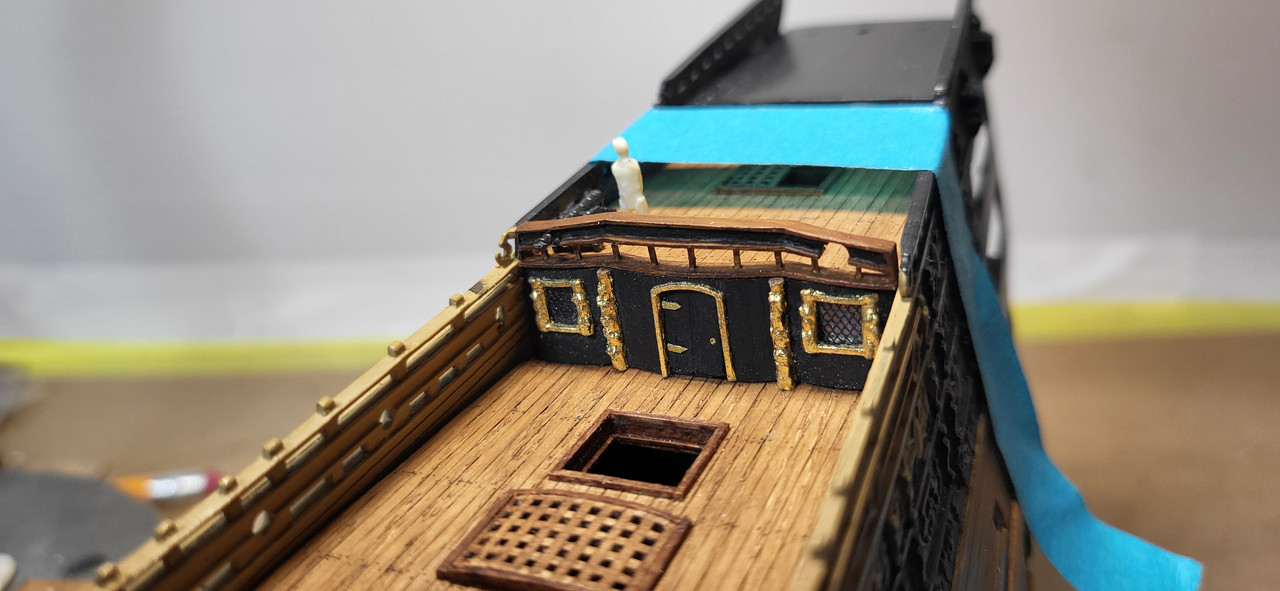
Thank you, Frank and Kirill, the decking for the most part is completed along with the poop deck bulkhead.....whew!!!. The final railings and steps will be added at the Qtr and poop decks once the hull and decks are glued in. Yes, the windows at the Qtr deck bulkhead might be a tad too big but overall in the grand scheme of things will not stand out, using the existing upper Qtr deck bulkhead I fashioned it as close to McKay's plans as possible to include 2 cannons and some artistic license. At this scale there are going to be some compromises. I still need to add a bit more decorations to the prior bulkheads or tone down the bling on the poop deck bulkhead, thanks for looking .
Michael D.


-
Thank you Ian, regarding the ladders, all the reference material I've read does not show them, Payne, Van De Velde, McKay etc, the Culver model along with Wolfgang Rotter and others do show either, but some of those also show what appears to be grating or netting covering the main deck which would render ladders useless in that case, I could be wrong though.
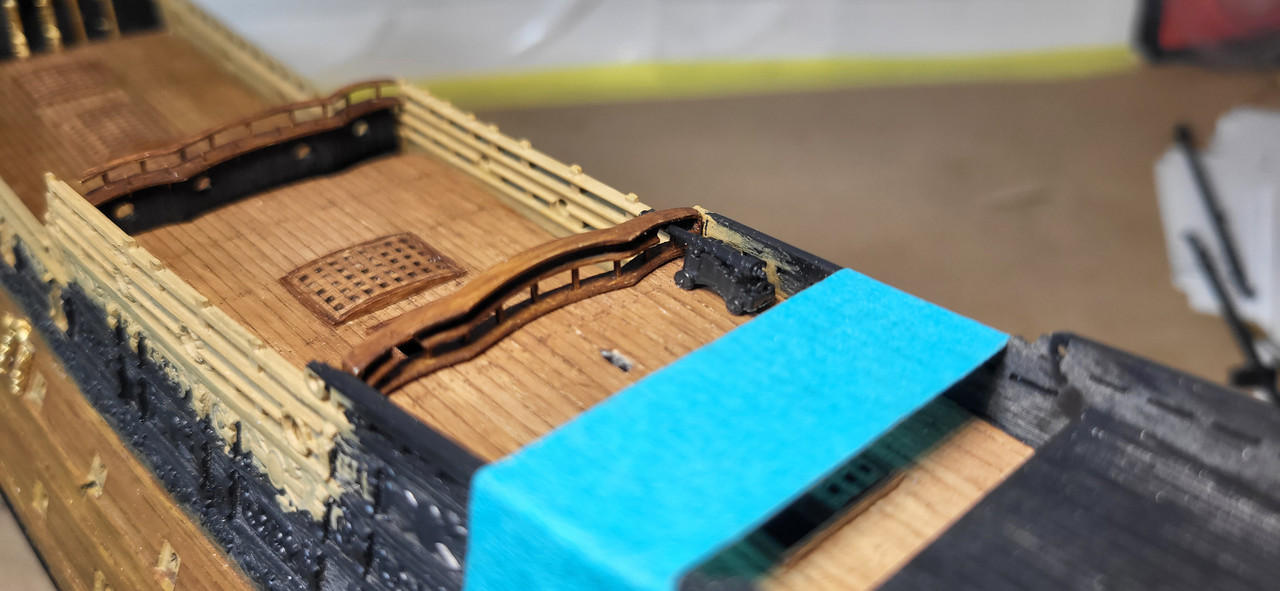
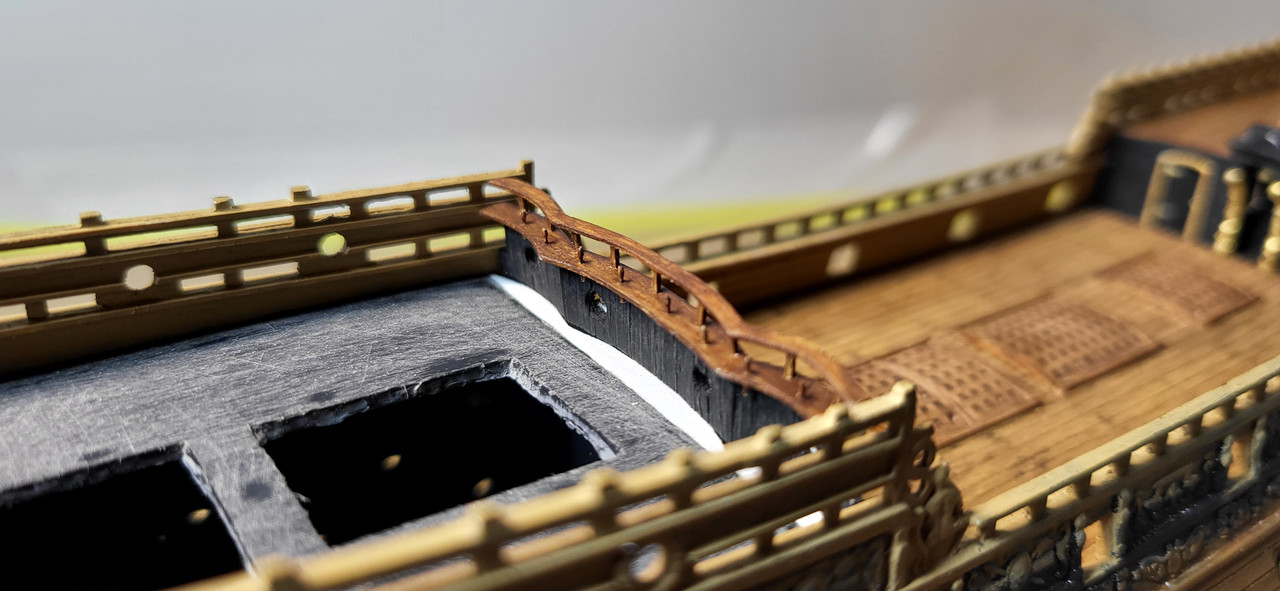
Besides some touch up the upper Qtr deck bulkhead railing is completed, this was quite fiddly to say the least and turned out ok.
Michael D.


-
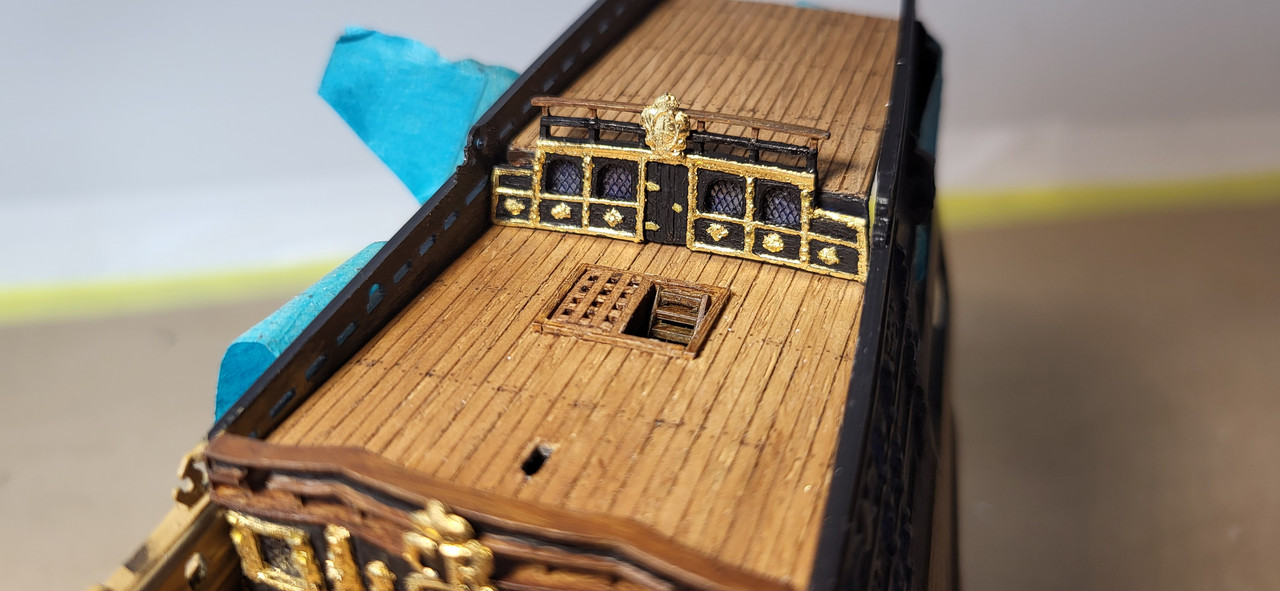
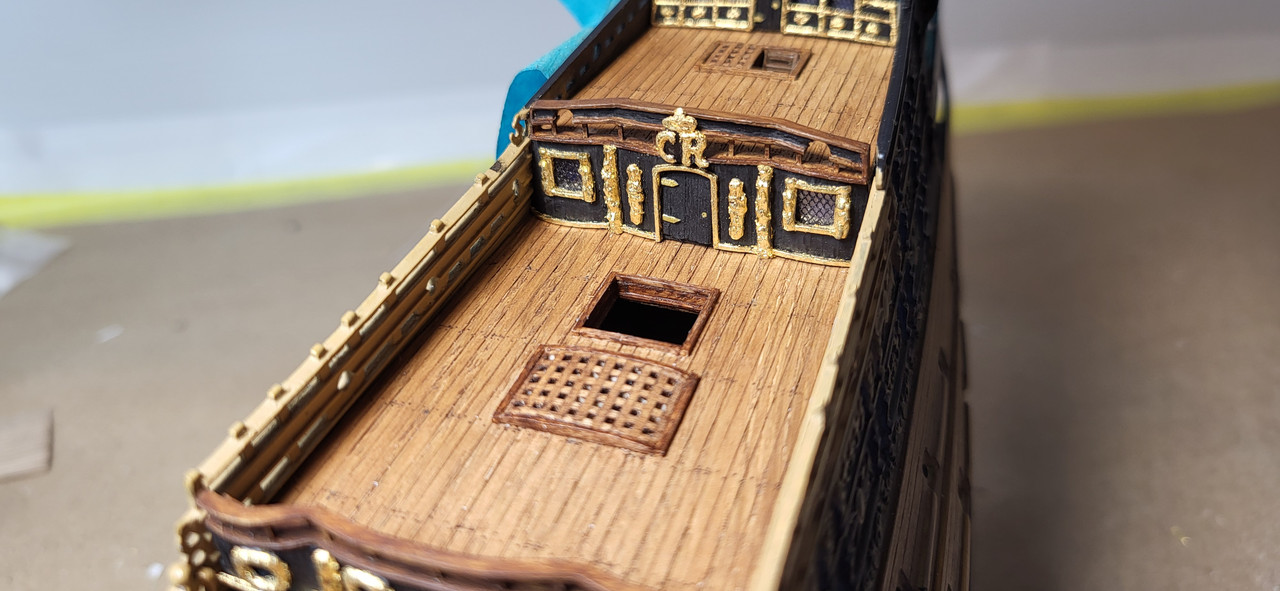
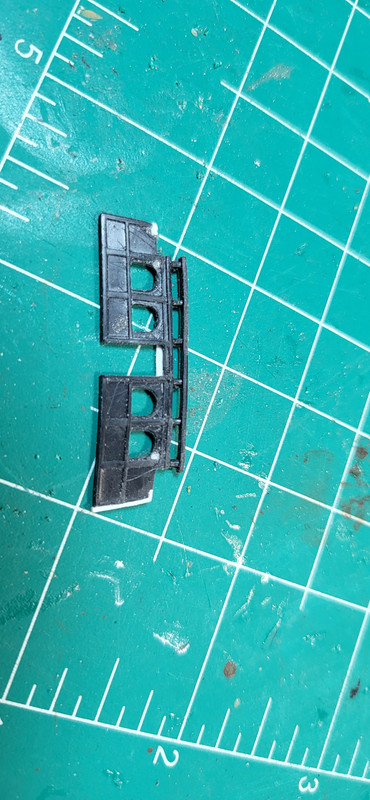
The detailing on the upper Qtr deck bulkhead is just about compete, I'm particularly pleased with how the windows turned out, I used the smallest tulle I could find for the grid and simply placed over some clear acrylic sheet and applied clear gel tacky glue over it, once dried glued them to the backside of the bulkhead, the armless crew member is there just for scale reference and measures 5'-8" tall at this scale.
Michael D.


- Baker, Bill Morrison, fake johnbull and 5 others
-
8
-
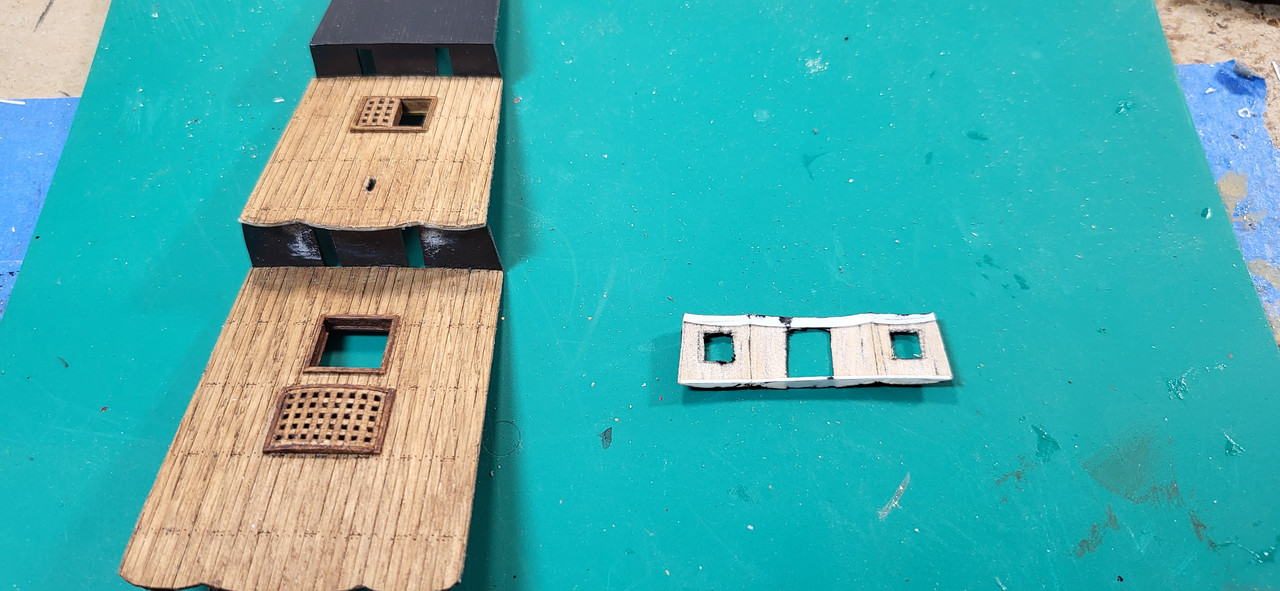
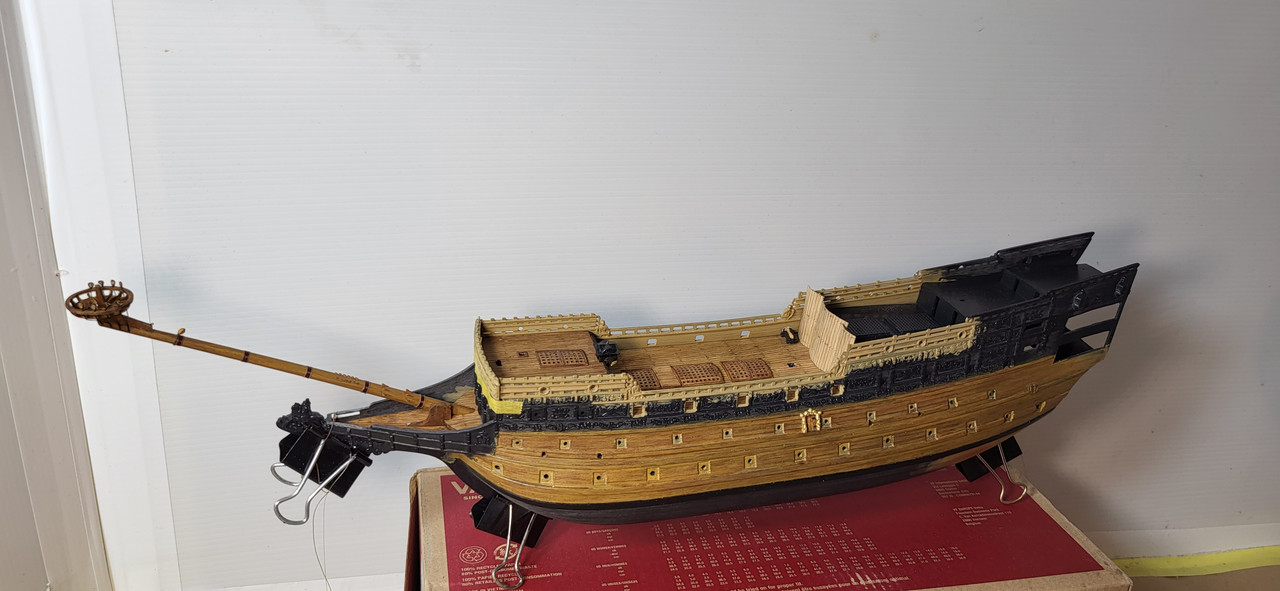
Work continues on the Qtr decks, the upper Qtr deck bulkhead is slowly taking shape along with the hatches with much fine tuning left to do but I'm liking the results thus far.
Michael D.


-
Thanks Ian,
3D printing is definitely a game changer and something I had thought about recently but for me anyways for now, there's nothing more satisfying then building from scratch with your hands as frustrating as It may be sometimes. Regarding the the deadeyes and chains, on the Vasa I used bluejacket ship crafters 1/8" old style hearts which I felt were a little too out of scale so I'll fabricate those this time around and use the same 28g wire for the chains.
Michael D.
- Bill Morrison and Rudolf
-
2
-
-
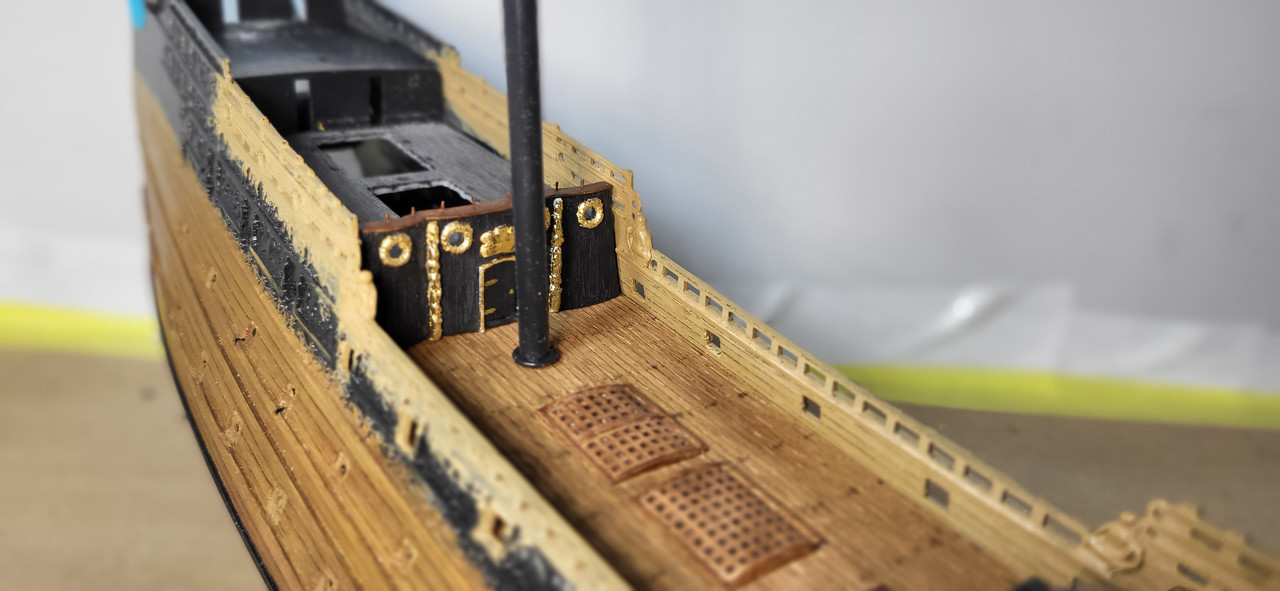
A few more decorations and some touch up and this bulkhead will be finished and on to the Qtr deck mods.
Michael D.
- GrandpaPhil, Baker, Ian_Grant and 7 others
-
10
-
-
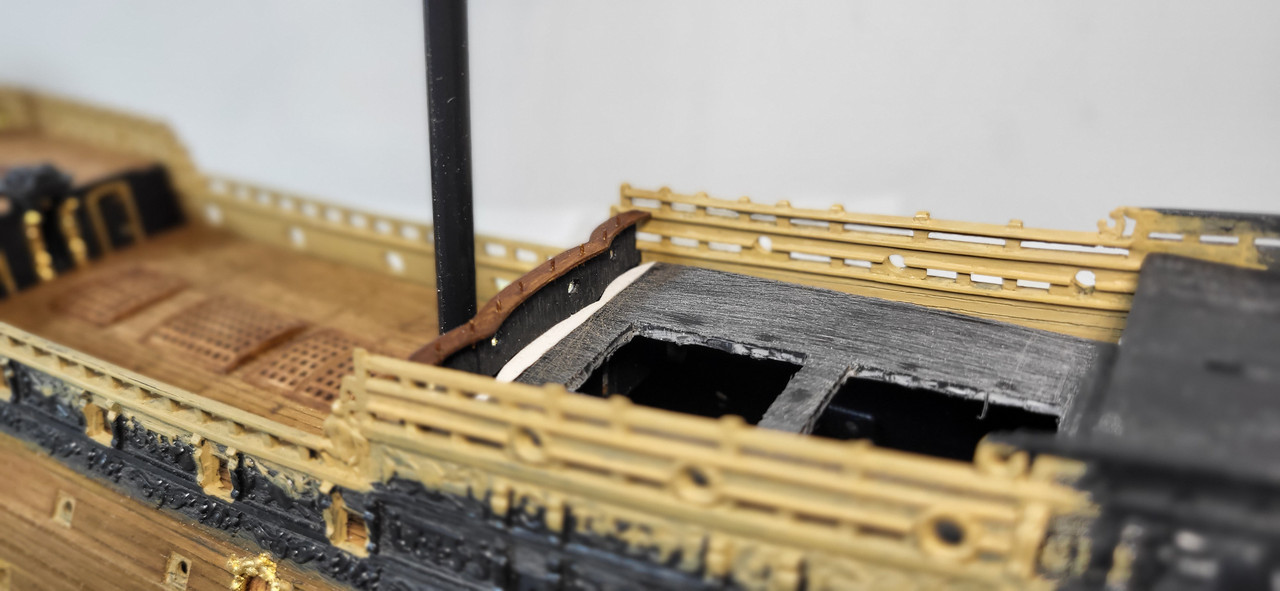
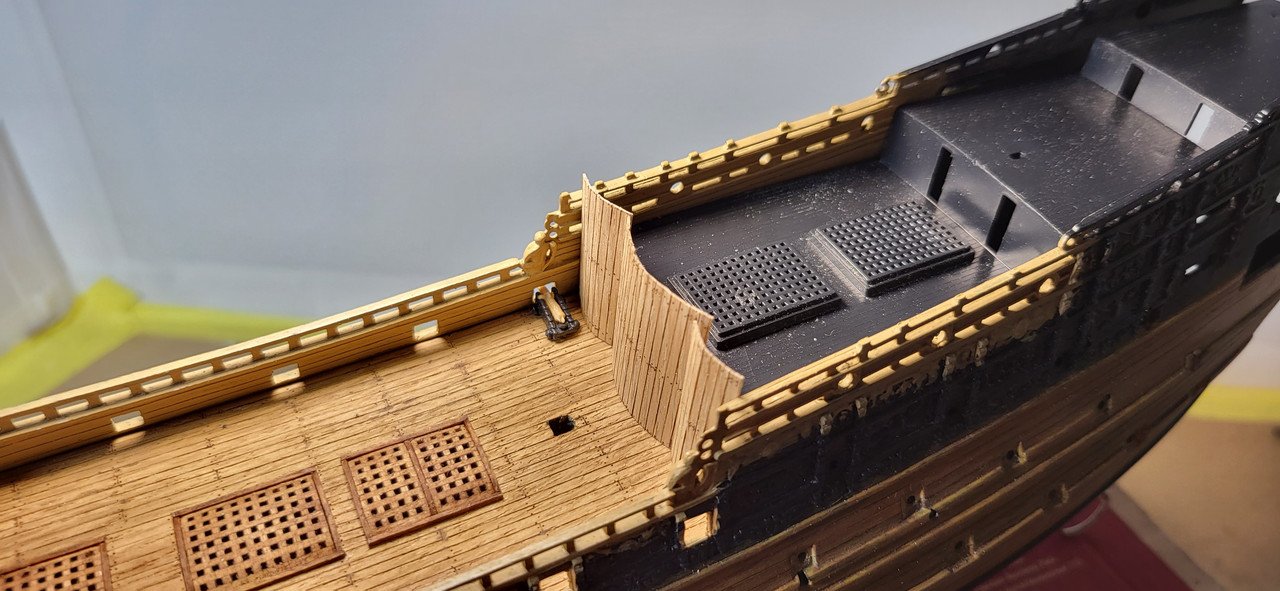
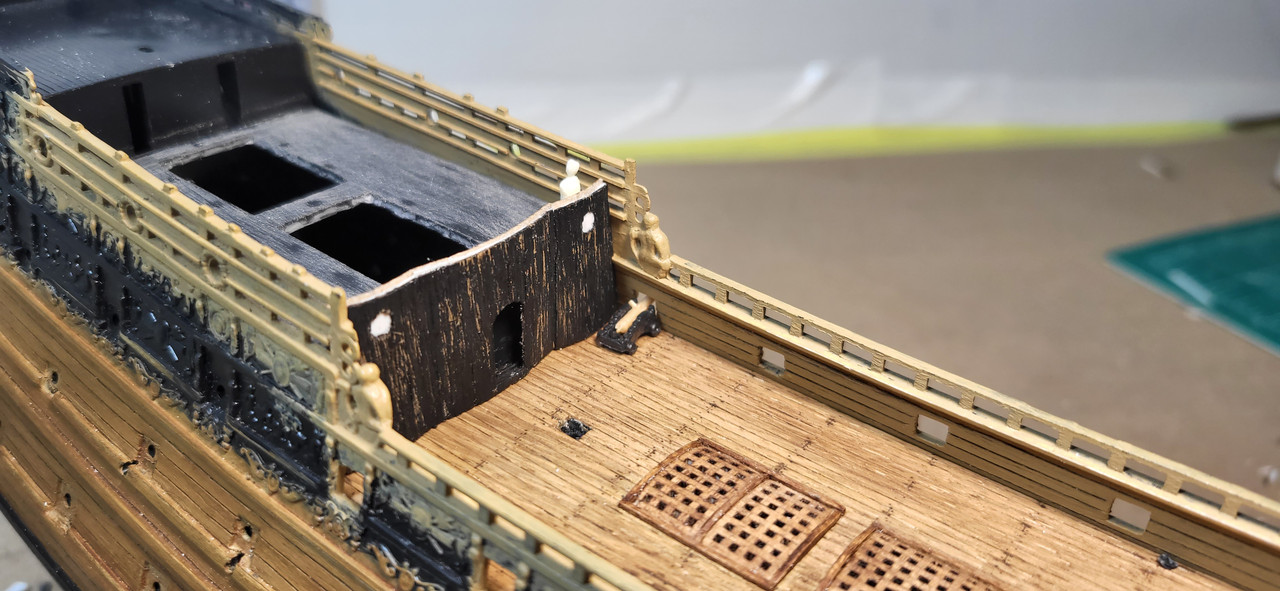
Trimmed the height of the bulkhead minus the rail for the belying pins, also a shot of the scalloped extension of the Qtr deck. Thanks for looking.
Michael D.

- Bill Morrison, Rudolf, GrandpaPhil and 6 others
-
6
-
 3
3
-
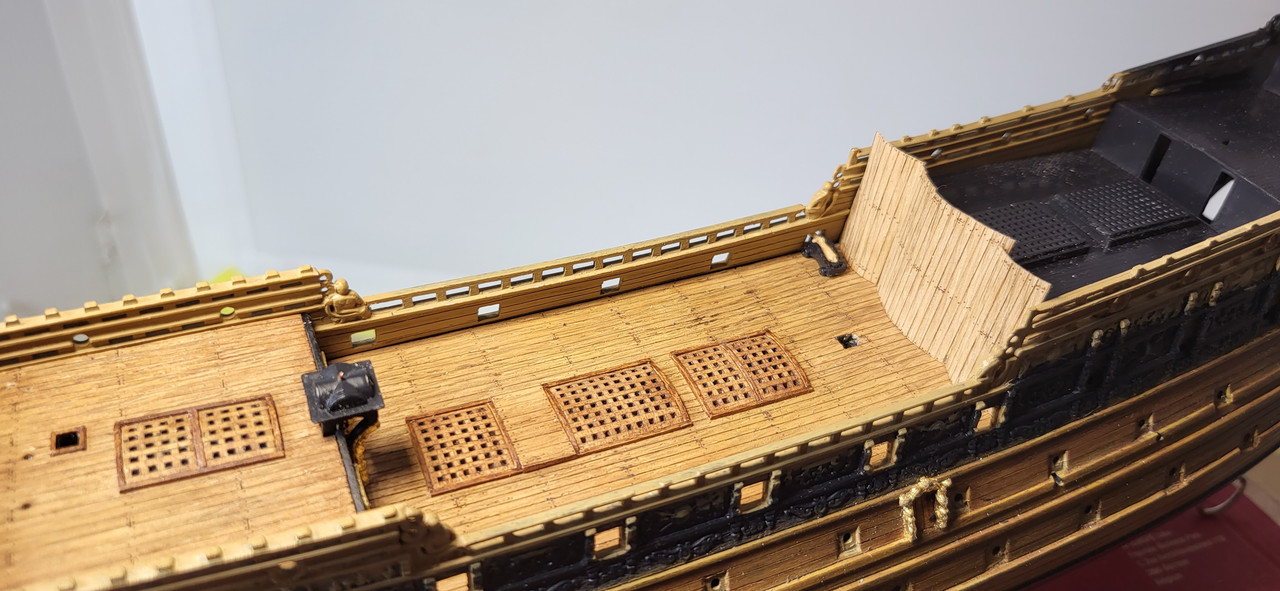
I finally have the main deck gratings in the arrangement I'm pleased with along with the capstan base, I needed to relocate the main mast forward according to plans in McKay's book, which was also needed as the modified bulkhead mockup would've hit the mast anyways and also needed to check clearance of the gun, it's tight but acceptable. Still much more work lays ahead in this area.
Michael D.
-
-
I use a #80 bit, the smallest available. The dead eyes for the bowsprit top are completed and I simulated the iron futtocks with thread, it looks ok and a mock up of the new overall length for the spritsail topmast.
Michael D.


- GrandpaPhil, Jeff T, shipman and 8 others
-
11
-
Michael I use 1.75 reading glasses and good lighting.
I use mostly 1/2 knots which is more than sufficient at this scale and sometimes just glue.
Michael D.
- fmodajr, Bill Morrison and Rudolf
-
3
-
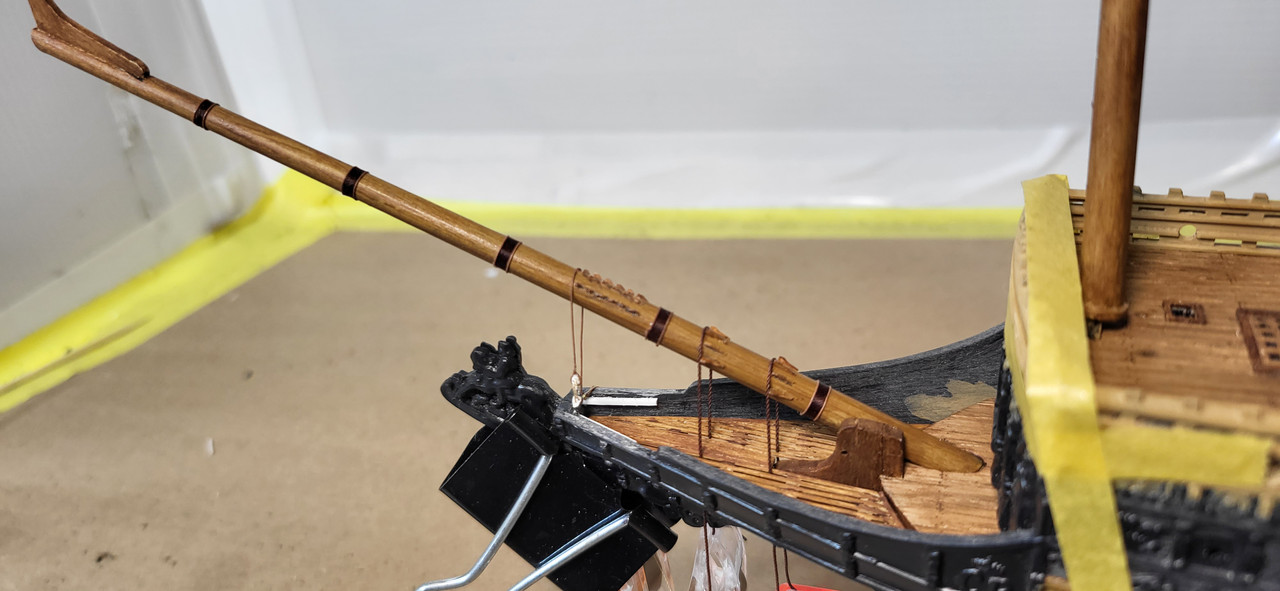
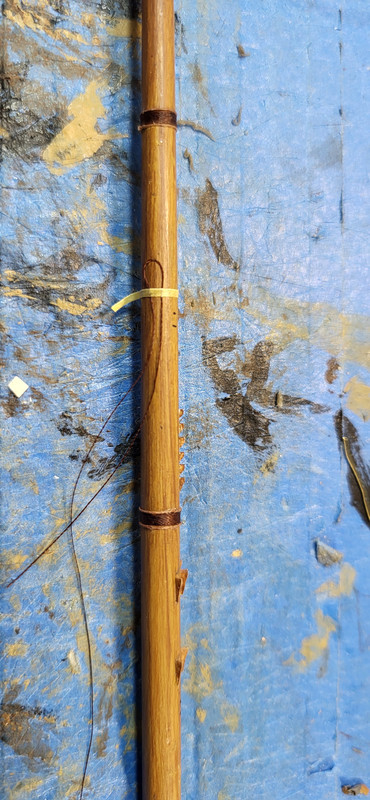
Indeed she is Marc and I'll try my best to produce a worthy representation of her and her rigging will definitely test my skill. I completed the wooldings using 100wt brown ploy thread and 50wt thread to simulate the wooden hoops, they are 1.8mm wide, 12" at scale. Thanks for looking.
Michael D.

-
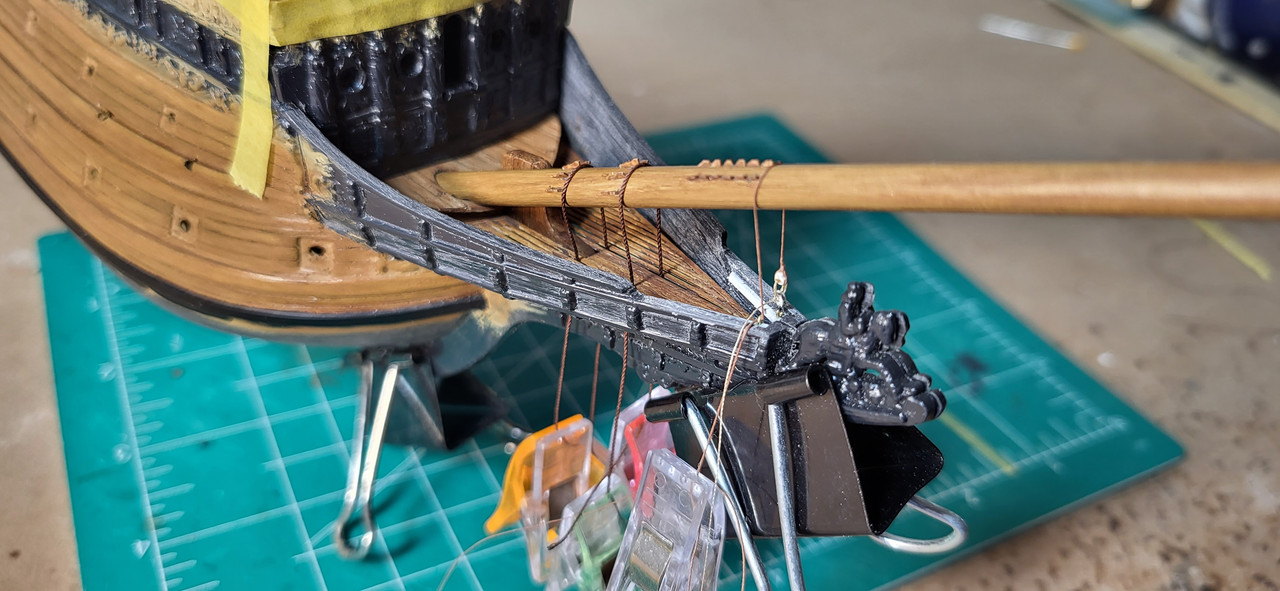
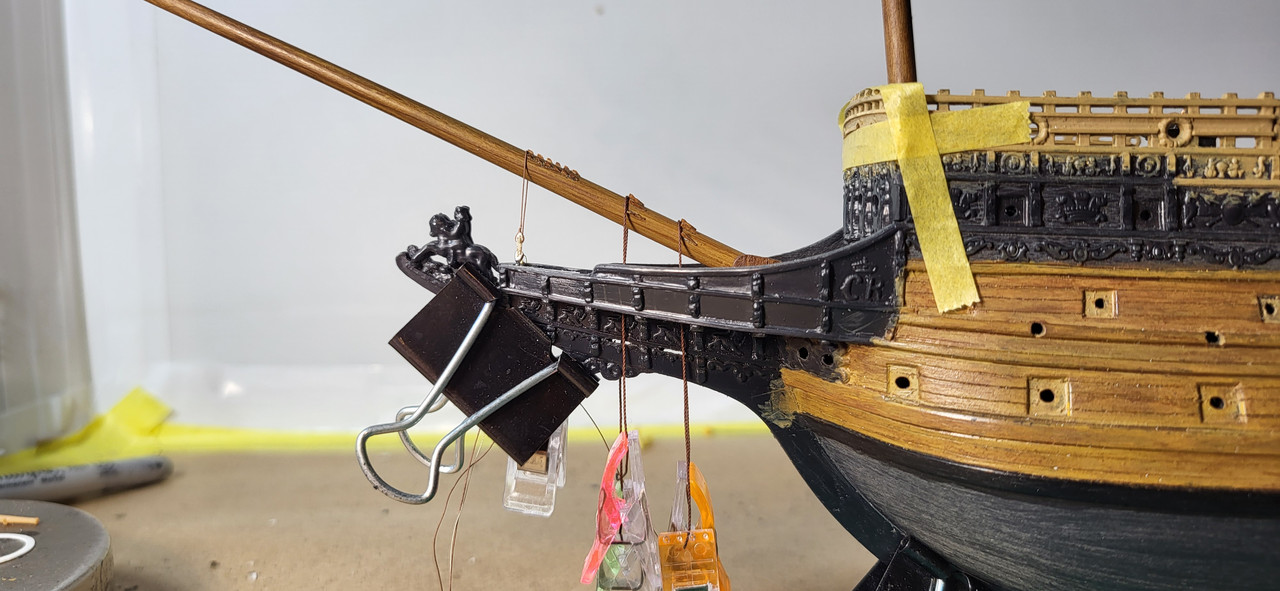
Thank you, Kirill, it will be quite useful, just amazed at the amount of detail in Paynes engraving. I'm working on the bowsprit shroud dead eye placement using .030"x.030" styrene as a rail to mount them on port side only with eye bolts on starboard side. This will no doubt be a tricky phase when the time comes to rig them, and I think scale wise everything is looking good.
Michael D.
- Ferrus Manus, GrandpaPhil, Baker and 7 others
-
7
-
3
-
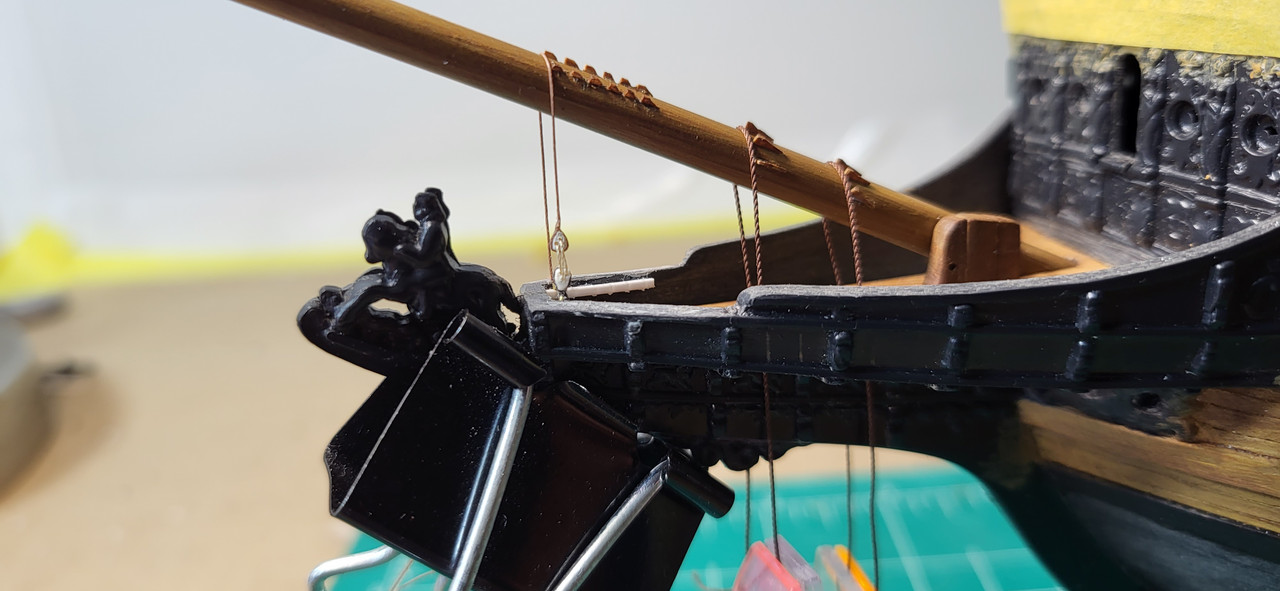
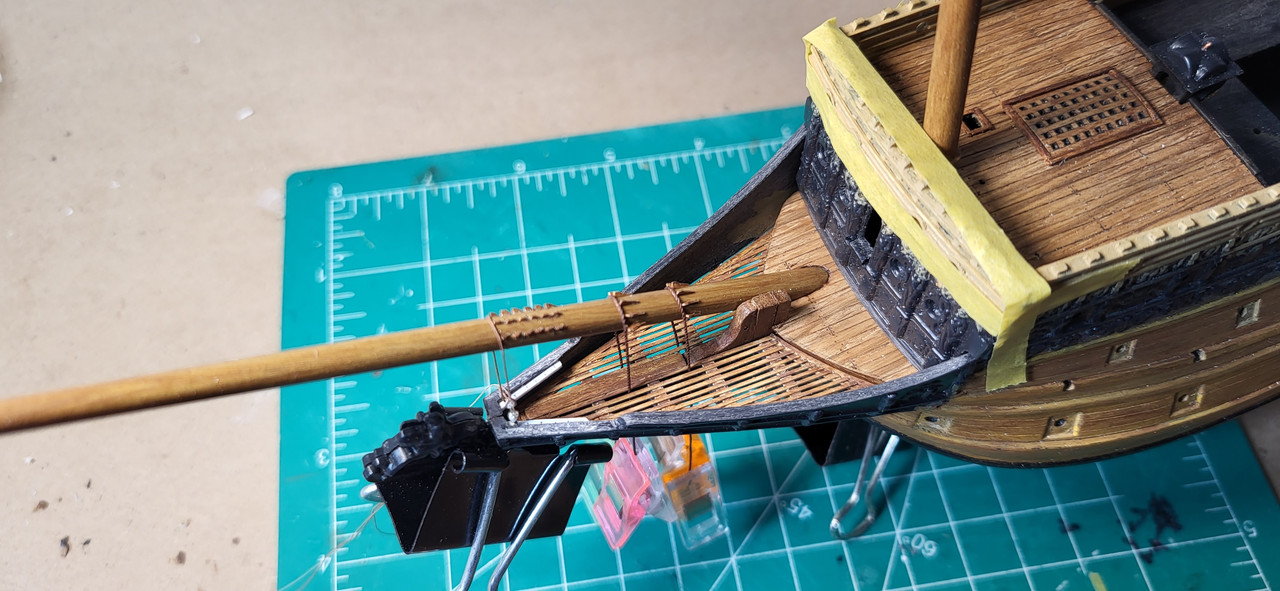
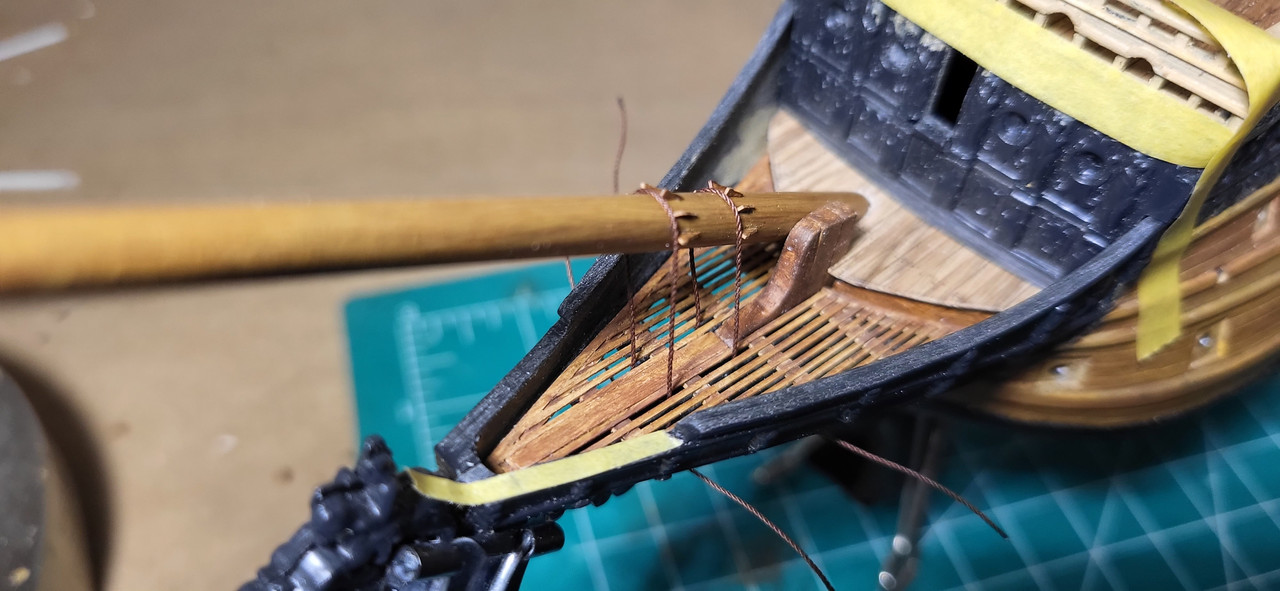
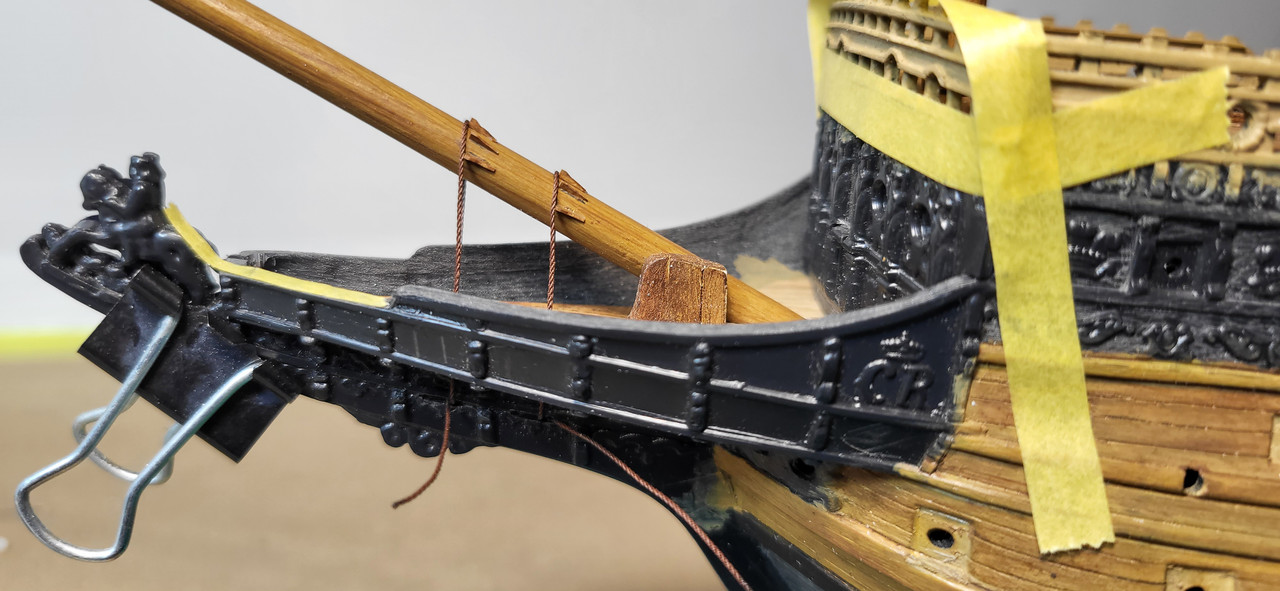
I took small break from the beakhead and roughed in the planking at the stern. I added the gammoning cleats, these measure just over 2mm in length and I'll pare them down a bit in height, the mock up gammoning rope is 0.4mm. Up next, I need to add the additional fore stay and shroud cleats and wooldings.
Michael D.


Sovereign of the Seas by 72Nova - Airfix - PLASTIC
in - Kit build logs for subjects built from 1501 - 1750
Posted
Yes I did Ian, once muscle memory sets in though, production is much faster😁. Marc at this point I'm inclined to use option A for that reason plus I can make them more uniform as well.
Michael D.