


72Nova
-
Posts
514 -
Joined
-
Last visited
Content Type
Profiles
Forums
Gallery
Events
Posts posted by 72Nova
-
-
Looking good👍, I like it!
Michael D.
-
-
Well looking at the Mayflower 2 replica the insides of the bulwarks are painted the same shade of yellow as the outside, although much lighter and the bulkhead frames are painted the same tan/beige as the outside, how historically accurate that is, who knows but I think a subtle contrast would look good.
Michael D.
-
Clearly stated on the box, series # 1908-400. Just the hull measures 16", finished about the same length as yours, around 19"
Michael D.
- GrandpaPhil and Ferrus Manus
-
 2
2
-
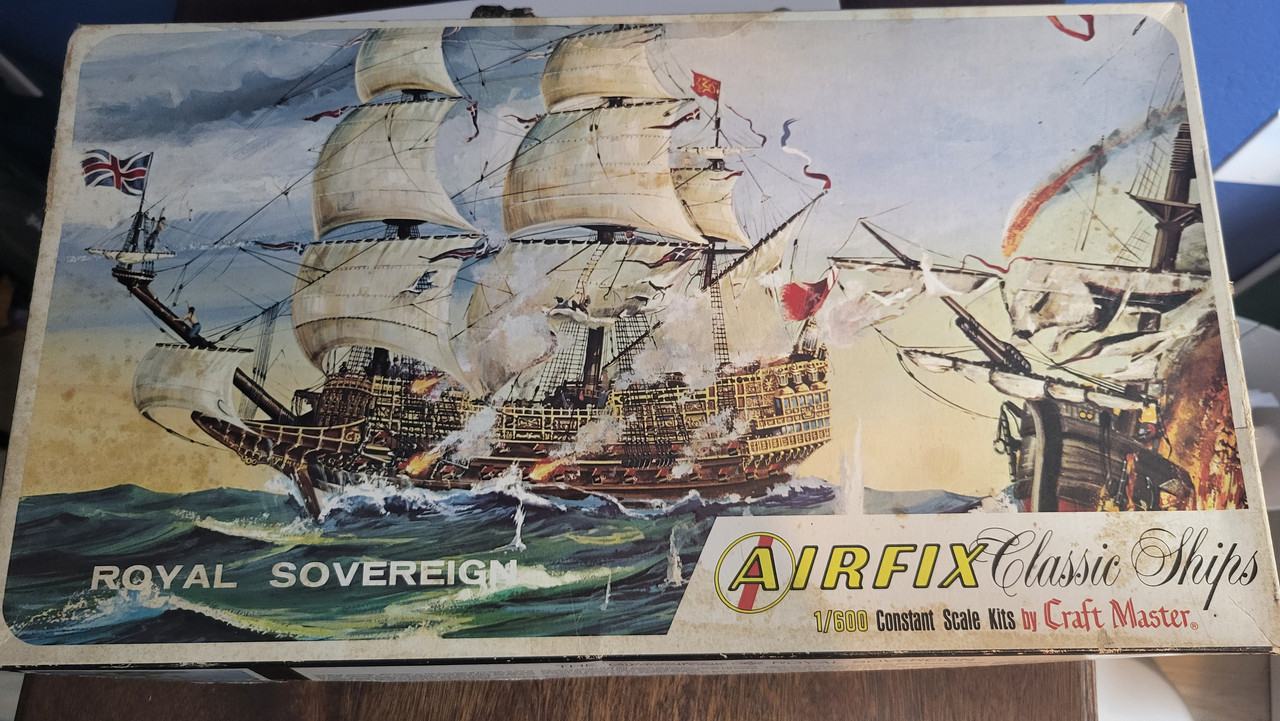
I picked up a vintage Airfix Sovereign of the seas by Craft Master and the 1/600 stated scale is even more ludicrous, making it like 3 inches.
Looking forward to seeing this take shape.
Michael D.
-
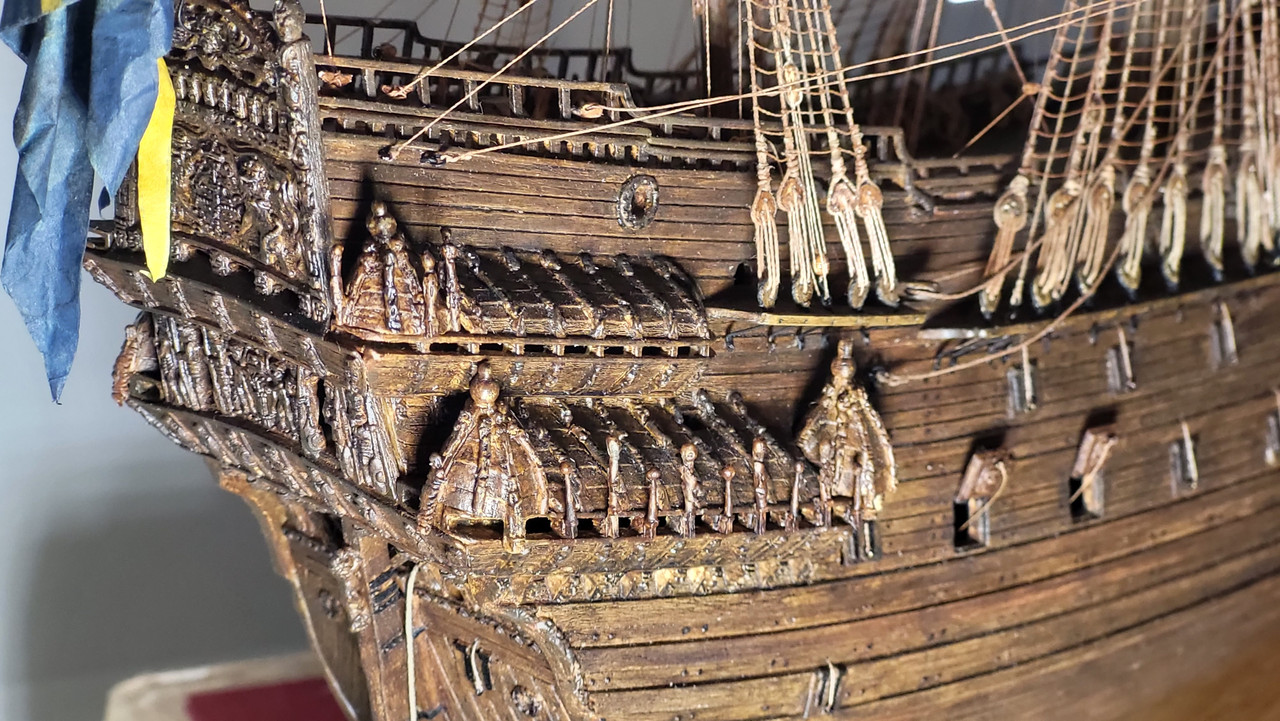
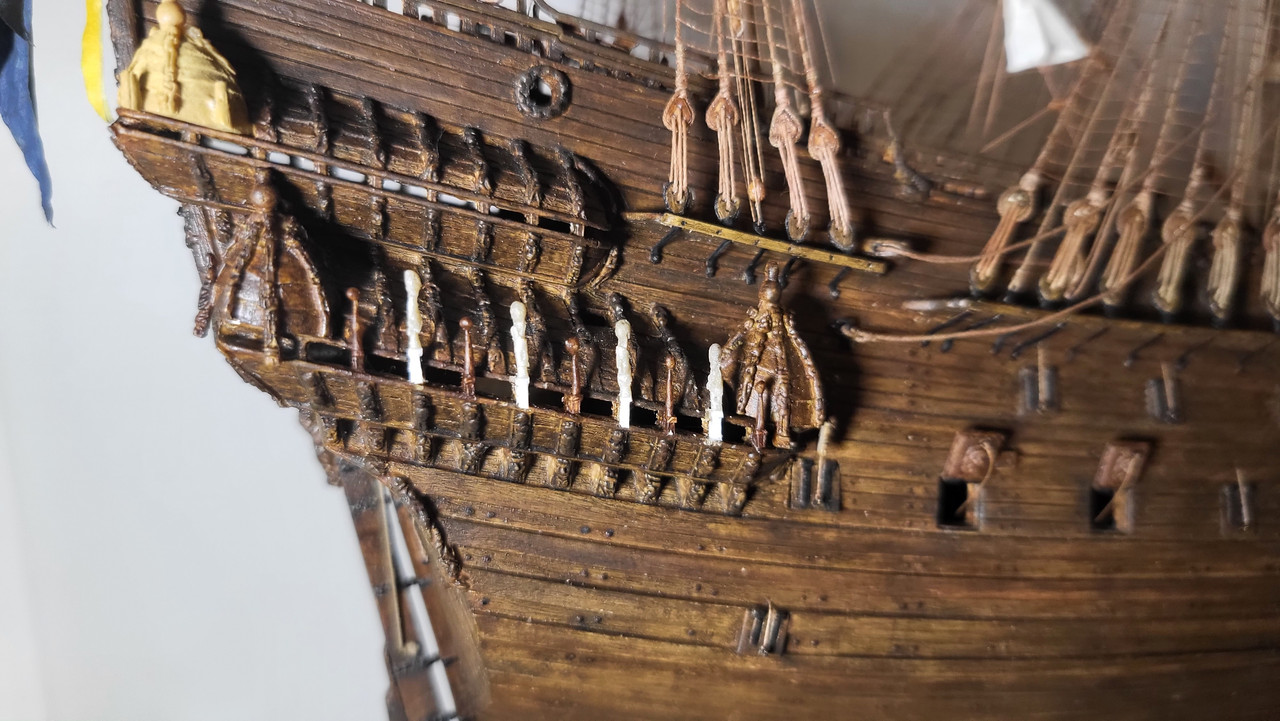
Using a combination of styrene and Sculpey clay I finished making up the figurines for the gallery, still some touch up to do and I could add more detail, but it already looks busy enough and I'm happy with the result.
Michael D.

-
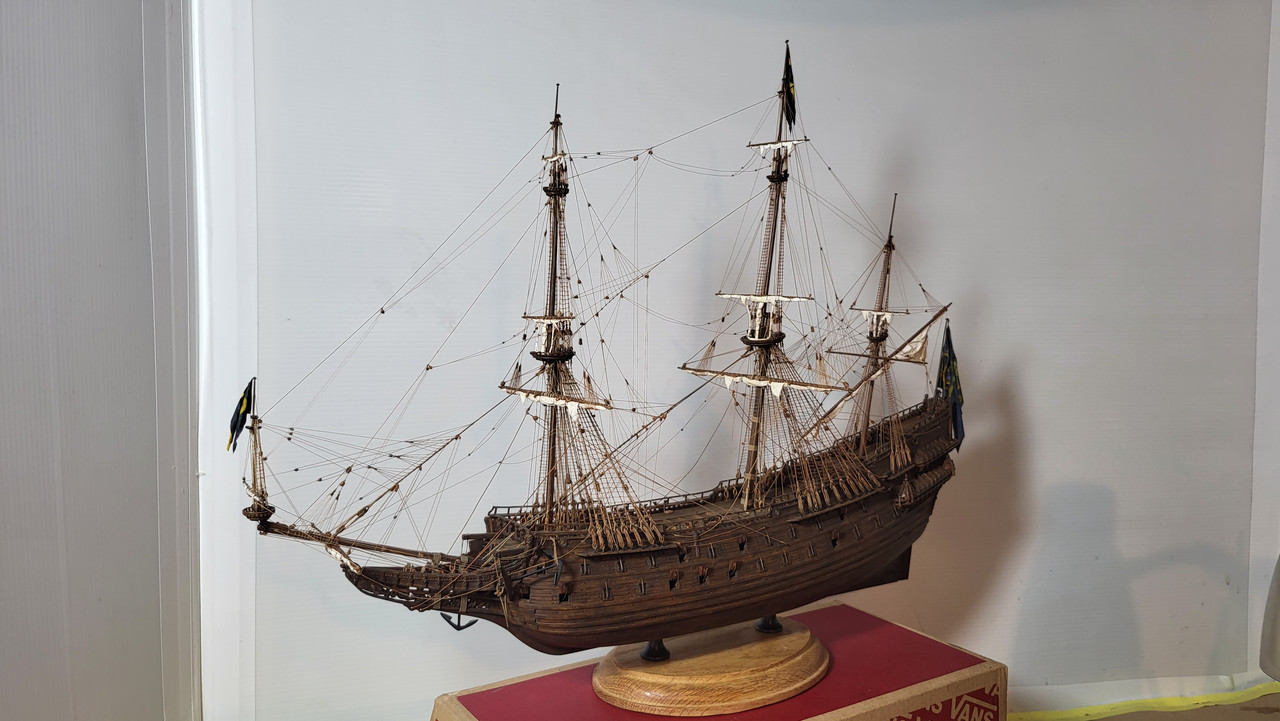
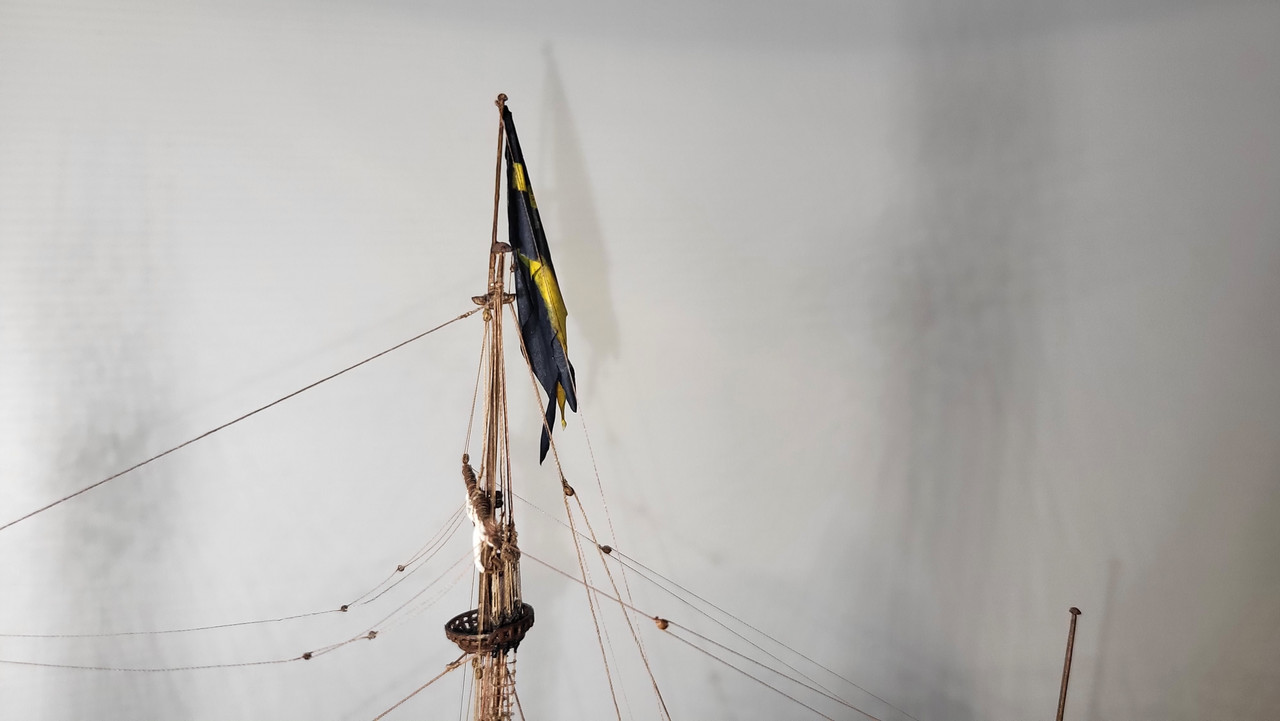
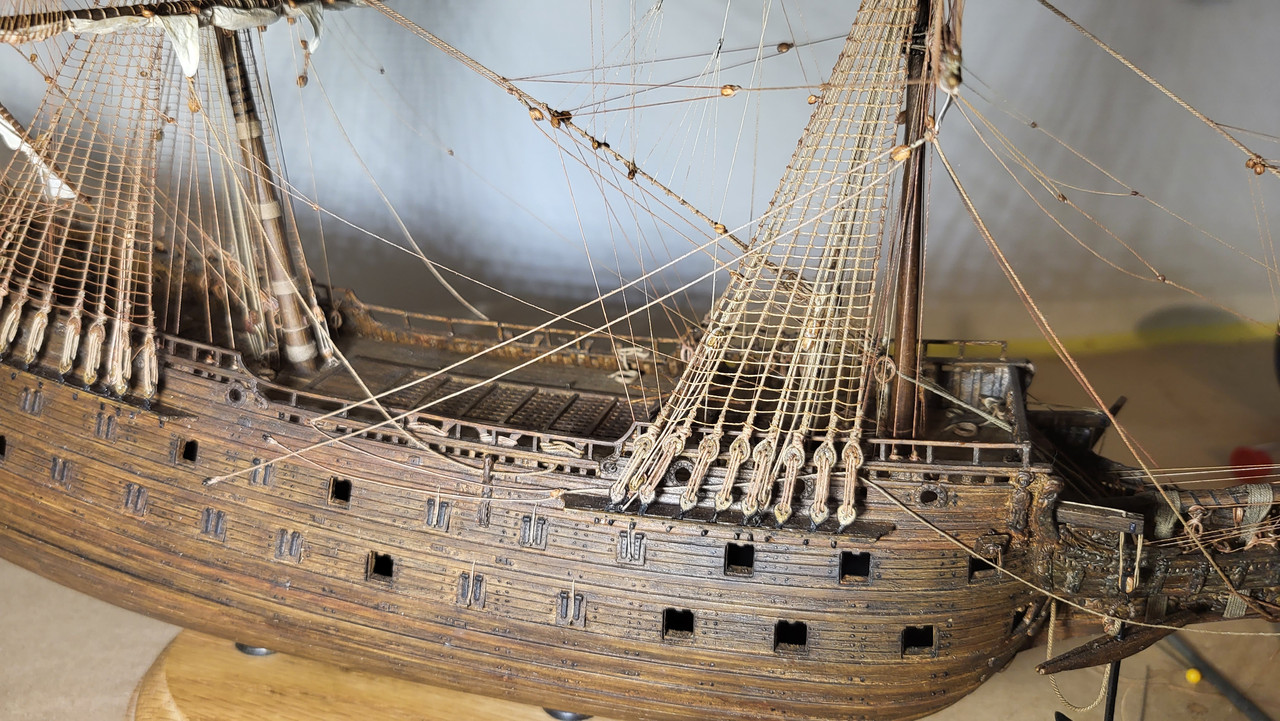
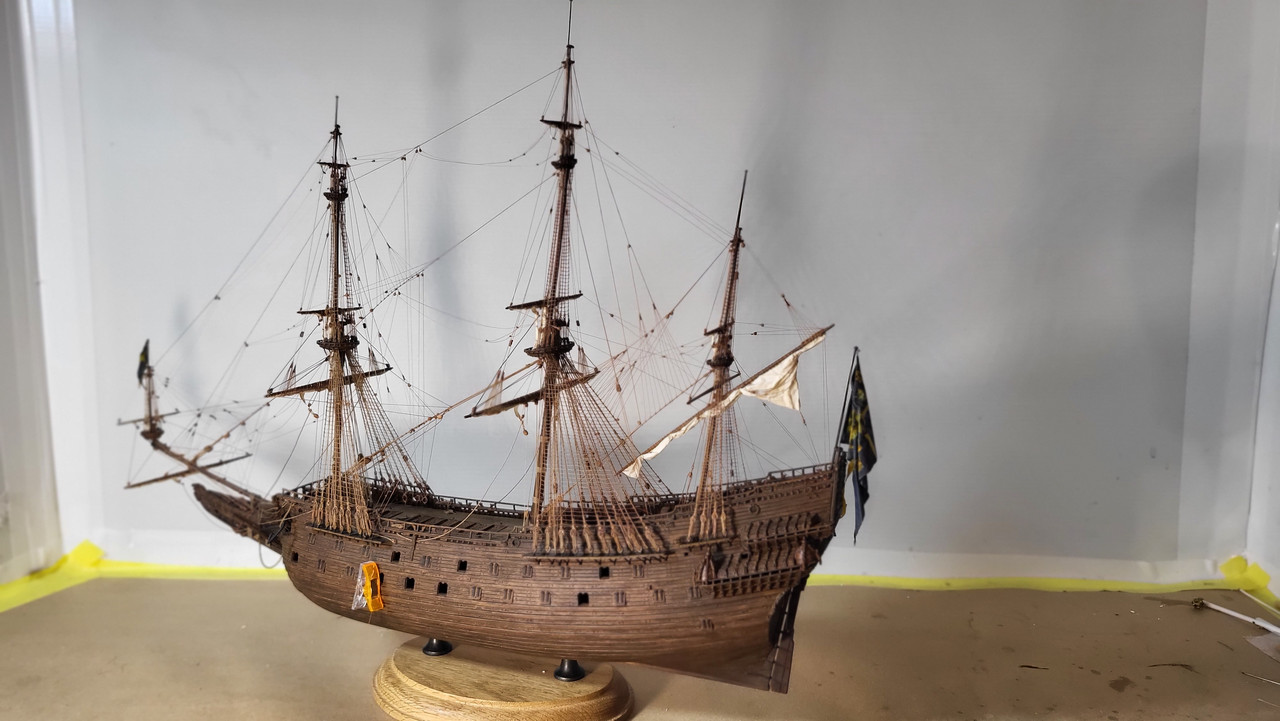
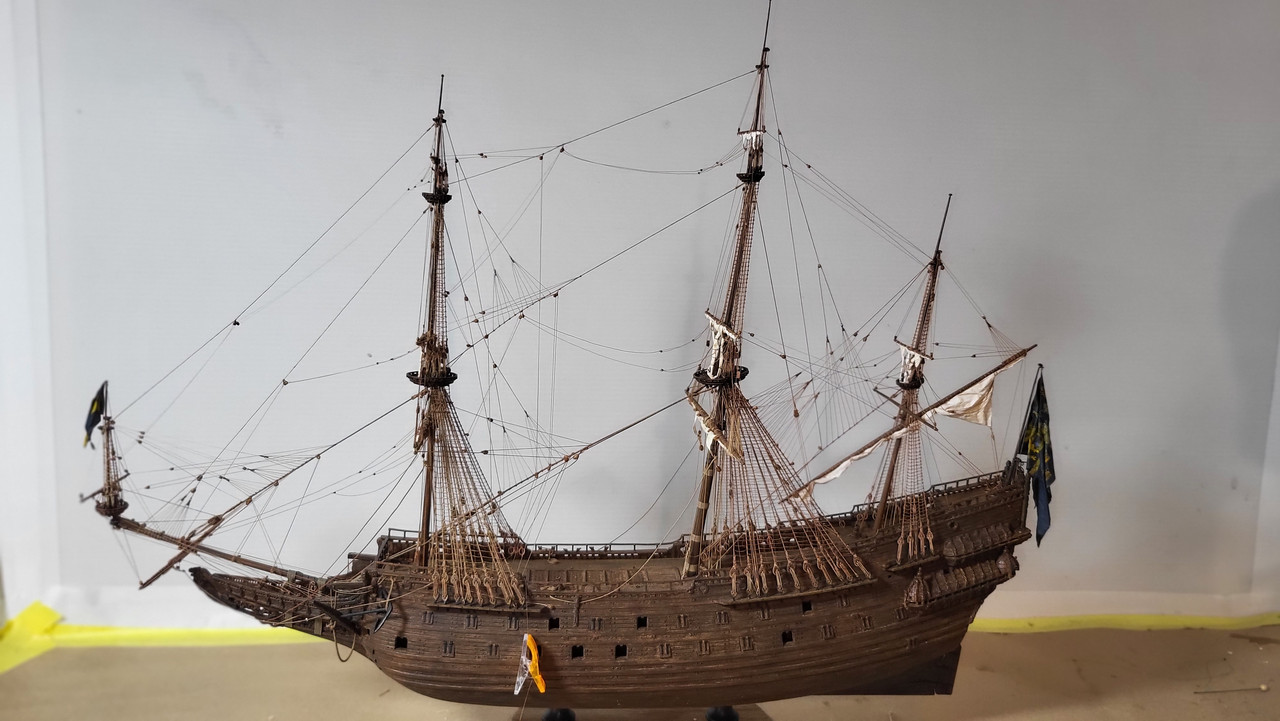
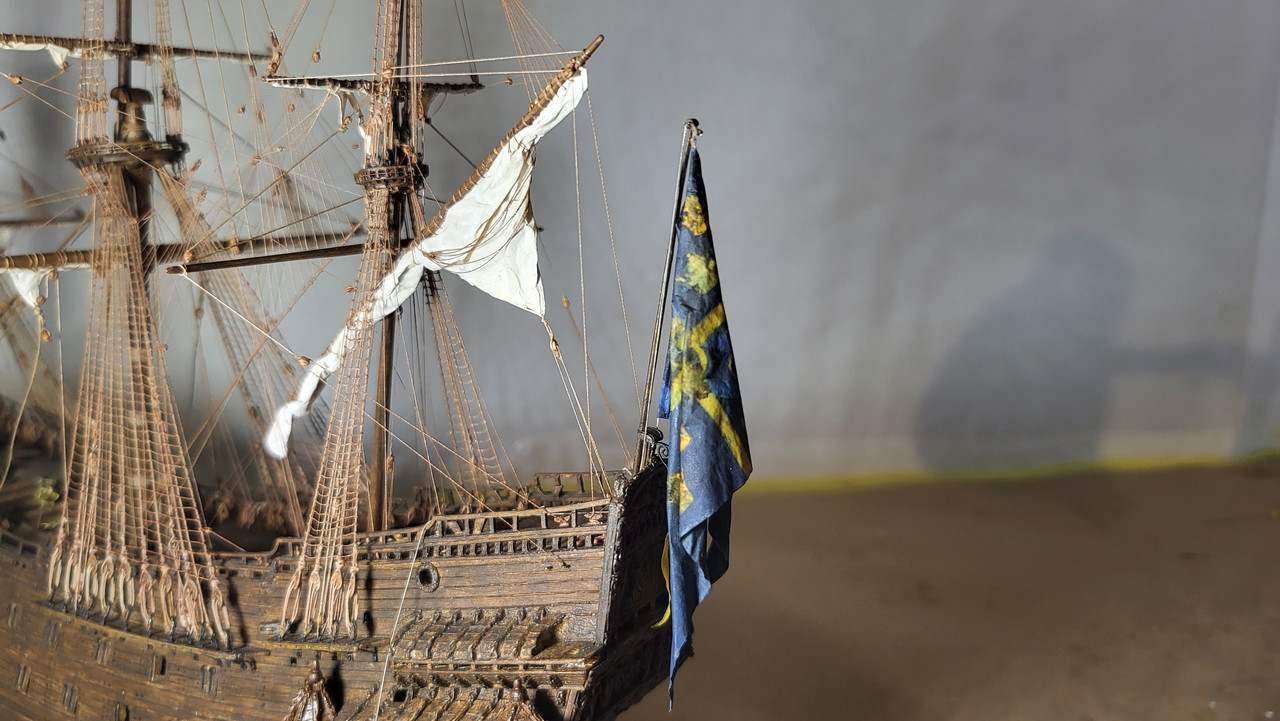
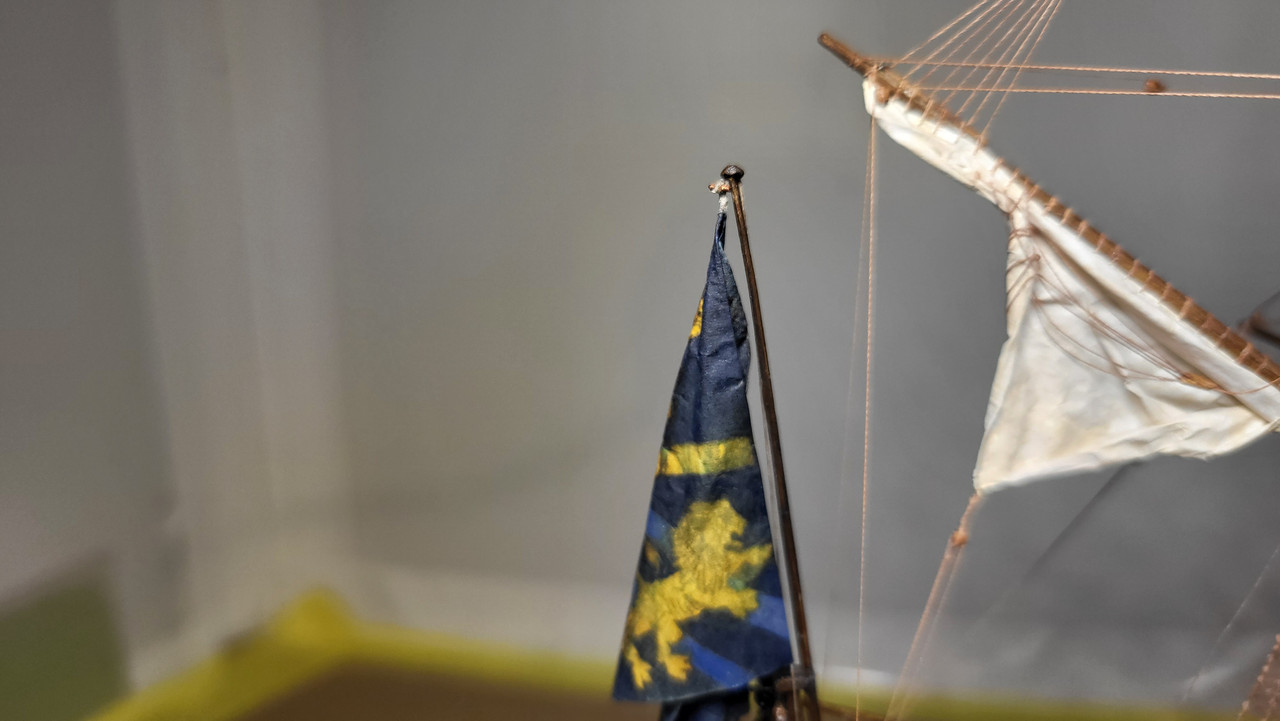
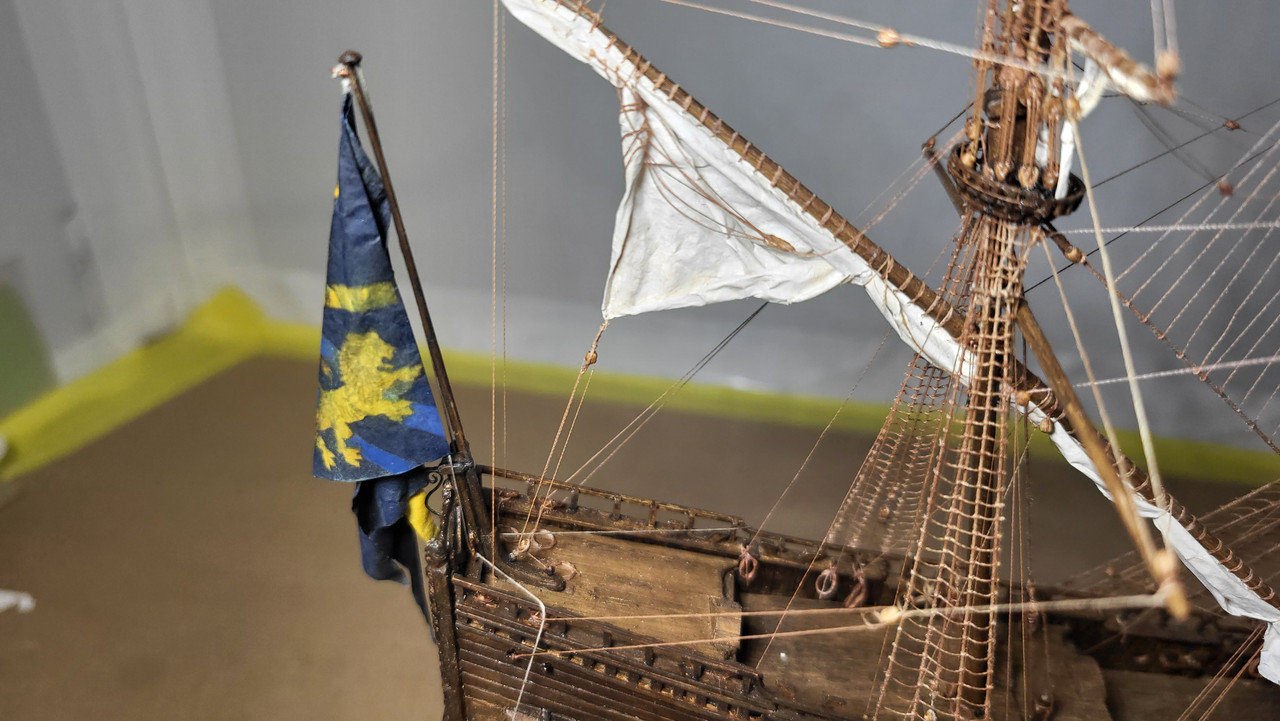
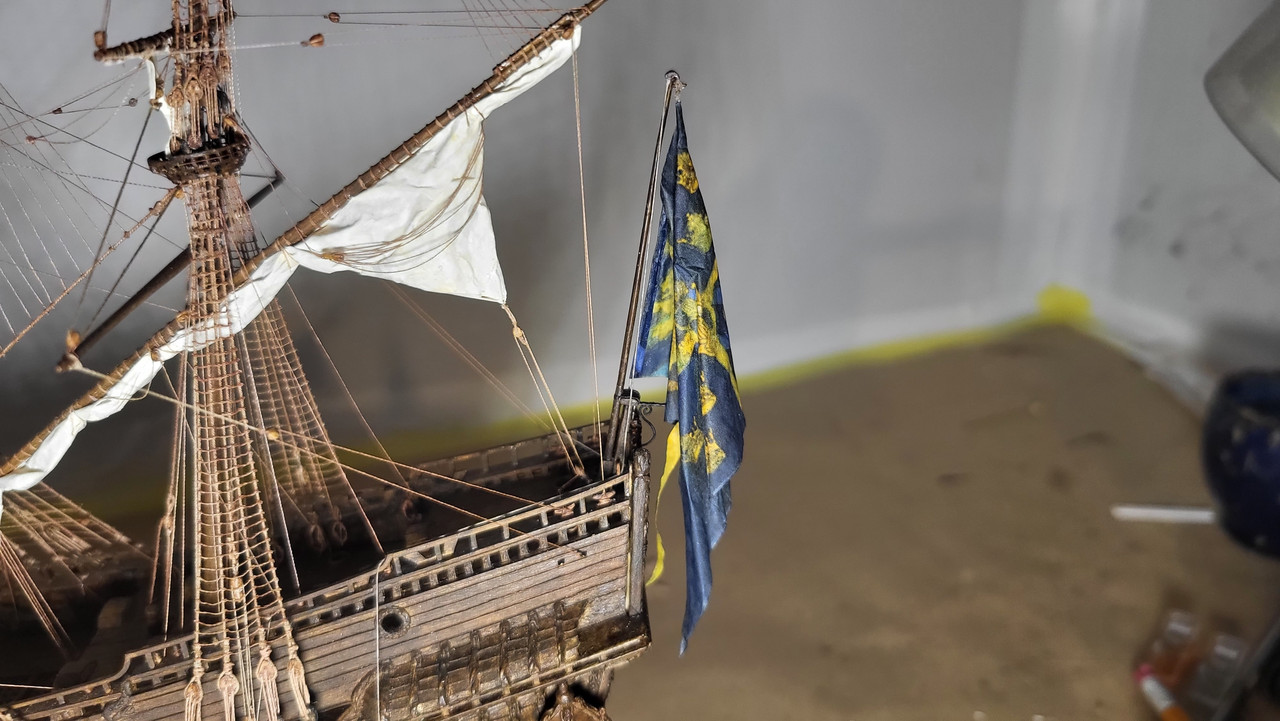
With the main mast flag in position, I can officially say the rigging phase for this build is completed, the halliards are led to the railing on portside aft of the main shrouds. Up next the galleries.
Michael D.
- baskerbosse, GrandpaPhil, chris watton and 9 others
-
9
-
 3
3
-
The more I look at the more I like too Marc, certainly a detail or lack of that really doesn't affect the overall appearance of the model and I will be doing the same with my next build.
Michael D.
-
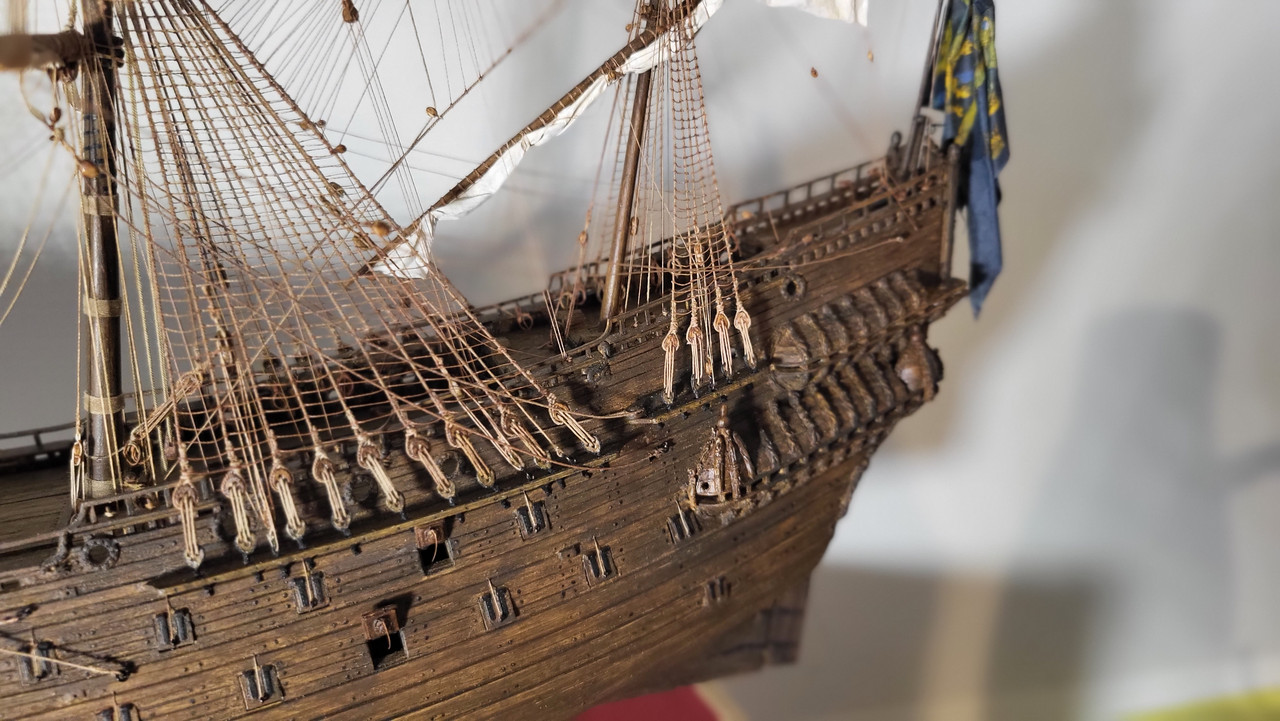
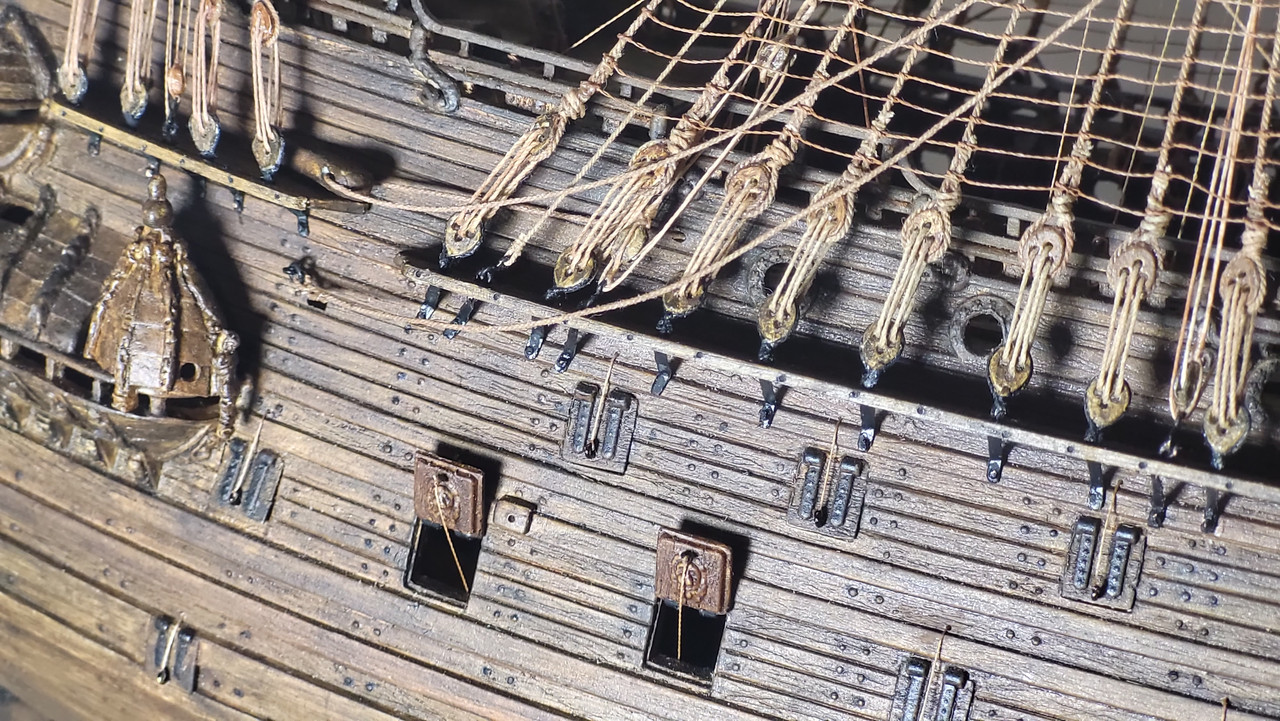
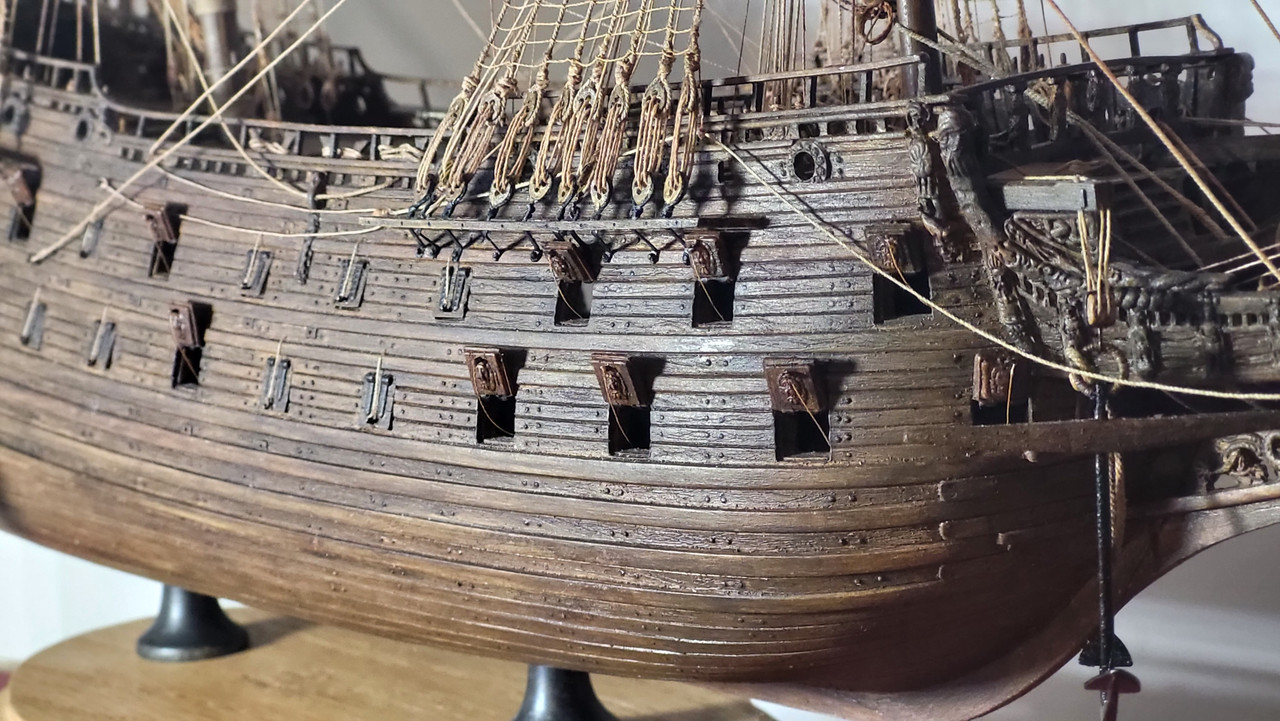
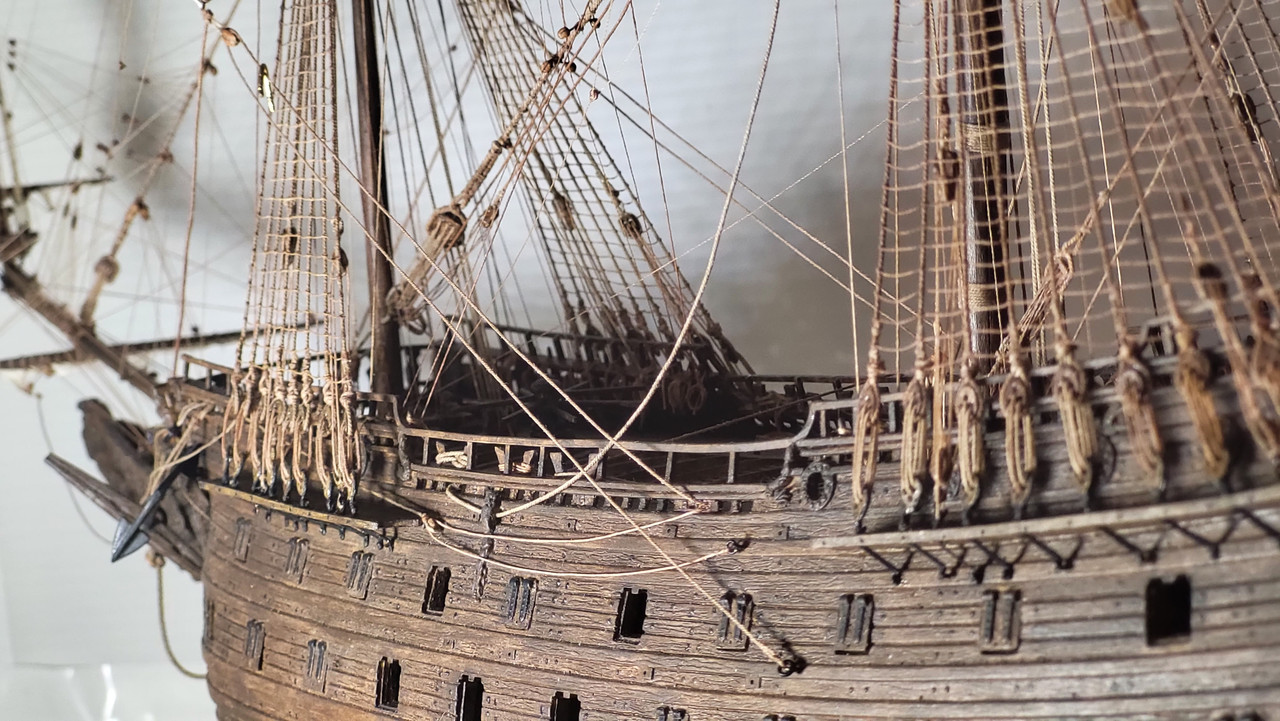
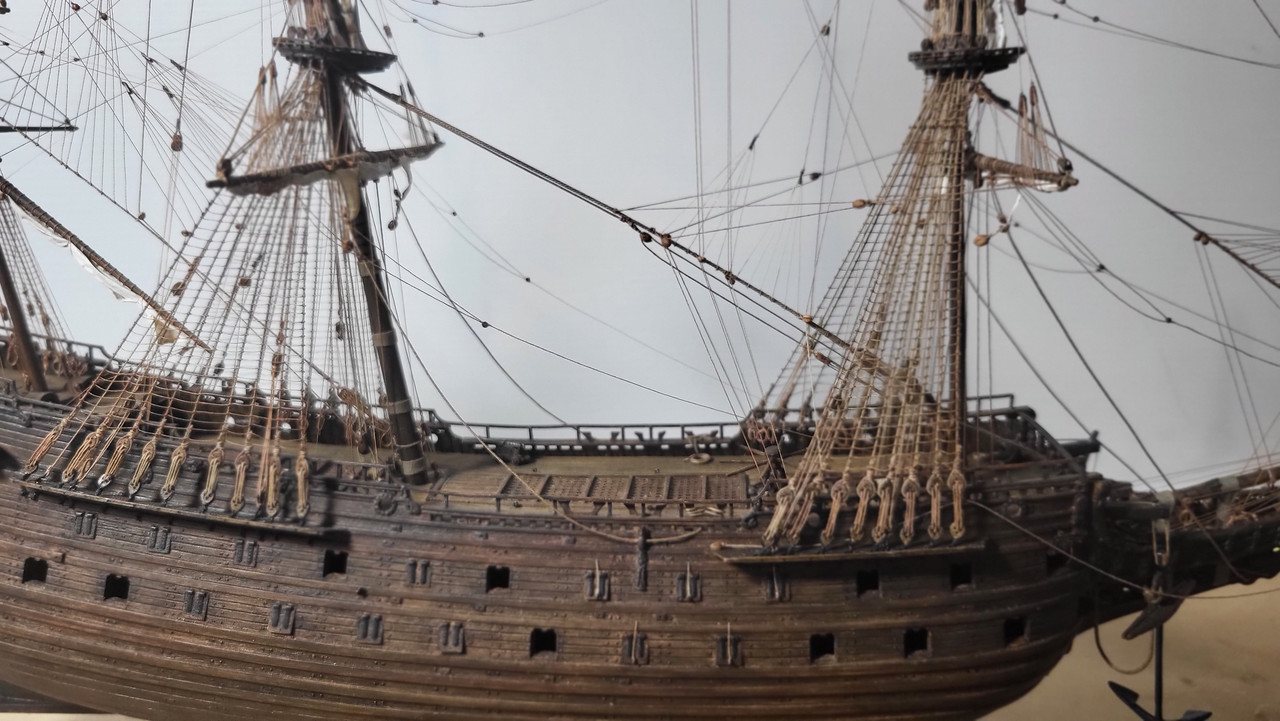
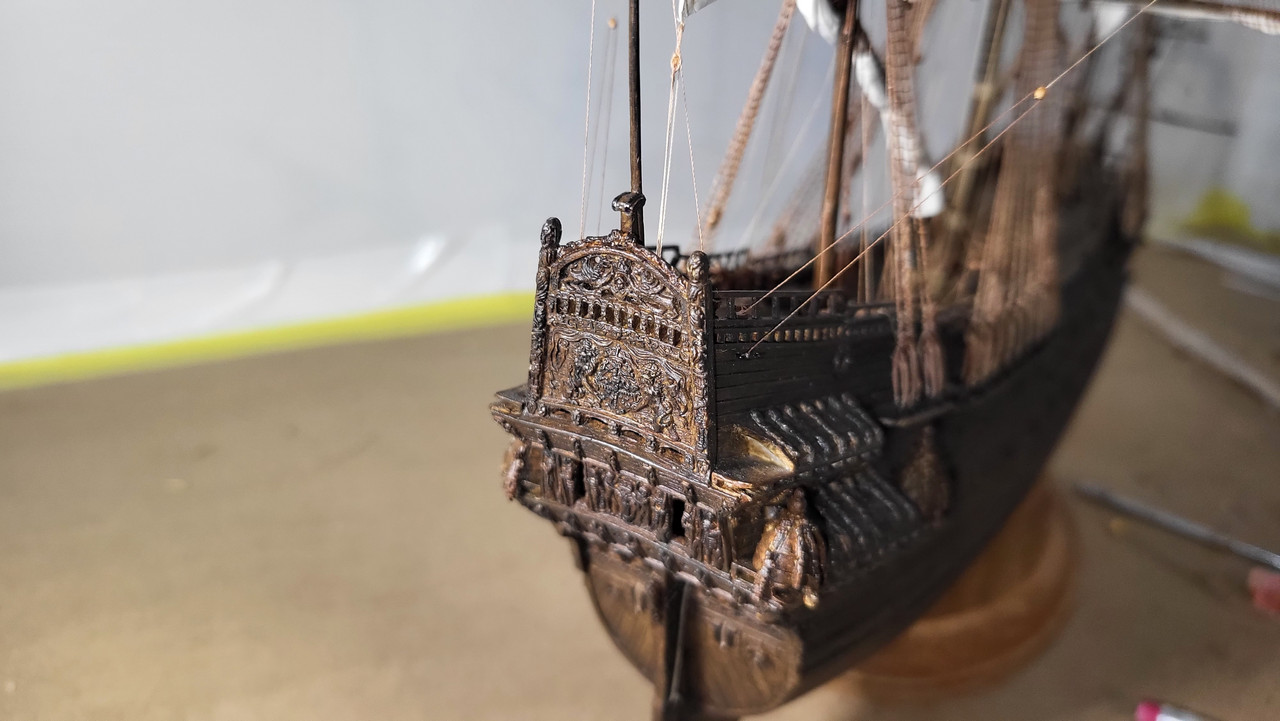
Less than a handful of tasks left on this build with the completion of the gun port lids, up next, I will be putting the finishing touches on the Qtr Galleries and finish up the starboard railing end, as always thanks for taking the time to stop by.
Michael D.
-
-
I've been silently following your build John, just brilliant on all phases, the use of the decals opens up a myriad of possibilities for adding much more indicate details and I love the look of the faux gold over gold leaf and paint, almost makes me want to build another one, but I'm happy with mine, just simply well-done Sir!
Michael D.
-
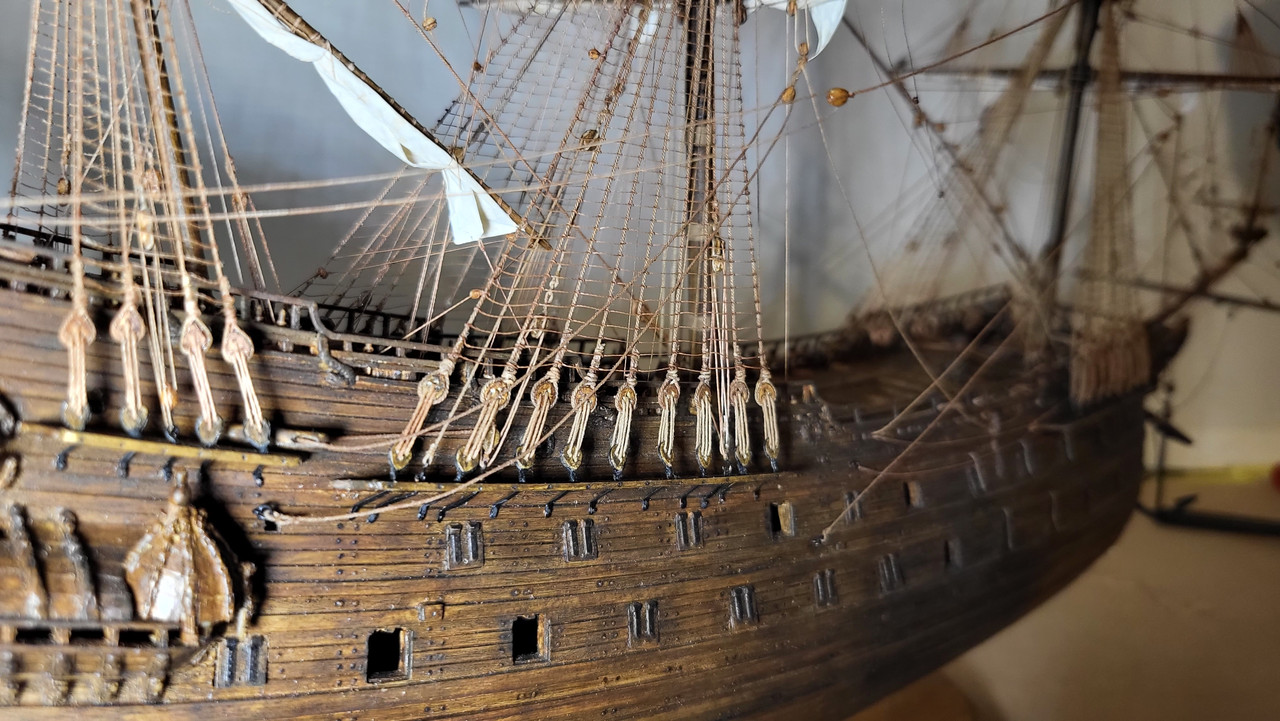
The starboard side rigging is finished with the completion of the main sheet and brace, the sheet is pretty straight forward but there are few options regarding the brace and I chose to attach the leading block with an eye bolt to the topside of the bulwark.
Michael D.

-
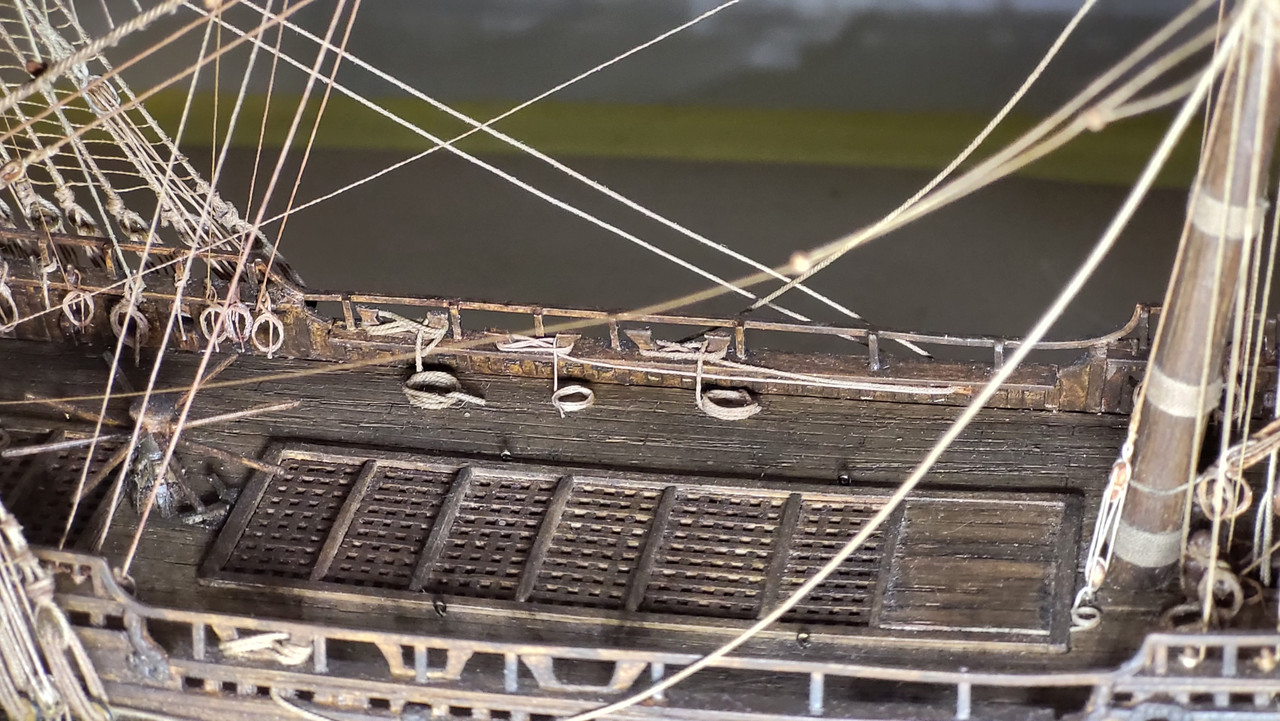
I finally completed the port side railing end using .030"x.030" styrene, I used plastic cement to soften the styrene enough to facilitate bending, also completed the port side fore course sheet, to achieve some slack in the line, adjust the line to the desired slack and put a spot of PVA on that side of the block, I usually use misc size wire or heavy thread as weights and make small adjustments to fine tune the slack you're after until the glue dries and repeat on the other side then you can finish up by pinching the line around block to get a tighter radius, in this case I was after just a small amount of slack .
Michael D.


-
-
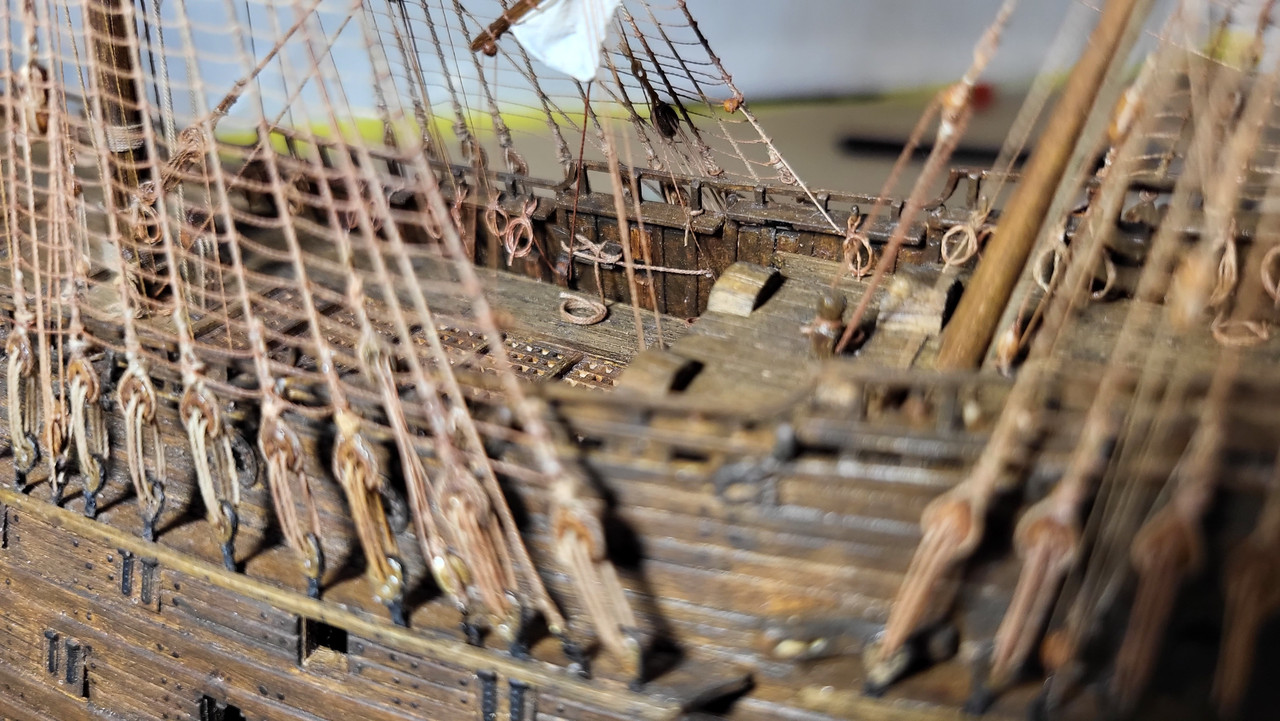
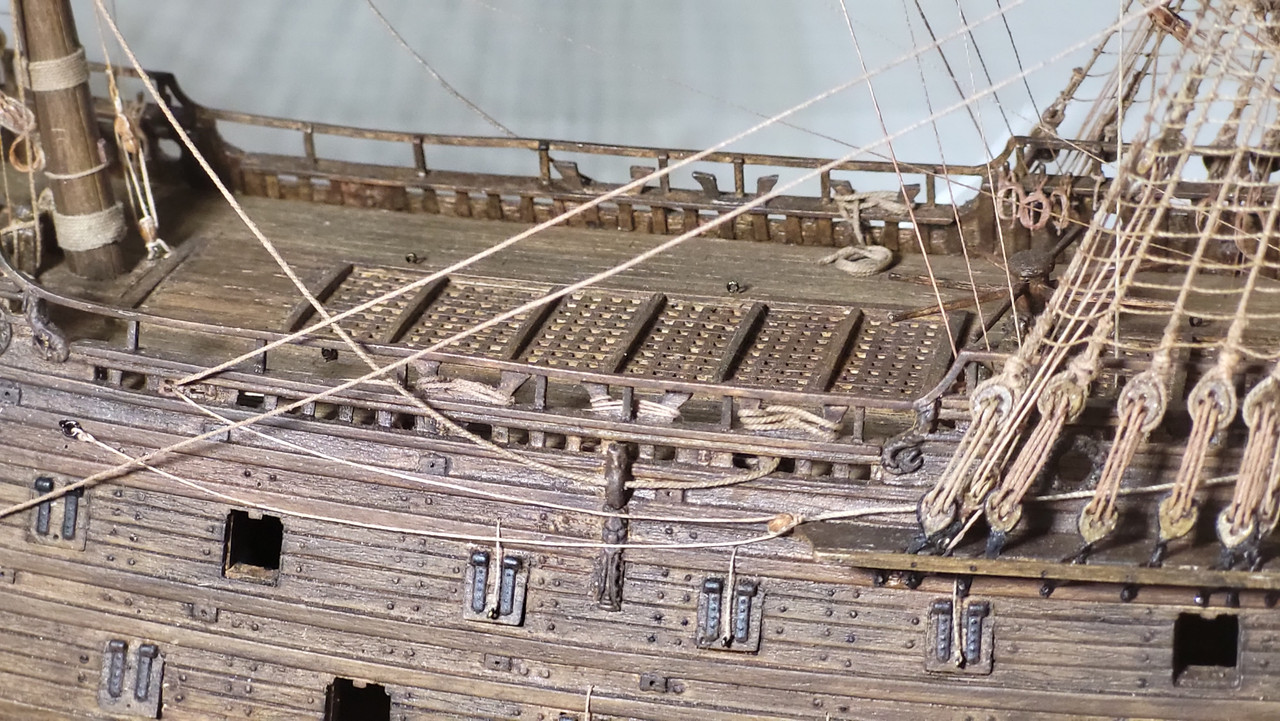
Starboard fore course and spritsail sheets are completed. I will soon start working on the gunport lids, finishing the ends of the railing at the bulkhead and attaching the Qtr gallery figures and building the case from the left over Mahogany I used for the Reale De France. Thanks for looking.
Michael D.
-
Thank you for the likes and compliments guys, much appreciated. I know went against most recommendations about ditching the spars and masts, but I was confident I good make them work and show what this model can look like with careful rigging.
Small little update regarding the main course bowlines, this was a little fiddly since I overlooked adding the blocks at the base of the fore mast early on, there should be 2 single blocks, but I went with a 1.5mm double block for simplicity in a very tight area, the lines are lead thru and tied to the bitts, I think it looks acceptable.
Michael D.


-
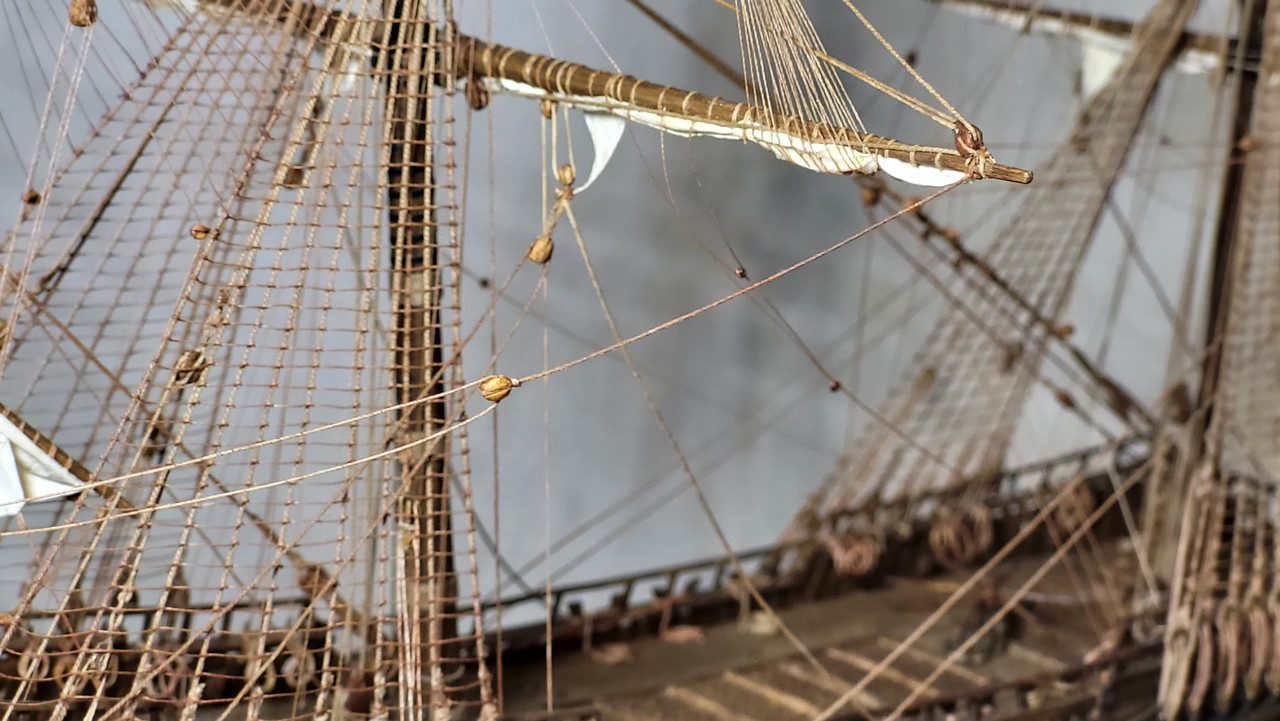
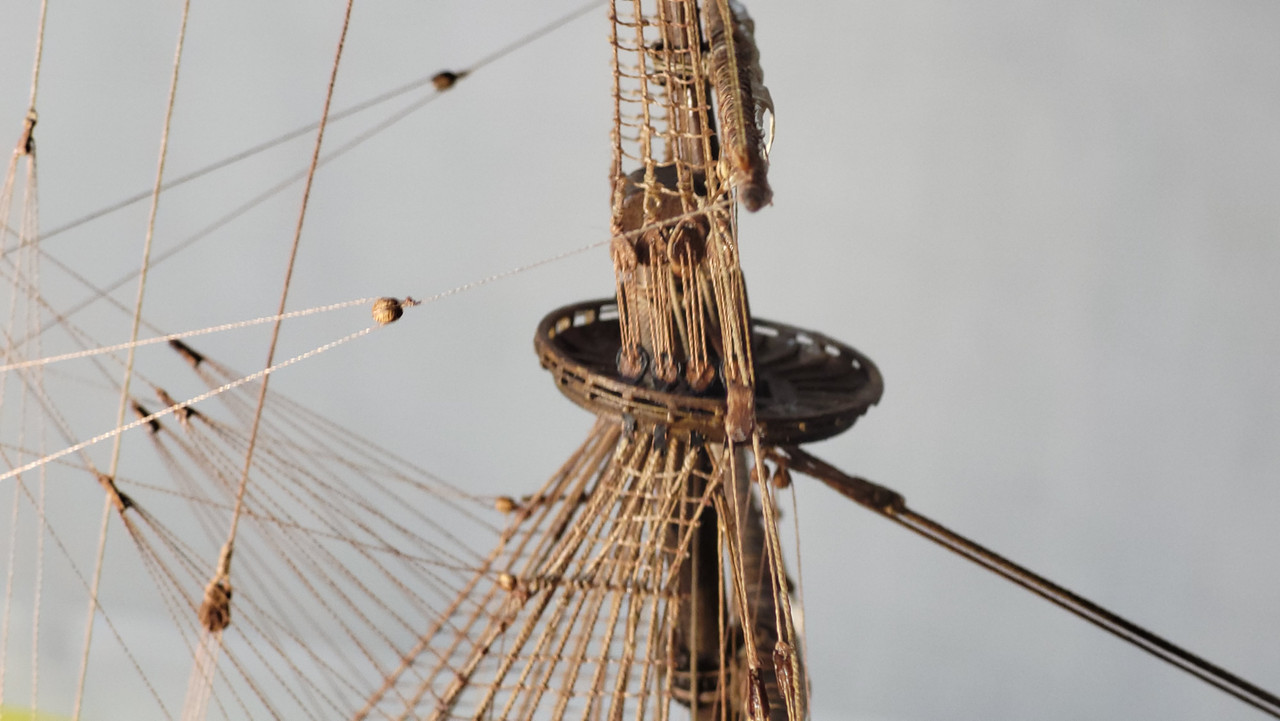
With the braces completed on the fore yards along with the main topsail bowlines, the rigging is nearing the end with the lower course sheets, main course brace and bowlines still left to do and that will pretty much complete that phase, still on the fence if I want to hoist the remaining flags, if I do their rigging will be taken down to the bulwarks and probably tied off at the railings.
Michael D.
-
-
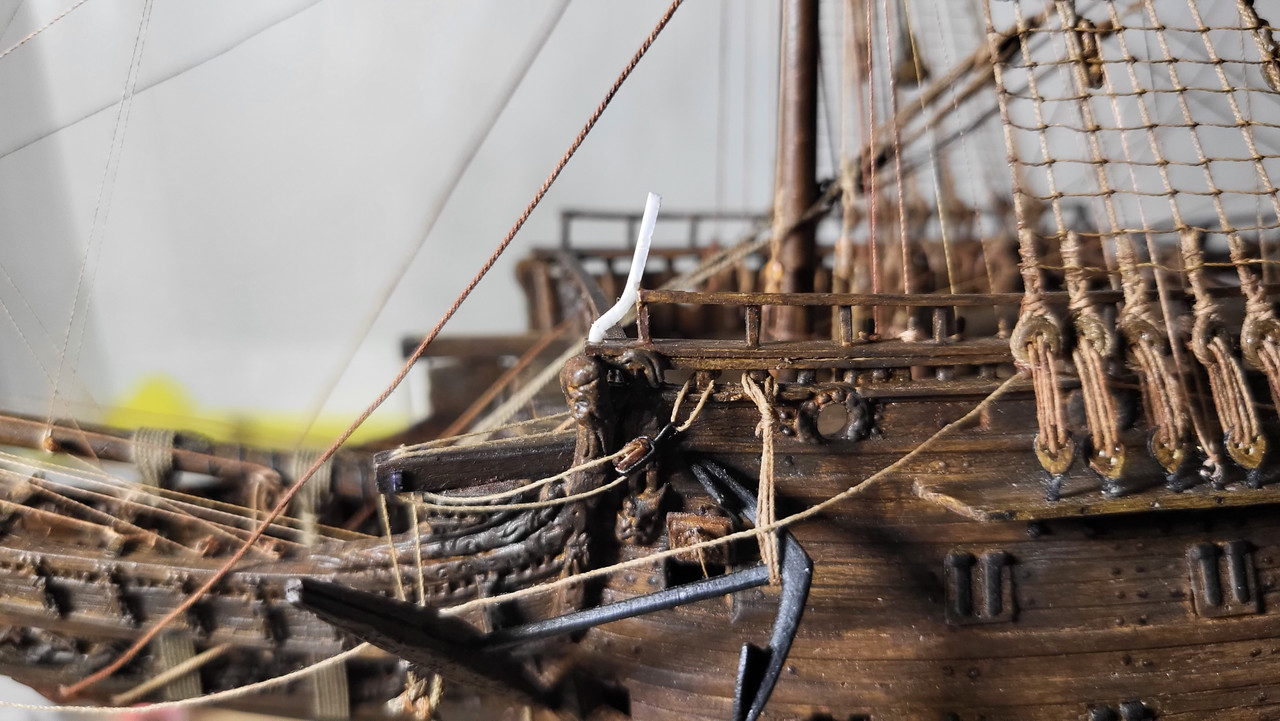
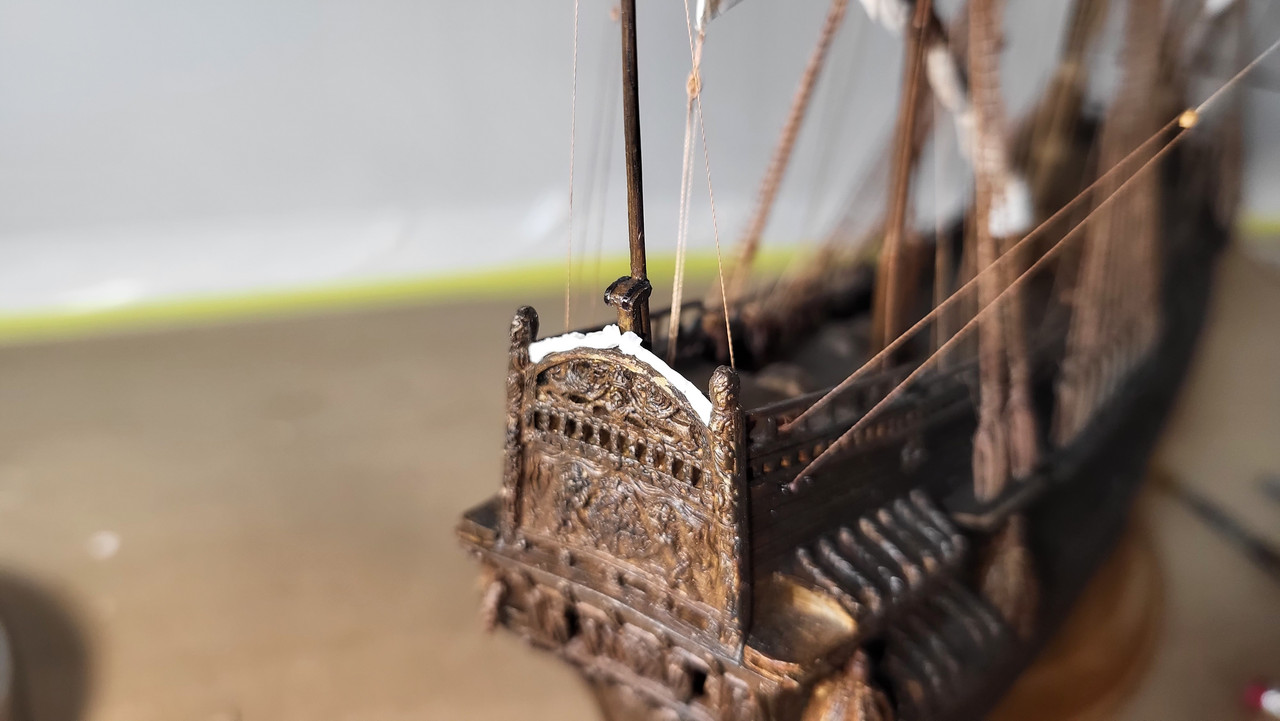
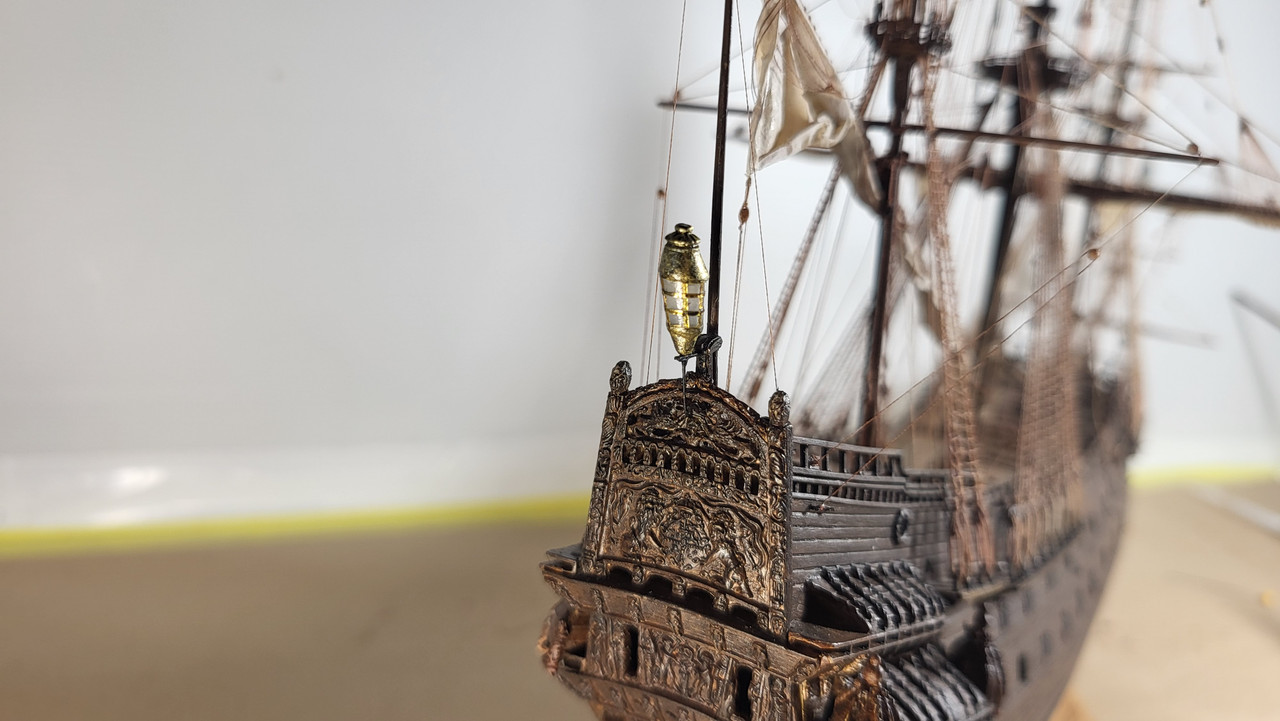
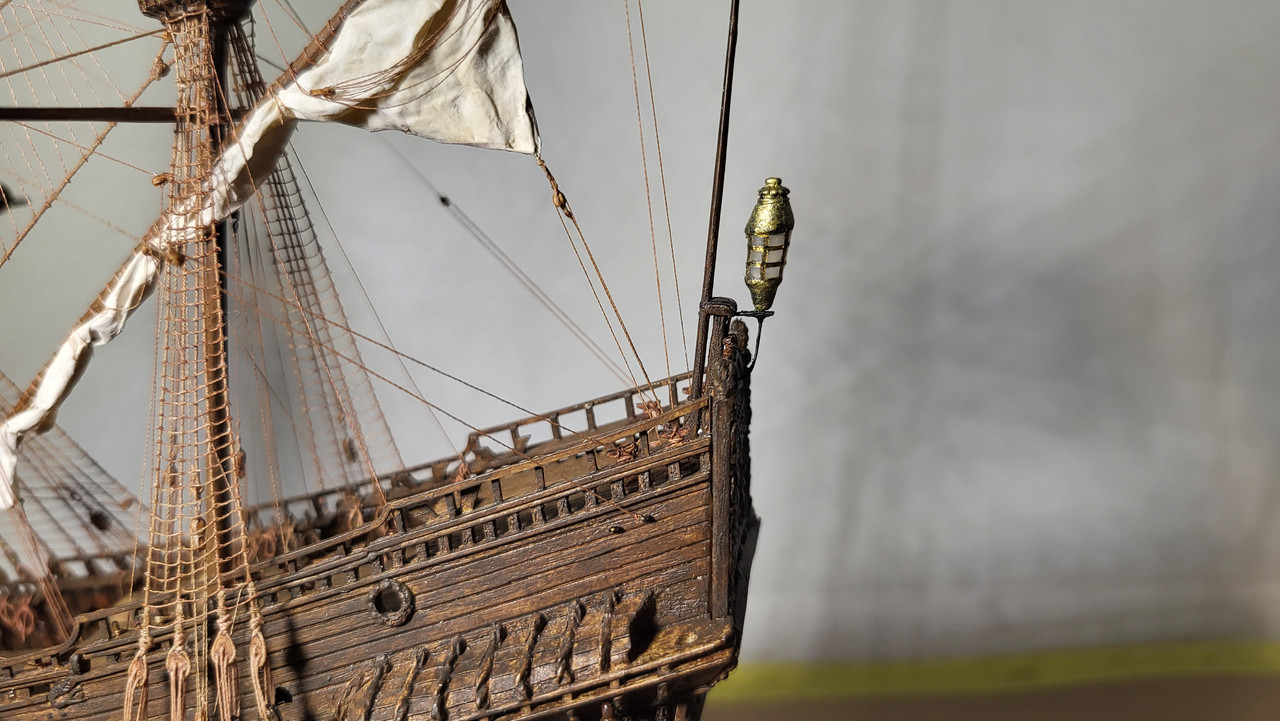
Thank you Shipman, in the end I went with what was the right decision, I really appreciated everyone's suggestions, on one hand I really liked the look of the lantern initially but the longer I starred at it the more it just looked out of place.
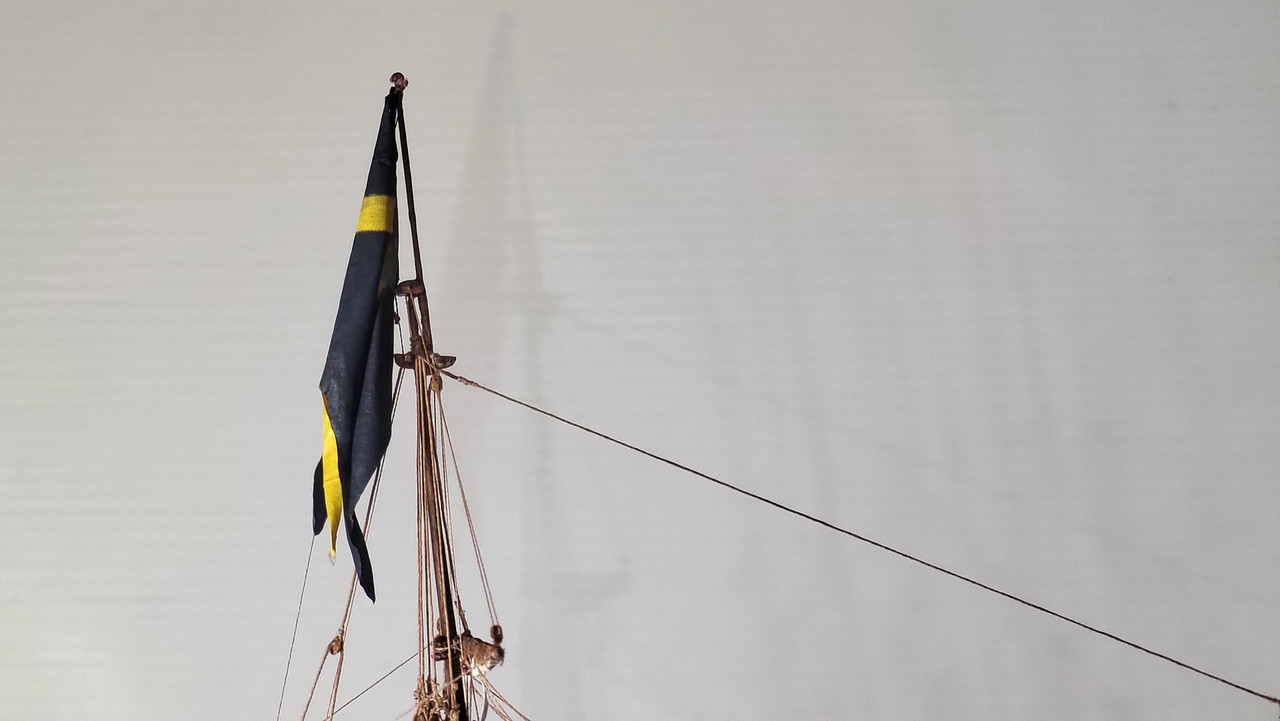
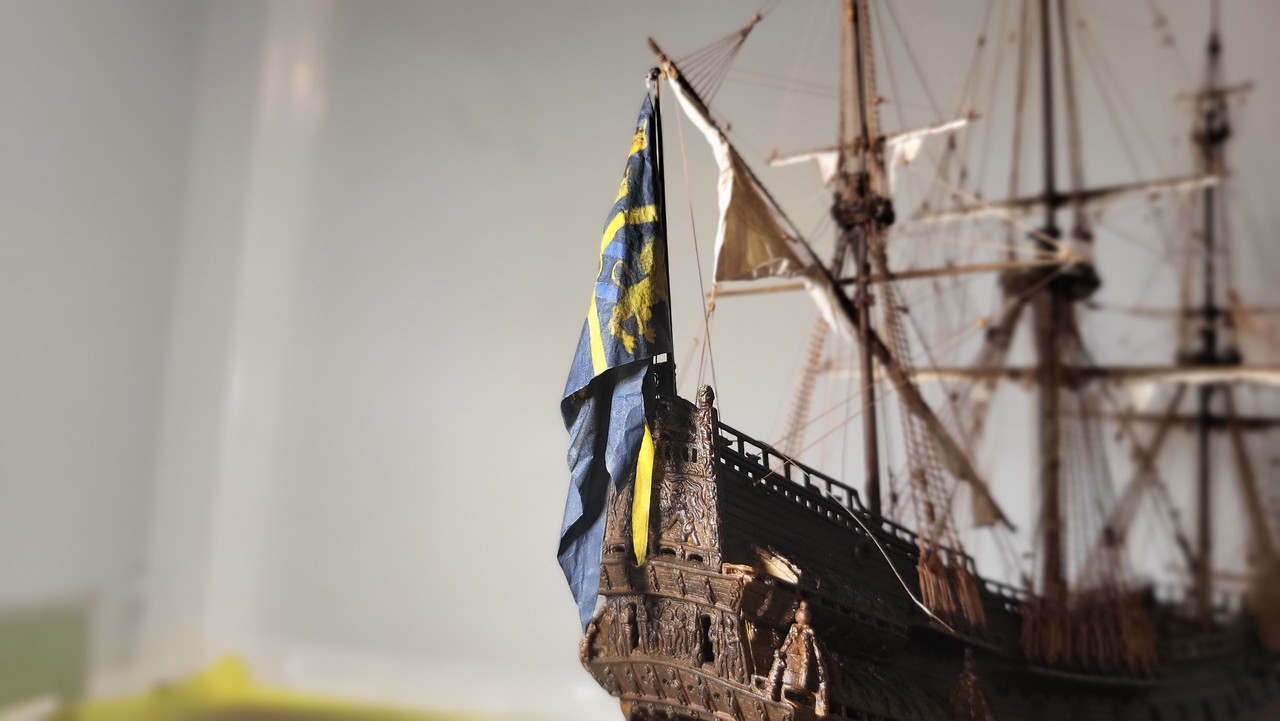
I did include the reworked mount though, I attached the toggle at the top of the flag and ran the line to make it look like it's lead through a simulated truck and down to a cleat on one side of the staff, the lower line is lead to a cleat on the other side, all in all I feel it looks as it should with a weathered looking flag. Thanks for looking.
Michael D.
- GrandpaPhil, fmodajr, fake johnbull and 6 others
-
6
-
3
-
I will look for the artificial gold and give that a try, hopefully Michael's will have it, thanks for that tip Kirill. Patrick I was actually checking out your lantern the other day, very, very nice job of it by the way👍. I originally added wings but the result looked more like flowers, so I removed them inspired by yours.
Michael D.
-
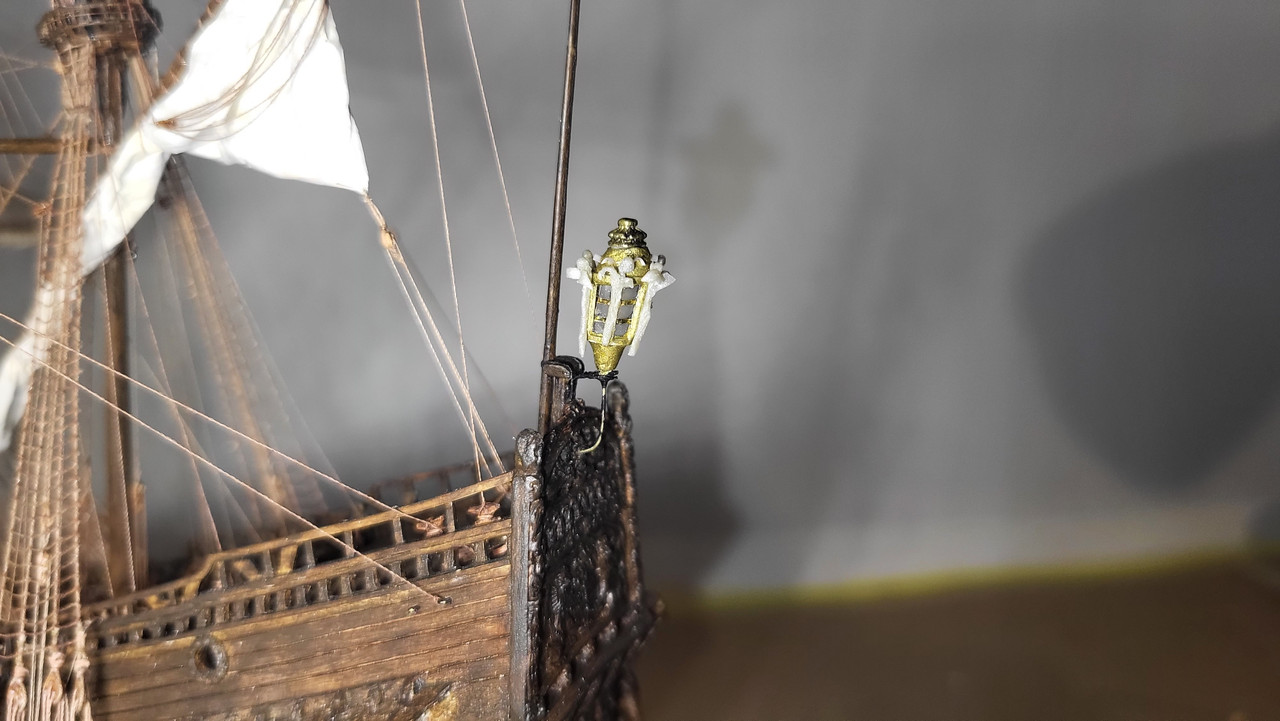
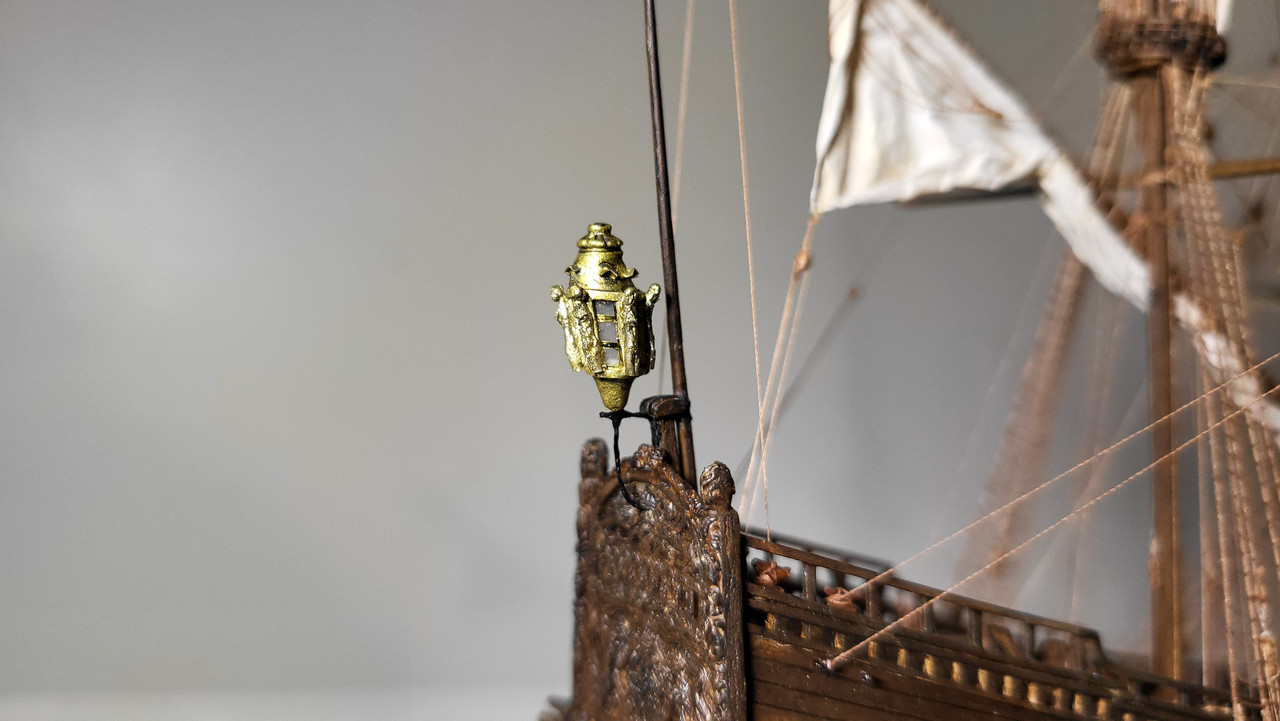
You do bring up a valid point Kirill but I think once the flag is installed it'll partially be hidden anyway. The lantern is still a WIP at this point as I want to add some detail to the lower section and tone the gold down just a bit to achieve a more metallic bronze look and maybe try to add the mesh to the panes, we'll see how that goes but I do want it stand out. As always gentlemen your insights, compliments and critique are very much appreciated.
Michael D.
-
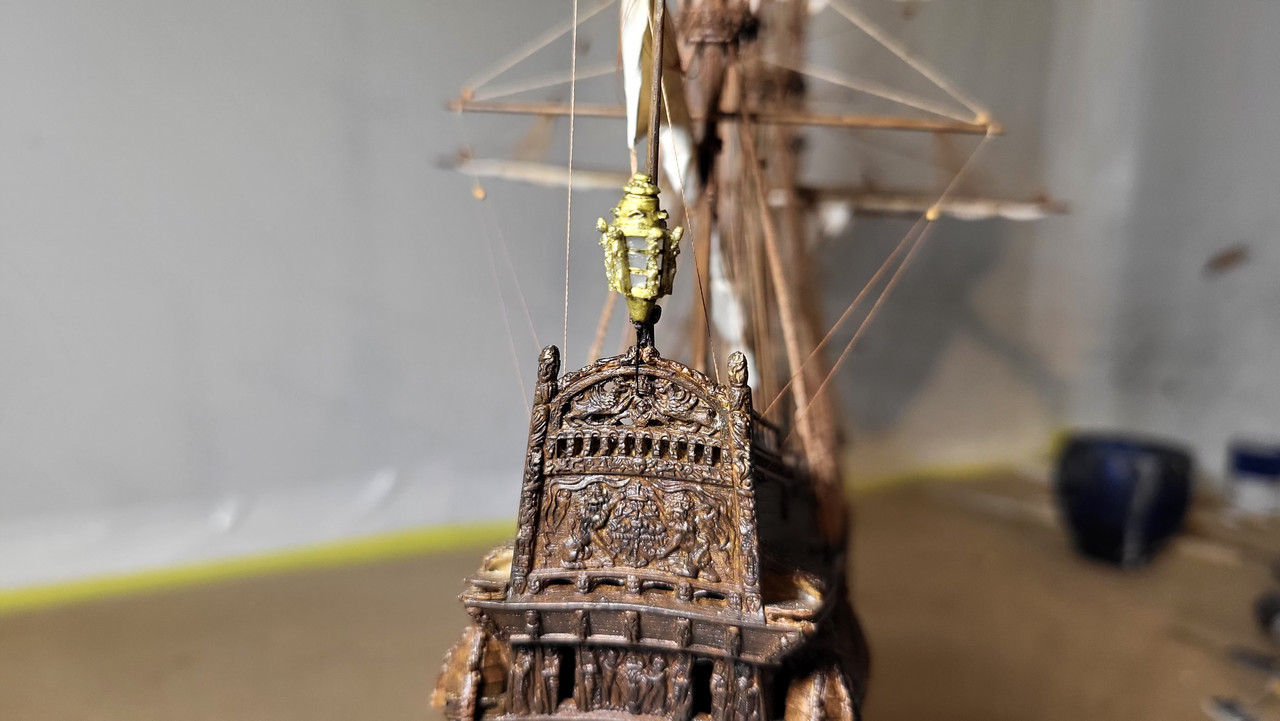
That design looks to be taken out of Landstom's book, very nice indeed. Since no lantern was ever recovered and the probability exists that it may never have been installed, we can only speculate what it actually looked like, so I figured I could use some artistic license, still some touch up left to do but I'm a lot more pleased with this rendition, I added some styrene to the vertical grids then created the sculptures from Sculpey clay , for the vents I used paper. Thanks for looking.
Michael D.
- fake johnbull, scrubbyj427, Jeff T and 4 others
-
6
-
1
-
Hi Kirill,
I could very well continue work on the lantern and make it more ornate but still on the fence on whether I want to display it, maybe just the mount. Regarding the brace pendants you are correct about the blocks stropped with a loop but really tough to do with 1.5mm blocks, I needed to simulate them instead and I believe it looks convincing enough at this scale.
Michael D.
- Hubac's Historian, shipman, Baker and 2 others
-
5
-
With the starboard braces and bowlines completed I needed to fabricate the taffrail carving, using sculpey modeling clay this is what I came up with. Also, I added some detail to the Ensign staff cap.
For the lantern I used a tapered CA applicator for the body and misc styrene for the rest, I used gold foil tape for the grids, gave all gold a wash of black, then gloss coated the glass area to complete.
The brackets are 28g brass wire and flattened 24g wire for the base, although far from perfect, I think it looks satisfactory.
Michael D.


Vasa By 72Nova - FINISHED - Airfix - PLASTIC
in - Kit build logs for subjects built from 1501 - 1750
Posted
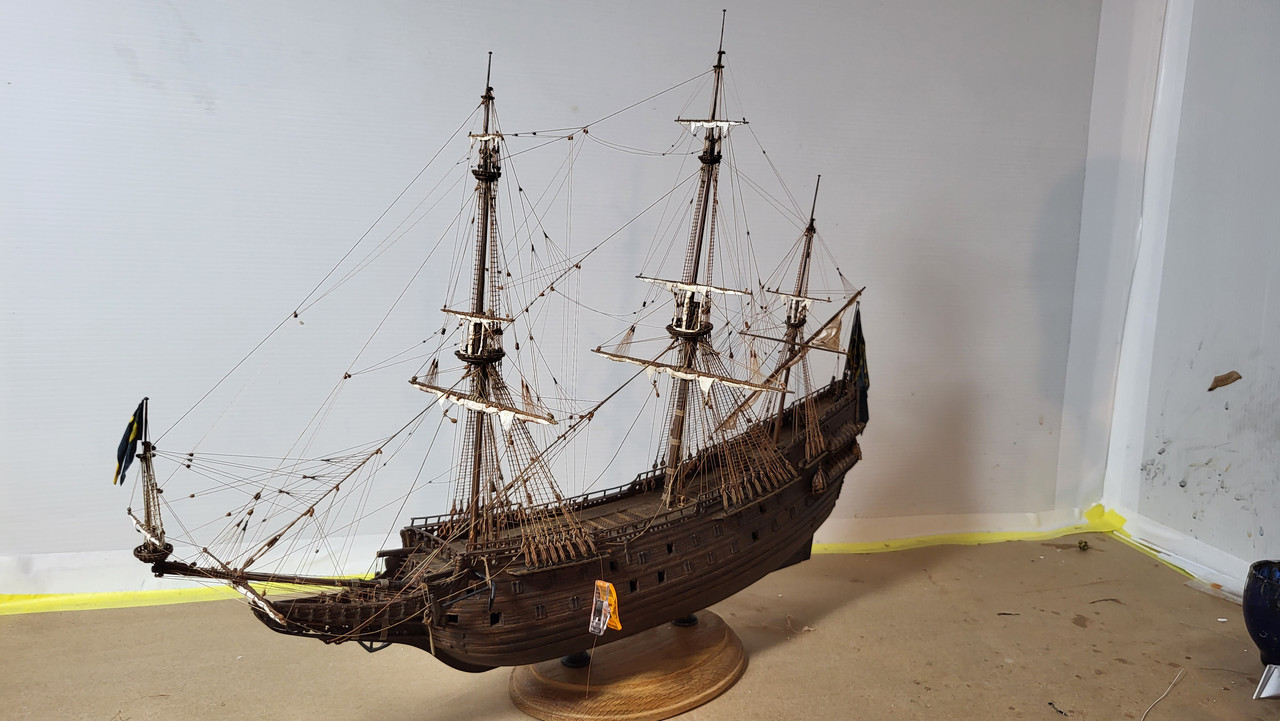
I finally completed the portside gallery and with that, this build is completed, I just want to extend my sincere gratitude to everyone's likes, comments and input that were very much appreciated.
Michael D.