palmerit
-
Posts
1,090 -
Joined
-
Last visited
Content Type
Profiles
Forums
Gallery
Events
Everything posted by palmerit
-
I clicked on it and it says Access Denied
-
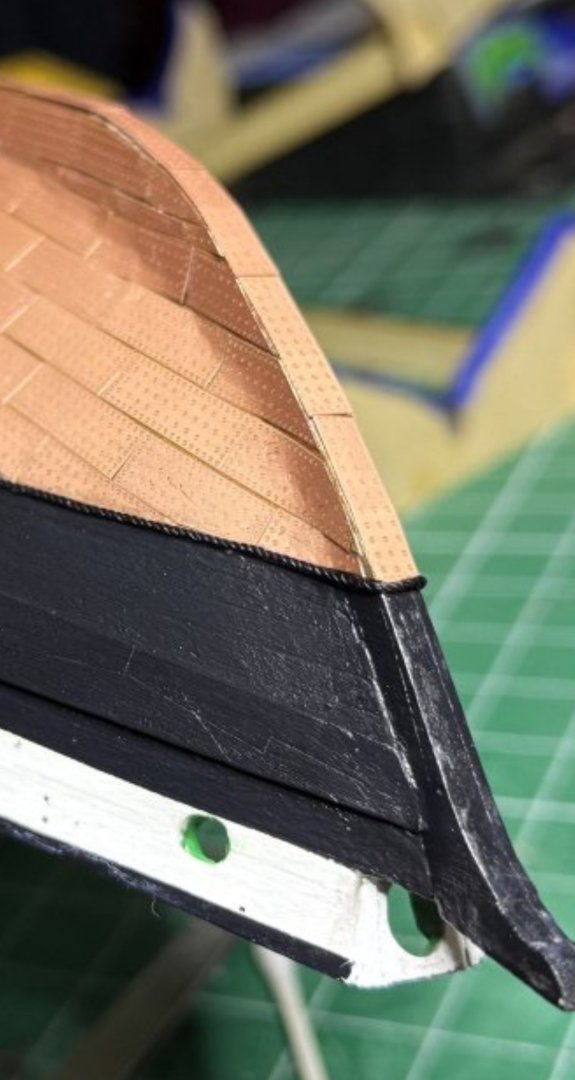
Definitely way better than my first experience planking (also on the Sherbourne). Smart to do a smaller, simpler, and less expensive attempt on the Sherbourne before trying to tackle something large, complex, and expensive.
-
Is there something at the upper end of the trimmed copper plates where it reaches the black? Rope?
-
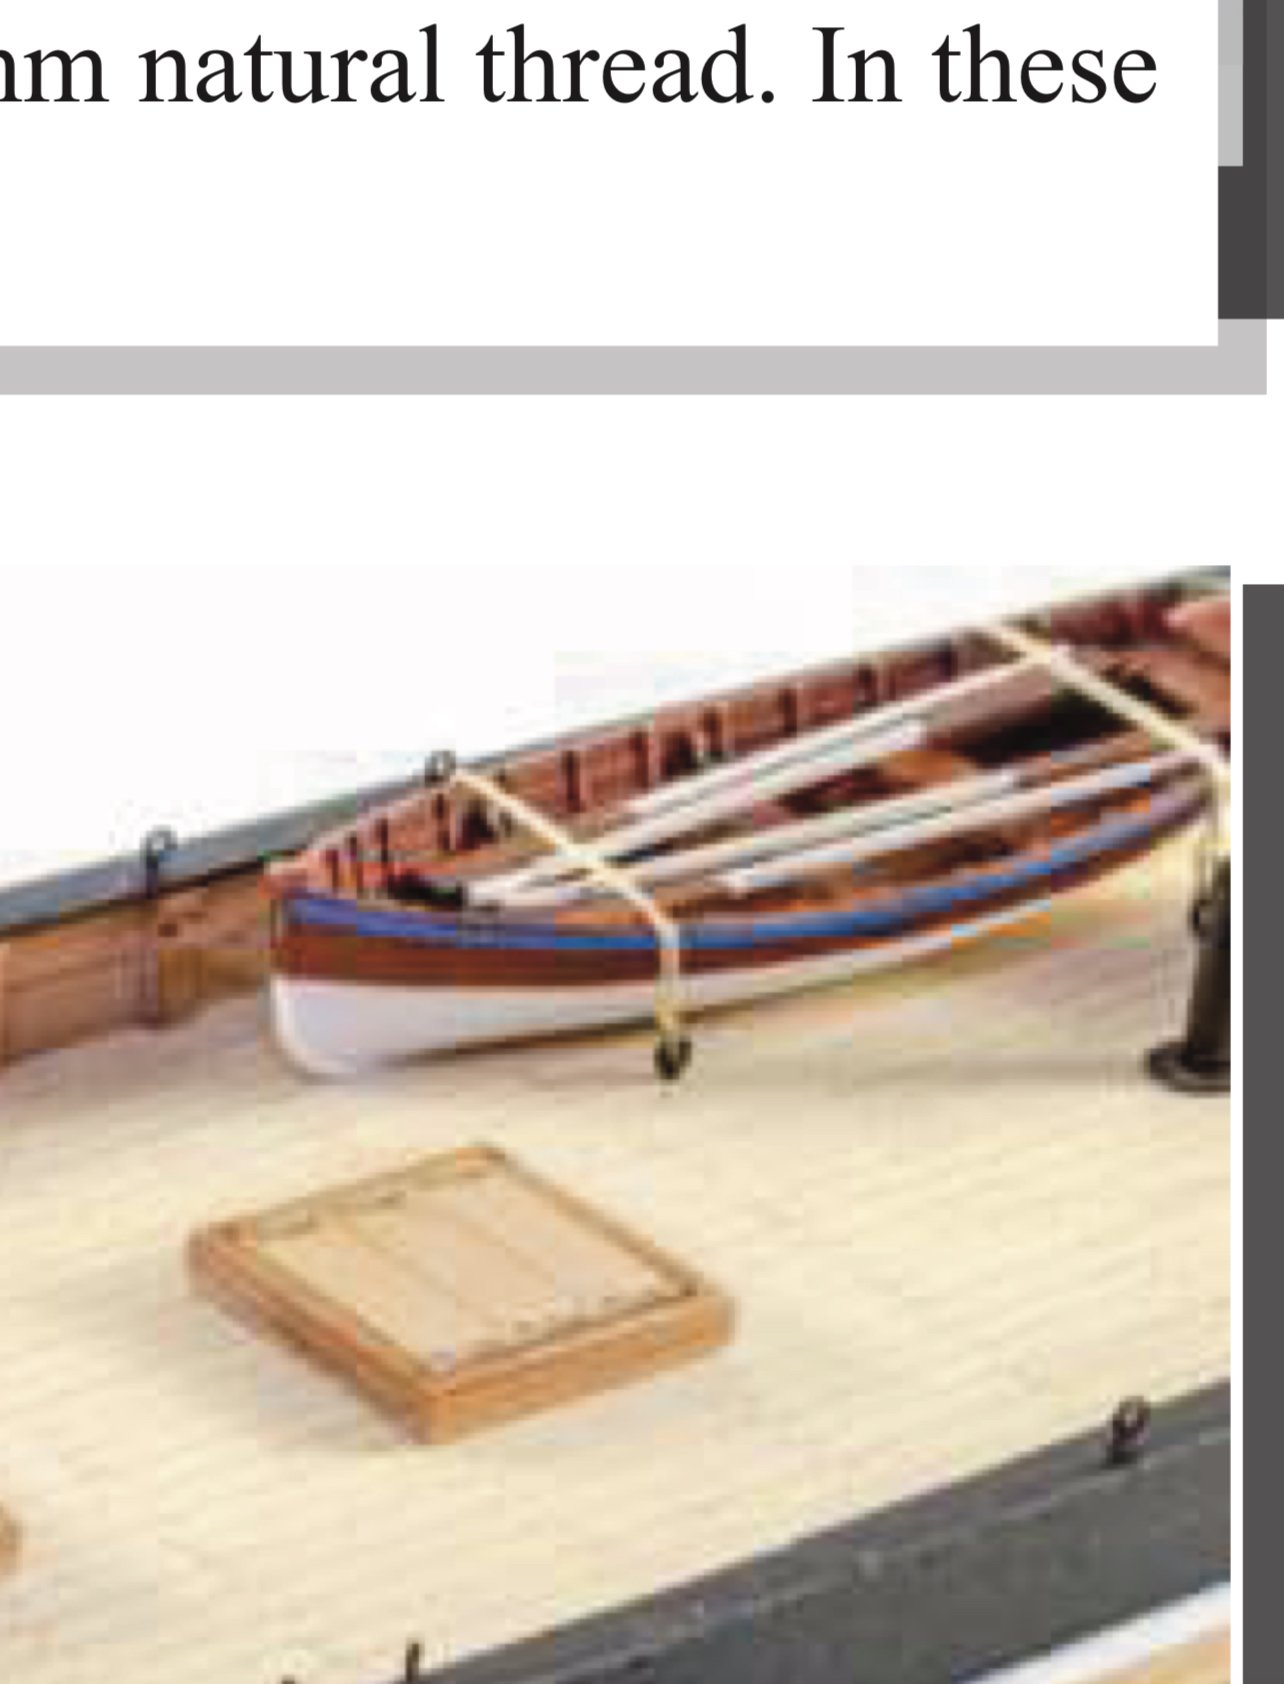
Can someone point me to the kind of knot used to lash a small boat to a deck? This is the photo from the Ranger instructions (and on @James H build log). Is a line looped through the eyebolts on both sides and then seized in a couple places?

- 133 replies
-
- 3
-

-
- Ranger
- vanguard models
- (and 1 more)
-
My understanding - which is incomplete - is that you can glue (wood glue) to wood that has been treated with shellac. I know you can't glue (wood glue) to wood that has been painted (and while you could presumably use CA glue on something that has been painted, my understanding is that you'd be gluing to the paint only). I don't know what the restrictions are on gluing to wood that has been treated with Danish oil or Tung oil.
-
Yeah, that's what I've usually done. I guess I'm wondering what other options there might be that I can test. I saw another post looking at different shellac options, some of which included Bitumen of Judea (which is almost impossible to find online). That seems to be another way to darken shellac. Don't know if anyone has used it. hartem.com sells some with a hefty shipping cost.
-
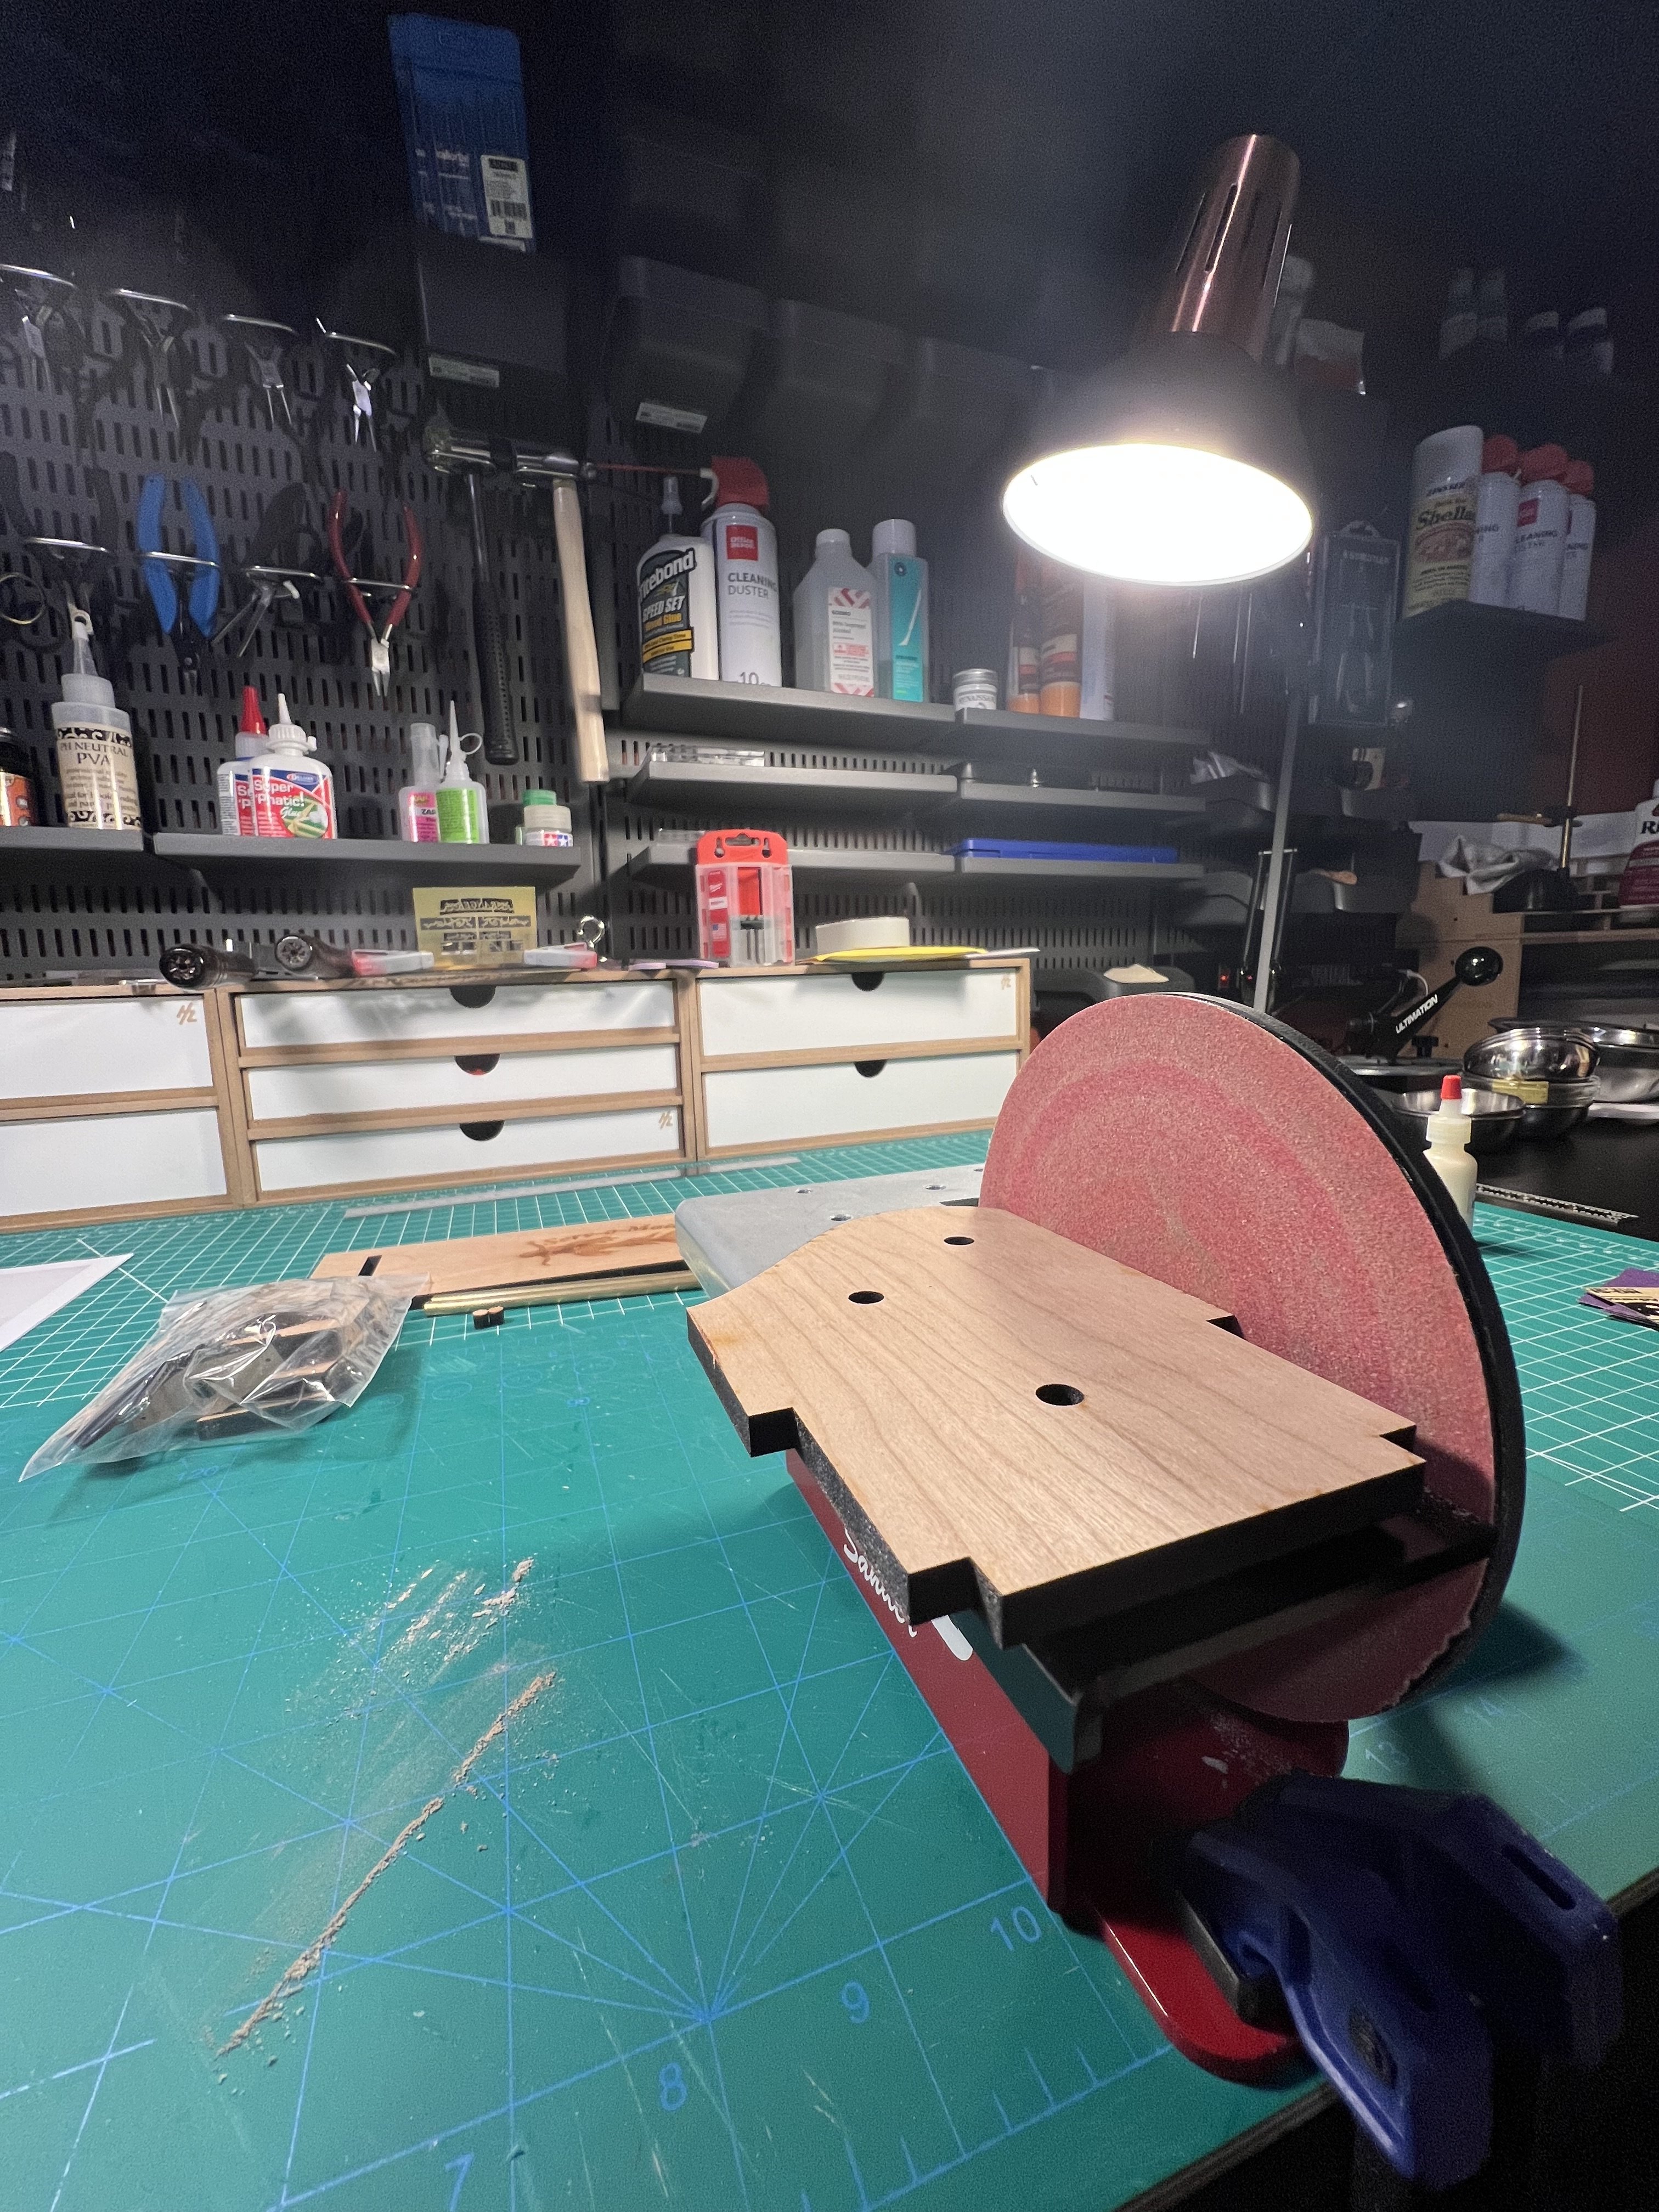
Their sander and their chopper both work great. I use them a lot. The sander makes things quicker and it’s nice to be able to pull it out whenever I need it (as opposed to an electric one that I’d need to go to the cellar to use). It also keeps edges square while sanding where sanding by hand would round the sides of a piece - especially useful when trying to sand char off the edges. I often have the adjustable square removed to give more room to sand larger pieces. Clamping it down to lets you sand quickly. But I often use it for small work without clamping.
- 71 replies
-
- 2
-
-
- grand banks dory
- midwest products
- (and 2 more)
-
Question about Swift pilot boat stem piece
palmerit replied to Pastor Wes's topic in Wood ship model kits
Not quite sure what piece is fitting to where. I’d get the hull shaped well with sanding and filler and then see about getting this piece to fit right - that could mean reshaping this piece. It’s often that pieces don’t fit quite right and you need to do various about of cutting, reshaping, using fillet, resanding, or even completely recreating a piece for another piece of wood. You’re lucky or very skilled if pieces fit as if they’re Lego pieces. I’ve usually had to bend, sand, reshape pieces. -
I’m working on the Model Shipways Philadelphia and following along with Olha’s build on YouTube. She noted that with soft basswood any stain will look “dirty” unless you do something to it. One option is using Minwax "Pre-stain Wood Conditioner" before adding the (Minwax) stain. I’m right that you would never first put shellac and then stain? That would not work (in the same way that you would not first put sanding sealer and then stain)? Olha seems to recommend putting on very thin CA glue (she says “cyanocravate”, which is maybe a European or Ukrainian nsme). Has anyone tried that? Are there other recommendations for doing a good stain of basswood (which most Model Shipways kits use)? Olha’s just using Shellac, but I’d like something darker). I guess another alternative would be a shellac that has color to it? Guessing that option would give some color to the basswood and not look “dirty”?
-
Agreed. It’ll probably take me another couple of models before I completely “get it”. You know you’ve really gotten the right bending in both directions (as well as chamfering the edge) when the piece of plank fits into place as if you were putting together a plastic or LEGO model.
-
Rope serving machine
palmerit replied to Capt. Kelso's topic in Modeling tools and Workshop Equipment
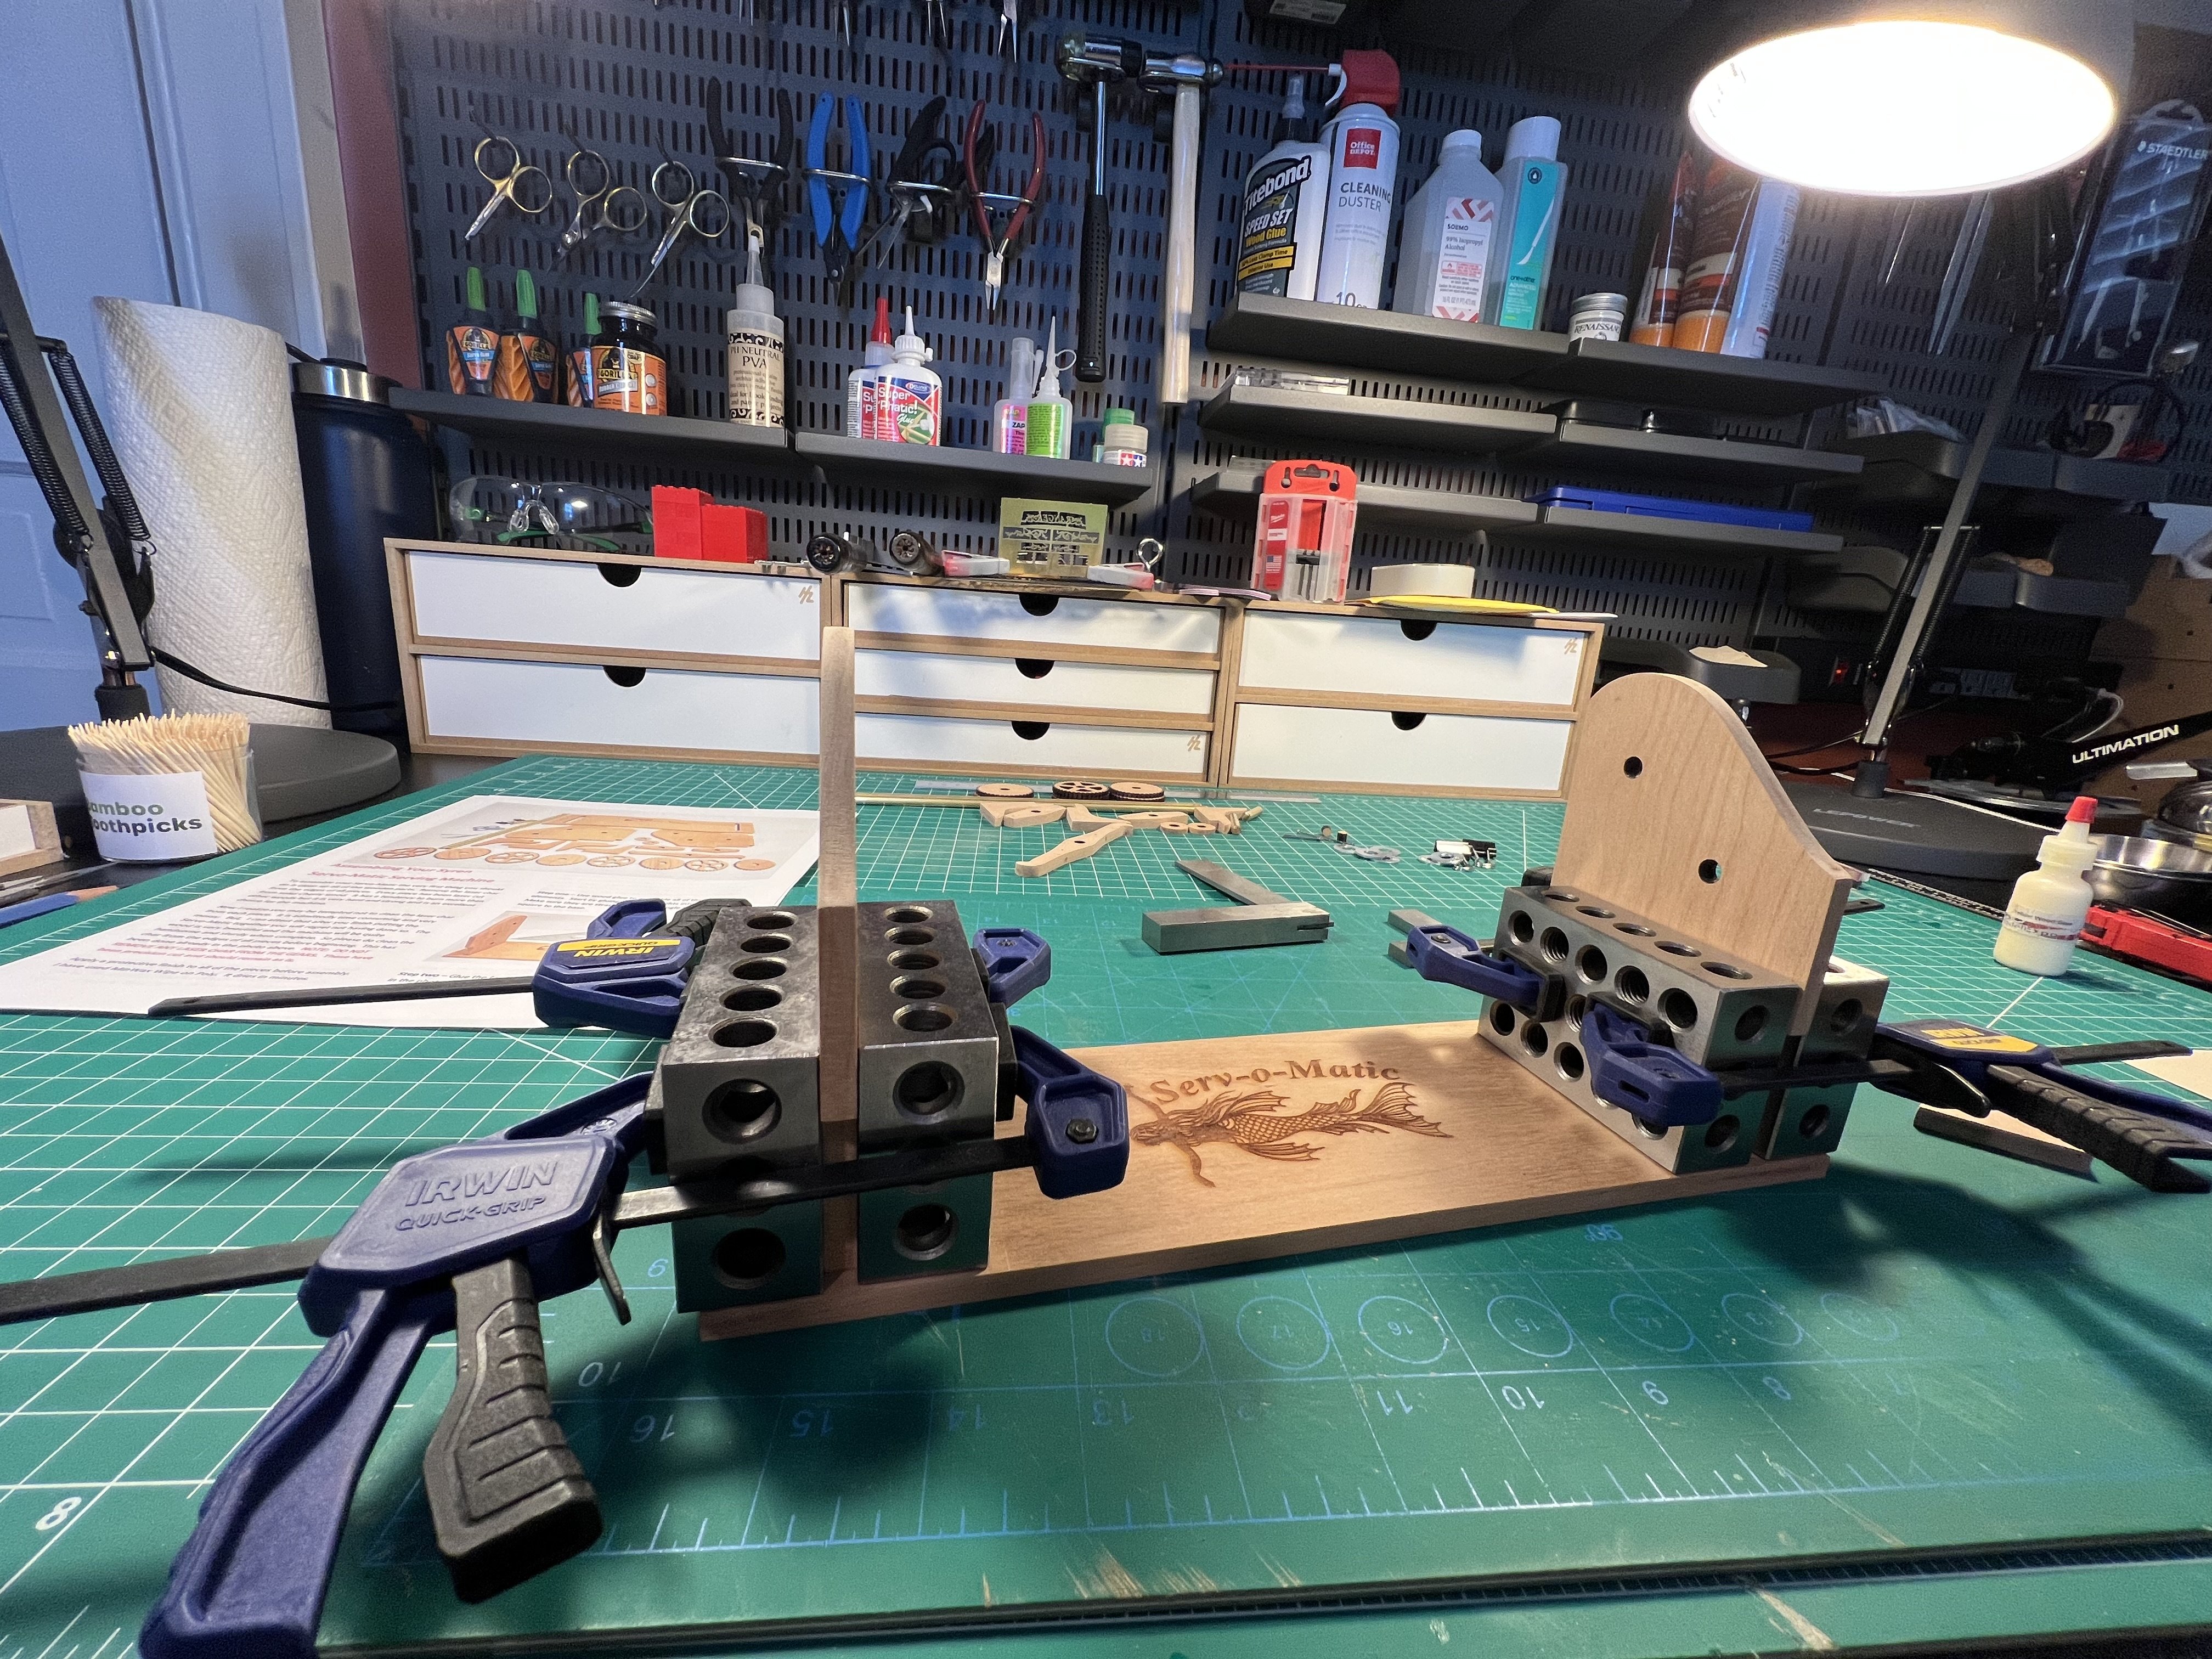
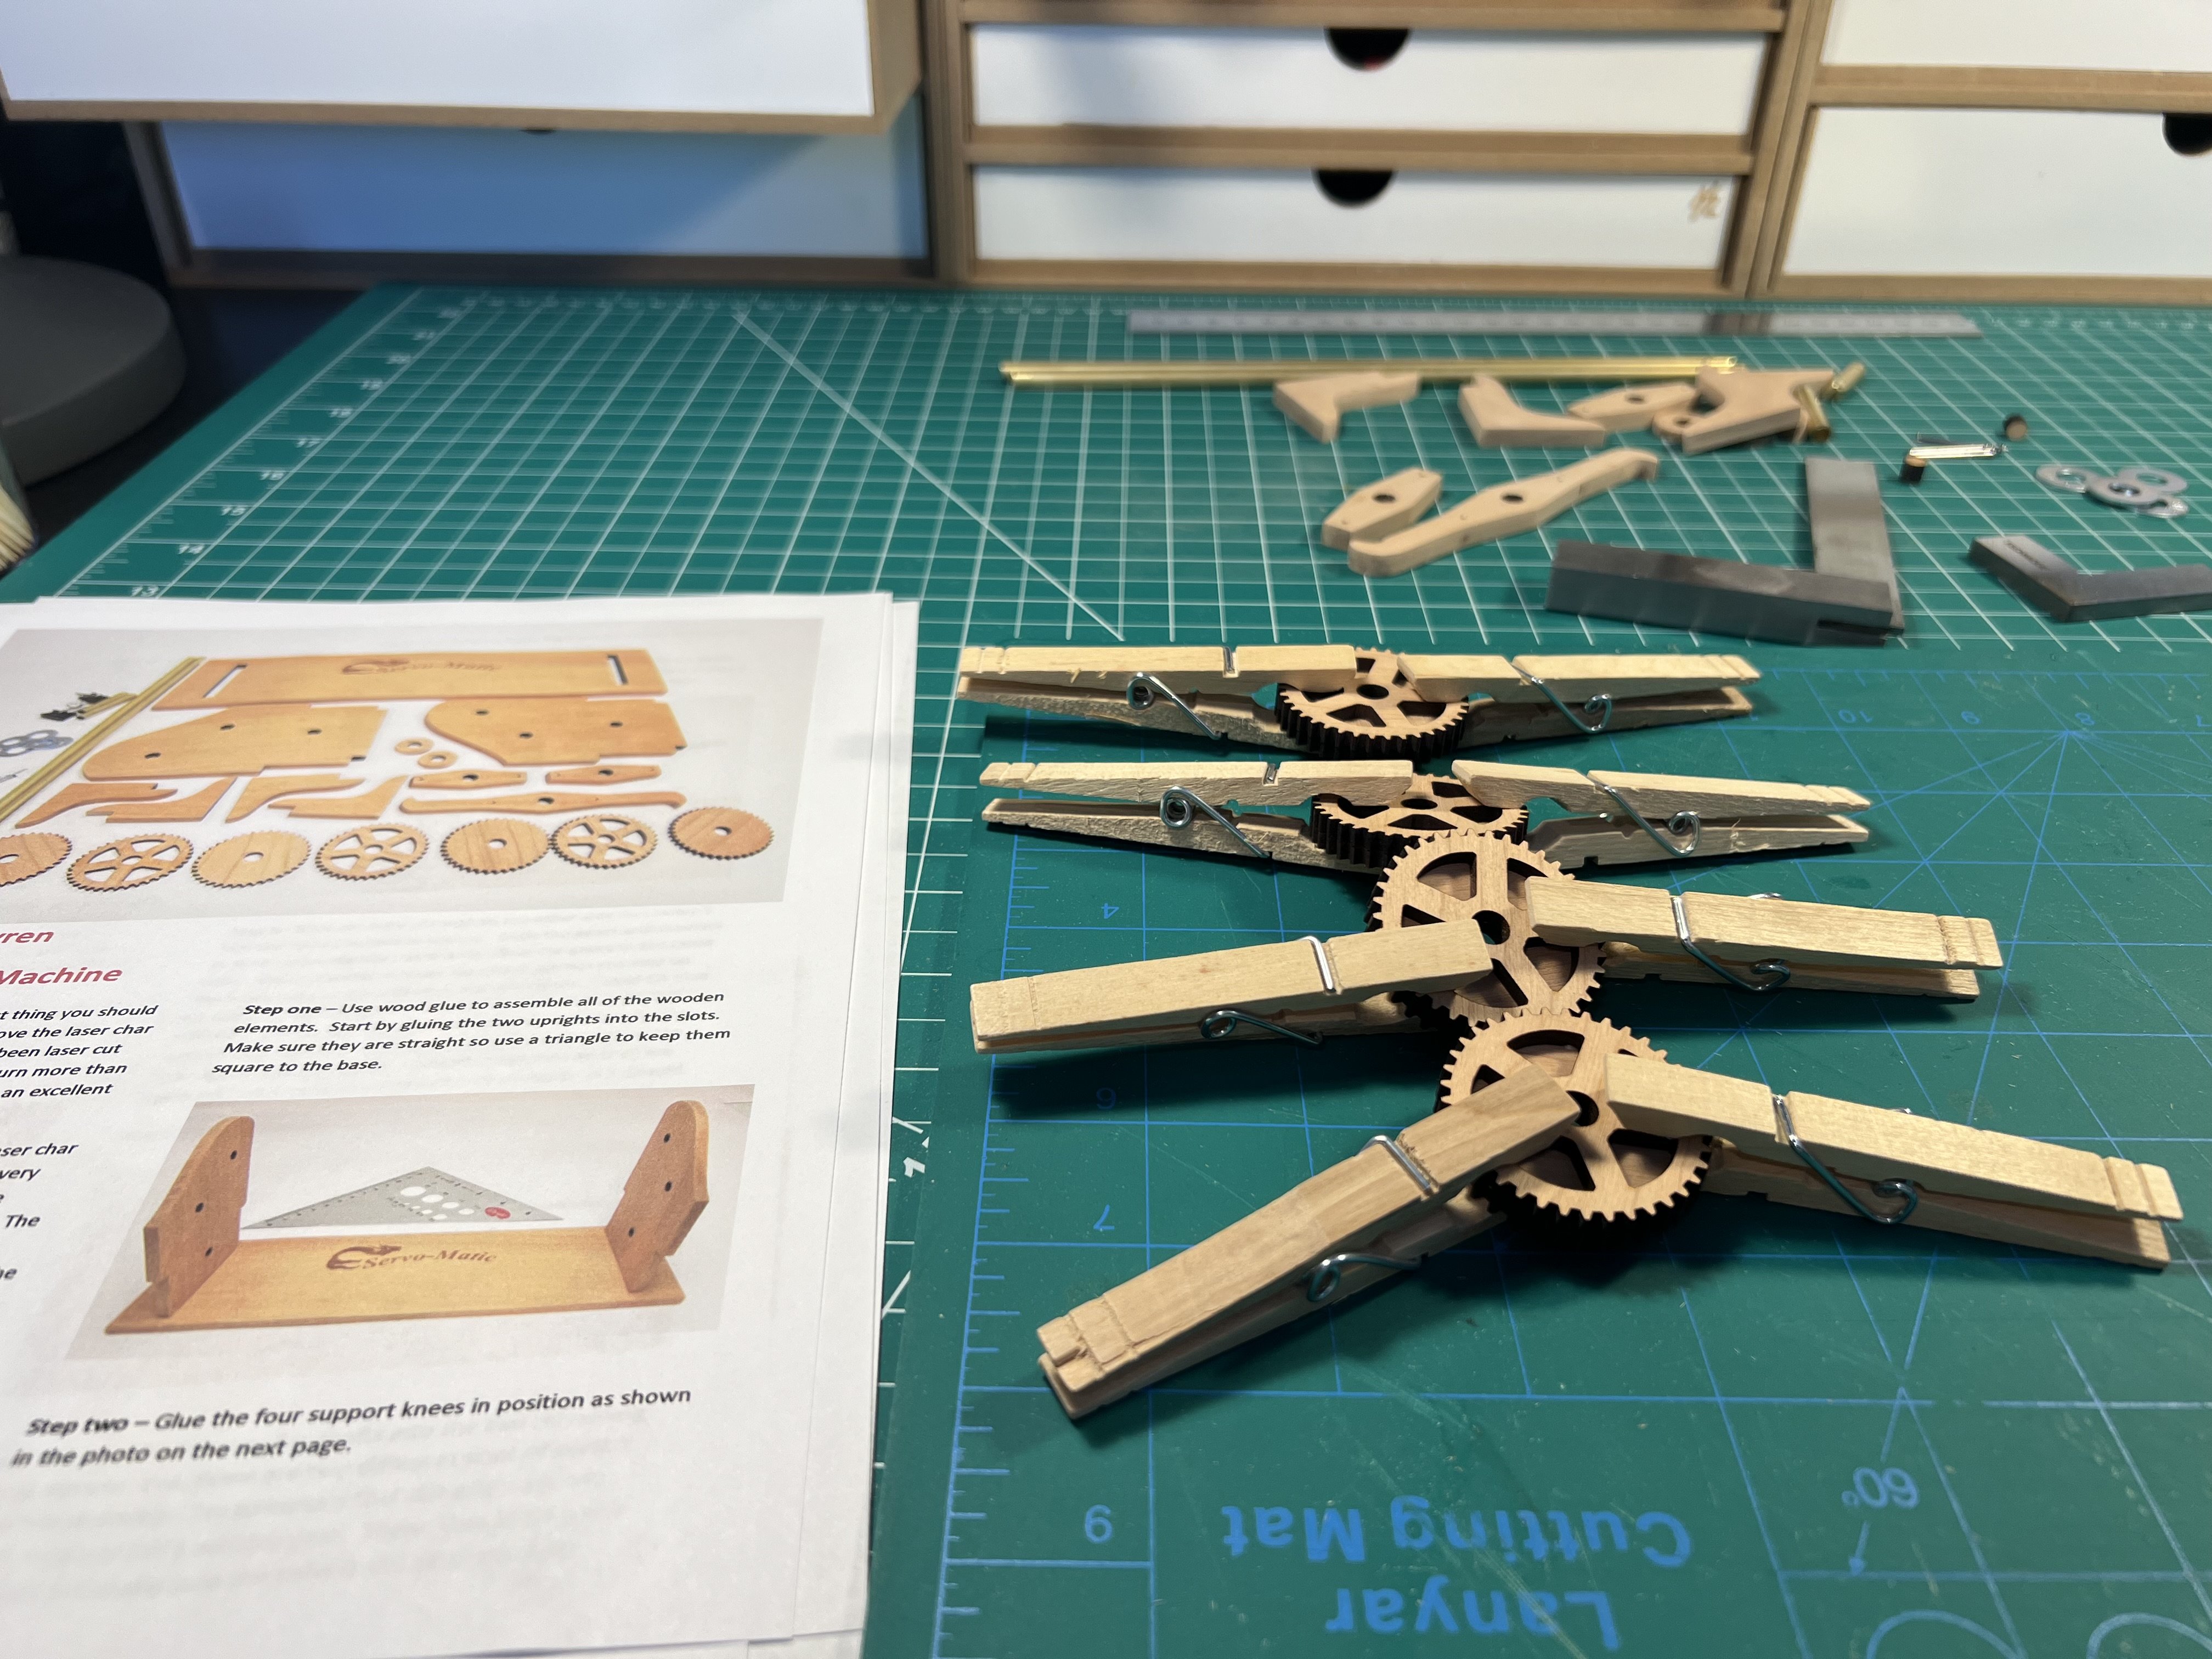
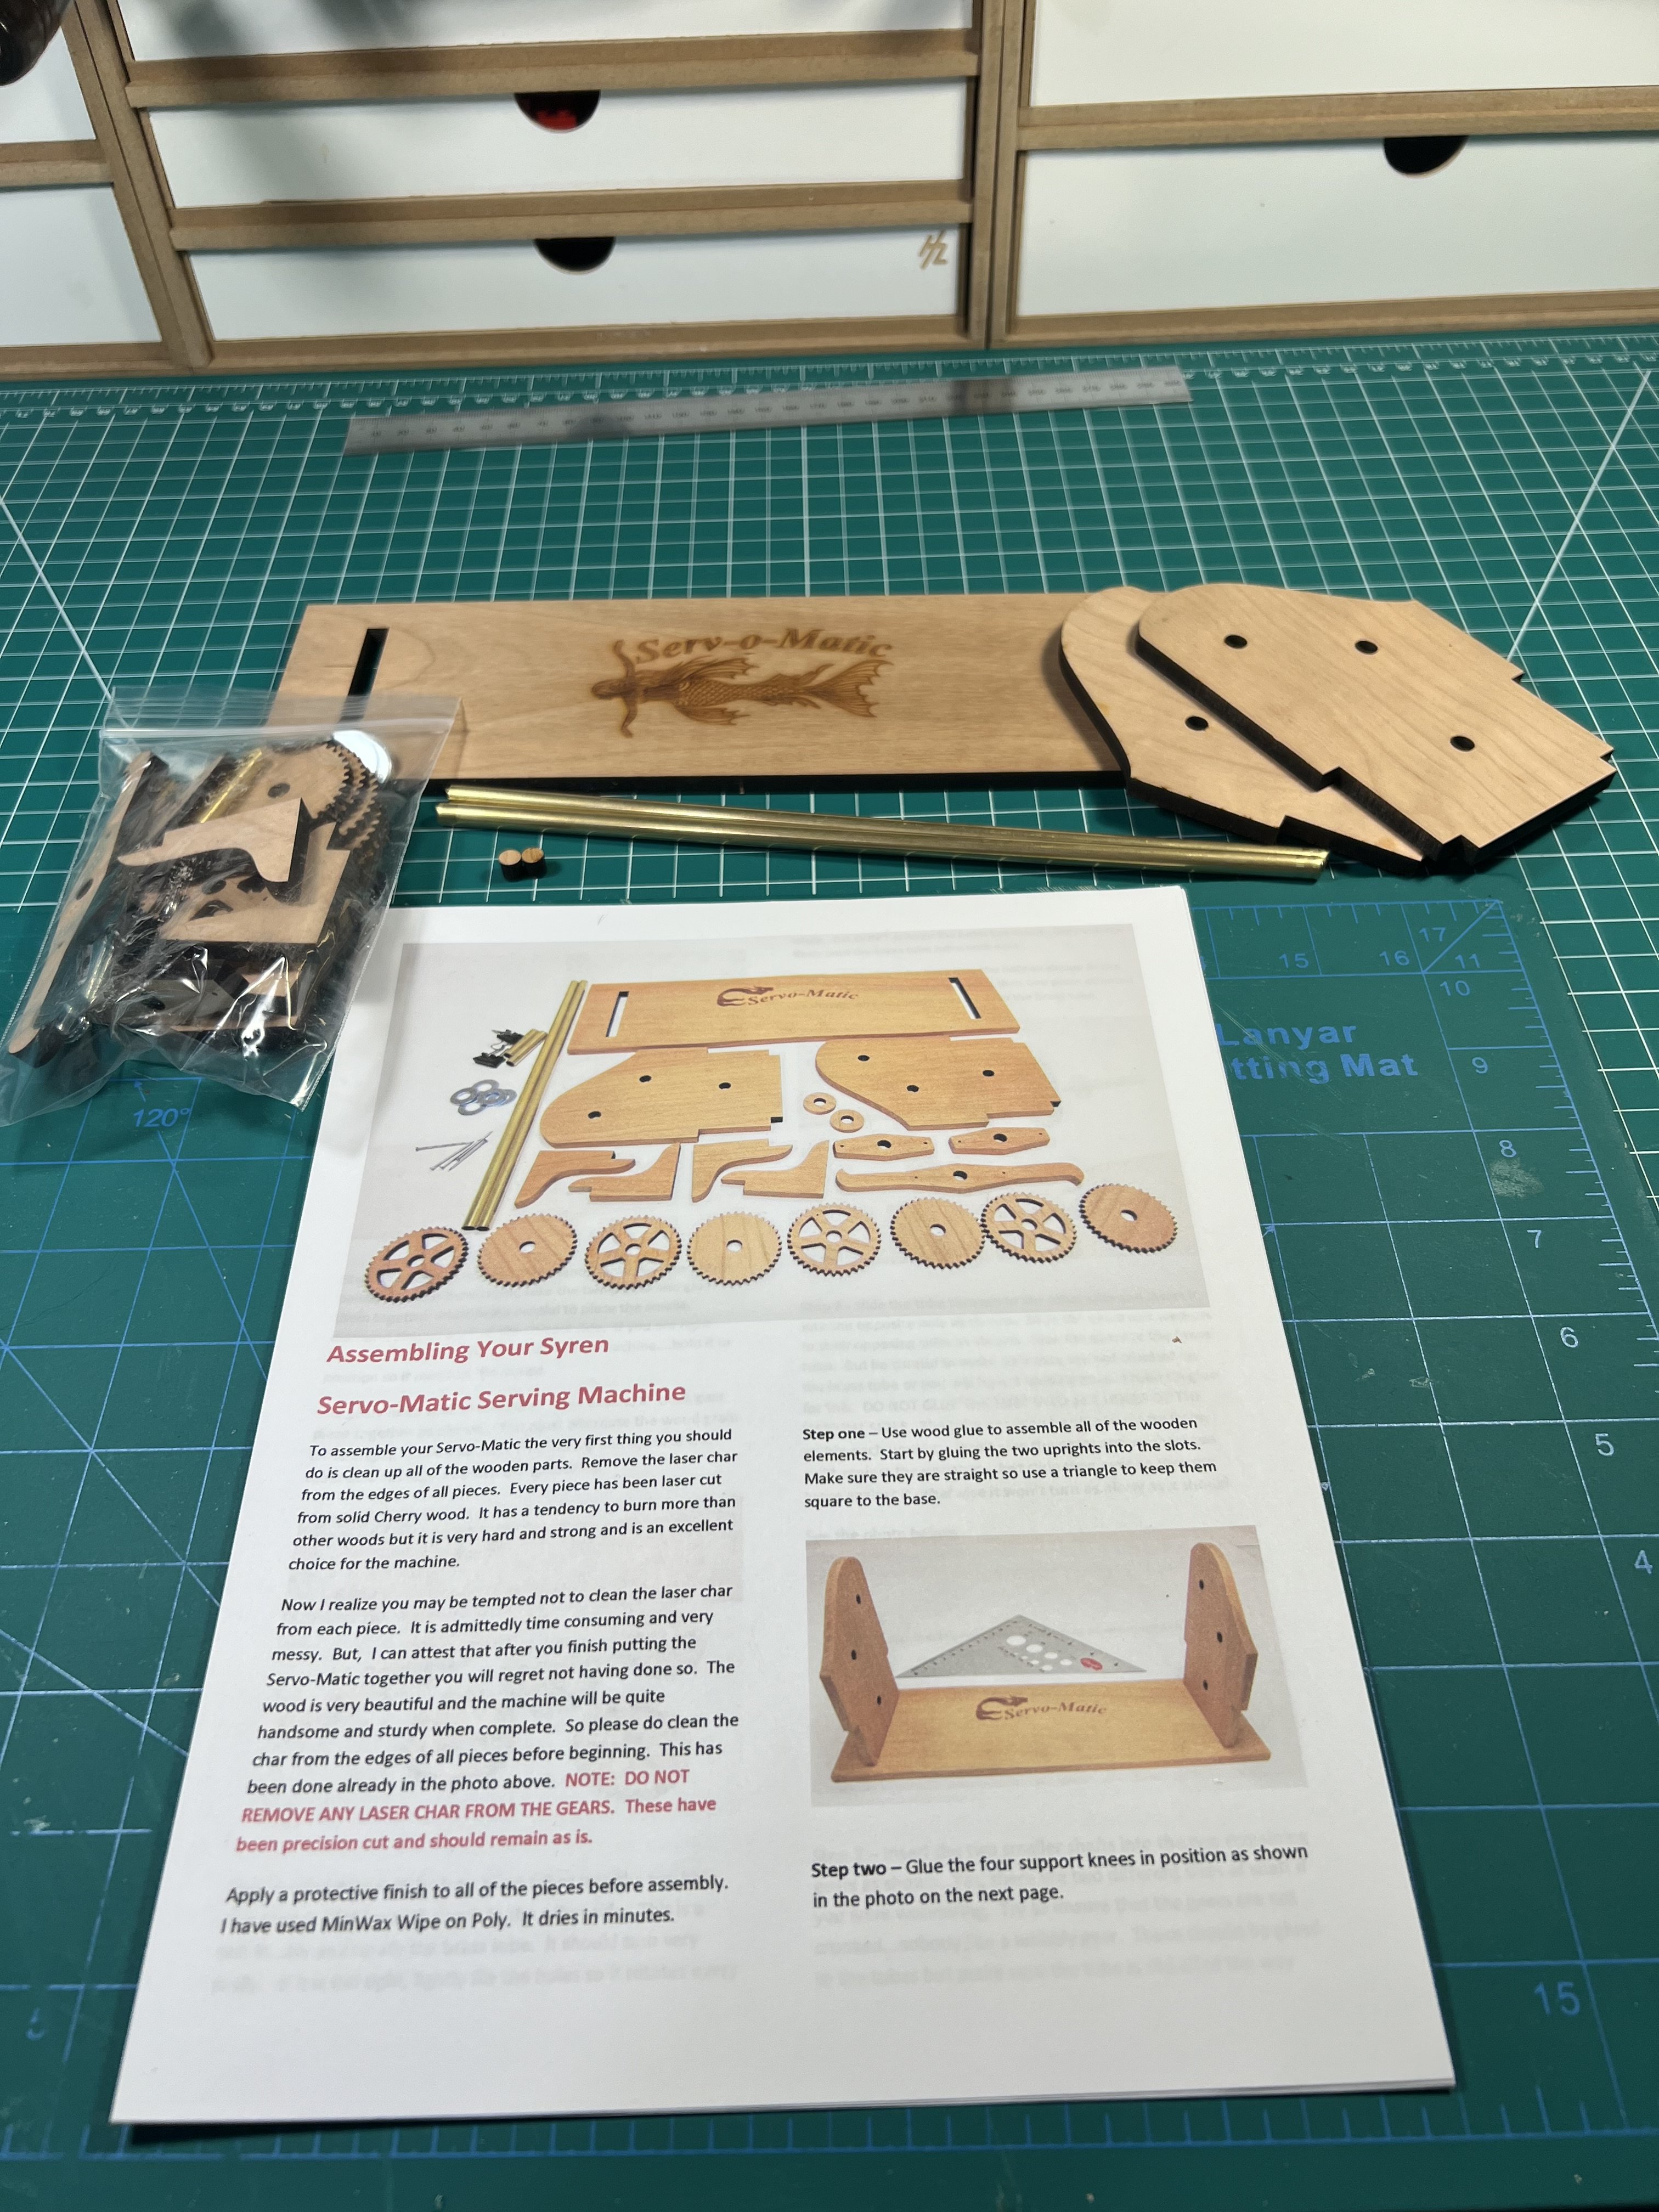
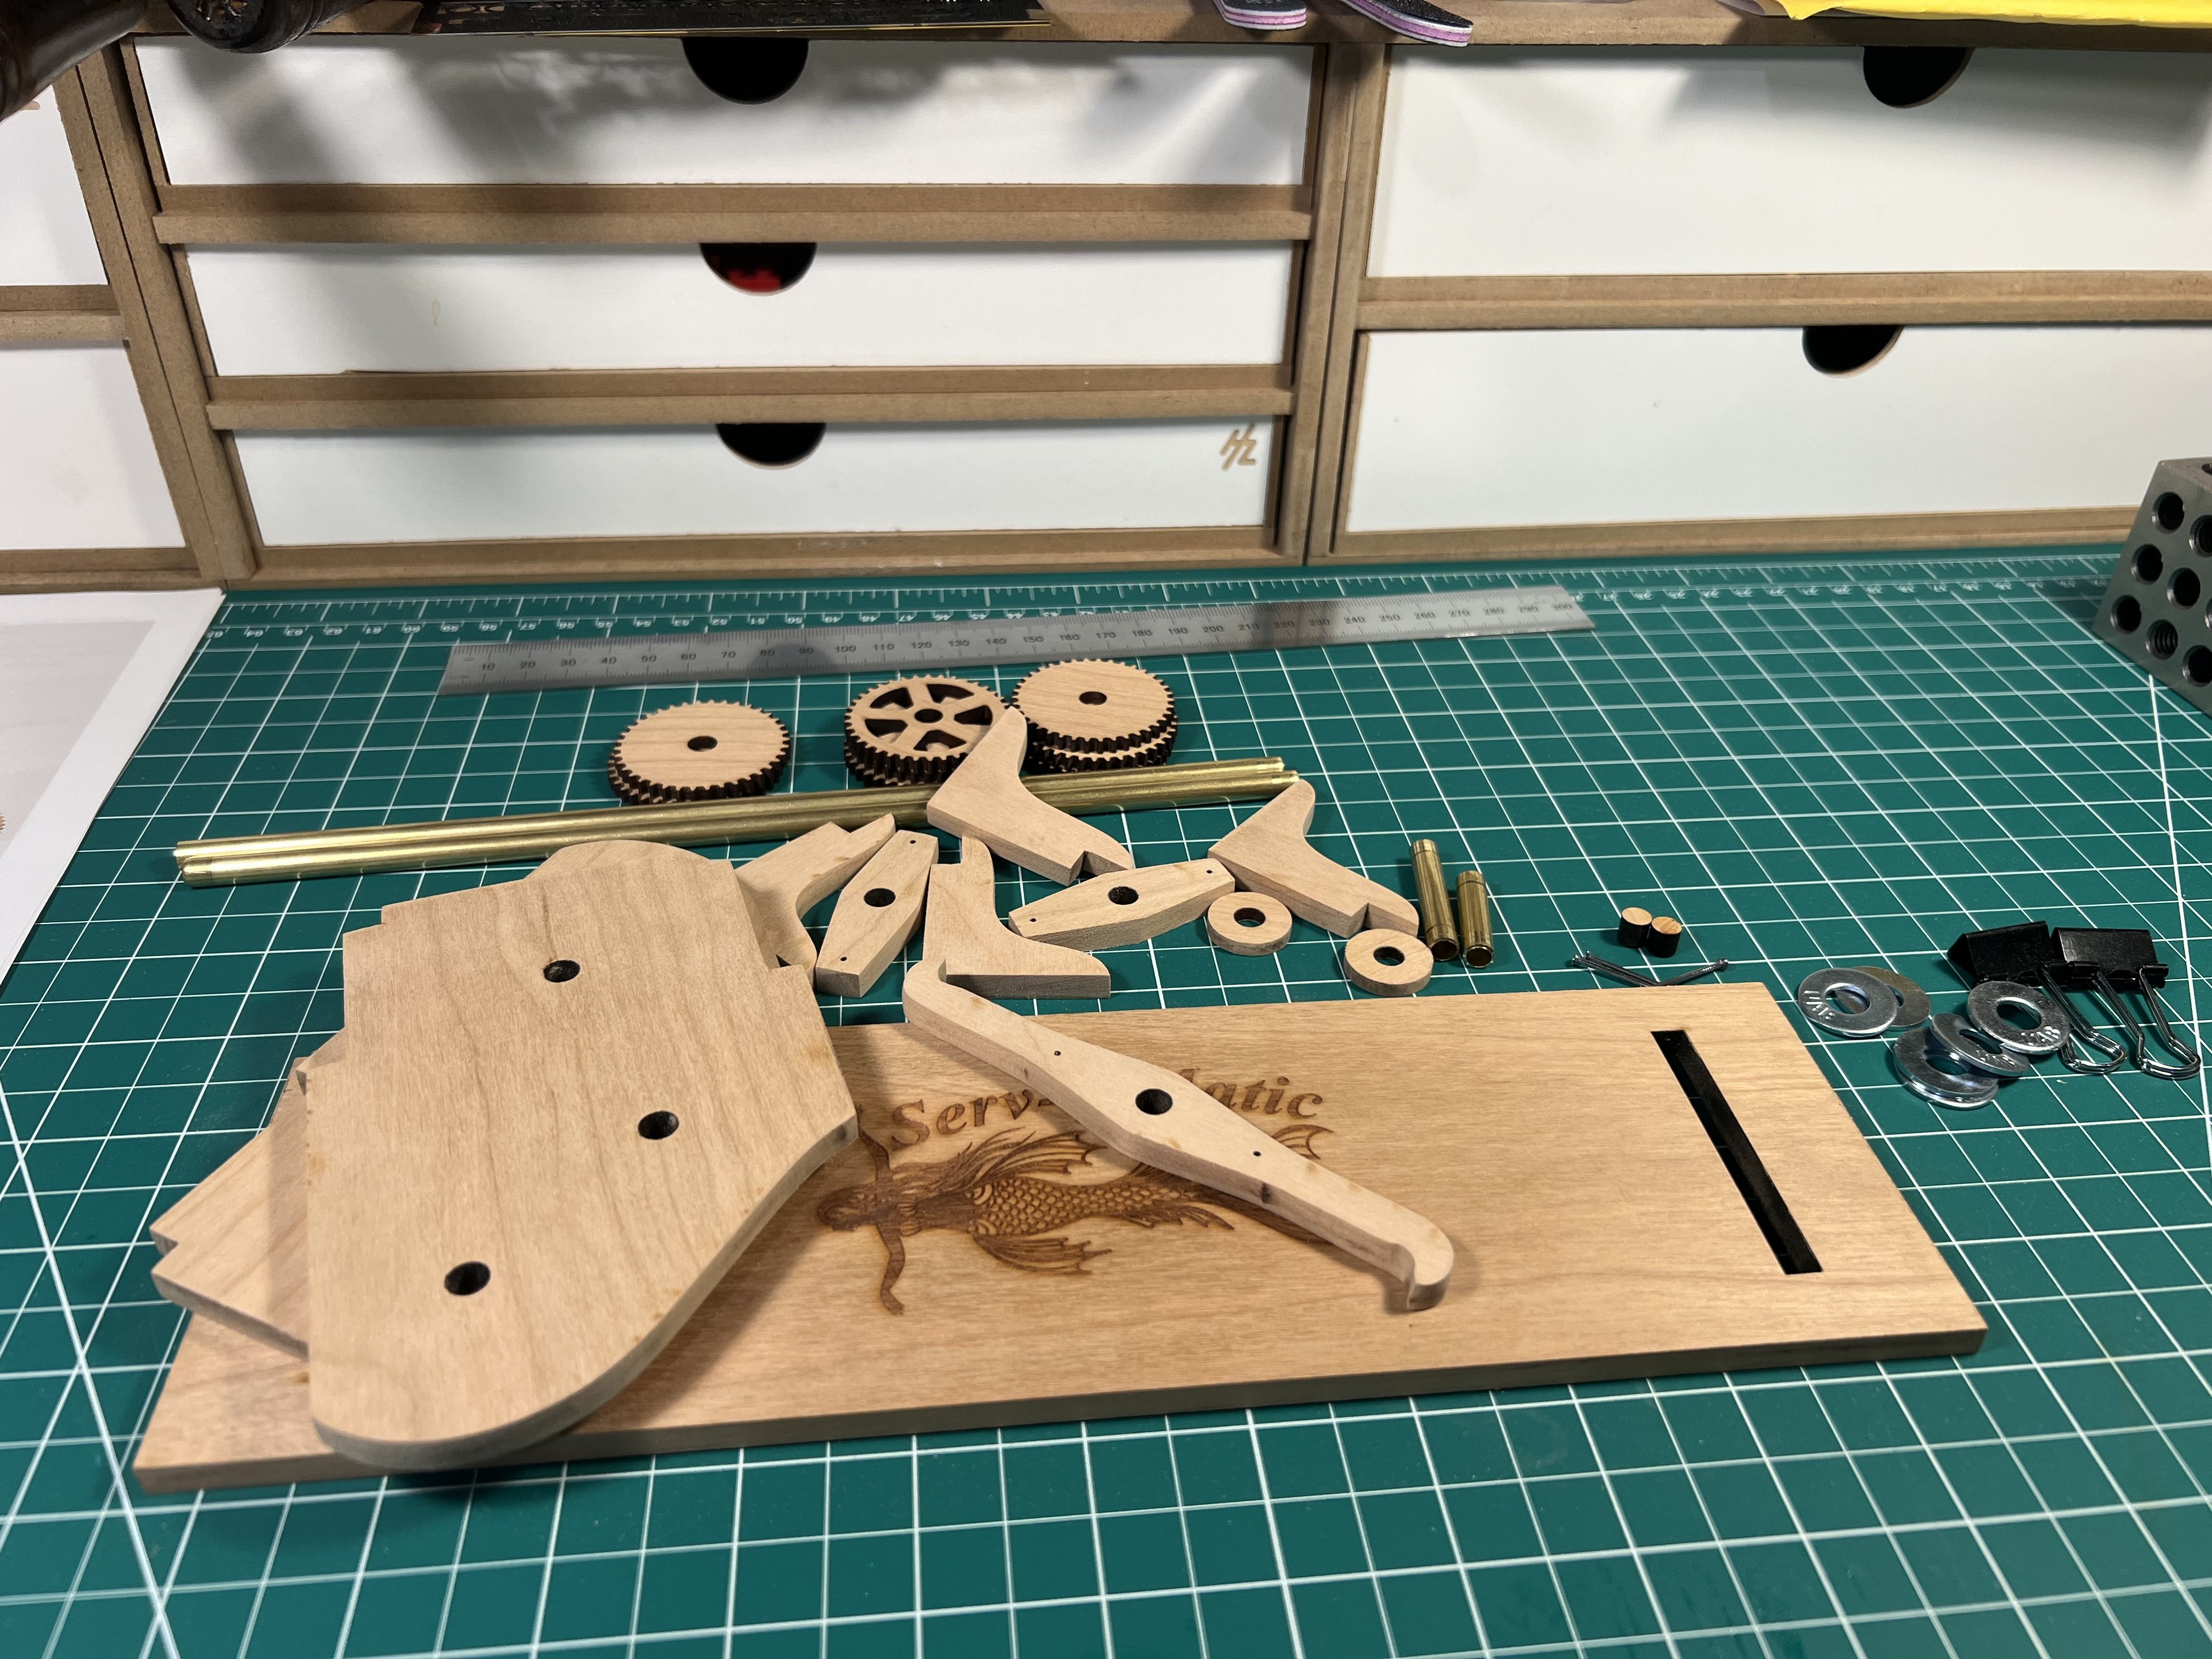
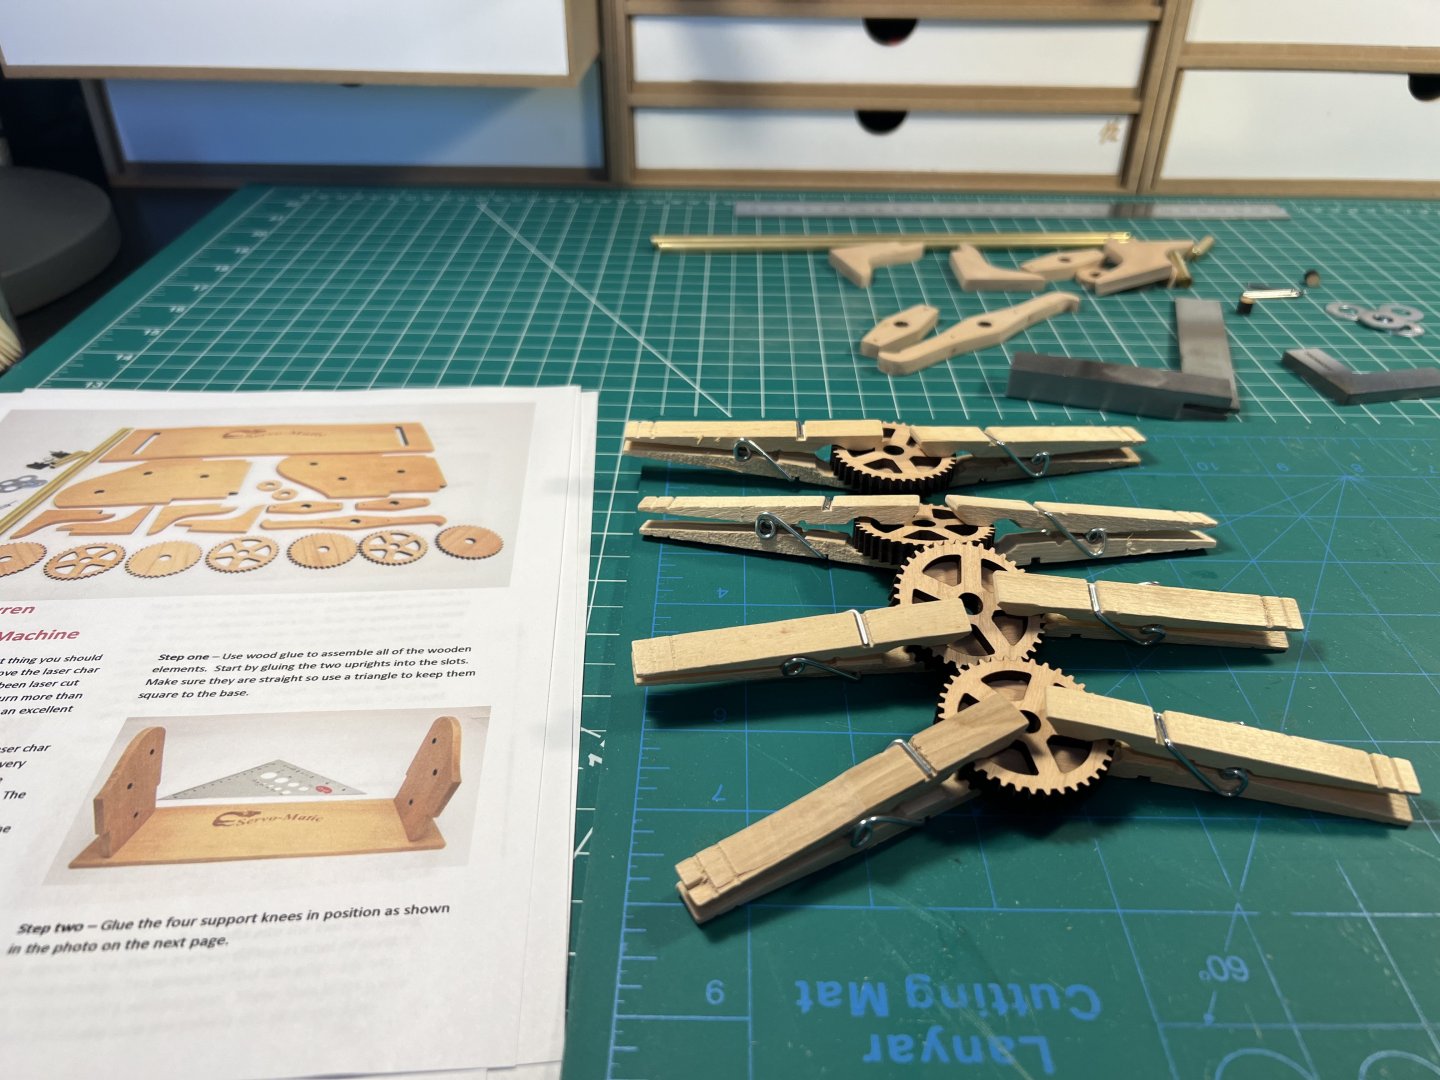
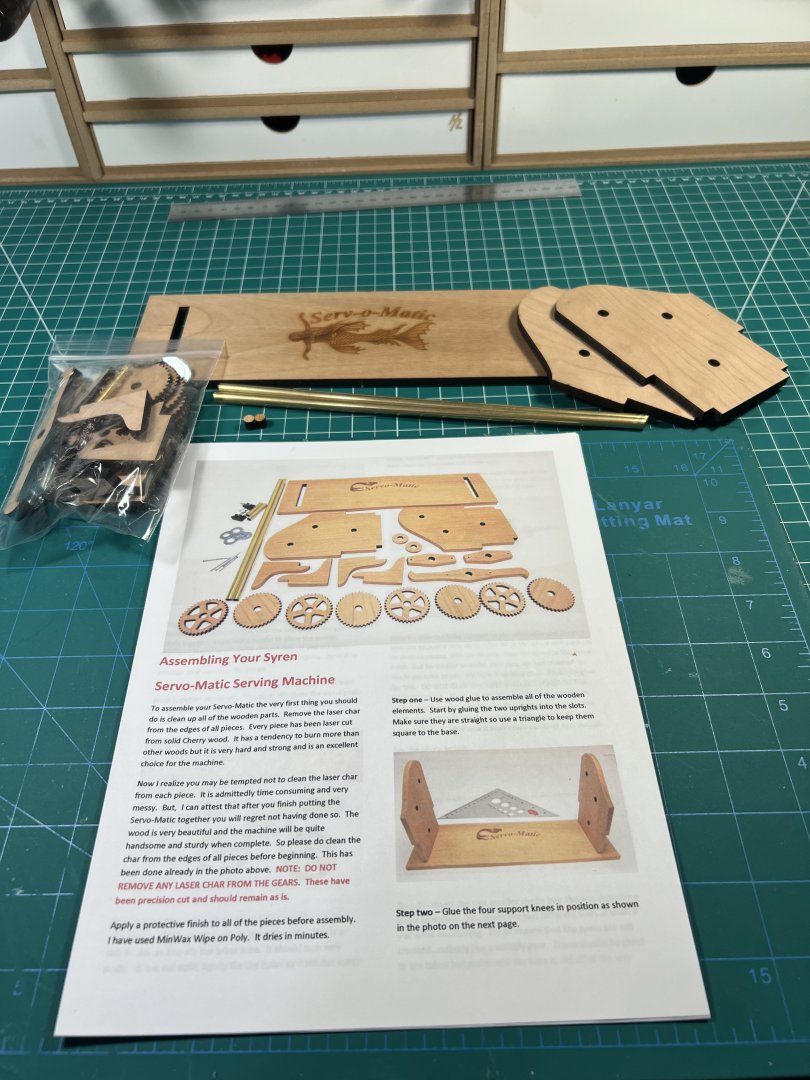
I'm in the middle of assembling the Syren Servo-Matic, so I haven't had a chance to try it. I can say that the materials are great and the instructions are clear - you need to download the instructions online since they're (understandably) not included in the actual kit. There is a video on the Syren site for using it: https://syrenshipmodelcompany.com/serving-machine.php I've seen the shipworkshop.com one recommended on here a few times. It's twice as much as the Syren one, but is metal and I think has a motor. They also have a combo serving / rope walking machine for nearly $500. -
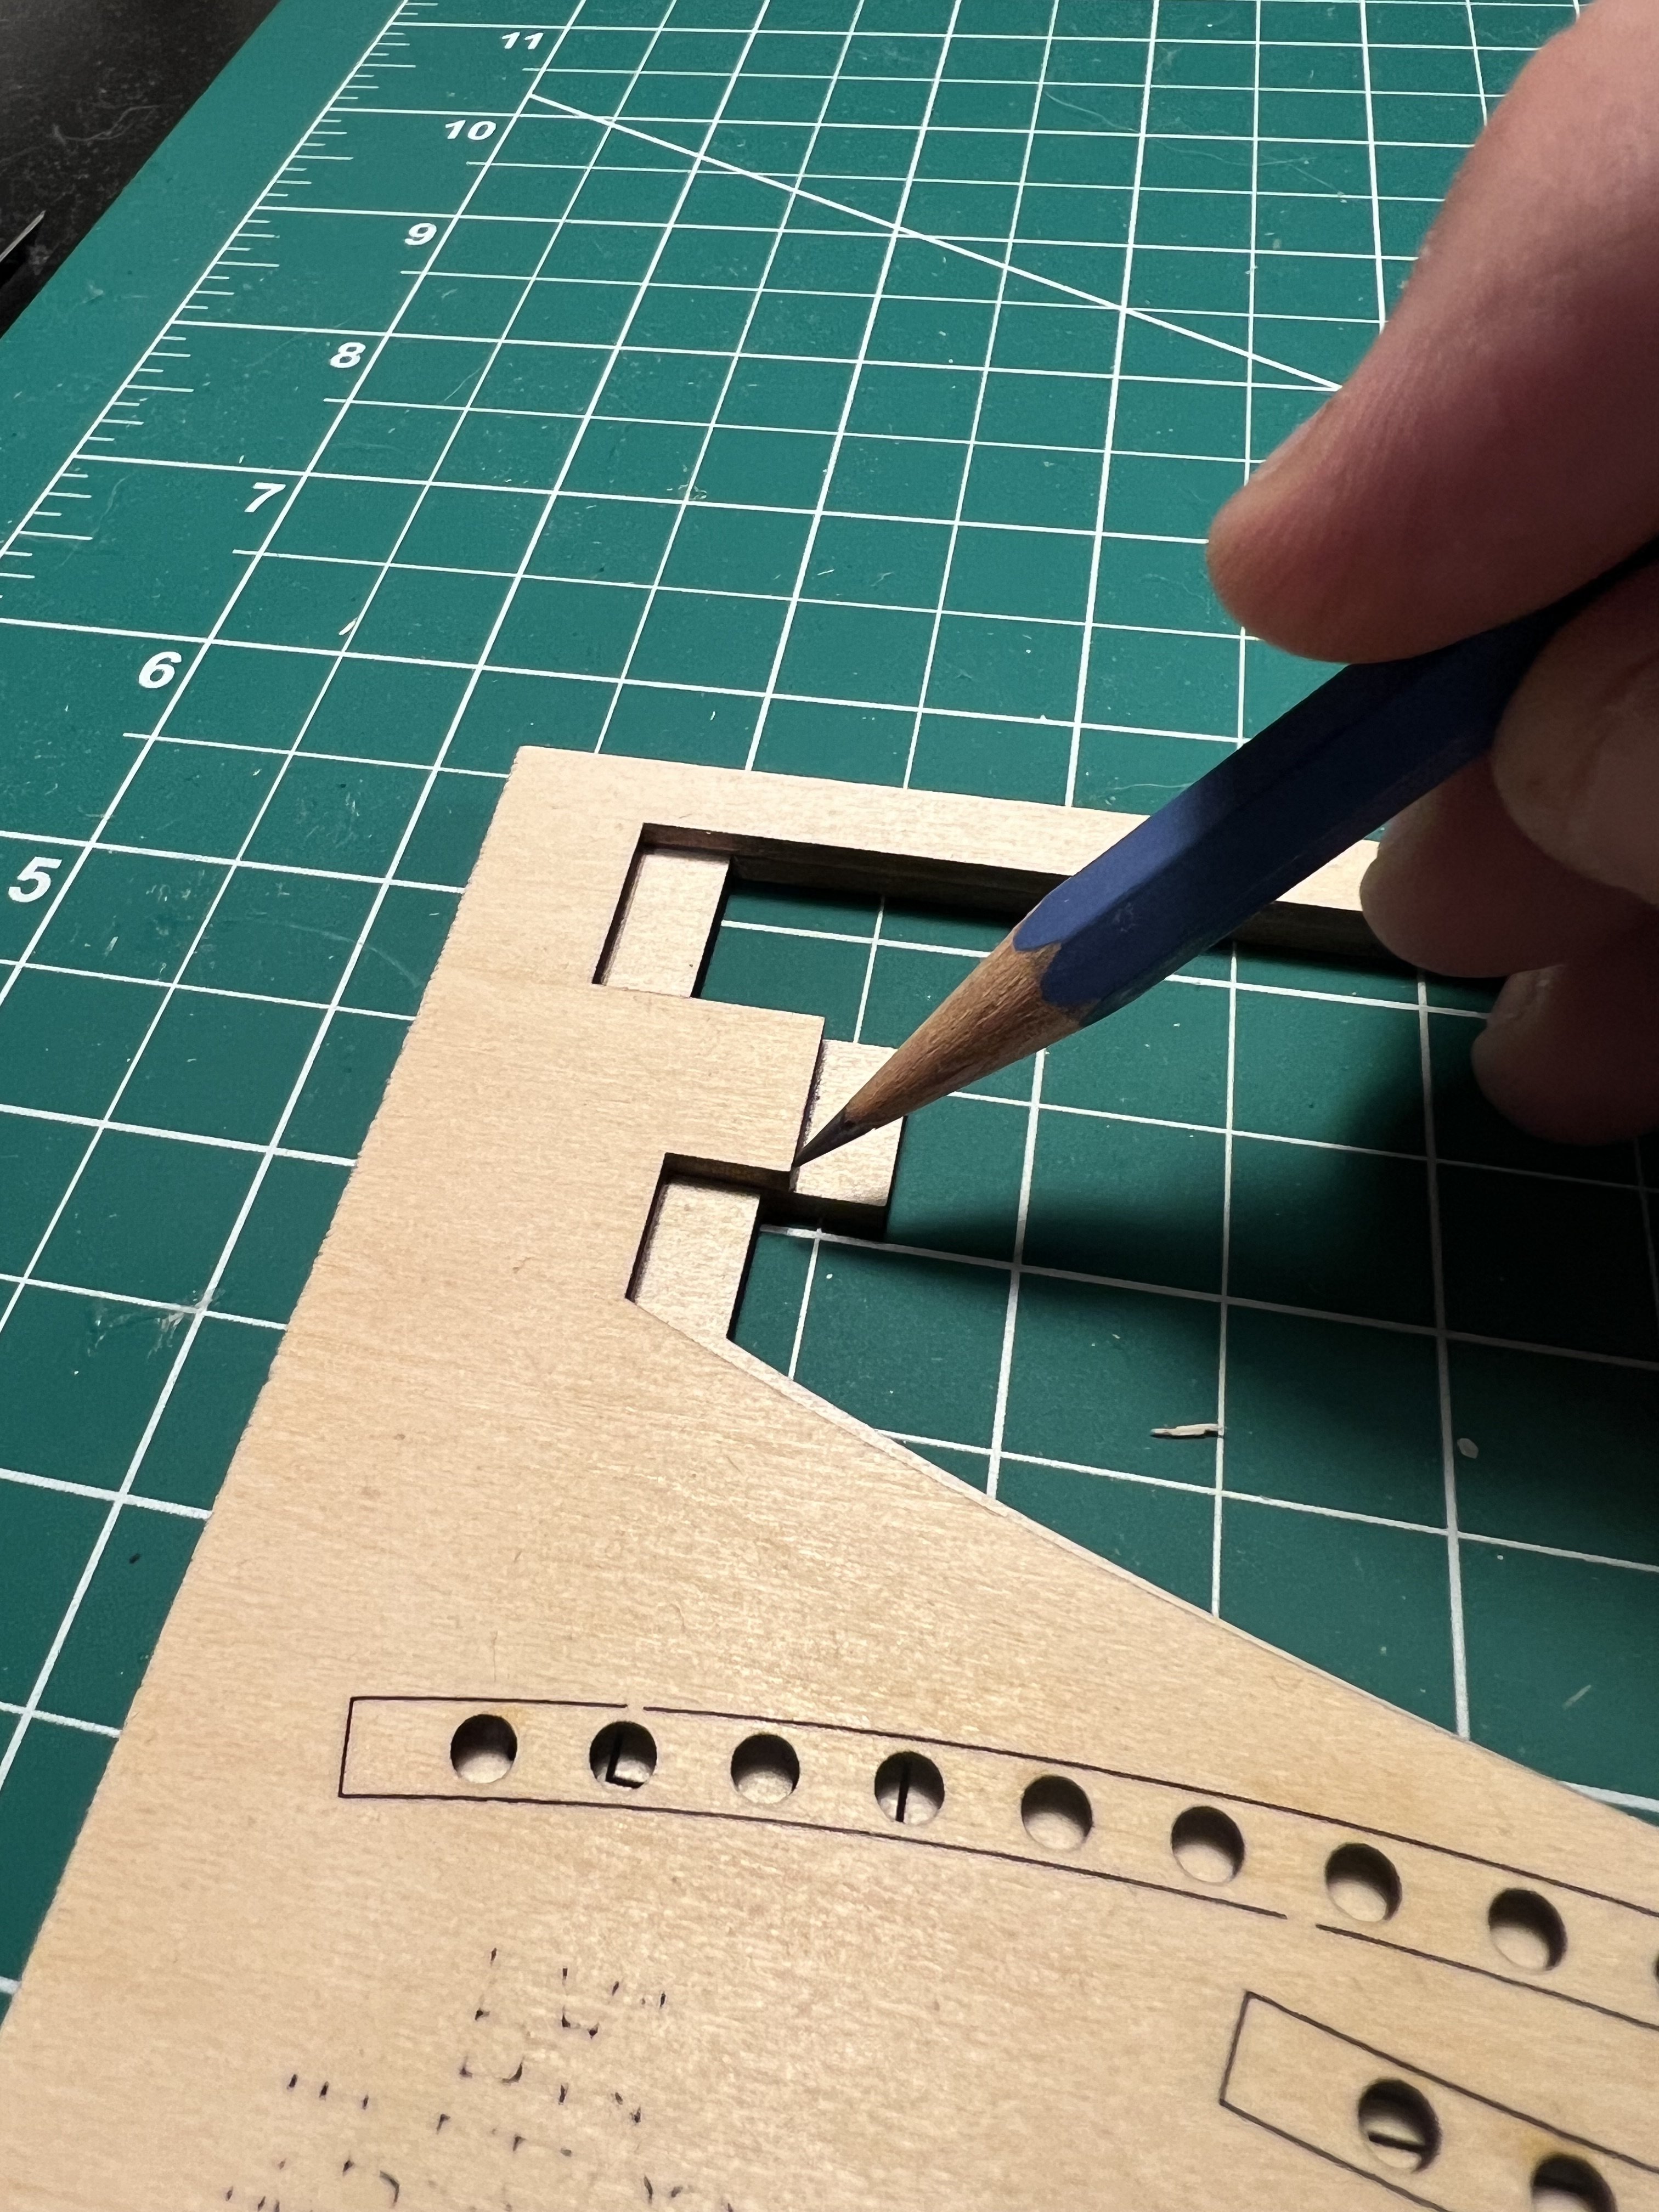
Everything’s a small learning experience. When assembling the Syren Servo-Matic I needed to keep the main pieces square to the base when gluing them. I only have one medium and one small square (and a bunch in my cellar far too large). I was going to use LEGO pieces, which work well and are easily configurable. But then I thought I’d use my 1-2-3 blocks. They’re heavy and perfectly square. Well, I forgot that they had arrived with machine oil on them. While I had wiped them off, some remained in the holes and ended up staining the wood pretty deeply. 1-2-3 blocks have their uses (they make for nice weights and arms from a Quad Hands can magnetically attach to them) I’ll not let them sit on exposed wood again. Glad I discovered this on the Servo-Matic rather than on a model.

- 133 replies
-
- 5
-
-
- Ranger
- vanguard models
- (and 1 more)
-
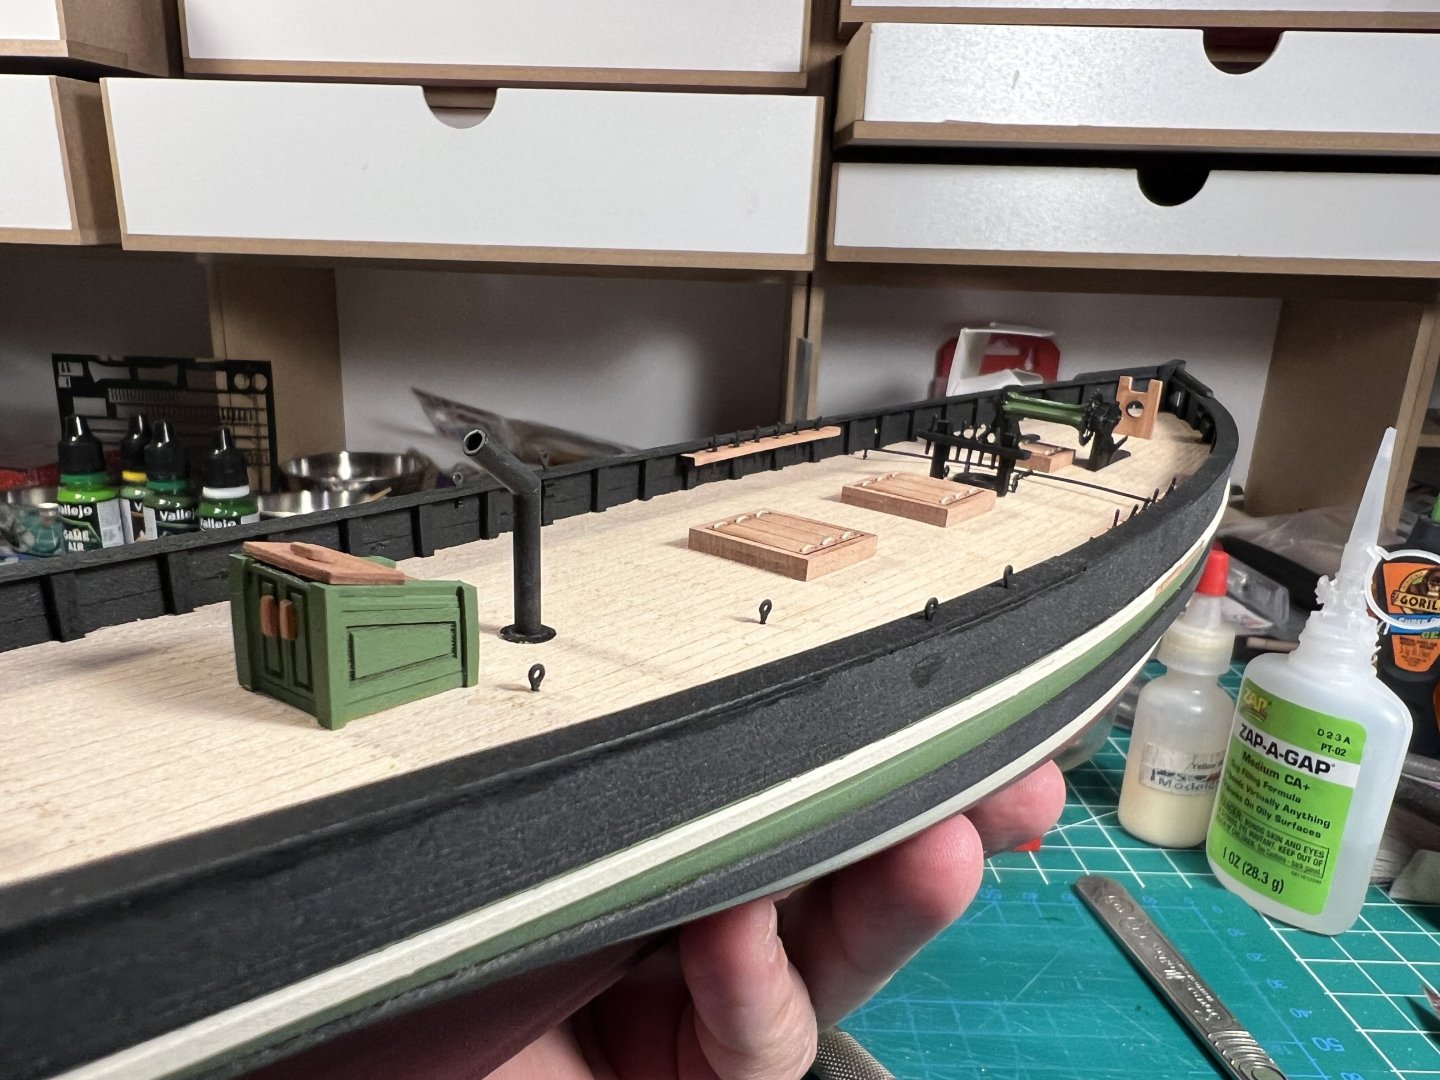
I decided to get the Syren Servo-Matic Serving Machine. It needs to be built. First step is sanding all the cherry wood pieces (except for the gears).


- 133 replies
-
- 5
-
-
- Ranger
- vanguard models
- (and 1 more)
-
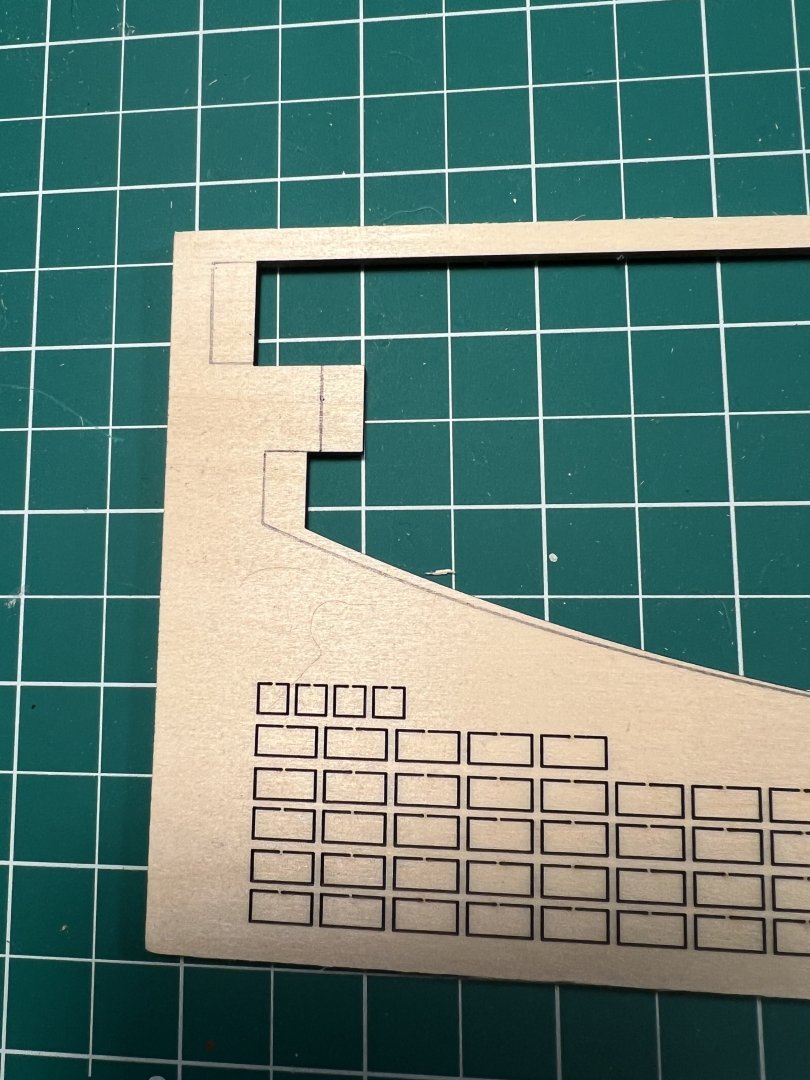
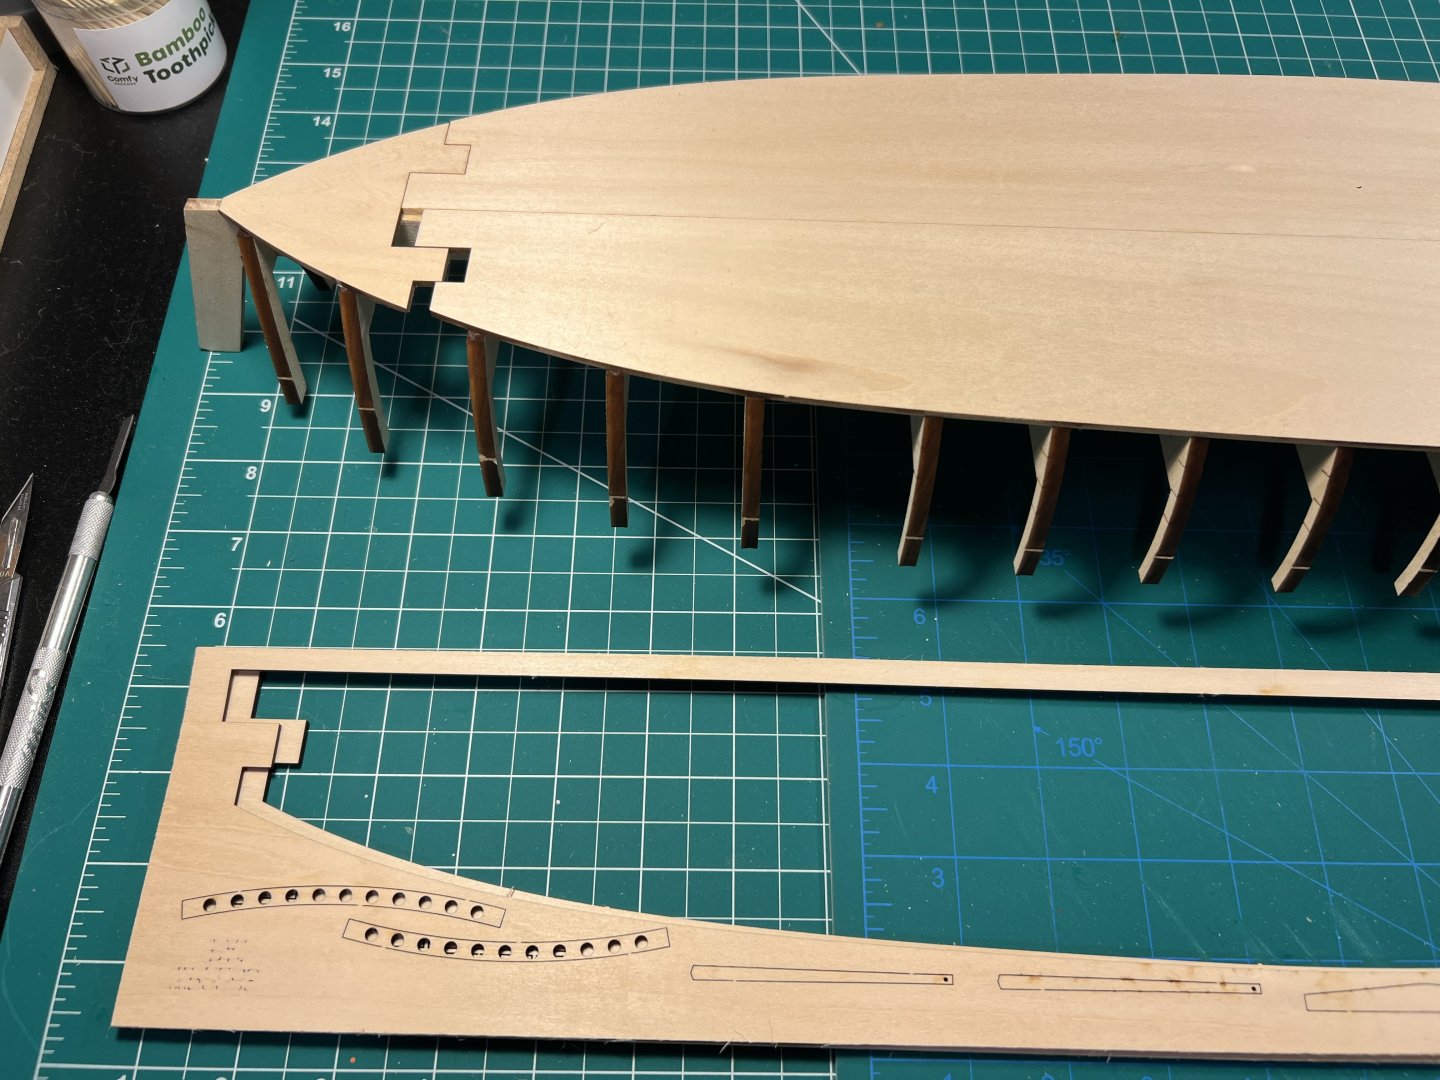
I cut out pieces by tracing out how much the part was too small compared to the correctly-sized piece on the other side (following what Olha did). I don’t think I would have thought to do it this way on my own.

-
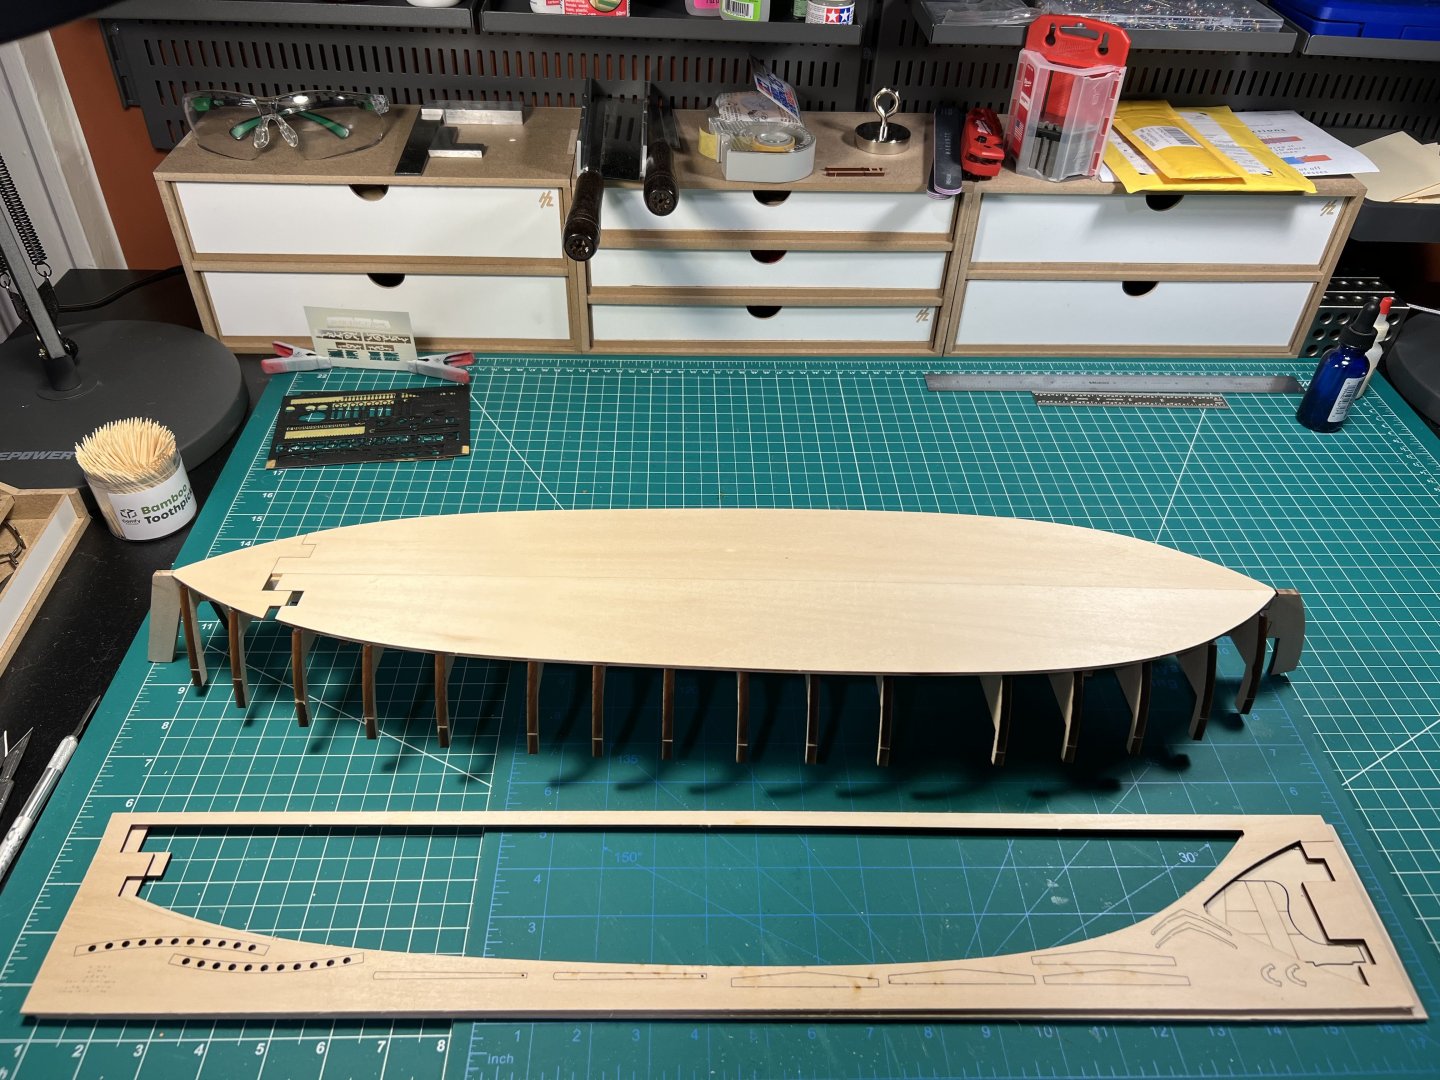
I’m planning to use Olha’s approach to fixing the fact that one of the pieces of the bottom was misprinted at the wrong scale, leaving gaps. I realized that even though I can fix this problem, the other parts on that sheet are also going to be the wrong scale. So I ordered a free replacement from Model Expo / Model Shipways. While their QA isn’t the best, they do have a reasonable replacement policy. https://modelexpo-online.com/parts
-
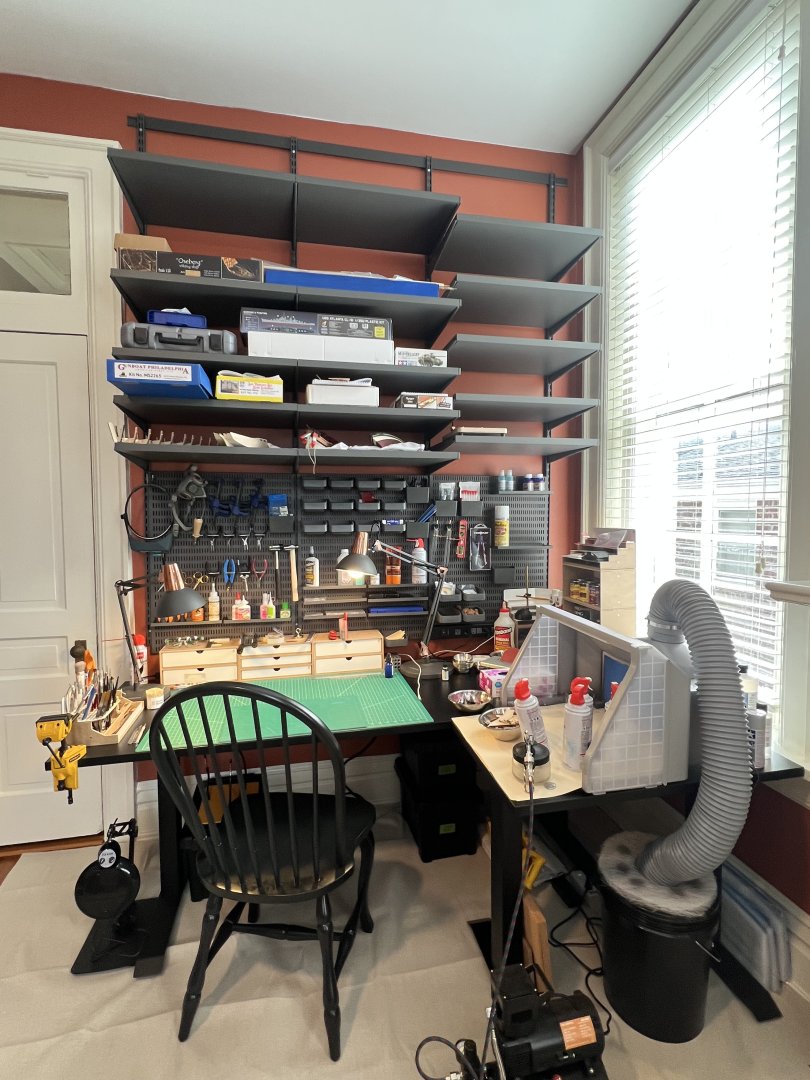
I haven’t had much time to work on models recently because in my spare time I’ve been remodeling my younger son’s bedroom before he finishes his sophomore year at college next week. Painting, adding shelving, redoing his closet. I had been using his room for modeling. I just put up a folding table in the middle of his room for modeling and another for my airbrush booth, covering up some stuff with a drop cloth. I just had stuff piled around, usually piled on his bed or on the floor. Now I’ve permanently taken a corner of his room and everything is organized. We used Elfa (Decor+) closet systems from the Container Store (it’s a Swedish brand I think and is certainly sold in other stores outside the US). I have shelves for models in progress and in the queue. Elfa has a garage+ system that works great for organizing tools and such. There are hooks for various tools and clamps and small shelves for glues and filler and things. I also bought a nice couple of work tables to replace the folding tables (a large one for work, a small one for my airbrushing) from a company called Desky; they sell adjustable standing desks but also fixed height work desks. Recommend both. Not cheap, not crazy expensive. It’ll probably be a month before I make steady progress again. We’re picking up our son next week and visiting family. Then we’re off to Europe for three weeks: Italy, France, and Scotland. I have a conference in the French Alps near Chamonix for a week and my wife has one in Glasgow after. We’re adding some vacationing in Italy (Milan and Aosta) (1st time for both, been in other parts of Italy a few times) before my conference and in Edinburgh (3rd time) and up on the Isle of Skye (2nd time) after my wife’s.
- 133 replies
-
- 4
-
-
- Ranger
- vanguard models
- (and 1 more)
-
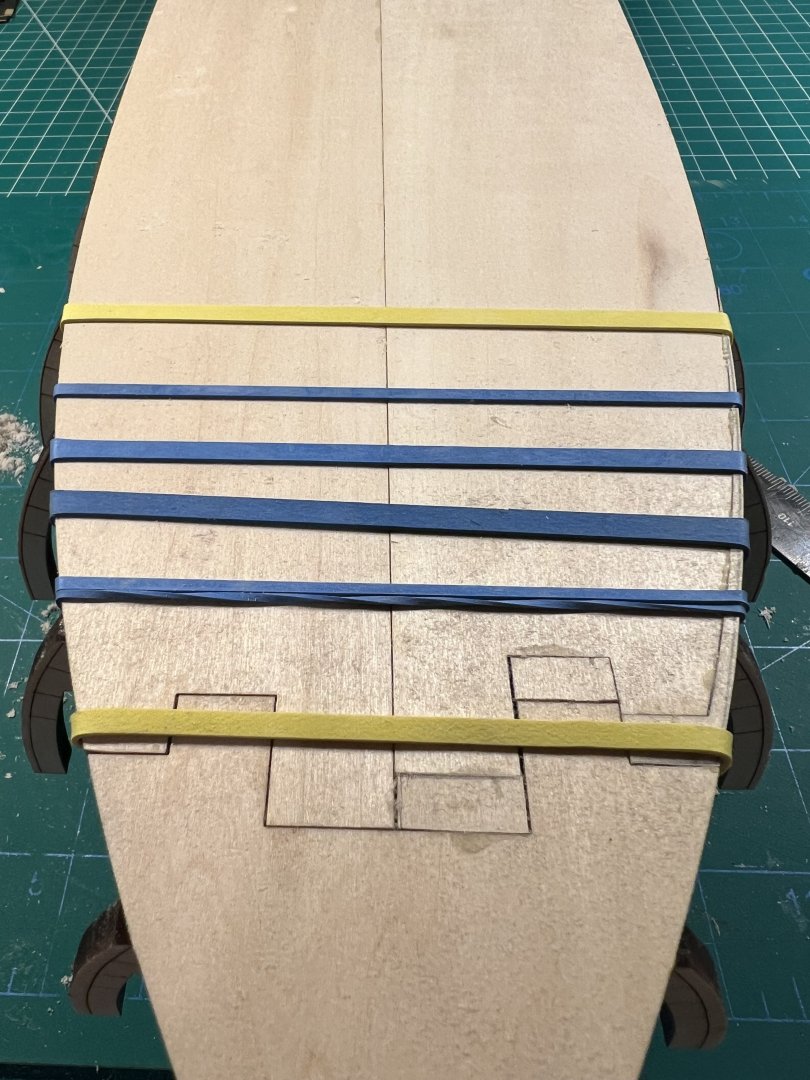
It takes a few models, a bunch of patience, rereading some build logs and write-ups, and re-viewing some videos, to really "get" planking. I'm definitely still a novice at it. Even if you're going to fully paint the hull - which means you can use filler liberally and sand the heck out of it to shape - use each model as an opportunity to figure out planking a little more. My Sherbourne hull ended up okay even though both first and second plankings were garbage and I ended up using a ton of filler and a bunch of sanding - jokingly I say that I might as well have carved the hull from a solid piece of wood. My Ranger was a lot better. I know what I'm going to do different on my next planked hull. I did the NRG Half Hull to get more of a handle on planking and it did help. But to be clear that tutorial gives you a sense of what the shapes of pieces should look like - you really get a sense of what you're trying to accomplish with edge bending in 3D for example - but in that model you're cutting planks from full sheets of thin wood, not doing strip planking. I'd love to see someone do something like a Half Hull project with a full write up and tutorial - maybe even videos - for doing strip planking.
-
First Build. I'm very impressed. The planking looks like it's from someone who's done some models before. And that model is so small, it would seem to be a far harder job.
- 12 replies
-
- 1
-
-
- English Pinnace
- Model Shipways
- (and 2 more)
-
Worst Planking Job Ever
palmerit replied to rhephner's topic in Building, Framing, Planking and plating a ships hull and deck
My first plankings (first and second) on my Vanguard Sherbourne were absolutely terrible. It took watching several videos, reading a bunch of build logs, and reading some instructions to kind of get it. As @BurgundyModels said, you need to get the 3D right in your head and it’s not intuitive. I ended up buying some more easy Vanguard fishers (working on the Ranger now) and this second strip planked model was better, incrementally. The model you’re working on seems small and has quite a pronounced bow, both of which I’d imagine would make planking even more challenging. Doing more faring of the bulkheads probably needs to be done, but I imagine part of the challenge is that you need to edge bend, taper, and add a curvature bend. -
A different option might be the Model Shipways Gunboat Philadelphia. It's large scale 1:24 and does not have a ton of small rigging. Olha Batchvarov just starting a group build on her YouTube channel:
-
Hull Finishing Examples
palmerit replied to Burgundy's topic in Painting, finishing and weathering products and techniques
I’m guessing the practicum is more detailed than his instructions. Would love a copy since I have that kit on my shelf. -
First thing I'd do is try a different web browser (and/or reboot the computer).
-
CA (cyanoacrylate) "super glue"
palmerit replied to Dr PR's topic in Modeling tools and Workshop Equipment
I've used Gorilla CA glue - gel for come applications, micro precise for others - and never had them dry up. I've also used Zap thin CA glue and haven't had a problem. I did have that happen to me "pre-modeling" with other brands of CA glue; I ended up just buying the small single use superglue tubes, which looked kind of like what you have. I treated them as single use and just tossed them after using them because they'd dry up. -
I’ve seen people use CA glue or shellac. My understanding is shellac can be undone with alcohol and dries clear, so I think (?) it’s preferred. CA dries faster I think.
-
I got the rack turned around with some surgery. I had to paint it black because I needed to add some wood filler around the wounds. I also added the belay pins and a few other pieces.

- 133 replies
-
- 6
-
-
- Ranger
- vanguard models
- (and 1 more)