-
Posts
375 -
Joined
-
Last visited
Content Type
Profiles
Forums
Gallery
Events
Posts posted by Force9
-
-
Apparently the crew referred to these as "Spice Boxes" (presumably because they resembled a common household item) and they were commonly included on the larger frigates for the convenience and privacy of the ships officers. It is tough to determine how permanent these were... You'd think they were flimsy screens that were easily removed when clearing for action. It seems that they might've been more solid fixtures... Captain Stewart ordered them removed prior to the battle with Cyane and Levant to give better clearance for the forward gun crews. They were not reassembled after the battle - probably because they were removed with an axe. On the cruise home the British officers began to grumble and get very surly about the lack of private facilities for the gentleman. (Apparently the were used to having these on Guerriere) They felt that it was very undignified to have to relieve themselves using the leeward channels like common sailors. One of the American Lieutenants finally got fed up and remarked loudly to one of them something to the effect that the prisoners were well positioned to attest that American officers cared more about their gunnery than about their round houses... Presumably that ended the trouble.
Here is my representation:
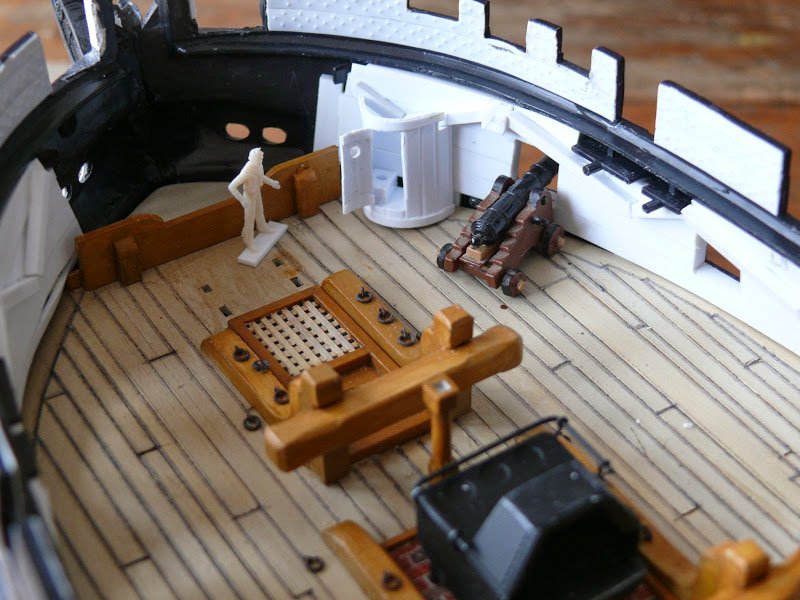
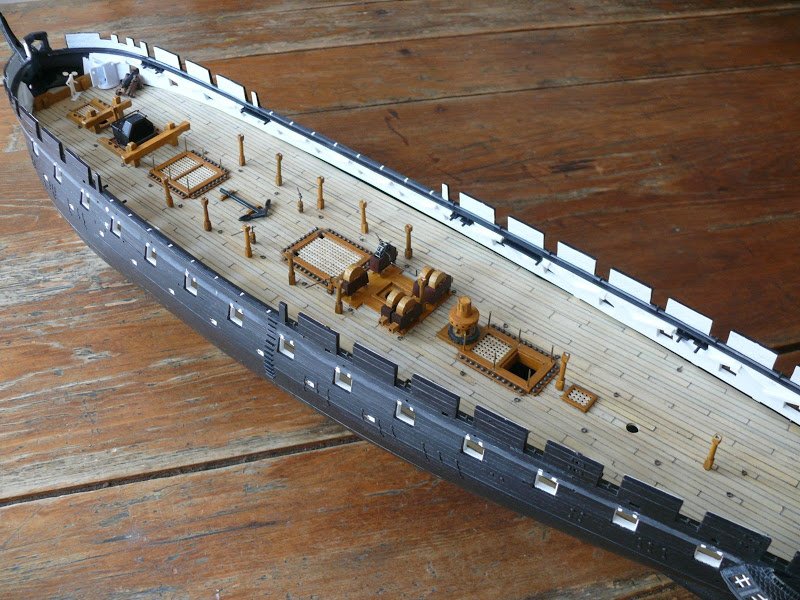
A fun detail that will get buried once my spar deck is in place.
Evan
- archjofo, Canute, uss frolick and 5 others
-
 8
8
-
A very crisp build sir!
I'm enjoying following along on this voyage. The gun tackle is terrific and your port lids are wonderful
Evan
-
HistoryGuy...
Tyrone Martin in his "A Most Fortunate Ship" states that during her 1811 refit the Trysail mast and "... What many today consider her 'trademark' - the 'split' dolphin striker - was installed." (Pg 141)
Olaf Eriksen in his terrific "Constitution - All Sails Up and Flying" (pg 214) itemizes the unique features of the Constitution:
"...let me reiterate some distinctive characteristics that will show and prove conclusively that Constitution was not rigged like an ordinary frigate, and in fact made part of her rigging unique.
First, Captain Hull added the double dolphin striker and the trysail mast.
Second, Commander Bainbridge changed the configuration of the bow.
Third, though the fore fiferail is typical of her type, the U-shaped pinrail and monkey rail aft of the main mast, and the spider rail on the mizzen mast are all unusual, and the Constitution is the ONLY ship having these type of belaying rails.
...The above innovations set Constitution apart from all other ships from this era, and every one of these is an indisputable historical fact."
I'm not familiar with the ships of the period to address how unique a split dolphin striker would be... I have not seen any references suggesting that Essex had this, but I could not gainsay either way. I do know that Chuck included a double dolphin striker on his excellent Syren kit, so he may have authoritative references that suggest this was common enough by the War of 1812. It does seem, however, that both Tyrone Martin and Olaf Eriksen (who, admittedly, used Martin as his central source) are convinced that the Constitution's arrangement was unique to her.
It may be that you've already settled your own conundrum - to make the United States different, you should mount a single dolphin striker regardless of the "impossible to confirm" reality.
Just curious - are you working with the Revell United States kit, or are you modifying the Constitution kit (my path if I were to attempt a United States)?
Anxious to see you post some progress!
Thx
Evan Gale
-
Patrick - thank for your generous remarks!
Marcus - I'm flattered to think my influence has extended into Germany! I think your modeler friend has made a great build of his own with his own interpretation of the great ship. His approach to handling the messenger is very interesting. I do think that part of the solution was to suspend some of the line from rollers hanging from the beams (refer to Dafi's excellent tutorial). Using blocks could be a problem since the messenger is usually joined with large bends to form the continuous loop.
I've made some more progress on the half hulls.I could not find any contemporary reference that verifies the presence of the chesstrees that are included in the kit. The Corne paintings don't show them and neither does the Hull model: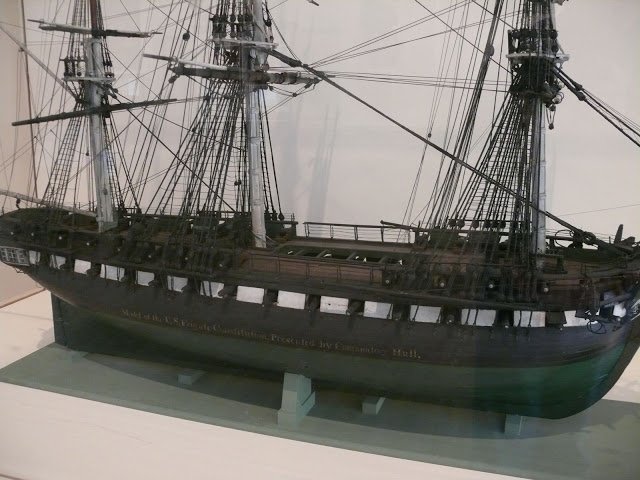 I've elected to fill in the attachment points and smooth everything over:
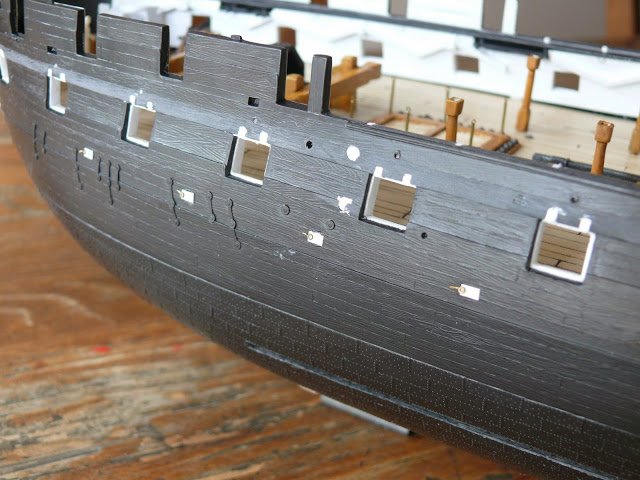 I have also enhanced the hawse pieces around the hawse holes and filled in the sides of the knighthead. The kit uses a flimsy piece that has molded rings fore and aft. I think these could be a weak point and otherwise look like molded plastic. I'll insert my own rings or perhaps replace the entire knighthead assembly with something scratch built:
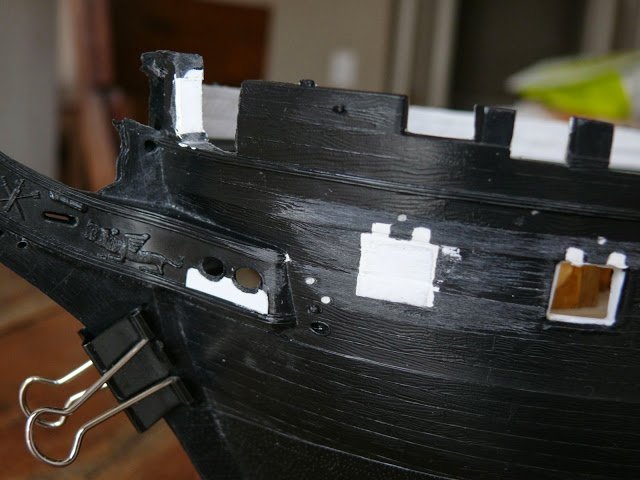 I've filled and sanded the gun port hinge openings and the forward bridle ports. I'll hit these with some light primer to expose areas that need extra attention and then lightly scribe some planking lines.Up next I'll need to start evaluating some of the rigging plans to determine appropriate openings, etc. that need to be added (or deleted) on these hull pieces. I'll also give consideration to adding the pin rails and cleats on the inner bulwarks with appropriate reinforcement for strength - I'll drill thru the bulwarks and insert some reinforcement pins.Lots to think thru going forward...Thanks for looking in...Evan
- mtaylor, hexnut, patrickmil and 3 others
-
 6
6
-
Henry -
She's looking very fine. I hope the weather Gods will ease up on your winter - just skip spring and go directly to summer!
Cheers
Evan
-
Cheers Popeye!
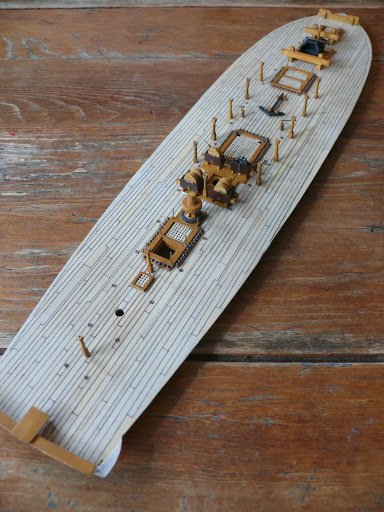
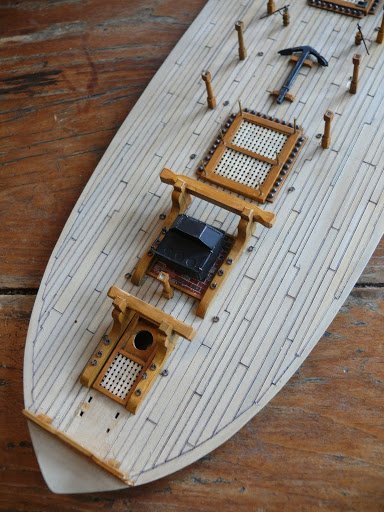
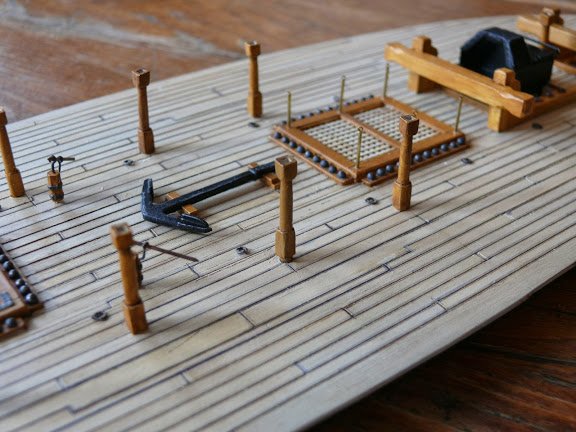
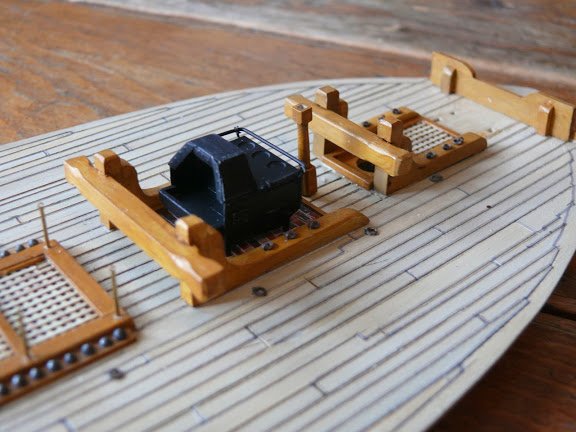
A bit of mindless fun:A few months back I was having another look at the historical deck plan of the US Frigate United States and I noticed an interesting detail on the gun deck: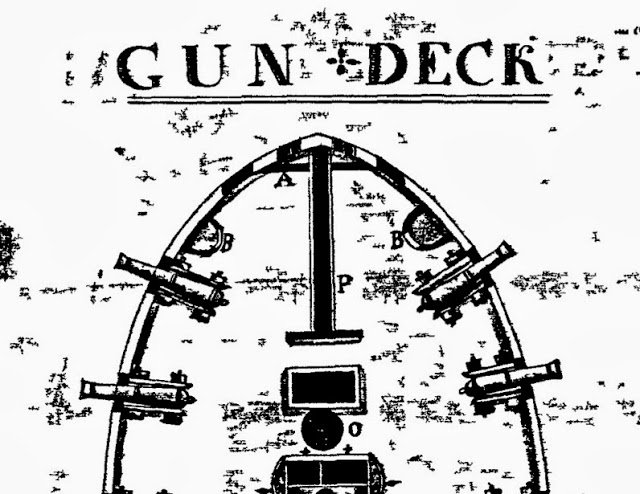 The items labeled "B" are listed in the legend as "Round Houses". Hmmm... I generally think of those as something external on larger ships a la Victory... I did a quick google search which found an article by Cmdr Tyrone Martin on the USS Constitution museum website that mentioned these in more detail. http://www.ussconstitutionmuseum.org/constitution-resources/the-captain-speaks/the-guns-of-constitution/Apparently the crew referred to these as "Spice Boxes" (presumably because they resembled a common household item) and they were commonly included on the larger frigates for the convenience and privacy of the ships officers. It is tough to determine how permanent these were... You'd think they were flimsy screens that were easily removed when clearing for action. It seems that they might've been more solid fixtures... Captain Stewart ordered them removed prior to the battle with Cyane and Levant to give better clearance for the forward gun crews. They were not reassembled after the battle - probably because they were removed with an axe. On the cruise home the British officers began to grumble and get very vocal about the lack of private facilities for the gentleman. They felt that it was very undignified to have to relieve themselves using the leeward channels like common sailors. One of the American Lieutenants finally got fed up and remarked loudly to one of them something to the effect that the prisoners were well positioned to attest that American officers cared more about their gunnery than about their round houses... Presumably that ended the trouble.I decided that including them would be a waste of my limited Units of Effort since they would not be visible once the spar deck was positioned. But just a few weeks later the Log Lines blog on the Constitution Museum website had a great article on these same round houses. http://usscm.blogspot.com/2014/01/head-lines.html I took this as a sign from the Goddess of Ship Models that I should include these in my build for thoroughness. There would be one on both port and starboard, but since I do not know if these were removed before the battle with Guerriere, I decided to only include one and split the difference.
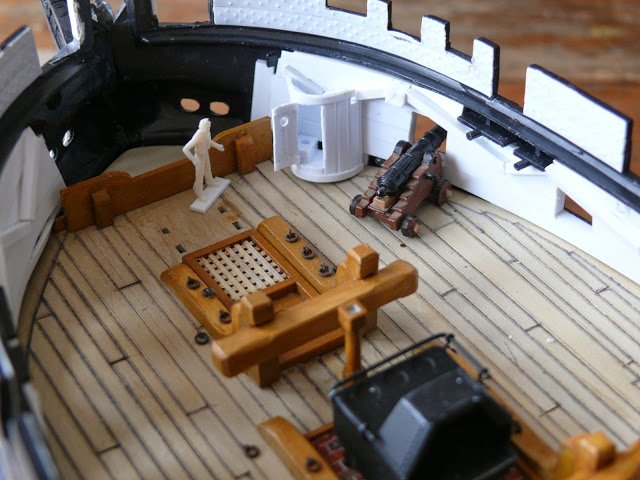
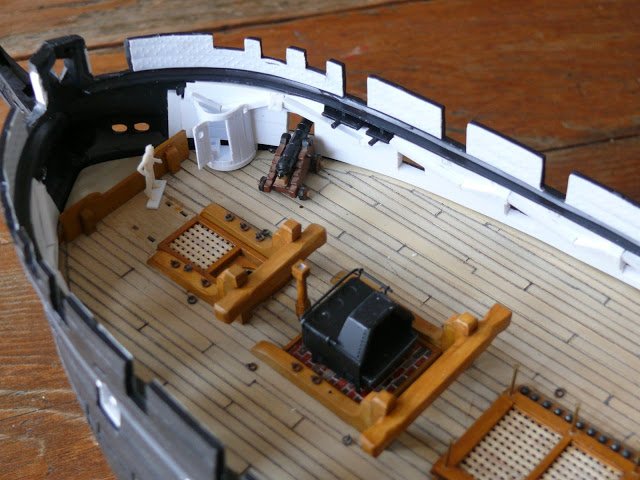
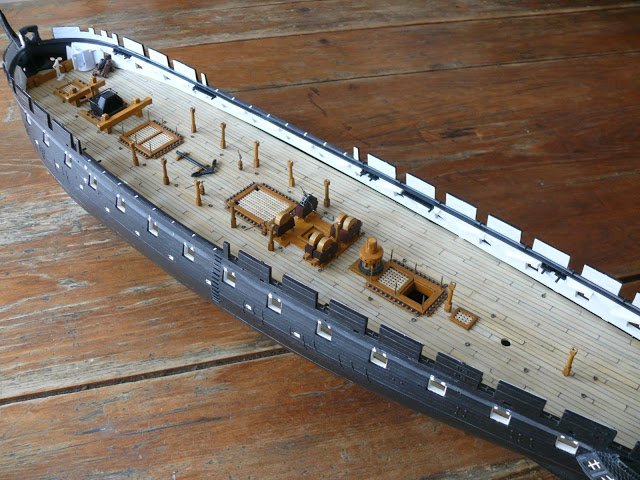 More details soon.Thanks again for following along.Evan
 -
Patrick -
The modern restoration is often a good source for how NOT to do something for the 1812 version... Commander Martin has noted in his writings (and I think in the Bluejacket kit manual?) that a waterway was NEVER added across the stern transom. I'll have to hunt down the reference.
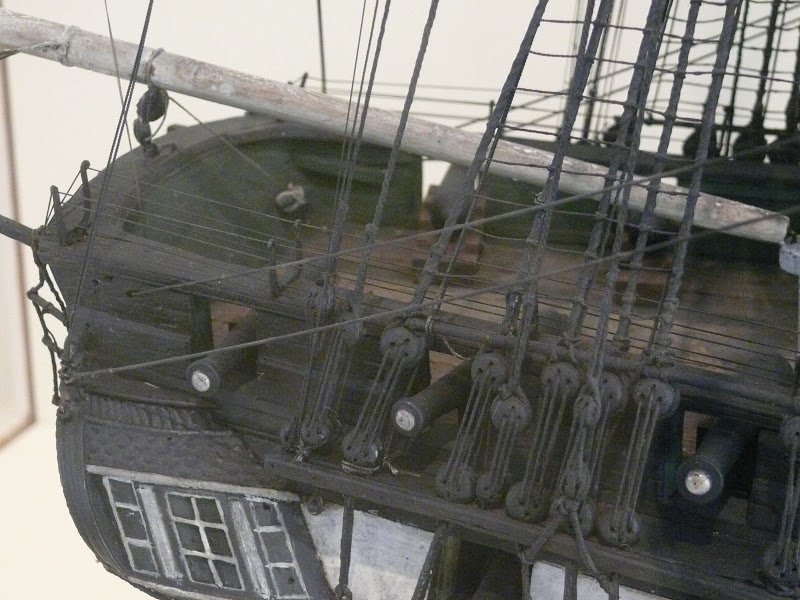
Unfortunately my picture of the Hull model is not clear, but that artifact does not have waterways across the stern.
Evan
-
It is a sure sign from the Goddess of Model Ships that she wanted you to include a more detailed foremast and platform than the one represented in your first effort... Looks like you'll be even more satisfied with the result once all is said and done!
Evan
-
Folks -
The omission of the port covers is often a hot topic across the various forums. Suffice to say that I am basing my build on the Corne paintings and the Hull model - both of which omit the covers. As Marcus points out, the Hull model does show covers on the forward most openings:
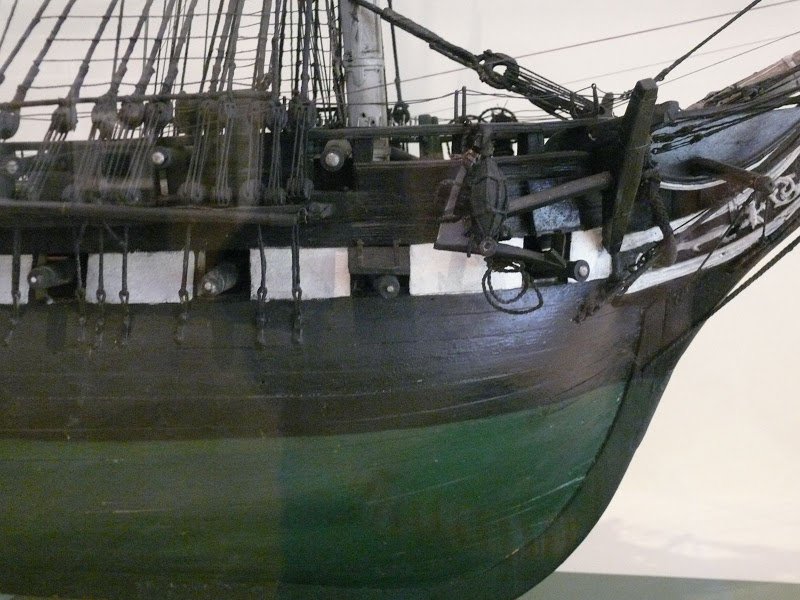
I'll do something similar. Presumably this was done to keep the bow area dry in plunging seas. Note also that these are full covers - not the half covers that we know Preble had added during his tenure.
It is hard to determine if the ports were EVER rigged as standard practice during the war years. We see a log entry in January 1814 that suggests the ports weren't rigged even in rough seas:
"The ship rolling deep but easy and taking in a good deal of water at her gun deck ports..." -- Lat. 10-39N, Long. 40-50WOther contemporary sources including the excellent Thomas Birch paintings of the Guerriere battle and United States vs Macedonian show no ports on any of the combatants:
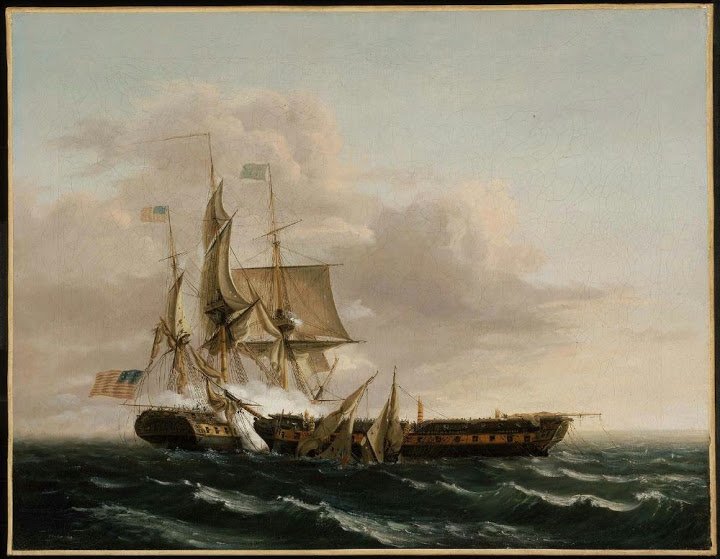
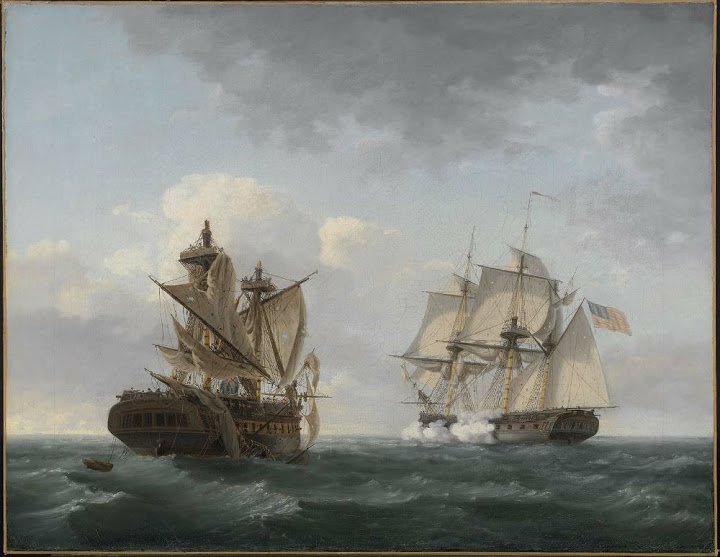
At the very least, it'll save me some work and I won't have all those vulnerable lids that easily break off during rigging!
Evan
- dafi and popeye the sailor
-
 2
2
-
Mort -
I too find it odd that there have not been many Bluejacket Connie builds across this and other forums. It may be that the smaller scale combined with the very high price tag is the ultimate deterrent. It is also based on a carved hull, which might turn some folks off...
Arguably, the two most accurate kits for her 1812 representation are the Revell 1/96 and the Bluejacket 1/96 - both at the extreme ends of the price scale. I've elected to build the Revell kit to get a War of 1812 version, but I've ordered some of the nice Bluejacket components to enhance my build. Perhaps the best of both worlds...
Hopefully we will see your effort posted on MSW in the near future.
Evan
-
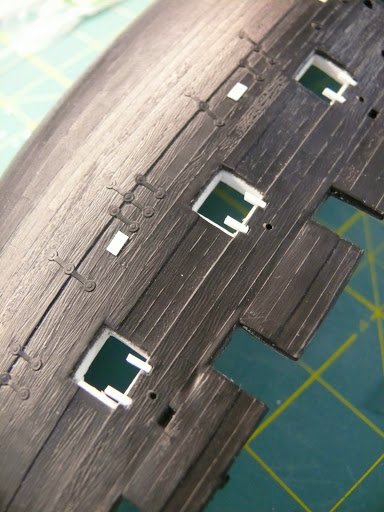
Folks -I thought I'd turn some attention to the half hulls... Up next was the tedious task of filling in the holes for the port covers. I won't be fitting gun port covers on my build. I filled them in with .040 x .040 Evergreen strips cut oversized for ease. I then came along next day and snipped them cleanly along the edge. I'll cover with filler and sand flat before painting:
 I also decided to improve the air ports along the berth deck. The Revell kit comes moulded with some small oval ports, but the credible sources suggest small scuttles instead. Note the air ports in the Corne painting:
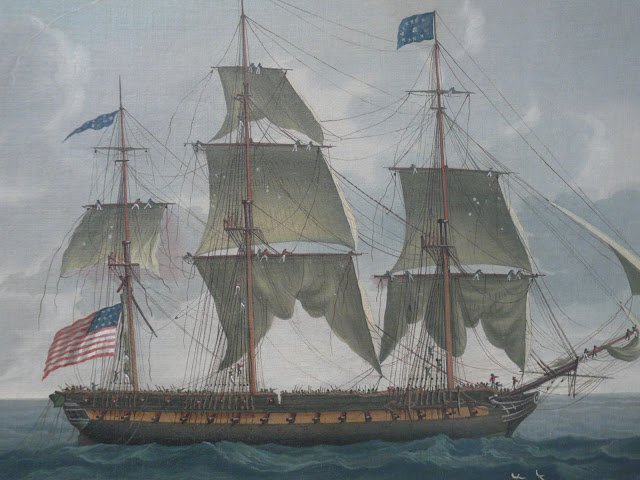 Chappelle notes in his American Sailing Navy book that " the frigates were all fitted with air scuttles on the berth deck... The scuttles had solid covers hinged at the fore side..."We know from Constitution's log dated September 1810 that the air ports were added:"Caulking gun deck -- cutting air ports for the berth deck."I simply glued some .010 x .080 strip over the existing ovals and added some of the small Jotika eyelets as hinges. Tough to properly represent the hinges at this scale, hopefully these will look fine after primer and paint:
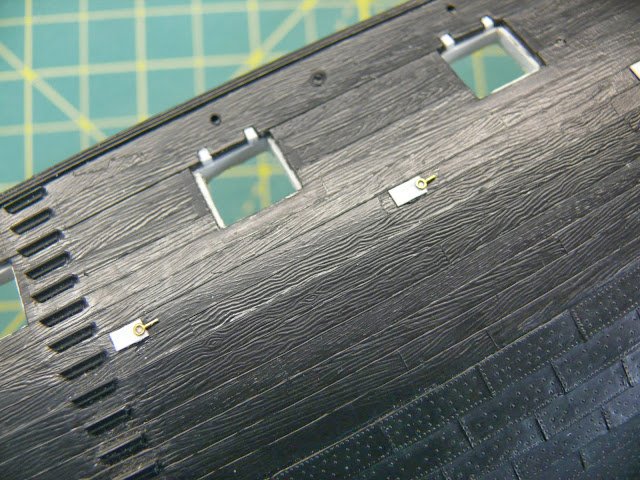 All fun stuff.Evan
 -
Marcus -
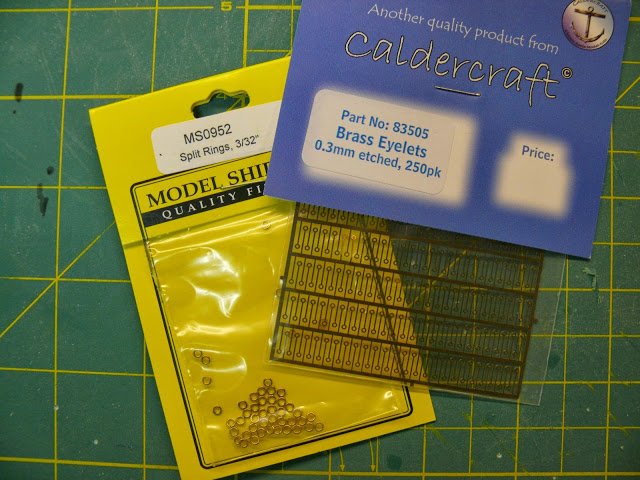
At this scale, the PE eyelets aren't going to look 2D, but I agree that some PE components often do look too flat. I didn't worry too much about the gap in the split rings... I'll just spin them until they aren't visible if that is necessary. Most of them don't show any meaningful gap at this scale.
Evan
-
I don't think any references to split lids appear until the Preble era...
-
Marcus -
Regarding the ringbolts...
I used a combination of the small Jotika PE eyebolts and the 3/32 split rings available from Model Expo:
Slightly pull apart the split rings with the blade of a hobby knife and insert the PE eyelet, then squeeze the split ring back together with your tweezers. I was particularly bad at this in the beginning - I think it took four or five minutes to do each of the first five or so, but then I found my rhythm and I clipped along at a fair pace. All were dipped in a quick bath of acetone and then spent a few minutes in a pool of Blacken-It for color.
I cringe at what others will think of this... The truth is that creating your own eyelets and split rings is an easy exercise and can save a needless expenditure of hard earned cash. Pour a glass of your favorite beverage and settle down in front of your TV and before you know it you'll have dozens of each. I happened to have a stash of the split rings at hand from a fire sale years ago and I've got tons of the Jotika PE eyelets after having stocked up for my Heller Victory build (since suspended in favor of Constitution) and I thought the small time savings was worth it to regain momentum on my build.
Hope that helps.
Evan
-
Hello Patrick!
Wonderful to see another Connie in the mix and your work on the Niagara indicates that this will be a terrific build to watch. Modifying the kit to reflect her earliest period is ambitious... You'll need to do some serious research. I don't know much about her earliest configuration, but I suspect you'll not need to find turned brass carronades... The ship was originally fitted with 18 pounders on the spar deck and the carronades came along later...
I'll pull up a chair and settle in to watch your build progress...
Evan
-
Folks -
The CD is available thru the USS Constitution museum or the online Navy museum store.
Most of the content, however, is available online at the official US Navy tour site:
http://www.history.navy.mil/USSCTour/frDrawings.html
The drawings are mostly relevant to the 1925 restoration, but there are some good documents that highlight some of the differences across the years - particularly the 1812 configuration vs the modern restoration. it is widely acknowledged that the modern version of the ship is not accurate for the War of 1812 period and steps are gradually being taken across the more recent refits to move the ship back to her glory years appearance. The midship waist was corrected in the last go around and the bow (or stern?) is due to be corrected in the next refit beginning in 2015. Unfortunately, as these changes go into effect, the MS model will get more and more out of whack and folks will really need to accept it as only representing the 1925 restoration.
The AOTS book has some terrific drawings - especially regarding some of the ship's details - but keep in mind that much of Marquardt's assumptions are not accurate for her glory years. He seems not to have been aware of the Hull model, for example, which would've given better insight into some of the wartime configurations. Commander Martin determined conclusively that the skylights were not present until long after the War of 1812 among other erroneous details included in the AOTS version.
Commander Martin's book "A Most Fortunate Ship" is a must have and I'd also recommend the rather expensive "Constitution - All Sails Up and Flying" by Olof Eriksen, which has a terrific and well researched presentation of her 1815 rig.
Hope that link helps
Evan
- Scallywag and usedtosail
-
 2
2
-
-
Tom, Popeye, Marcus...
Thank you for your very kind remarks! Much appreciated.
I should comment further on some of my color choices... The chain pump color is NOT authentic. In fact, I have no idea how these were painted in August 1812. Likely colors would be black, red, white, or natural wood. I wanted these pumps to stand out - but not too much. I ruled out red since nothing else on that deck was red. Black seemed too much - the anchor, camboose, and gun barrels already would show enough black on this deck. Wood would blend too much with everything nearby and they'd disappear... White was too blah... I had mixed up some roof red and roof brown to make a mahogany color for possible use for the captain quarters panelling. I decided not to go that route, so I re-purposed that color for the pumps. Seemed like a good compromise - a neutral color that still stood out enough to make the pumps interesting. Certainly NOT how they were painted during her battle with Guerriere... purely artistic license on my part.
Also - the Revell instructions specify the gratings to be painted black. This is likely because of the Hull model. But that artifact only shows black gratings on the spar deck - the gun deck still shows the gratings in natural wood:
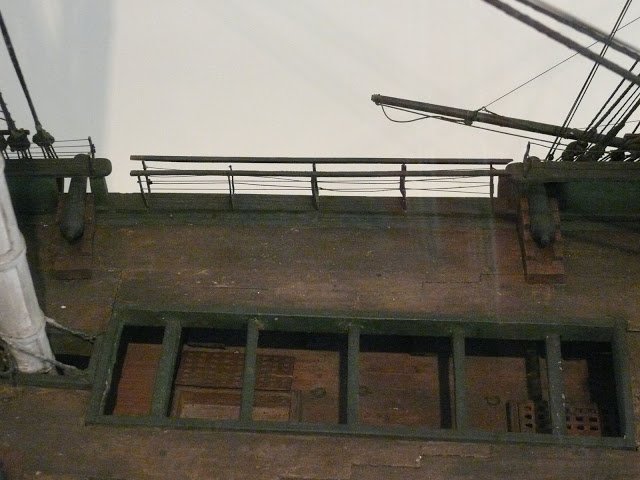
I elected to avoid black for the gratings on this deck... I'll have to give it careful consideration for the spar deck.
The camboose and anchor were both primed and then airbrushed with Vallejo Air "Gun Grey". Next came a thin coat of MicroLux "Engine Black". Lastly, I used a fine sand paper to expose the underlying gun grey along some of the edges and corners.
The brick tray under the camboose was first airbrushed with MicroLux "roof red". Individual bricks were then picked out with either gray, black, or a mix of black/red using a small brush. Lastly I re-scribed the lines between the bricks to expose the white styrene underneath.
Thanks again to all who follow along.
Evan
-
Thank you all for the compliments! It felt good to dust off the old air brush and get out the sable brushes.
I suppose I could elaborate a bit on the wood effect... The forums are full of terrific examples with detailed explanations - most of which have eleventy six steps ending with "simple"! I'll add my method to the pile...
Real wood has tonal depth... I need to replicate that using different layers of color. Firstly, I always prime everything. No matter what. I used a rattle can of Tamiya gray primer, but I'm not too particular about the brand I use.
The Vallejo Air paints are terrific. No need for a dope like me to carefully replicate multiple blends of colors to pass properly through my cheap airbrush. The other nice thing is that the good folks over at MicroMark commissioned Vallejo to produce "MicroLux" acrylic versions of the most popular Floquil railroad colors that were going to disappear shortly. Many of these colors lend themselves nicely to period sailing ships. Several of the most used colors are made available in the larger 2oz bottles.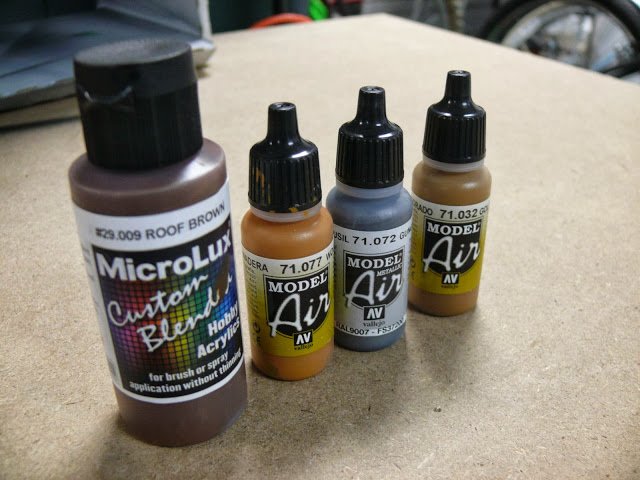
For all of the wood elements I start with a foundation coat of Vallejo Air "Aged White" applied with an airbrush. This gives the piece the underlying bright tone. At this point it would be normal to switch over to an oil based paint to add the next layer of wood tone. In this case I was able to use Vallejo Air "Wood" applied with a brush. No need to switch over to smelly oils and thinners with much more onerous cleanup. Since it is pre-mixed airbrush paint, The Vallejo Air paint will go on nice and thin and I can layer it up to get a good medium tone while still allowing the underlying bright tone to show through. The next layer was Vallejo air "wood" mixed with a bit of MicroLux Air "Roof Brown". I just did one thin coat with a brush to give a final, deeper tone.
The last step is the critical part...
There have been many great ideas that have moved the human race forward through time. The wheel was a nice start... steam engines... the first airplane... landing on the moon. Penicillin was good too. But the guys in the white lab coats at Vallejo really made a contribution when they came up with this stuff: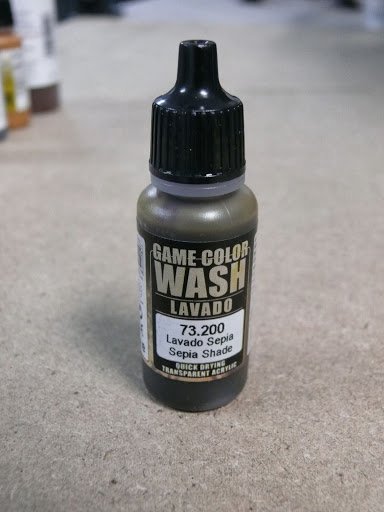
Acrylic wash that can be applied over acrylic paint. No smell, no need to mix paint and thinner... water clean up. This stuff belongs in the pantheon of great human achievements. As a final step, I smear this sepia wash over everything and immediately wipe it off with a soft cloth or cotton swab. Pretty similar to using a stain with wood. This final step imparts a nice woody sheen across everything and helps the colors blend. I should note that with Acrylics, I always allow the paint to dry overnight before adding the next layer. I did, however, wait only 20 minutes or so to add more paint within the same medium color layer whenever I was trying to deepen the tone.
See - "Simple"!
The deck was done similarly, but with only two layers. I varied the colors on the second layer between Vallejo Air Wood mixed with Aged White, sepia wash, and dark wash. I did add a bit of Vallejo Air "Earth" to the Aged White on the first layer just to give the entire deck a slightly deeper tone. A dark gray .03mm pen was used for the lines between the planks.
Thanks again to everyone for following along.
Evan- usedtosail, DCooper and CIWS01
-
 3
3
-
Paint!Folks -Apologies for the long gap between updates - I just got caught up in the flow and haven't paused to add to my log.It may be hard to believe, but I've actually begun to smear some paint over some of the plastic...I've got the gun deck and associated furniture mostly done with a few minor touch ups needed here and there:
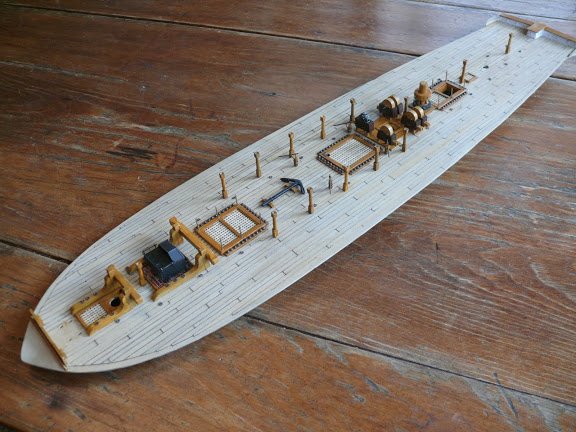
 Spare Anchor:
 Camboose:
 Capstan:
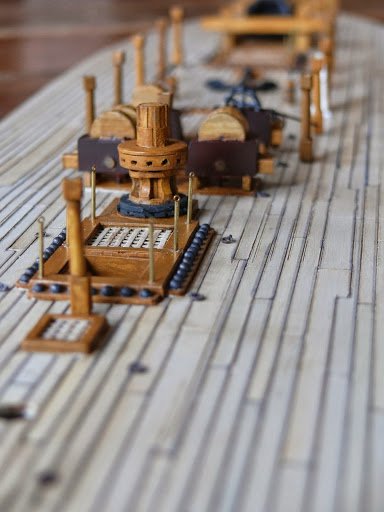
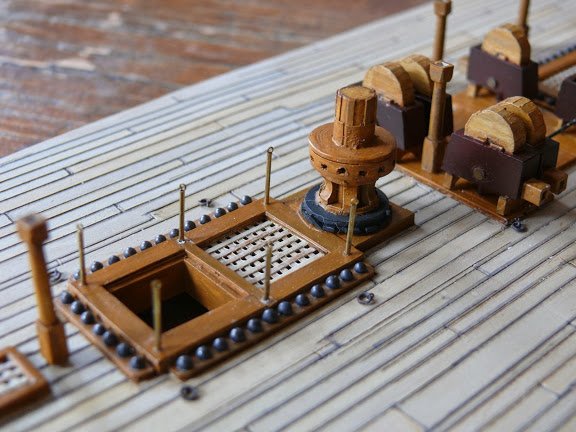 Chain Pumps:
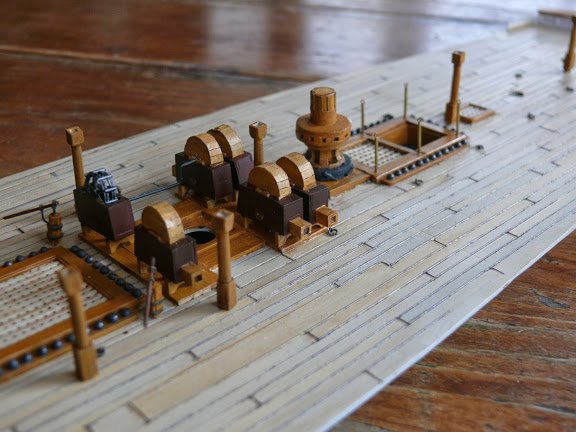 I was a Floquil paint guy in the past, alas, we know how that has gone. I'm now trying Vallejo paint and I'm becoming a big fan.Thanks for looking inEvan
- mtaylor, james_carder, Aussie048 and 6 others
-
 9
9
-
Jim - thanks for the guidance on the belaying pins... I may need to acquire another set since I will use more pin rails than the Revell kit specifies.
Folks - I am making steady progress on painting the gun deck - nearly complete. I may as well wait a bit longer to show everything all at once...
Stay tuned!
Thx
Evan
-
Hello Jay...
No self-respecting topman would climb thru the lubbers hole - they'd clamber to the tops from the ratlines. They'd likely only ascend on the weather side so that the natural forces would press them against the shrouds. Have a look at this contemporary painting of the crew going aloft to shorten sail for battle:
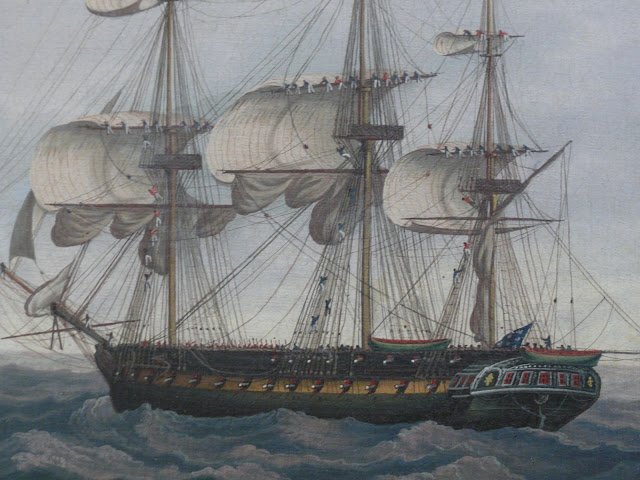
I am enjoying your build very much and have a keen interest in your rigging details.
Evan
-
-
Hallo Marcus
The Constitution's small brake pumps led down to cisterns on the orlop deck (below the waterline) that were fed from pipes to the outer hull. I am not familiar with the AOTS Essex layout, but Chapelle has a layout drawing showing the chain and brake pumps in the traditional position - nothing that far up in the bow. I suppose such a configuration would be useful for cleaning the muddy anchor cable as it came inboard, but I would think it would be difficult to draw directly from a pipe led outside on the bow... I would think at least a small cistern would be needed.
Very interesting!
Evan


USS United States by popeye the sailor - Revell - 1/96 - PLASTIC - bash
in - Kit build logs for subjects built from 1901 - Present Day
Posted
Great progress Popeye... I used the kit deck and scribed my own plank pattern after sanding the deck smooth. Fun.
FYI - You can get a veneer deck for this kit thru John at scaledecks.com
Evan