HOLIDAY DONATION DRIVE - SUPPORT MSW - DO YOUR PART TO KEEP THIS GREAT FORUM GOING! (Only 13 donations so far - C'mon guys!)
×


Louie da fly
-
Posts
7,986 -
Joined
-
Last visited
Content Type
Profiles
Forums
Gallery
Events
Everything posted by Louie da fly
-
 Hi Peter. Looking forward to seeing your progress. Steven
- 69 replies
-
- 3
-

-

-
- spanish galleon
- Imai
- (and 1 more)
-
Um . . . where I come from we call those things scones. A biscuit is something like this - but I believe our American cousins call these cookies . . . Steven PS: Add my vote to see a build log for your Norden. I haven't visited North Yorkshire, but I did get to York. Amazing place. Loved it.

-
You're doing a beautiful job already. I've a long history as a mediaeval (Viking period) re-enactor, and if you want to pick my brain about details of things like the rig of ships, size and thickness of shields and their decoration, cargo, and anything else that I might be able to help with, feel free to ask. Steven
-
Superb work, Patrick! Steven
-
Oh, and regarding the overlap in the yard - I agonised over that for quite a while. Though there are certainly some examples with greater overlap, I based it on the majority of contemporary illustrations and several modern photos. Steven

- 508 replies
-
- 10
-
-

-
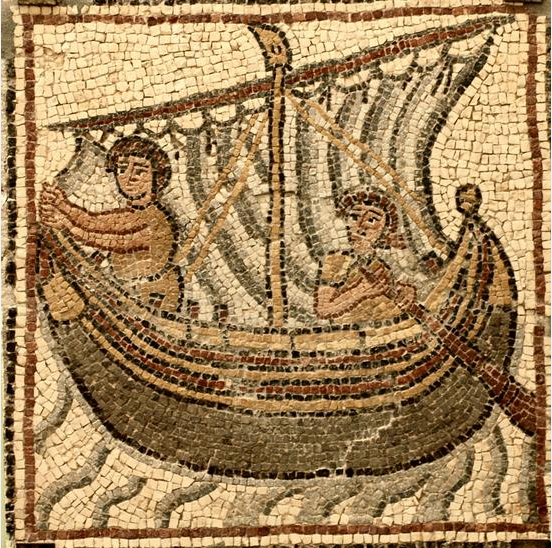
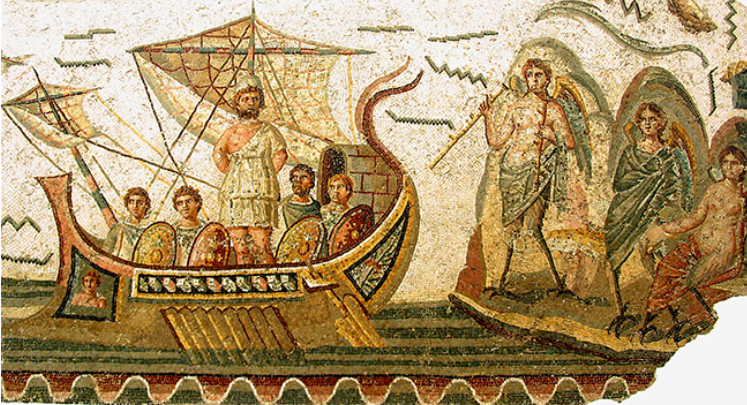
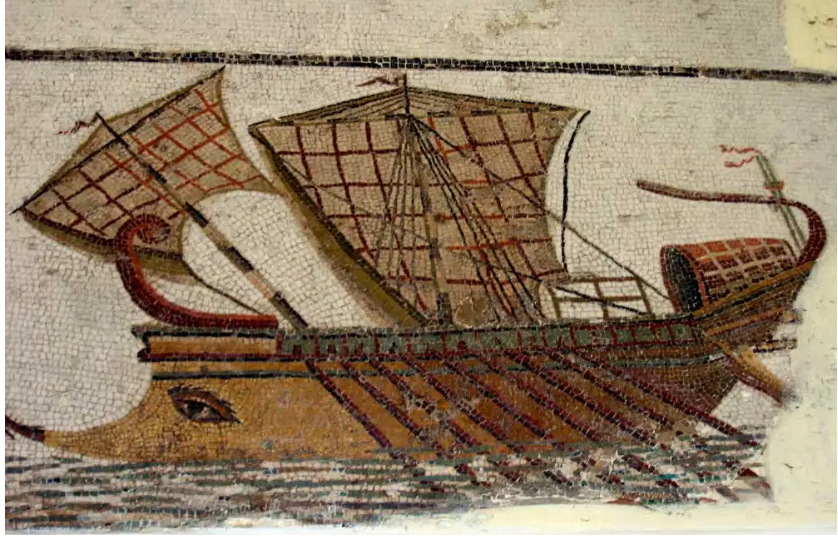
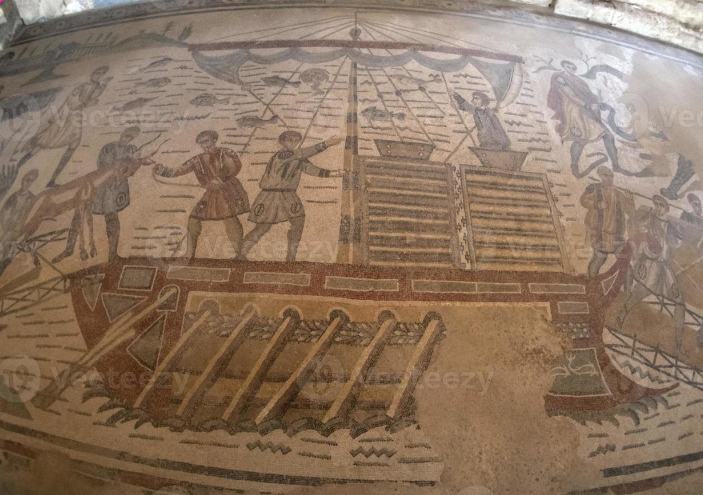
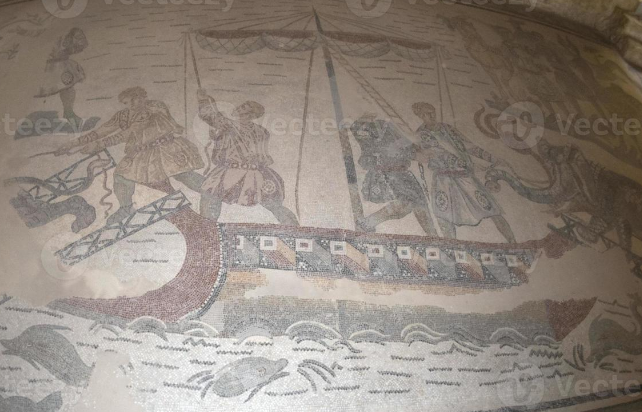
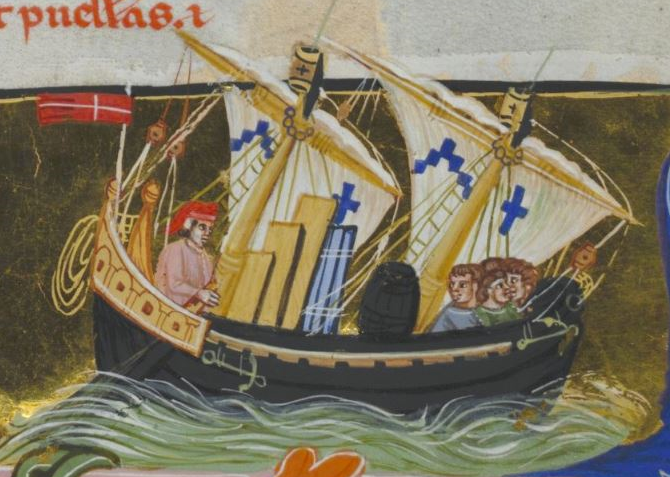
Thanks everyone for the likes. Ian; again I think you'd have to look at contemporary pics to work out whether to make your yard in two pieces. The first consideration would be - how long was the yard? Lateen yards, because they are on a diagonal, are longer than square yards. Could your galley's yard be made from a single tree? Were trees available tall and thin enough? The second consideration - did contemporary artists accurately depict the yard, or just portray it as a single piece because they were (a) lazy or (b) ignorant? Here are some contemporary pics of Roman ships under sail. I'm afraid you'll have to draw your own conclusions. Villa of the Augustinian era. Palazzo Massimo Museo Nazionale Romano Mosaic in Qasr, Libya c. 540 C.E. Yard indeterminate Single yard Roman mosaic of Odysseus, 2nd century CE, displayed at the Bardo Museum in Tunisia. - single yard. Fragment of the mosaic showing the Roman galley, 2nd century CE. Single yard. And note the nice awning. Two Ancient Roman mosaics from the Villa del Casale, Sicily. Single yard. Third question - lot of the time they are shown under oars with the mast lowered- do you even need to show her under sail? Steven
-
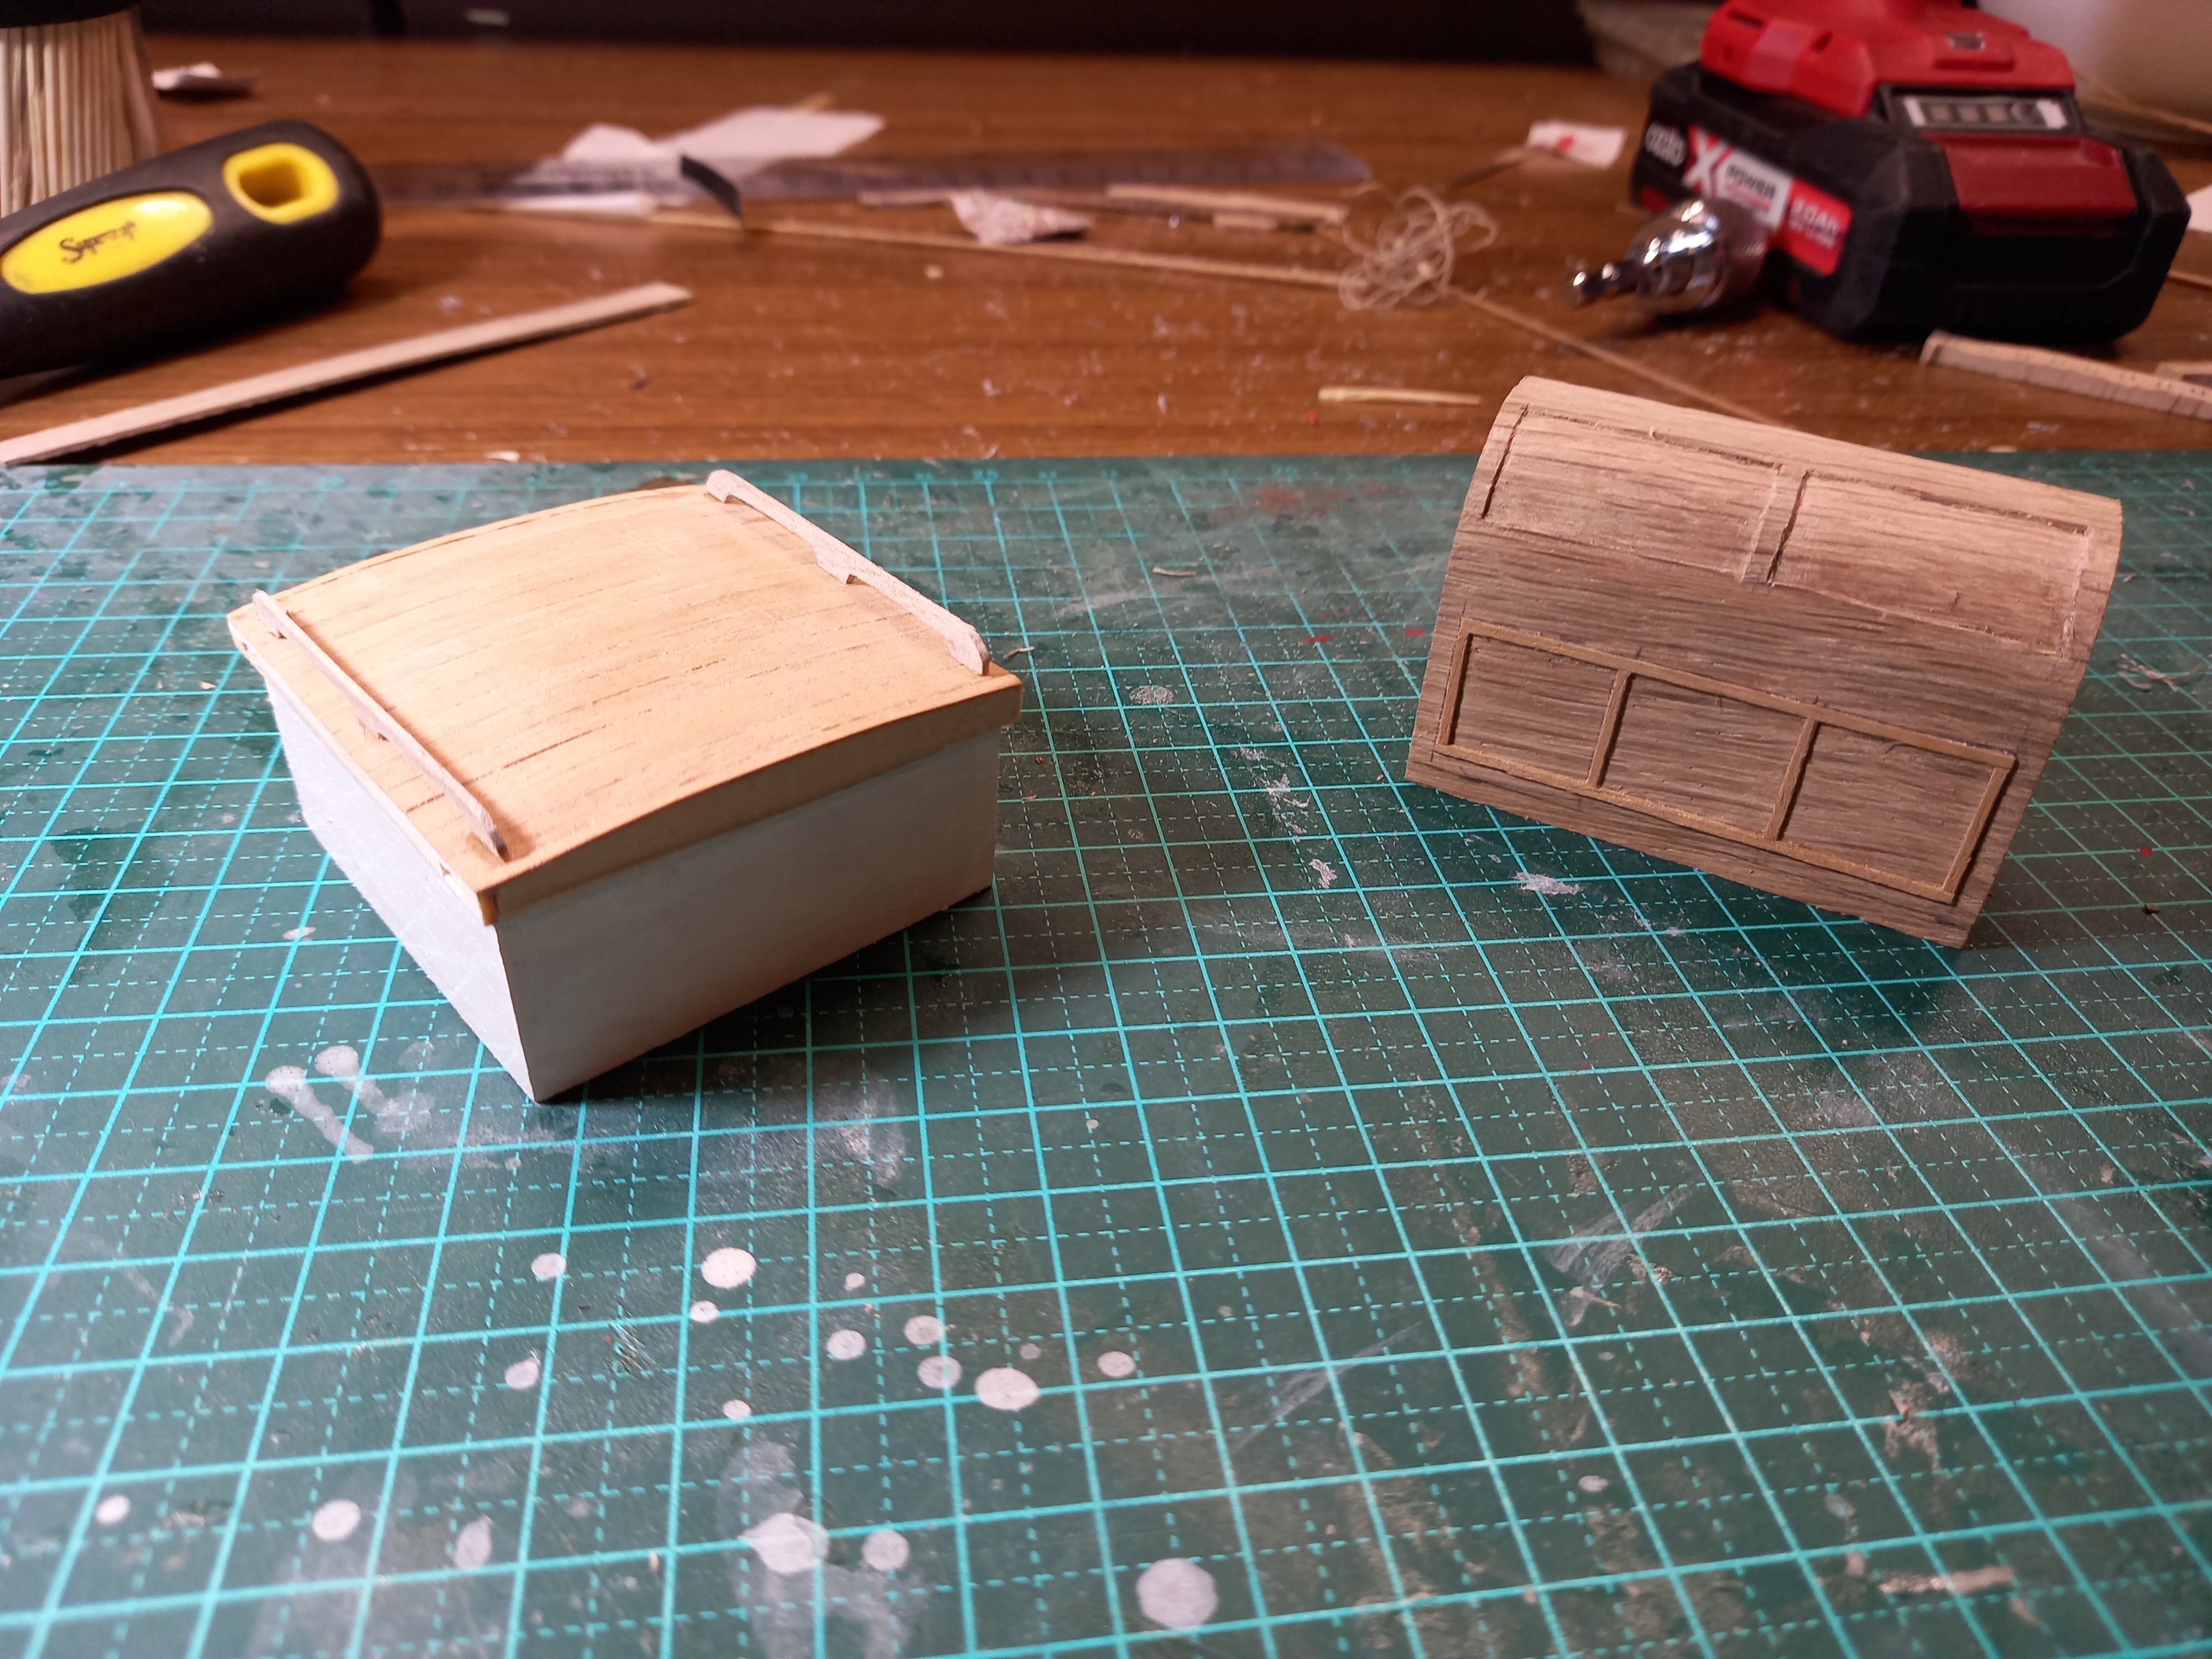
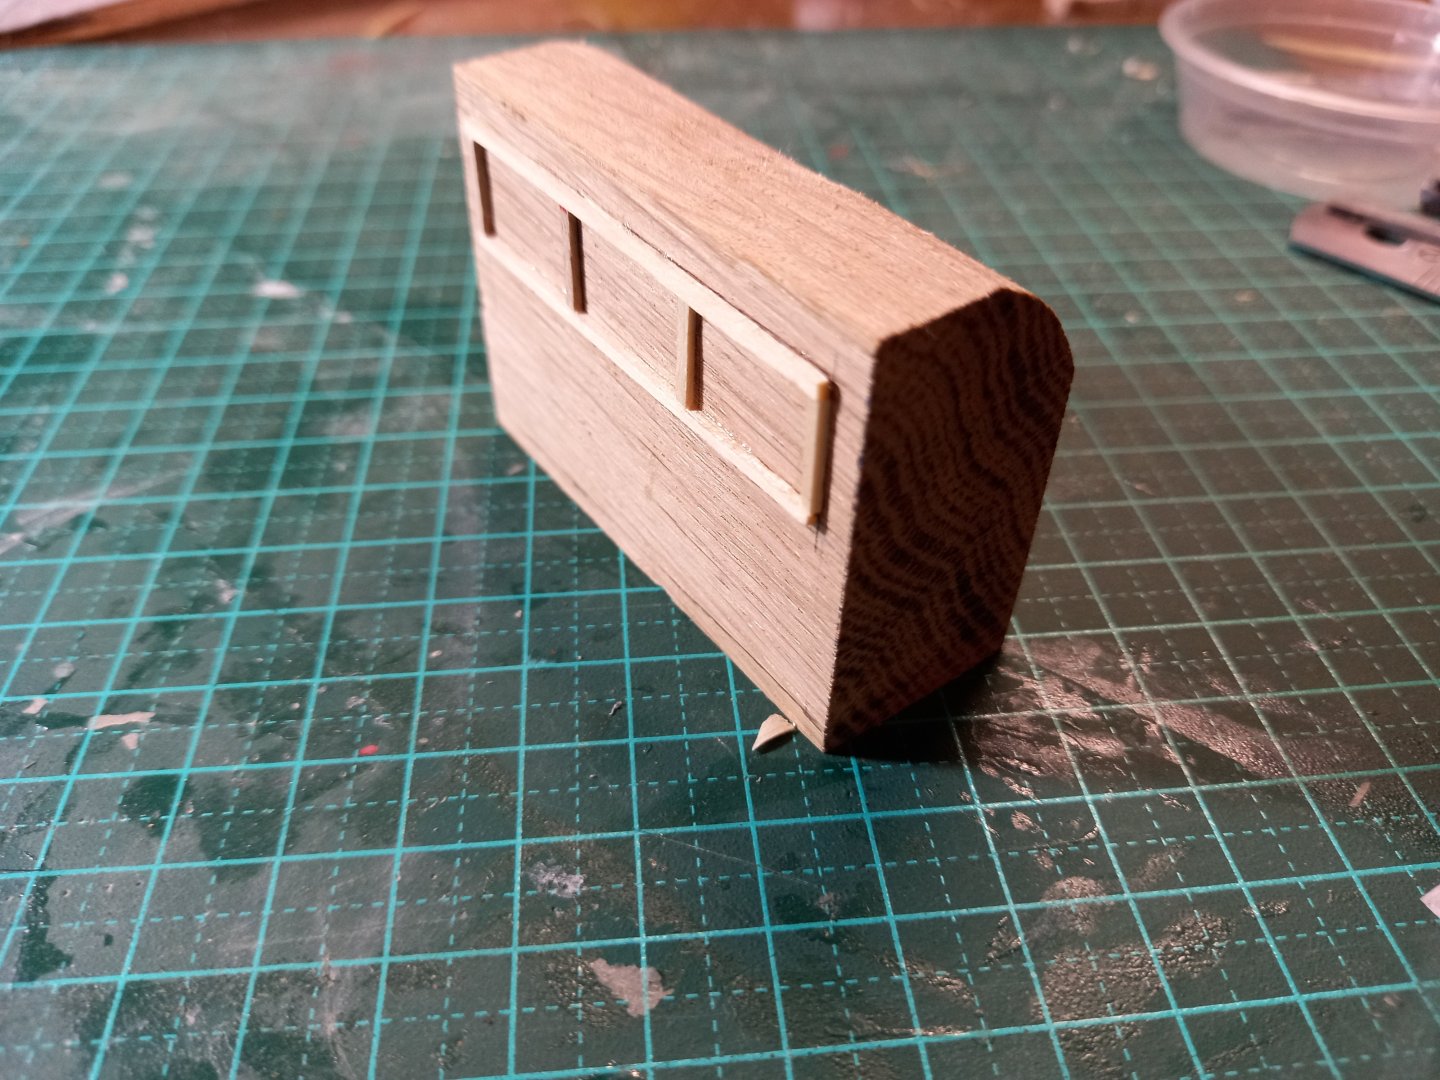
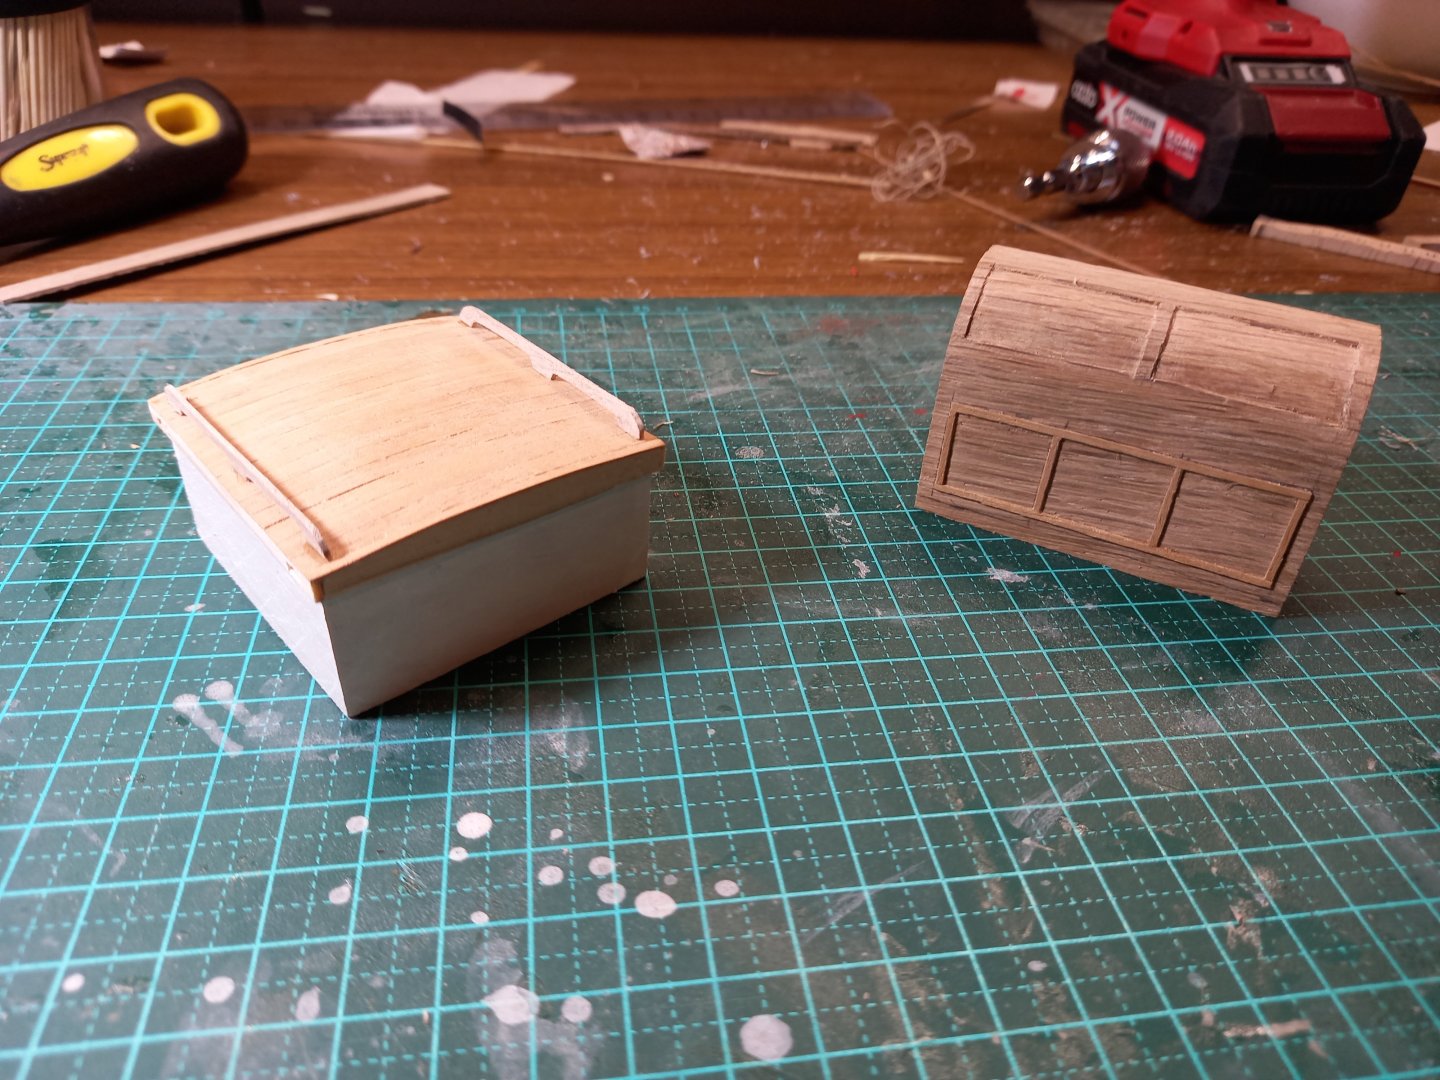
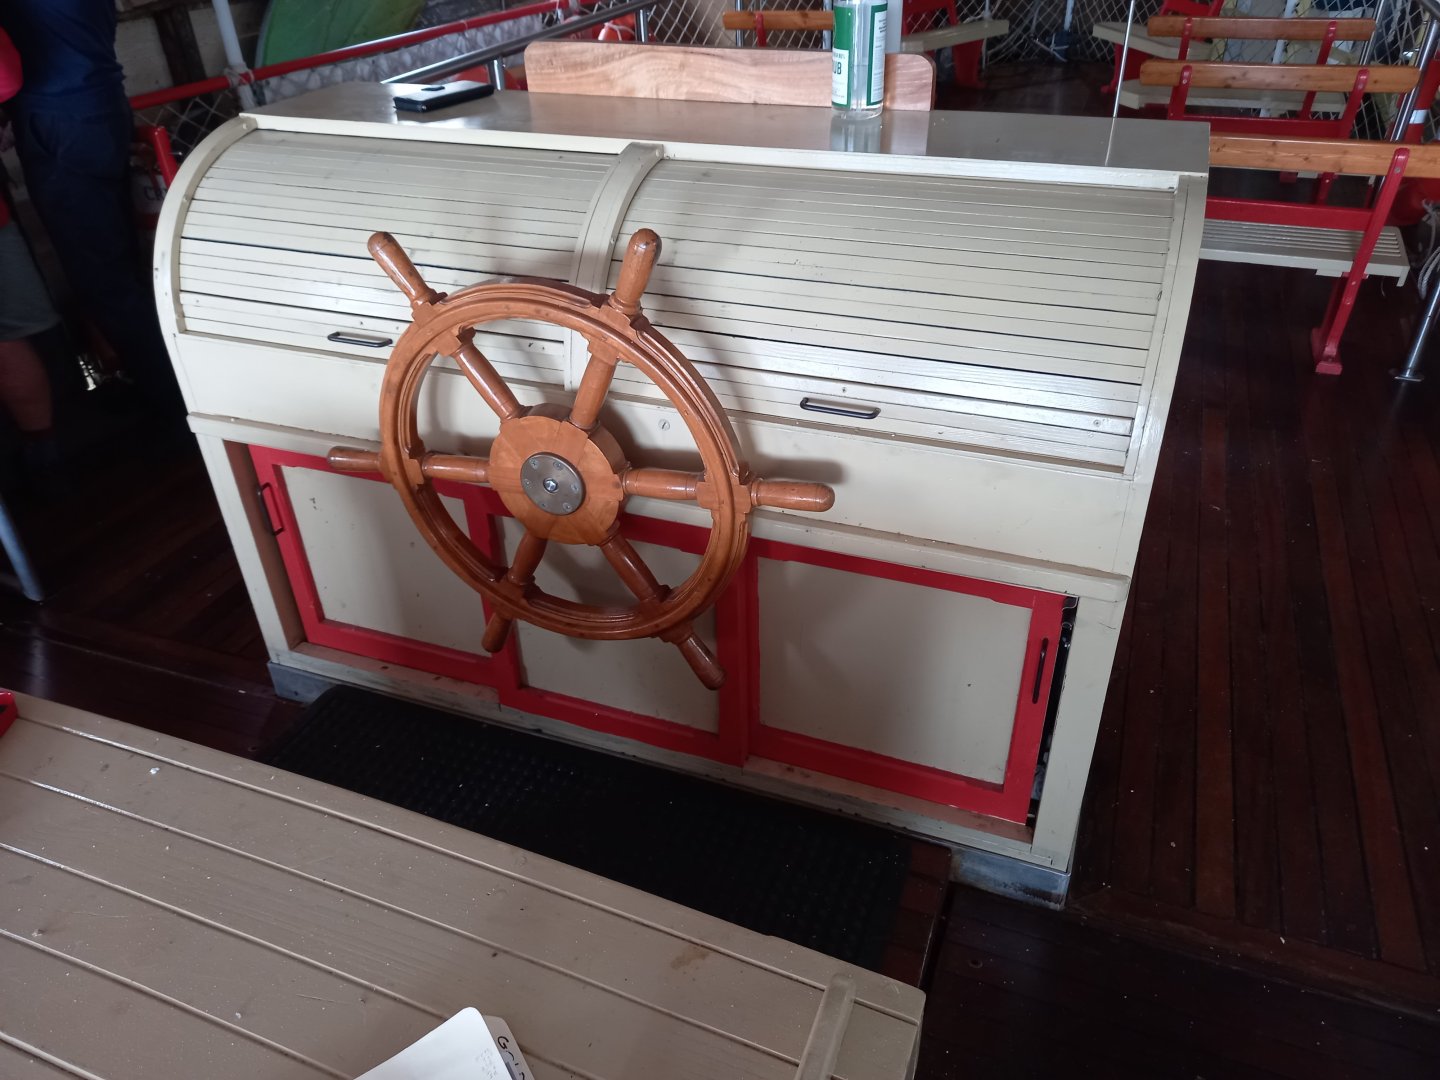
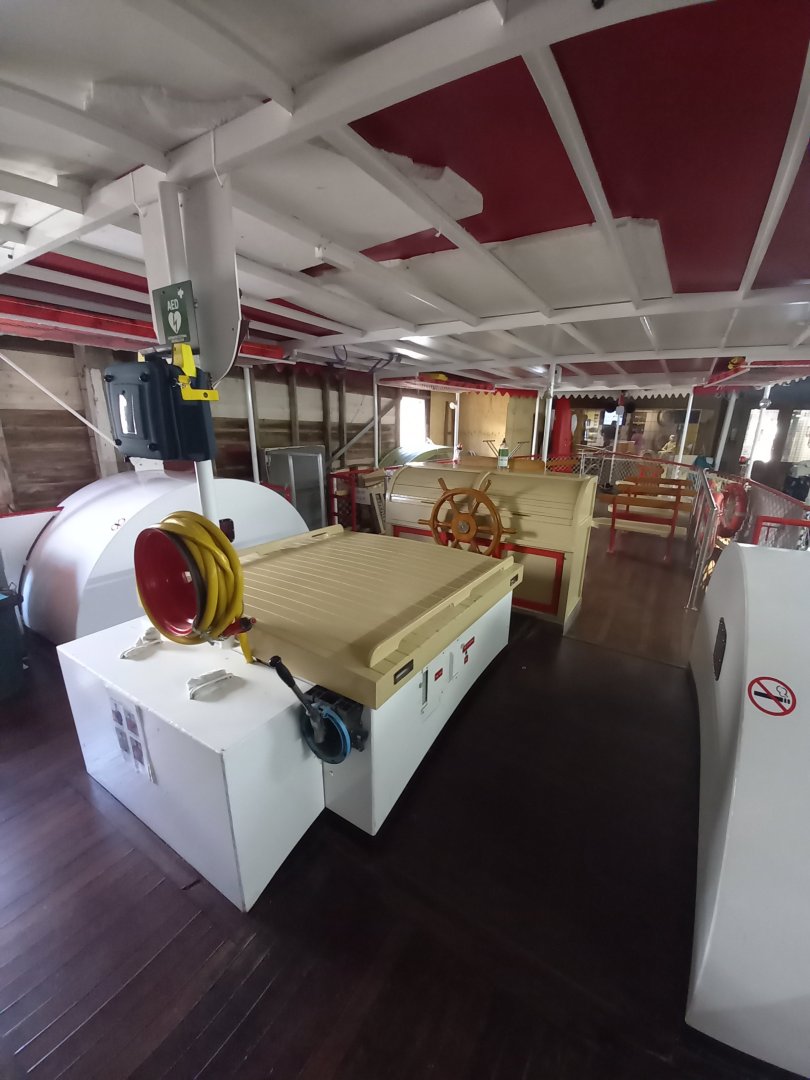
Deck fixtures and fittings for the big one. I'm putting more work into the detail for this one because it'll be on permanent public display. And here are the full sized ones . . . Steven
- 110 replies
-
- 10
-
-
-
- Paddlewheeler
- Ballarat
- (and 3 more)
-
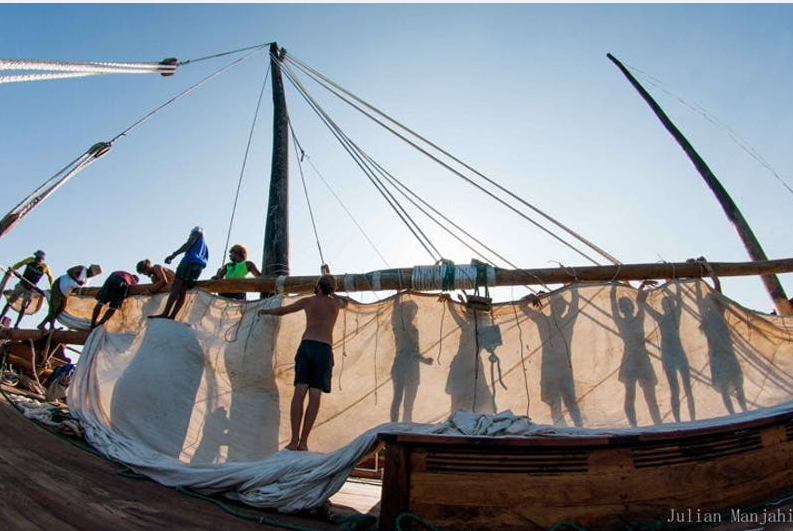
Working on the bolt ropes and robands. (Took me 4 tries before I could cancel spell-correct. Roland's, ribands, you name it . . .) Mizzen complete and sail curved to indicate the wind. Seems to have worked. And now to do the same for the middle and fore mast sails. Steven


- 508 replies
-
- 12
-
-
-
HMCSS Victoria 1855 by BANYAN - 1:72
Louie da fly replied to BANYAN's topic in - Build logs for subjects built 1851 - 1900
Wonderful work, as usual, Pat. Steven- 1,002 replies
-
- 4
-
-
- gun dispatch vessel
- victoria
- (and 2 more)
-
Glad you liked the Pompeii pics. Naturally, go with the awning you want to have. You don't have to make it hard on yourself. I'm interested in seeing how you solve the problem of making it, but I'm sure you'll succeed. Italy is an amazing place, chockablock with history. I've only been to Torino (Turin) and Rome, but even with just those two I was blown away. But make sure you include Venice in your itinerary, and spend time in San Marco (Saint Mark's) basilica. Apart from anything else, the mosaics are out of this world! (My wife's been there - I am so jealous!) Steven PS: I'd love a good picture of this mosaic, but unfortunately they don't allow photography.
- 536 replies
-
- 5
-
-
- Quadrireme
- radio
- (and 1 more)
-
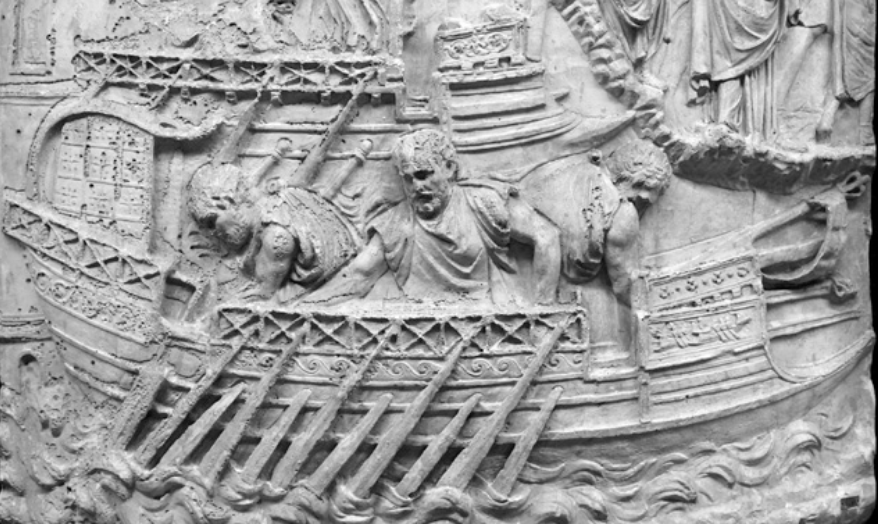
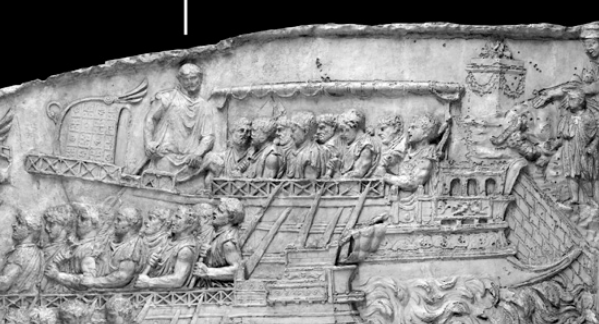
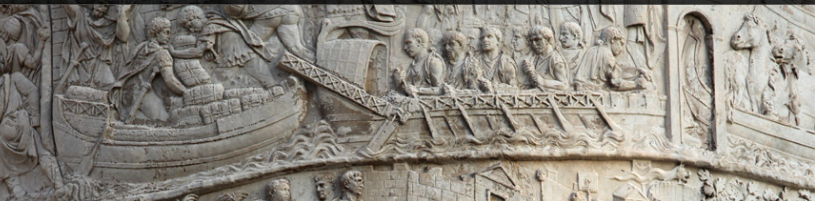
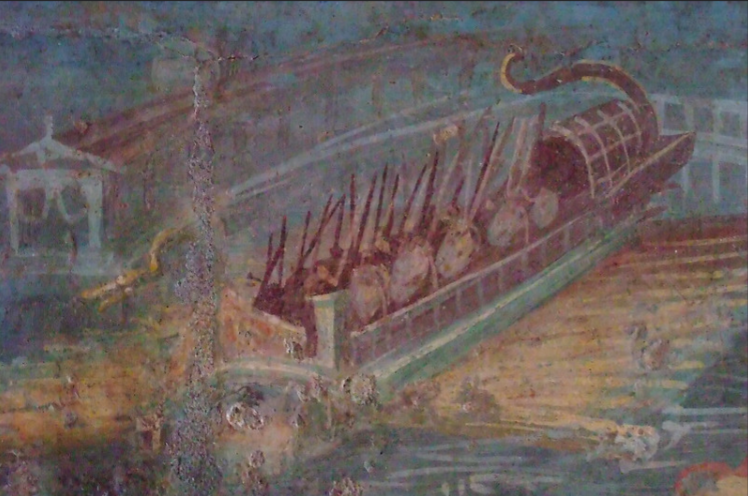
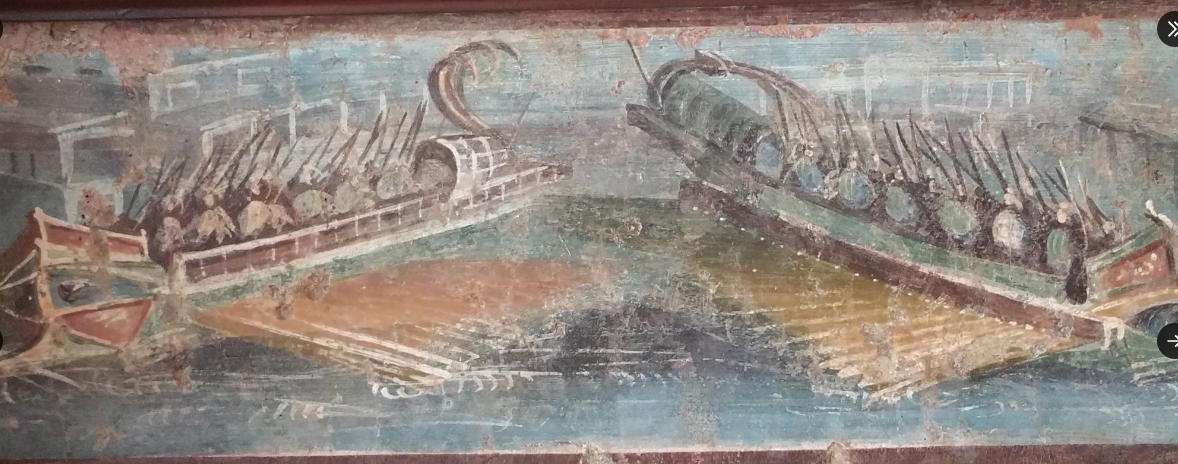
I've just been looking for contemporary representations of these awnings - they're a bit few and far between - most are modern interpretations. But Trajan's column has this: and these And these frescoes are from Pompeii: Not quadriremes admittedly, but certainly war galleys. And though other forms of awning are perhaps not unknown, these arched ones seem very common. I agree that if you want to use the awning as a "handle" you need something fairly robust. I suppose it depends how robust you want it. I've had success with the technique I showed above, but it probably isn't strong enough for your purposes. Perhaps turn a hollow cylinder on a lathe and then cut it lengthwise to act as the arched part. Or use a hollow metal or plastic cylinder the same way. Adding the vertical sides so the top doesn't pull away from them as you lift might be a problem. But certainly, something solid with a fake fabric top looks to be the way to go. And perhaps a bentwood fake framework (as shown on the pictures above) as well. Again, I've had success bending wood in quite tight arcs - see post #217 at Hope this helps, Steven
- 536 replies
-
- 7
-
-
-
- Quadrireme
- radio
- (and 1 more)
-
Do you have a picture of how you want it to look? You might like to have a look at how I did the one on my dromon - and the following page, as well as She's looking very good. Steven
- 536 replies
-
- 3
-
-
- Quadrireme
- radio
- (and 1 more)
-
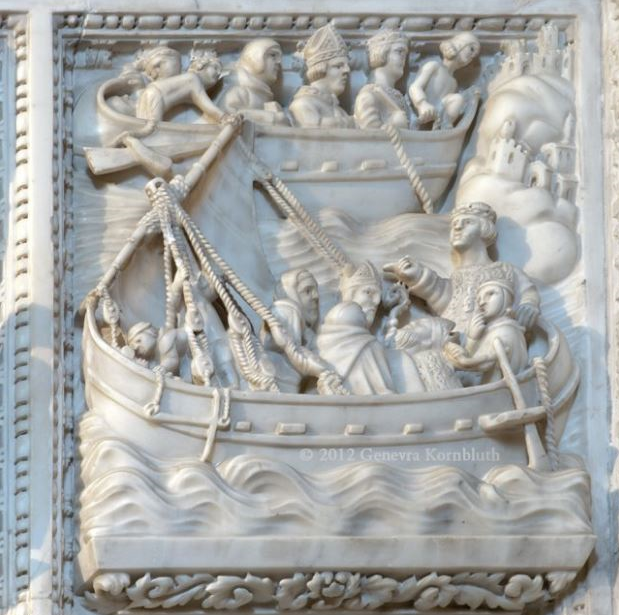
Yes, anchors of the time had to be made in pieces by hand and hand-forged together by a blacksmith. They weren't terribly big at this time (as evidenced by anchors found in archaeology from the period) and a ship would have had to carry quite a large number (such as the 11th century Serce Limani wreck, which had 8 of them). The picture in post #414 above shows two anchors each side - one at the bow and one at the quarter, and I'd be very surprised if they didn't have more than that. Regarding the sliding stock, I'll have to think about that a bit. My interpretation of the mosaic picture is that as the stock is shown (unlike in the pictures in post #414) it was more likely to be a permanent stock at right angles to the arms. Steven
-
Oh, yes. I was assuming that. As you correctly surmised the diagram was just to work out proportions. Steven
-
Thanks everybody for the likes. Druxey, thanks for that. I'm still heart-in-mouth about dampening and shaping the sail. I'll try it with the mizzen (the most disposable and easily replaced) before I try it with the other two. Certainly the 14th century representations seem more reliable I'm inclined to go with the longer shank - and the flukes. Interestingly, neither of the examples above show the stock (perhaps it was only put in place when they were planning to drop anchor, as otherwise it would get in the way?), and both have a ring at the lower end (presumably for fishing the anchor). But the stock on the San Marco example is definitely there, so I'll be following that. My thought exactly. Steven
-
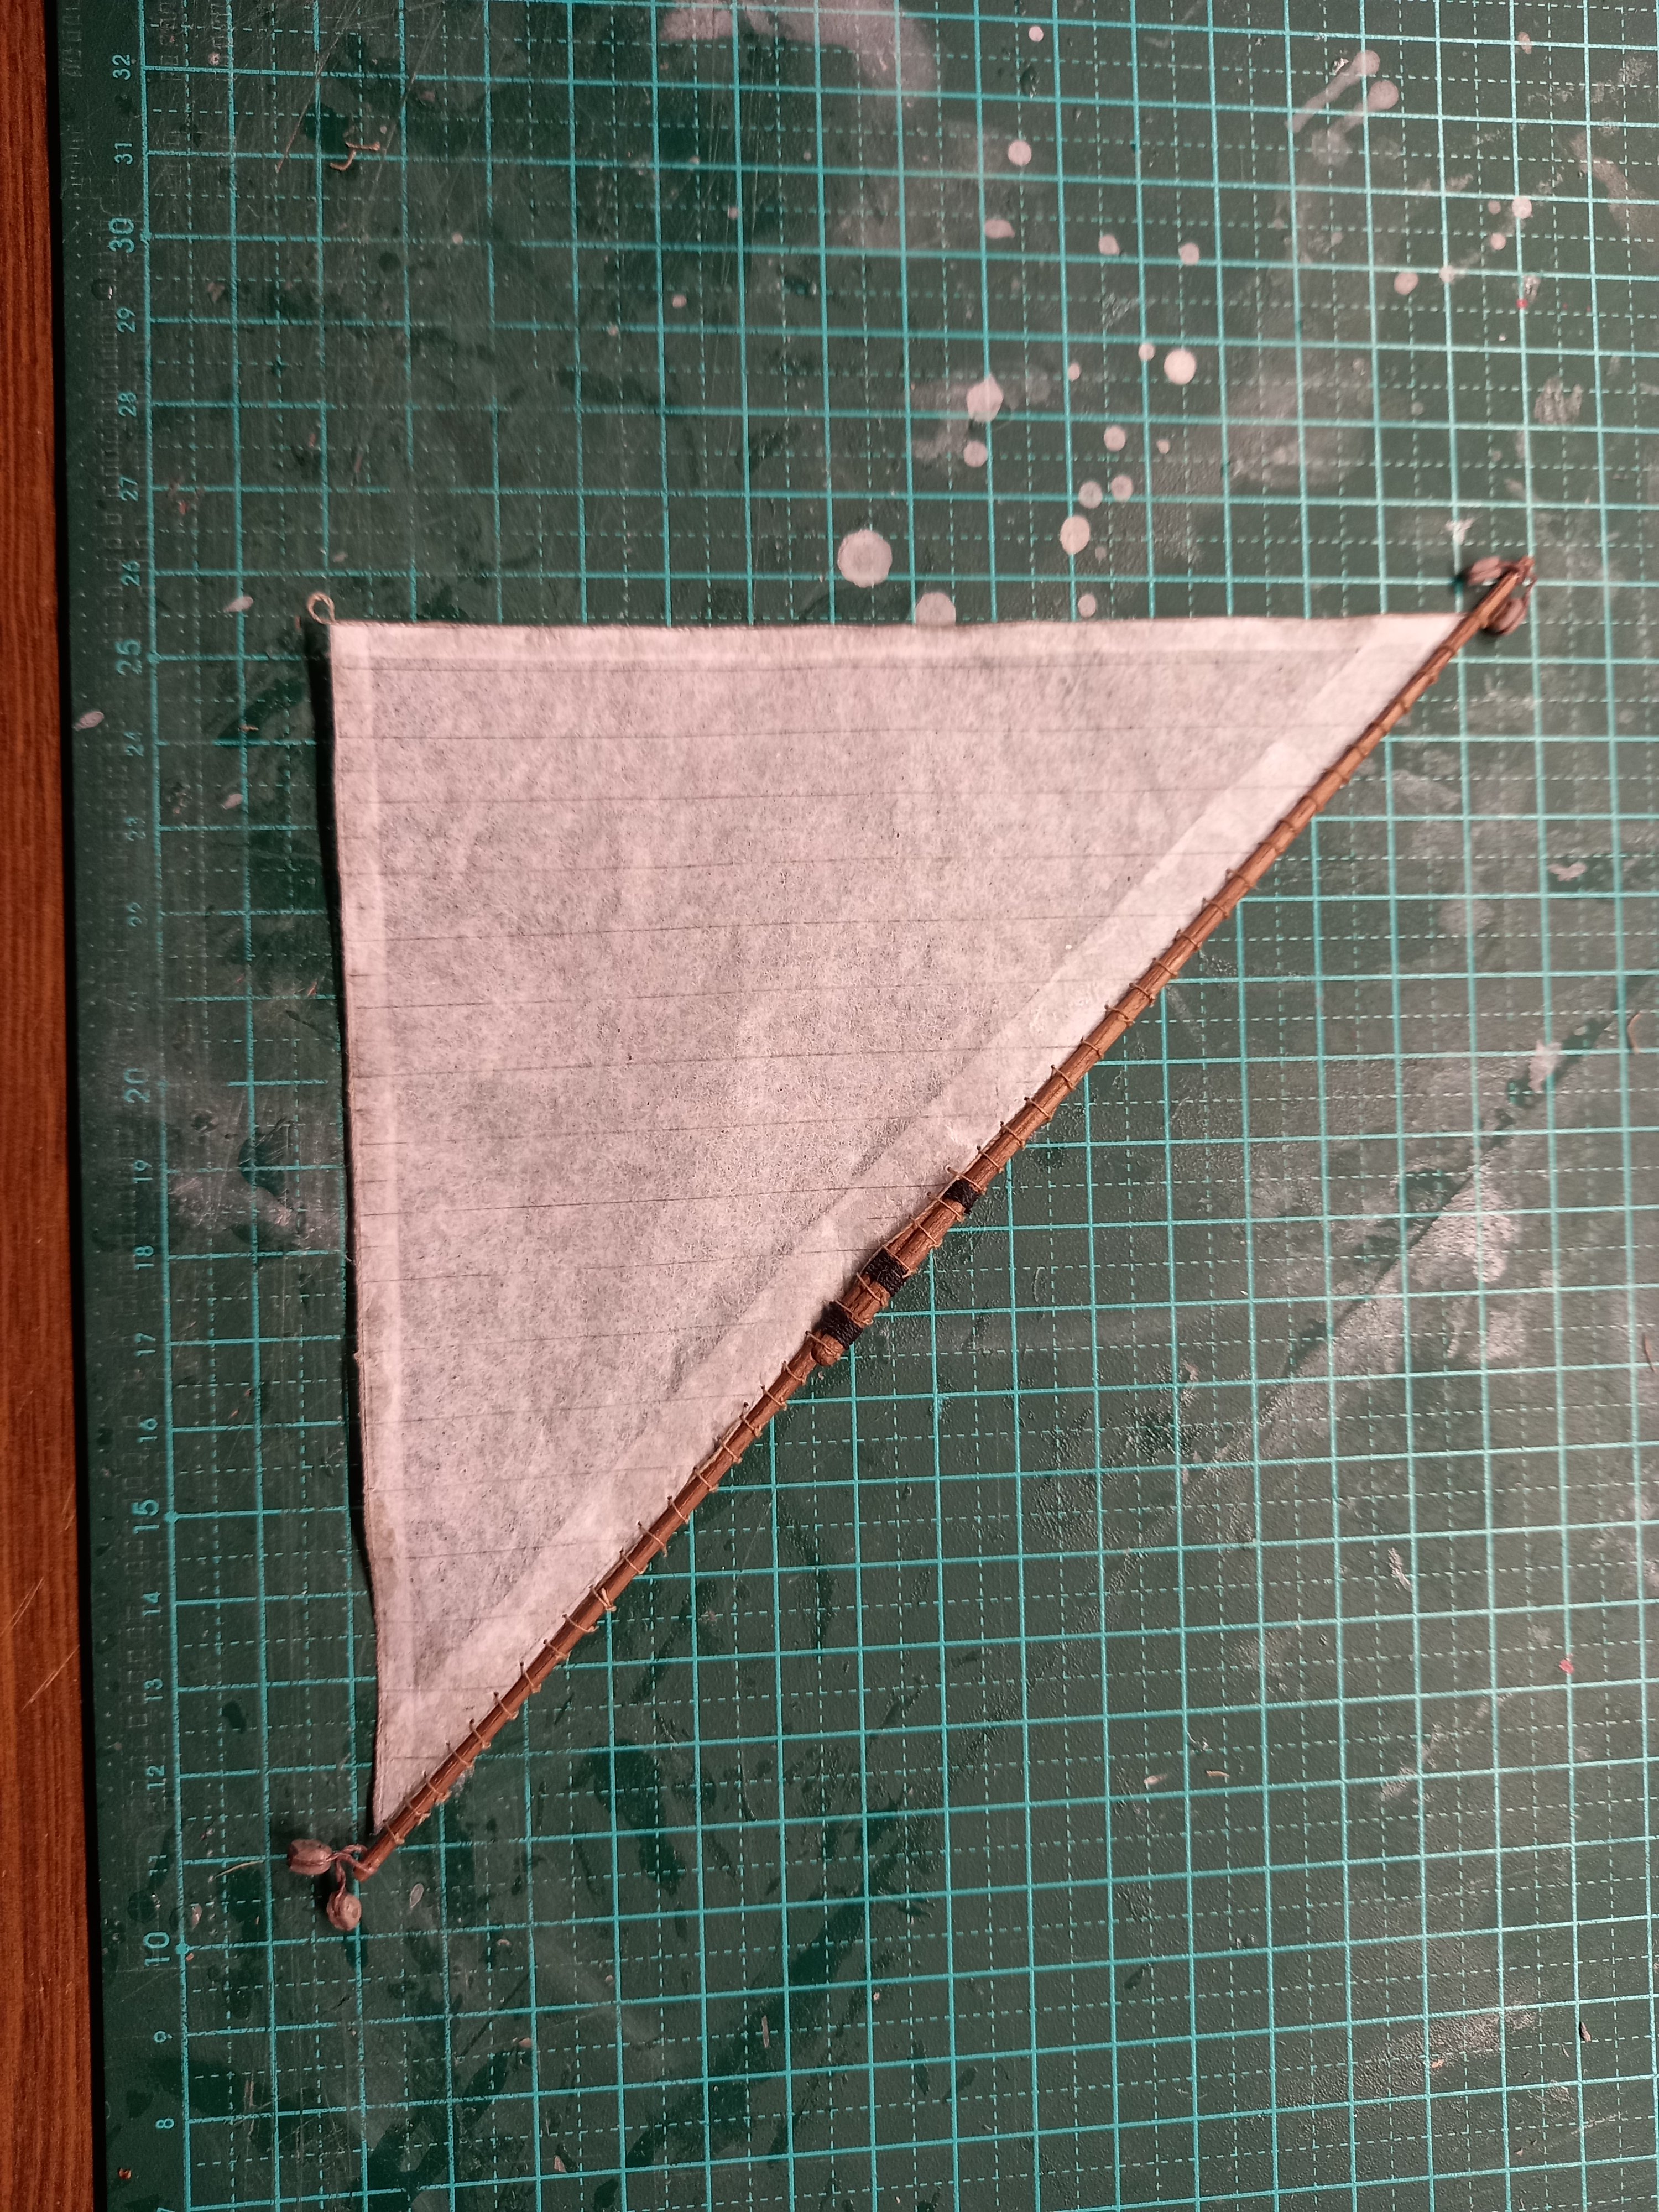
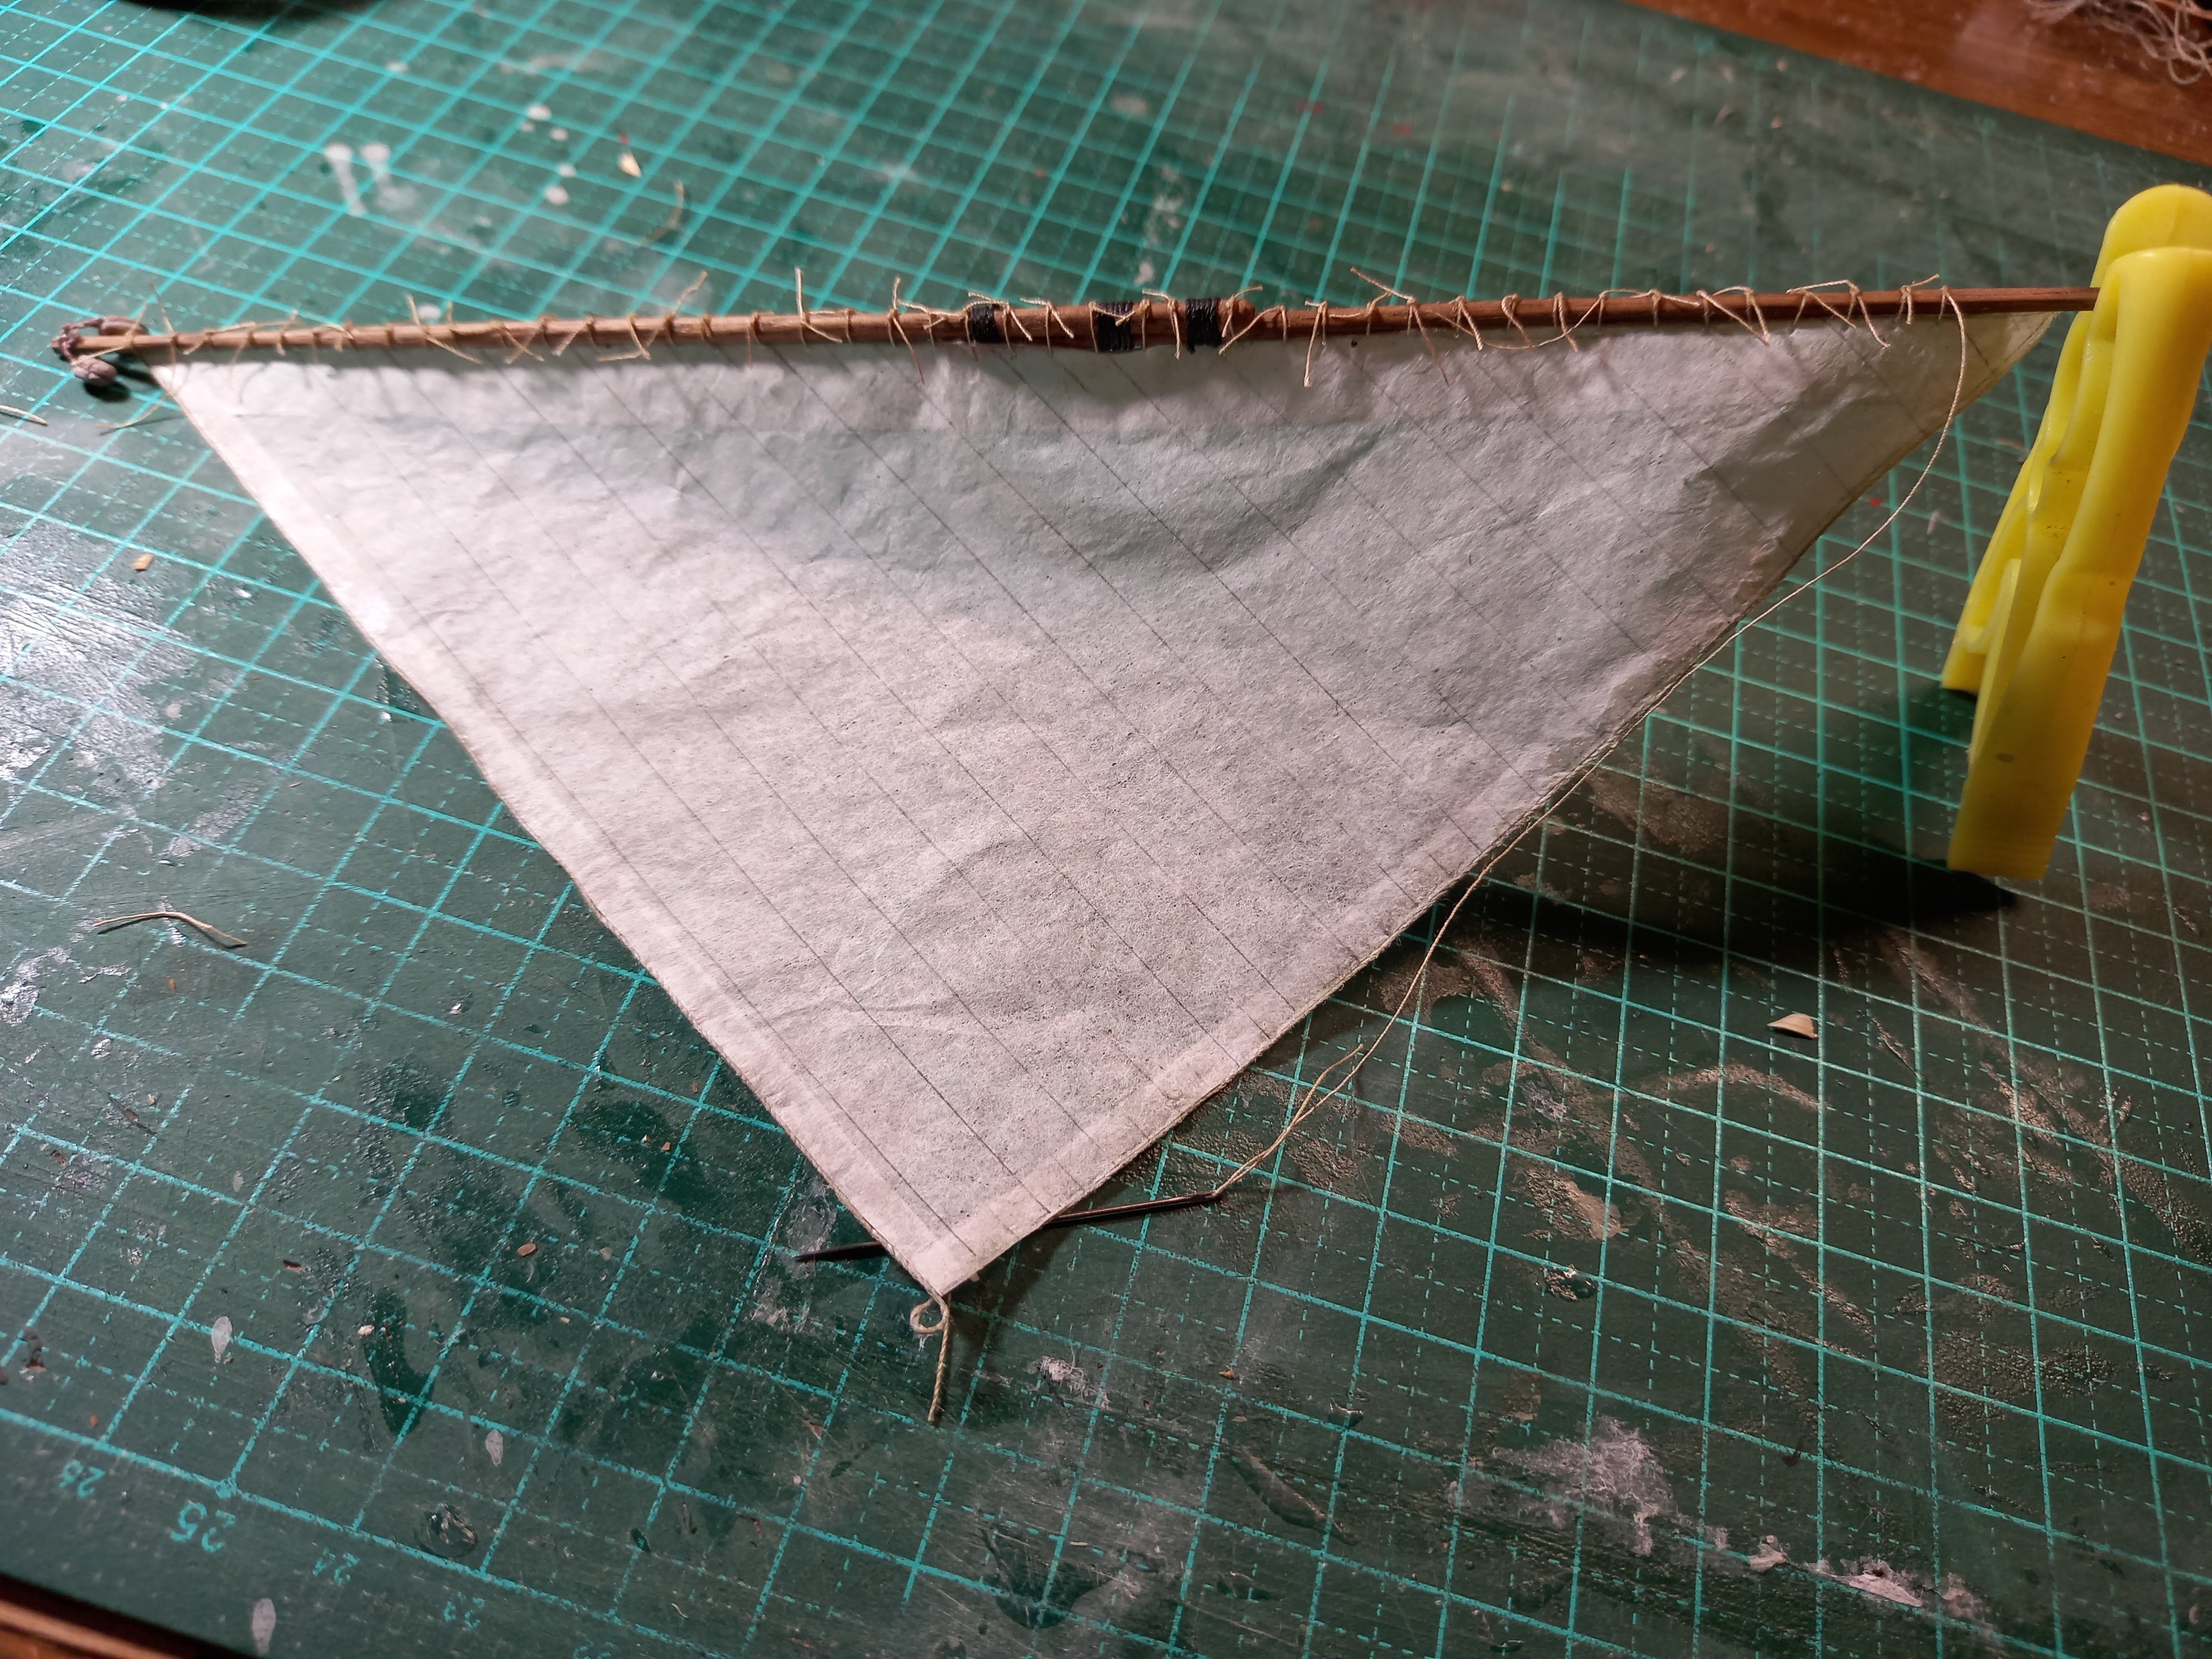
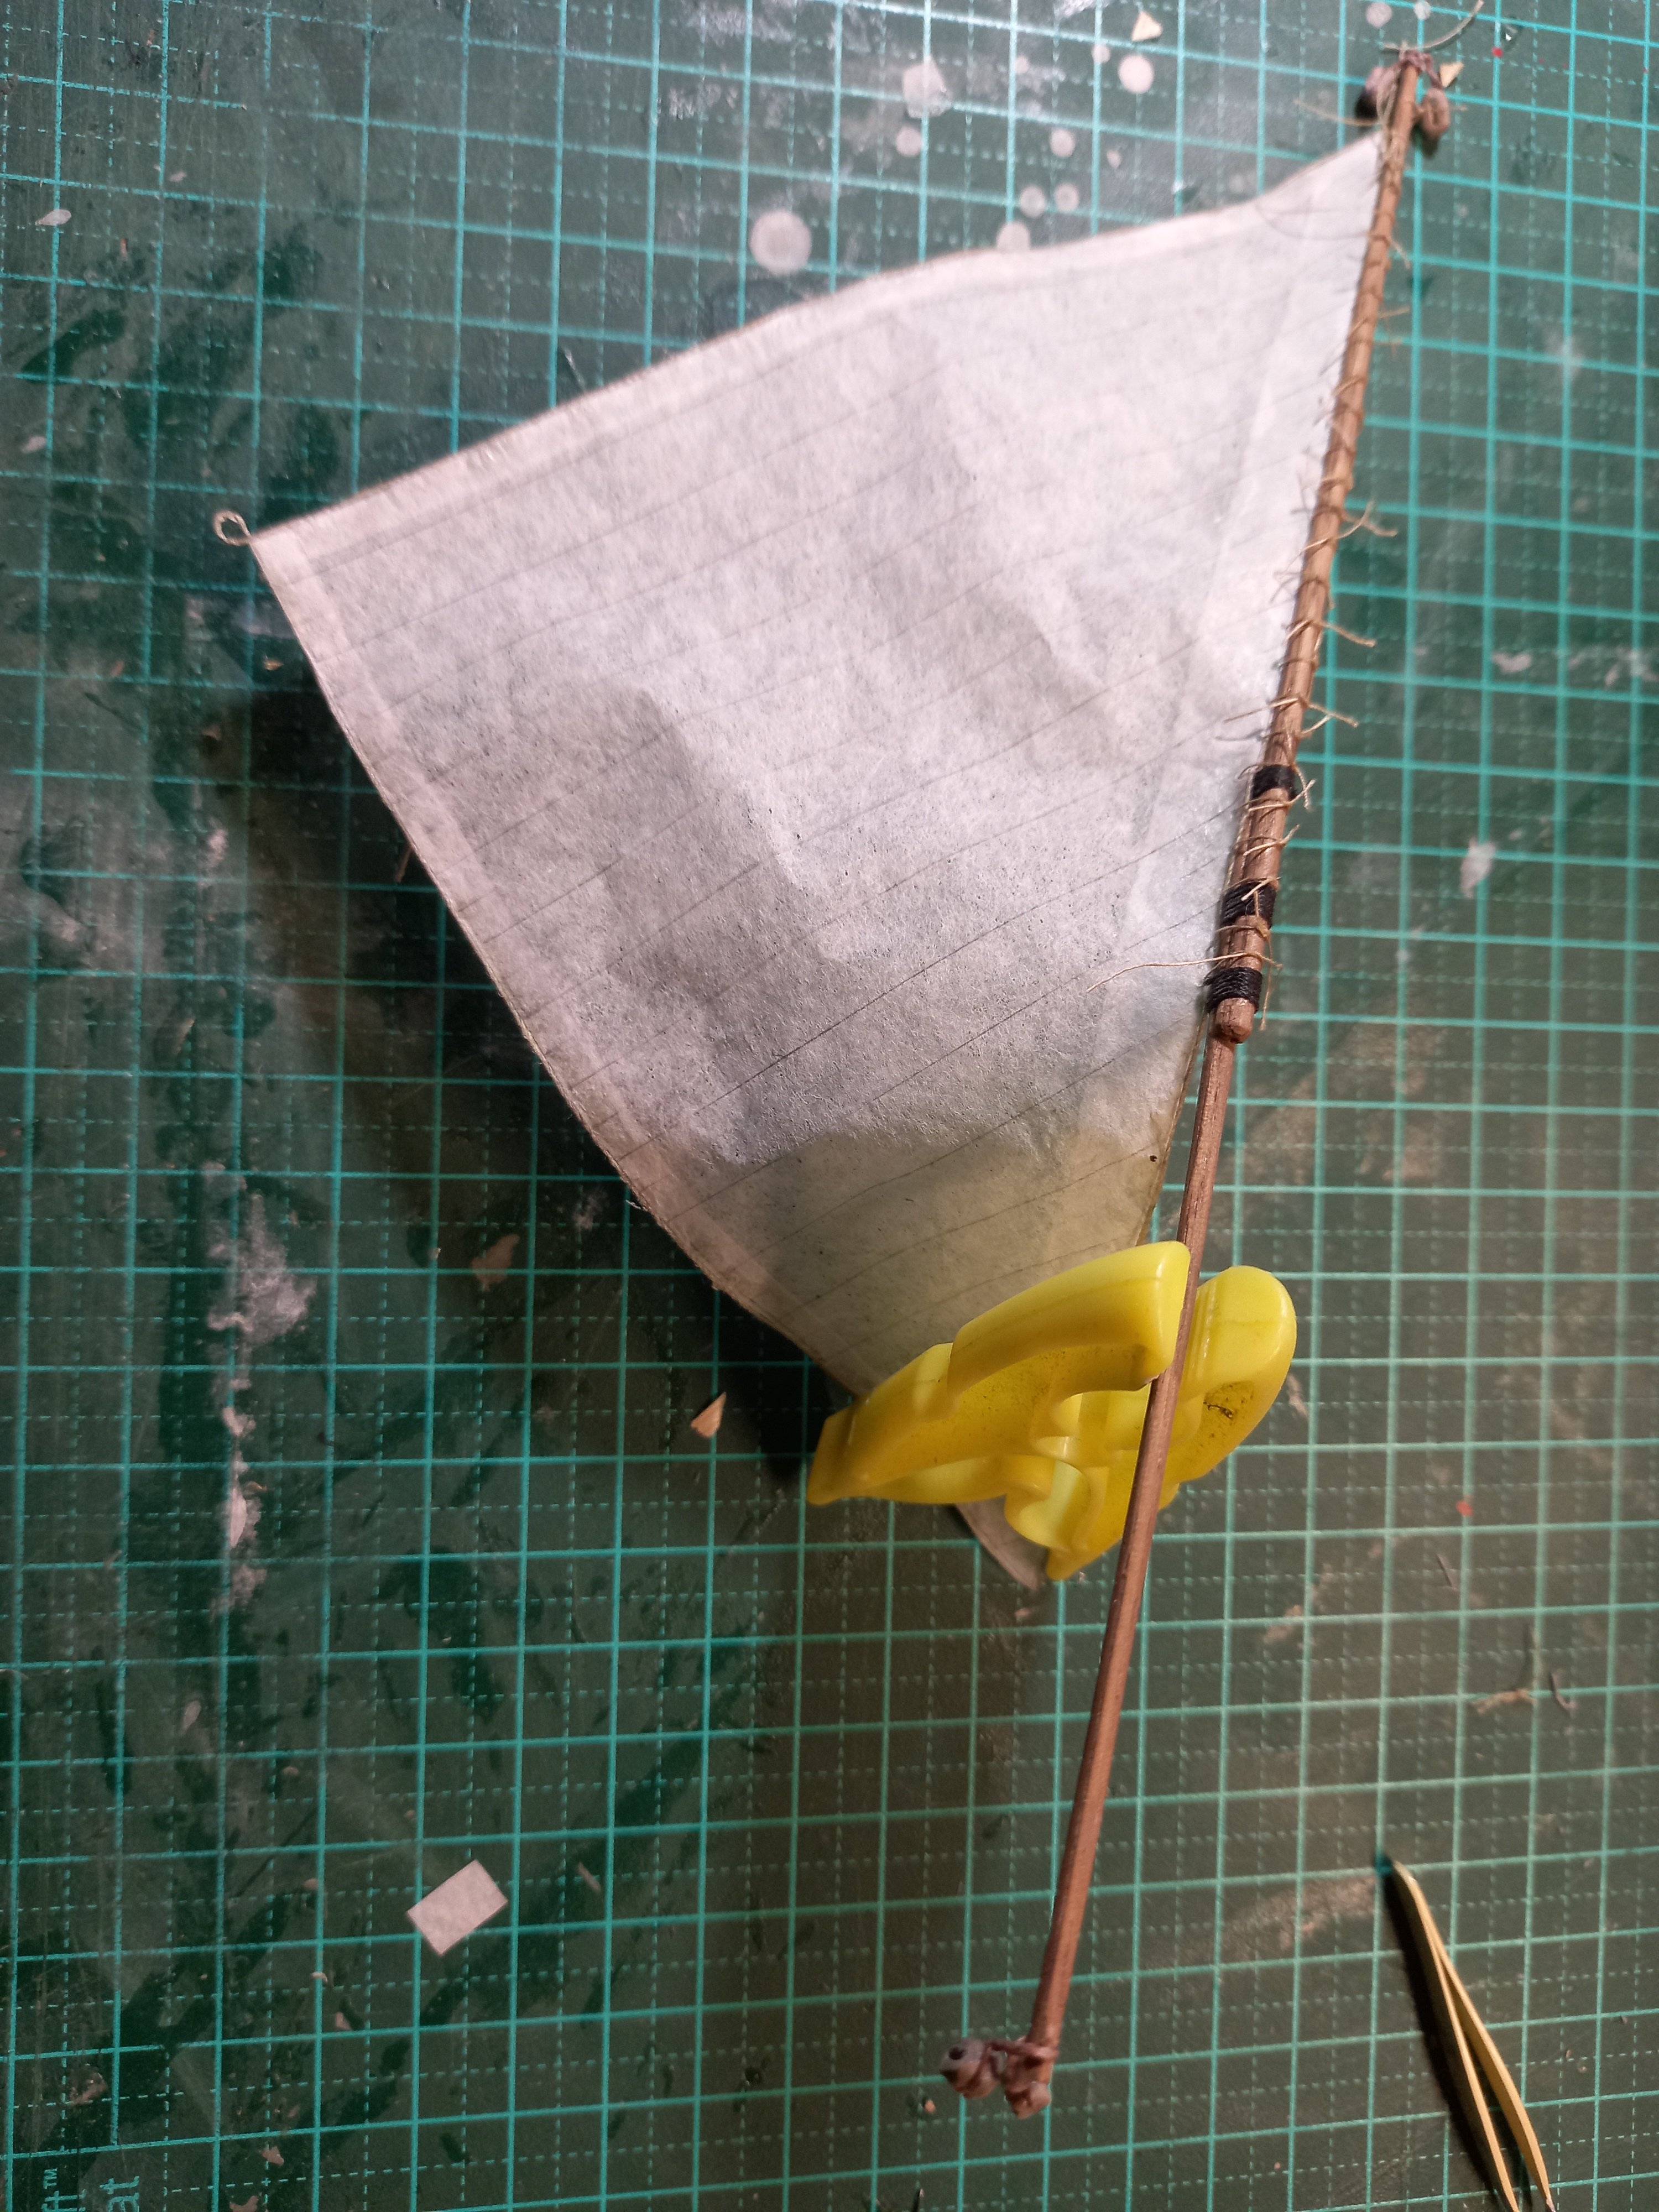
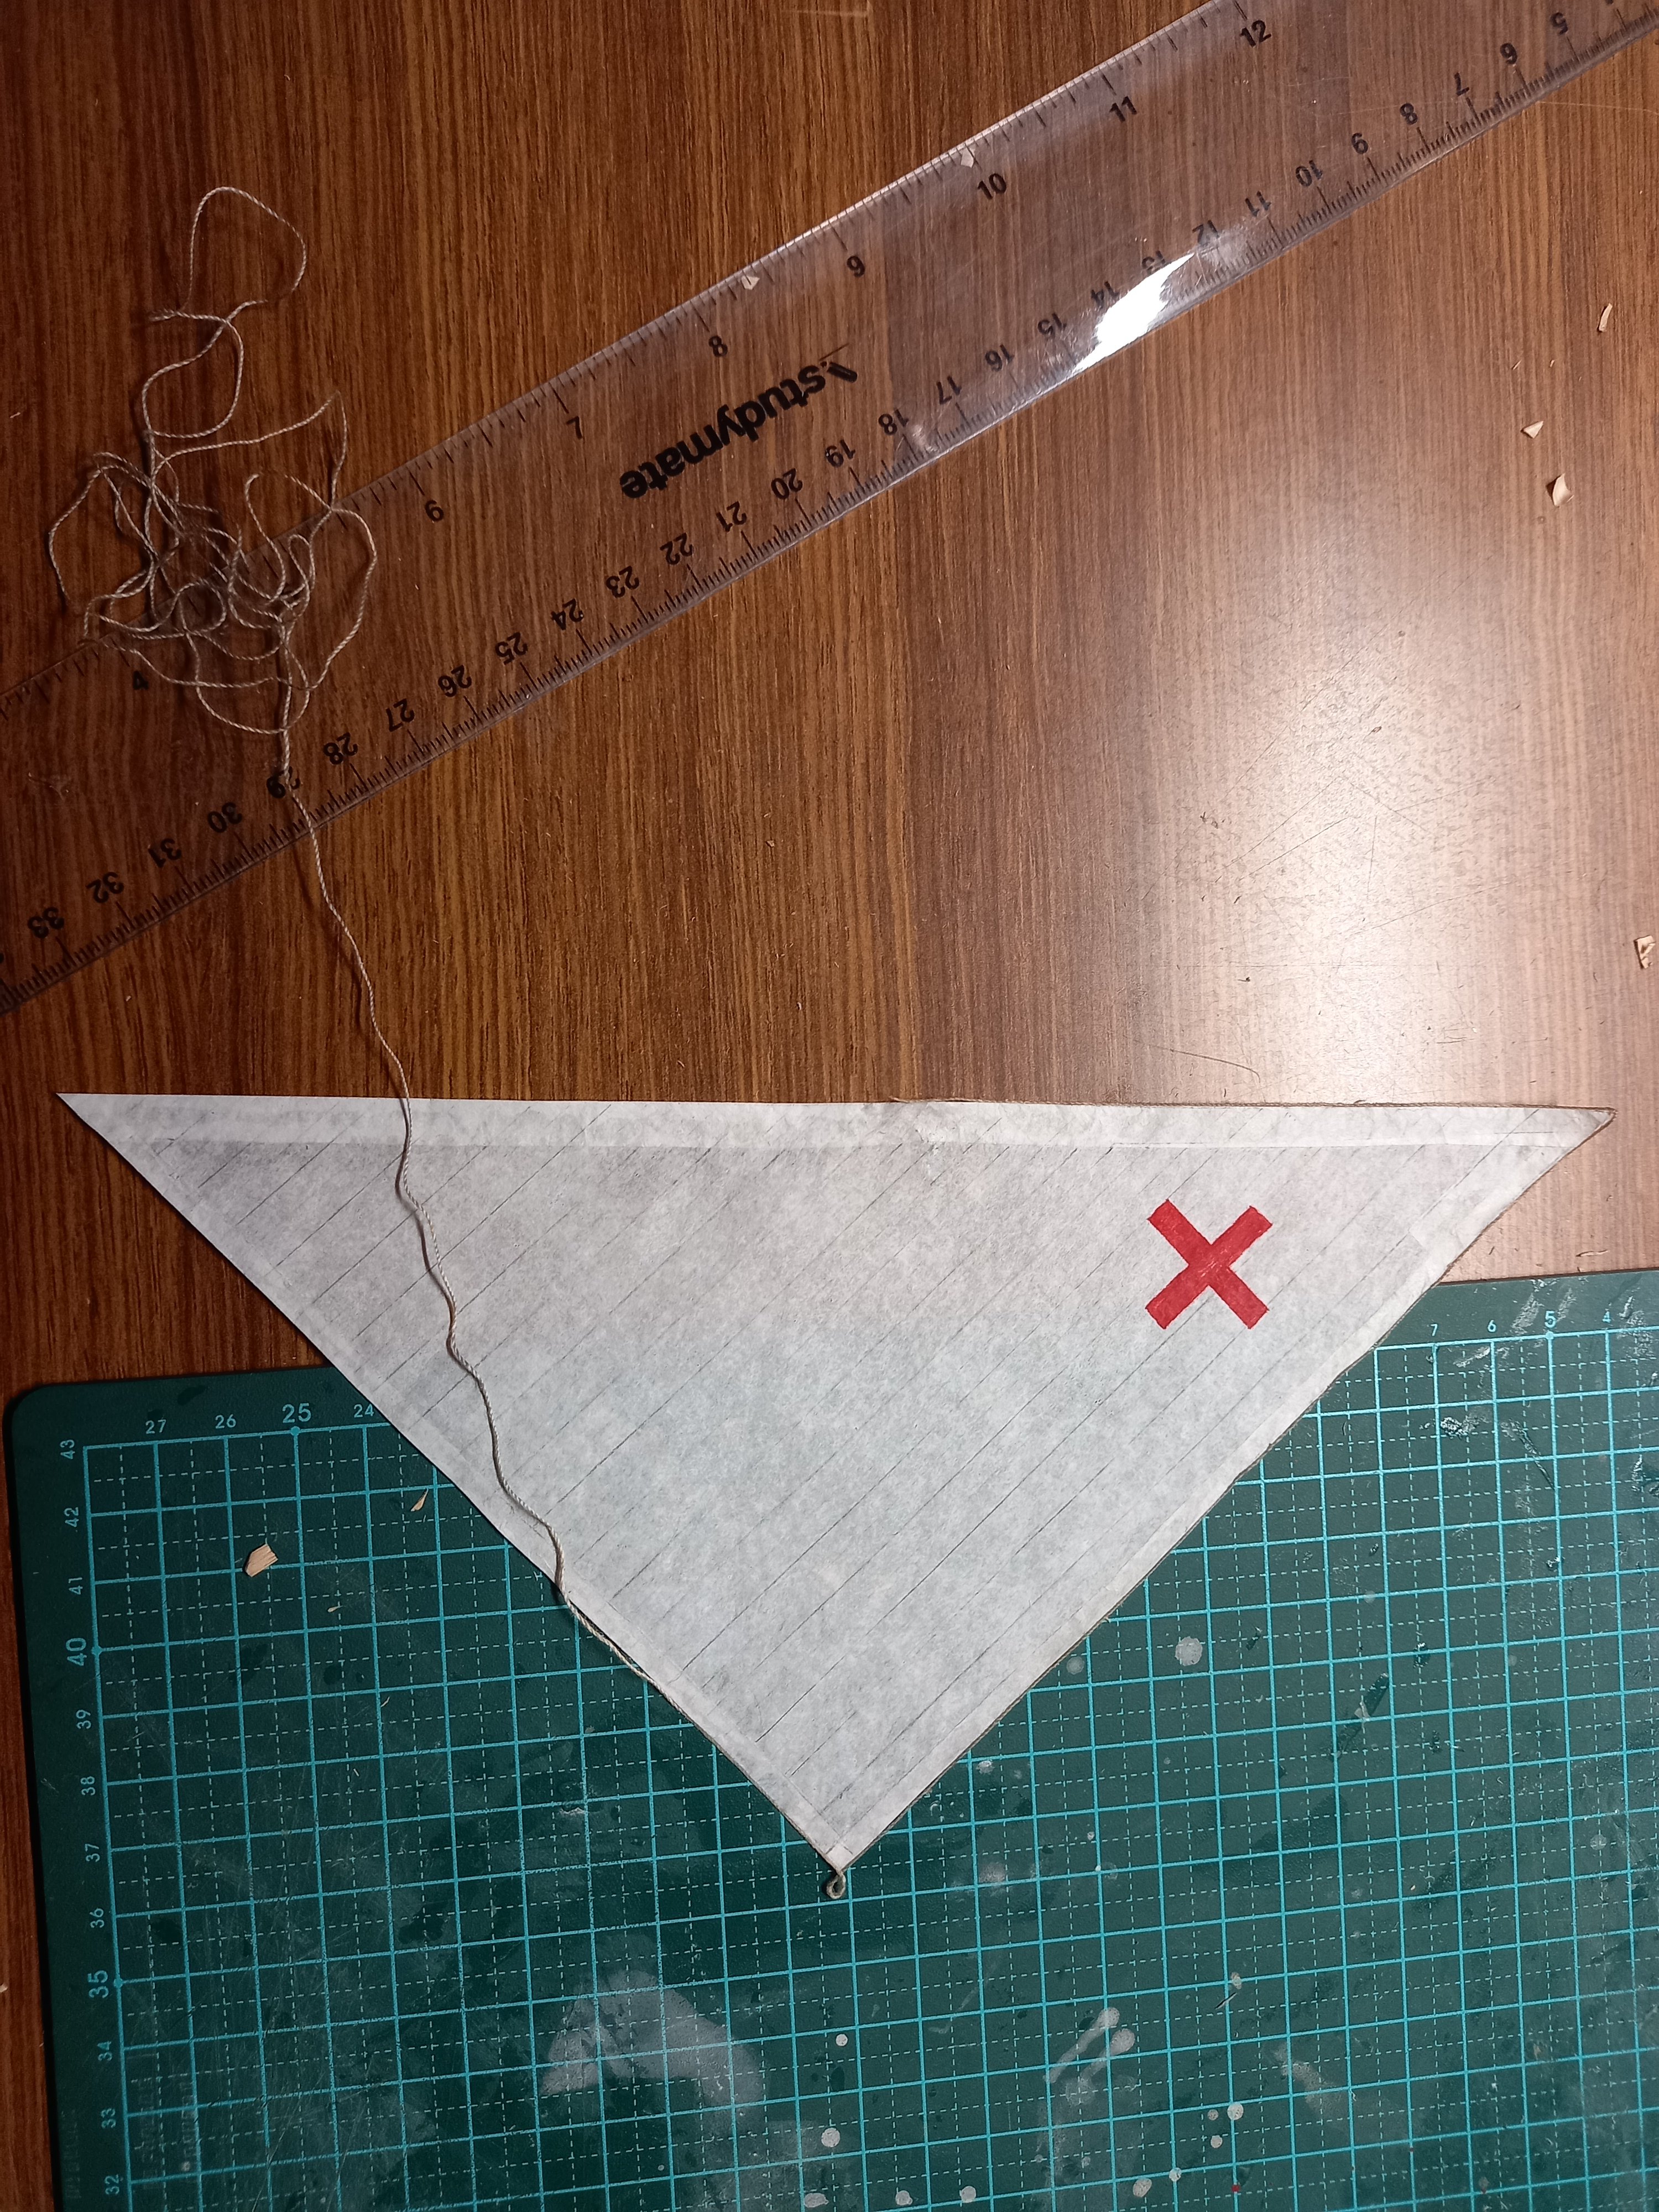
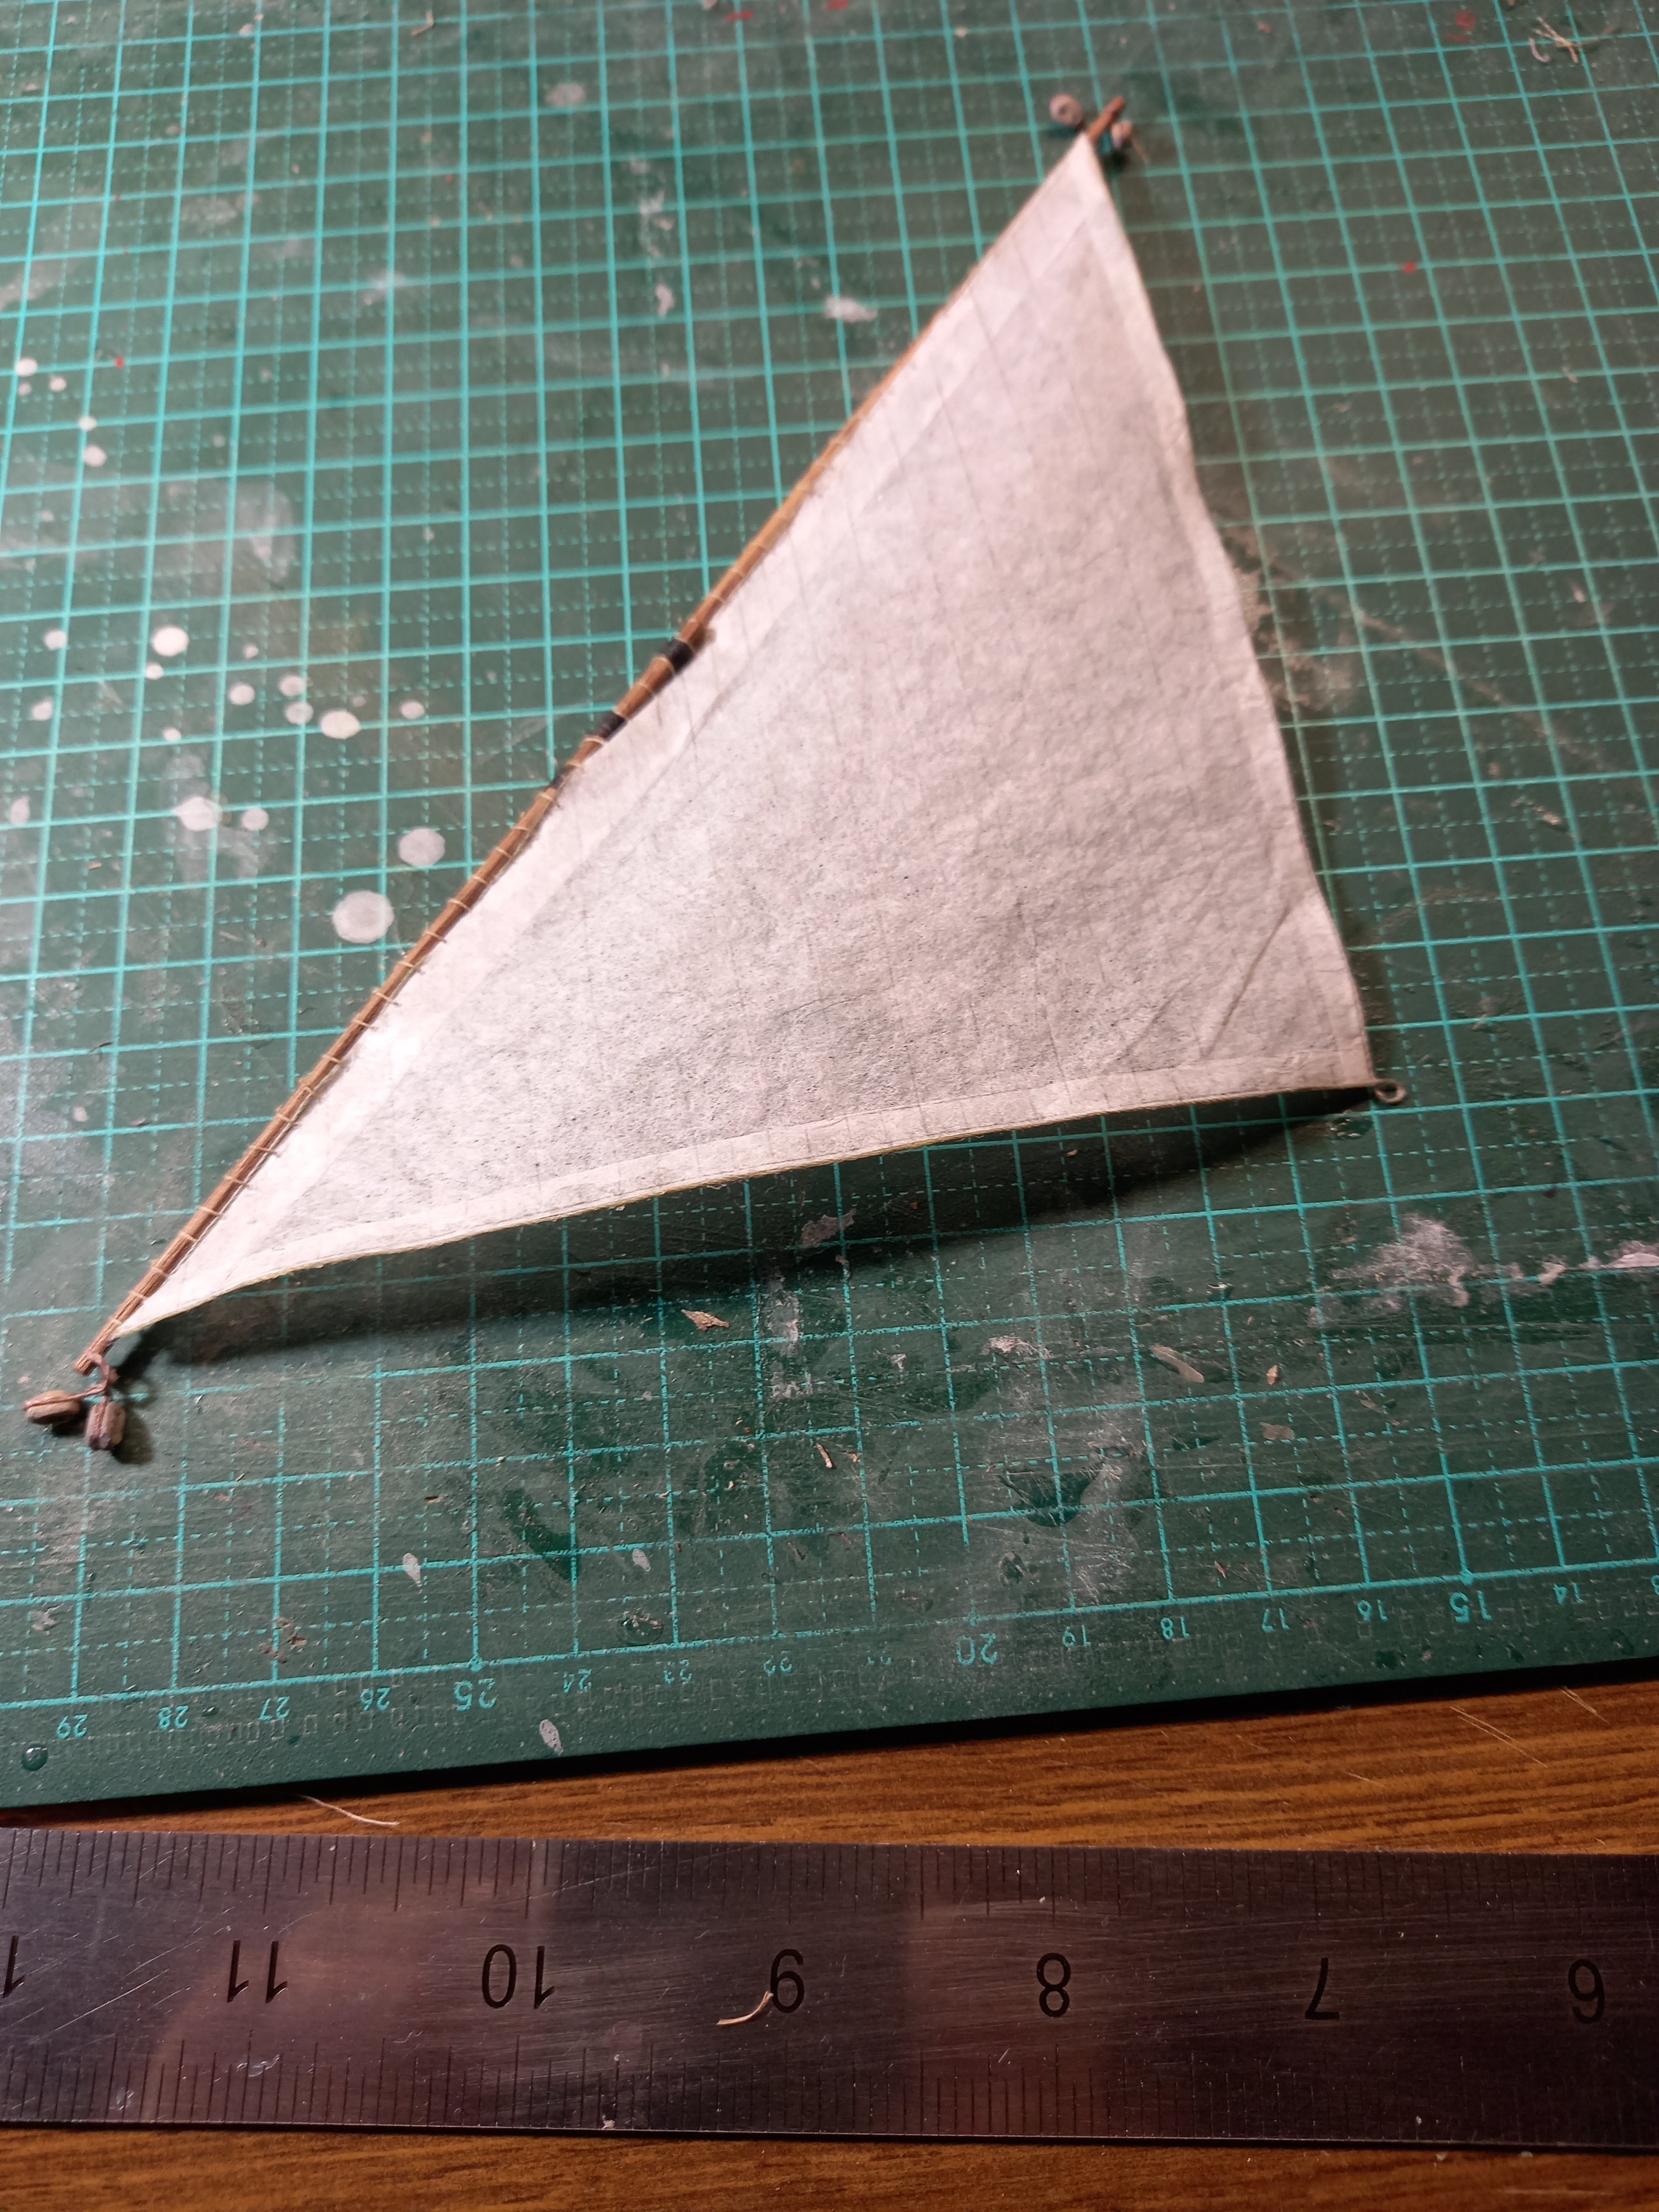
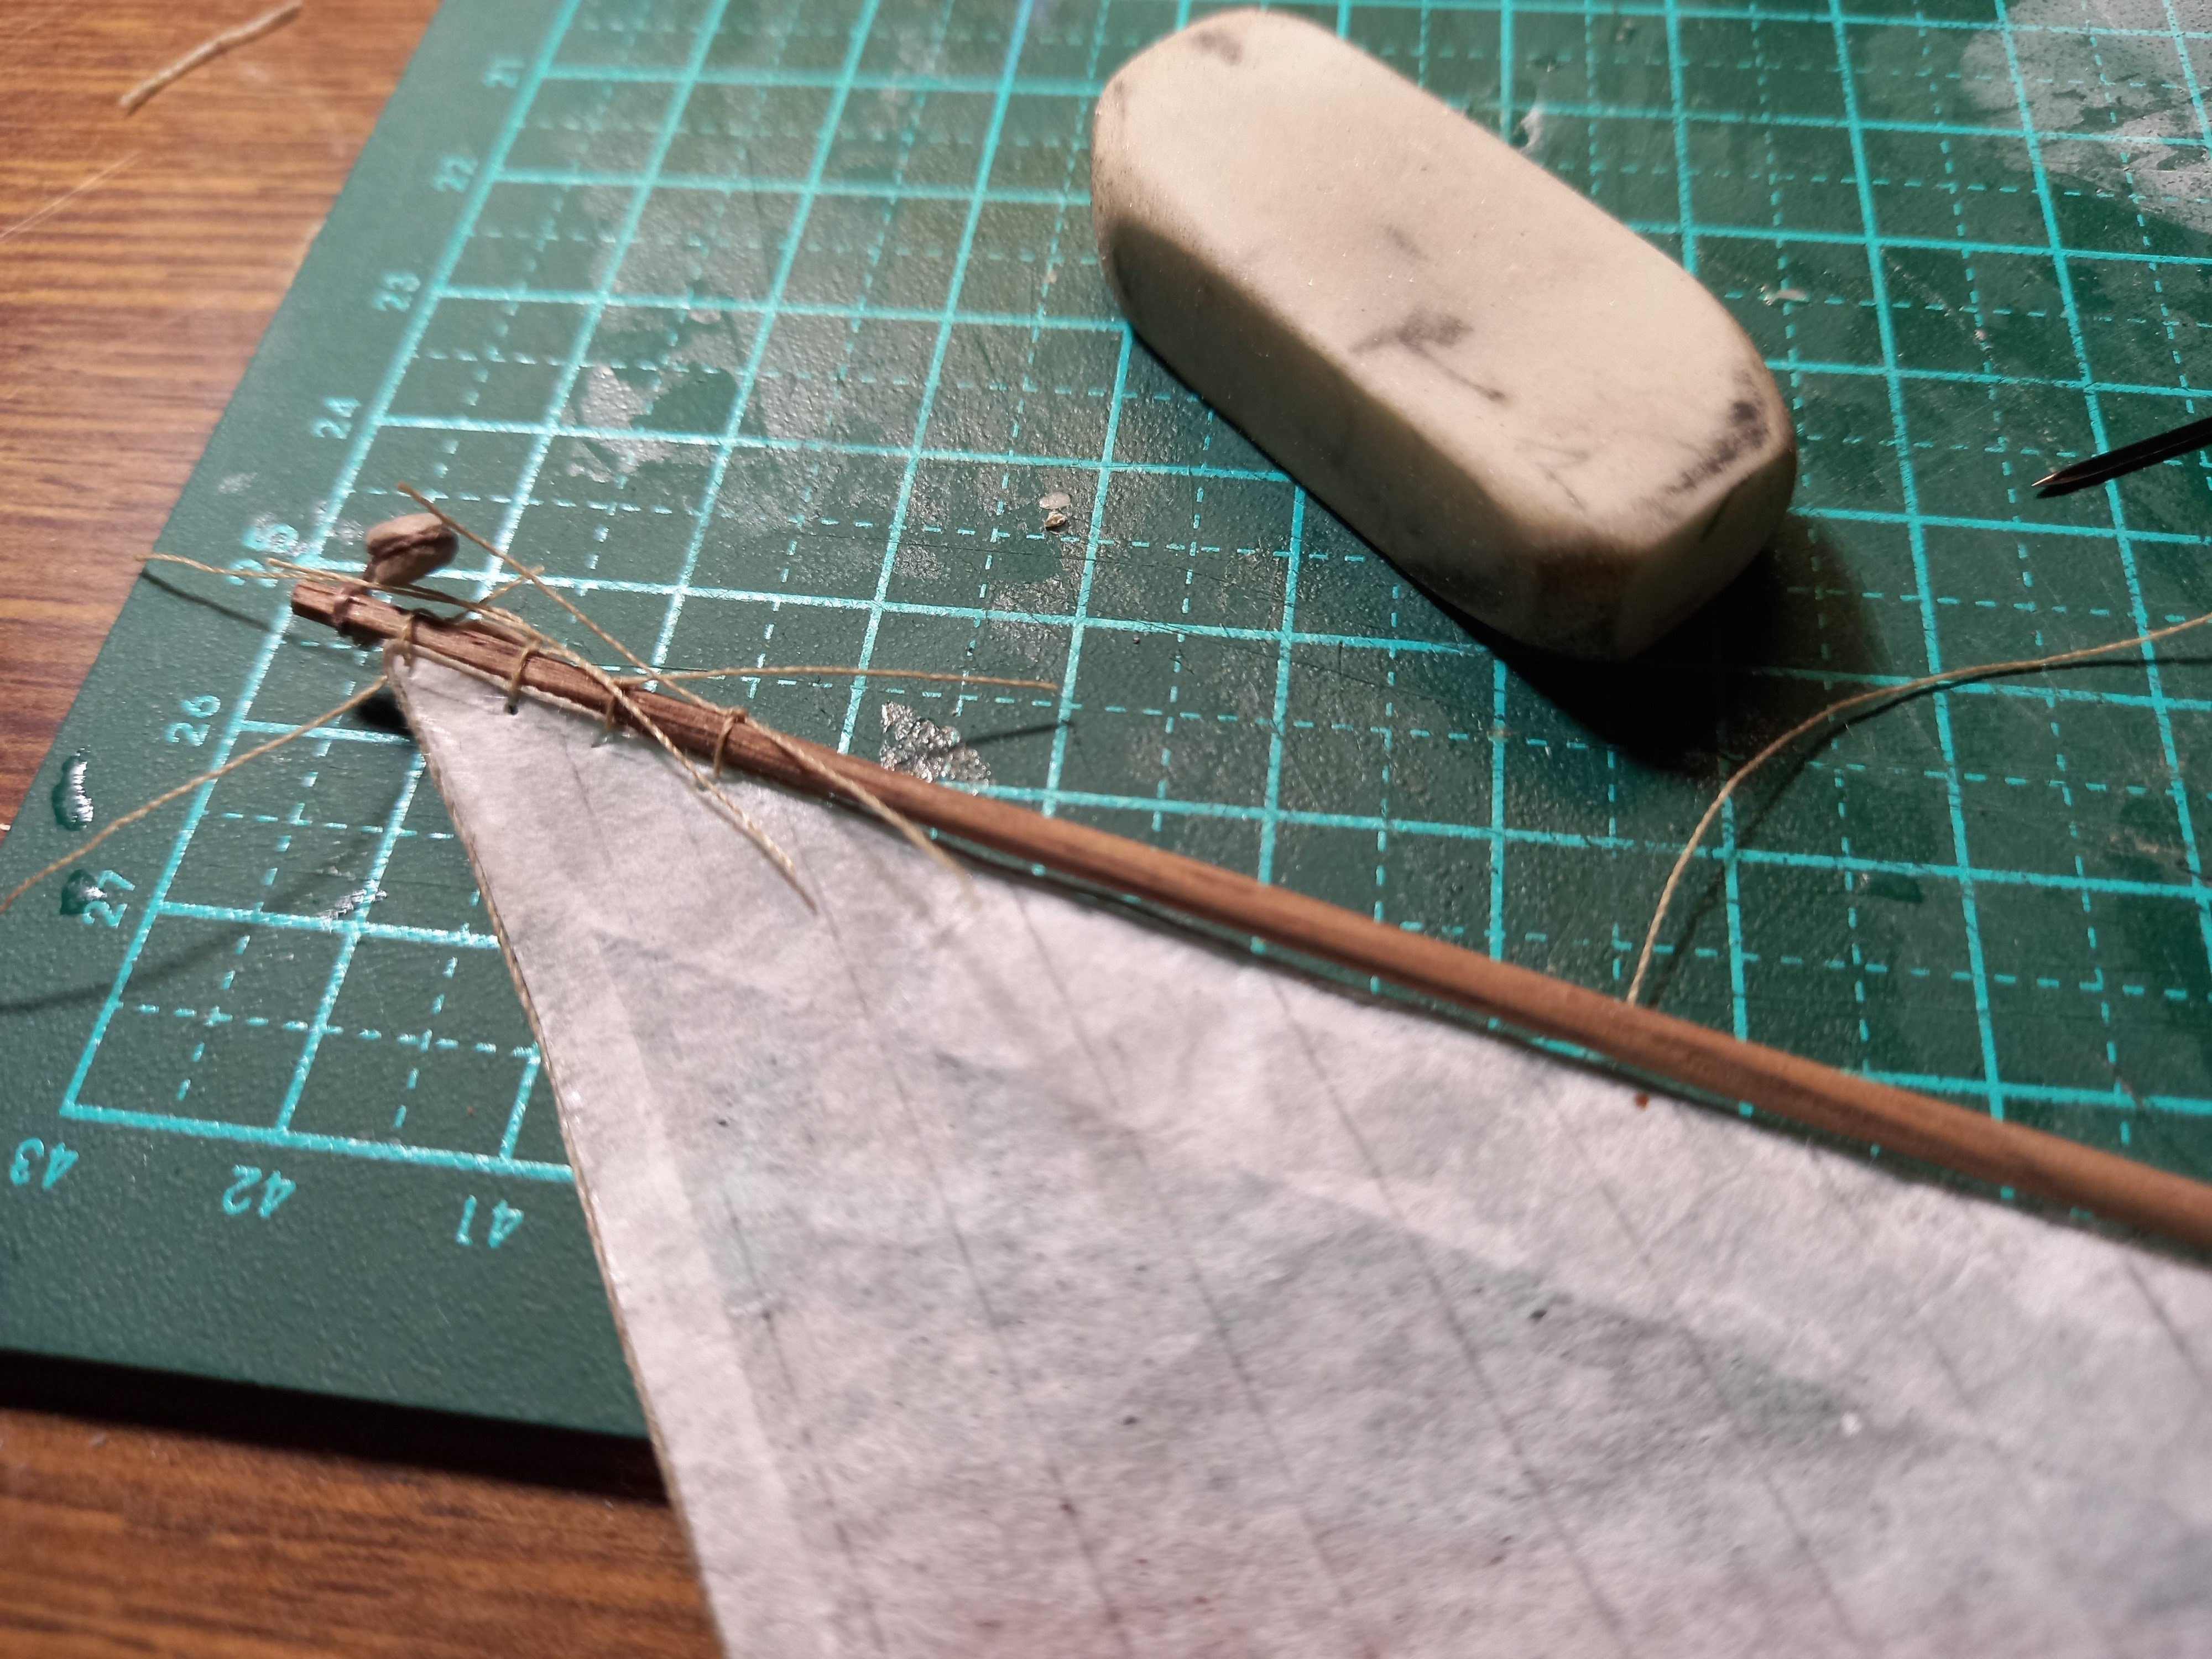
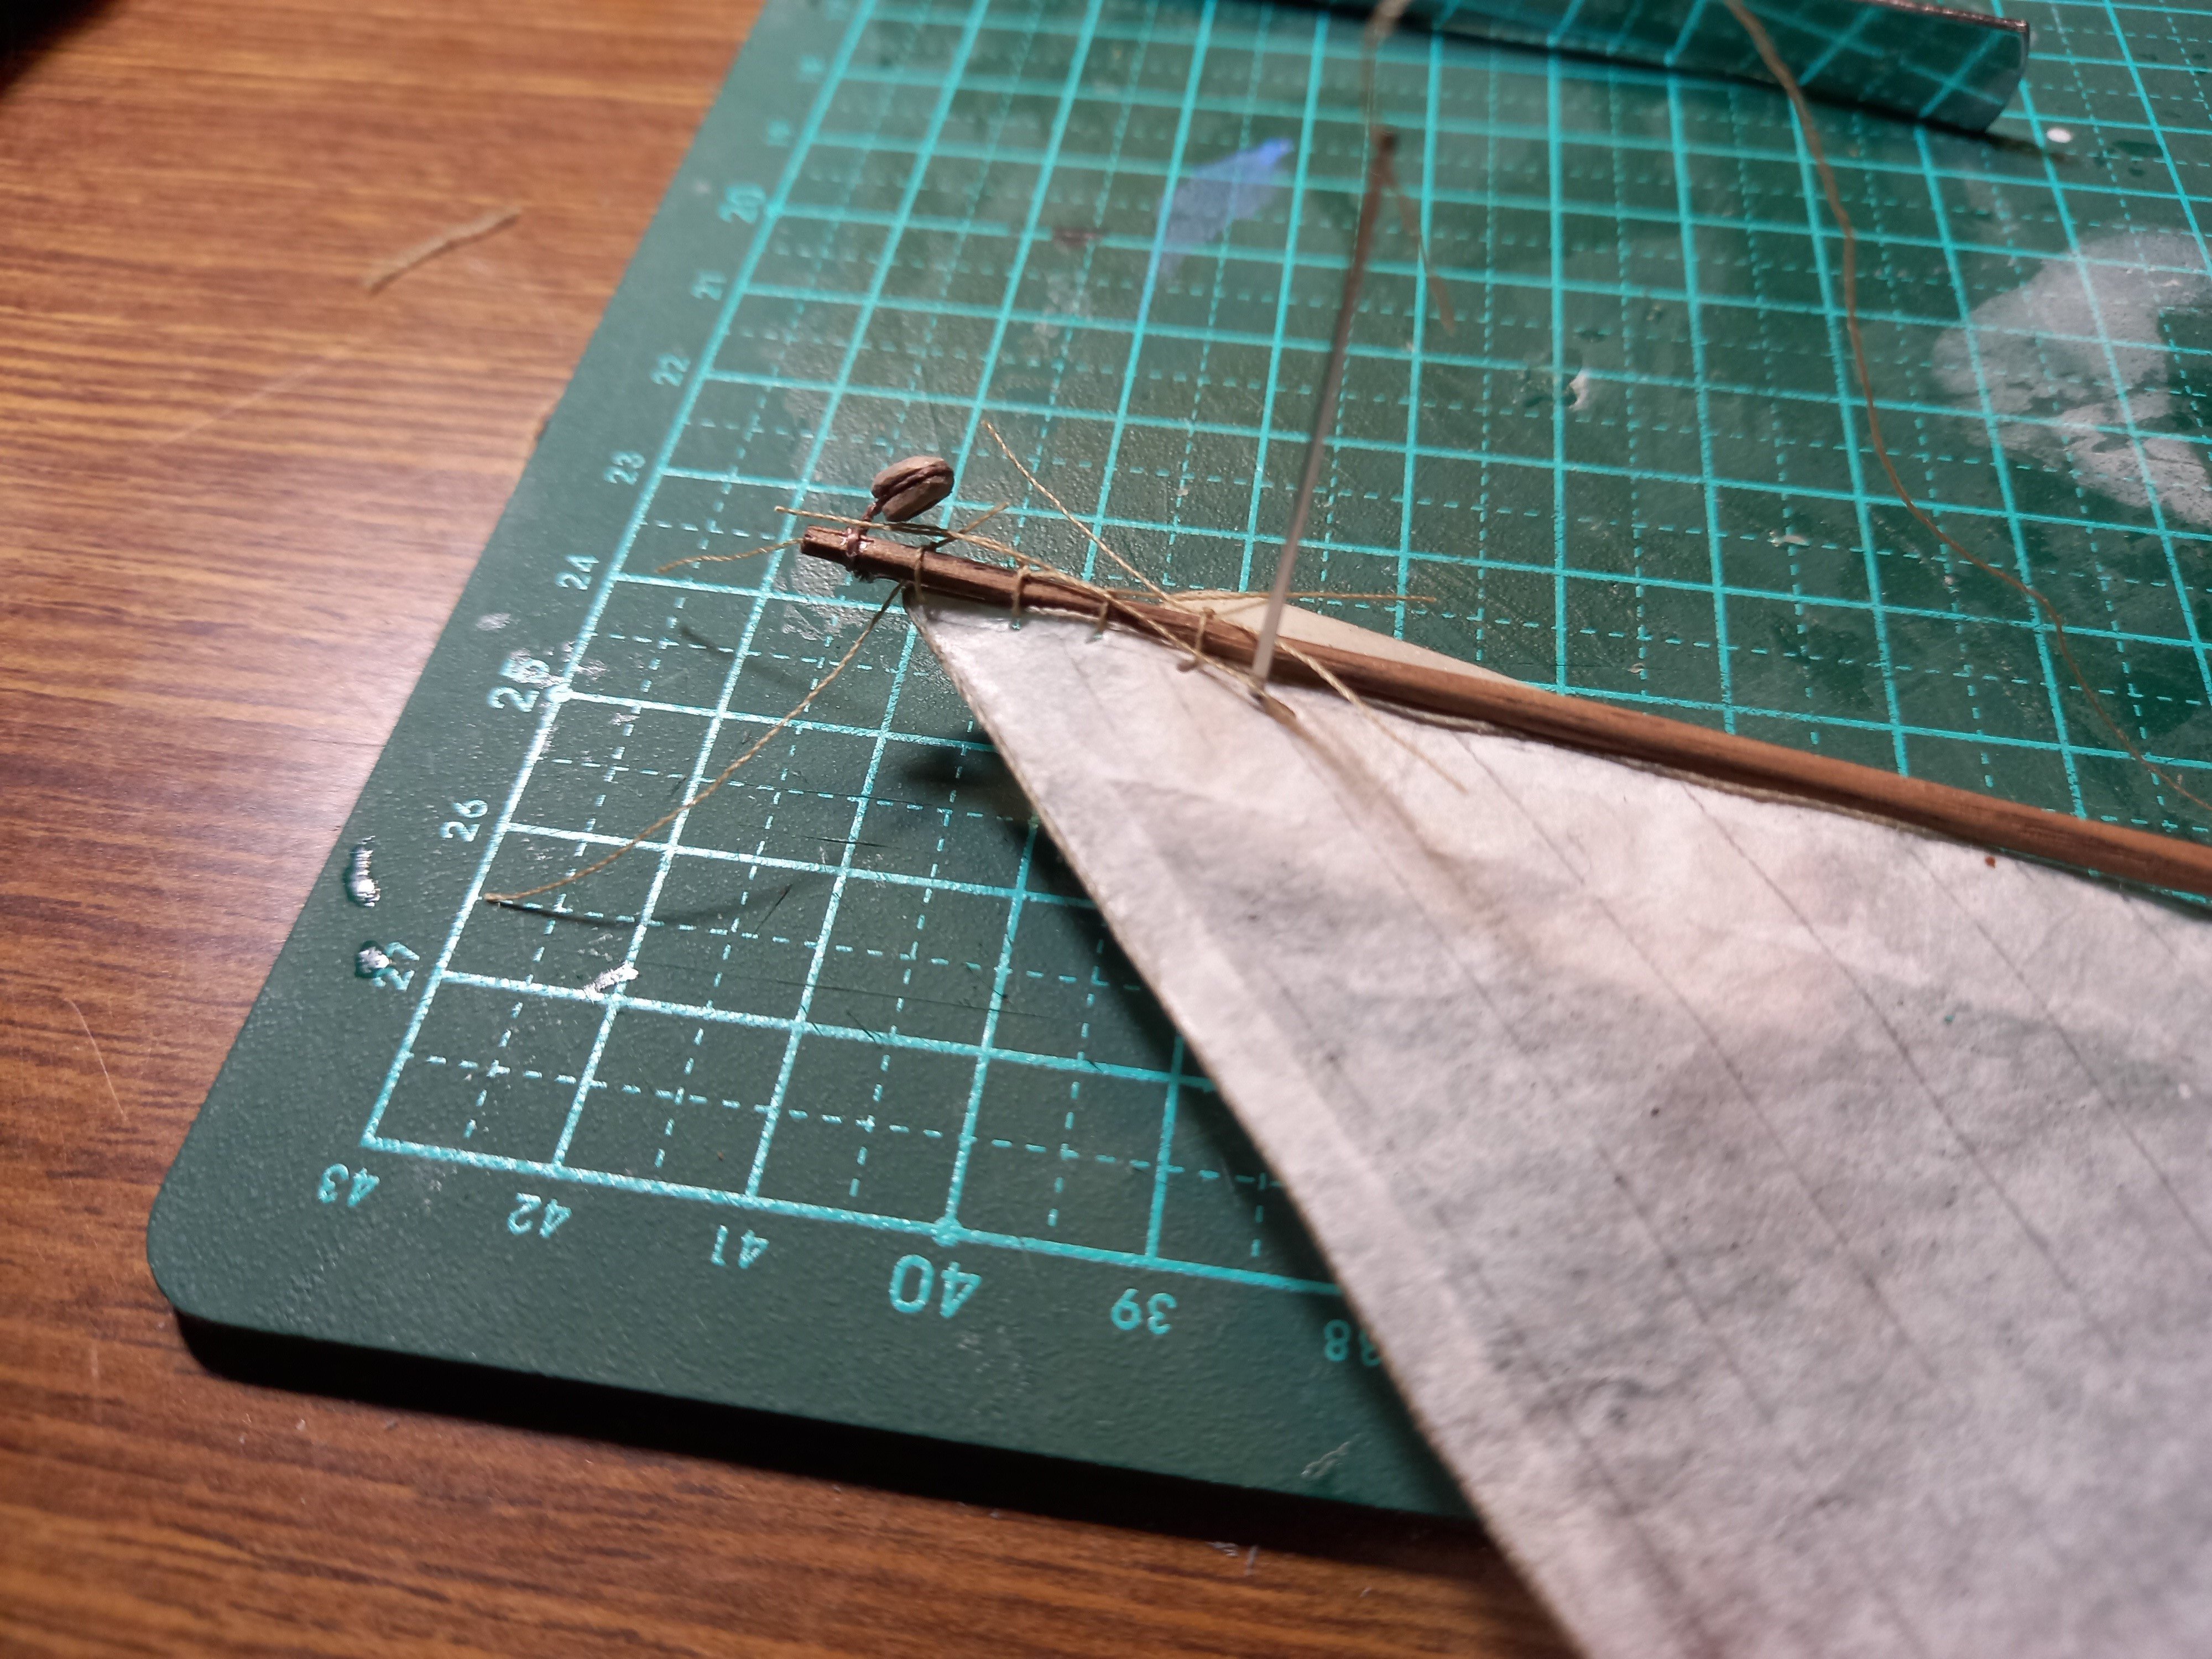
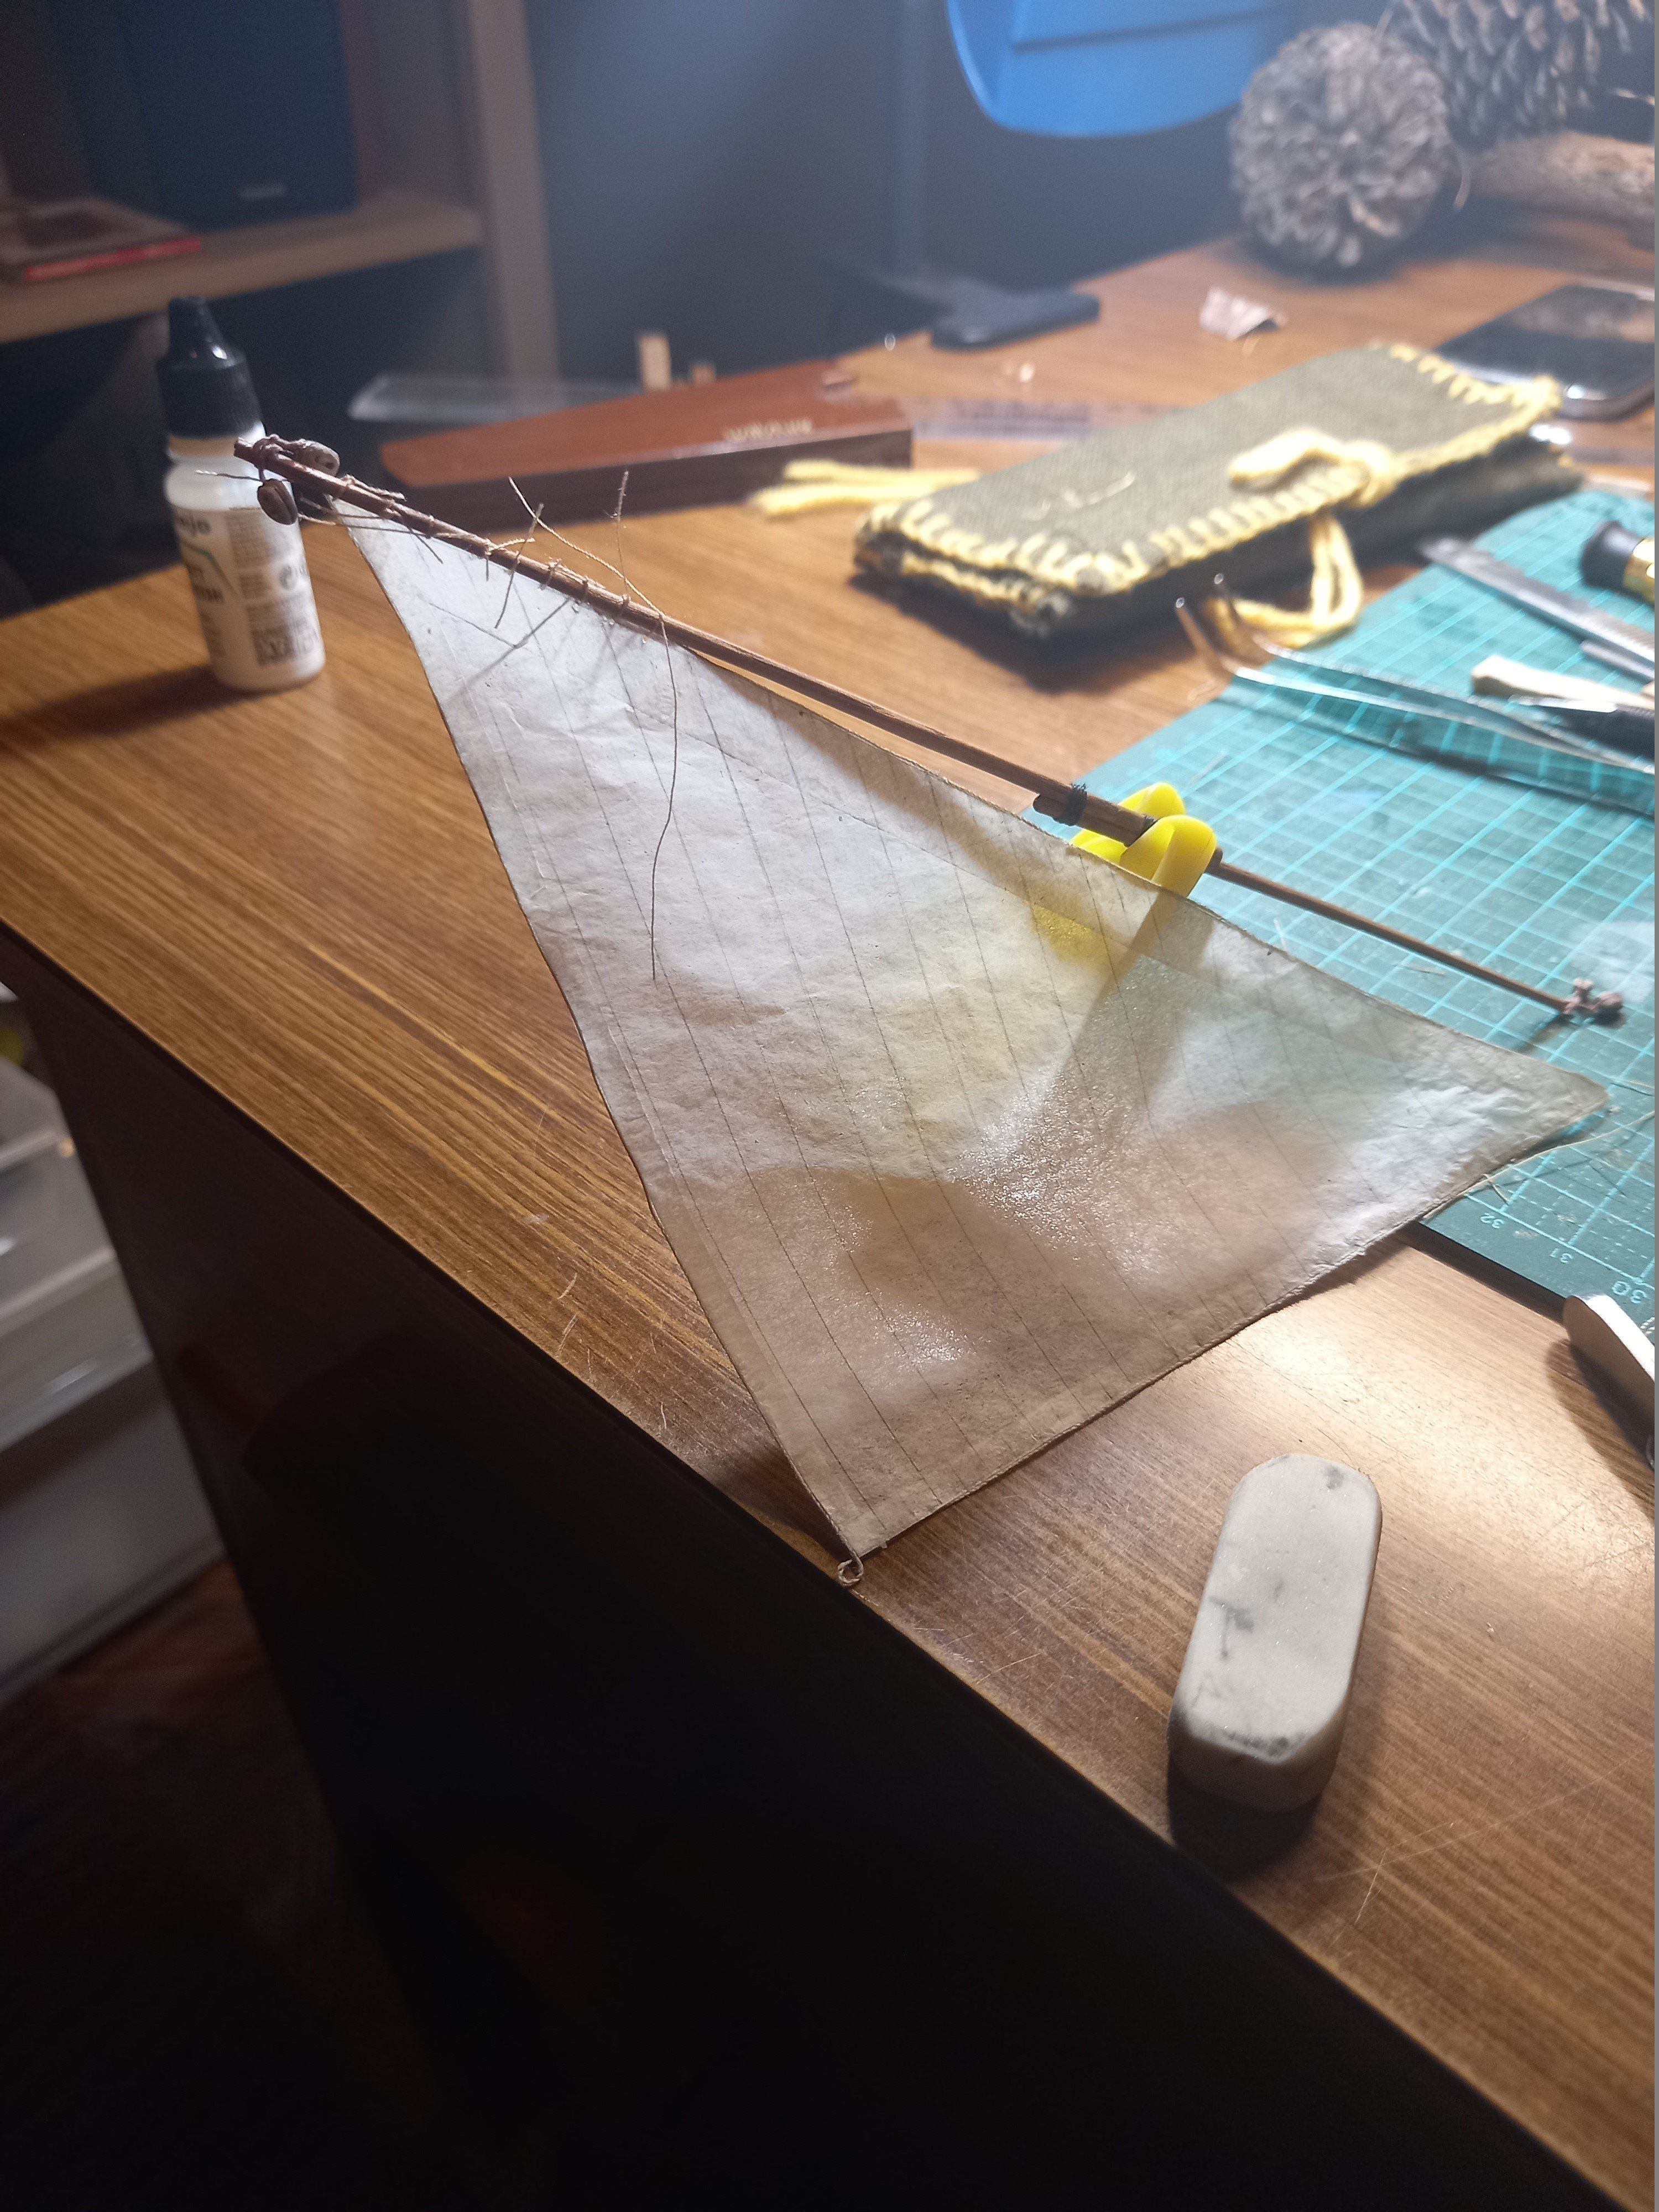
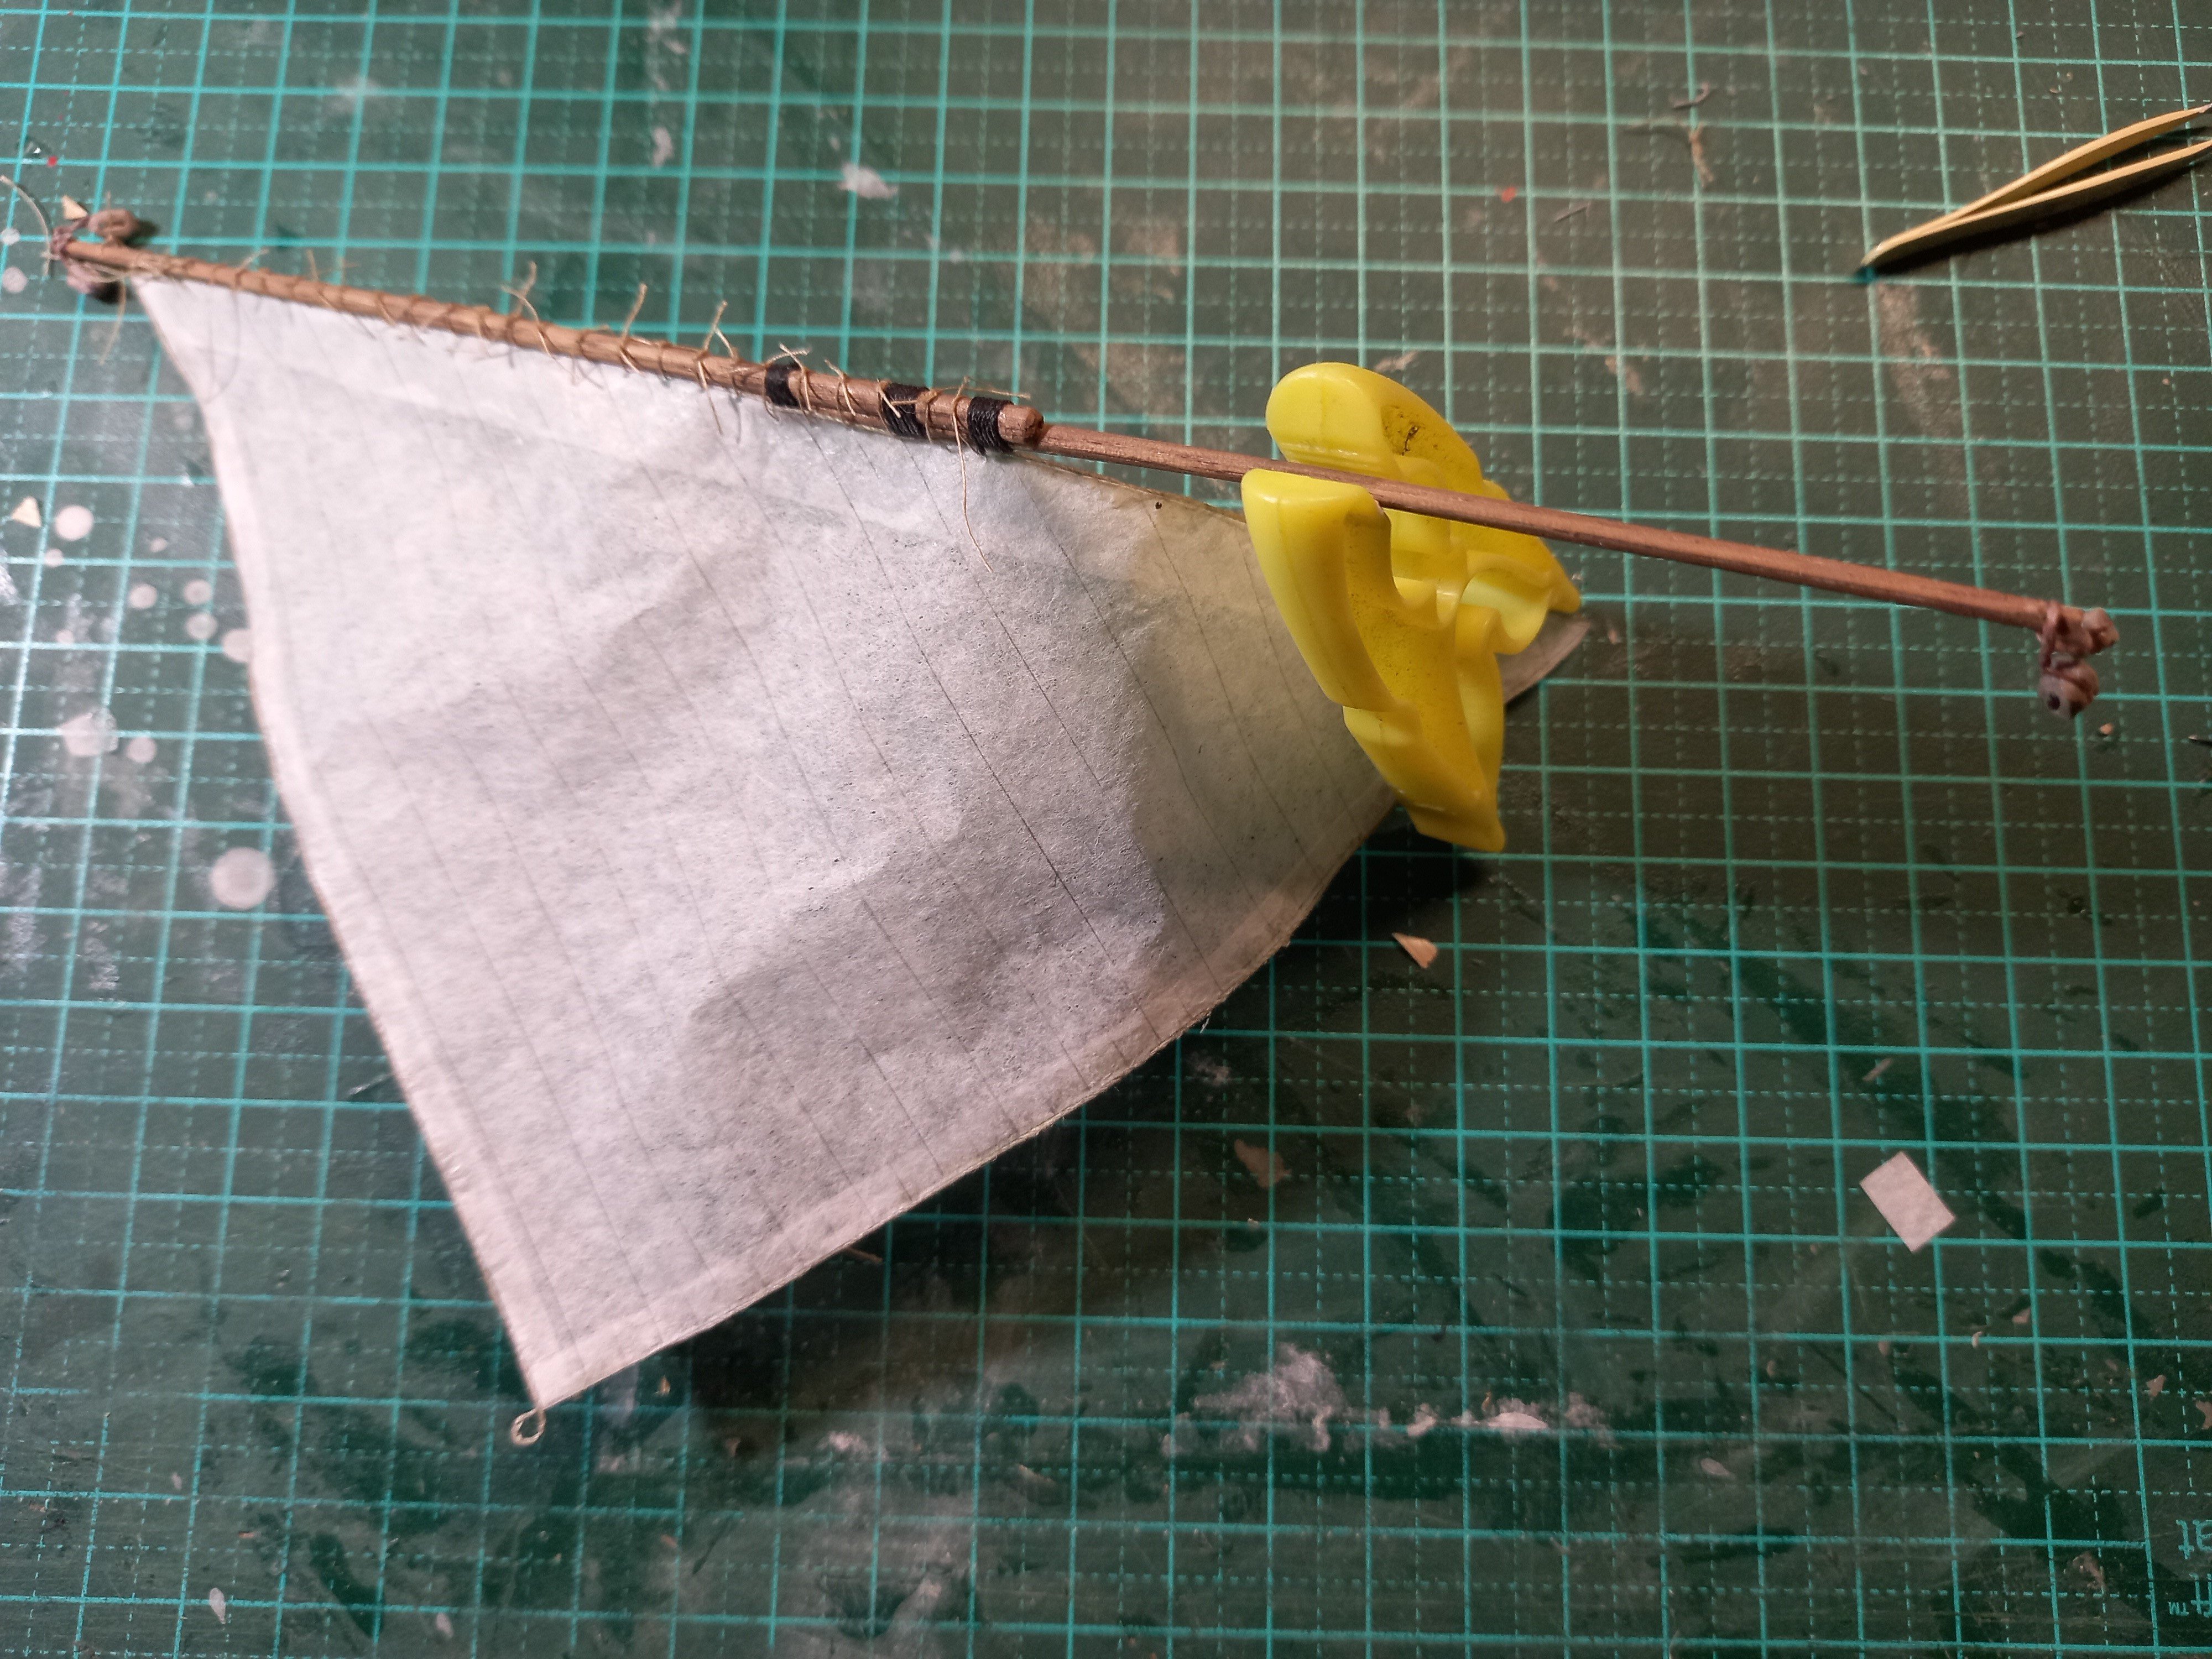
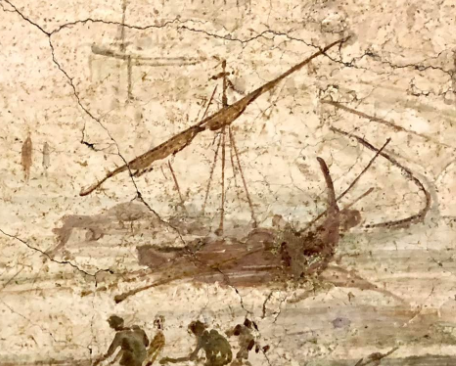
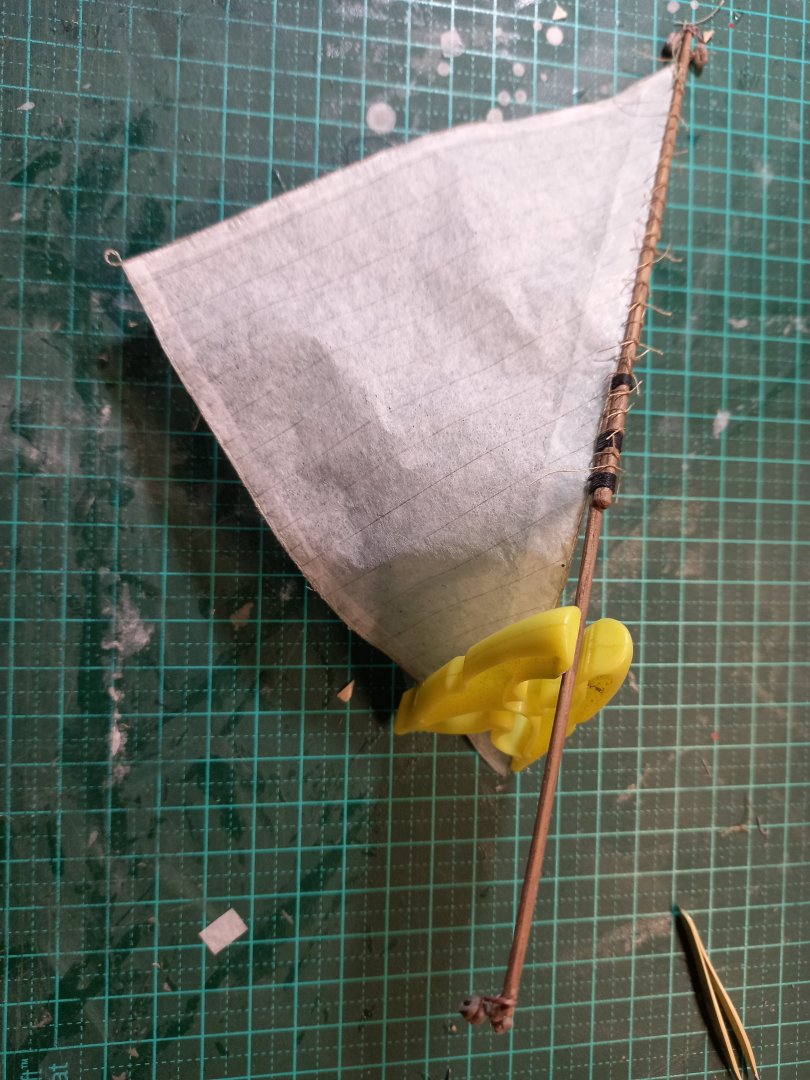
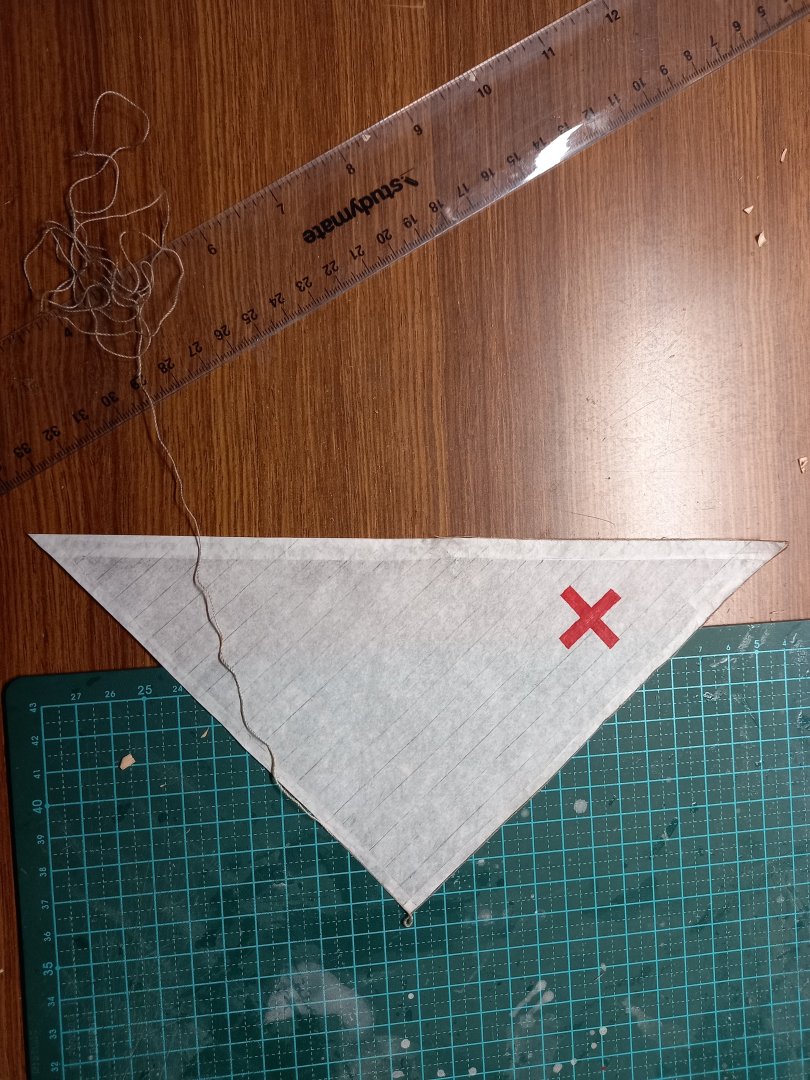
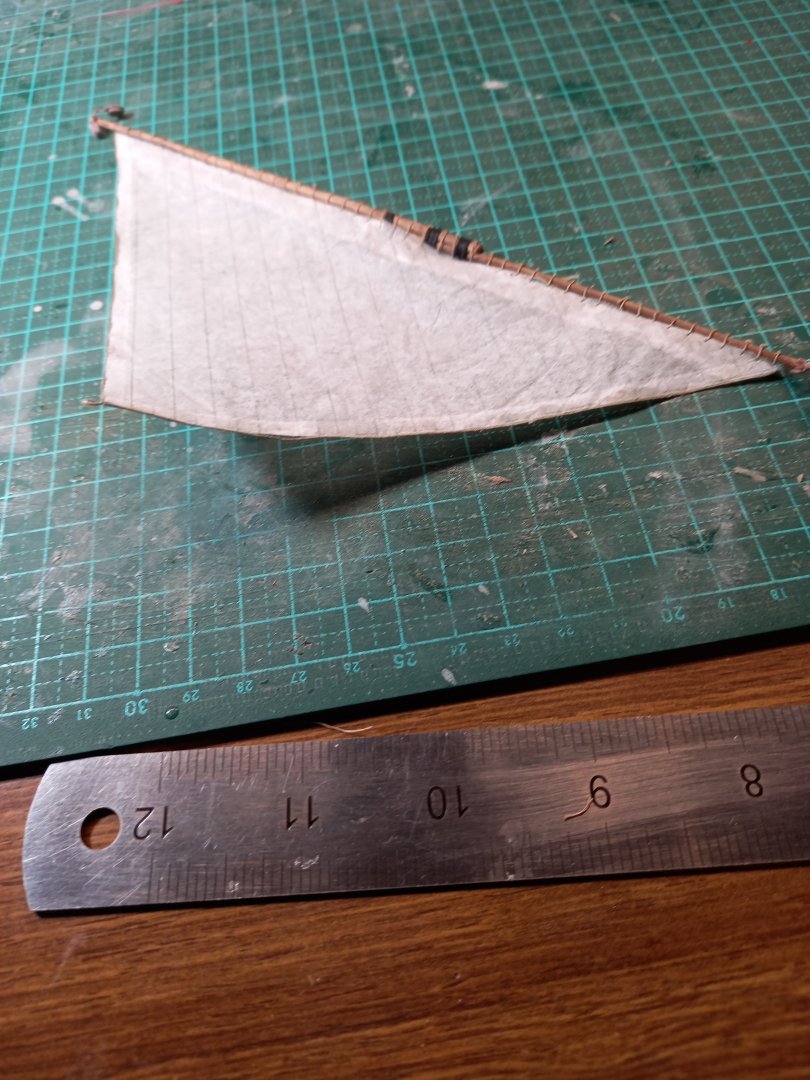
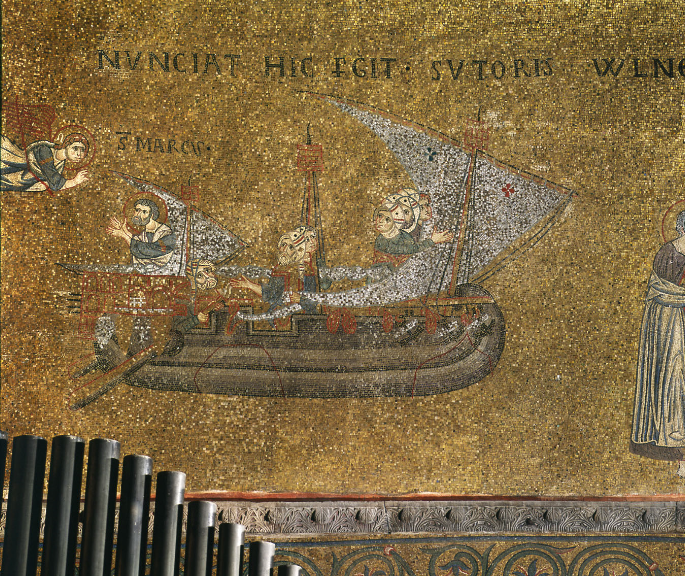
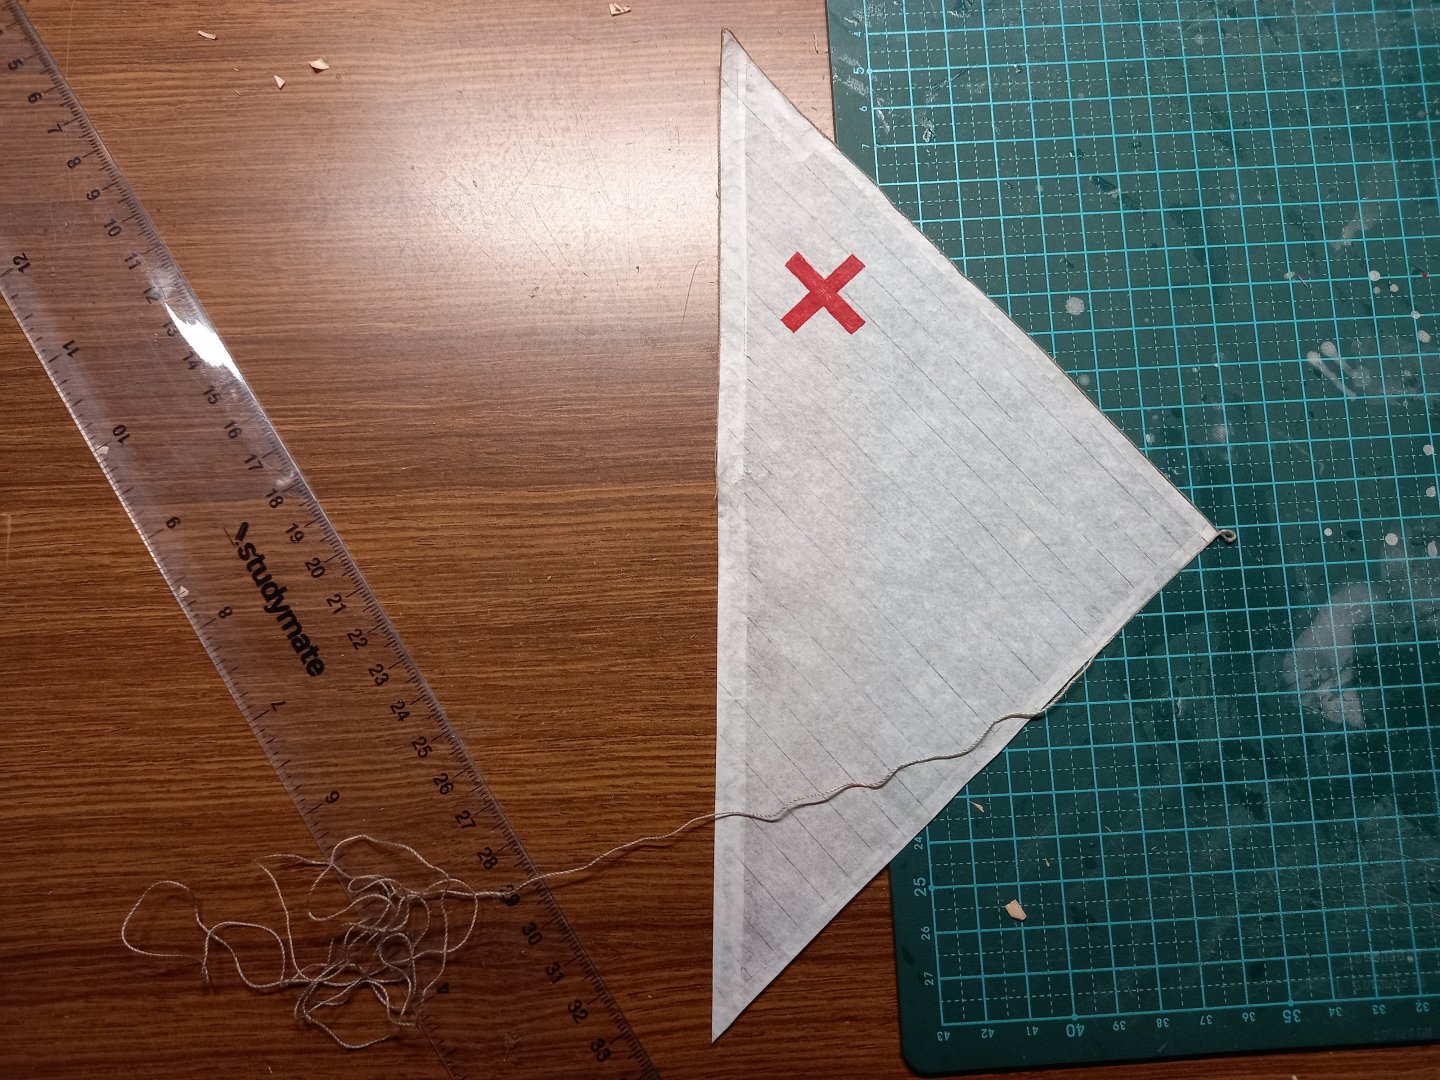
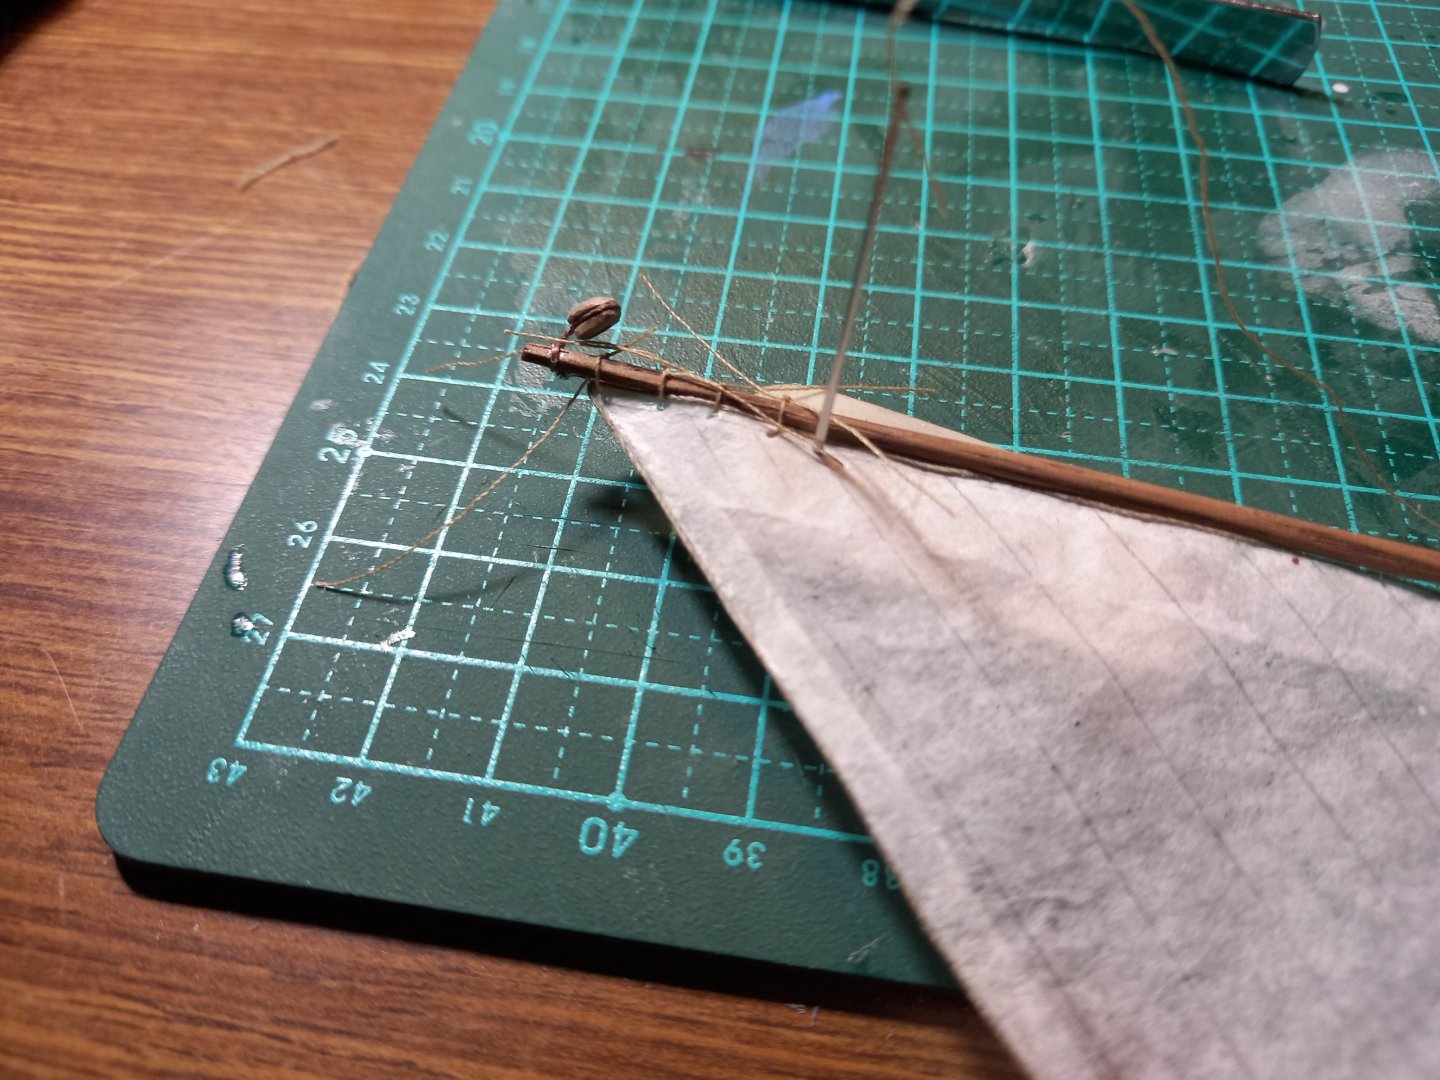
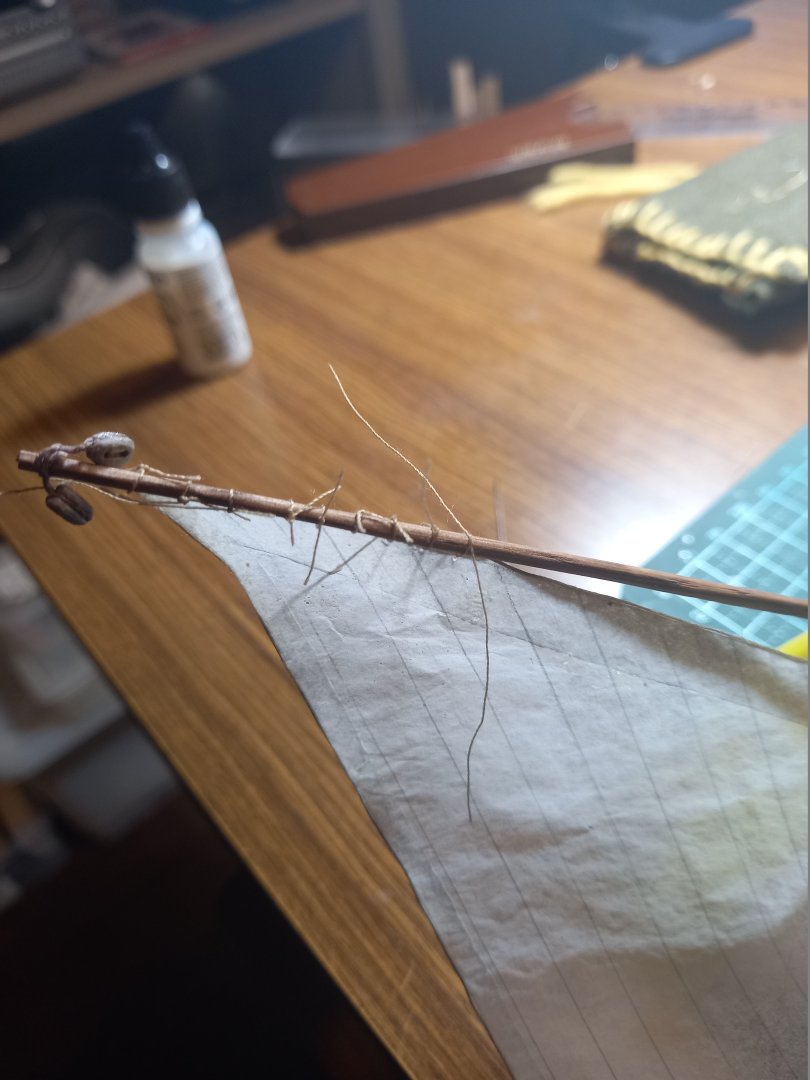
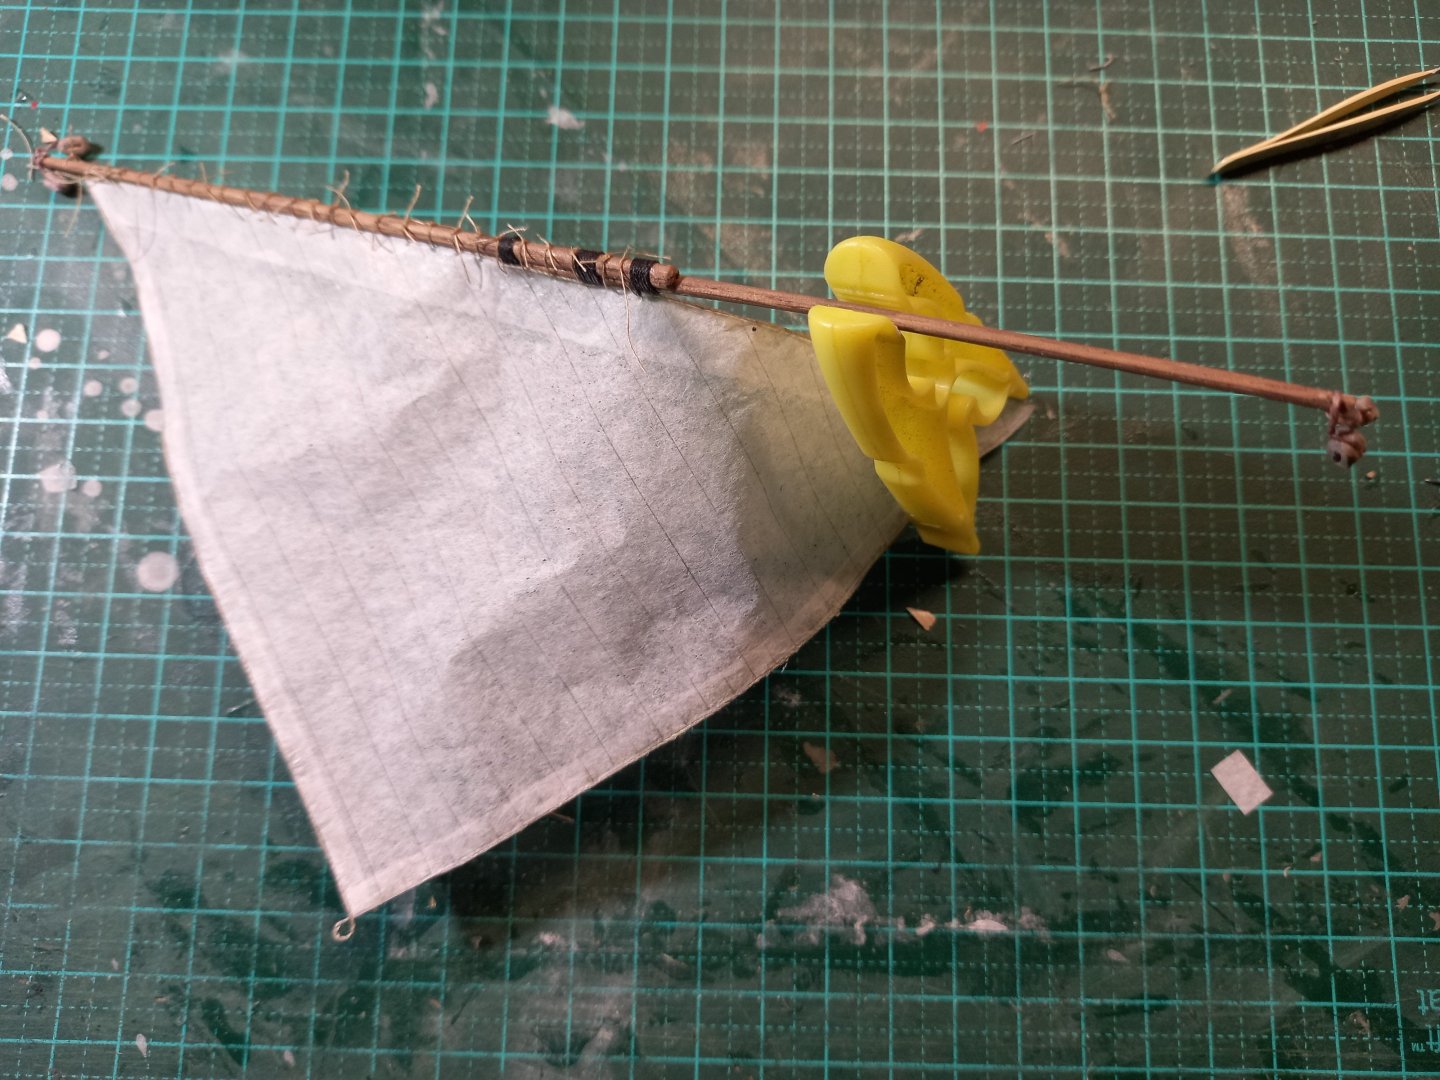
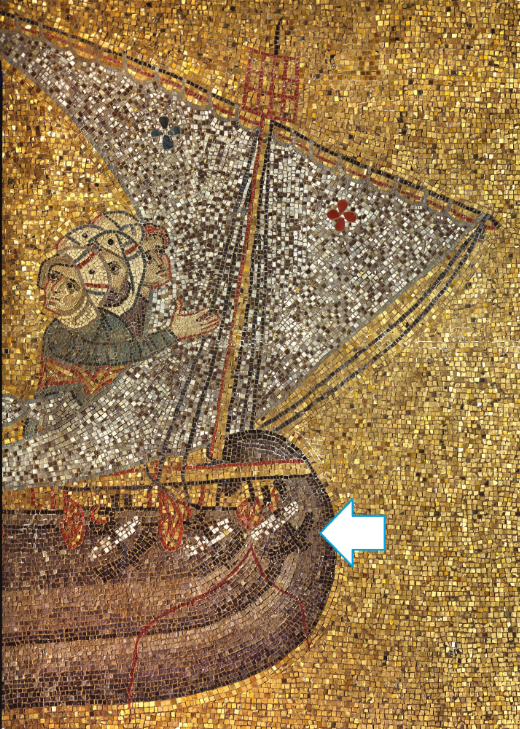
Adding the bolt ropes to the edges of the sails. Glued to the edge of the sail with matt acrylic varnish. Much more fiddly than I'd expected. I had to do a short section, let it dry and then do another until I'd gone all around the outside. I discovered the assembly would then stick to the cutting board, so I needed to peel the section of sail and bolt-rope off each time I did this, otherwise it would stick fast and tear as I removed it. And I had to go back over it to repair the places where the rope hadn't adhered properly to the sail. Now that's complete, I've started adding the mizzen sail to the yard with robands made of cotton sewing thread, using a needle to pierce holes in the sail and then tying a reef knot in each individual roband. It turned out that I needed to glue the first thumb knot together and to the yard, then come back later and do the other half of the knot and glue it in place. Otherwise it would all come loose and untie itself. And by that time I'd forgotten which way I'd done the first part, so I think I ended up with a decent number of granny knots. Not to worry, though. At this scale you can't tell anyway. I used a cunning mechanism (a clothes peg) to keep the top of the yard facing upwards so all the knots ran along the top. Still in progress. Once they're all done I'll go back and trim the free ends back close to the knots. And I'm just getting into designing the anchors. Though there are plenty of contemporary representations of anchors from the 14th century, I've been able to find only a single one from the 12th - in another mosaic in San Marco which appears to have been done about the same time. It shows three anchors at the bow - the arrow is pointing to the foremost one. I've worked out how big they would be and their proportions, but the shank looks terribly short to me. What do the rest of you think? Should I lengthen the shank? And also add flukes - it is, after all, pretty difficult to portray these on a mosaic - and for the same reason perhaps taper the stock as well? Steven


- 508 replies
-
- 12
-
-
I think this is likely to be a difficult build, but if you have the passion and patience to stick with it, and ask lots of questions, you should be able to make a success of it. I've seen other people do equally difficult ships as their first build - it's mainly a matter of not giving up when it gets difficult, but persisting, getting help and advice and also recognising that you will make mistakes - it's part of the process, and not letting that stop you. I'm pretty sure there are already build logs on MSW for the same model. Look at them carefully (you can access them via the Search bar at the top right of this page) and learn all you can from what others did. And ask lots of questions if you hit difficulty. With persistence I'm sure you will be able to produce a model you can be proud of. Best wishes, Steven
-
Sooner you than me, mate "Penultimate" = second last - the one before the last one. "Antepenultimate" - third last - the one before the one before the last one. As in "her antepenultimate breath" at 2:04 in the Flanders and Swann song "Have Some Madiera M'dear"
-
Beautiful work, and a beautiful vessel, Patrick. As usual your handiwork is superb. She's taking shape beautifully, and looks just like I'd imagined she would have in real life. Steven
-
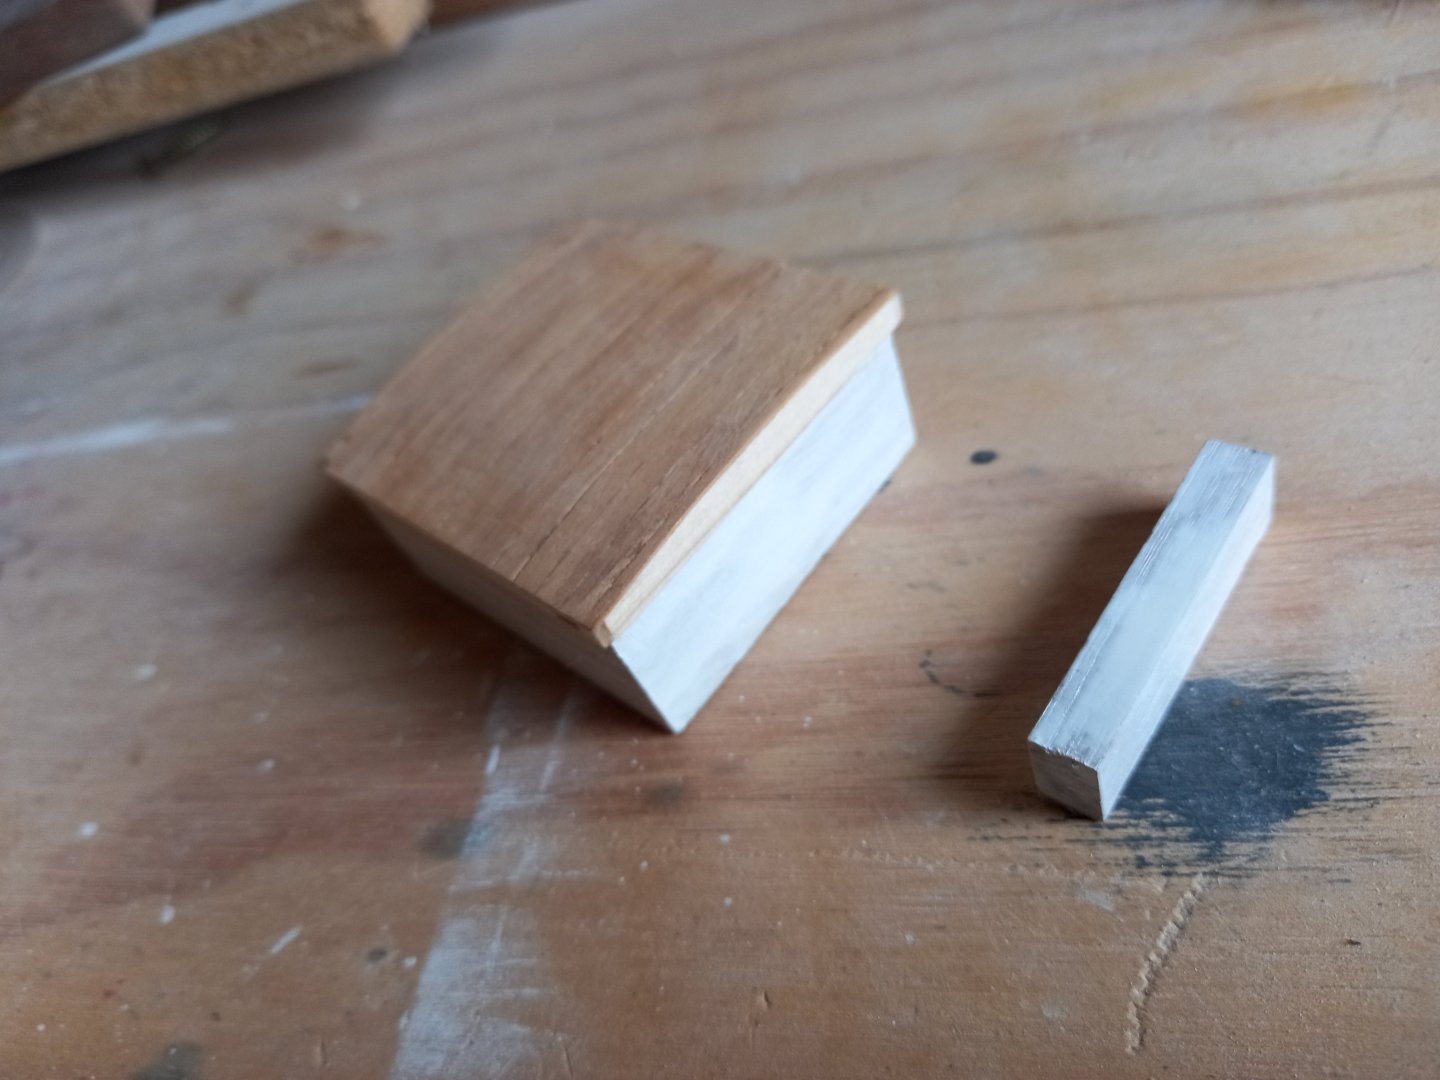
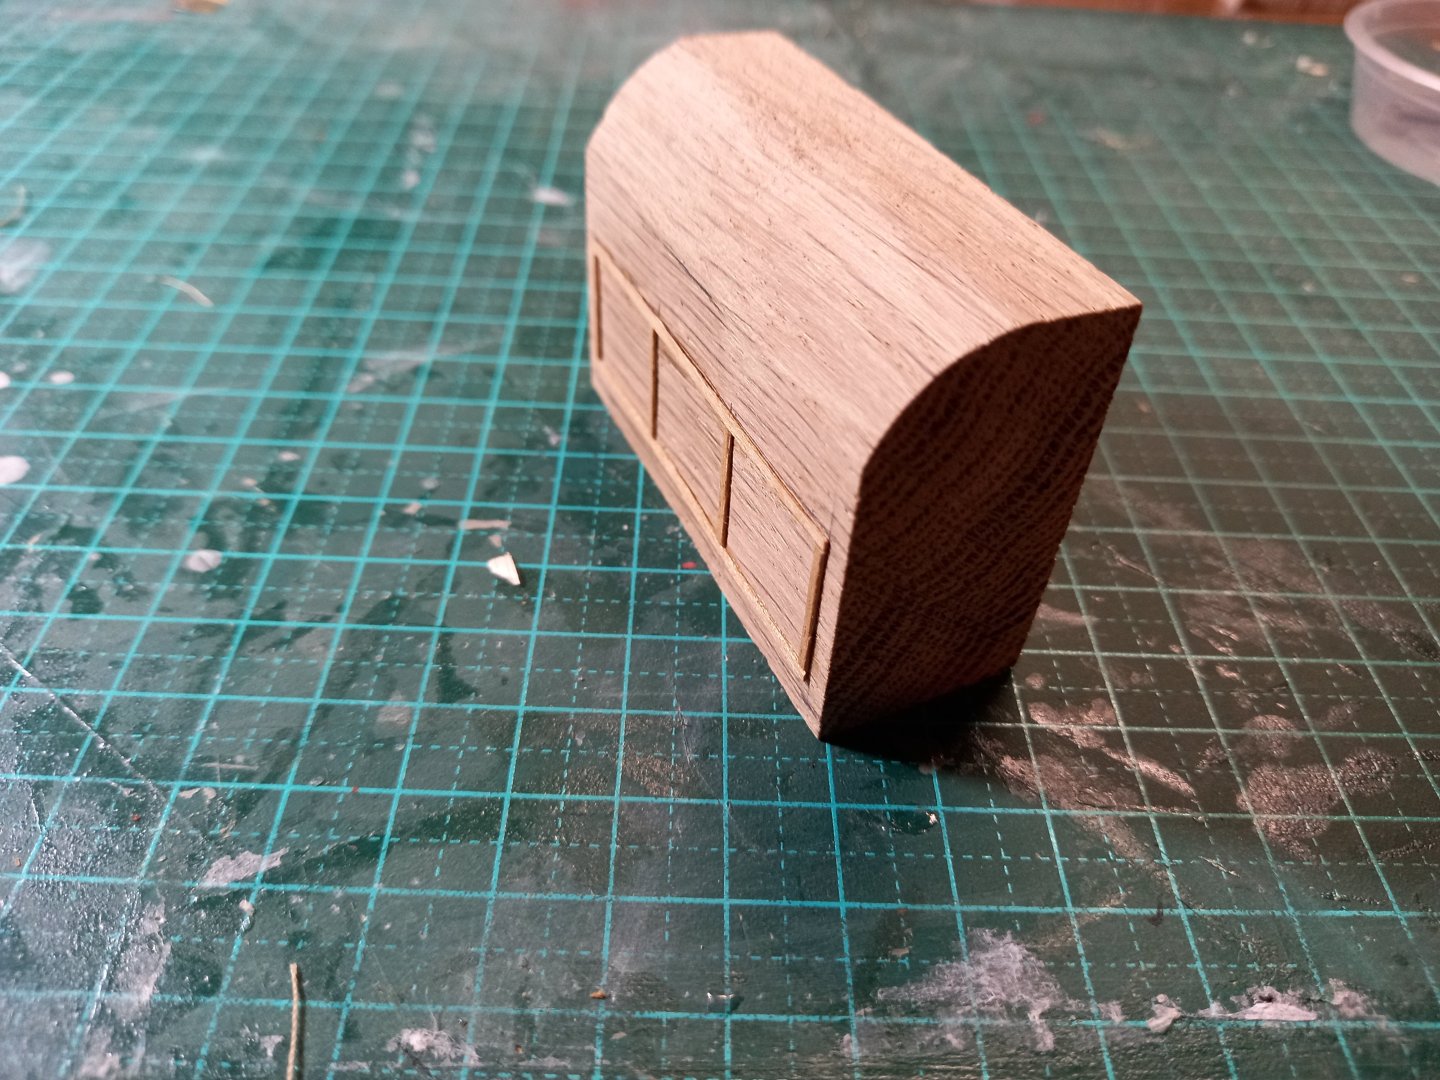
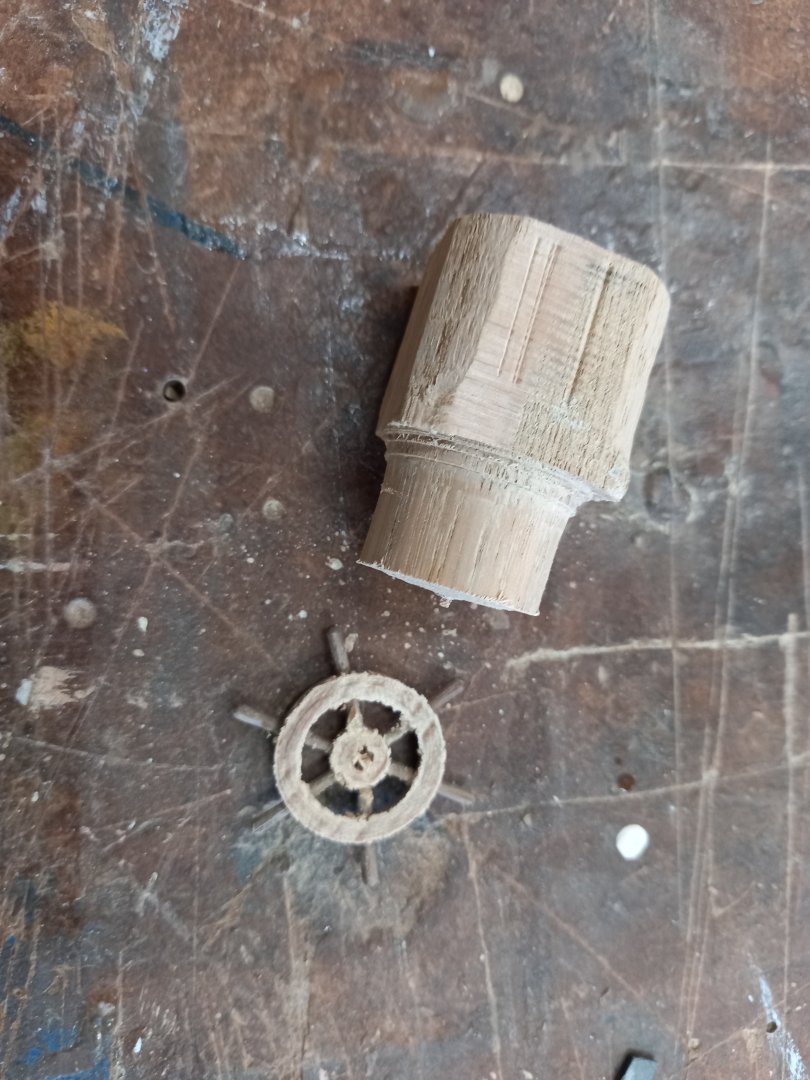
Oh, I don't know. If Woolies was gone, Coles would effectively have a monopoly. But I'm sure they wouldn't take advantage if that to hike the prices up . . . (irony). Back to the subject at hand. A-a-a-and - IT WORKED! In the event, I used a coping saw to cut it off instead of a fretsaw. It seemed like a better tool for the job. Very much heart in mouth, with the lathe at the slowest speed and gently pressing with the saw as the work rotated. But - voila! Success! (very pleased - I'd been very worried that sawing the wheel off the base would destroy it, but it's turned out just as I'd hoped.) Steven
- 110 replies
-
- 14
-
-
- Paddlewheeler
- Ballarat
- (and 3 more)
-
Pat, I may end up using a wider bladed saw. Depends what's available. But I also need very fine teeth if I don't want to destroy the thing. I'm using toothpicks for the posts that support the awning - at least for the smaller model - and they work well. For the larger one, bamboo skewers or something similar. Andrew, the NAAFI is of course famous from the Highly Esteemed Goon Show. But with the motorised paddles and pool I really think you're asking a bit more than I had in mind . . . Steven
- 110 replies
-
- 5
-
-
- Paddlewheeler
- Ballarat
- (and 3 more)
-
Hello from South West of England.
Louie da fly replied to Missile-Monkey's topic in New member Introductions
Coincidence - I was just watching a thing on TV of Martin Clunes (who lives in Dorset) and a self-described "lady novelist" doing the rounds of the county seeing places mentioned in various books (especially Thomas Hardy's novels). Beautiful place, Dorset. I missed out when I was in the UK - we went to Hampshire and Somerset but never got to Dorset. Looks like we need to go back sometime. A paddlesteamer sounds really interesting. Have fun with it, and make sure you start a build log so we can see your progress. The people on MSW are very friendly and helpful, so don't hesitate to ask questions if you hit problems. And photos! Post lots of photos! Steven -
Keith, I intend to mount it back into the lathe and slice it off (carefully) with a traditional fretsaw (very fine blade) as the lathe turns. Steven
- 110 replies
-
- 4
-
-
- Paddlewheeler
- Ballarat
- (and 3 more)