HOLIDAY DONATION DRIVE - SUPPORT MSW - DO YOUR PART TO KEEP THIS GREAT FORUM GOING! (89 donations so far out of 49,000 members - C'mon guys!)
×


Louie da fly
-
Posts
7,989 -
Joined
-
Last visited
Content Type
Profiles
Forums
Gallery
Events
Everything posted by Louie da fly
-
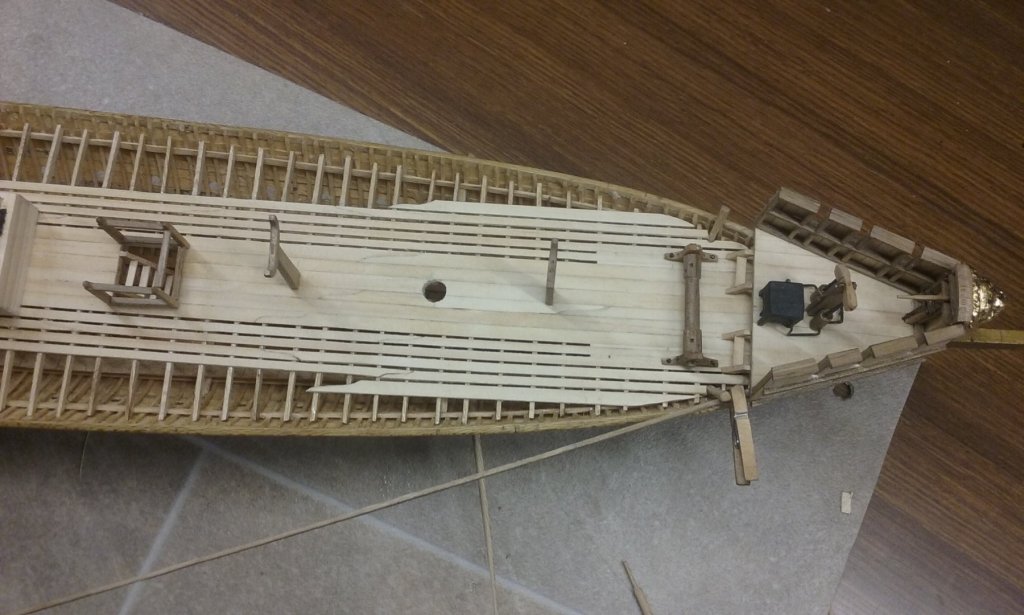
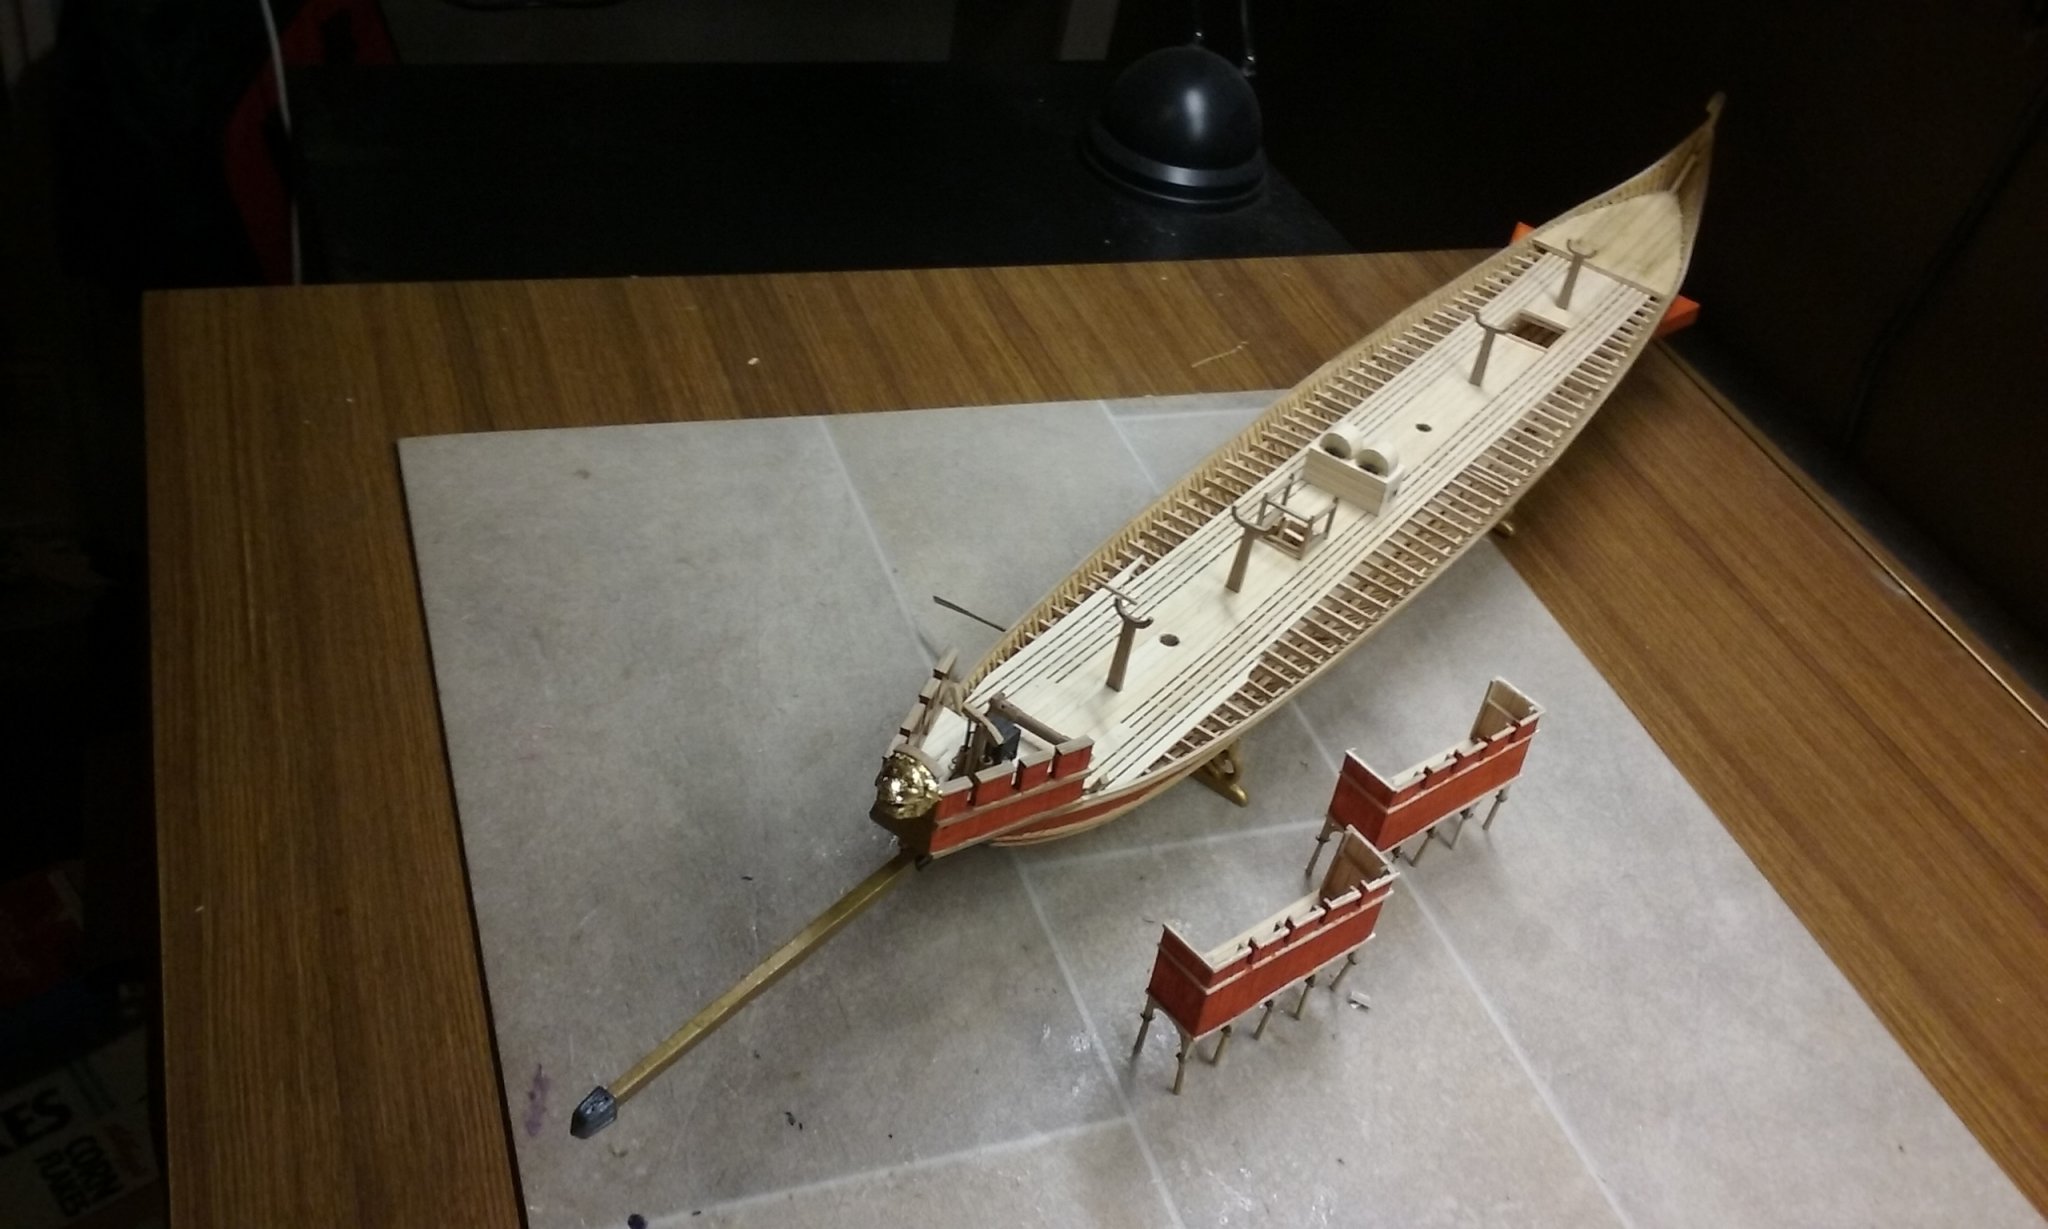
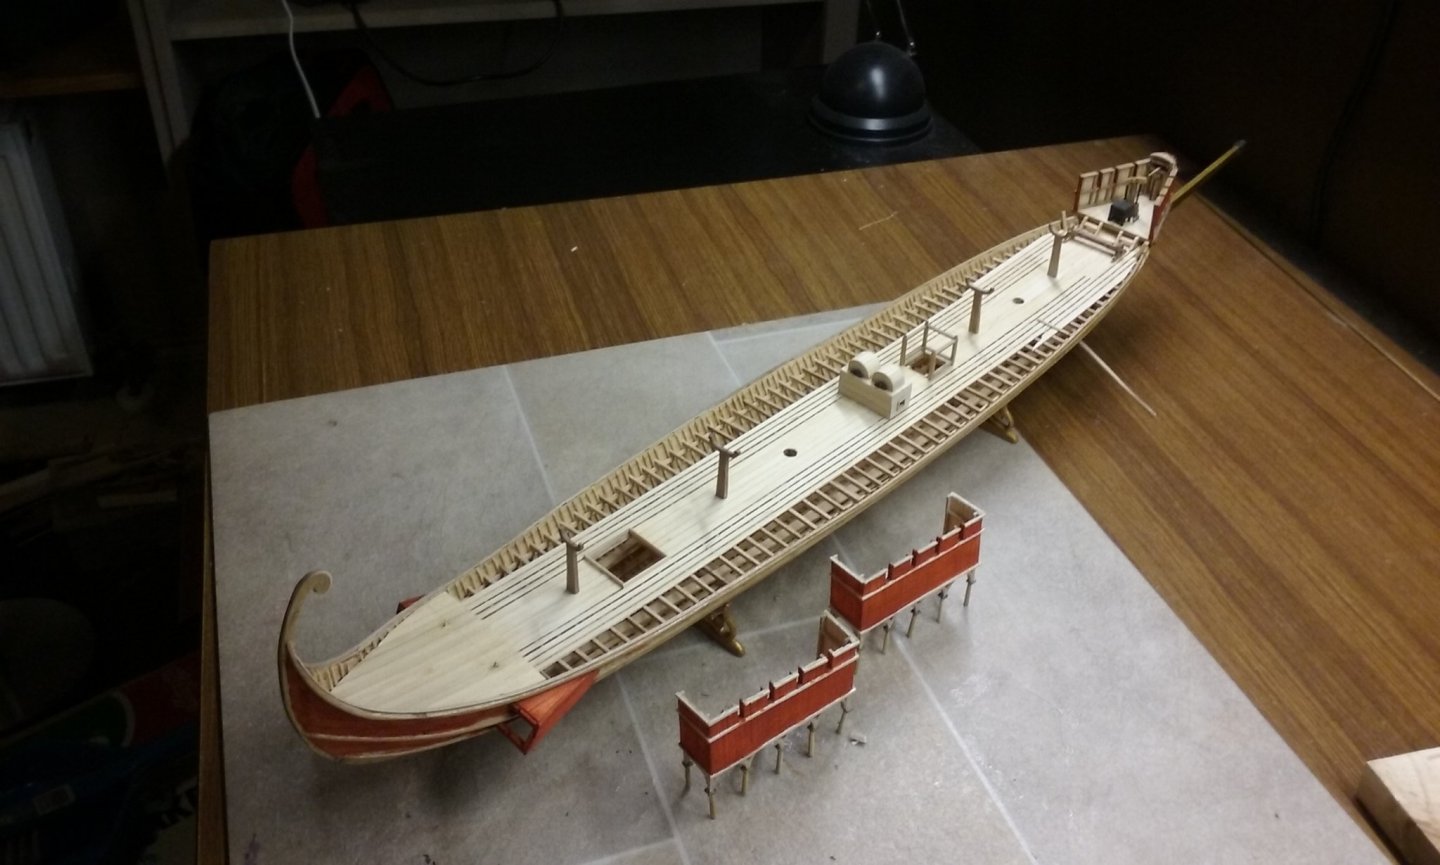
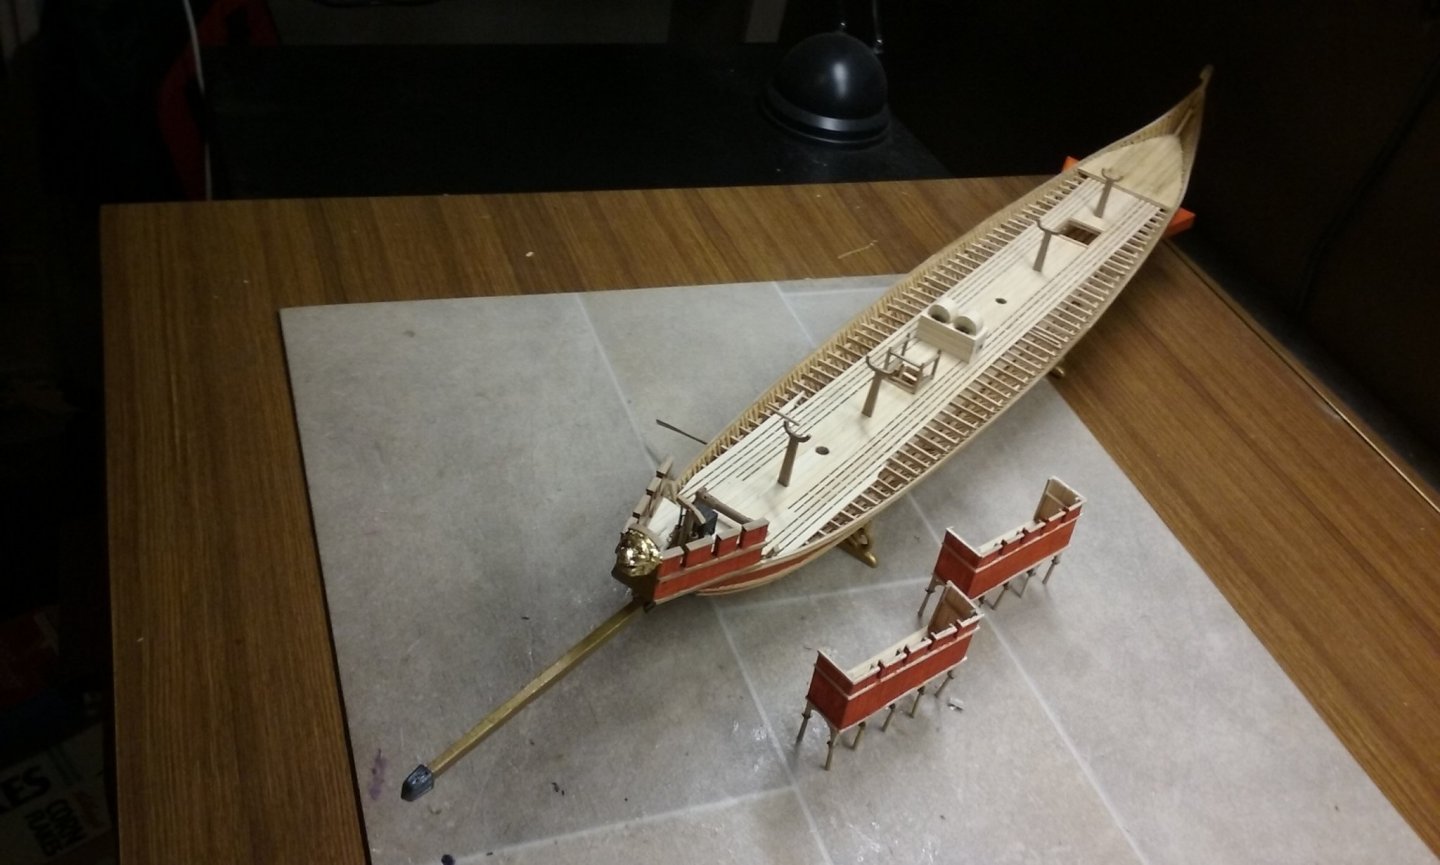
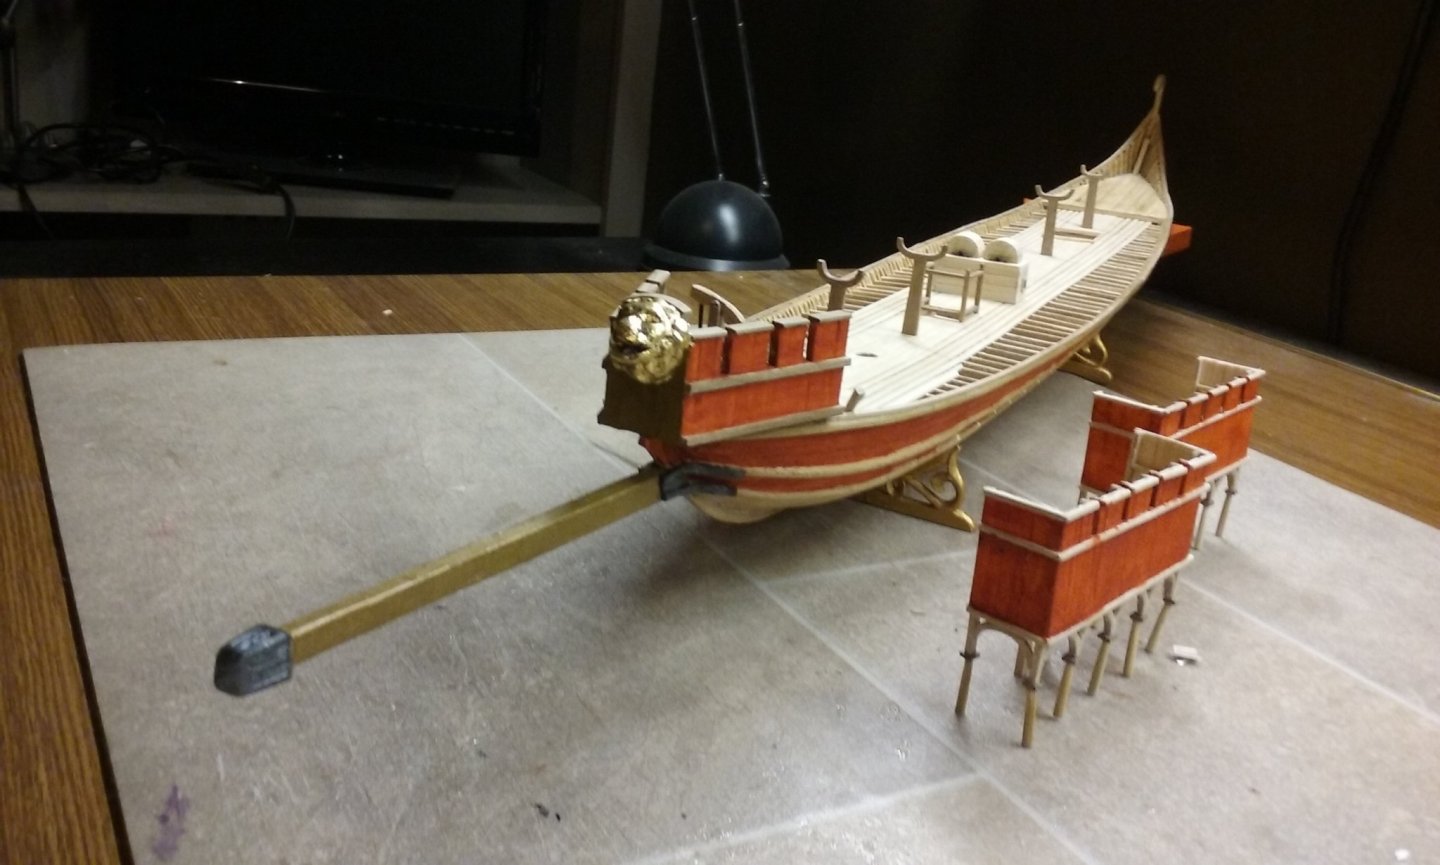
 Finally got some paint that is the colour I wanted to use for the dromon's hull - basically a red ochre, which would be the source of the tint in red paint at the time . I'm using enamel (Humbrol) because I've found that a tiny bit of PVA glue under acrylic paint seems to mess up the finish. This is the first coat. The trim will be yellow ochre, and the bottom will be black (the colour of pitch). Normally Byzantine ships are shown as black all over in contemporary pictures, but the Emperor's ship is shown as red with yellow trim. I haven't decided yet whether to paint the sternpost and "tail" yellow or red. Once the painting is all done, I can put the lower oars into place and then finish off the deck (I need it open for the time being so I can see where to glue the oars). And then I can put all the deck items in place that I've been holding off from, add the upper oarbenches and the side castles and the awning at the poop, insert the masts etc etc. Steven
-
Of course! How could you think otherwise?😉 Not a bad idea, but I think it might be a little too stiff for the job - it could crumple rather than follow the shape I want. The Easter-egg foil seems to have just the right properties for the job - enough stiffness, but still flexible enough to get the shape right. Steven
-
I like the perspex brackets 😉. Should keep everything nice and square. Looks like you've hit the ground running! Steven
-
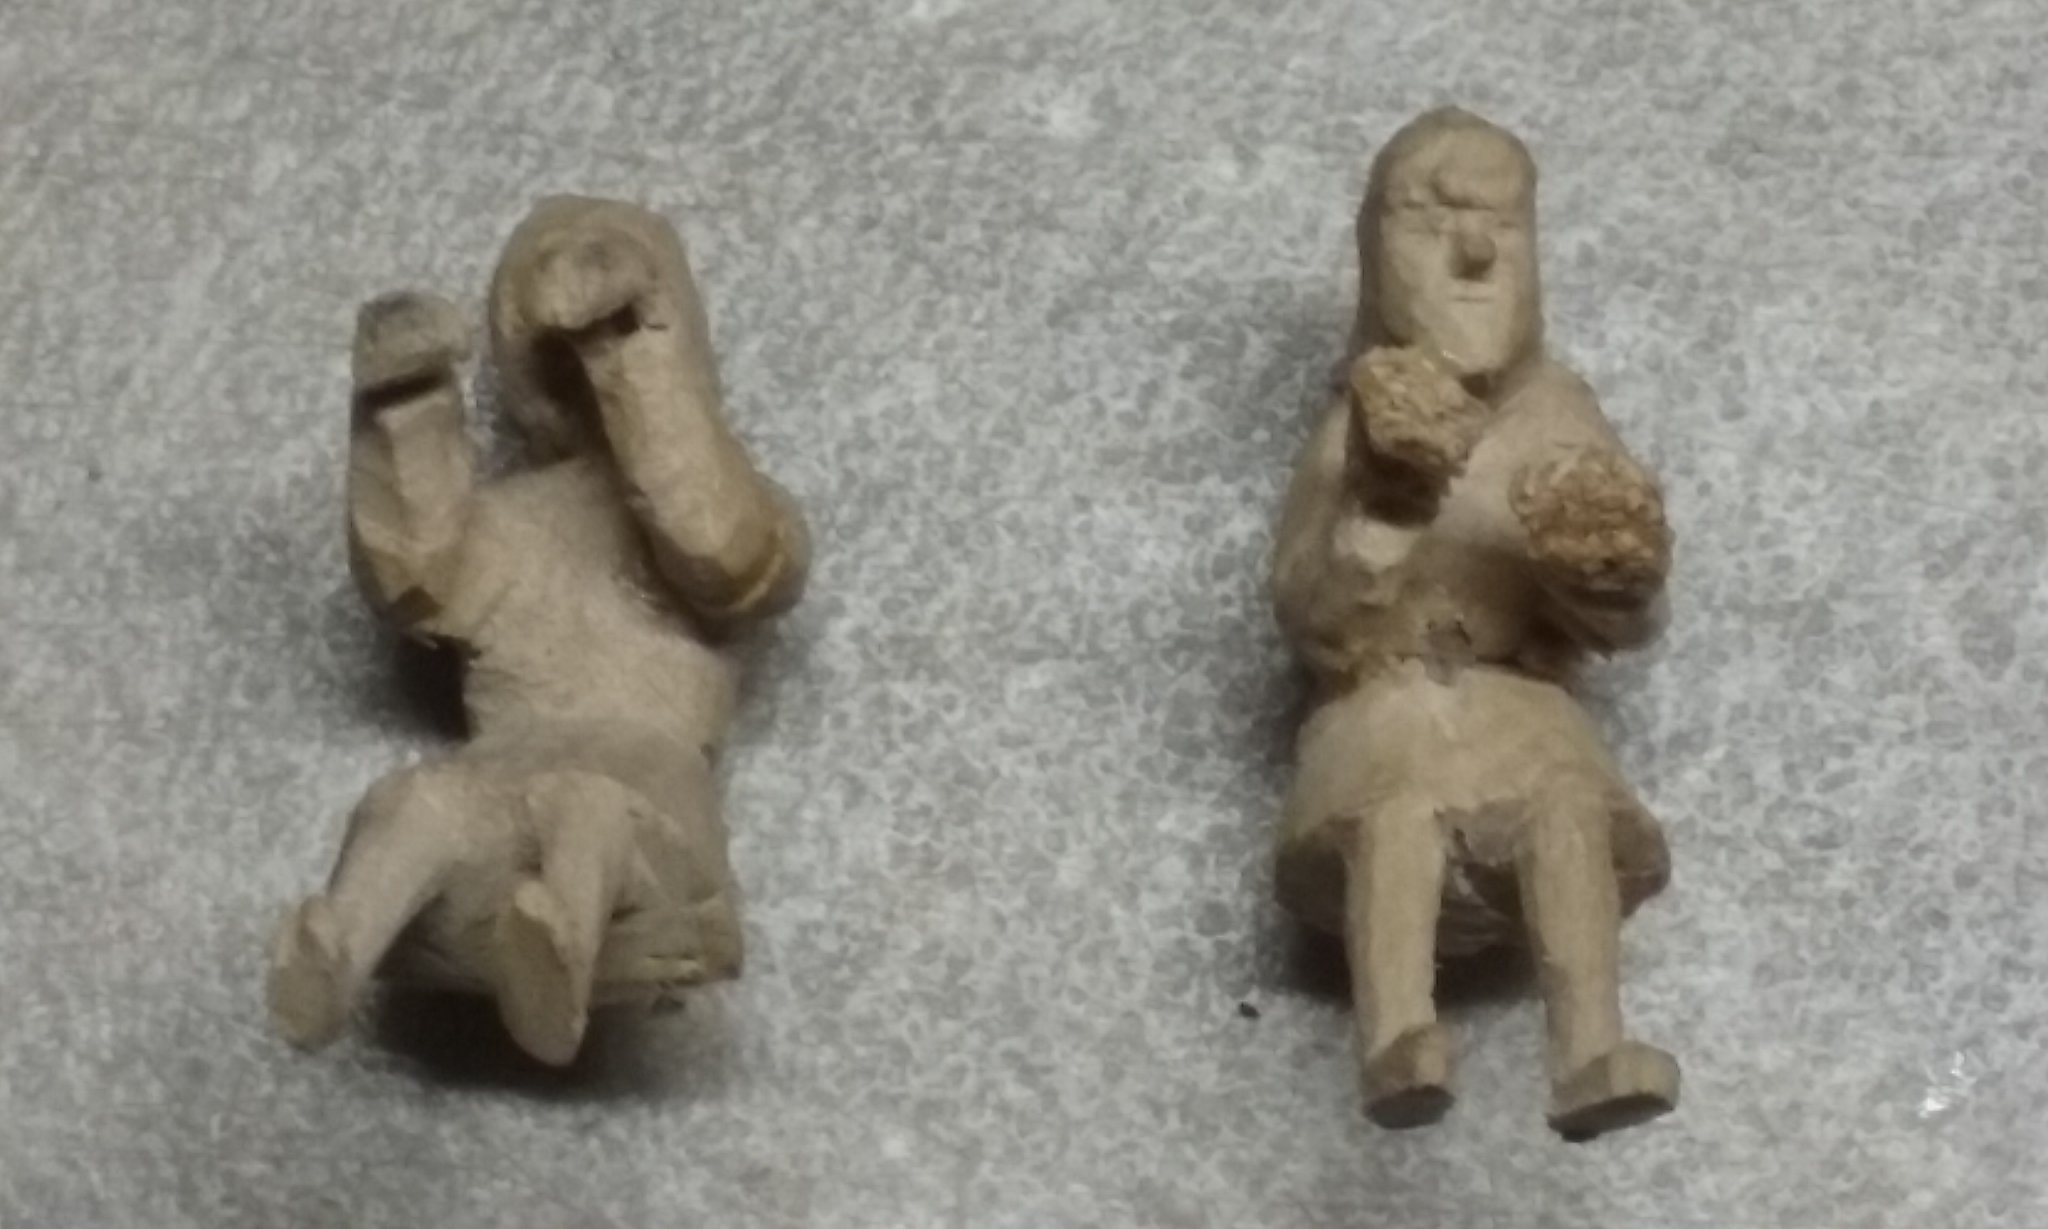
No, I hadn't thought of that, but they're fairly constrained by having to hold the oars so the blades will be at the same level as those of the lower bank. On the other hand, I'm thinking of making, say, 5 different figures for each side (10 in all) cast in resin from these two originals, and then give them different details of hair, beard, face etc and re-cast 5 of each so we end up with a bigger mix of people - not unlike the way the Entombed Warriors were made with mass-produced bodies and individual heads. I can paint the tunics and hair different colours (though dark hair will of course predominate) to add to the variety. Still thinking it through . . . Steven
-
It's always worth following your builds, Dick. Such a wealth of research, and (very) convincing speculation on "how it must/may have been" when there's a gap in the available information. Steven
- 263 replies
-
- 1
-

-
- nave tonda
- round ship
- (and 2 more)
-
Yes, Dick. I'm thinking of making them of thin foil (from Easter eggs) as I did with the big banner. They seem to have about the right modulus (I think that's the first time I've ever used that word outside the science classroom!) of stiffness and flexibility, but I'll find out when I try it. Steven
-
Nope. Almost certainly radiata pine - a pretty inferior timber also known as Monterey pine, originated in America but has become the most common building timber in Oz. Where do you live, Peter? In Ballarat, where I am, a lot of people have fruit trees. The people either side of us both have pear trees, and I've been able to get smallish branches from them when they trim the trees. I also follow the Council tree loppers around and have got hold of plane, ash, elm, oak and walnut (the last one was from the neighbour's tree which died - score!) You might be able to get in touch with commercial tree loppers and see if you can get pear wood from them. Only problem is that you'd then have to wait for it to season - about 12 months for each 25mm thickness. How much do you need? And in what sizes? Steven
-
Beautiful work as always, Dick. The straight central section looks a little strange at first sight, but that's removable, for loading cargo, isn't it. Steven
- 263 replies
-
- 1
-
-
- nave tonda
- round ship
- (and 2 more)
-
Not really - I've tried it but it never seems to give the precision and detail I want, and wood stays where you put it, unlike modelling clay. I've used it (well, plasticiene, actually) to work up a rough idea of what I want to do, but I find wood is better for the final model. And anyway, I like carving ☺️ Modelling wax is easier to carve than wood but less forgiving if you make a mistake. You can't add a bit of filler to cover it up. I've bought some sculpy but haven't got around to trying it. Steven
-
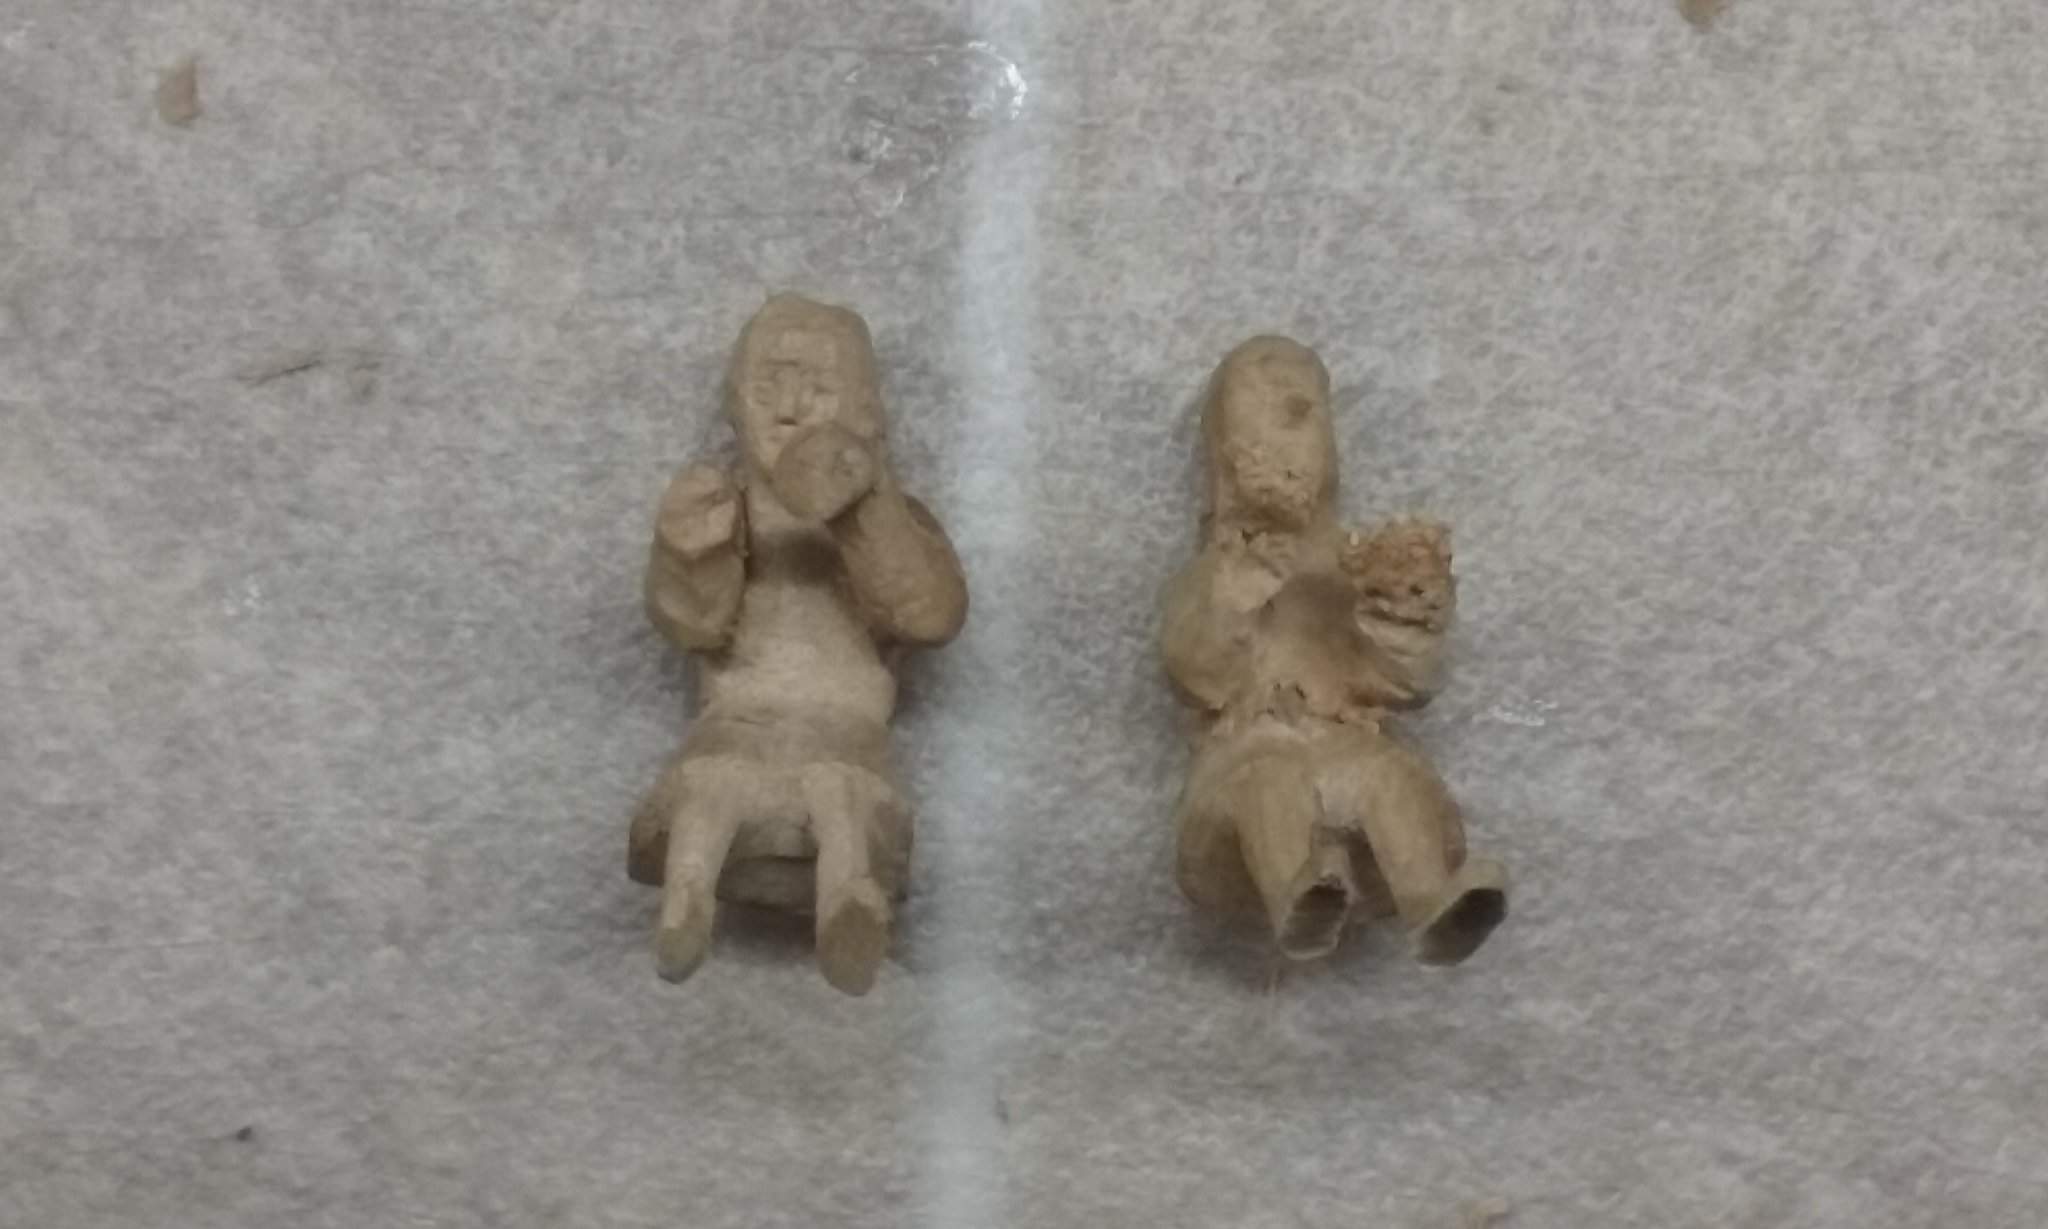
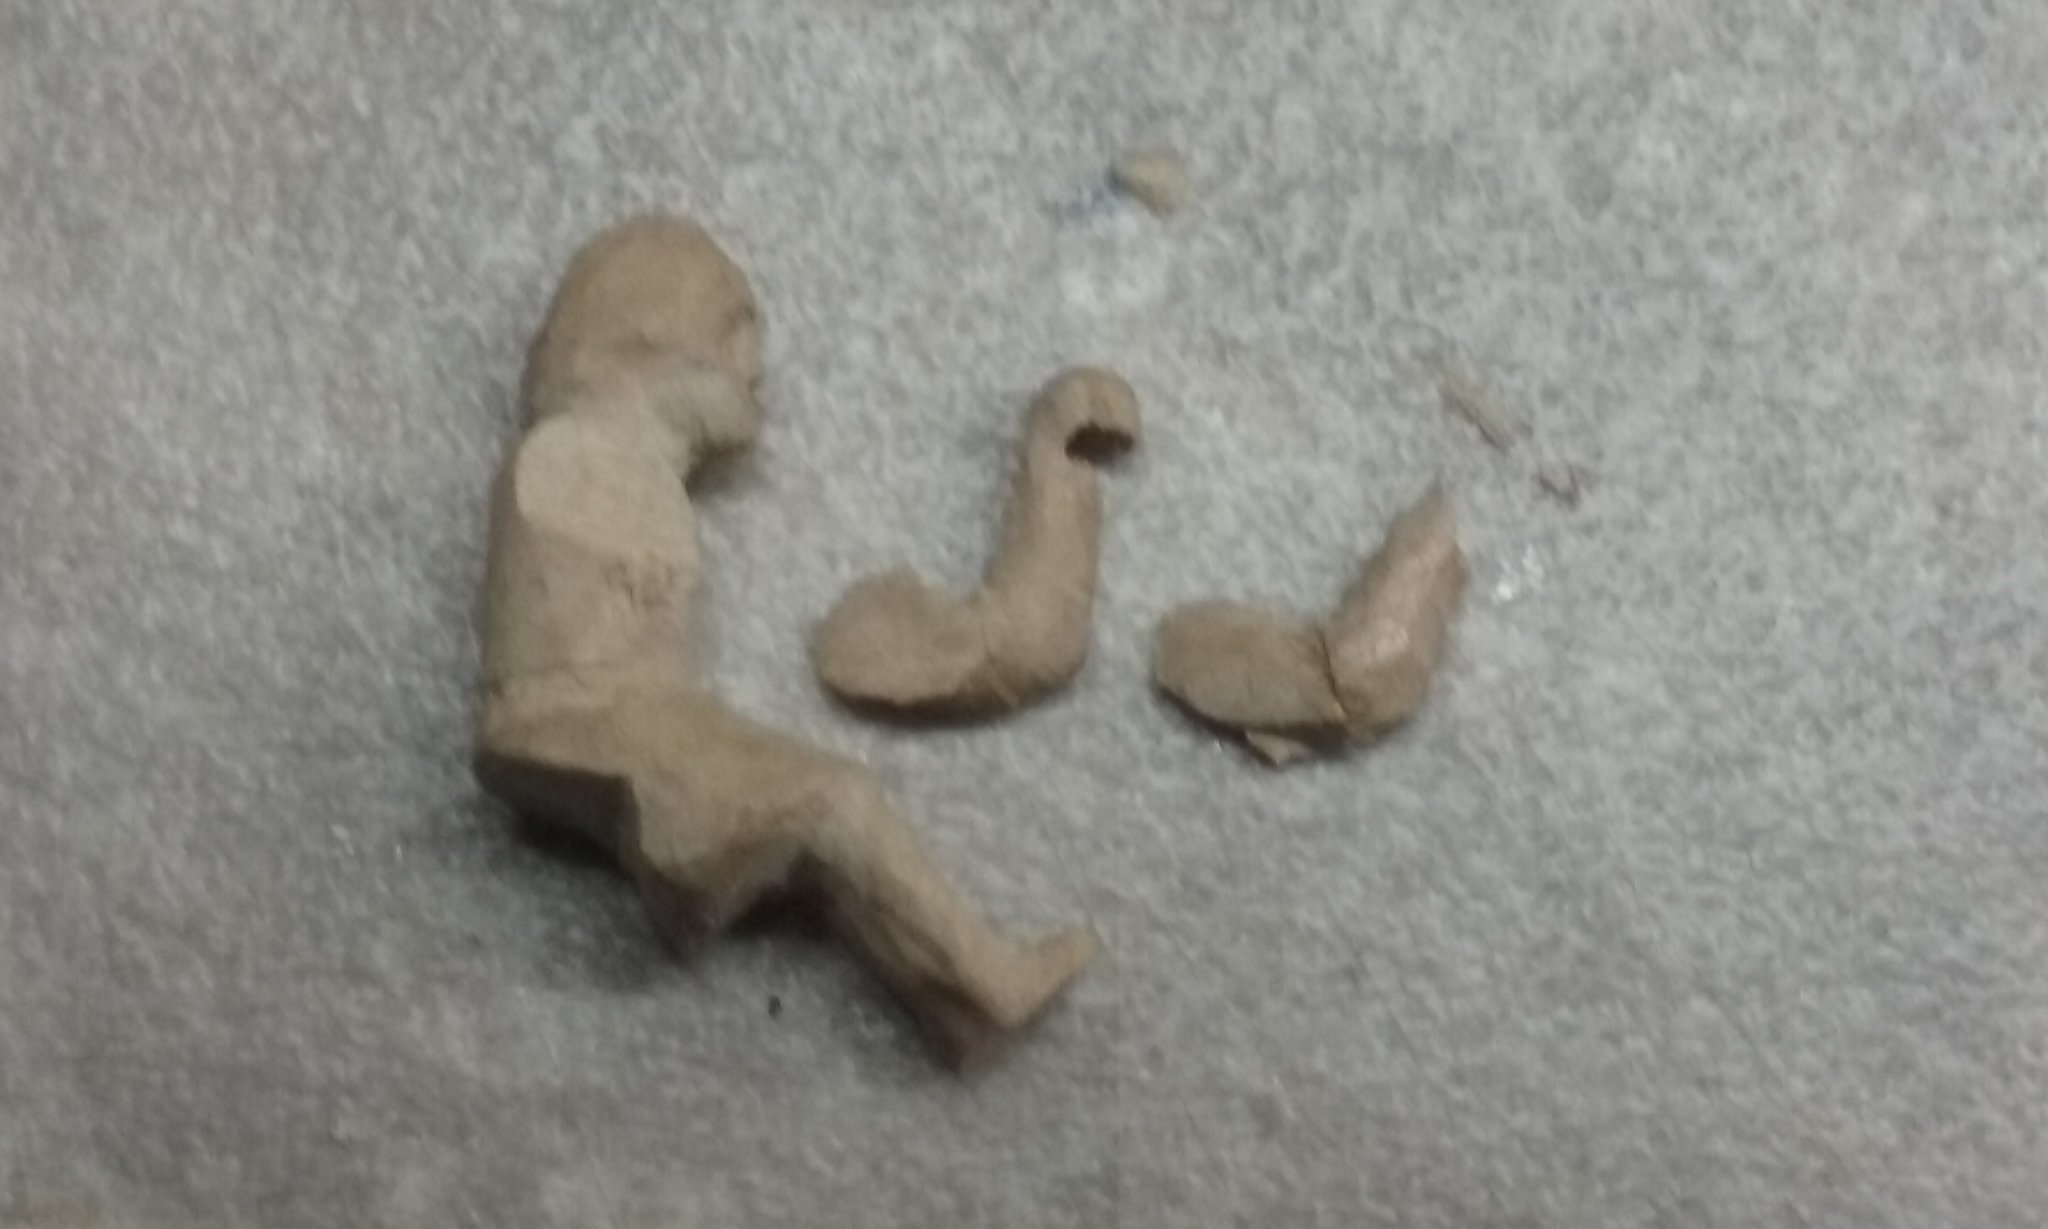
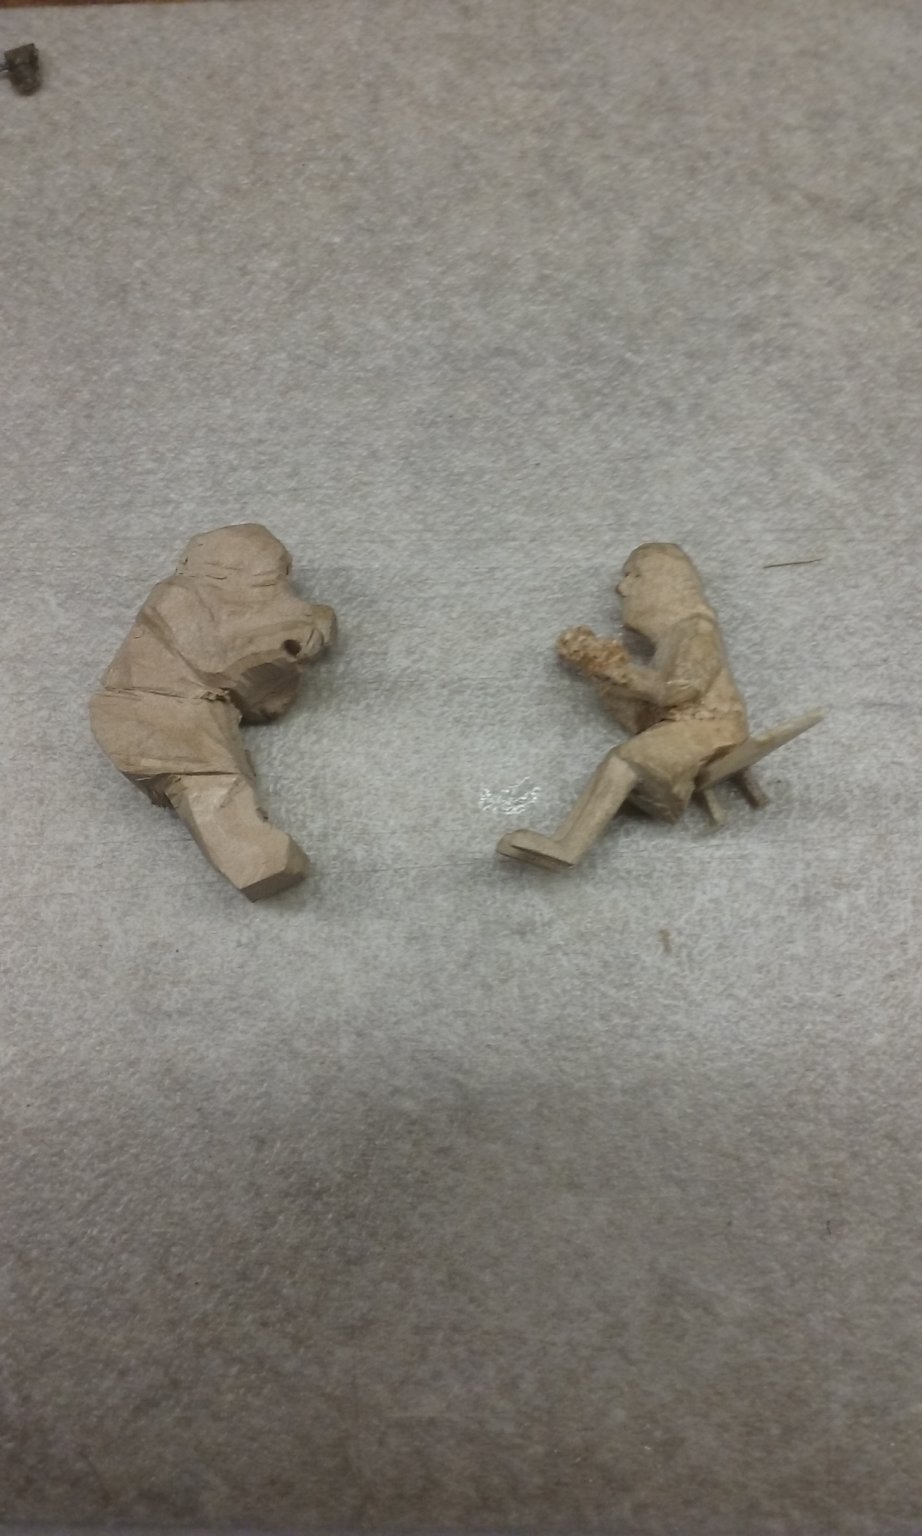
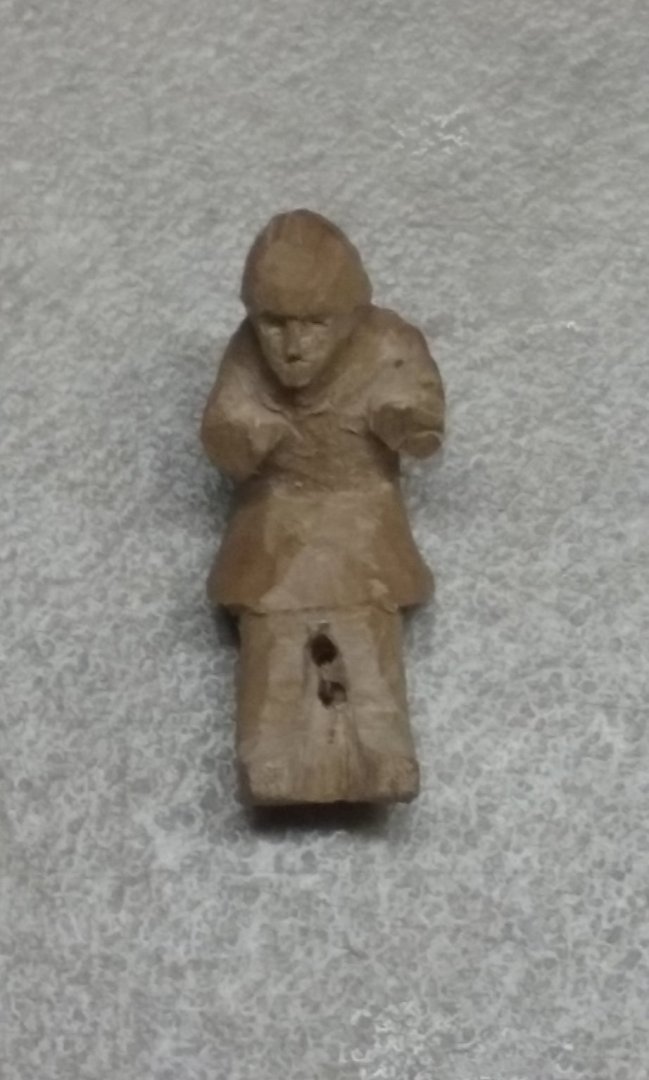
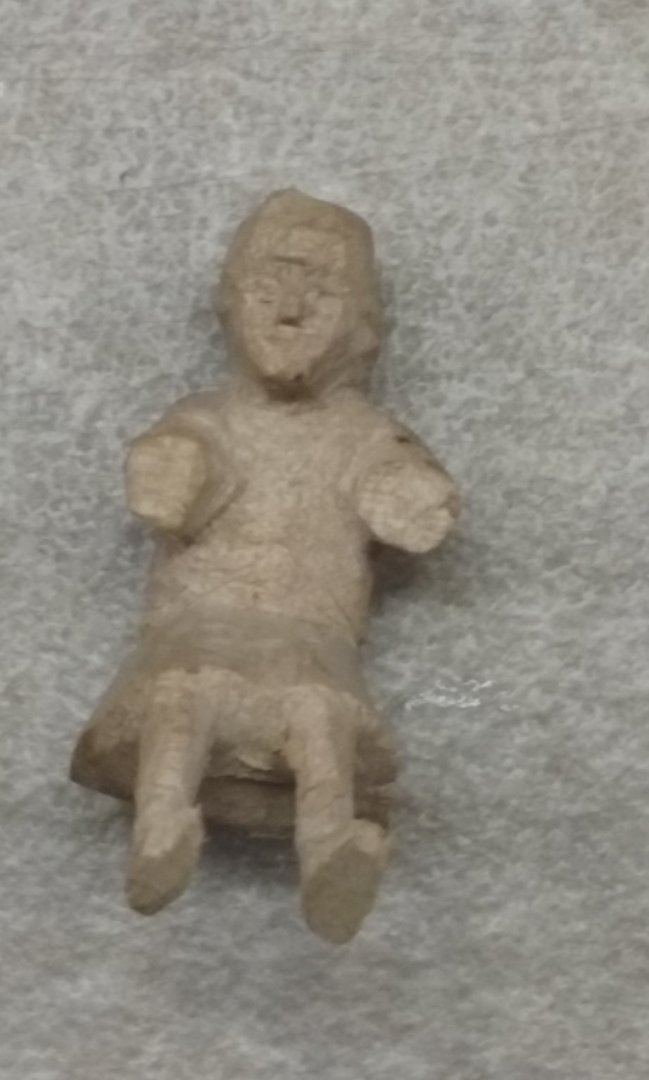
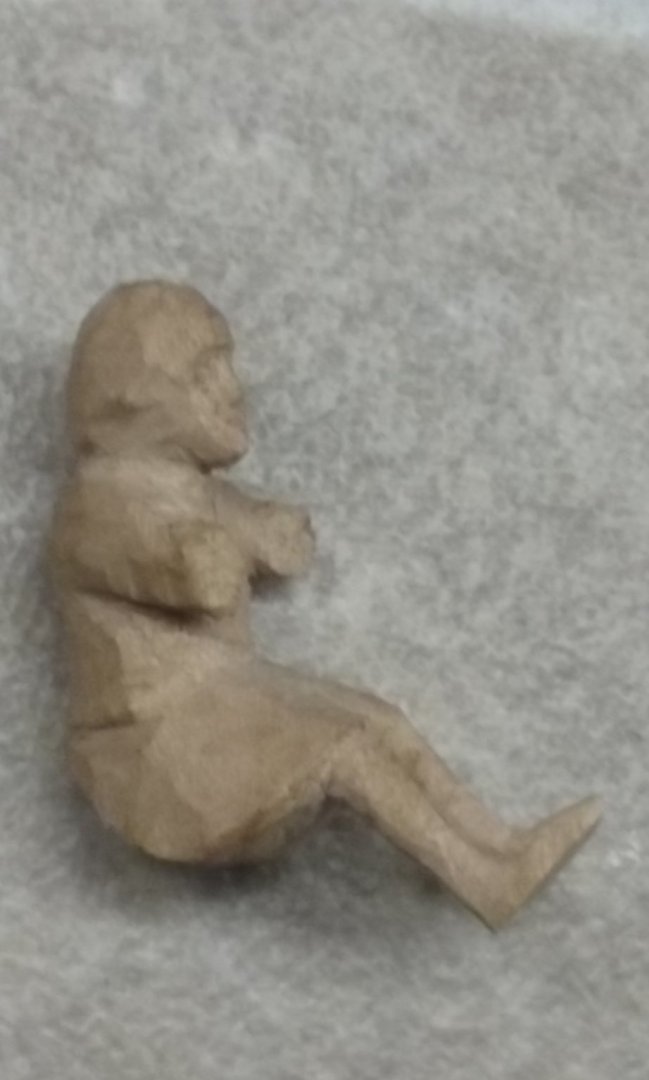
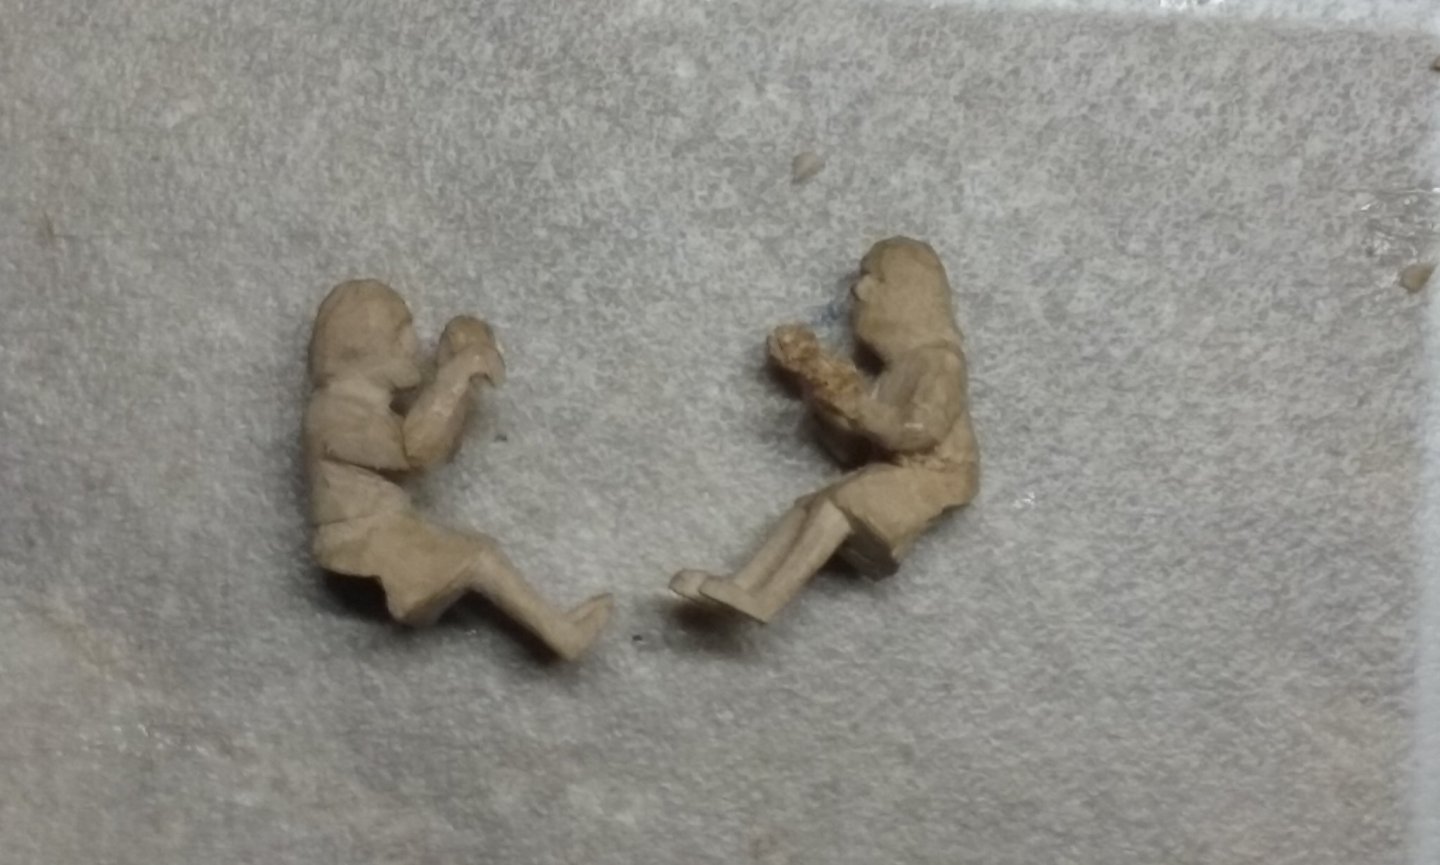
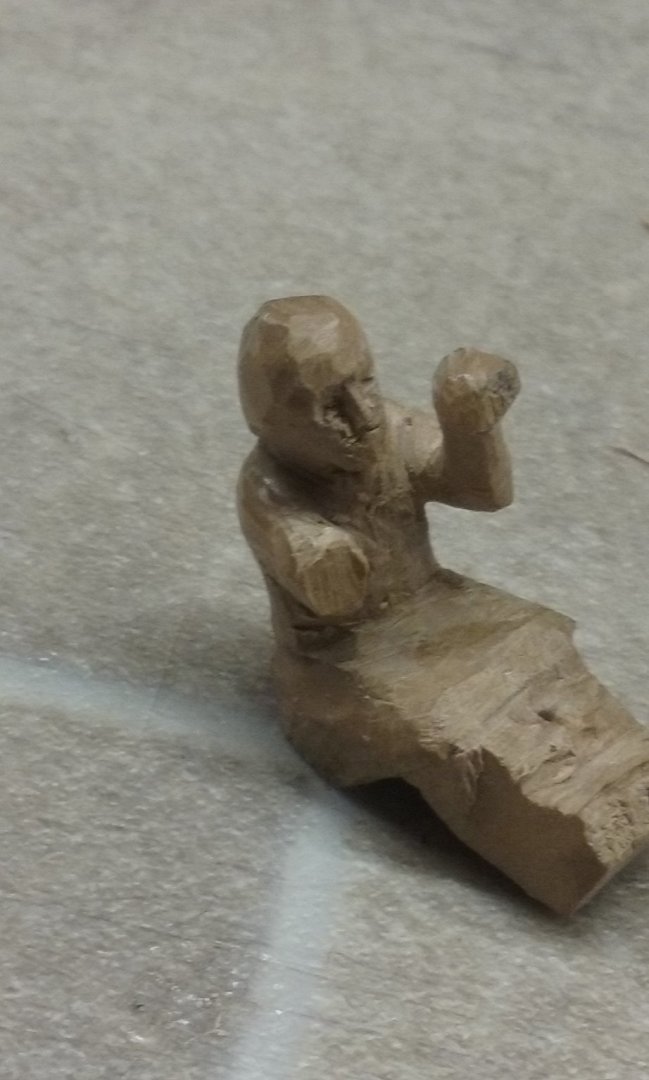
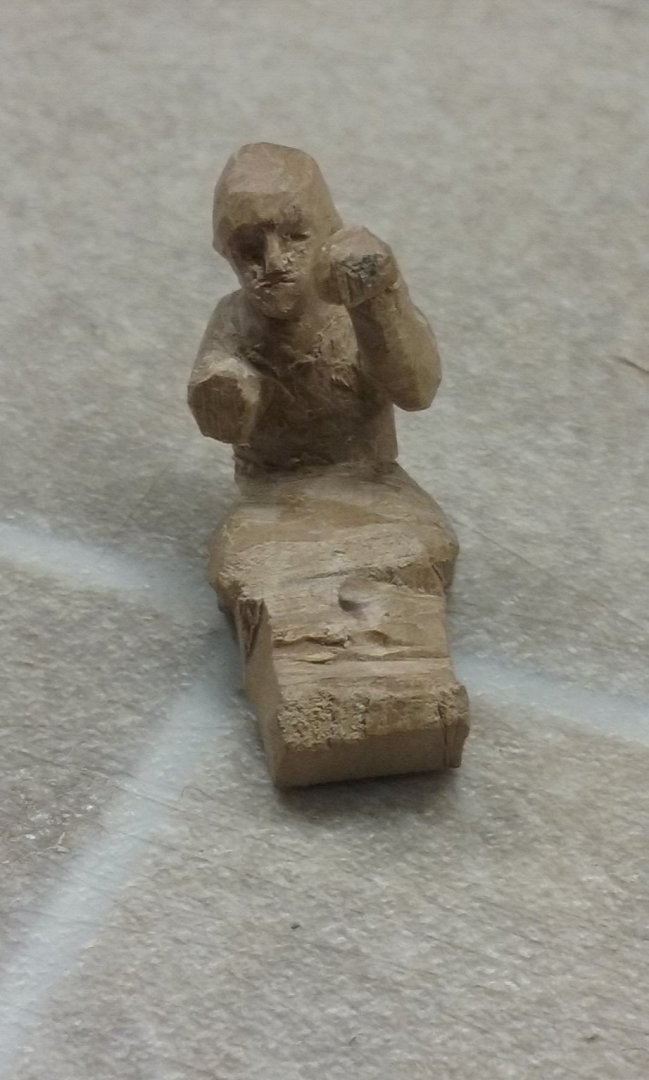
Here is the oarsman with his arms broken off and his legs started to be shaped. Legs done, and ready to glue the arms back on. (Sorry about the photo quality.) I glued the arms on, and checked the new guy against the one I'd already done. Then it became obvious that the new guy's hands were higher up than the old one's, not because I'd glued them on too high but because I'd carved them that way. Time to get clever - I sawed off the arms at the shoulders and re-glued them to be as close as possible to a mirror image of the arms on the other oarsman. A lot of mucking around, but I think I've finally got it right - except that I now have to carve a new right hand - the arm fell on the floor when I sawed it off and the hand split off, never to be seen again . . . sigh. Steven


-
That was always a concern, Pat. Certainly I had to ditch a lot more of the old structure than I'd wanted to (have a look at the first couple of posts in this build log). But I've managed to keep much of the original and I'm pretty happy with that. The hull above the waterline will mostly be original, as will the main deck and the forecastle, but the deck of the aftercastle will be new. It's a shame I lost the main hatch and the longboat - they were pretty cool. The bowsprit, fore and main masts and their spars and shrouds I still have, along with their original sails (which will have to be replaced but will serve as a pattern for the new ones). The mizzen and bonaventure mizzen have been lost along the way, along with their spars, sails and rigging, and will have to be re-done. I'm hoping that when it's all done it will be a nice snapshot of what I was capable of at 17, with the new stuff showing how much I've learned in the interim. Steven
- 740 replies
-
- 2
-
-
- Tudor
- restoration
- (and 4 more)
-
Very nice work, Christos. Those are fleurs de lis on the coat of arms?
-
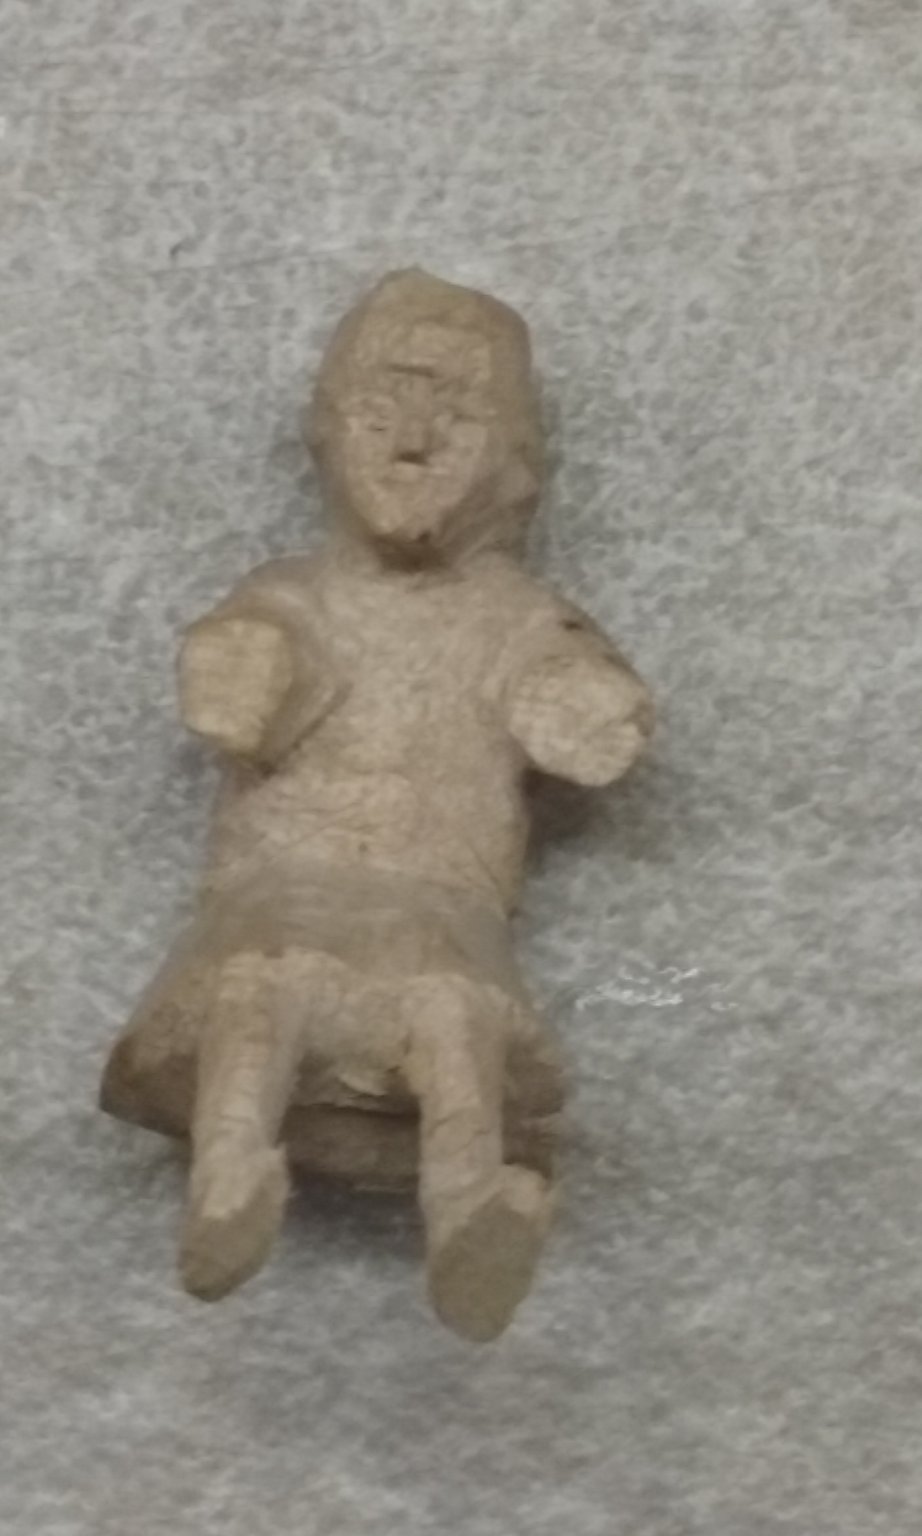
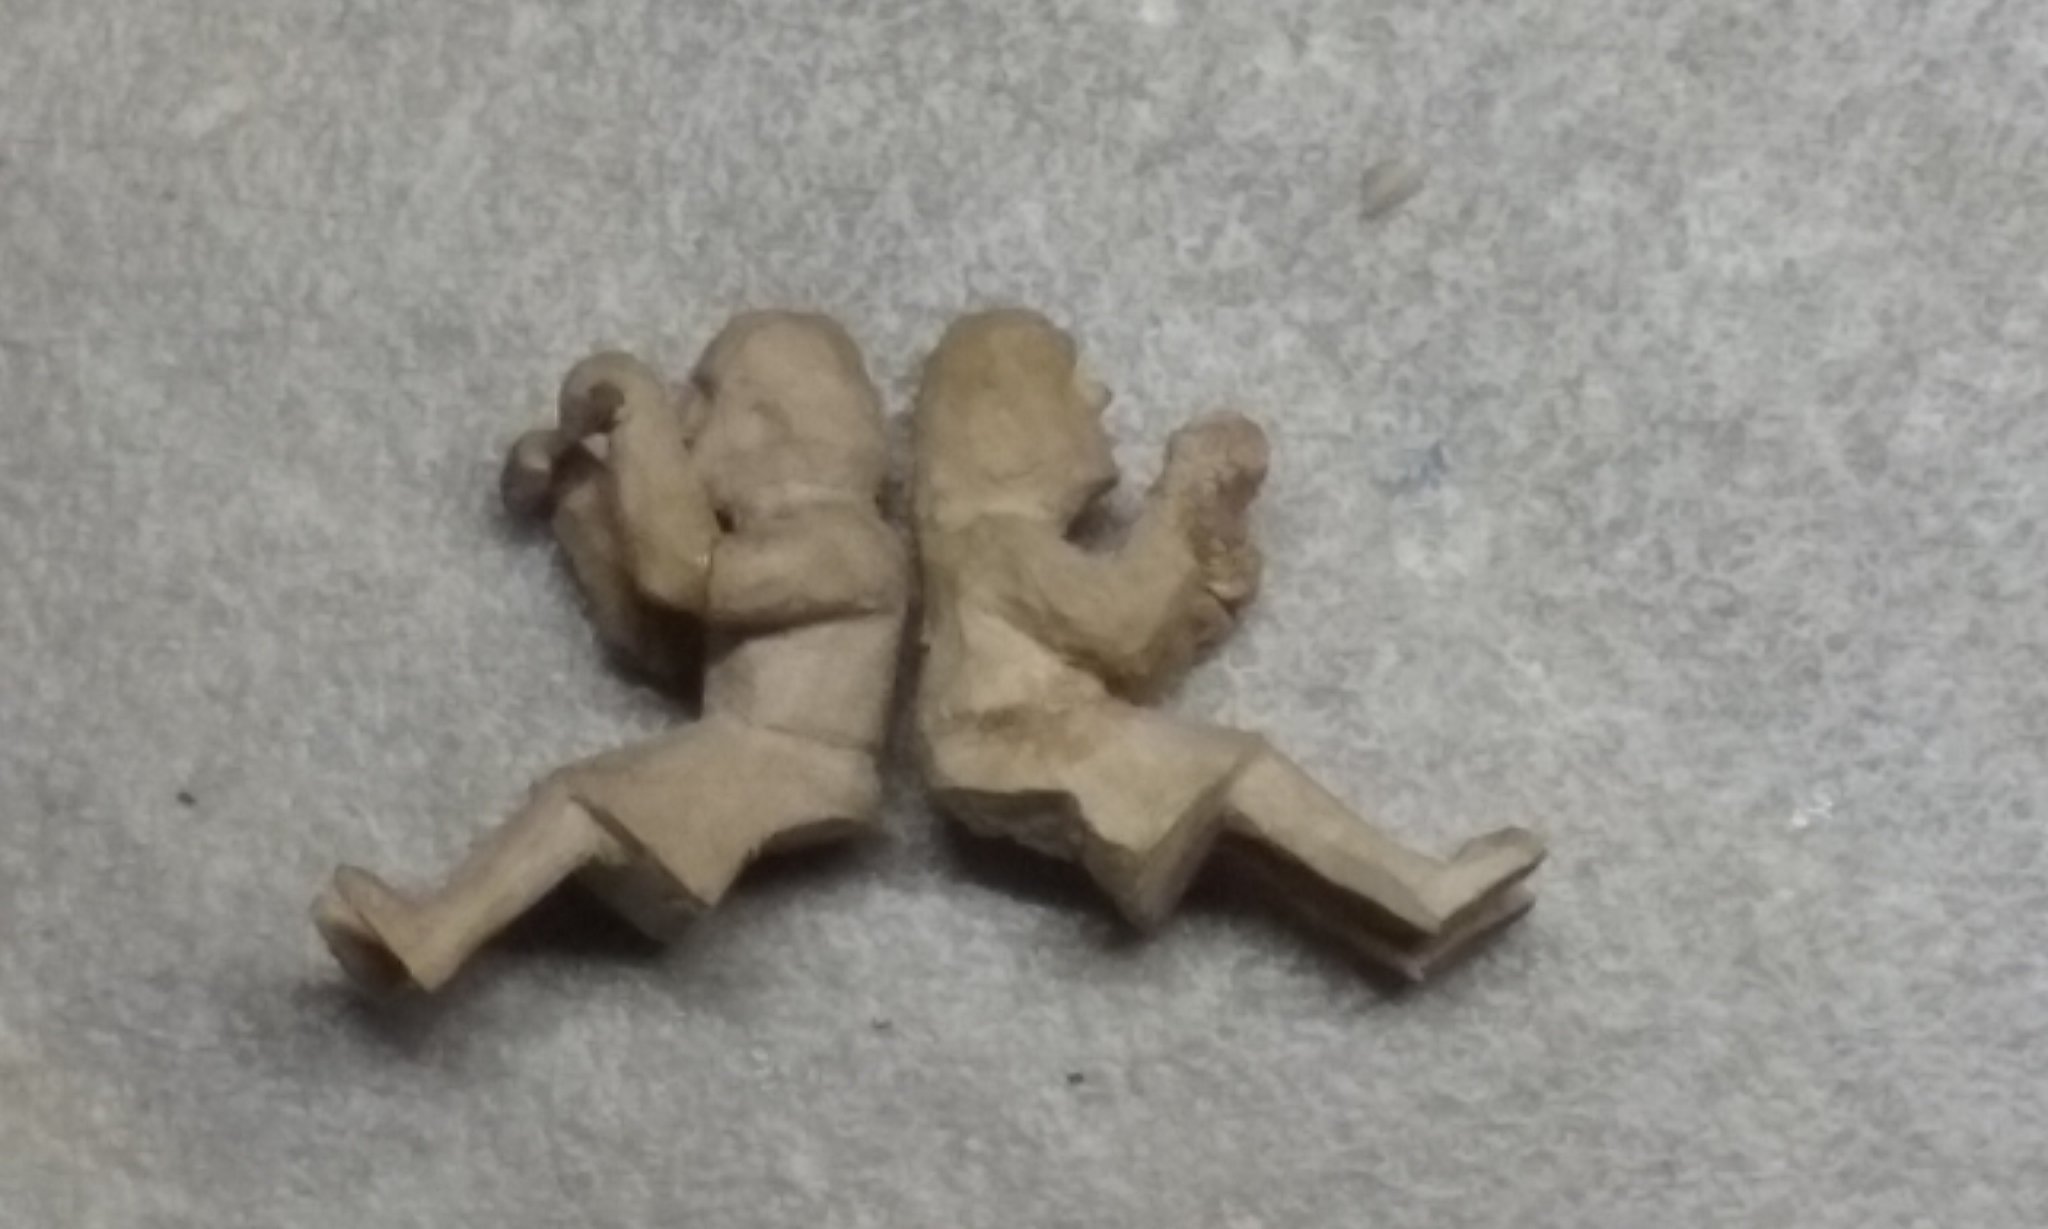
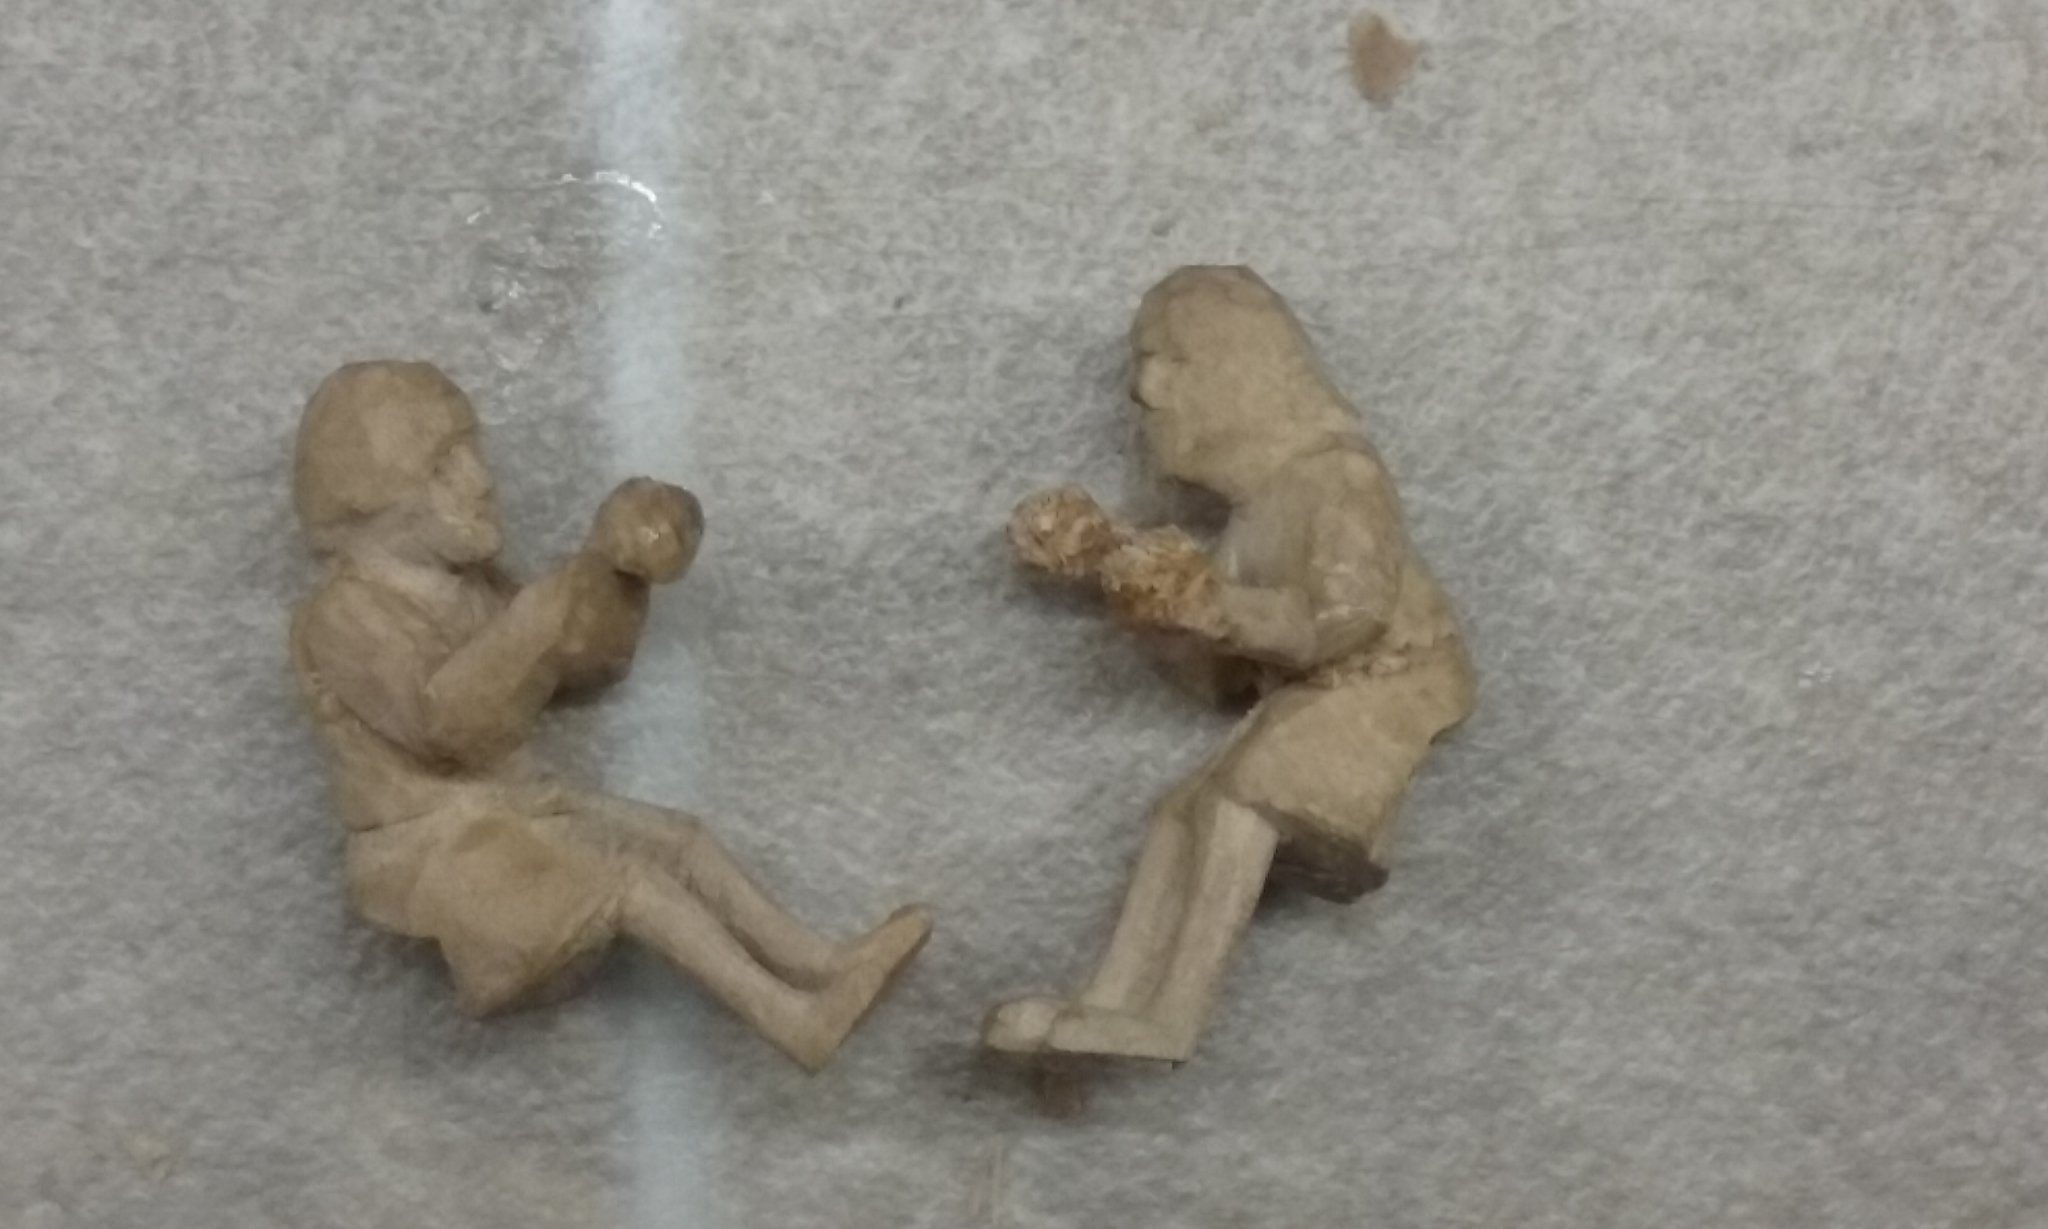
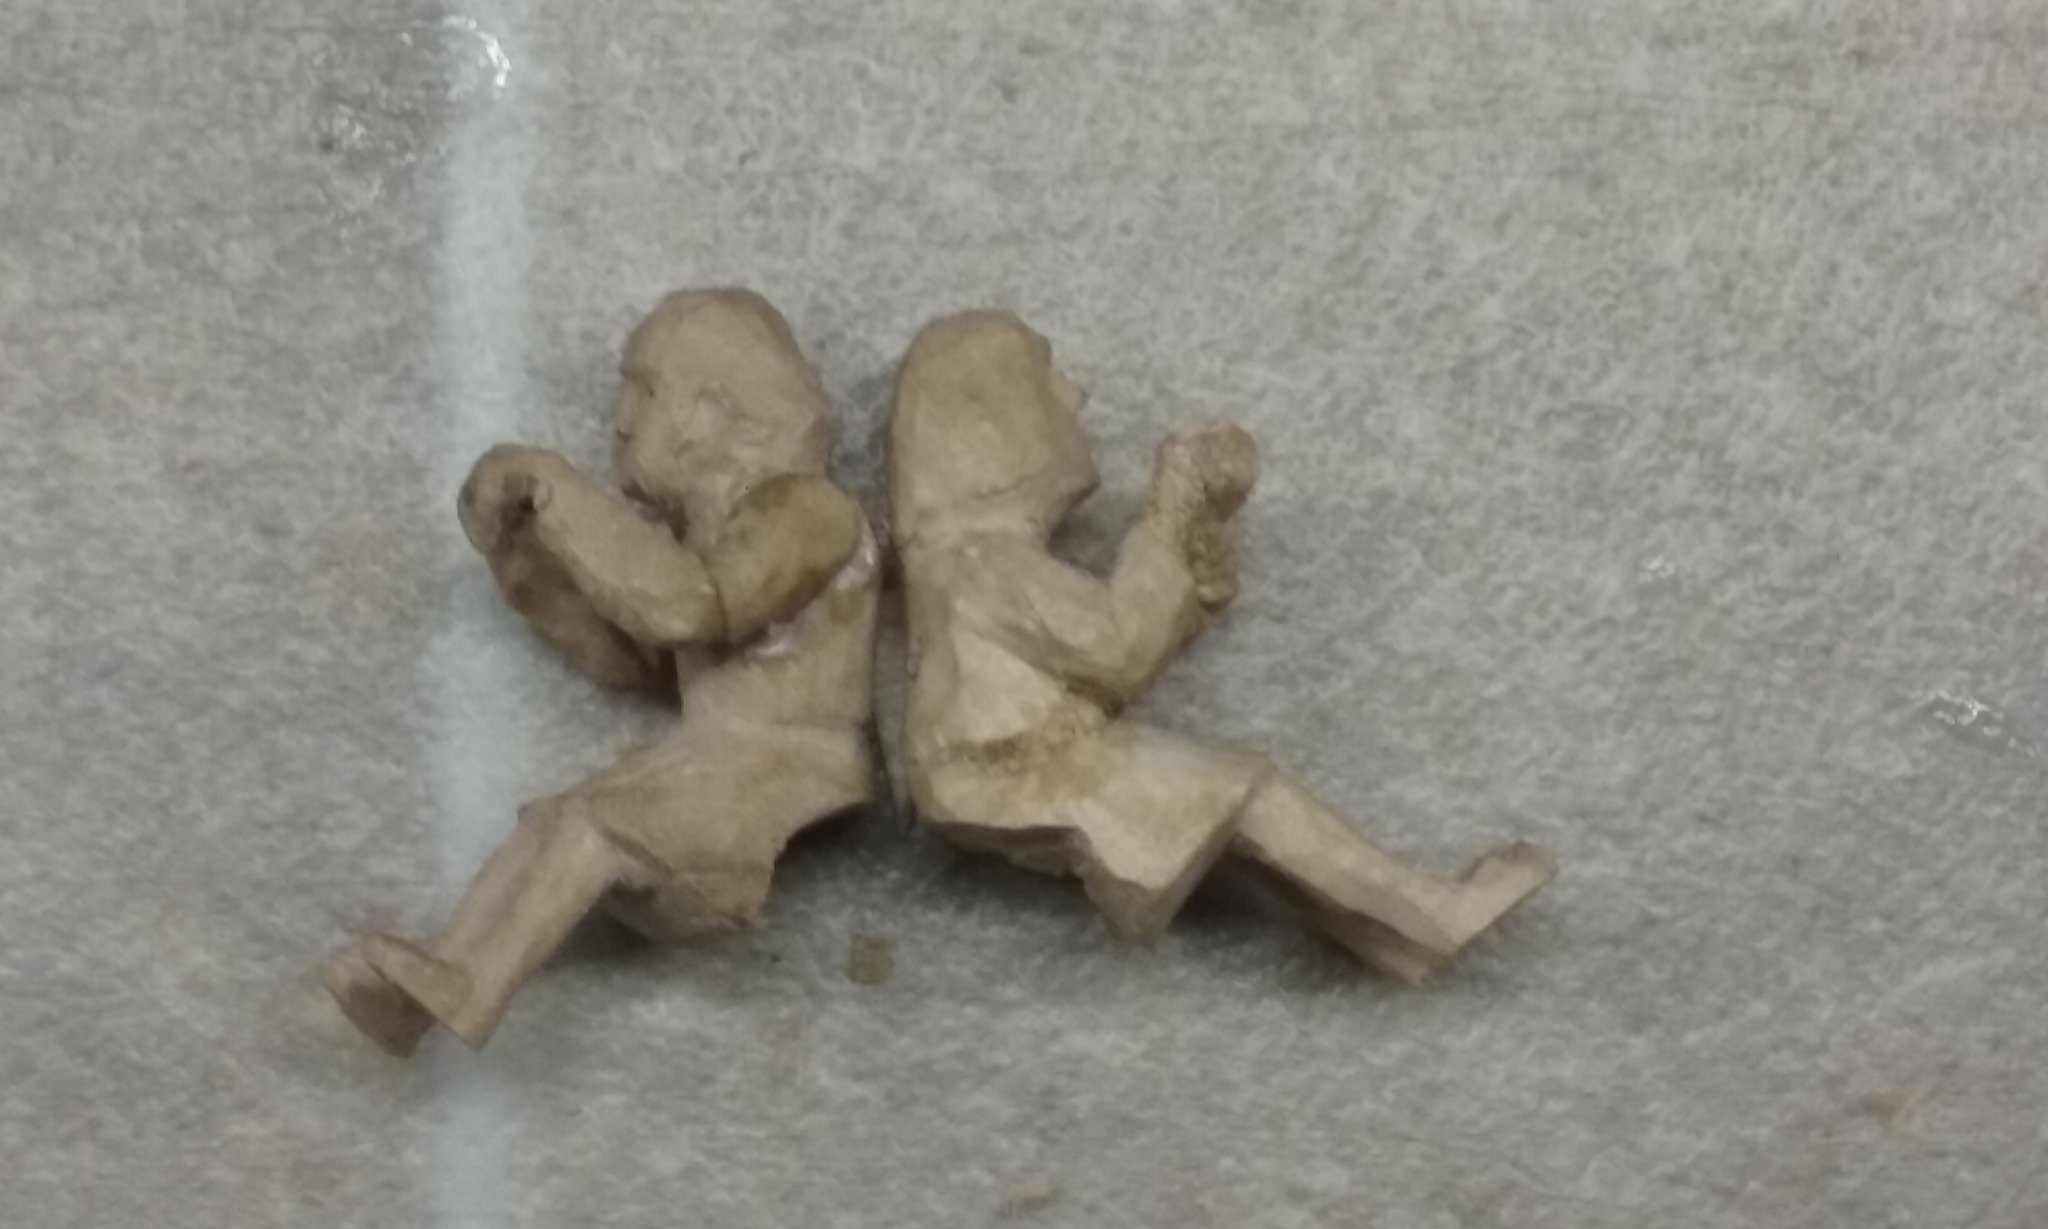
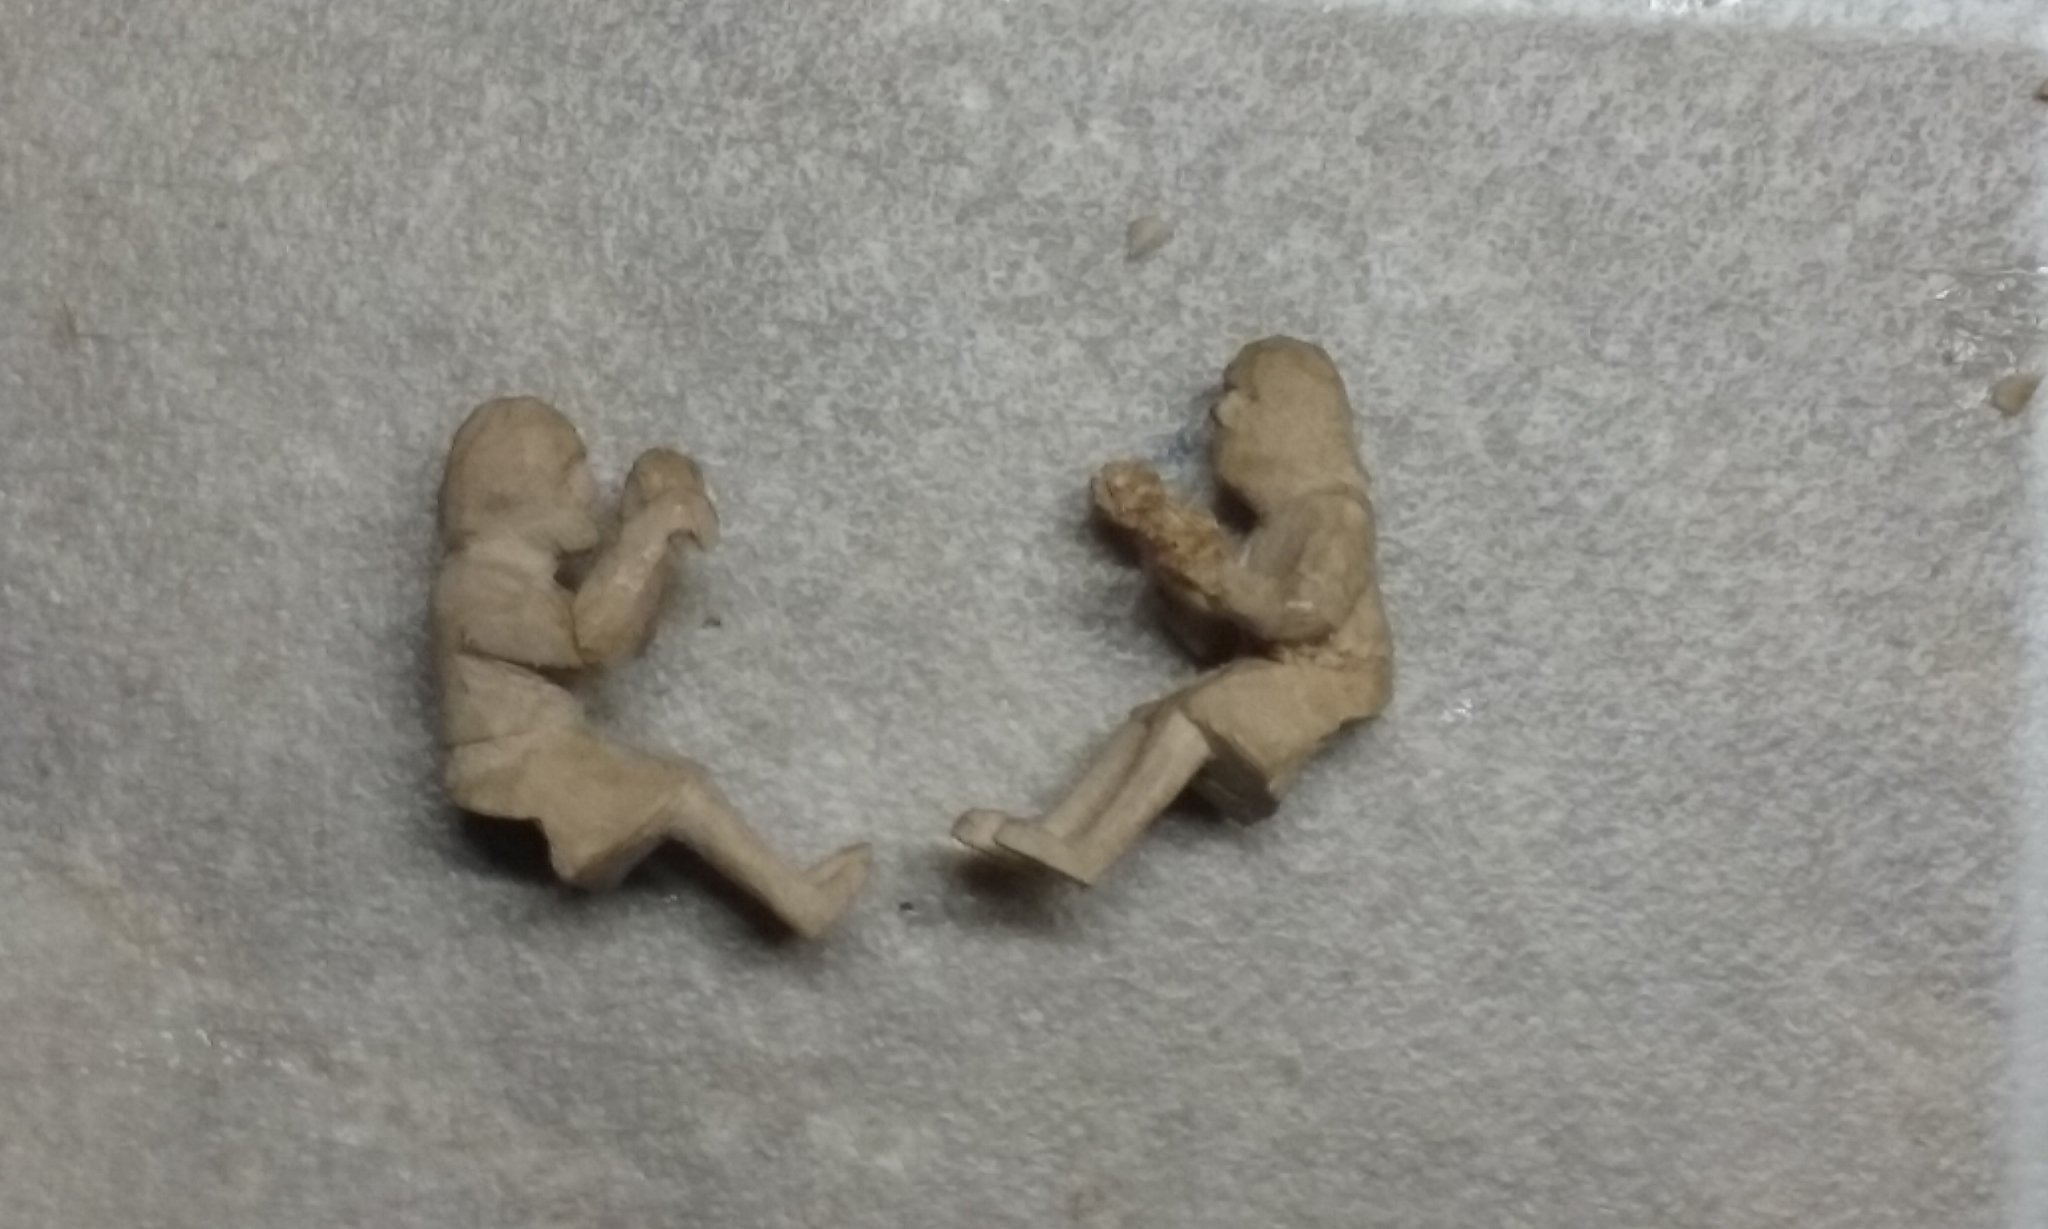
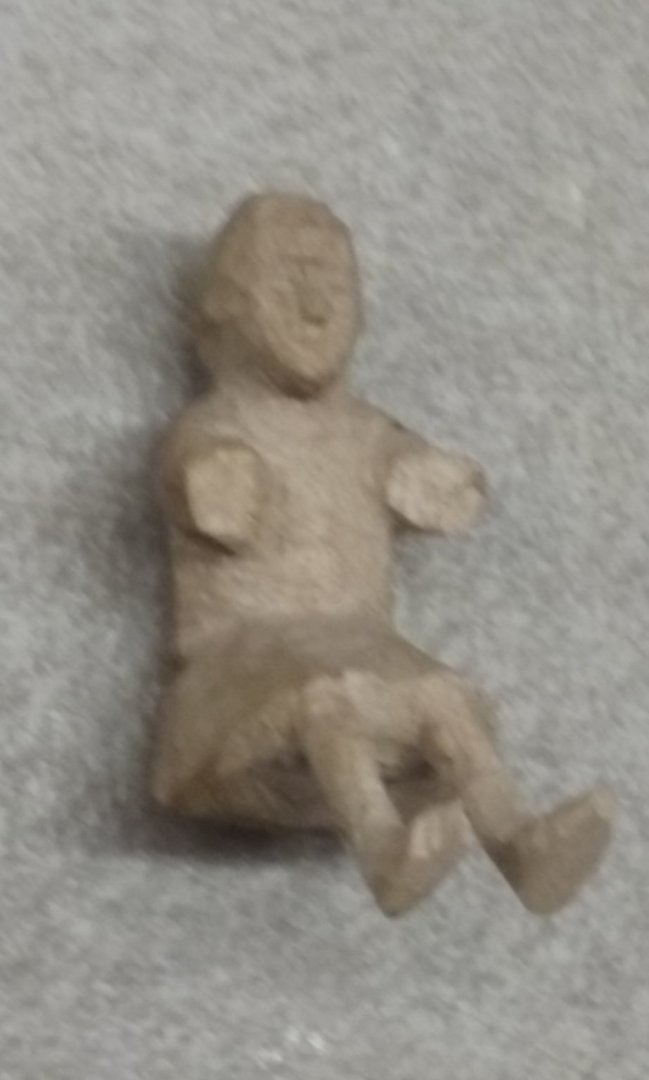
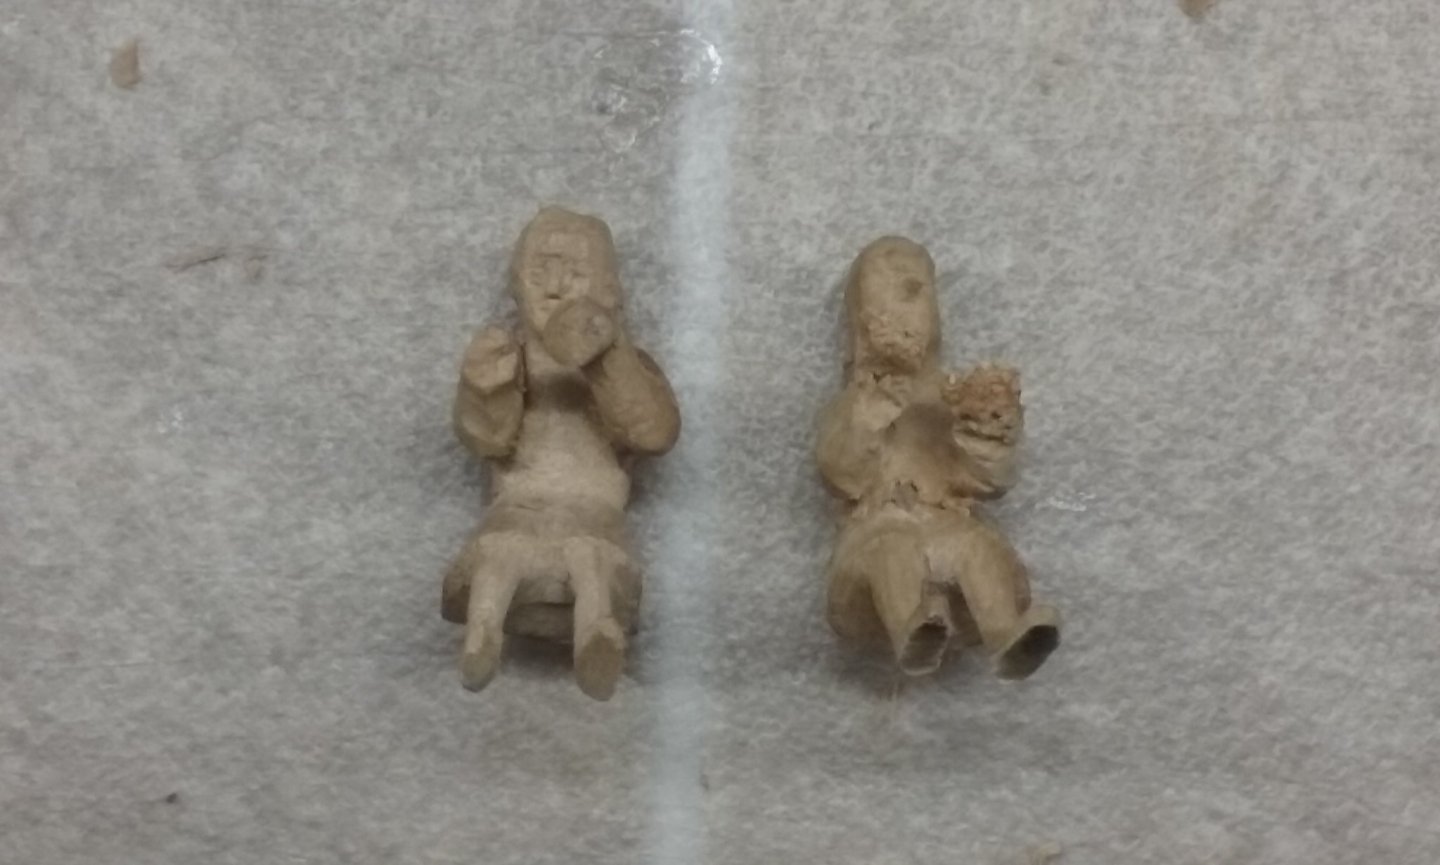
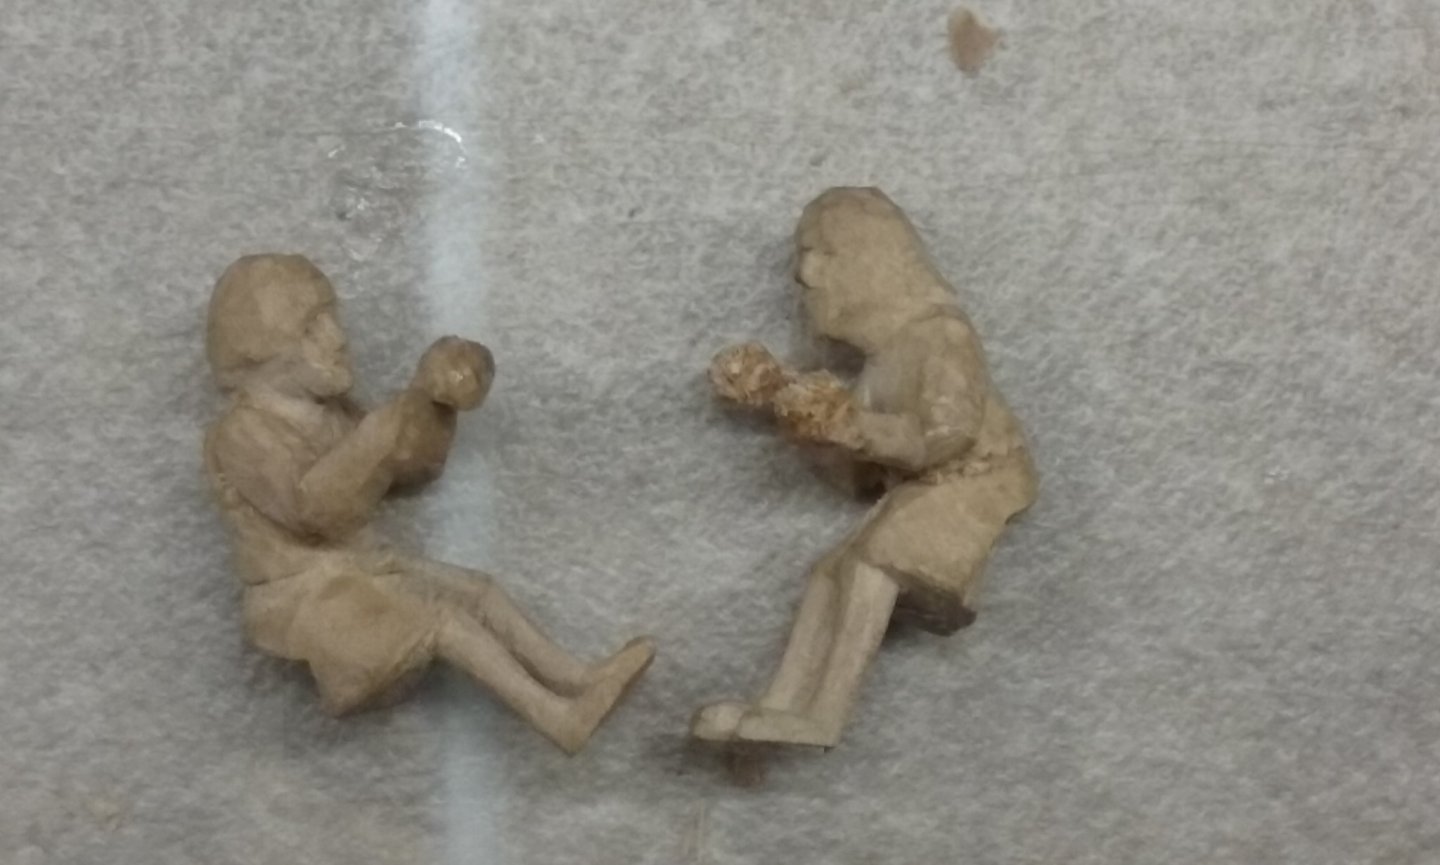
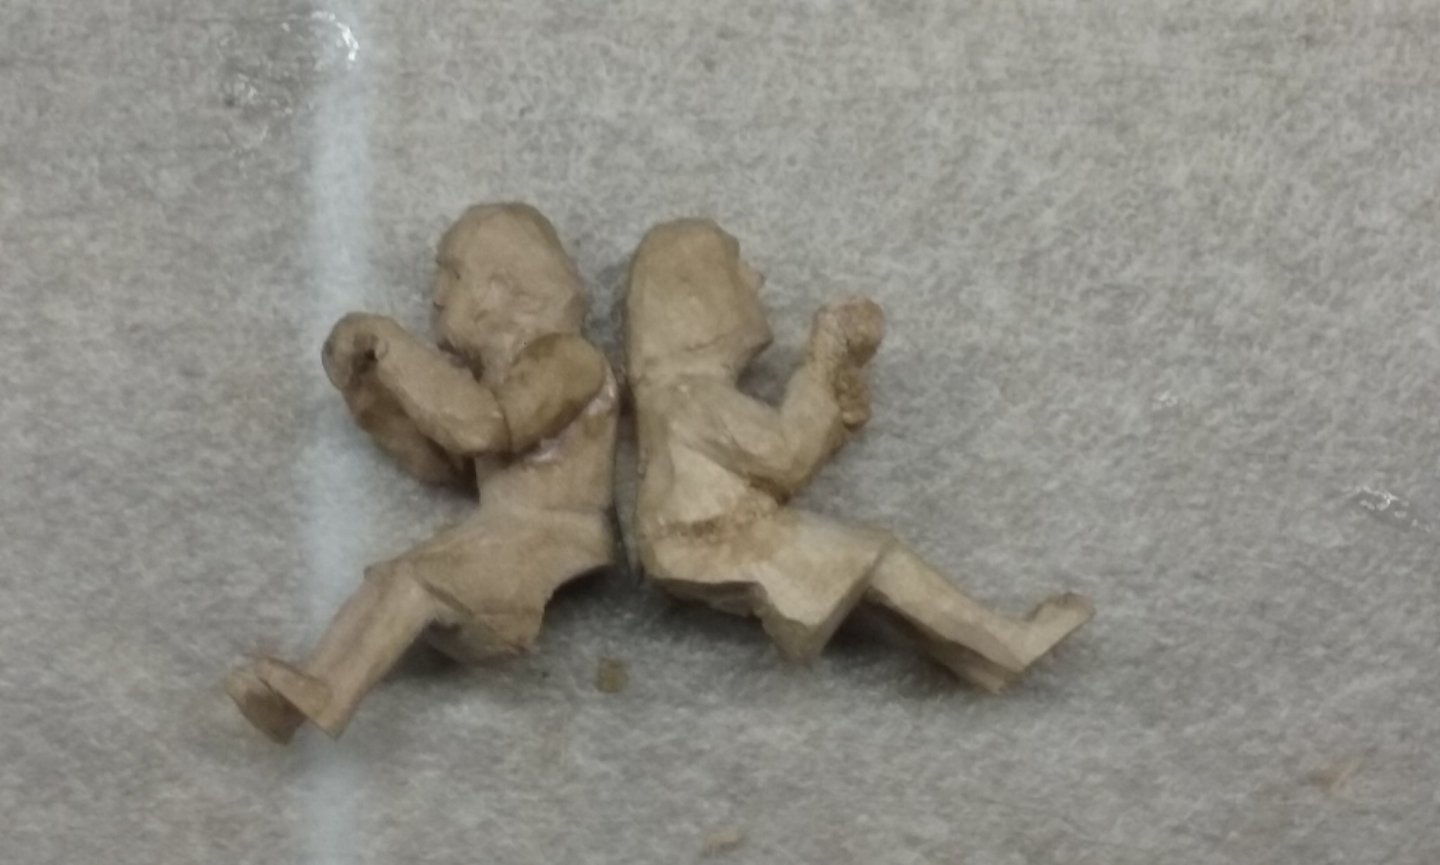
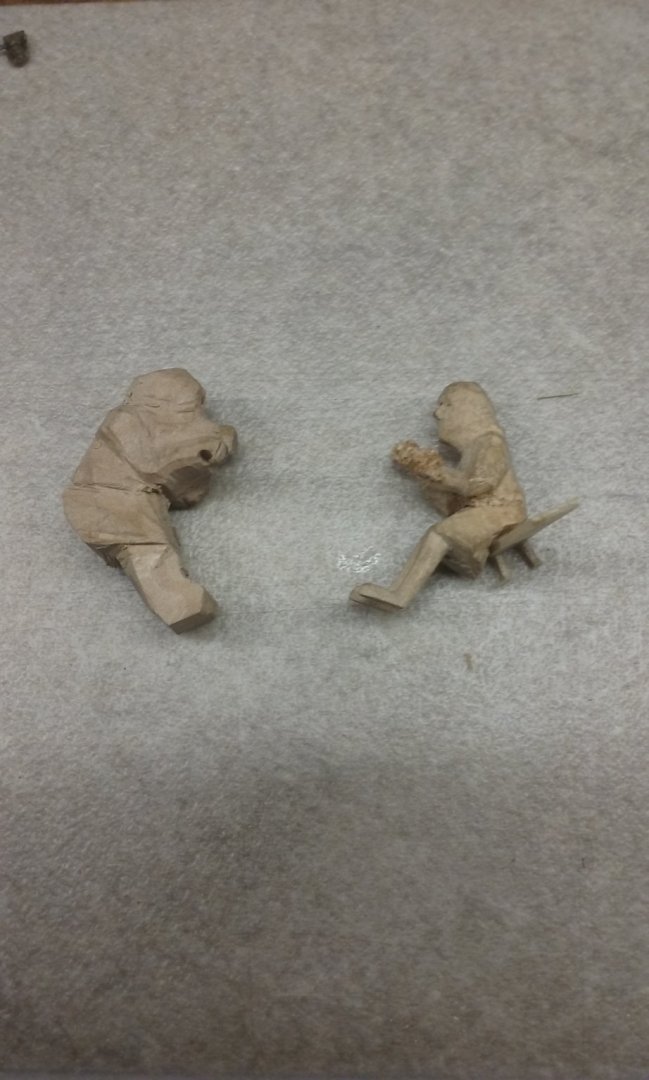
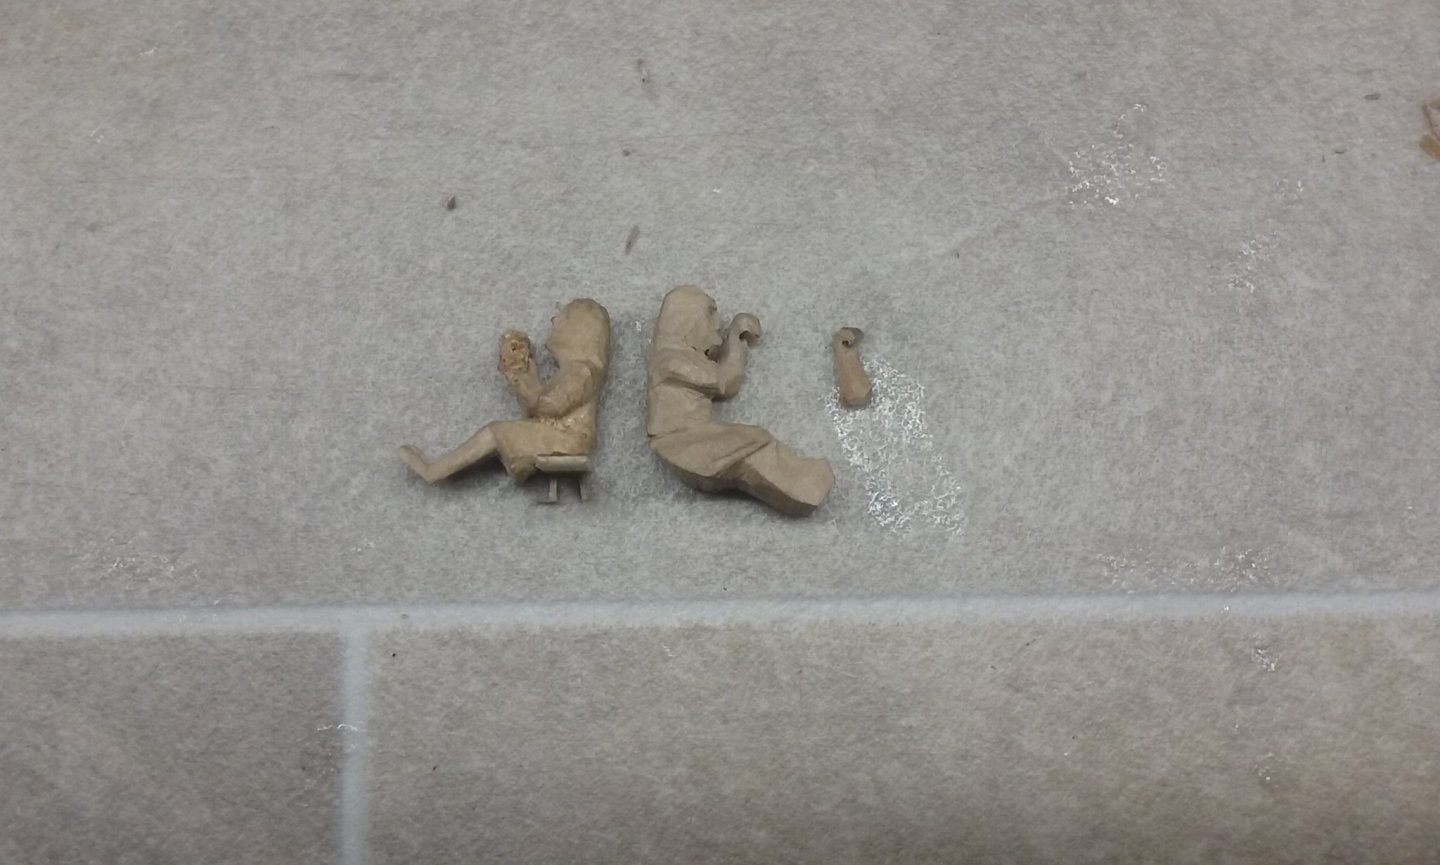
I've been carving the prototype for the upper oarsmen for the port side, so I can then cast 25 of them in resin. The starboard one was done some time ago, and I've applied to this one what I learnt from carving him and fitting him to the hull (see post of Aug 15 above), to make a "mirror image". Still in progress. I haven't done the legs properly yet, but coming along nicely. Here are the two oarsmen facing each other - the existing starboard oarsman is on the right. Rather difficult to carve, particularly getting the scalpel blade into the space between the arms and the head and chest to get rid of the "negative space" there. So difficult that I managed to snap off one of the arms while I was trying to do it. I was about to glue the arm back on, when I suddenly realised - problem solved! I now had room to get the scalpel blade in where it had been so difficult. So I left the arm off and carved the chest and head while I had the chance. Now the starboard oarsman is on the left. Here he is "in rough". I need to smooth him off a fair bit, but he has a face and the main features are in place. And then, while I was working on the legs, I broke off the other arm! But again, this posed an opportunity rather than a problem - I'd been a bit worried I'd carved the hands too far apart (the oar handle is pretty short). So now I have the chance, by slightly swivelling the arms when I glue them back on, to get the hands closer together. It's an ill wind that blows nobody any good (or as Mark Twain said, a clarinet is an ill wind that nobody blows good . . .*) More pics when I've progressed further. Steven *He'd obviously never heard the Mozart clarinet concerto played well . . . or Weber, for that matter.
-
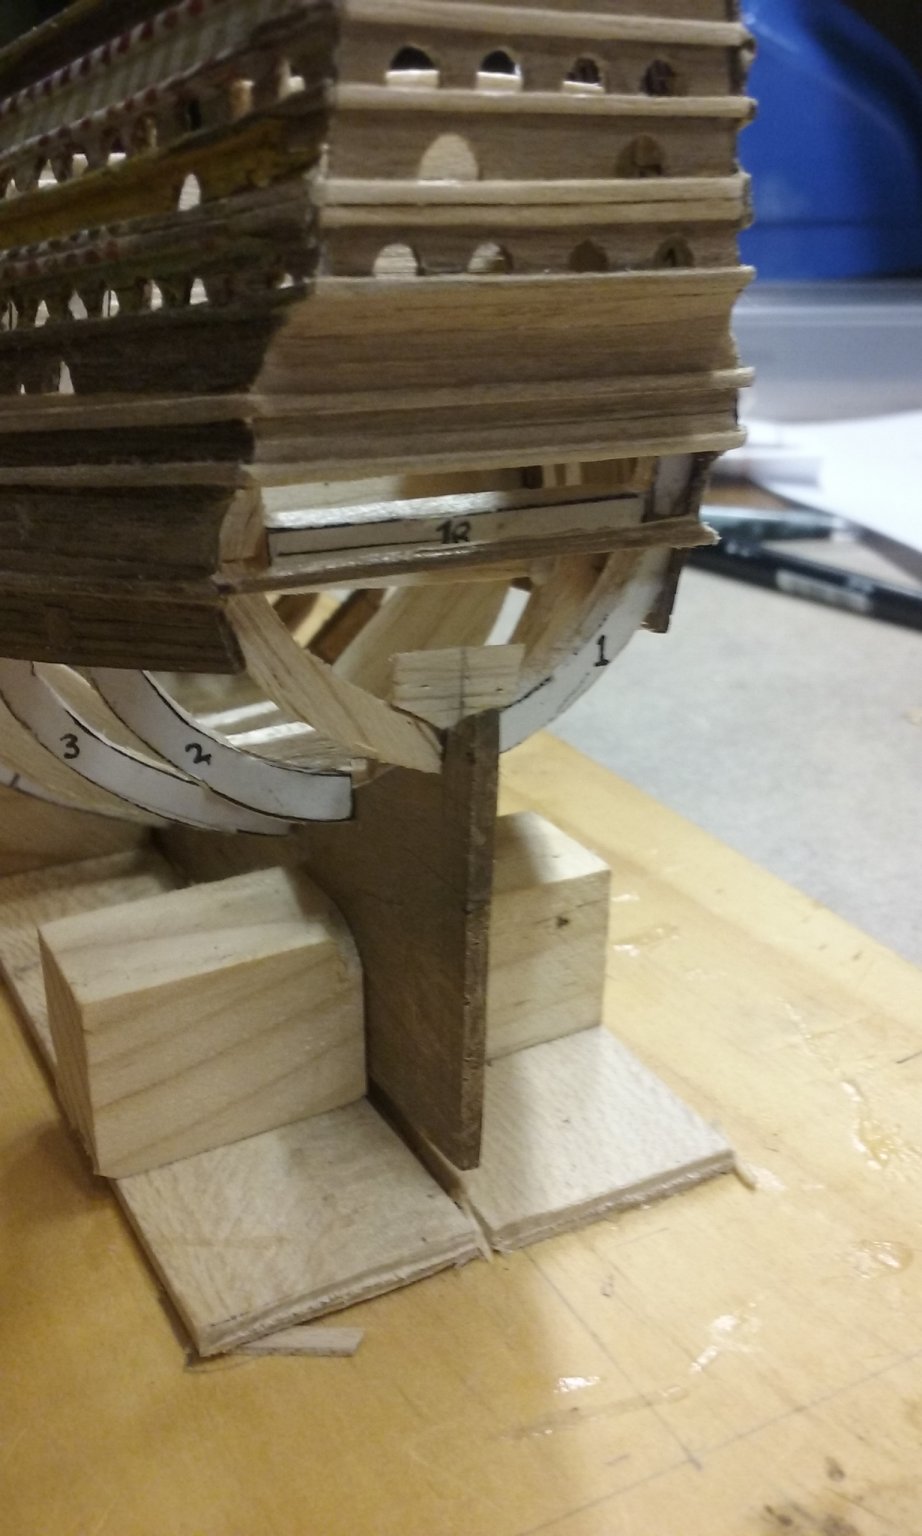
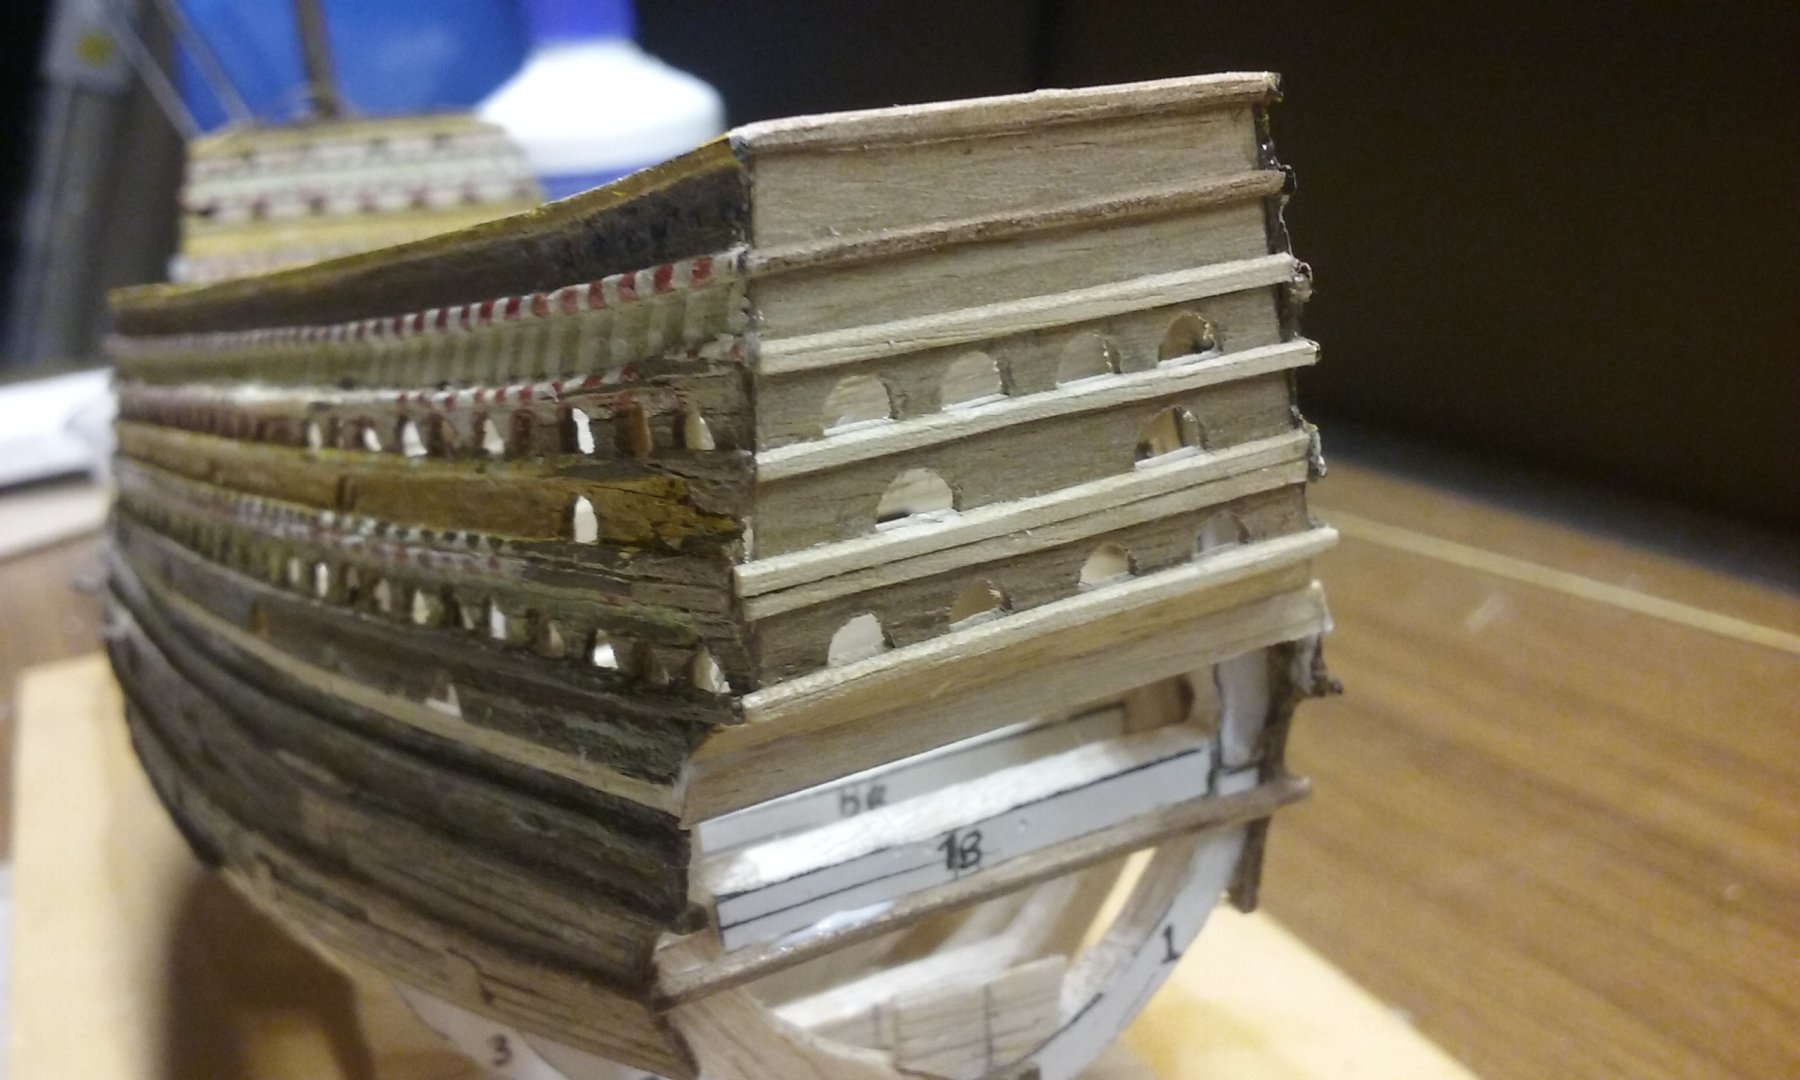
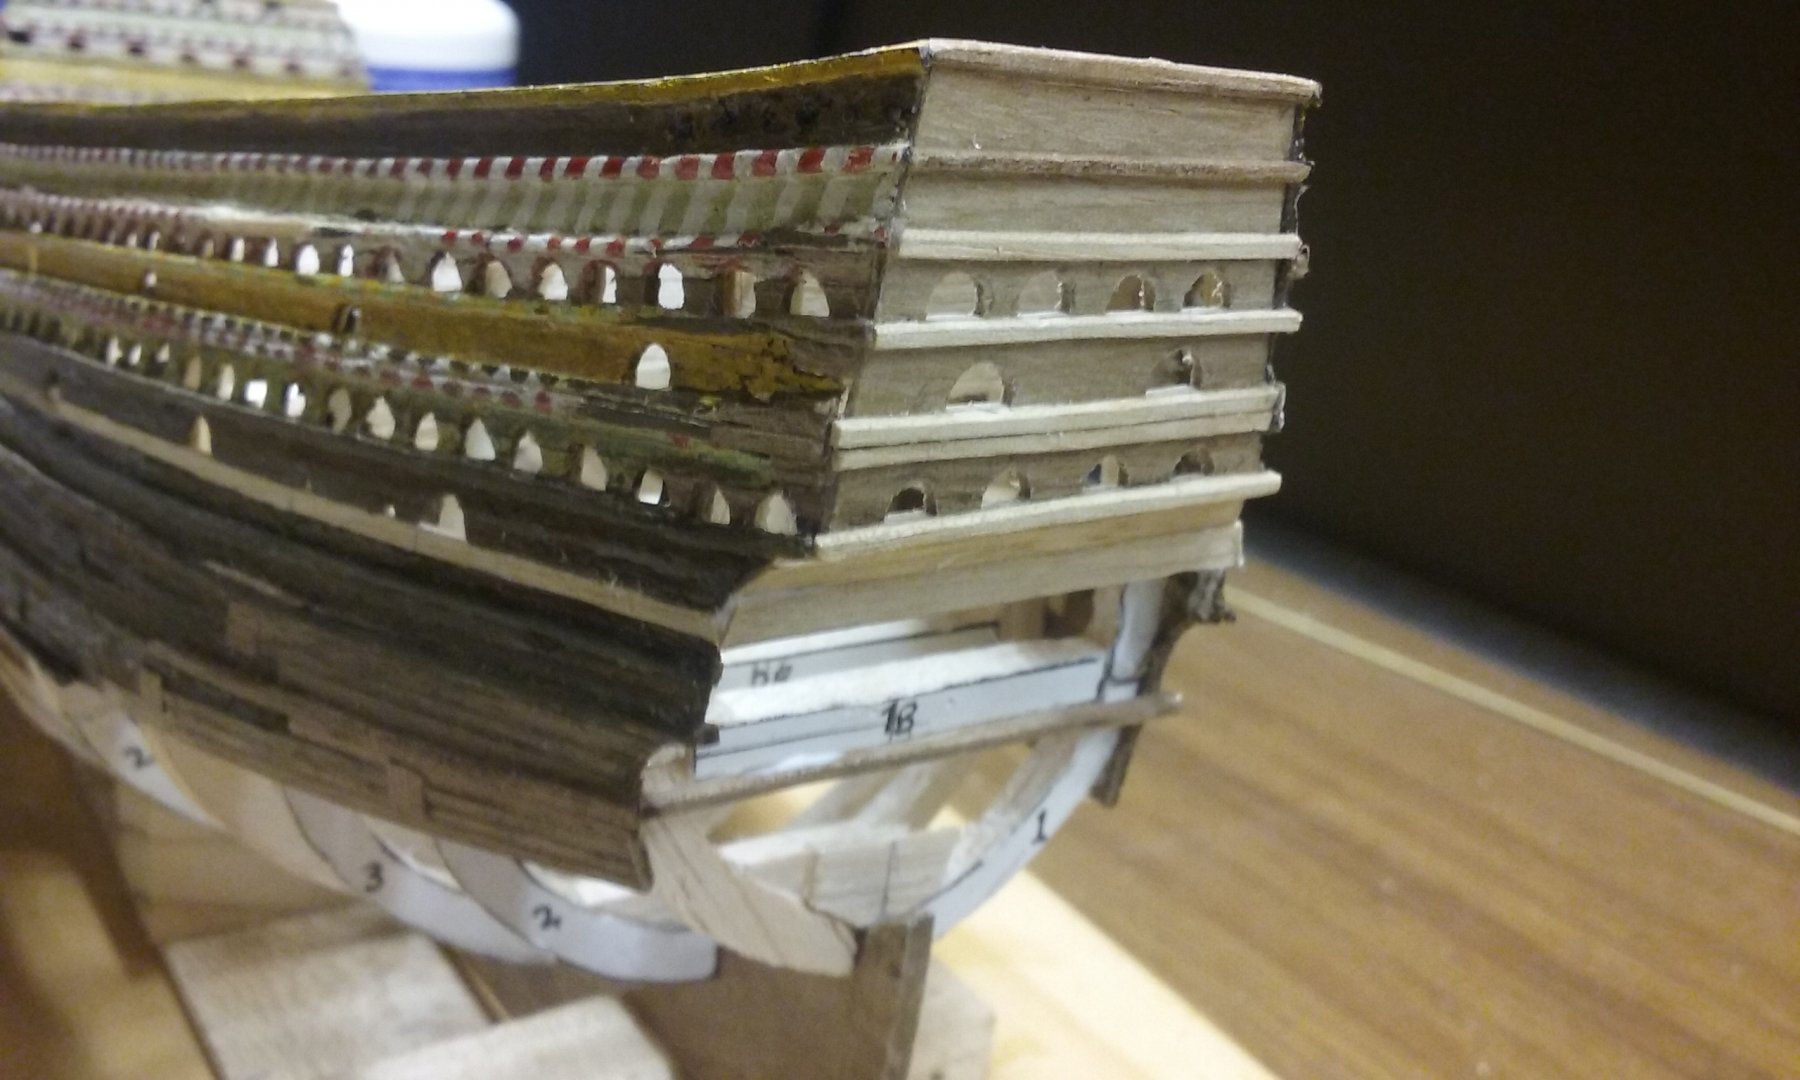
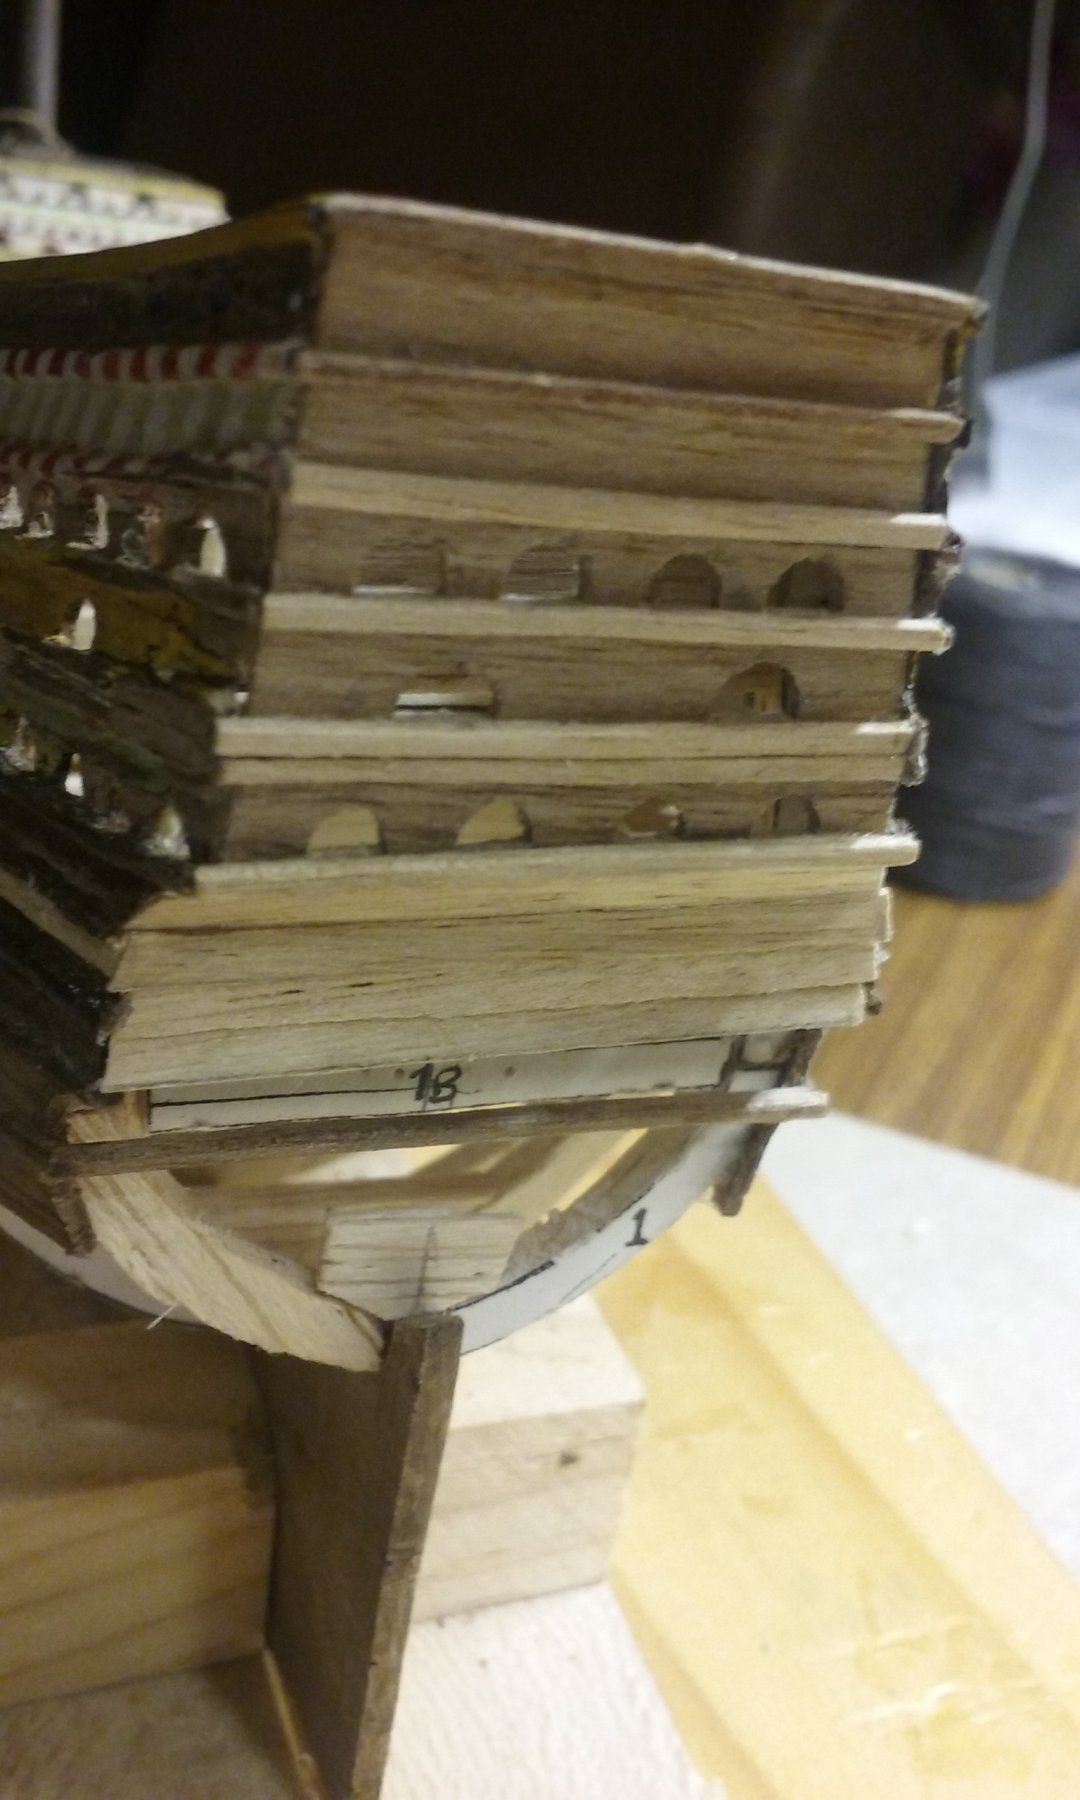
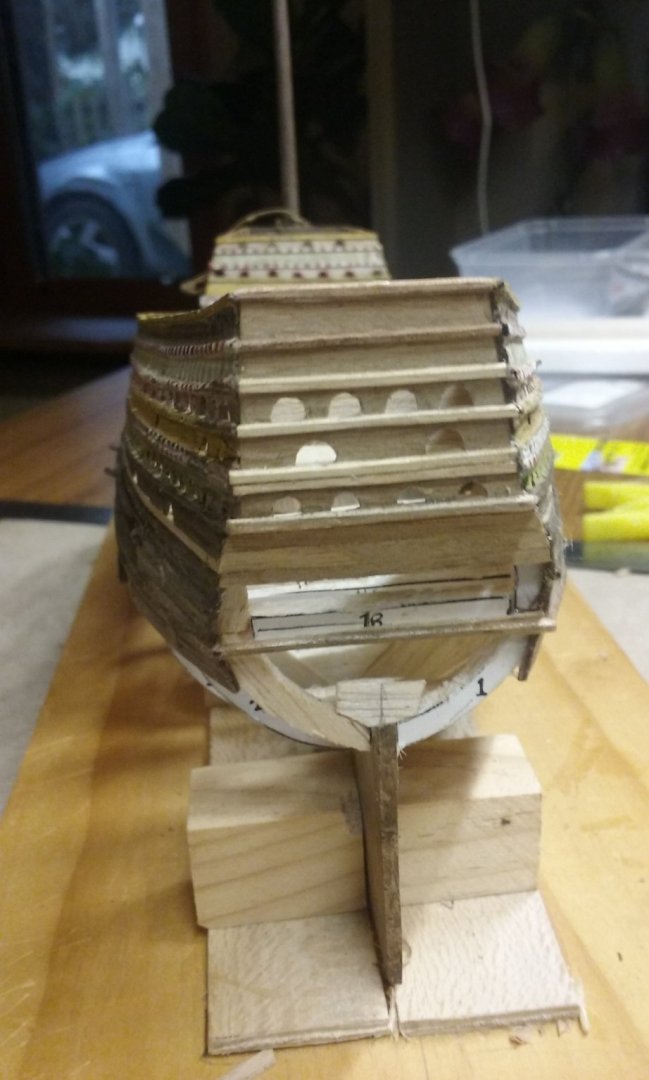
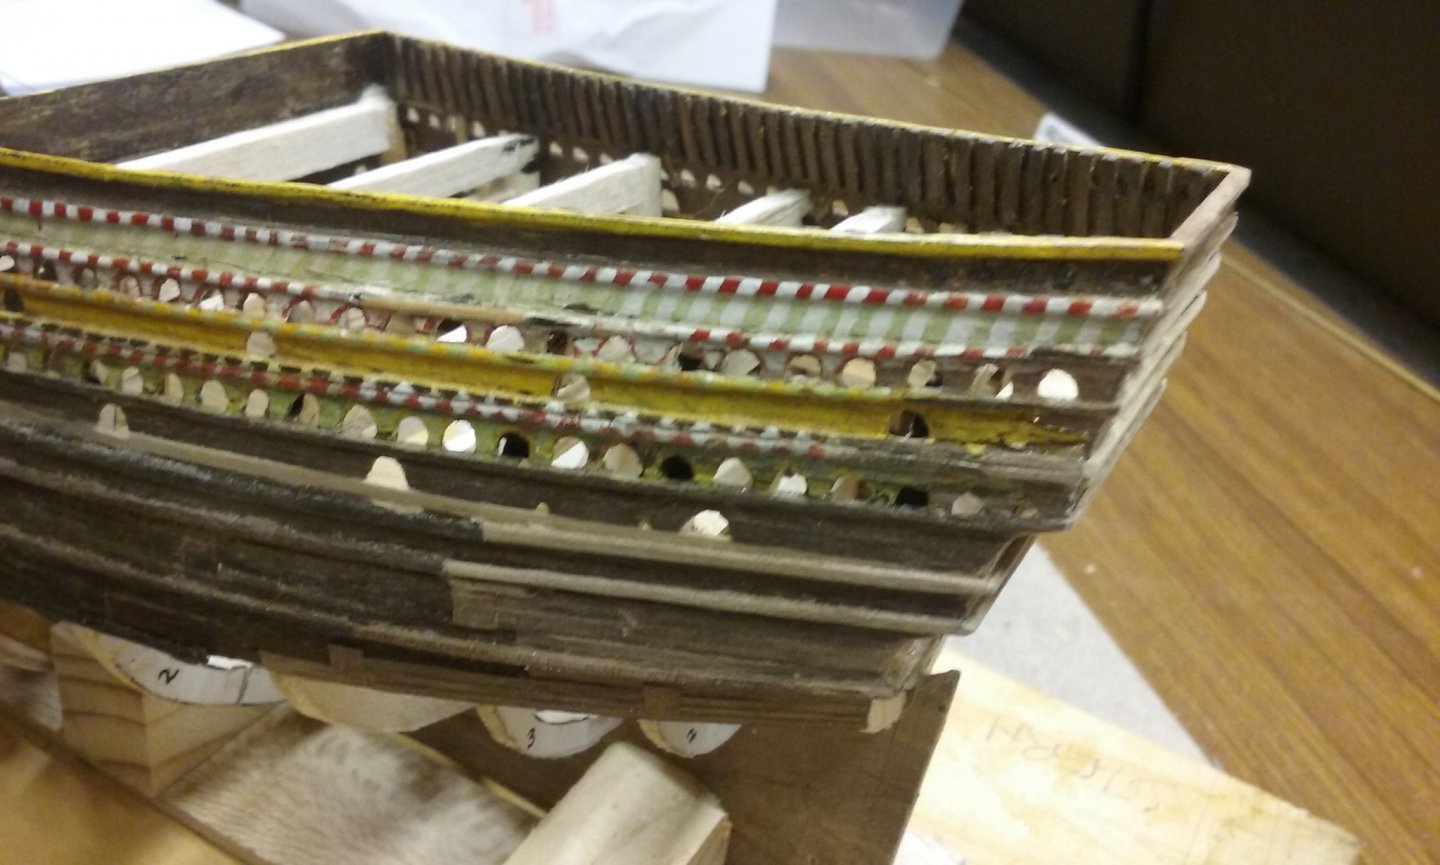
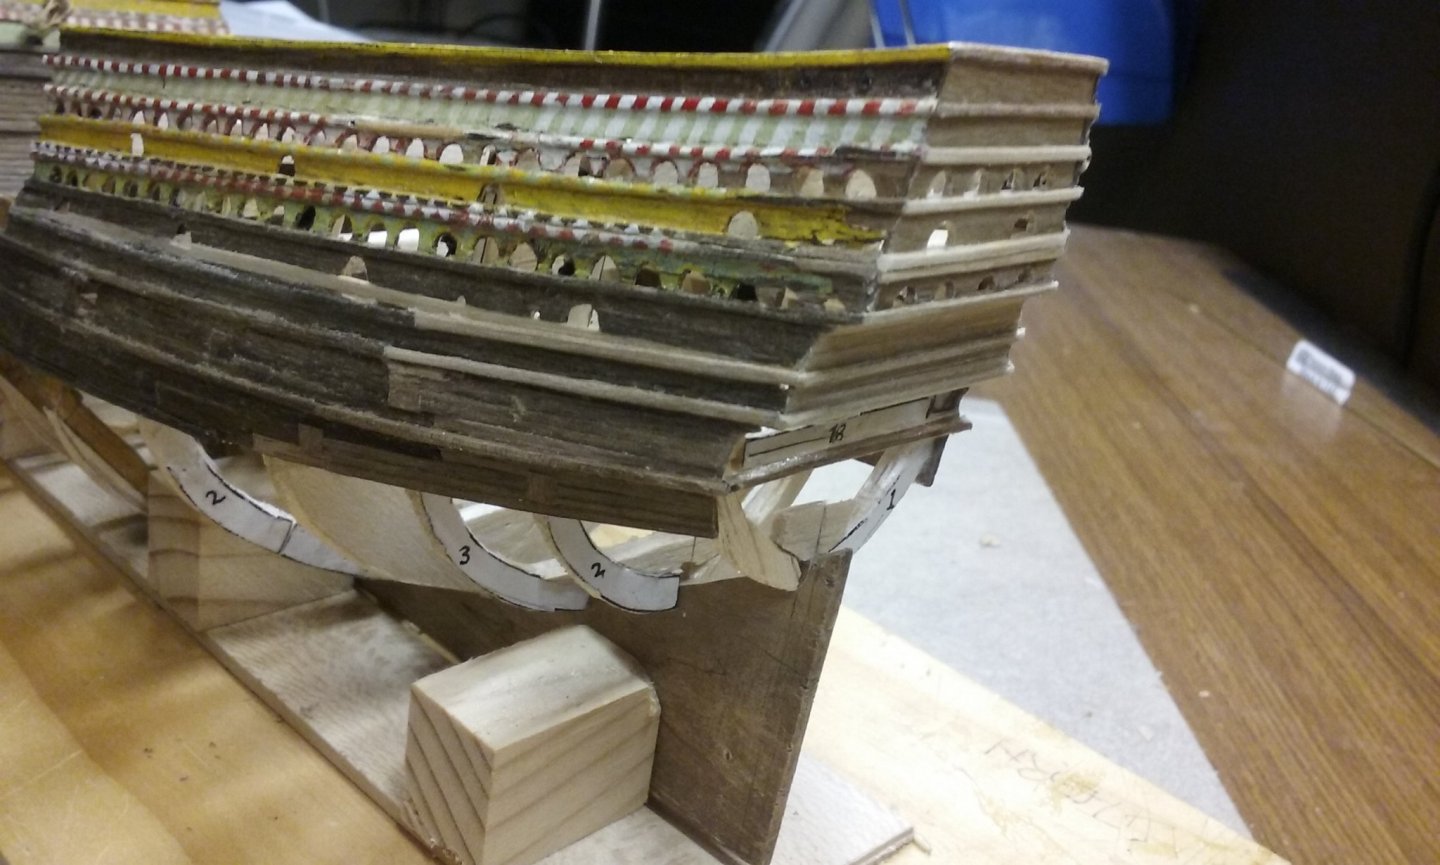
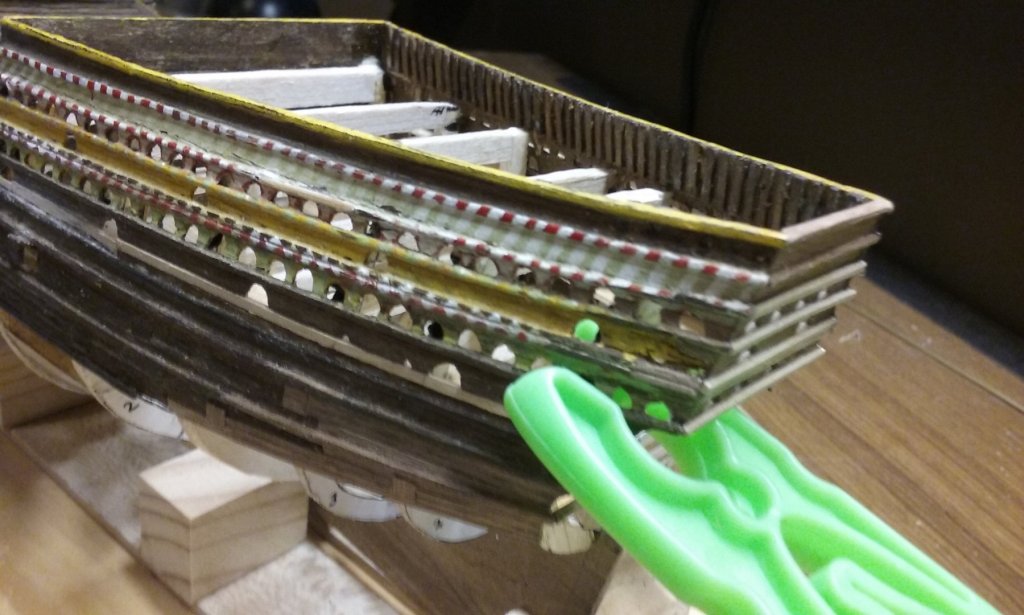
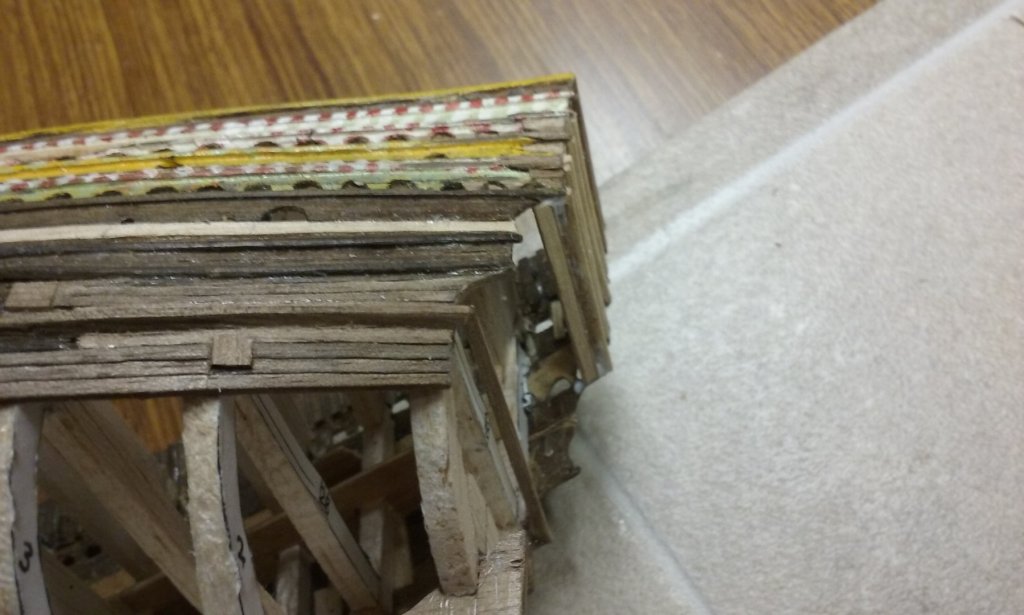
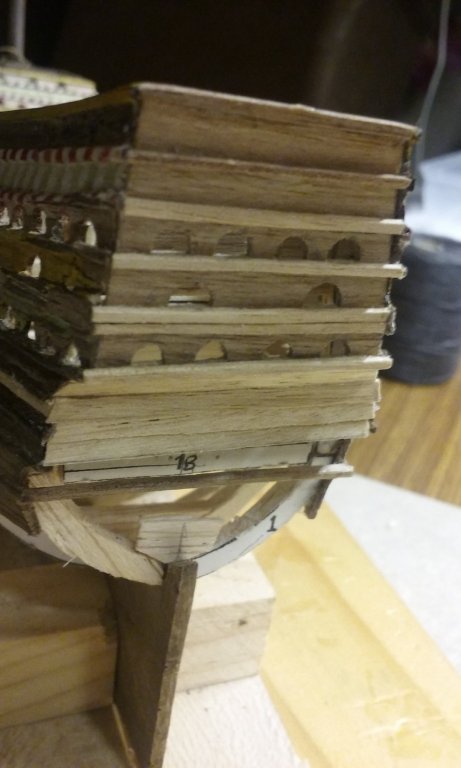
I decided I couldn't live with the off-square stern sneering at me, so I took everything off below the transom and started again. To overcome the problem with the wales on port and starboard sides not lining up, I carved the curves in the port side below the transom so they did. I had to re-align some of the port side wales a bit, too, but it felt good to do it. Her are the pics: I put in new wales on the transom, all parallel to the gunwale and the lowest wale. That gave me a starting point. I had to re-cut two of the lowest line of arched gunports, as they'd followed the (off-square) line of the wale below them. And here I have started planking below the transom. The two cut-out curves of the port side at the stern have been adjusted to line up with those of the starboard side: And the first panel of planking below the transom complete. Here it is from the port side. The lighter-coloured wood is the new stuff. Though I was originally going to colour it the same as the original wood I've decided instead to keep it as it is, to show the new work compared with the old. Steven


- 740 replies
-
- 9
-
-
- Tudor
- restoration
- (and 4 more)
-
Bill, if you want your ship to look like she's been at sea for a long time without opportunity for repair or painting, go for it! I remember when I read "Two Years Before The Mast" they kept the crew busy with maintenance of the ship every day during the voyage, but when they were going to their home port they repainted, repaired and made the ship look brand spanking new so they could show off when they got home. It was a point of pride. But they didn't paint her until then. Anything that was worn probably wasn't fixed till then either, unless it affected the efficient handling of the ship. Maintenance of hull, masts, spars, cordage and sails would have been done as a matter of course, but "priddying up" seems not to have been done as a routine, so a ship after a few months at sea would probably have looked a bit dull and scruffy. I suppose it would also depend on the captain, but any expense unnecessary to the running of the ship is likely to have taken a back seat. Steven
-
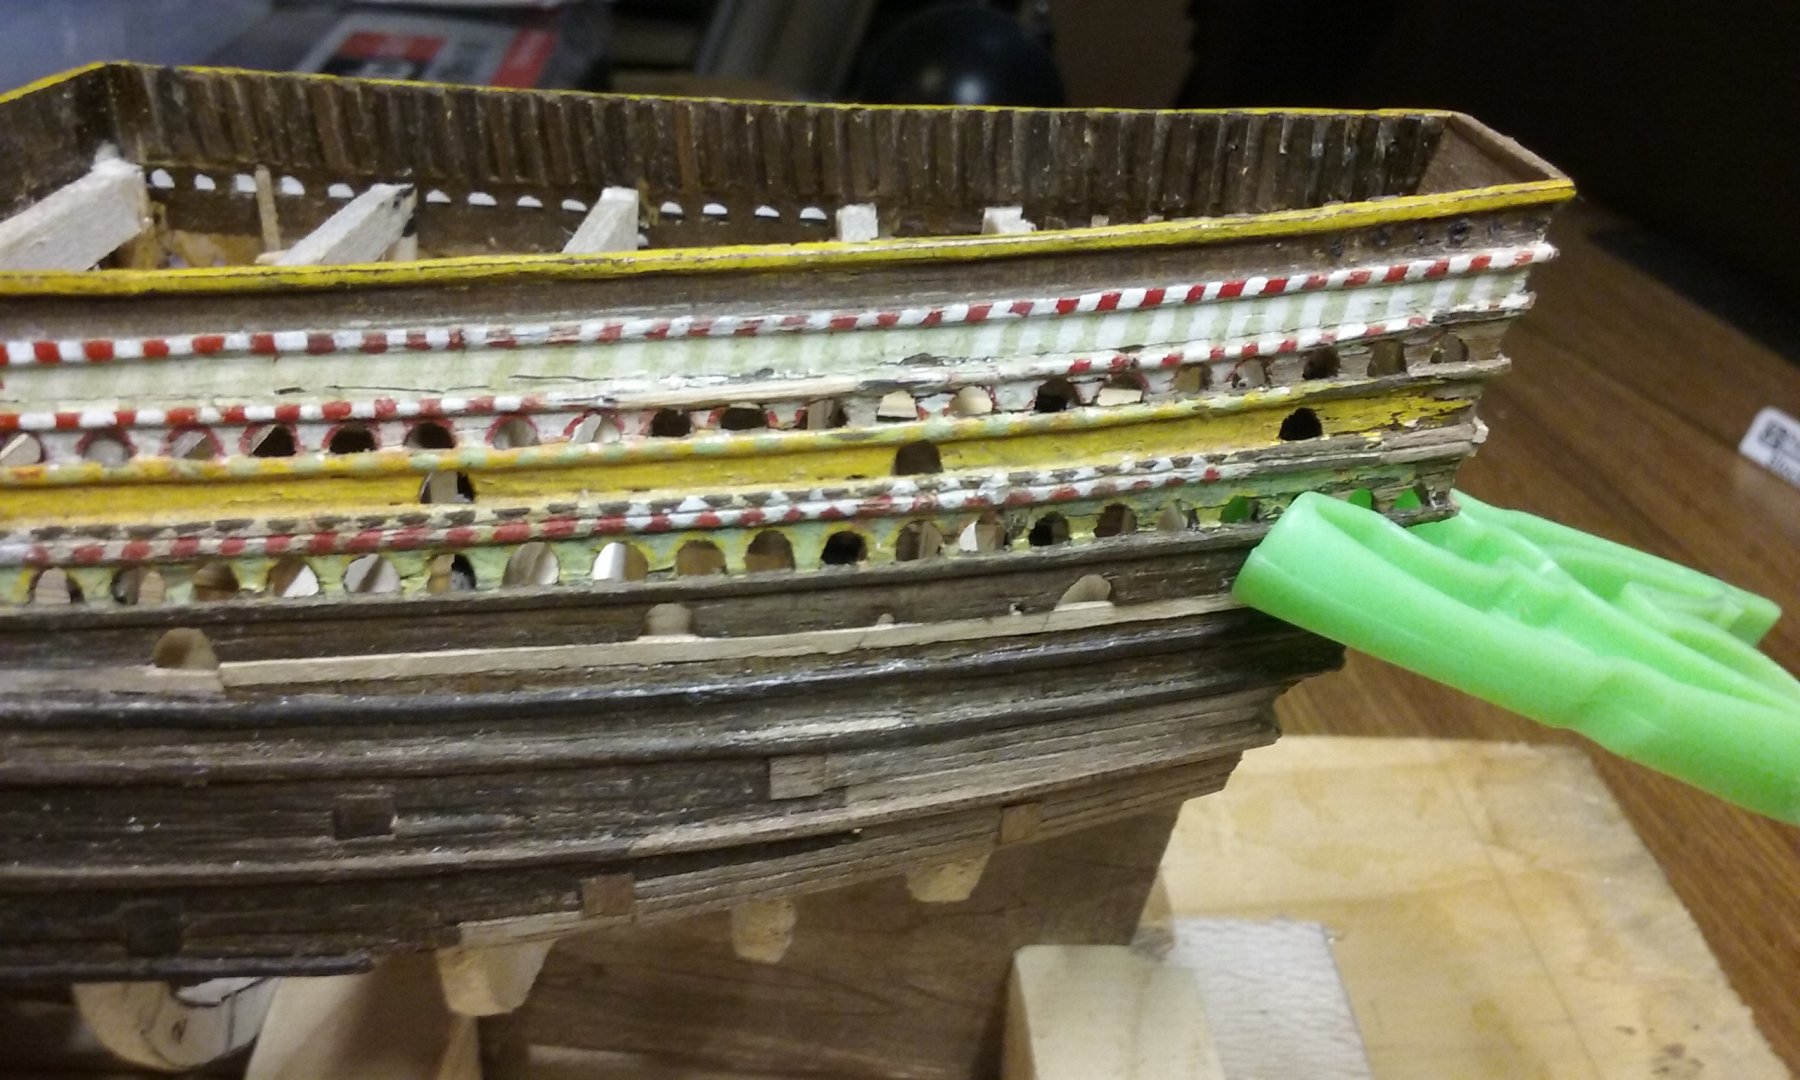
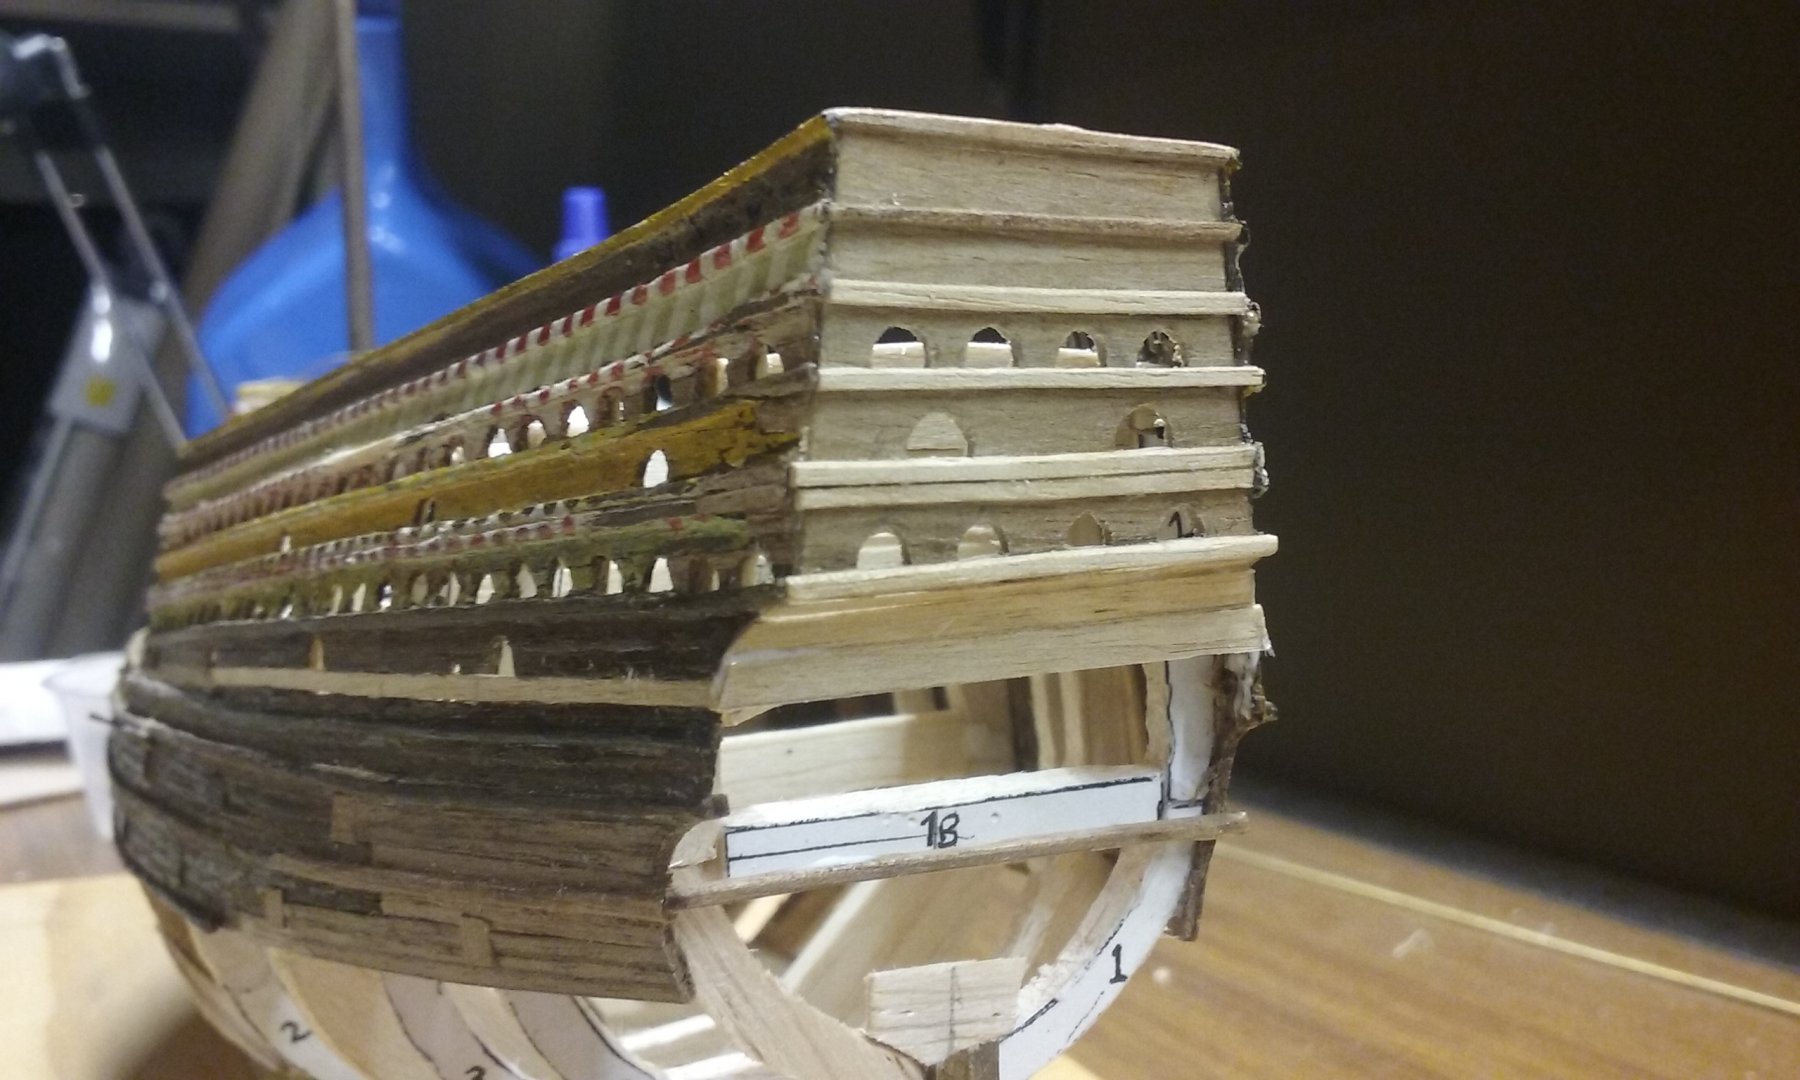
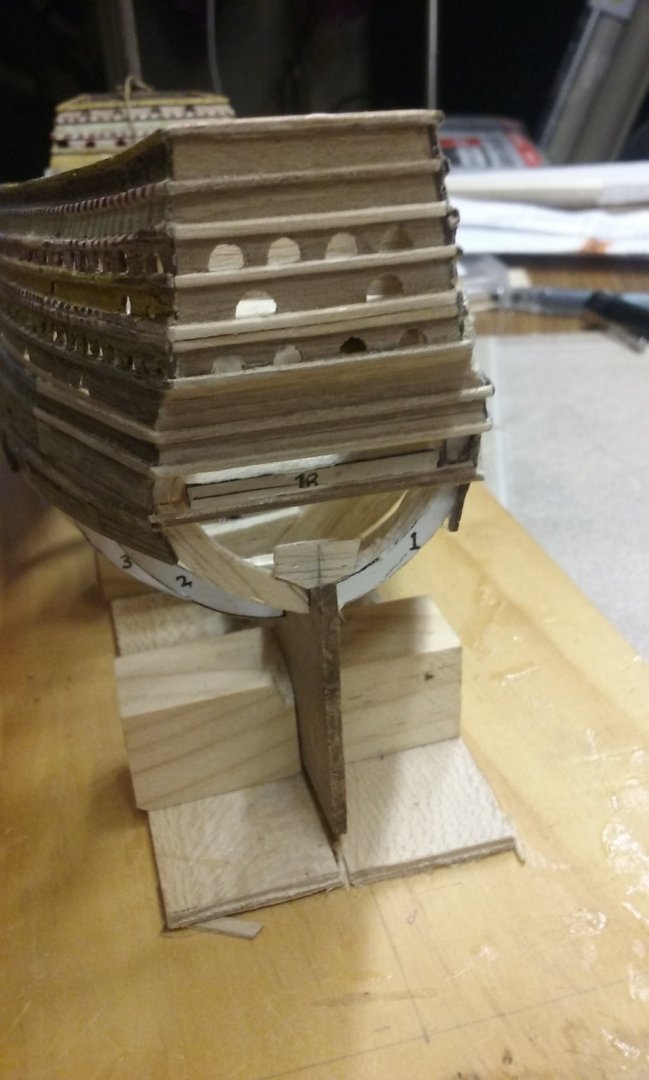
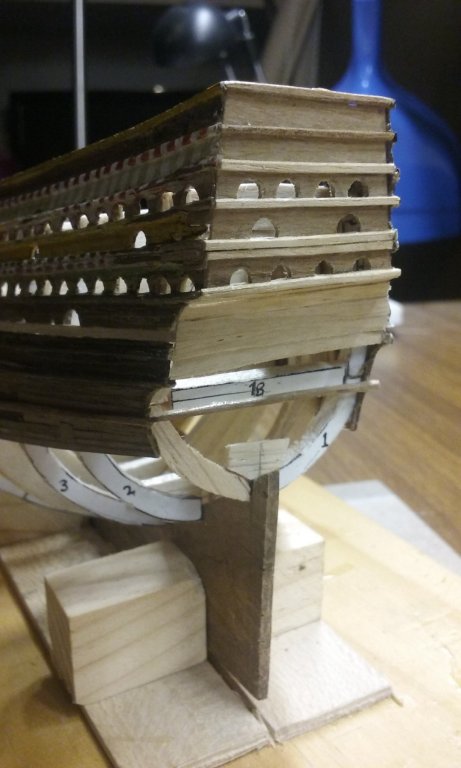
Finished with the "filling piece" on the port side. And added the planking across the stern. Unfortunately the port and starboard sides don't quite line up, so I've had to taper the planks to gradually change the angle of the planking and get it right at the different parts of the stern (and bodge it a bit, such as lining up the upper surface of a wale on one side with the lower surface of the one on the other side). It's a legacy of my 17 year-old self, plus the changes I had to make to incorporate the existing superstructure into the new hull shape. But once it's cut to shape and sanded smooth you have to look pretty carefully to see it. Steven


- 740 replies
-
- 7
-
-
- Tudor
- restoration
- (and 4 more)
-
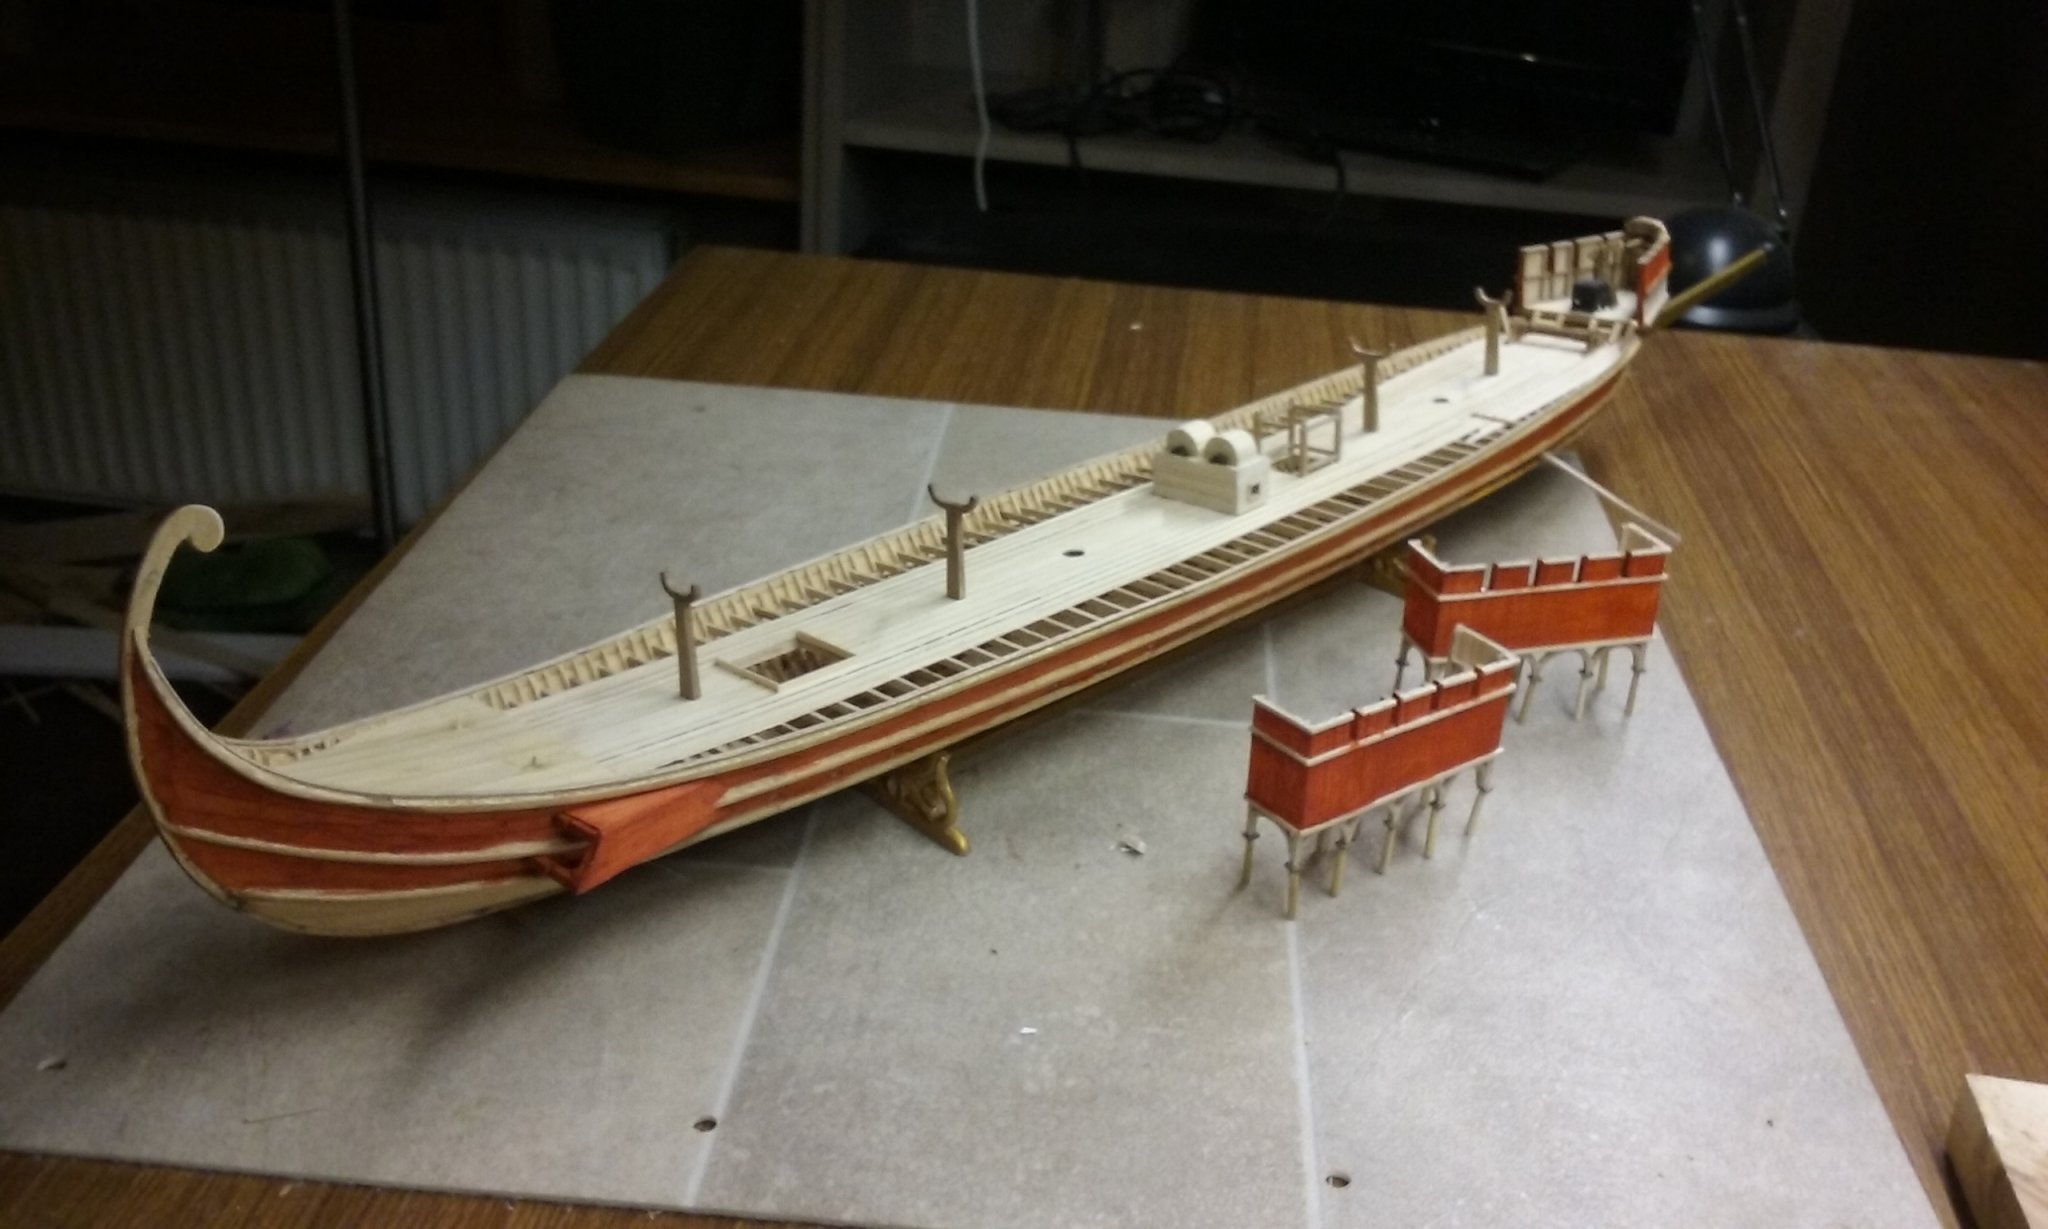
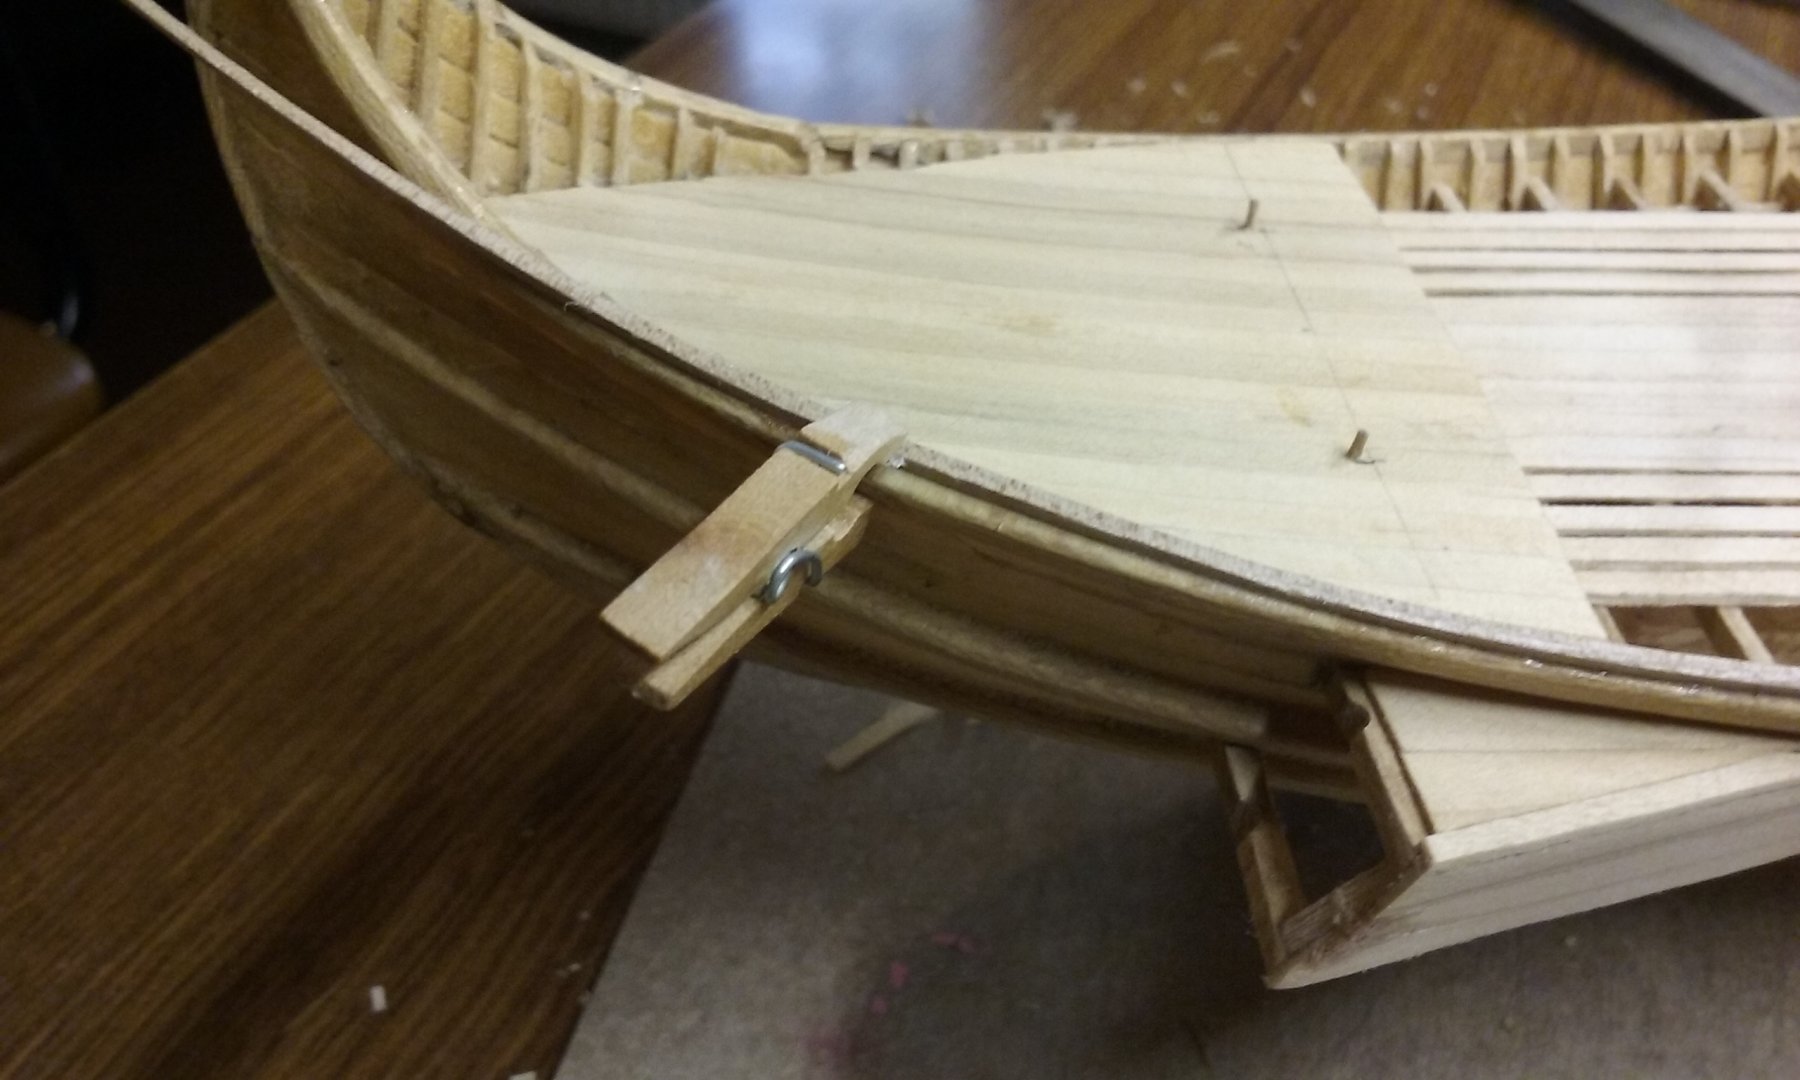
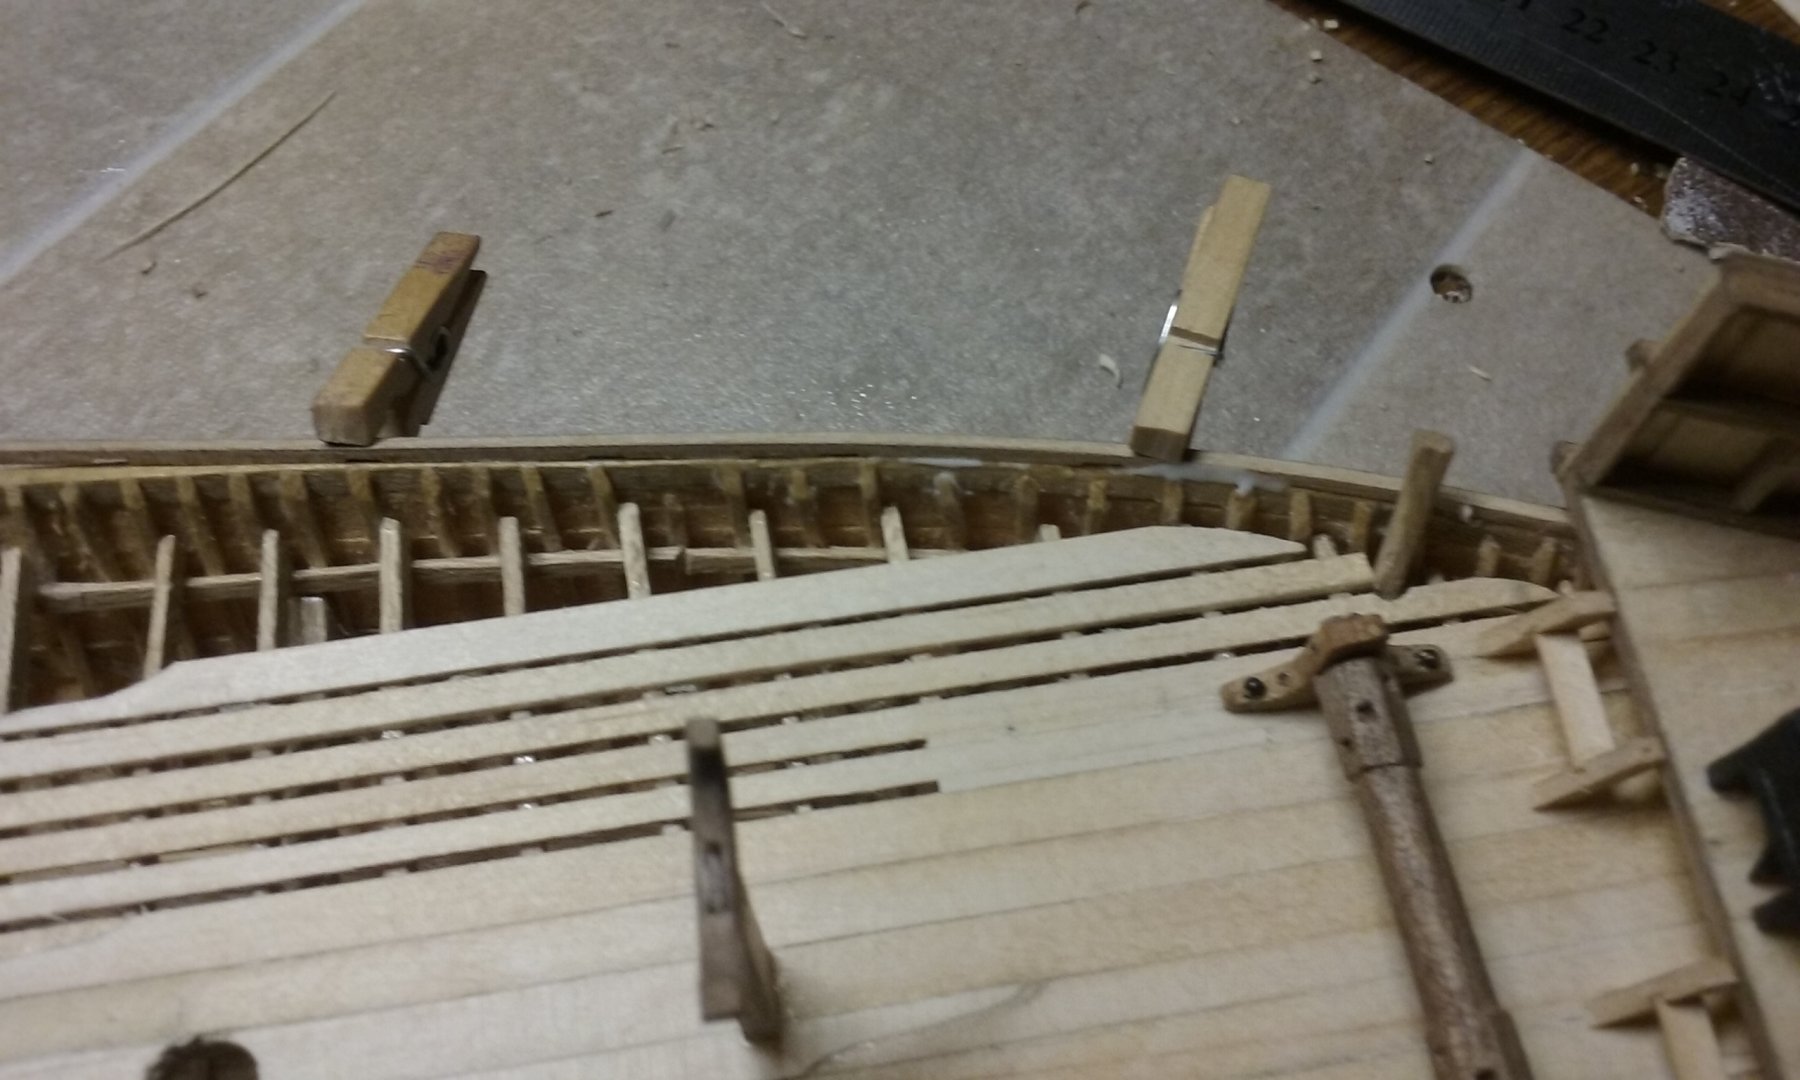
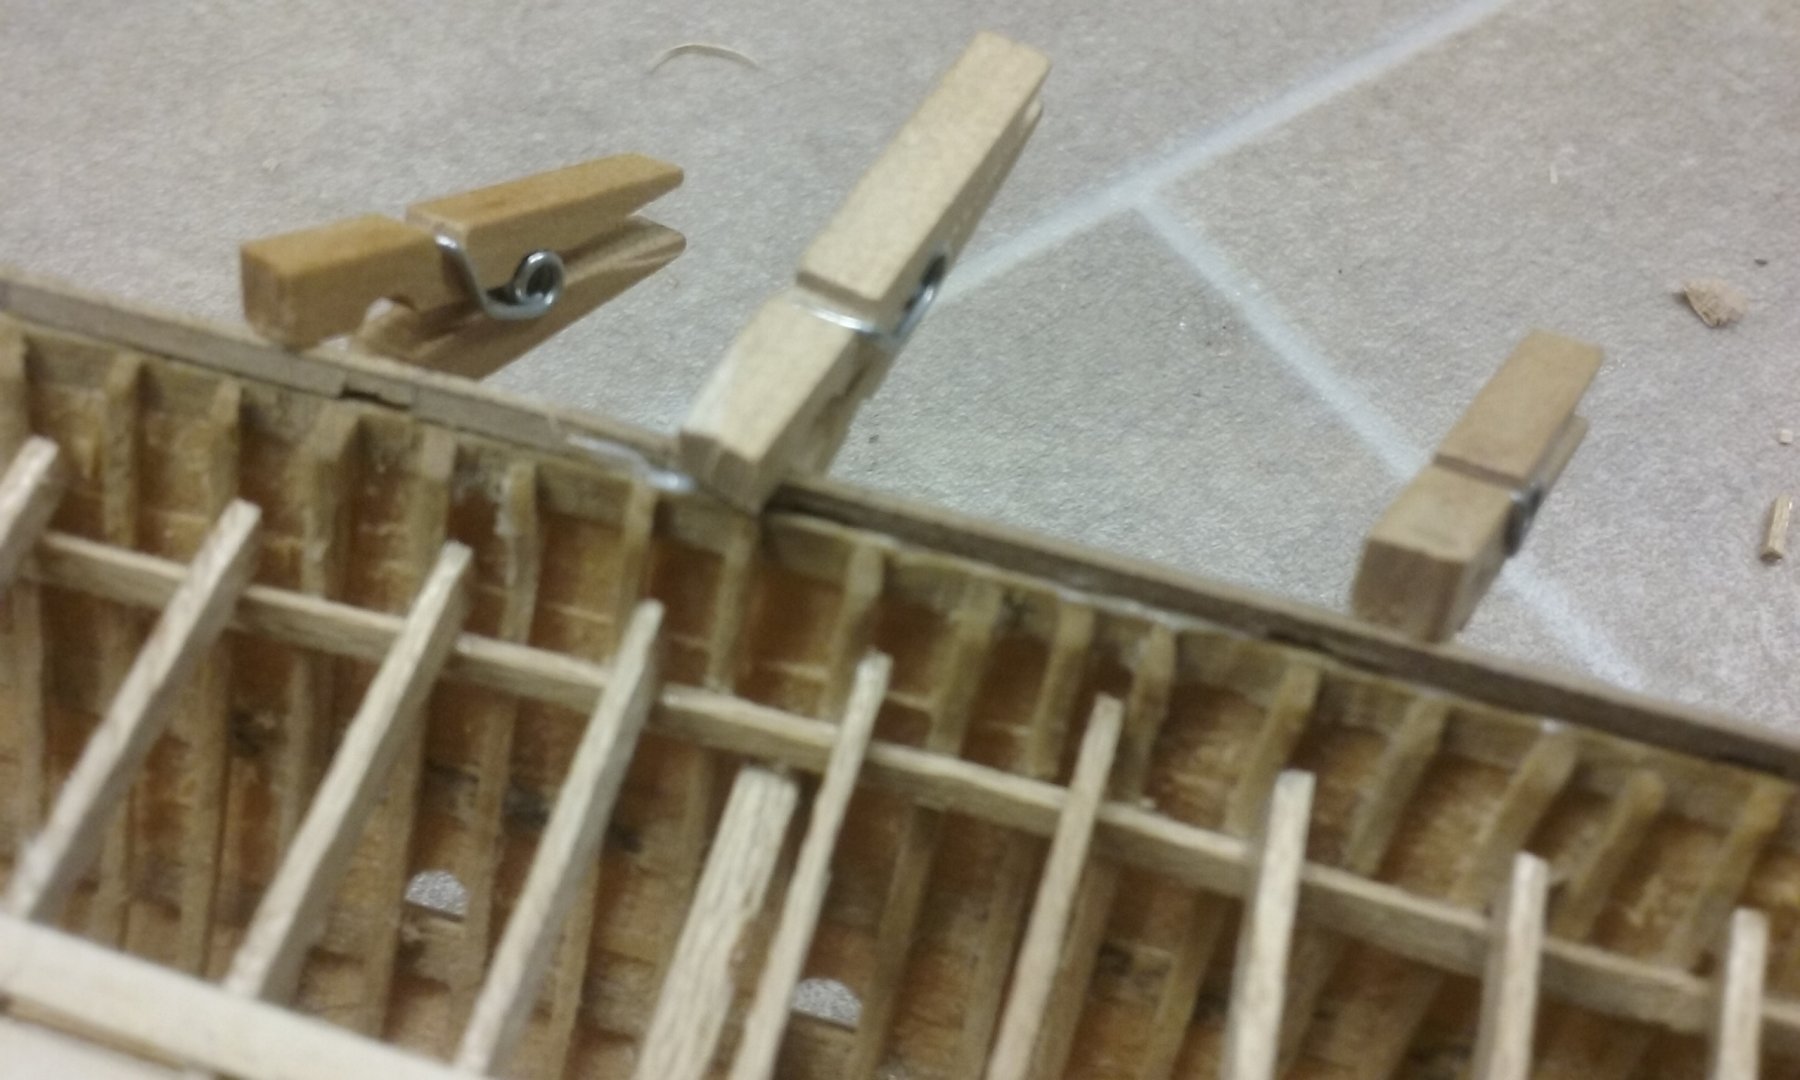
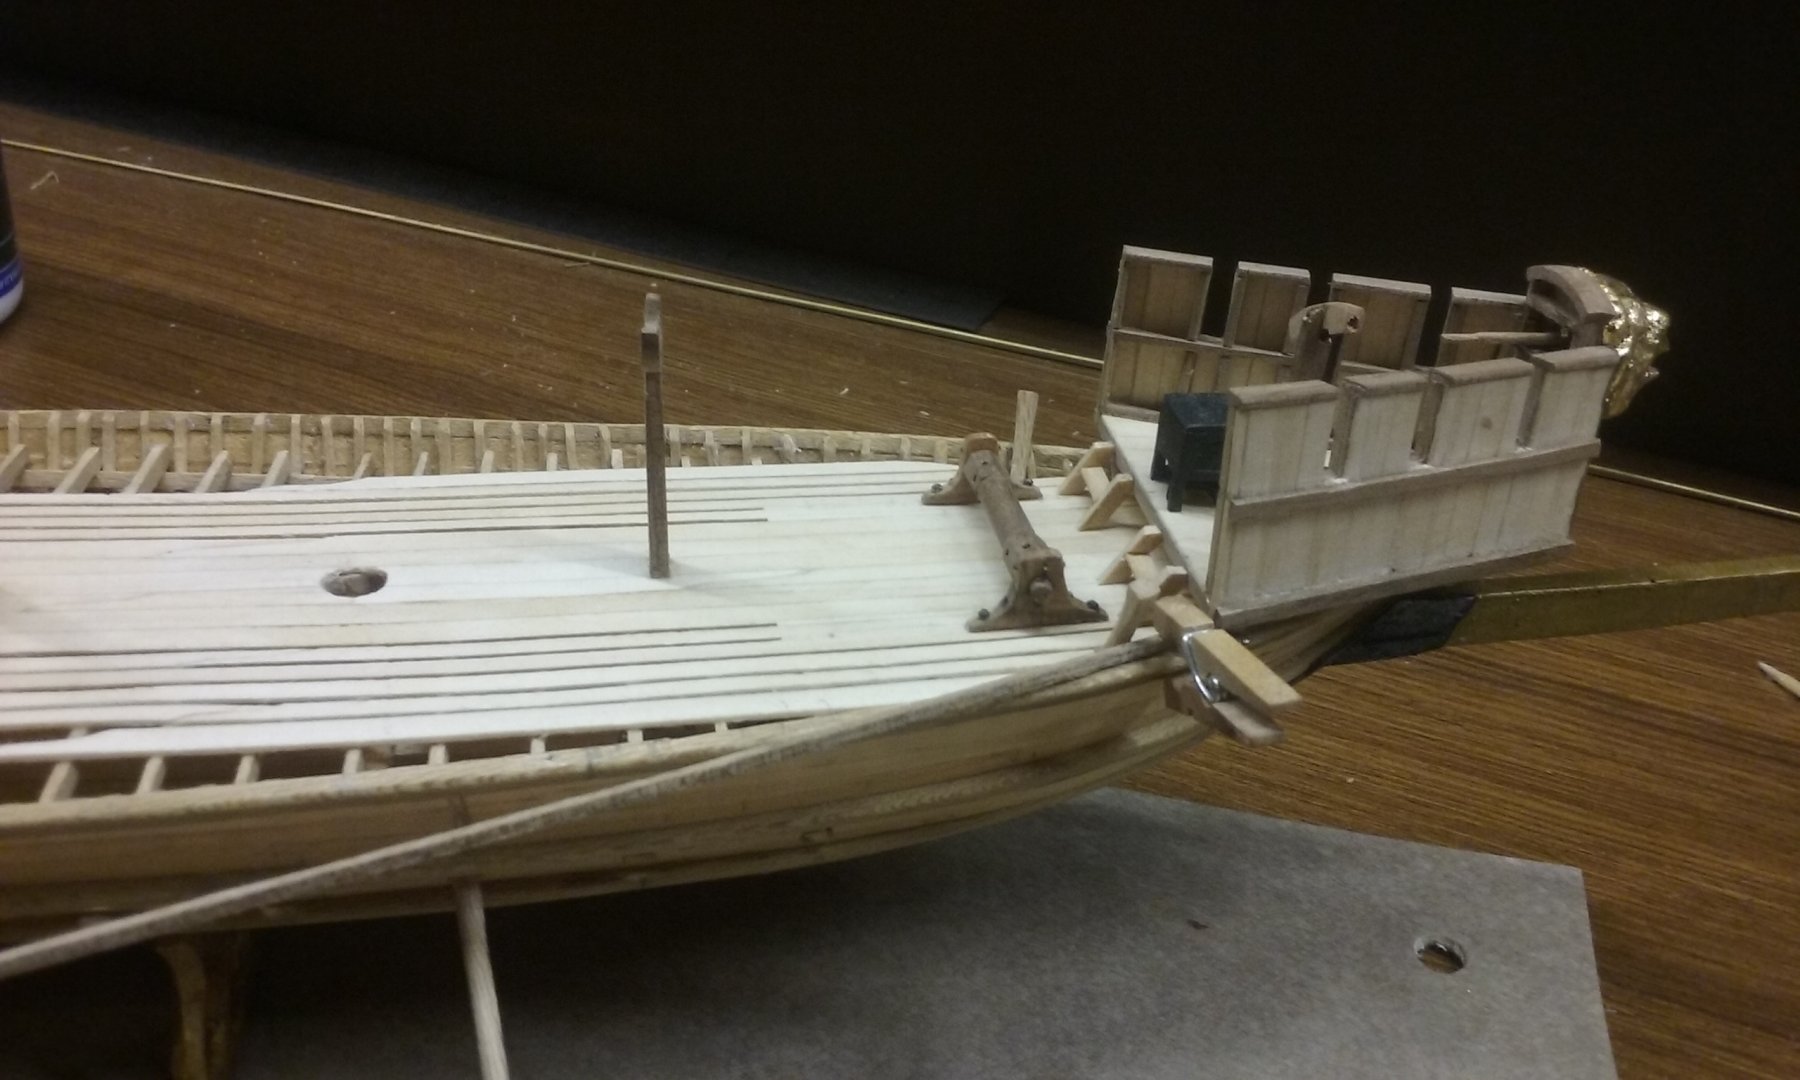
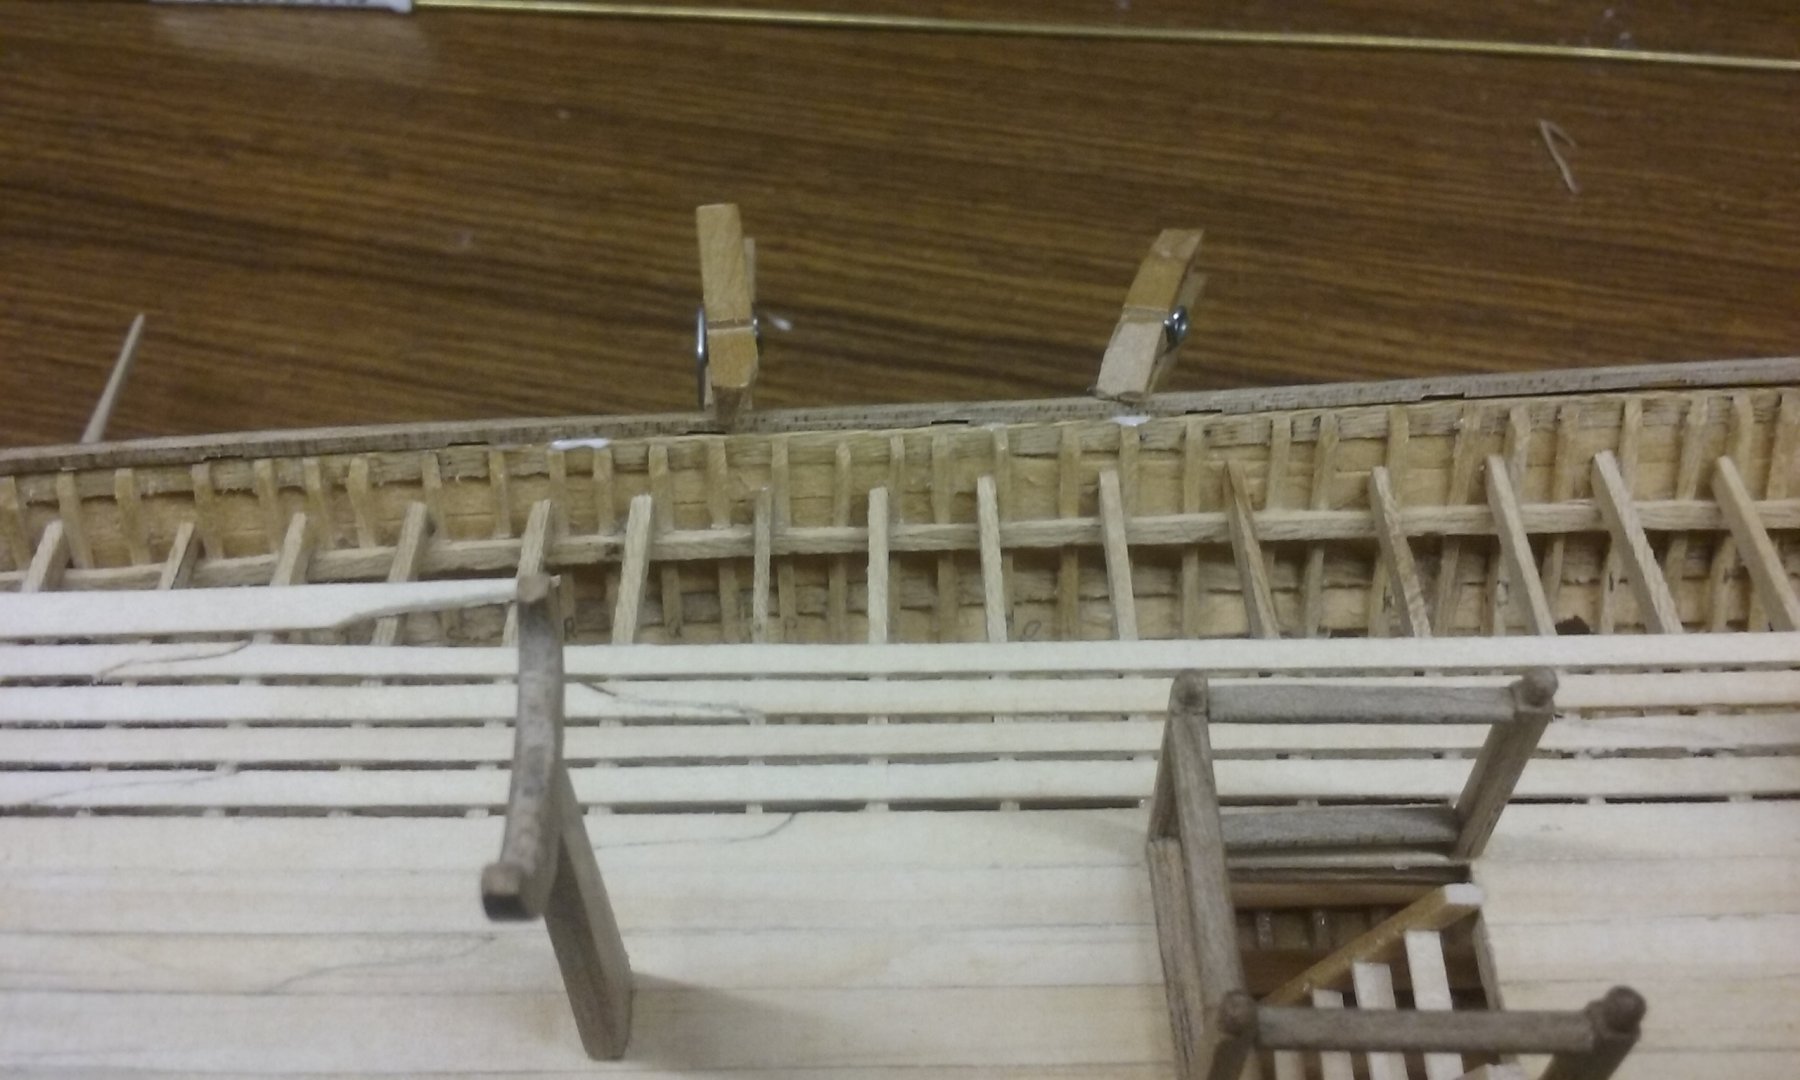
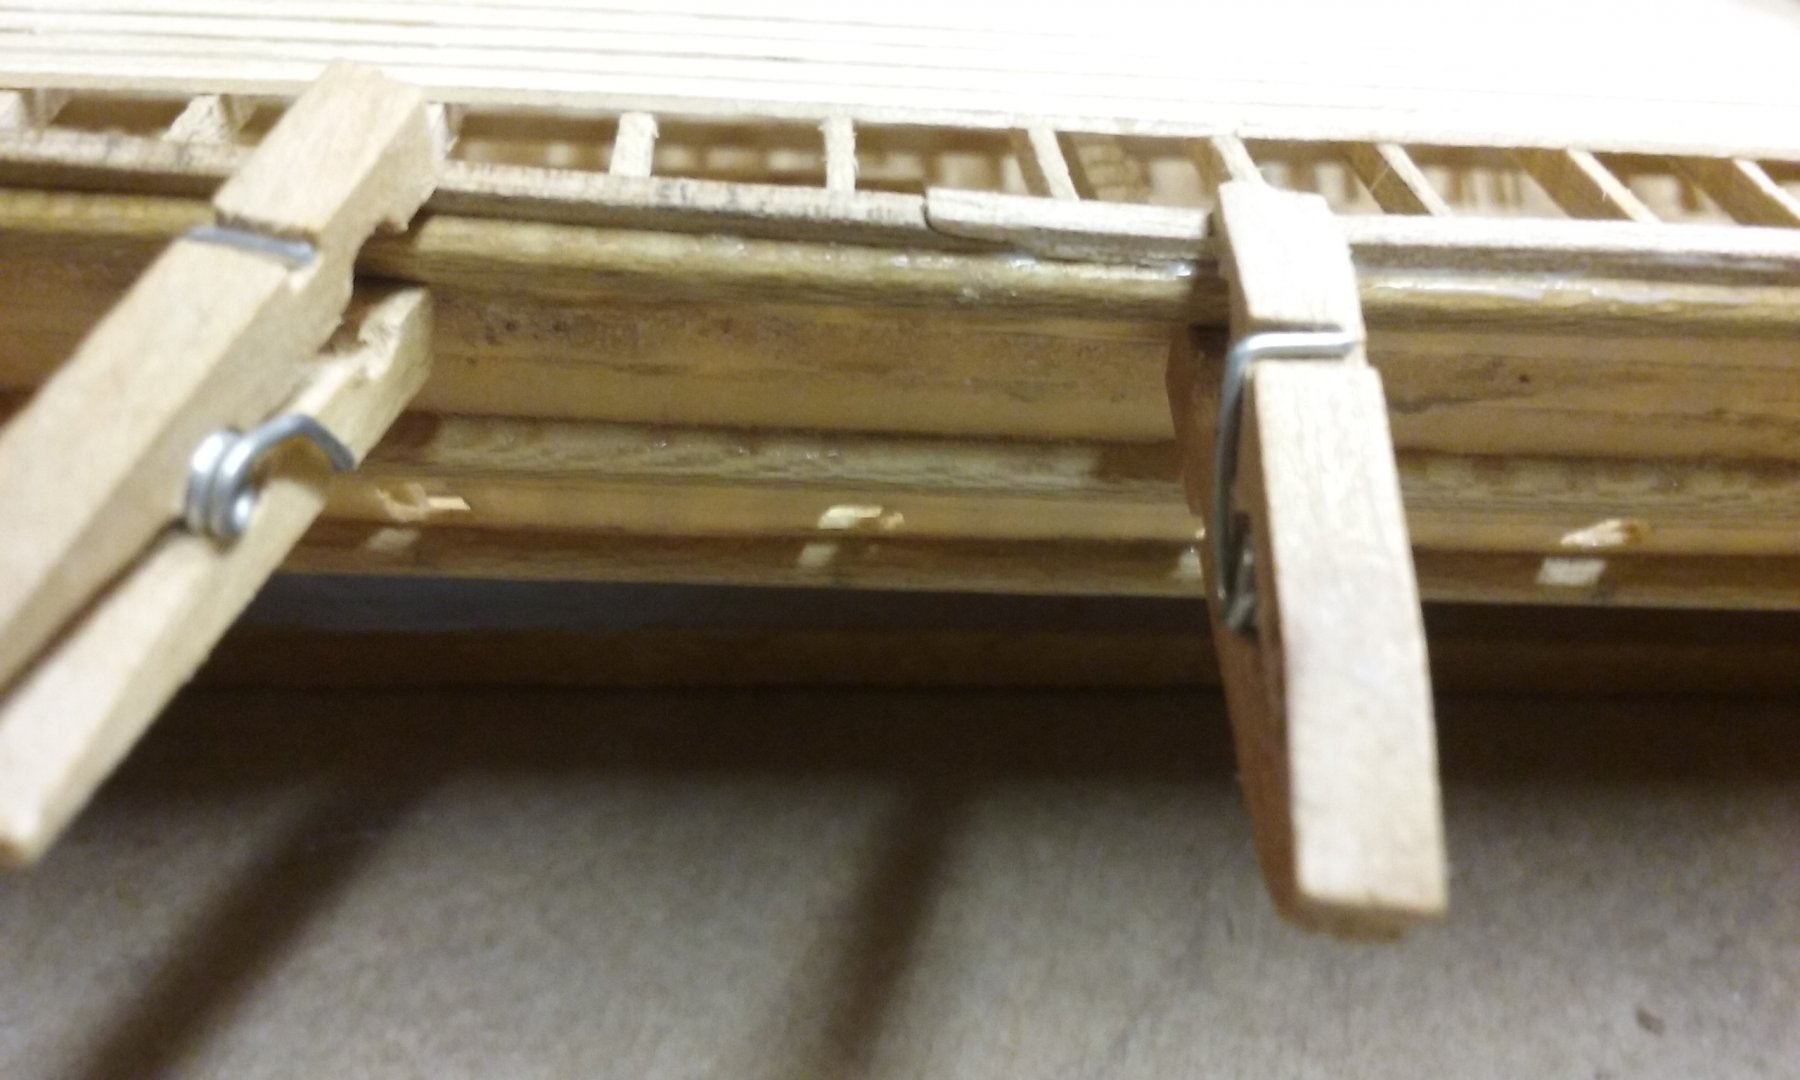
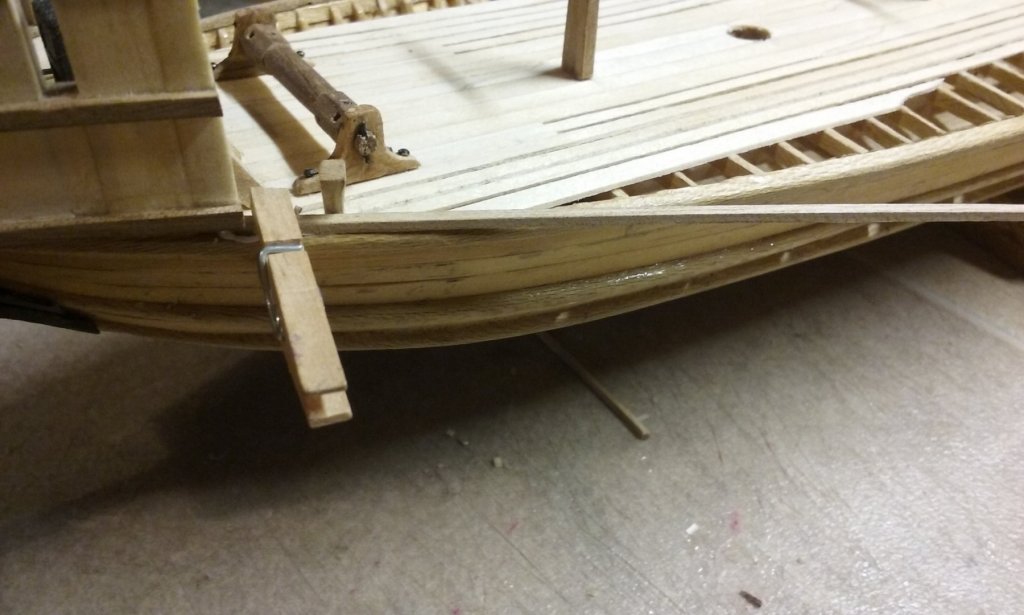
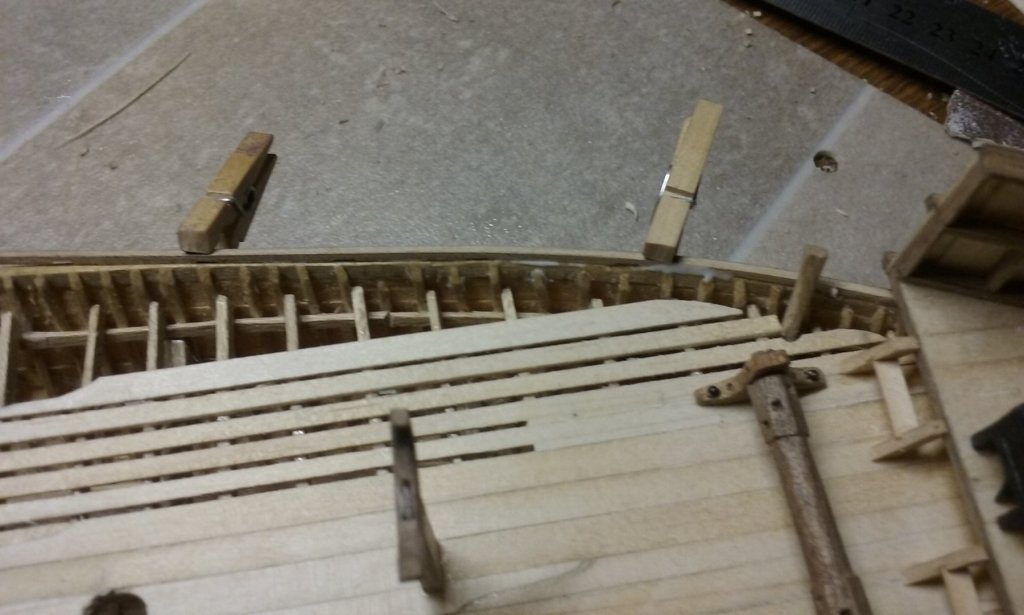
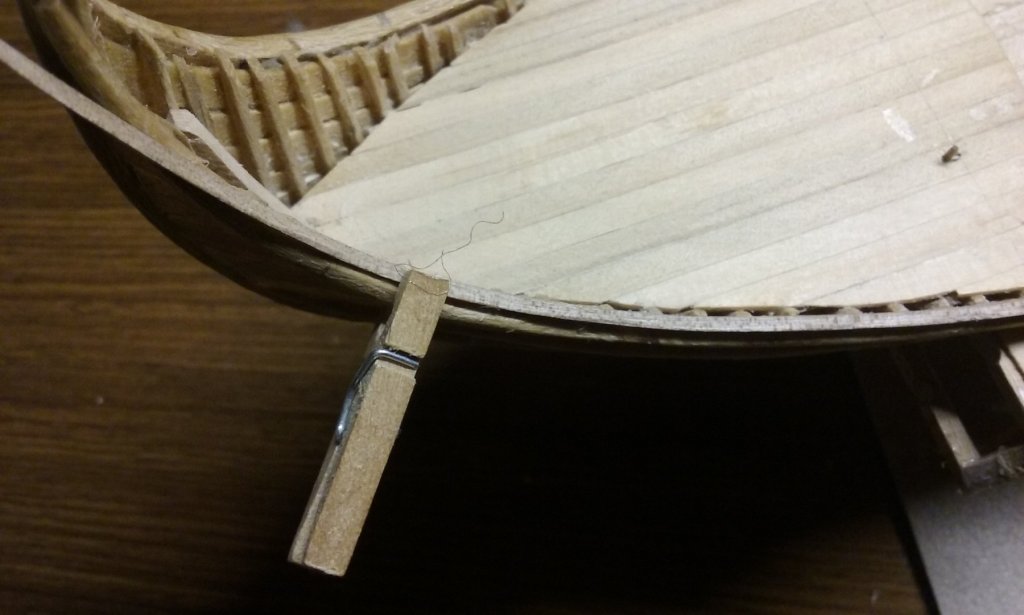
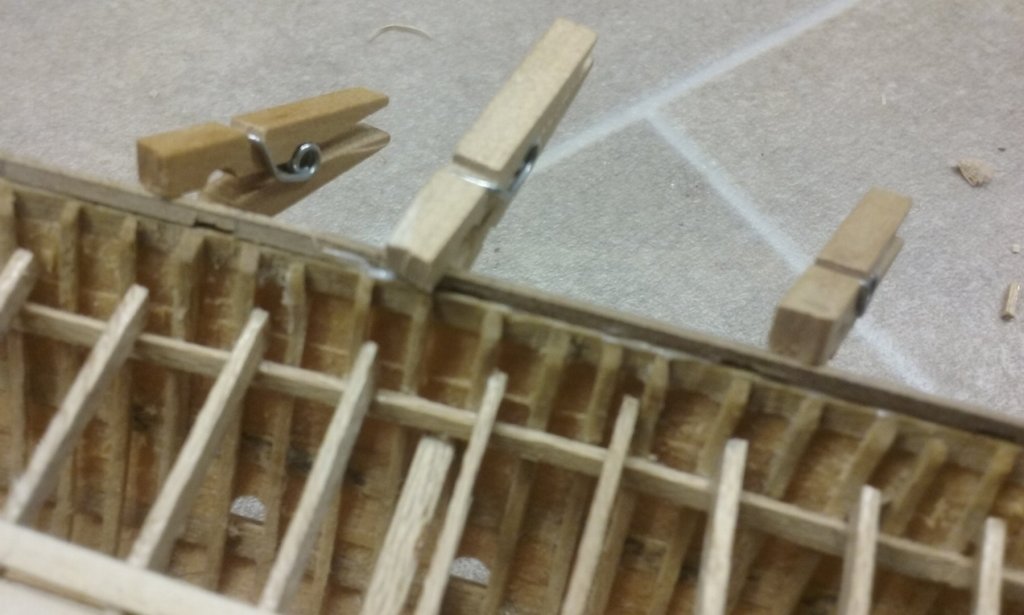
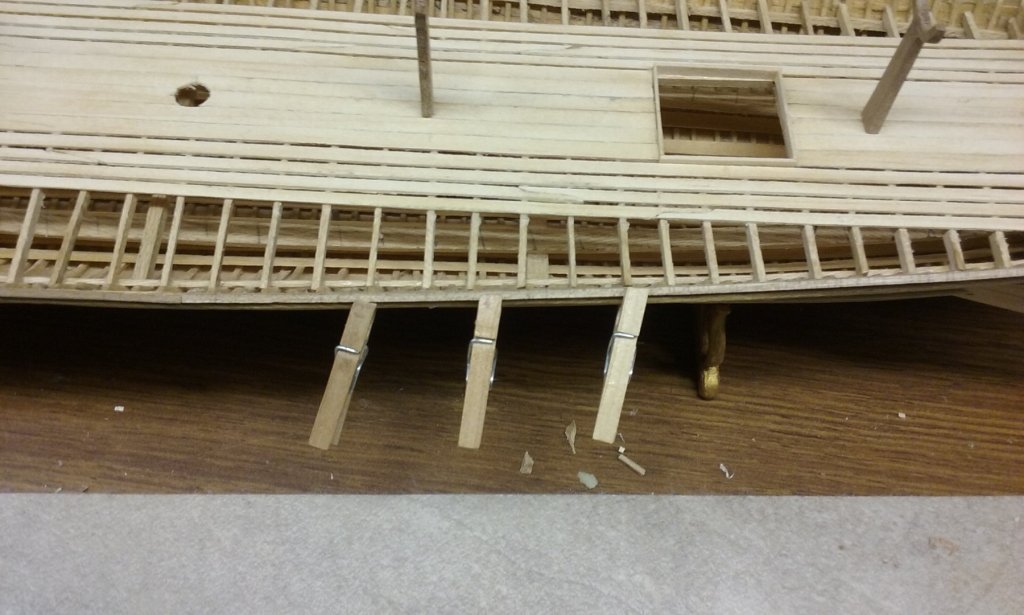
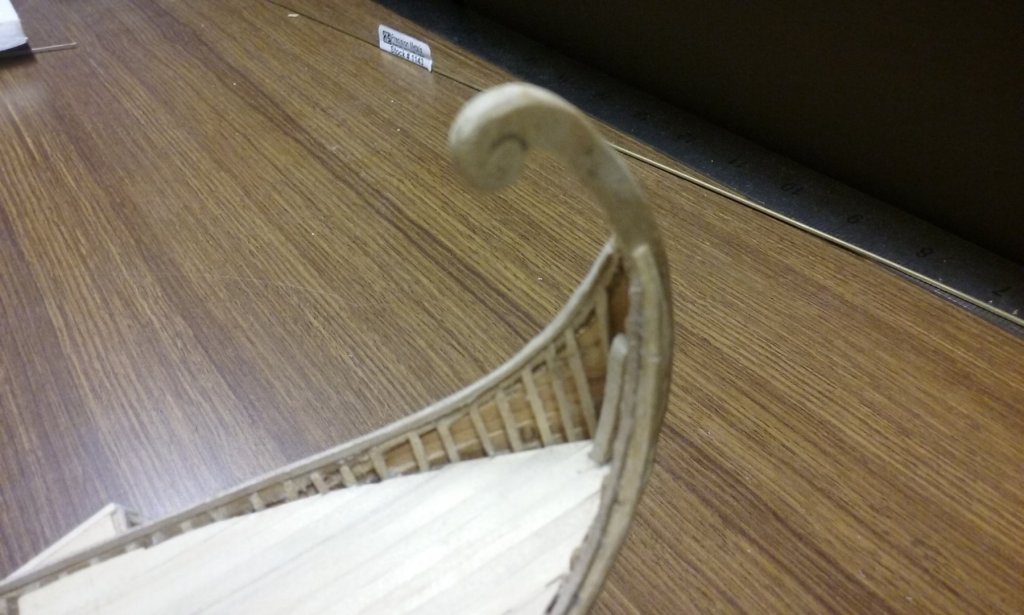
Thanks everyone for the likes and comments. Messis, that's a cat food container . . . Here's the starboard stringer nearing completion - I had to make it thinner at the end to cope with the extreme curve at the tail. And here's the port stringer attached at the forecastle And further along the hull And here's the scarph joint And the curve at the stern for both stringers Steven


-
I agree, Dick. In fact I think I'll be using your inspiration (i.e. pinching your idea!) for the position and form of the lower halyard blocks for my own dromon. The PDF on the gréement (rigging) of a carrack I found particularly interesting. I hadn't looked at this PDF before and I had no idea they'd recovered so many rigging elements or done all this reconstruction stuff on how they were arranged. Fascinating. Steven
- 263 replies
-
- 1
-
-
- nave tonda
- round ship
- (and 2 more)
-
Dick, I'm sending you a message and attaching a couple of PDFs from the wreck reports - one on rigging and one with the sep de drisse (which is made of three parts, the lowest of which is emplanted on the keel like on a mast step). Trouble is, there's so much information in these reports I've never taken the time to look all the way through them. But in one of these attachments I've just come across a diagram from our old friend Michael of Rhodes being used as source for the calcet. Steven
- 263 replies
-
- 1
-
-
- nave tonda
- round ship
- (and 2 more)
-
Yes, I'm using an on-line French maritime dictionary that could certainly be described as vieux . . . Very useful, but perhaps out of date in some circumstances. Steven
- 263 replies
-
- 2
-
-
- nave tonda
- round ship
- (and 2 more)
-
Funny, when I translated it, it came out as "hoisting boats". There is a word "manutention" in the text which can mean either victualling or handling (that would probably be the "barrels of wine"), but embarcation turns out to mean ships boats. (Who knew?) Steven
- 263 replies
-
- 1
-
-
- nave tonda
- round ship
- (and 2 more)
-
I've been meaning to look up double pulley A 167 from the Lomellina - here it is: "Discovered next to calcet A 162, under the two wheels A 66, double pulley A 167 was found without sheaves, with a cord passing through one of the end holes. It measures 65.6 cm long with a width of 17.2 cm and a thickness of 9.2 cm, and has two sheave-holes, 19.2 and 20.4 com high and 3.6 cm wide. The presence of a hole at each end signifies that it is part of a two-fold tackle, taking two double pulleys; this tackle system is not normally encountered in the rigging of a ship, except for the mainyard lift. It develops a very great force and could have been used to lift heavy weights (this type of tackle was also used for hoisting the boats.) In any case, the absence of sheaves, as in the sep* and the calcet, could indicate that they had been temporarily unrigged." *The sep de drisse is the fixed block in the main deck which takes the main halyard. Steven

- 263 replies
-
- 3
-
-
- nave tonda
- round ship
- (and 2 more)
-
Probably one of the most difficult planking jobs there is - I had a similar one with my dromon and eventually decided just to leave it as it was and make it an object lesson for next time. Yours is even more difficult because it's clinker, not carvel, so it's harder to disguise slight errors (I've been able to sand mine smooth and I'll be painting over it so it won't be visible). I see that though on the original the stem and sternposts were carved to take the ends of the strakes, they didn't do that on the model. It might have made things a bit easier. The third and fourth strake from the bottom look a little strangely-shaped - the third one seems to taper outwards instead of inwards as it approaches the stem/sternpost, and the fourth has had to be altered to allow for that. There's a similar issue with the third and fourth strake from the top. I don't know if there's a way to completely fix that, however, short of taking off the offending bit and doing it again. Perhaps you could cut the dodgy bits off those strakes and replace them with short planks that are the right shape, each joined to the main strake at a frame. You might be able to fix it with stealers - the Skuldelev site ( https://www2.rgzm.de/navis/ships/ship002/Ship002Engl.htm )says "Part of the sternpost was preserved, and was found with two stealers with carved out continuations of the strakes 2, 3, 4 and 5, 6 respectively. " However, what you decide to do with it is up to you, it's your build and you're the only one who has to be satisfied with it. Steven
-
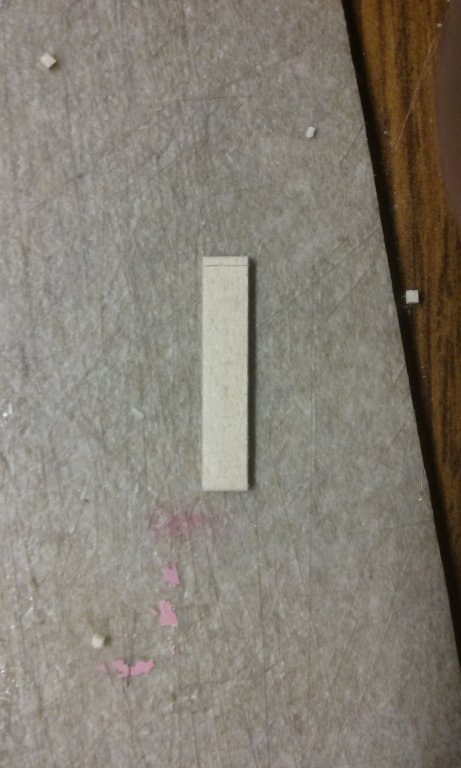
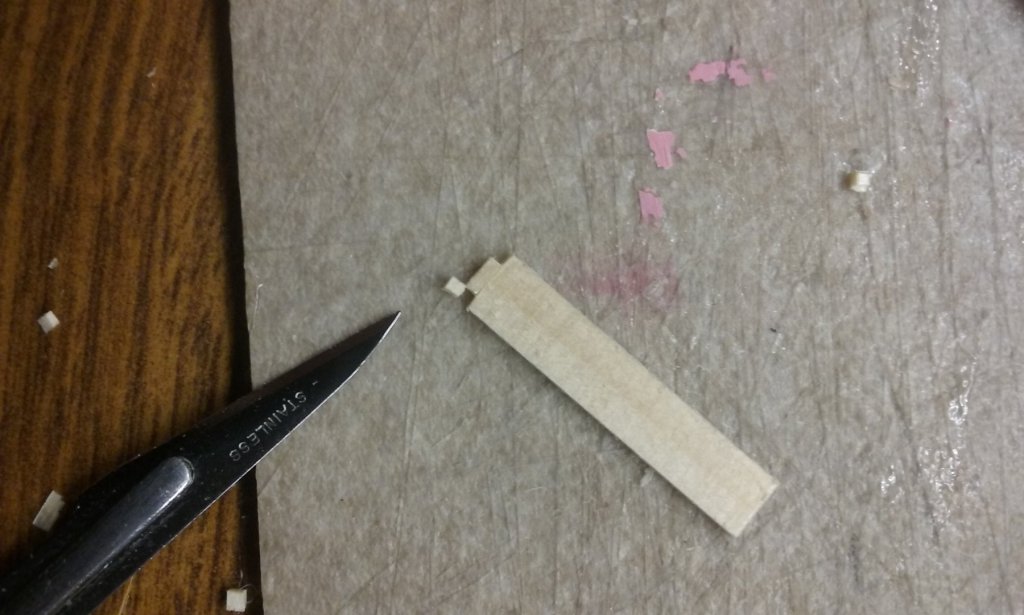
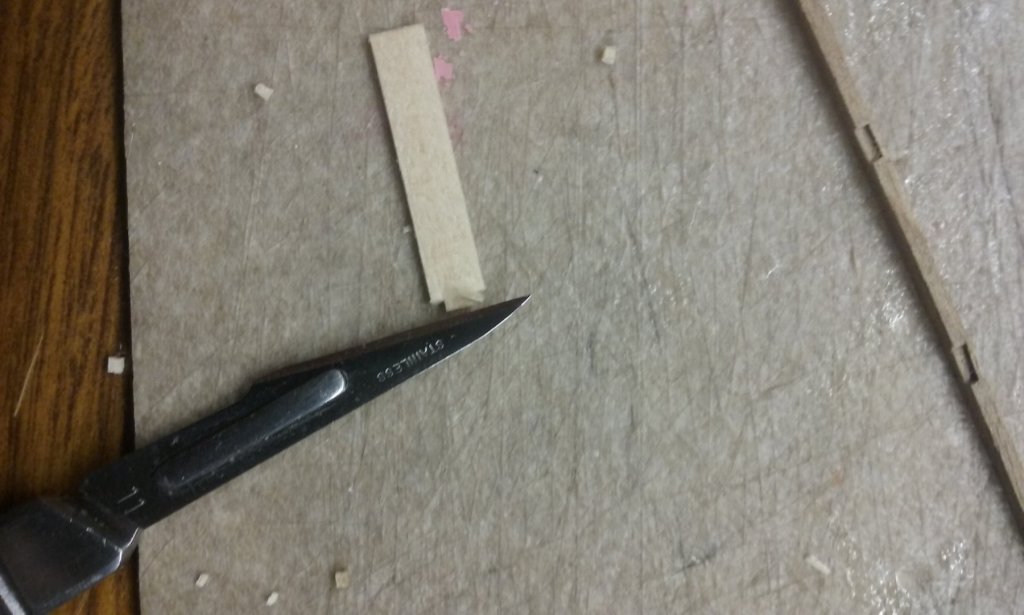
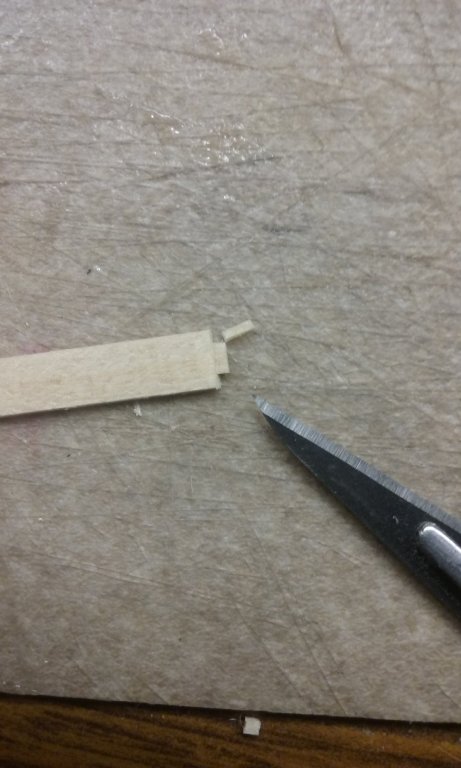
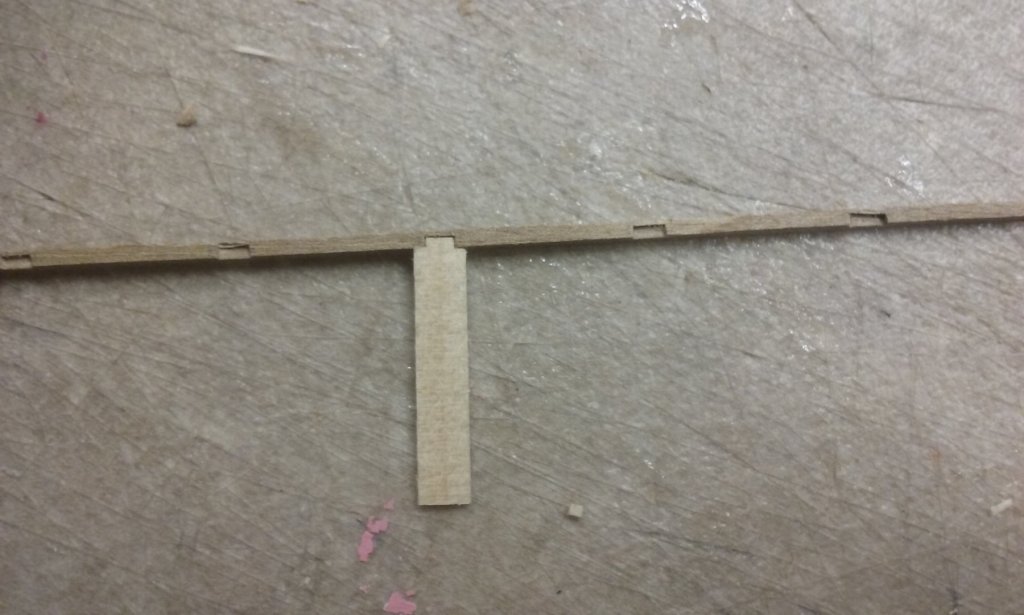
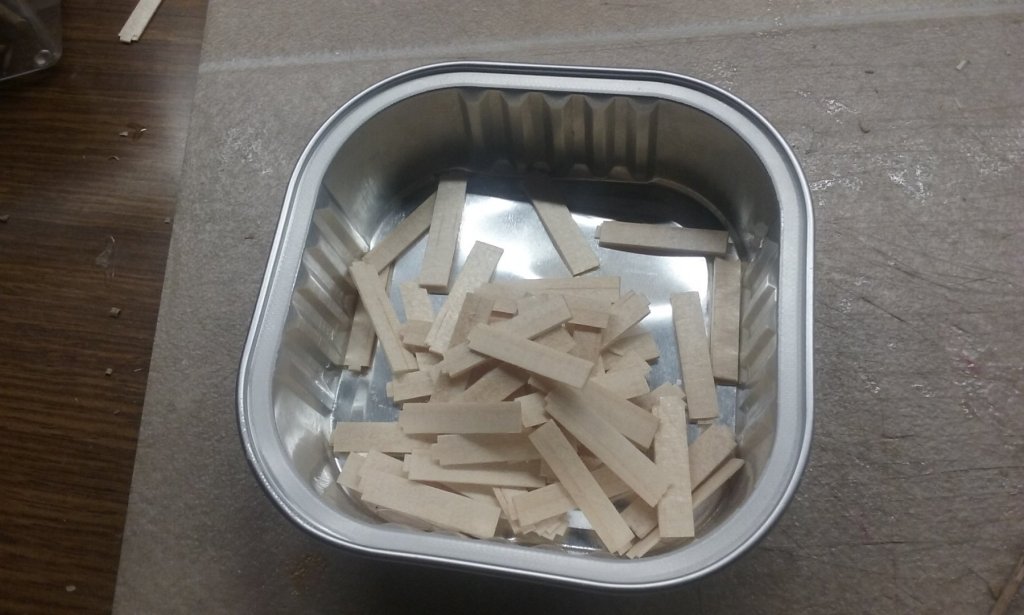
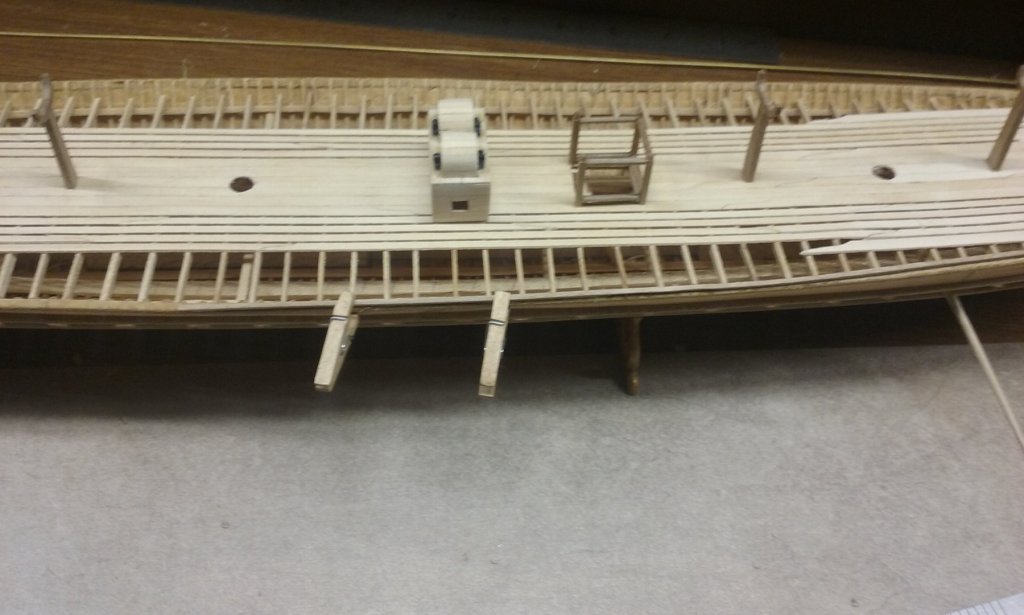
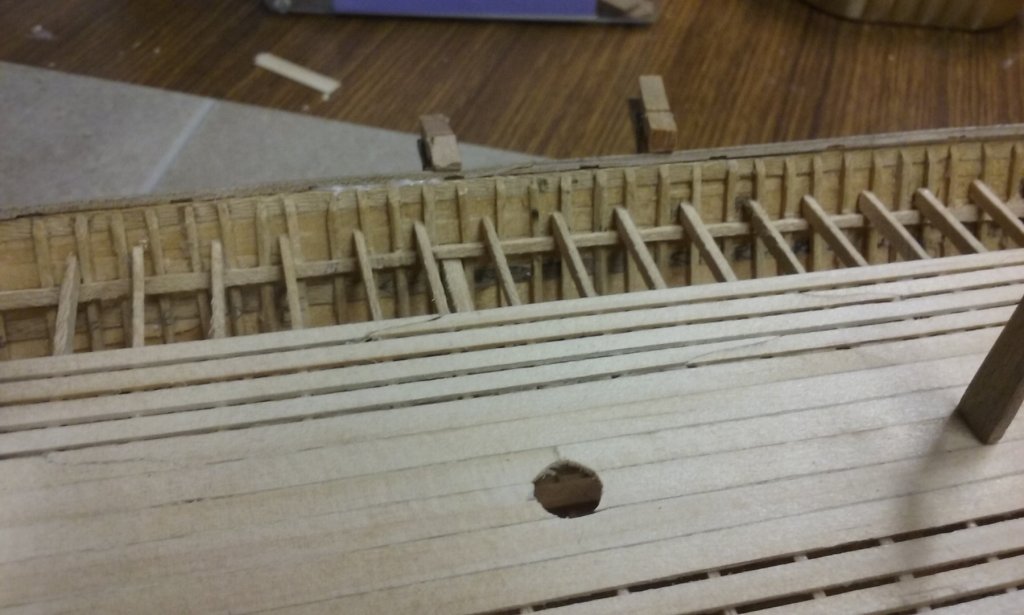
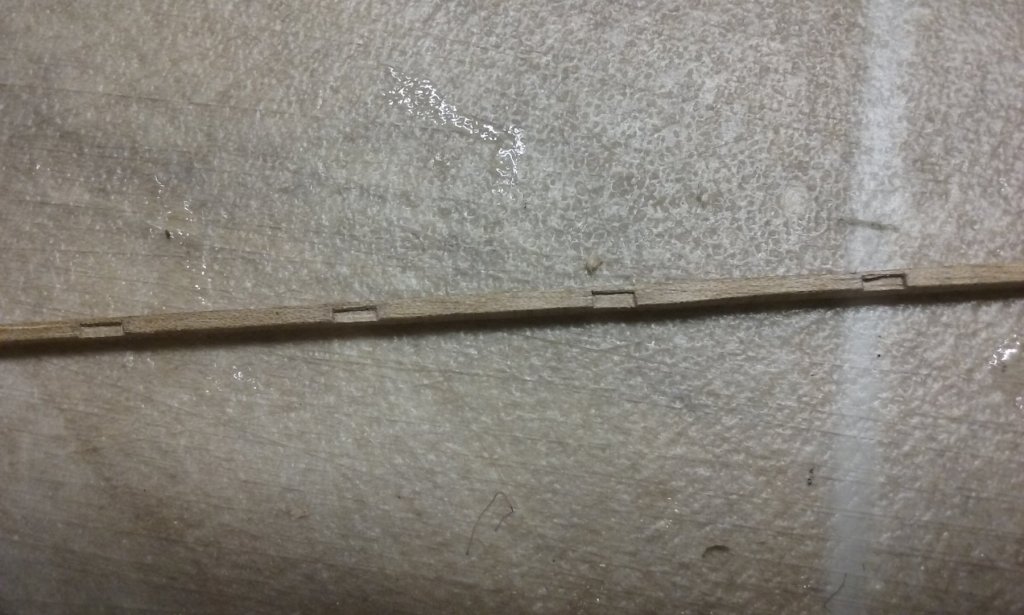
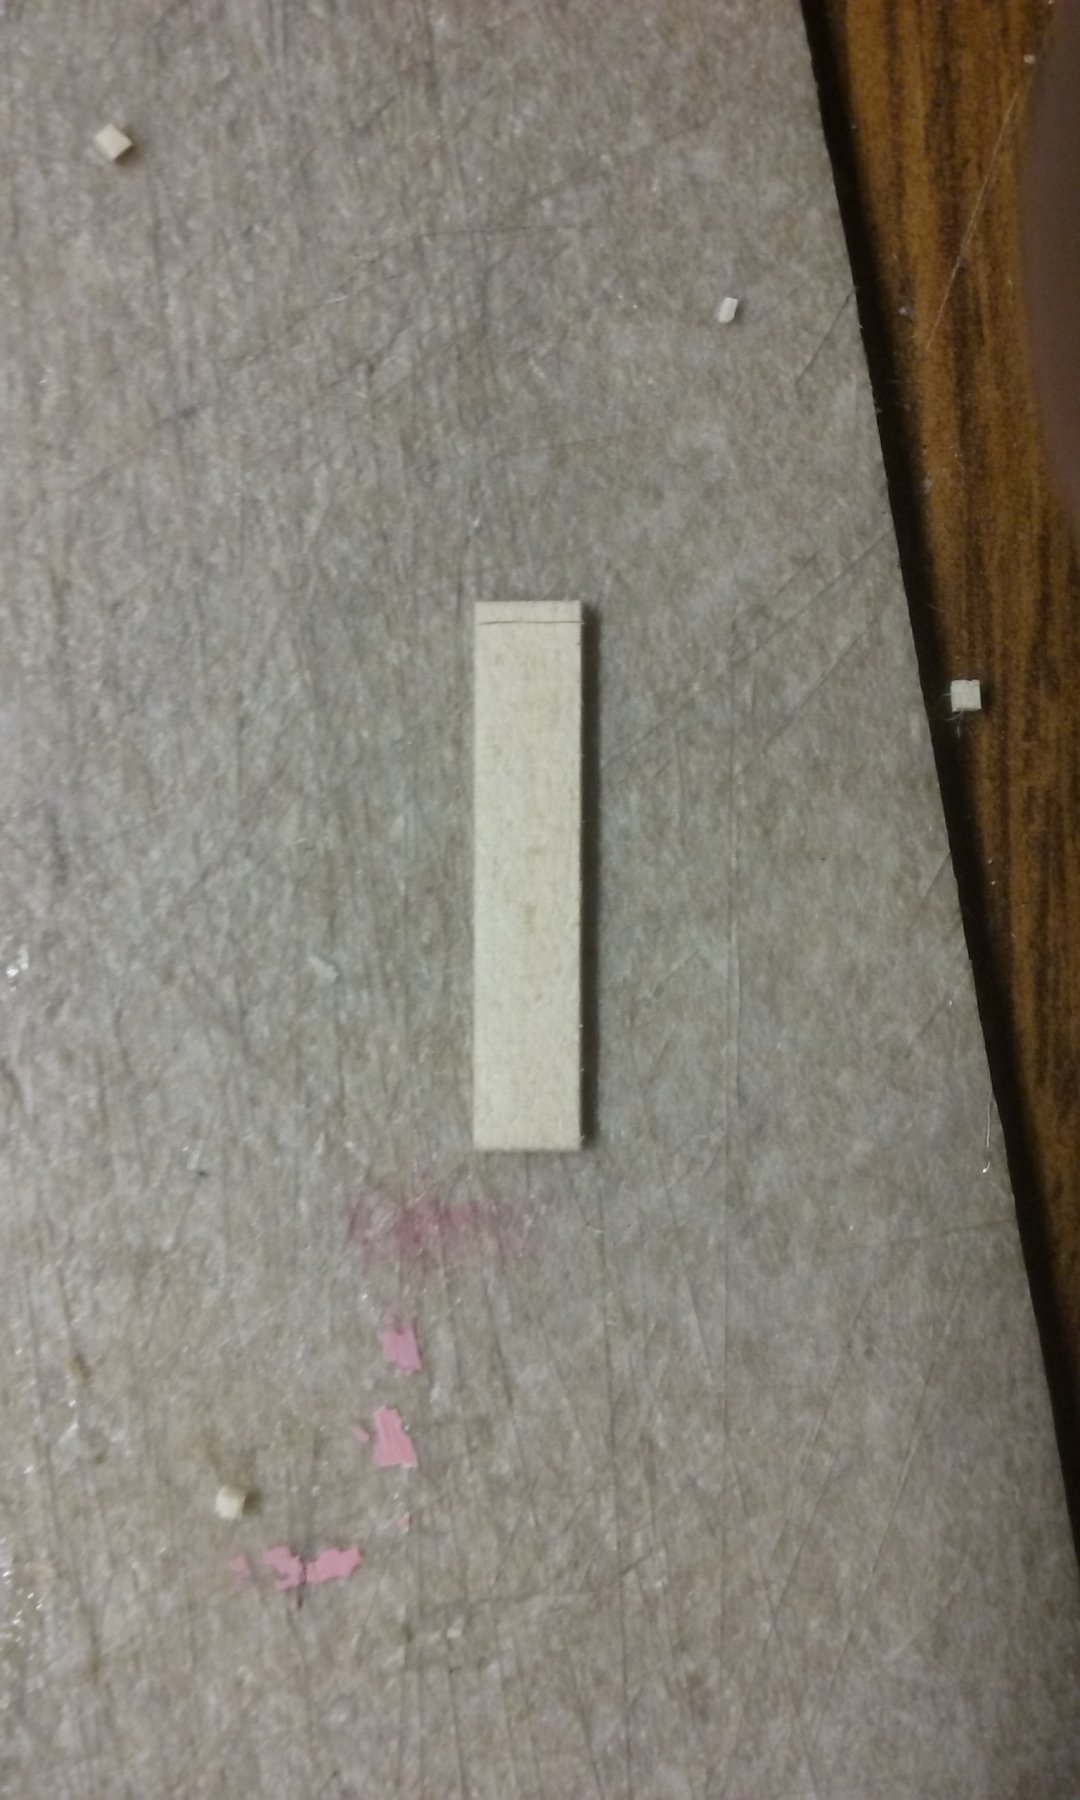
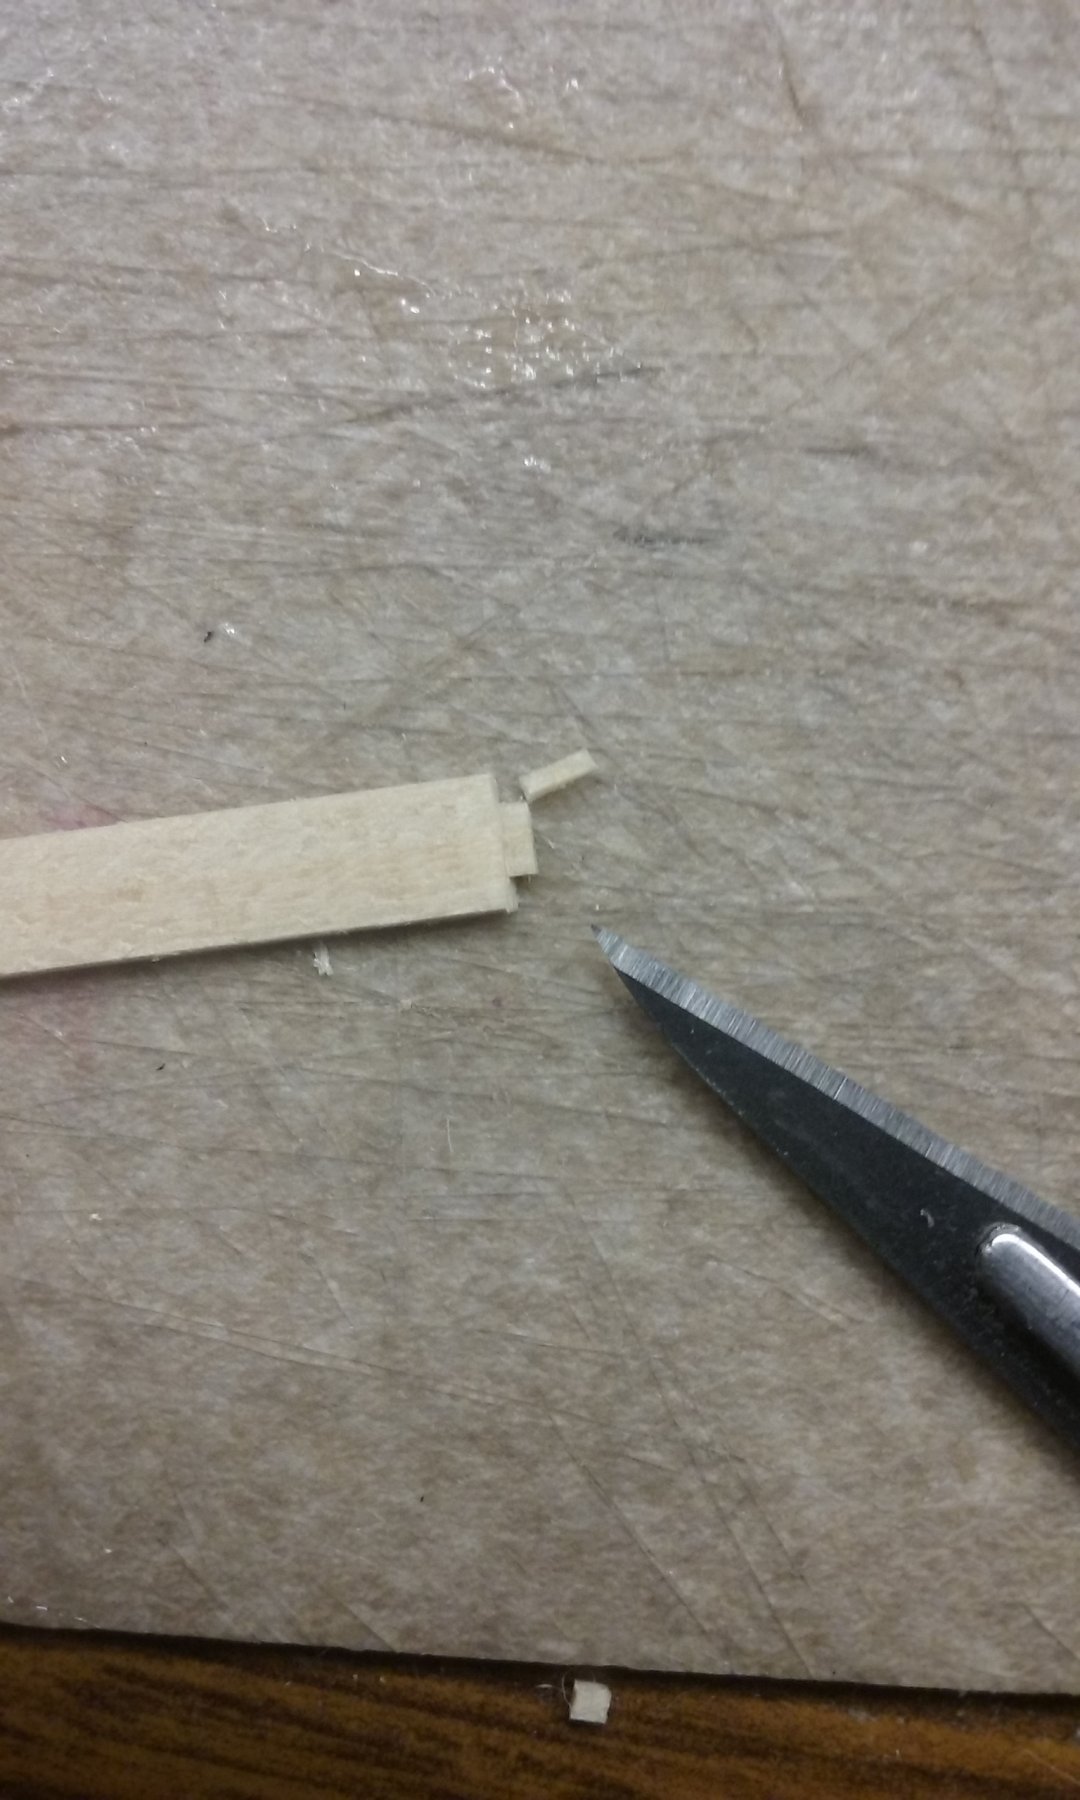
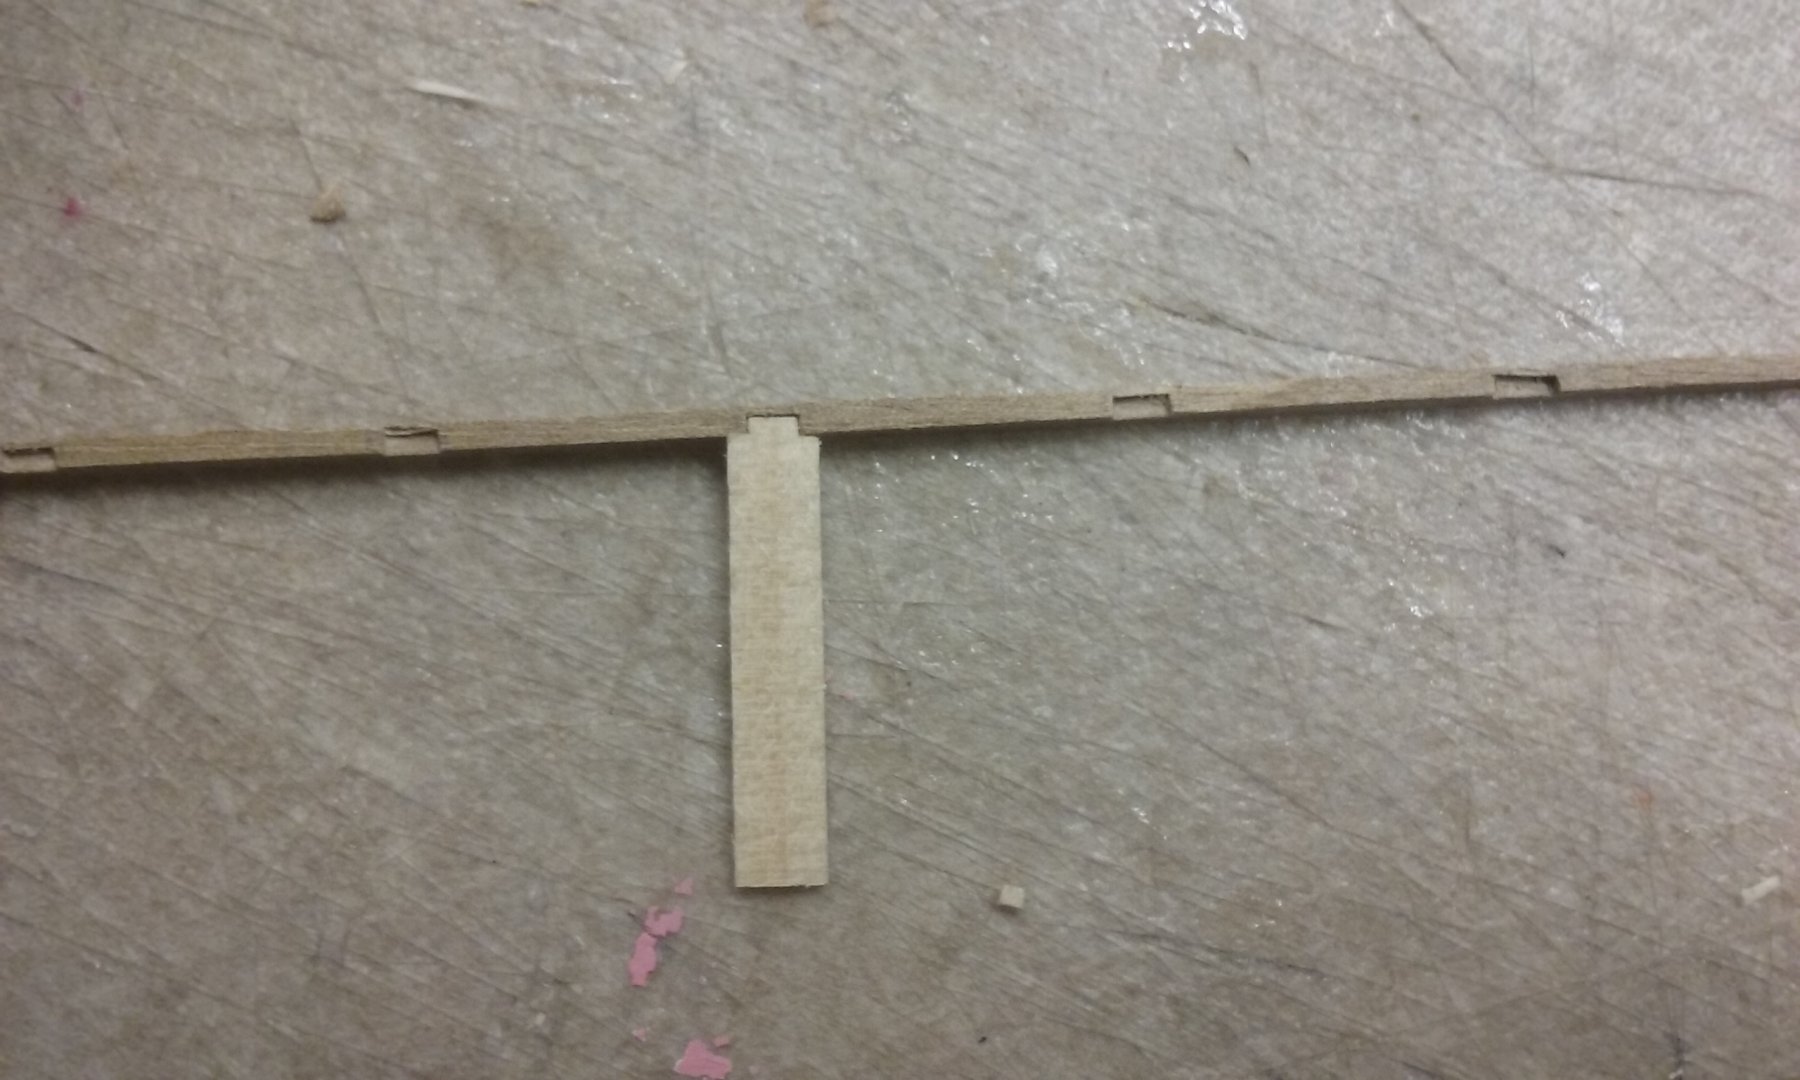
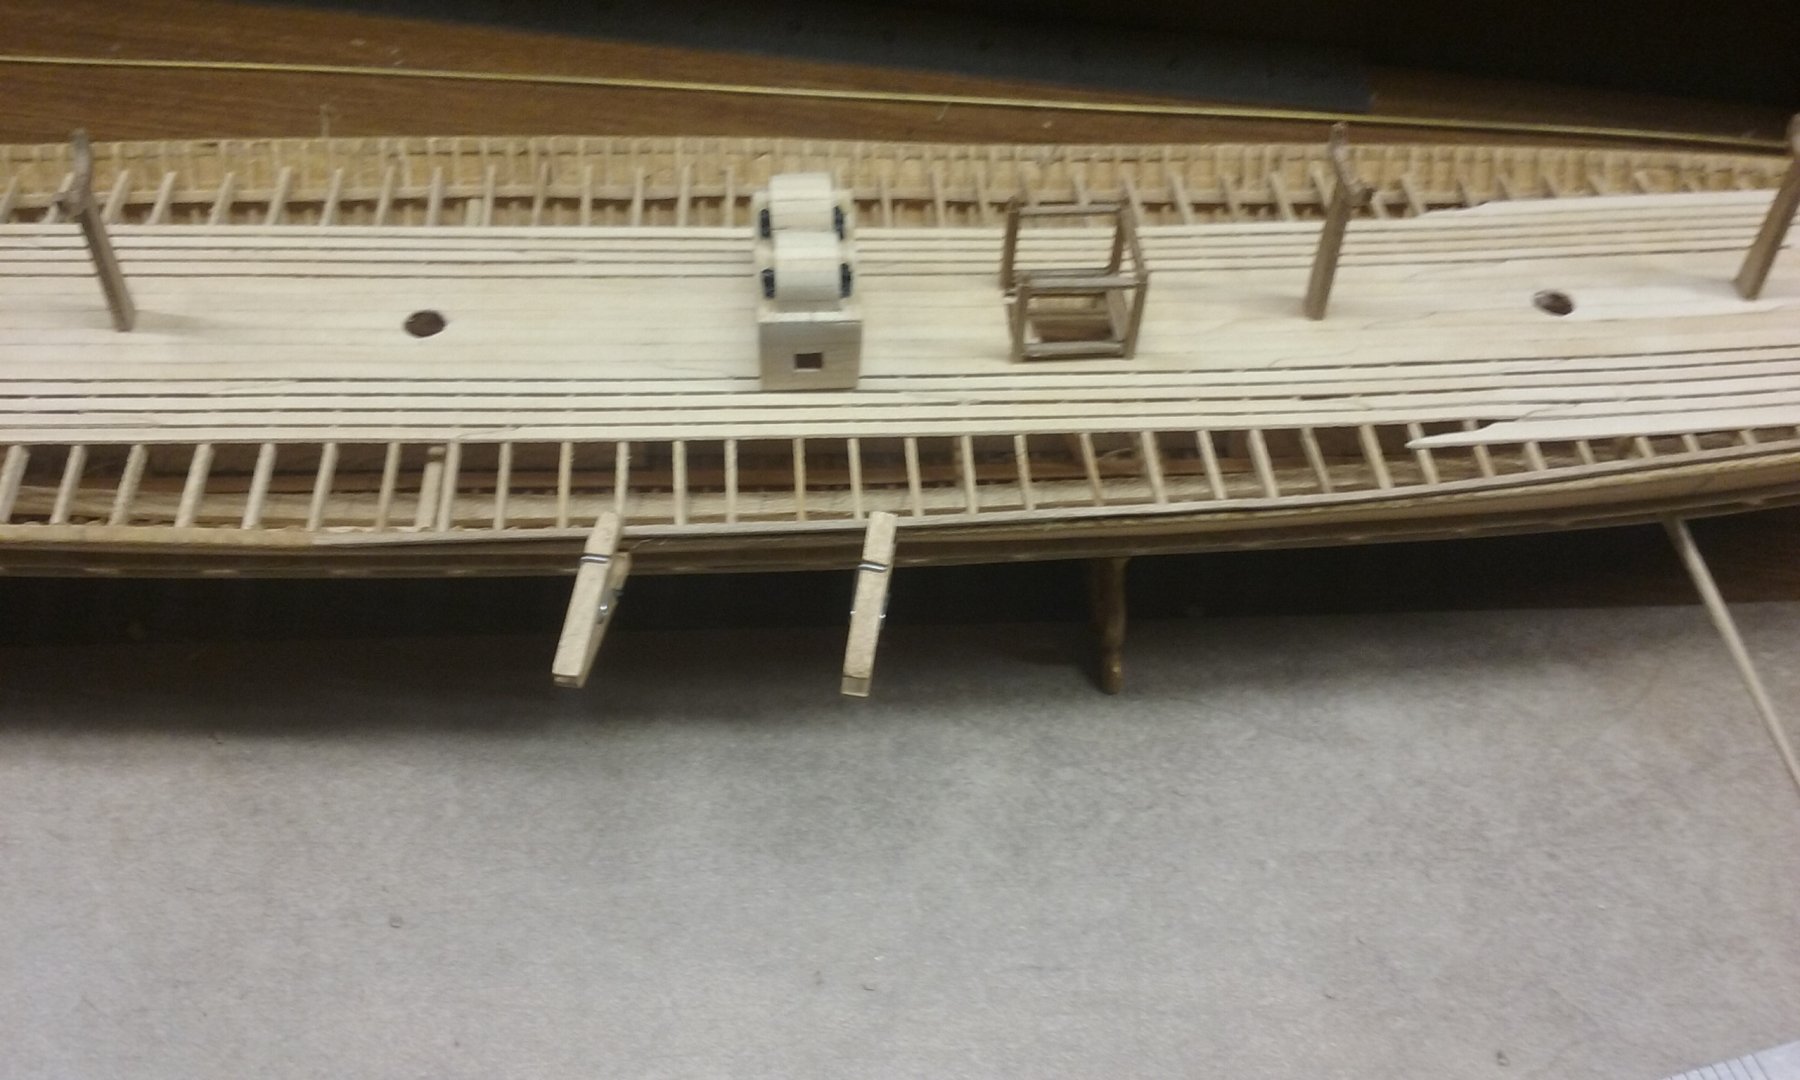
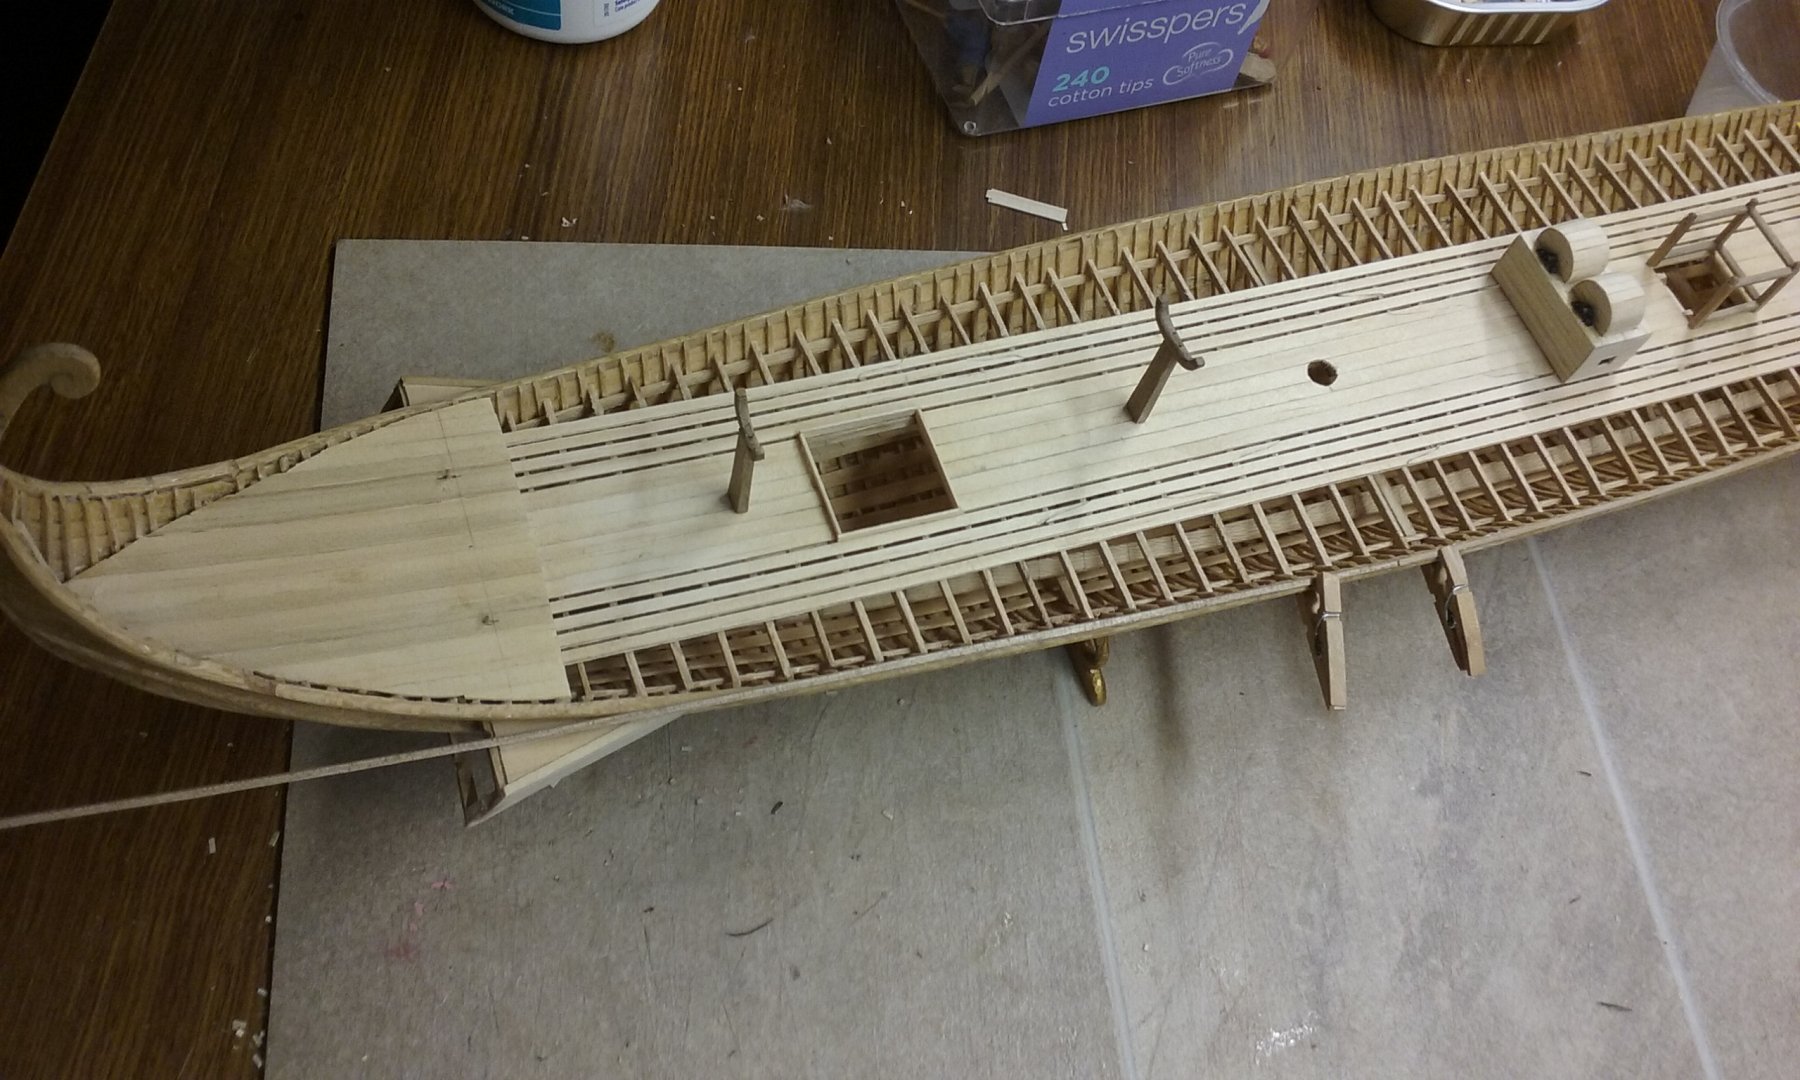
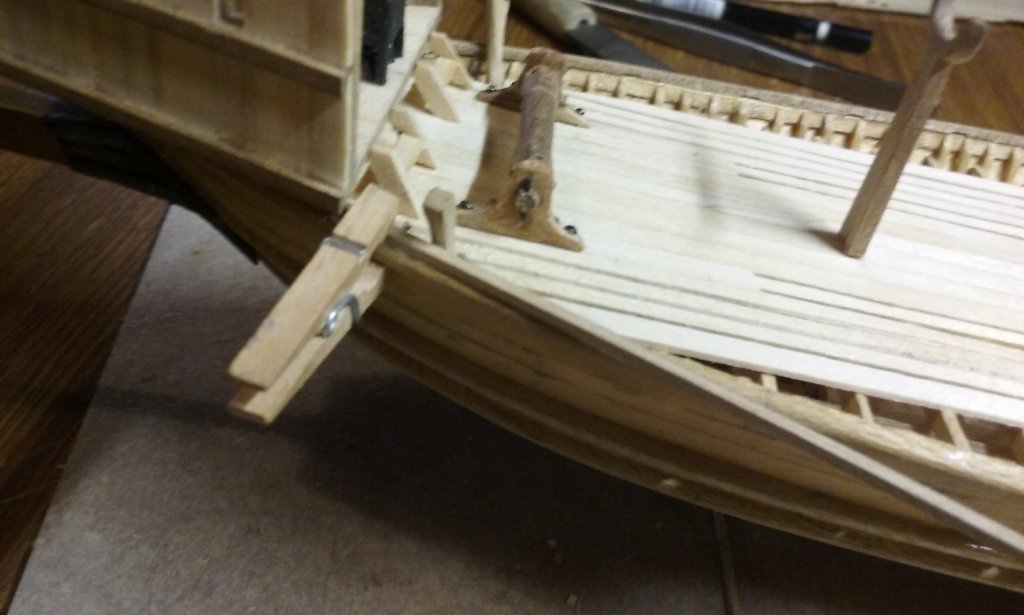
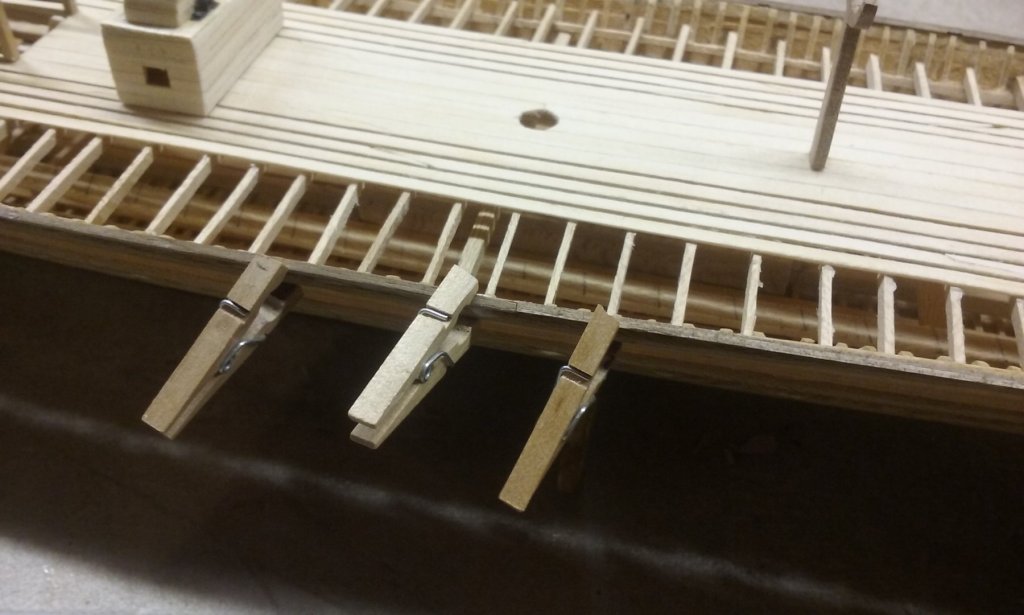
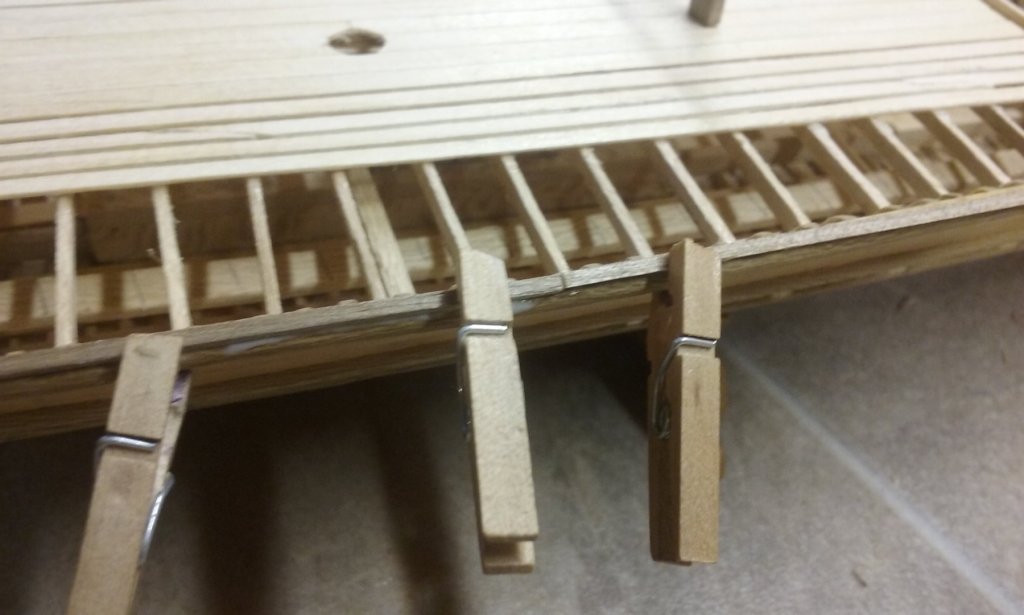
Here's the starboard stringer with the slots carved out of it. And the forward end glued in place. And the stringer curved and glued in place bit by bit: Here are the upper oarbenches under way: The blank, with a line cut into the end for the beginning of the tenon: Cutting the tenon to shape: And thinning the tenon to fit in the slot: Fifty benches: Scarph joint for the second half of the stringer: More to come . . . Steven