Louie da fly
-
Posts
7,989 -
Joined
-
Last visited
Content Type
Profiles
Forums
Gallery
Events
Everything posted by Louie da fly
-
 It just hit me last night - I've been in the throes of writing the Great Viking Novel for as long as I can remember (may never get published, but hey, it's fun), and my hero goes on a trading trip in a knarr in 1065 to the realm of Jarl Thorfinn the Mighty, (https://en.wikipedia.org/wiki/Thorfinn_the_Mighty) whose base was the Brough of Birsay in the Orkney islands north of Scotland. Here's a wonderful map https://maps.walkingclub.org.uk/os/explorer/463-orkney-west-mainland At the very top left of the "mainland" you'll see "Brough Head". Zoom right in and there's the Brough of Birsay, a small island cut off whenever the tide is full (sea-level changes dramatically with the tides), and that's where Thorfinn had his settlement. Brough is basically the same word as the Old English burh - a fortified settlement - which appears as "-burgh" or "-borough" at the end of many place-names in Britain. The island slopes upward from almost sea-level at the eastern end where the settlement was, to high cliffs on the west. As far as I can see traders coming here could have pulled their ships up on the sandy beach at high tide and perhaps unloaded when the tide was out. Here's a video with really good views of the island - I hope that is of some help to you. Maybe you could consider this as a setting for your Roar Edge. Steven
 -
Beautiful work, as usual, Patrick. Steven
-
Here's a figure 70mm high (equivalent to 1.75 metres or 5 ft 9" at 1:25 scale) - https://www.planetfigure.com/threads/fer-miniatures-january-new-release-changes-to-come-viking-warrior-gamla-uppsala-1087.76208/#google_vignette Get rid of the axe and the cross and he might do. And you might be able to do something with the guy drinking from a horn here: https://free3d.com/3d-model/viking-drunk-3d-printable-5188.html He does have a helmet on, and his multi-layer skirt and his "cloak" are a bit strange, but he's not too bad. (By the way, try drinking out of horn with the pointy end above your mouth like that and you'll get a face full of beer - don't ask me how I know.) Steven
-
It is indeed difficult to get Viking period figures who are ordinary people, not warriors or the rich. A site that gives a more realistic idea of what "normal Vikings" looked like is at https://sagy.vikingove.cz/en/the-interview-for-hella-the-viking-blog/ A well-off merchant might have looked like this - https://www.pinterest.com.au/pin/137219119871448037/ While a really high status Viking (probably a member of the nobility) might have looked like this https://www.pinterest.com.au/pin/948148527770532075/ (that cloak is copied from a real archaeological find, including that wonderful decorative border - click on the Pinterest link and it takes you to an article on the original find). Sorry I can't help with figures ( I have to carve mine), but cargo would yes, be barrels, perhaps oiled leather bags (for waterproofing) chests (There's the Mastermyr chest, which contained carpenters' tools https://en.wikipedia.org/wiki/Mästermyr_chest and https://www.angelfire.com/wy/svenskildbiter/Viking/vikchest.html, and is fairly typical, as well as the Oseberg chests https://loveevamk.life/product_tag/32008505_.html - but use those with caution, as they were in a royal grave). For my own nef - though it's from a few centuries after, ships hadn't changed all that much - I added a cargo of barrels - see post #193 and onward at Hope that helps. Nice to see someone doing a merchant ship instead of all the drakkars! Steven
-
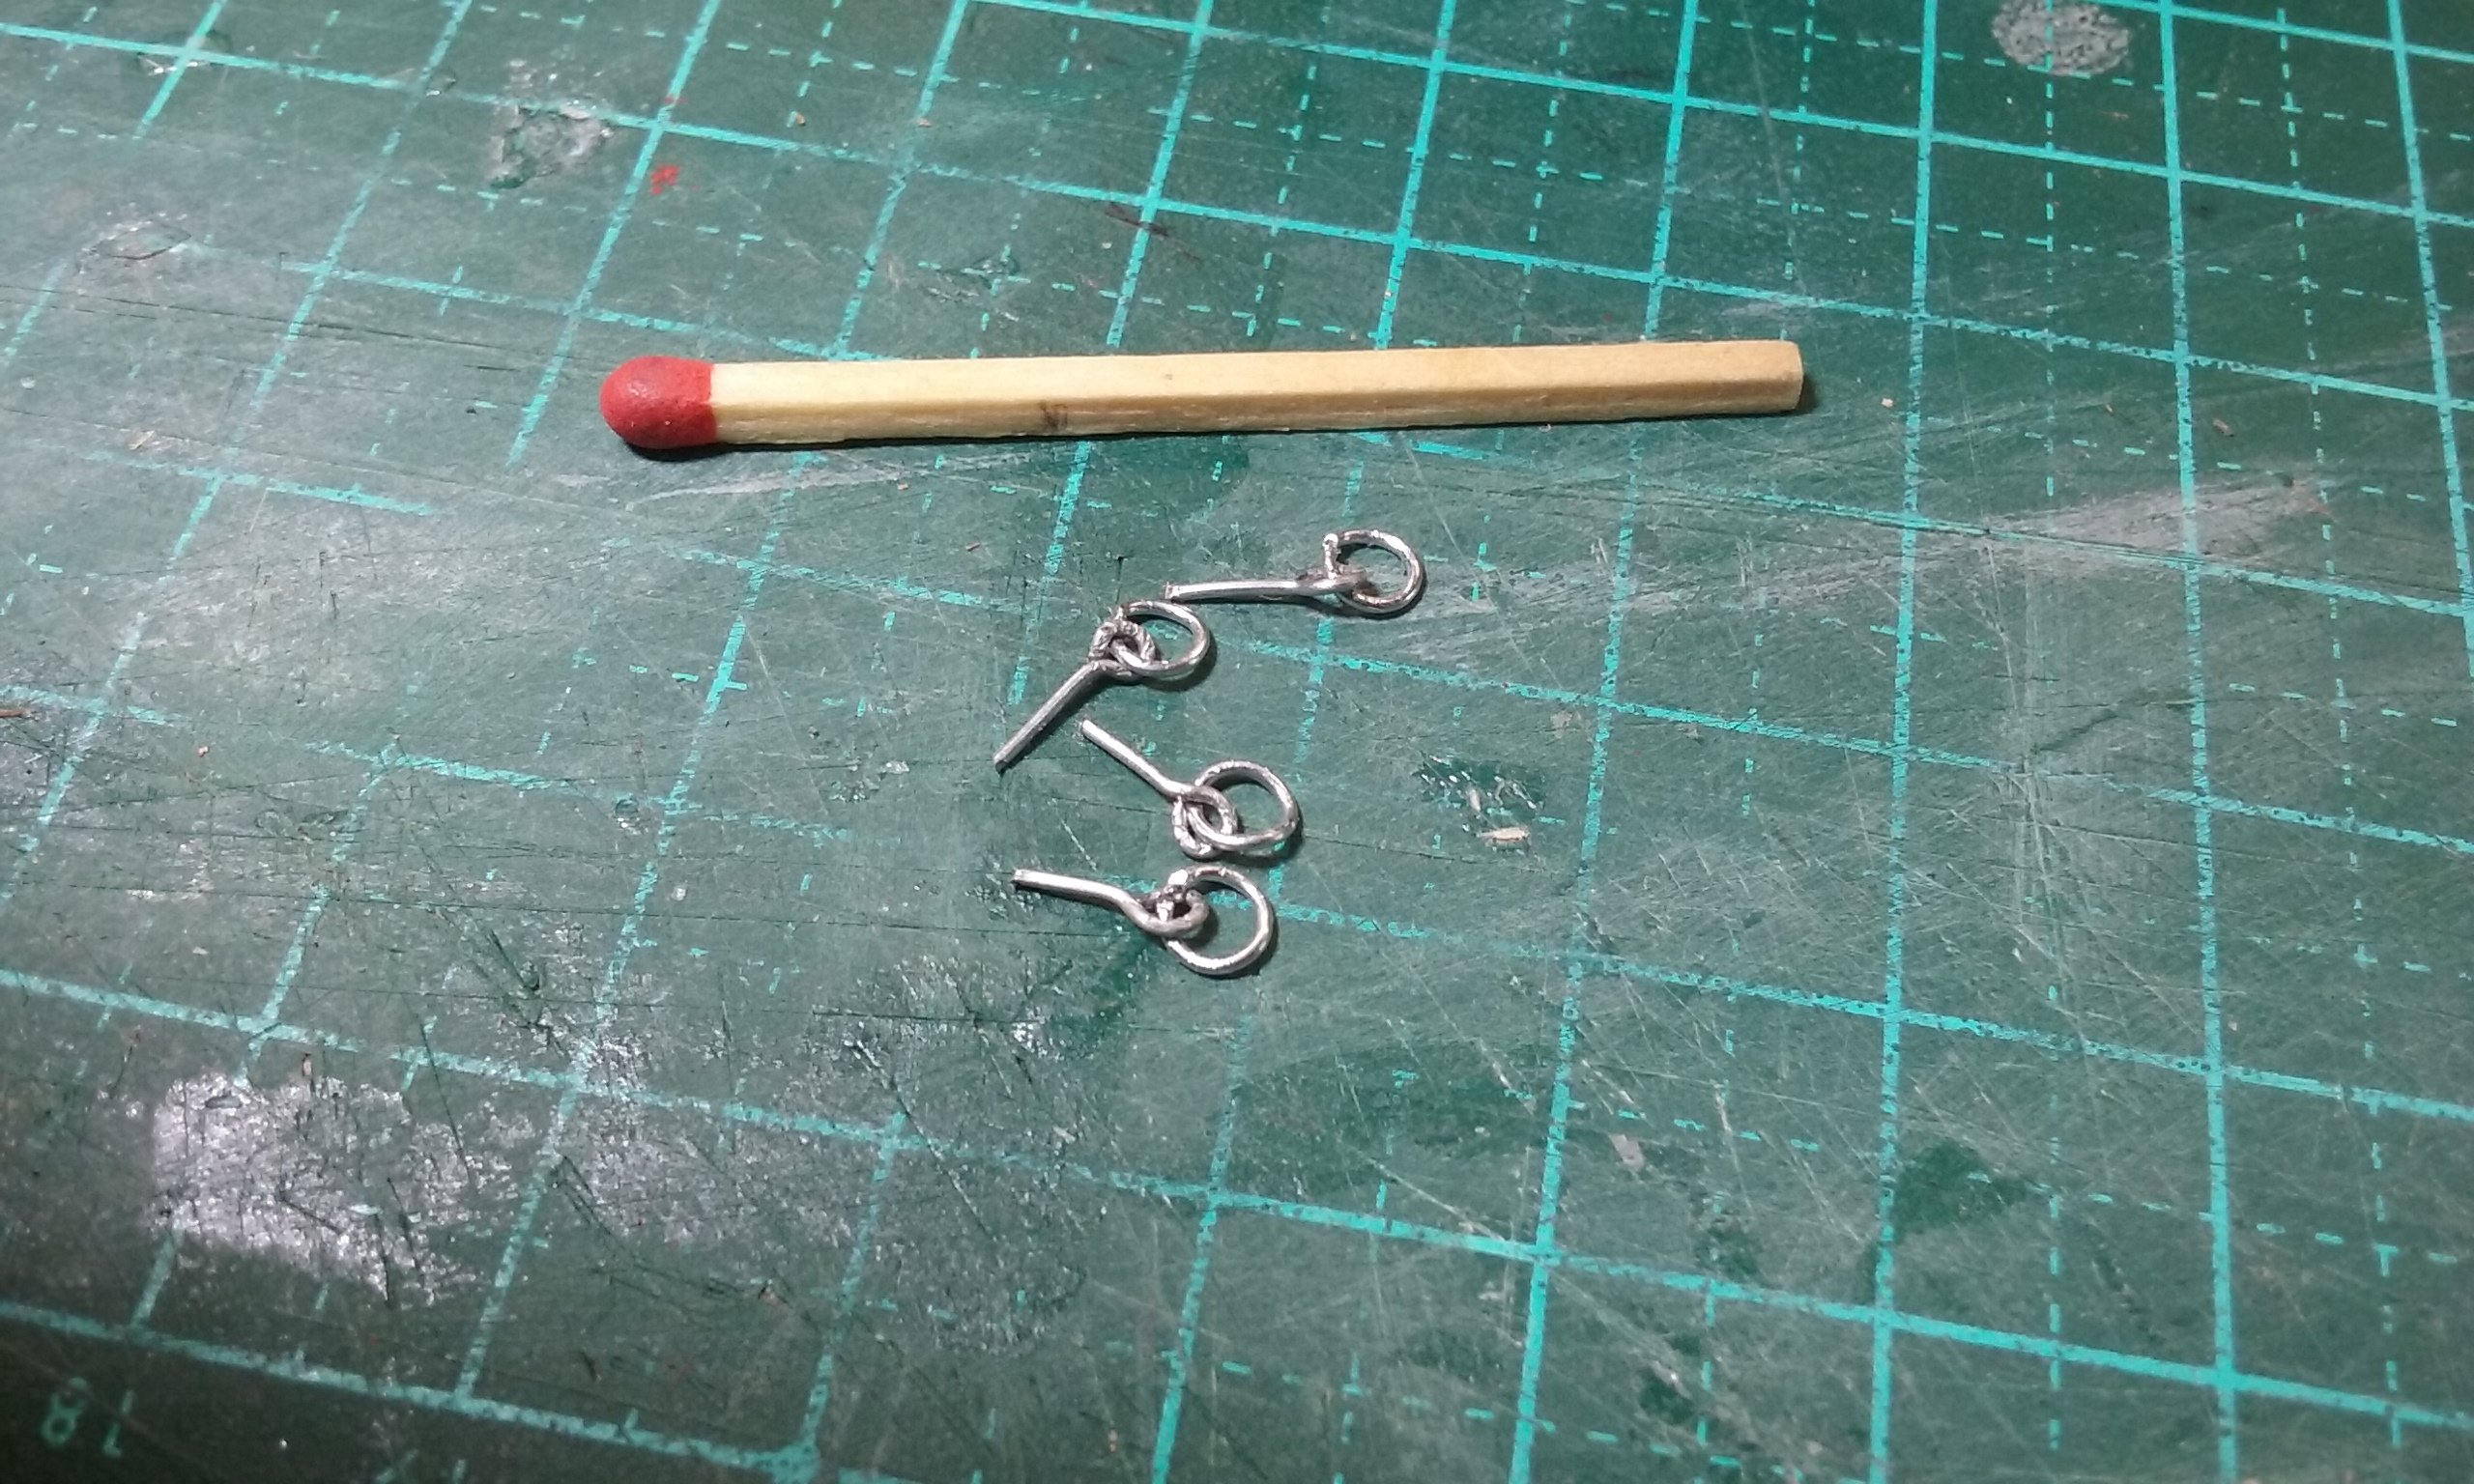
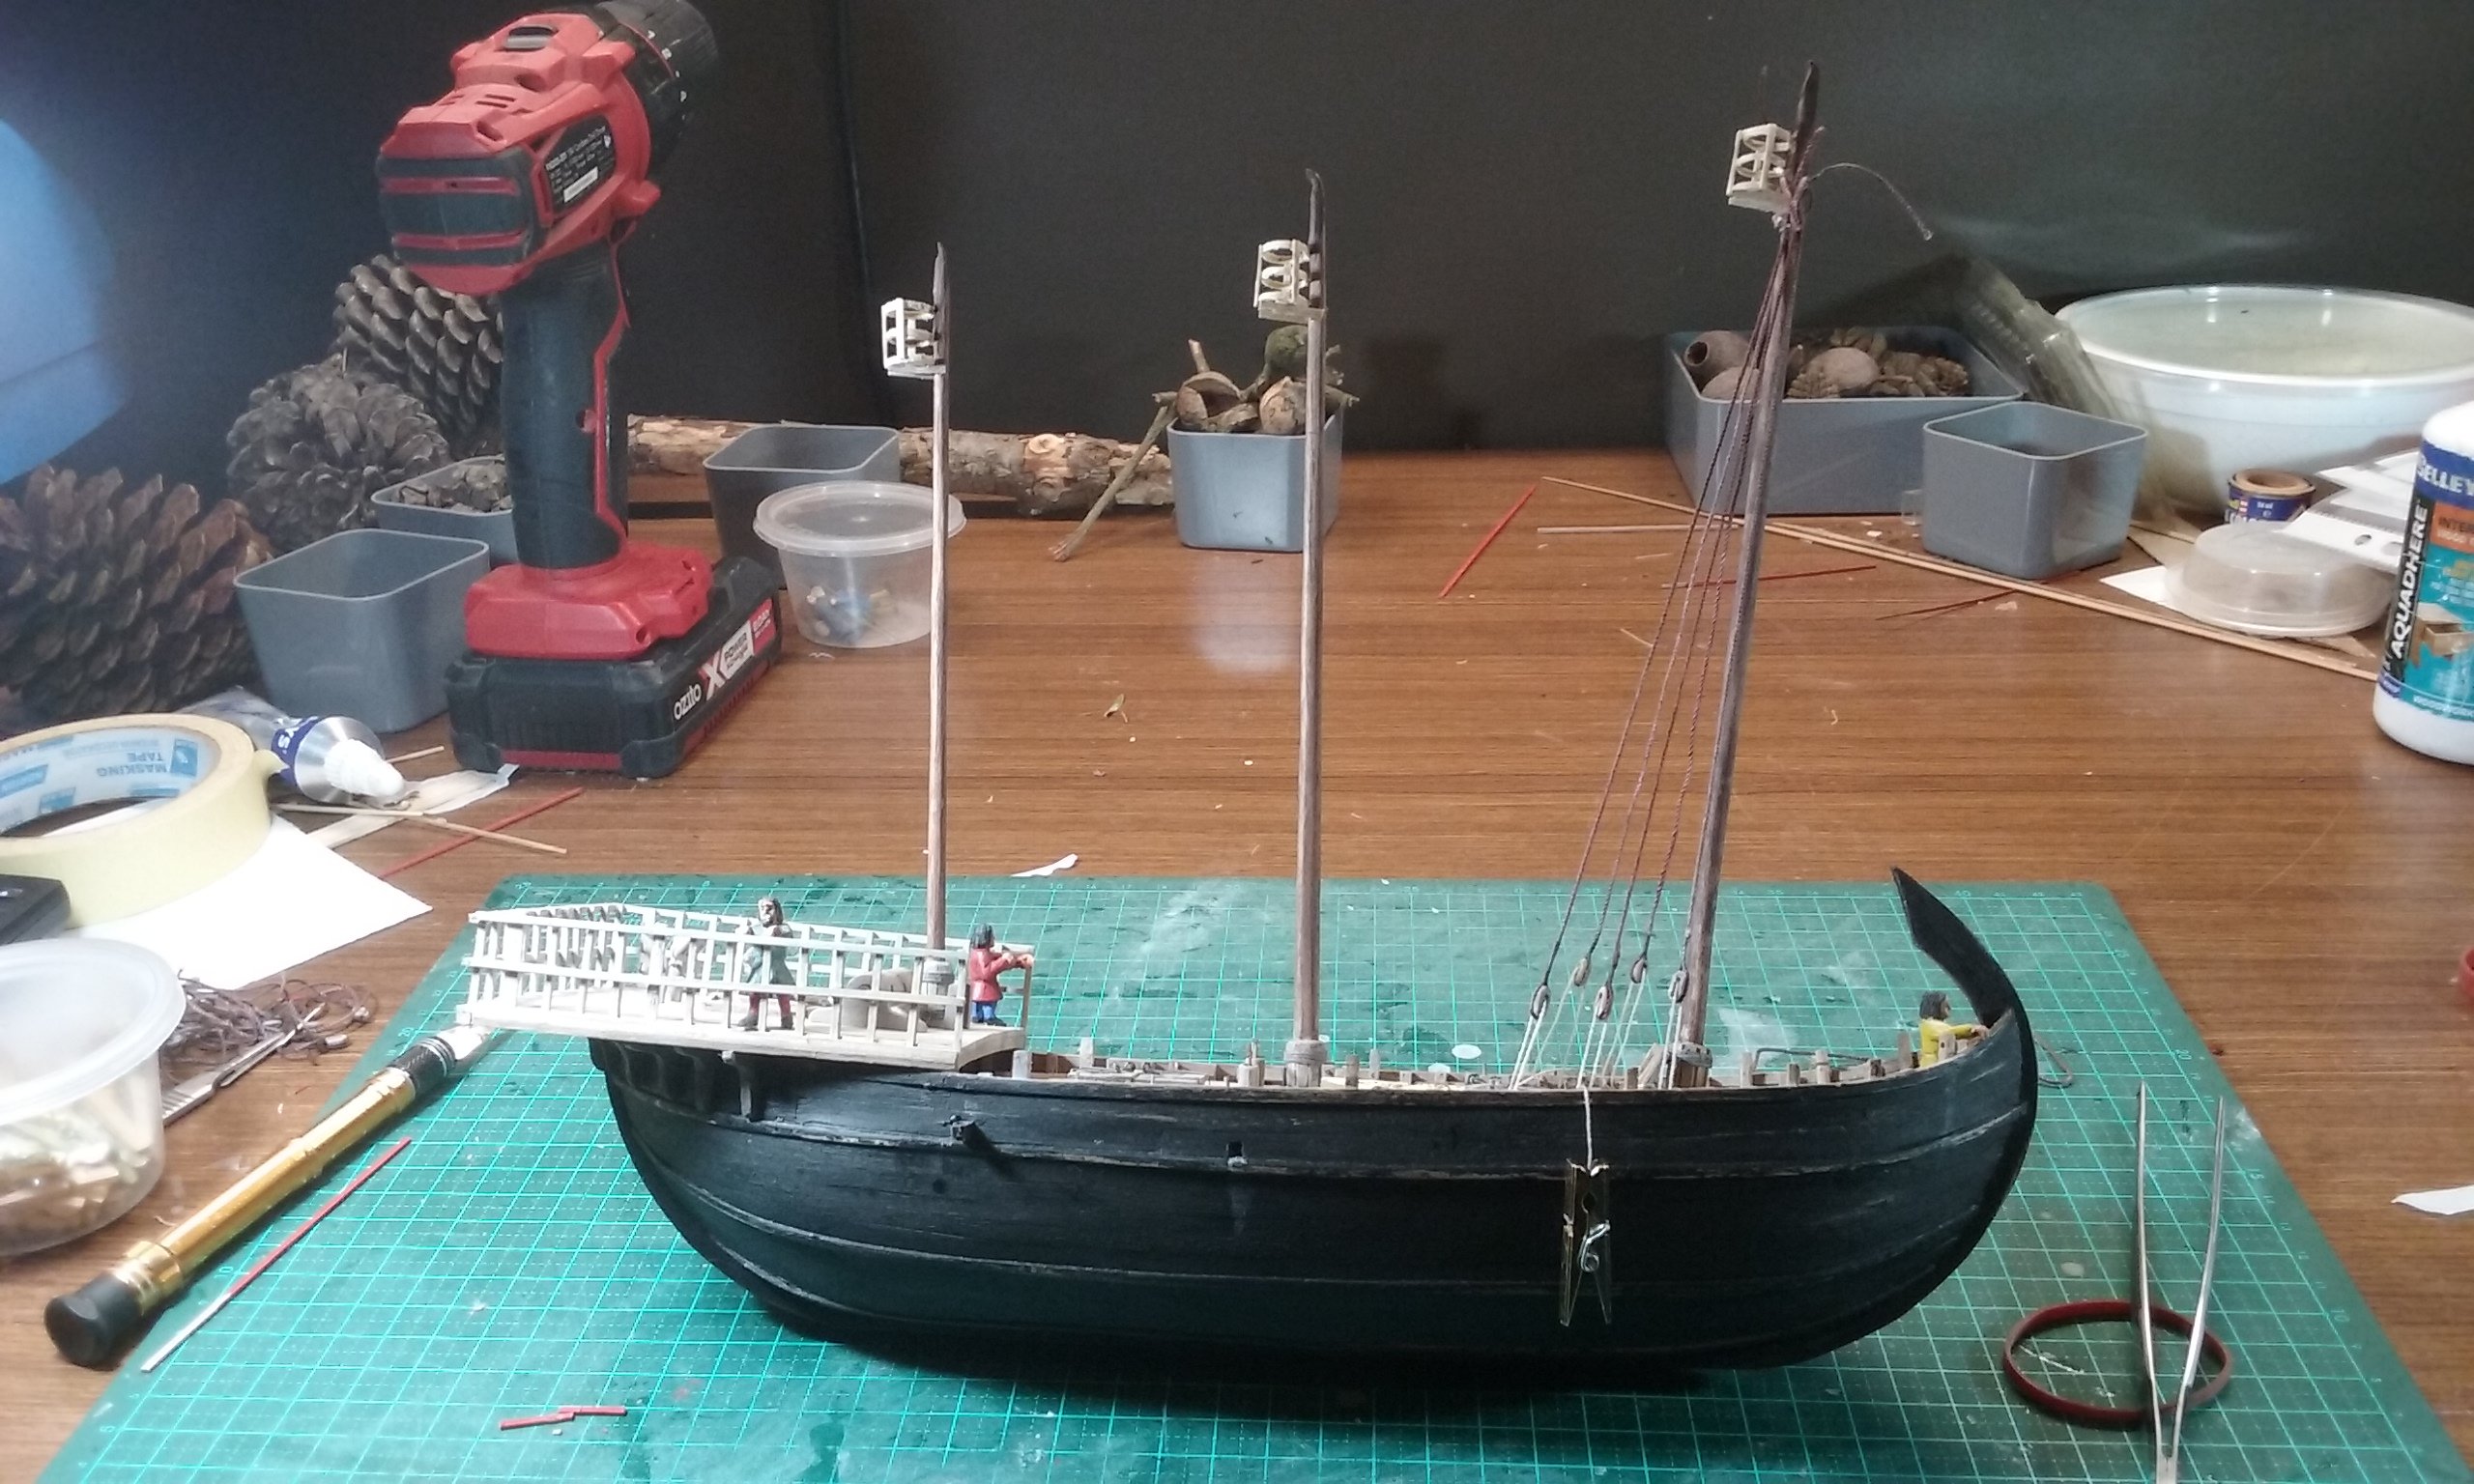
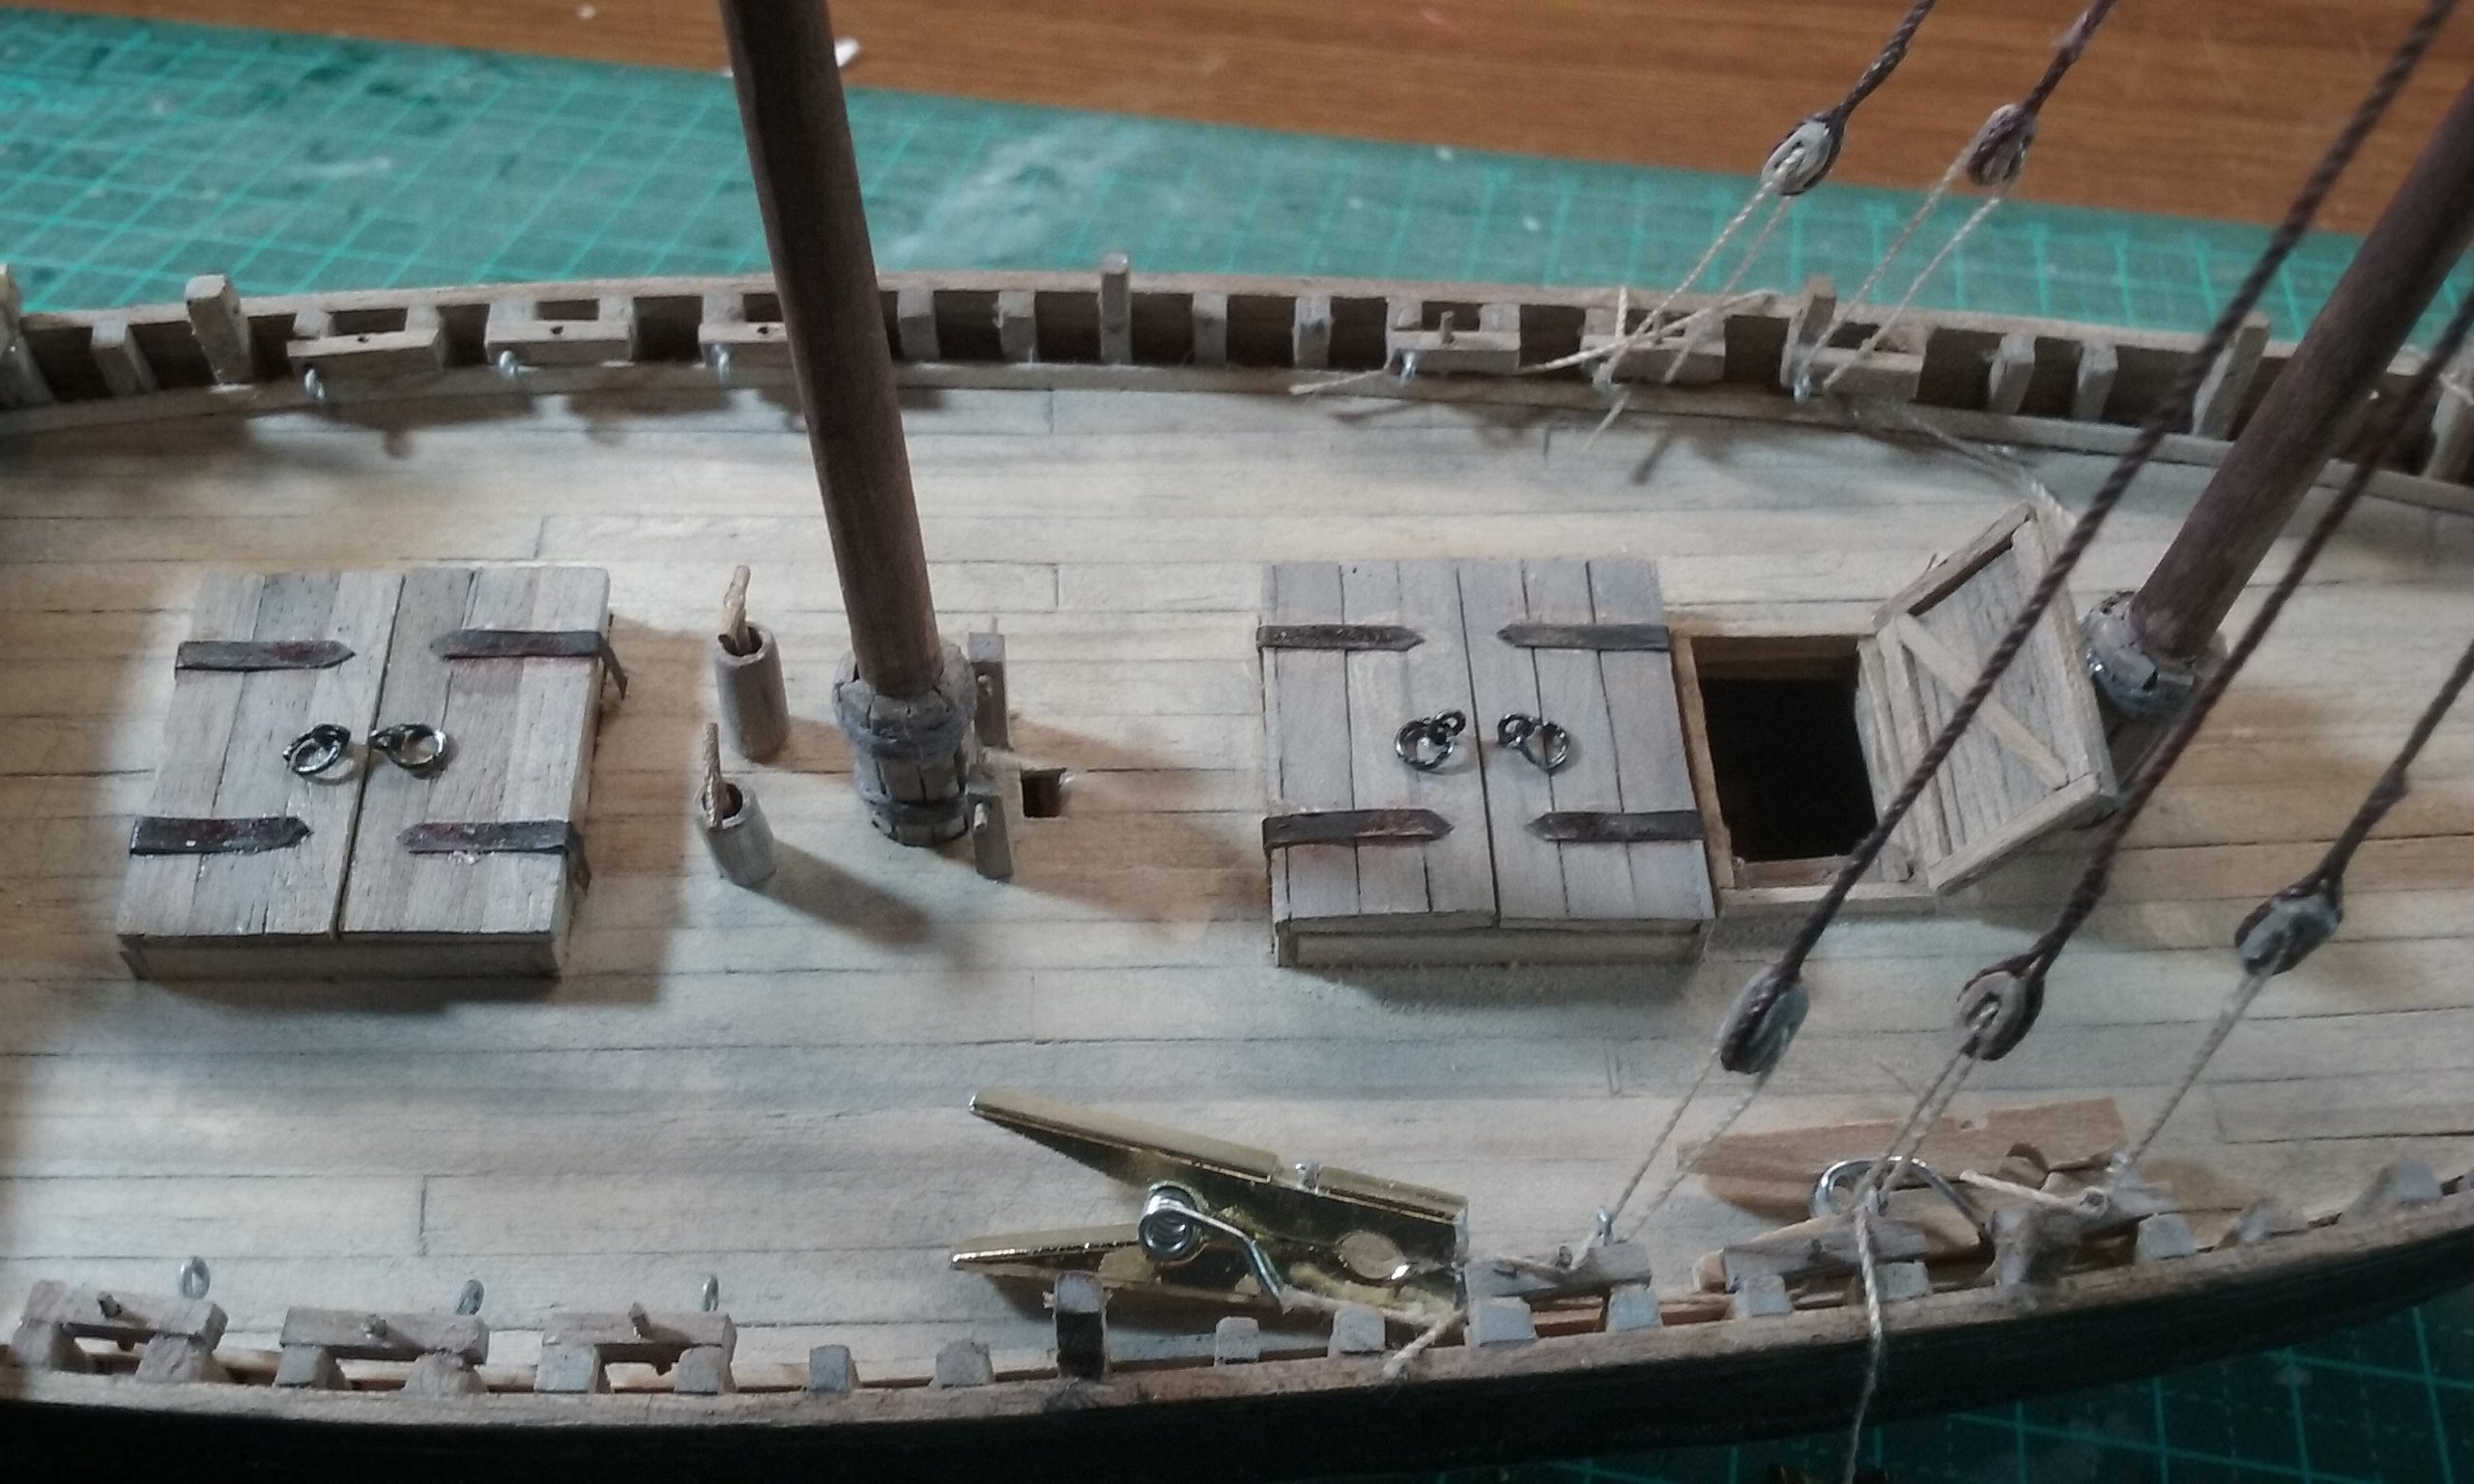
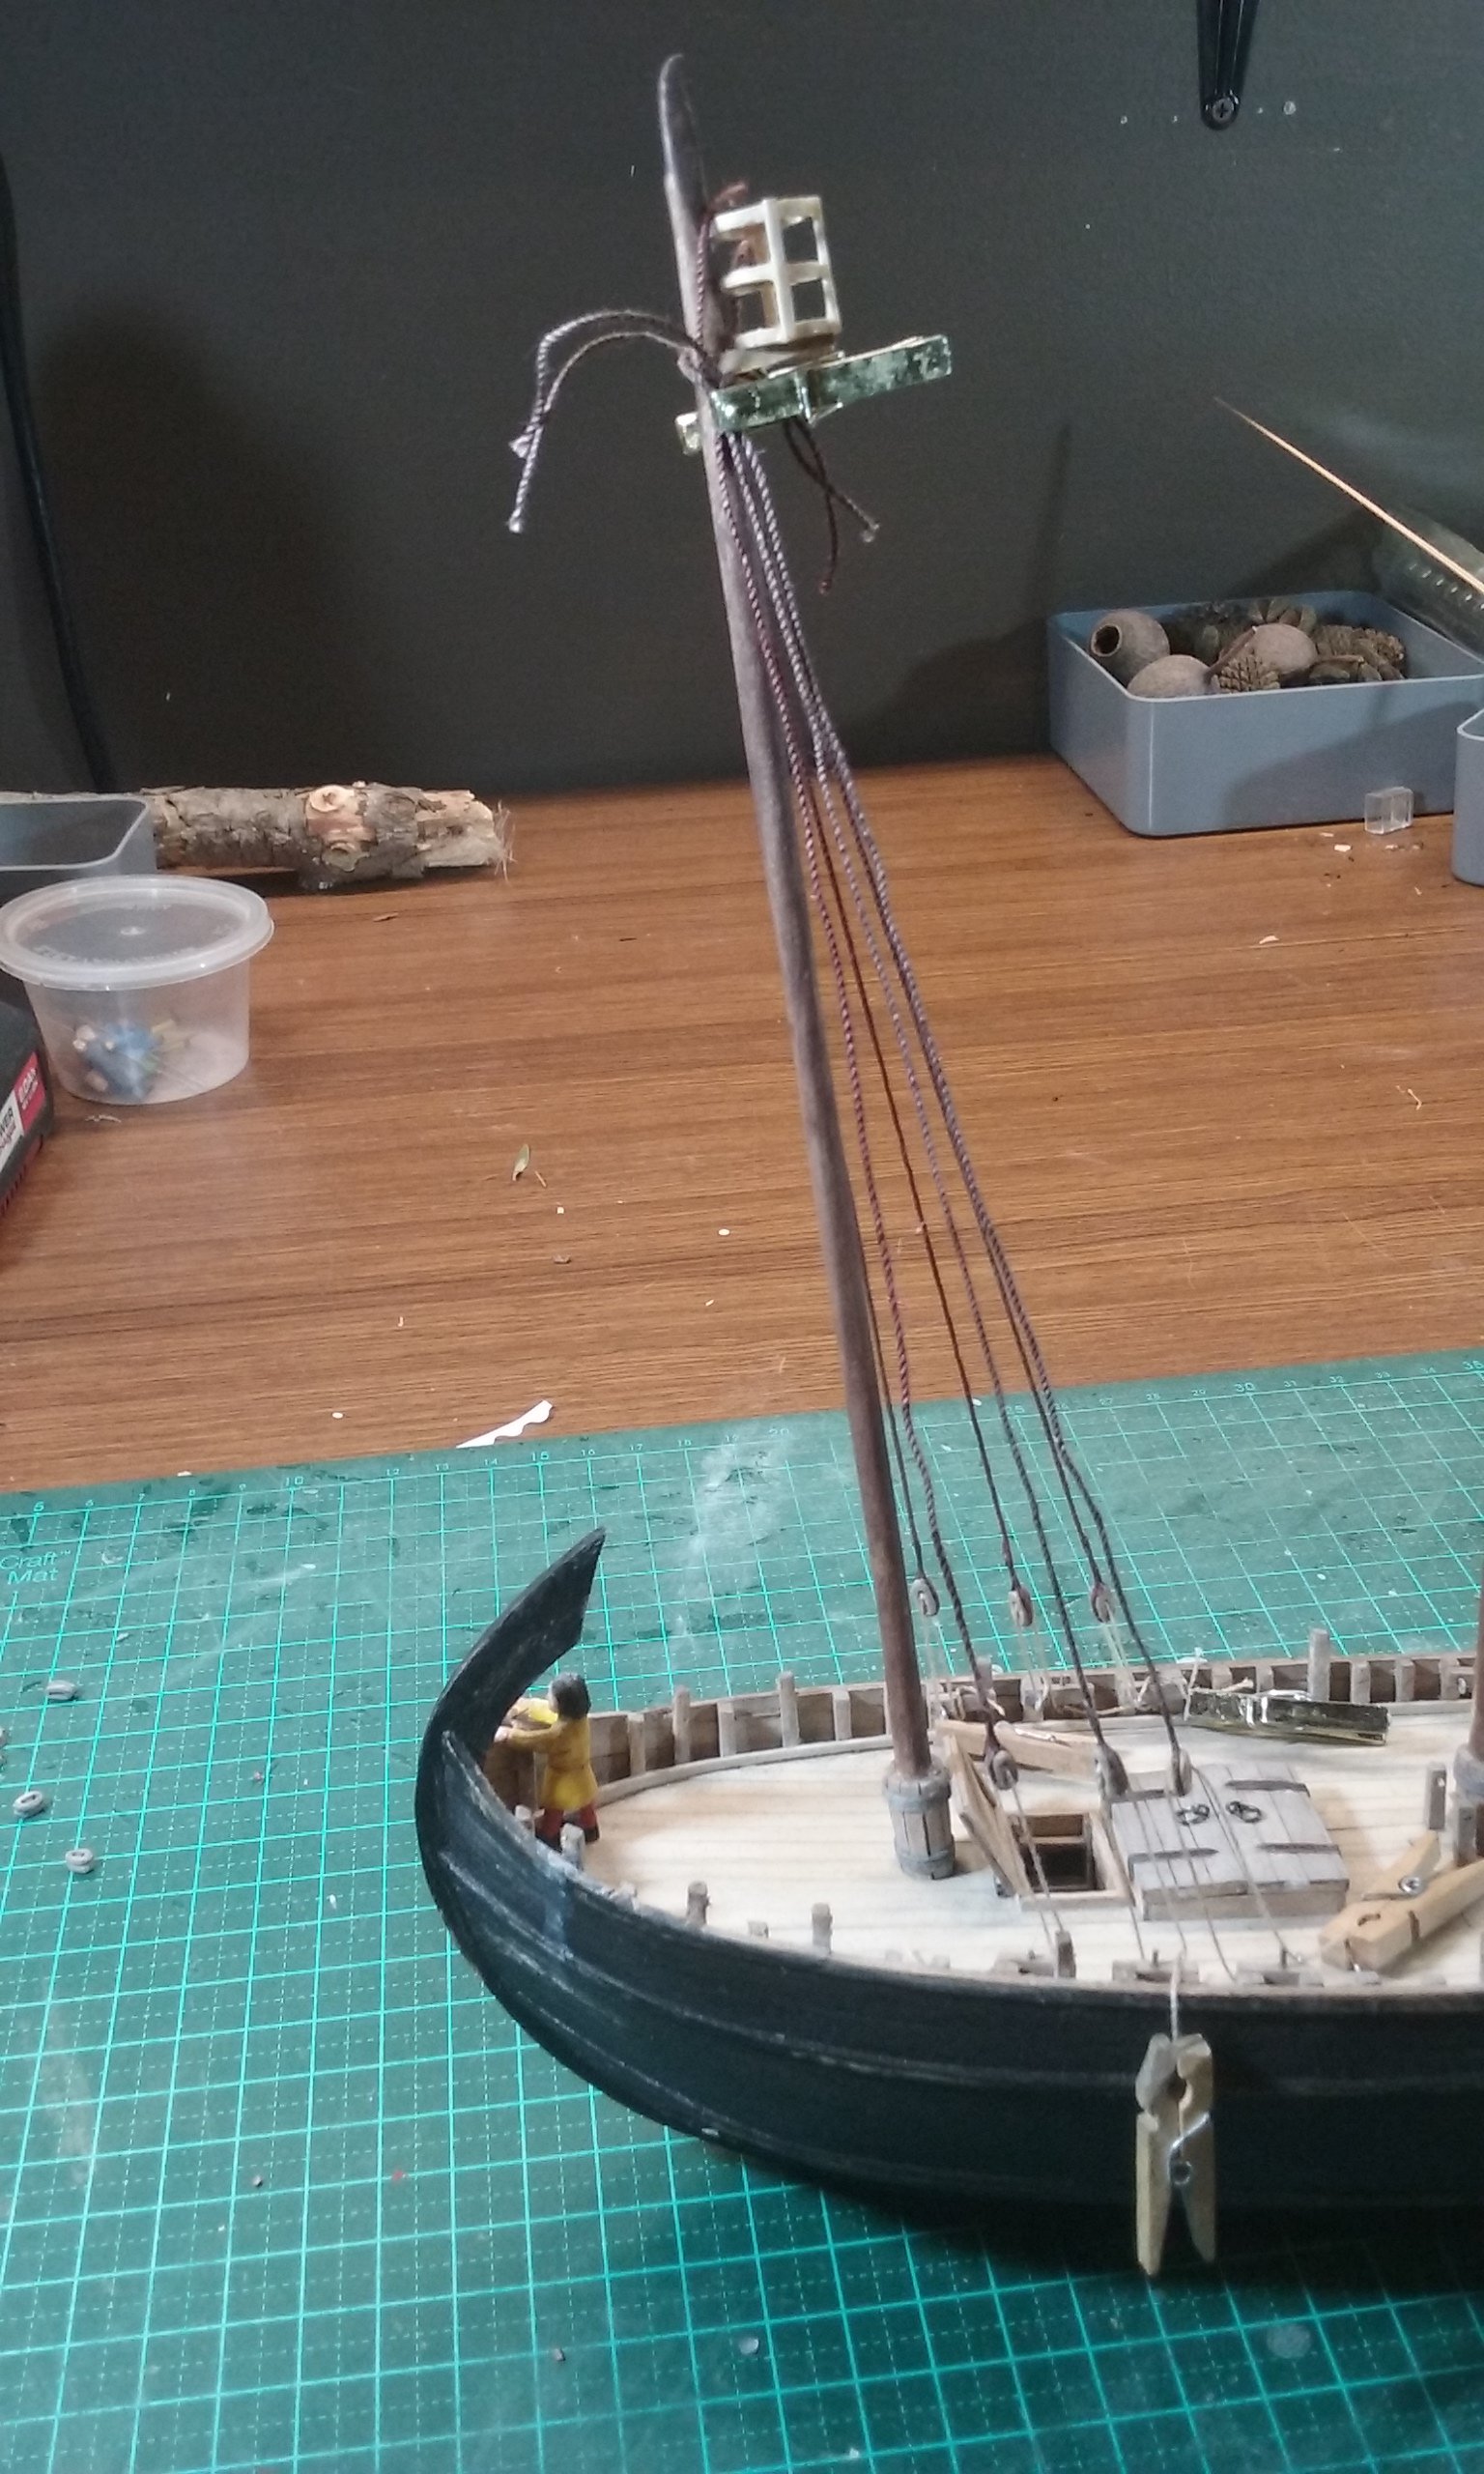
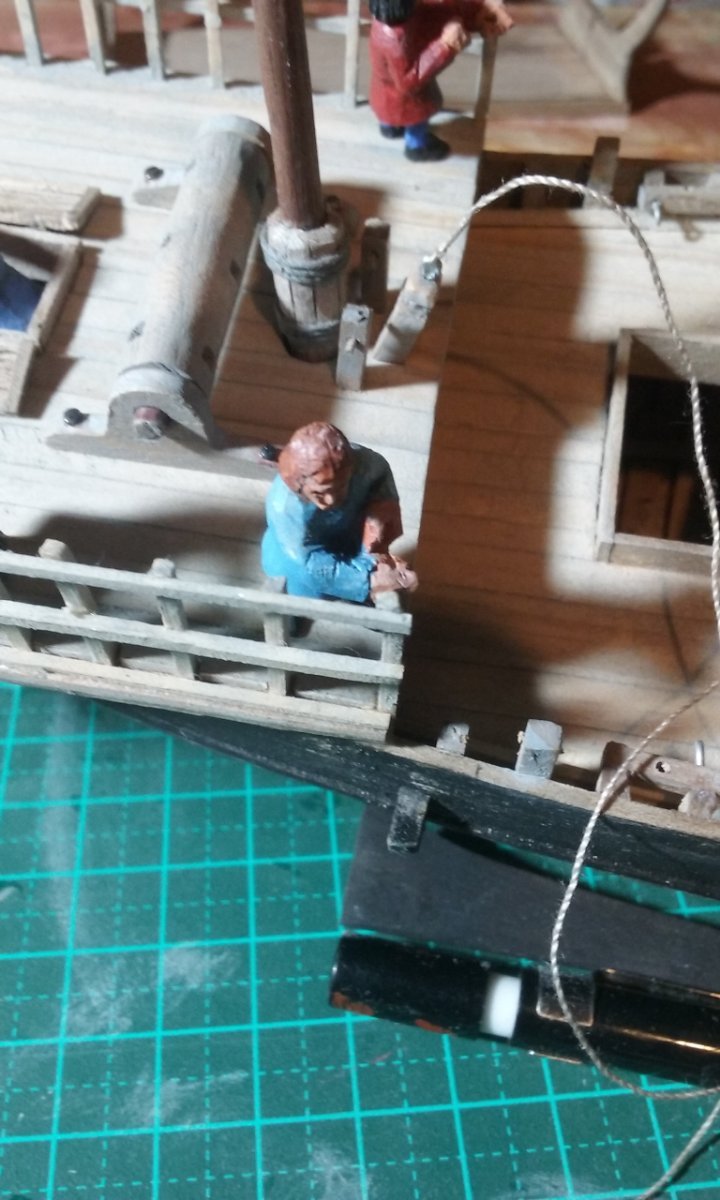
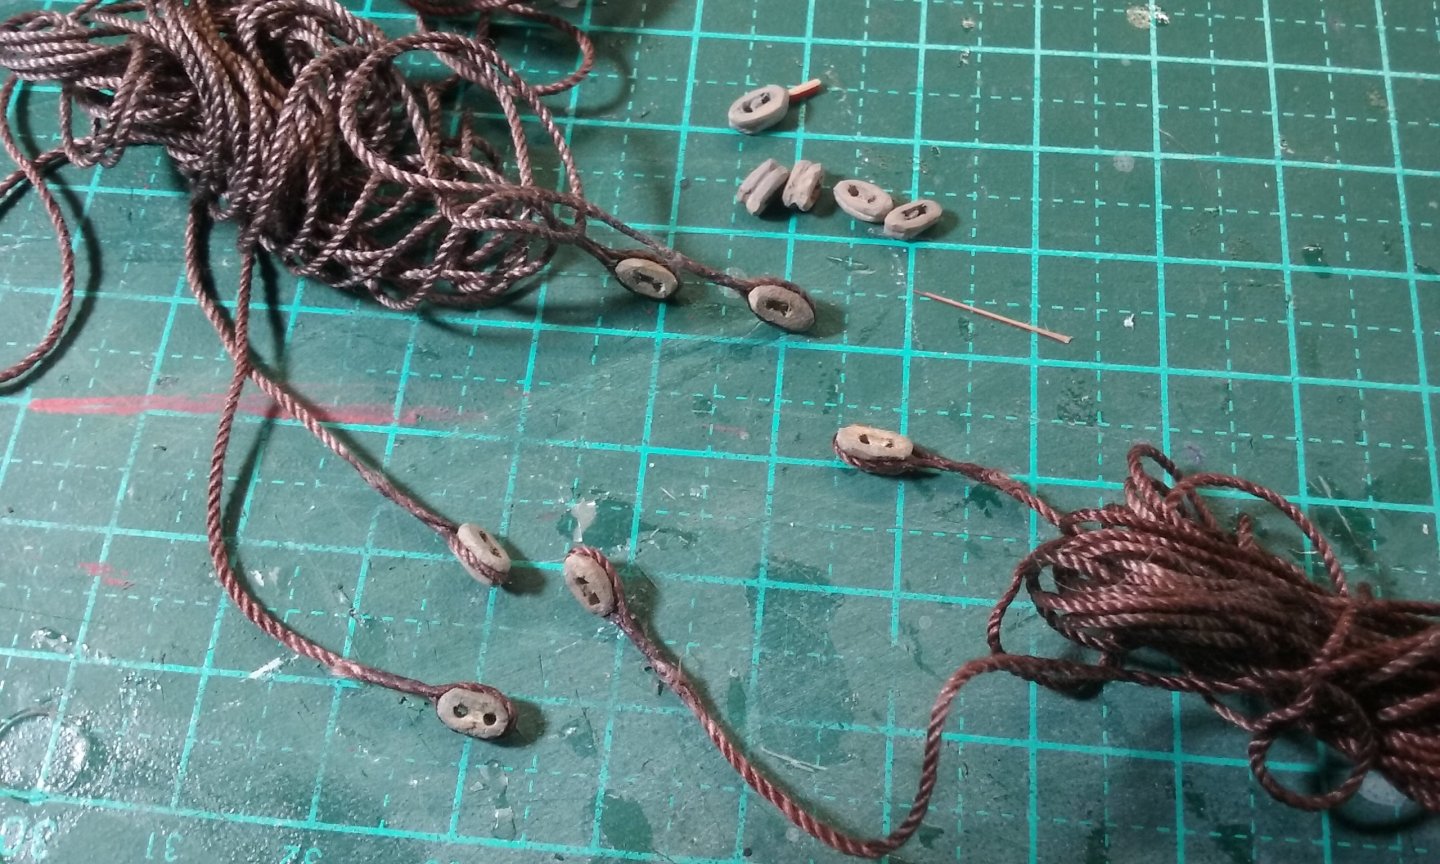
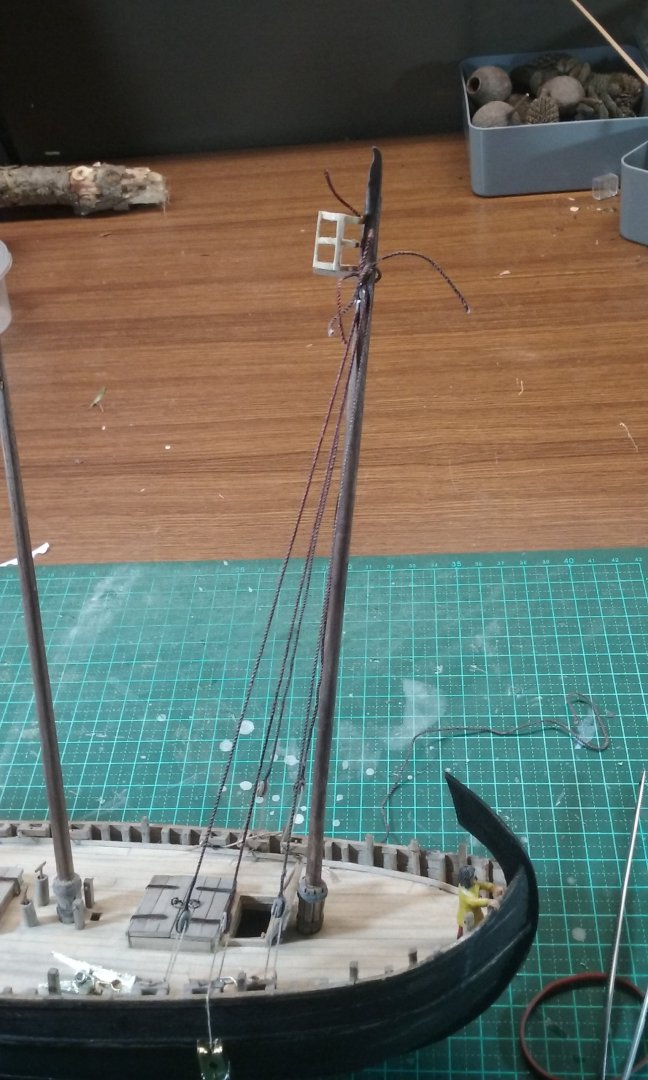
Ian, that block looks like an ordinary block with a toggle each side. Those toggles have been found in archaeology as far back as the 11th century, though I don't know if they've been found from the Classical Roman period. They are very useful for quick attachment and release of different parts of rigging on Mediterranean lateeners - for an example of the toggle in use see my post #1217 at Tony, thanks for your nice comment. Much appreciated. More progress on the San Marco ship. Grab rings for the hatch covers: Hatch covers in place and with grab rings (now blackened) in place. I had to wait until the masts were glued in before I could finalise the hatch covers, otherwise I wouldn't have been able to see the mast steps to guide the masts into position. Shrouds: Foremast starboard shrouds in place: All foremast shrouds in place. The port shrouds are loose because the lateen sail was within the shrouds - if the leeward shrouds were kept tight they would interfere with the sail as it bellied out with the wind. Getting ready for tomorrow's Modelling Exhibition! while I'm sitting there keeping people (and their precious little darlings) from touching my models with their sticky fingers I'll probably be working on positioning the halyards and their tackle, and adding the blocks for the tacks to the yards. Steven


- 508 replies
-
- 12
-

-
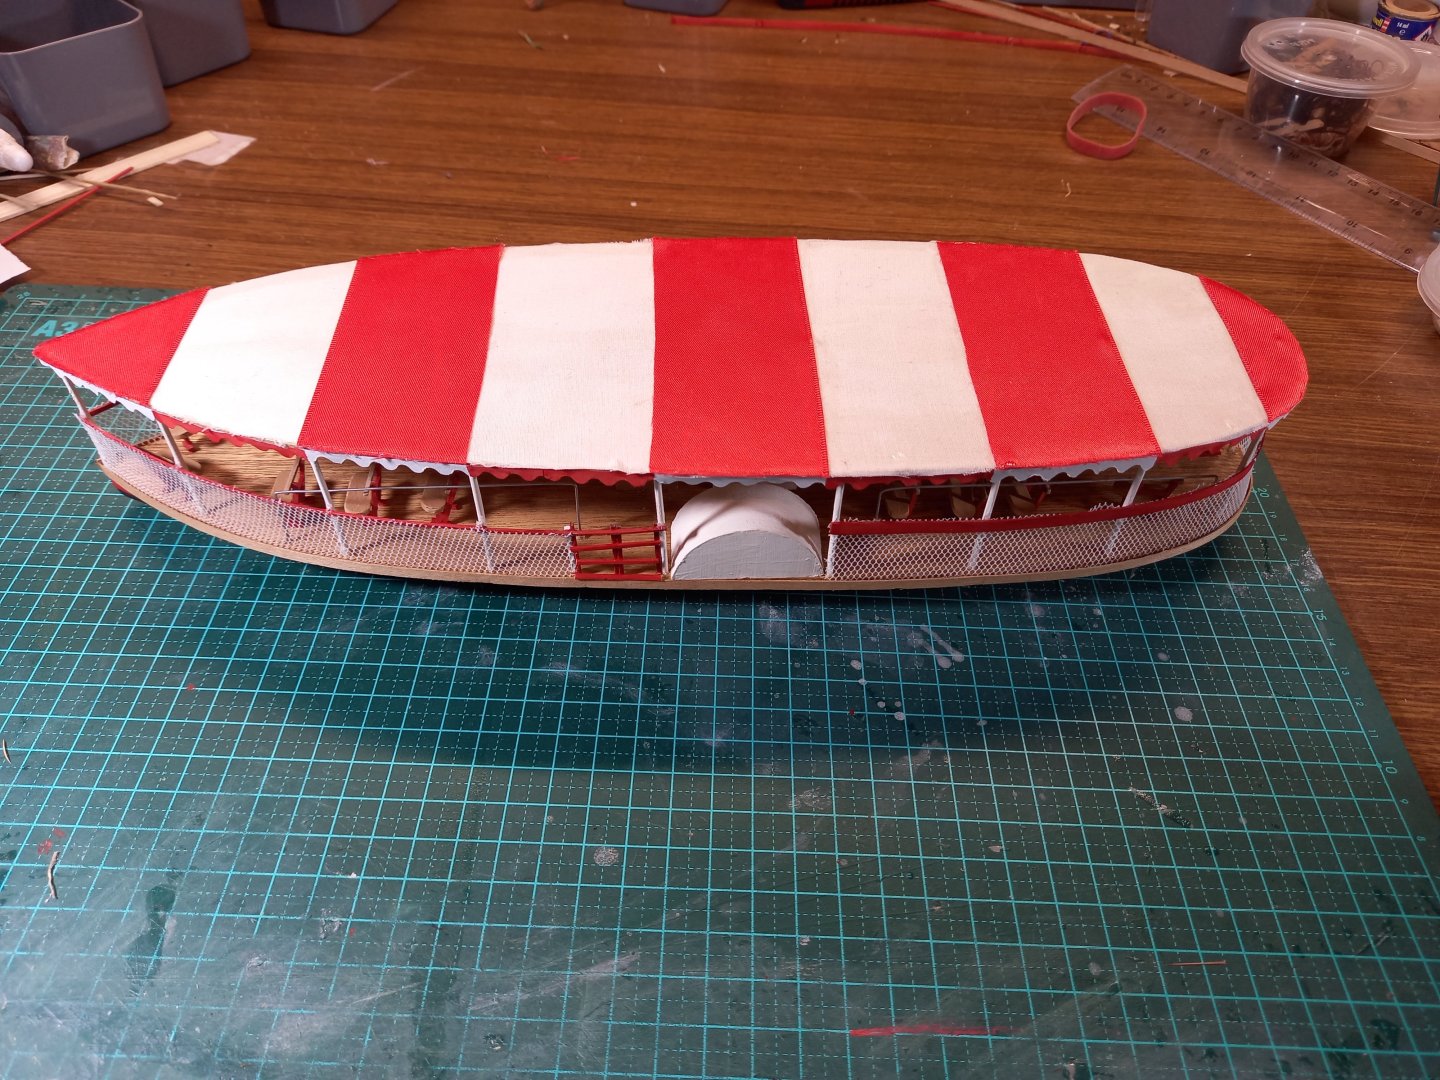
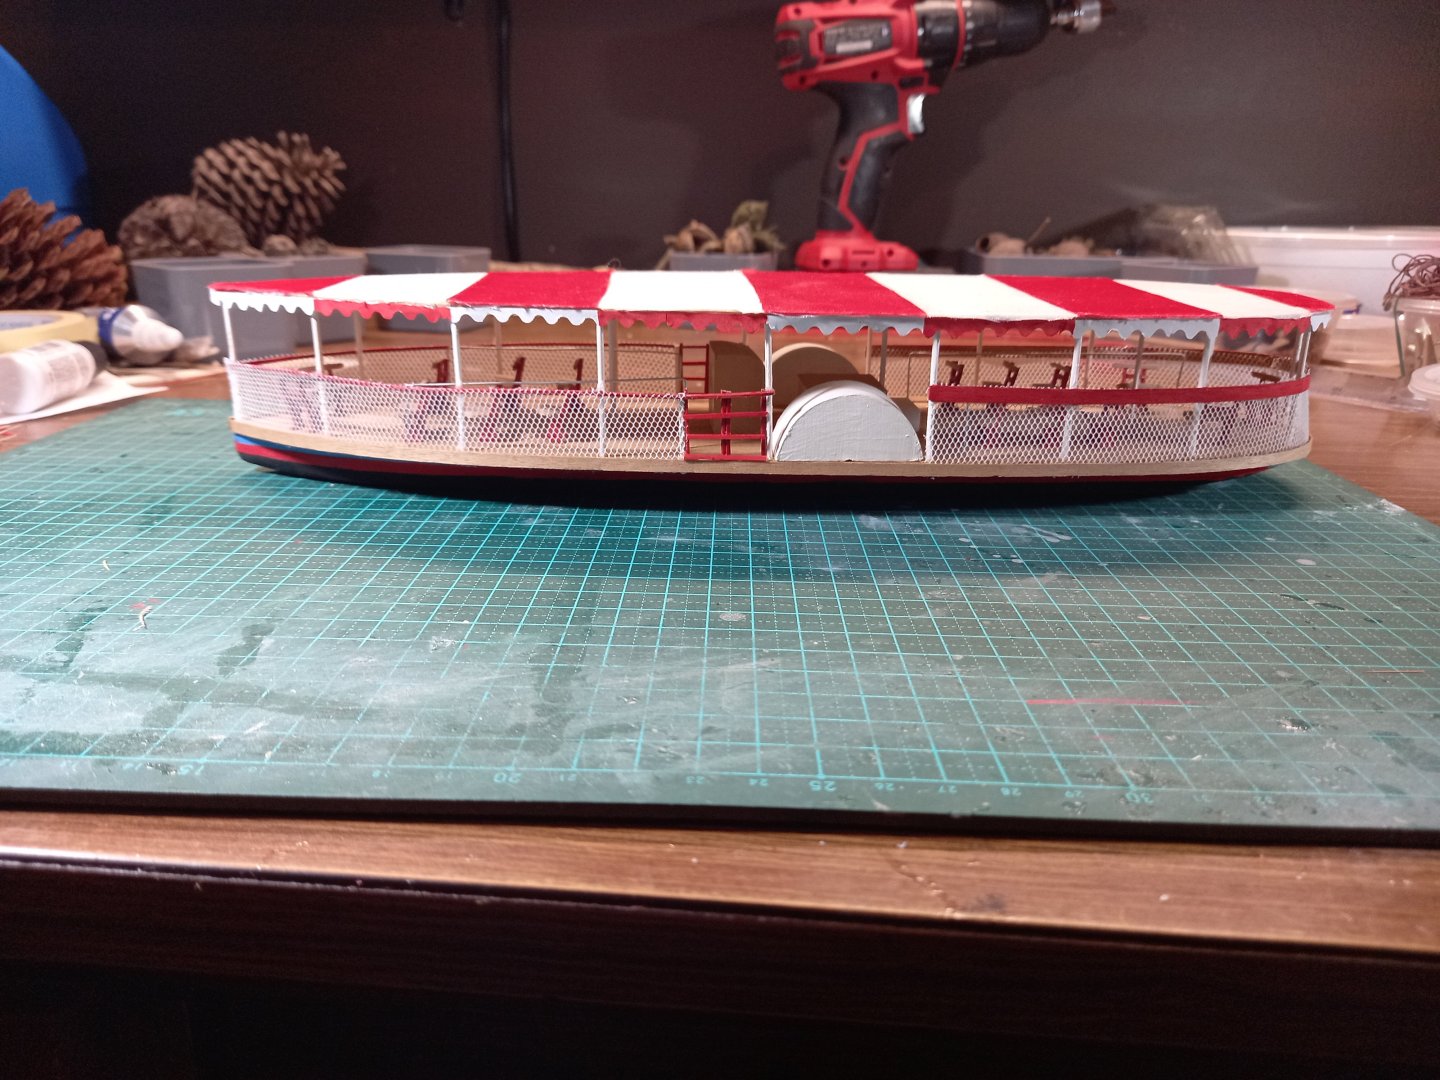
And the little gates fixed - a bit rough and ready, but at least well enough for a prototype. When it comes to the "good one" at 1:25 I'll be more careful and finish them better. Ready for tomorrow's exhibition. Steven
- 110 replies
-
- 8
-
-
- Paddlewheeler
- Ballarat
- (and 3 more)
-
Beautiful work, Patrick! You're making good progress. Steven
-
Thanks for all the likes. Druxey, I don't know how many I'll make, but the purpose right from the start was to work out how to make multiples without too much waste effort. Not the same as my usual builds, where the research and the figuring out are as much fun as the making. It'll be a bit of a sideline which doesn't make too many demands on my problem-solving abilities, just more of a relaxing thing when I have a bit of spare time. I've already got about half a dozen hulls cut out ready to go further. Not really in any hurry. Steven
- 110 replies
-
- 3
-
-
- Paddlewheeler
- Ballarat
- (and 3 more)
-
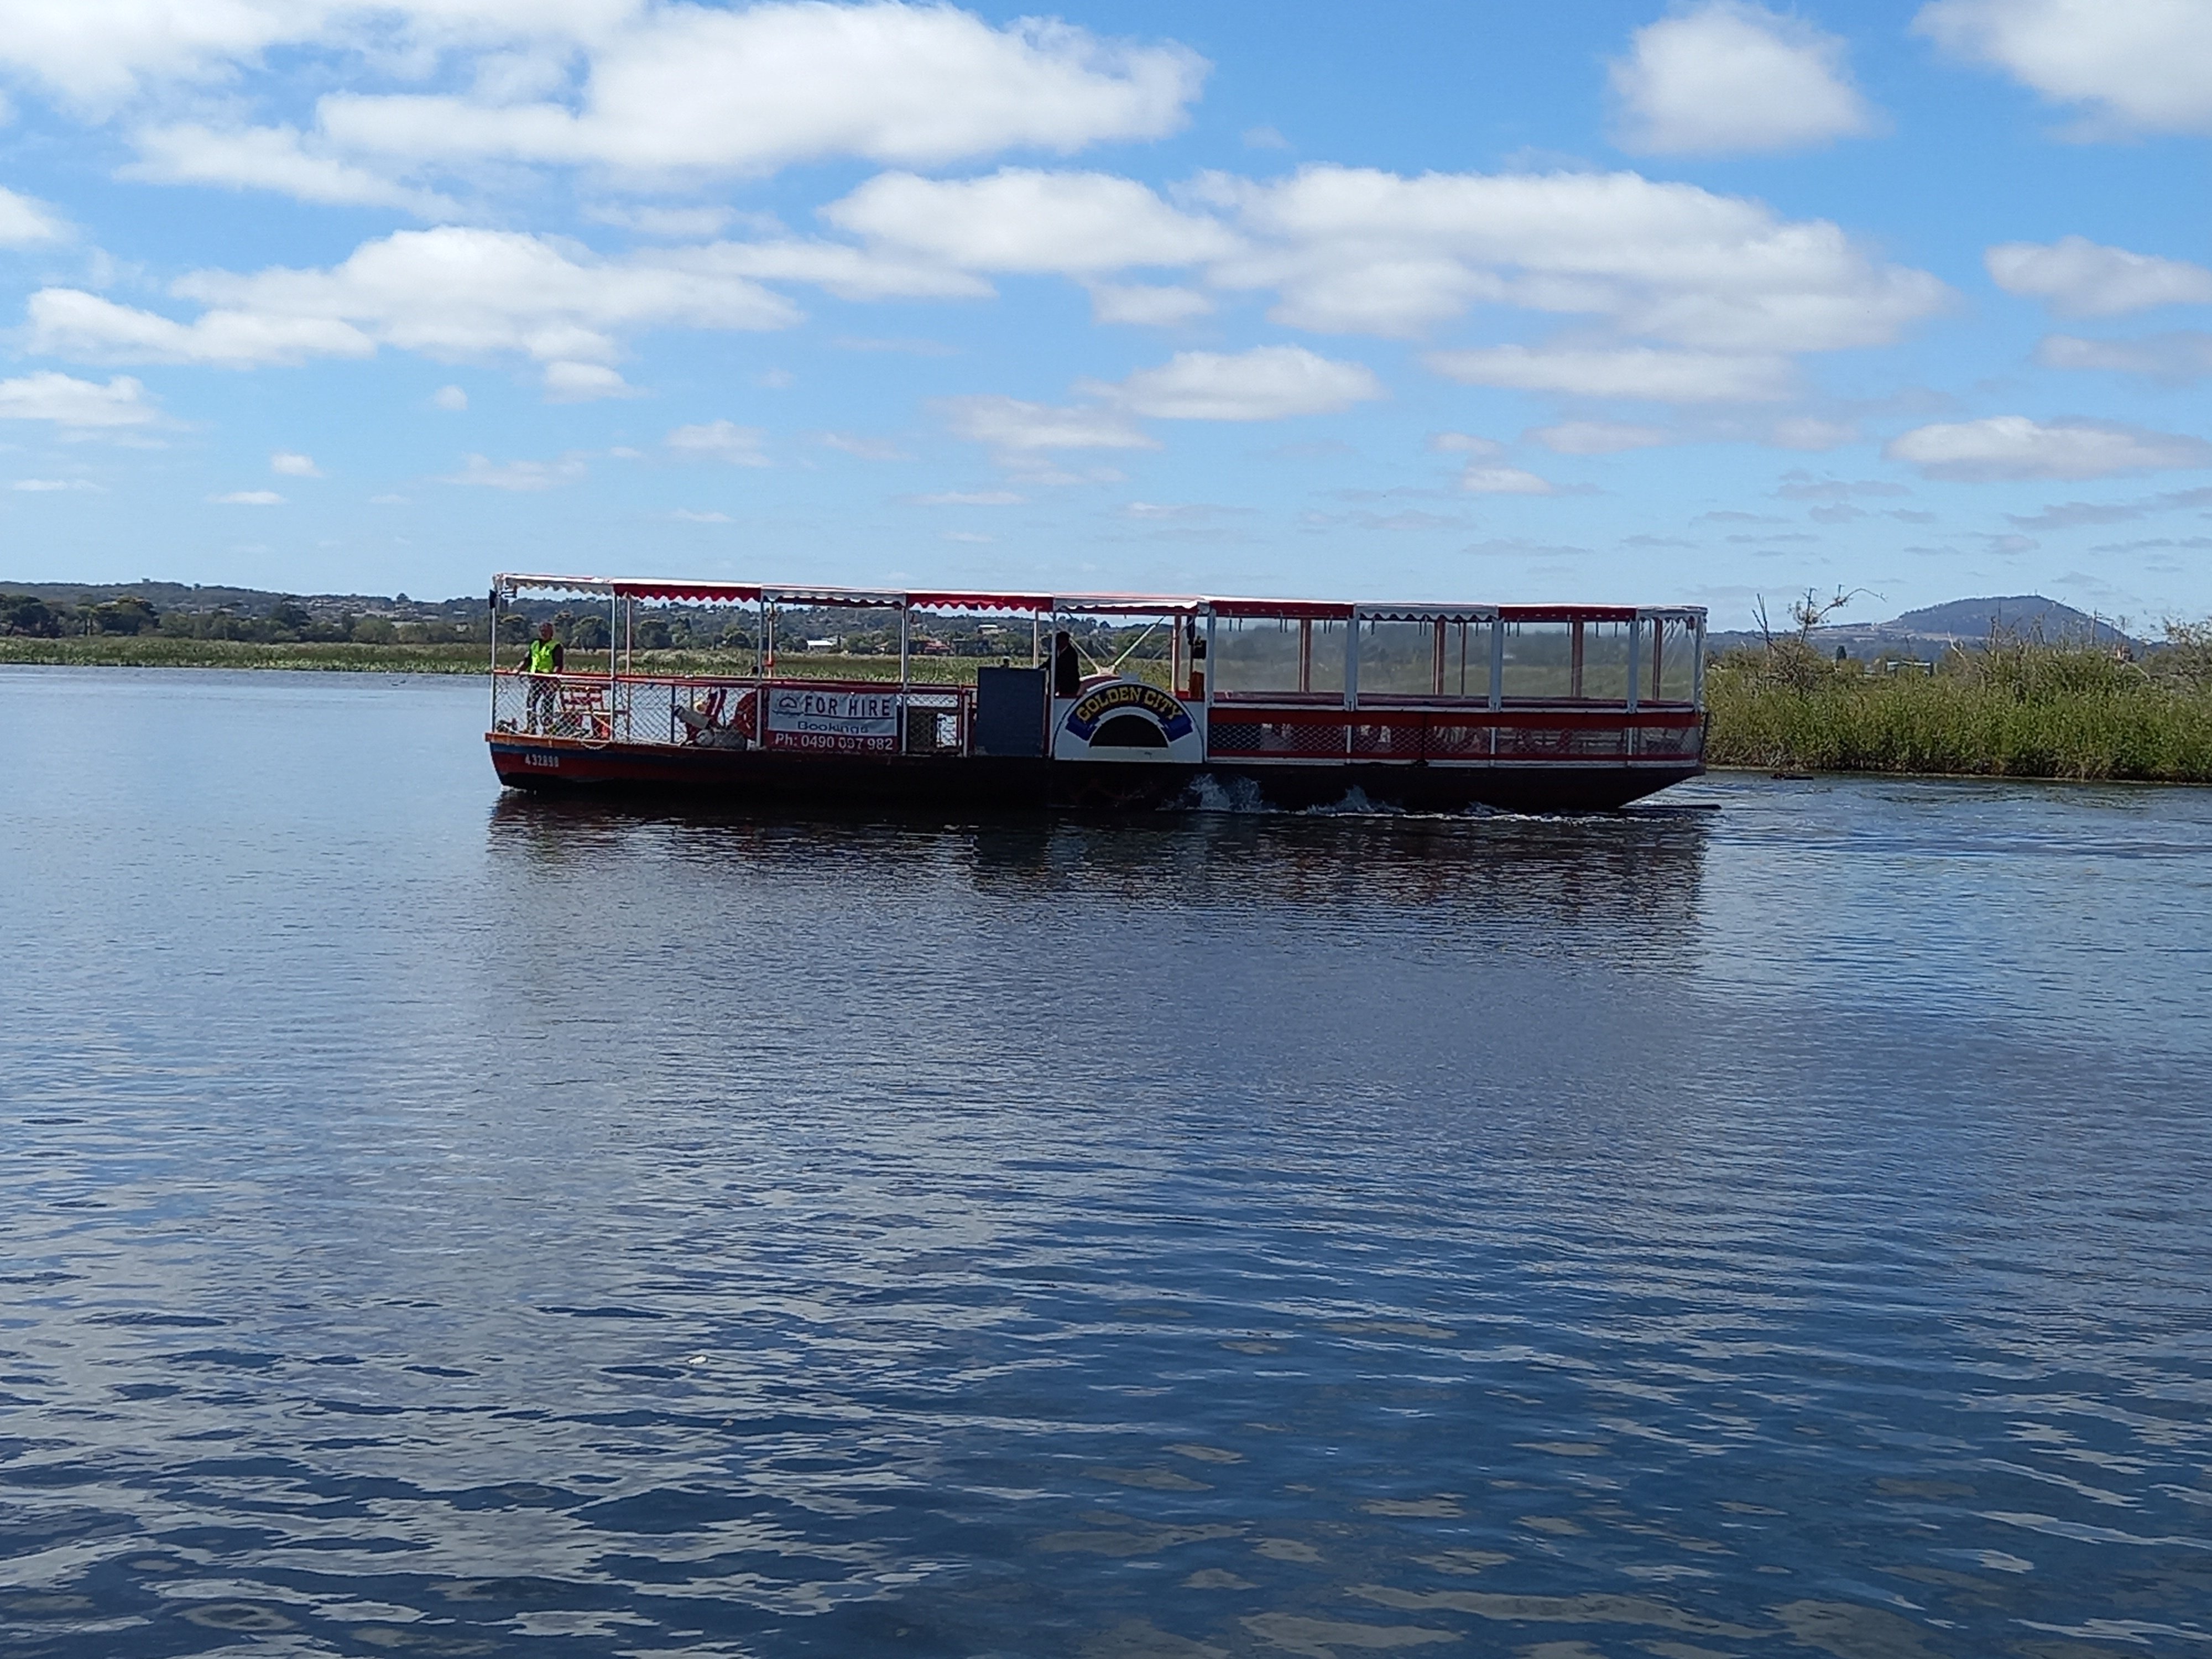
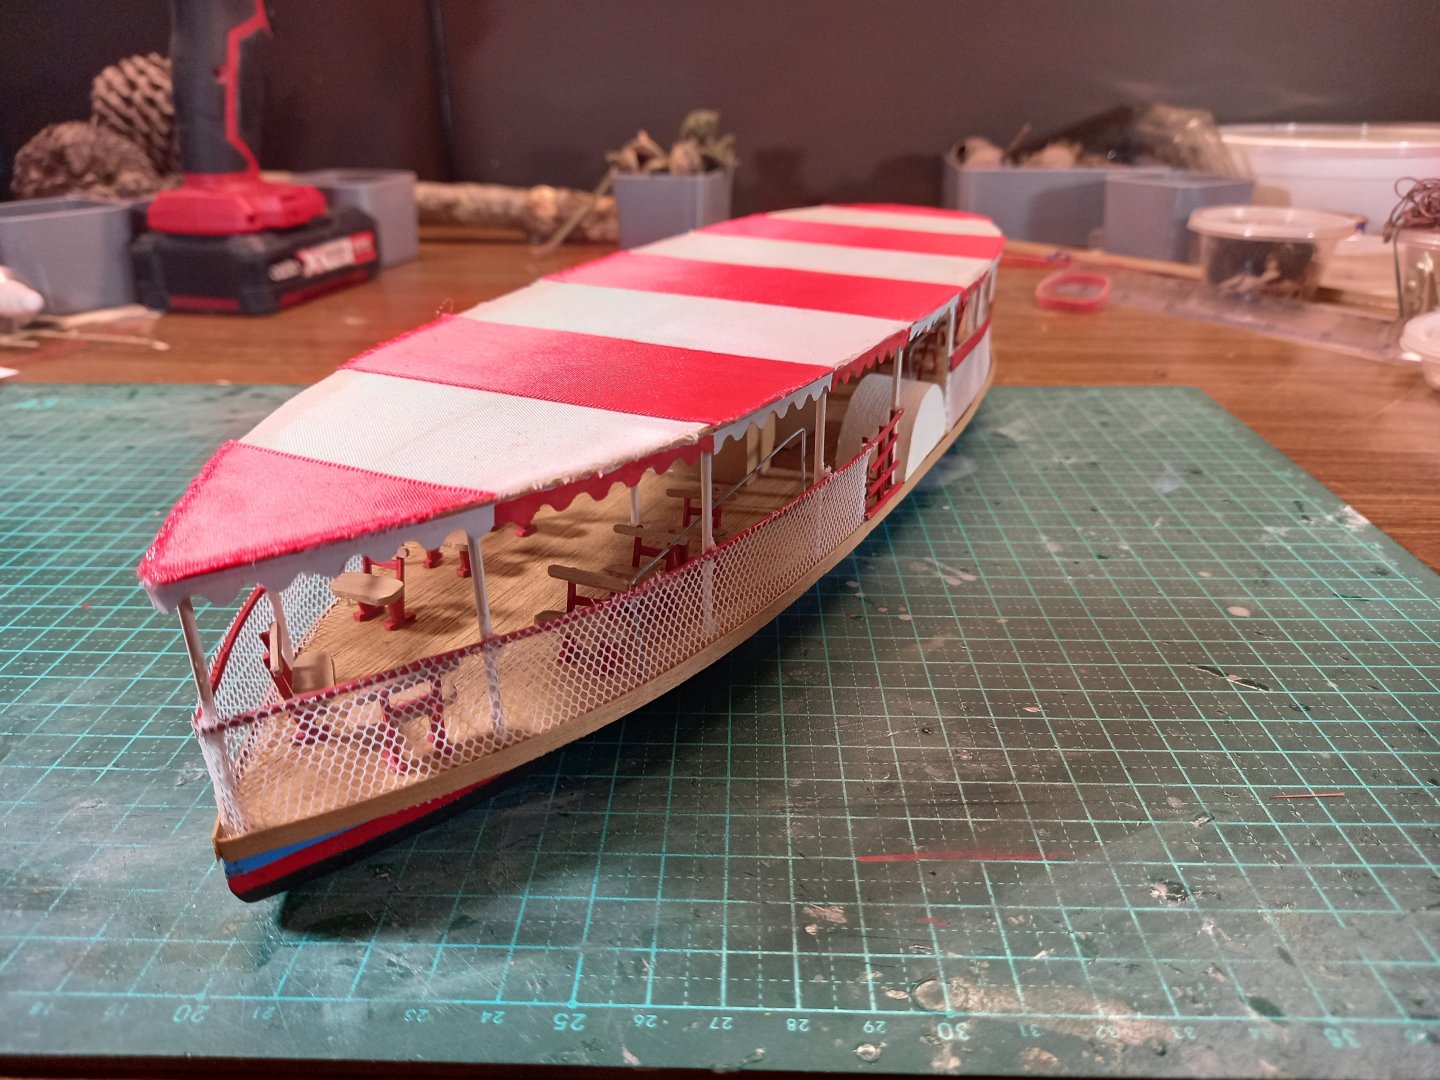
Almost finished, just in time for an exhibition by the modelling club I'm in. It's a little rough and ready because it's a prototype, but that's OK. When I come to do the finalised one I'll put the lessons I've leaned doing this one into practice. In the meantime, a bit more paintwork, (adding the vessel's registration number and name) and I really need to re-do those little red gates amidships - a bit *too* rough and ready! And here's the real thing. Steven

- 110 replies
-
- 16
-
-

-
- Paddlewheeler
- Ballarat
- (and 3 more)
-
I agree with Patrick and Stevinne. This was a very common size for forecastles at this time - see https://www.pinterest.com.au/lowe1847/great-carracksnaos/ - beginning as a quite low structure the forecastle got bigger and bigger and more unwieldy, presumably to give advantage in boarding/deterring boarding. It probably made the ships very crank, and this plus the adoption of big guns which made boarding a less vital part of normal tactics, probably led to the adoption of the lower sleeker galleon. Of course I could be biased. Here's the forecastle of my own Great Harry, Mary Rose's big sister. Steven
-
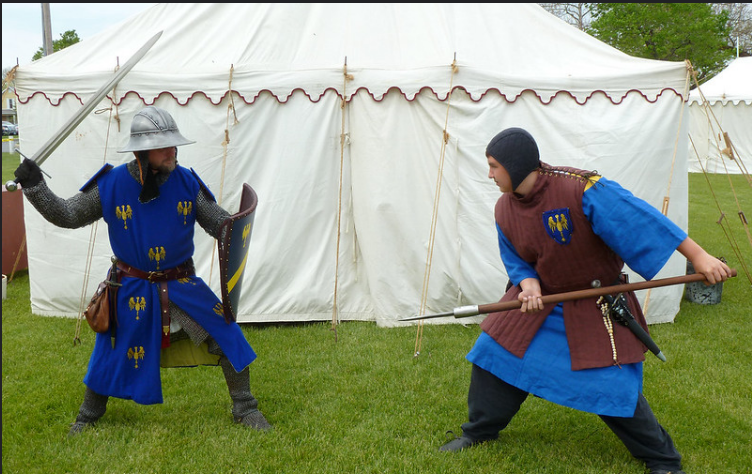
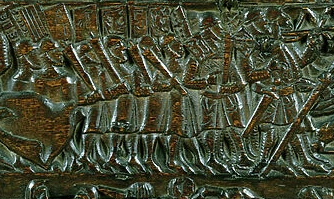
That's interesting - the goedendag is mentioned as being one of the most common weapons of the victorious Flemish army at the Battle of Courtrai (also known as the battle of the Golden Spurs because of the huge number of golden spurs looted from dead French knights), but a wooden chest commemorating the battle shows them like this: And remnants have been found of the real thing: https://www.military-history.org/feature/medieval/the-goedendag-medieval-weaponry.htm Of course Flemish re-enactors have adopted this nasty thing (though only for display purposes - much too nasty to really fight with) Steven
-
When I lived in Port Hedland (NW coast) the iron ore trains were 3 km (2 miles) long. One broke down in the middle of nowhere and a repair engine was sent to get it going again. Unfortunately, the location he was given was the far end of the train, so he slammed into it going umpty ump miles an hour, 3 km too early. Steven PS: Probably enough Australiana - back to our scheduled programme.
-
Thanks, Dick. I had been puzzling over this very issue and hadn't come up with a workable solution - apart from perhaps having the ladder going off to the side! (Perhaps great minds think alike.) Certainly, the contemporary pictures are quite equivocal - they could be interpreted as having the ladders either behind or to the side of the mast - except that some show two ladders, one on each side of the mast, each leading down to the relevant gunwale. I don't know if I'm prepared to do two for each mast - I'm still thinking about it. As far as what the rungs should be made of, I know you used wood, and that would probably be easier to make than rope ones, but I'm still not certain which way I'm going to go. Steven
-
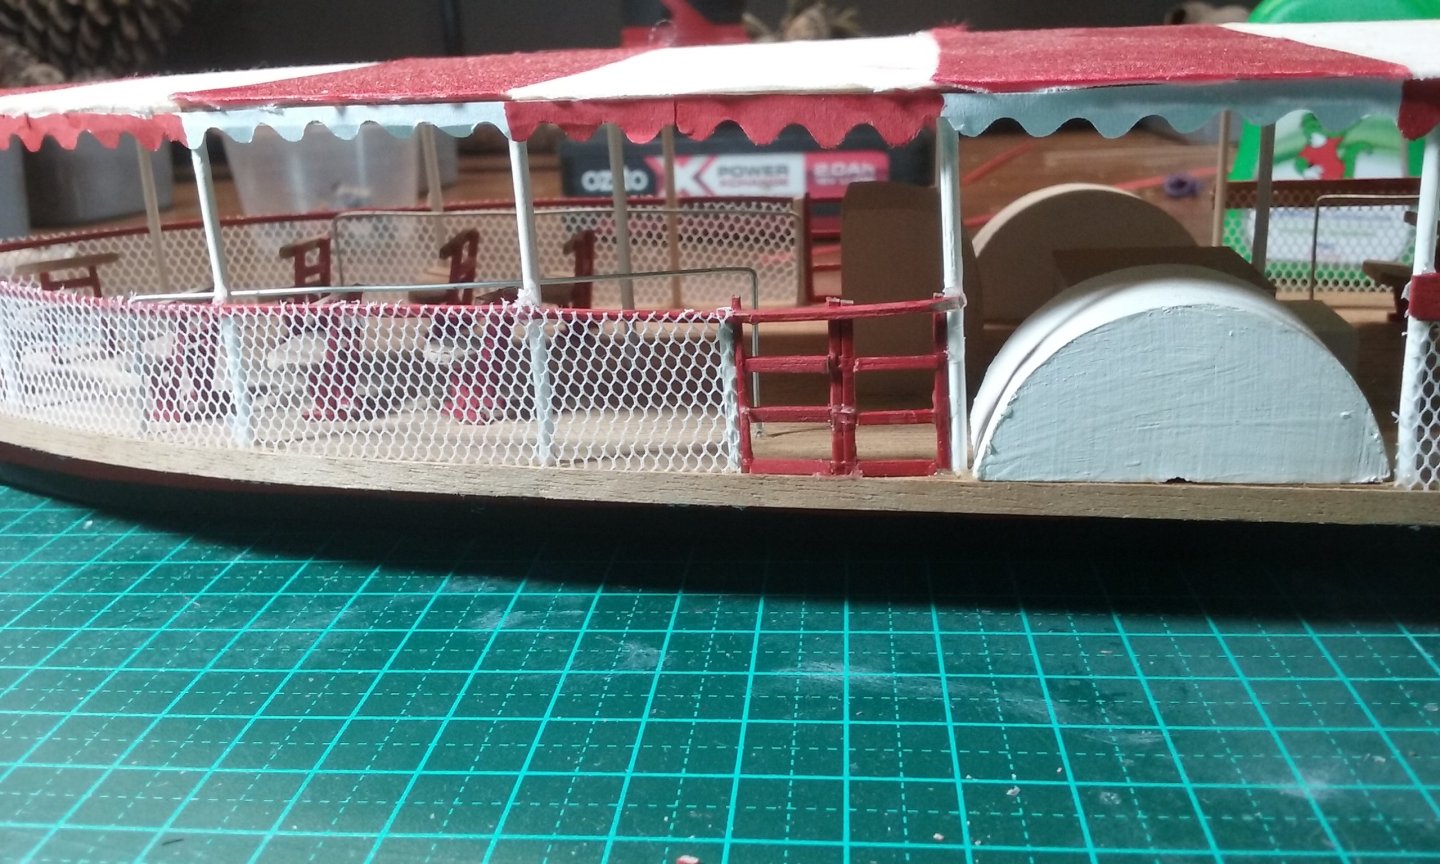
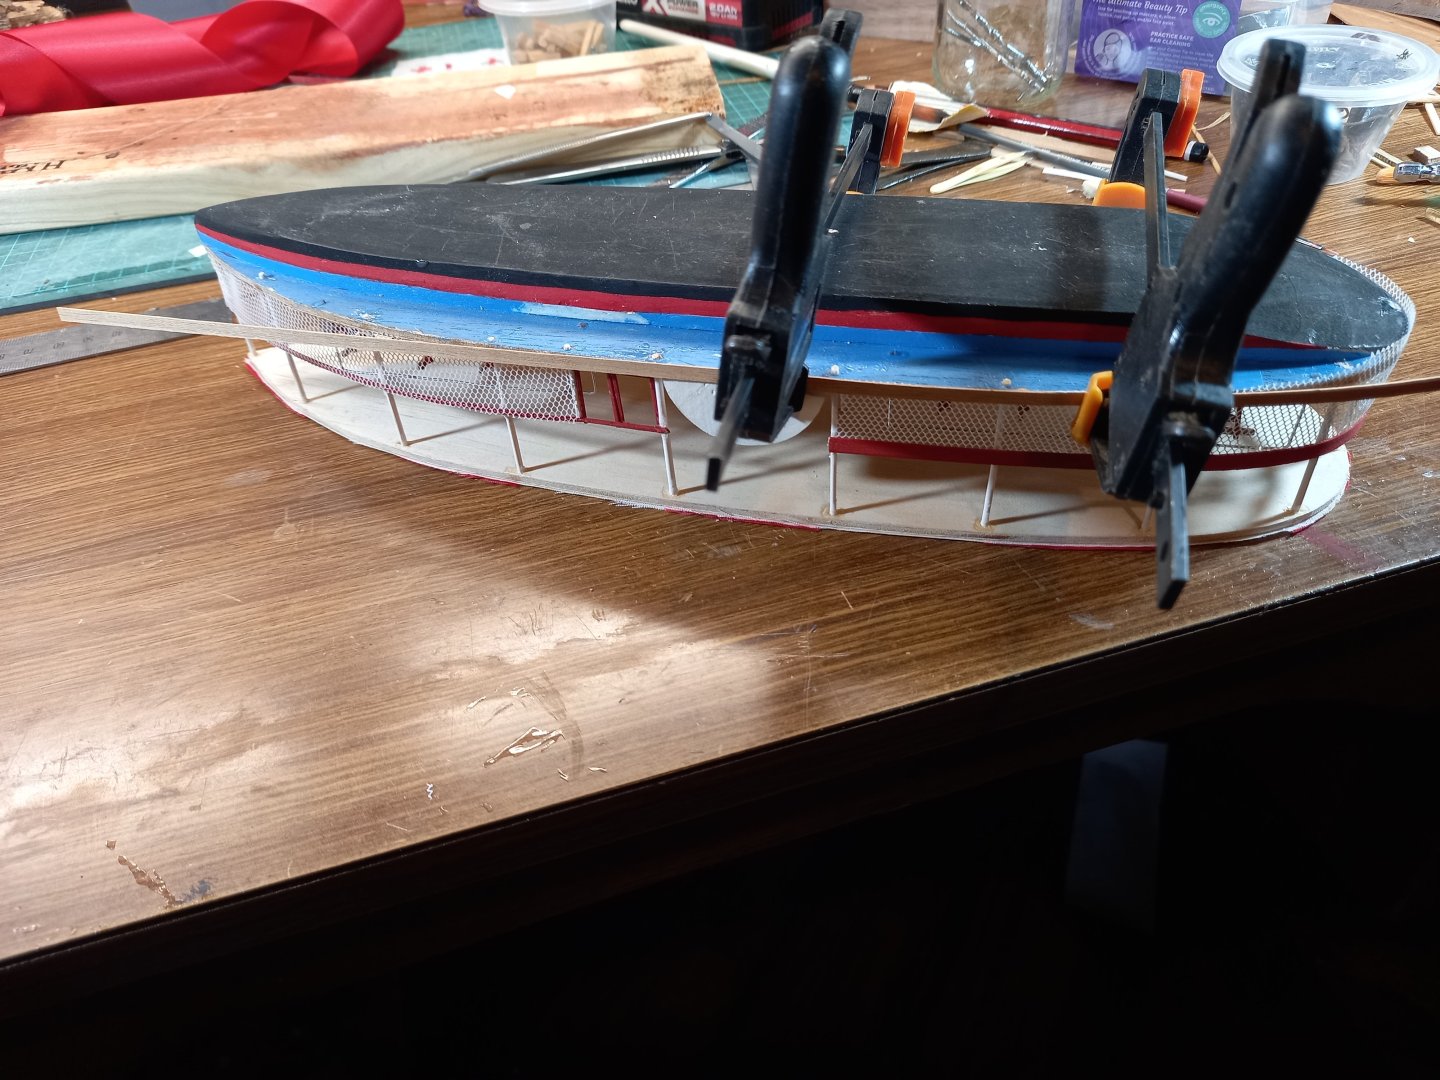
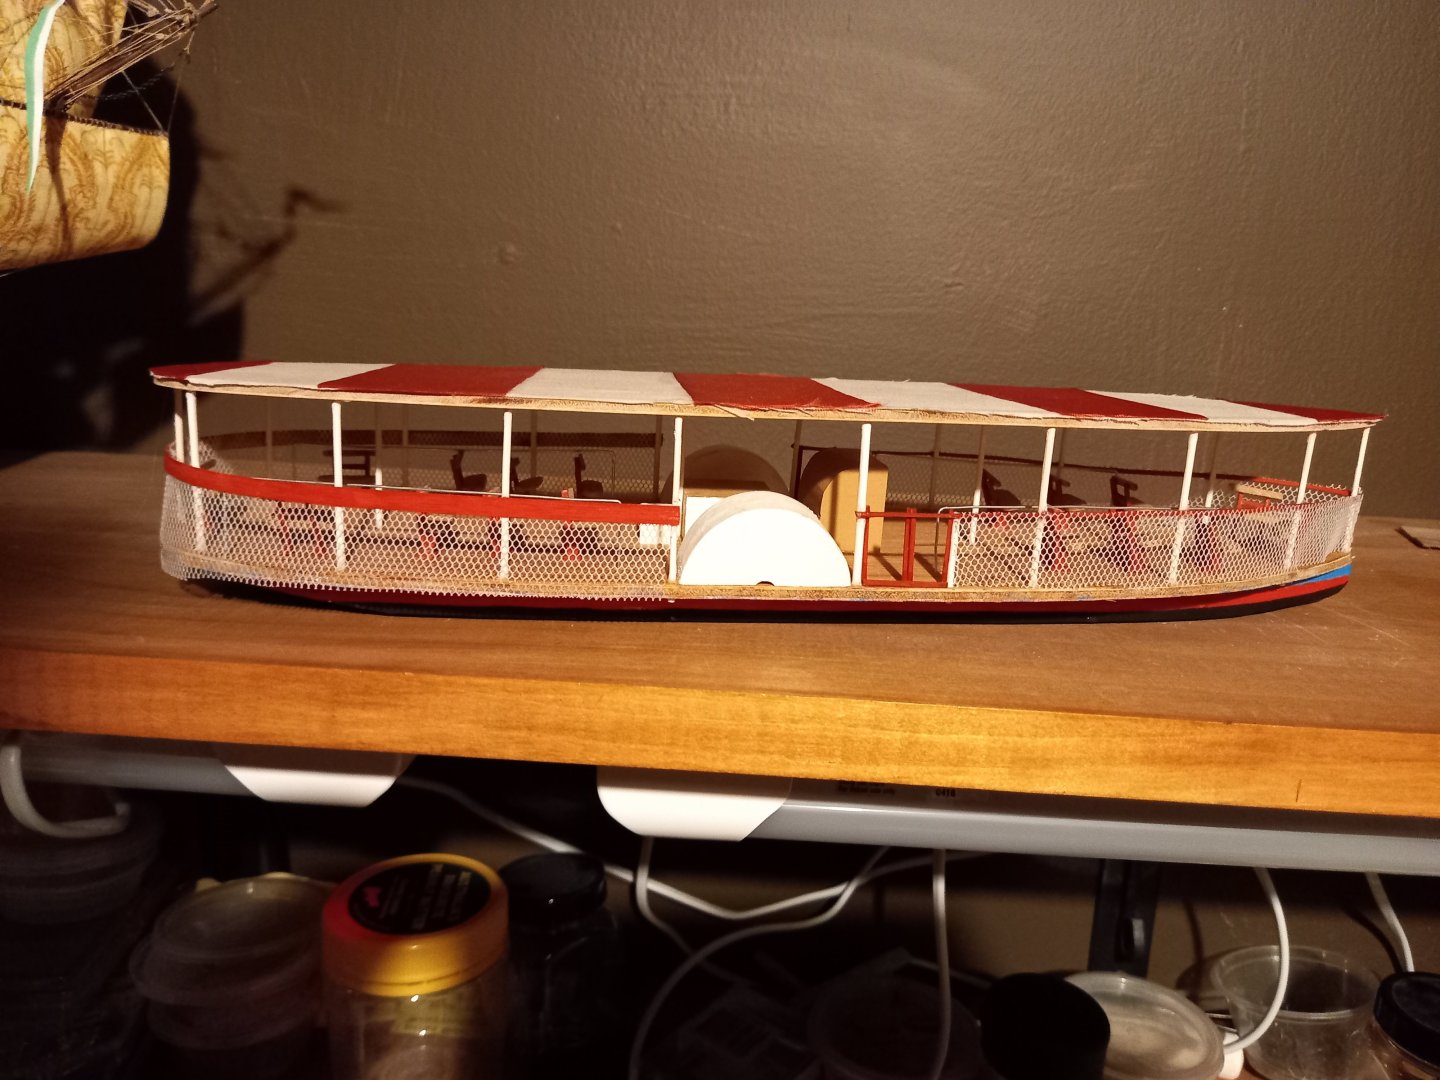
Well, I've made some progress. Glued lengths of red ribbon onto the roof awning to make the roof alternately red and white stripes. But I don't think I'll do it that way again. I've found my wife's wavy scissors won't cut cloth, only paper, so the 'fringe' won't be able to match the roof. So I'll probably just paint the stripes on instead. Also added the mesh netting at the railing and learnt a few things. Next time I'll add the mesh behind the rail before I put the rail on the model. It'll look better. I did this with the rail on the aft half of the vessel - it looks and works better. And I'm fixing an edging to the deck to cover the edge of the plywood. I discovered some REALLY thin veneer languishing neglected at the Men's Shed and it's ideal - so I've commandeered it all for myself. Should do for a large number of future models of this paddlewheeler. And it's OK, because they'll be sold as fundraisers for the Men's Shed and the volunteers who operate her. Steven

- 110 replies
-
- 11
-
-
- Paddlewheeler
- Ballarat
- (and 3 more)
-
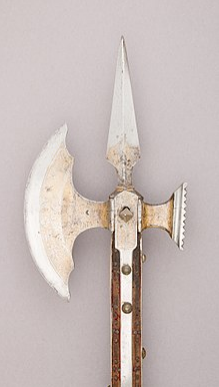
That sounds almost Australian. I might steal it. Then there's the old "pollaxed" (NOT pole-axed - a poll axe was a real thing, with poll meaning head.) I think being hit by one of these would certainly discombobulate you . . . Steven
-
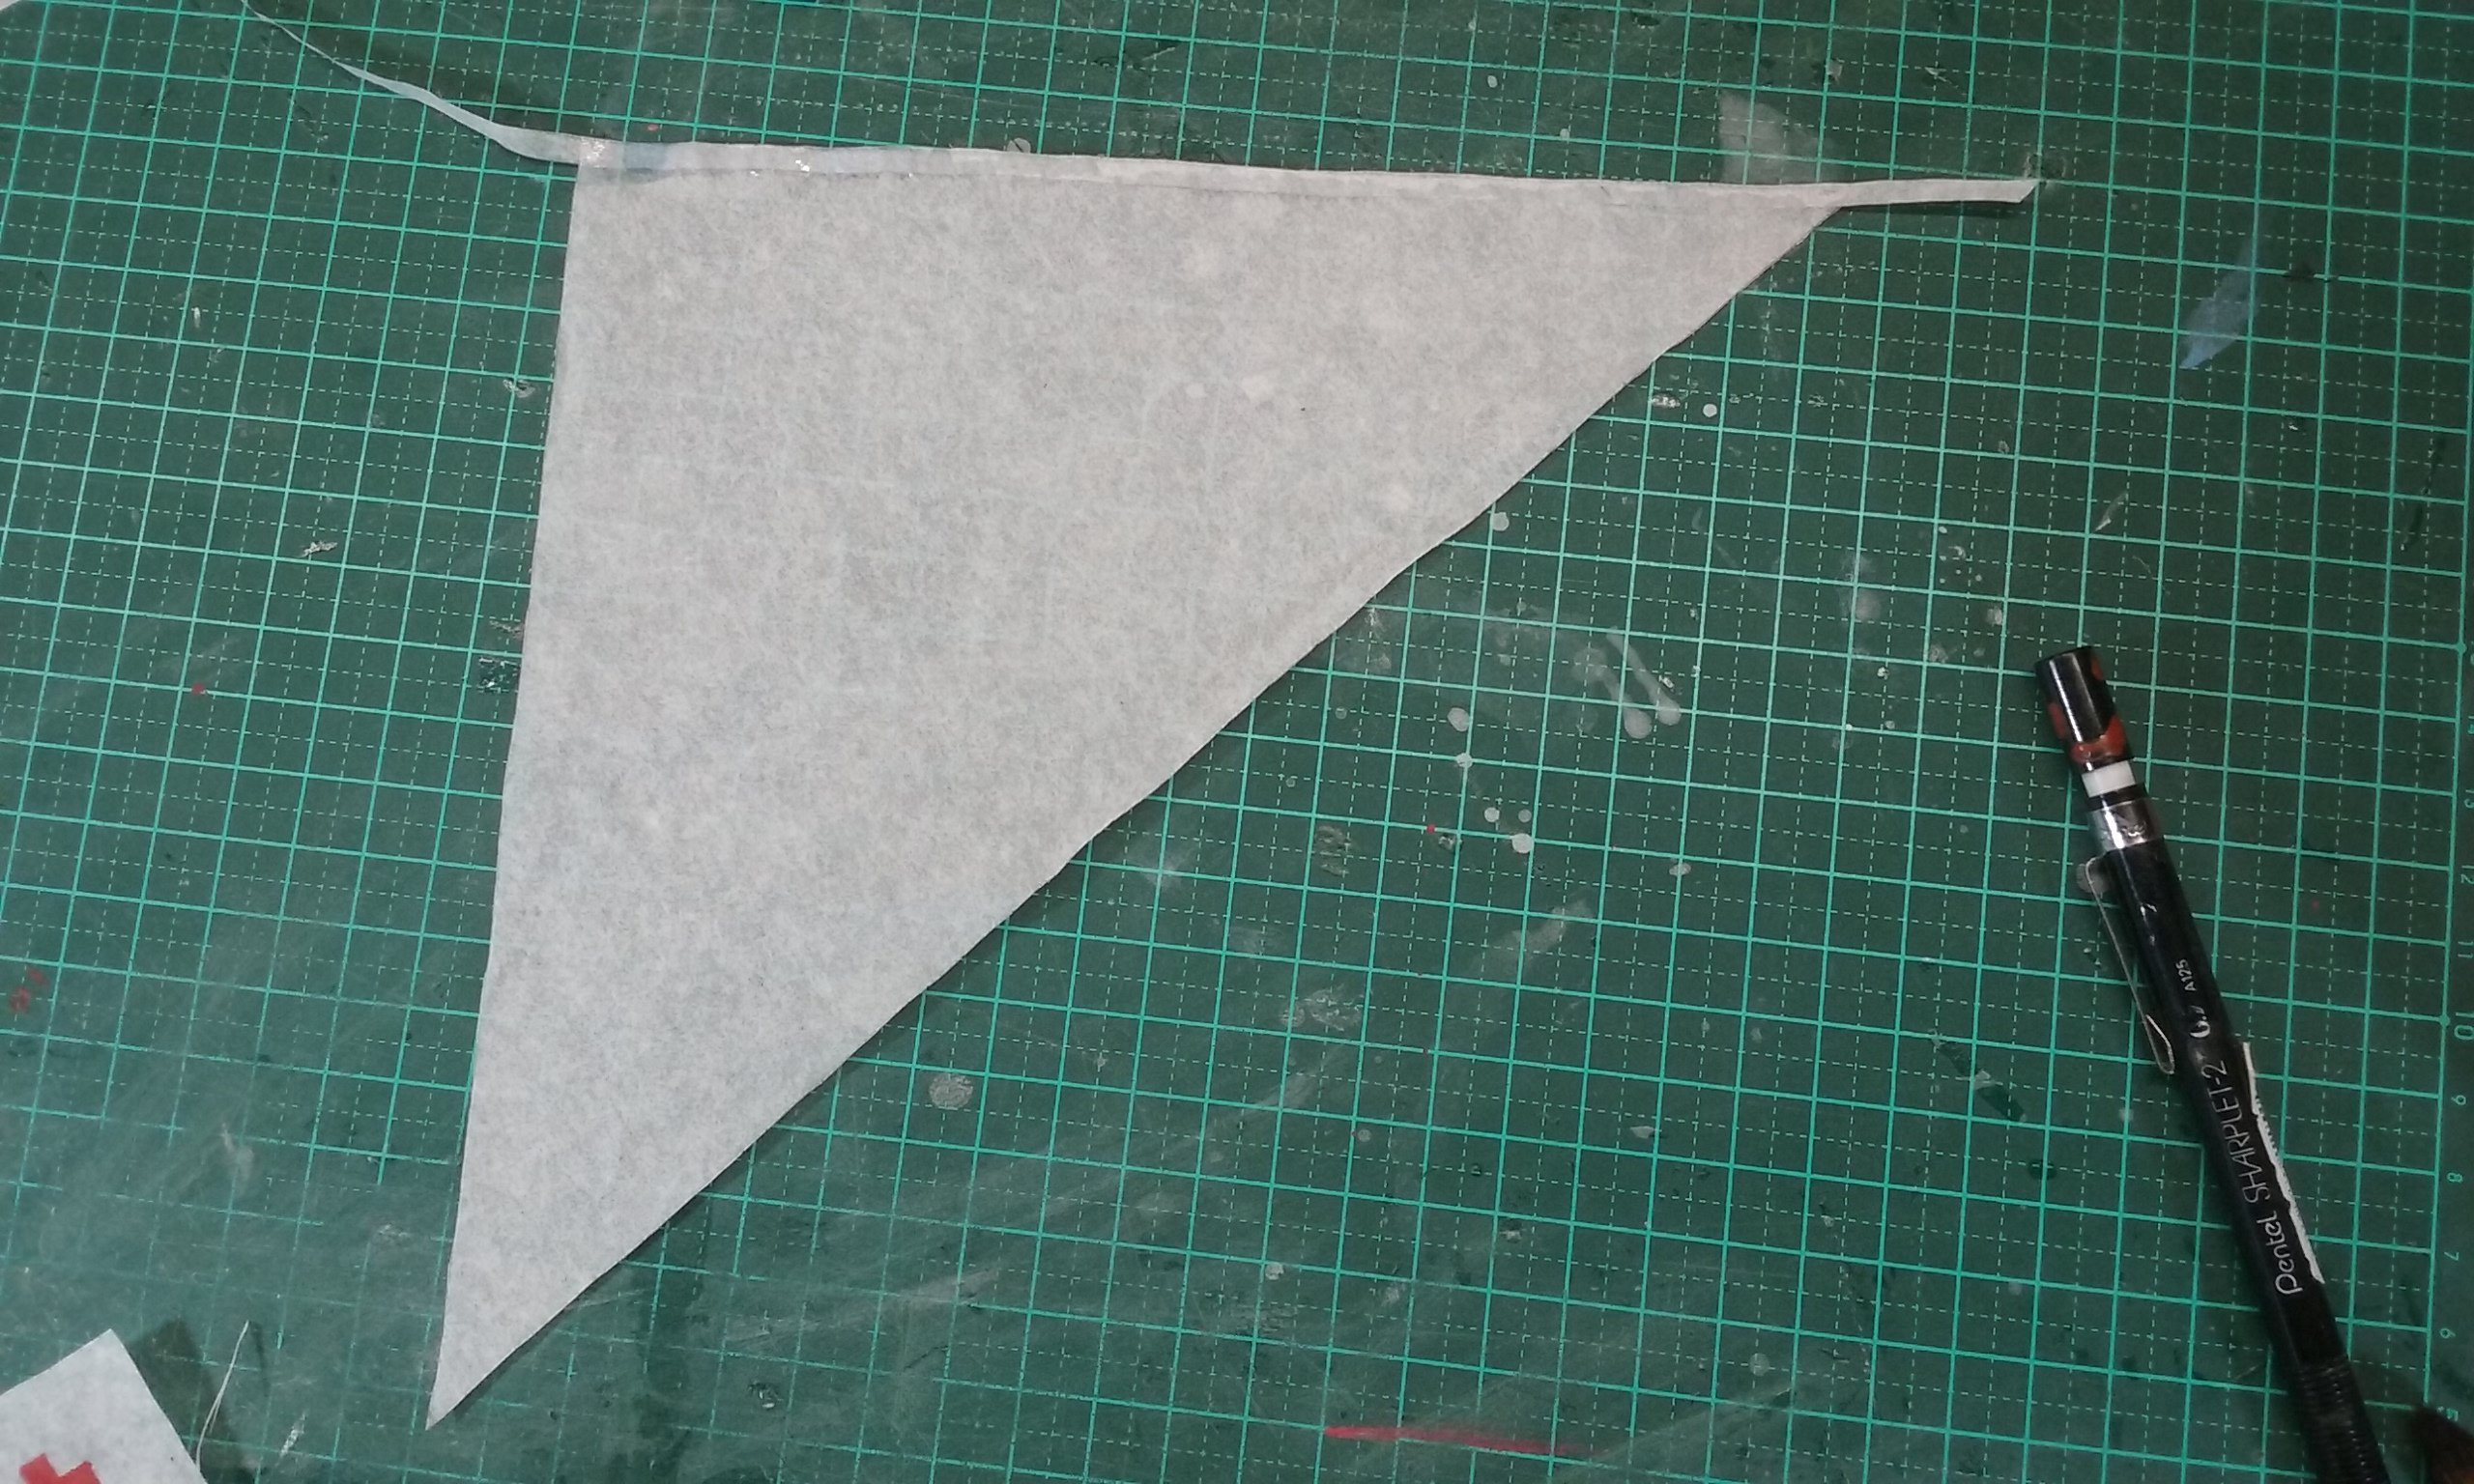
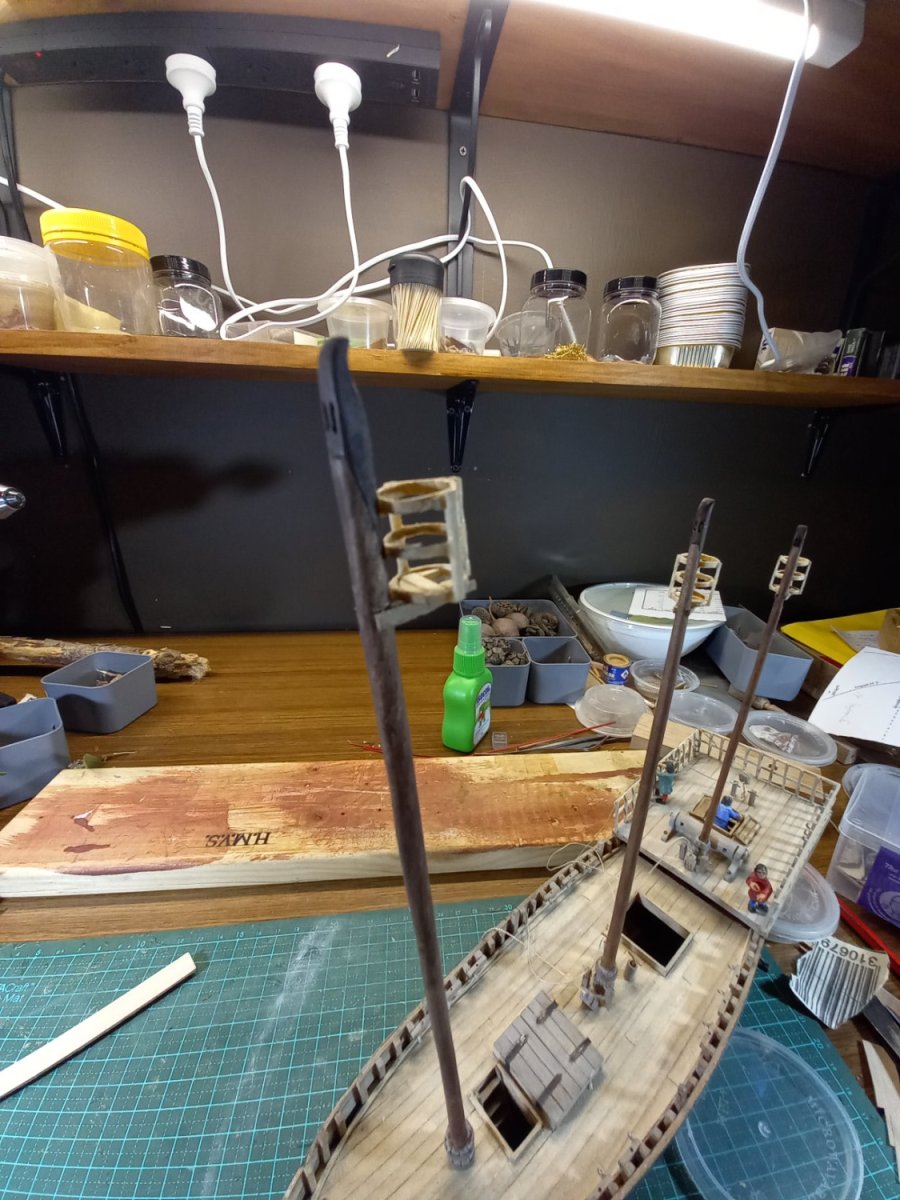
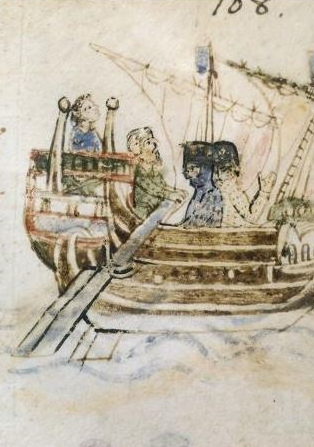
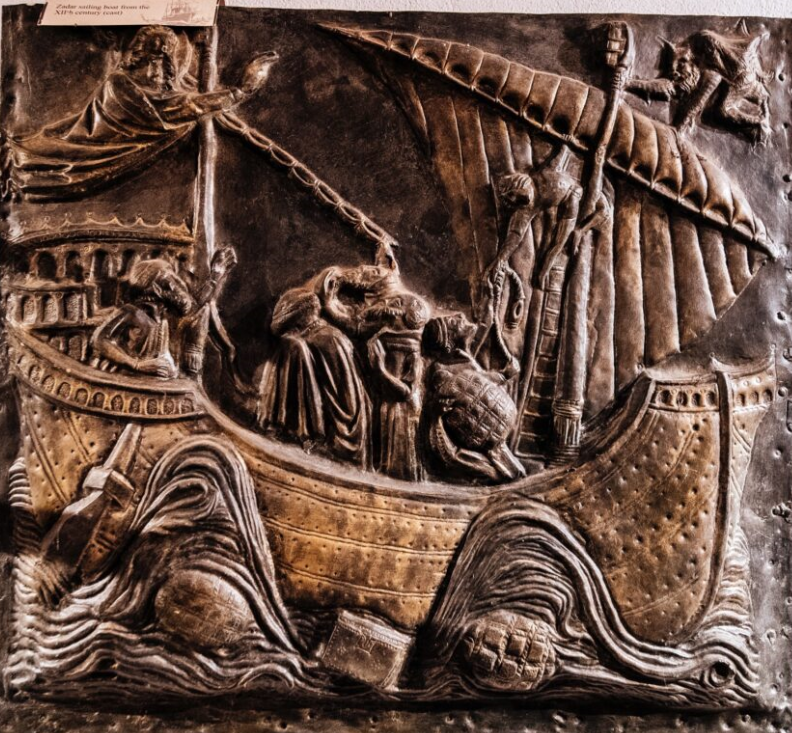
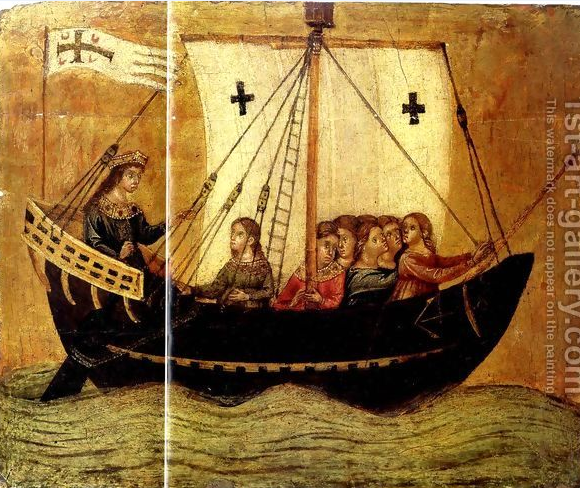
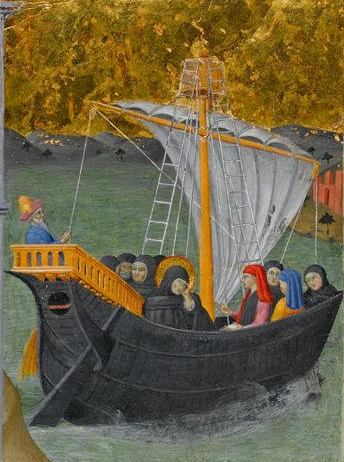
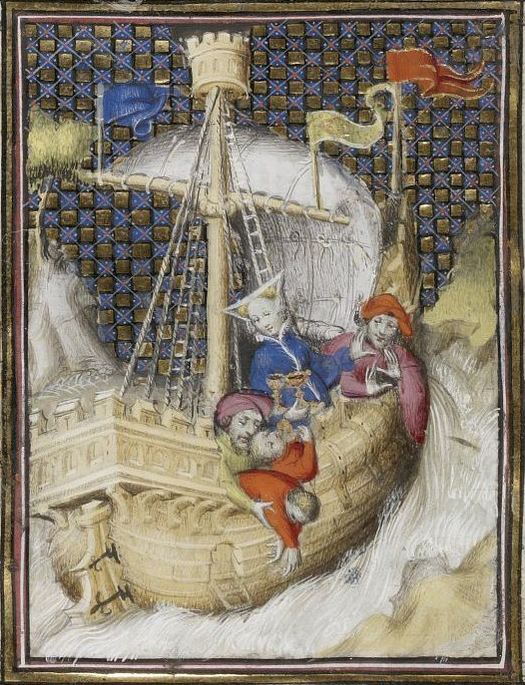
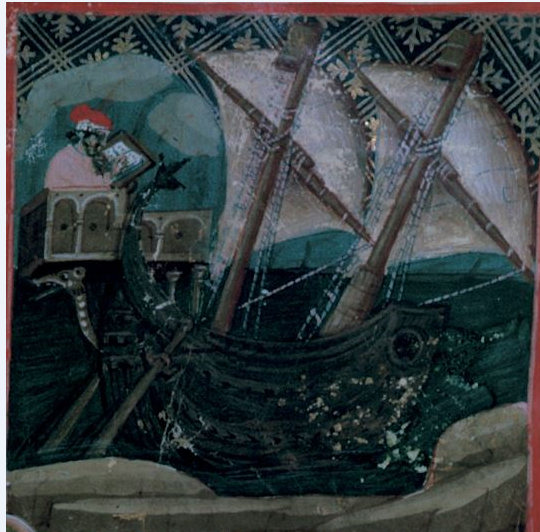
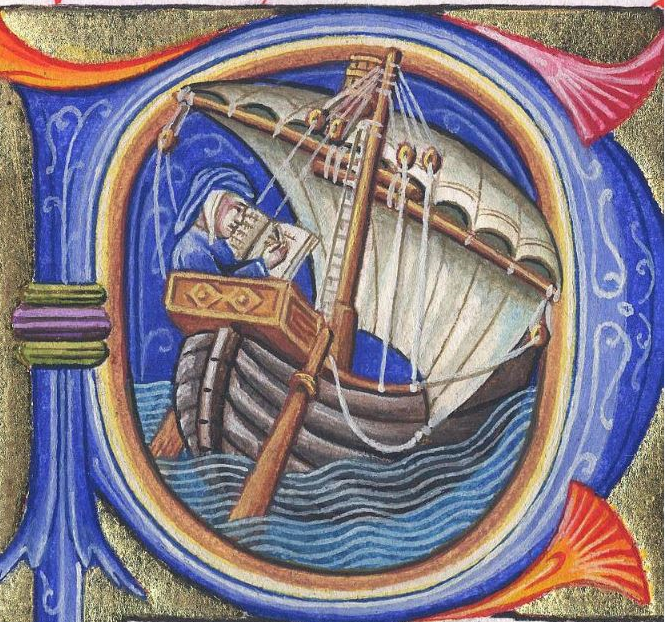
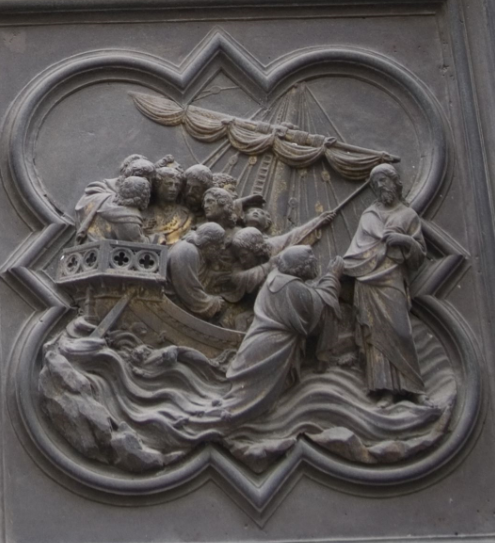
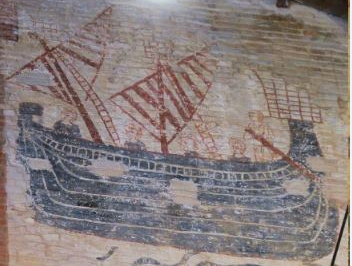
I've been doing test runs with the silkspan, gluing it together with the matt acrylic varnish that was recommended. Not too bad. And trying out for painting the crosses on the sails. I've tried various ways of doing it, but still not really happy with the results. From the left - acrylic painted directly onto the sail, a band of different acrylic, painted onto the sail and then outlined in pencil, painted onto a separate piece of silkspan and glued onto the sail. This seems to be the least worst version. Heart in mouth, I've started gluing the reinforcing strips to the edges of the sails.There's a bit of transparency to start with due to the varnish, but if the test piece is to be relied upon, that seems to fade after awhile as the varnish matures. But maybe I should have made the sails a bit bigger and folded the edges over, rather than glue on separate strips. I think it would have been easier. I'm also researching rope ladders for the masts. I'd hoped to avoid them, as they often don't appear in contemporary pictures and several pictures show crewmen shinnying up shrouds, not using ladders. Unfortunately, a Genoese round ship from a few short decades different has an undeniable rope ladder, though the top end isn't in the picture. So I've been checking out other rope ladders - I have two questions: 1. Where is the top of the ladder fixed to and 2. Are the rungs rope or wood? Here are the pics I've been able to find that are vaguely similar in time period (by "similar" I mean no more than two or three centuries apart!). 14th century Chest of St Simeon, Croatia 1360ish St Ursula by Paolo Veneziano 1422 from north doors of the Florence Baptistery by Lorenzo Ghiberti 1430 approx. St Augustine Departing from Africa by Master of Osservanza Boccaccio by the Maitre des Cleres Femmes du duc de Berry, 1403 British Museum Egerton 943 f. 63 Dante embarks on a ship 1st half 14th century Dante on shipboard. Date unknown, but looks 14th century Siege of Damietta - frescoes in Palazzo Comunale, Mantua,(1220-1230) From church of San Eustorgio Milan 1336 to 1339 Unknown ship - maybe 13th century Detail from Icon of Virgin and Child, Church of St Kassianos, Martyrdom of St Ursula from the Belles Heures du Duc de Berry Nicosia, end of 13th century 1405-9 Met Museum BH Lg19v 178v Surprisingly, most of them seem to come only up to the bottom of the "crows nest" (I couldn't call it a top - too confusing) or even lower, leaving the sailors to clamber up over the sides of the thing to get in - unless there's a lubber hole in the floor of the top, but they seem too small to allow for that. Steven


- 508 replies
-
- 11
-
-
Not really - it really comes from England - there's not an Australian equivalent that I can think of (not any that are suitable for a family forum, anyway). But I liked the sound of it, so I've adopted it as an "honorary" Australian term. It means astounded, amazed and often also impressed, or even shocked. Flabbergasted. Steven PS: Your gob is your mouth, so it's as though you've been smacked in the mouth, that's how amazed you are.
-
The Mary Rose... a bit of obscure history.
Louie da fly replied to mtaylor's topic in Nautical/Naval History
I don't know how far back bosun's pipes go, but the Byzantines (and IIRC the Ancient Greeks) used flutes to give the time to the oarsmen of their galleys - probably because the high pitched sound could be heard over the deep sounds of the ship, oars etc. And I expect that's the same with bosun's pipes - they're VERY shrill. Steven
- 1 reply
-
- 7
-
-

-
You usual superb work, Patrick. I am continually gobsmacked by the quality of your modelling. Steven
-
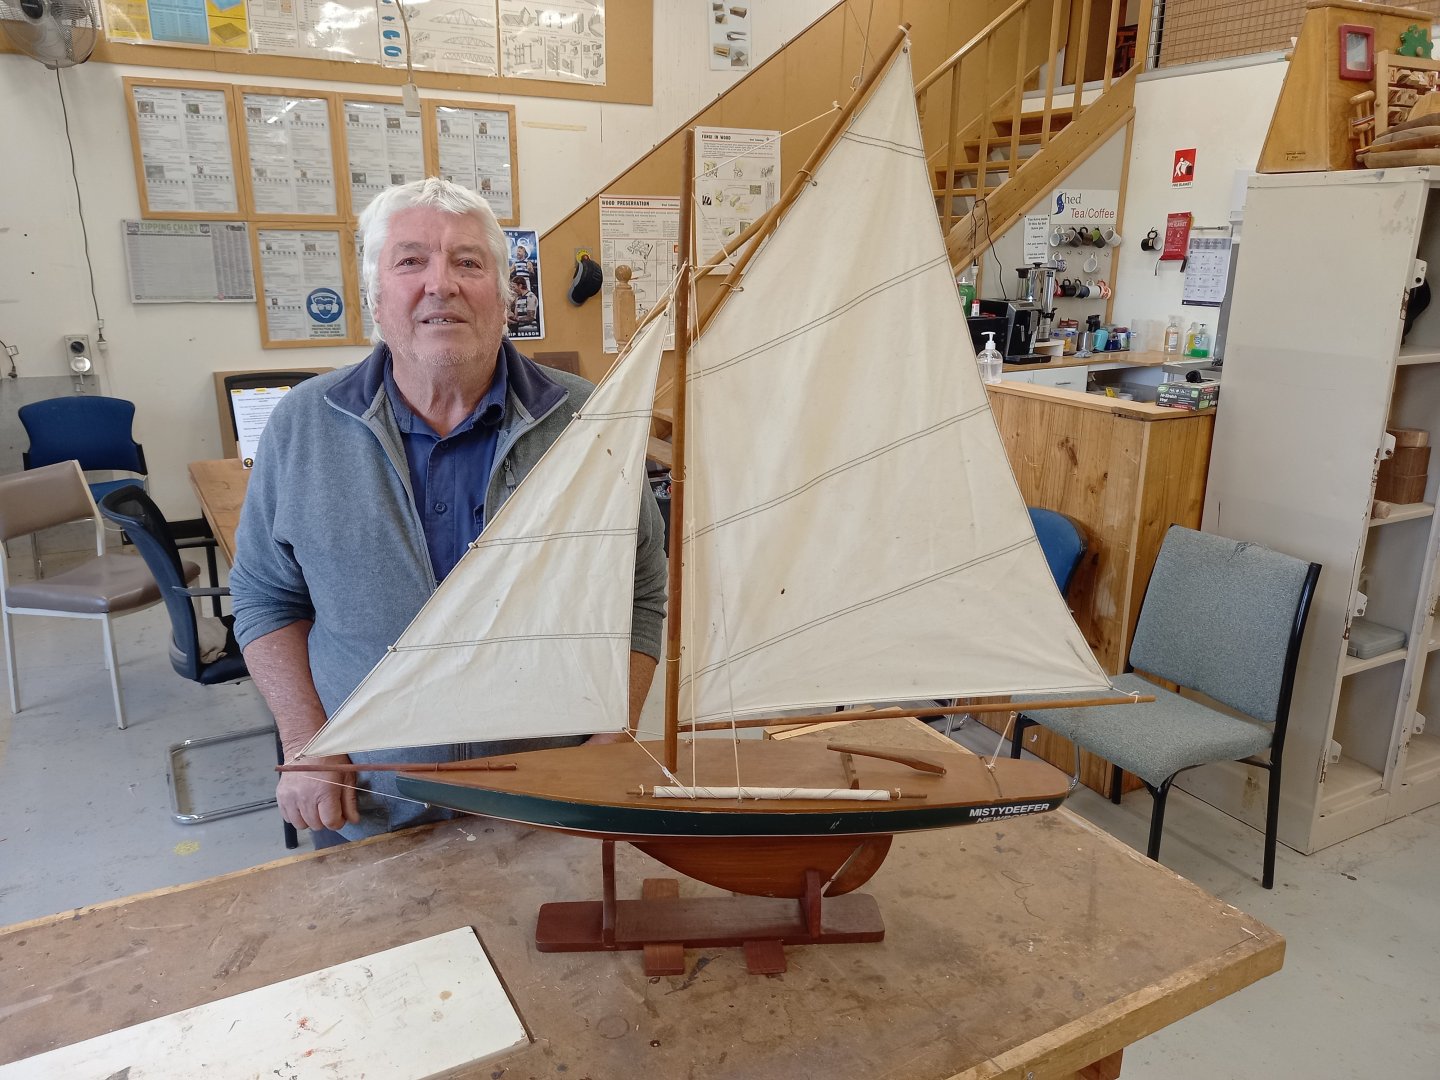
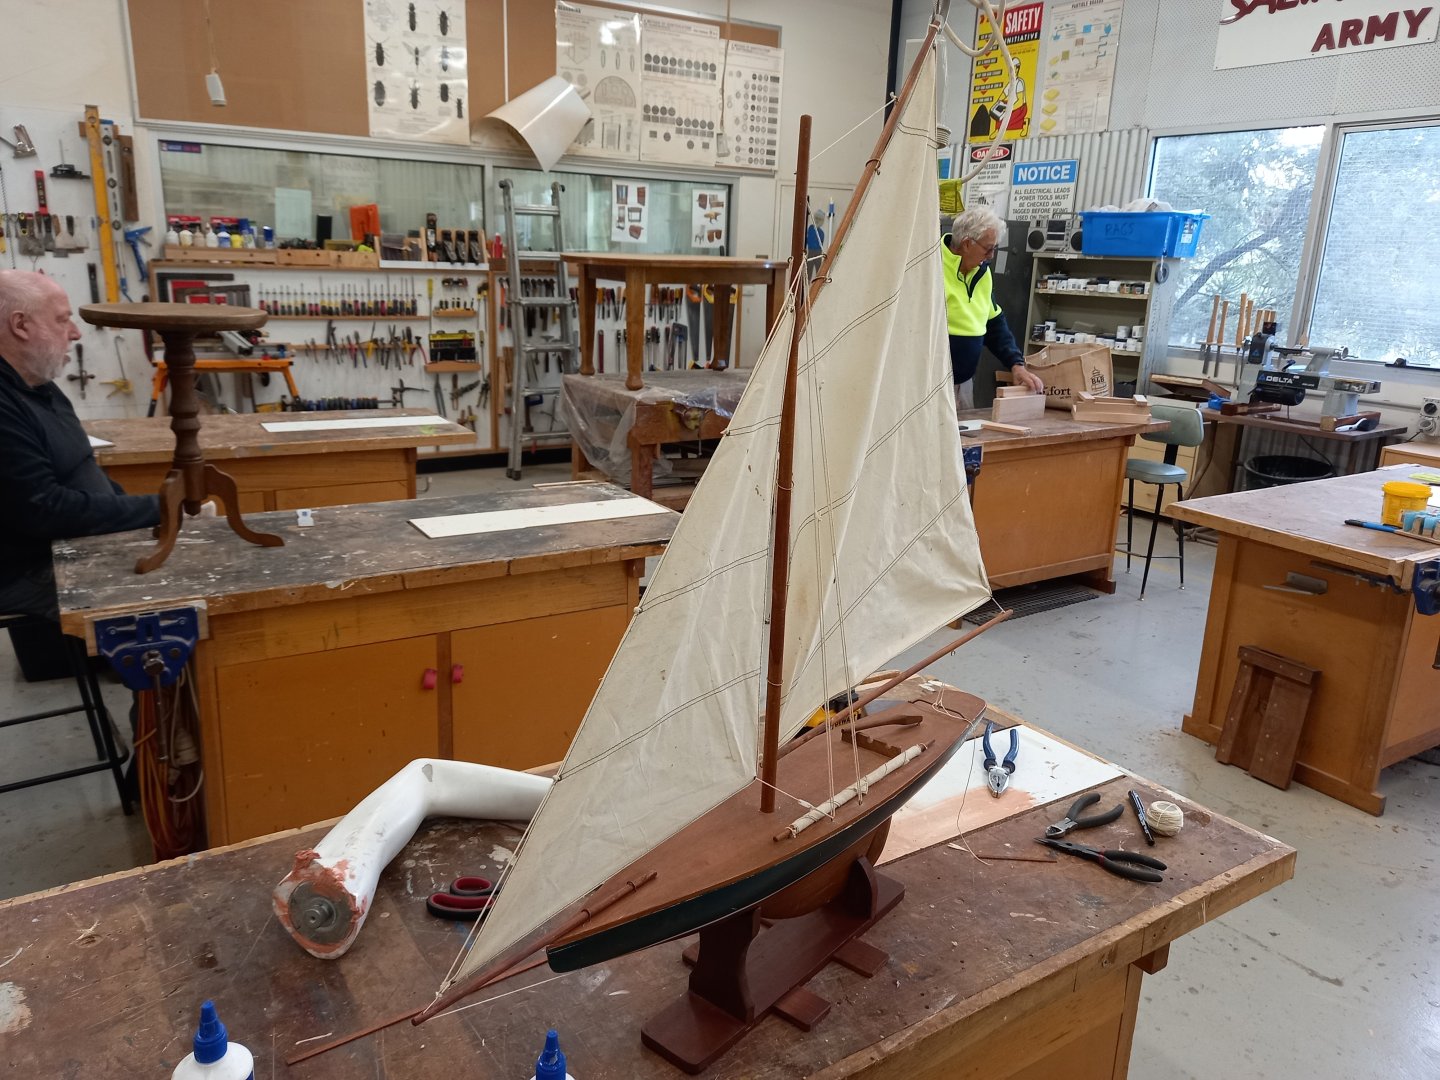
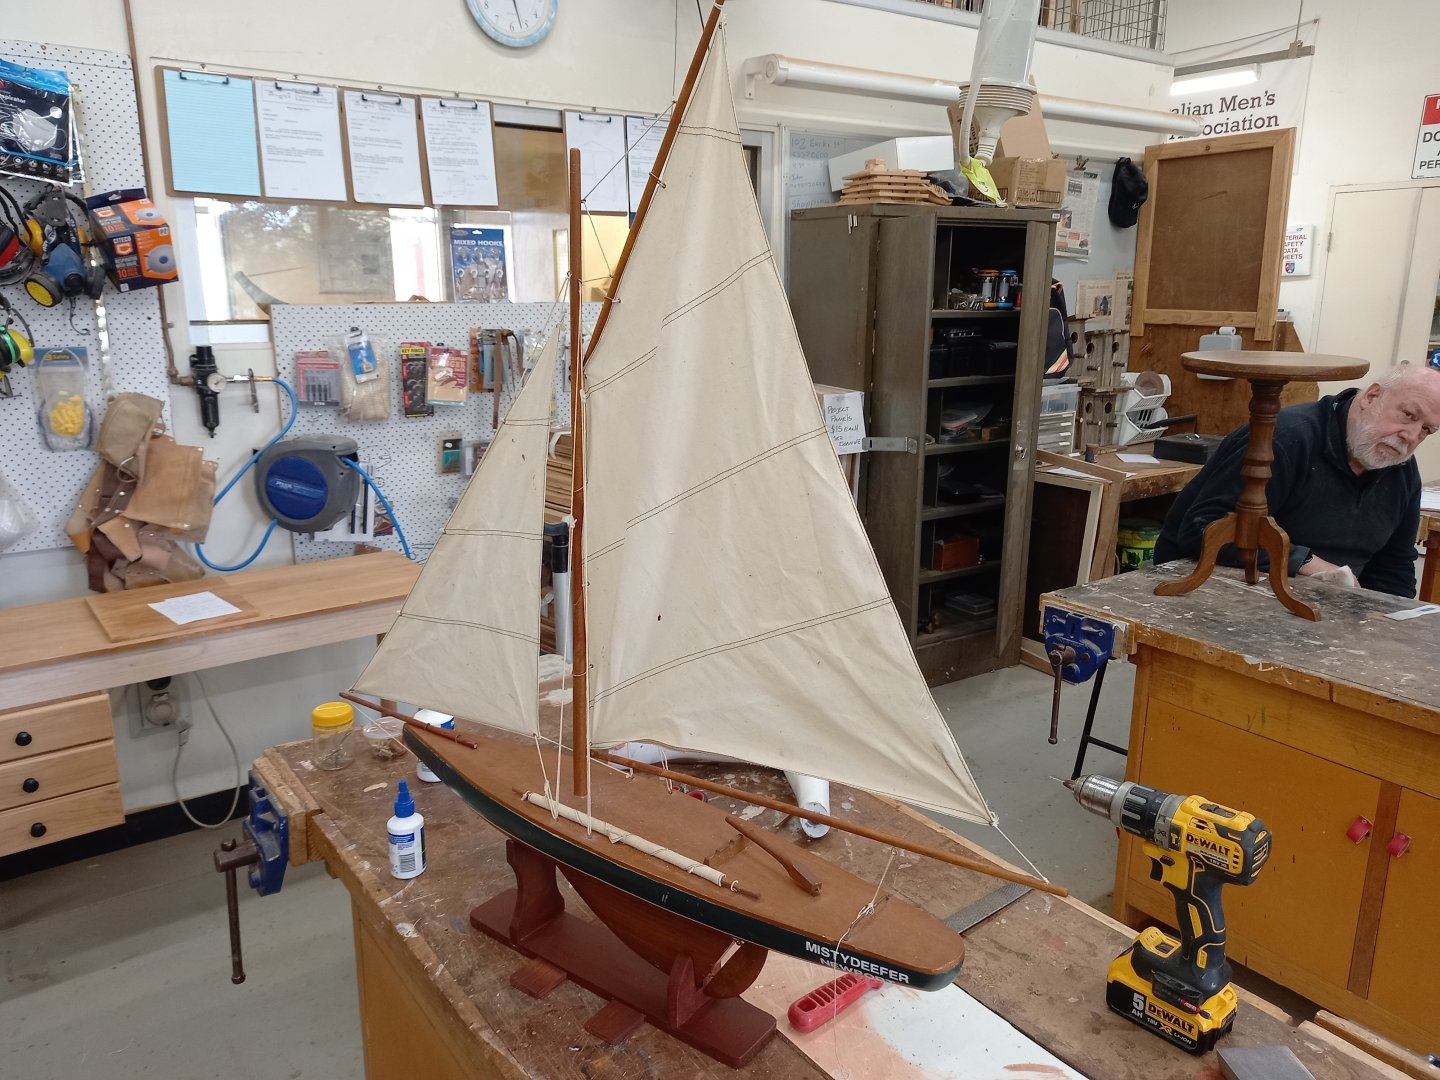
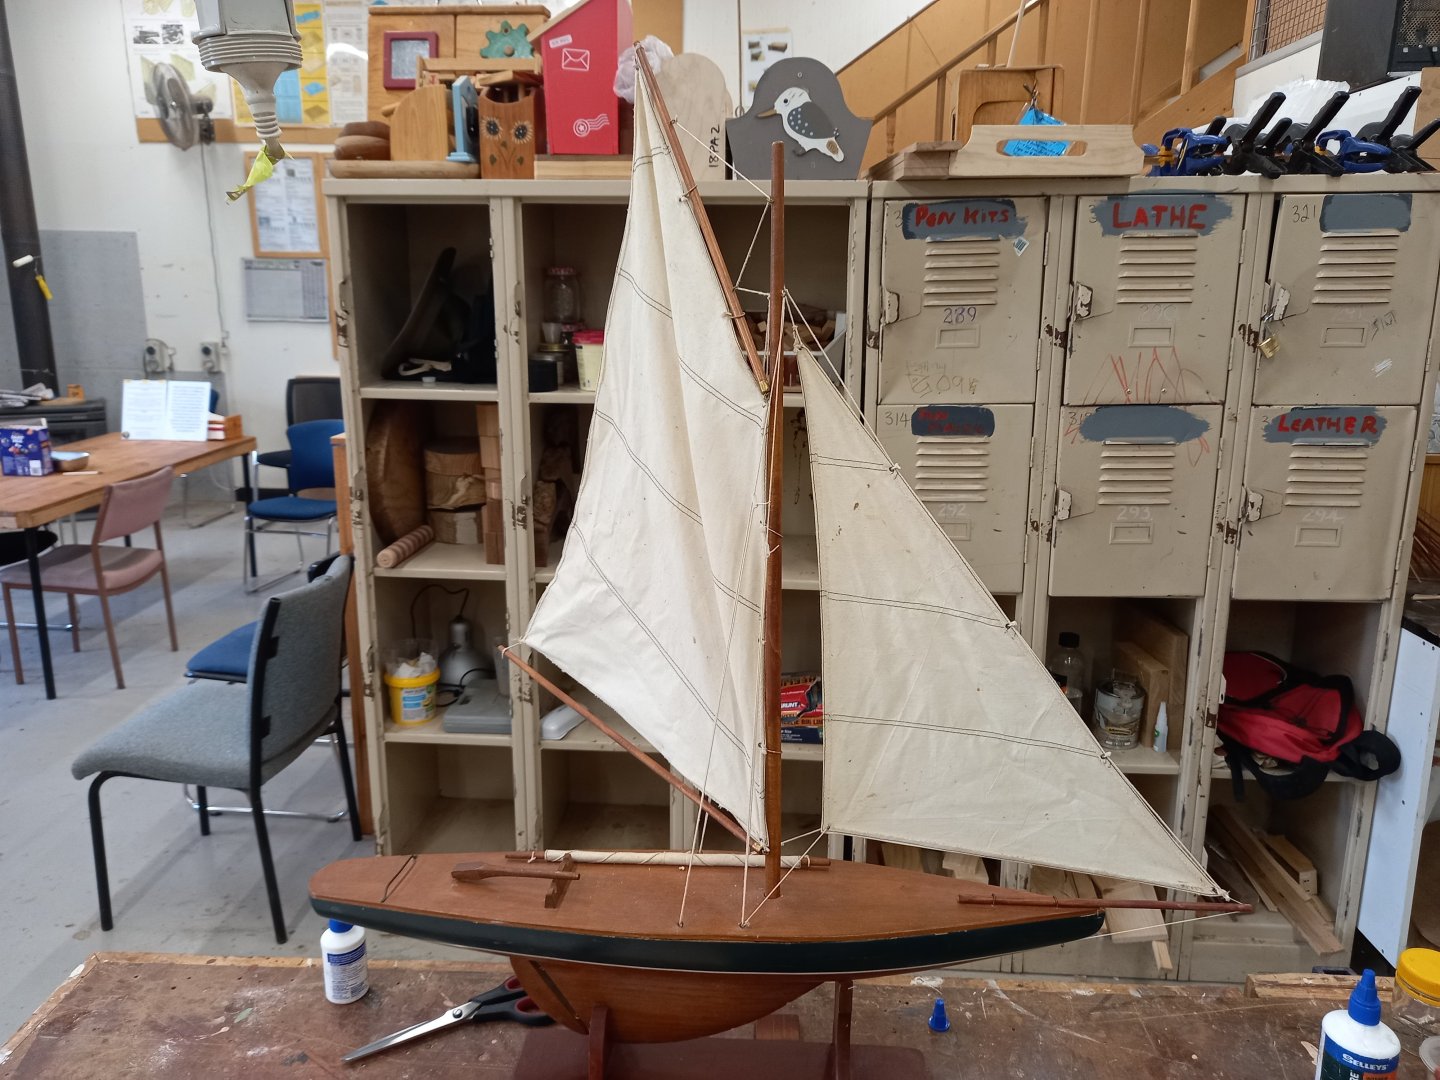
The stand was too narrow and prone to tipping over (probably why the model got damaged in the first place) so I added some cross-beams to stabilise it a bit. Also added another coat of stain so everything matched. Then I got to work untangling the rigging. Turns out -AFTER I'd undone and redone the tangles that the model had been made to be disassembled so I might have been able to untangle everything more easily by simply pulling the mast out and rotating it. Sigh. Anyway, finally got that all sorted, added the bowsprit and main boom, re-rigged her, cleaned the deck again, and *finished*! Regarding the name, I asked the owner. He had a cat called Misty and a dog called Deefer (think about it - Deefer dog). So she's Mistydeefer. The owner's very happy with it. Steven

-
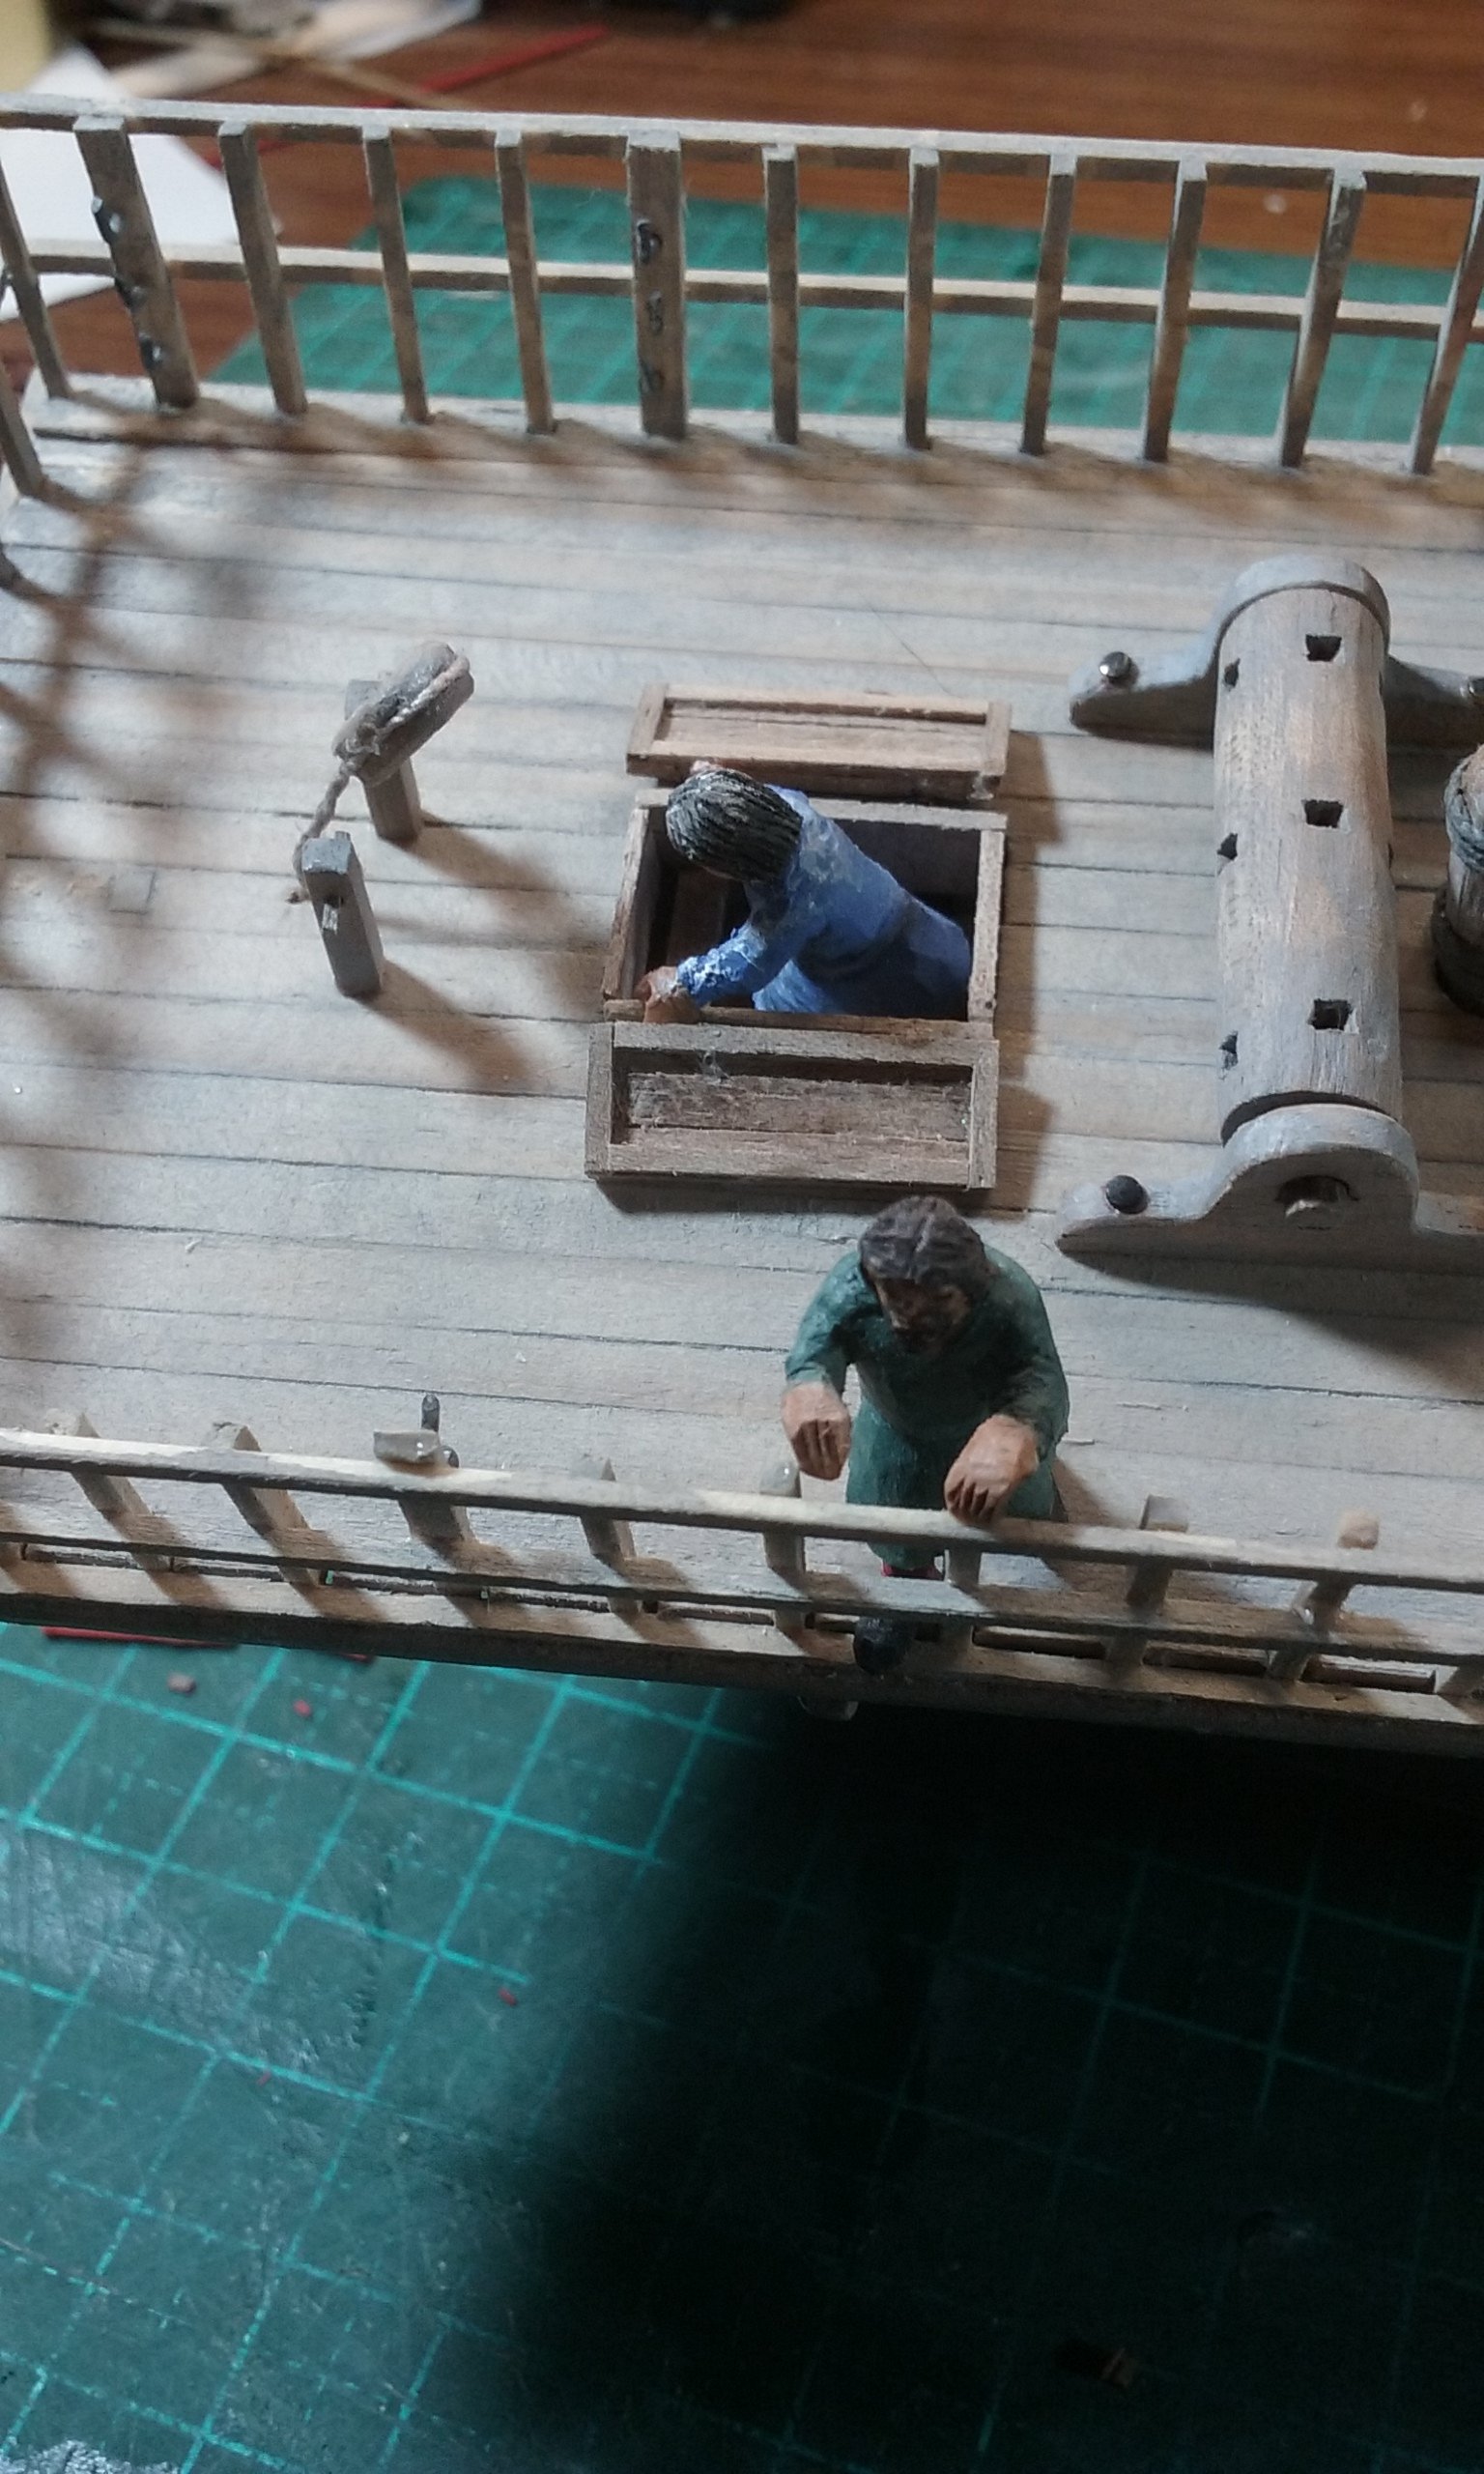
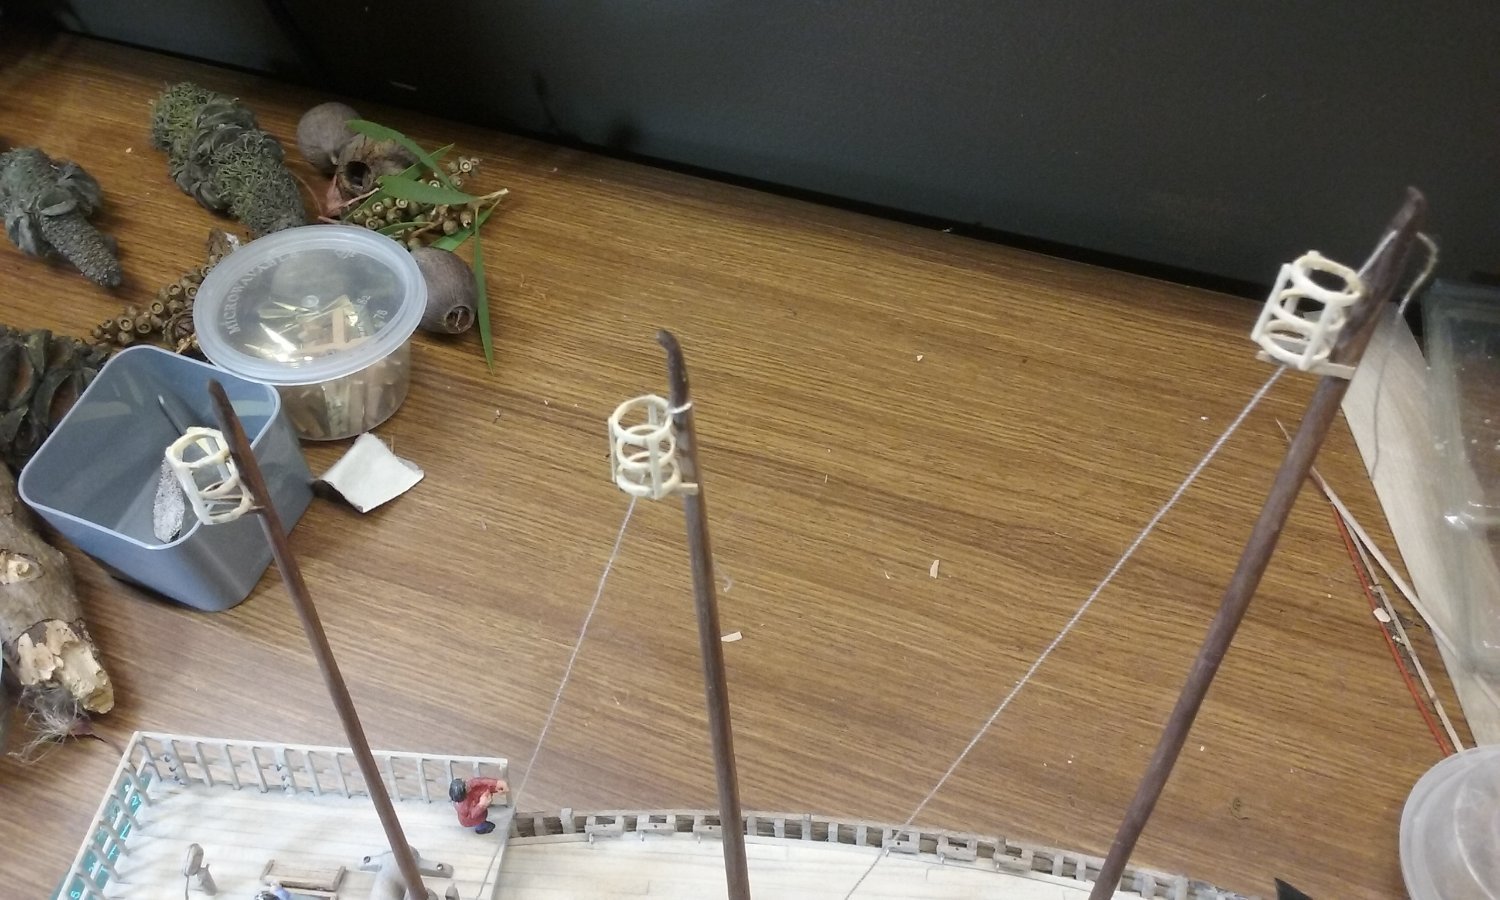
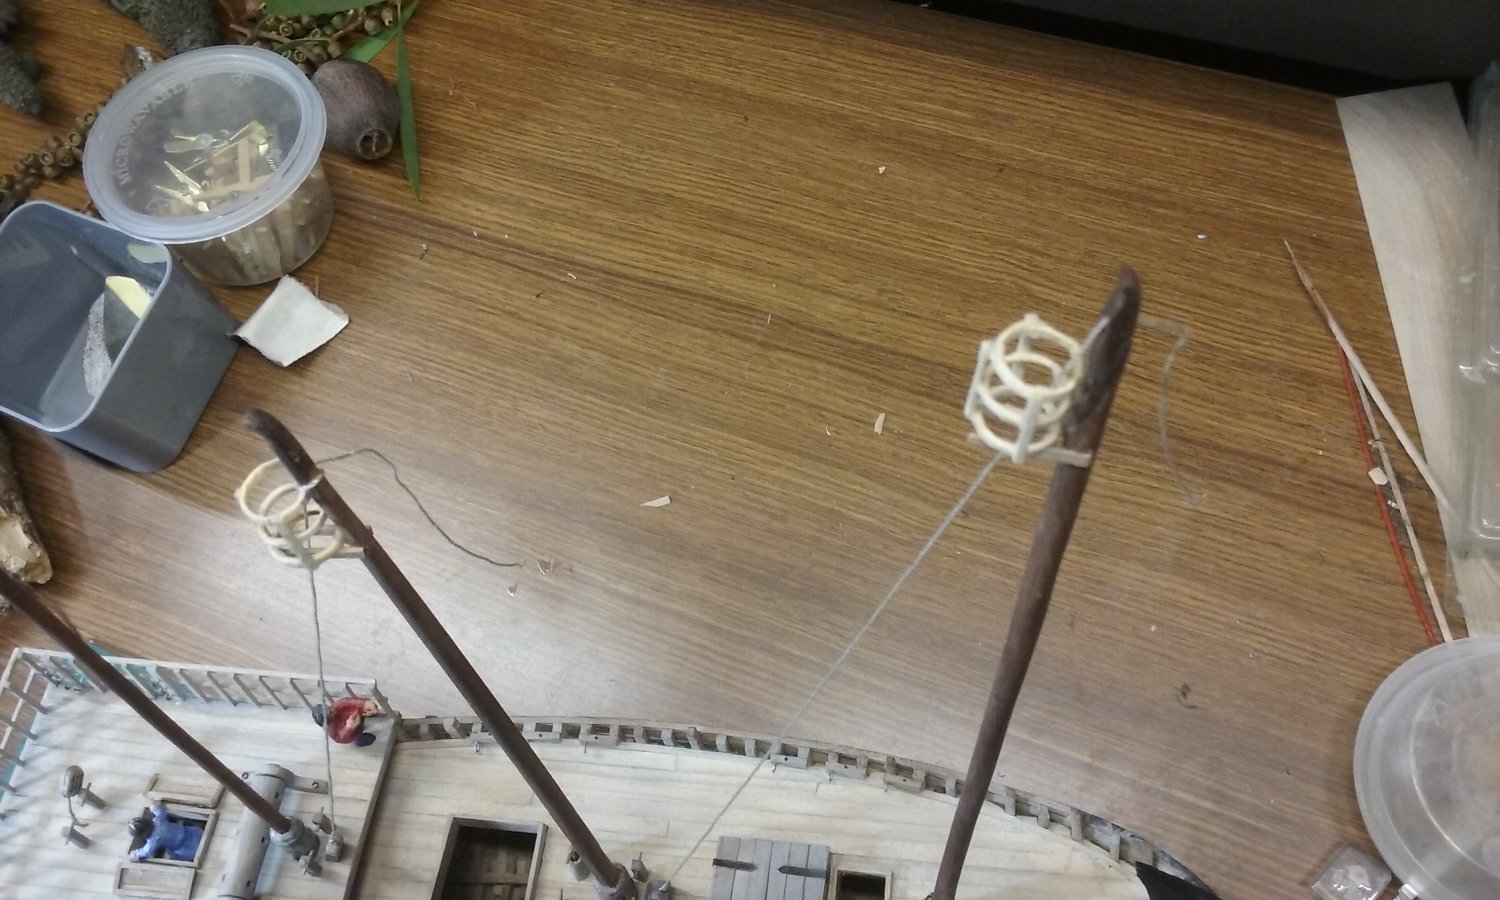
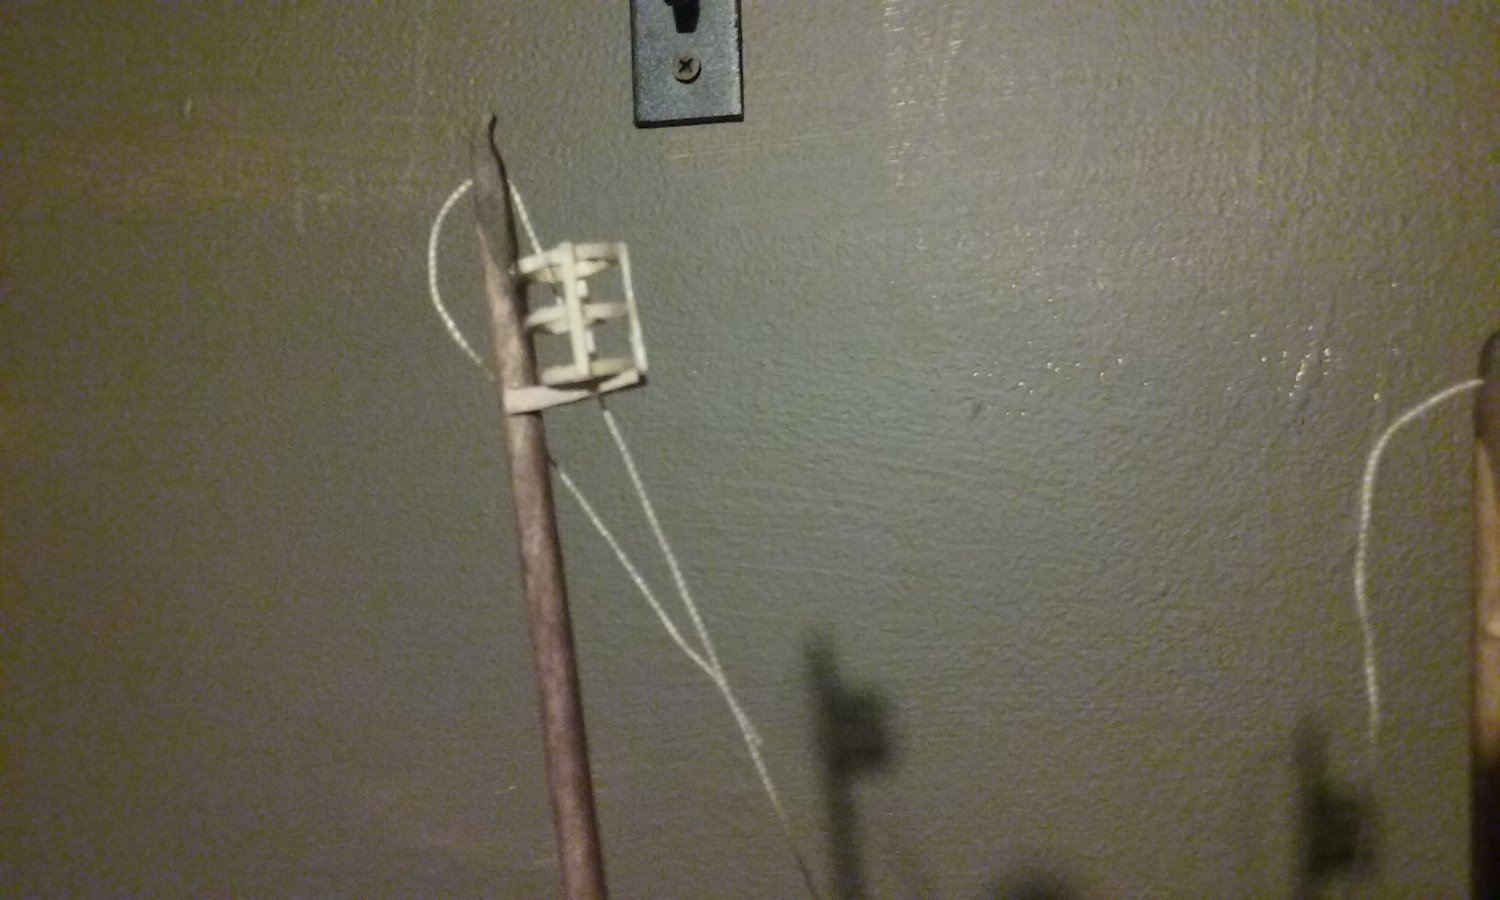
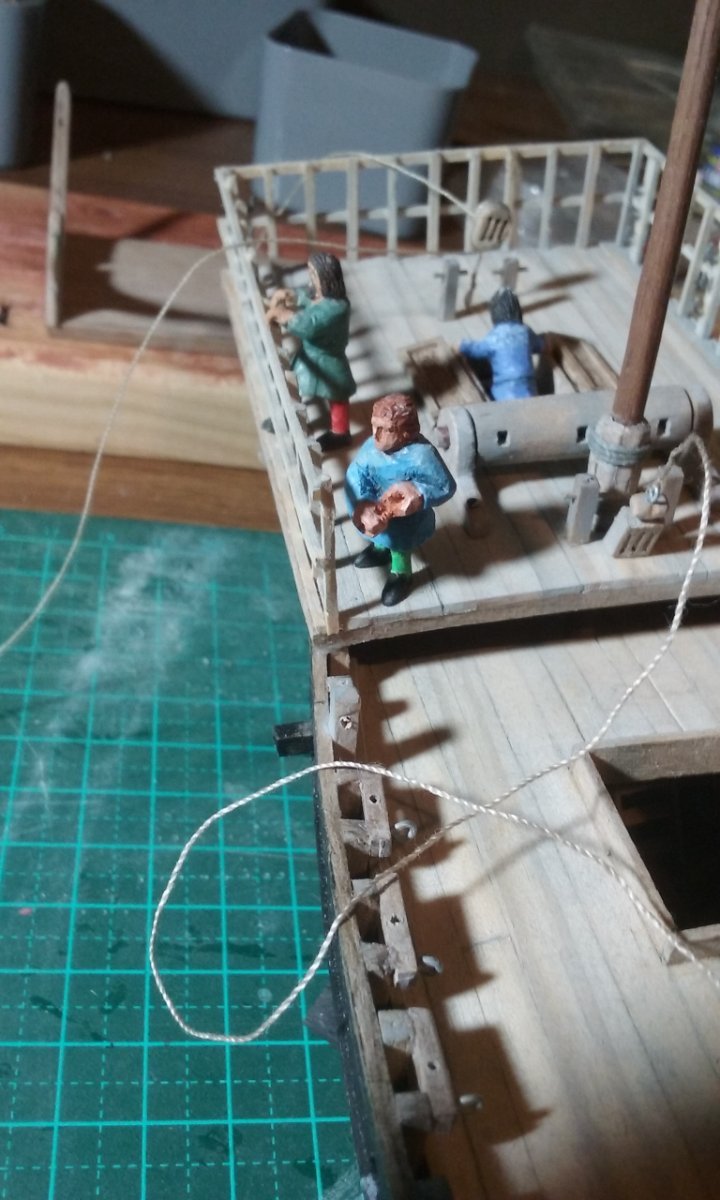
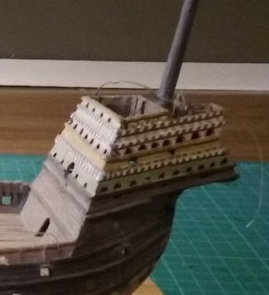
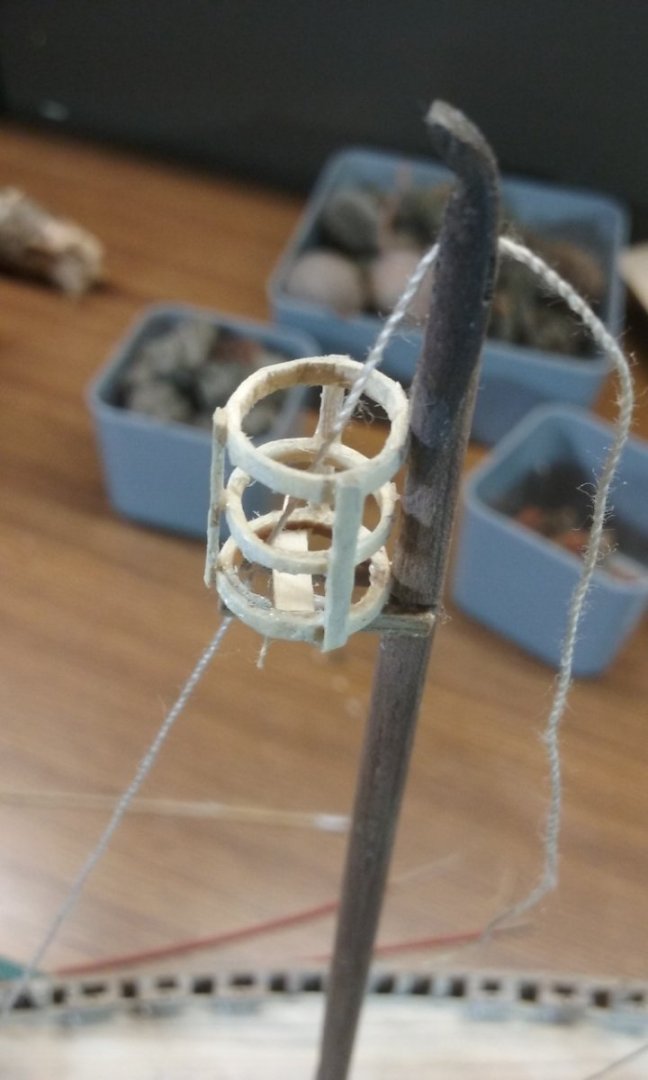
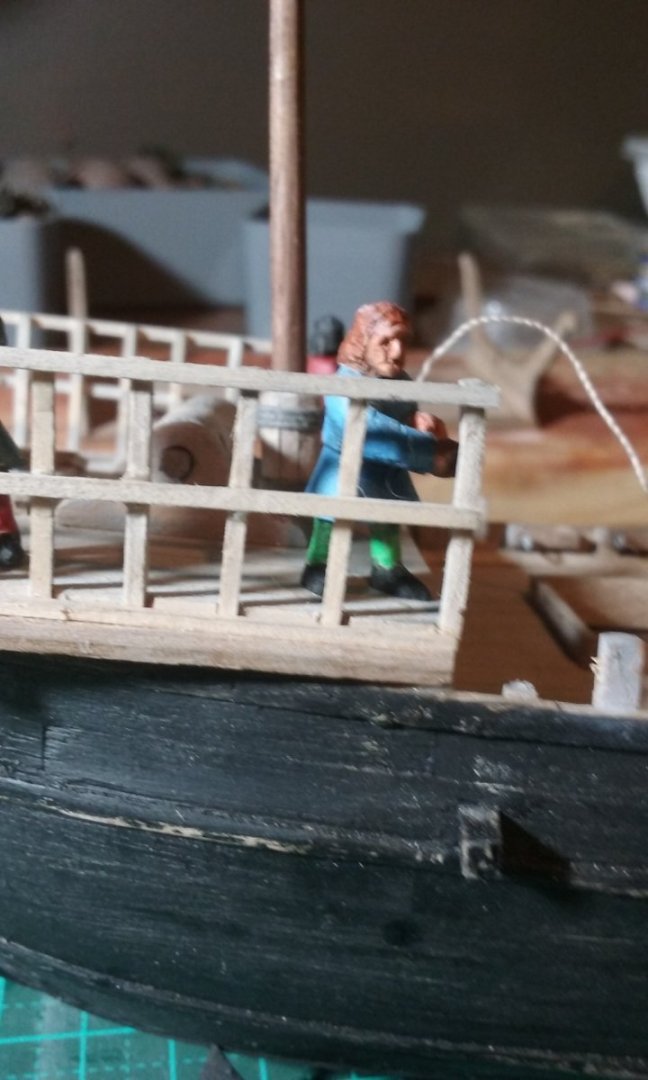
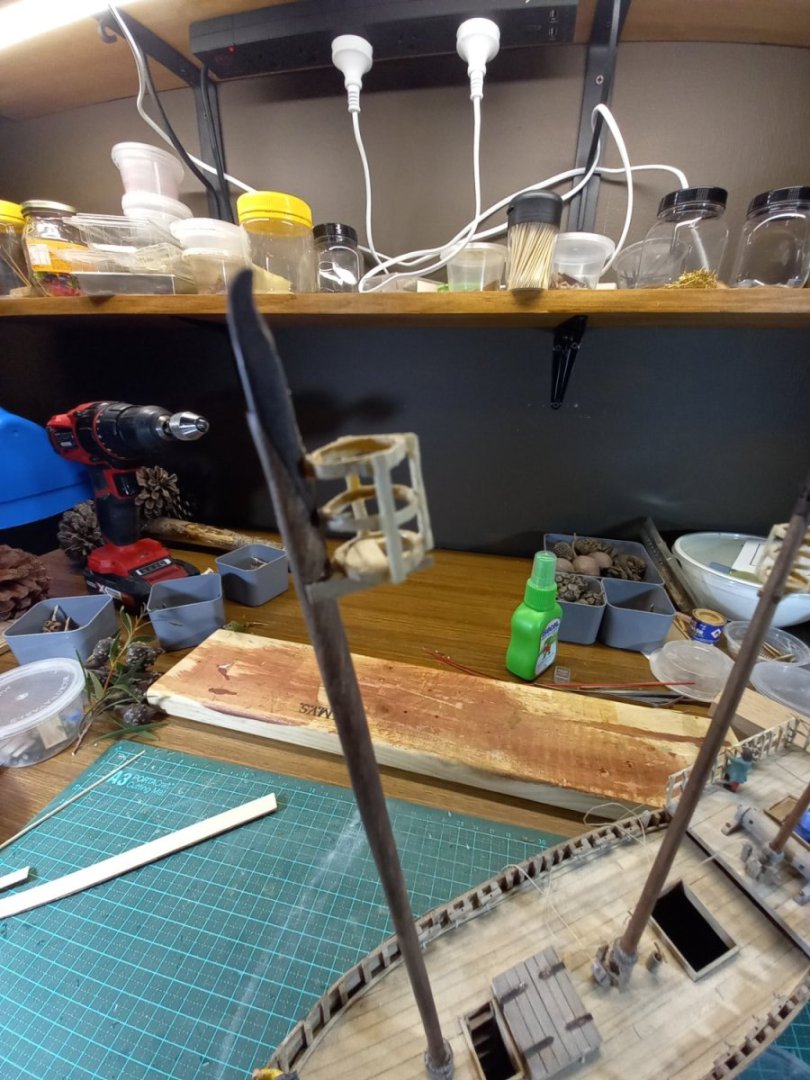
I've temporarily placed the two steersmen in their positions on the poop deck, to work out where exactly the tillers should come to. And I've been working on providing floors for the tops - up till now I'd left them open at the bottom except for a couple of beams each to support the framework of the top. The thing is, the halyards pass diagonally through the tops, so they can't have a full floor. But the poor lookouts need somewhere to stand. So after a bit of thought, I've come up with a solution - plank the floors, but with a gap for the halyard. But first I had to work out exactly where they pass through, lining them up with the sheaves of the calcets and the knights on the deck. Planking begun And complete Very fiddly, but finally got it done. Pretty happy with this solution. It may be nothing like what was really done back in the day, but it is workable. Steven


- 508 replies
-
- 16
-