Louie da fly
-
Posts
7,993 -
Joined
-
Last visited
Content Type
Profiles
Forums
Gallery
Events
Everything posted by Louie da fly
-
 It doesn't look like there's much sheer on the decks, even the quarter and poop decks, Dick. Is that right, or am I seeing things? In that three-quarter view looking from the bow it certainly looks that way. Steven
 -
It's been a while since I checked your build, and I can only say how impressed I am with what you've achieved. I have to make shields as well for my dromon and so far I haven't found a satisfactory way to do it. Maybe I can emulate your method. Can you provide some more detail on how you went about it? Steven
- 473 replies
-
- 2
-

-
- greek bireme
- dusek
- (and 1 more)
-
Me too, Robin. Really I only get to work on the model on the weekends, and if family or household things need to be done, the weekend can fly past with next to nothing achieved. I'm very much learning as I go, and sometimes things just don't work out the way I want. I made a scraper to cut the rebate in the keel and it works after a fashion, but not as well as I'd hoped - maybe it's my technique. Until that's fixed I can't put the keel in place and then start planking. That's my big goal - I'll actually have a hull, not just a block of wood. After that I think the rest of the build be - I won't say easy - but at least not so frustrating. I have to tell myself Soit patient, as the French say. Steven
-
Very very interesting. I've occasionally thought about RC but decided it was all too complicated. Maybe I'll change my mind after this. By the way, do you have any problems with the control cords chafing? They seem to be going through a couple of holes cut in metal plate immediately after they leave the spool. Am I right in thinking that the ship is controlled completely by the sails without the rudder? Steven
- 97 replies
-
- 2
-
-
- macedonian
- frigate
- (and 2 more)
-
That's pretty much what my wife said - though she didn't say anything about a centipede (but that was when I'd only just started, so the centipede analogy wasn't as obvious).
-
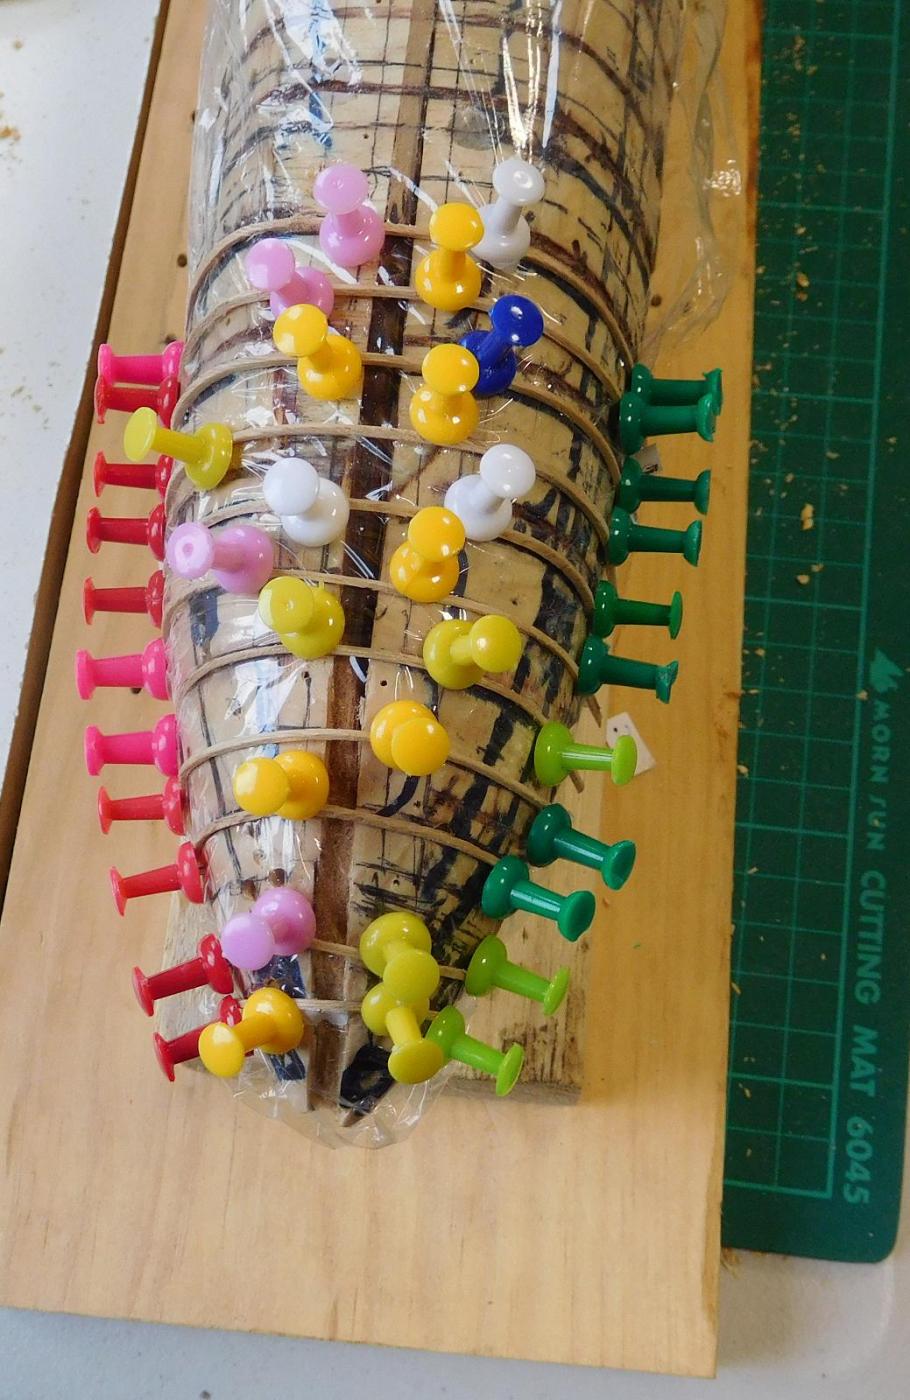
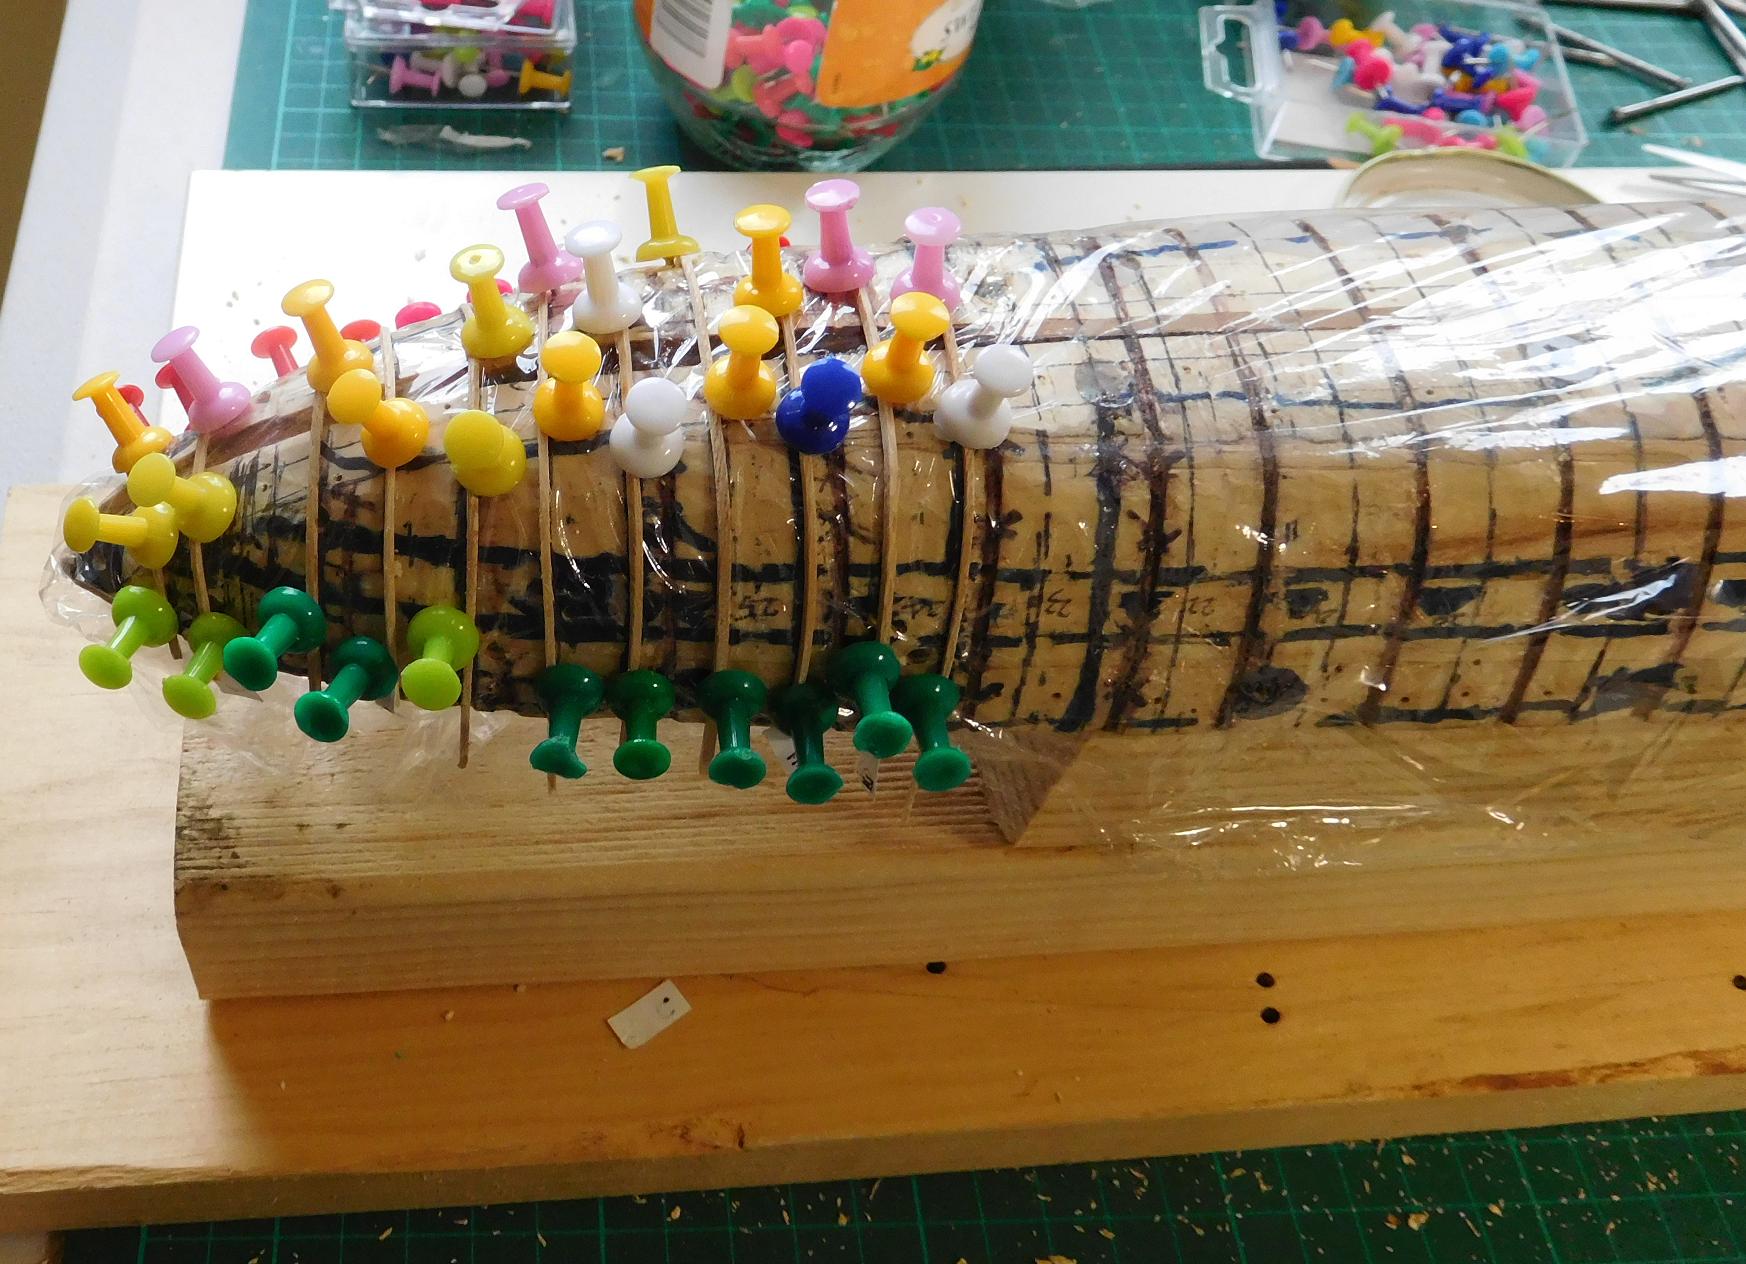
I discovered that if I held the handle of the pin in a pair of pliers and pushed inwards while twisting it back and forth, the pin would go in nice and tight. So I've managed to get all the frames onto the plug much faster than I expected, and without damaging my thumb. Note - all the starboard pins are green and the port ones are red (well, a lot of them are pink, but it was the best I could do). Probably won't be able to do anything else till next weekend, but finally making progress. Next step is to cut the rabbet in the keel and then put the keel in place and glue it to the frames.

-
I thought of it, but they're not controllable enough - they tend to pull to one side or another no matter what you do to prevent it. At least I know this works - I just have to take a little longer, that's all (to allow my thumbs to recover). Steven
-
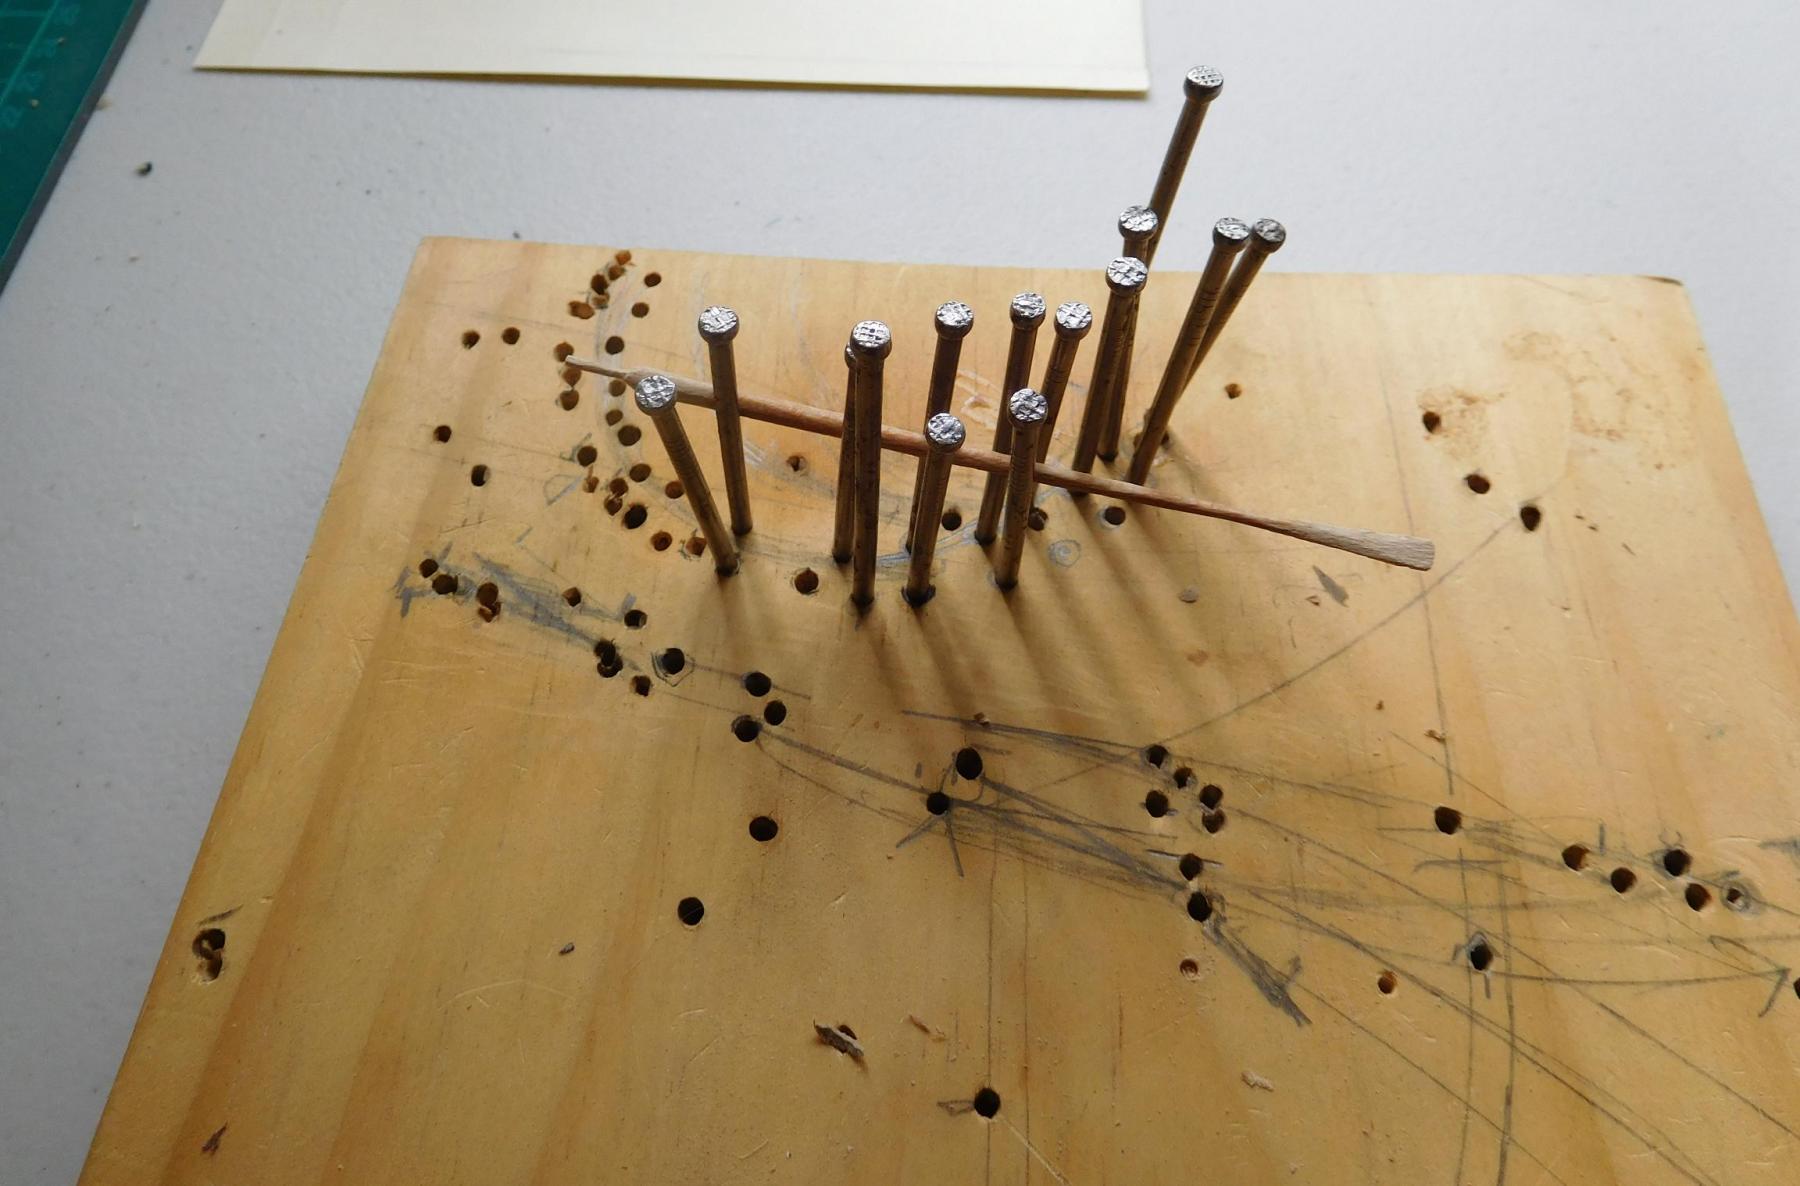
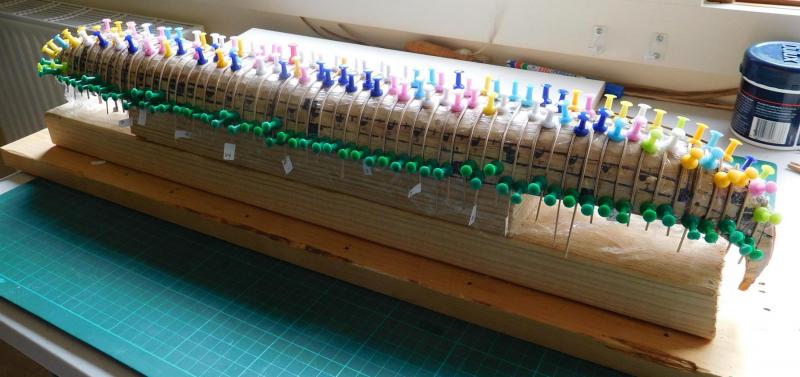
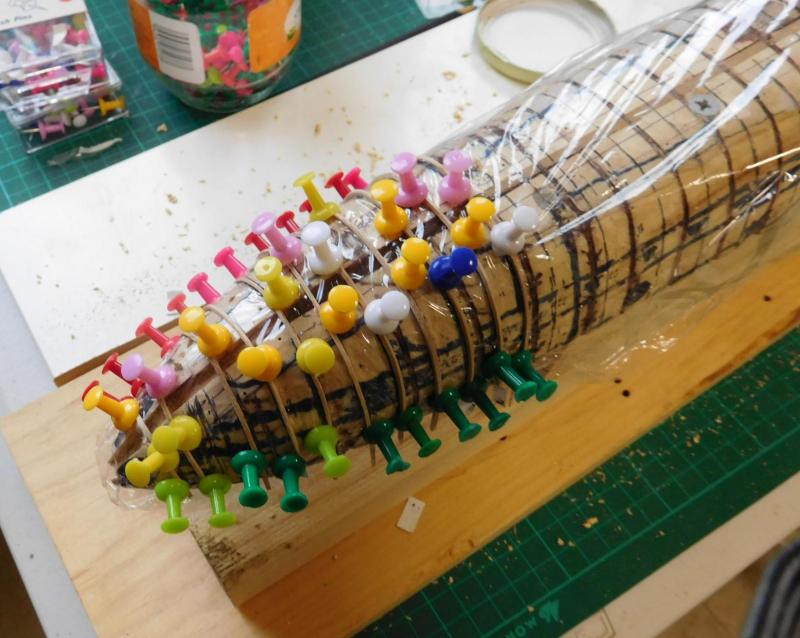
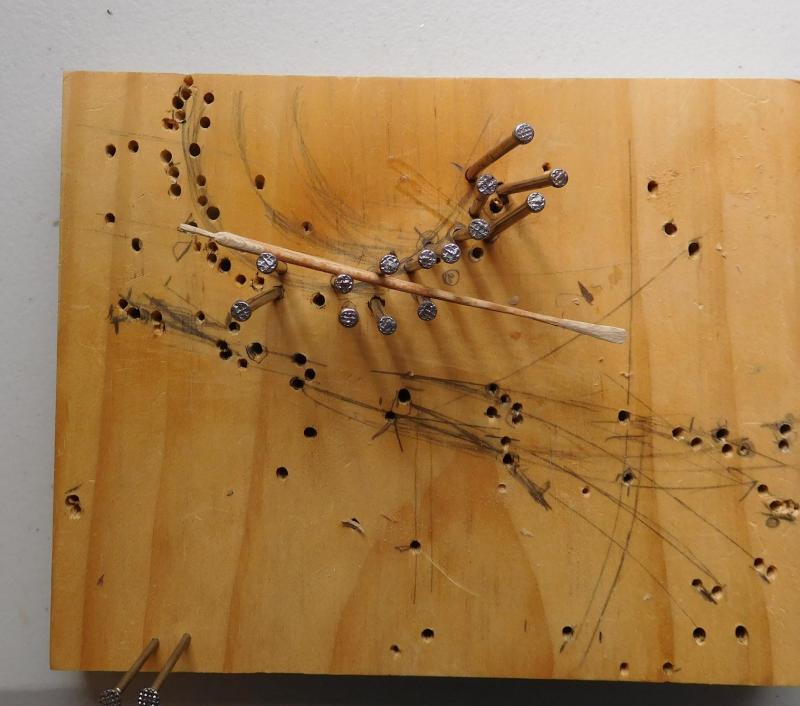
Well, after a false start or two I've finally started framing. First I made a jig to support the plug upside down high enough off the table to provide clearance for the 'tail' at the stern, with a wide enough base to keep it from toppling and destroying all my beautiful frames. The plug is screwed to two pieces of 70x45mm (3"x 2") pine wall framing and to a base of 140x19mm (6" x 1/2") pine plank. Very rigid, very stable. I wrapped the plug in cling-wrap to keep the glue from sticking the frames to the plug,then drilled something like 190 1 millimetre (1/25") diameter holes in the plug to take a line of push-pins each side of the keel and another line just below the "gunwale" (guns hadn't been invented in the 11th century) on each side to keep the frames in position and lined up. I first tried using just a single line of pins each side at gunwale level, but the frames bowed down below the bottom of the plug with a gap of up to 2mm between the frame and the plug, and wouldn't stay square. Using 4 pins per frame seems to work quite well, and helps keep them square to the keel. I already had one lot of holes from the earlier attempt but I had to drill more because I'd discovered in a lot of places the push pins for adjacent frames were too close together and fouled each other, and I needed another line of holes - between every 1st and third hole, in line with the frames, but offset far enough from the other line of holes so they were clear of the other pins. (I only broke one drill bit - not bad considering how thin the drill-bits are and that I was just using a hand-held electric drill!) I've just started putting the frames in position and it seems to be working well, except for very sore thumbs from pushing the pins into the plug. They need to be tight to grip properly so I have to force them in, which is hard on my thumbs. Add to that the first failed experiment with only two pins per frame, and it adds up to a lot of pressure on the pads of the thumbs. They're not all perfectly square and spaced, but once they're all in position I can go back and tweak them. I have 11 frames in place - only 113 to go! Steven PS: My wife says it looks like I'm giving the ship a perm!


-
I thought that might be the reason. A clever idea. The build is looking very good. Steven
-
Very nice, clean, precise work. It looks like it will be a very good model. The gun carriages look a bit unusual - I've never seen any that looked like that. Steven
-
That's very interesting. I suppose it depends on how strongly they were built. And if the construction was too weak, they'd find out the hard way - if they survived. [edit] Maybe that's why forcastles changed from rectangular to triangular in the 15th century - too much overhang? Steven
-
Uniforms of the Royal Navy and Marines circa 1724?
Louie da fly replied to timboat's topic in Nautical/Naval History
An interesting theory. Whether it has anything to do with the reality, I have no idea. Steven -
Uniforms of the Royal Navy and Marines circa 1724?
Louie da fly replied to timboat's topic in Nautical/Naval History
Maybe they didn't. I think that's more Hollywood than reality. I don't know enough about Samurai to comment, but our ideas of pirates are formed more from fiction than fact. As far as the military goes, well, red's a bright colour; but maybe there were plenty of other coloured sashes as well. -
Uniforms of the Royal Navy and Marines circa 1724?
Louie da fly replied to timboat's topic in Nautical/Naval History
And an ordinary sailor seems generally to have worn either floppy trousers (slops) or petticoat breeches, a shirt and most likely a Monmouth cap, plus presumably a jacket when it was cold (info from here. By the way the word "slops" comes from their originally being made in Shropshire, otherwise known as "Salop" - from Wikipedia: Steven -
A fully functional submarine from Spain 1858
Louie da fly replied to dgbot's topic in Nautical/Naval History
I don't know about fully functional, but I'm pretty sure experiments were made in Napoleon's time but failed to go into full production because Napoleon refused to fund such a diabolical machine . . . -
Actually that was a mistake on my part, which I regretted once I started carving. I should have left quite a bit more wood at the base so I had something to hold onto. I won't do it that way again. Yes, the mushy card works fairly well - it means the edges can be nice and soft and have it look like a mattress instead of just a bit of cardboard. It can even be shaped in a mould (mold for our American cousins) if done properly - it's basically papier mache', after all.
-
I'd agree. If the evidence isn't there, I don't think a spritsail would be justified, no matter what modern people may do with their reconstructions. Just because it might look obvious to us to put one on (and it may well improve the working of the ship) doesn't mean they had them in the day. Stirrups seem so obvious for riding horses, but nobody used them until something like the 6th century AD. The idea just hadn't been invented yet, no matter how much of a no-brainer they seem with hindsight. Steven
-
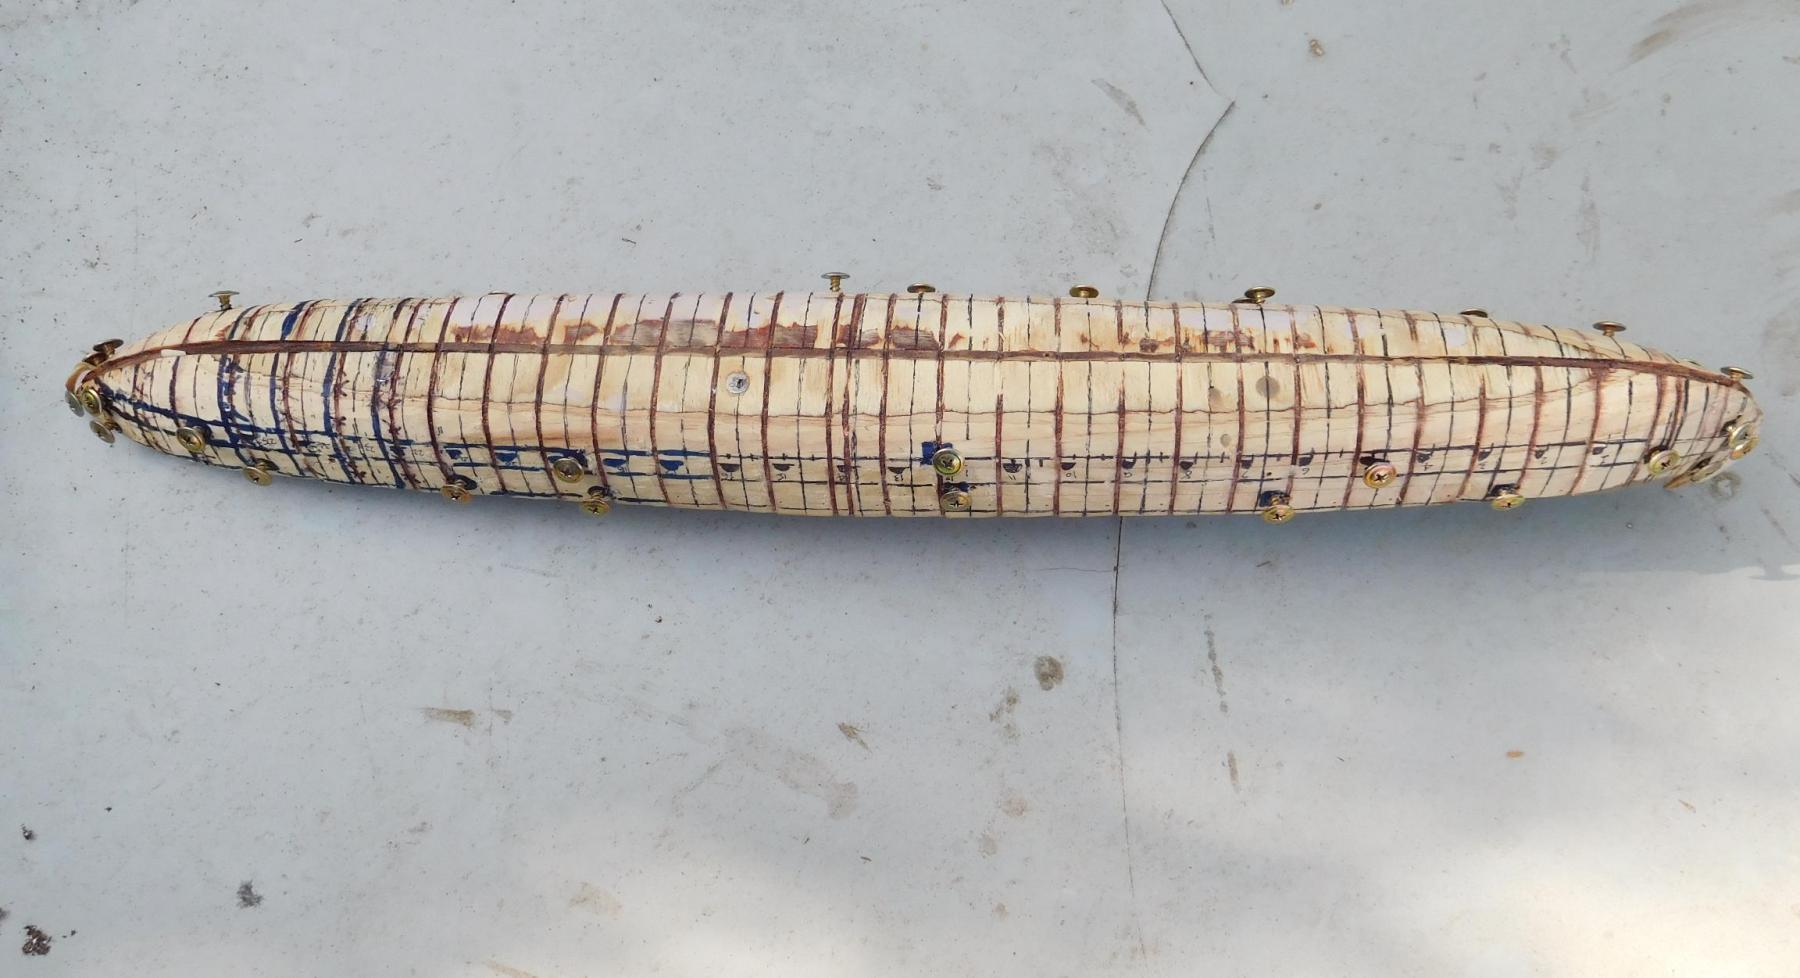
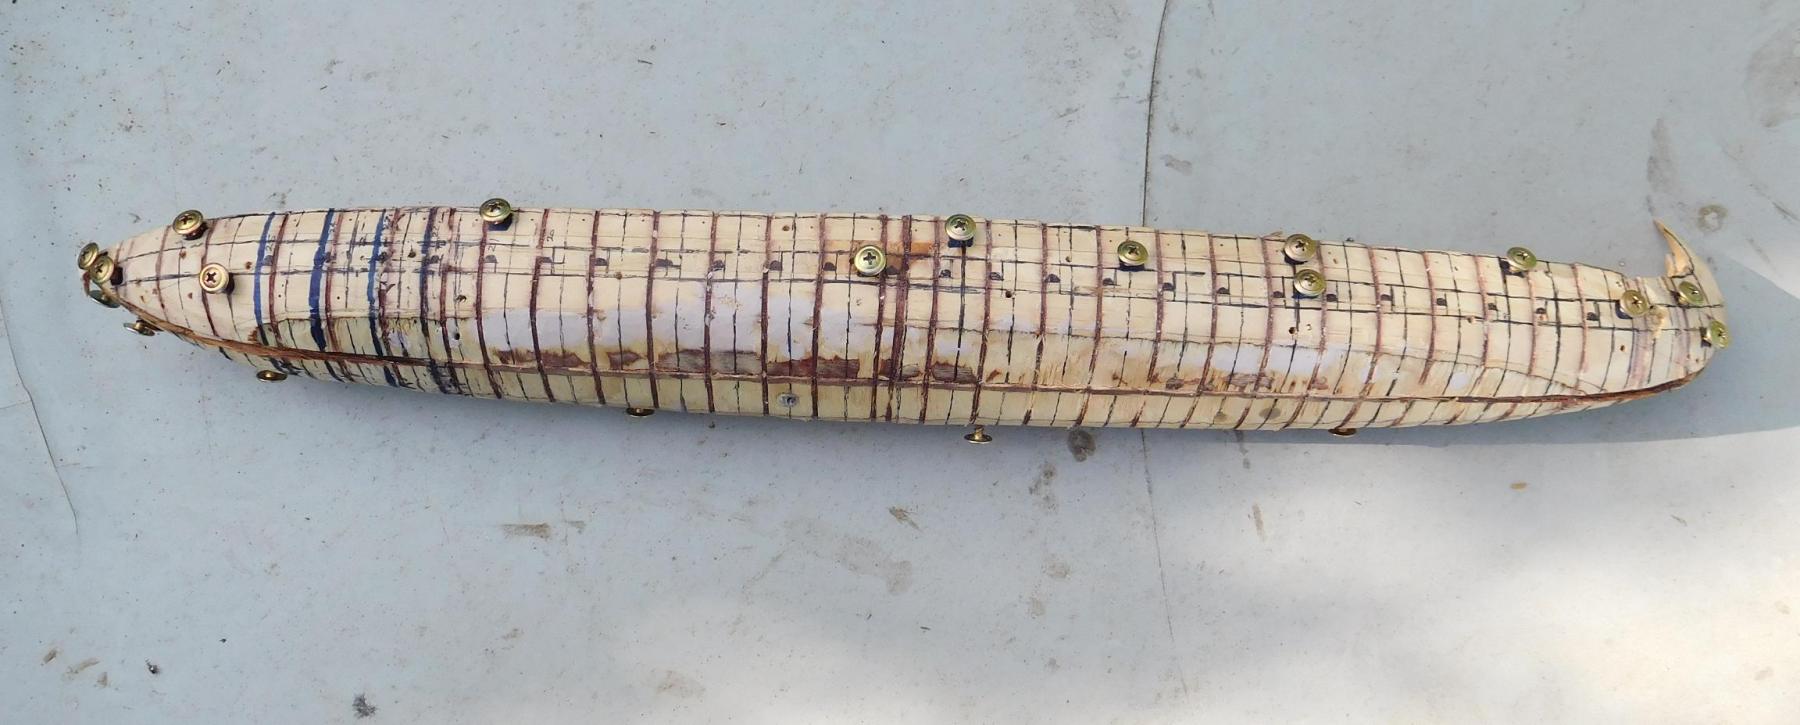
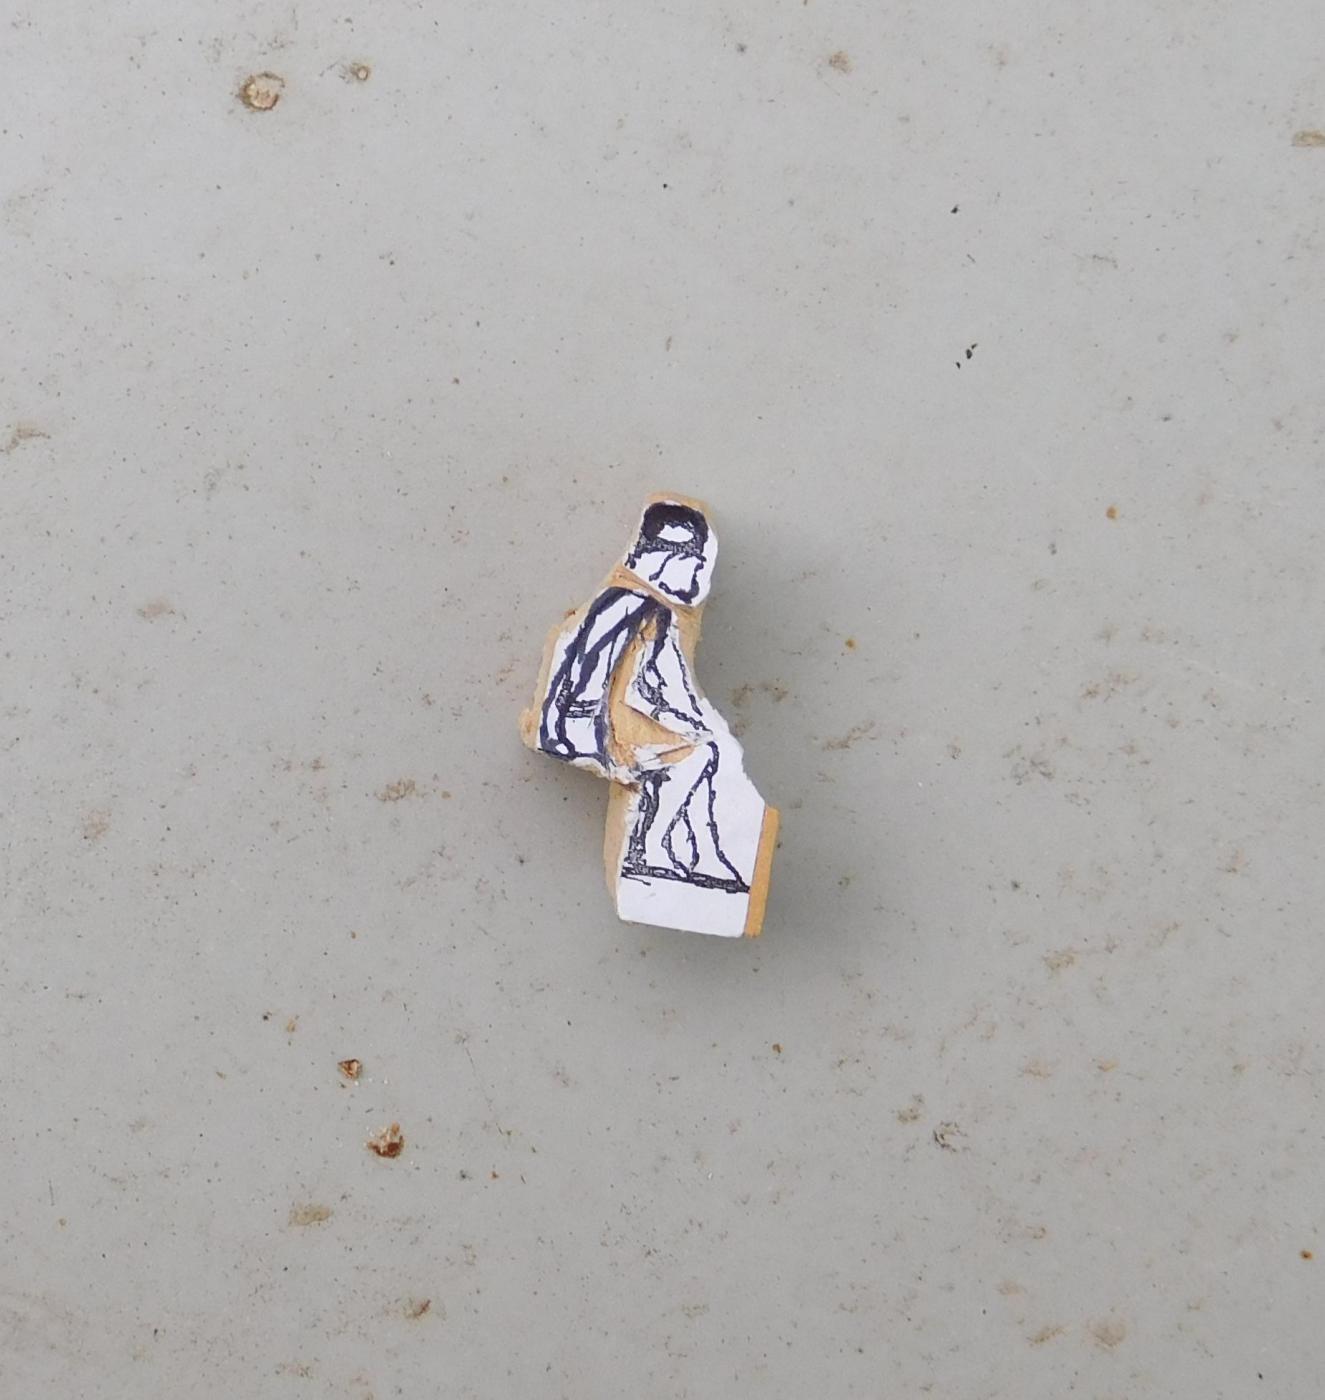
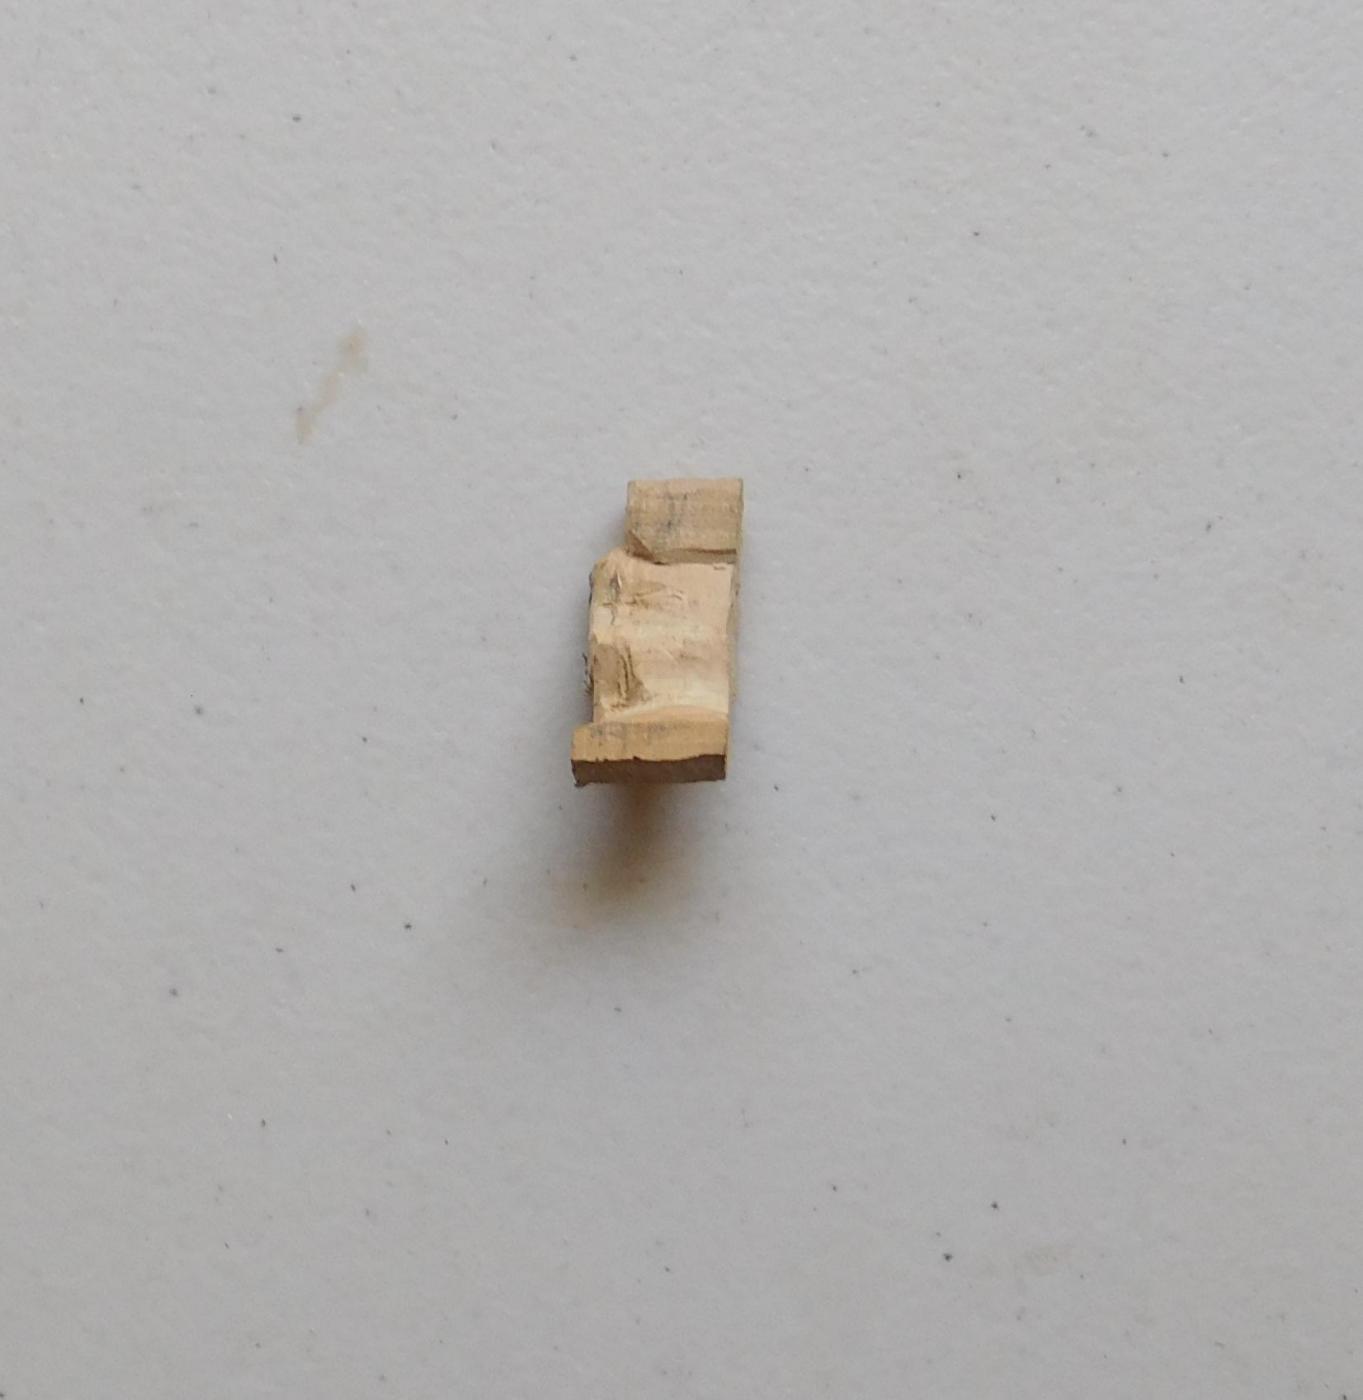
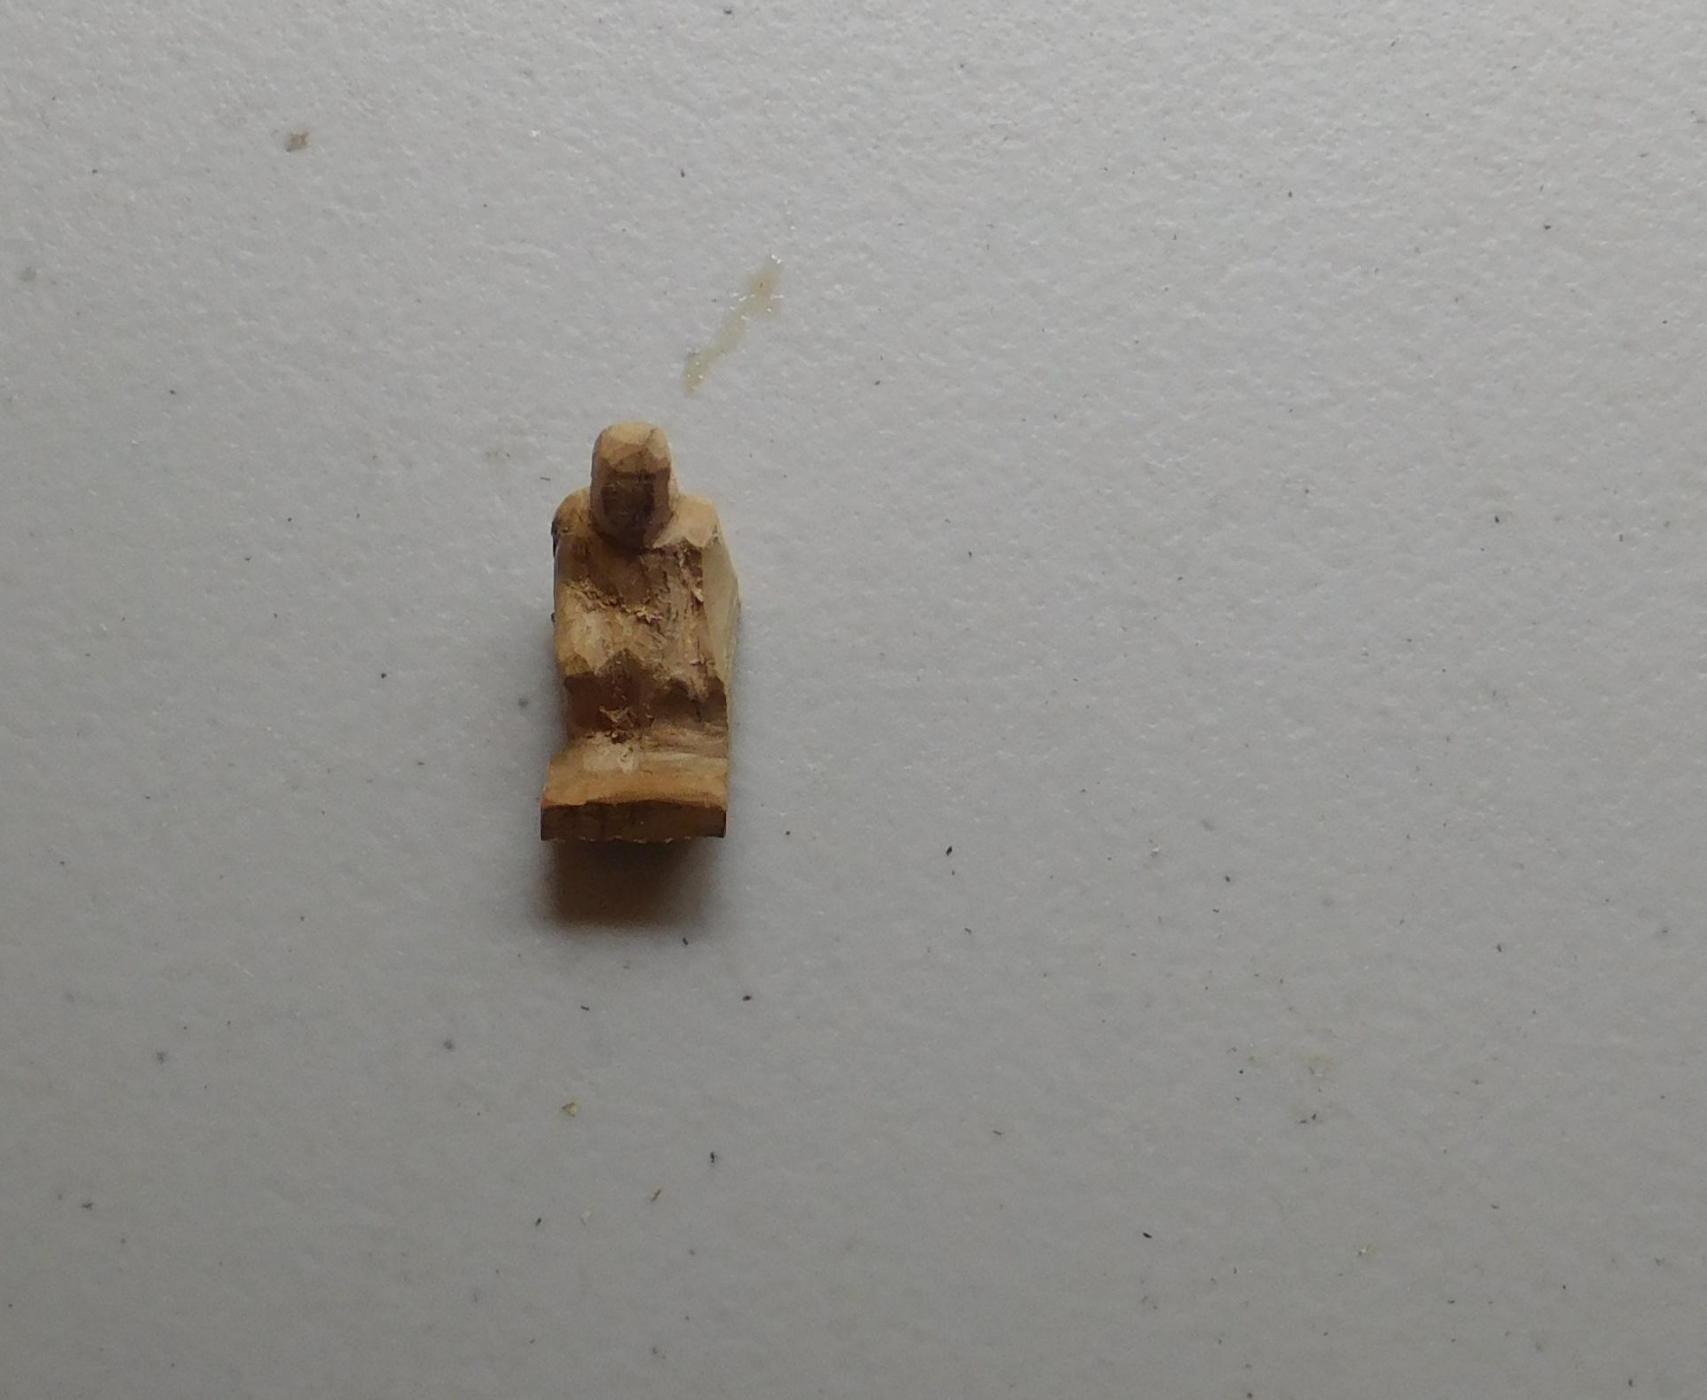
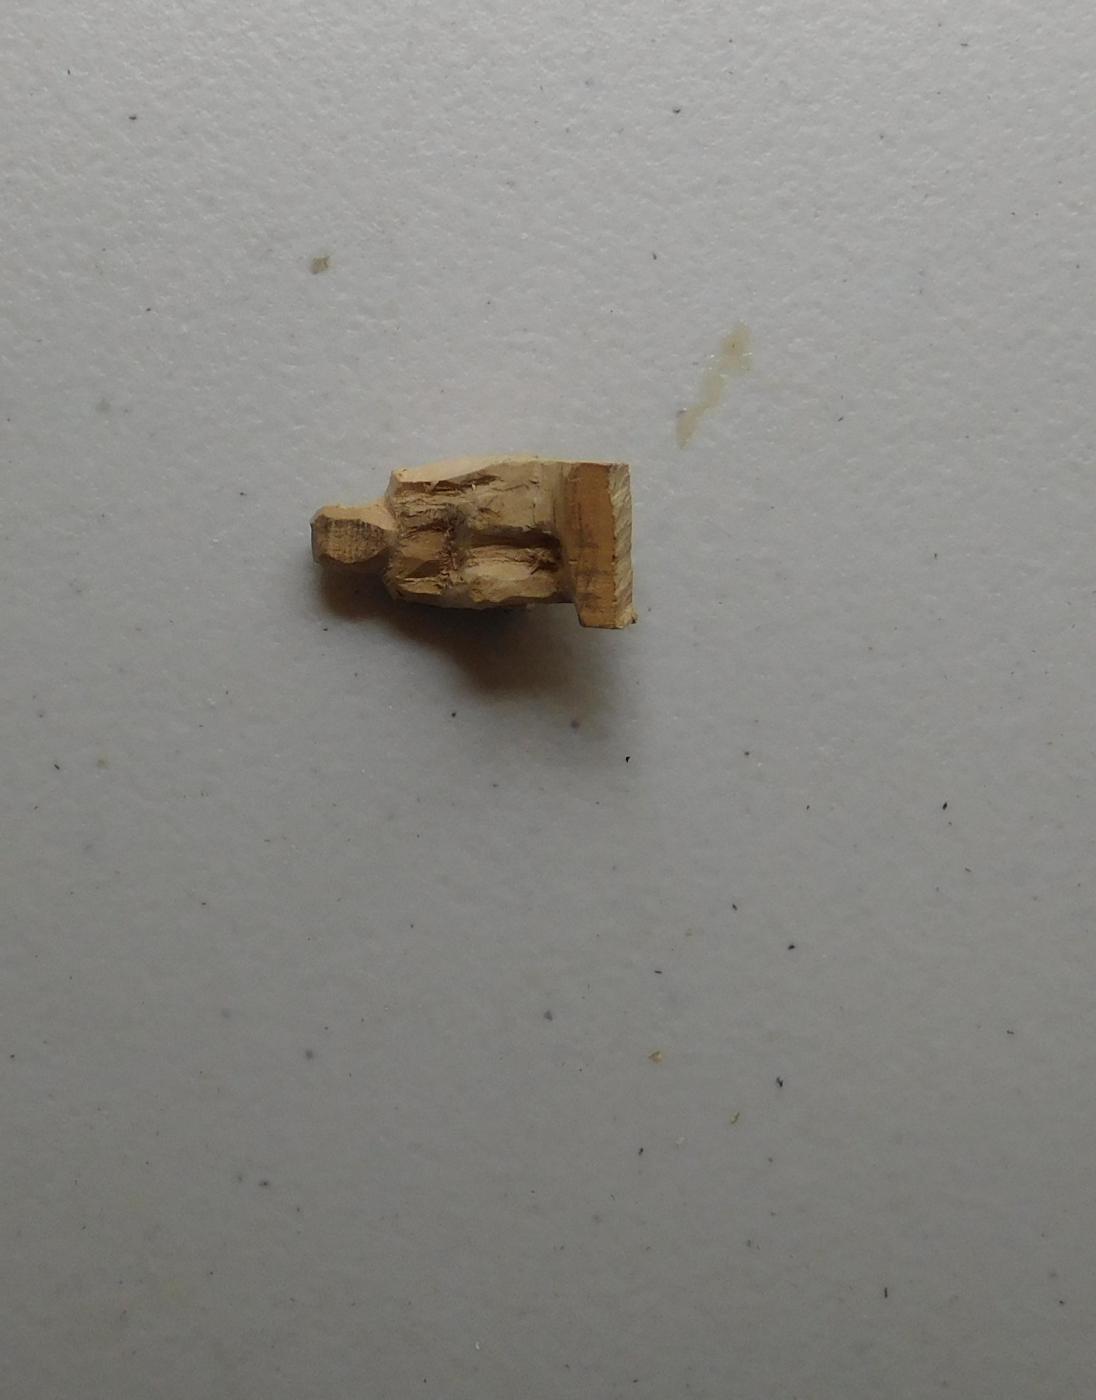
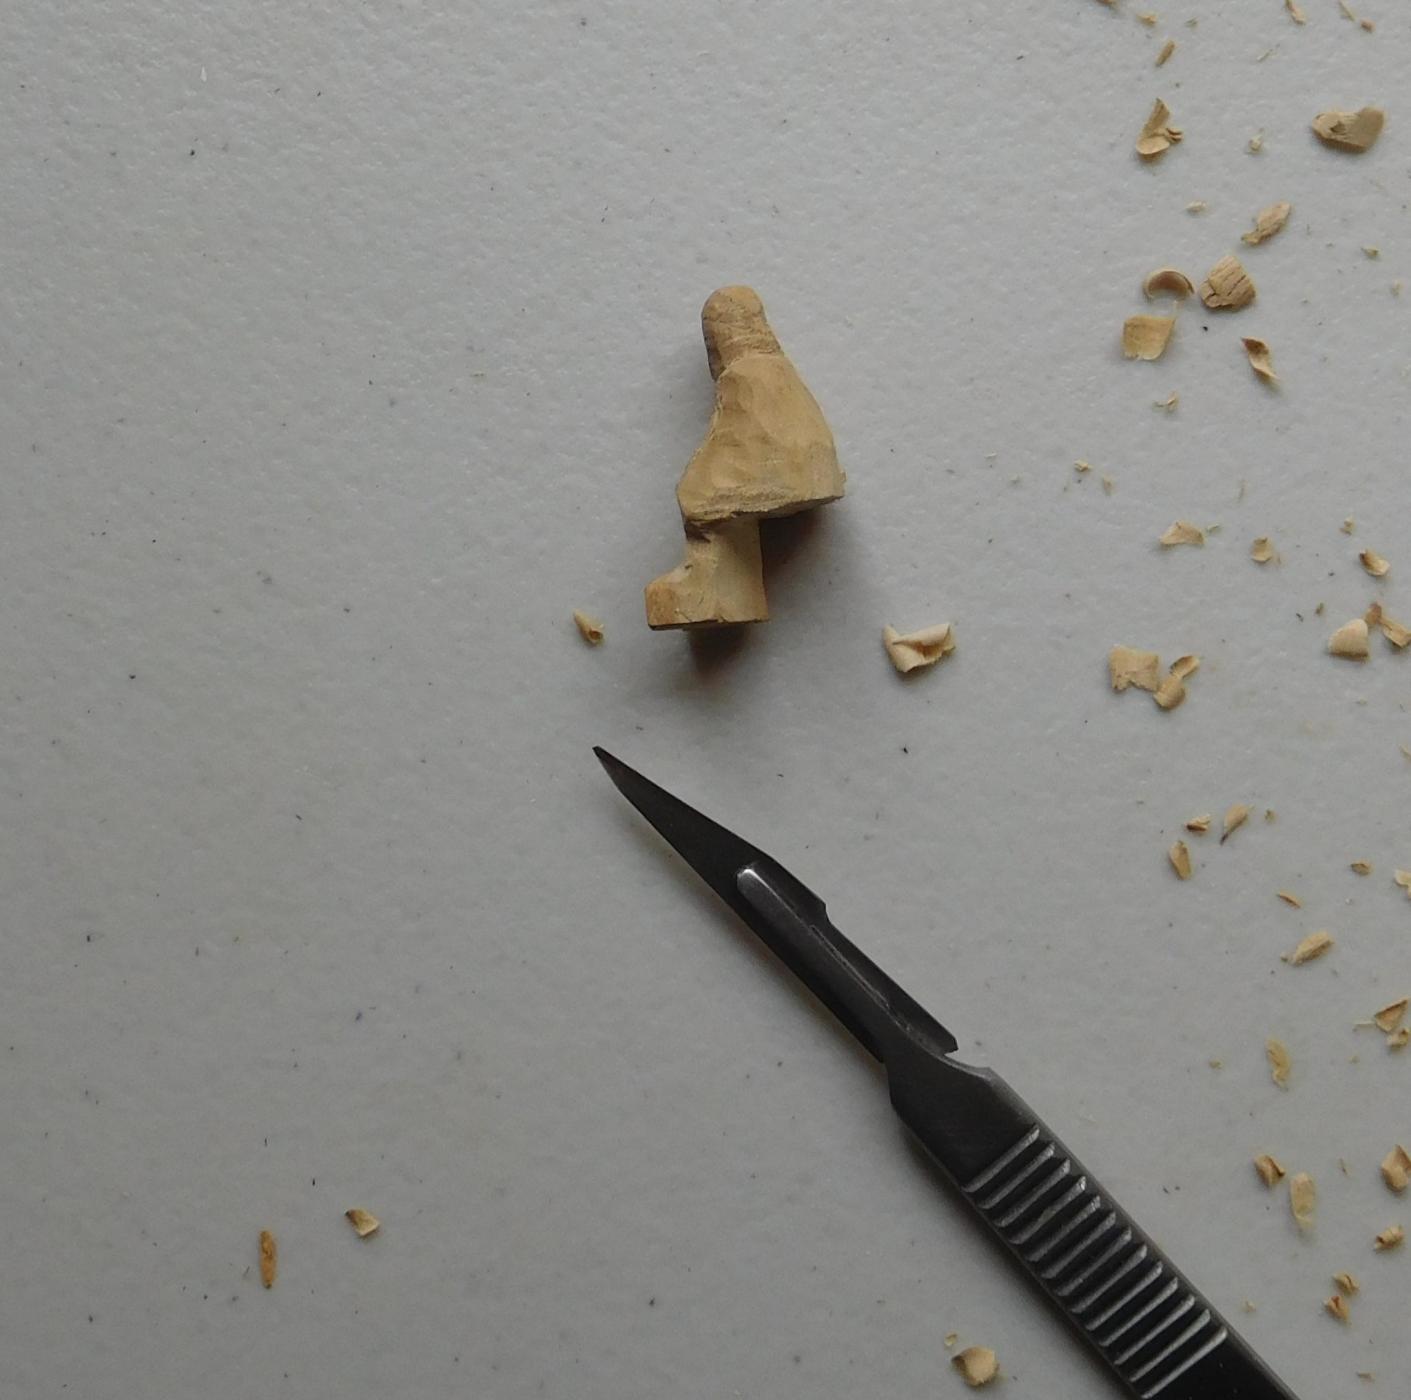
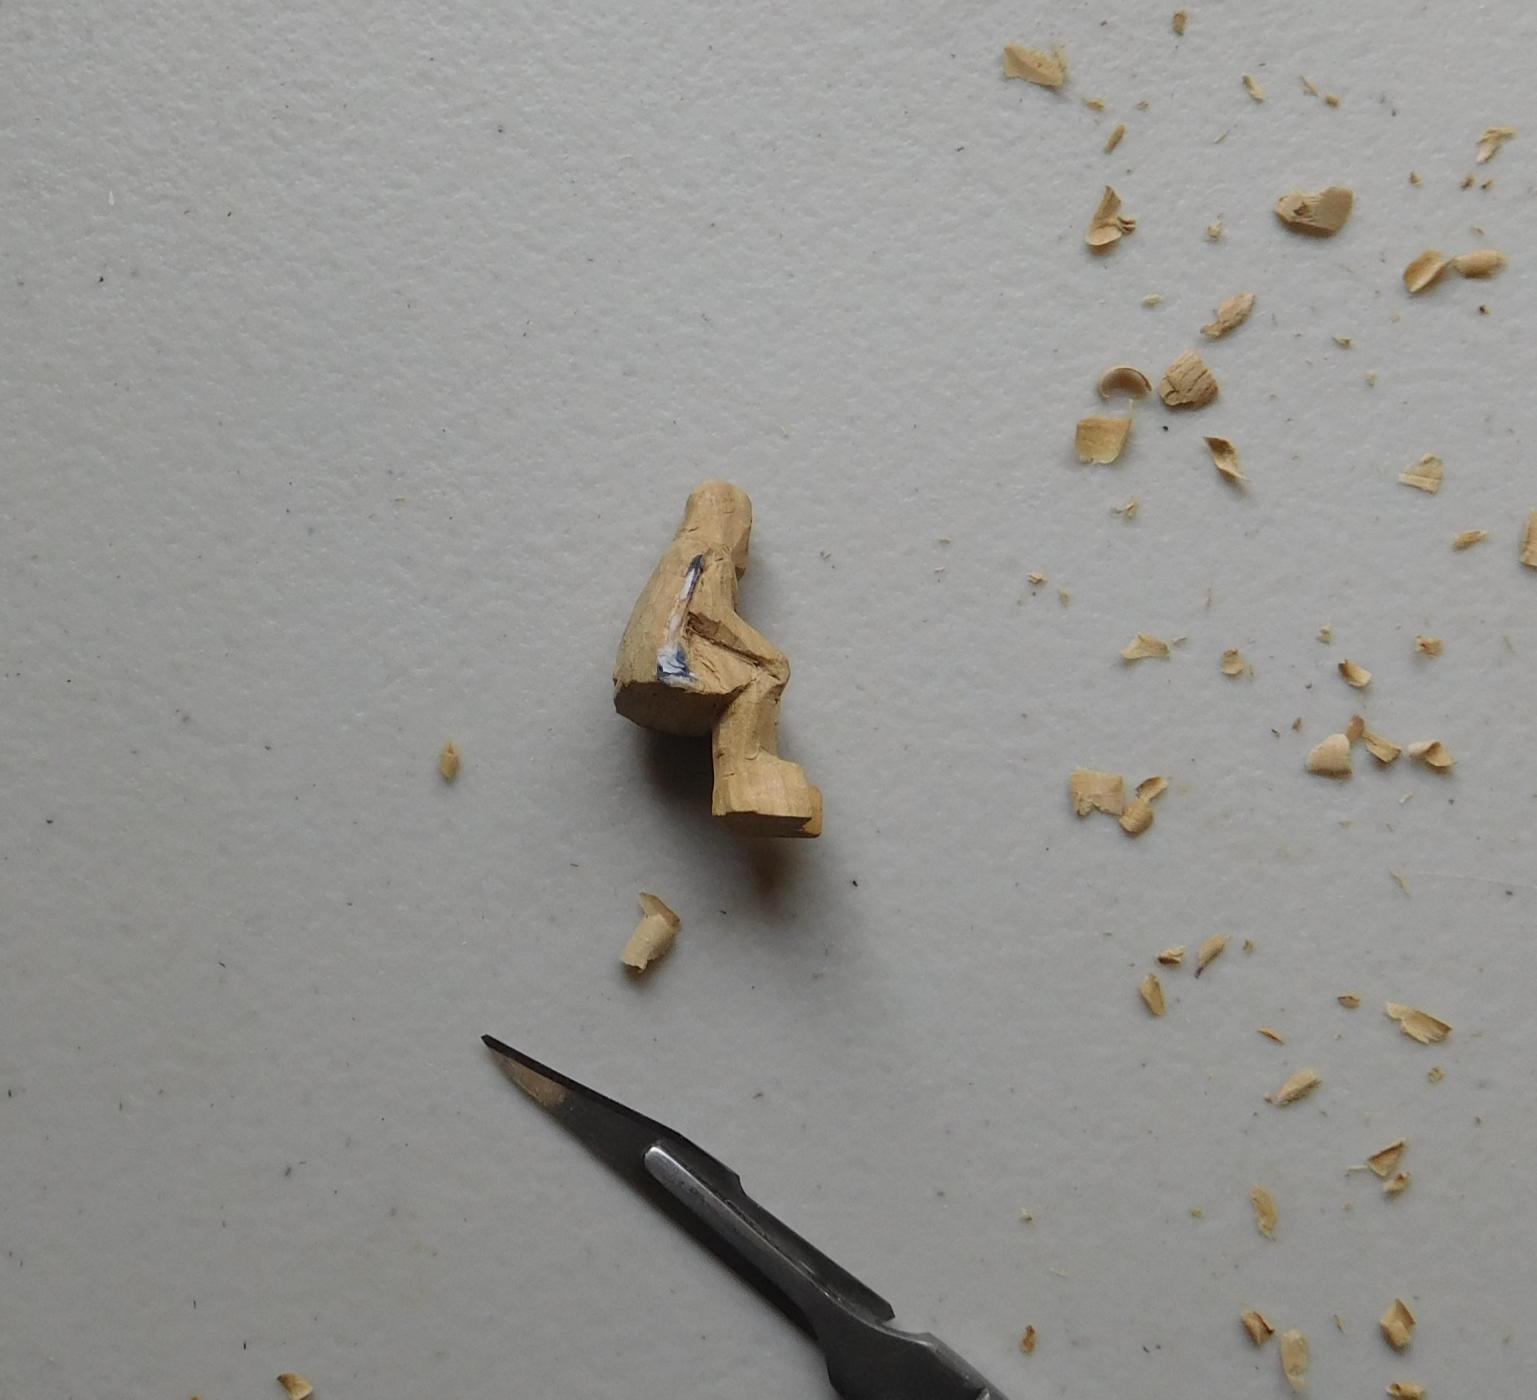
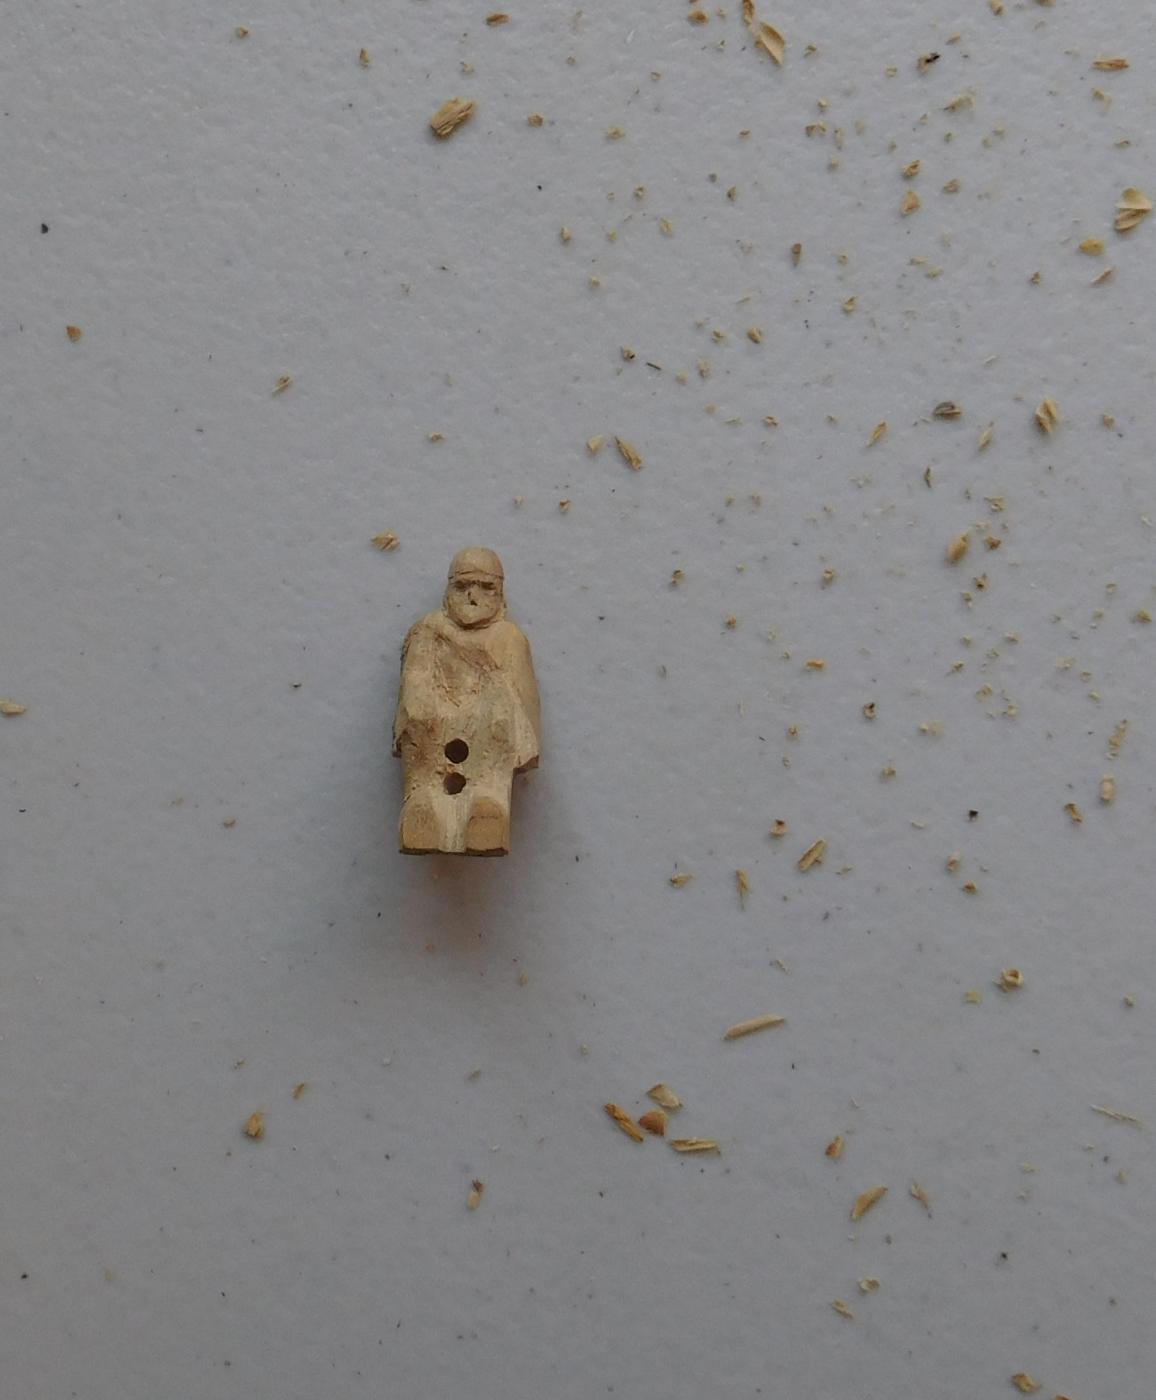
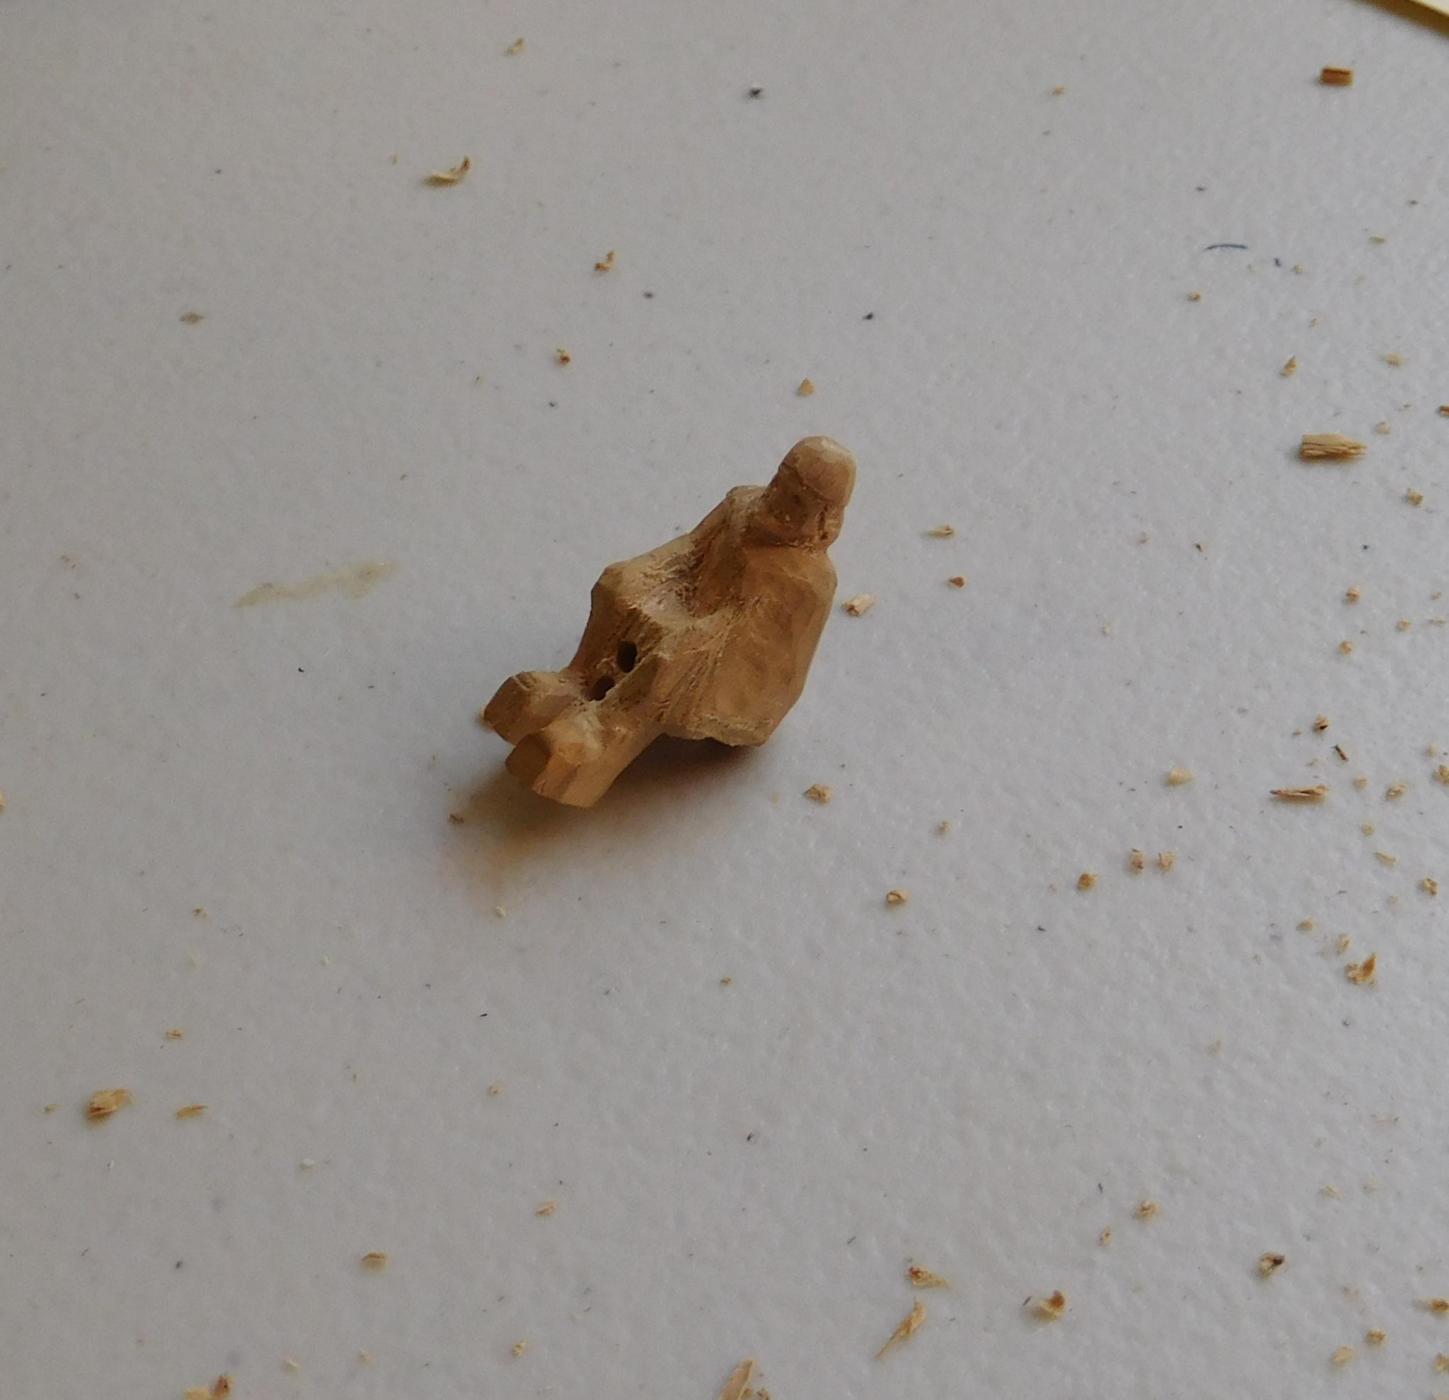
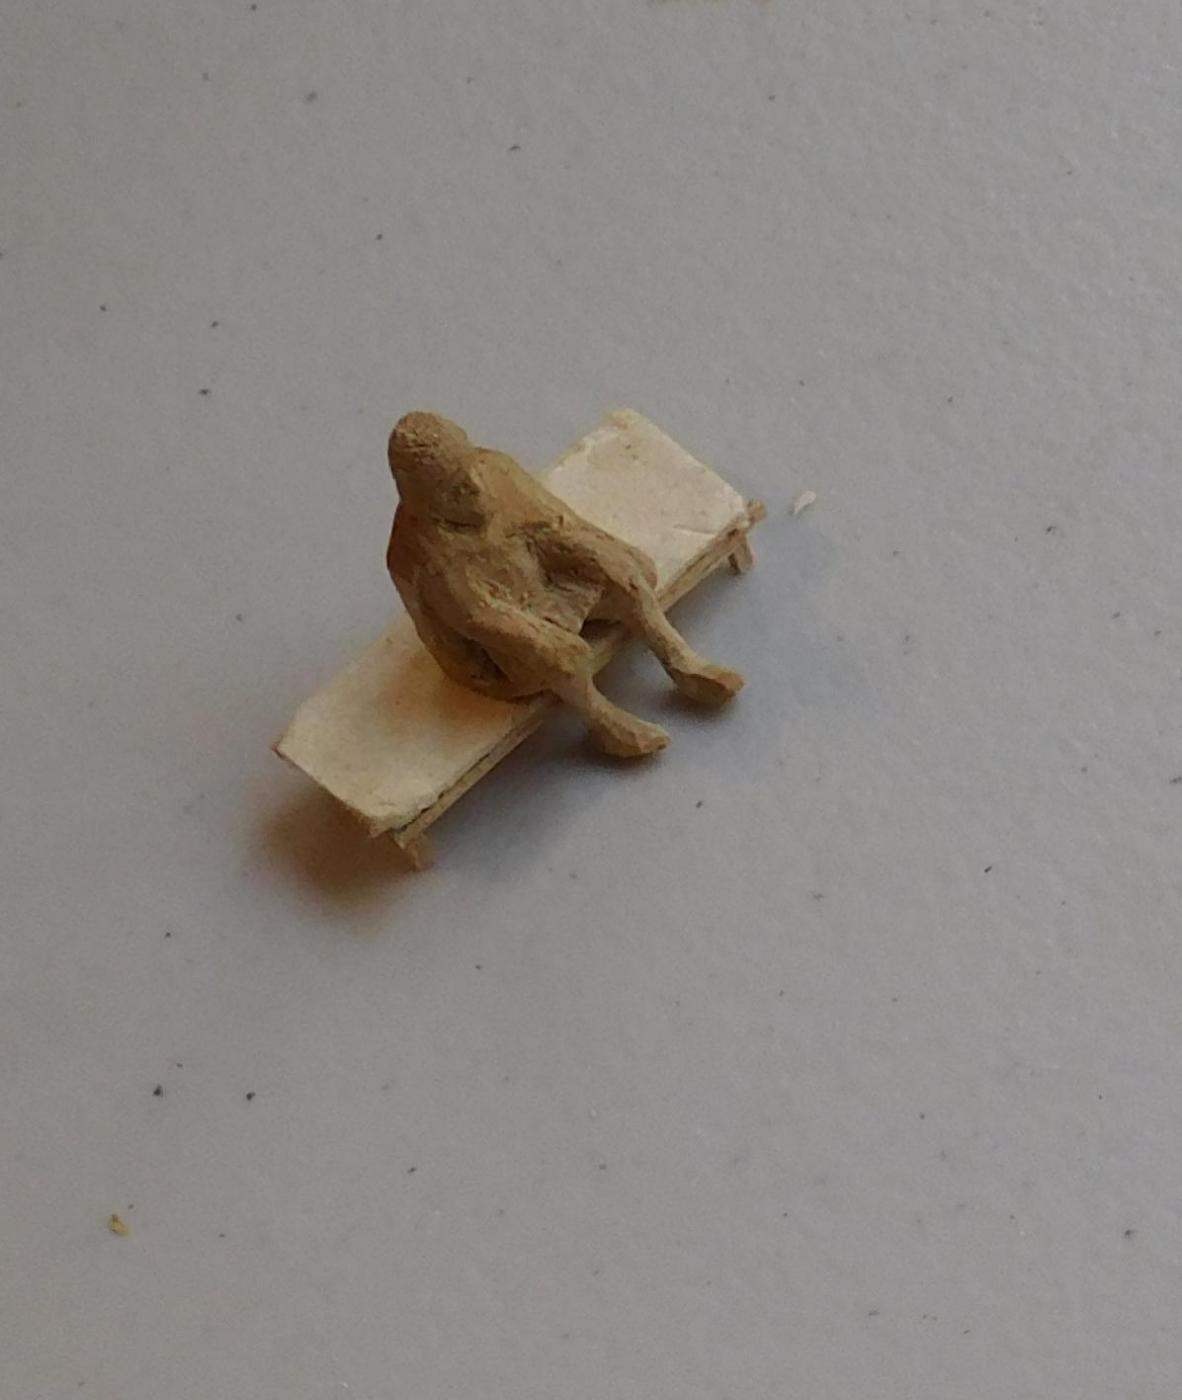
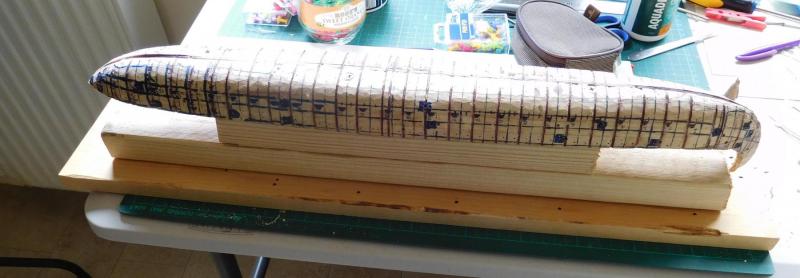
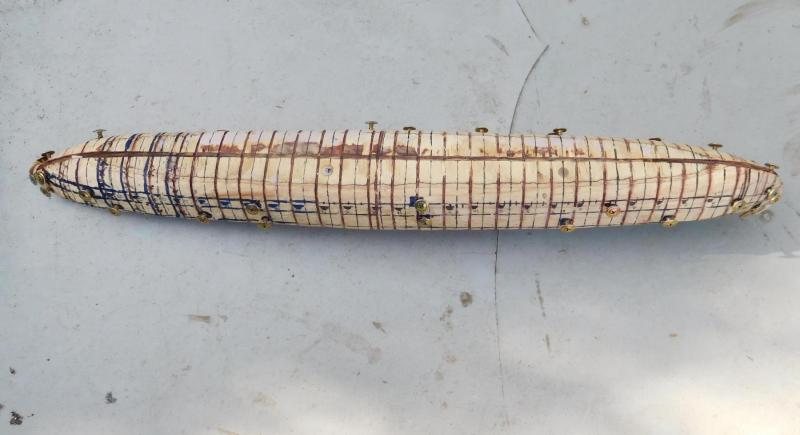
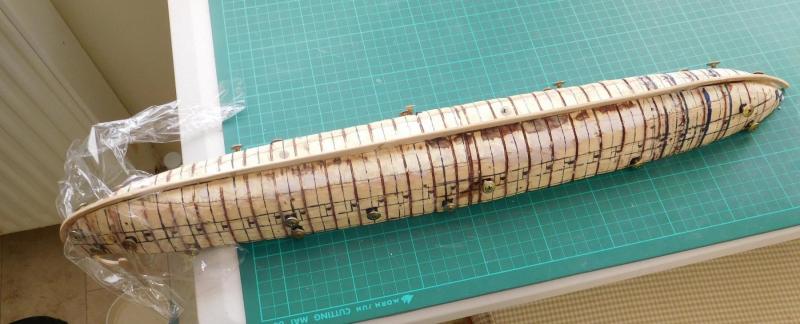
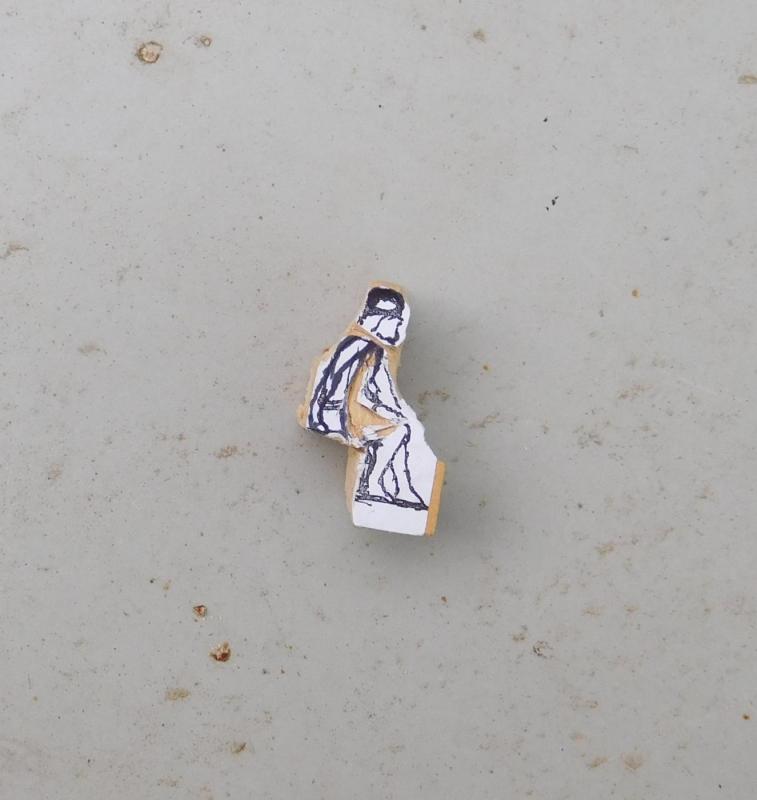
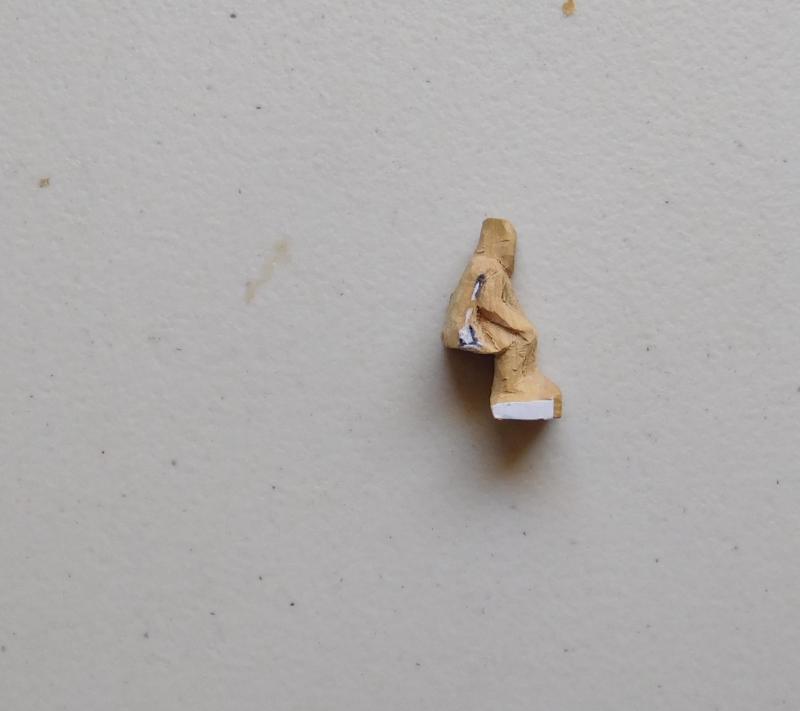
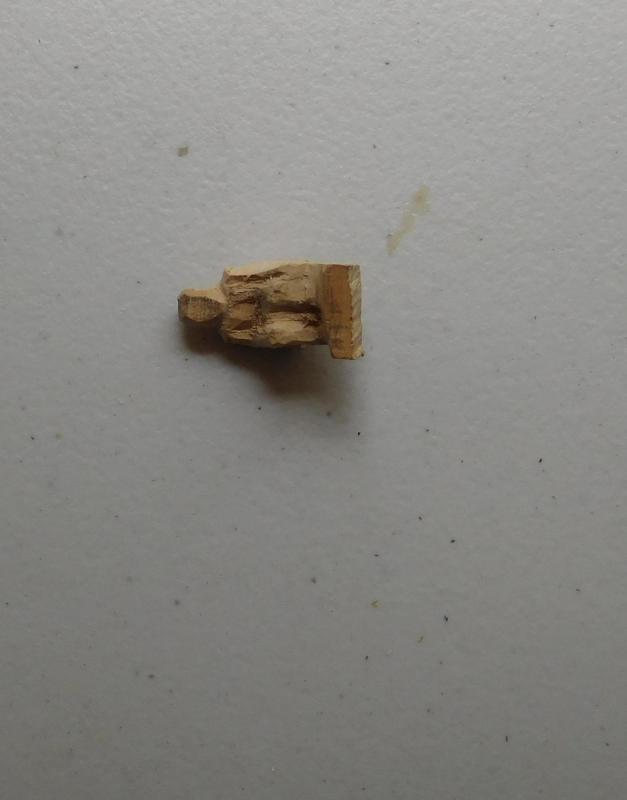
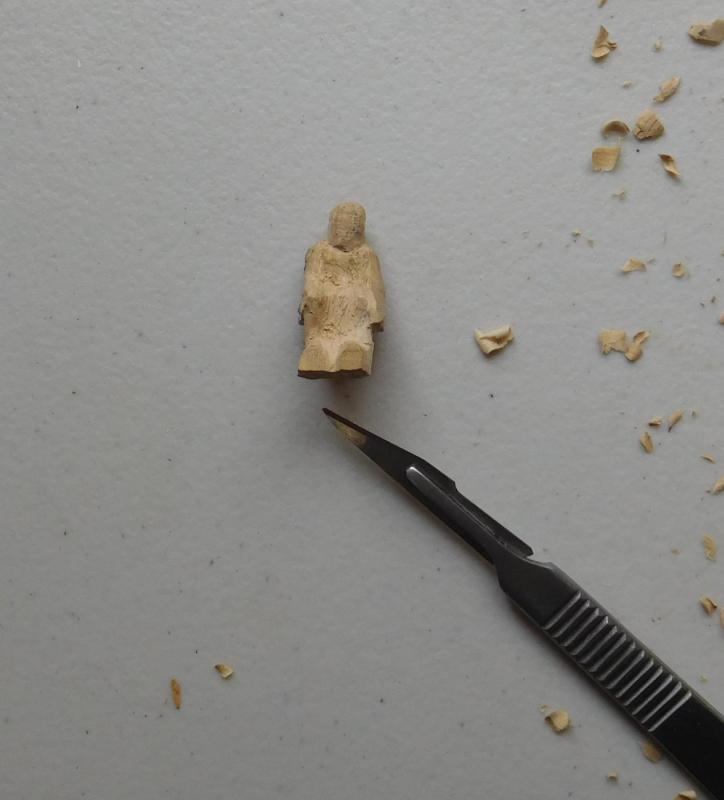
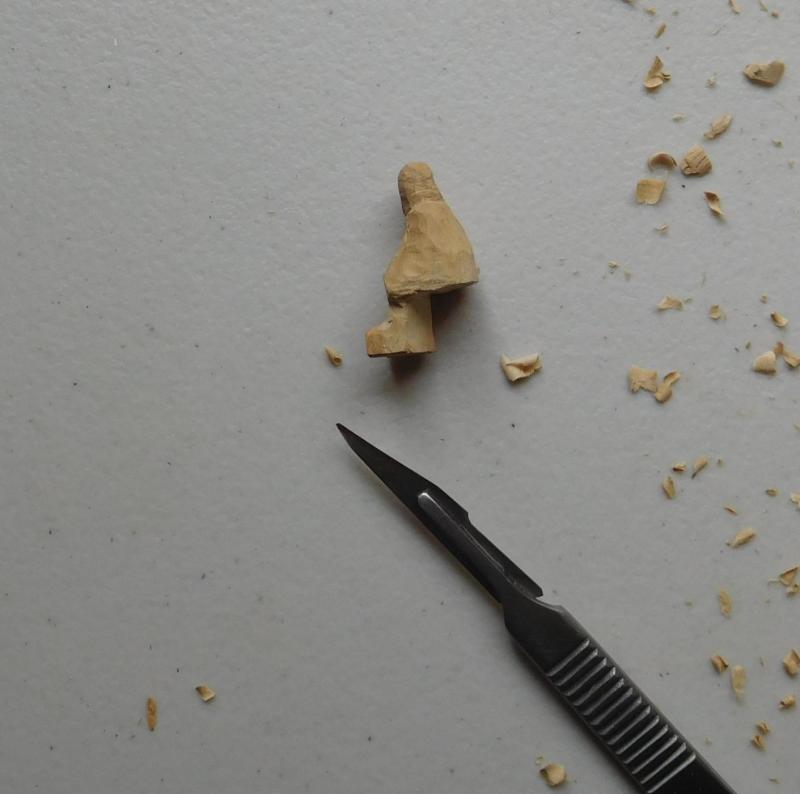
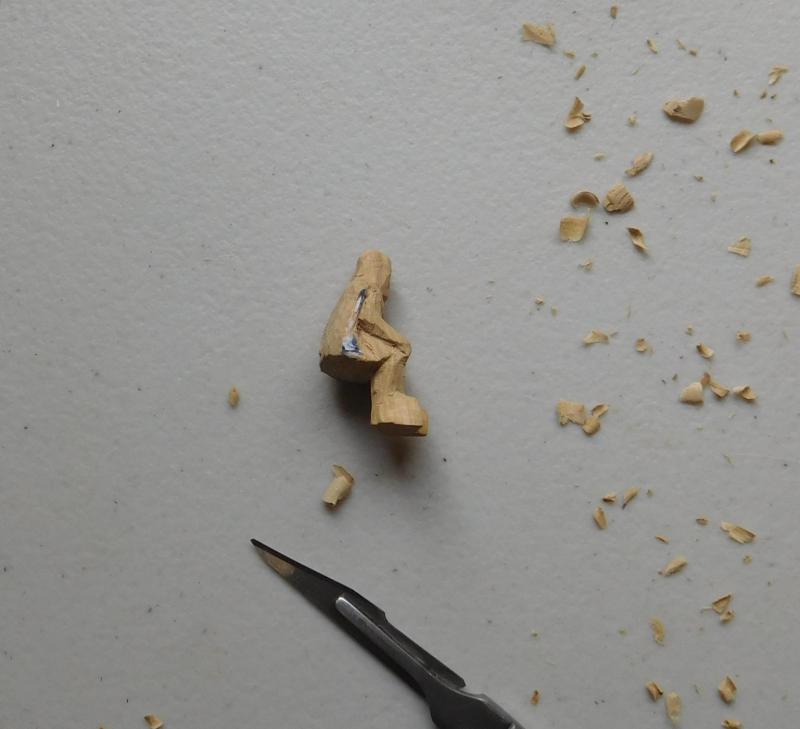
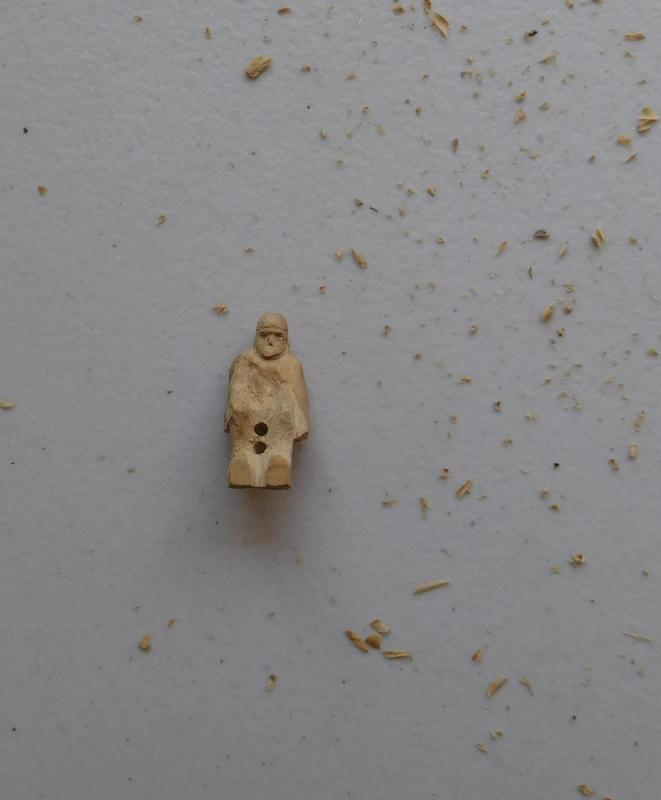
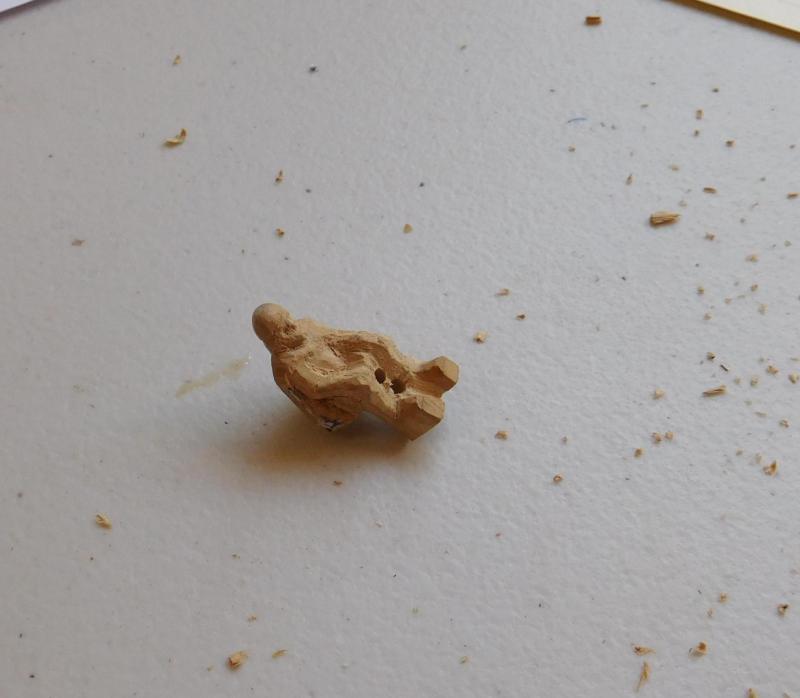
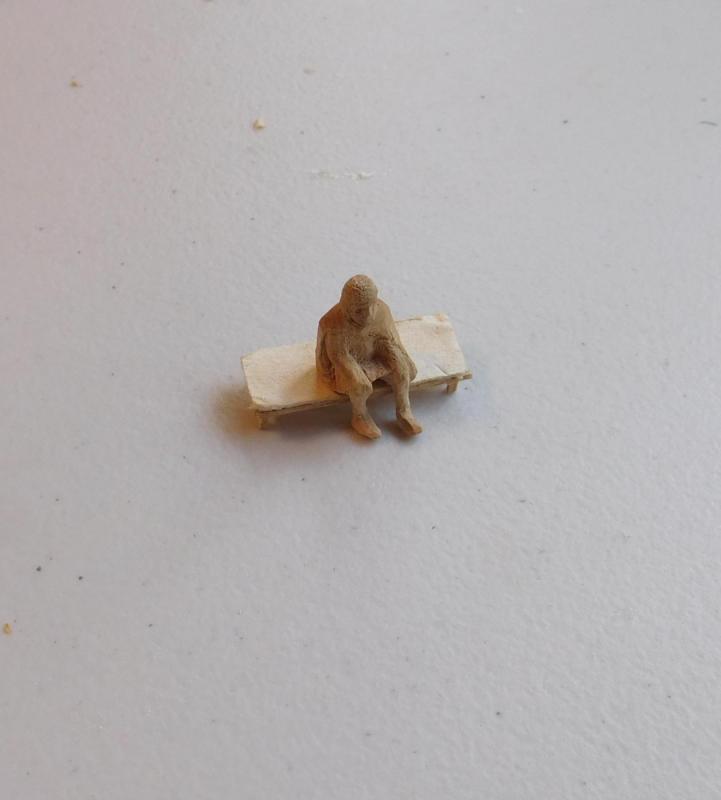
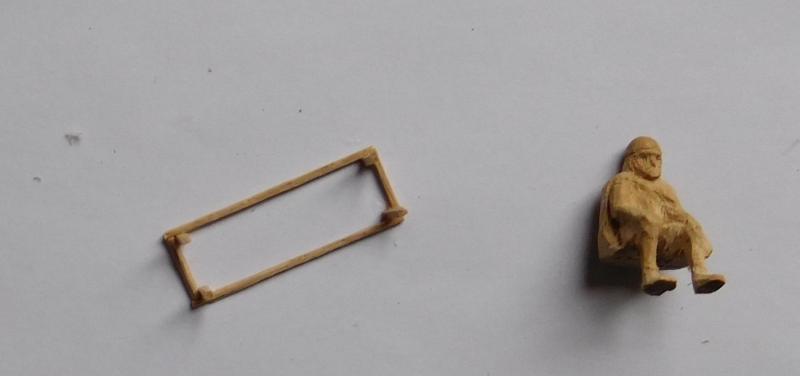
I've been fairly busy over the last week or so. I've finally shaved the plug down to size (1 millimetre less, all along the hull - I must be mad). I've marked the positions of the frames I intend to put in for the "first fix" and also the lines of the wales and the positions of the oarports. I glued the sternpost back on (using clingwrap to keep the glue from sticking together things that should be kept apart), and the keel assembly fits nicely onto the plug. I've yet to put grooves in the stem and sternposts to take the frames there (the plug overlaps them and this seems the easiest way to put the frames on in these areas). I've straightened the few oars that were bowed, using water, a heat gun and my really trashy bending jig. (It works, though!). Had to be careful this time -the oars are so thin I didn't want them charring or bursting into flames. And I've also carved the droungharios (captain). The captain is the hardest figure I've ever done - having someone sitting down was quite a challenge to work out. First cut Second cut Beginning to take shape (and time for a new scalpel blade!) Given a face and holes drilled to separate the legs And I've made his kravatos (which translates as "bed") - nobody's sure exactly why the captain had a bed on the poop deck, (it's the only area of the ship with an awning over it). So I've made it something simple, that he could sit, recline on or sleep on as needed. I made the mattress out of a bit of cardboard from a dog-biscuit box. Cut it to shape than soaked it. The glossy layer of paper on the surface can be peeled off and the cardboard underneath gets soft and mushy and can be moulded with the fingers so it looks soft. I'm thinking of putting a layer of fine fabric over the mattress so it looks more luxurious. And here he is . . . I used the point of the scalpel to pick away at his hat so it looks furry - a furry red hat was a badge of rank at the time. He's also the only person on board wearing a cloak (another mark of rank) and when I paint him I'll have him in highly coloured, expensive clothing. I still need to smooth him off, but I'm very happy with how it's all going. And it won't be long now before I can actually start planking the hull (at last!) Steven


-
I didn't take the addresses, unfortunately, just recorded the pics as I stumbled across them. So I've put them up here Steven
-
That's a nice piece of work and a good addition to the character of the ship. Steven
-
That would be it, of course. The foremast on a carrack was usually pretty tiny, and I suppose this is a temporary stub to get the forestay correctly worked out.
-
Linden was used for shields in Anglo-Saxon times, and it's possible that this was because it was soft enough to receive a blow with an edged weapon without splitting, and perhaps (if you were lucky) trap it in your shield so you could have an uninterrupted 'go' at your opponent. I swear by pear wood for carving, ever since I was given some when I was a teenager. I haven't tried other fruit woods, but I find the fine grain of pear suits my purposes very well, (though carving the faces of 1:50 scale figures is pushing the outside of the envelope a bit, even for pear wood). By the way, is it just me, or do other people have trouble with the screw thread continually coming loose on craft knives like the one at the bottom of Chuck's post of 19 October? I've found it so annoying I got a proper surgical scalpel. The No. 11 blade is the same shape as on the craft knives, and a scalpel works much better for me. Only problem is the occasional broken blade (I'm pretty hard on them). Steven