Louie da fly
-
Posts
7,991 -
Joined
-
Last visited
Content Type
Profiles
Forums
Gallery
Events
Everything posted by Louie da fly
-
 Hans, could you post a photo of the back of the shields so we can see the way they are fixed? And maybe a shield that's been removed from the ship? Thanks, Steven
 -
You're off to a good start, Valter. What kind of timber is that? Steven
-
Thanks Martin. That looks fantastic. I'll have to get one when I can fit it in the budget. Tired of burning my fingers with the heat gun. Fortunately for my current build it's only the wales that need bending and I'm nearly finished. (The planks are only about 0.5mm thick, as it's a very lightly built craft). Steven
-
This is a very useful and worthwhile tutorial. I'm eagerly looking forward to the one on two-piece moulds. I've got 50 oarsmen to make and I've never tried moulding with rubber and resin.
-
This is a really brilliant video. Unfortunately my frames are so thin that I can't put pencil marks on them that are visible. Serves me right for trying to build a dromon with scale thickness frames. But it's very clear and easy to understand. I'll be sure to use this technique in subsequent builds
-
What is that amazing tool? It seems to be an attachment for a soldering iron? If so what is it called and where can I get one?
-
I asked a similar question a while ago and got a reply here. It seems that some at least were lashed to the side of the ship.
-
A very worthwhile project, John. There's a fair bit of detail in these paintings, which should be helpful. I take it you're going to convert plans for other, similar ships to construct the model?
-
I don't know if it would be acceptable as this is a repair, not a "renovation", but would you consider making a new, wider base to help prevent a re-occurrence of the accident?
- 749 replies
-
- 2
-

-
- albertic
- ocean liner
- (and 2 more)
-
I never cease to be astounded and impressed by the level of research that's gone into your build, Dick. I takes me hat off to you, sir.
-
Rob, I think this might be a case where the wrong nomenclature is being used as you mentioned above. The (almost) vertical ropes running from the masthead to the deadeyes are the shrouds, and yes, they are used to support the masts. However the shrouds also form the sides of the "rope ladders" for access aloft. The ratlines are the thinner ropes used as the "rungs" .
-
Looking very good, Dick. Good to have you back. I totally agree about the shrouds being fixed inboard , and with blocks rather than deadeyes - Carpaccio and others are very specific about this. And yes, it's far better to follow what the evidence shows us than to take what seems to be the easy or "accepted" way of doing things. Ship design changed over the centuries, and sometimes when we do this we learn why they did it that way. A beautiful and impressive model. I've learnt a lot from following this build. Steven
-
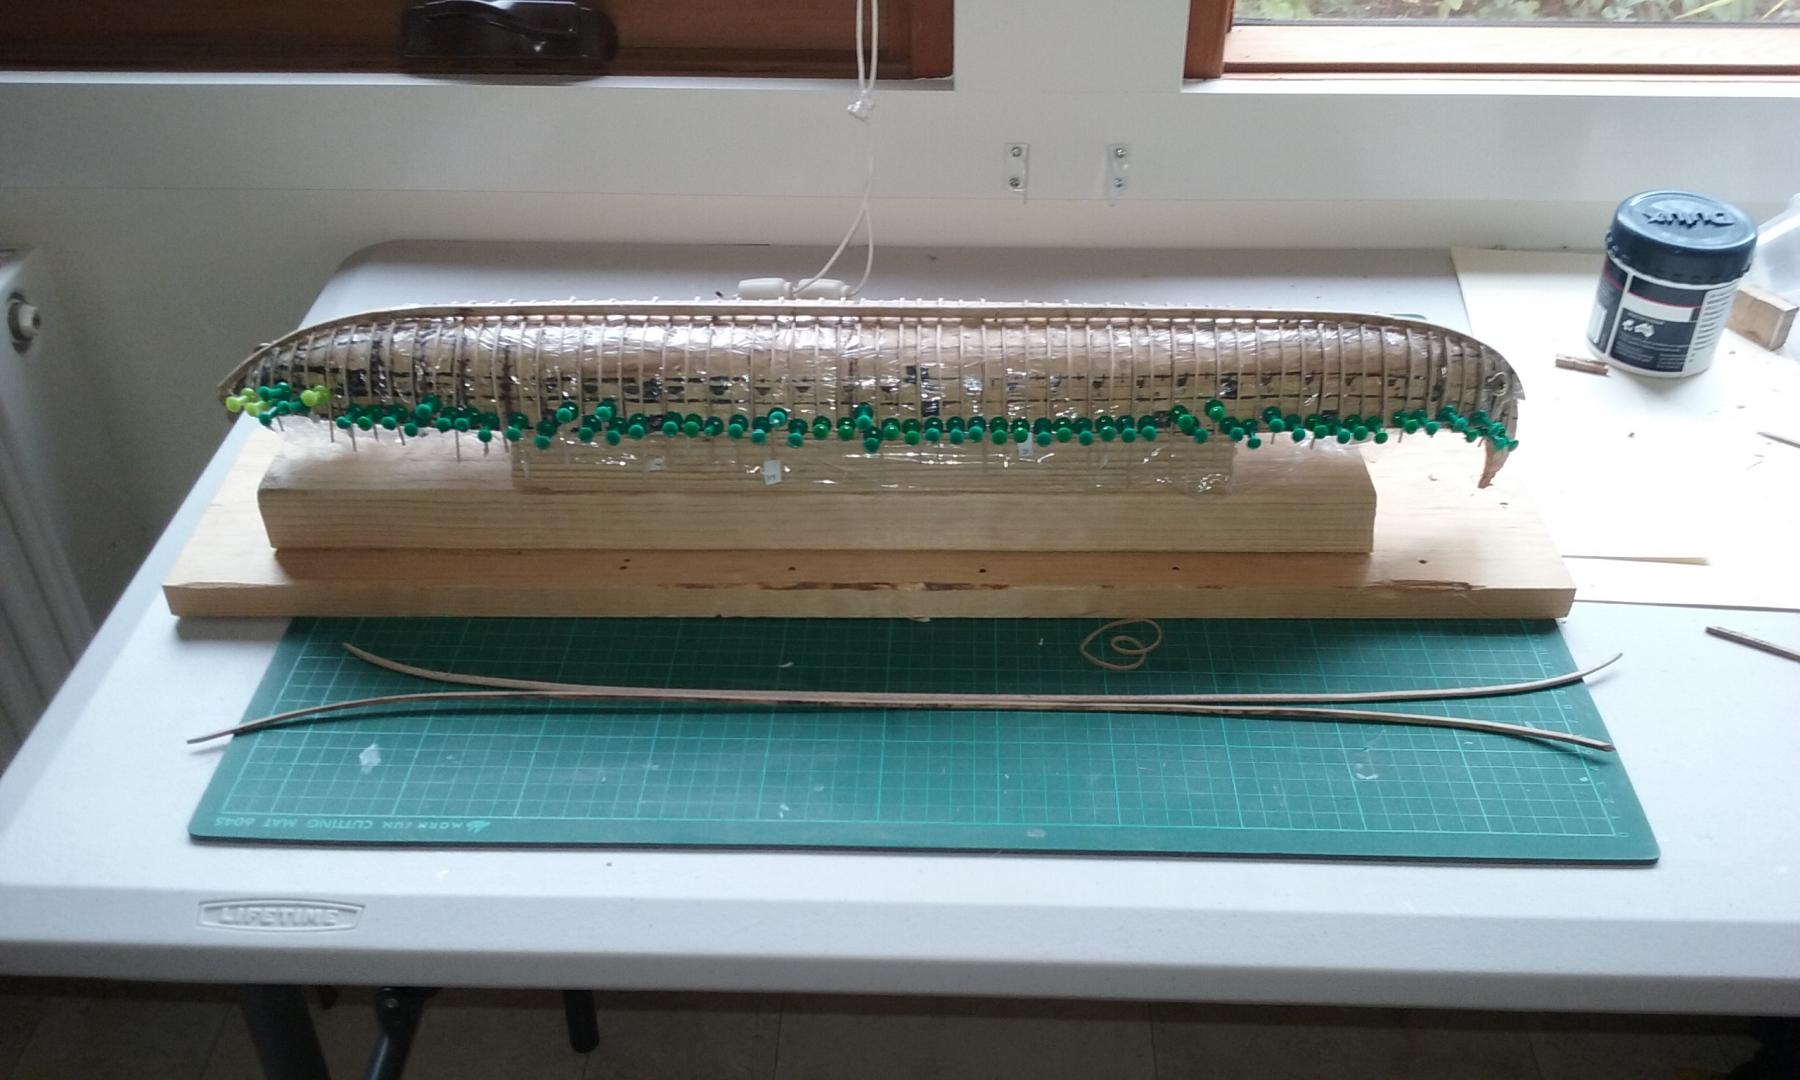
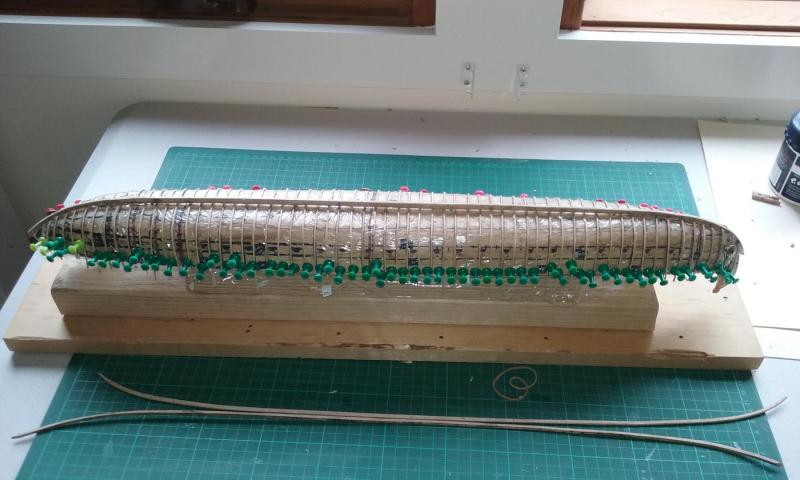
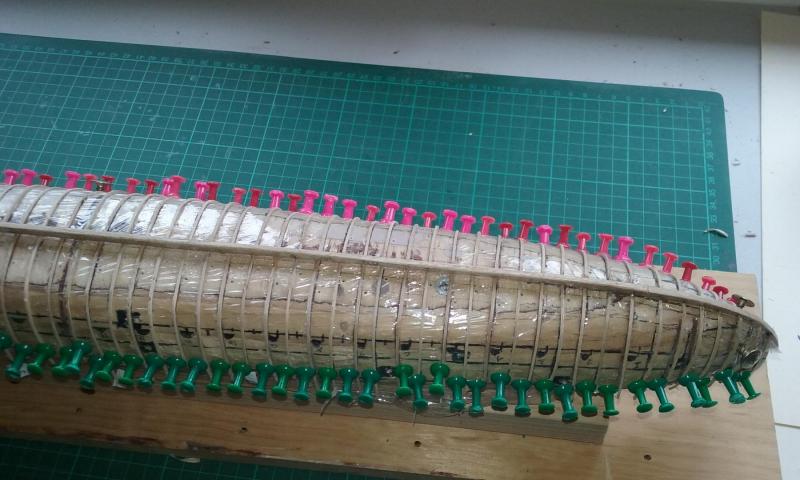
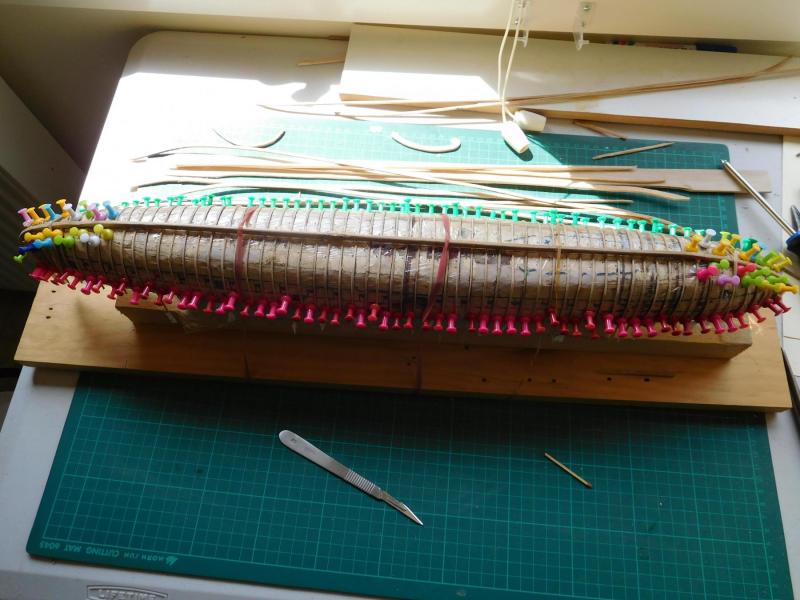
End view of the first pair of wales in place, with the screws removed. I'm pretty happy with it - seems to have worked well, and good symmetry. I've bend one of the next pair of wales to shape, but will have to wait till the weekend to do the other one. In the meantime I'm smoothing it off, firstly with a file and then with wet and dry sandpaper. Steven

-
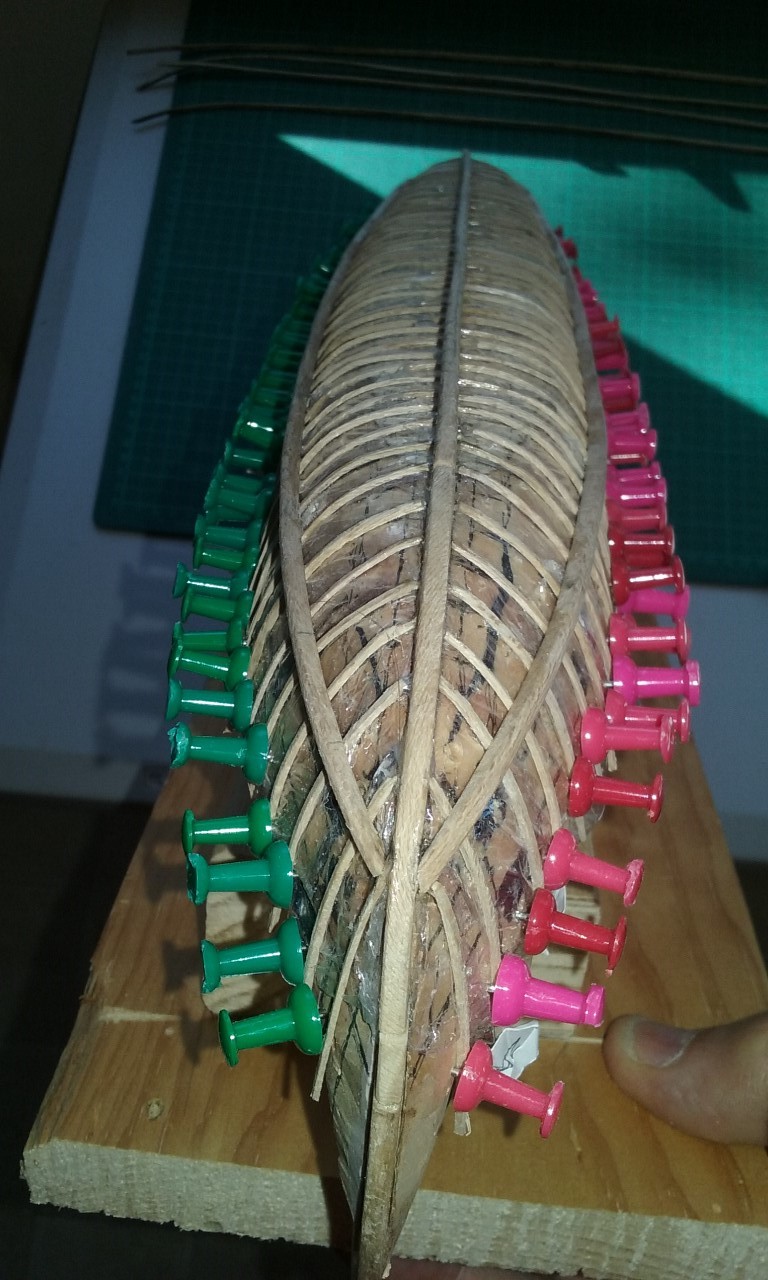
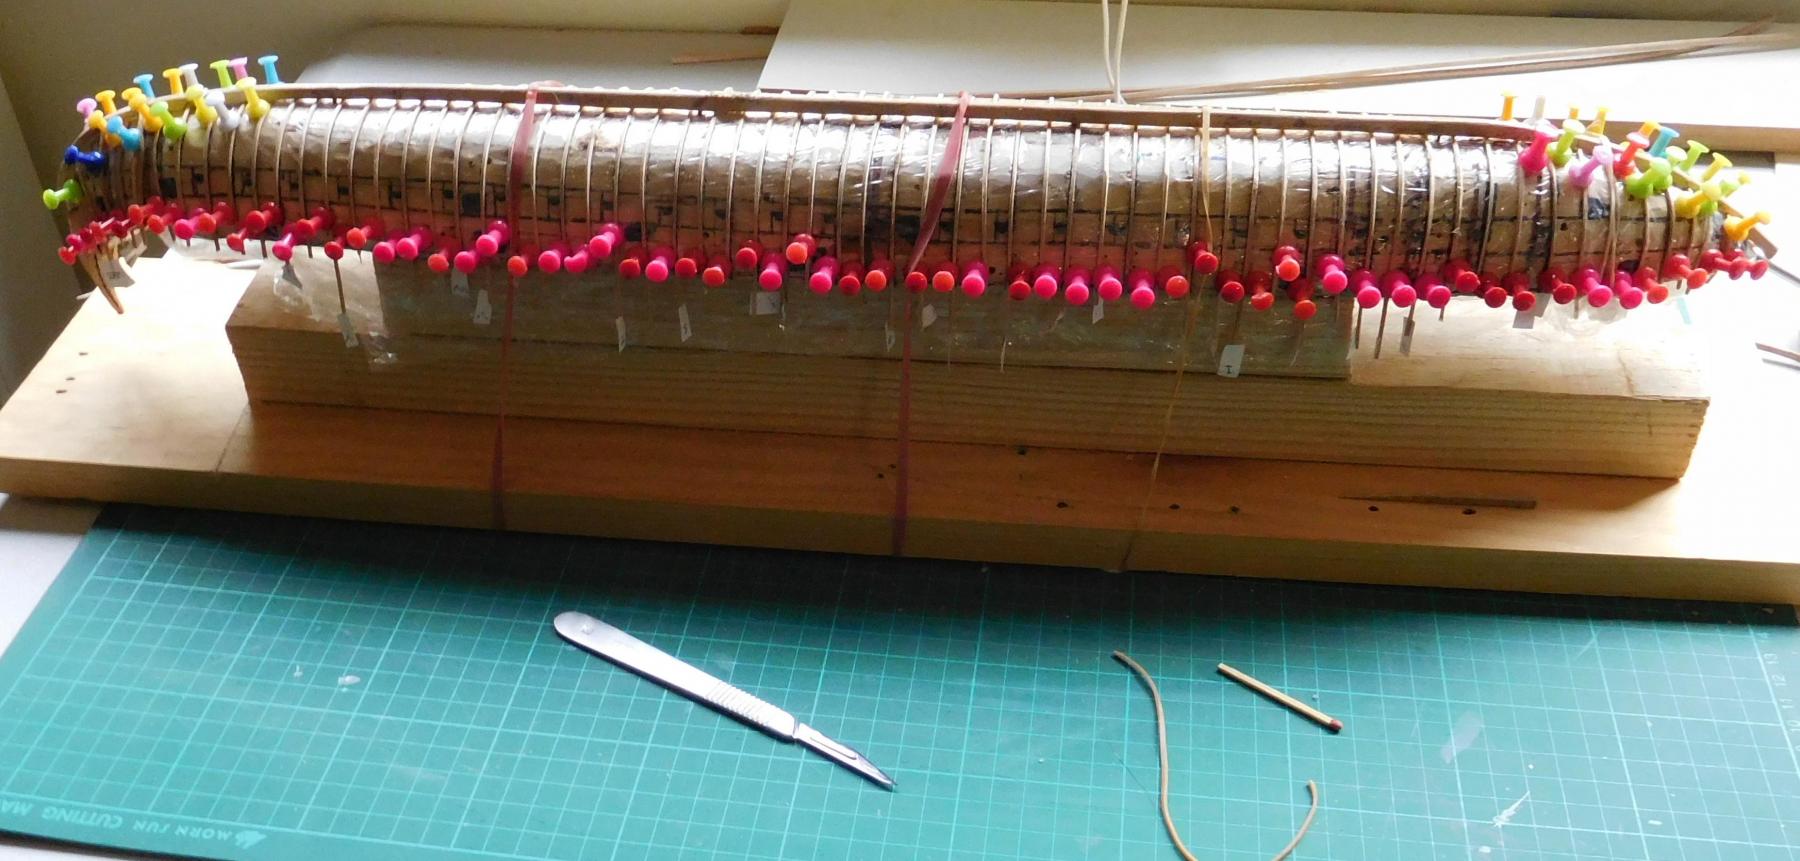
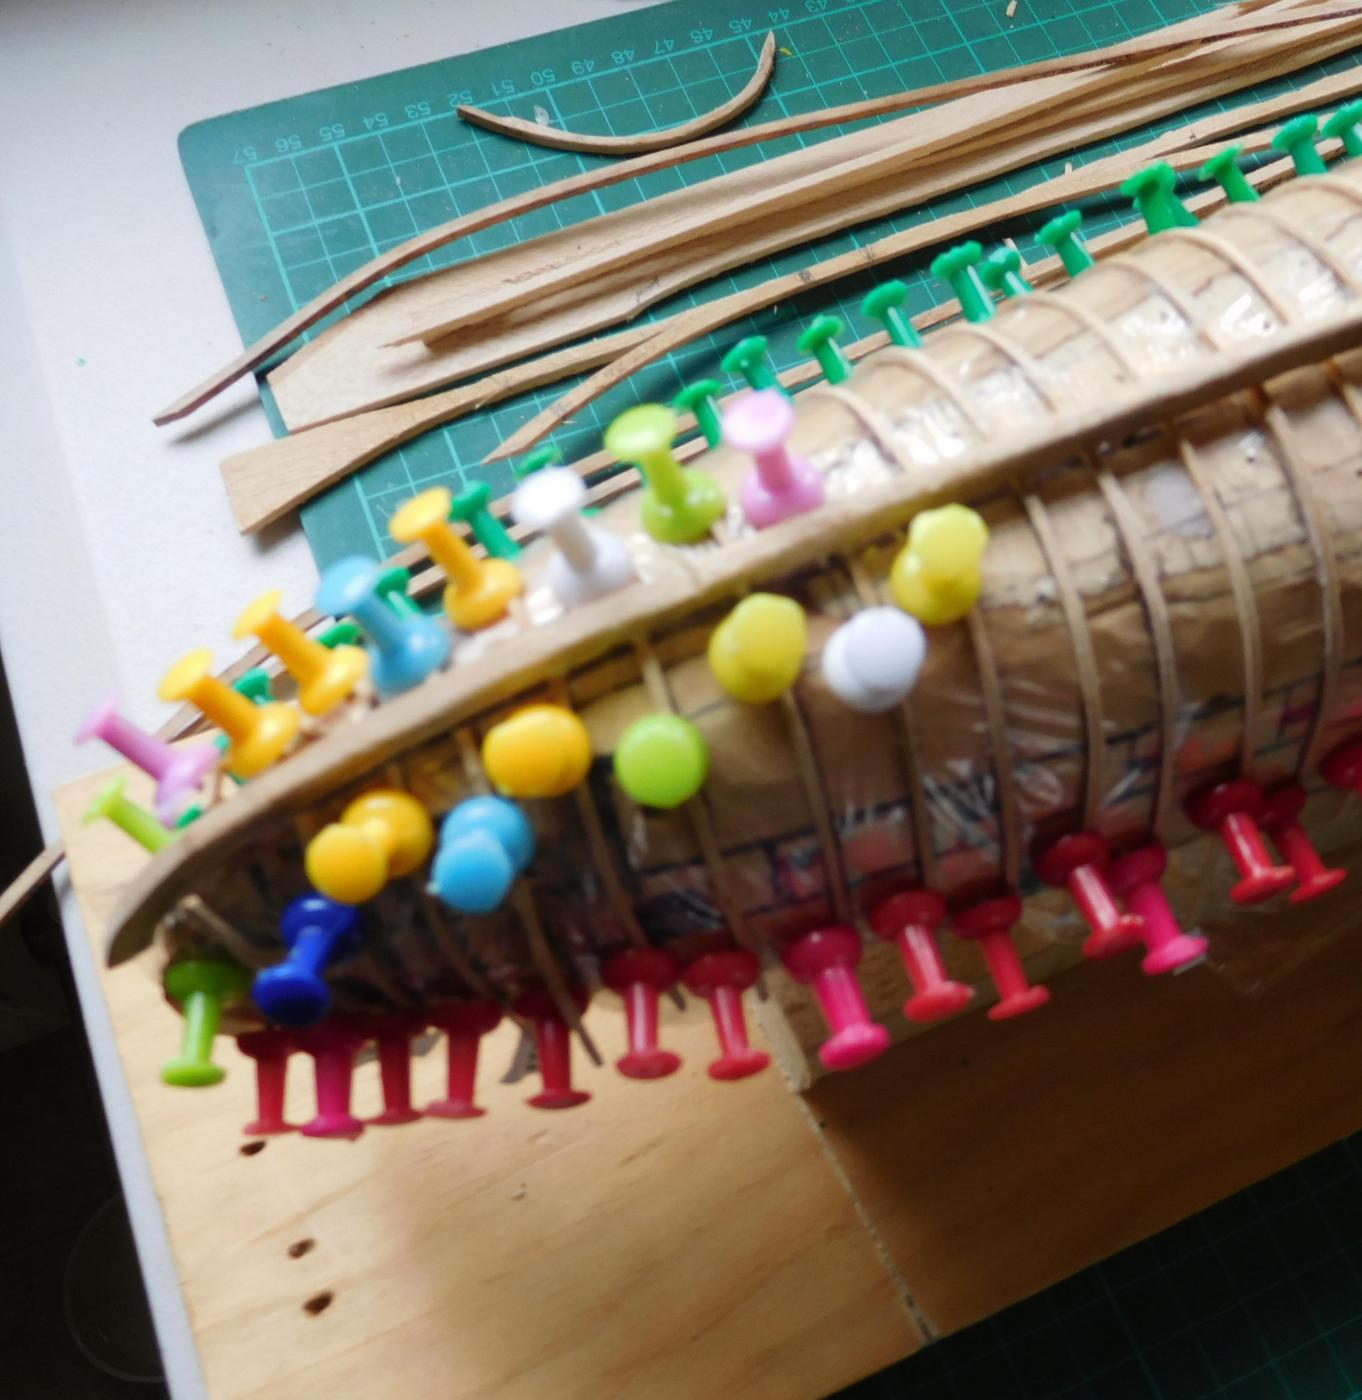
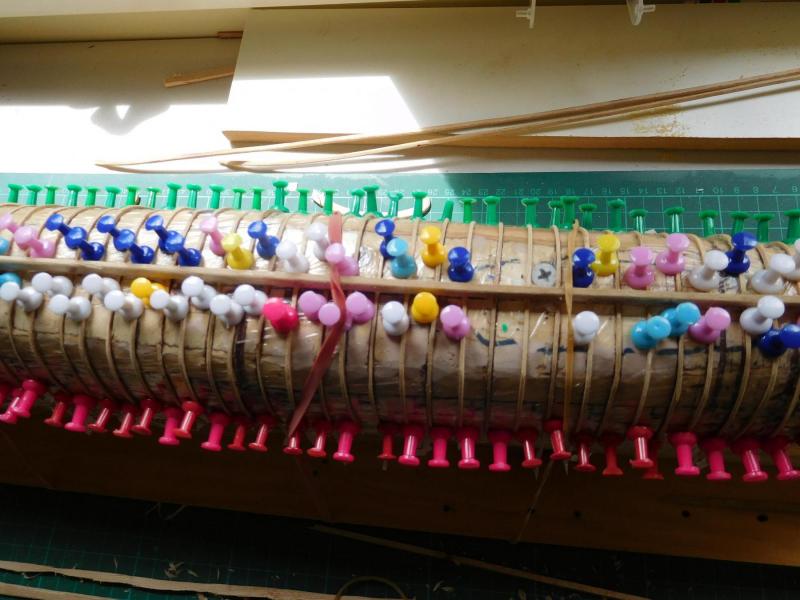
Thanks for the compliment, Druxey. The push pins are currently taking the place of the gunwale. They'll have to stay till I put it in position. I think it's interesting how much more elegant the ship looks with the 'tail' in place. Without it, she doesn't look bad, just a bit ordinary. With it, she has style! Steven
-
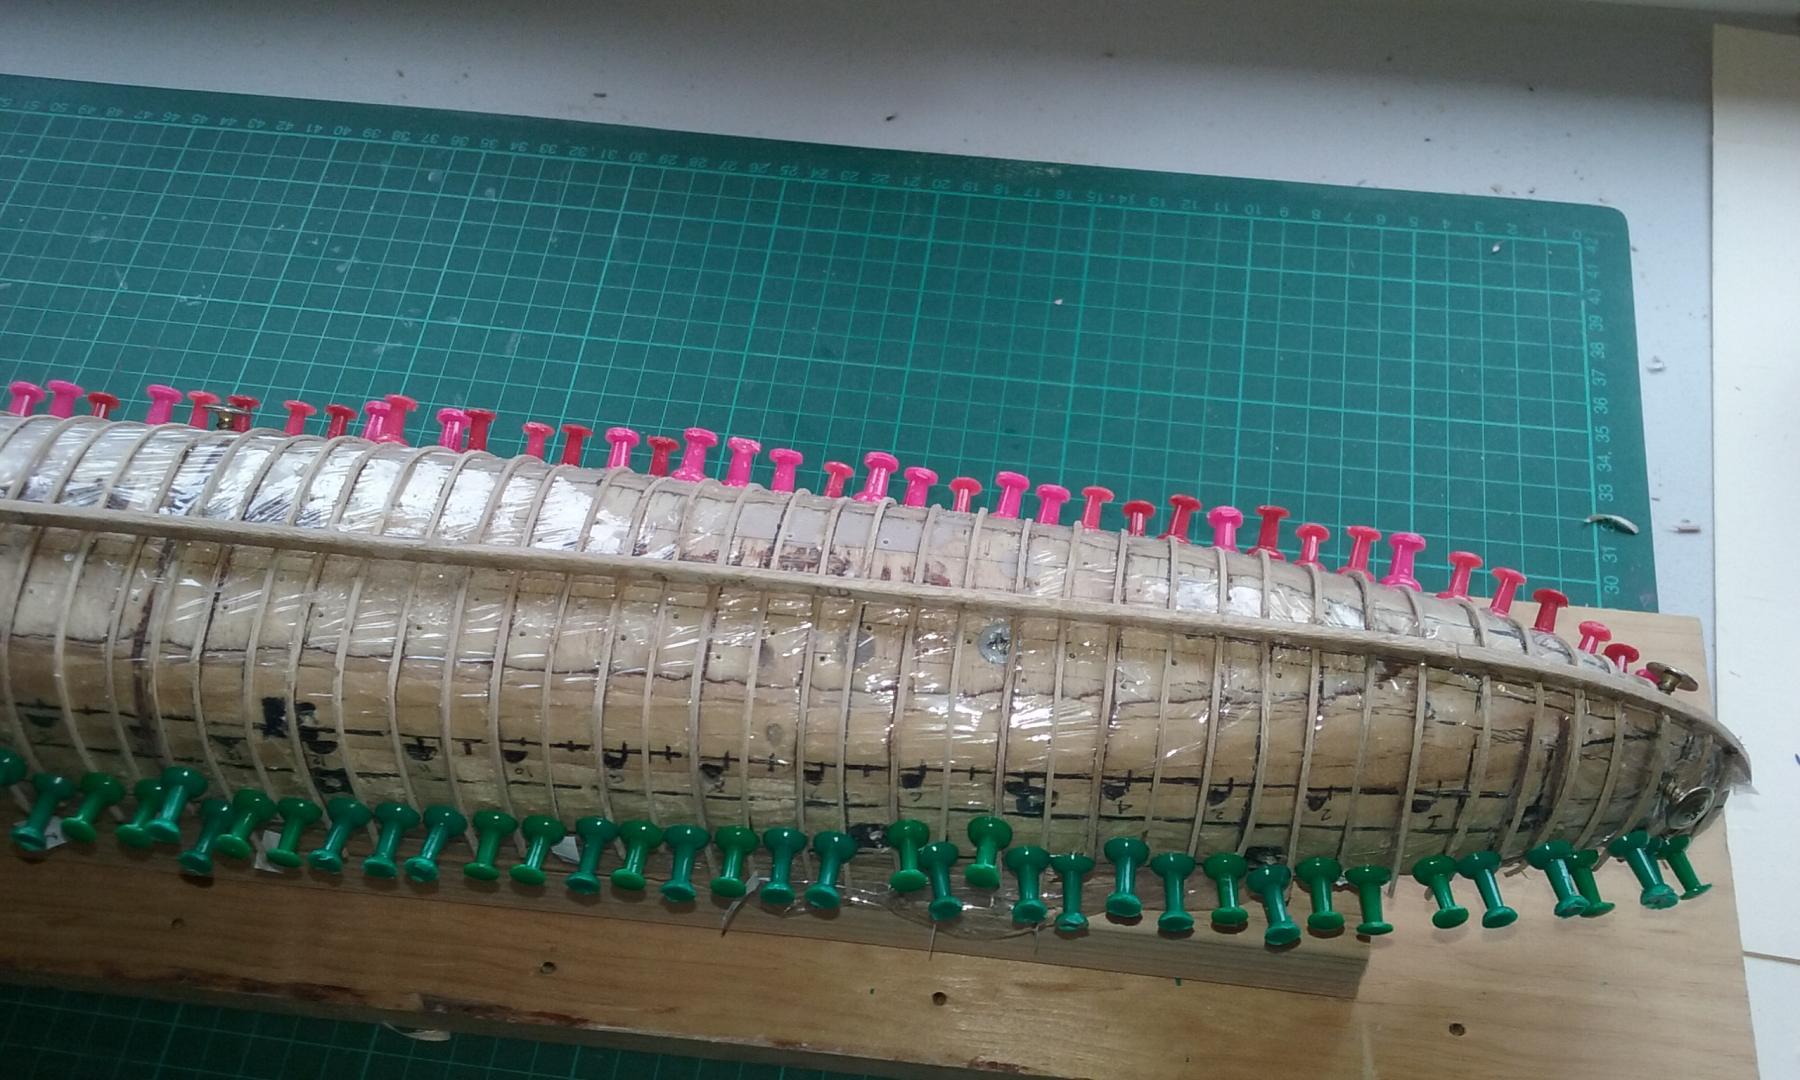
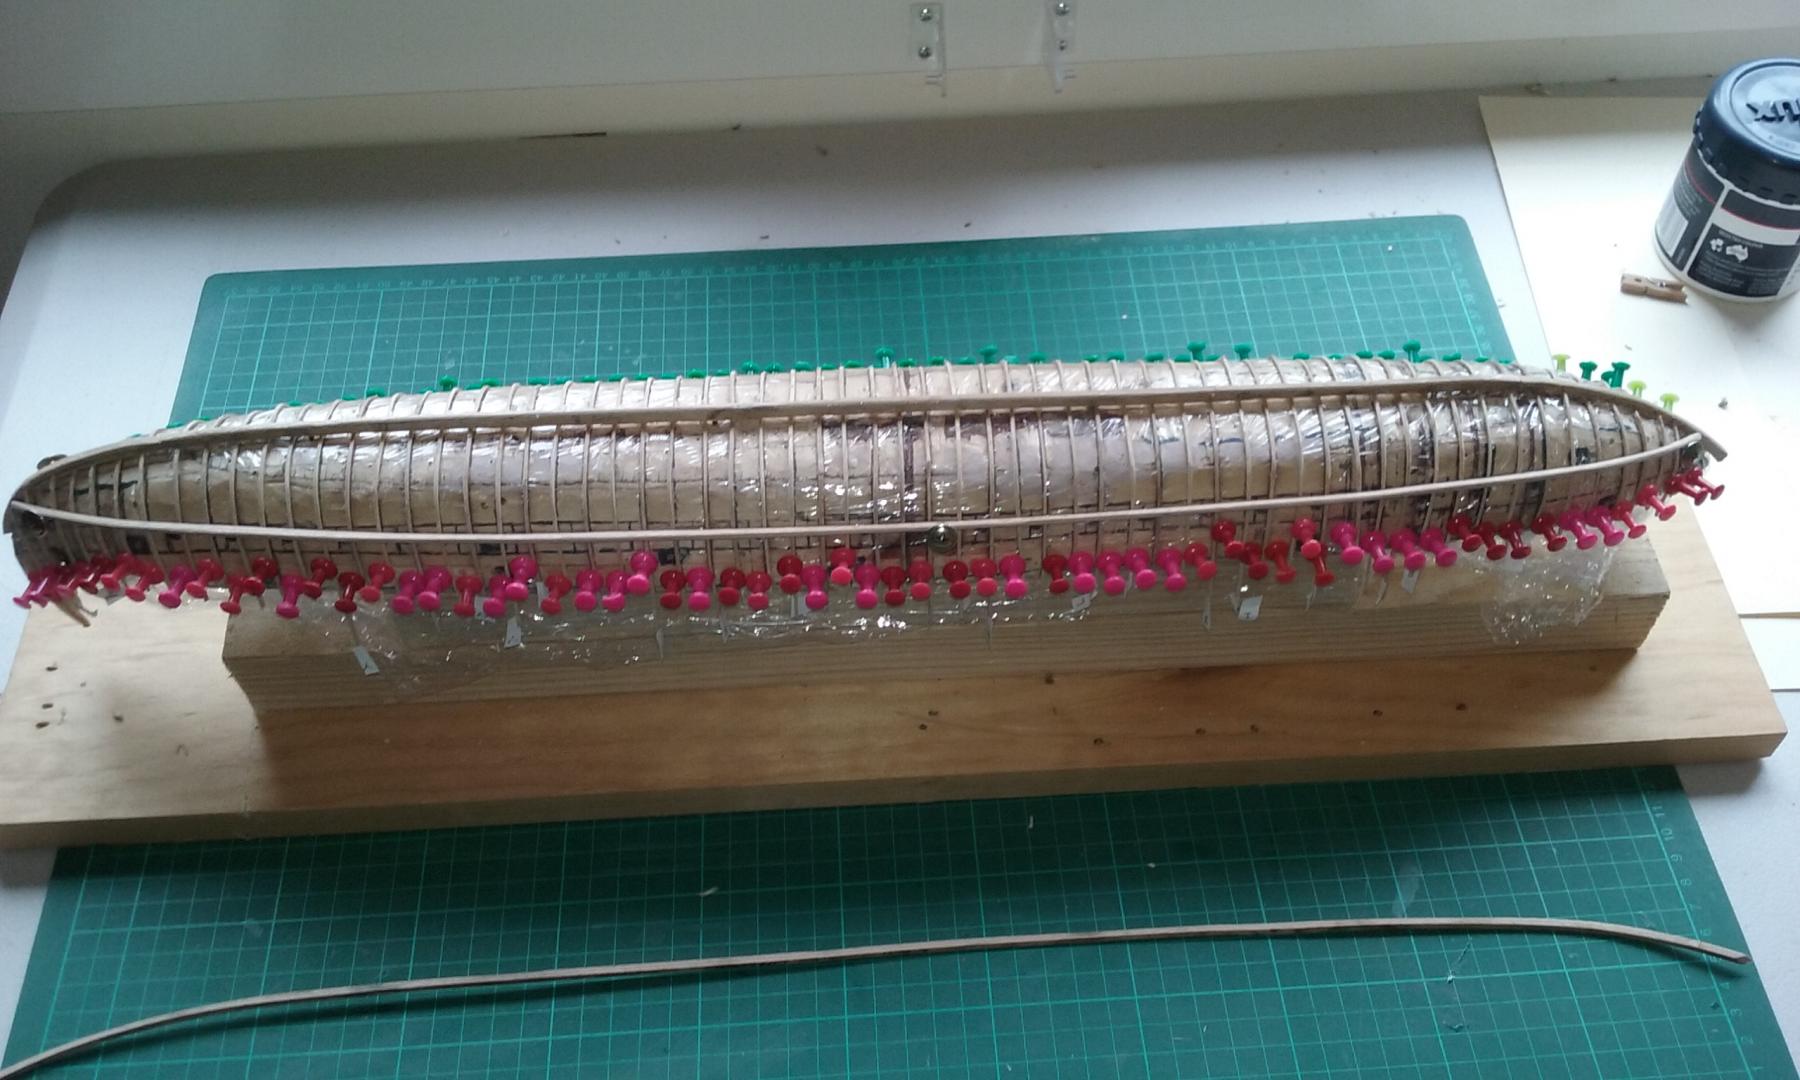
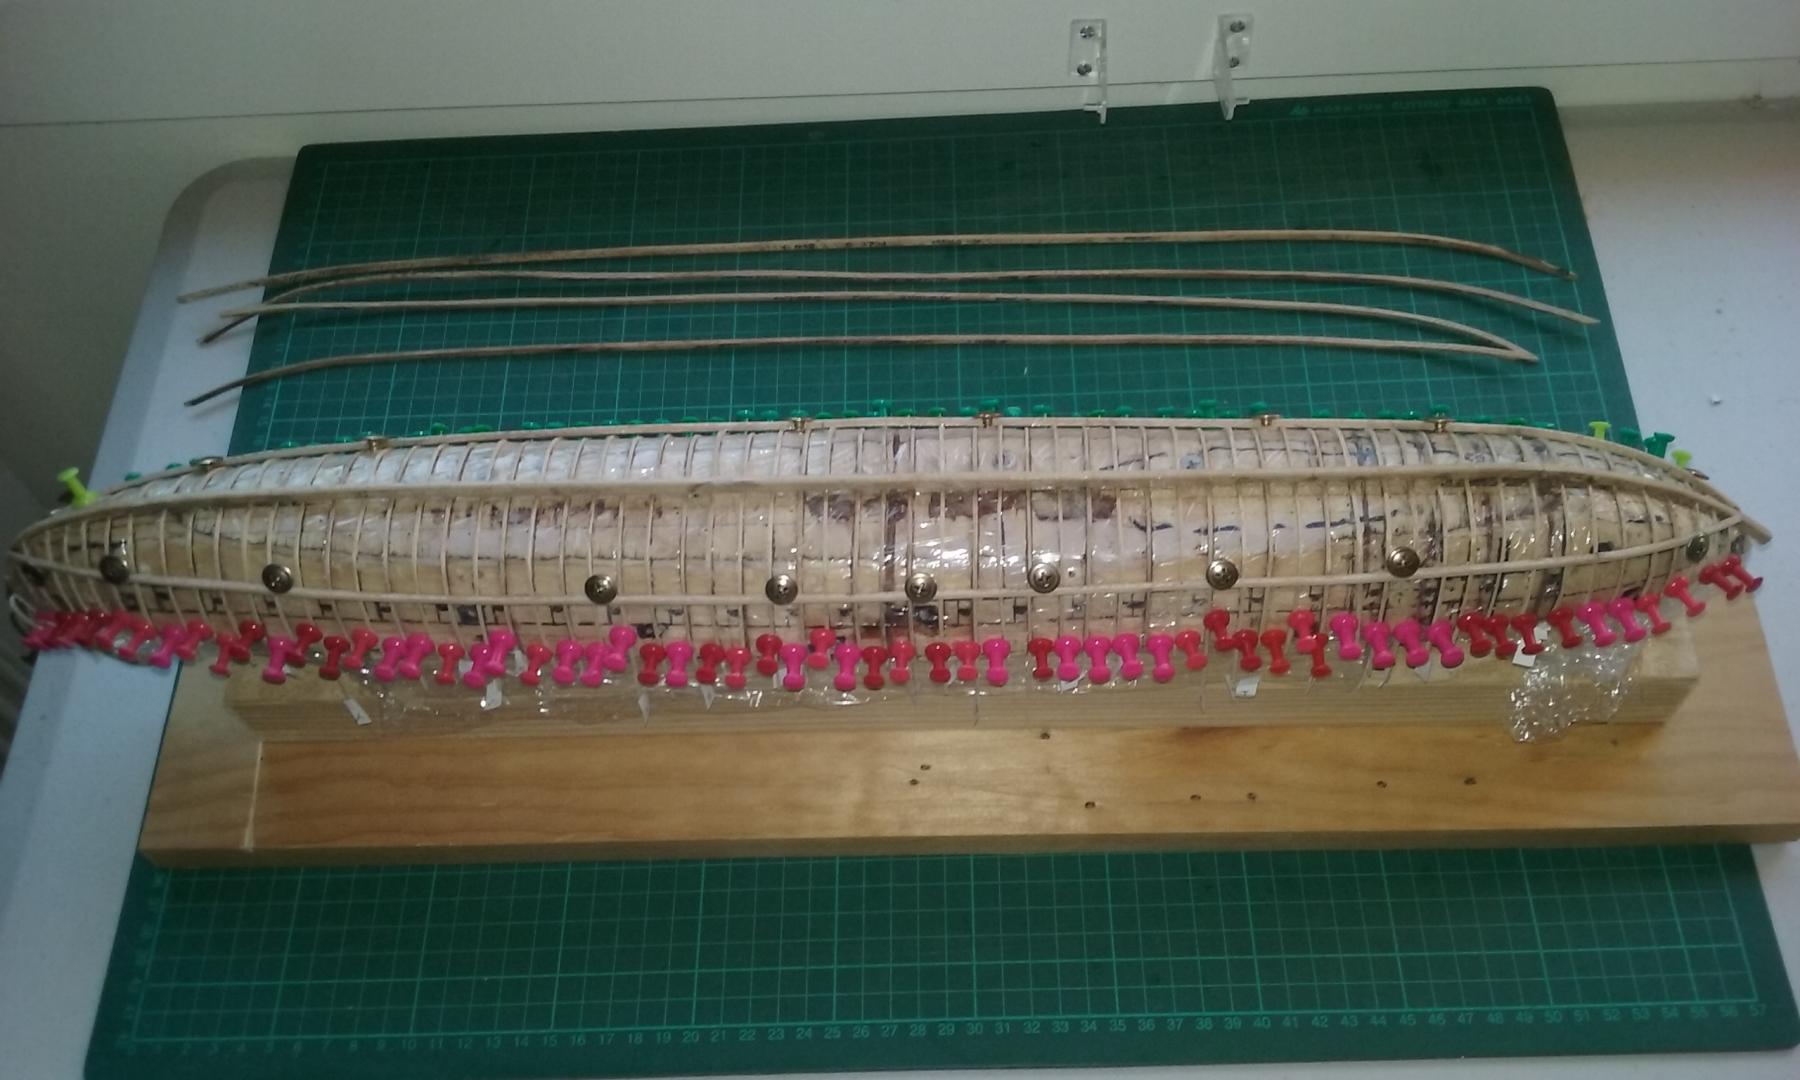
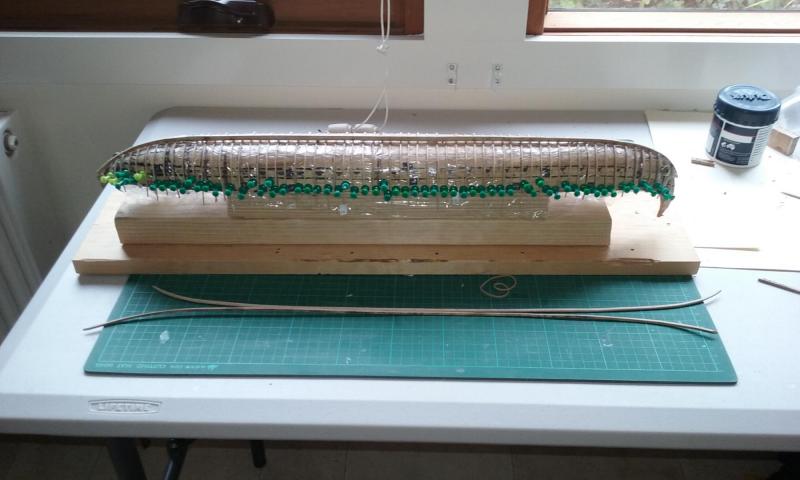
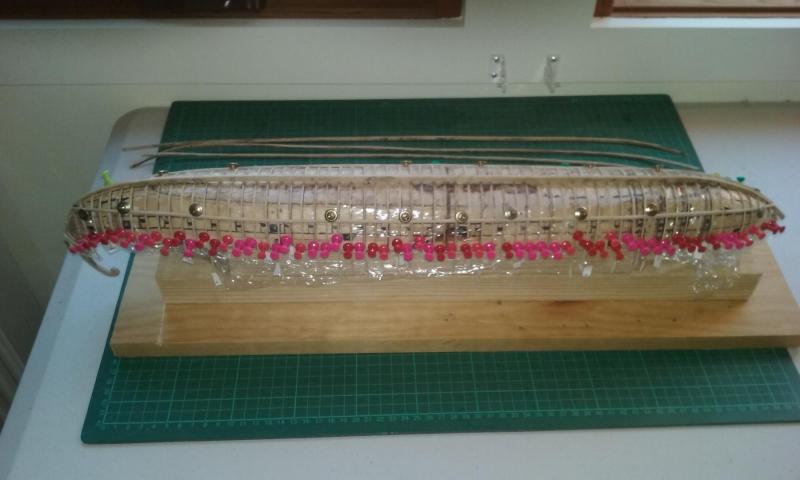
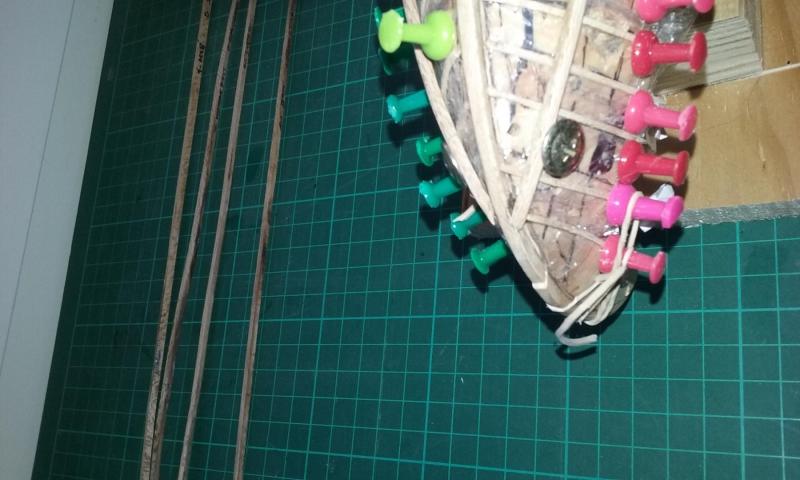
The keel is now in place and I've taken away the rubber bands. It seems to be nice and straight, and no problems. After that I went on to glue the lower pair of wales to the frames. I'd previously steam-bent them to the closest approximation I could of their final shape. I got them closer and closer to the right curve, but I was never able to get them in contact with the frames all the way along - there were always a couple of places where they were about a millimetre off. In the long run I decided to screw them down into contact with the frames and hope that I'd got them close enough to maintain a natural shape for the hull. Who knows, the wales might have a smoother curve than I'd managed when I carved the plug. And this is a theoretical reconstruction, after all. If the hull is a millimetre wider than I'd planned, it shouldn't make much difference overall. Nobody knows for sure exactly how wide dromons were anyway - I had to guess the beam when I first did the drawings. So I've resolved not to worry too much about it. If it comes out a little skewiff, I'll just have to accept that as the price of pushing the outside of the envelope. Some time ago I had a small accident and the stern "tail" broke off the keel at the weakest point, the scarph joint holding it to the sternpost. This didn't affect things while I was working on the keel, but the second pair of wales will have to be glued to the "tail", so it was time to put it back on. I extended the clingwrap the plug was wrapped in so it went past the join and added another piece of clingwrap to make sure of things. With a bit of luck it will prevent the glue from sticking the "tail" to the plug so it won't cause problems when I remove the hull from the plug. I used a rubber band to hold it in place and alignment. Fortunately the push pins made good anchoring points for the rubber band to exert the forces in the right direction to keep the tail lined up. My next task is the second pair of wales. It takes quite a while to get them properly, so I might be away for some time . . . (like Captain Oates) Steven


-
That's my major worry, Druxey. I'm doing all I can to minimise any warping tendency, but only time will tell. If I'd used properly seasoned timber and built the model on good solid bulkheads - or even heavier frames - the problem wouldn't have arisen. However, I'm confident the keel is now ok and I'm steaming and bending the wales so they're symmetrical about the keel and lie as close as possible to their true finished shape without having to be forced there. I've pre-bent all the frames and they are so thin that no individual one will impose much warping force, but collectively they might. But if I've been careful enough it will all come together. I've probably bitten off a bit more than I can chew trying to do more than my current skills allow, but I wanted to try this out. And if it all works - well, I'll feel I've really achieved something. If not - it's a learning experience. Robin - I've always loved Donald Sutherland in that movie. "Have a little faith, baby - have a little faith". Steven
-
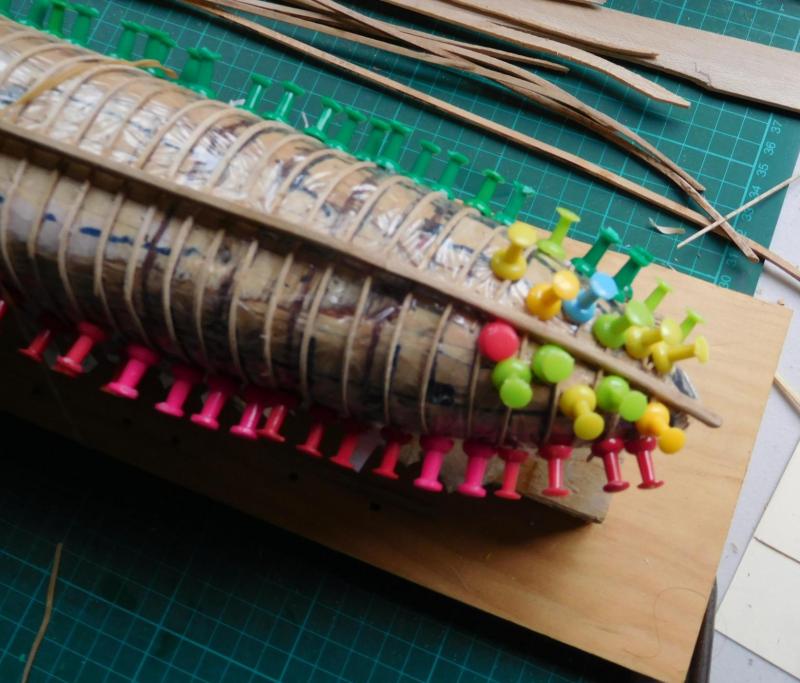
After a long pause when family matters got in the way, and the model sneered at me whenever I went past, I've been able to do some more on the build. I discovered a major problem - the wood I was using for the keel and frames was not properly seasoned - I'd picked it up from the roadside after the street-tree trimmers had been past and hadn't left it long enough before I used it. That didn't matter for the frames - they're so thin they can take any shape. But I discovered that the keel, which had been straight when I made it, had warped dramatically. I first thought of making another keel, but none of the other pieces I had were straight enough to use as they were - and I had the keel just the shape I wanted it (except for the warp). So I put it in my trusty bending jig made out of a plank and some nails (see pics in previous log entries), wet the keel under the tap and steamed it straight again with a heat gun. It took a lot of trial and error, steaming and bending, checking against the hull, and steaming and bending again, but it finally worked! FINALLY, I've been able to glue the keel to the frames, and remove the line of push-pins along the keel. I held the keel in place with a number of rubber bands. Once the glue on the main frames was dry I was able to remove the rubber bands. Most of the frames are in a single piece and I could glue them directly to the keel where they pass over it, but the curve at the bow and stern is too acute, and the frames had to be made in two pieces - port and starboard. I was able to end-glue these frames to the keel and it seemed to work. I clamped the ones at the extreme ends to the keel with bulldog clips because push-pins couldn't go in at the correct angle to hold them against the keel properly (not shown in photo). So now all the frames are on and I've started on getting the wales shaped exactly (again by repeated trial and error bending and steaming) so they will give the hull some proper structural shape of its own - currently it's only held in shape by the plug. I'd put up some photos, only my camera has chosen this time to commit suicide. When it's fixed I'll post some. Steven


-
Dick, I've seen a lot of representations of ships that are identical to carracks except that they have only a single mast - for lack of a better name I call them 'proto-carracks'. Not only prior to the carrack 'high period', but contemporary with it as well - I've come to believe these contemporary ones were simply smaller than full-fledged carracks and didn't need all those masts - like a cutter in relation to a frigate. And yes, almost no sheer in this picture. Steven
-
Yes, sheer is really a curve, not a straight line. But over a short enough distance it approximates a straight line and you can get a fair idea of the slope at that point. Steven
-
I don't know how sheer is expressed in maritime terms, but slope in ground and on roofs is expressed either in degrees to the horizontal plane (e.g. 30 degrees) or in the amount of vertical distance compared with the horizontal distance - for example a roof that falls 1 metre in 20 metres of horizontal length would have a 1:20 (or 1 in 20) fall. These measurements are different ways of expressing the same thing - for example a 30 degree angle is equivalent to a fall of 1 in 1.732. Probably the easiest way to express sheer would be in vertical vs horizontal distances. Steven
-
Oh, it wasn't a criticism, just interested. Personally I think your interpretation is probably closer to the reality than the pictures are - representing foreshortening in a two-dimensional picture is always difficult and I think it often gets exaggerated by the artist. About how much sheer do you think you have on the quarter deck and the poop - i.e. what vertical distance compared with the horizontal distance? As the knighthead is in the shape of a person's head, maybe the dot is his eye? Steven PS: I like that jig you have for the model - does that swivel so you can get at the model from all angles?
-
It doesn't look like there's much sheer on the decks, even the quarter and poop decks, Dick. Is that right, or am I seeing things? In that three-quarter view looking from the bow it certainly looks that way. Steven
-
It's been a while since I checked your build, and I can only say how impressed I am with what you've achieved. I have to make shields as well for my dromon and so far I haven't found a satisfactory way to do it. Maybe I can emulate your method. Can you provide some more detail on how you went about it? Steven
- 473 replies
-
- 2
-
-
- greek bireme
- dusek
- (and 1 more)