Louie da fly
-
Posts
7,989 -
Joined
-
Last visited
Content Type
Profiles
Forums
Gallery
Events
Everything posted by Louie da fly
-
 Watching you make the boats has provided me with solutions to problems I'd been worried about with my own build. The wooden strip screwed onto the plug at gunwale height to hold the frames at the top, and the push-pins you use to hold the frames at intermediate positions are brilliant. Are these just normal push-pins as are used on a notice board in an office? I tried copying your technique with a pine plug and the pins wouldn't go very far into the wood. Are you using a soft wood for your plug? Your build is looking very good. Steven
 -
Well, I bit the bullet and threw out three oars which didn't come up to standard. And organized the rest into categories - 1. almost right, 2. needs a fair bit of work, and 3. Perfect as it is. There were more in the first and third categories than I'd thought. And good news - the most recent half dozen were the best. So maybe I'm getting better as I go along. It's quite cleansing throwing out the unsatisfactory ones. Now they're not sitting there sneering at me every time I go to make another oar. I've marked out the lines of the wales on the plug and also where the oarports will be. Id been wondering how to mark them accurately enough to miss the frames, which are 4mm apart. But the tholes sit in the third wale from the keel, with the oarport plank immediately above. Once the wale is in place I can shape the plank to fit and mark the oarports on it. Then when the ship is fully planked I'll cut them out. When I made the Great Harry I cut the arched gunports in the upper works directly into the planks before fixing them to the ship. I got away with it - barely - but it weakens the planks and it's a bad way to go. Figuring out how to accurately mark out the oarports on the dromon has taken a load off my mind. Oh, and I've made 5 shields. The production line is up and running. Steven
-
A thing of beauty, Druxey. You can feel justly proud. Steven
- 641 replies
-
- 4
-

-
- greenwich hospital
- barge
- (and 1 more)
-
Thanks, Mark. But I must say looking at other builds on this forum, including yours, makes me very conscious of my own shortcomings and how much I have to learn. Still, I suppose even the best modellers were newbies once. I'm not completely new to modelling, but the learning curve is very steep when I look at what others are capable of. But I suppose each of us is his/her own worst critic, and perhaps we should give ourselves credit for what we can do well. Steven
-
Glenn, for the rivets, have you considered resting your plates on a solid piece of metal with hemispherical holes in it where the rivets are to go? I've done this when "heading" traditional (full sized) rivets that joined two pieces of 1/16" steel sheet. I did the rivets one by one, and rested the unformed rivet head in a hemispherical hole I'd drilled in a piece of railway line. Bash the other end of the rivet a couple of times and you have a nice hemispherical head. This is the way the old 'rivet snap' works. I find the business end of a drill bit makes a hole close enough to hemispherical to pass muster. I'm not sure I've explained that terribly well. Maybe I should post a diagram of what I mean. But basically, if the plate is supported everywhere except where the 'dimples" of the rivets are, you may not get that deformation of the plates that is so frustrating. The main problem, as I see it, would be getting your hemispherical holes and your punching lined up accurately enough. On the other hand, if anybody can manage that kind of precision, I think you're the one. Steven
-
Oh, that's just amazing! I take my hat off to you, sir. If this is just the test model, how good is the final form going to be? Steven
-
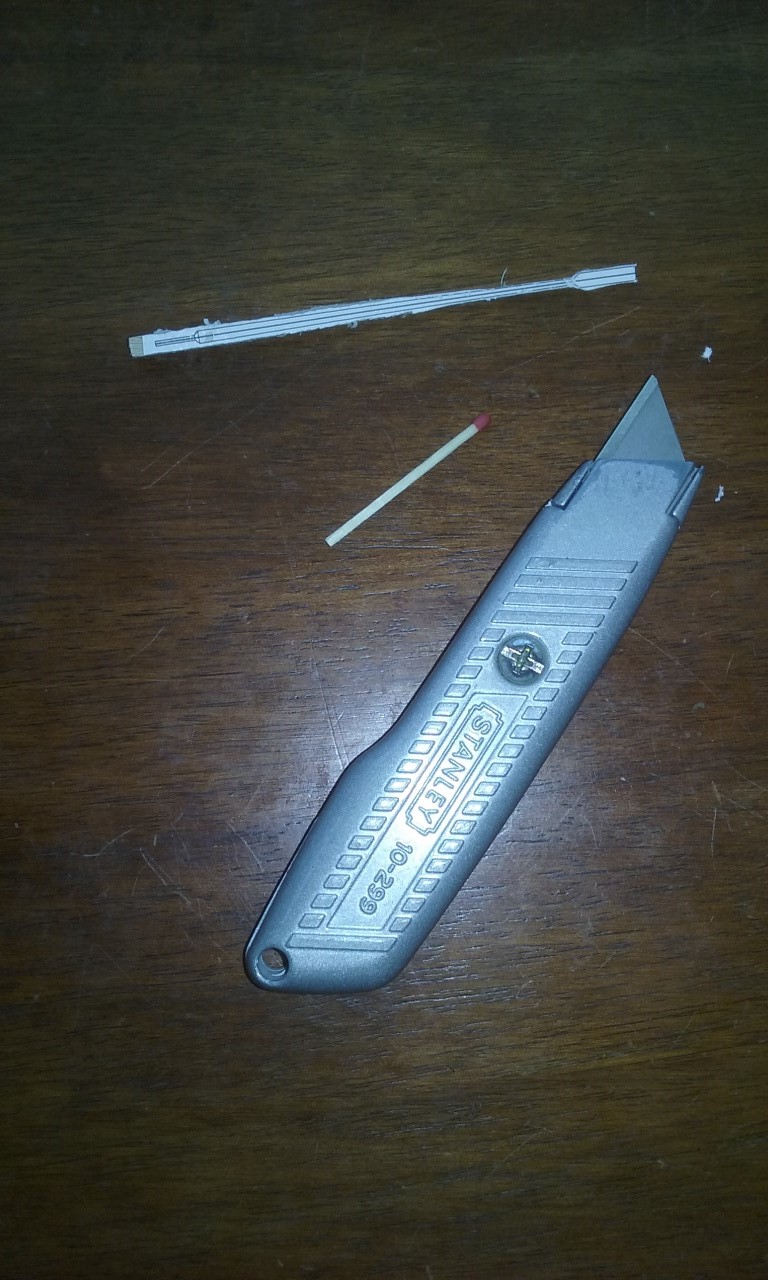
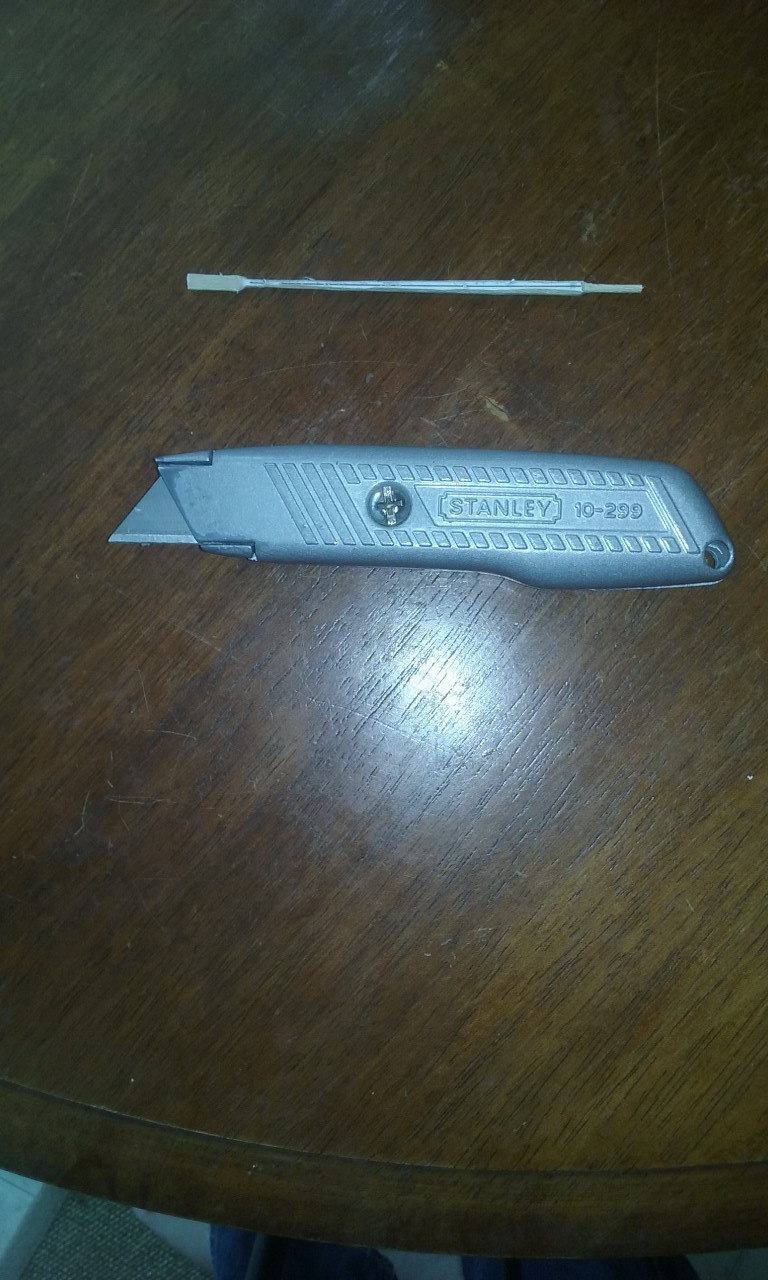
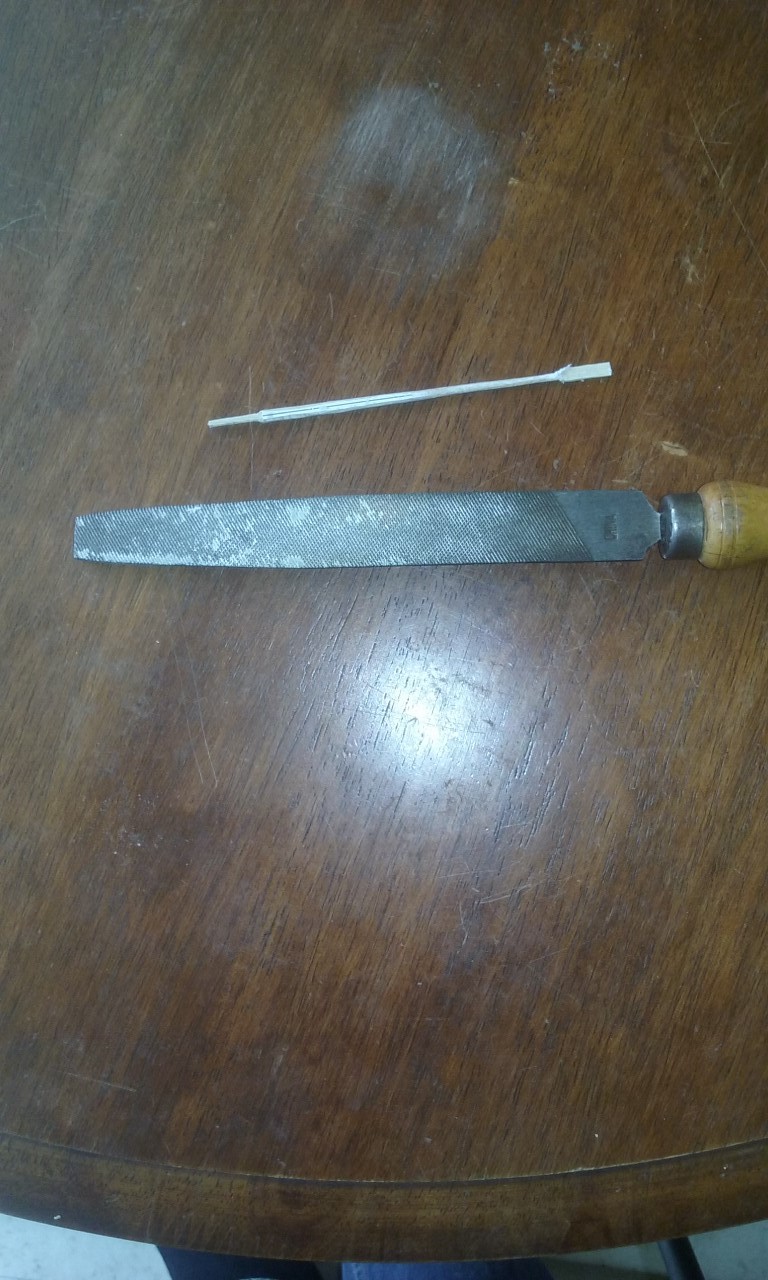
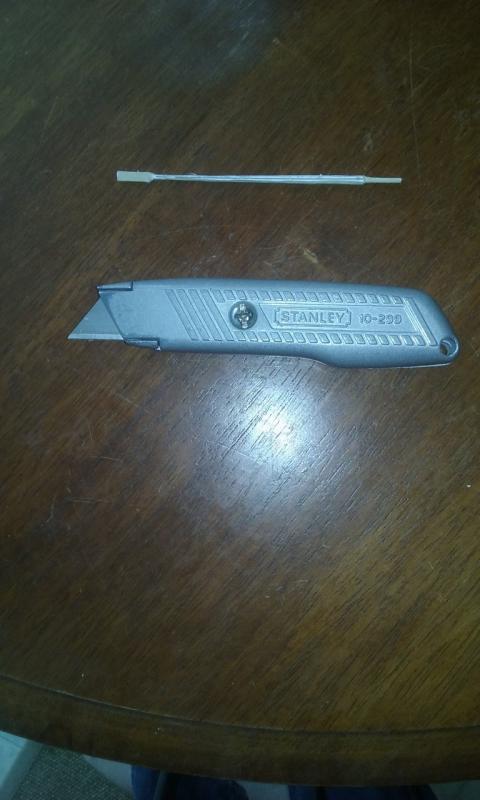
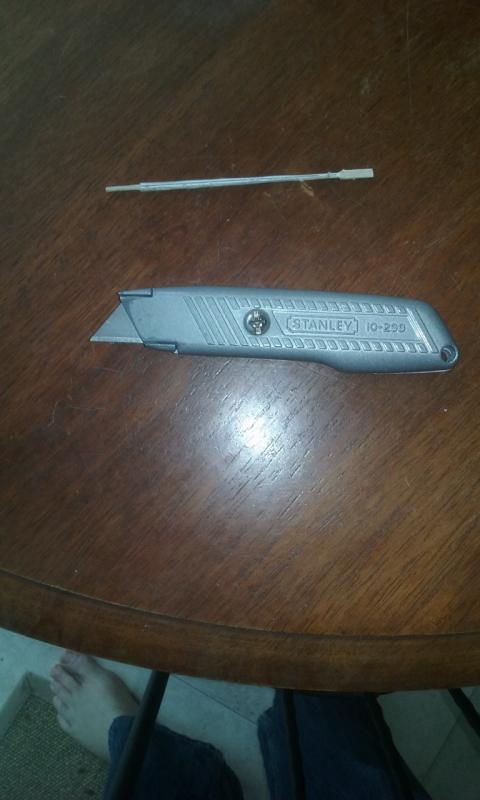
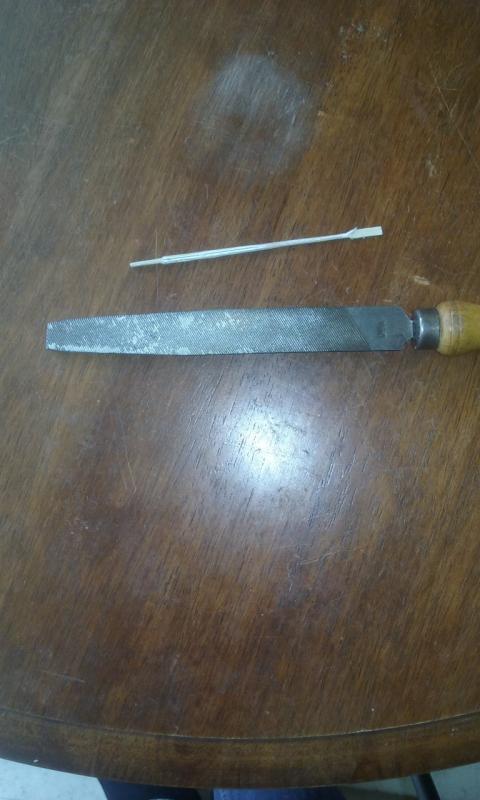
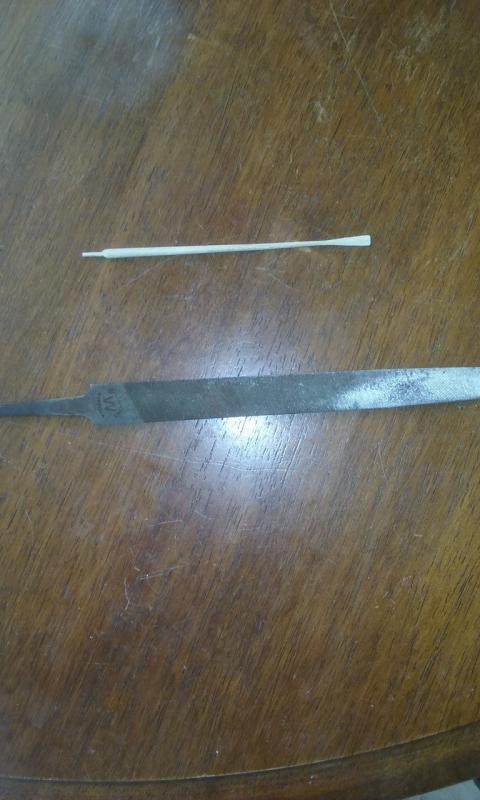
Here's the process I go through in making an oar. I drew the oar in AutoCad and copied it multiple times and printed it off, then glued the sheet of paper to a sheet of wood a little thicker than the thickest part of the oar. Then I sanded the sheet back so it tapered from handle end to blade. I've shown a photo of that in an earlier post. Then with a coping saw I cut the individual oars apart. Next, I use the Stanley knife to carve it to the outline. And then carve it from the back so the thickness tapers to match the taper in the width, and the oar blade is getting close to the right thickness. Once that's done, I cut off the corners, changing from a square to an octagonal section. And using a fairly coarse file turned the octagon to a circle. Clean-up and tidy up with a finer file, and finishing off the blade to shape - note this is the new shape I decided on from looking at contemporary illustrations. There are a number of previously made oars that will have to have that done to them as well. To be honest, I'm not all that happy with my consistency in making the oars - it's more whittling than proper cutting to shape. At least two of them will have to be discarded, and I might get rid of several more that I'm not happy with. I think I need to get more professional, and finish them, not by eye, but by measurement with vernier calipers. I think I'm a little too slap-happy in my technique, and I need to correct that so I don't waste all the time I put into making the oars. I timed it this time - it takes something like two hours to make one of these things, and I shouldn't throw that time away on an inferior product that then has to go in the scrap bin. There may well have been variation in oars 'in the day', but that would have been so minimal that at 1:50 scale it would be invisible. On a happier note, I've finally finished the first batch of frames - I'm putting in every fourth frame onto the plug and planking over it, and then I'll put the rest in afterward. It's very difficult to cut the frames thin enough (1mm) with a Stanley knife and I was worried that the frames were too thick and might get stuck in the grooves in the plug when I wanted to take the assembly out. So I've filed them all thinner so there's more clearance between the frames and the grooves. Rather difficult with frames only 1mm thick, but I managed to work out a technique which worked without imposing too much strain on them. I put a thin sheet of wood over most of the frame and press down, and just file down the bit that's sticking out. The sheet of wood holds the frame still and reduces random forces in the wrong directions that otherwise might deform or worse still, break the frame.


-
A nice piece of work, Dick. The precision needed to build a mast up as they did in the day would be utterly daunting, and I think your solution is brilliant - and is certainly indistinguishable from the real thing. And this marks a real milestone - the hull is complete and you're now free to work on the masts and rigging. I salute you, sir. Steven
-
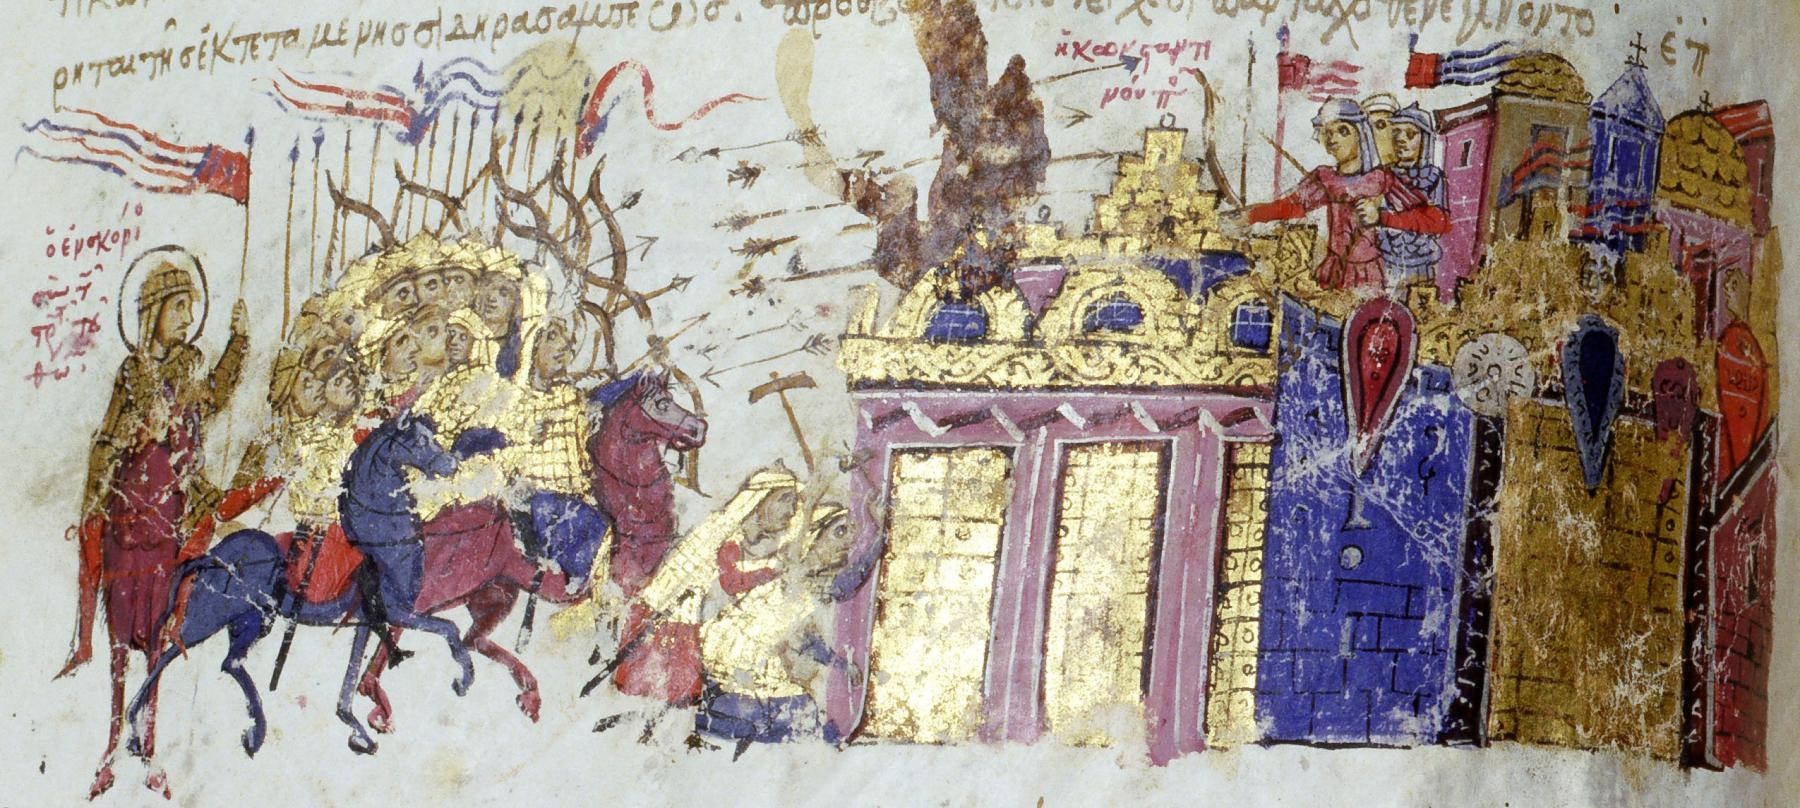
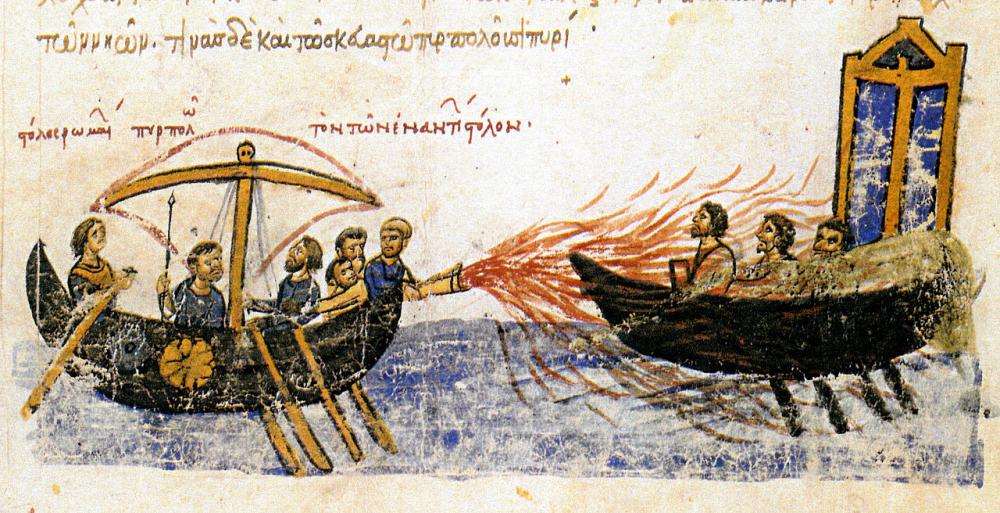
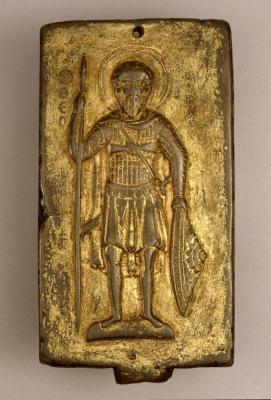
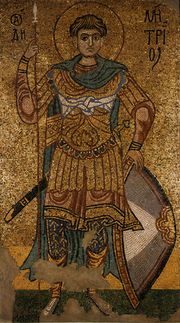
Druxey, this is mainly something I get into while I wait for the opportunity to do other things. Making and bending the frames is taking considerably longer than I expected, and every time I bend a couple of frames to shape on the plug I have to wait 24 hours for them to dry into a stable shape. Leaves me with time on my hands. (Also, perhaps I'm a little too easily distracted). Carl, the Byzantine military and naval establishment was formed of themes - regions of the Empire that provided contingents of men. The Cibyrrhaeot theme (southern coast of Asia Minor) was the main source of men for the navy. So there's a possibility that they'd all have shields the same. But on the other hand, there's no evidence that the pattern on a Byzantine shield had any significance at all, except to look good - certainly nothing to suggest anything organisational. My own opinion of the picture above with all the shields the same is that the artist was a bit lazy. And even then, one of the warriors on deck is carrying a shield with a different pattern. So now I'm coming to the opinion that the shields should be different after all. We'll see - by the time I get to the point of putting them on the ship, who knows what I'll have decided? Steven
-
Thanks everybody for all the 'likes'. It's good to get the feedback. I'm currently in two minds about the shields. In Byzantine pictures of battles mostly (but not always) each fighter's shield seems to have a different device. This was before heraldry became a subject in its own right, with the shield device being specifically "owned" by the person, and handed down from father to son. That didn't start till the mid-late 12th century, and even then only in Western Europe. But there only two existing contemporary pictures of ships with shields along the sides, and in one of them all the shields on each ship are the same. In the other, two shields are visible and they're different. So what do I do? Make them all the same, on the basis that the shields "belonged" to the ship, or make them all different, as though each fighting man had his own? I still don't know. I'm inclining to the "all the same" view - it makes it all consistent. But maybe adding a bit of variety is a better way to go. Steven


-
Beautiful work, Druxey; both the sweeps and the standards For what it's worth I prefer the sweeps with the blades horizontal. I agree the dolphins are displayed to greater advantage, and if they're not in use there's no reason for them not to be feathered. Steven
- 641 replies
-
- 2
-
-
- greenwich hospital
- barge
- (and 1 more)
-
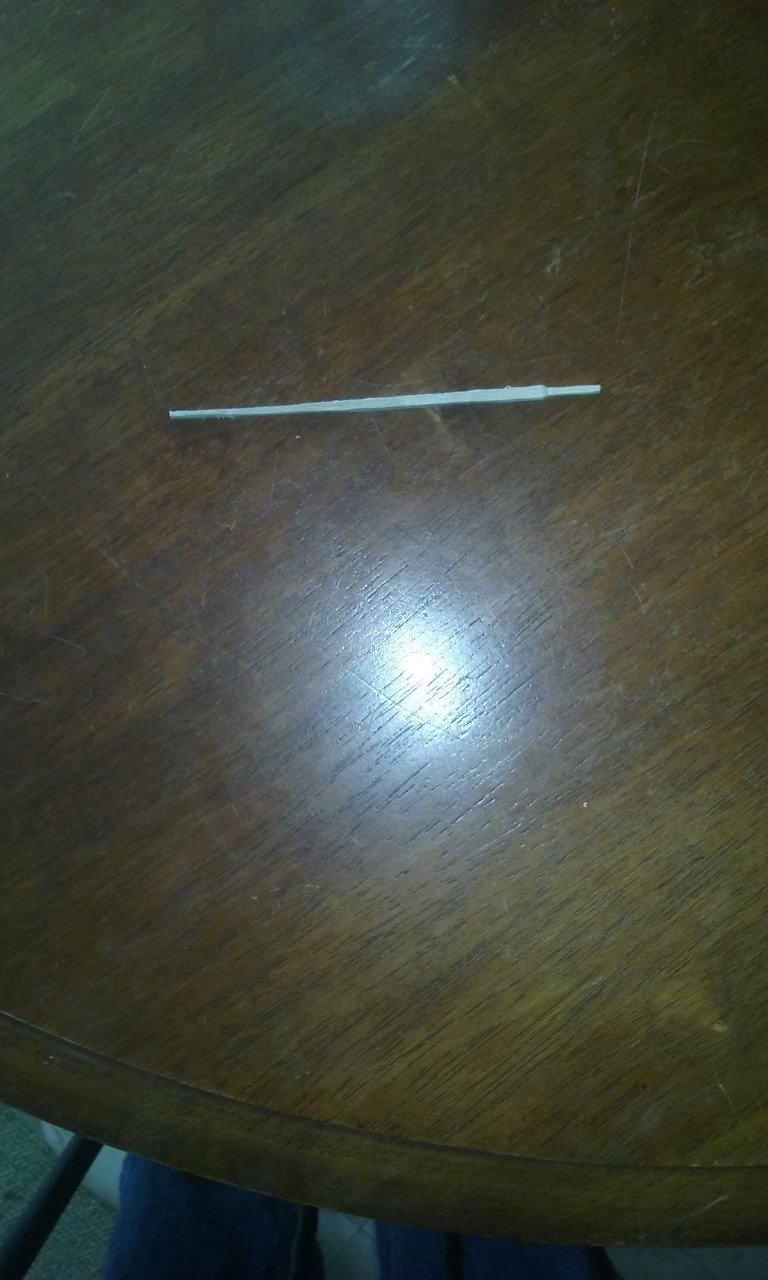
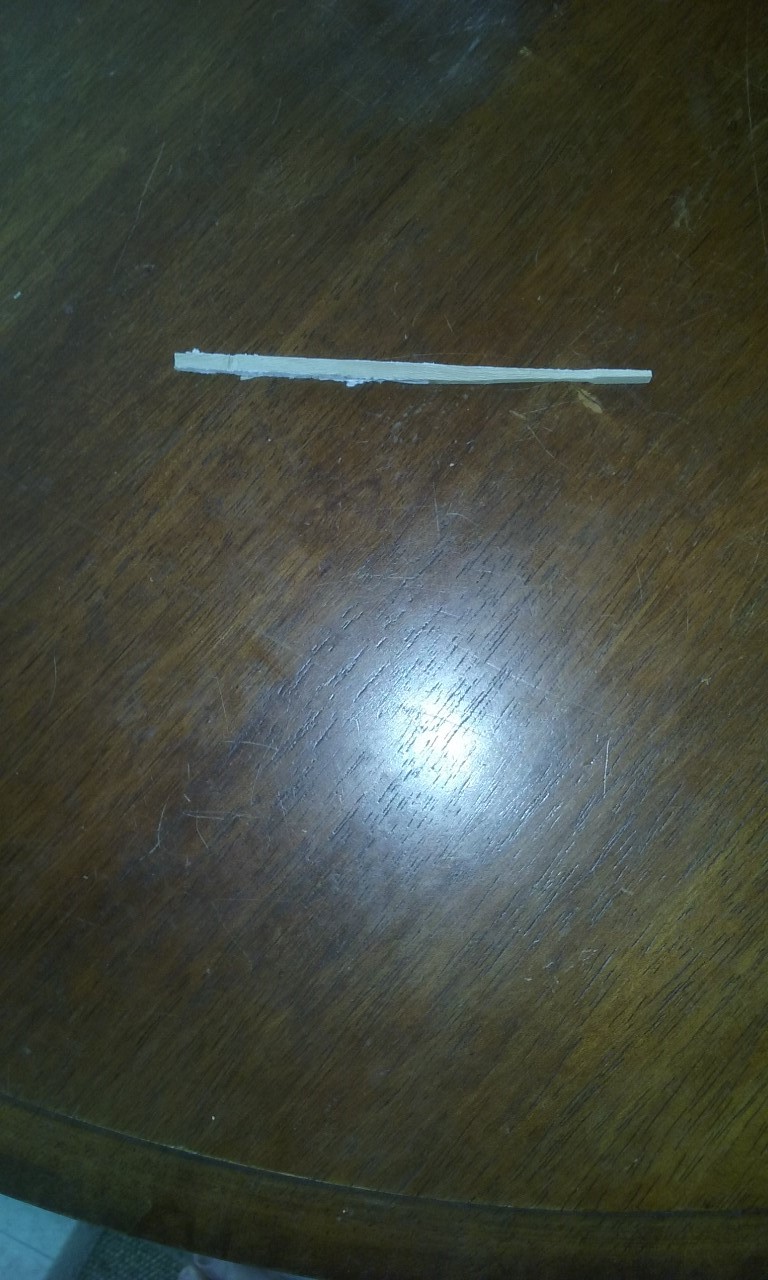
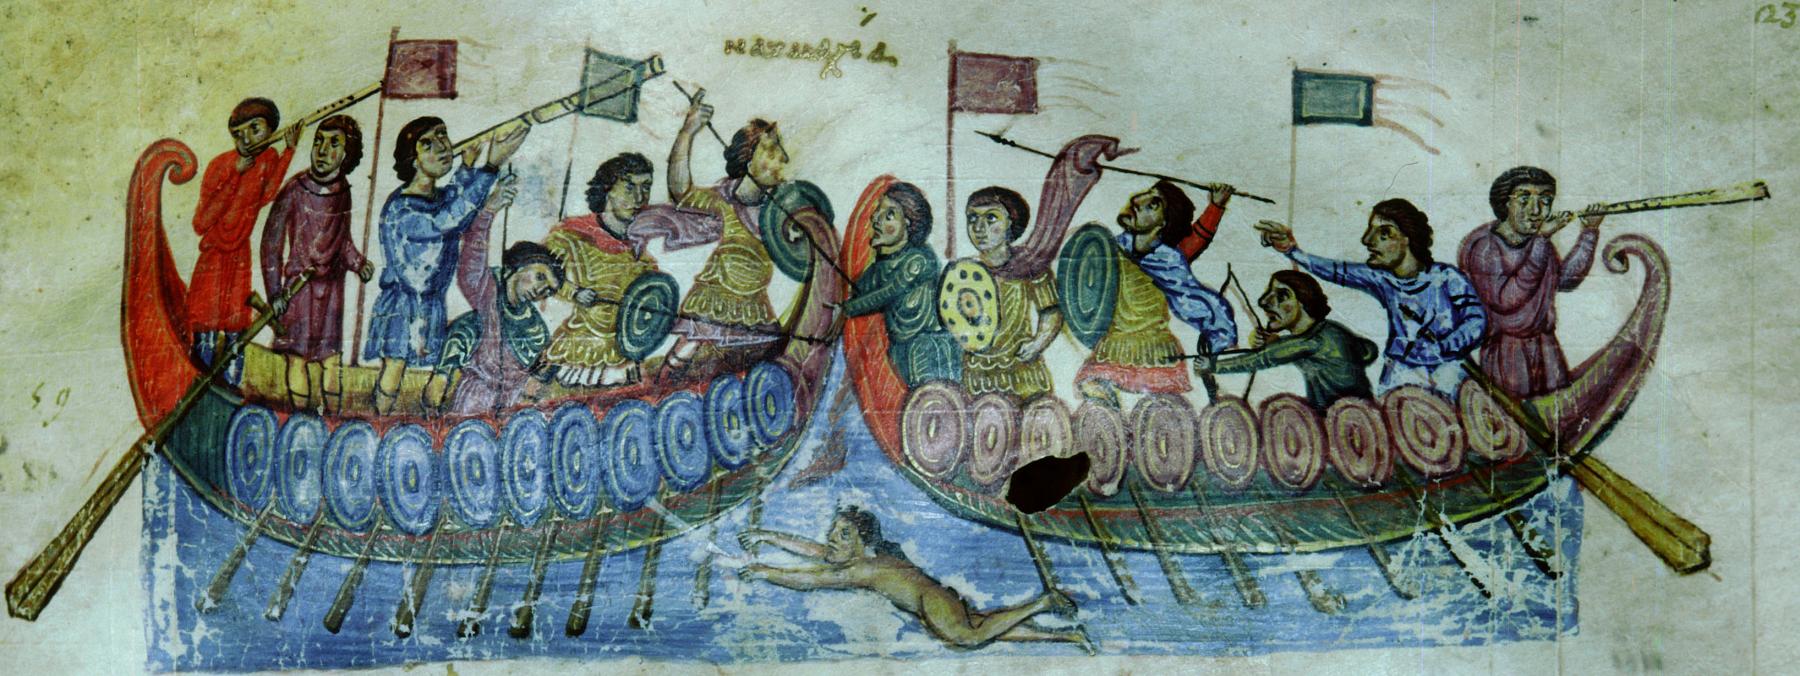
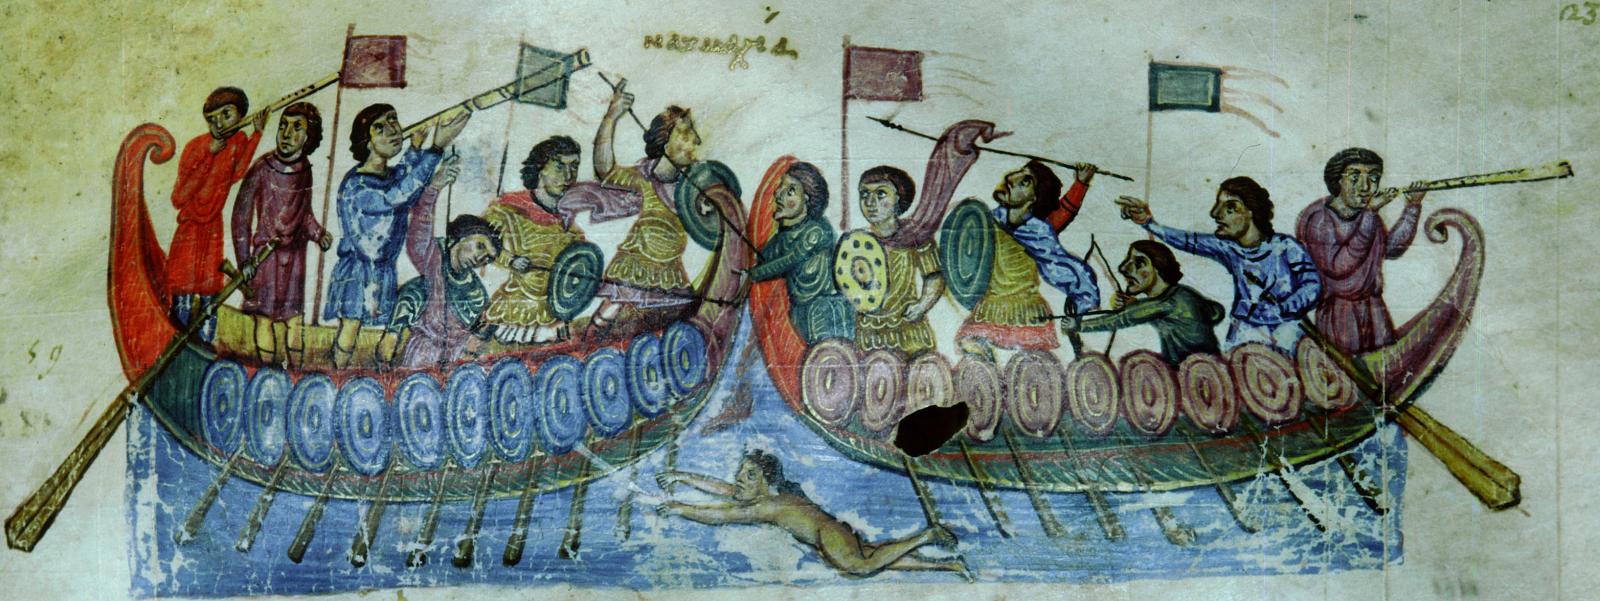
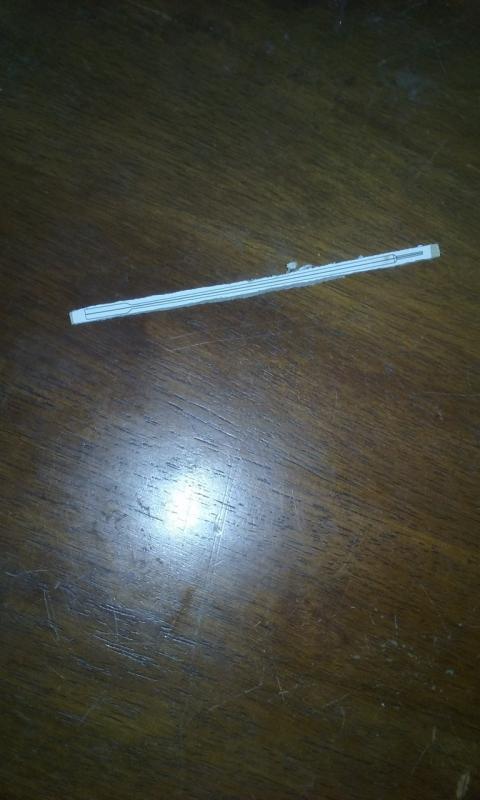
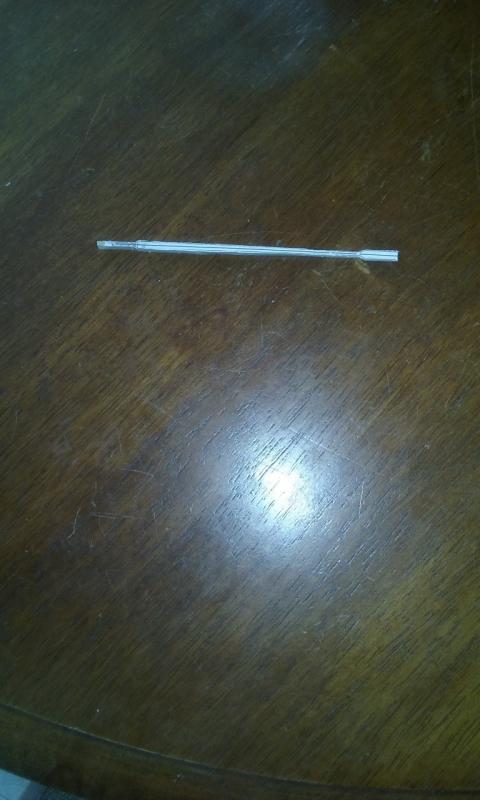
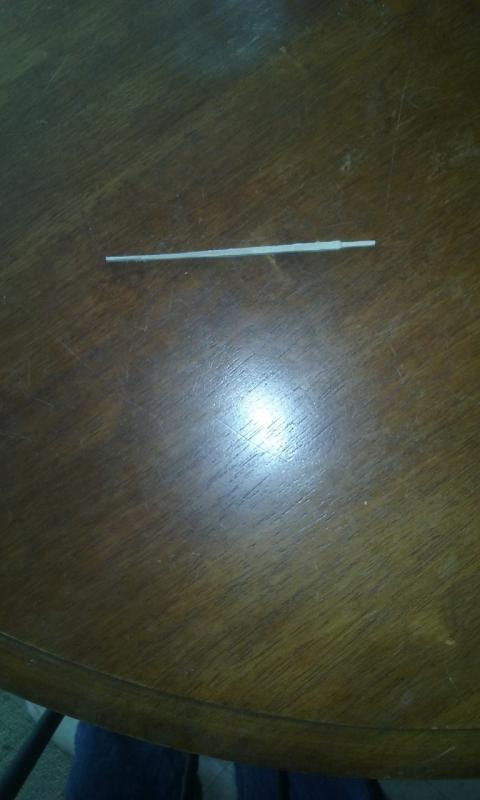
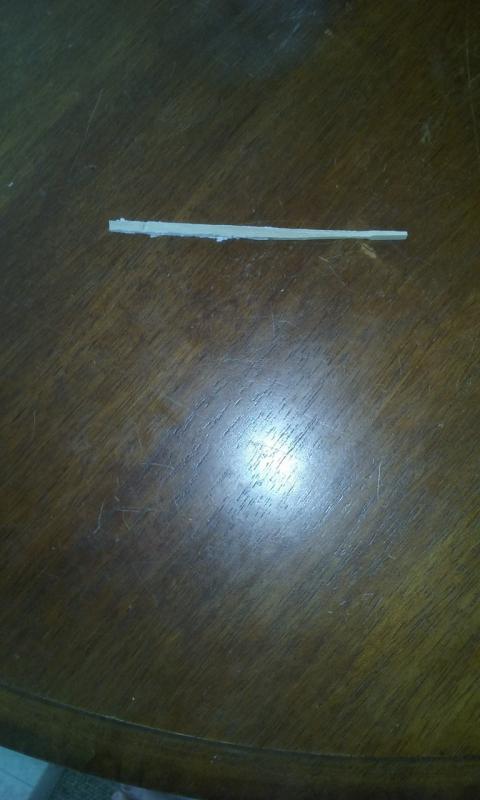
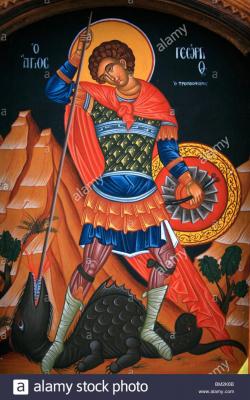
Mark, Yes, the shields hang on the sides. If you look on the first page of this thread, there are a couple of diagrams I've drawn which show them. Unfortunately, I've just realised that hanging them by the enarmes the way I've shown is physically impossible - the enarmes should be slung over the upright, not threaded along the horizontal beam of the pavesade. You'd never get the shields on and off. I haven't yet worked out exactly I'll fix them in place, but I'm sure I'll come up with something. I've never tried sculpy, but I believe without having to cram the cardboard into the boss in the middle, it's likely the dog biscuit card will do the job without crumpling. And the detail is surprisingly good. I've just made a flattish conical shield out of modelling clay and cast it in a plaster mould. Once that's hard, I'll cast a new shield blank made of builder's bog. It's hard and stable enough that I can carve all the detail in it I want - particularly the raised shield rim and perhaps a line to show the (non-raised) boss. And then use it to make a mould out of of builder's bog so I can make all the cardboard shields I want. I've been collecting contemporary pictures of Byzantine shields. At this time they were pretty equally divided between round shields and others which were tear-drop shaped. I'm going for round shields on the dromon (a tear-drop shield wouldn't work on the side of a ship) and I've so far collected over 50 designs, though several of them seem to duplicate each other. I've probably got enough for all the shields to be different from each other. During my shield research I began to notice other things, particularly about the oars shown in contemporary illustrations. I'd based my oar blades on the ones in Age of the Dromon, but on further investigation I believe they aren't a true reflection of the shape of oar-blades of the time. Contemporary illustrations show oars tapered all the way from the handle to the end of the blade. I don't believe the whole loom took part in the taper, but the blade itself may have. This picture is contemporary with the ship I'm making, and I based the shapes of both the dromon's tail and the steering oars on it. I've just noticed, by the way, that the steering oar of the left hand ship appears to show a tiller (though the steersman's not using it). Even taking into account the likelihood of error and carelessness on the part of the artists (and the possibility they may never have really looked at a dromon's oar-blade), I still feel it's the best representation we have. Lacking any definite evidence to the contrary I've decided to taper my oar blades. I'm changing the ones I've already made and will make the next ones to the new shape (only 82 to go!). Here's a pic of the old and new shape together.


-
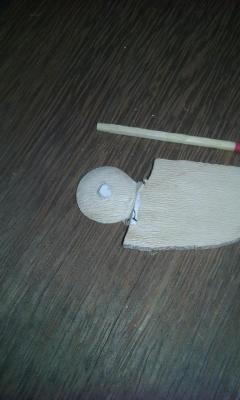
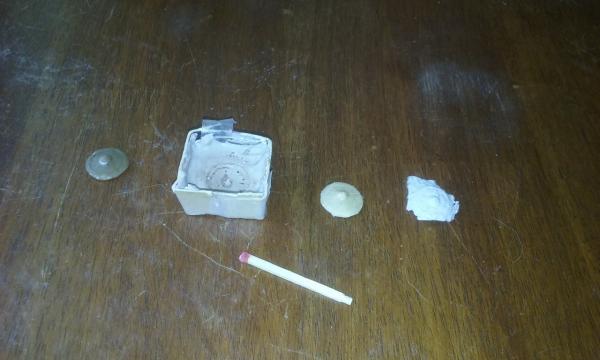
I've just spent about a week literally going around in circles (pun intended) making shields for the sides of the ship. I decided that I didn't want to carve 50 shields. Byzantine shields in contemporary representations are routinely either the shape of a bowl with the inside toward the holder or a very shallow cone and carving 50 of them would be just too much hard work. Ideally I'd make them of wood, but as a shield of the time was usually about 7mm (a little over 1/4") thick, it was totally unrealistic. So I decided to carve a single shield and cast from that in some suitable material that would be light and strong, probably paper or cardboard, or perhaps papier mache'. I also thought of using builder's filler, but for various reasons (including wastage every time you mix up a batch) I decided against it. I decided to make the shield bowl-shaped. The shields I was accustomed to using in my mediaeval re-enactment days had a hole in the middle covered by a bowl-shaped central iron boss, which encloses and protects the hand so you can grip the shield by a rigid handle across the hole. This puts your hand in the same plane as the body of the shield, so your control is better than if the handle was offset. Here is the shield in the process of being carved out. I used pear wood, as it has a nice fine grain. And here it is complete. But I shouldn't have made my mould out of plaster of Paris. Trouble is, that stuff is too soft to take repeated castings without deteriorating to the point that all useful detail would be lost. So I decided to change tack and make the mould of builder's filler instead. But as the wooden original had curled up at the edges when it got wet, I couldn't use it again. So I cast another on in the plaster mould, using builder's "bog" (filler) - wonderful stuff - hard and strong and durable, and makes a beautifully detailed casting. An hour or so later I tried to take the new shield 'blank' out of the plaster. Couldn't do it without breaking the mould, but as I wasn't going to use it any more, that was ok. Then I made a new mould out of goopy builder's bog and put the shield in face down. I'd covered the shield with shoe polish first, to stop the casting from adhering to the mould. It worked well - there's a small nick in one edge of the blank where I had to put a blade in to get leverage, but that's all. Then I tried making shields. I used thin card to approximate a 7mm edge, but it crumpled in the mould, even though I'd wet it first. Next I used card from the box the dog biscuits came in. Pretty good, but still a bit of crumpling, so it ended up with a groove from the centre to the outside edge. It's possible that with care and practice I might be able to overcome this problem. I also tried papier mache', using damp shredded paper and a bit of PVA glue. It filled the mould all right and came out ok, but didn't have the quality of detail the dog biscuit card had provided. From left to right - the builder's bog 'blank', the mould, dog biscuit shield and papier mache' Then I took a break overnight, and as I lay awake it came to me. I'd got the shield wrong! I looked again at the Byzantine shields I had pictures of. They didn't have a boss sticking out of the surface of the shield. Because Byzantine shields, without exception, were controlled not by a rigid handle as the Viking, Anglo-Saxon and other West European shields were, but by enarmes - short leather or rope loops attached to the back of the shield. You grab both enarmes in one hand and control the shield that way. Having used both techniques I can say I'd far rather use the handle, but that's not the point. With enarmes, you don't need the a hole in the middle of the shield or a boss sticking out of it. So I'm back to square one. I'll make a new shield blank (this time as a shallow cone). And it won't have that boss sticking out. I know if I had kept it as it was hardly anybody would have known. But I would. Steven


-
That is such a beautiful vessel, and so beautifully done. I'd go for tossed oars if we're voting. But you'd need a crew . . . It is possible to make or carve crewmembers - whether from wood or other materials. But it would add to the job - you'd need a dozen of them, and then that would mean you'd also need a steersman, so that makes 13 - or 14 with a passenger . . . it all starts becoming a bit much. I enjoyed carving the crewman for my own build, and I'll be making maybe another 3 or 4 from scratch, but once it gets up to those kinds of numbers it stops being fun and becomes a bit of a chore. Steven
- 641 replies
-
- 4
-
-
- greenwich hospital
- barge
- (and 1 more)
-
Sultana figurehead discussion
Louie da fly replied to CharlieZardoz's topic in Nautical/Naval History
Just a thought - an 18th century American would have had very little accurate idea of what a Sultana looked like. Anything exotic would probably have been good enough - possible involving flowing garments and some kind of turban? Possibly something like the first and third ladies at http://thestreetballet.tumblr.com/post/57090904732/asianhistory-question-asks-hi-mrms-mod (warning - the second lady is NSFW) -
Timmo, that's a beautiful build. I look forward to seeing her completed and in the water. Any chance of a video when the time comes? Those masts look very tall to fit in a car. How are you going to transport the model? Steven
-
A fascinating model, but I have to know - what is an Elven Prayer ship? A ship elves pray in? Or have I missed the point completely? Steven
- 10 replies
-
- 5
-
-
- kalavente
- prayer ship
- (and 2 more)
-
A beautiful job. Also nice to see your sailmaking has Royal approval. Steven
-
Druxey, I agree - your version is far more informative and I believe gets across what a truly miserable day it must have been. There are similarities, but quite significant differences as well. I find the sterns of the barges absolutely fascinating. Without a real-world example to compare them to, it would be hard to believe these were accurate representations of actual vessels. What conceivable purpose would a stern like that serve? Steven
- 641 replies
-
- 3
-
-
- greenwich hospital
- barge
- (and 1 more)
-
Beautiful precision work, Glenn. This is the original steampunk. It is fascinating watching this build progress. (On a totally different subject, I've sent you a PM relating to the Glass Wreck.) Steven
-
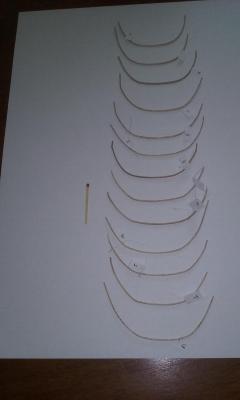
Here are the frames I've made so far. It's interesting that even though they're supposed to be progressively narrower as they progress towards the ends from amidships, they seem to be anything but consistent in shape. However, I believe this is because of variations in the wood and the conditions under which it was clamped into place. In any event, the springiness of the wood will enable them to return to their correct shape once they're in place on the plug and held in with planking and wales. The hard part was getting the wood to bend around a quite sharp corner at the futtock. Once that's been achieved the rest should follow without too much trouble (I hope). Steven
-
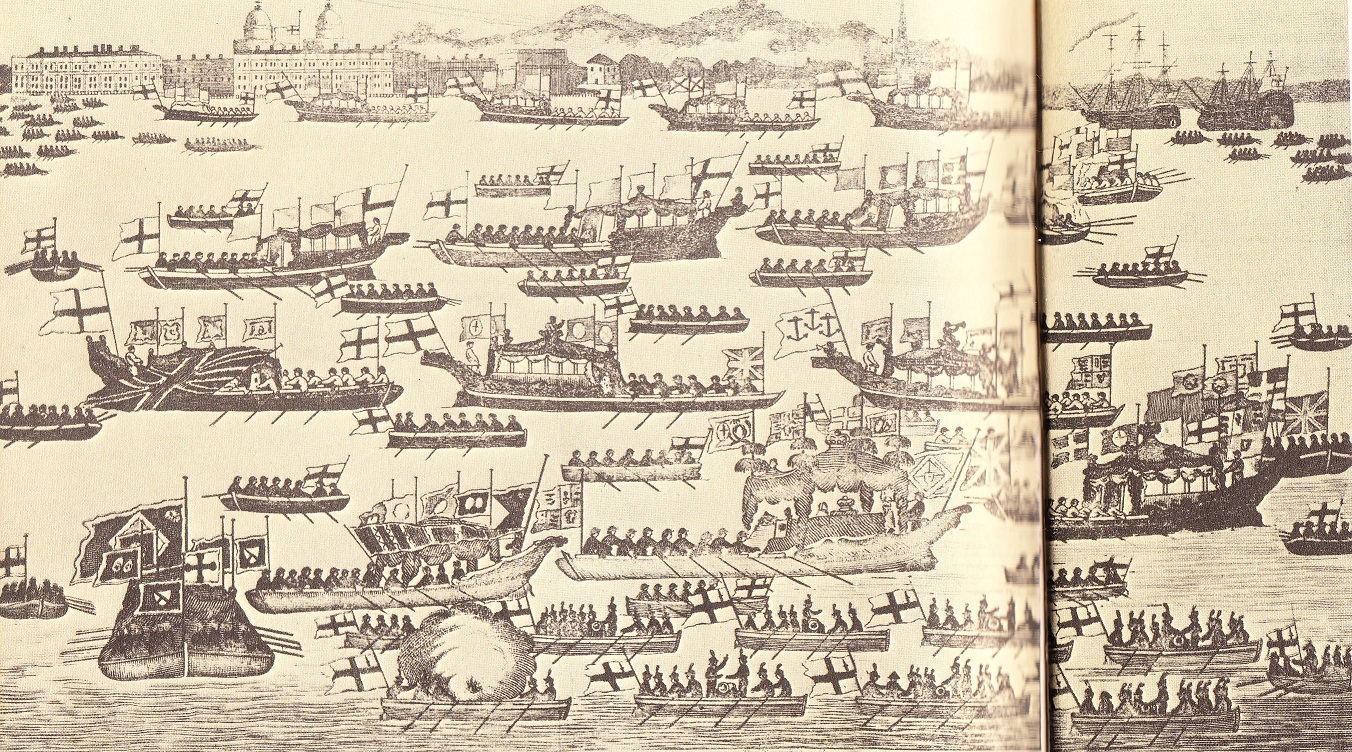
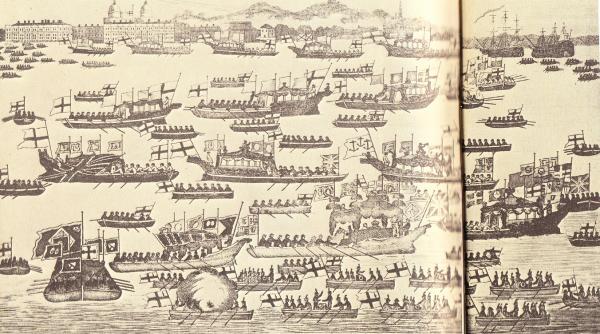
Thought this might be of interest. As far as I know, it's a contemporary picture of Nelson's funeral procession down the Thames. Not very accurate representations of the barges, but it might contain some useful details, and a bit of an insight into the spectacle on the river. You can see what I think must be the barge carrying The Body on the far left, draped in a Union Jack. [edit] No, I think I'm wrong - it's the one bottom centre with the crown on top of the canopy and another on top of the coffin. I think I can see Hornblower at the tiller, too . . . Unfortunately I don't know where it came from. It's in an old book on Nelson, and is unattributed. (Sorry about the fold in the middle). Steven
- 641 replies
-
- 8
-
-
- greenwich hospital
- barge
- (and 1 more)