Ryland Craze
-
Posts
1,569 -
Joined
-
Last visited
Content Type
Profiles
Forums
Gallery
Events
Everything posted by Ryland Craze
-
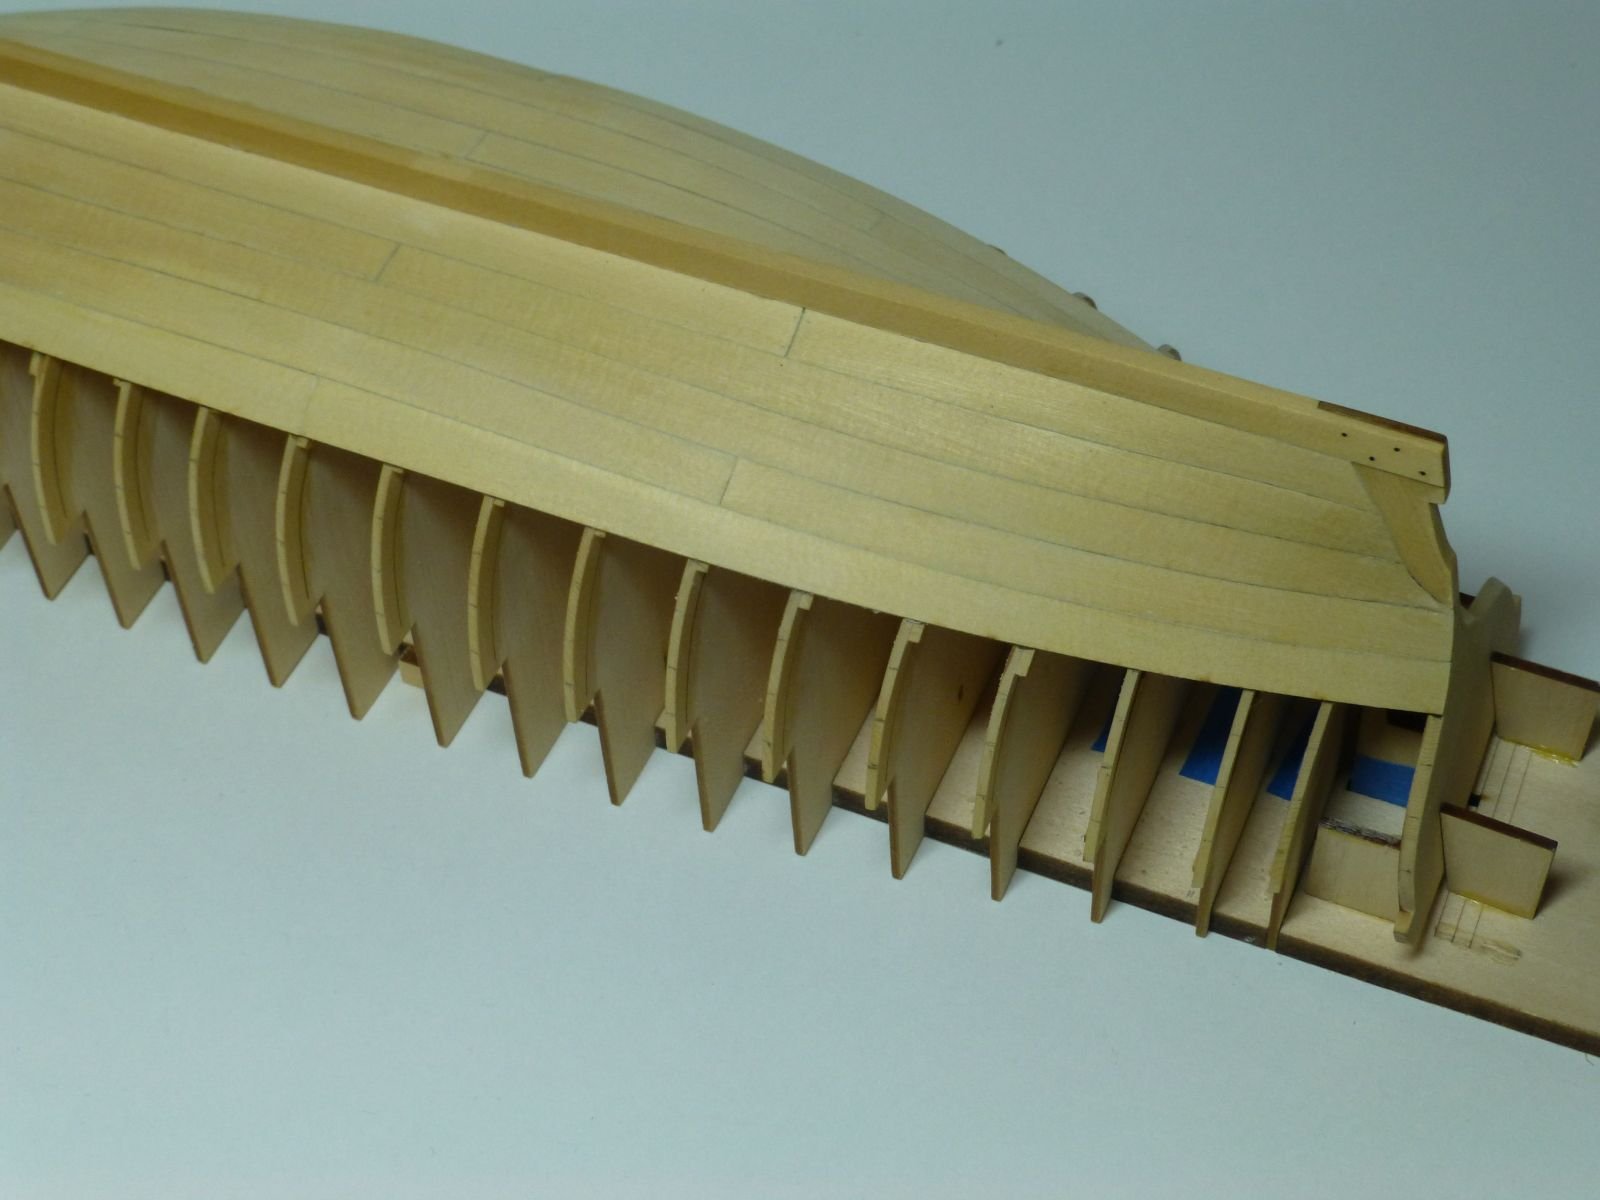
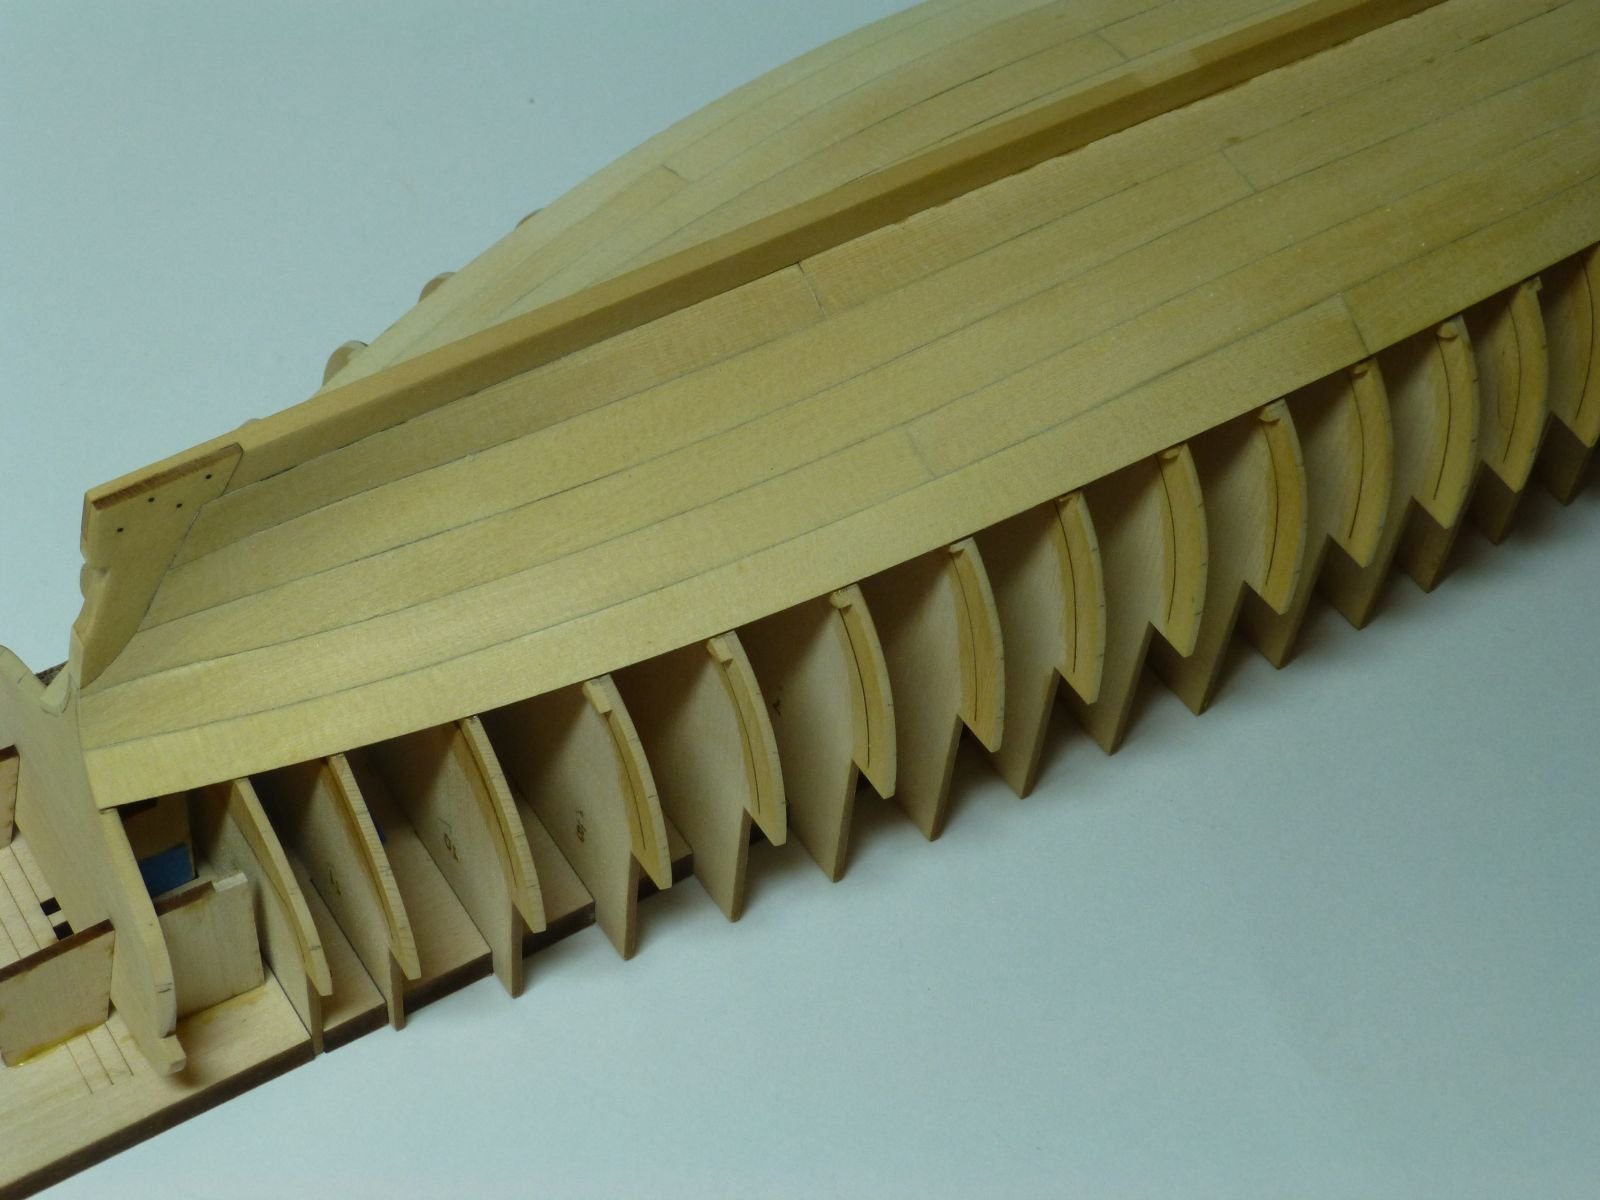
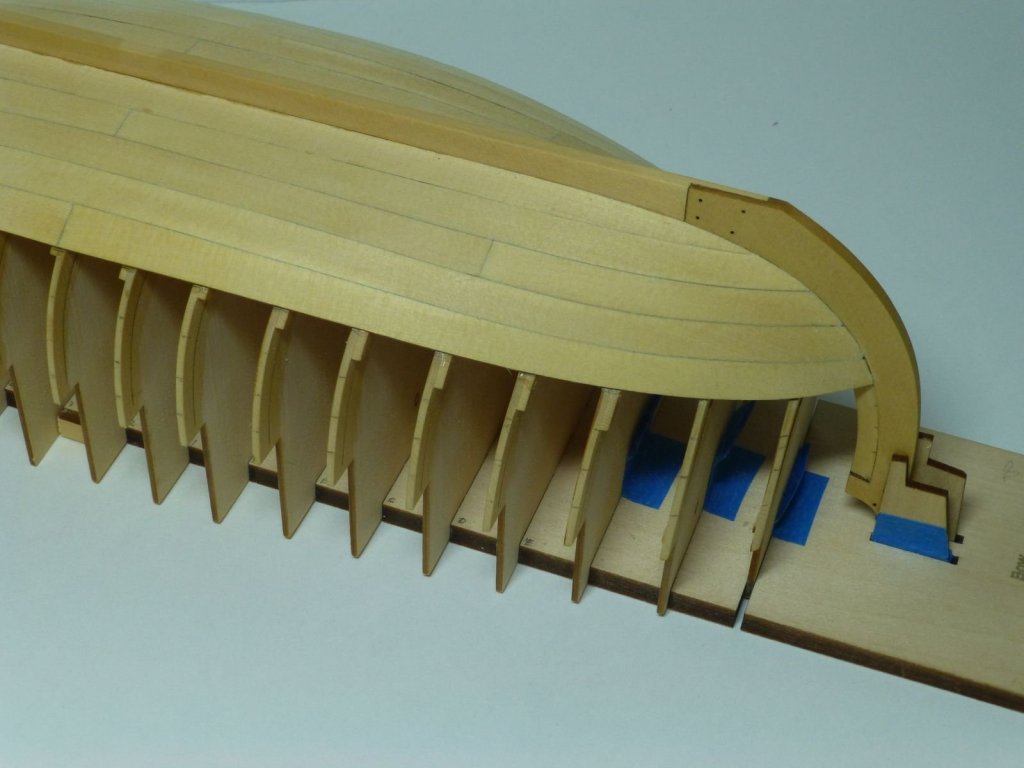
 It has been a while since I have updated my build log. I am about half way through the planking process. I have only snapped two planks in the process of contouring the planks. It was easy to make replacement planks using the excess wood on the bottom of the laser cut plank sheets. I am finding that the planks fit much nicer now that I am beyond the first three rows of planks from the keel. I am drilling the holes for the simulated nails when I install each plank as it seems easier to me not to miss the bulkheads below the plank with my drill bit. Here are some pictures of my progress to date:
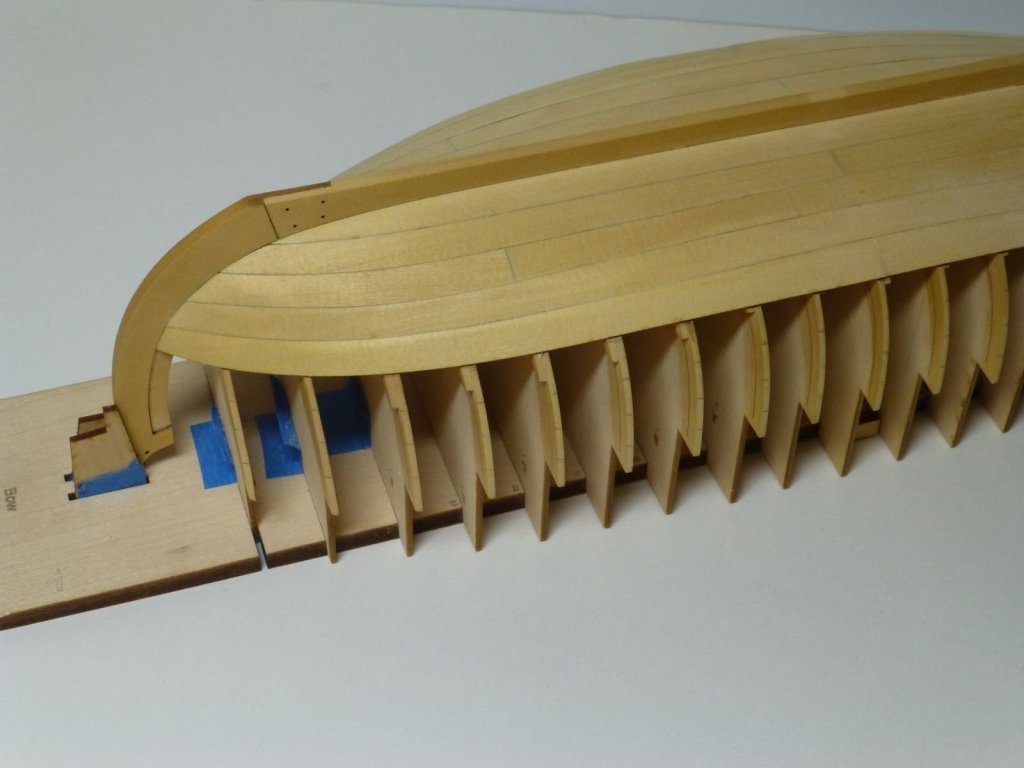


- 263 replies
-
- 17
-

-
- Medway Longboat
- Syren Ship Model Company
- (and 1 more)
-
Photo Etching - do it yourself
Ryland Craze replied to Dziadeczek's topic in Metal Work, Soldering and Metal Fittings
Thomas, Gene Berger is a member of the Hampton Roads Ship Model Society and he does his own photo etch for his award winning scratch built models. I consider him a master builder. He is on MSW as gberger. Here is a link to his website that has a presentation on photo etching. www.geneberger-models.com/photo-etching/ He has taught several of our Club members how to make photo etch parts. -
Congratulations on completing your Pinnance. You did a nice job on building this model. I have enjoyed following your build log.
- 90 replies
-
- 1
-
-
- english pinnace
- Finished
- (and 1 more)
-
Congratulations on the completion of your Cheerful. I have enjoyed following your build log and look forward to your next build.
- 574 replies
-
- 1
-
-
- cheerful
- Syren Ship Model Company
- (and 1 more)
-
You are making good progress on your Longboat. I probably had more tape on my frames than what you have. It really strengthened the frames and did not cause me any problems in the fairing process. The tape will be removed before you start planking.
- 109 replies
-
- 2
-
-
- medway longboat
- Syren Ship Model Company
- (and 1 more)
-
That is a nice birthday present, something you will cherish for the rest of your life. We can tell that you are a proud PopPop.
-
I am sorry to see this happen, but glad the young boy is OK. The good thing is the new model will be much better.
-
Thanks Chuck. We are already registered for the Northeast Joint Clubs Show. We look forward to seeing you guys. We will also be spending some time in Lyndhurst and touring NYC. I will also be visiting my favorite place to eat as pictured below.

-
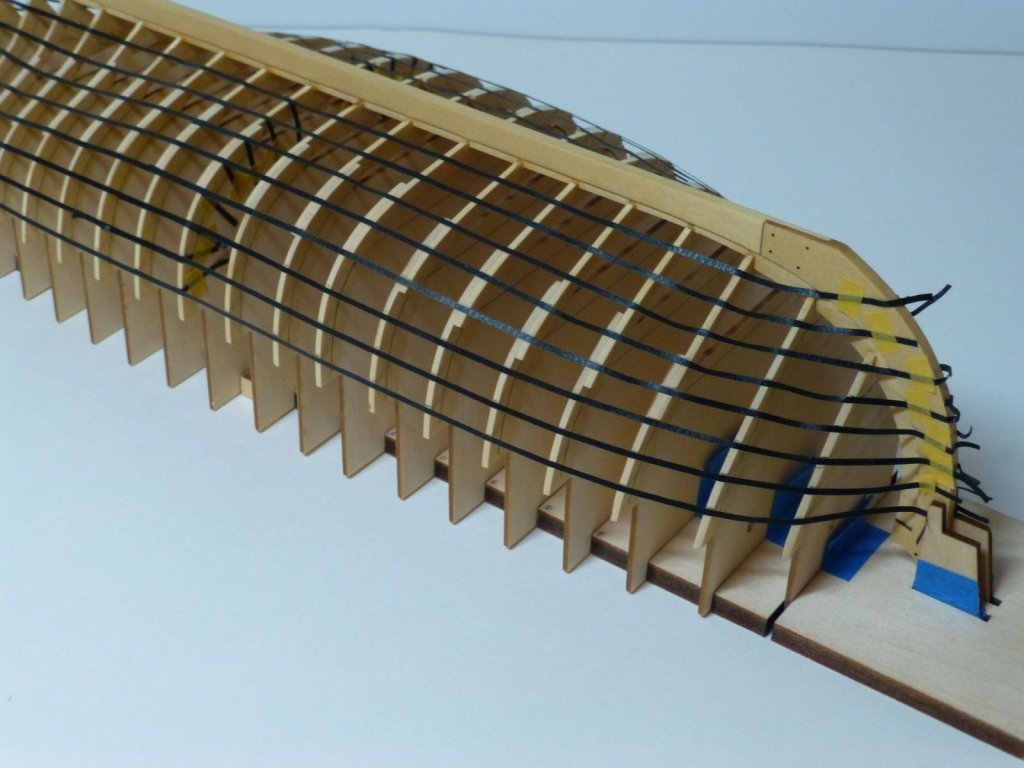
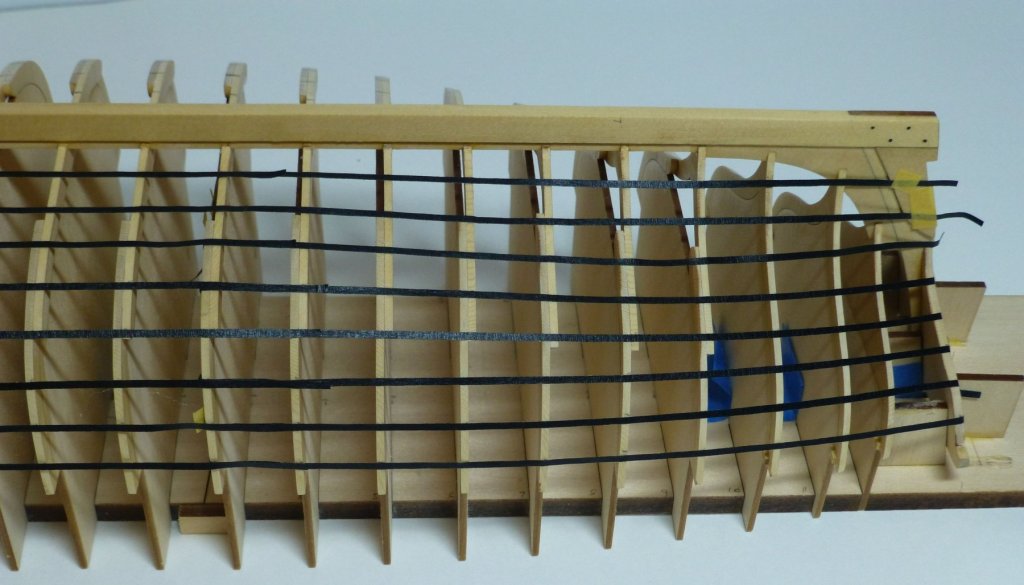
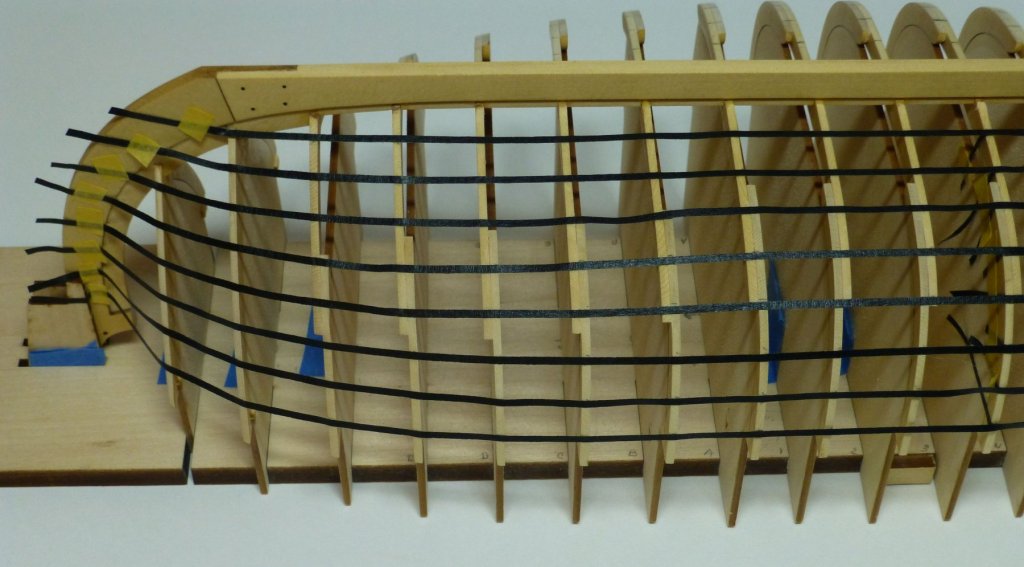
Thanks Michael for your comment and for the "Likes". I have completed the lining off of the port side of the hull. Now I can start the planking.

- 263 replies
-
- 2
-
-
- Medway Longboat
- Syren Ship Model Company
- (and 1 more)
-
Your Longboat is looking very nice. Thanks for the tip on installing the simulated nails as each plank is installed. I hope to see your model at a future SMSNJ meeting.
-
Congratulations on completing your Longboat. I have enjoyed following your build log and have learned a lot that will help me on my build. I hope to see your Longboat at the Northeast Joint Clubs Conference and Show in New London CT in April. Thanks also for all of the fine photos of your model.
-
Ken, very nice job. I cannot wait to see this in person in April.
-
Byrnes Table Saw Tips (requested)
Ryland Craze replied to Matrim's topic in Modeling tools and Workshop Equipment
Joe, I get my blades directly from Thurston. They are great to deal with. http://www.thurstonmfg.com/jewelers-slotting-saws.html -
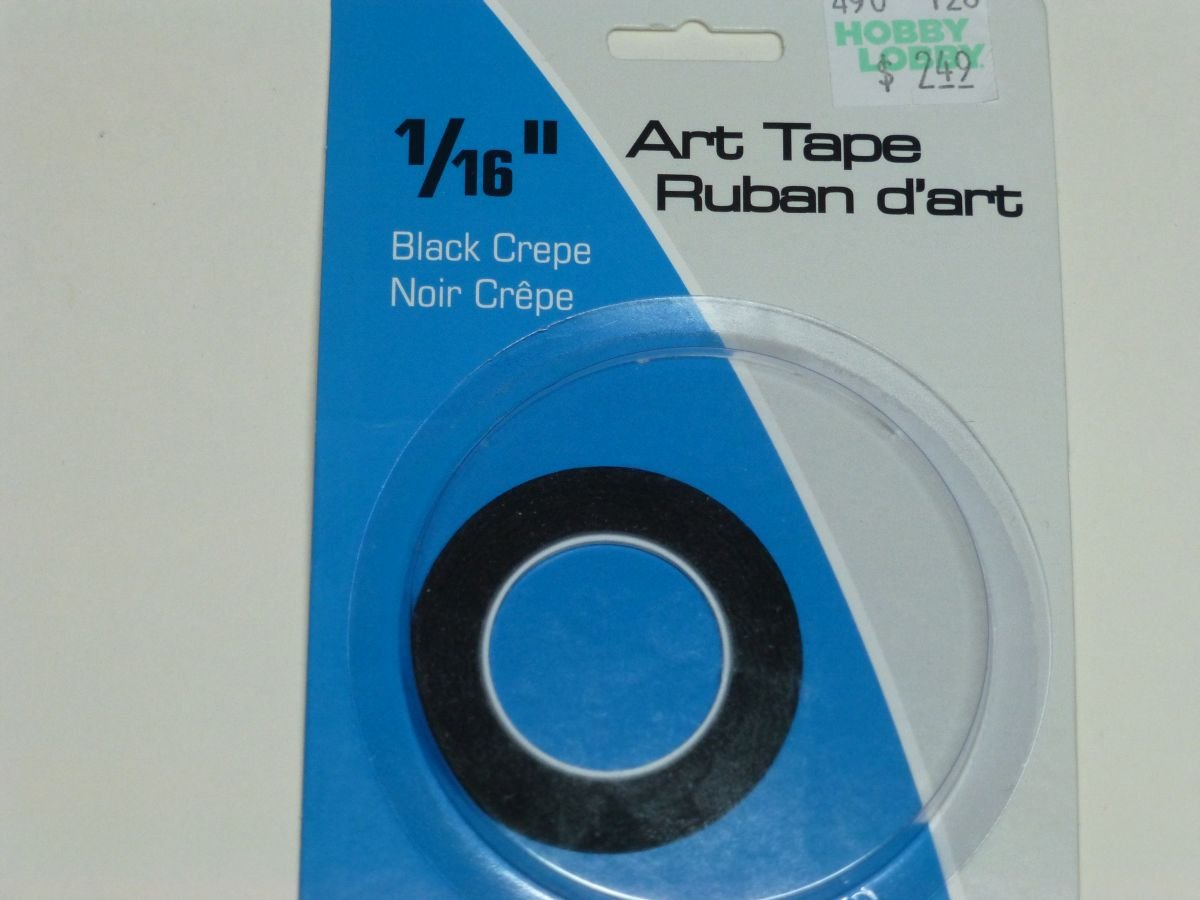
Completed lining off the starboard side of my Longboat. I had trouble with the tape sticking to the frames, but found some 1/16" Art Tape from Hobby Lobby that has worked out very well. I took a damp rag and wiped off the surfaces that I wanted the tape to stick to. The slightest amount of dust will cause the tape to not adhere properly. Now to start the port side and then on to the planking.

- 263 replies
-
- 10
-
-
- Medway Longboat
- Syren Ship Model Company
- (and 1 more)
-
Looks like a good start. It will be nice to see another addition to the Cheerful fleet. I look forward to following this build log.
- 160 replies
-
- 1
-
-
- cheerful
- Syren Ship Model Company
- (and 1 more)
-
You did a good job on your bolsters. I hope mine turn out as nice as yours.
-
Can i live without a BYRNES TABLE SAW
Ryland Craze replied to shihawk's topic in Modeling tools and Workshop Equipment
Here is a print friendly version of the Byrnes Saw Tips. I have enjoyed my Byrnes saw and have used it more than what I thought I would have. It is a high quality and precision miniature power tool. Byrnes Saw Opeation Tips.pdf -
That is good news. I was afraid that I had messed up the transom. It is great that you designed this kit so that small mistakes by the builder can be corrected leaving no evidence of the mistake.
- 263 replies
-
- 3
-
-
- Medway Longboat
- Syren Ship Model Company
- (and 1 more)
-
That is good news. Thanks!
-
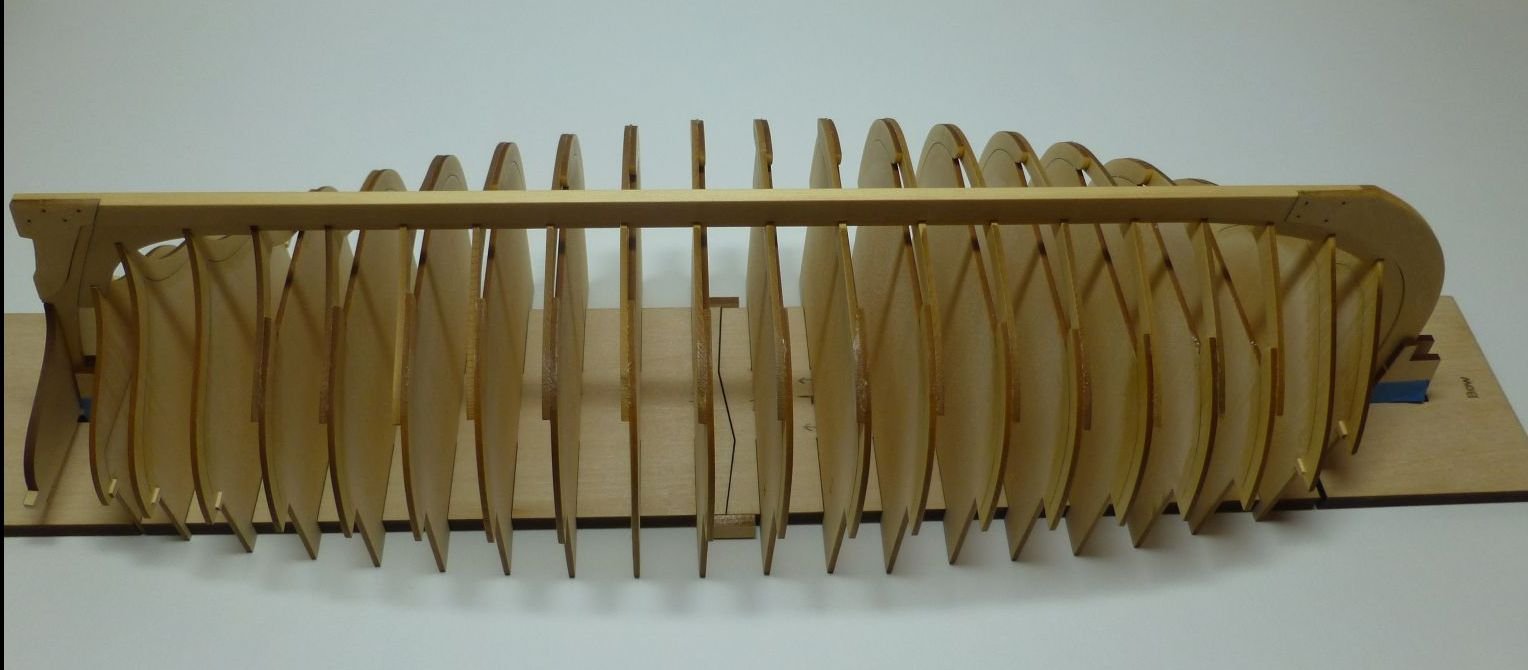
Thanks Rusty. I will definitely remove the tape after I finish fairing the frames and before I start the planking. When fairing the stern portion of the frames, I accidentally hit the "ears" of the transom with my sandpaper. This took off a little wood on the "ear" of the transom where it should not be faired. This did not cause much damage, but repeated hits with sandpaper would round off the the transom edge. To prevent this from happening again, I placed a piece of painters tape over the "ears" on the transom to protect it from accidental fairing.
- 263 replies
-
- 6
-
-
- Medway Longboat
- Syren Ship Model Company
- (and 1 more)
-
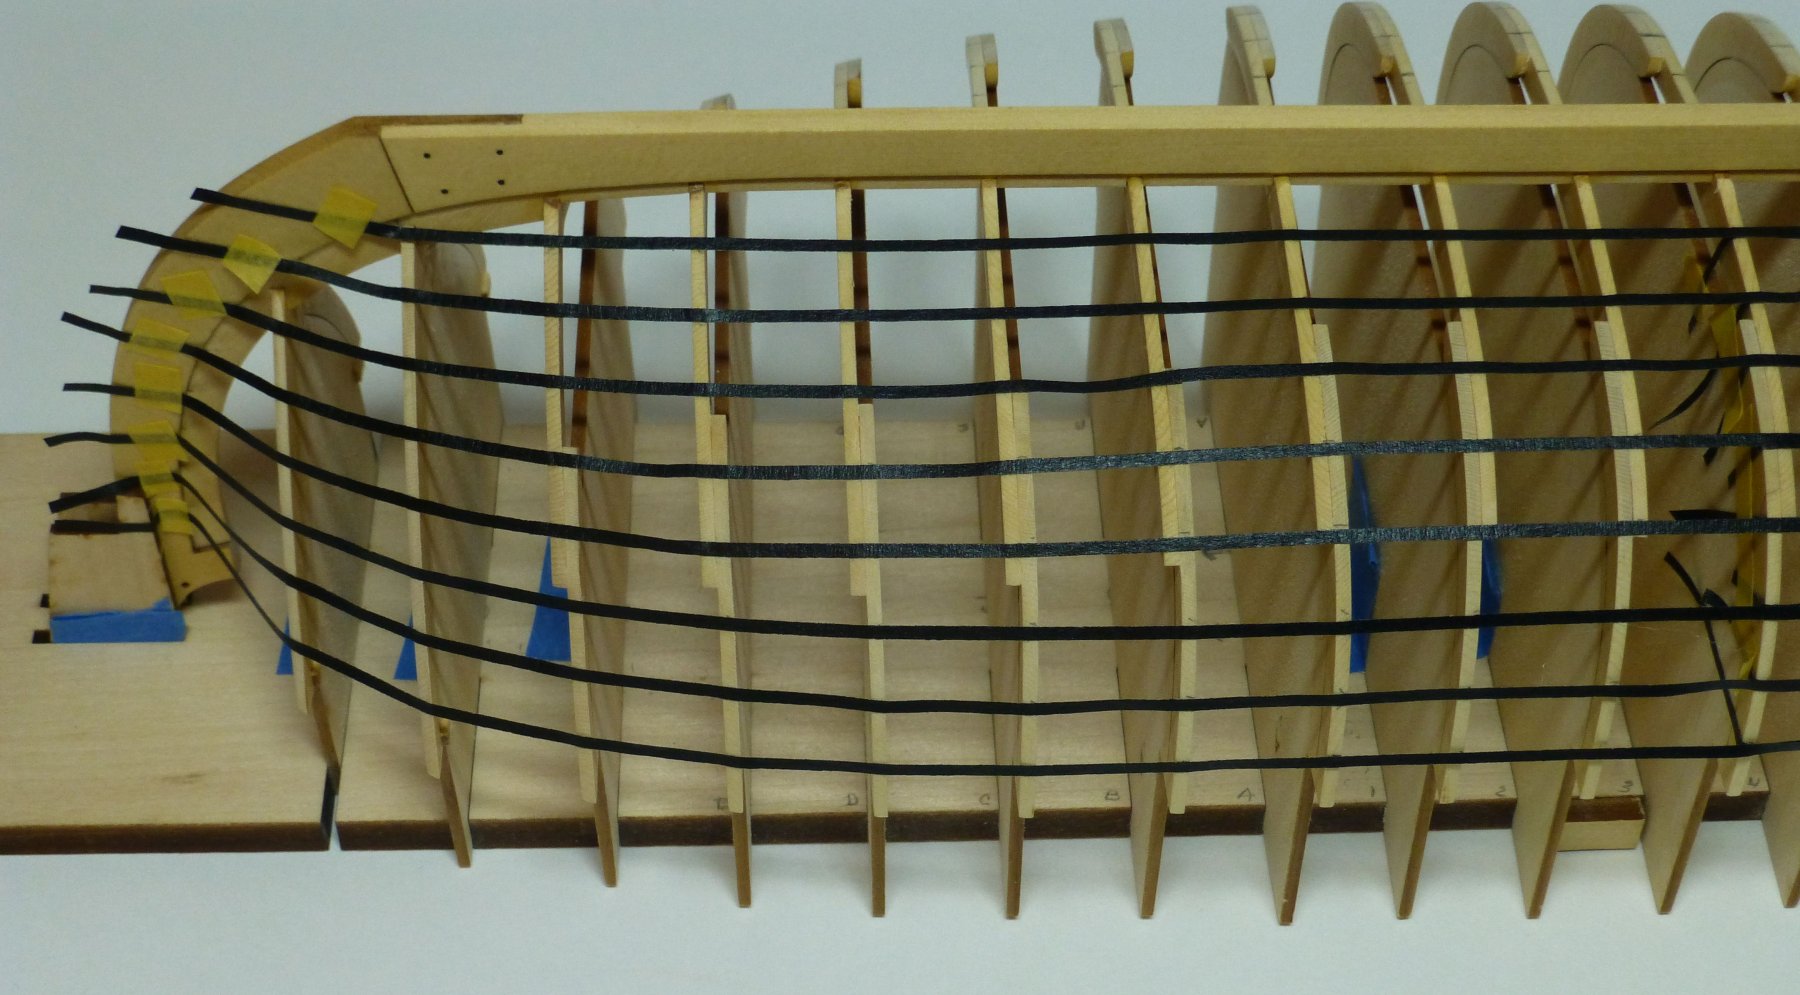
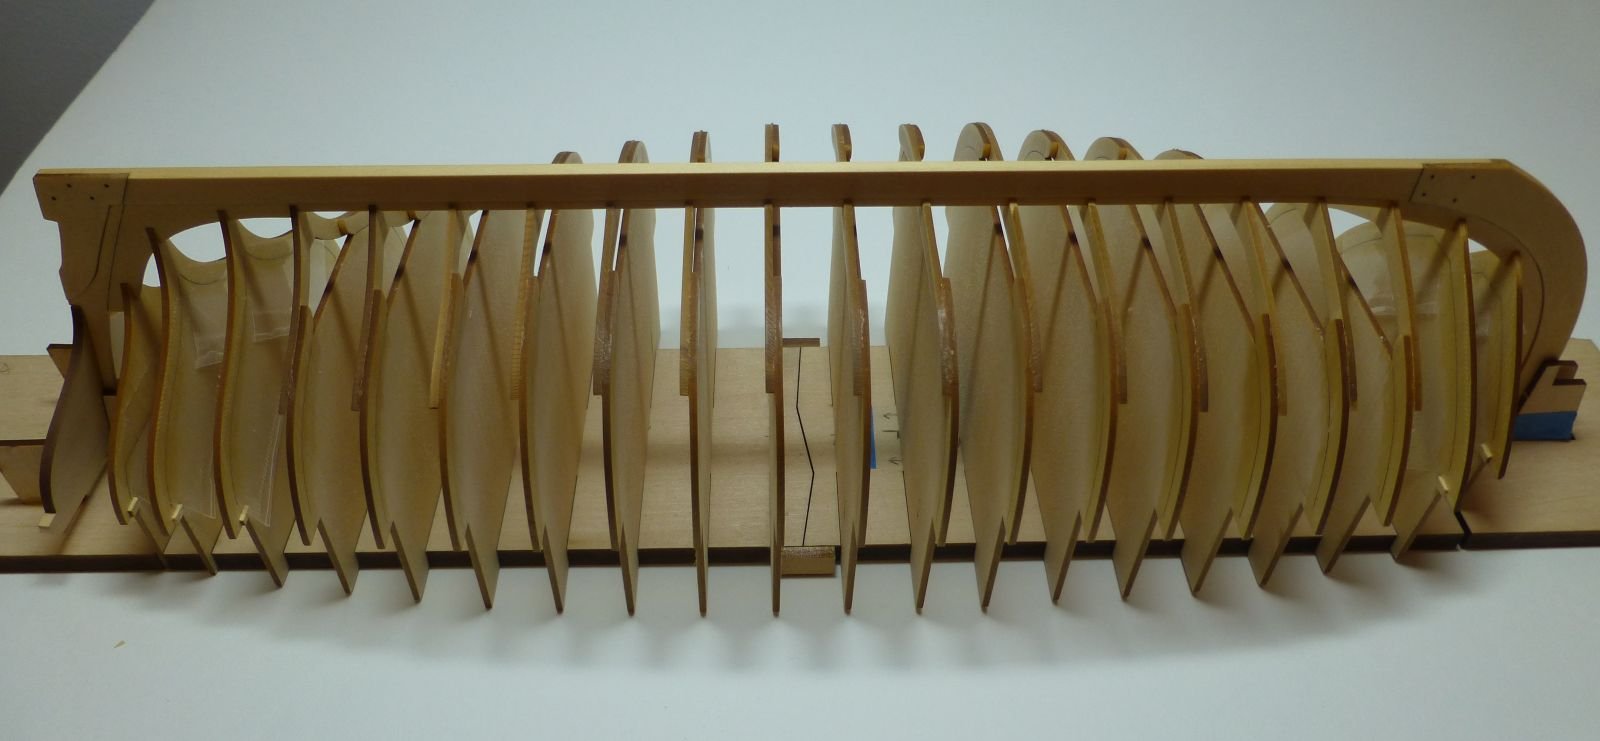
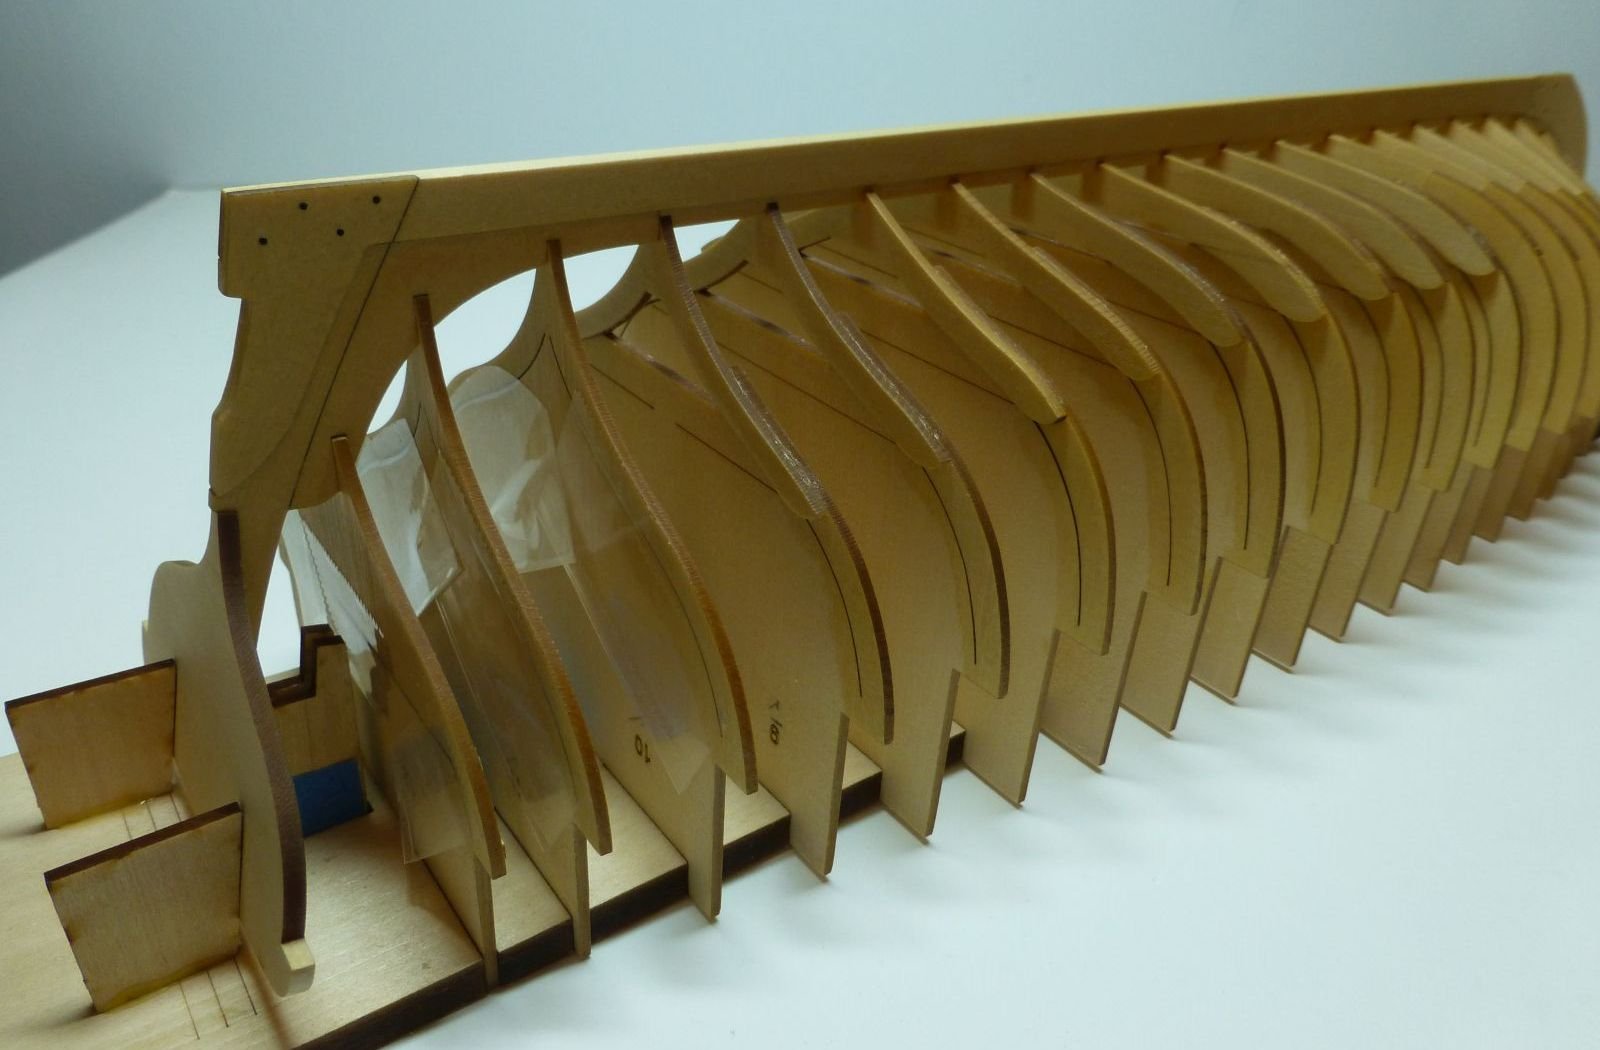
Thanks Chuck and Michael for your comments and also for the "Likes". Chuck, the tape really made a difference as it strengthened the frames. The camera makes it look as if it is overlapping the frames in some places. I trimmed the tape so that this would not happen. But, I did not allow for the angle of the frame edge being changed when the frame was faired and a small portion of the tape has come in contact with the sanding stick in some places with the sanding of the frames. This has not caused any problems with the fairing process. I will be removing the tape when I begin the planking process so as not to chance the tape being glued to the frame.
- 263 replies
-
- 2
-
-
- Medway Longboat
- Syren Ship Model Company
- (and 1 more)
-
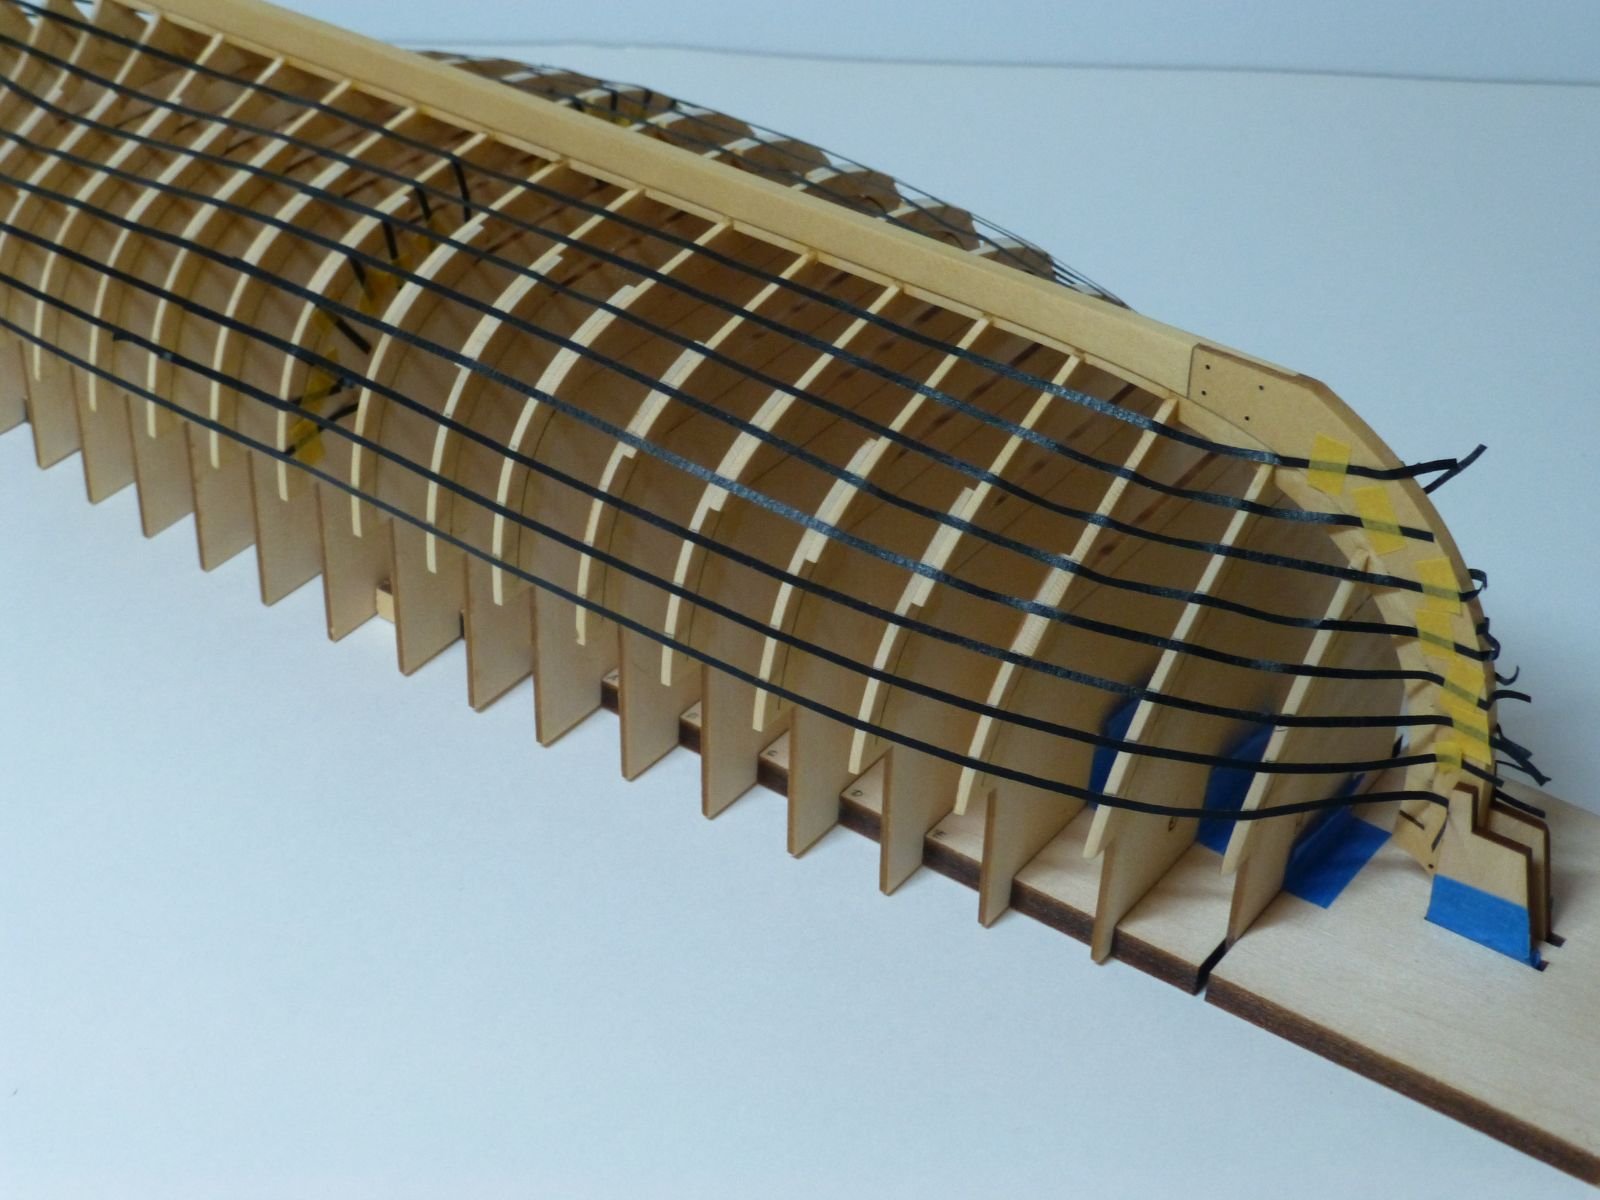
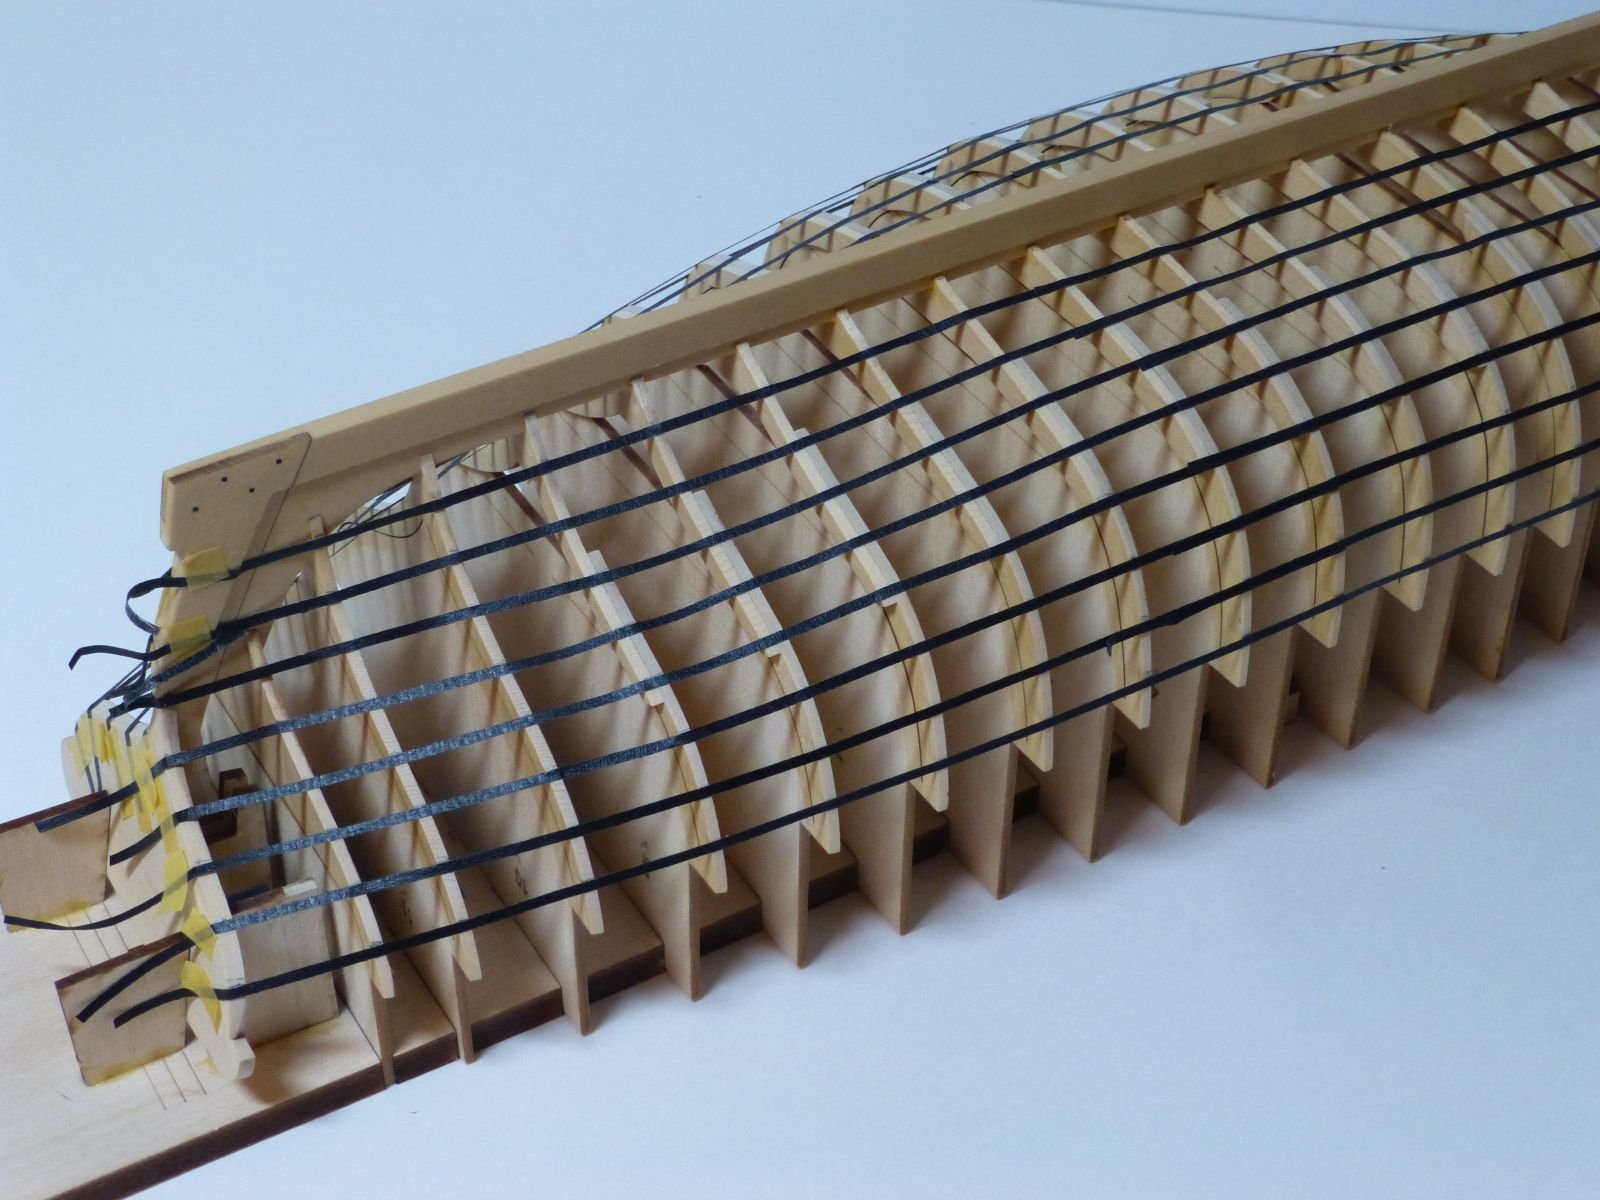
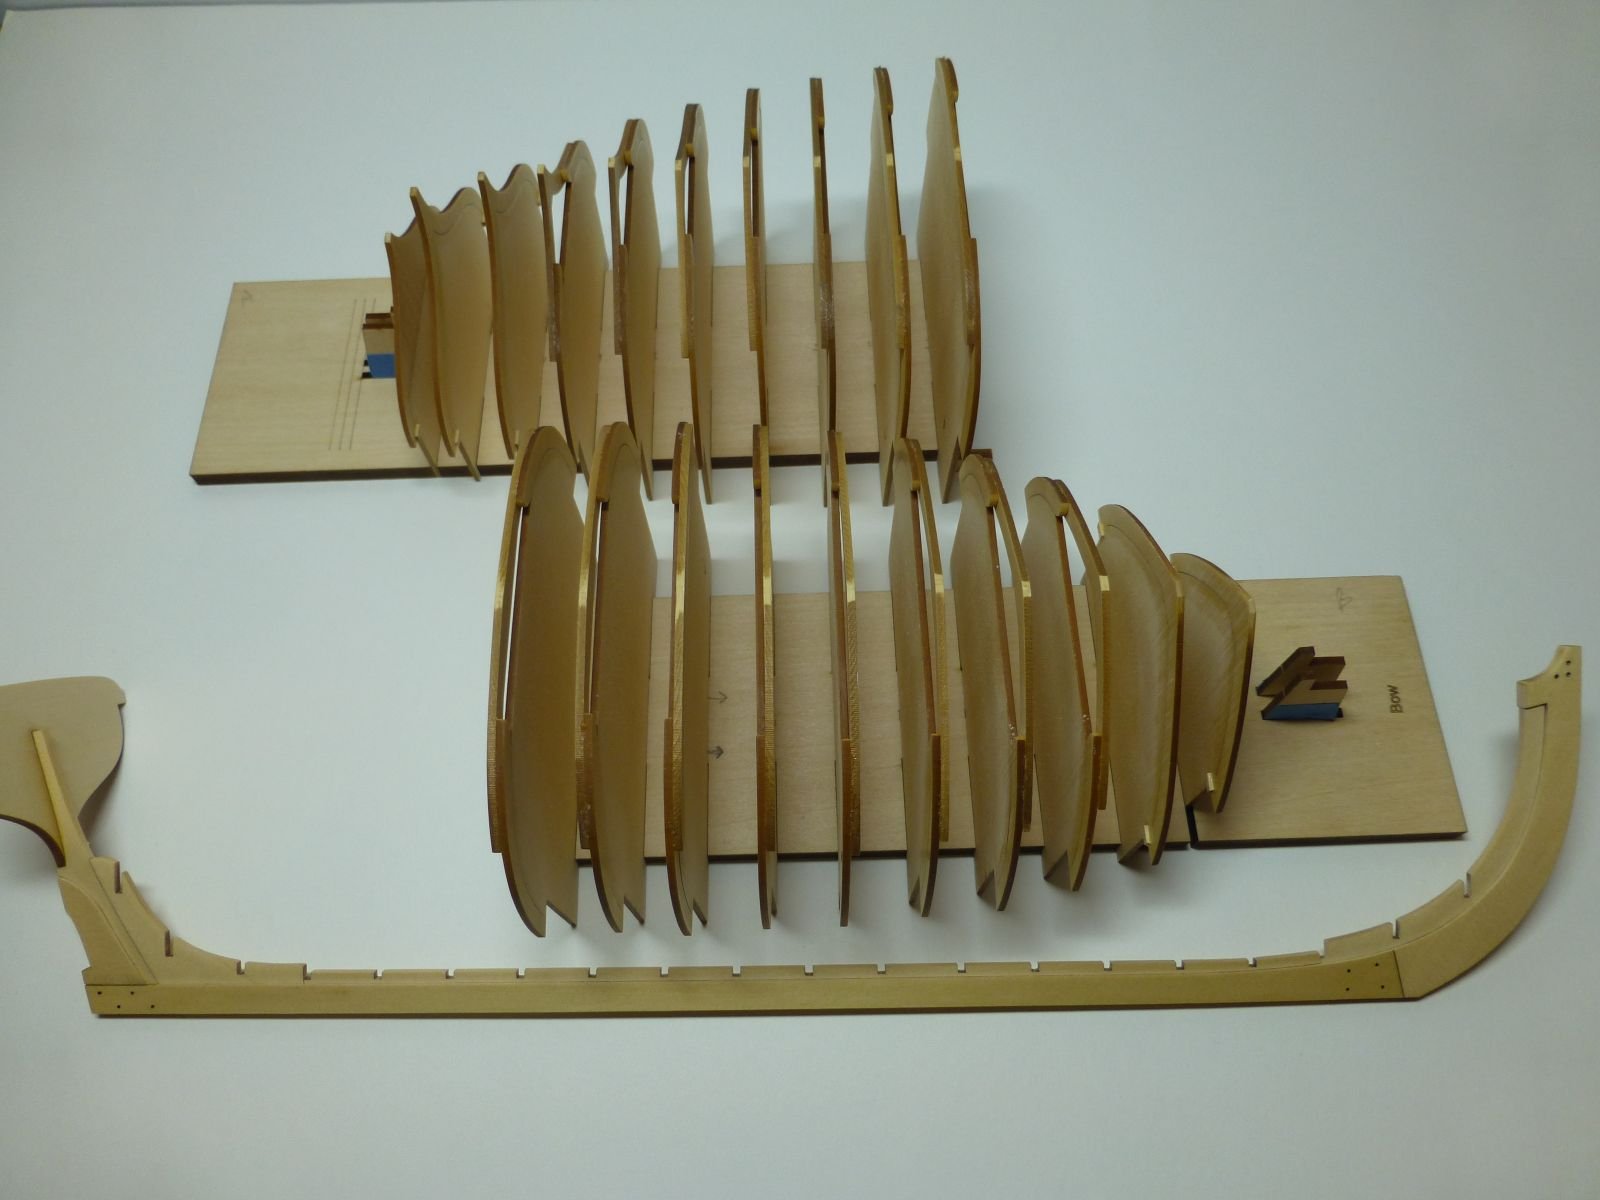
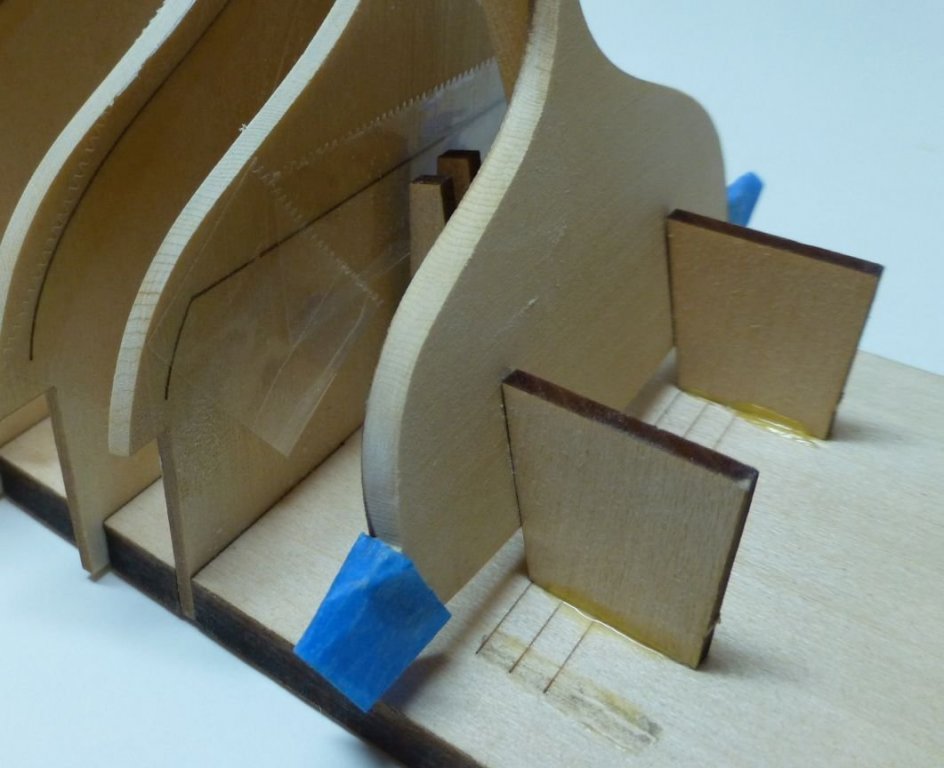
Thanks everyone for the "Likes". In preparing the frames for gluing the keel to them, I took care to make sure that they were properly aligned. The design of the kit gives you a little "wiggle" room for adjusting the frames from side to side. With the keel dry fitted to the frames, I used a 1/32" thick piece of flexible planking material as a batten and kept adjusting the frames from side to side until all the frame edges touched the batten. I taped some of the frames to the build board using painters tape so that they would not move when I removed the dry fitted keel. I also marked the frame where the edge of the keel was so that I would have a reference point to place my glue. When it came time to glue the keel to the frames, I followed the kit instructions and placed a generous dab of glue on the frame pieces. After aligning the keel, I used a damp paint brush to remove any excess glue. I glued the stern half of the frames to the keel and let them set up for 24 hours and then glued the forward half of frames to the keel. Here are photos of my progress to date: Next step is to "gently " fair the frames and to line off the hull. I hope everyone has a safe and Happy New Year!

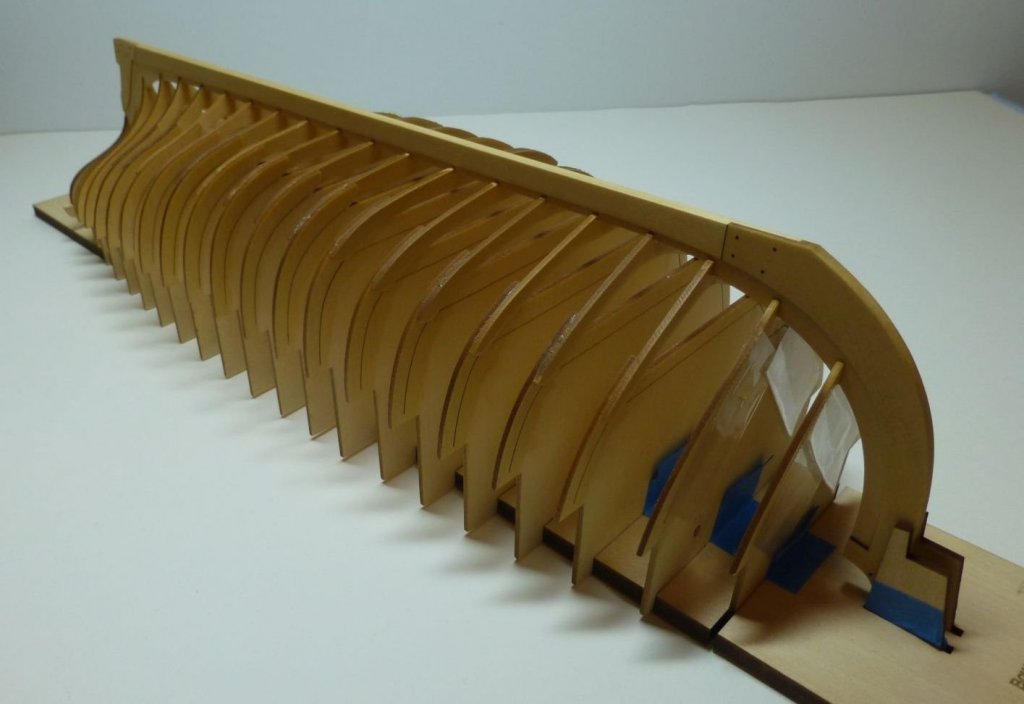

- 263 replies
-
- 13
-
-
- Medway Longboat
- Syren Ship Model Company
- (and 1 more)
-
Welcome Sea Hoss to MSW. We look forward to seeing your Syren build. If you finish it by the end of April, maybe you could bring it to the annual Northeast Joint Clubs Ship Model Conference and Show held in New London, Connecticut. I have seen several well done Syren's on display there over the years.
-
Thanks for the "Likes" and to Ken for his comment. I have completed the frames by following the instructions. I sanded them with 600 grit flexible nail files. I had to do very little sanding to get the frame tabs to fit into the slots on the build board. I also had to do a little filing of the slots in the keel to get the frames to fit. Once completed, I test fitted the keel assembly to the frames and everything fit perfectly with some minor adjustments. Next up is to get the frames properly aligned and glue the keel to the frames.


- 263 replies
-
- 14
-
-
- Medway Longboat
- Syren Ship Model Company
- (and 1 more)
-
Question on gluing the keel on top of the frames. The slots for the frames on the build board allow for some side to side movement for adjustment purposes. I am concerned that if the frames are not exactly centered on the keel, then this will cause problems when it comes to planking the hull. Does anyone have any suggestions that would help to make sure that the frames are properly aligned on the keel?