Ryland Craze
-
Posts
1,569 -
Joined
-
Last visited
Content Type
Profiles
Forums
Gallery
Events
Everything posted by Ryland Craze
-

Echo by davec - FINISHED - cross-section
Ryland Craze replied to davec's topic in - Build logs for subjects built 1751 - 1800
Congratulations on completing your cross section. I am looking forward to seeing it entered in the IPMS Richmond show on February 29th. It will definitely be an award winning model. -
Beautiful job on this model. Thanks for sharing your progress.
- 170 replies
-
- 1
-

-
- medway longboat
- Syren Ship Model Company
- (and 1 more)
-
Bob, you have done an excellent job on building your Longboat. Your craftsmanship is so clean and crisp. I cannot wait to see your next steps on this build.
- 170 replies
-
- 1
-
-
- medway longboat
- Syren Ship Model Company
- (and 1 more)
-
Hello and yet another Syren in progress
Ryland Craze replied to Kevin53's topic in New member Introductions
Kevin, Welcome to MSW. You have a nice looking Syren and I hope you start a build log. I will definitely follow it. -
Your Longboat is coming along nicely, Jean-Paul. Your build log is very detailed and will help future builders of the Longboat. Keep up the good work.
-
You have done an excellent job on your Longboat. I am looking forward to your masting and rigging.
-
Thanks Michael. I like this color because it is low sheen, almost a matte finish. When thinned, it levels out nicely. I may shoot some dull coat on it. I have read where Chuck mentions this in several of his posts.
-
I always buy brushes that are on the upper end of quality. With the 40% off coupon, it makes them affordable. I clean them frequently during a long painting session and they seem to be as good today as they were on the day that I purchased them.
- 263 replies
-
- 3
-
-
- Medway Longboat
- Syren Ship Model Company
- (and 1 more)
-
I am not brand conscious as I buy my brushes from craft stores, such as Michaels or AC Moore. You can find all kinds of brushes in the artist supply section of the store. They are reasonably priced when you use the 40% off coupon.
- 263 replies
-
- 2
-
-
- Medway Longboat
- Syren Ship Model Company
- (and 1 more)
-
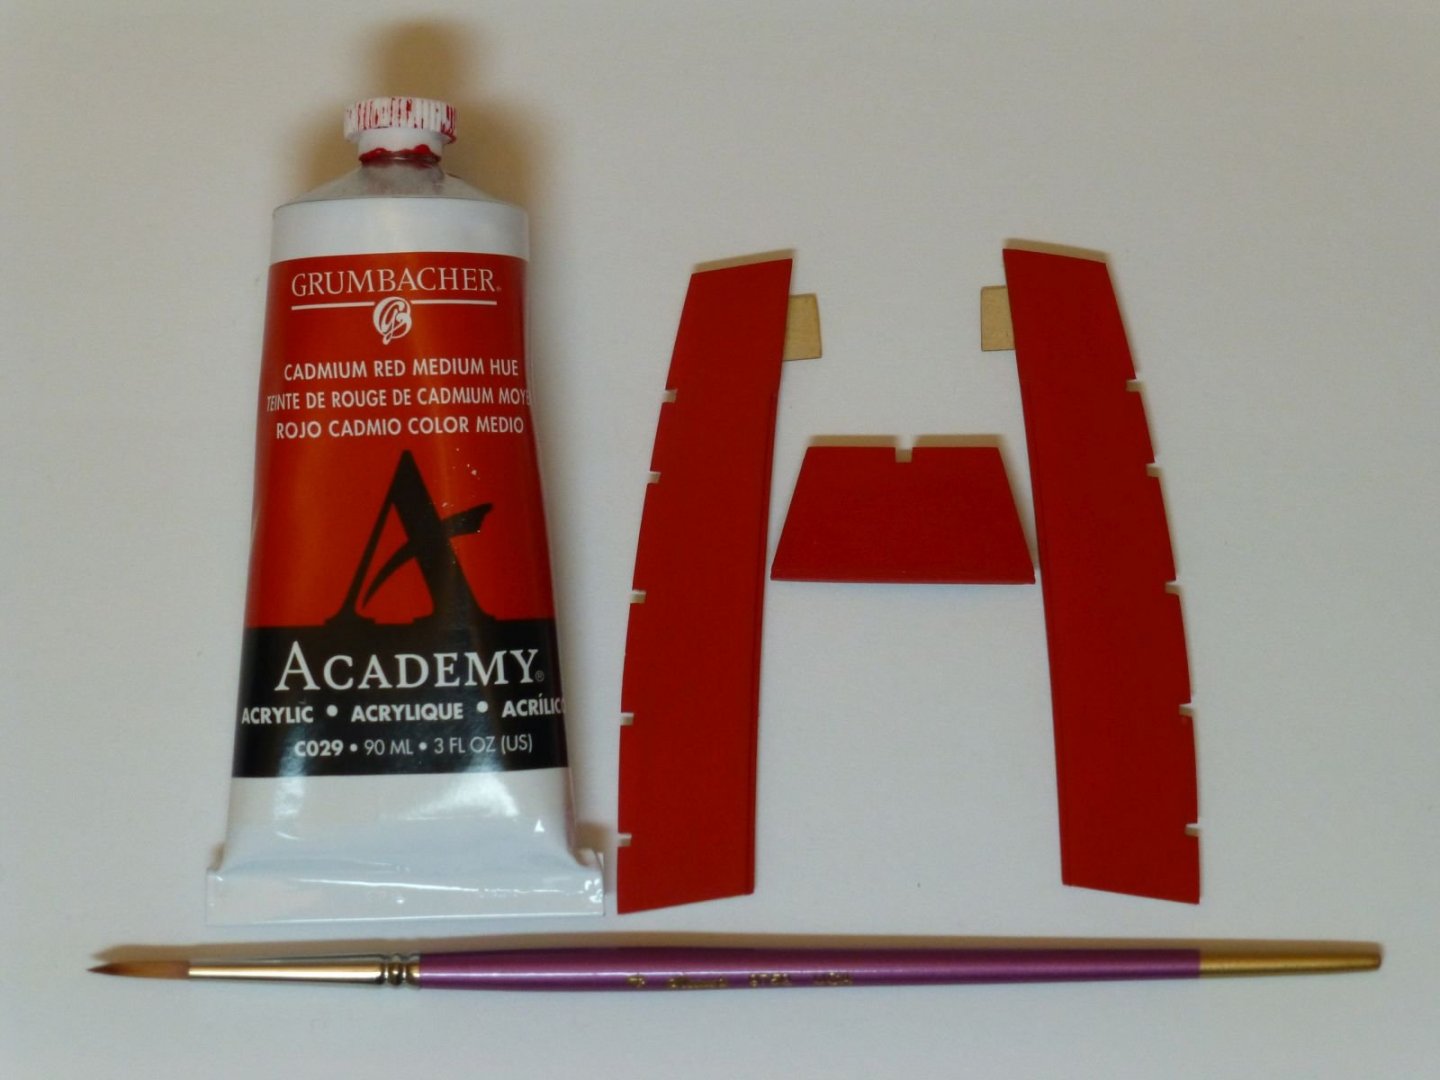
Bob, I am using Grumbacher Academy Acrylic Cadmium Red Medium Hue paint on this build. The cockpit seats below have nine coats of highly thinned paint on them and I will probably add another three or more coats. I thin the paint with distilled water and lightly sand the surface with 400 and 600 grit sanding sticks after every three or four coats. I use a thick brush as it will hold a lot of water. It is just like painting with water colors. I put a small dab of paint in my painting dish and add a drop of water beside the paint. I place a small amount of paint on the tip of my brush and then dip the tip in the water. This thins the paint. I am constantly adding water as the brush soaks it up. It takes time, but it leaves a painted surface without brush marks. I have to credit Chuck Passaro with teaching me this technique.
- 263 replies
-
- 14
-
-
- Medway Longboat
- Syren Ship Model Company
- (and 1 more)
-
Thanks Ben for your comments. Your Winchelsea is coming along nicely.
-
Thanks Michael and Bob for your comments and for the "Likes". Bob, I also made a card template of the cockpit seats to get the initial position of the notches. I agree that completing the interior details is making the model look like a Longboat and I am excited to be moving forward to the next step of the build. I have applied one coat of Wipe-on-Poly (WOP) on the interior and will be applying another coat on the areas where there will be no paint. I feel that it is a good idea to lightly sand the WOP where you are going to paint as this will give it a surface for the paint to bite into. I know that Chuck paints over WOP on his models and achieves fantastic results. I would do a test on some scrap wood as different paints may react to the WOP. Also, I thin my paint to the constancy of water and apply many coats to get a smooth finish. I lightly sand the painted surface after three or four coats and usually apply around 12 coats of paint.
- 263 replies
-
- 3
-
-
- Medway Longboat
- Syren Ship Model Company
- (and 1 more)
-
Sorry to hear of the passing of your cousin. What an honor it must have been to have known him. These veterans of his generation sacrificed a lot for us to have our freedoms today.
-
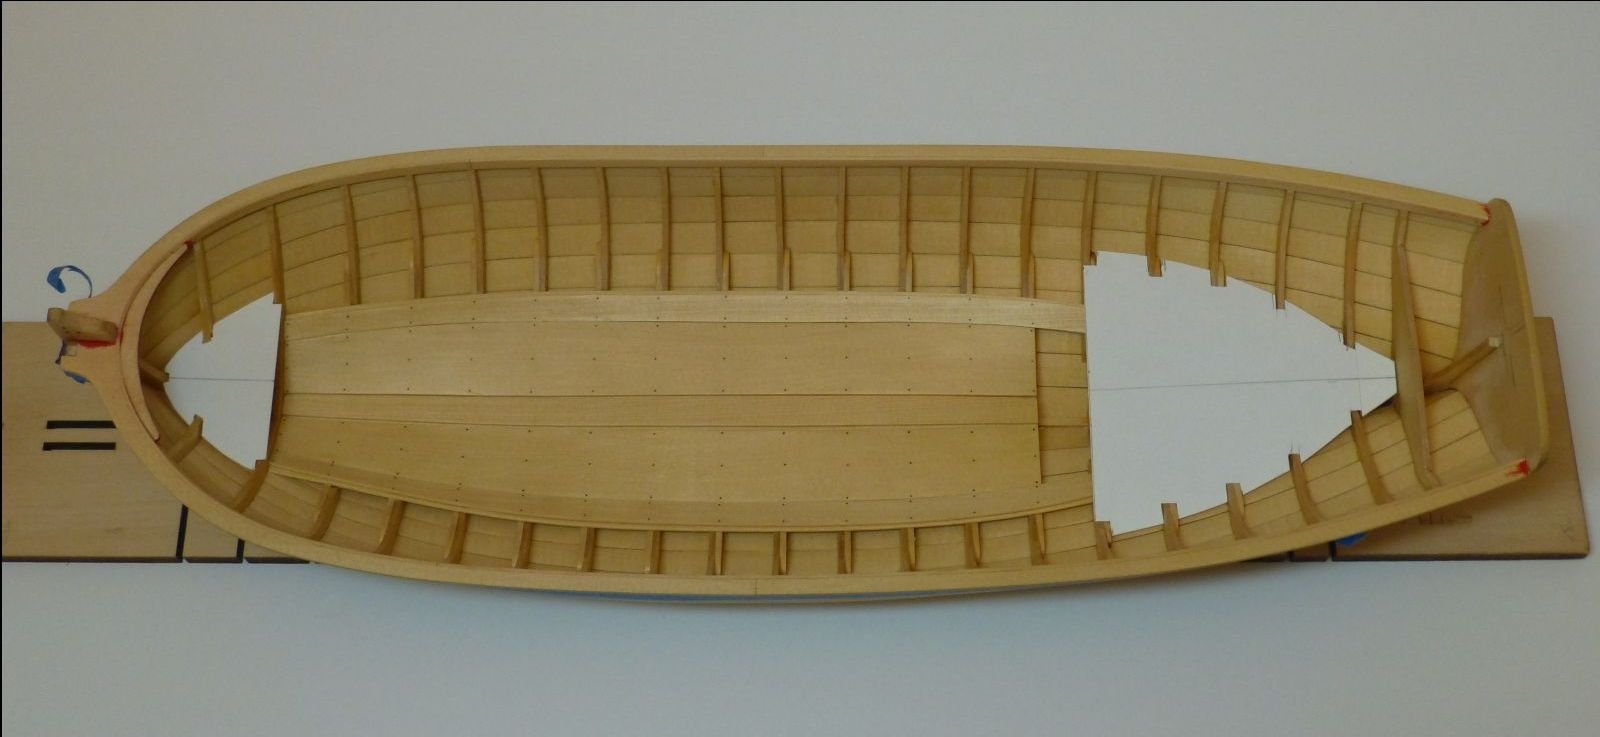
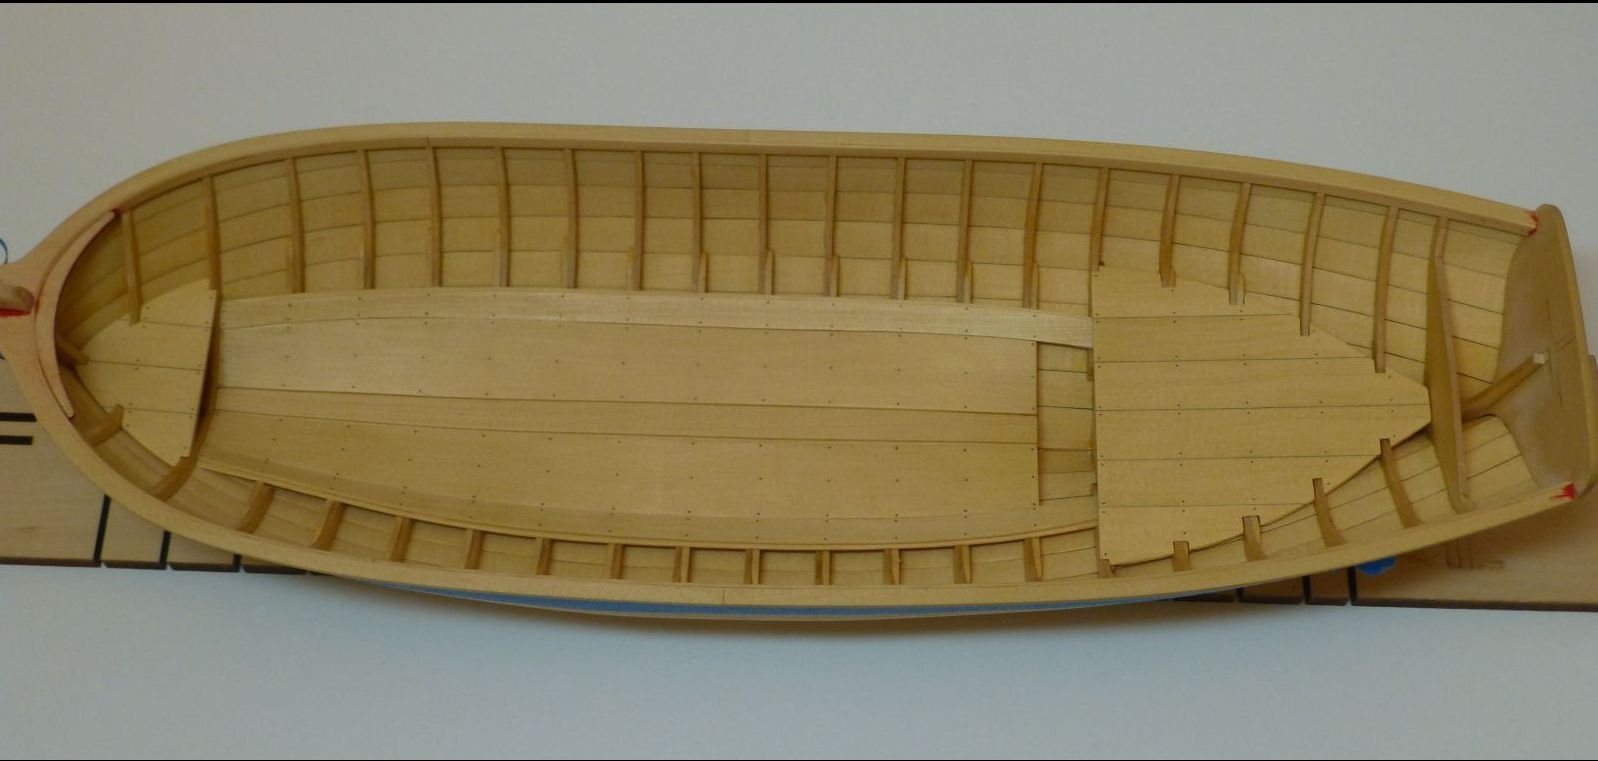
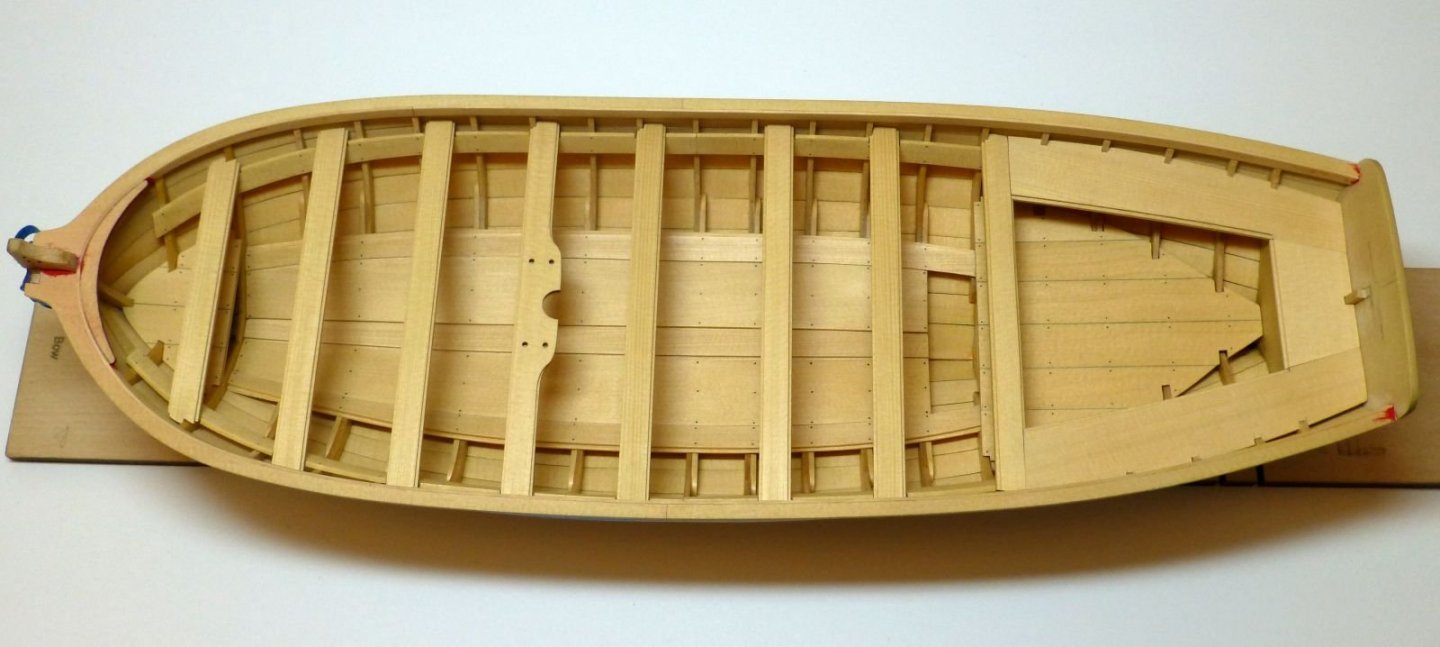
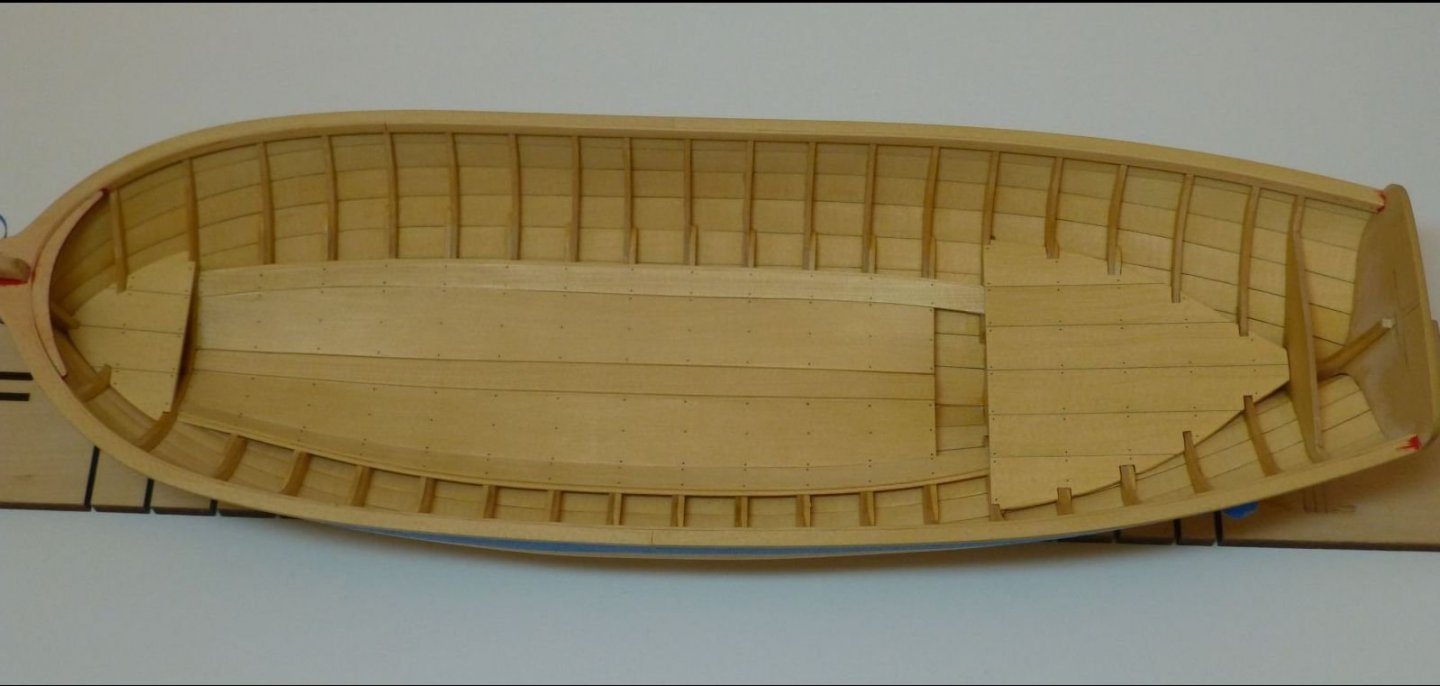
Thanks everyone for your comments and also for the "Likes". They keep me motivated to keep moving forward on this build. I completed the thwarts earlier this week and today I completed the cockpit seats. These took me some time to do as I would sand and file the notches, fit the piece, sand and file the notches some more and fit the piece again. I did this many times for each piece and found it a slow process, but very rewarding. I am very happy with the results and received a lot of positive comments for my fellow club members at the Hampton Roads Ship Model Society meeting this past Saturday. Here is a picture of my work since my last post: Here is a picture of the Longboat with the thwarts and cockpit seats dry fitted: I had jumped ahead of the instructions as I wanted to construct the interior details before I painted the model. I feel this worked out very well for me as I was handling the model quite a bit fitting the interior details. I am sure that I would have a lot of paint touch up to do if I had painted the cap rails before I did the interior details. I cannot wait to get some color on this model as it really looks dull with no paint on it.

- 263 replies
-
- 14
-
-
- Medway Longboat
- Syren Ship Model Company
- (and 1 more)
-
Congratulations on completing your Confederacy. You did an excellent job on building this model and documenting the process of your build.
-
kit review 1:8 Ferrari Timossi Racer ‘Arno XI’ (Special Edition)
Ryland Craze replied to James H's topic in REVIEWS: Model kits
Wow! I thought I was looking at the real thing.- 12 replies
-
- 5
-
-
- hydroplane
- arno
- (and 2 more)
-
Looking good Jesse. The finish line is in sight. You have built a highly detailed model of the Syren that will be an inspiration for other Syren ship modelers.
- 1,306 replies
-
- 3
-
-
- syren
- model shipways
- (and 1 more)
-
Glad to see you back in the workshop. I hope your recovery is going well and I am glad that Santa was good to you. Wishing you and Marge a Happy New Year and good health in 2020.
- 52 replies
-
- 3
-
-
- artesania latina
- titanic
- (and 1 more)
-
I have completed installing the risers and now I will start on the thwarts. I hope everyone has a happy and safe new year and I wish good health to you in 2020.

- 263 replies
-
- 17
-
-
- Medway Longboat
- Syren Ship Model Company
- (and 1 more)
-
Thanks Chuck for your comment. I used heat to bend the floorboards. I have found that the Alaskan Yellow Cedar (AYC) bends well with the application of heat. For the two outer floorboards that are made of two pieces of AYC each, I installed each piece separately as it was much easier to bend a 1/32" inch thick floorboard as opposed to a 1/16" thick floorboard. I received many positive comments on my Longboat at my ship modeling club meeting this past Saturday. The design of this kit makes me look like a better modeler than what I am.
- 263 replies
-
- 2
-
-
- Medway Longboat
- Syren Ship Model Company
- (and 1 more)
-
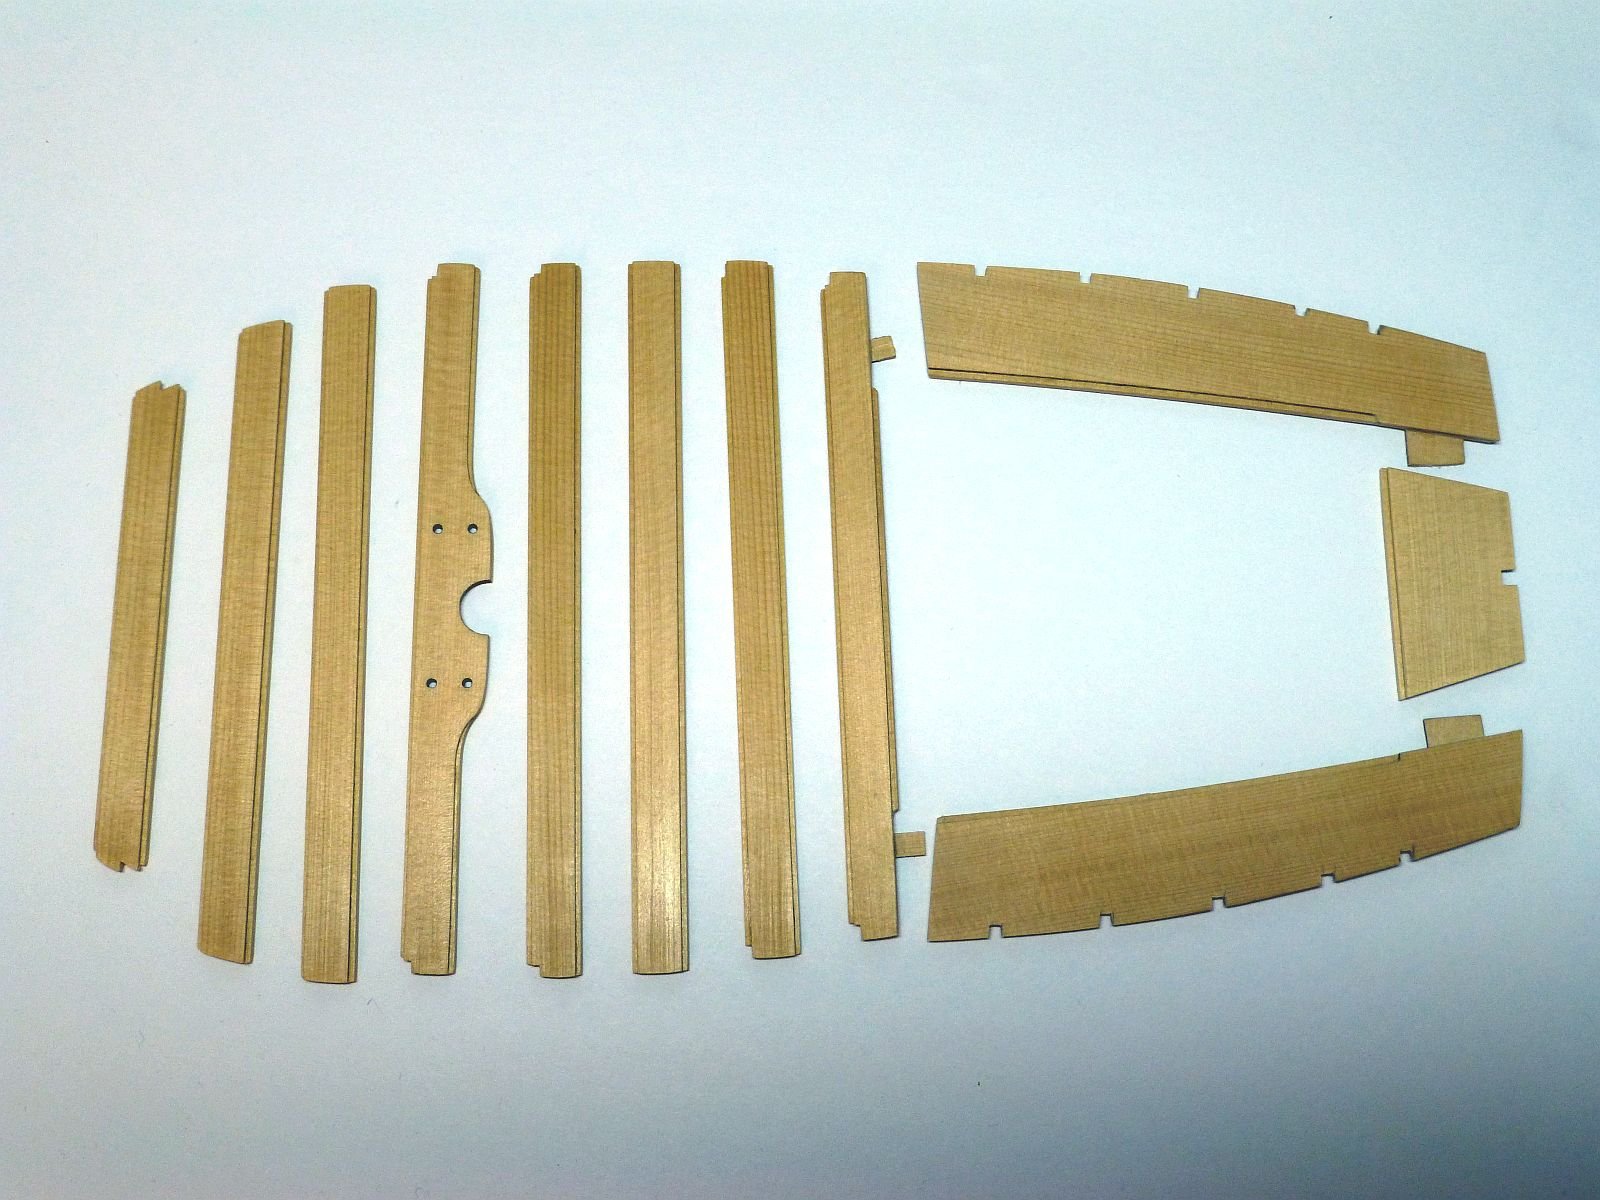
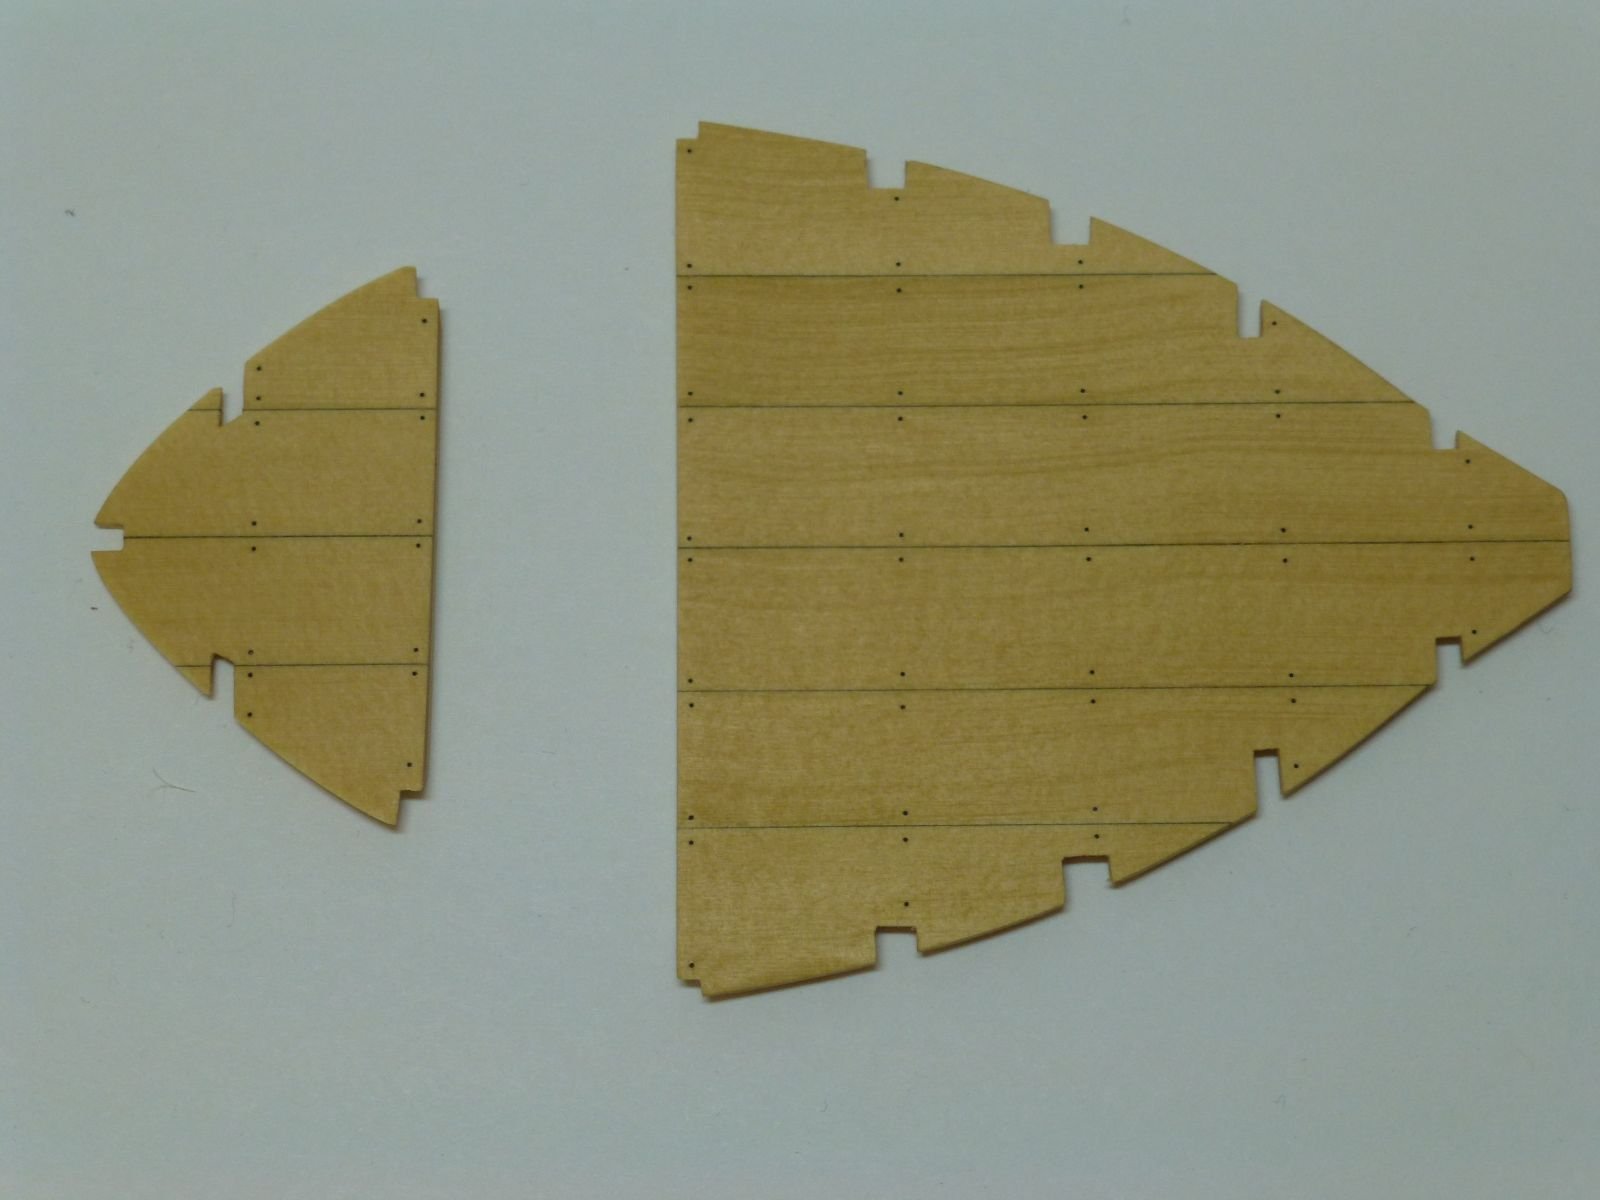
Thanks everyone for the comments and the "Likes". Rich, thanks for the link to the Jax blackening agent. I ordered the 4 ounce jar and received it very quickly. This should last me a long time. I initially painted the cap rail and did not like the color that I chose. I stripped the paint off by scraping and sanding and will repaint it later with a different color of red. I decided to move on to Chapter 4 and install the floor boards and the bow and stern platforms. I felt this would be better for me as there would be no paint on the cap rails for me to mess up. I found it easier to make a pattern out of card stock as recommended in the instructions for the platforms and then transfer it to the laser cut platforms. This helped to locate the notches for the frames. Here is a picture of the paper patterns that I made: I used a sharp blade and small files to make the cuts on the platforms. I also had to bevel the bottom of the platforms to sit properly on the frames. This was a slow process for me, but I was satisfied with the fit. Here is a picture of the bow and stern platforms with the simulated nails installed and two coats of wipe-on-poly applied: And here is a picture of the platforms dry fitted to the inside of the hull: I will be installing the risers next. I am really enjoying this build.


- 263 replies
-
- 16
-
-
- Medway Longboat
- Syren Ship Model Company
- (and 1 more)
-
Belay Pins
Ryland Craze replied to shipman's topic in Discussion for a Ship's Deck Furniture, Guns, boats and other Fittings
I use this image as a guide when I make belaying pins:
-
I have a PDF of the instructions. It is two files with a total of 109 pages with many color pictures. This is for the newer Constructo Enterprise kit number 80837. I have uploaded the files below: ENTERPRISEINSTRUCCIONES-1.pdf ENTERPRISEINSTRUCCIONES-2.pdf I hope this helps.