Ryland Craze
-
Posts
1,569 -
Joined
-
Last visited
Content Type
Profiles
Forums
Gallery
Events
Everything posted by Ryland Craze
-
 Art in its best form. I am really enjoying this build.
- 641 replies
-
- 6
-

-
- greenwich hospital
- barge
- (and 1 more)
-
Ken, Your Rattlesnake looks great. It was a real pleasure meeting you at the SMSNJ Club meeting last week. There is a lot of talent in that Club which shows in the models they build. Your Rattlesnake is coming along nicely.
- 481 replies
-
- 2
-
-
- rattlesnake
- model shipways
- (and 1 more)
-
Your Cheerful is looking great. We missed you at the Northeast Conference. Don't slow down too much as we would like to see you bring your Cheerful to next year's Conference. Looking forward to more updates.
- 310 replies
-
- 3
-
-
- cheerful
- Syren Ship Model Company
- (and 1 more)
-
Congratulations Sal on being voted first place for the People's Choice Award. There were a lot of excellent ship models on display and that award is quite an honor to receive. It was a pleasure seeing you and your Syren at the Conference. You have built a beautiful model and your build log will be a great reference source for future Syren builders.
- 659 replies
-
- 8
-
-
- syren
- model shipways
- (and 1 more)
-
Nice job on the winch. Will this be made into a mini kit like your other deck fittings? It has been a joy watching the Cheerful being built.
- 1,051 replies
-
- 4
-
-
- cheerful
- Syren Ship Model Company
- (and 1 more)
-
Really nice work Erik. I can not wait to see the rest of the hull planked.
-
Your windlass turned out really nice. The iron straps and hinges are really small and difficult to make. You did an excellent job on making them. I enjoy following your build log.
- 64 replies
-
- 5
-
-
- 18th century longboat
- model shipways
- (and 1 more)
-
Agree, there are several ways to get the same end result. This is what I like about this hobby, woodworking in miniature. I remember when I first started in this hobby, I always liked the smell of fresh milled wood when I opened a new kit for the first time. I have never done full scale woodworking, but have always liked wood products. I can see from the pictures that your excellent full scale wood working skills have filtered down to your ship modeling.
-
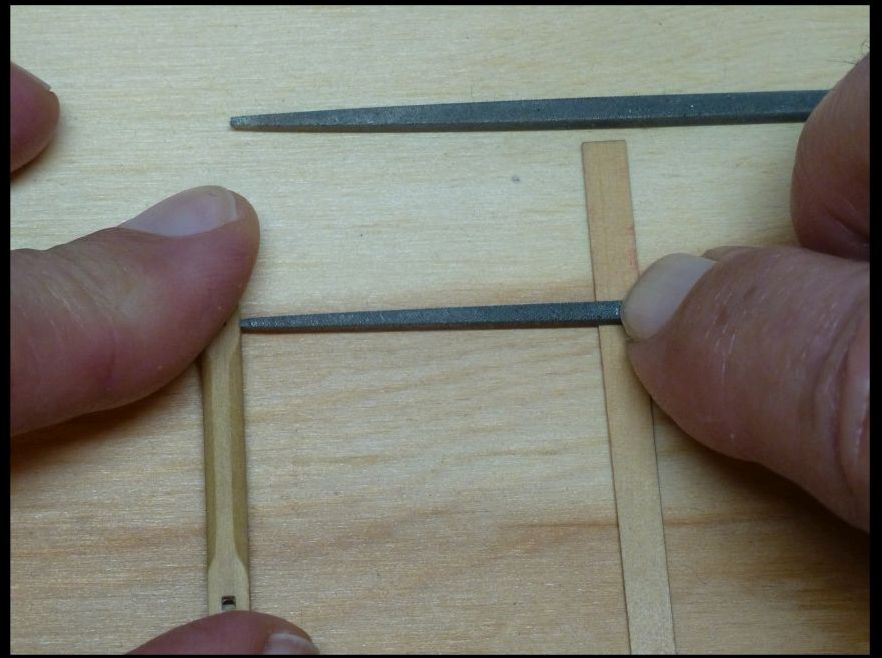
Thanks everyone for the comments and Likes. Dave, I started off using your method, but I had problems keeping the holes squared to the base. The reason I started with a small square file was that I could lay the flat side of the file on a scrap piece of planking and insert it into the hole on the windlass. This made the small square hole right angled to the base of the windlass. The windlass on the Longboat is made out of a square piece of wood, whereas your windlass tapers from the middle to the ends. My method would not work on your windlass. The file acted as a starter hole and it kept the impression of the nail square to the windlass stock. I hope this makes sense. Your windlass looks great as well as your AVS. I have enjoyed following your build log and look forward to you completing it. I have a MS AVS that is begging me to finish it.
-
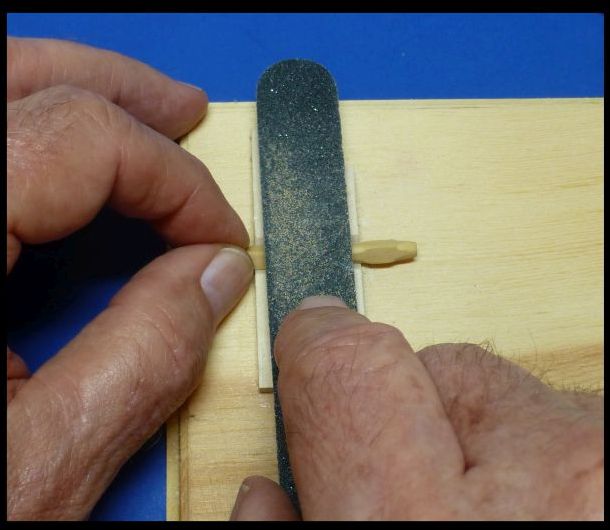
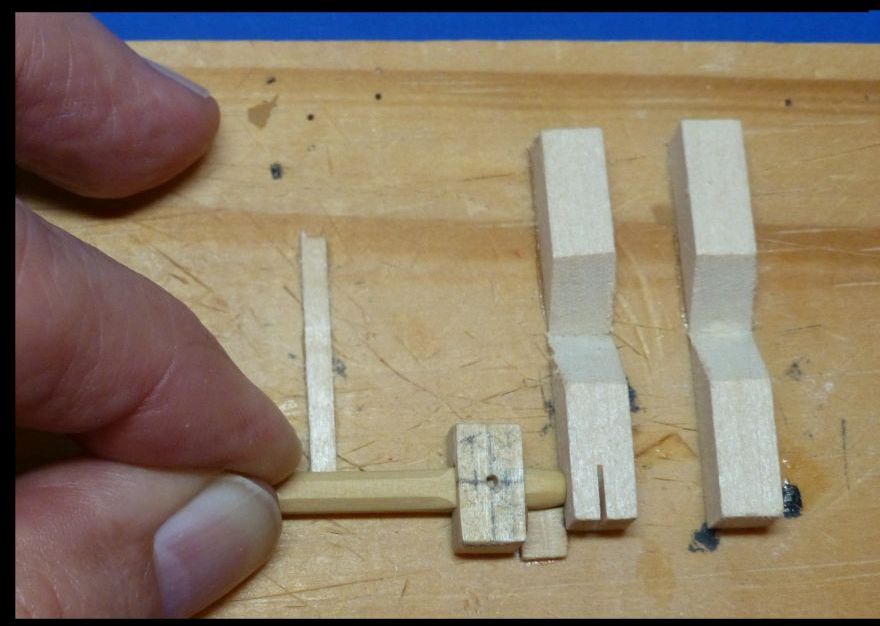
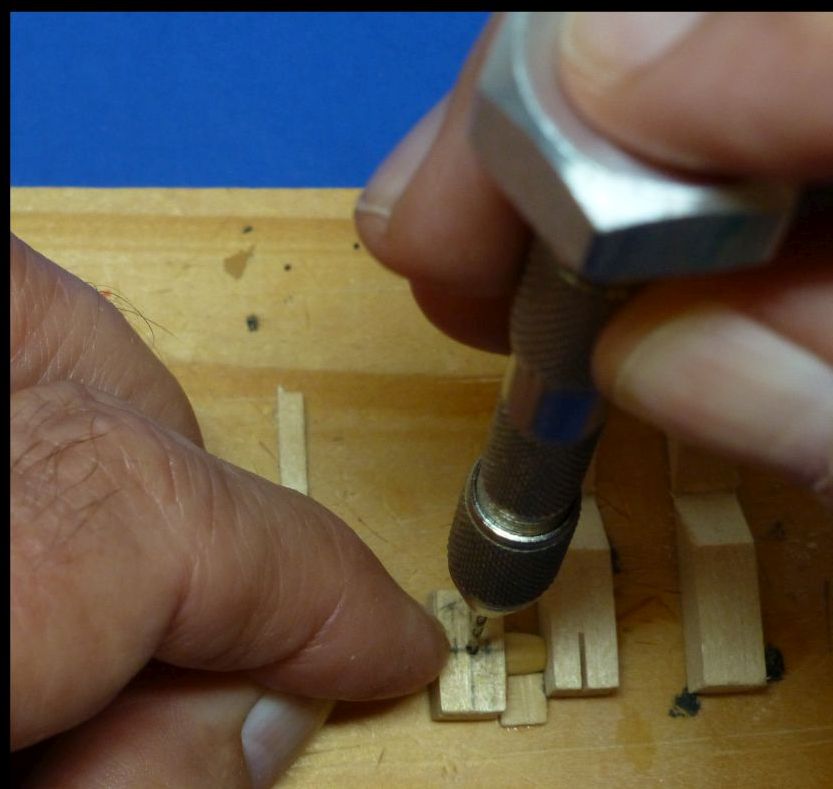
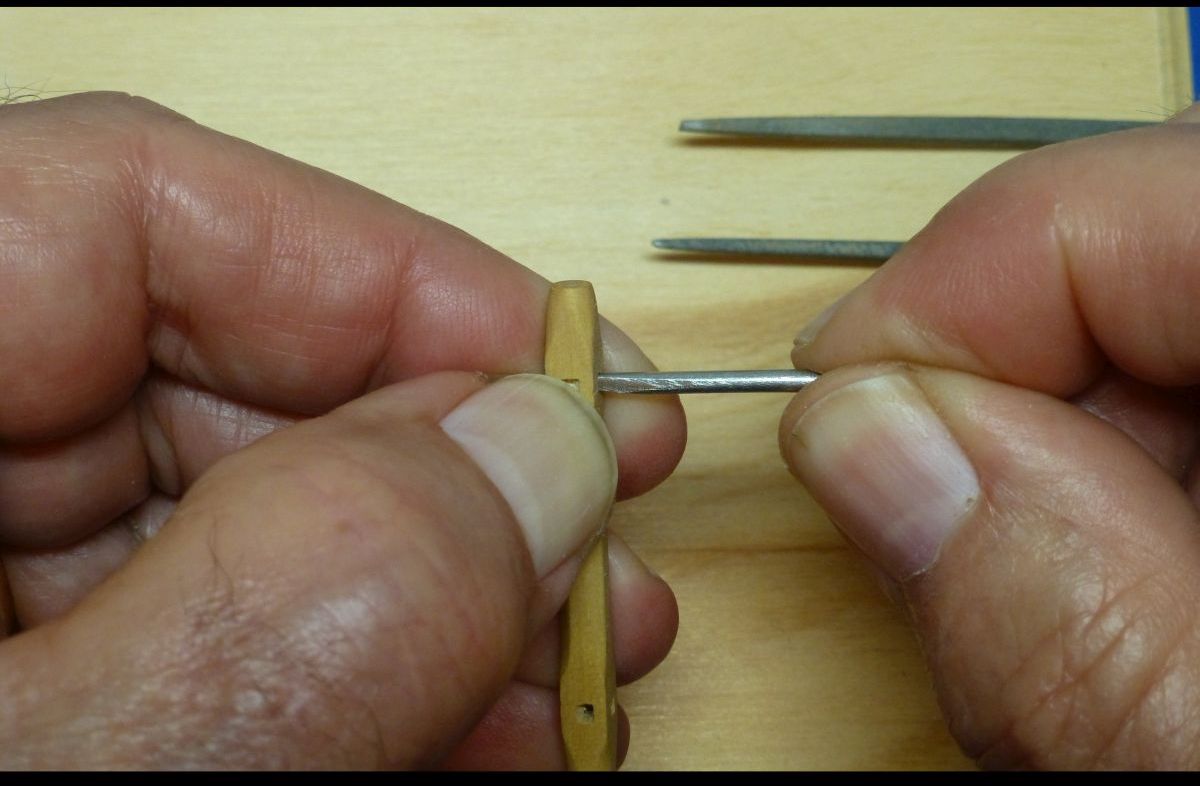
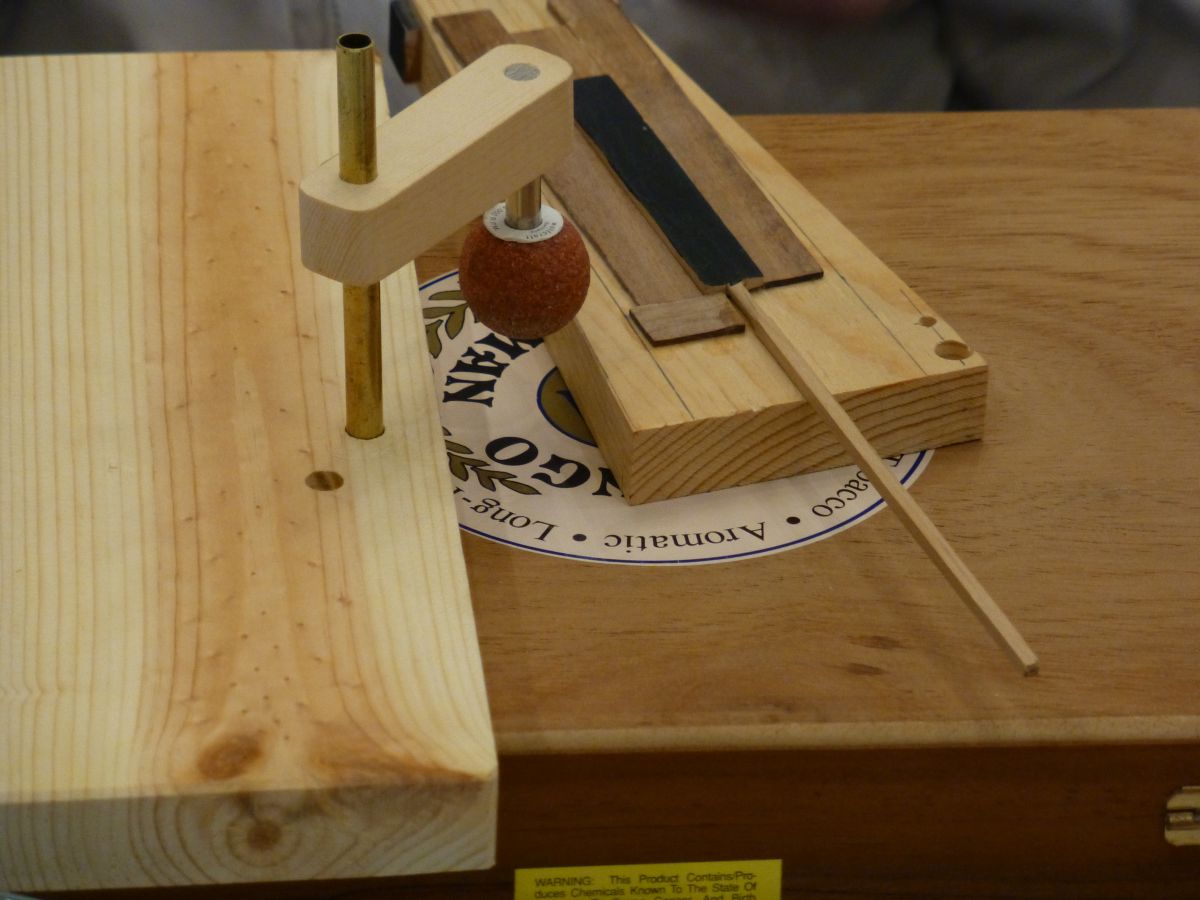
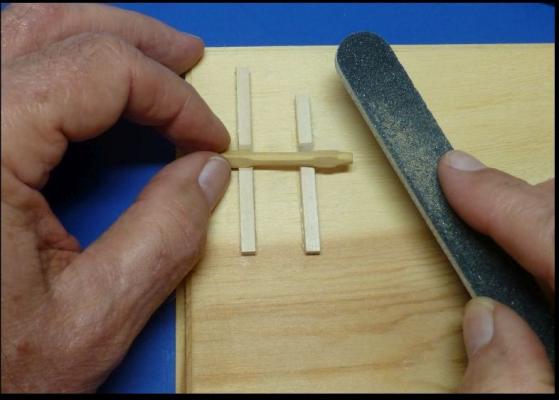
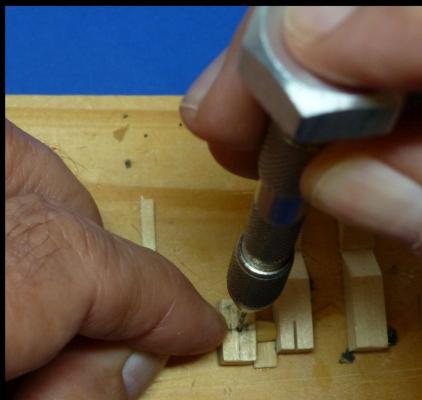
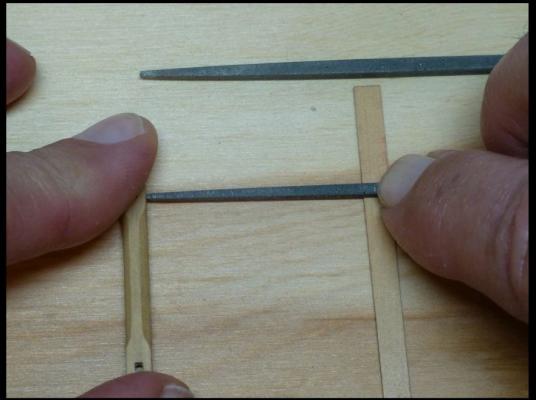
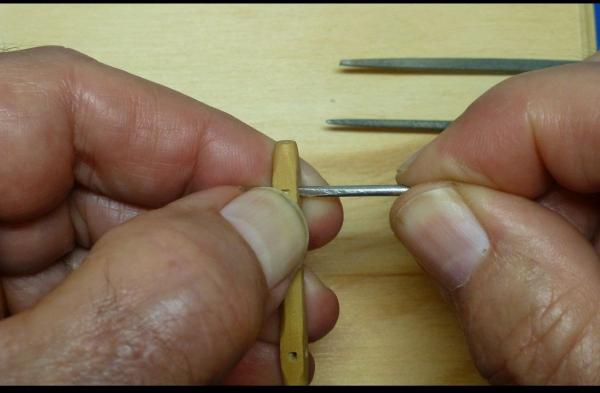
Thanks Chuck for your comments. Your work inspires all of us to try to do better with our builds. Cathead, I really struggled with making my windlass. It took me three attempts until I finally made a windlass that I was satisfied with. I am going to try to explain how I made mine. I made a jig by cutting some scrap wood at 45 degree angles and I placed my windlass in the "V" that was formed with the scrap wood. I then used sanding sticks to shape the windlass being careful to keep it horizontal to the wood base. Once I had the shape of the windlass, I made another jig to drill the holes in the windlass. I used a #61 drill bit in my pin vise and would twist it several turns. Then I would keep rotating the windlass until I drilled all four sides of the windlass. The holes would eventually go all the way thru the windlass, meeting in the center of the windlass. The windlass now has round holes. To get them square, I placed the windlass on a flat piece of wood. I then placed a piece of old planking material to use as a resting place for a small four sided file. I then pushed the file, with pressure against the wooden base, into the round holes in my windlass. It is important to keep the flat side of the file horizontal to the wood base. The flats of the windlass will lie naturally flat on the wood base. The final step was to open up the hole to about .045 inch. I had taken a finishing nail and filed the point square and pushed it into the square hole made by my square file. I filed the corners of the nail so that it left a crisp square edge. Once I finished with the square holes, I placed a small bit of wood into the windlass hole to fill the interior of the hole so that you could not see all the way through the hole. This was quite a challenge for me and I had many failed attempts trying other methods. I finally got thru this and am now able to continue on with the build. If you have any other questions, please do not hesitate to ask me.


-
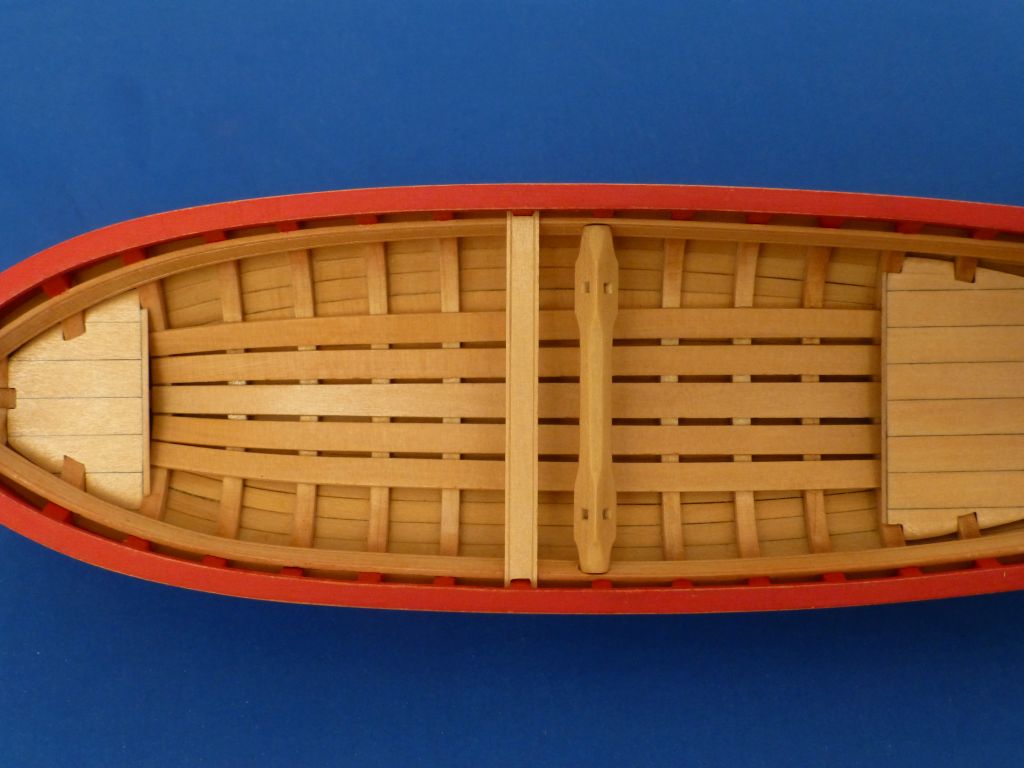
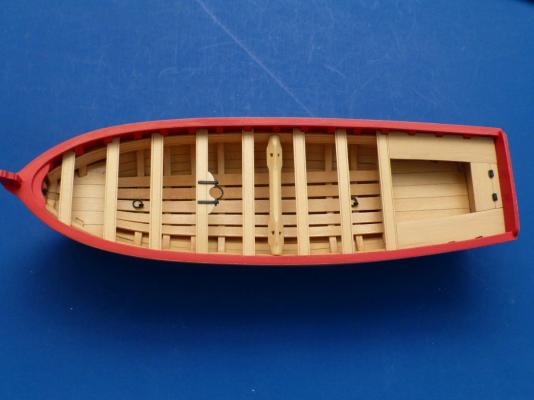
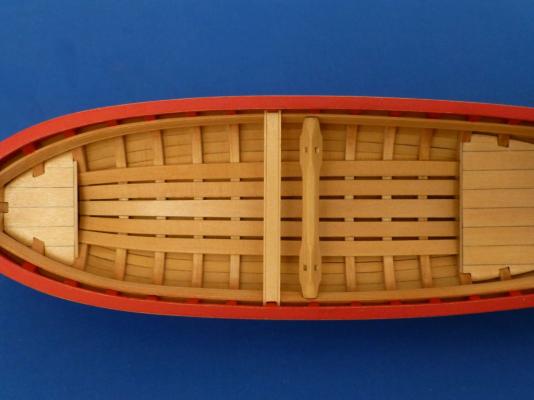
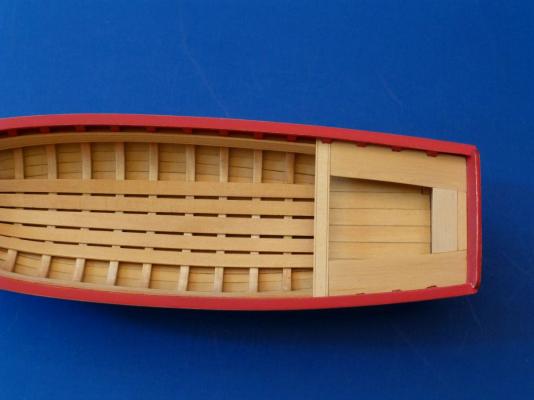
I finished the interior ironwork. I definitely appreciate the work of the Longboat builders before me as I had trouble with the small locker hinges and ironwork due to my stubby fingers. I also had several pieces that mysteriously disappeared from the tip of my tweezers never to be found again. Here is a picture of the longboat with the thwarts installed. All that is left to do for the interior is to install the six knees on top of the thwarts and against the sides. I have also decided to redo my belaying pins.
-
Thanks Greg and Chuck for your comments and also the Likes. I do not like doing things over, but I do see improvement in my work when I do things over. I hope to finish the interior and all of the ironwork before I head up North in a couple of weeks.
-
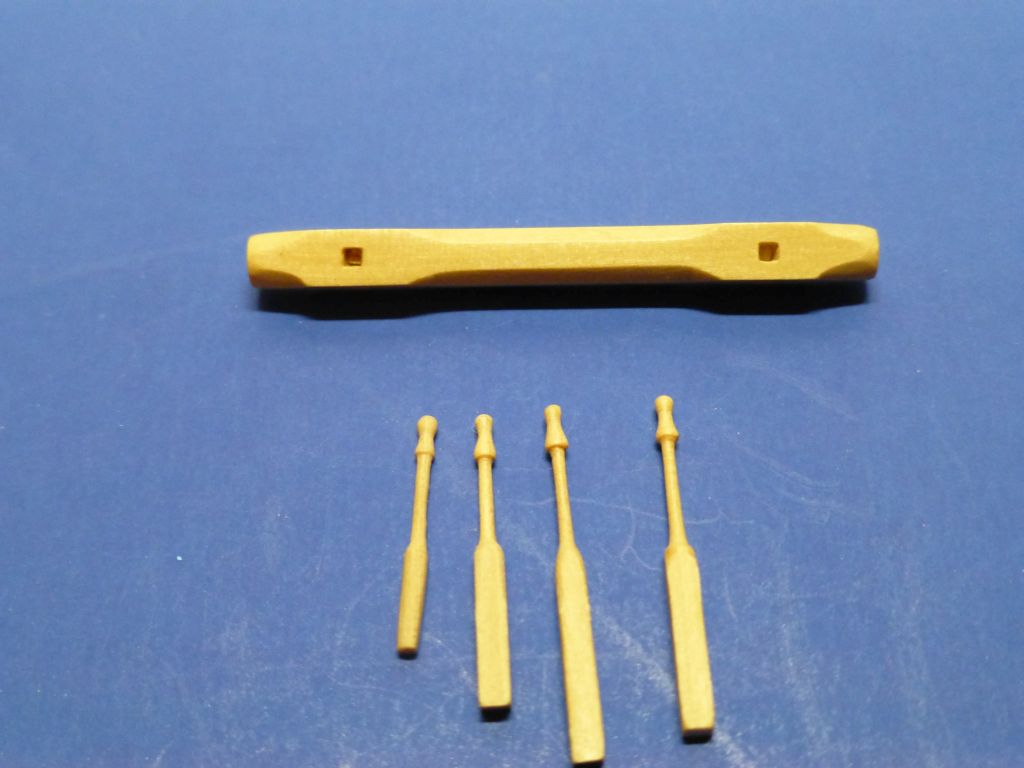
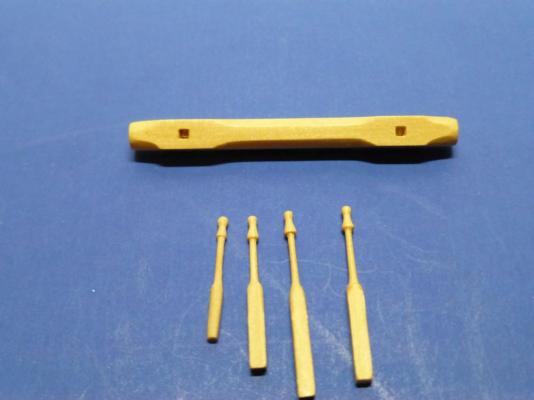
Thanks everyone for the comments and the Likes. It is hard to believe that so much time has passed since I last updated my build log. I have been working on finishing up the interior of my Longboat. I turned some belaying pins using my dremel too lusing it as a lathe. They were very small, but I found that the more I made, the results kept improving. I also made the windlass and after the third attempt, I finally made one that I was satisfied with. Here are some pictures of the work that I have done.
-
Shaz, Check out Ken's (xken) USS Constitution build. He is using pounce wheels to imprint his copper plates. Here is a link to his build log. http://modelshipworld.com/index.php/topic/11935-uss-constitution-by-xken-model-shipways-scale-1768/page-9 Good luck on your coppering process.
-
Congratulations on completing your PT Boat. You did an excellent job on building it. I know that your ship modeling mentor would be proud of your work. It is a shame he passed away before you finished it. I am looking forward to your next build.
-
Congratulations on your Picket Boat completion. You did an excellent job on this build. Thanks for giving us a highly detailed build log. I really enjoyed it.
- 105 replies
-
- 1
-
-
- picket boat
- model shipways
- (and 1 more)
-
Paul, Congratulations on completing your Longboat. You did an excellent job on building this model. I am looking forward to seeing your next build.
- 37 replies
-
- 4
-
-
- model shipways
- 18th century longboat
- (and 1 more)
-
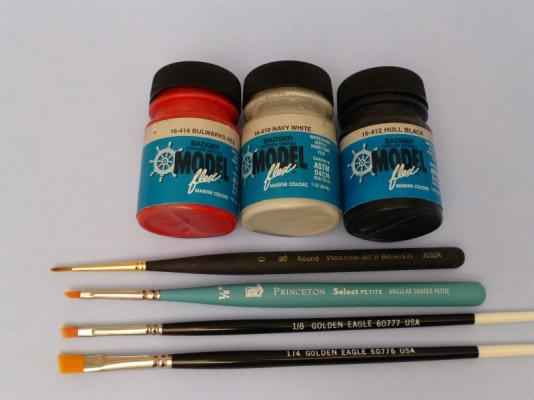
Jack, I purchased my Badger Model Flex Marine paint on-line from internettrains.com. I got good service from them and the cost per 1 oz. bottle was less than $3.00. Here is the link to their site: http://www.internettrains.com/merchant2/merchant.mvc?Screen=CTGY&Store_Code=IT&Category_Code=PNTACYBADMAR David, I am going to check out chicagoairbrushsupply.com. I also found out that Ages of Sail also carries these Badger paints. For my brushes, I buy them from craft stores, like A.C. Moore and Michaels. I like the small brushes that have a slanted tip. They last a long time as long as you clean them after every use. Here is a picture of some of my brushes: Erik, I used Bulwarks Red, number 16-414. They have several reds in their Marine paint lineup. Here is a link to the marine color chart at Mega Hobby: http://www.megahobby.com/ModelflexPaintMarineColors1ozBottlesBadger.aspx Paul, any day that you sit at your modeling work table feels good. Thanks for your comment.
-
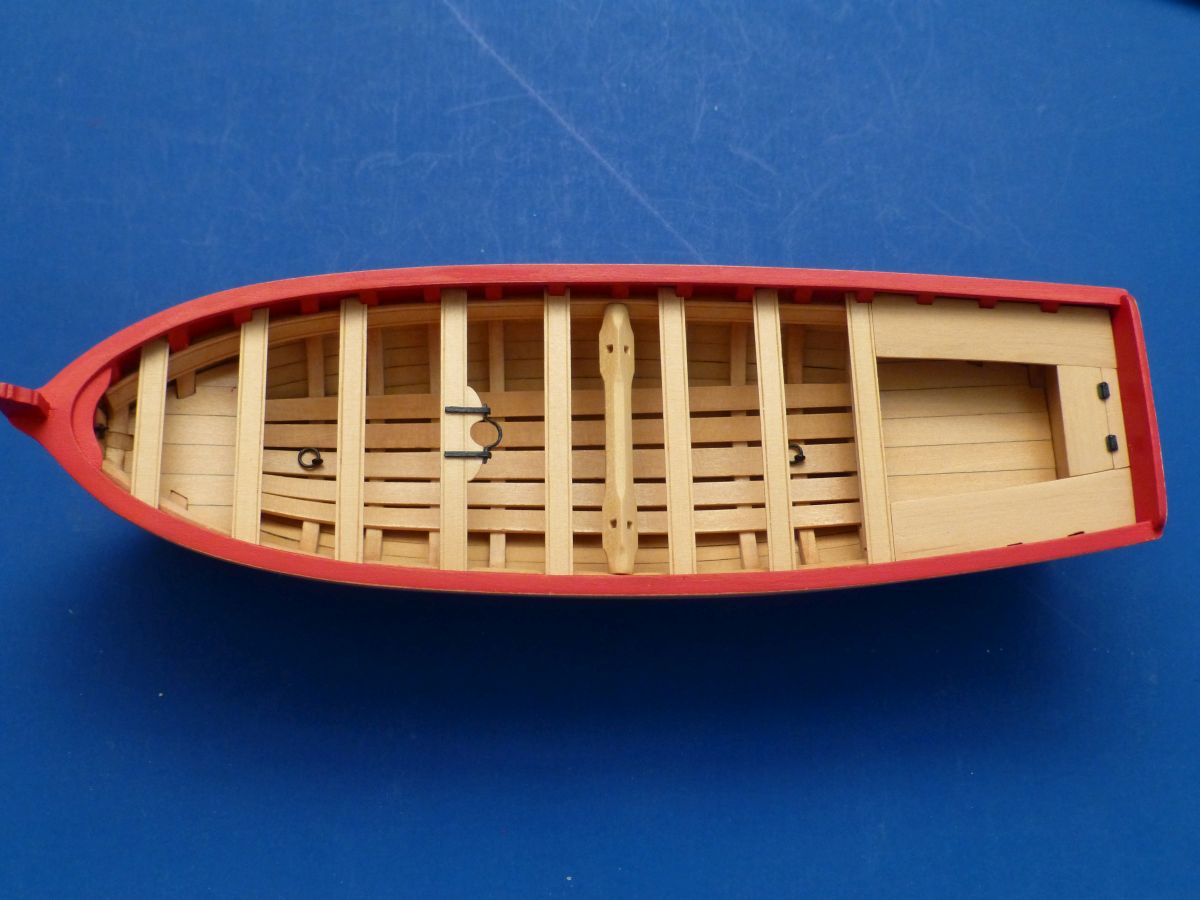
Thanks everyone for your comments and those that hit the "Like This" button. Based on your comments, I will keep the thwarts and cockpit area natural with several layers of wipe on poly. I have always liked the natural look of wood and the wipe on poly brings out the beauty of the boxwood. Erik, I have to give a lot of credit for the paint job to the Badger Model Flex Marine Colors paint that I am using. This is excellent paint and it lays down very smooth, with no brush marks. Kurt Van Dahm told me about these paints and they have an excellent choice of colors. They come pre-thinned for airbrushing, but I apply them with a standard paint brush. I am currently working on the mast thwart and hope to have pictures of the progress soon.
-
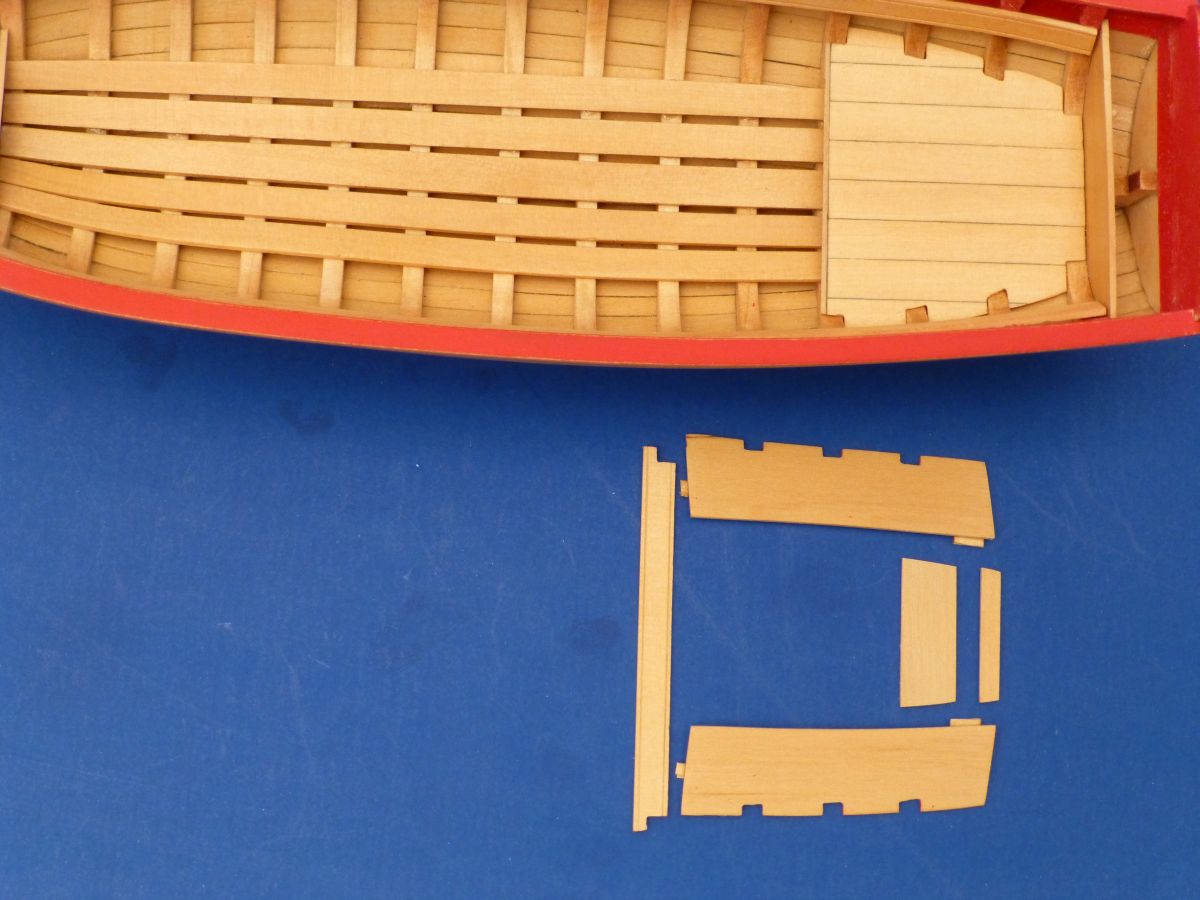
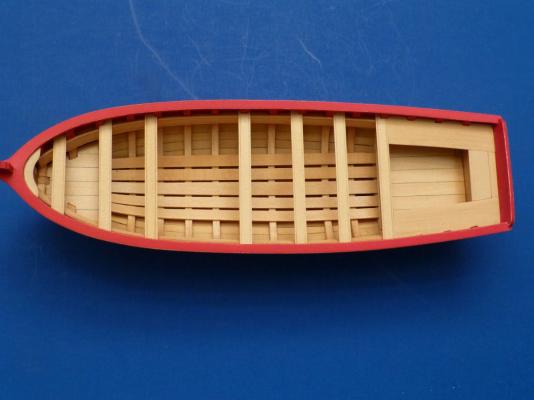
Thanks Jack and Mike for your comments and all of the "Likes". I appreciate everyone taking the time to look at my build log. I have been working on the thwarts and have completed the seats around the cockpit area. At this time, I am debating whether to paint the thwarts and seats red, leave them all natural or do a combination of both. Right now, I am leaning towards painting the thwarts and cockpit area. Here is a photo of my progress with the thwarts and cockpit area dryfitted:
-
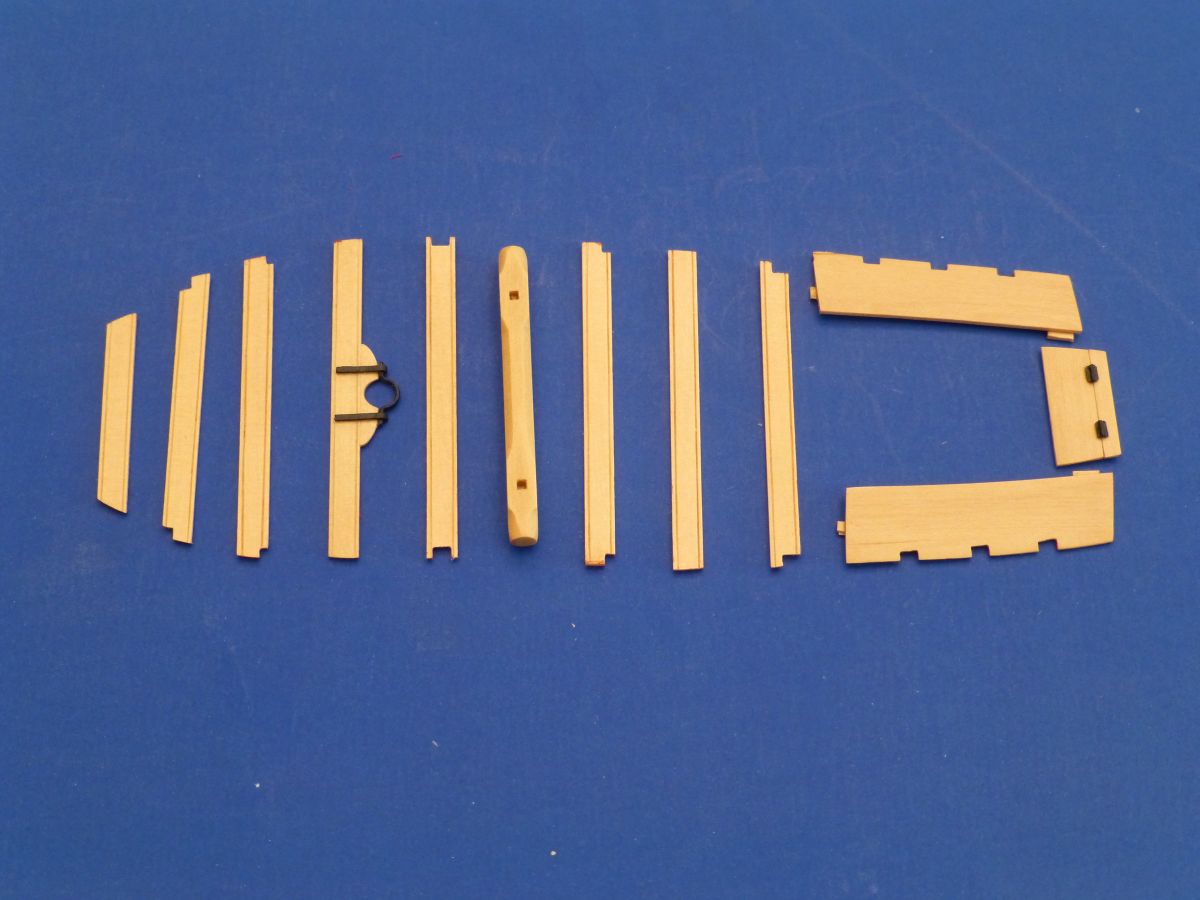
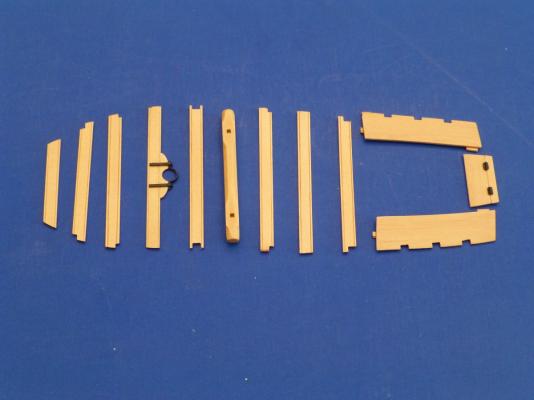
Thanks Marty and Jim for your comments. I just realized that it has been over a year since I last posted on my build log. I took advantage of the rainy weather and worked on the cockpit and locker of my Longboat. And here is a photo of the parts dryfitted on the Longboat

-
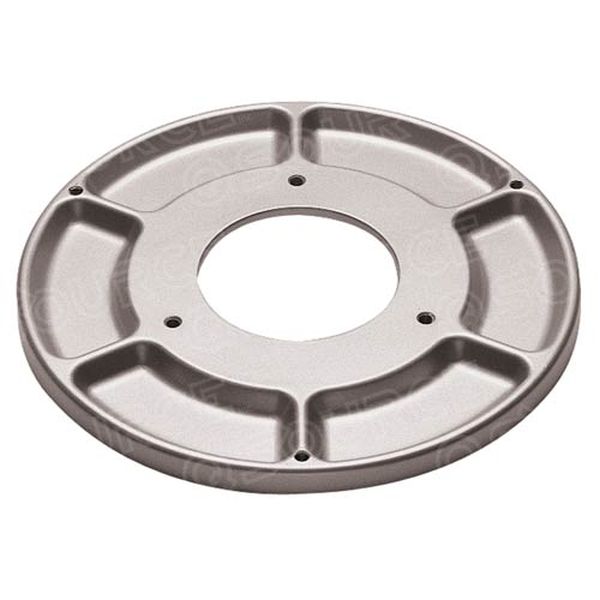
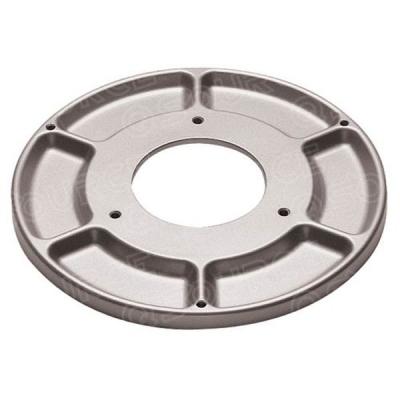
Good choice. I have this same vice and I have really enjoyed using it. I mounted mine on the PanaVise 312 base. Here is a picture of the base and the product description: The PanaVise 312 Tray Vise Base Mount is a cast aluminum base mount that helps stabilize the vise and features six integral parts wells with rounded and sloped walls for easy parts retrieval. The PanaVise 312 includes six non-marring, anti-skid pads and has three 0.25-20 holes that are drilled and tapped on the outer lip for mounting accessories such as the 371 Solder Station. It is compatible with the 201 PV Jr. Vise and 300 & 305 Bases.
-
Brian, Congratulations on completing your AVS. It has been a real pleasure following your build log and it will be an inspiration to other AVS builders. I look forward to your future builds.
- 831 replies
-
- 6
-
-
- Armed Virginia Sloop
- Model Shipways
- (and 1 more)
-
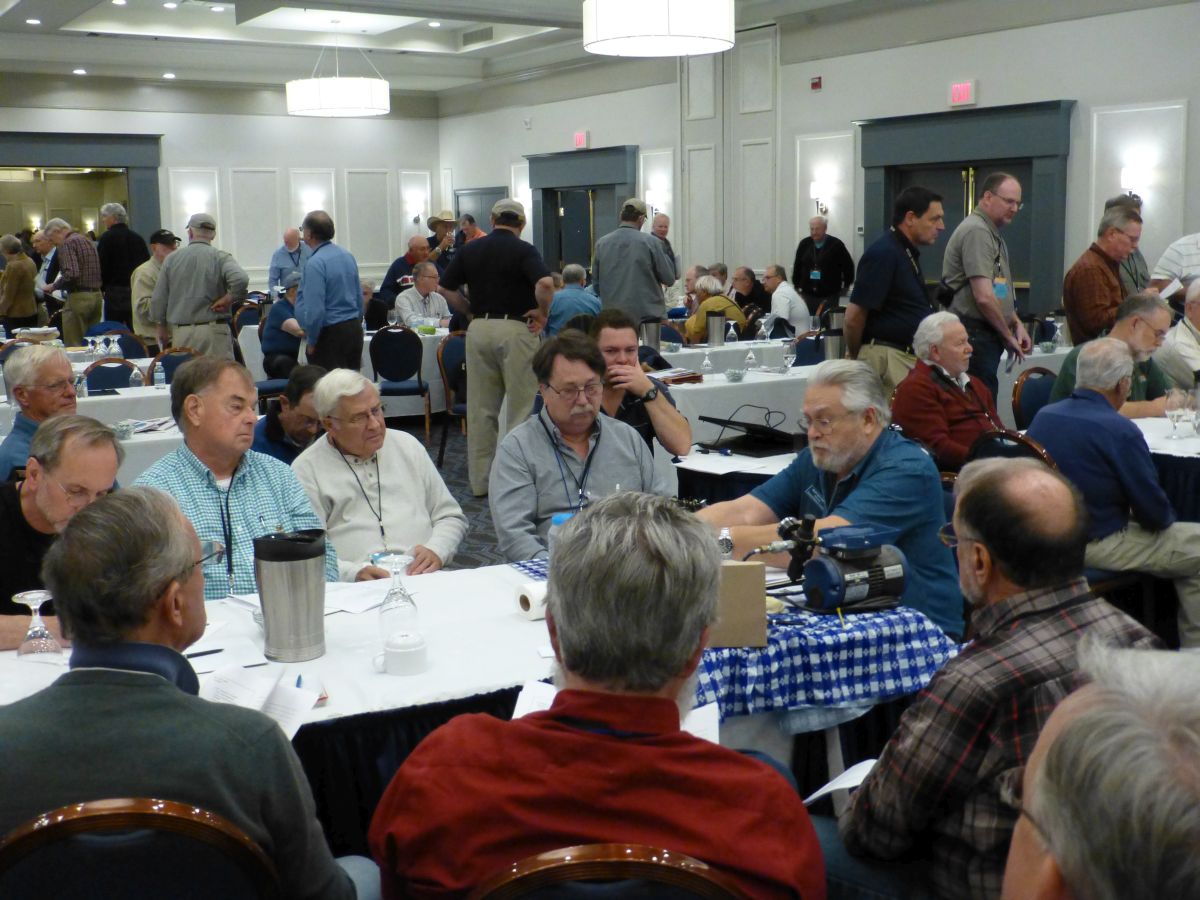
2015 NRG Conference Update - MYSTIC
Ryland Craze replied to Chuck's topic in NAUTICAL RESEARCH GUILD - News & Information
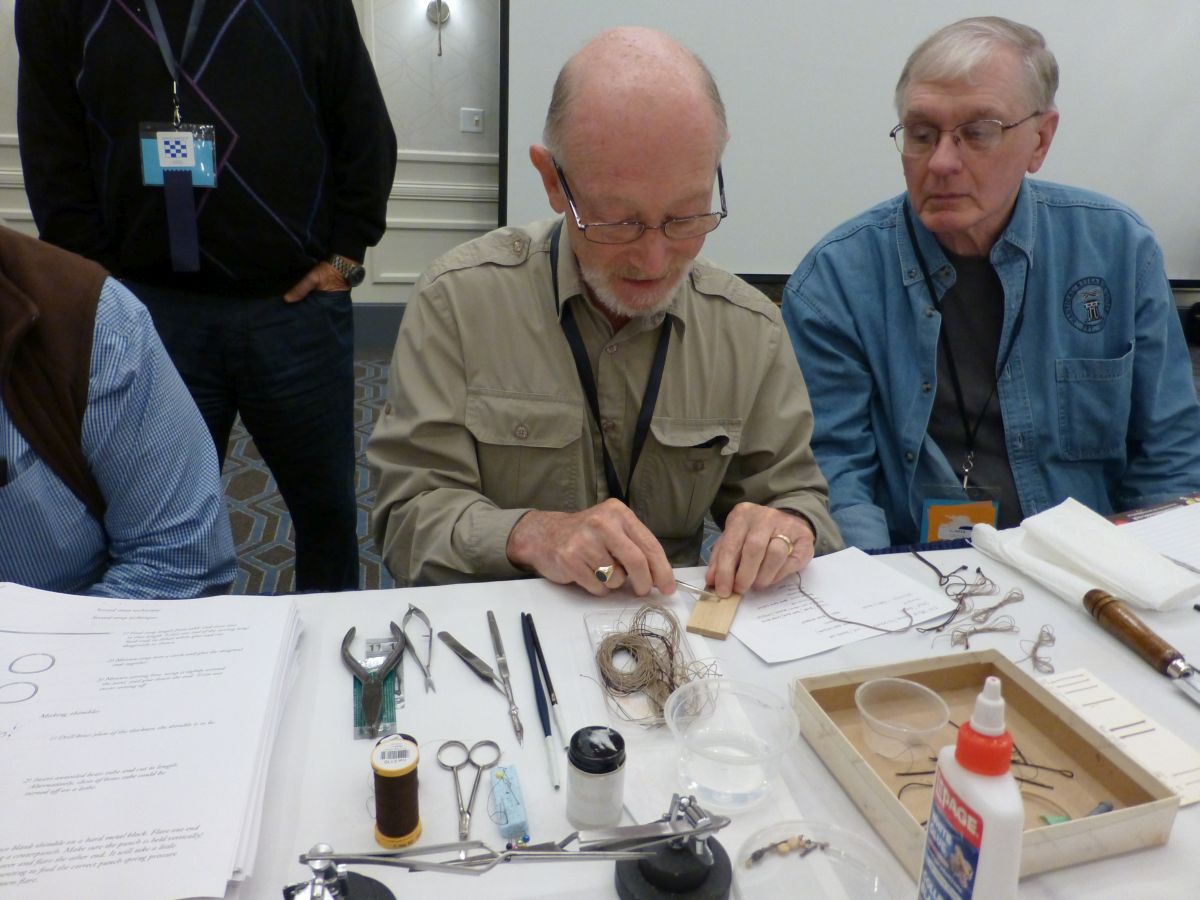
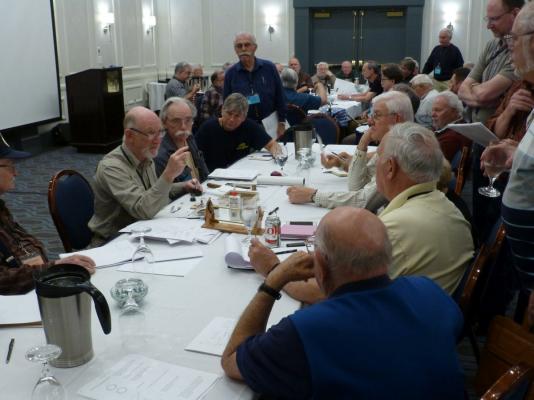
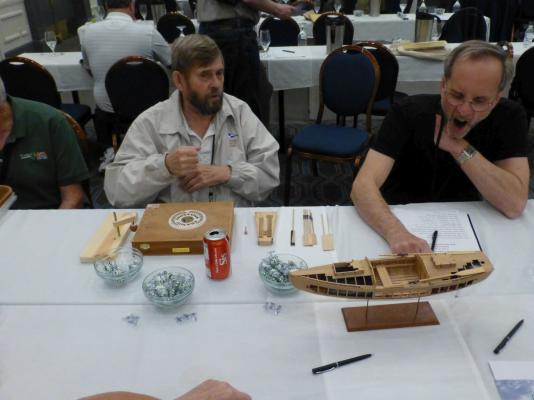
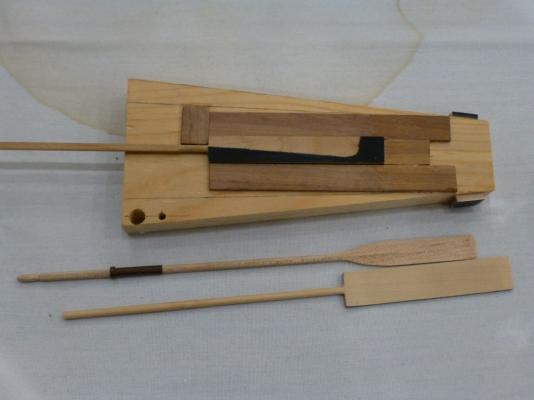
There was a lot more going on at the NRG Conference than the tours on Thursday. The pictures I posted were from two of the four tours given at Mystic Seaport. What I liked were the modeling roundtables held on Friday. There were five roundtable sessions given by the following presenters: - David Antscherl - Rigging Tips and Tricks - Nick Damuck - Making Scale Silk Span Sails - Chuck Passaro - Serving Rope - Kurt Van Dahm - Airbrushing Basic - Steve Wheeler - A Jig for making Oars David Antscherl giving his rigging session Kurt Van Dahm giving his airbrushing session Steve Wheeler teaching us to make oars using a jig I hope others post their pictures as many had better cameras than mine.


-
2015 NRG Conference Update - MYSTIC
Ryland Craze replied to Chuck's topic in NAUTICAL RESEARCH GUILD - News & Information
Greg, I understand that the Seaport just acquired the Wiseman collection from his estate. Several models were in the hallway in their cases. There were many discussions among the tour group members as to why these models were not on display. The curator said it was lack of space as only about 10% of the models are on public display. They are building a new 5,000 square foot exhibition building and they hope they can display more ship models there.- 73 replies
-
- 11
-