-
Posts
1,569 -
Joined
-
Last visited
Content Type
Profiles
Forums
Gallery
Events
Everything posted by Ryland Craze
-
Thanks guys for the comments and for the "Likes". I cannot take credit for the spacing jig as this was Doug McKenzie's idea. I am also participating in the Ship Model Society of New Jersey Group Build of this kit and Doug had emailed members a drawing of this spacing jig. I just put his jig idea into pictures. I left a little gap between the keel and the 1/32" spacer so that any glue that would seep between the 3/32" notched piece and the keel would not glue the jig to the keel. After a few minutes of set time of the Titebond II glue, I removed the jig and cleaned up any excess with a small dental scraper and a paint brush dipped in water.
- 263 replies
-
- Medway Longboat
- Syren Ship Model Company
-
(and 1 more)
Tagged with:
-
Thanks for the comments and the "Likes". It has been awhile since I posted and thought that I would give an update on my progress. The instructions call for a 1/32" rabbet along the keel. This is accomplished by centering the four 3/32" notched pieces on the 5/32" keel. I used a method that Doug McKenzie used on his Longboat build to center the notched pieces. I created a small jig by gluing a 1/32" thick piece of wood to some scrap wood and used this jig to center the notched pieces. Here are some photos of my construction process: The remaining long jointed piece fit almost perfectly between the stem and stern jointed pieces. All I had to do to get a perfect fit was to run a couple of passes with a sanding stick on the stem end of the long piece to remove some laser char. This shows the precision of the laser cut pieces in this kit. I put a coat of wipe on poly on the keel assembly, inserted the simulated bolt pieces using the the supplied fishing line, sanded the bolts smooth and finished it off with another coat of wipe on poly. Next up is assembling the frames.
- 263 replies
-
- Medway Longboat
- Syren Ship Model Company
-
(and 1 more)
Tagged with:
-

Hello all and already looking for help
Ryland Craze replied to Signode388's topic in New member Introductions
IIiya, Welcome to Model Ship World. I have attached a copy of the Phantom Practicum by Chuck Passaro. This looks like a very nice model. Good luck on your build. Phantom-Practicum-Complete.pdf -
Jeff, Take your time and you will be OK. I realized early on that the sanding sticks that I was using (flexible nail files) were rounding off the edges. I cut some 1/8" plywood into strips and made my own sanding sticks using sandpaper and rubber cement. The hard plywood kept the edges from being the rounded off. I also used a chisel to remove a lot of wood. I constantly measured my lap joints to make sure that I did not remove too much wood. Also, you have to keep the work area clean as the yellow cedar attracts the laser burn dust. I also taped a paper towel to my work area to serve as a small cushion as the yellow cedar is soft. Good luck, you will do OK.
-
Thanks guys for the comments and for the "Likes". The kit comes with two types of keel assemblies. One is a simplified version which has scarf joints. The other is a complex version that has lap joints that requires some carving and sanding. I decided to go with the complex keel assembly knowing that if I messed up, I still had a simplified version. I took it slow and easy, taking many measurements with my caliper, to get a good fit. I cut and filed each joint so that it was half as thick as the keel. I am pleased with the results as the joints are tight and lay flat on a piece of glass. Here is a picture of the tools that I used. I failed to put my digital caliper in the picture.
- 263 replies
-
- Medway Longboat
- Syren Ship Model Company
-
(and 1 more)
Tagged with:
-
Very nice and crisp. I like everything you have done. Thanks for the updates.
- 231 replies
-
- model shipways
- armed virginia sloop
-
(and 1 more)
Tagged with:
-
Thanks Michael and Jim. At 1:24 scale, this model allows you to add a lot of detail. On the down side, mistakes will be harder to hide. Chuck and Mike (Stuntflyer) have set the bar high with their quality work and I am sure Rusty will be building one. I am no where close to their skills but will do the best that I can. I am looking forward to this build.
- 263 replies
-
- Medway Longboat
- Syren Ship Model Company
-
(and 1 more)
Tagged with:
-
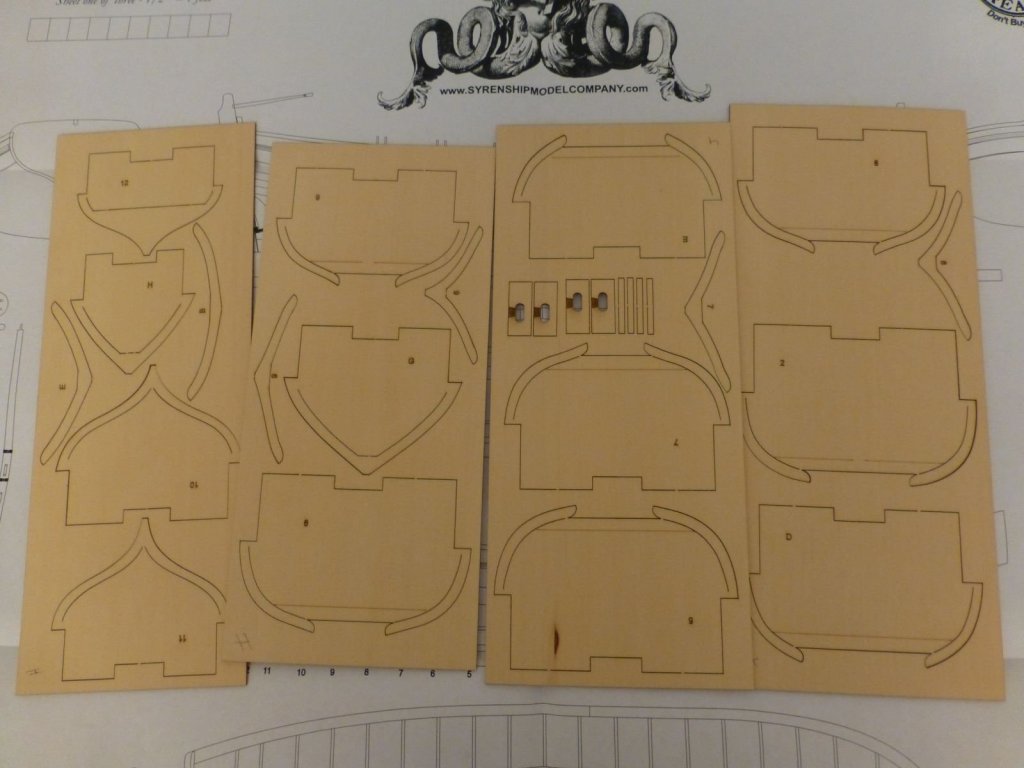
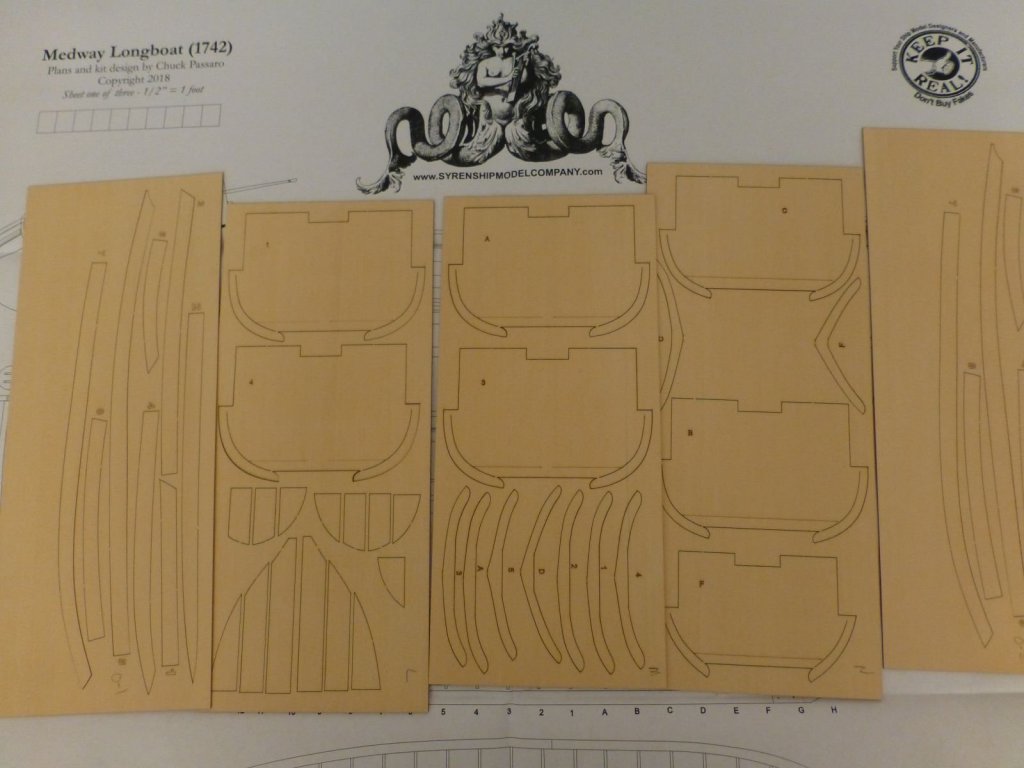
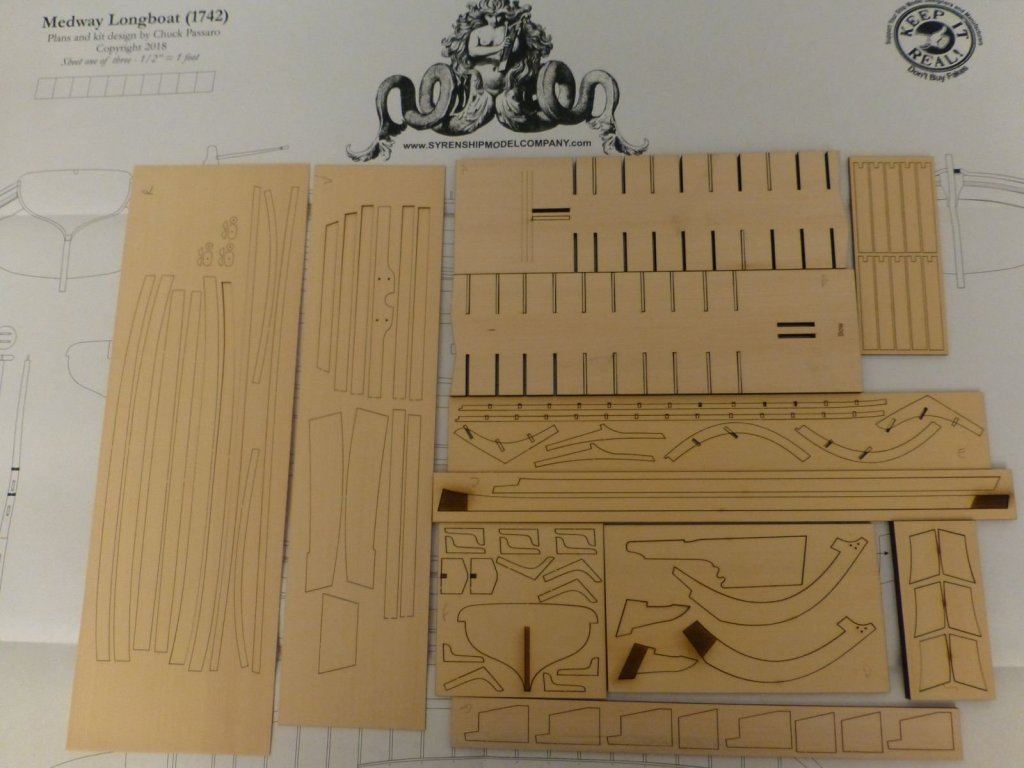
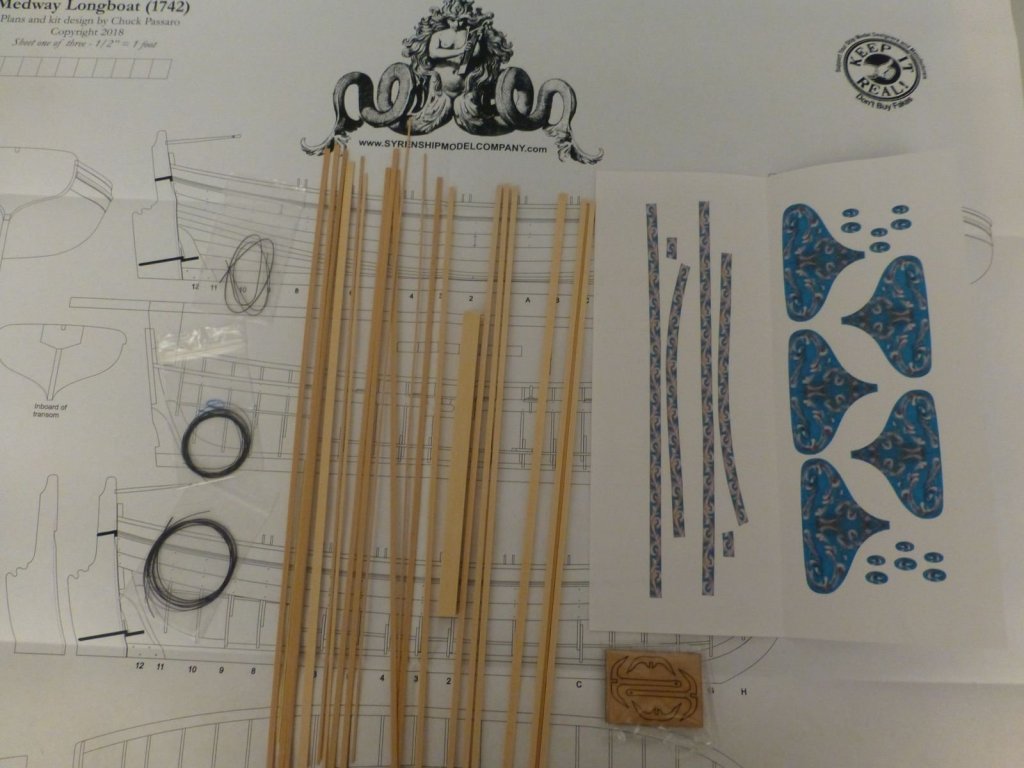
I was one of the lucky ones who was able to obtain one of the first run kits of the Medway Longboat from Syren Ship Model Company. I ordered it Thursday morning and it made its way from New Jersey to Virginia and was in my mailbox Saturday afternoon. Upon opening the box, I could tell the quality of this kit that we have seen produced and designed by Chuck. I have attached pictures of the kit's contents. The laser cutting is some of the best that I have seen and there is very little laser char on the backside of the wooden sheets. The boxwood and yellow cedar strip wood is milled very nicely and has clean, crisp edges. All of the laser cut parts are easily identified and some have their part numbers etched on them or adjacent to the part. I am glad to be part of this group build and I look forward to following the build logs of other Medway Longboat builders. I also welcome suggestions from MSW members throughout this build on how to improve my model.
- 263 replies
-
- Medway Longboat
- Syren Ship Model Company
-
(and 1 more)
Tagged with:
-
I am looking forward to following your build. I enjoy reading the current builds of our MSW plastic modelers and the photo etch really intrigues me. I also like the weathering of these plastic models. It brings them to life.
- 140 replies
-
- the sullivans
- trumpeter
-
(and 2 more)
Tagged with:
-
Congratulations on finishing your Ice Yacht. You did a beautiful job on this model and I like all of the details you added. I hope to see this model at the Northeast Joint Clubs Conference in April.
-
Your Pinnace is looking good. Glad to see you back in the shipyard. It was also great seeing you in Las Vegas at the NRG Conference. I know you learned a lot of new modeling techniques that you will use in building your Pinnace.
- 90 replies
-
- english pinnace
- Finished
-
(and 1 more)
Tagged with:
-
This will be the start of my Medway Longboat kit once I receive it. I have been following the development of this kit and it will be fun building it in a Group setting. I have watched projects being developed over the years by Chuck and each one gets better and more innovative than the one that preceded it. The first step in this build is to visit the downloads page which has all of the chapters of the build plus other information that will help you in the building of your Longboat. It can be accessed by going to the link below:
- 263 replies
-
- Medway Longboat
- Syren Ship Model Company
-
(and 1 more)
Tagged with:
-

English Pinnace
Ryland Craze replied to Jaeon's topic in Building, Framing, Planking and plating a ships hull and deck
Jaeon, You are correct in that you will reduce the false keel along its entire length. This will form a consistent rabbet along the keel for the first plank (garboard) to lay. Good luck on your build. -

Requesting feedback for future MSW Group Projects
Ryland Craze replied to Chuck's topic in Group Projects on Model Ship World
Count me in. This means I need to get started on my Queen Anne Style Barge and have it completed very soon. I also plan to present the group build concept to my Club members as I feel some would benefit greatly in a group build environment. -
At the top of the page, the message icon is next to the globe. Click on this and it will open the Inbox window. Then click on the Compose New button. In the To area, type KenW and complete this section with your message to him. Then hit Send and Ken will receive an email that he has a message. Definitely bring the model to the meeting next week as you will get plenty of help on solving the issue with the bulkheads.
-
Your work looks nice. I am going to enjoy following your build log.
- 103 replies
-
- queen anne barge
- Syren Ship Model Company
-
(and 1 more)
Tagged with:
-
I will be following your build log. The cherry wood looks real nice.
- 74 replies
-
- queen anne barge
- Syren Ship Model Company
-
(and 1 more)
Tagged with:
About us
Modelshipworld - Advancing Ship Modeling through Research
SSL Secured
Your security is important for us so this Website is SSL-Secured
NRG Mailing Address
Nautical Research Guild
237 South Lincoln Street
Westmont IL, 60559-1917
Model Ship World ® and the MSW logo are Registered Trademarks, and belong to the Nautical Research Guild (United States Patent and Trademark Office: No. 6,929,264 & No. 6,929,274, registered Dec. 20, 2022)
Helpful Links
About the NRG
If you enjoy building ship models that are historically accurate as well as beautiful, then The Nautical Research Guild (NRG) is just right for you.
The Guild is a non-profit educational organization whose mission is to “Advance Ship Modeling Through Research”. We provide support to our members in their efforts to raise the quality of their model ships.
The Nautical Research Guild has published our world-renowned quarterly magazine, The Nautical Research Journal, since 1955. The pages of the Journal are full of articles by accomplished ship modelers who show you how they create those exquisite details on their models, and by maritime historians who show you the correct details to build. The Journal is available in both print and digital editions. Go to the NRG web site (www.thenrg.org) to download a complimentary digital copy of the Journal. The NRG also publishes plan sets, books and compilations of back issues of the Journal and the former Ships in Scale and Model Ship Builder magazines.


