Ronald-V
-
Posts
1,780 -
Joined
-
Last visited
Content Type
Profiles
Forums
Gallery
Events
Everything posted by Ronald-V
-
 Thank you Frecap! That's very kind of you to say! 👍 And everyone else als thank you for looking in and the likes, appreciate it a lot!
 -
Okay, just a quick adjustment before F1 starts... I slightly countersunk the holes in the stern and it looks much better! Thanks for the help guys!
-
Thanks for checking in guys...countersink the holes is indeed an option. I will look into that. And your right regarding that if in doubt now...it can be annoying later on.
-
That looks so good!
-
You're absolutely right, the problem is... the gudgeon pintle patterns are as far into the holes as they can go. So, in terms of design, this should be the intention. If I wanted the gape narrower than in the drawing, I'd have to modify the pintle patterns (probably file them a bit off). I think this is simply the difference that can occur between a drawing and the actual execution (including all the parts). So yes...your first statement applies here... Just wondering if others had the same result
-
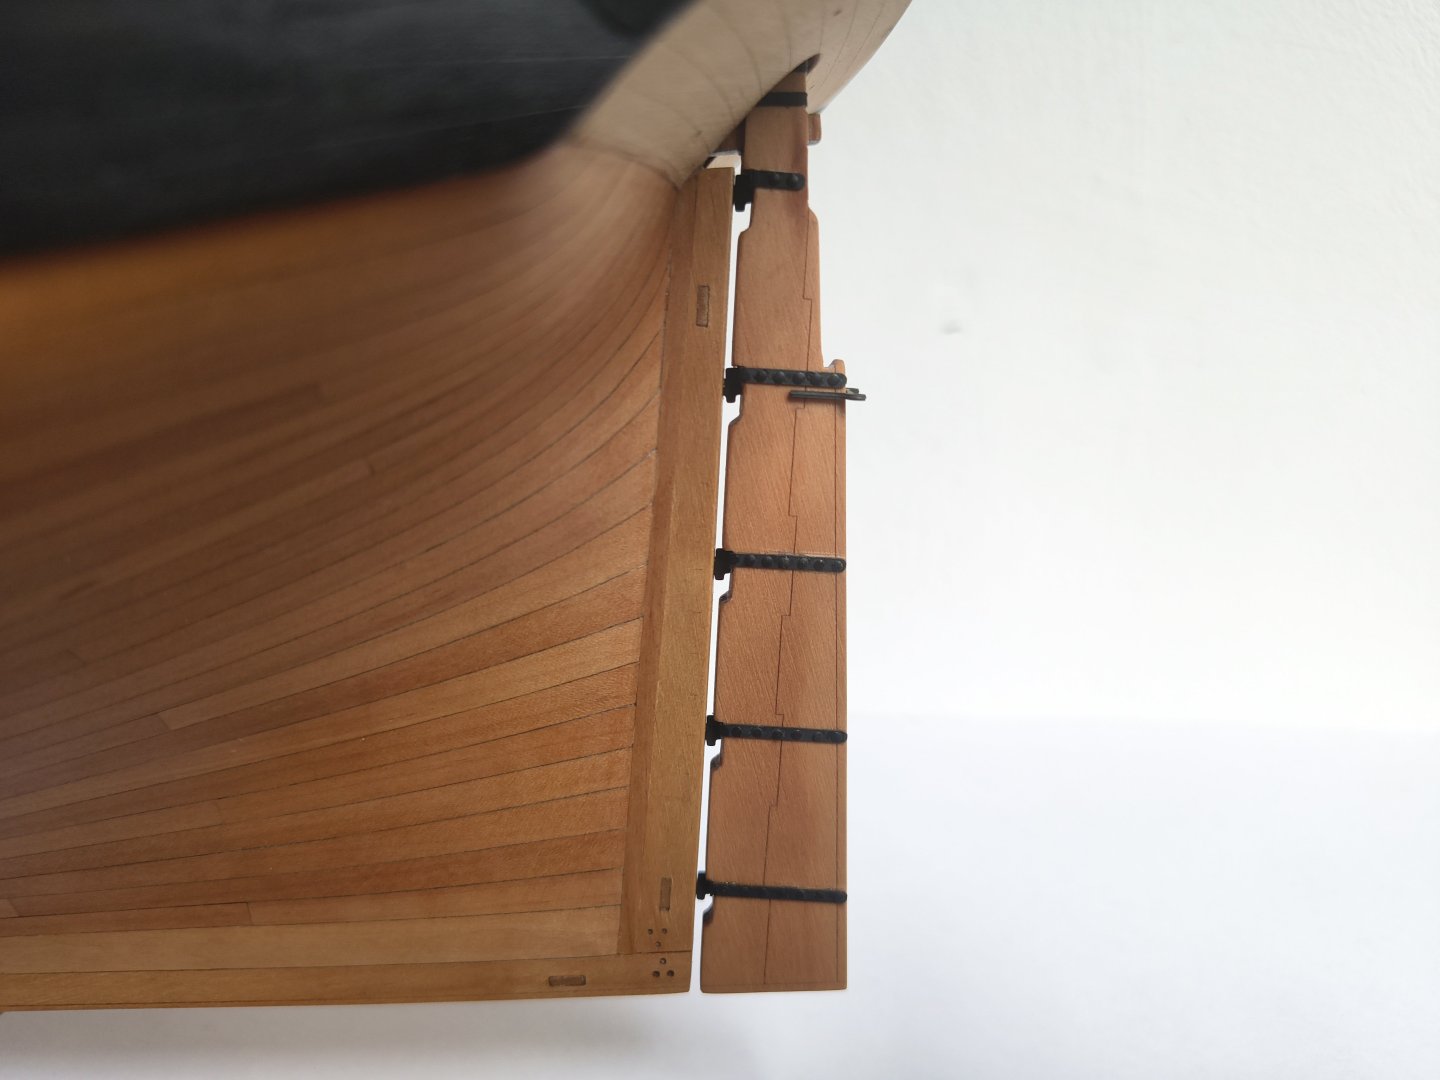
Does anyone think the space between the rudder and the hull is too large? It seems okay, right? According to the drawing, it should be a millimeter, and mine is 1.5. So it's pretty close. When I first attached the rudder, I thought...the space seems too large? But now that I've looked at it a few times and taken a picture, it seems okay (perhaps also a bit influenced by Blue Ensign, who thought the space was too large and adjusted it ) It's sometimes a bit difficult to see in other logs regarding the angle of the photo, so I thought...let me ask what others think. By the way, there is practically no space between the edge of the hole where the rudder fits in...but in principle that is not noticeable

-
Thank you Theodosius! That's a generous compliment! 🙏
-
Love the stained planks! Such a nice green
-
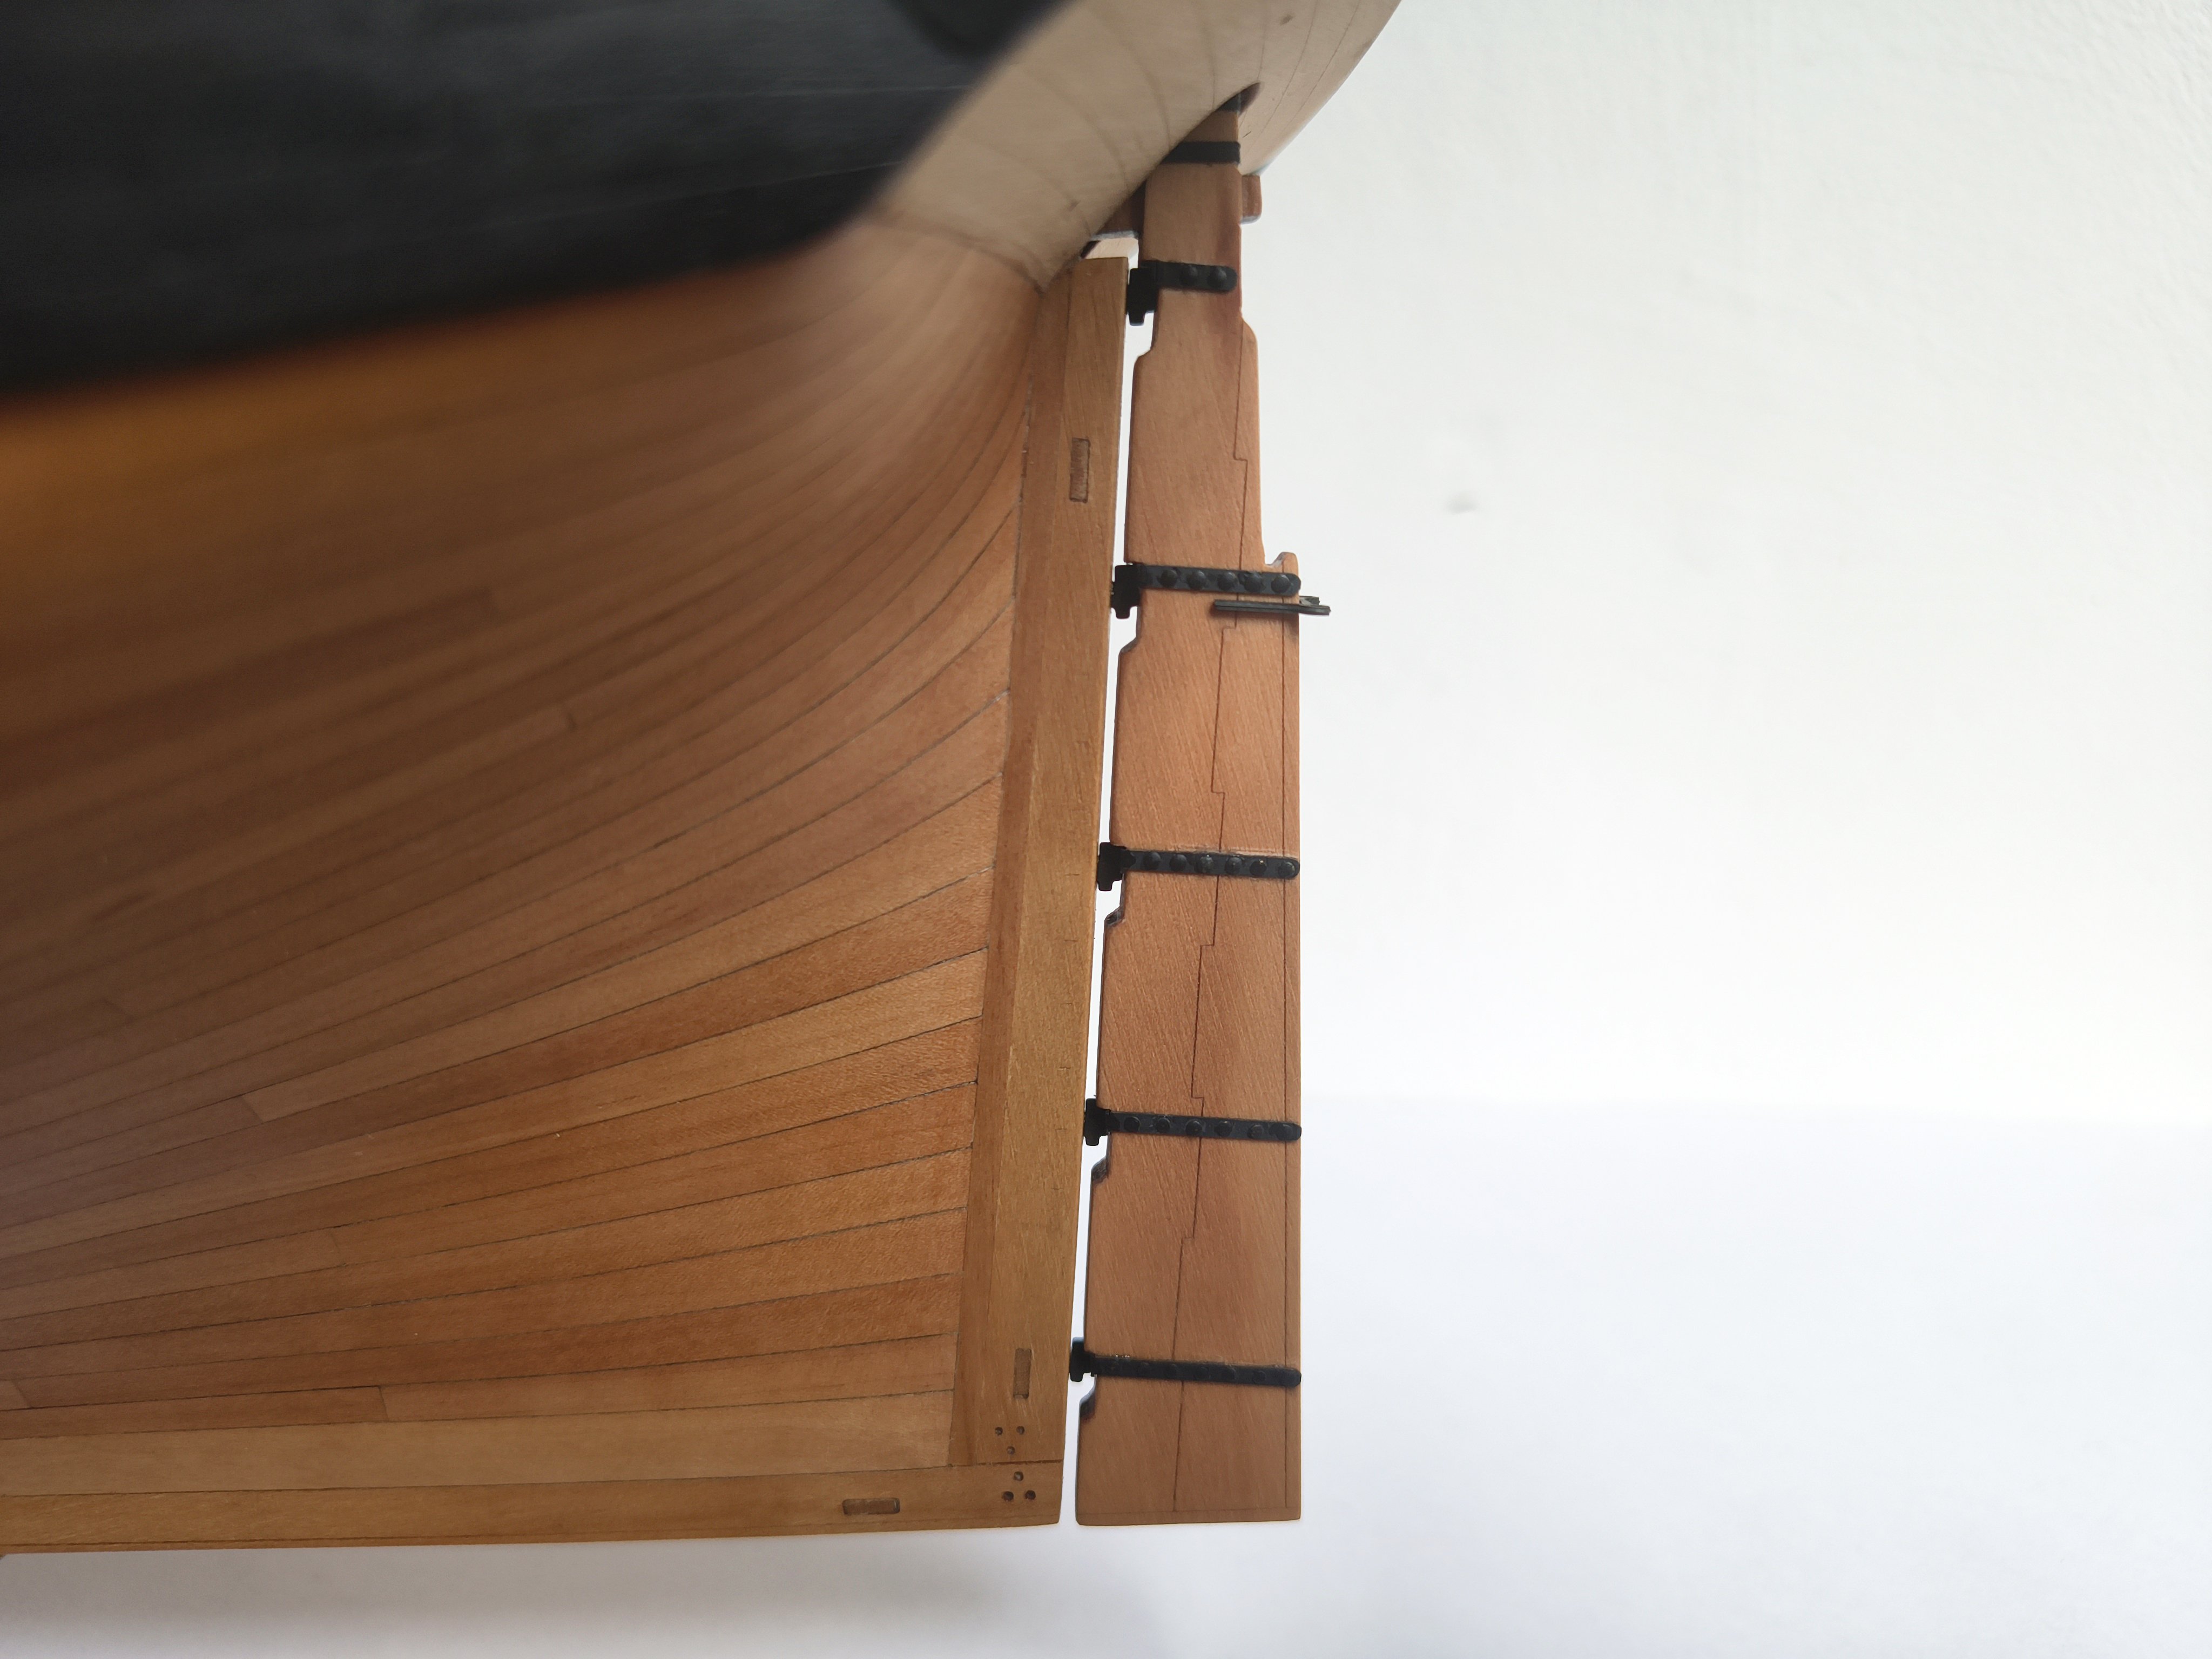
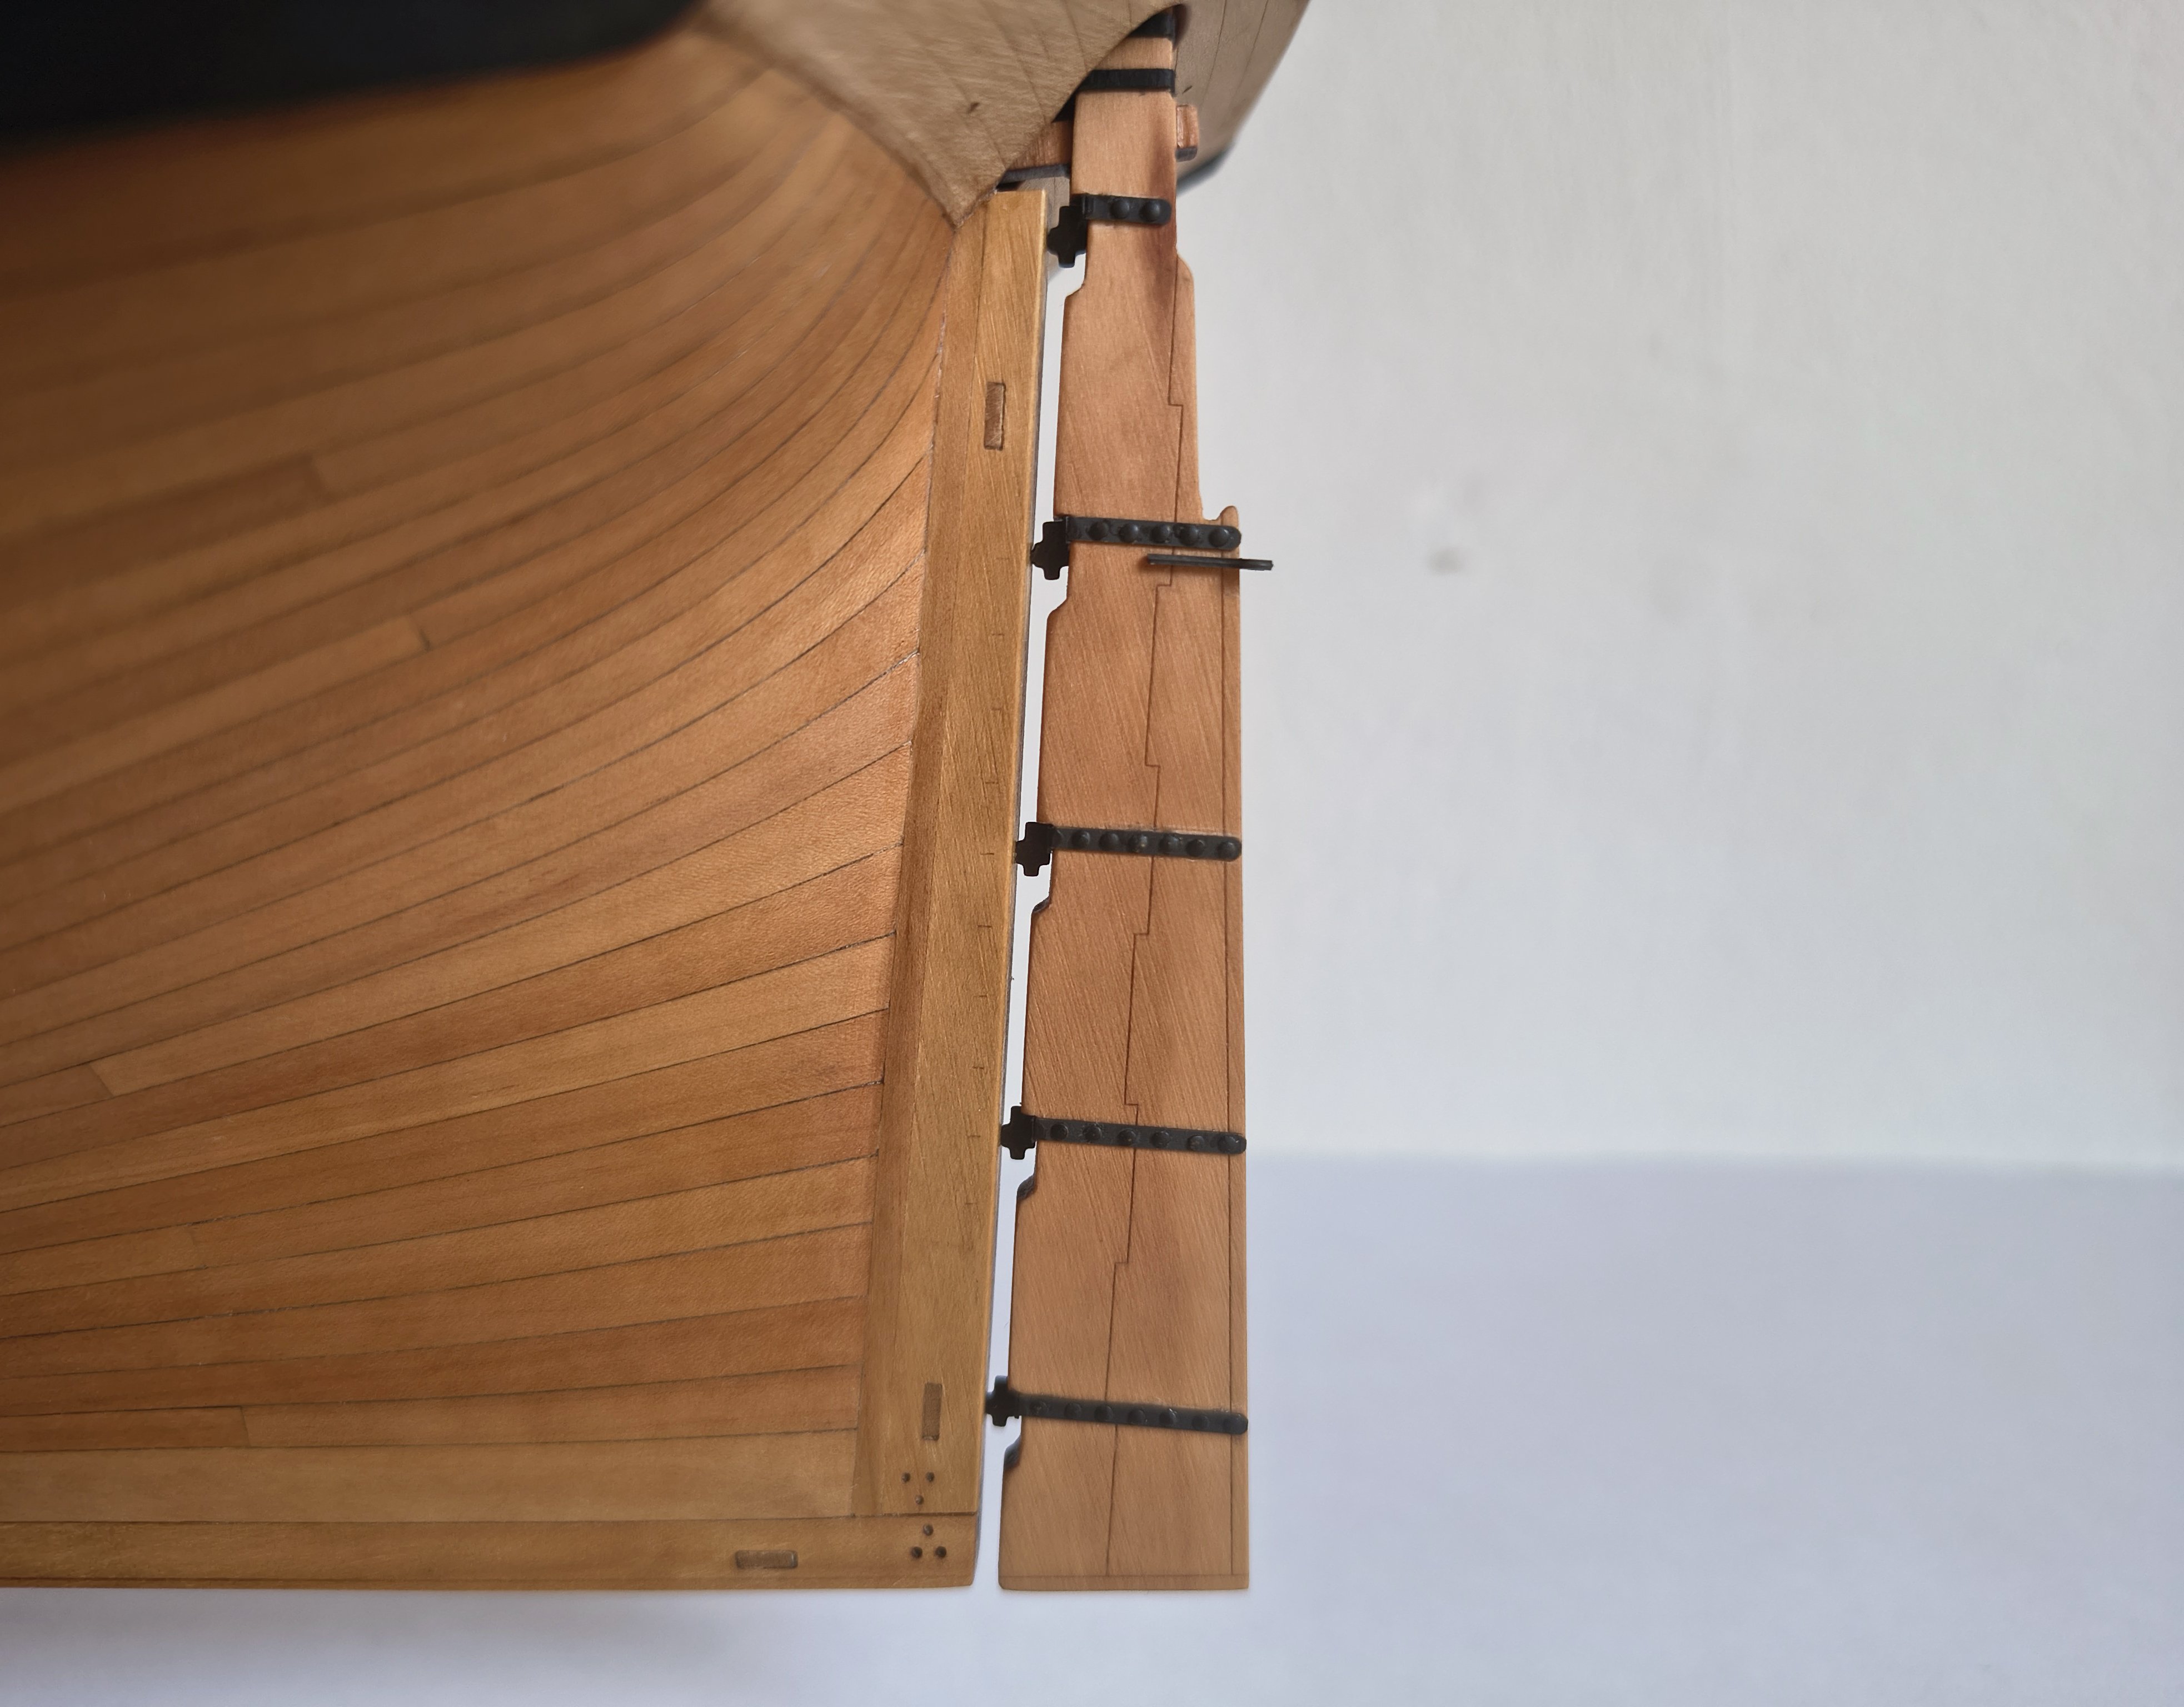
Update: I've been working on the rudder these last few days. Below are some photos of the process. First, I lightly tapered the rudder. This was optional according to the instructions. However, the visible effect is very minimal, and you really have to look closely to see the difference. That said, it only took me 15-20 minutes to sand it that way. The drawing of the tapered rudder, so it was quite easy to indentify what was nessecary to sand: Sanding of the "inner piece" After that I glued the two outer patterns to the inner piece so that you can see the nice engraved lines on top of it. My personal suggestion regarding the kit design as an "improvement" is to actually laser-cut the engraved parts as separate components, similar to those used in Winchelsea kits, etc. This also applies to the prow. I think this would elevate the kits to an even higher level, because now you'll still see the "inner section," which has different colors. But that's just my humble opinion. I glued a toothpick into the top so I had more grip while putting it in the WOP. 4 coats of WOP applied here just as the hull itself to match it color-wise I blackened the pintle straps with AK blackening fluid. Then I used two nails as guides to position the straps correctly. It took me a while to get used to using the right amount of CA glue without making a mess, but overall, it turned out fine. After attaching the rudder and gudgeon pintle patterns, (and also attached all the nails) I noticed they weren't connected to the pintle straps on the sides. I solved this by using small pieces of thick black paper to connect them. The lines engraved at the top I think are supposed to be rudder straps. Perhaps these were expected to be painted? I used black paper again for this. I ignored the top one, this one will not be seen when installed. Afterwards, I went over everything again with some black paint, as the black layer applied by the blackening agent gets damaged quite quickly when installing the parts. Details are a bit hard to see because of the lighting, but when it's attached to the hull it will look better. This is the final result: I'll first paint the rudder hole in the hull black, and then I can attach the rudder in its final position. And then I'll figure out exactly how I'm going to attach the rudder brace straps. It will probably be a fiddly job


-
Caldercraft Red Ochre
Ronald-V replied to scrubbyj427's topic in Painting, finishing and weathering products and techniques
Krick Modellbau in Germany has some stock of this color. I recently ordered from here, and the service is excellent. I just don't know what the shipping prices are to the US compared to CMB. But it might be something for you. -
Lovely little ship! Well done and congratulations on finishing it
- 44 replies
-
- 1
-

-
- Nave Egizia
- Amati
- (and 1 more)
-
Taking a break from a difficult phase will almost always help...after that you often look with a new perspective and motivation 👍
-
Very interesting look....nice job!
-
Ha thanks Uwe! And thanks for looking in on my Instagram page, regarding the expo...no not really, maybe i'm going to take a look but that's all
-
Have fun on your journey!
-
Thank you Andrew for your kind words!
-
MONTAÑES by Amalio
Ronald-V replied to Amalio's topic in - Build logs for subjects built 1751 - 1800
Pure beauty! -
Looks like a good start of the second layer! 👍
-
Thank you Nick! 🙏
-
Well done! That looks really good now
-
That is a very nice first layer of planking! Love the flow of it, no kinks whatsoever. Regarding how to plank. As Chuck says in the first video of the planking tutorial...he discribes the process in the Winchelsea manual. In chapter 2 I believe, so maybe take a look at that if it's something you like. https://syrenshipmodelcompany.com/hms-winchelsea-1764.php
-
Haha no worries, I won't