Ronald-V
-
Posts
1,934 -
Joined
-
Last visited
Content Type
Profiles
Forums
Gallery
Events
Everything posted by Ronald-V
-

HMS RESOLUTION 1667 by KarenM - 1:48
Ronald-V replied to KarenM's topic in - Build logs for subjects built 1501 - 1750
It's really beautiful! -
Very nice colours indeed! Love the whole overall look. The downside with a "one piece" stern is indeed the painting. You can't easy paint/airbrush the pieces seperately. But I think it will turn out fine, because this already looks really good 👌
- 144 replies
-
- 3
-

-

-
- Christiania
- Vanguard Models
- (and 1 more)
-
Looking good! I also ordered the wax pencils...just to give it a try. Which CA brand did you use?
-
Congratulations on finishing her! That's not a small task! Lovely build and I like all the details...well done! 👍
-
Ah thanks! I get it now...For myself, I prefer to continue making videos myself, just for artistic reasons, but I do see the possibilities of what Grok could do 👍
-
Thanks Andrew! 👏 Thank you so much
-
Very nice result! Love all the details like the toilet room etc...well done!
-
That's a neat first layer! And you are going lightning speed!
-
Really cool cut-outs indeed! Didn't know they could be so artful...well chosen!
-
Improving skills is a never ending story 😆
-
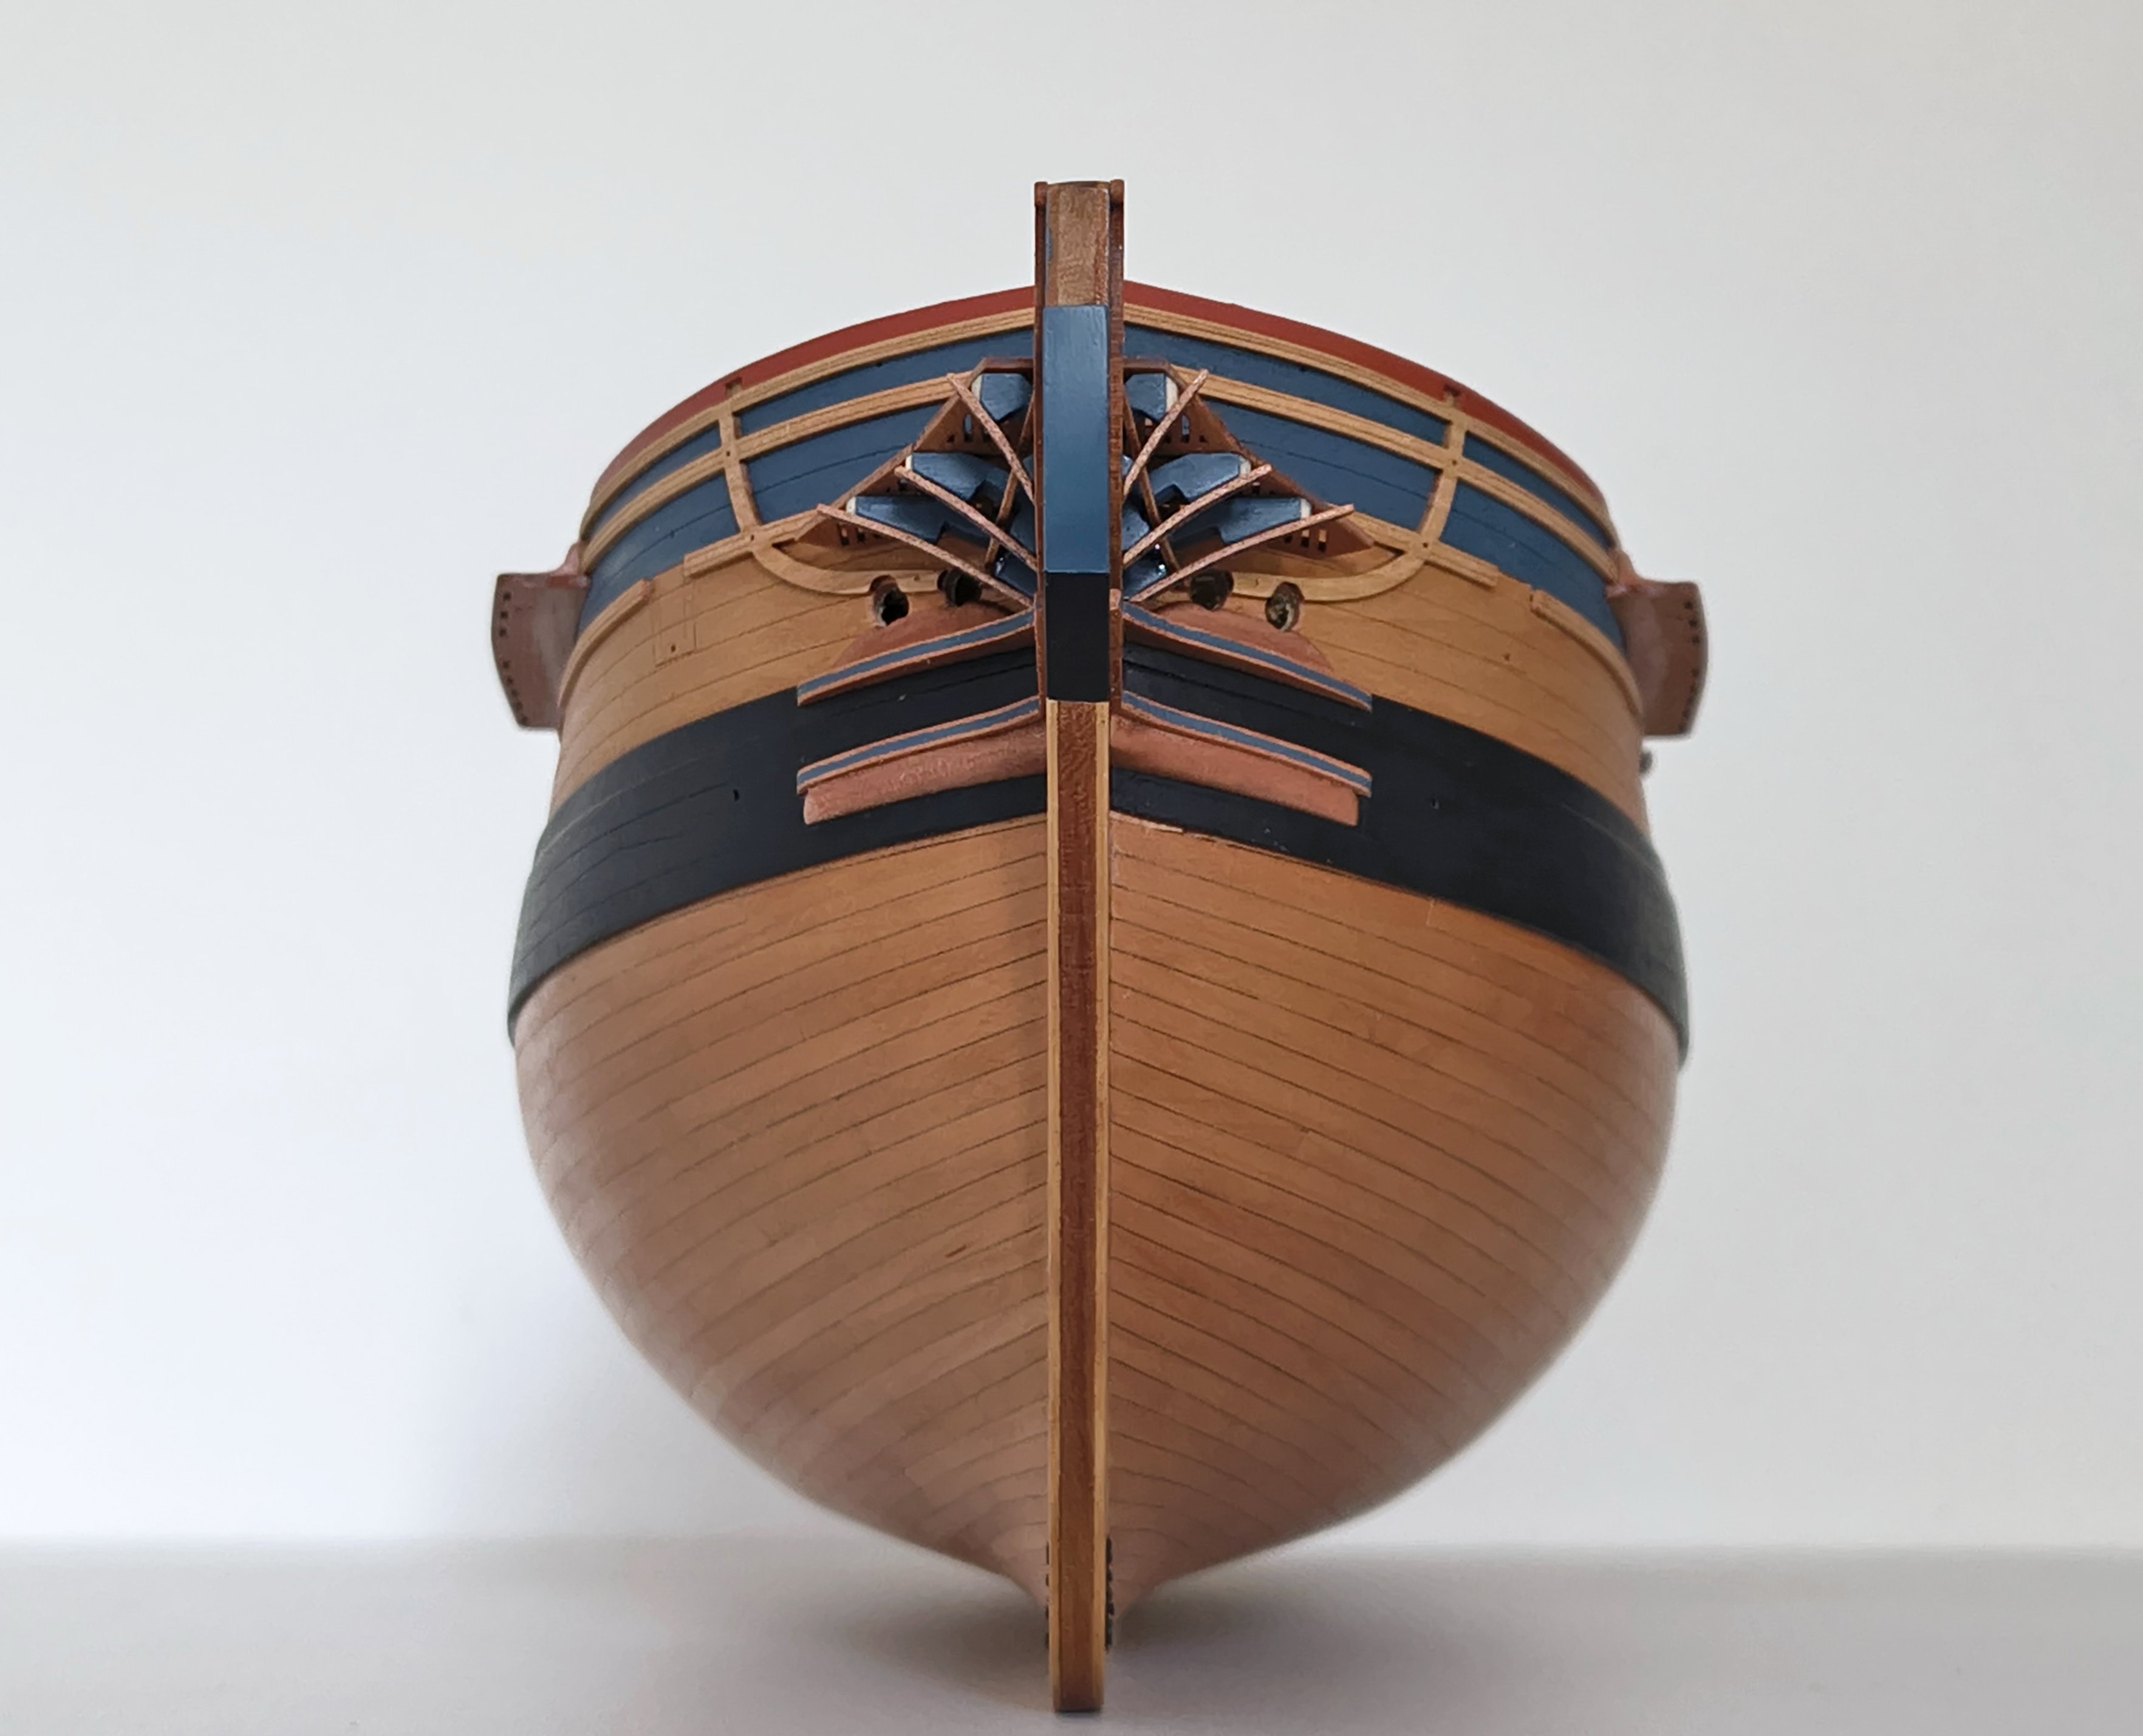
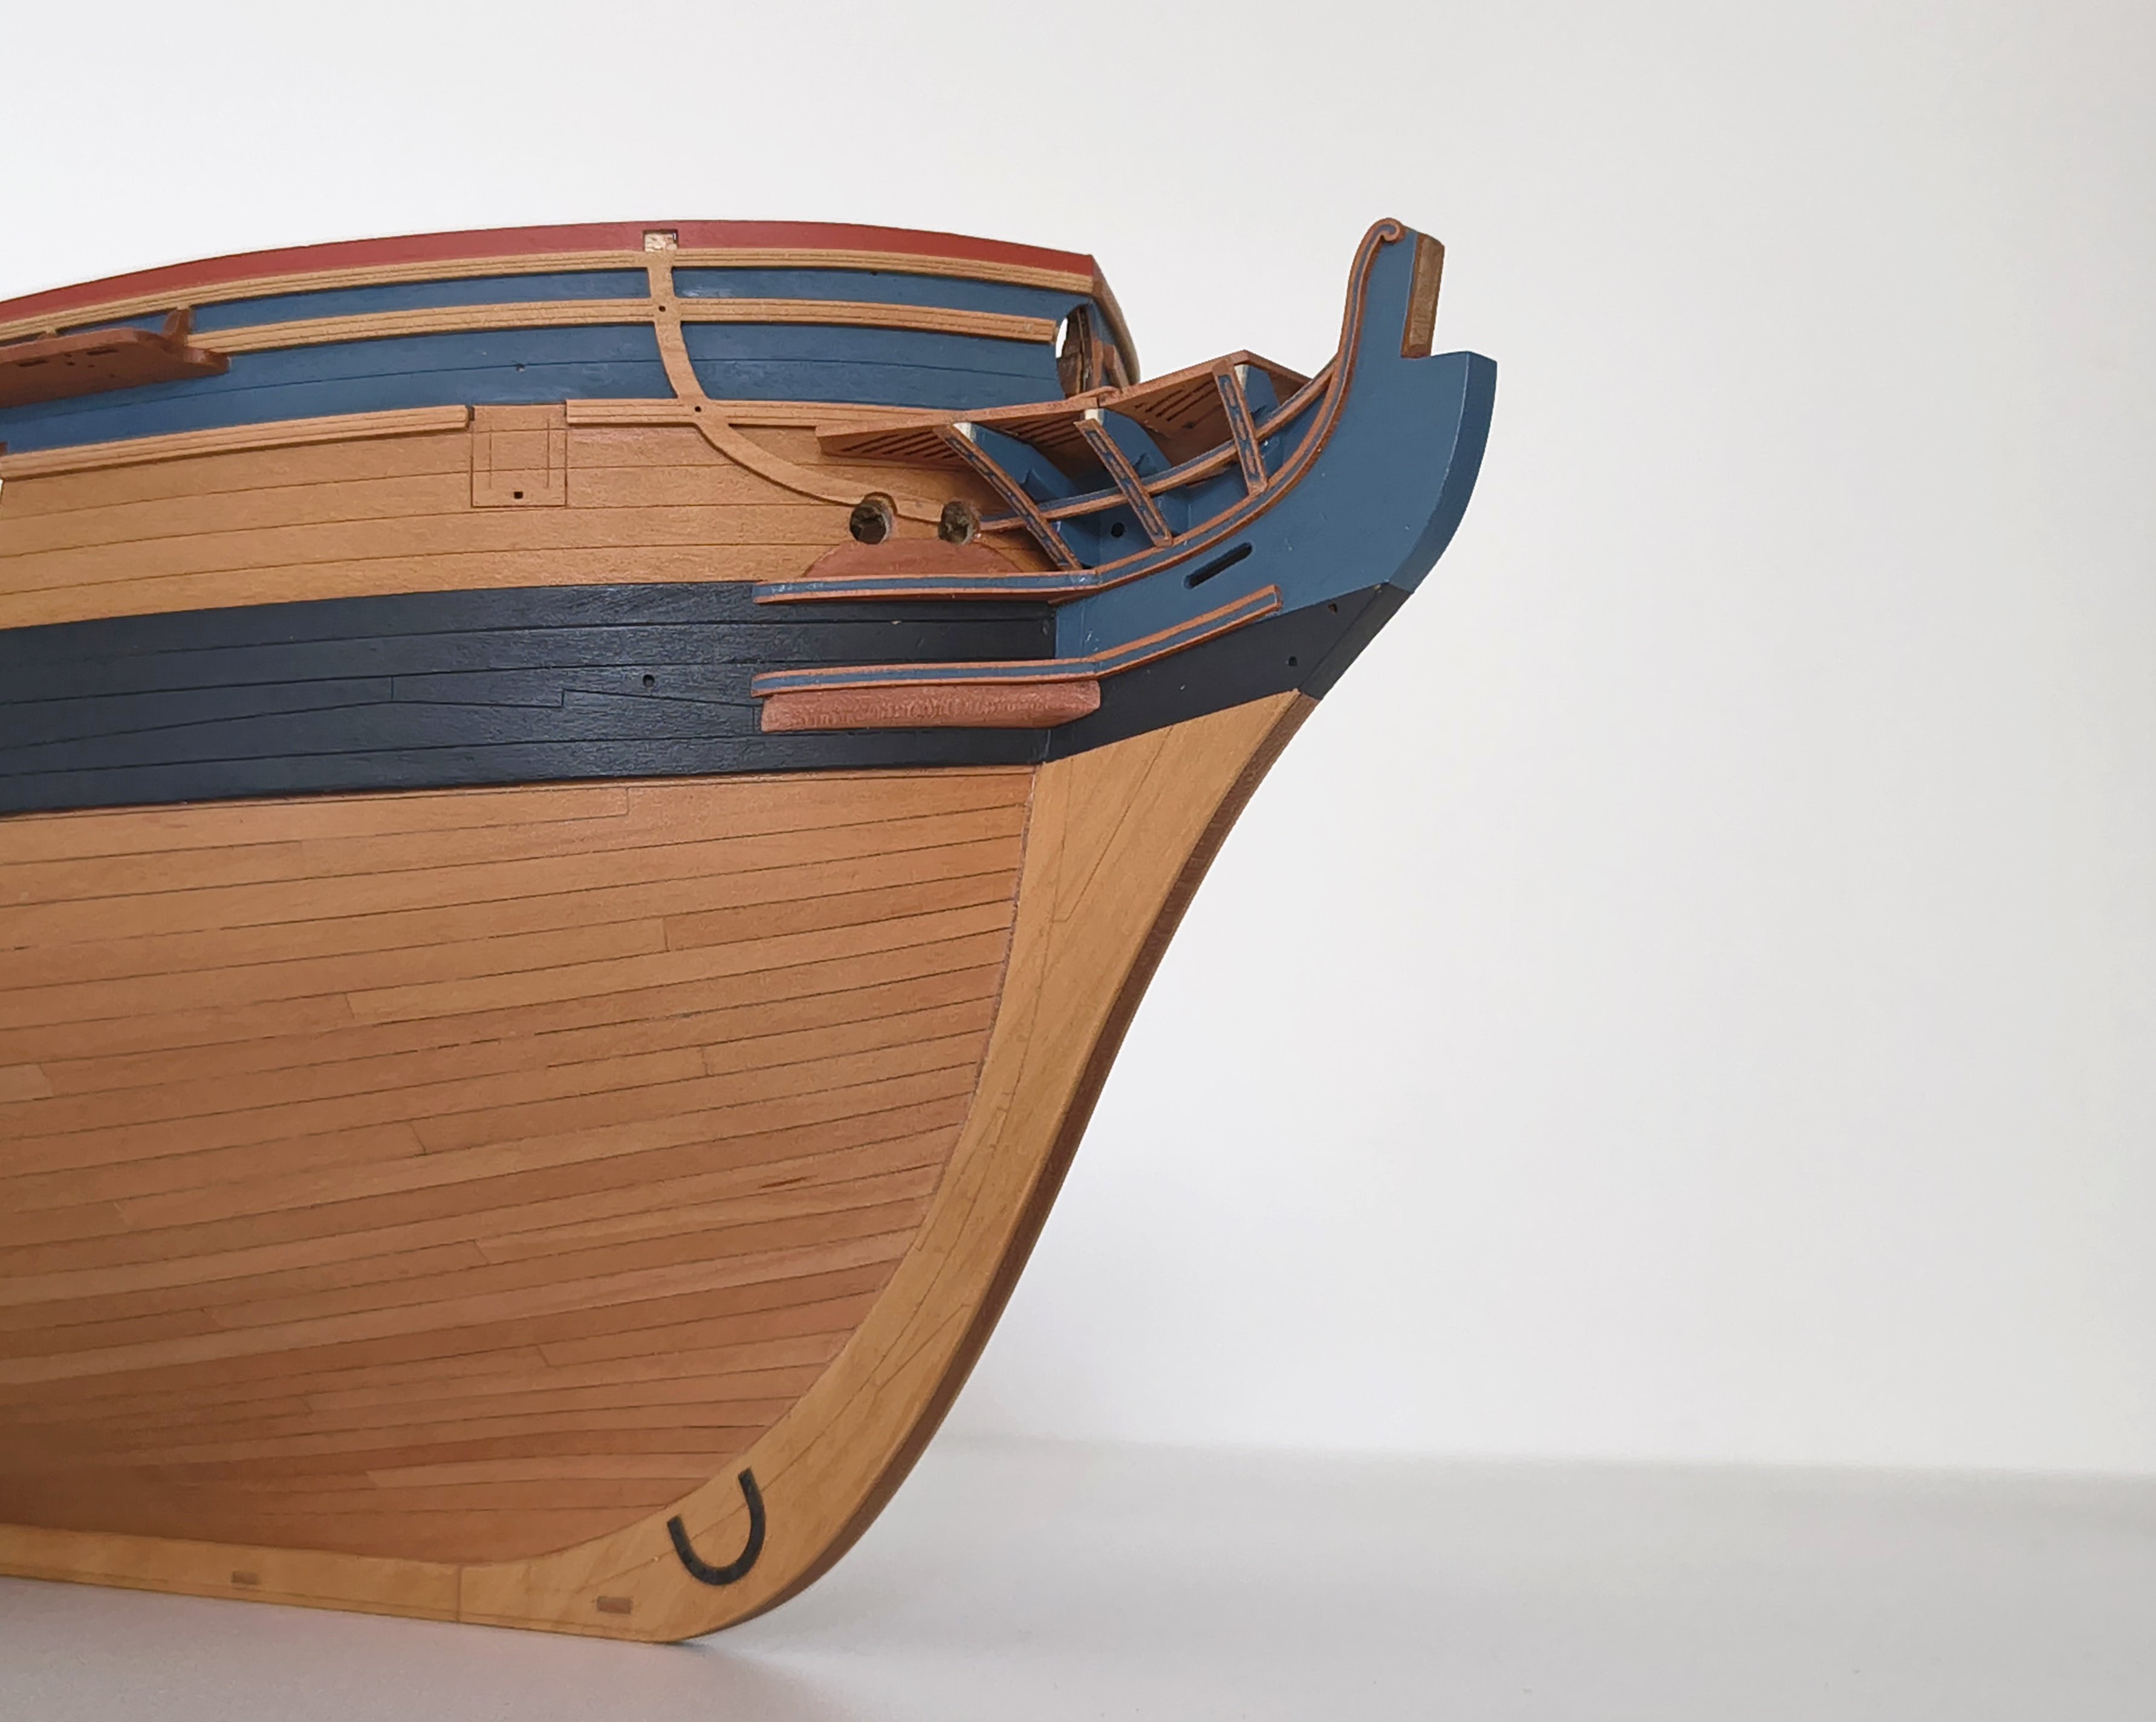
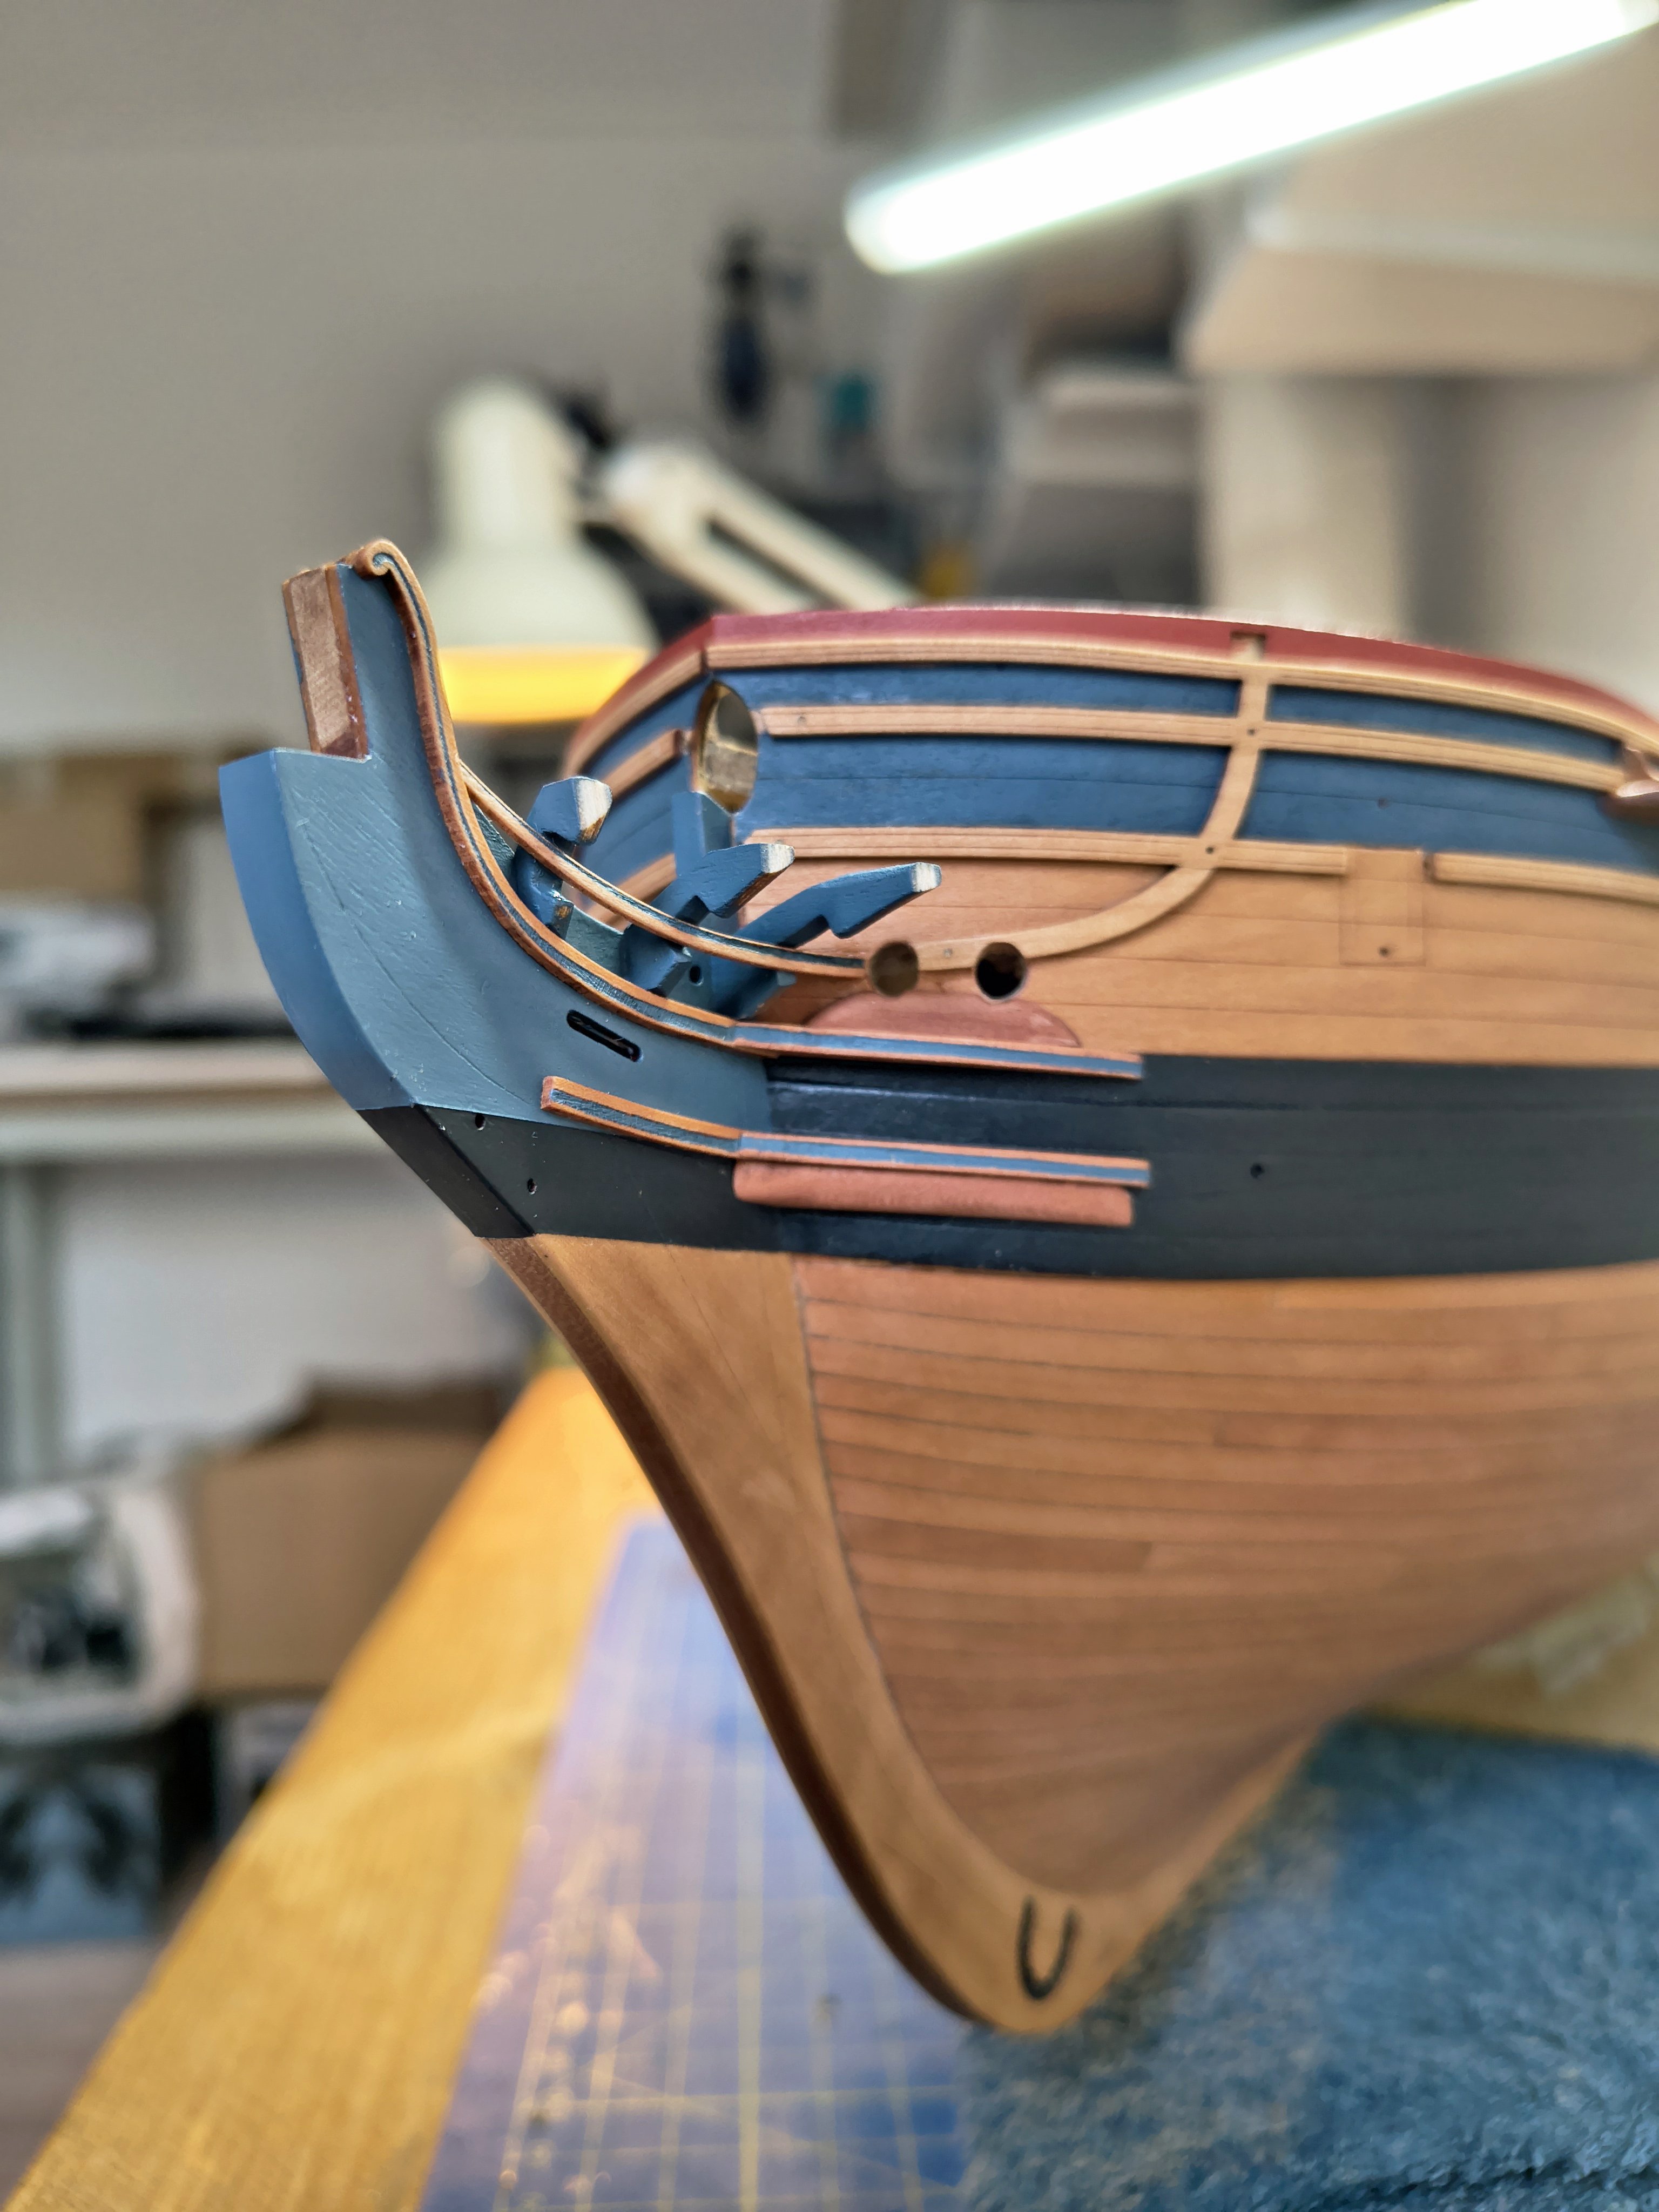
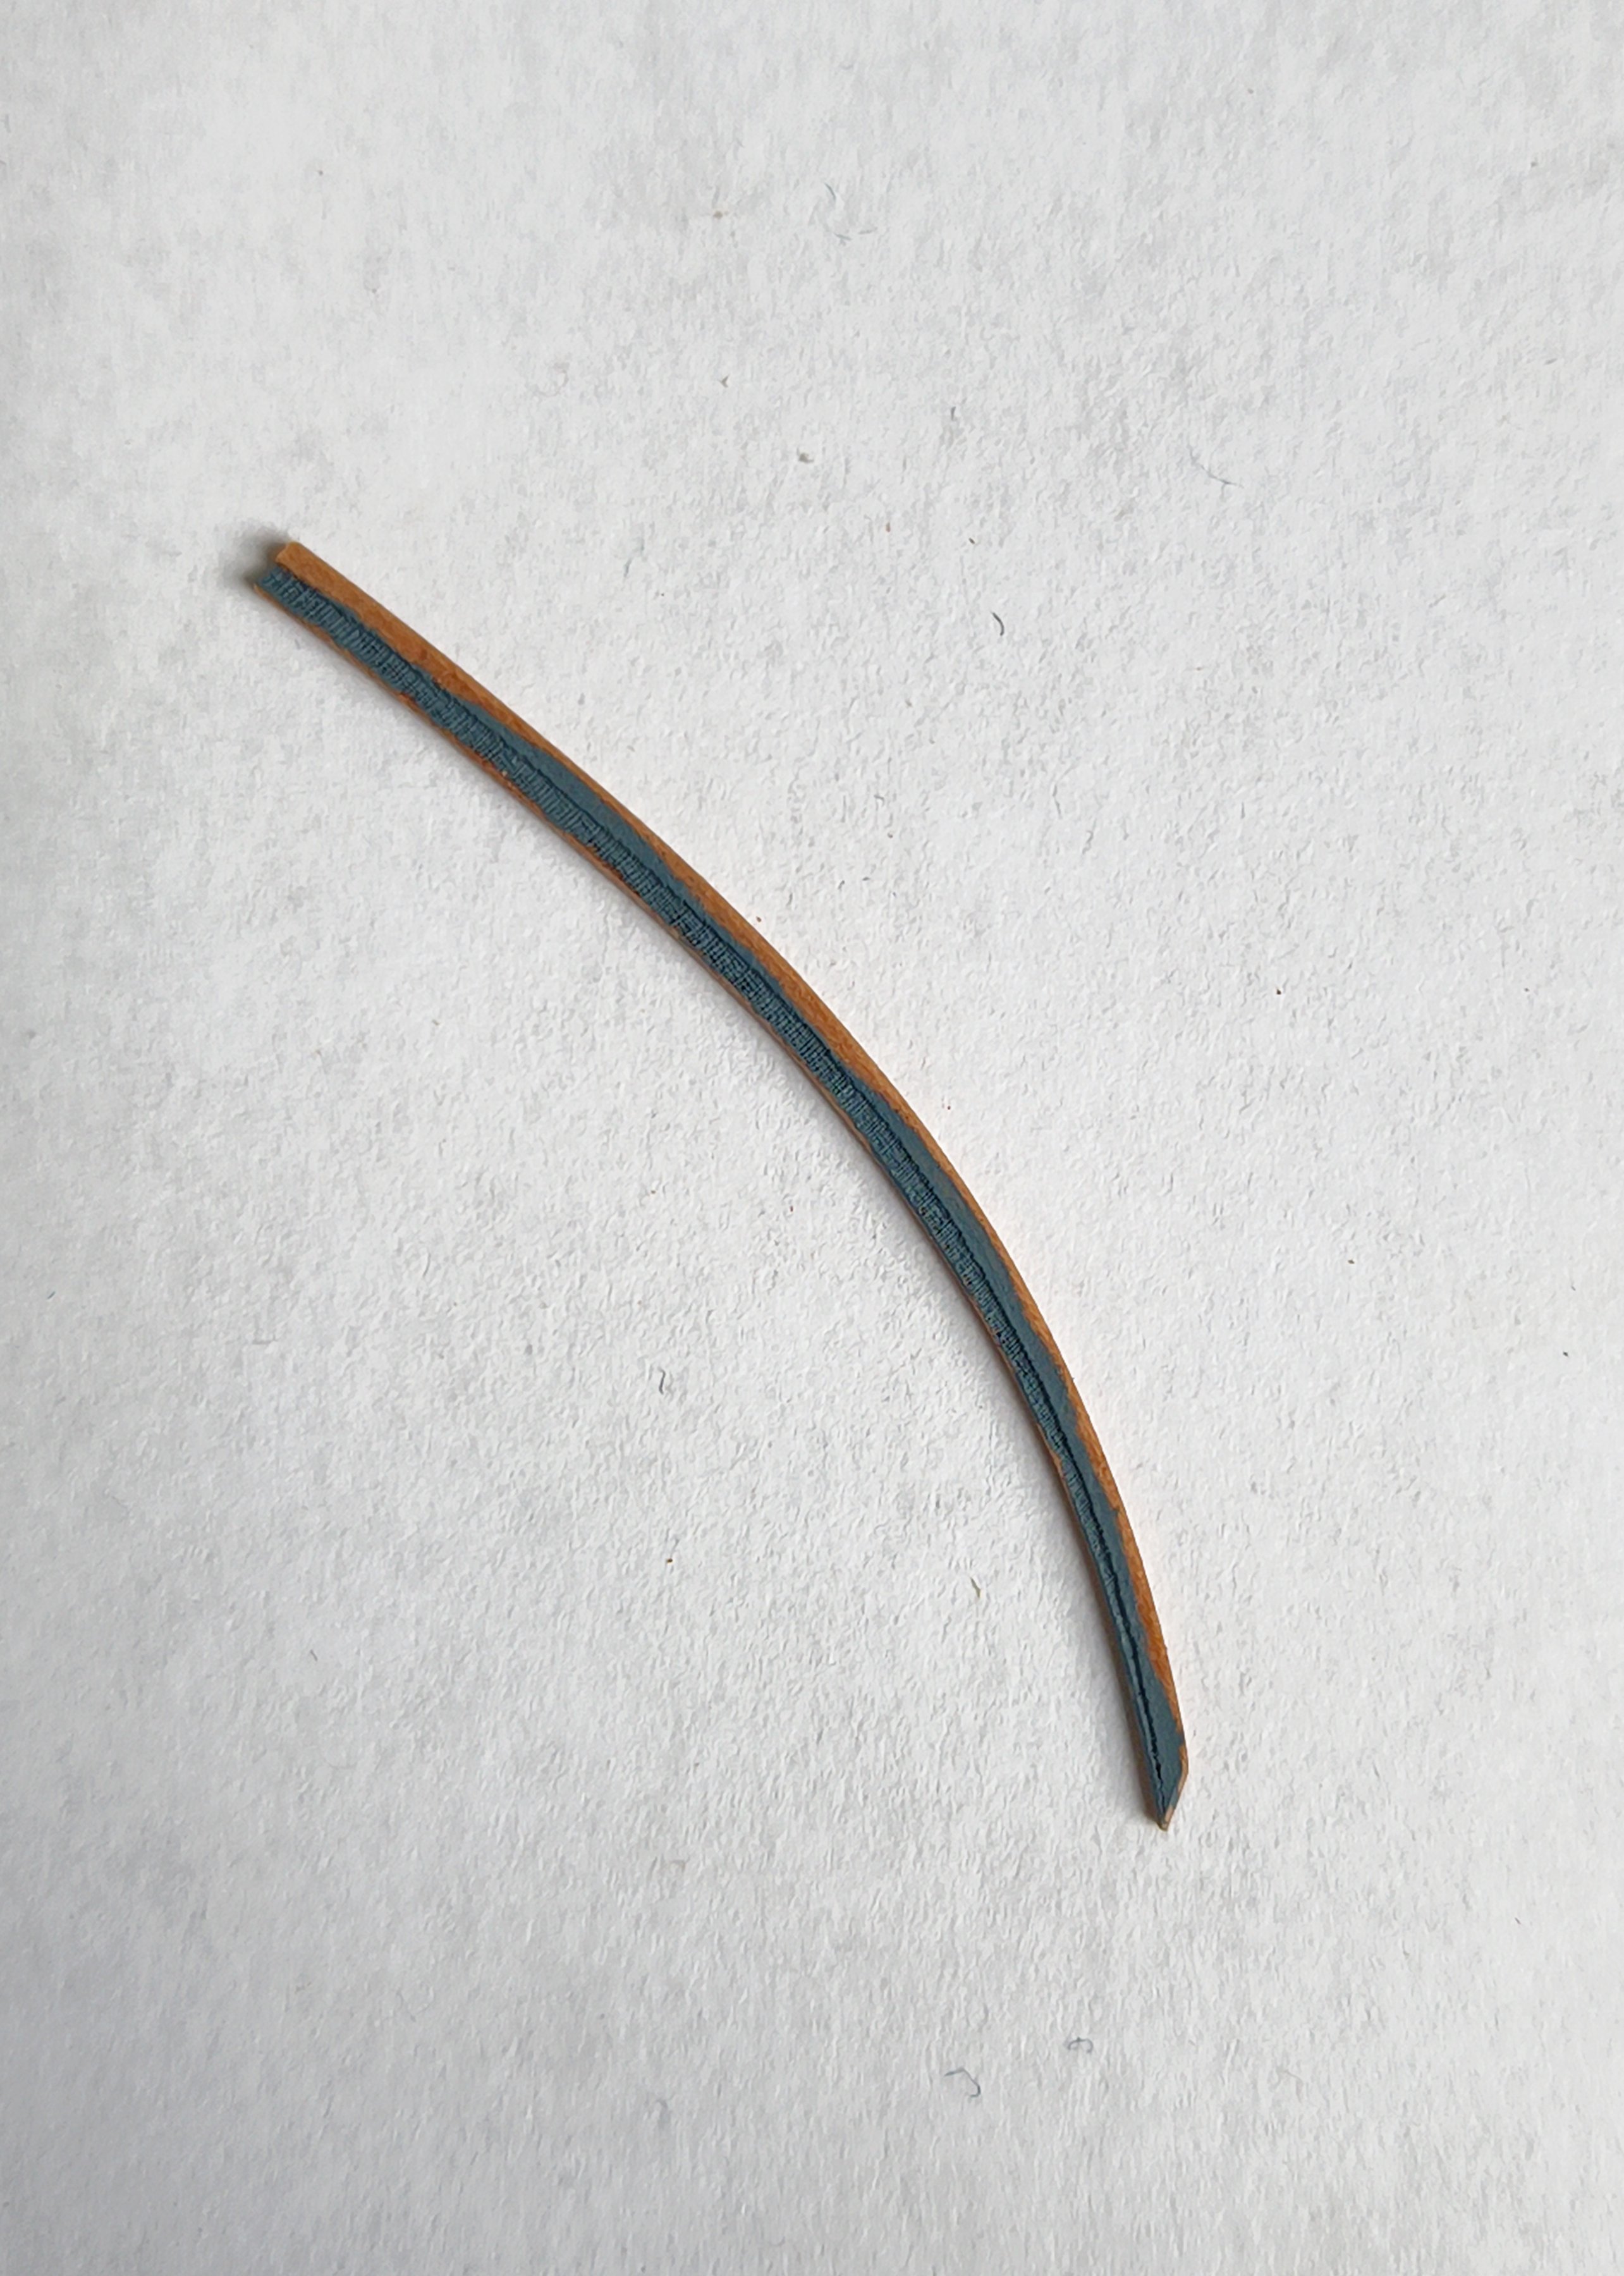
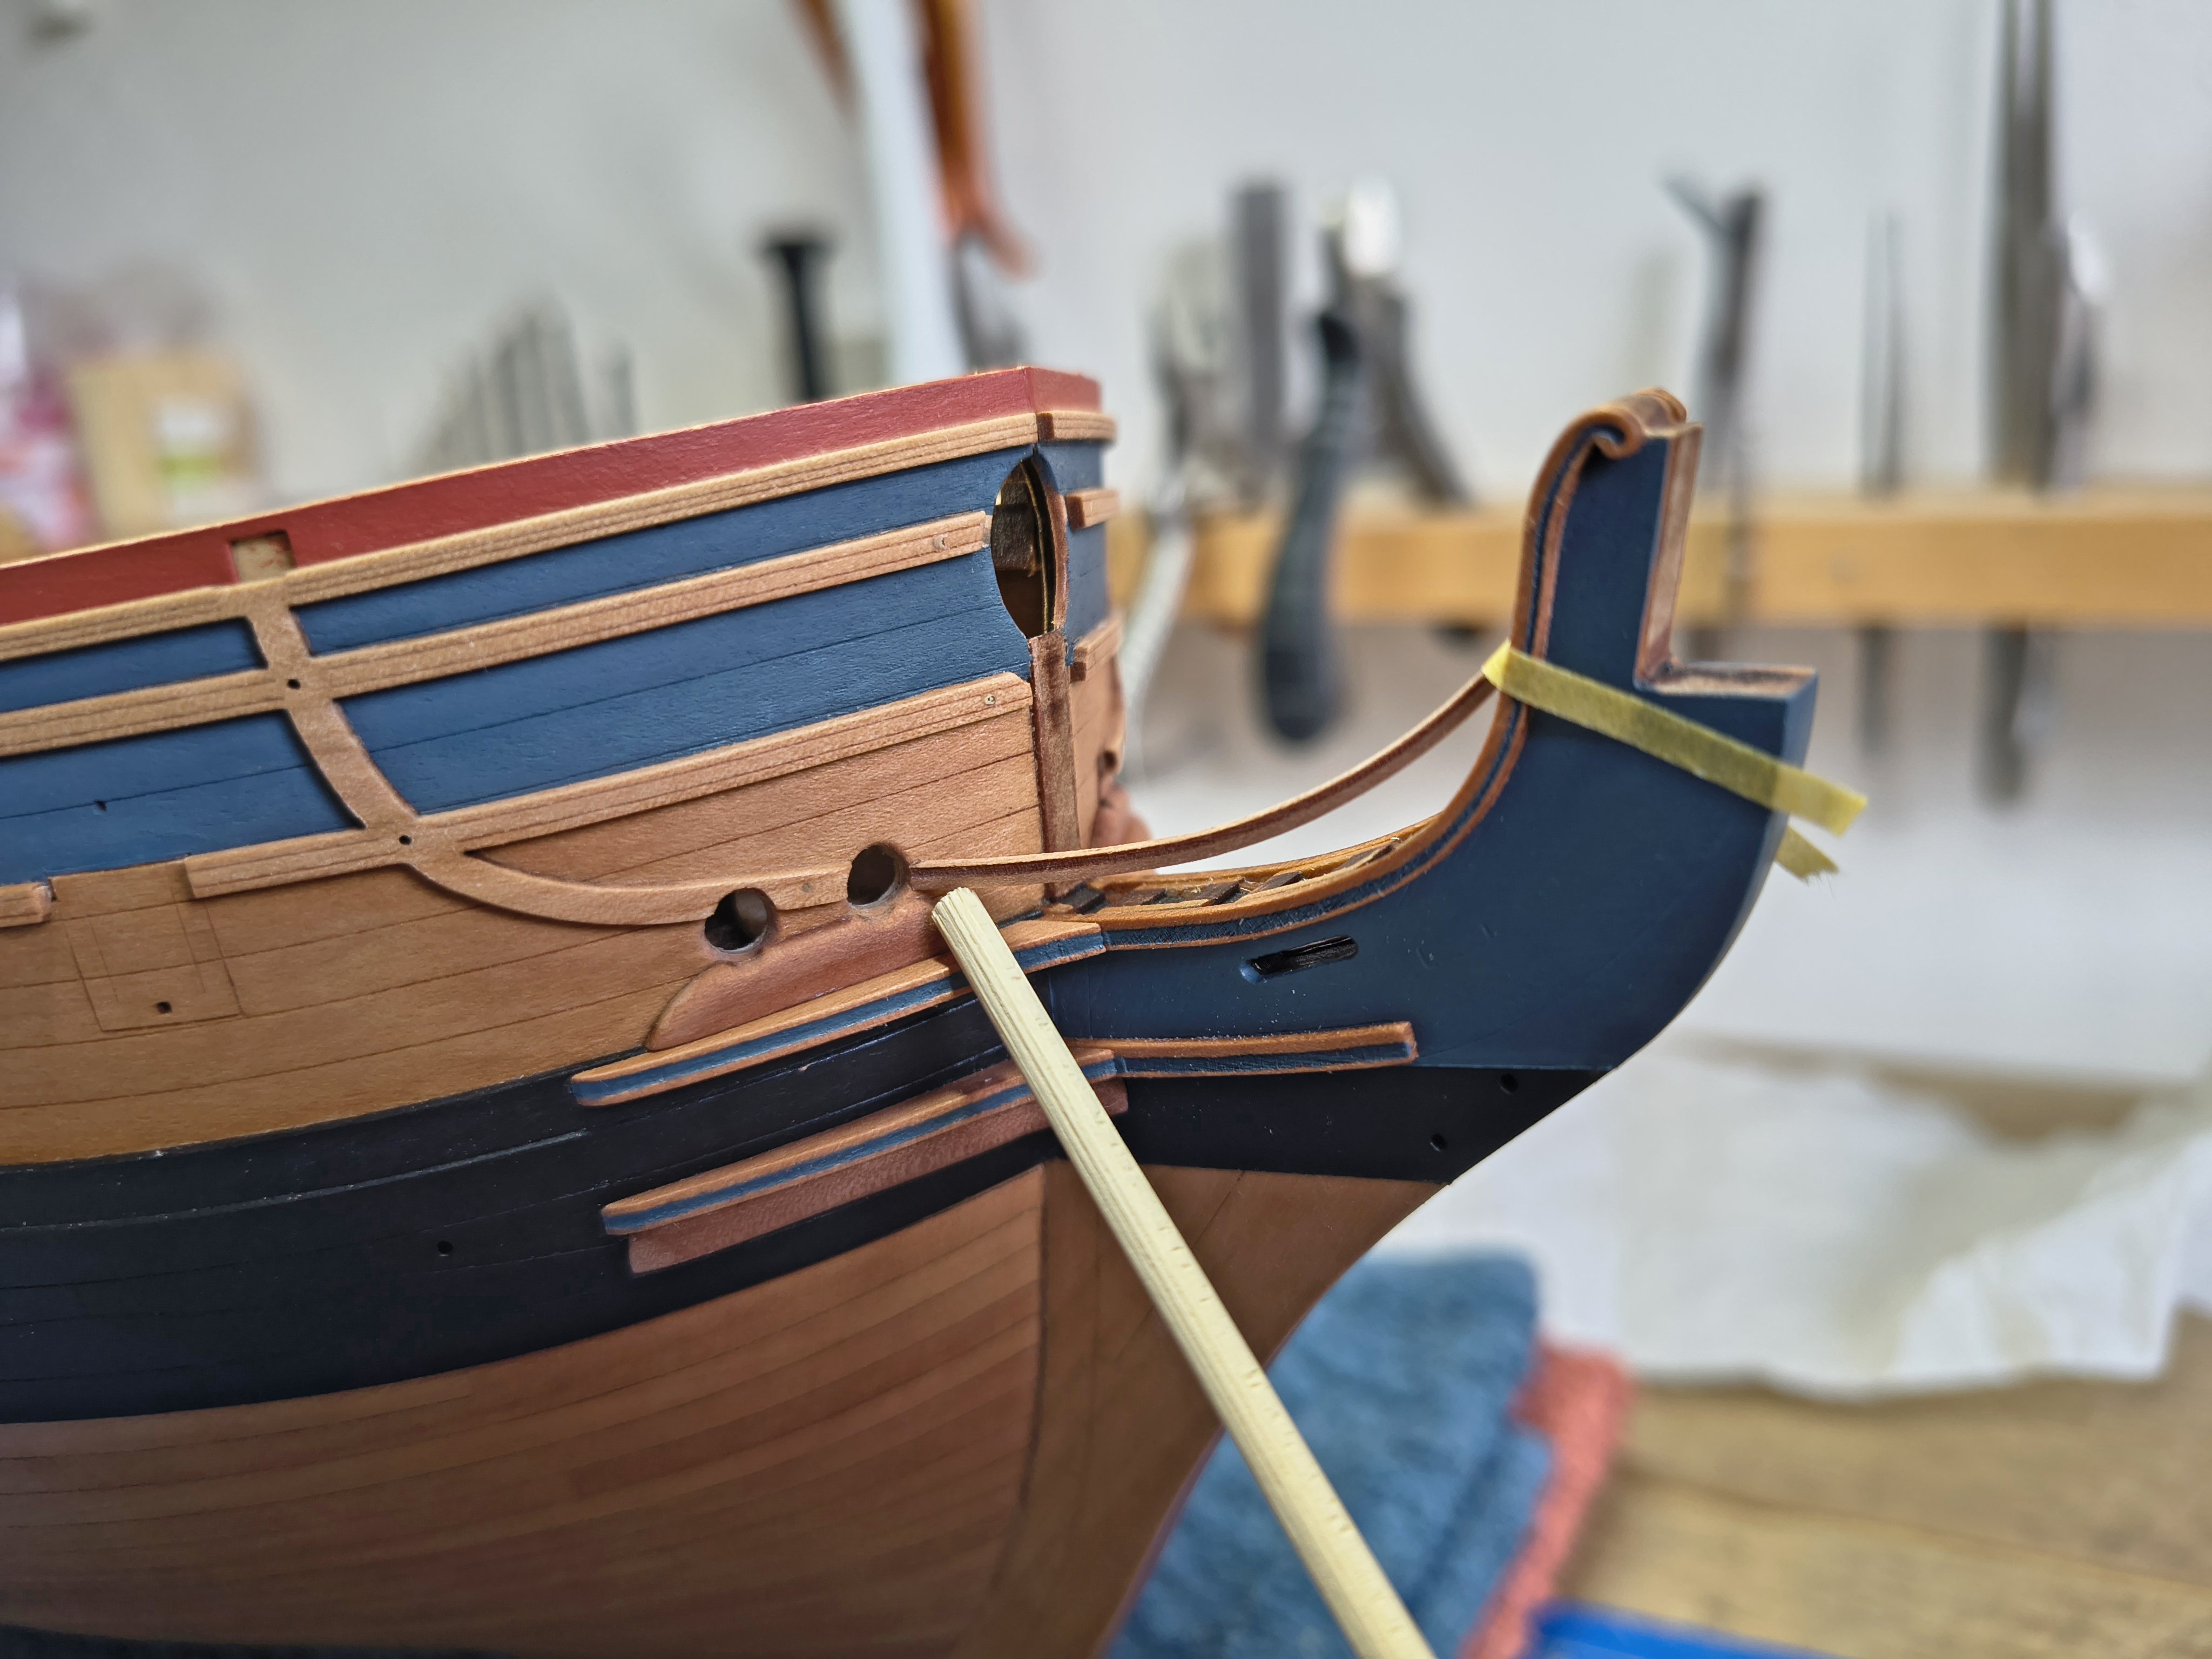
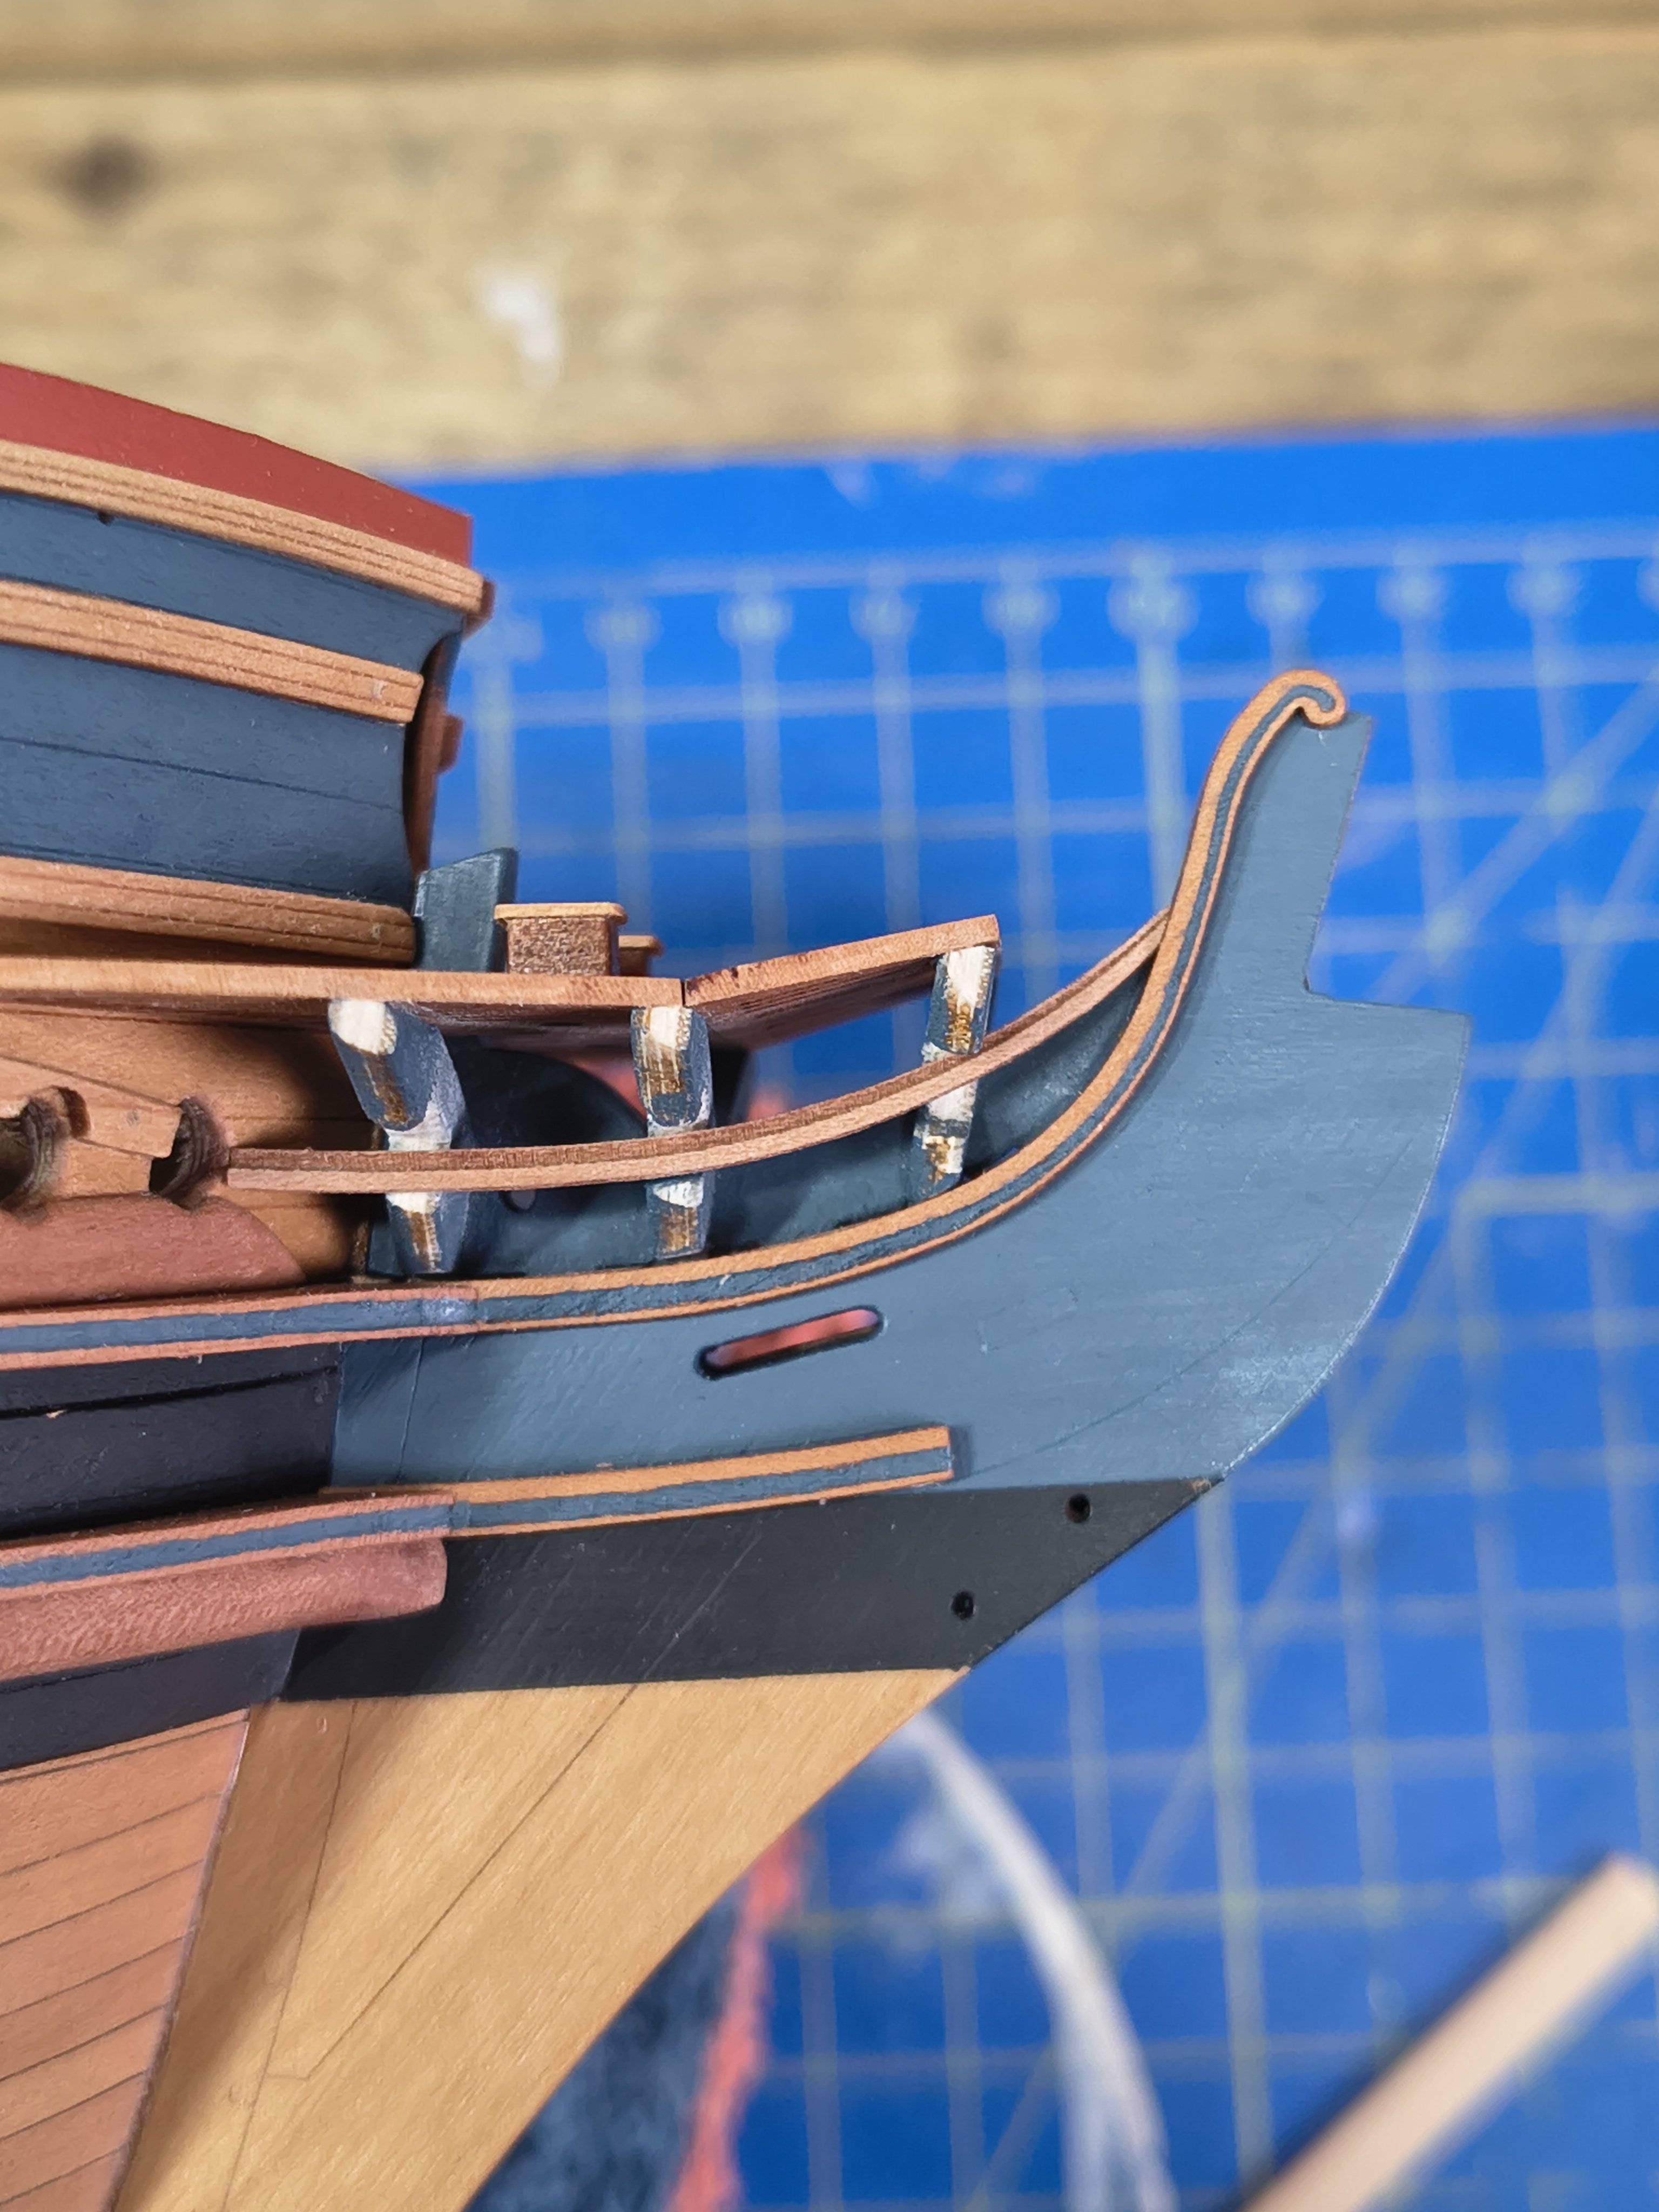
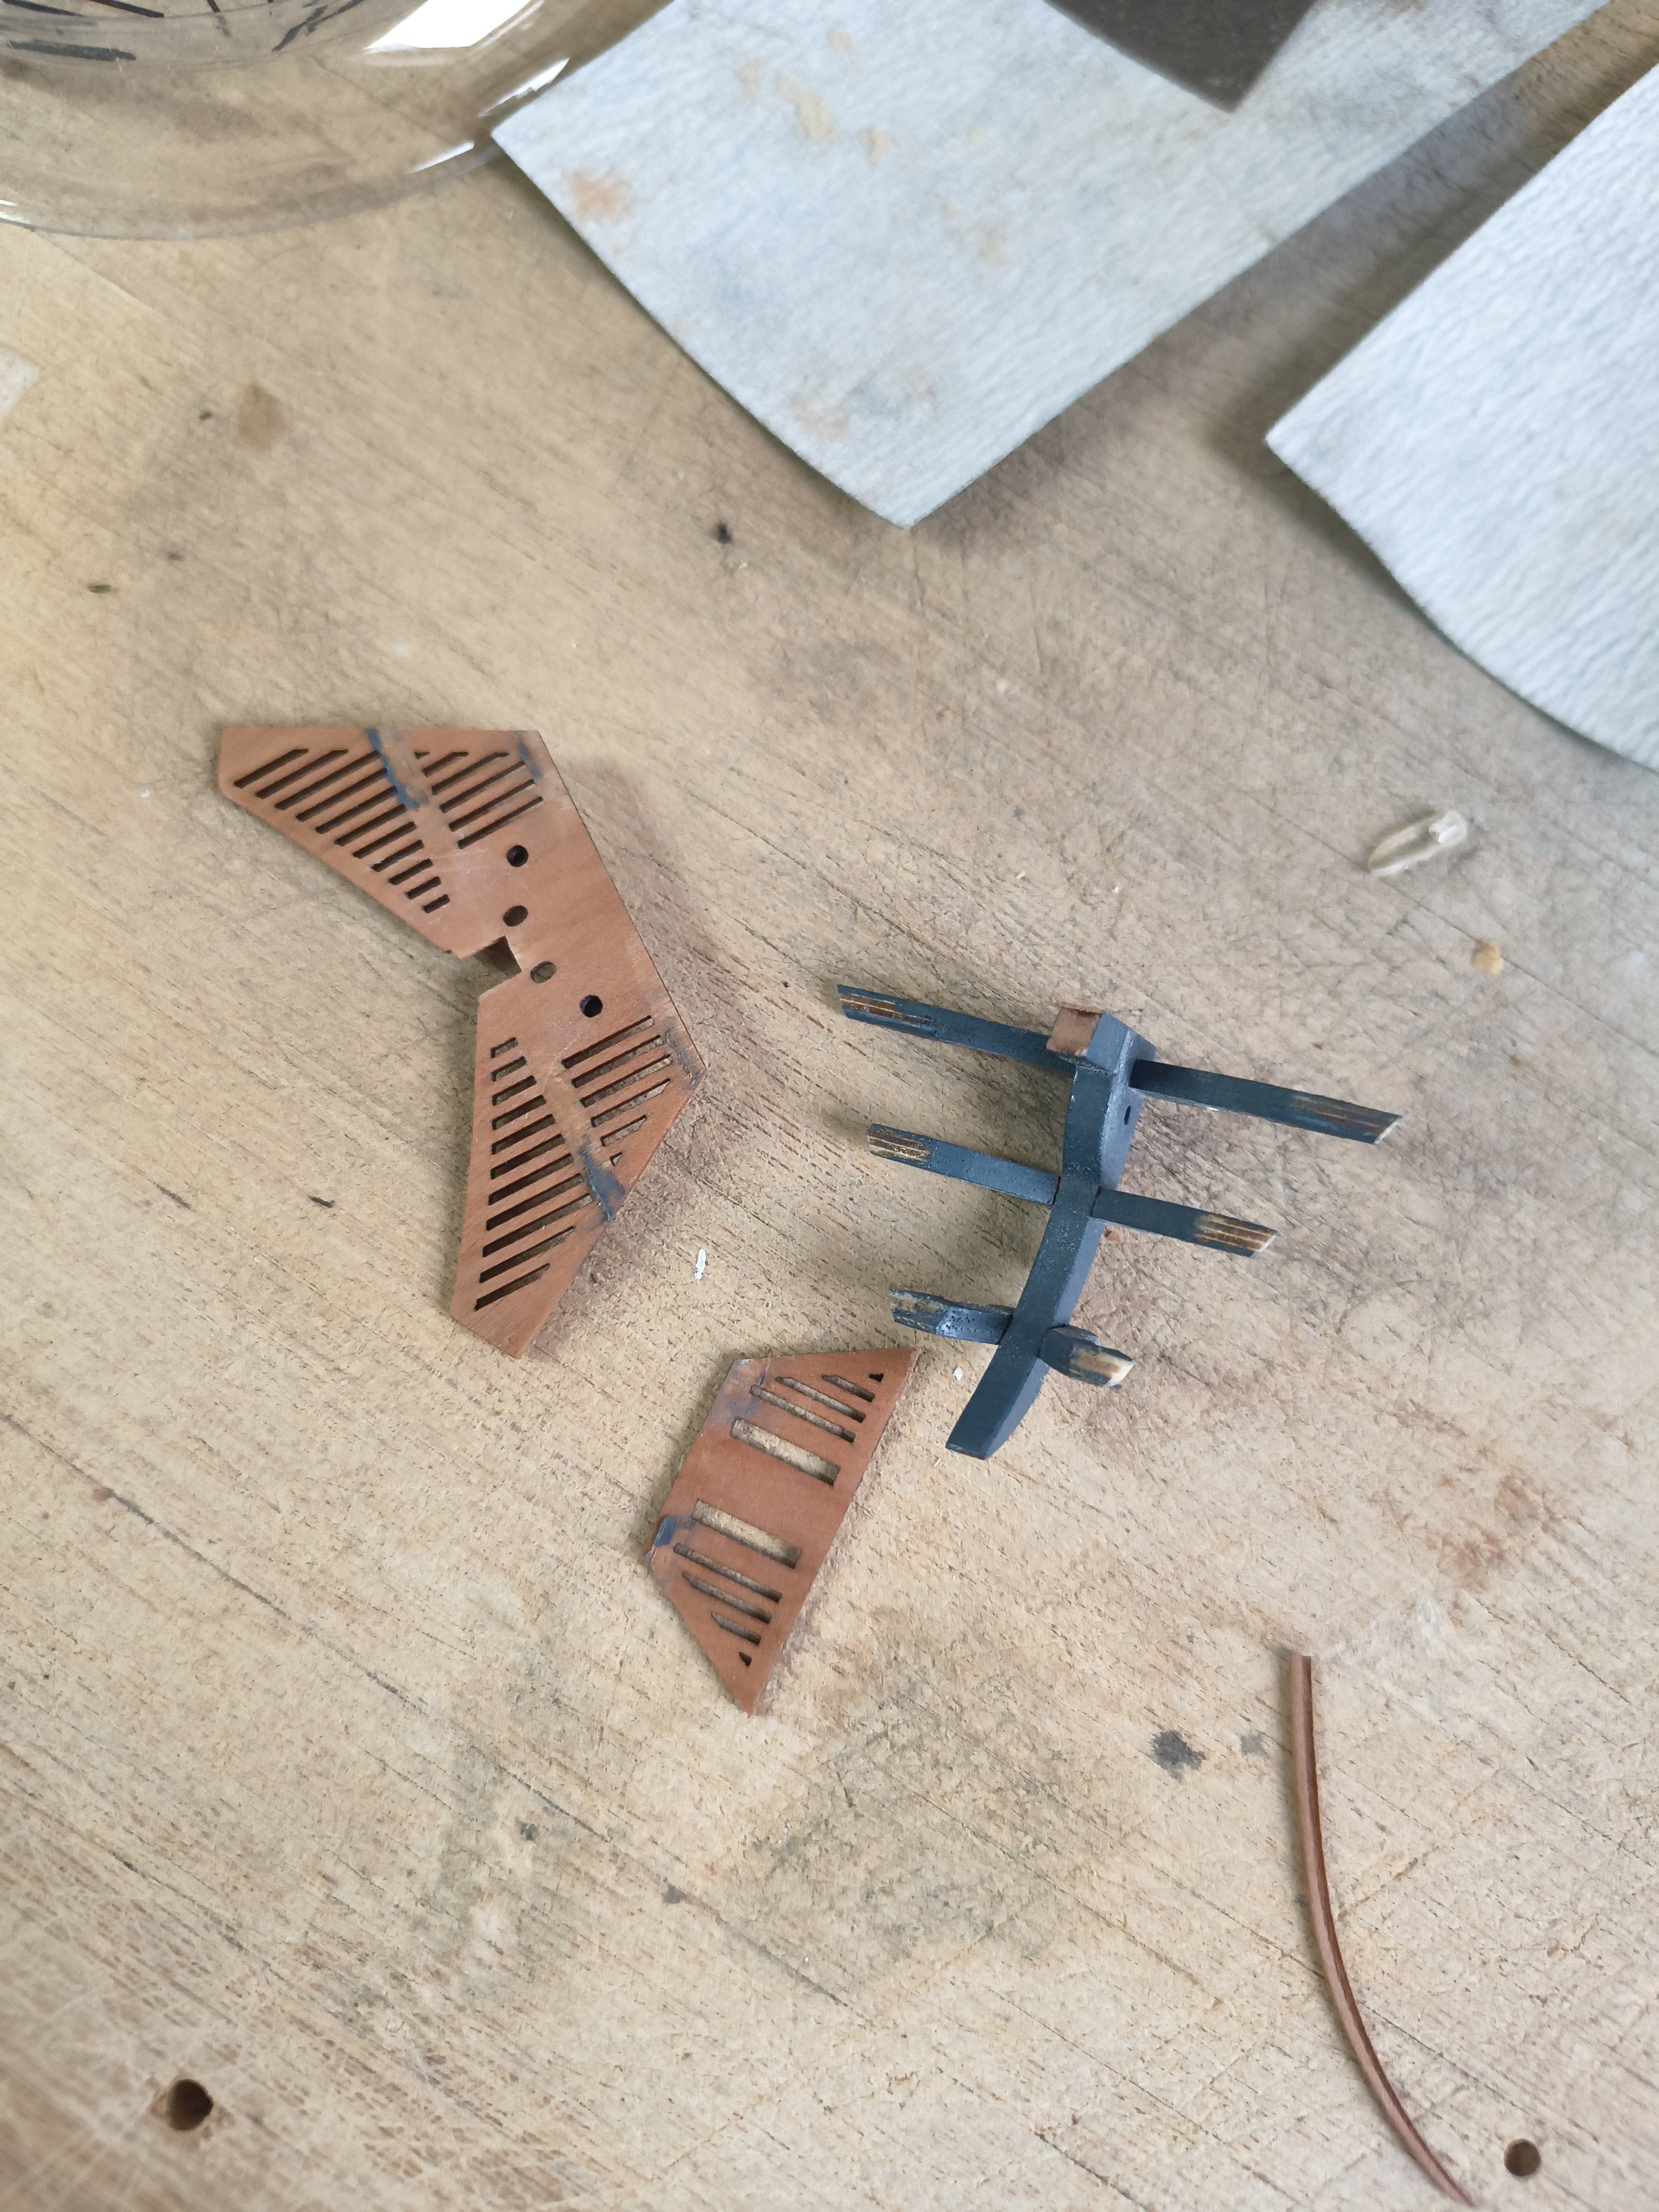
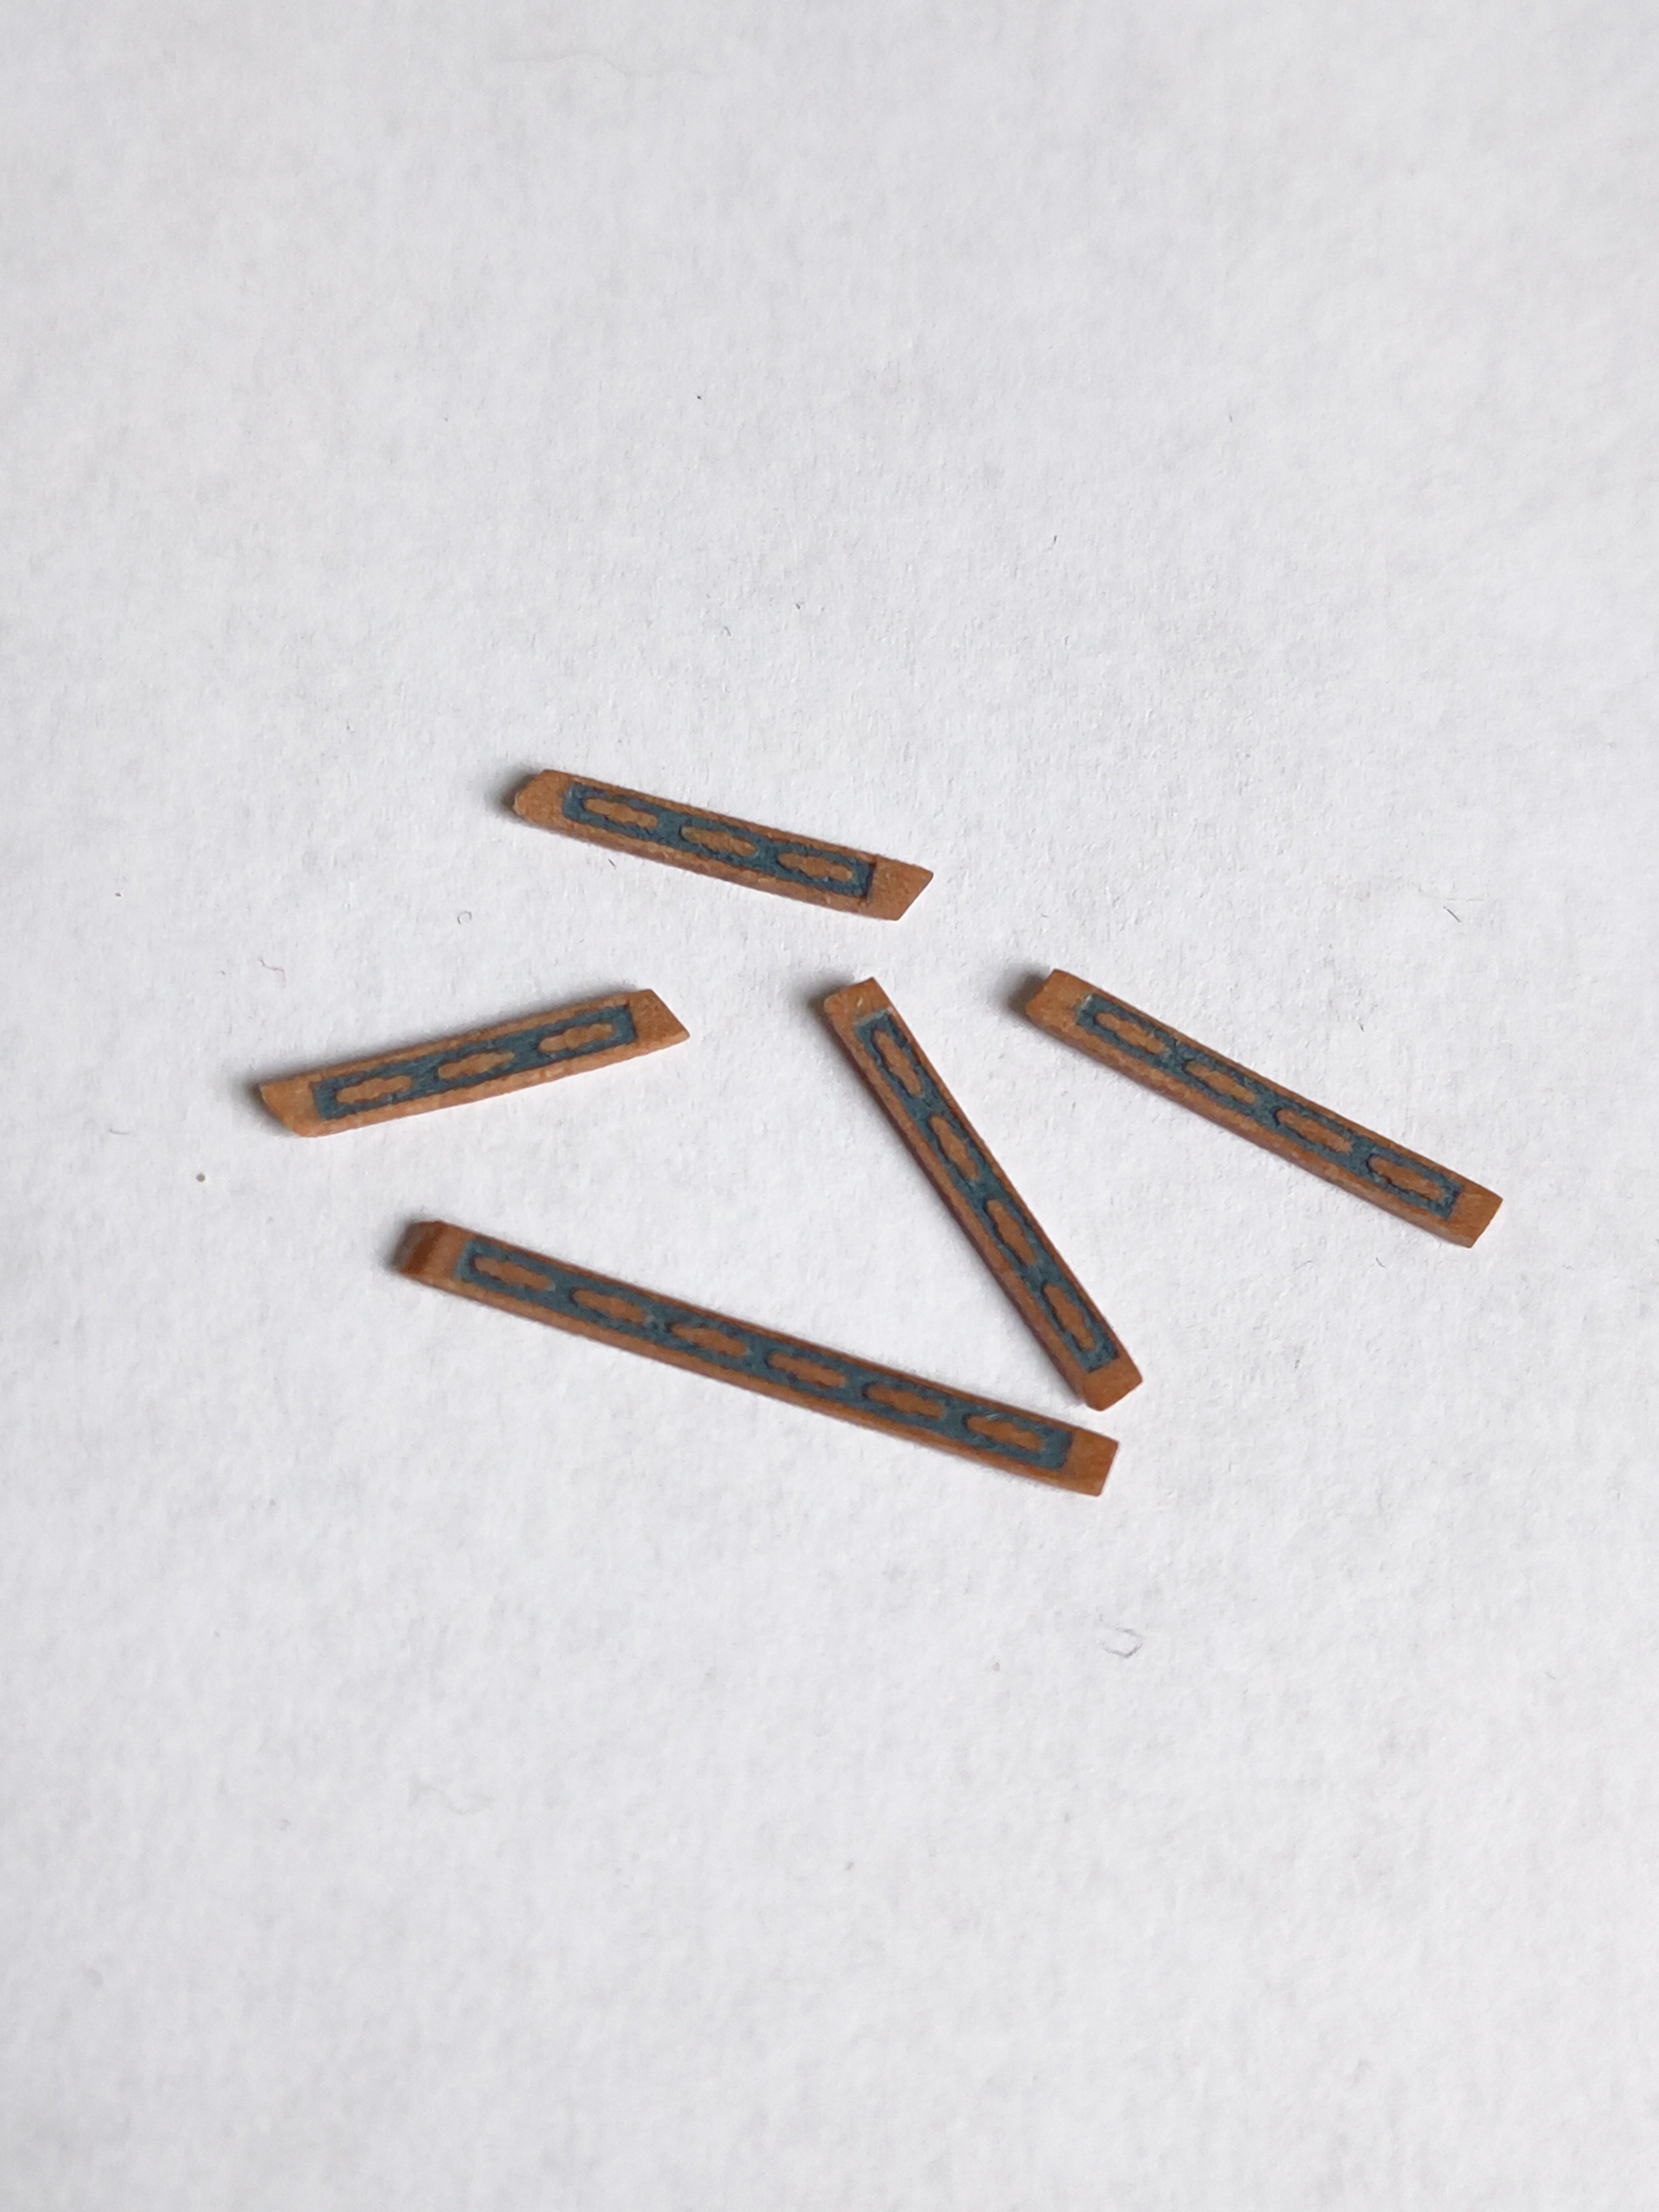
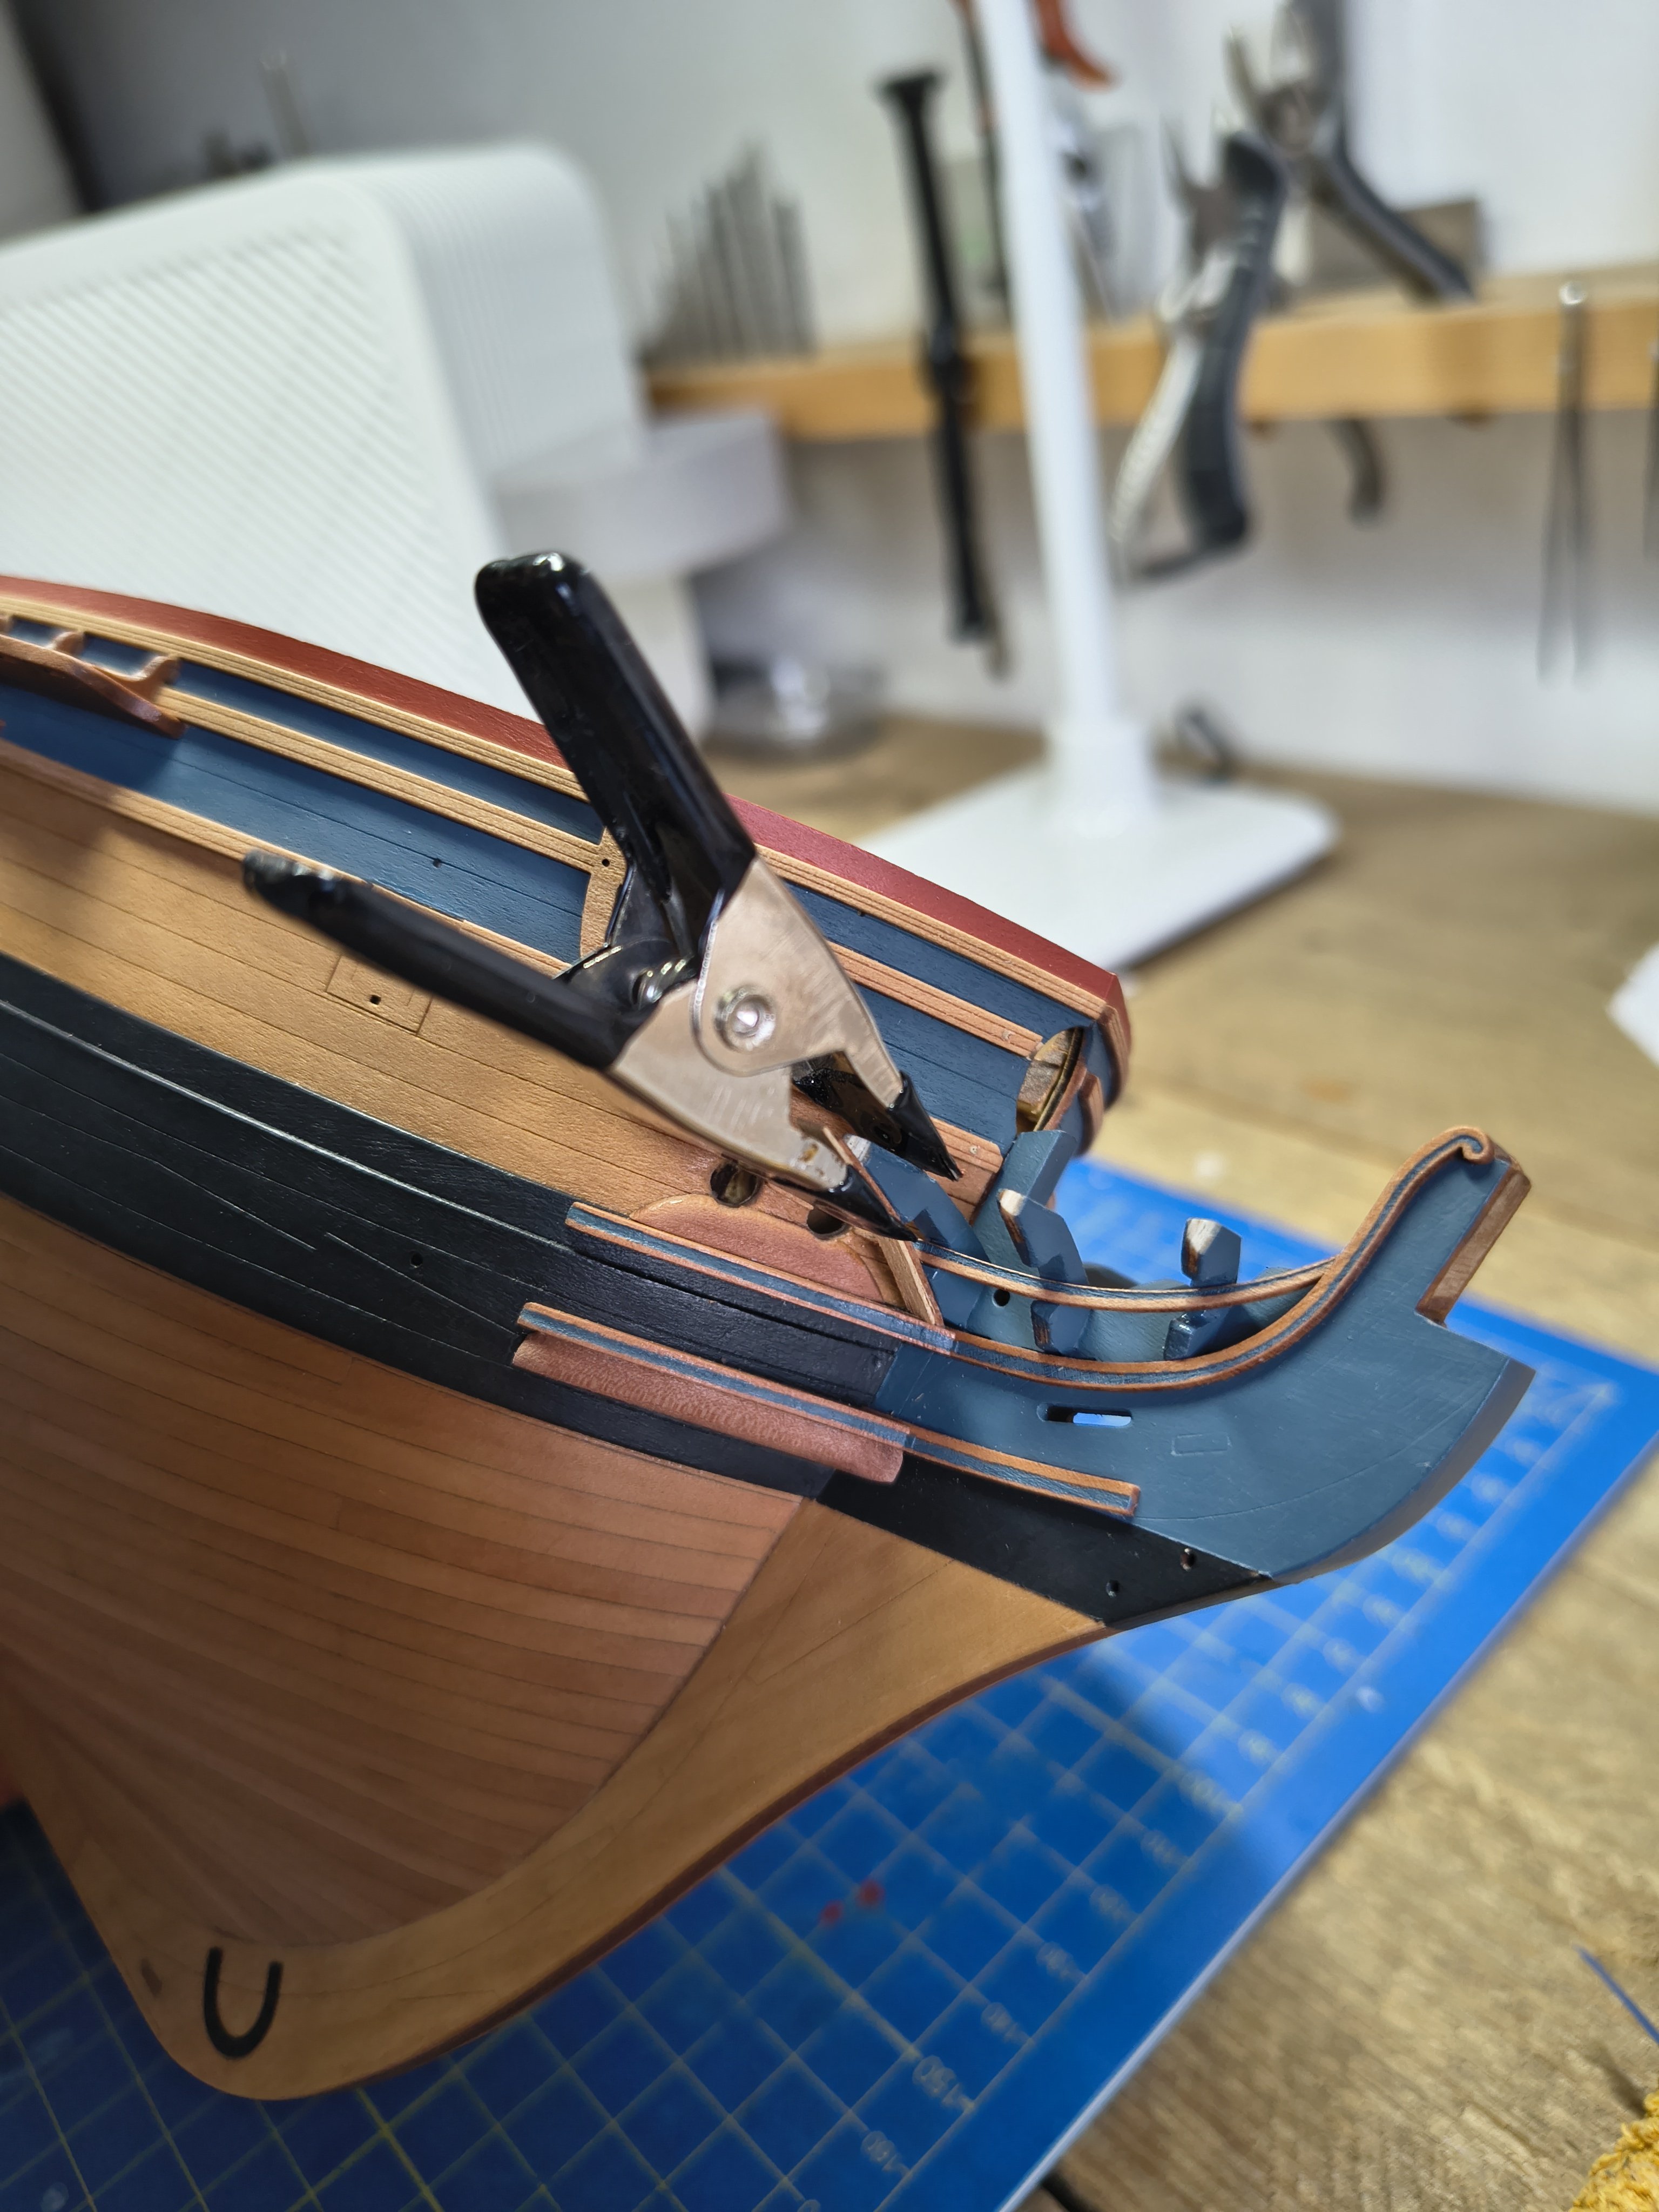
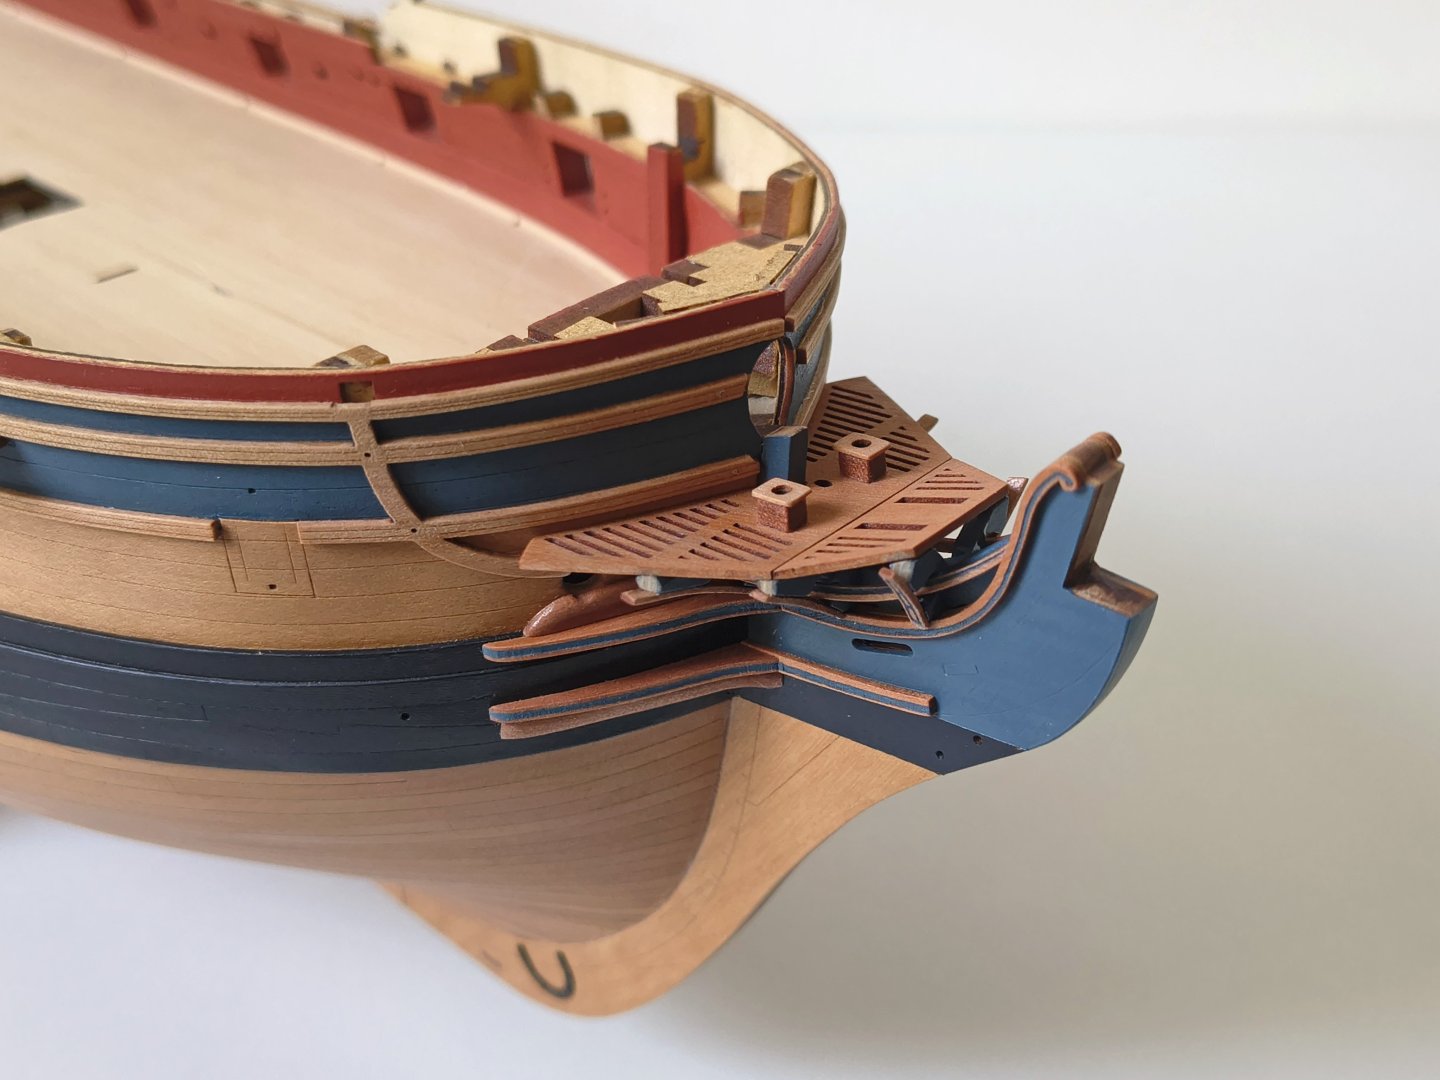
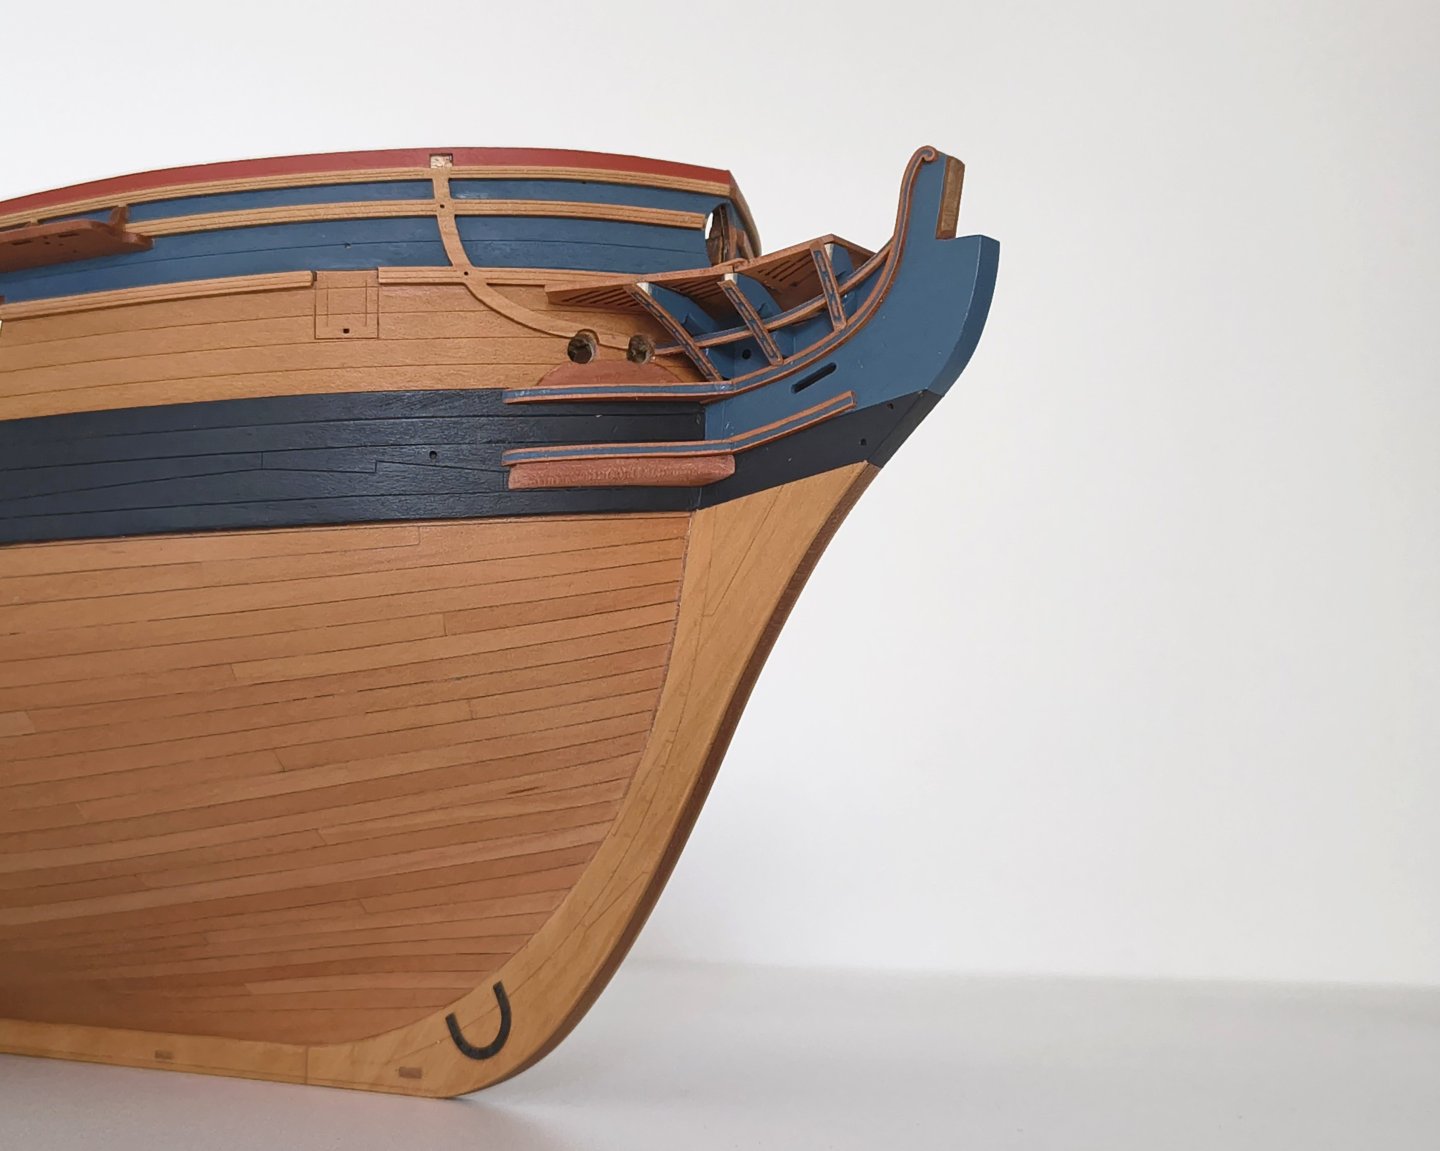
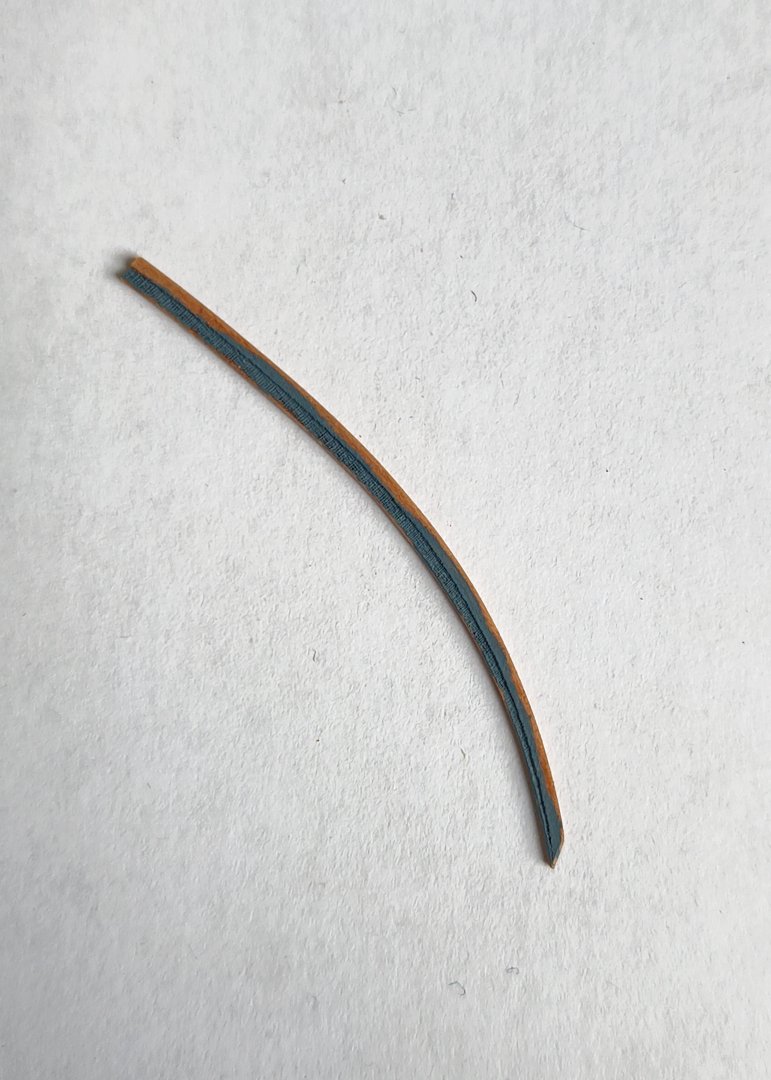
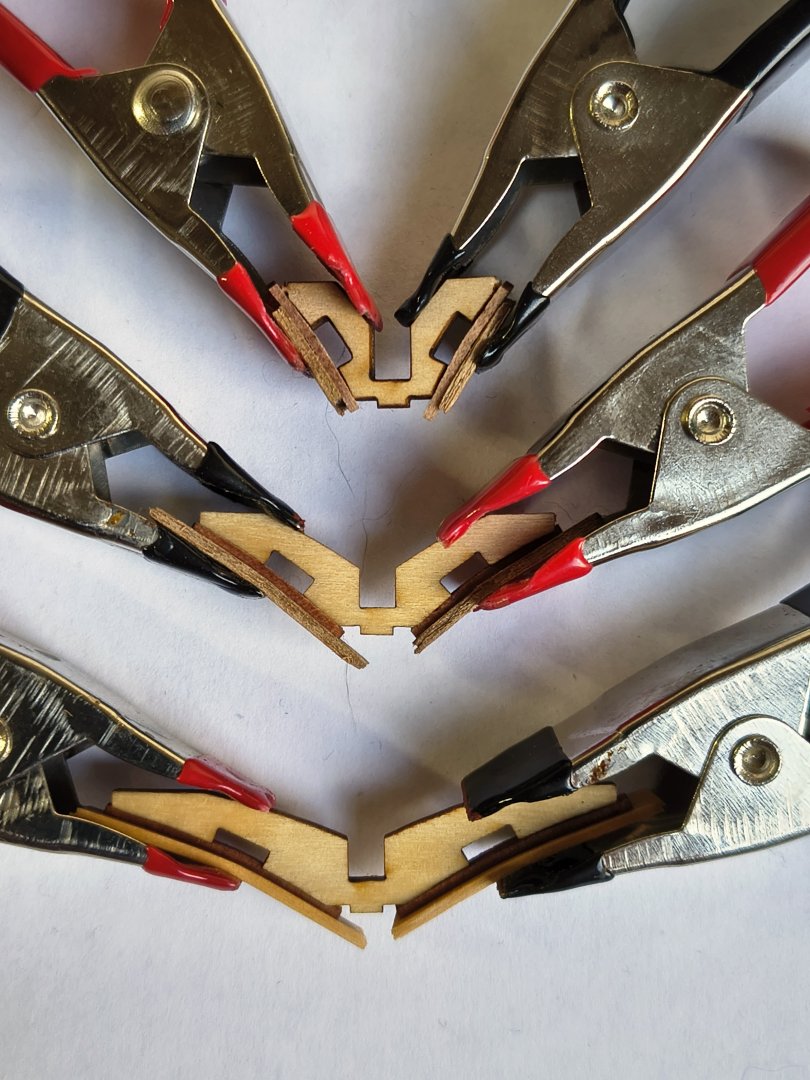
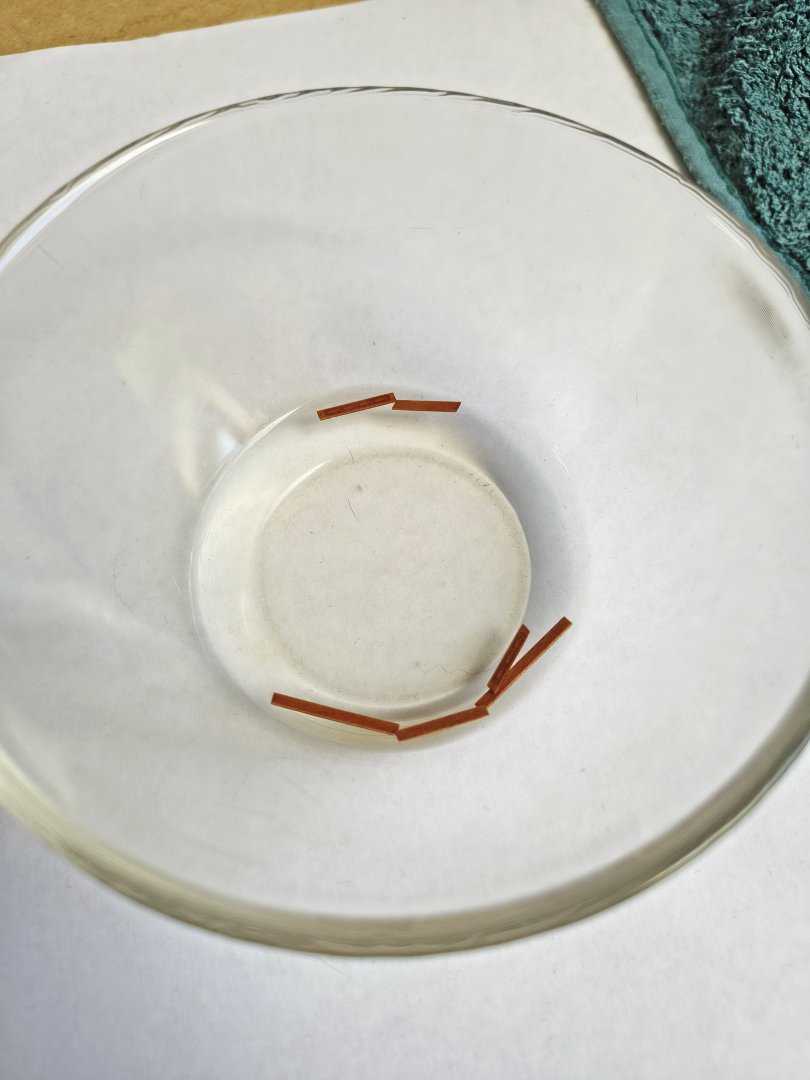
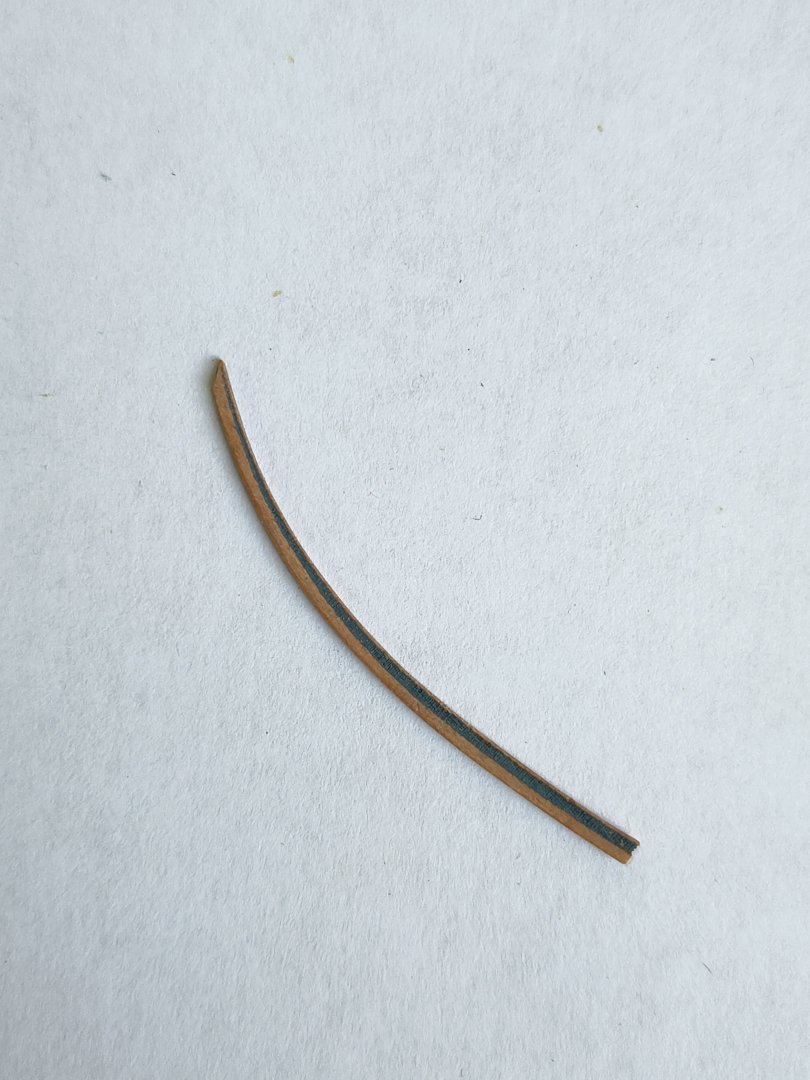
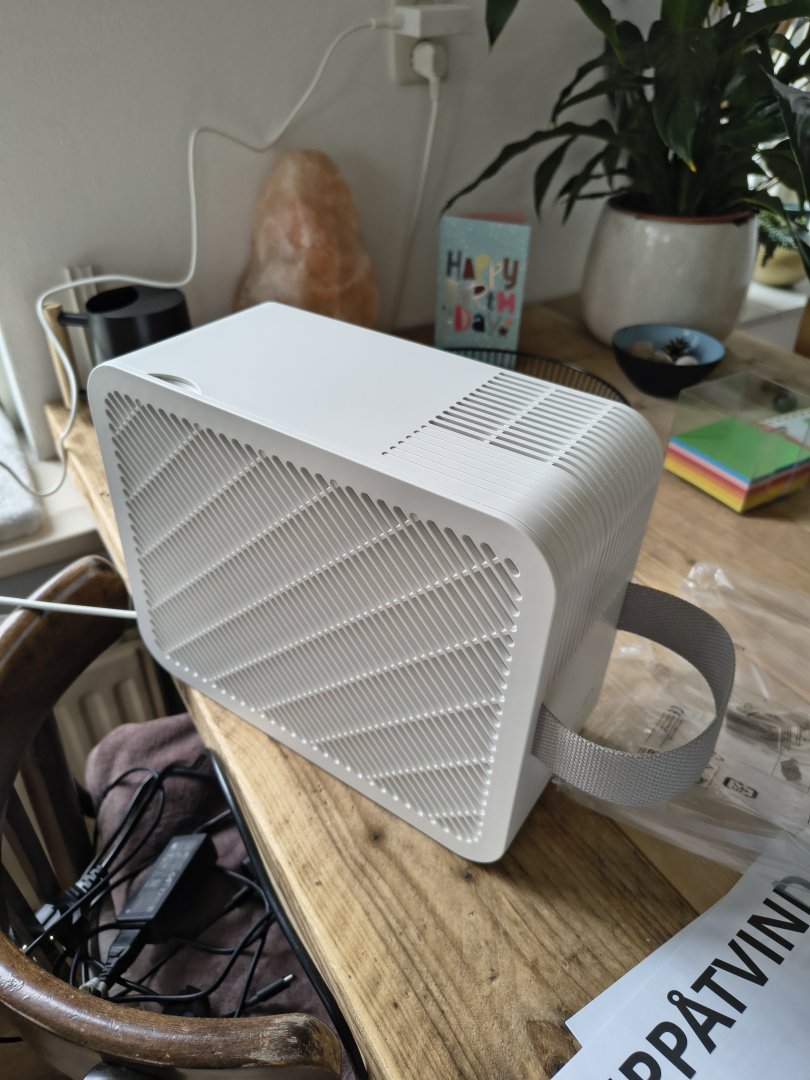
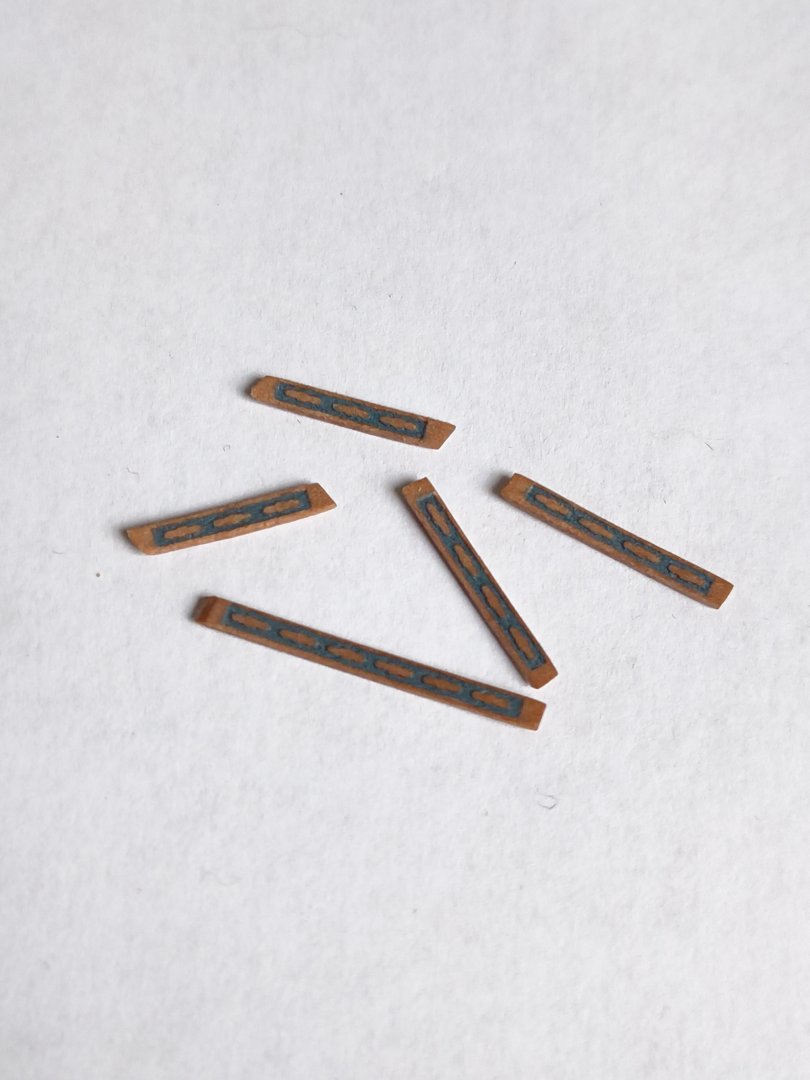
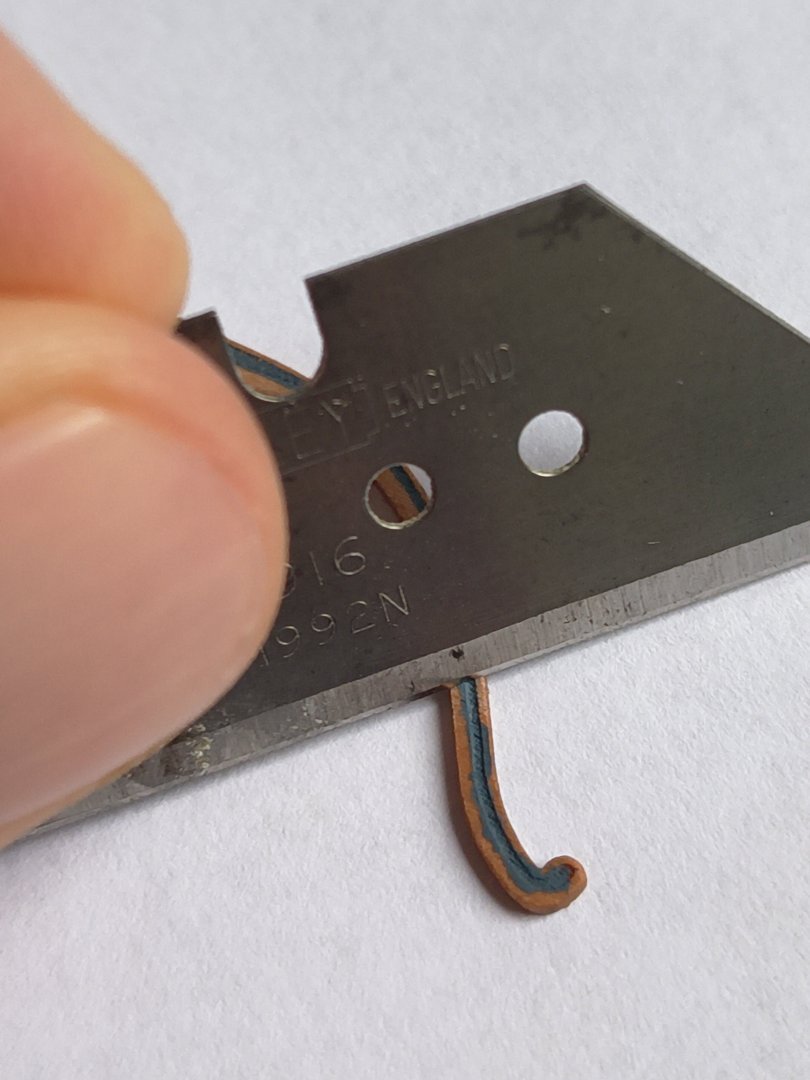
Okay...to follow up on yesterday's update, here are some pictures of the process. The final part of the "Head foundations," as Beef Wellington so nicely called it, revolves around the correct placement of the two "bow lower rails." I first sanded them to size because Chris had left them slightly longer, as every ship is slightly different. This way, without the grating assembly/gammoning knee getting in the way, I could hold the bow lower rails at the start point (inner hawse holes) and end point (tip of the gammoning knee) and cut them to the correct size. (I would recommend leaving them a millimeter longer so you have some extra meat at the last minute if it's just a tad too short.) By the way... I assume there shouldn't be any sideways curves/distortions in these rails, but that's my interpretation of the plans/kit. They might have been in the original, but I think for better flow they should be straight. That's why I've sized them this way. The next step was to file the slots in the V-brackets to size to prevent any sideways deformation of the lower bow rails, reaching the start and end points of the rails on the hull. Again...this is my interpretation; perhaps the original prototype had a slight curve in it...I have no idea So, here and there I had to file the slots a little larger (especially those closest to the hull) so that the rails would actually lie on both sides at the start and end points without putting any tension on them. That's why I had laid the ship on its side here...so the rails would fit in place without any effort. All that filing loosened the glued gratings from the V-brackets, which actually turned out to be a good thing. (I used some rubbing alcohol to loosen them completely.) After everything was cut to size regarding the "lower bow rails," I could paint or varnish all the parts. I'm so glad the parts were lasered because, as you can see, I'm a pretty terrible painter, haha... I found it really difficult to paint the lasered part blue here without going all over the place. In my own defense, though... I'd had too much coffee and had been working out beforehand, haha, which always makes for a less-than-steady hand. I used the same order as with the previous lasered decorations. First, I treated all the raised areas with WOP, so the blue paint wouldn't adhere as well. Then I painted the lower part (the lasered part) blue. Then I scraped everything off the raised part with a knife and gave the scraped area an extra coat of WOP. This creates beautiful, straight lines. In the meantime, I also bought this beautiful dust extractor from Ikea, based on Mike Y's tip. Very happy with it and it has a handy design After I put the gammoning knee with the V-brackets back in place, I glued the lower bow rails with CA. I found this more practical and felt stronger because the contact points were so small. The next step was to install the V-shaped head rail patterns (how does Chris come up with all those names,😆). First, I soaked them in some warm water (about 15 minutes) and then clamped them to the extra set of V-brackets Chris had provided...a second set is very handy (thanks, Chris👍). I'm not sure if pre-soaking was really necessary, since the curve is minimal, but I thought it might help with the gluing afterward. The painting method was in exactly the same order as the "lower bow rails" described earlier. By the way, before painting, I tried sanding the underside of these parts so they fit seamlessly with the lower bow rails. (Not entirely successfully 🥲) Then I glued these parts to the V-brackets. This is where it was helpful that the gratings weren't on top, as this made clamping them until the glue dried very convenient. However, gluing them wasn't easy...it took me several tries to get them reasonably secure. (I think it would be difficult if they came loose later, so I wanted to make sure they were secure.) Of course, lastly, the gratings were glued back in place (with the cute "seats of ease") and that's the end of this chapter... By the way, I haven't sanded the head rail patterns at the top to length yet, as you can see in the photos; they still extend beyond the V-brackets. This is how it looks in the manual, and I saw that they were sanded to size later. I don't think I'll sand them to the correct length until I install the bow main rail. Perhaps that rail will still have some influence on this. Here are some more photos...I'm happy with the final result! I didn't think it was the easiest part of the ship, but it all turned out well. I thought this photo was really cool!


-
For now, Russ, I've painted everything by hand. I'll try airbrushing the photo-etched parts, like the decorations and windows that are in the next chapter. I find these extremely small (and especially smooth) parts really difficult to paint with a brush, covering them evenly without creating a thick, lumpy finish. Wood absorbs...so applying a few relatively thin coats with a brush will give you a nice, even layer. (It's important to use the right brush for this, though.) I blackened the black metal parts that are already on the ship with a special liquid. That's given a quite nice finish too
-
Yes then I understand correctly and yes they are lasercut, so I think that would be difficult to replicate. Perhaps with some kind of paper template that you can cut out after printing and then use as a template. But I'm afraid that would be very difficult at the scale you're building. Unless you're a gifted painter...then you could try it by hand. 😱
-
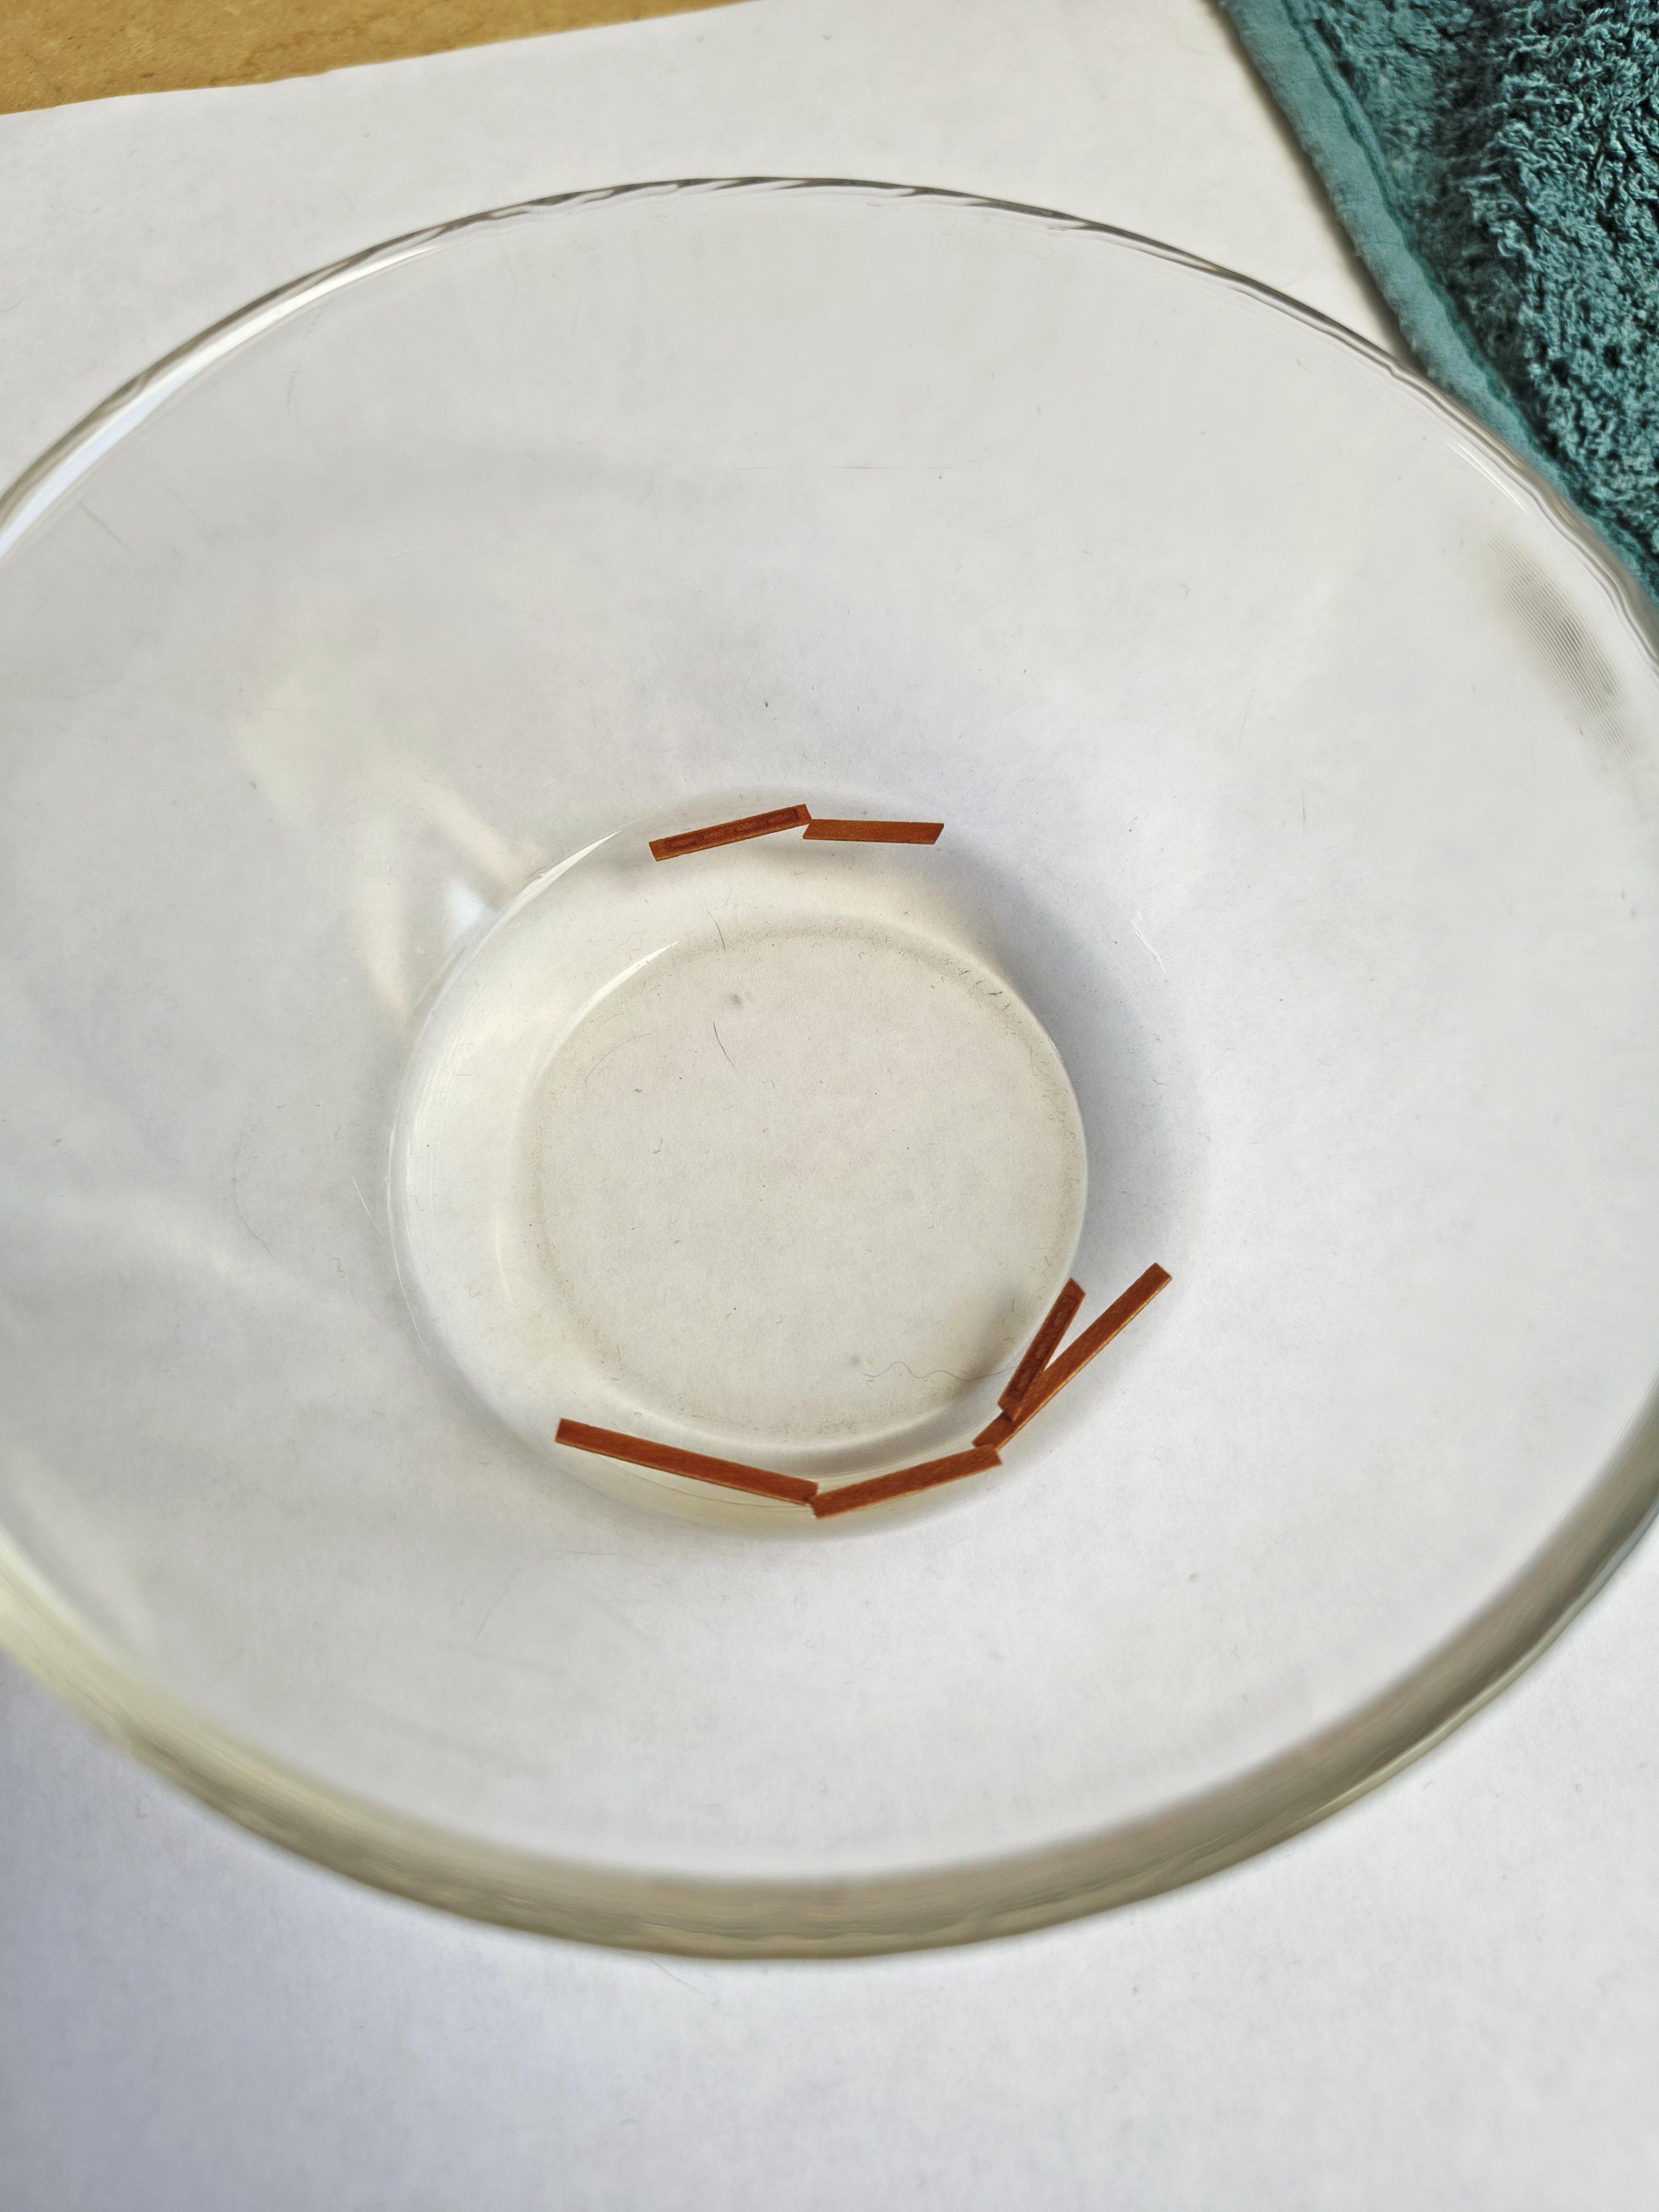
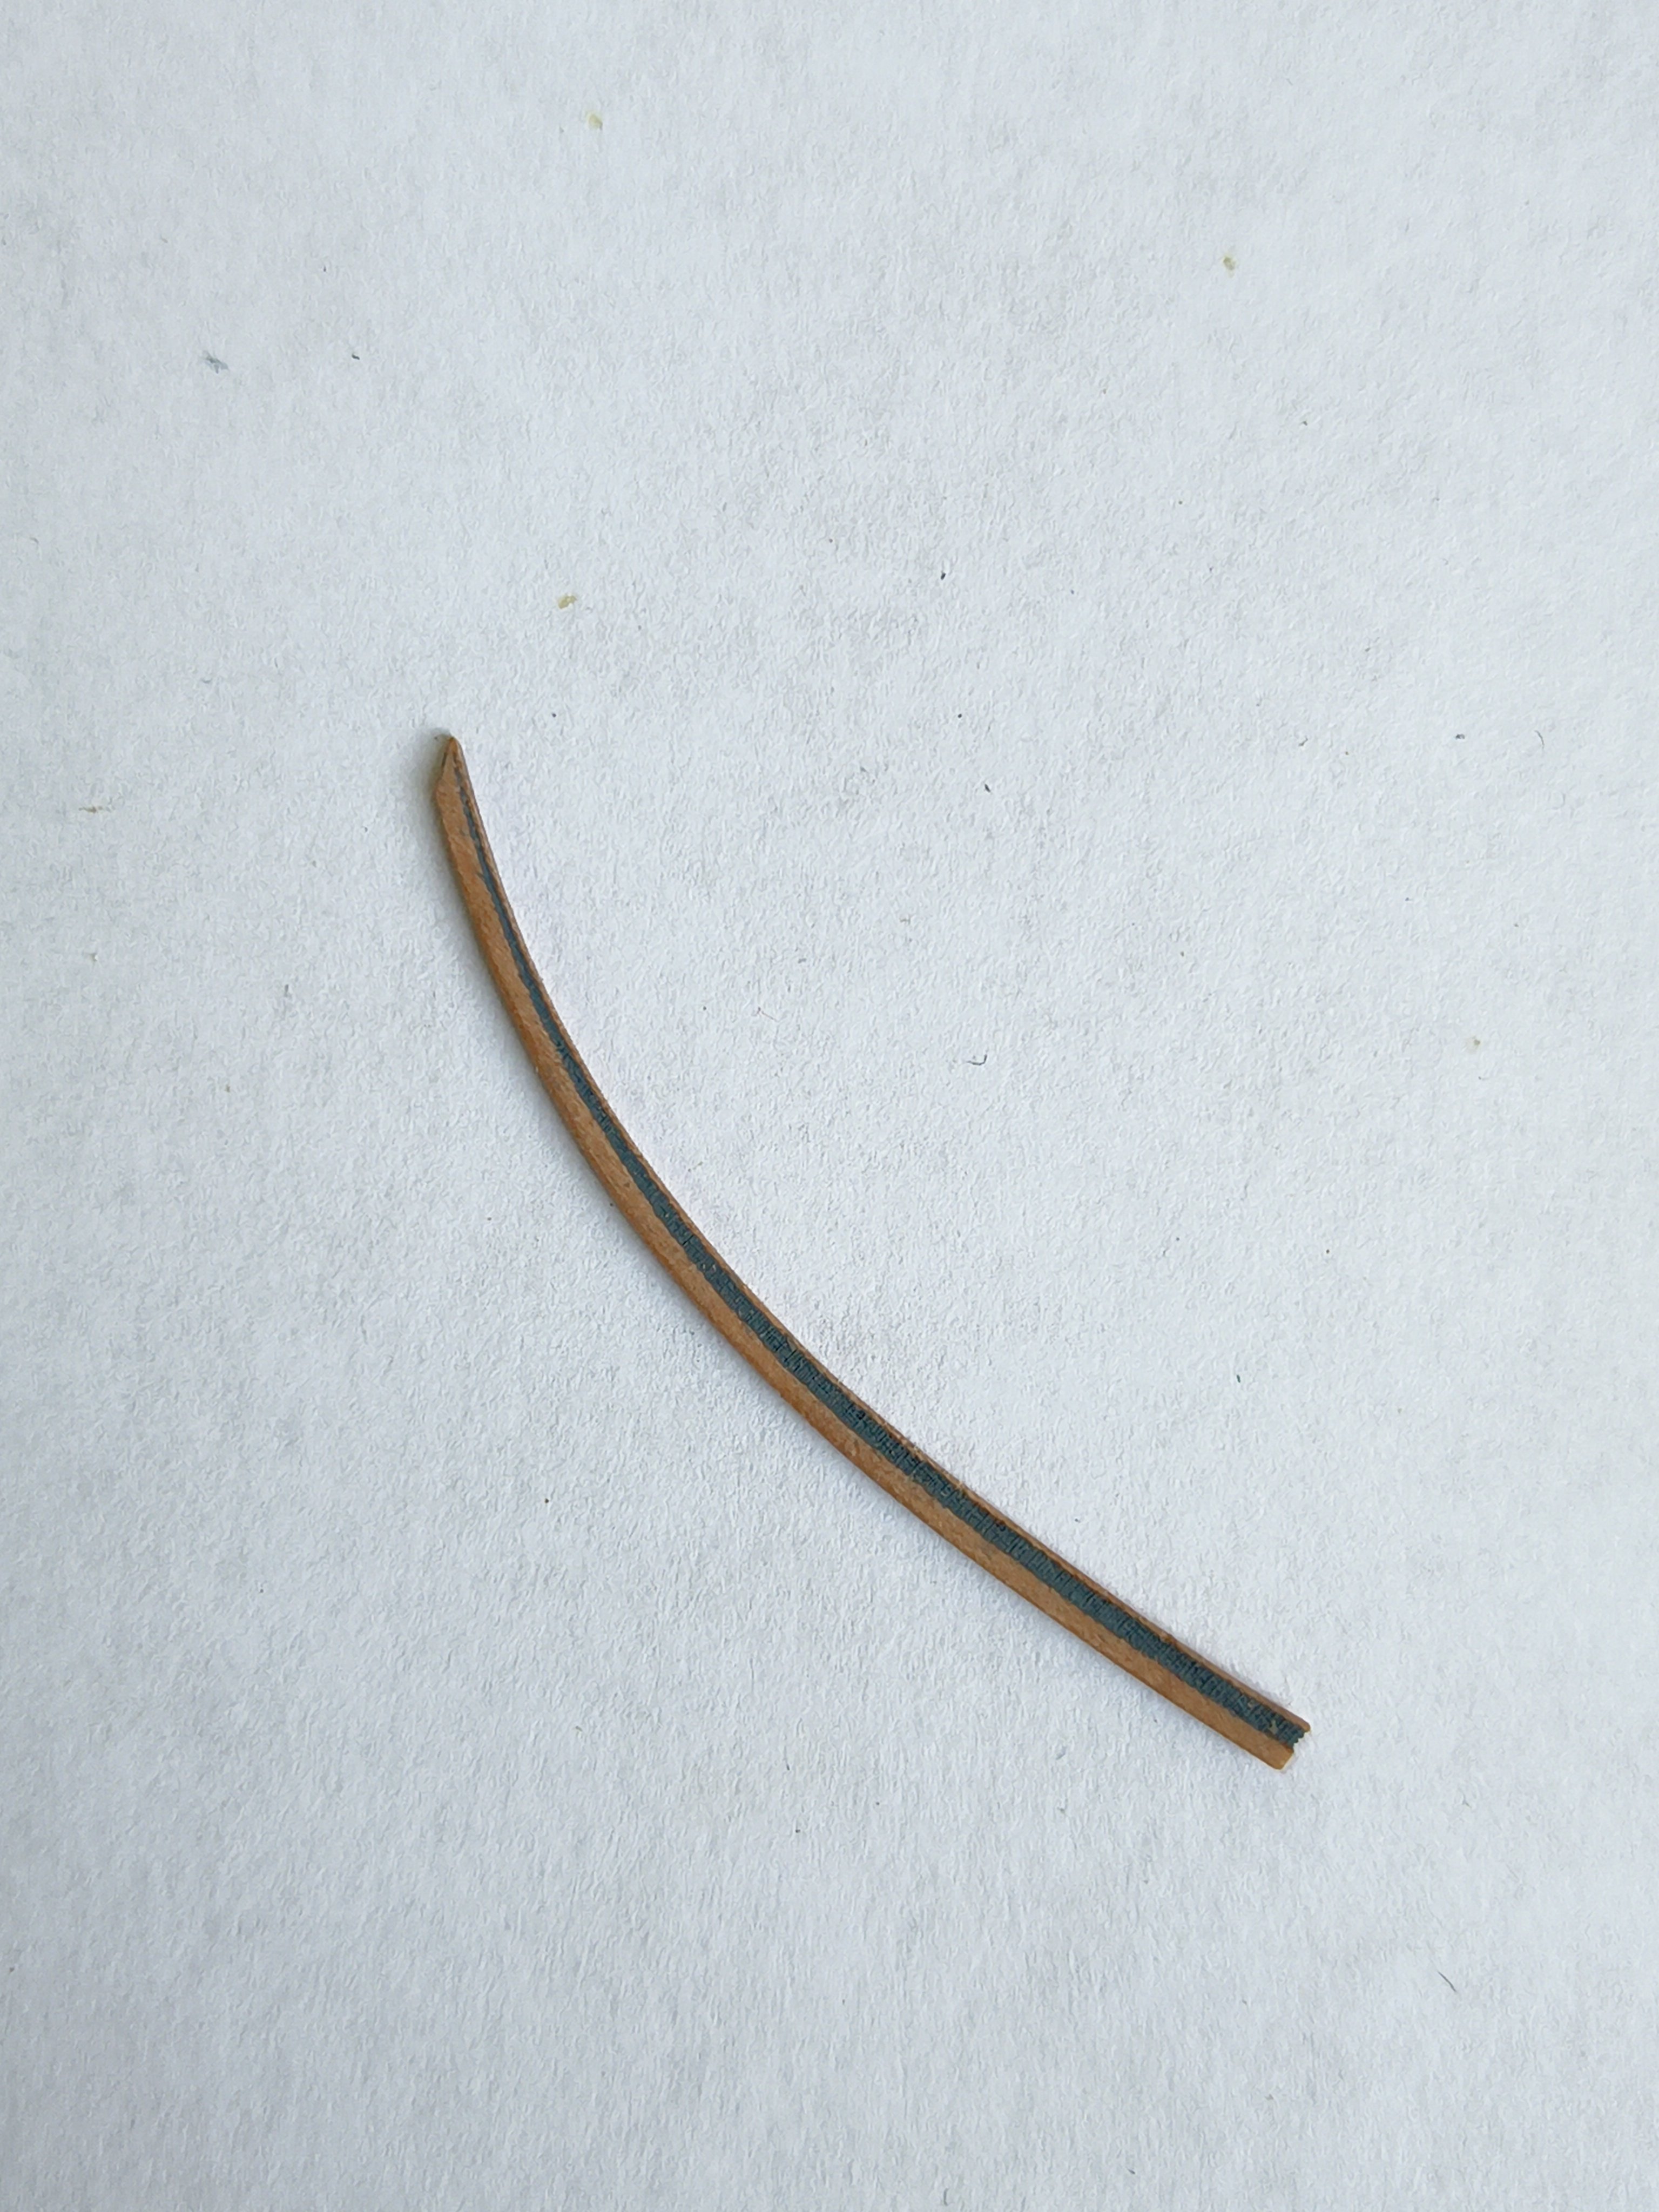
I hope I understood your question correctly...it's still early haha, otherwise just let me know. These are lasered. Chris Watton is responsible for that (part of the kit decoration). The only thing I did was paint the lower part (which was burned away by the laser) blue. Of course, I can't paint that neatly, but I was able to scrape off any paint that ended up on the higher part with a knife. Like this:
-
Your comment shows that we really are our own worst critics...because your head supports etc. look really, really good! But ofcourse thanks for your generous compliment, I really appreciate it! Not exactly sure what Imagine and Grok 4 is, but I asume it has something to do with filming? I made this with my phone...saw a friend of mine post nice little reels of her creative stuff and she did everything on her phone. And just recently I bought a better phone then I had with all the editing stuff on it (music and such). It's all very basic stuff, but fun to add and a bit different than a photo So much thanks for your compliment Frecap! I really wouldn't call myself a master (that are some others here on the forum are in my eyes) But I'm glad you can get something out of it. Everyone else thank you so much for the likes 🙏
-
Thanks Mark! Really enjoying your work with the "Le Rochefort", such an inspirational build log 👍
-
This chapter is finally finished! Of course, not all the parts that will be added are in place yet, but the manual now continues with other sections of the ship. A more detailed update with photos will follow tomorrow. Maybe not entirely clear...below is a reel/film, you can press play VID_20251106_152227616~2.mp4
-
Thanks, Gregory for your detailed explanation! It's pretty clear how everything works, but just like in Chuck's rope walk videos... I think I'll only see if I have more questions once I actually try it. It seems like something you really need to try to see if I've got it all figured out. But I definitely understand the basics now. And you really used materials you can find anywhere, like Lego gears...perfect! Again, thanks for explaining, will bookmark this for when I need it! 🙏
-
I agree with Russ! Very helpful, LoydB, thanks!
-
Info is always welcome ofcourse, if it's not too much trouble. Also handy for other forum members. Your homemade rope looks great! And 48inch sounds a bit more like a realistic length for me haha, in Europe the houses are for a lot of people a bit smaller then the American ones
-
Don't you need quite a large room/table for using the ropewalk? That would be a problem for me...not yet at the point of needing the rope for the Sphinx, but something that i'm considering.
-
Nice start! Enjoy the process!