Ronald-V
-
Posts
1,780 -
Joined
-
Last visited
Content Type
Profiles
Forums
Gallery
Events
Everything posted by Ronald-V
-
Welcome! And a nice build already!
-
 Man...lightning speed! 👍
 -
Thanks Mark! 🙏 Thank you! They're pre-mixed colors (thankfully), so it's just much more convenient to have a large quantity on hand. I'm very happy I found these colors. Incidentally, I don't mind mixing them myself, but for these larger projects, it's more convenient to have some pre-mixed colors. Colors I use for the black are "matt metal black" or "Ironwork black" is it called now from Jotika/Admiralty colors. And the blue is "Tamiya Medium blue XF-18". I had seen them on the HMS Diana built by Beef Wellington here on the forum (worth a look)
-
HMS Victory by ECK - OcCre - 1/87
Ronald-V replied to ECK's topic in - Kit build logs for subjects built from 1751 - 1800
They look really, really small! Nice job! -
Thanks Nearshore! And also everyone else who gave a like, really appreciating it!
-
To be honest...I just sanded much better then before. The first time I painted it (when it failed) I barely sanded it, but the second time I sanded it much more thorough, and also between each layer (the black needed 5 layers 😬). Maybe is pre-treatment the wrong chosen term. I could also use primer ofcourse, but find this with most acrylics not necessary.
-
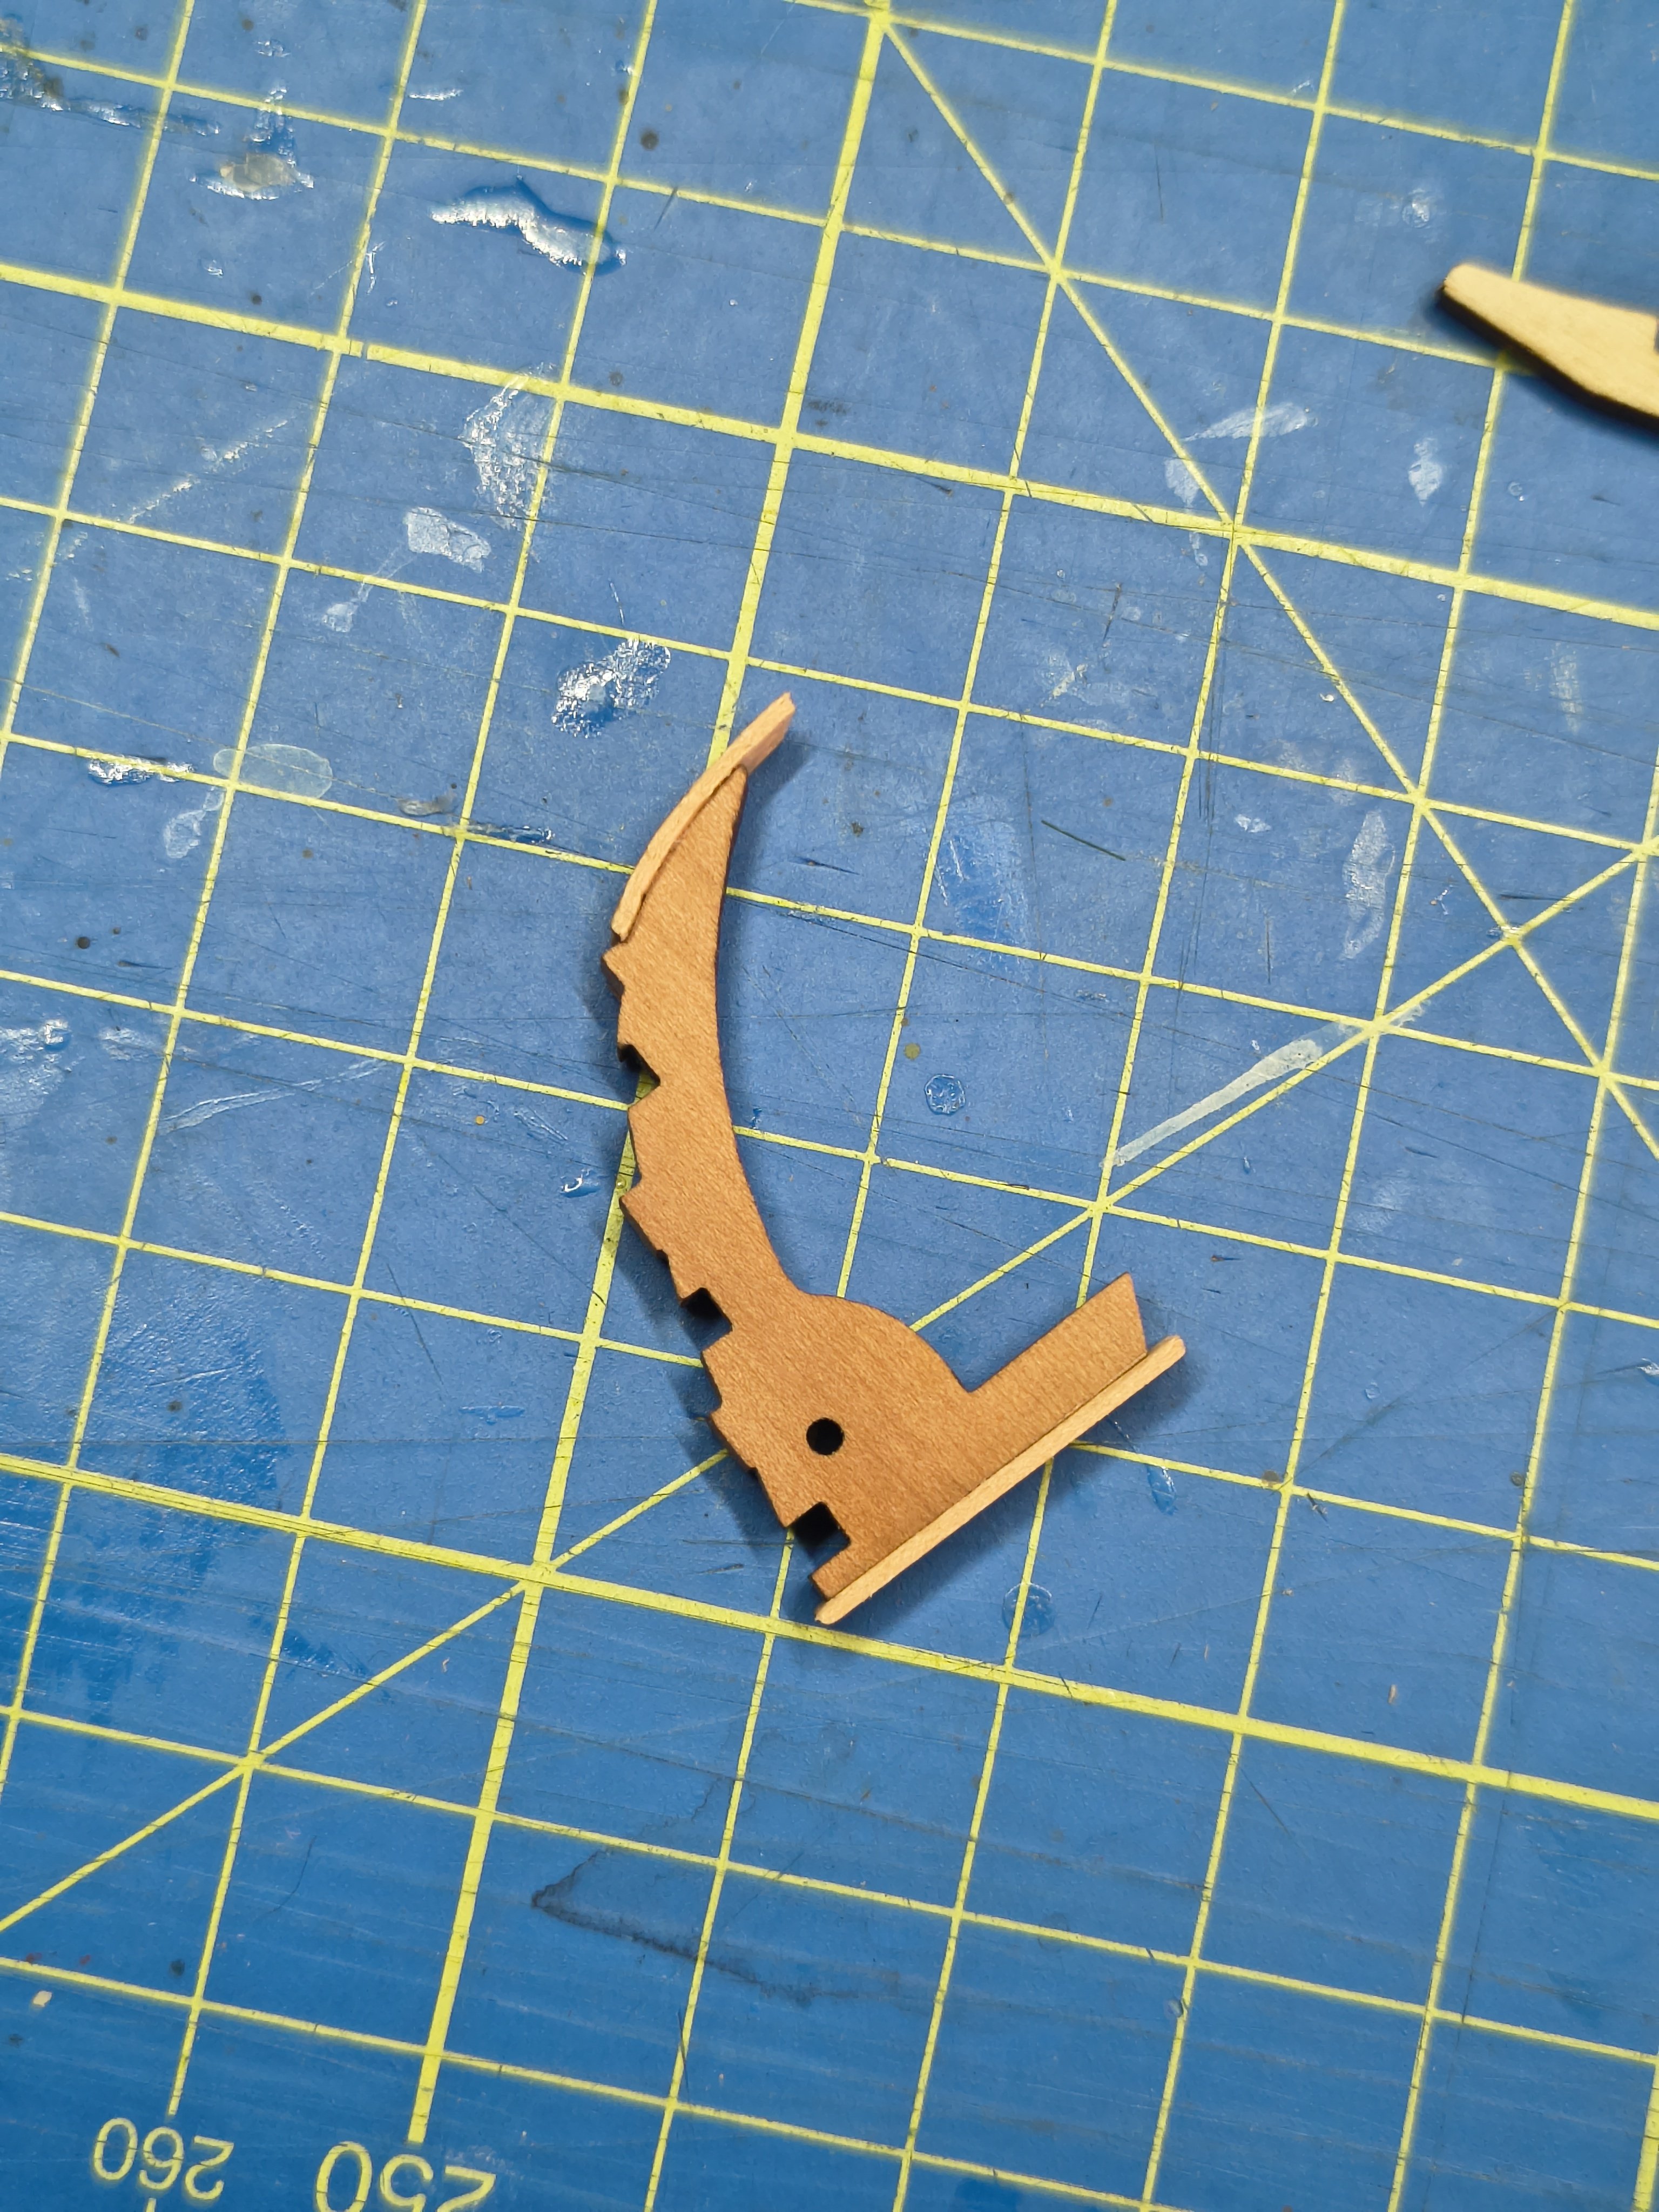
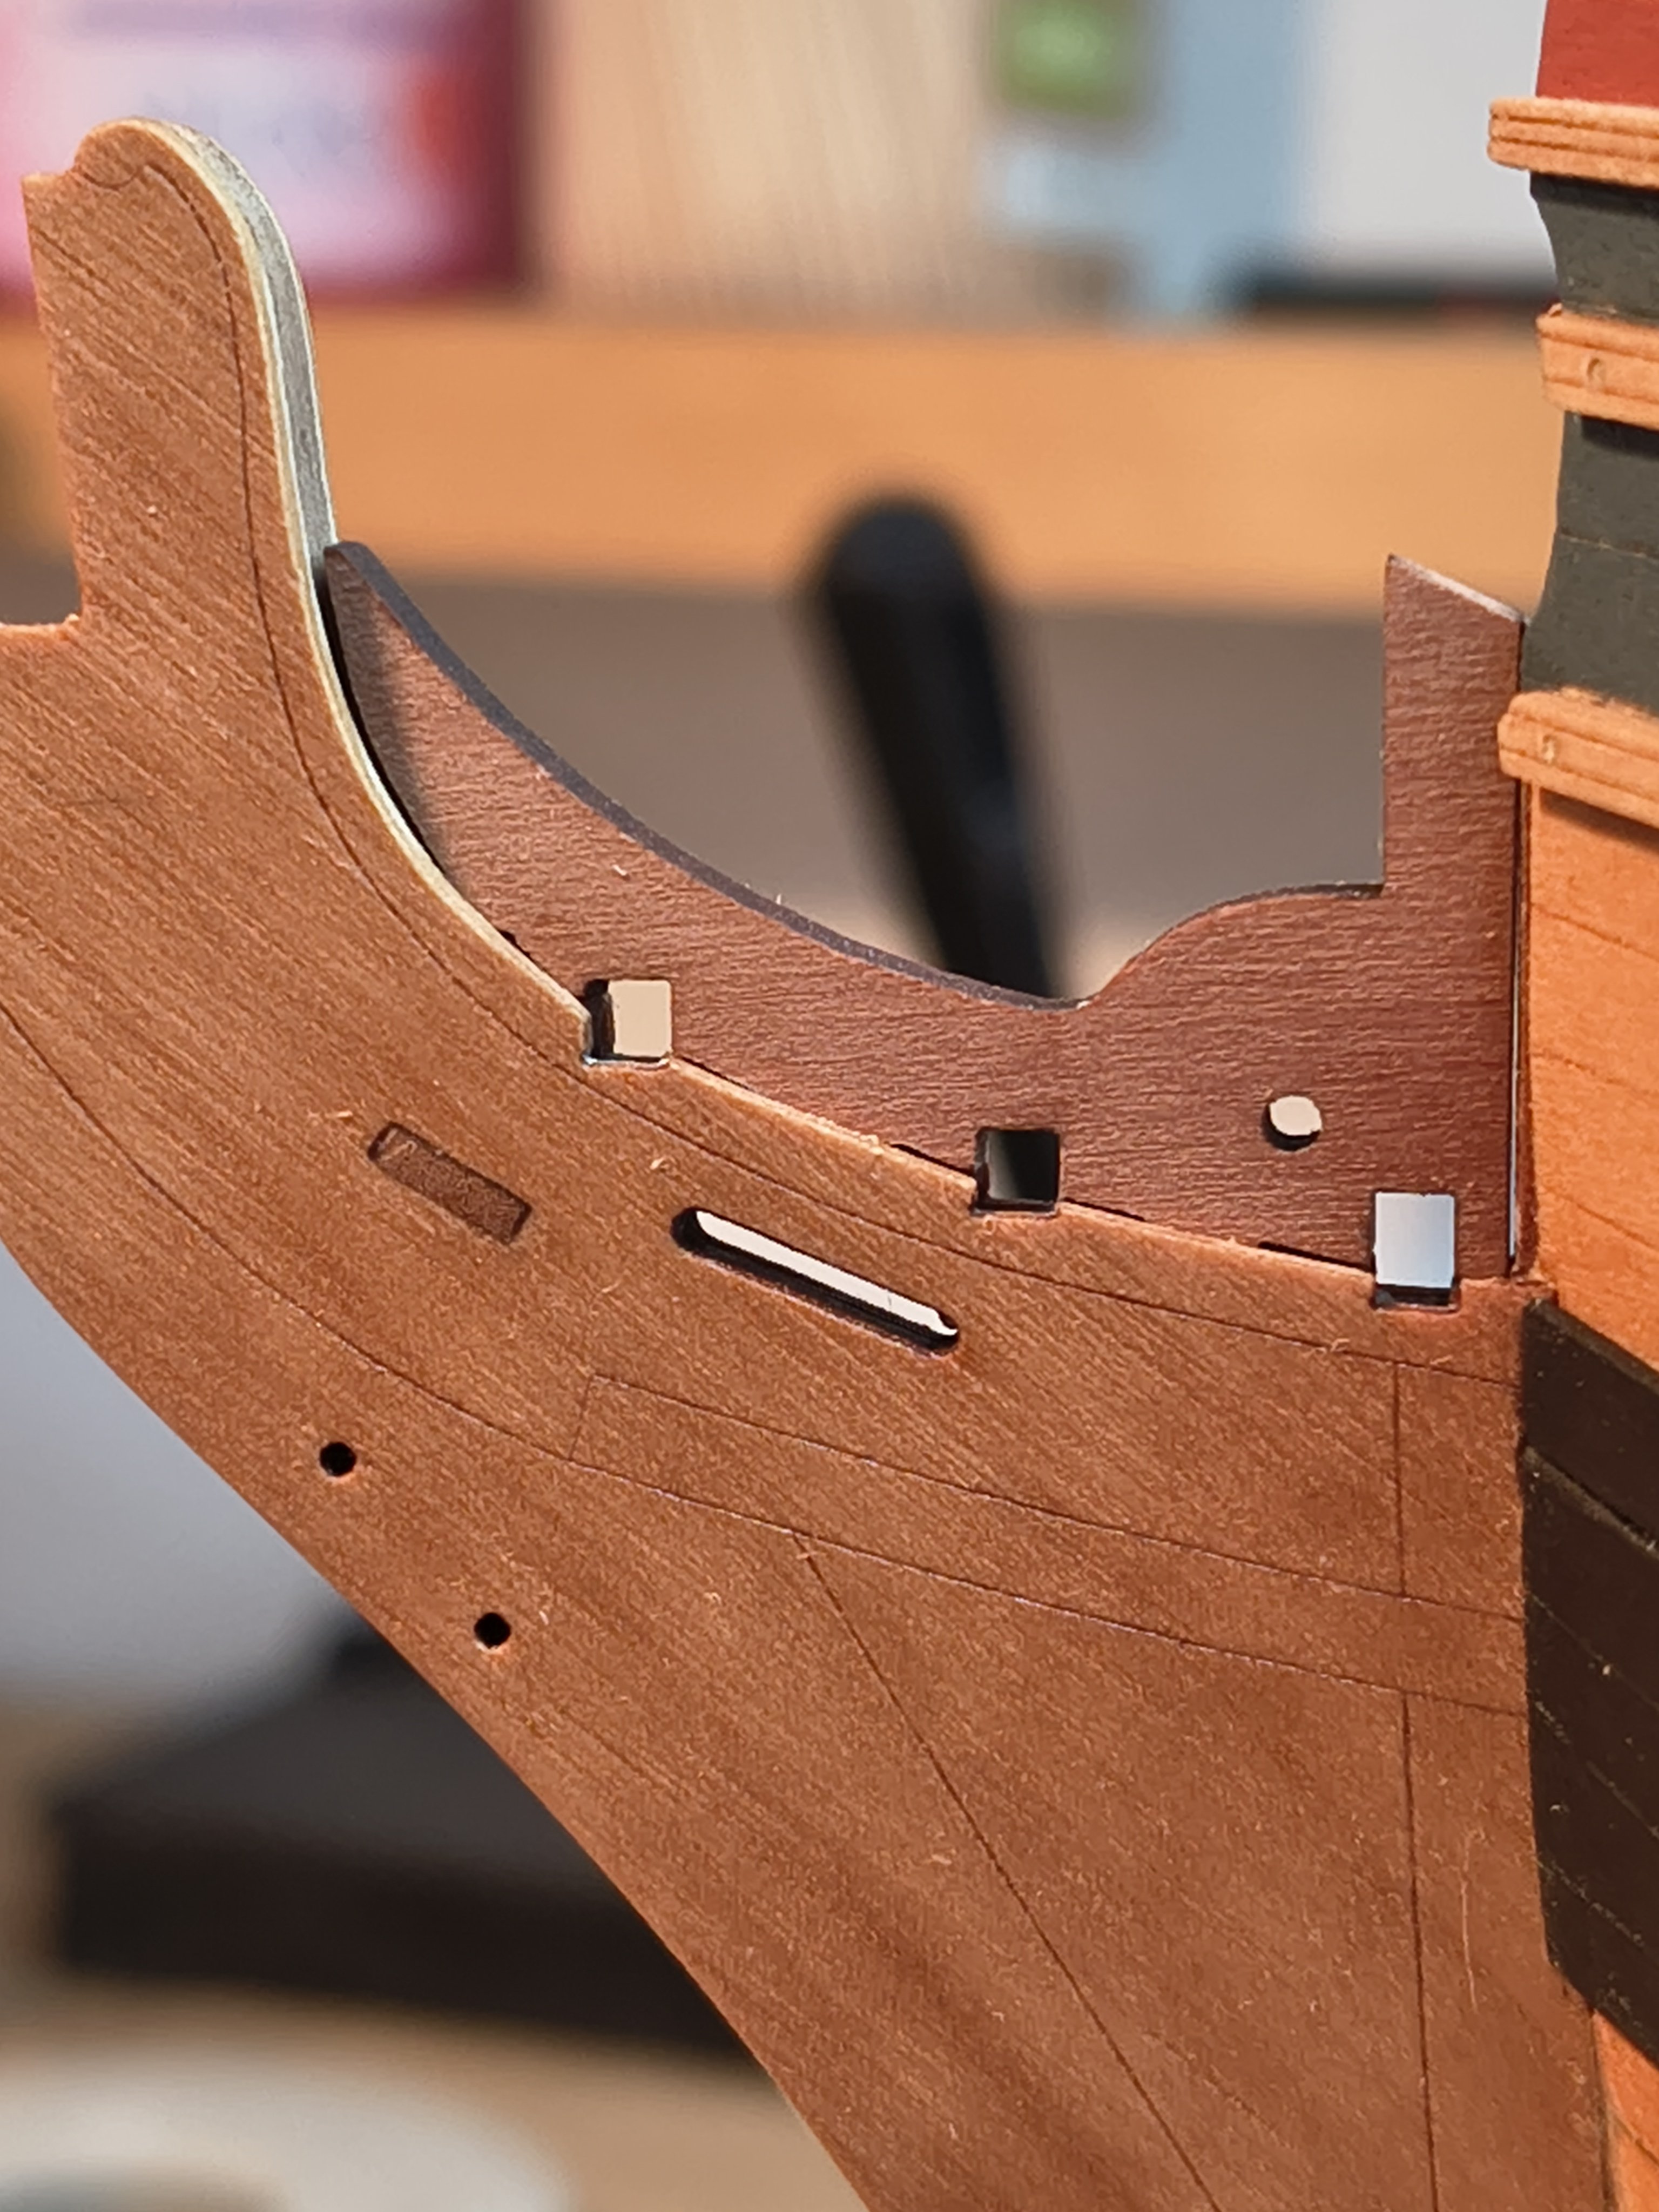
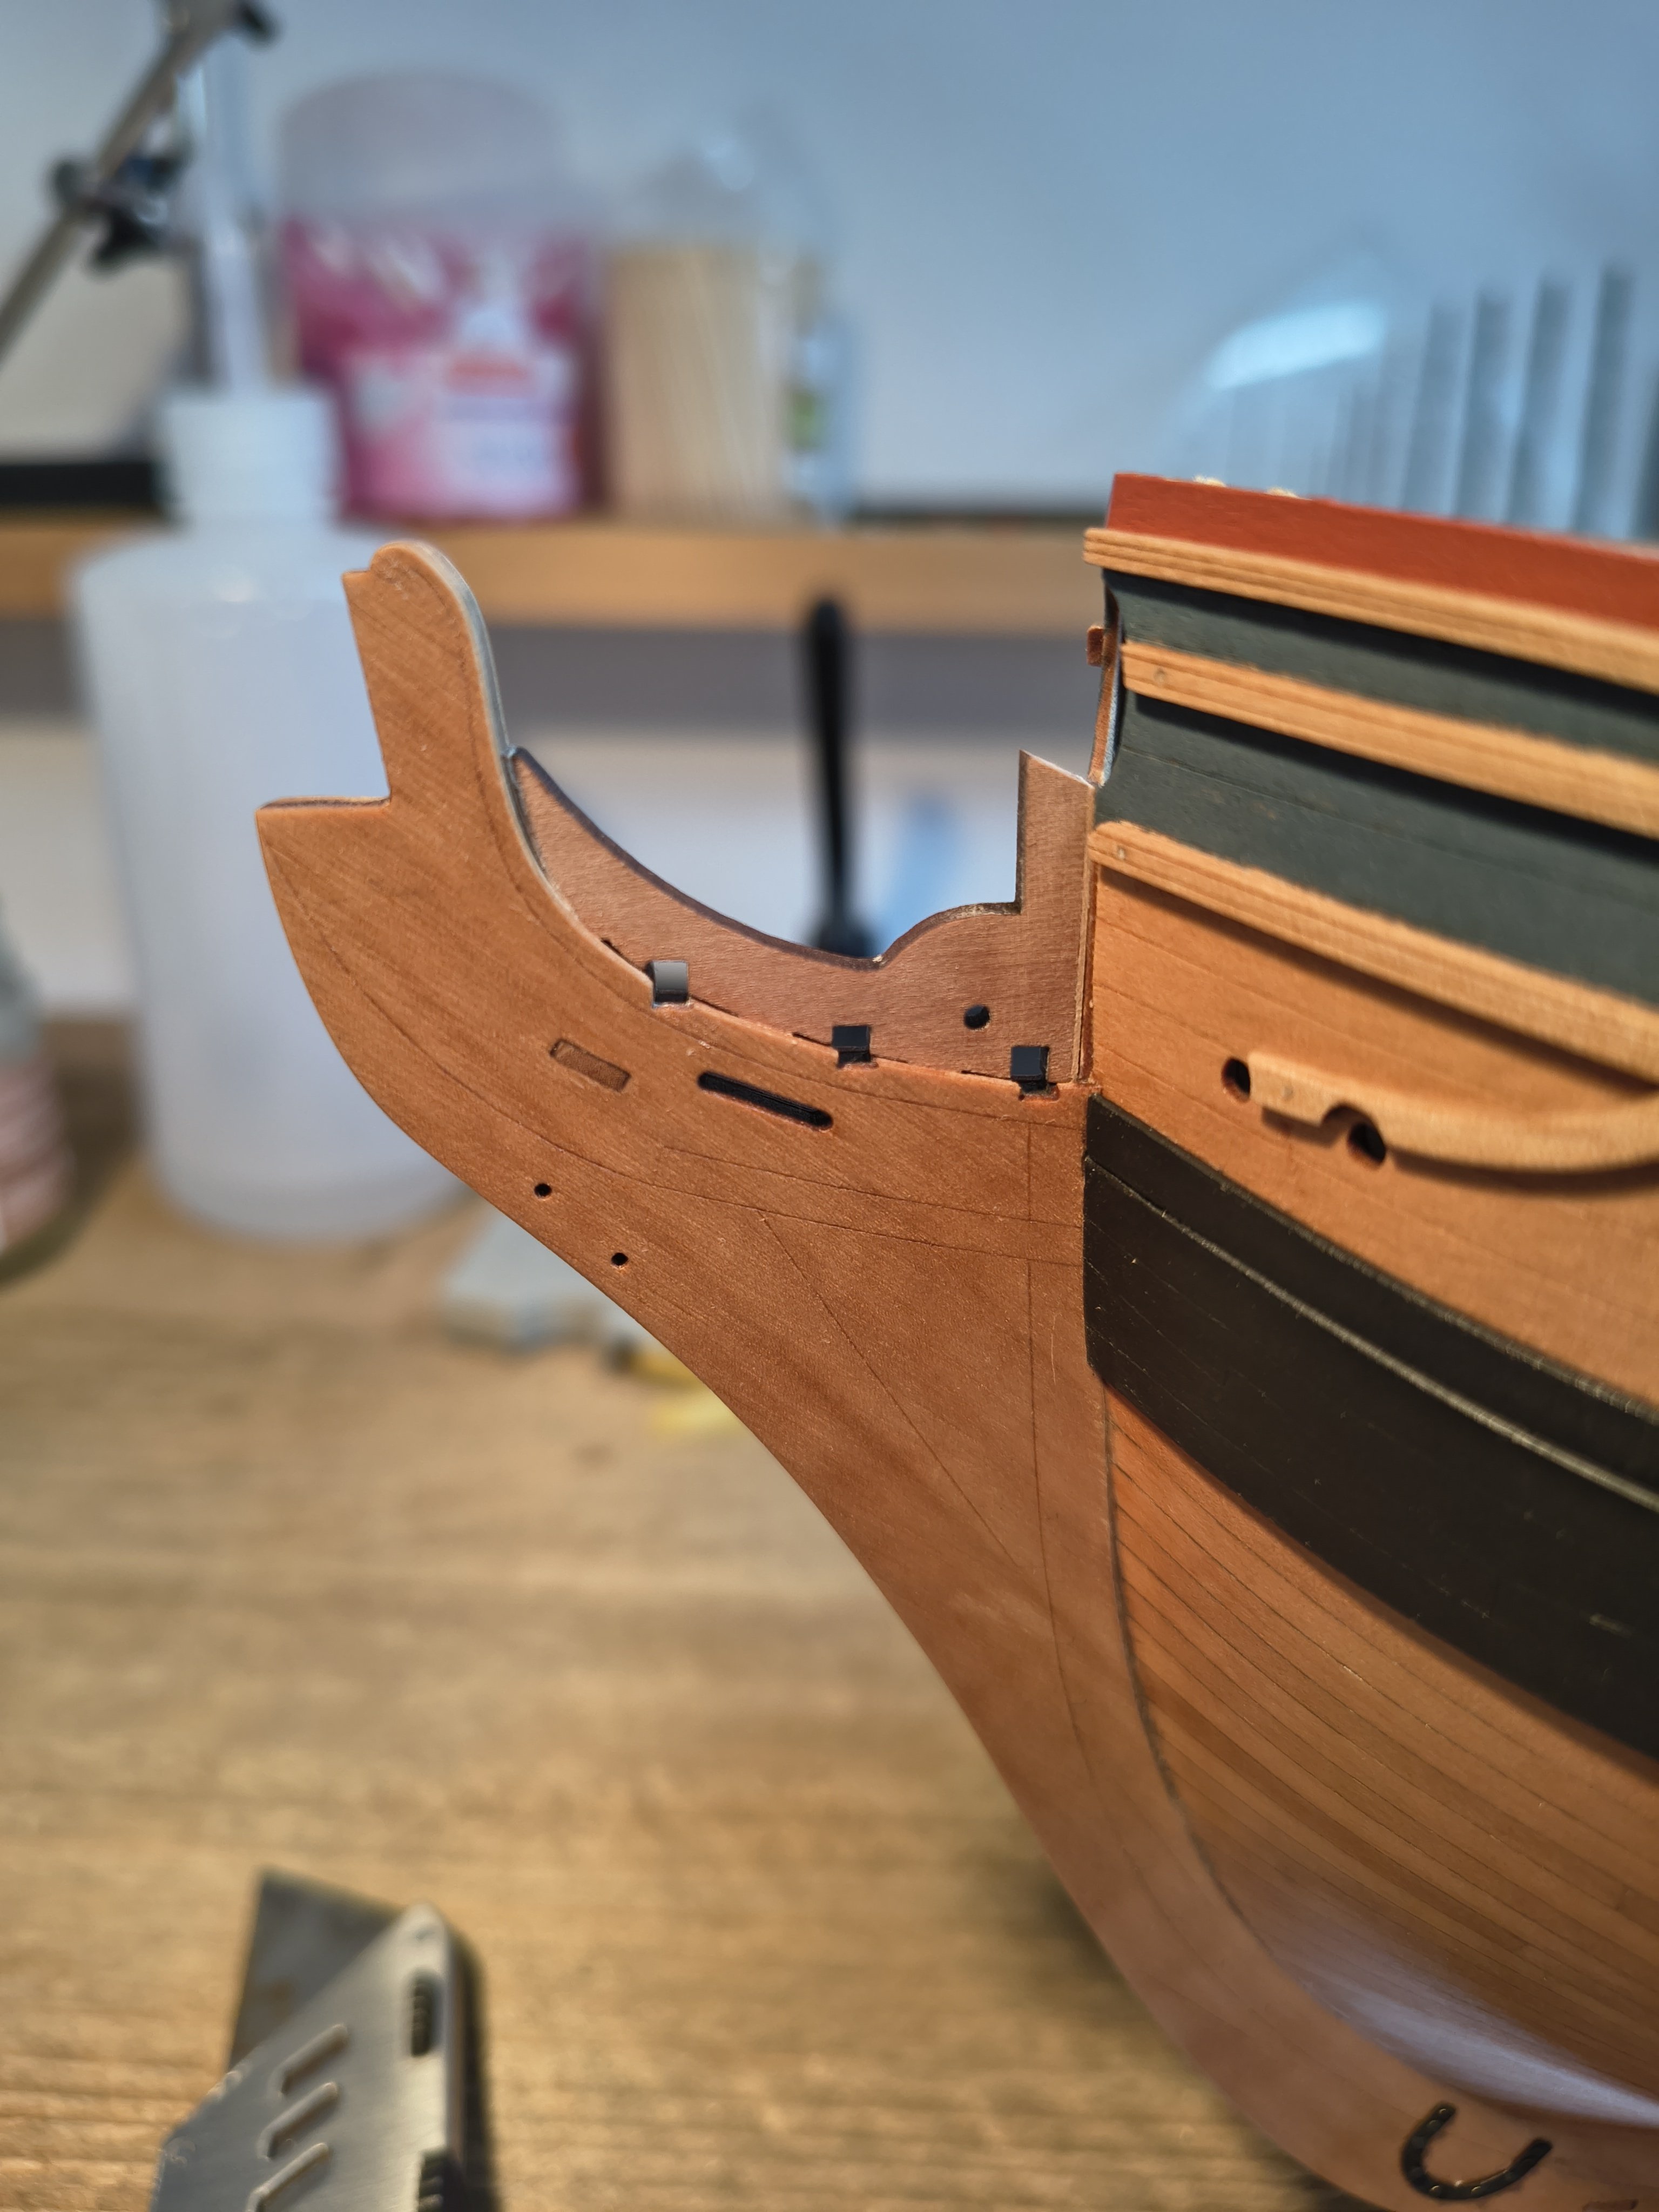
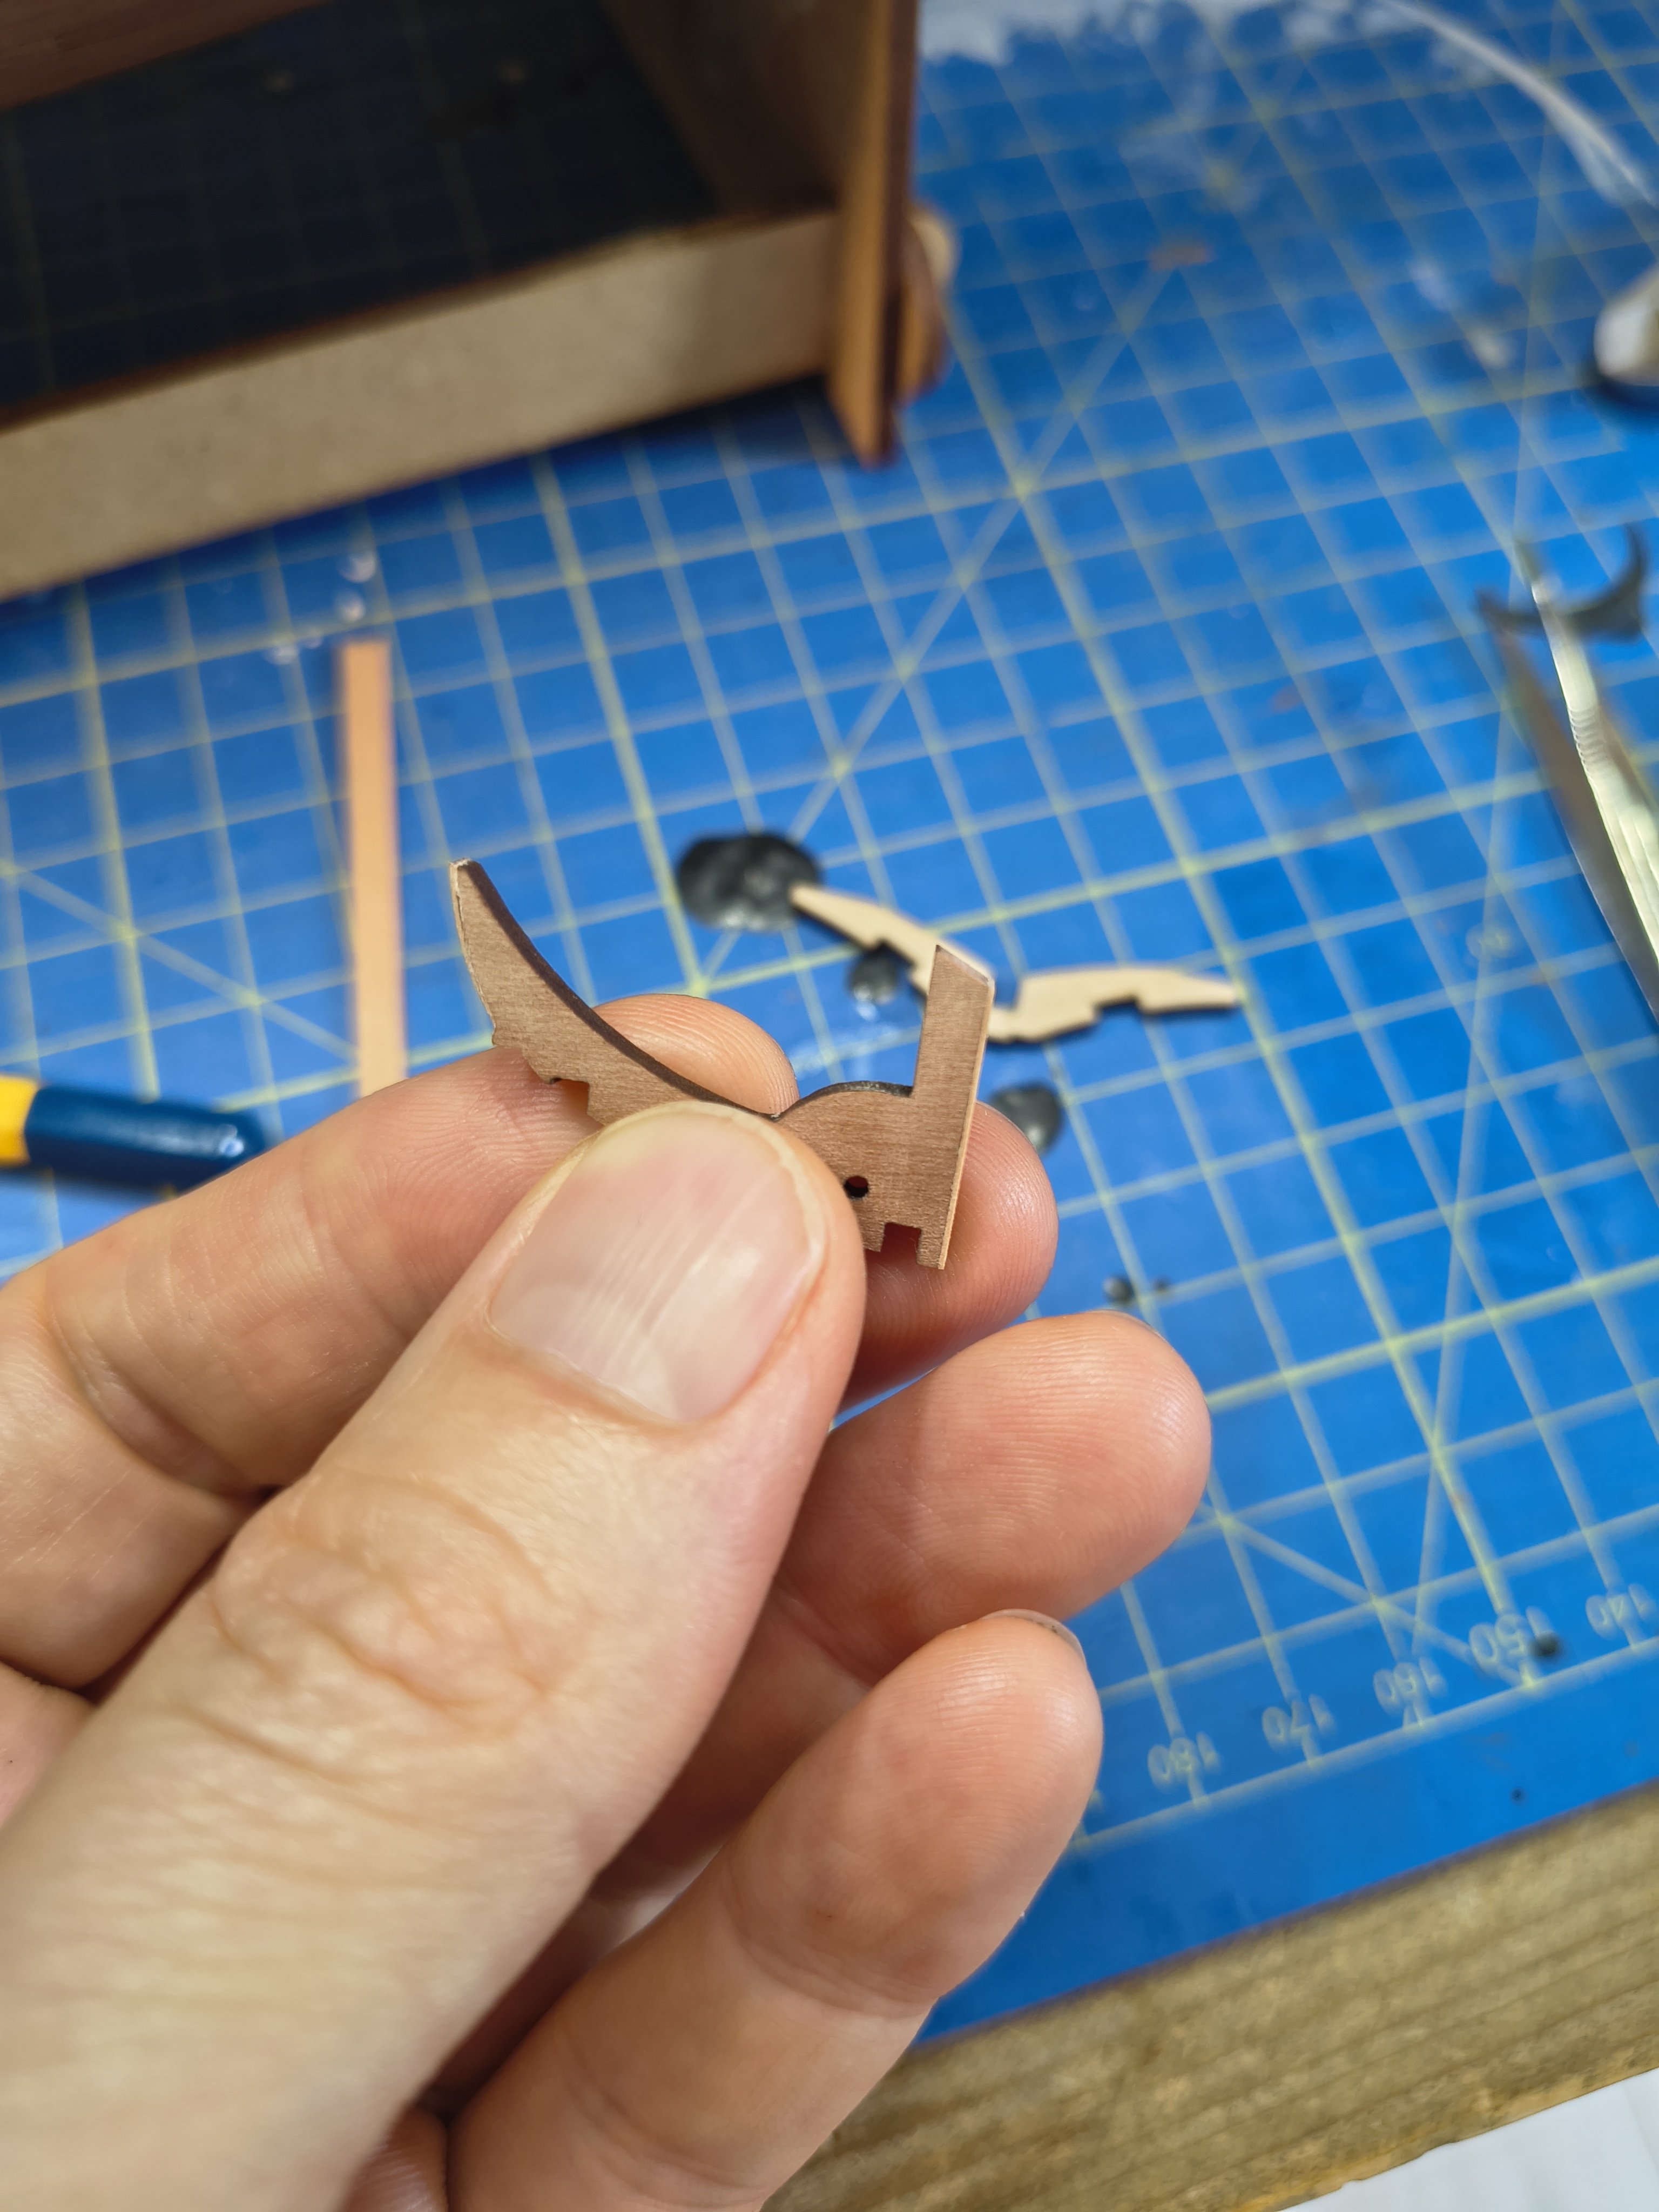
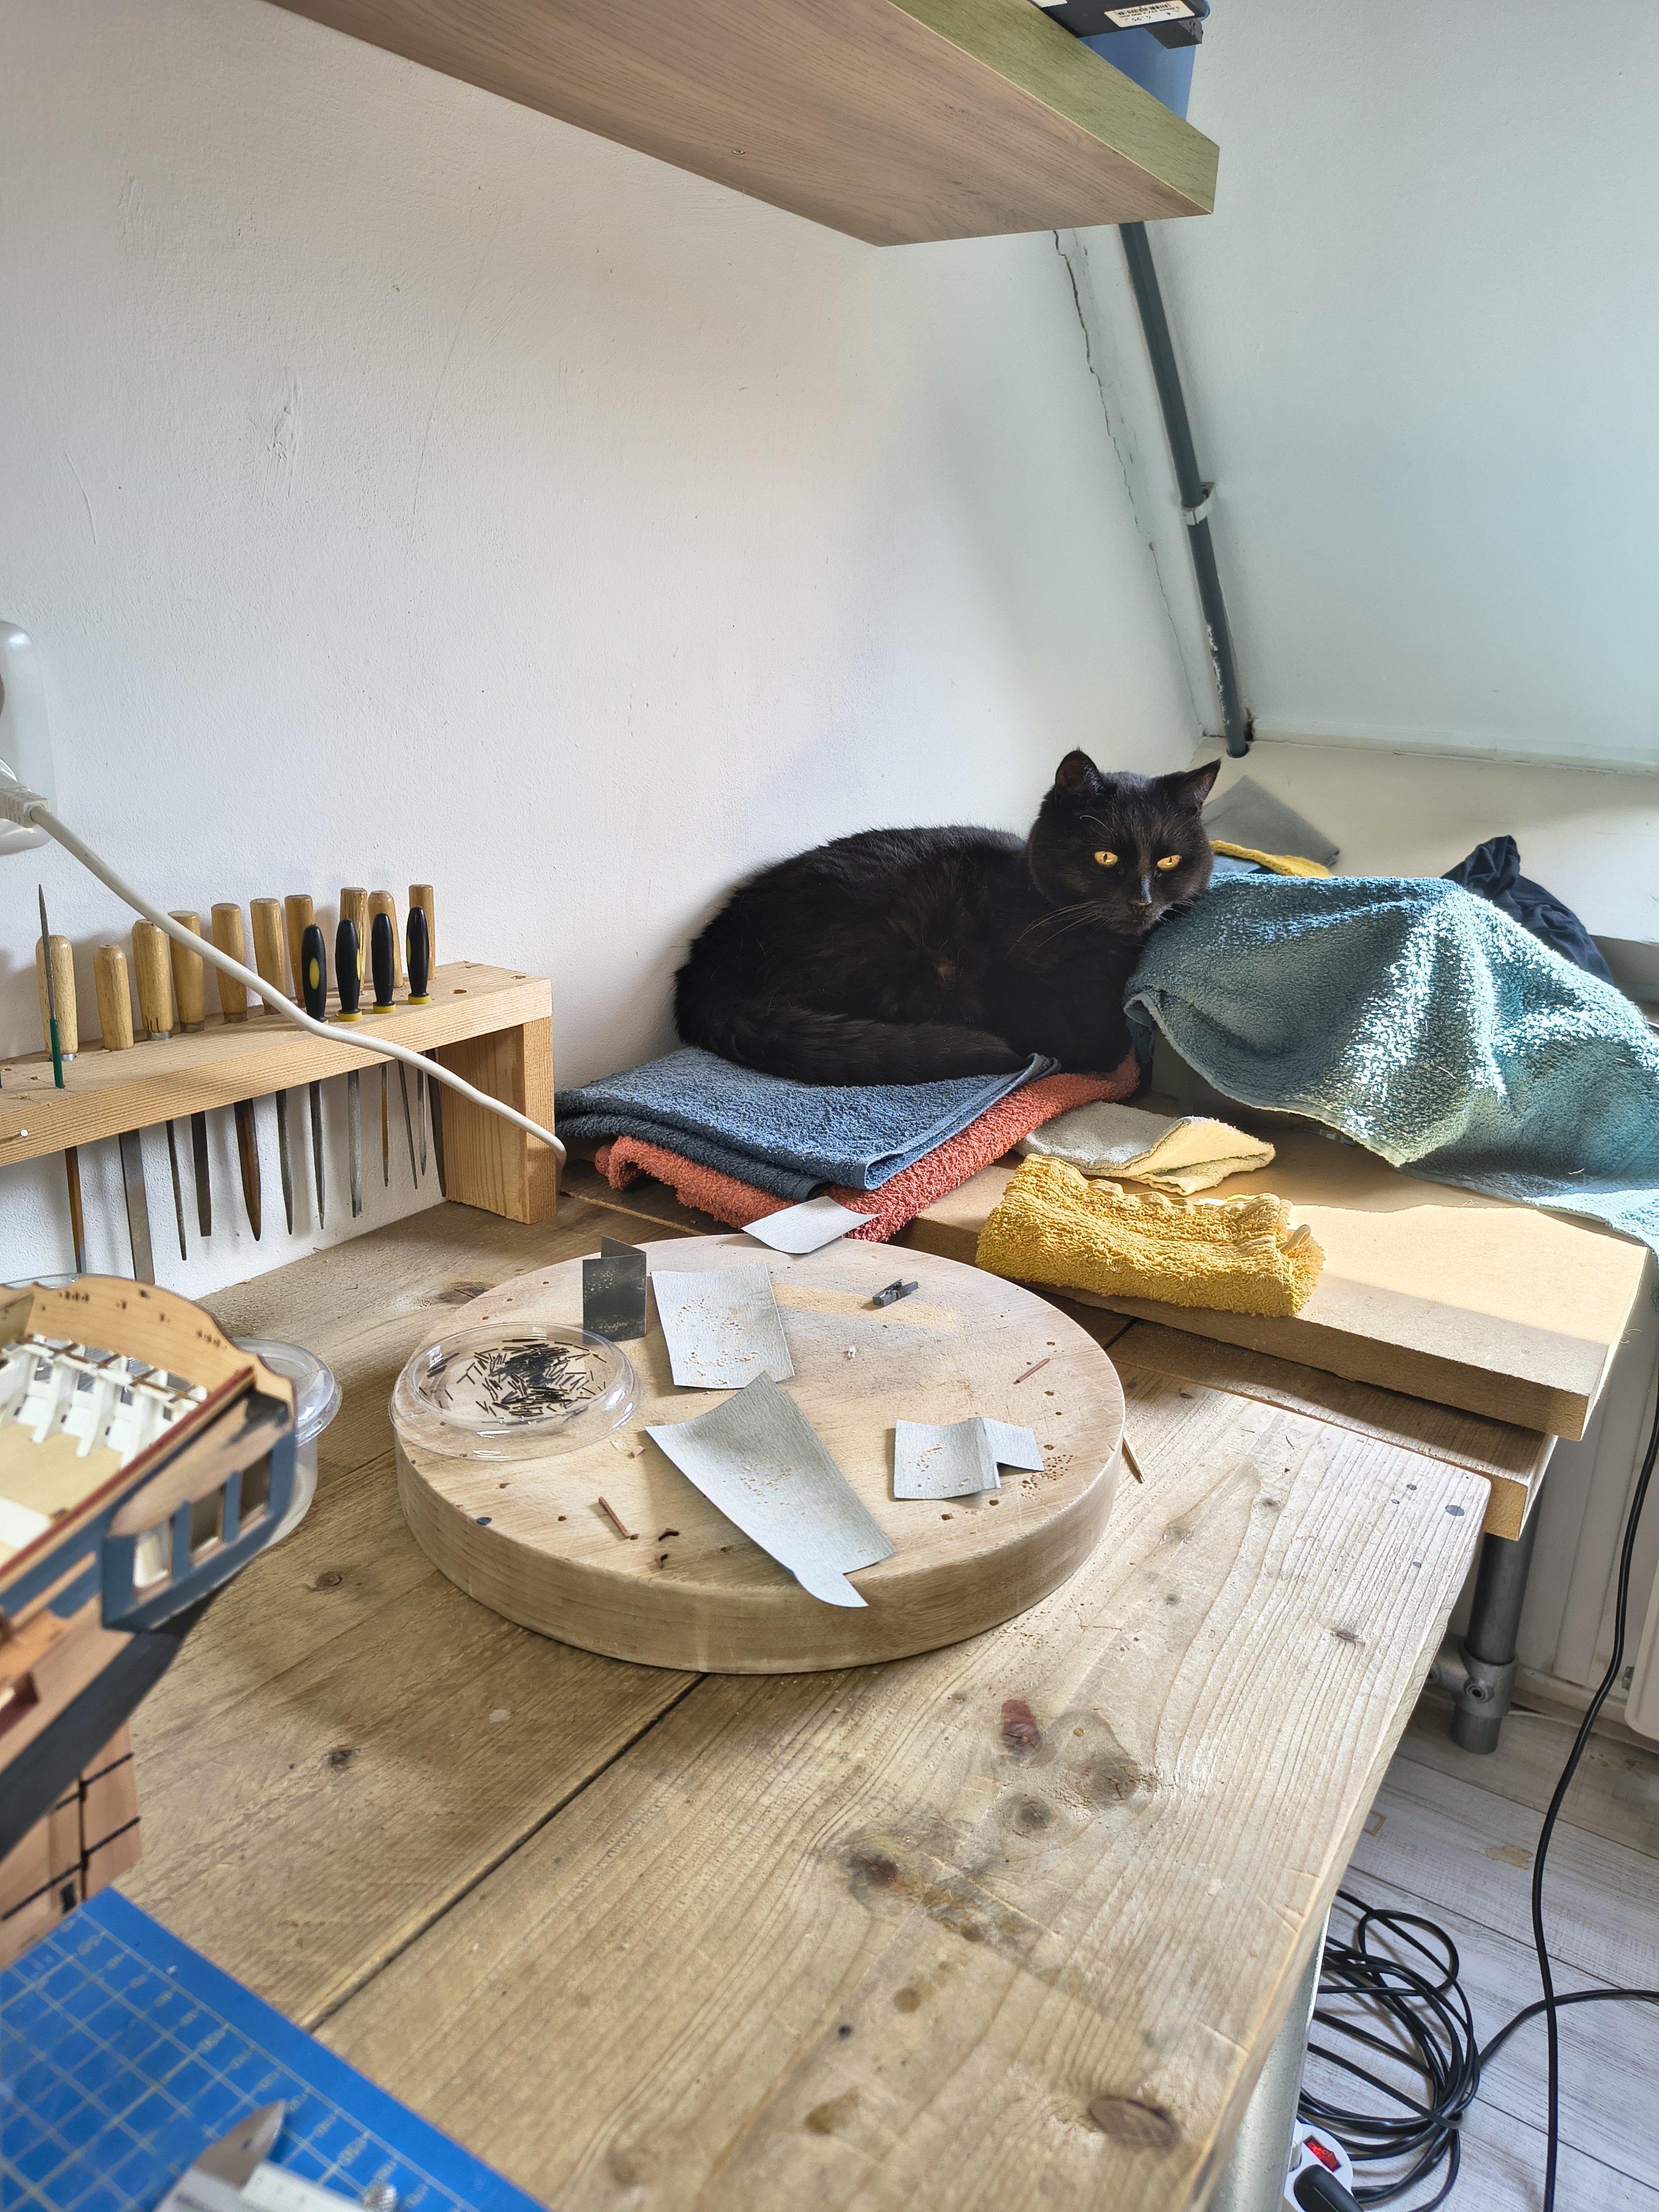
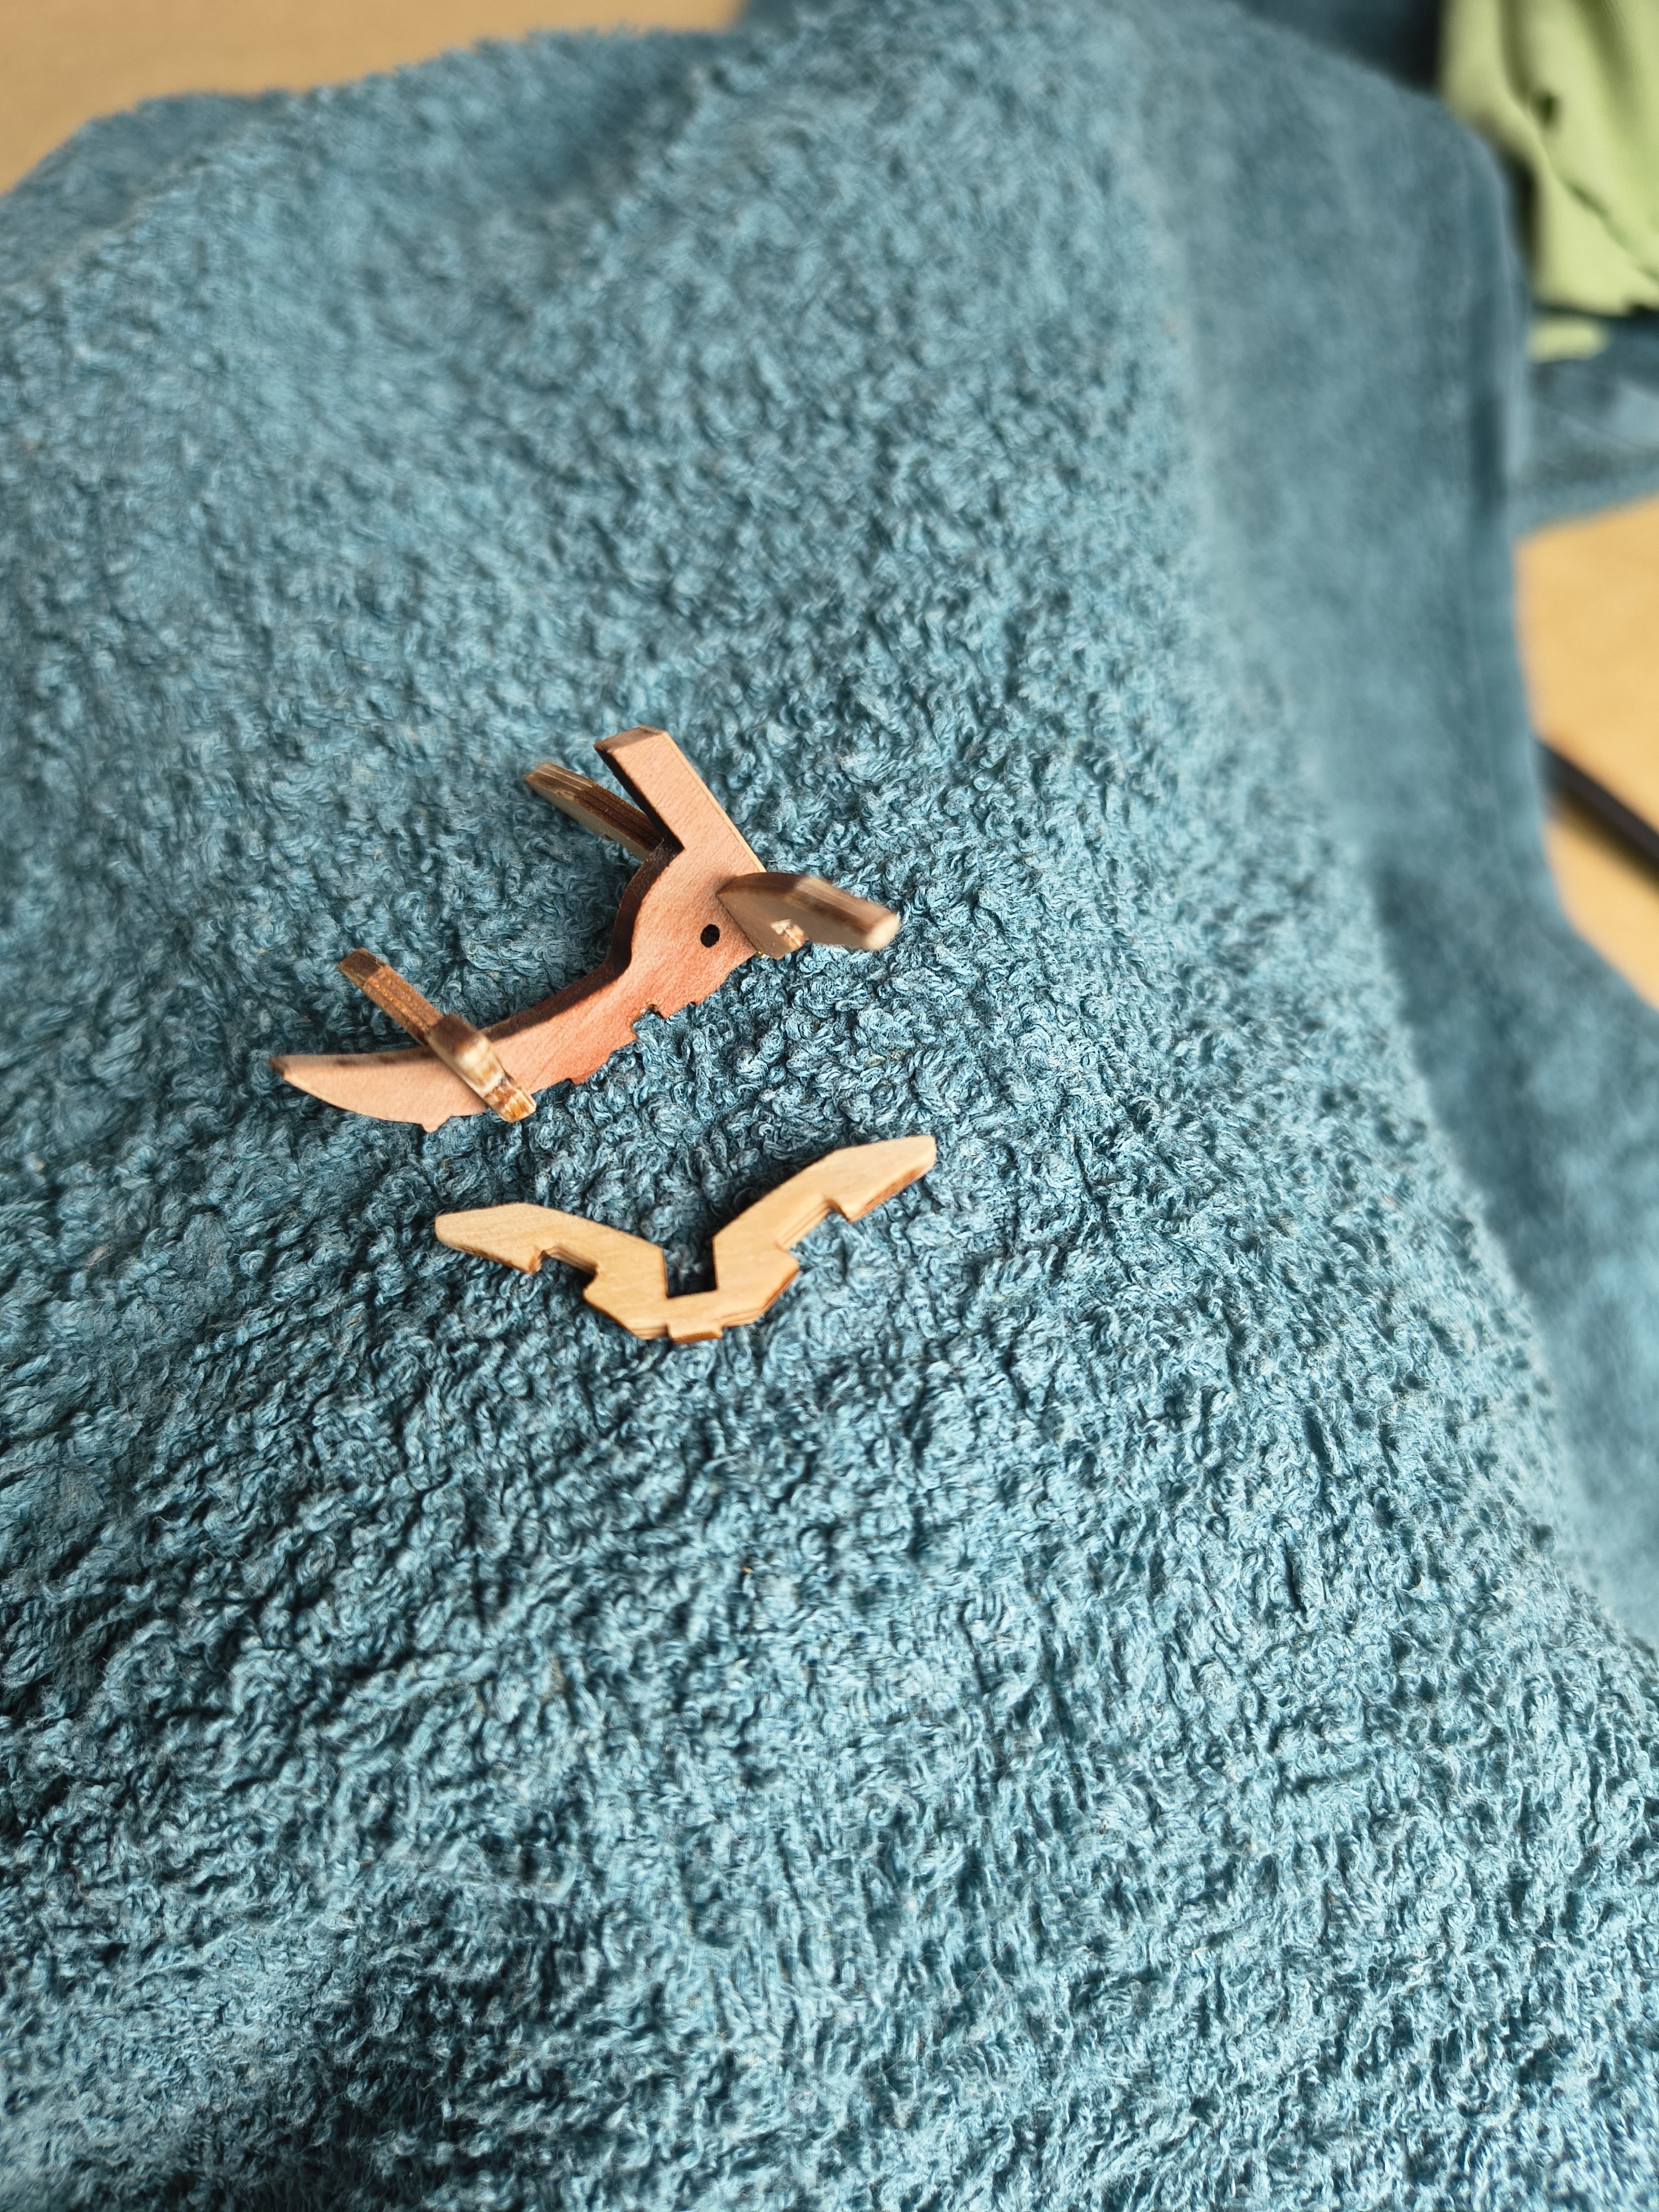
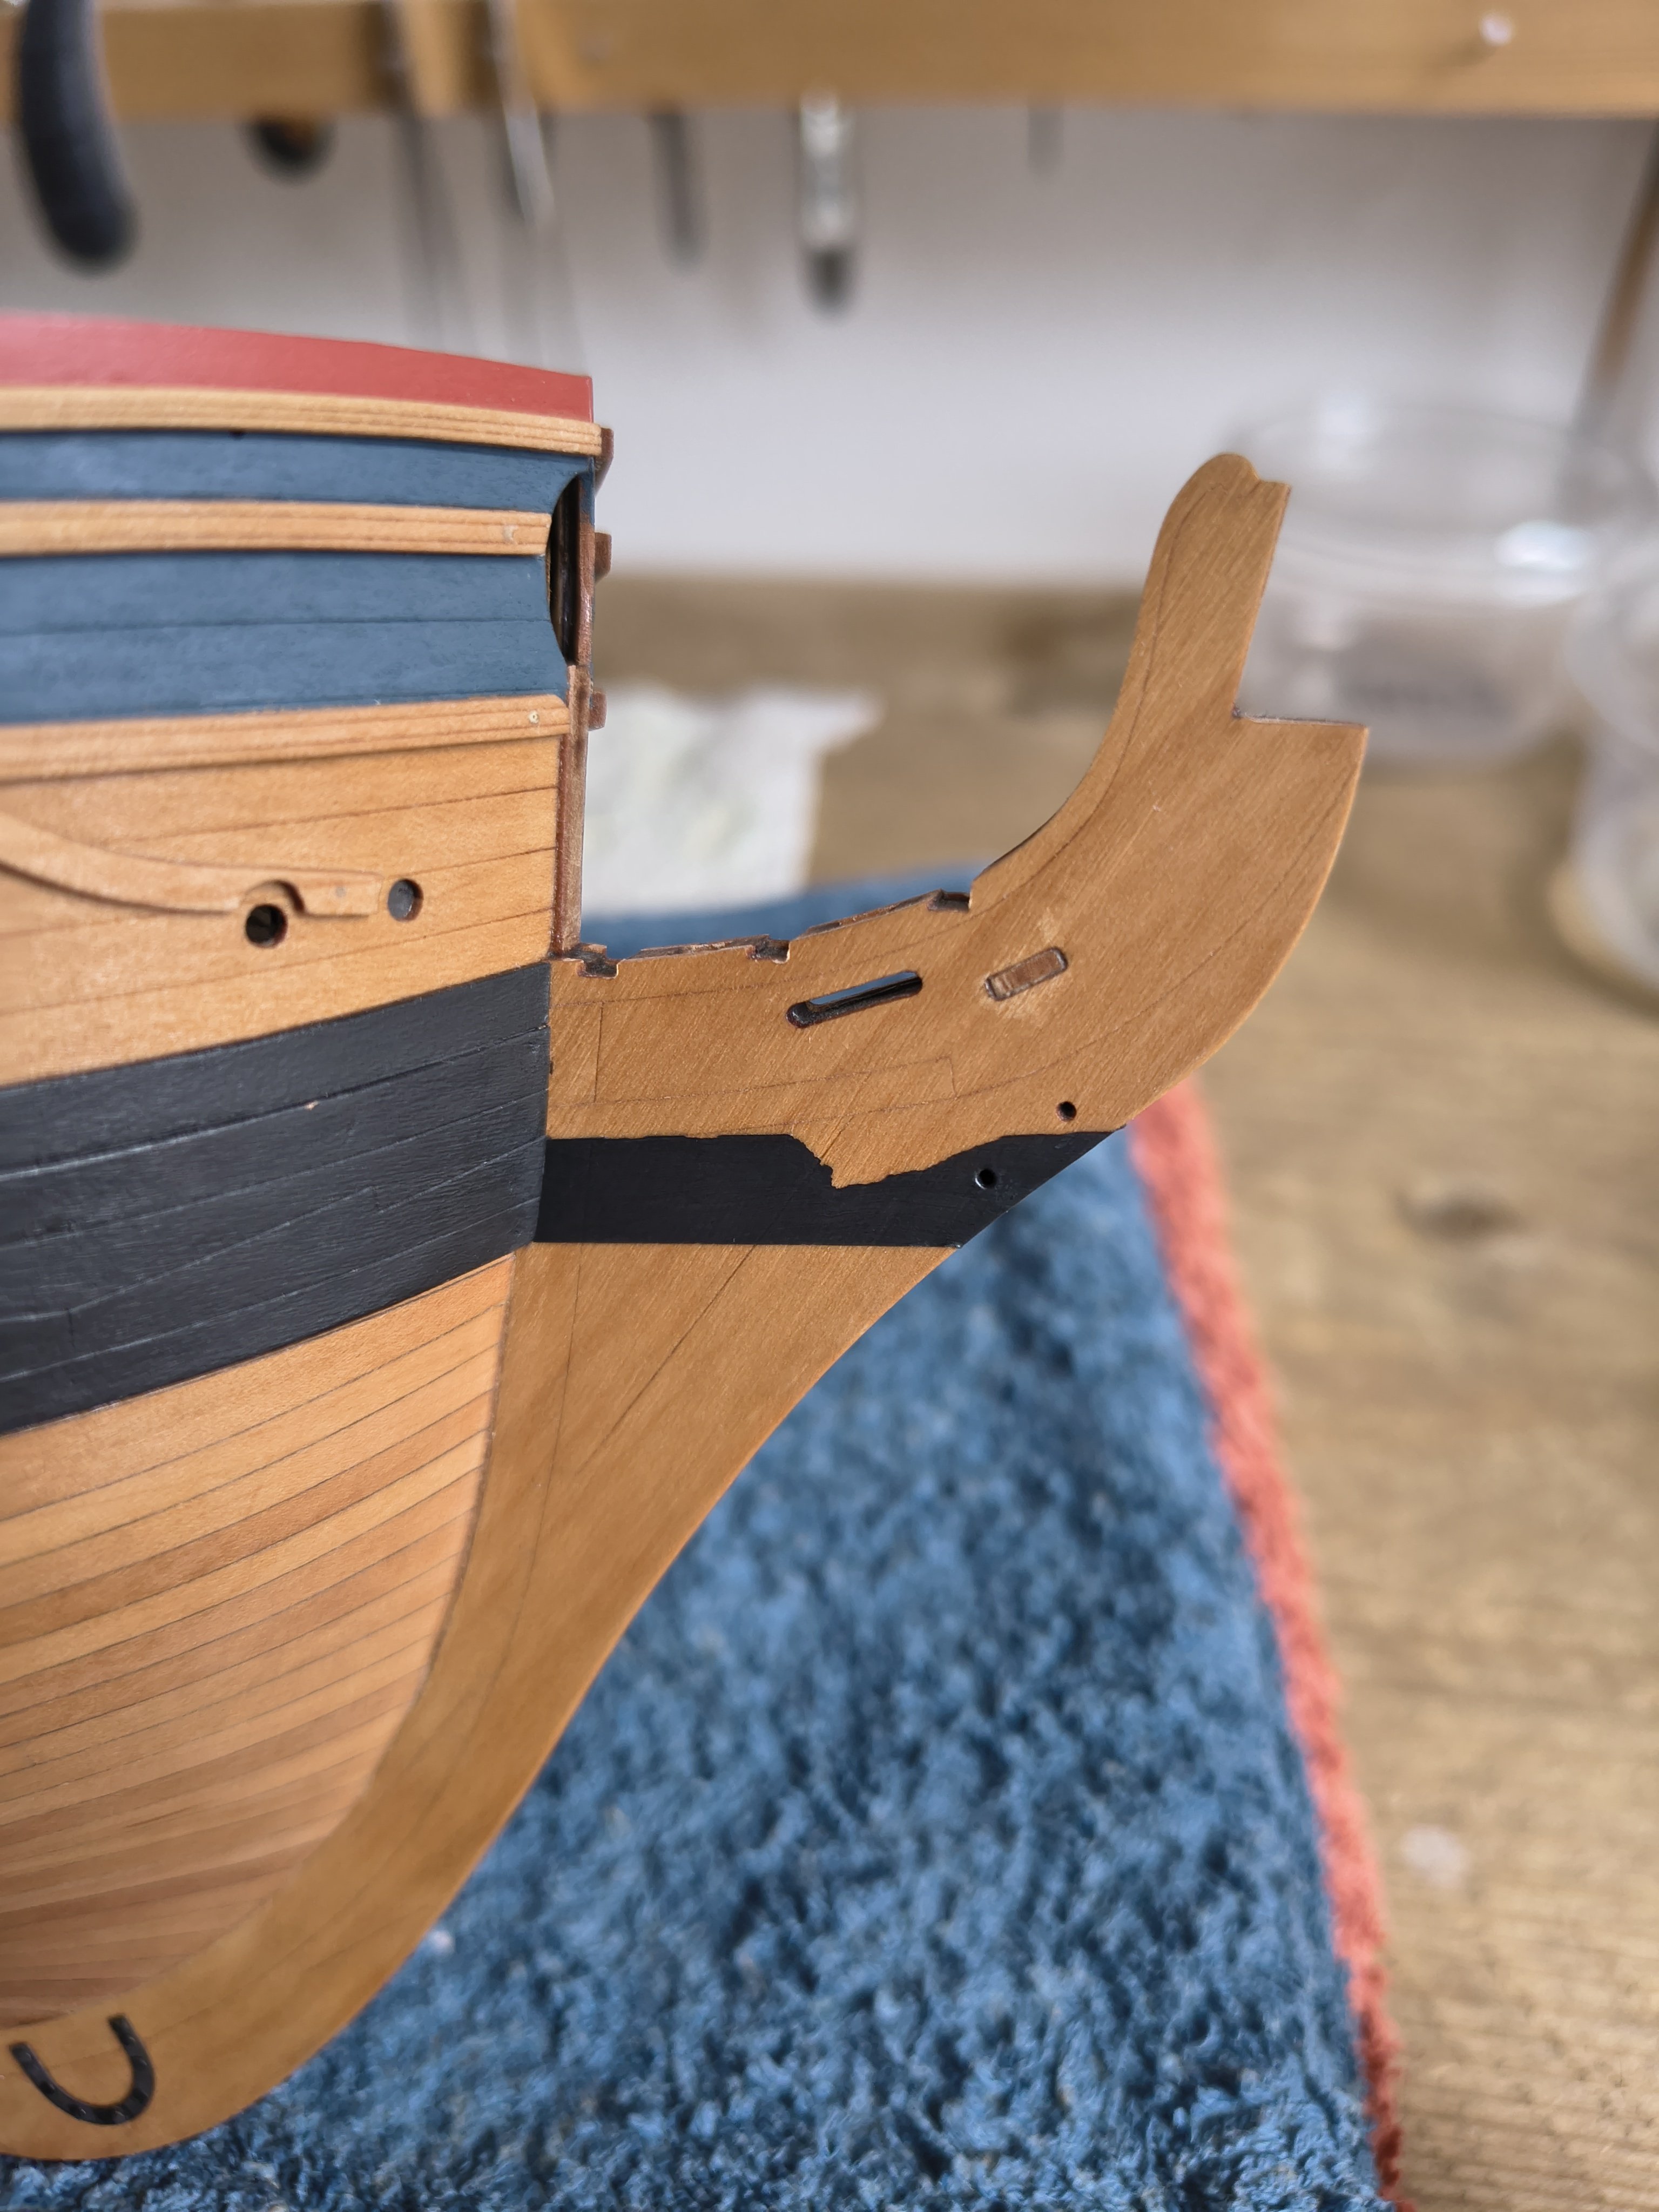
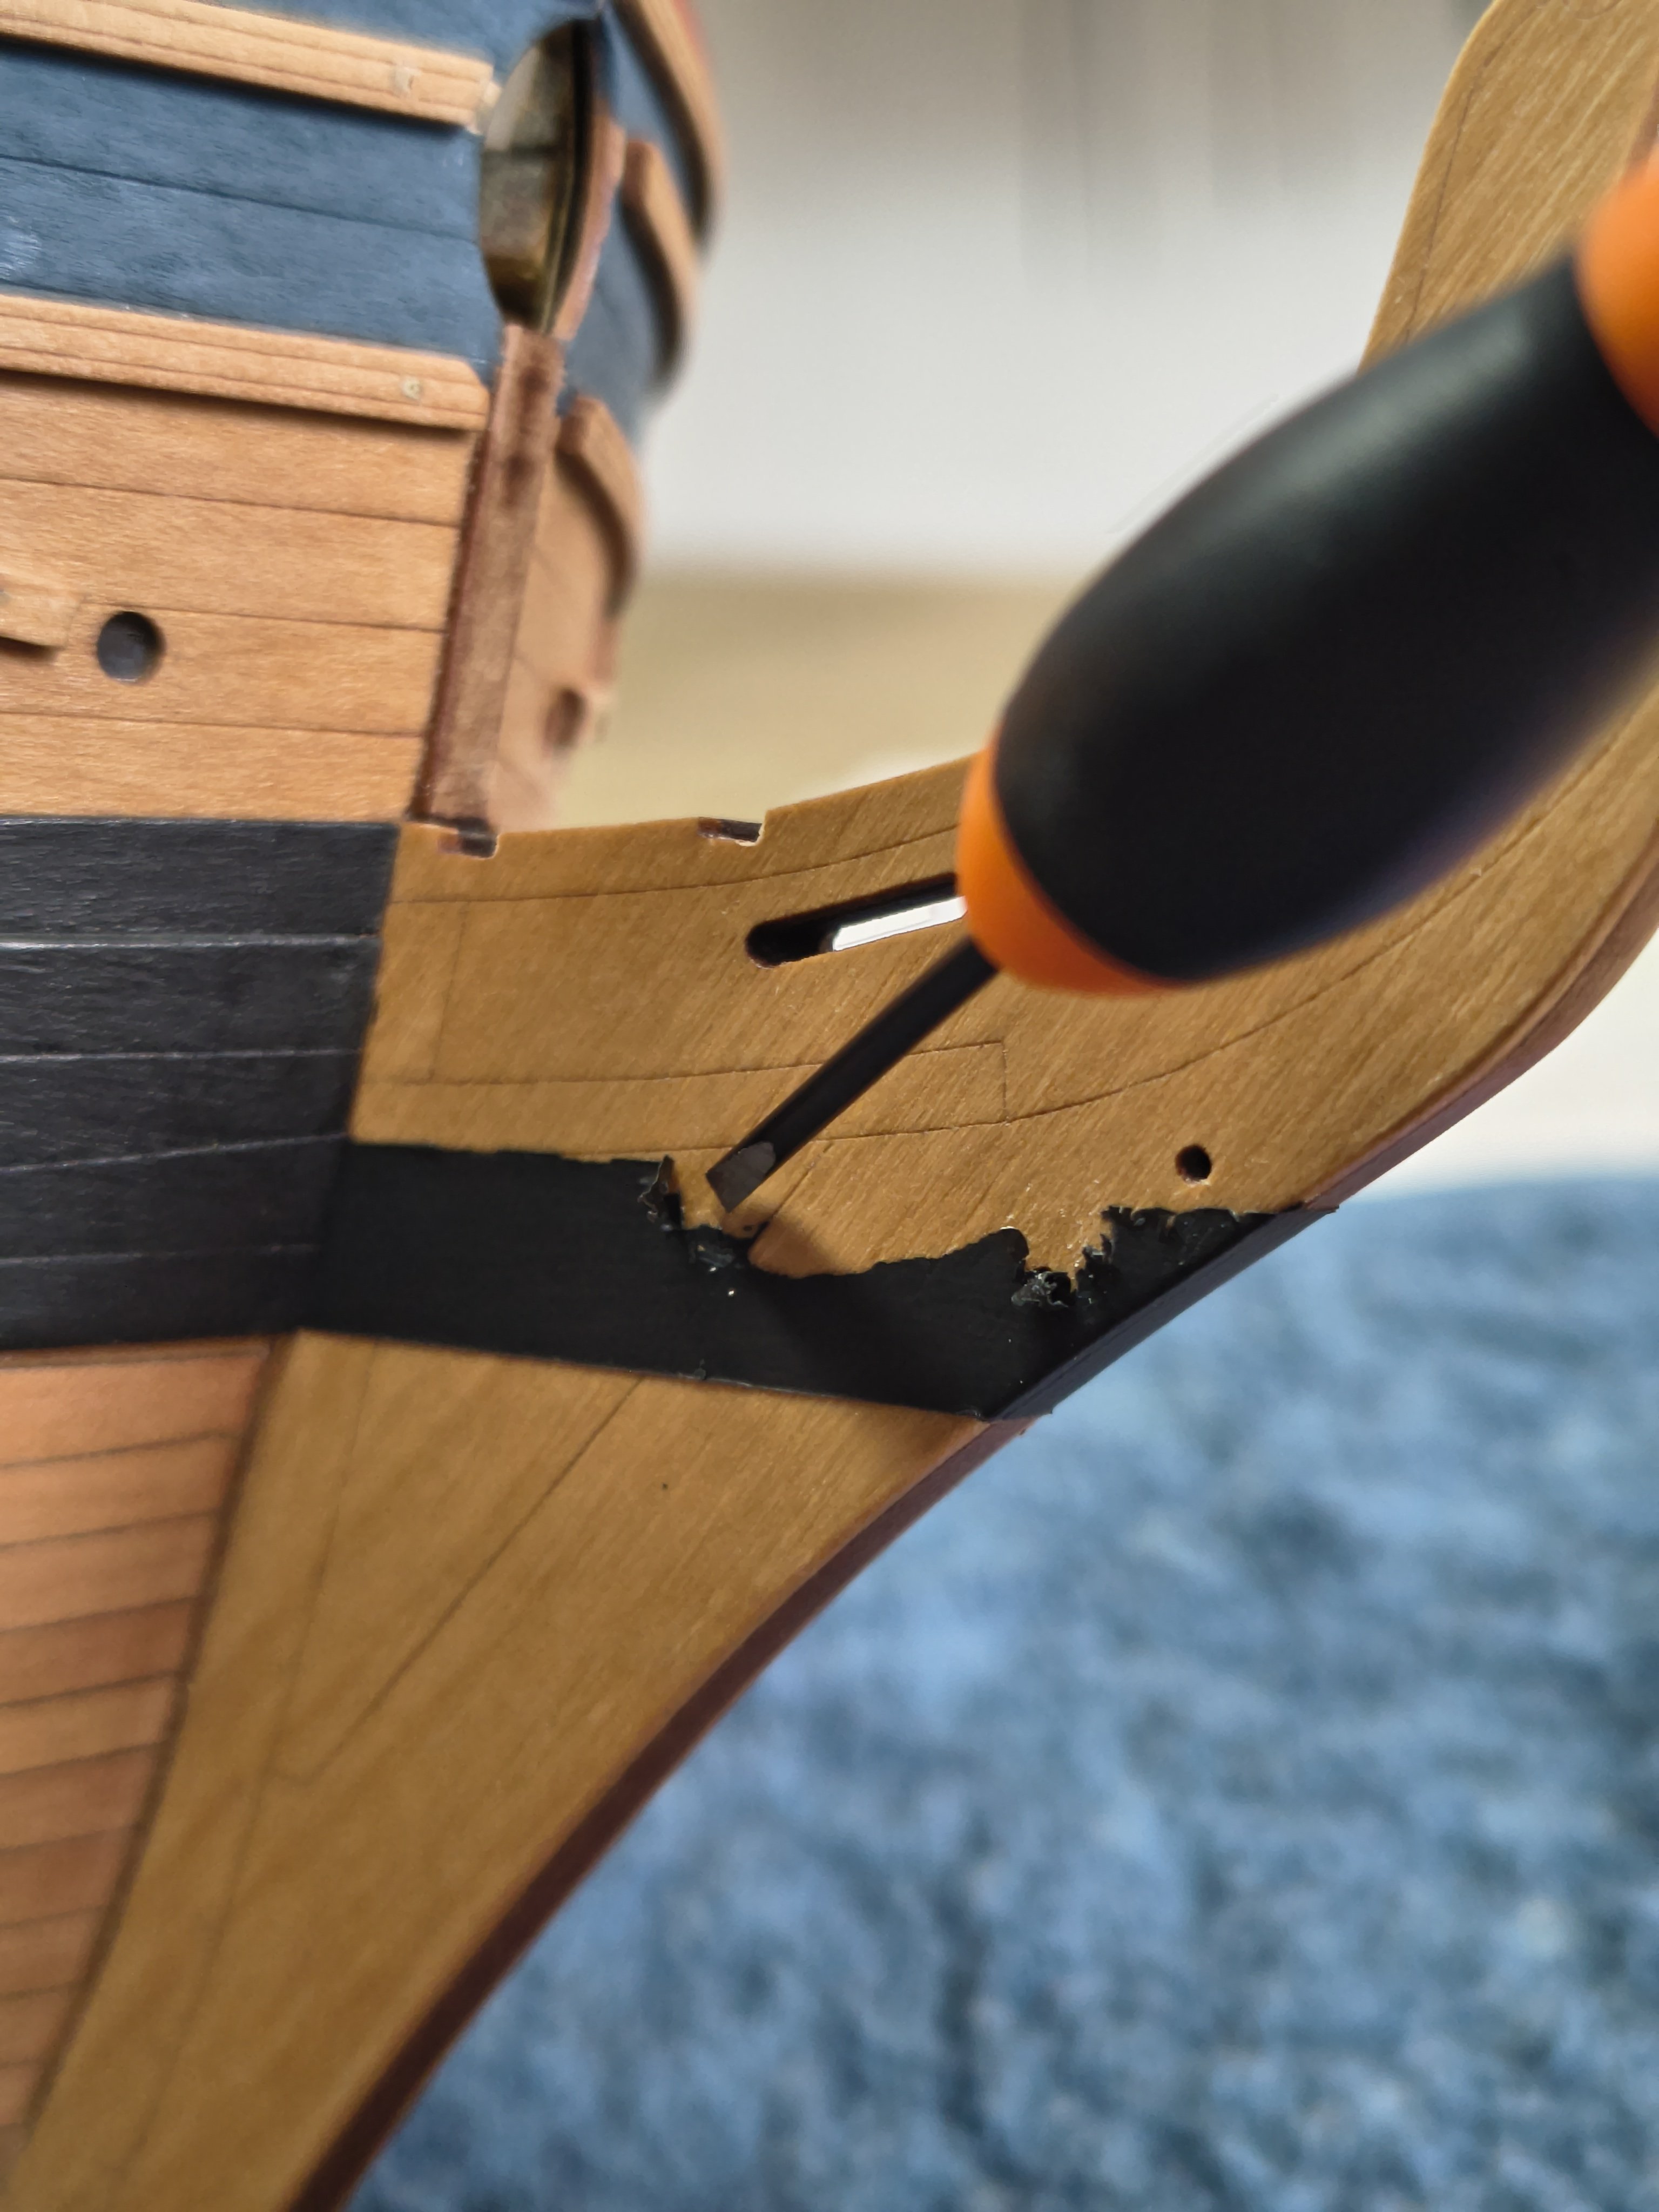
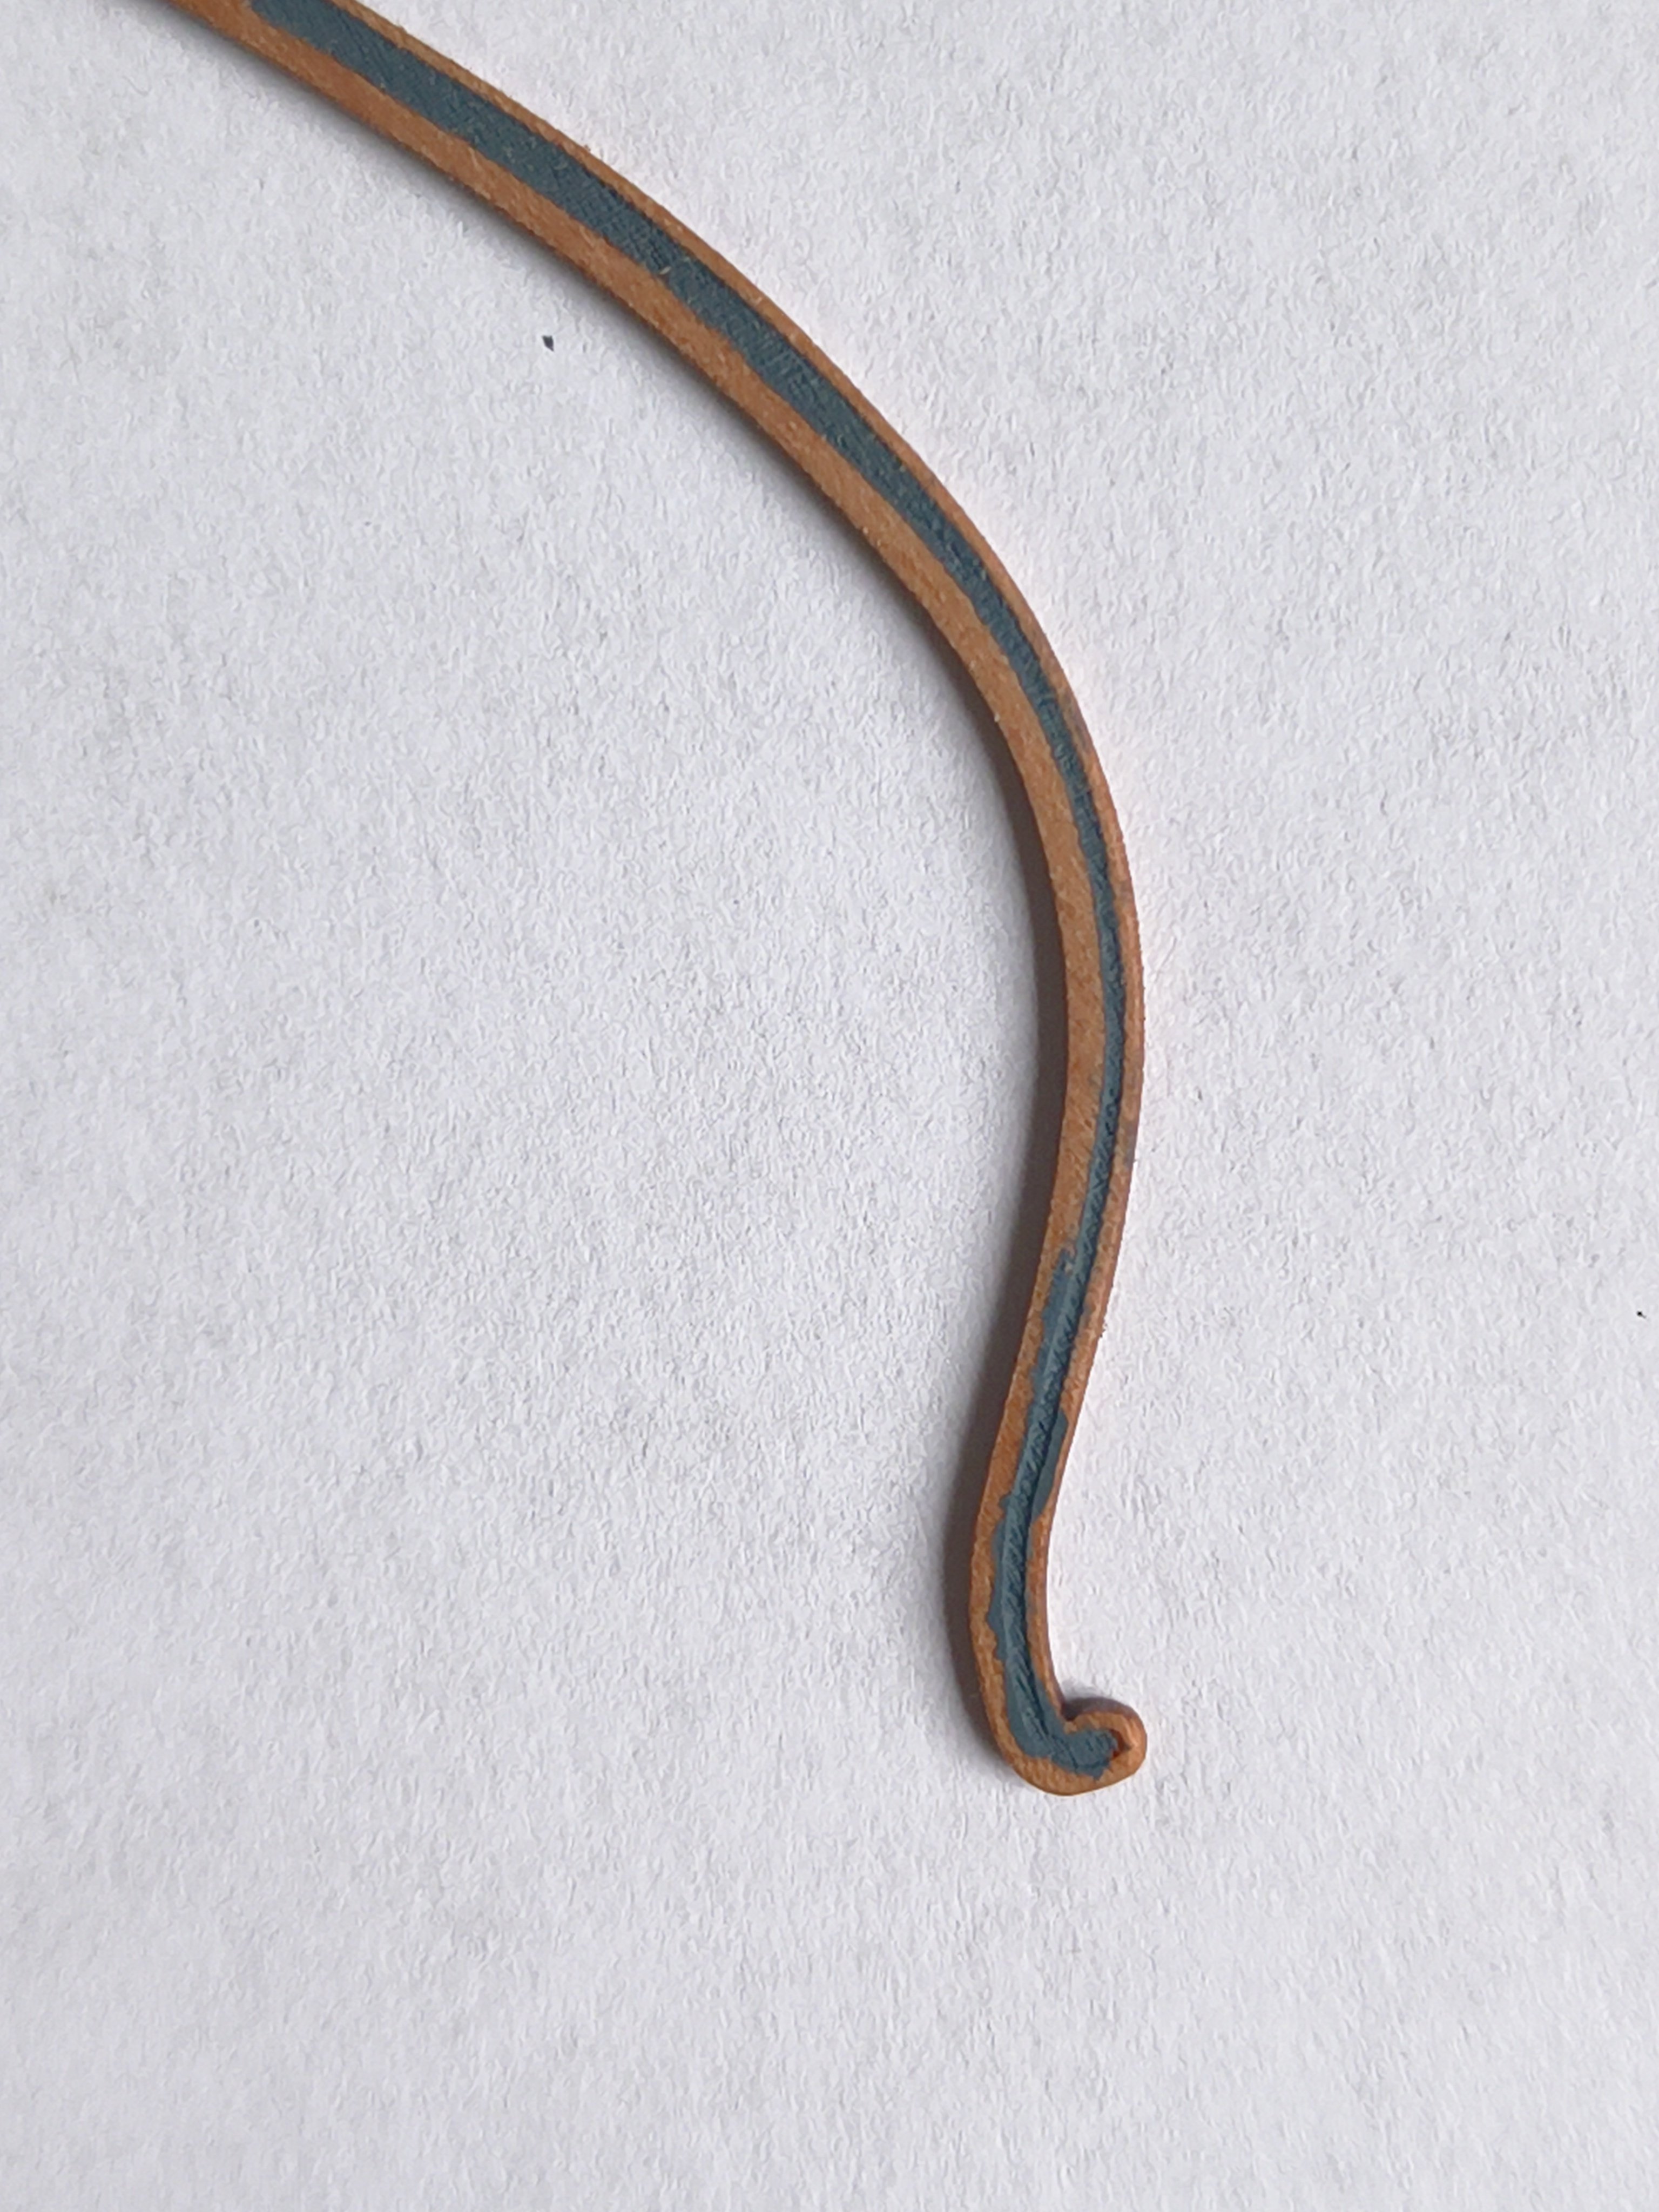
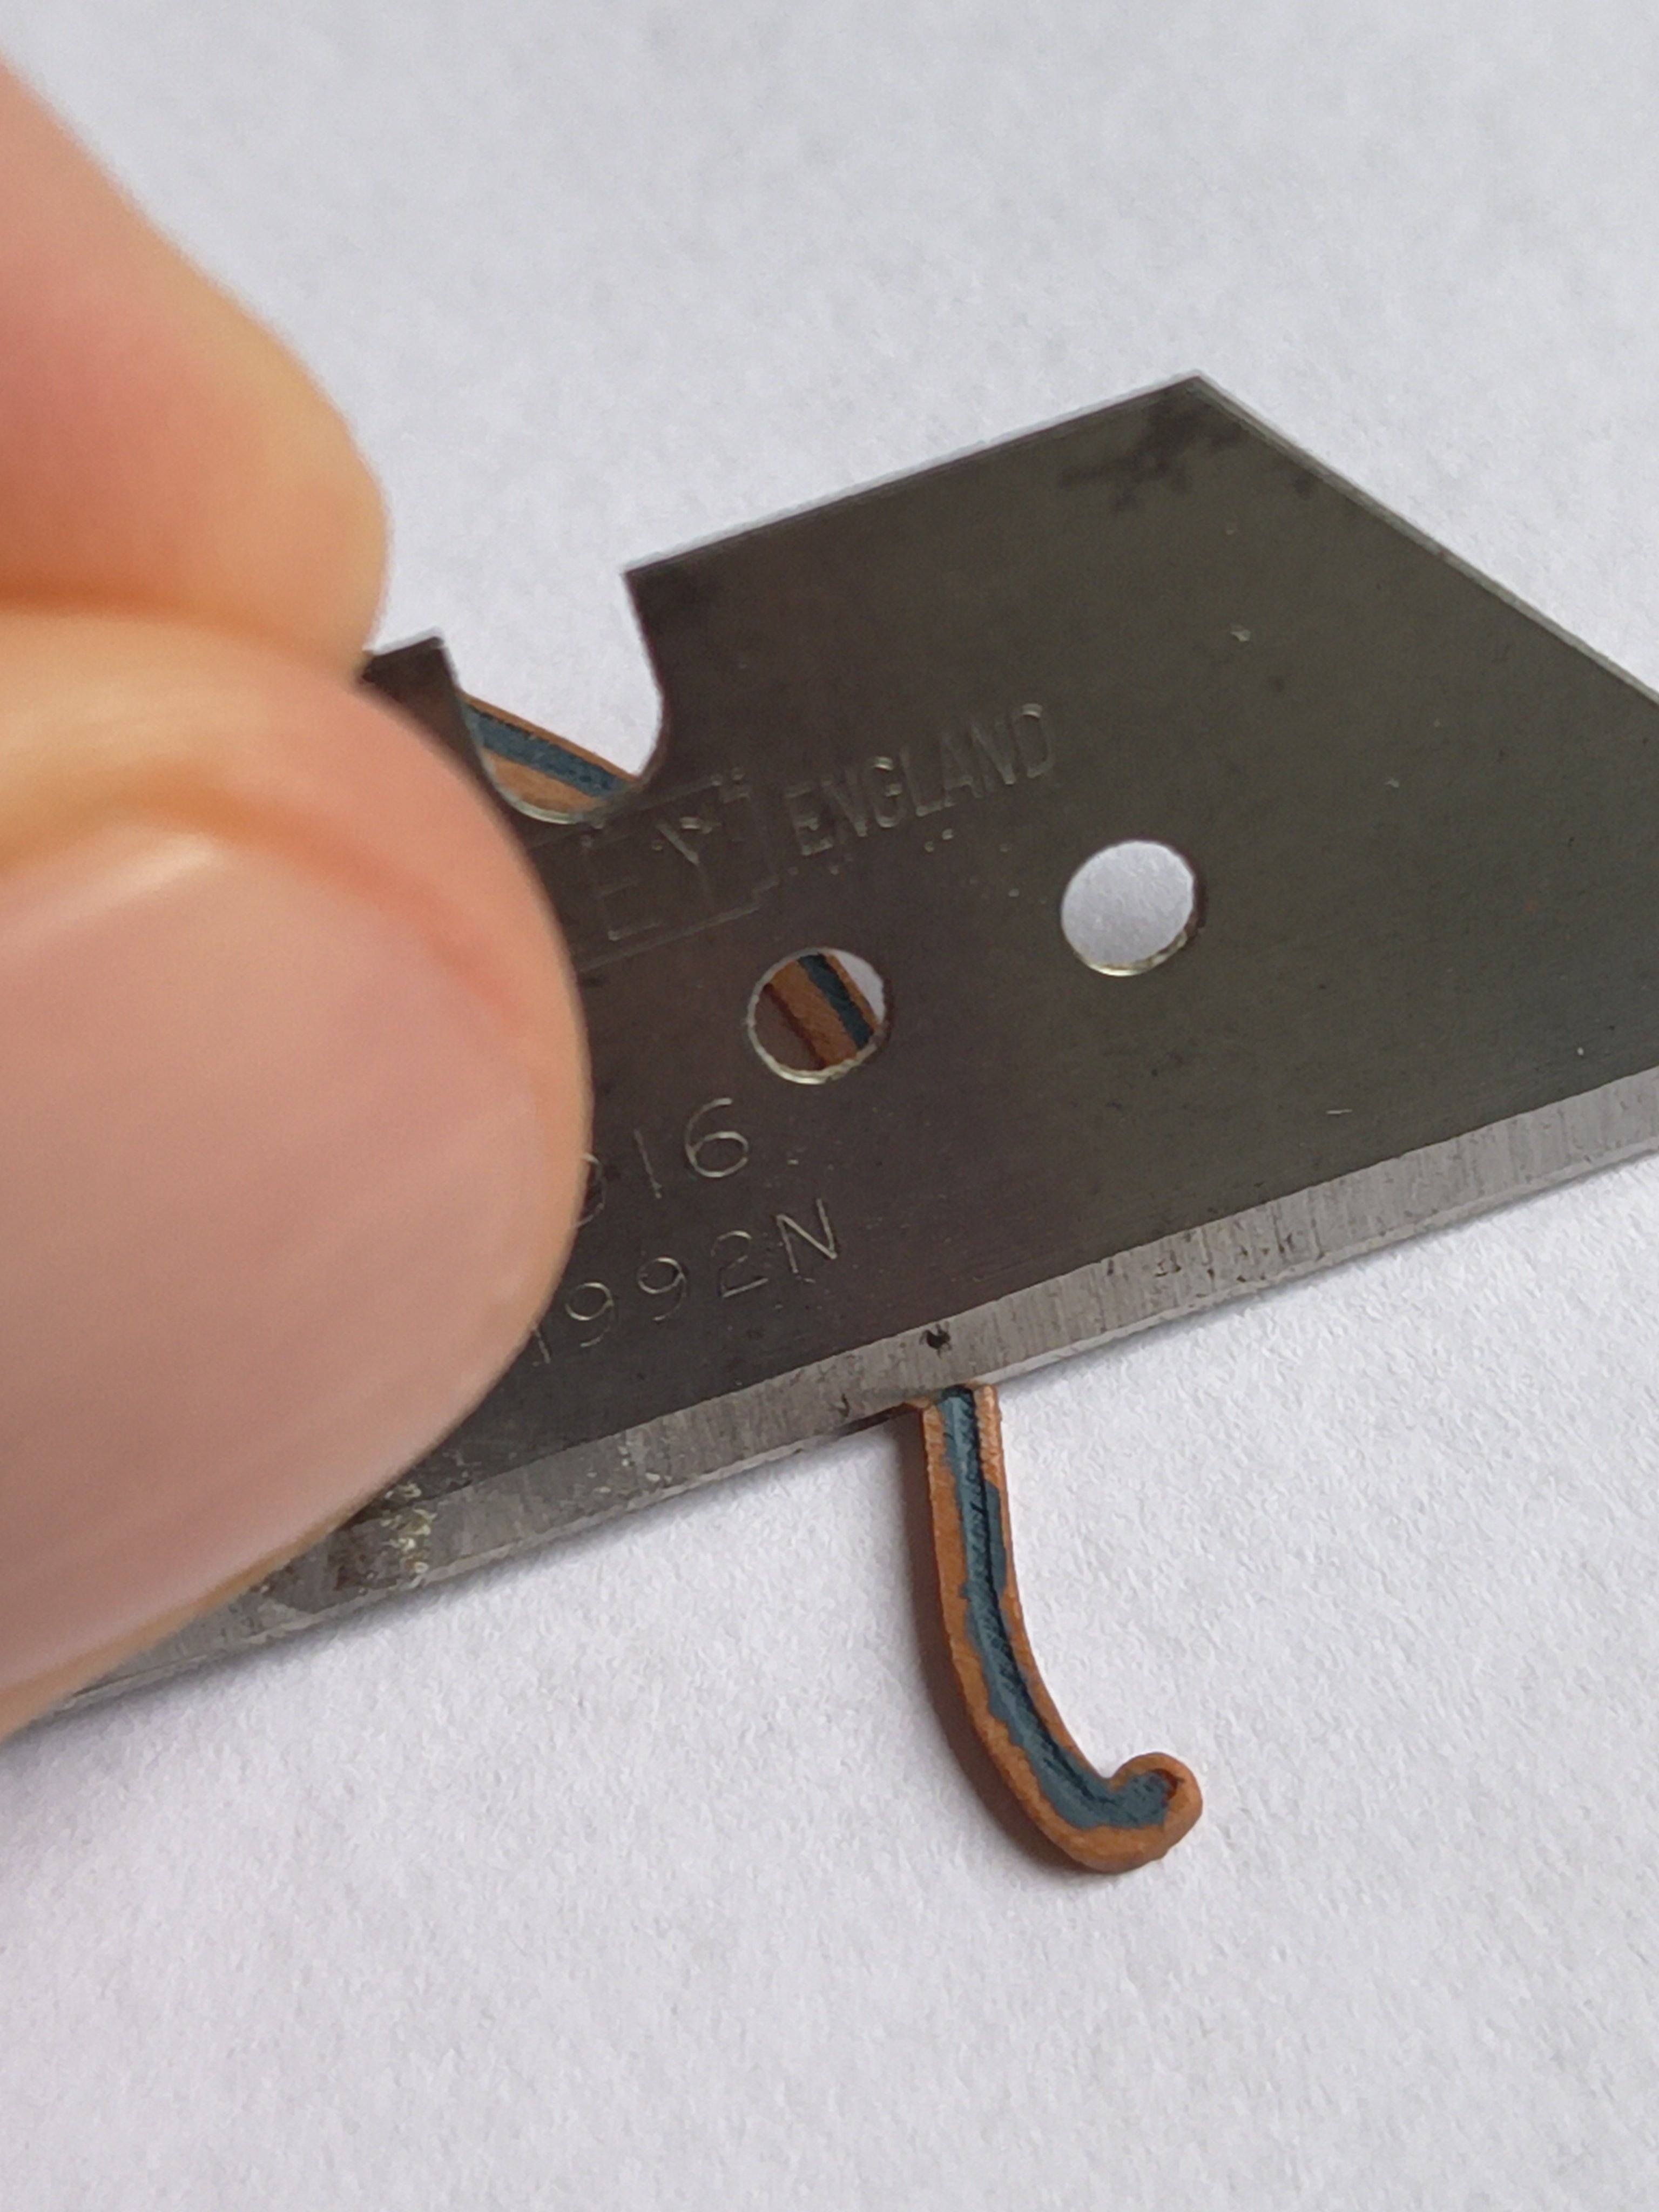
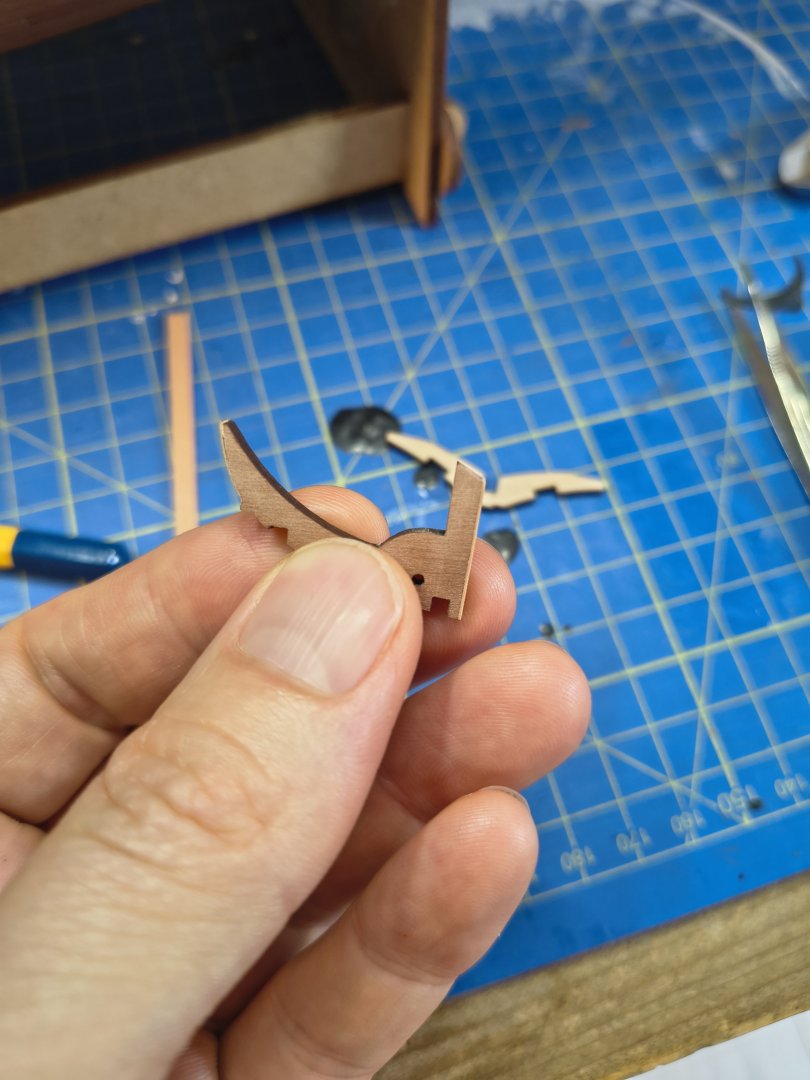
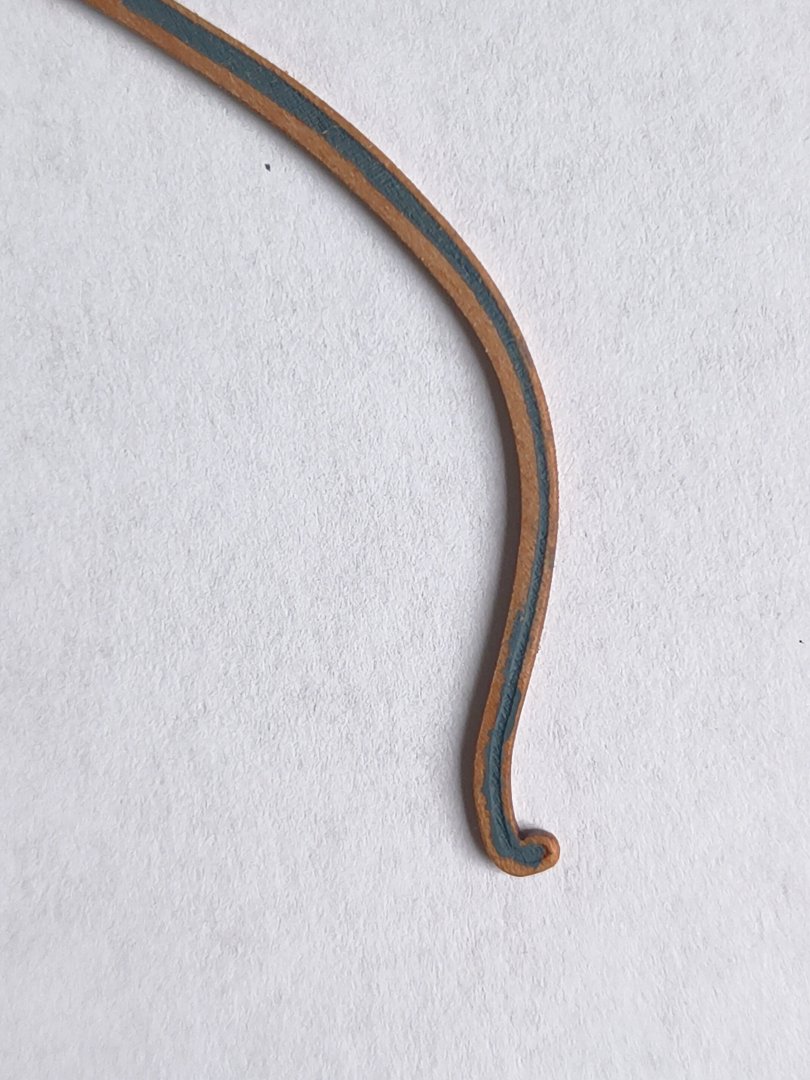
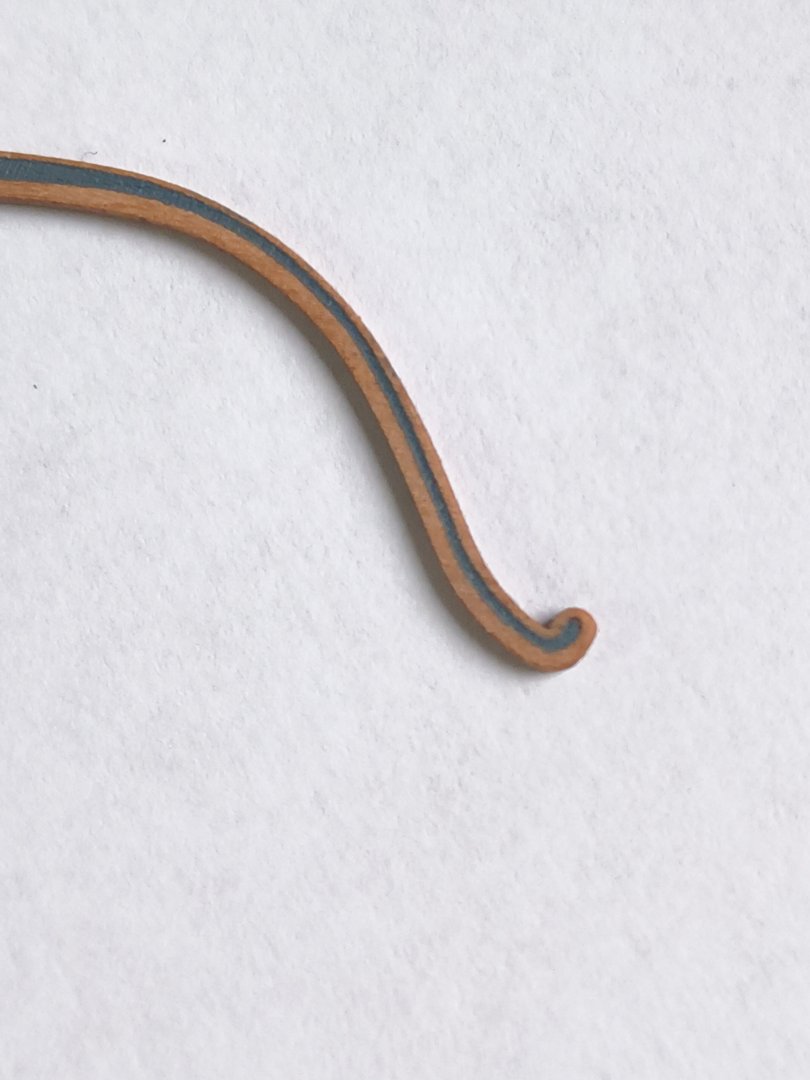
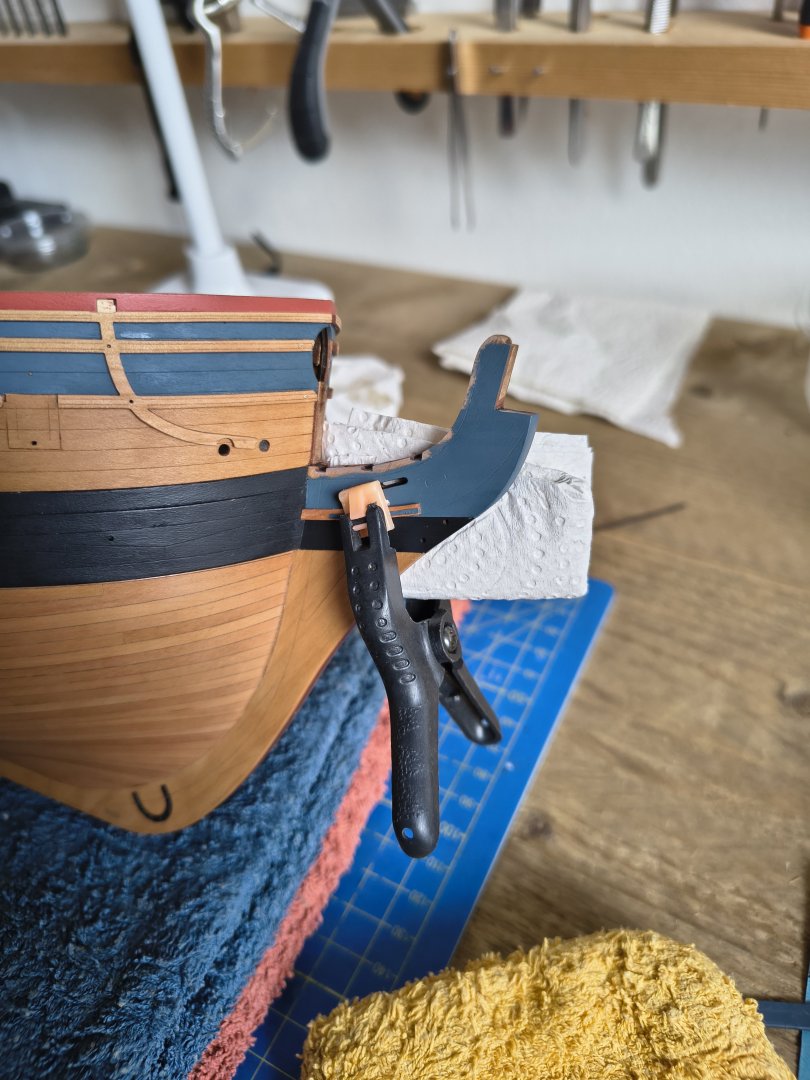
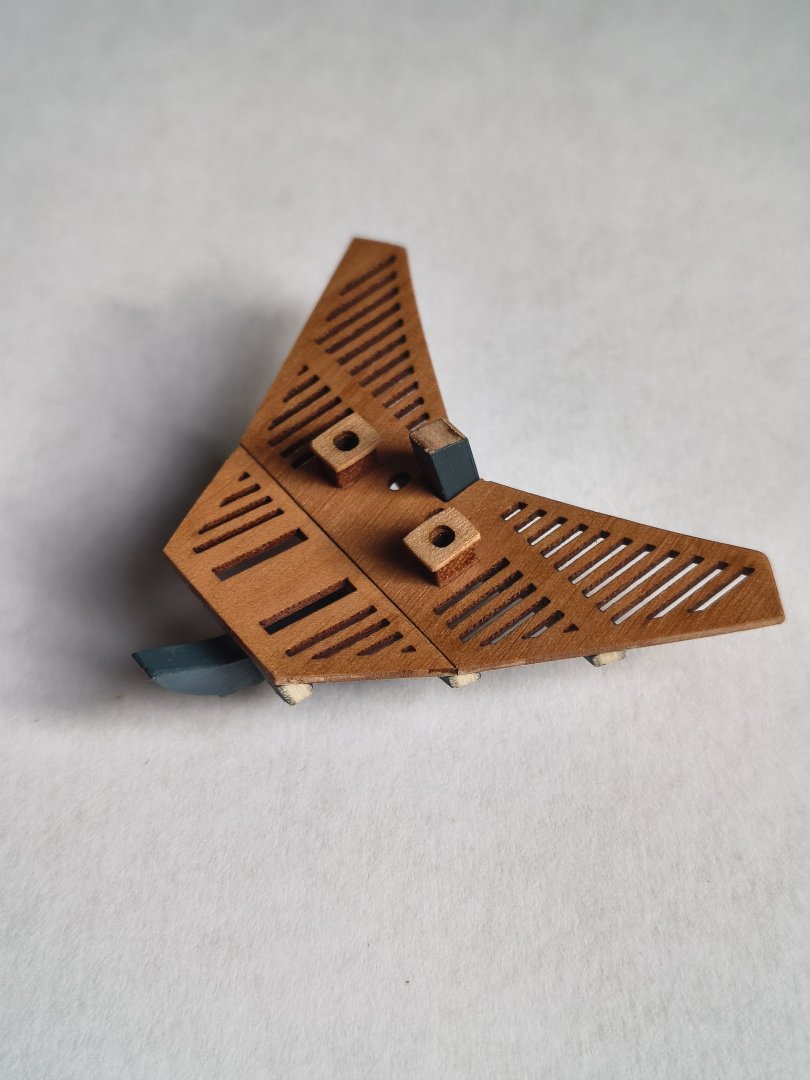
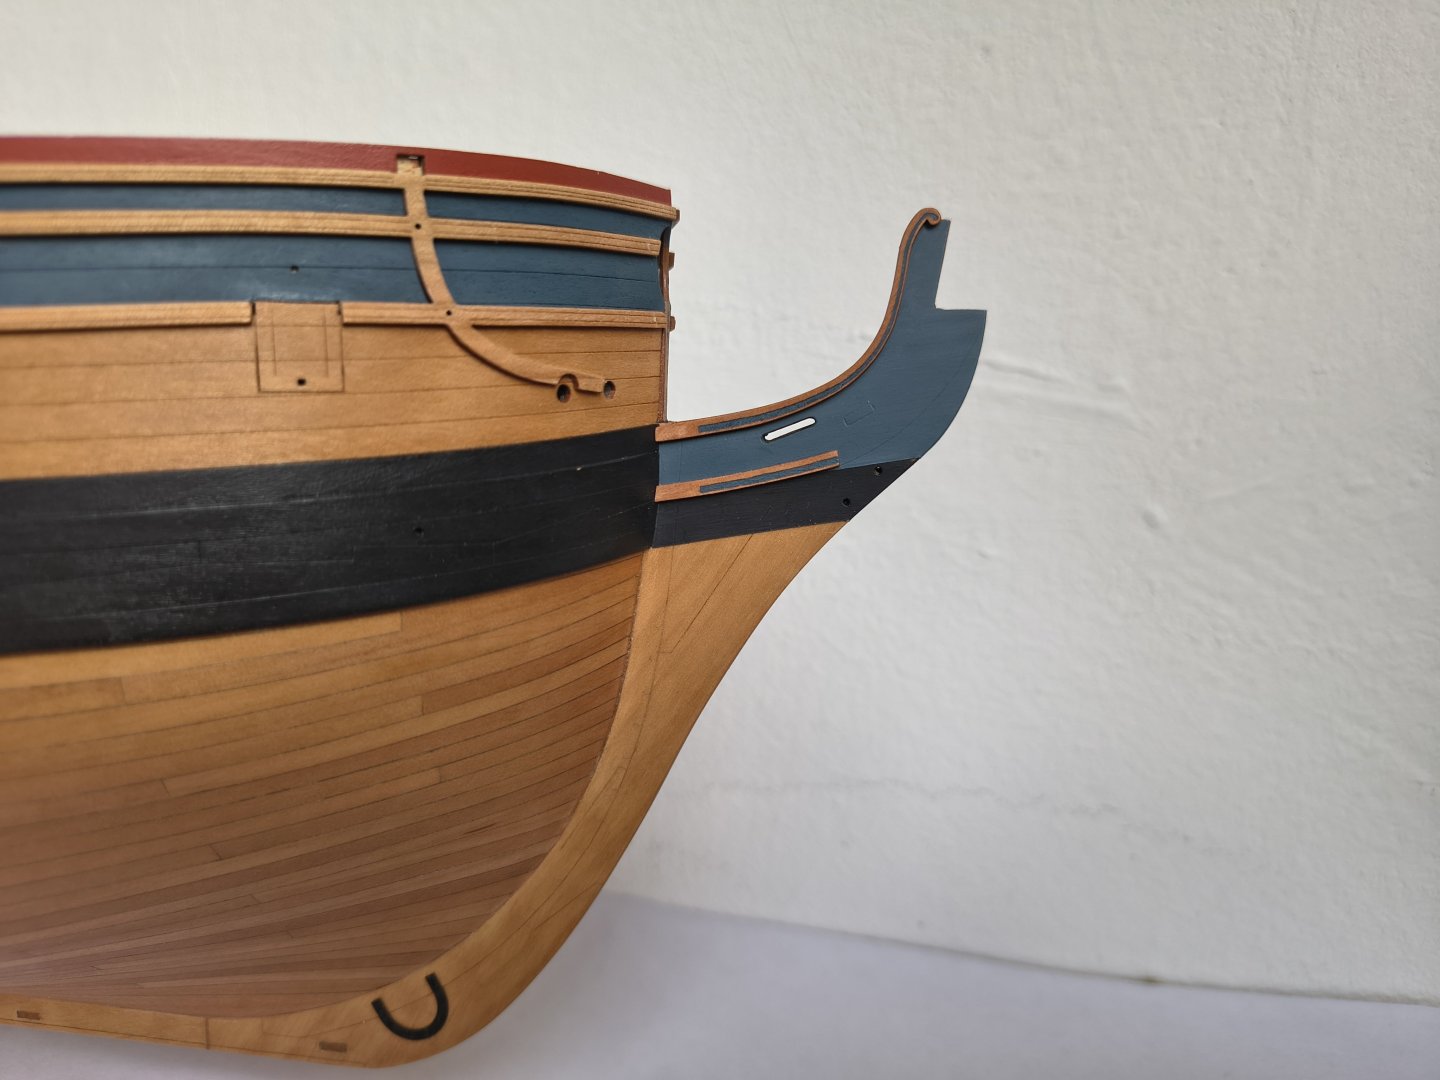
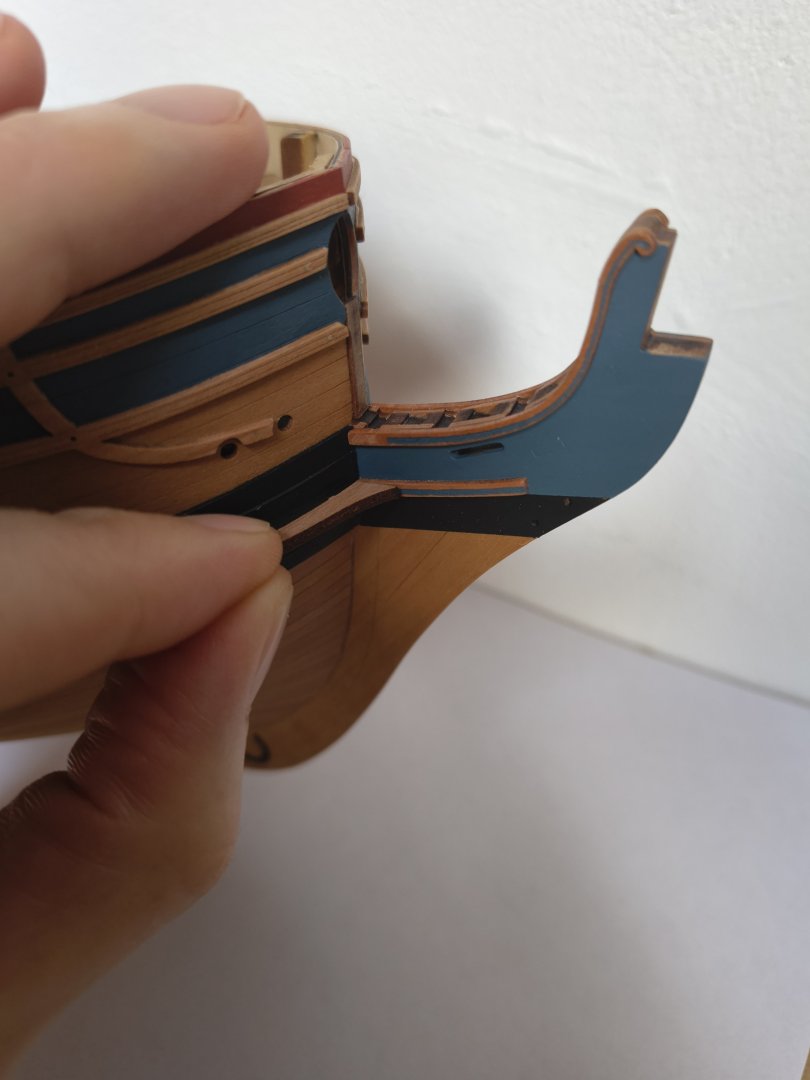
Update: I actually wanted to post an update only after I finished the entire bow...but I had so little time to actually work on the ship, so I thought...might as well post a small interim update. Otherwise, it'll be a very long update. First, I had to fit the gammoning knee. I noticed it didn't quite fit the curve of the prow. I probably sanded away the char a bit too enthusiastically. So I glued some scrap wood to the knee and then sanded it into shape. Supervisor 🥸 Next, I glued the V-brackets to the gammoning knee, but discovered that the middle one wasn't completely straight/level, which would cause problems. So, I loosened it with some alcohol and re-glued it. Dryfitting as much as possible, nothing glued here Okay...this part wasn't so good, haha. I was too hasty here. I had everything nicely taped off before painting, but I didn't do a good prep (sanding), and with the WOP already in the wood, removing the tape didn't go well. That was just stupid of me and way too hasty. Prepping is very important, especially if the wood has already been treated. I pulled off a nice chunk of paint while removing the tape But with a sharpened screwdriver I was able to remove the paint again and this time I did it properly with the right pre-treatment The bow hair brackets were relatively easy to paint because I could scrape off the excess blue paint with a knife. This gave me a nice, clean decorative line in the center, as the laser-etched decorative lines are slightly deeper than the rest. I did, however, paint the "raised areas" that weren't going to be blue with WOP first. This made the blue paint adhere even less, which was an advantage. Glued the bow hair brackets onto the now painted prow. It looks like this now I painted the black line at an angle, this seemed to be the case with almost all the contemporary models I've seen. From the side it then appears that the wales continues at the same angle towards the prow. I've already finished the bow grating, etc., but I'm still unsure whether I should do anything about the bow lower rails that will be attached to the sides. Blue Ensign indicated in his log that the slots in the V-brackets could be smaller. But perhaps I'm too far along in the build to do anything with this. It doesn't seem very visible in other build logs, so I might leave it as is. Later I will continue with sanding and attaching the bow cheeks That's it for now...I hope I can make some more progress in the near future


-
Yeah too bulky looks also not good, so I understand your reasoning 👍
-
Good start with the Swift! And a meticulous approach 👌
-
For me it's just a matter of taste/preference...that's all. Do you like a painted ship or just natural? But in terms of making money I wouldn't know to be honest. And yes you can cover mistakes with piant and filler, that's one of the benefits from painting a model
-
Love the wider shots! The ship comes really alive now with the fittings...great job so far
-
It looks quite thin indeed...but my knowledge is way to poor to give a real judgement
-
MONTAÑES by Amalio
Ronald-V replied to Amalio's topic in - Build logs for subjects built 1751 - 1800
Exquisite! 👌 -
Woah that looks nice! 🙃
-
-
Great works as always Kurt! Nice to see everything come together. What problems did you experience with the blue painted window insert spaces?
-
Thanks Perry! 🙏
-
Nice one Kenny! That will look very good when sanded
-
deck planking options
Ronald-V replied to manning16's topic in Building, Framing, Planking and plating a ships hull and deck
Yes...I think boxwood as well, It's a bit closer to the cherry color, which, in my opinion, makes it look more cohesive. Although cherry isn't a pear, you might be interested in Blue Ensign's HMS Sphinx. That's a combination of pear and boxwood. It gives the whole thing a slightly softer look. Unless you're someone who prefers stronger contrasts...then holly might be a better idea. -
Must be a real nice hull to plank! That shape is beautiful and looks not to difficult
-
Beautiful model! Well done! 👌
-
To be honest, I thought you were joking that after Chris shows his figure designs, there have been 1001 suggestions in the past about a finger looking too long or something like that. But I didn't know you were serious. 👍
-
Have fun with your new kit! I'm curious how it's going to look with the new resin castings
-
Thank you!😀