DONATION DRIVE - SUPPORT MSW - DO YOUR PART TO KEEP THIS GREAT FORUM GOING!
×


Ronald-V
-
Posts
1,899 -
Joined
-
Last visited
Content Type
Profiles
Forums
Gallery
Events
Everything posted by Ronald-V
-
To be honest...if I wanted to build a Victory, only the Caldercraft one would be good enough in my opinion.
-
 I never experienced staines from the graphite myself If you've applied it as neatly and smoothly as you did, I don't see how the graphite would end up on top of the deck and be smeared by the sandpaper. Some people use a scraper afterward to smooth the deck (not sure if that prevents the stains), but I've always used sandpaper myself and haven't encountered any problems.
 -
Nice paintwork Glenn 👍
-
Wish you all the light in these days Kevin, and i'm looking forward to see this ship build by you
- 322 replies
-
- 3
-

-
- enterprise
- caf
- (and 1 more)
-
What a beautiful work so far Palmerit! And nice upgrades from Syren 👌
- 38 replies
-
- 2
-
-
- crabbing skiff
- Chesapeake Bay crabbing skiff
- (and 2 more)
-
Thanks Frecap! Yes color choice is not an easy task, because it can make or break a model in my opinion. We will see how it's going to turn out...will be exciting!
-
What a cute little boat! Very precise and clean work, nice!
-
Work area pictures only
Ronald-V replied to Johnny Mike's topic in Modeling tools and Workshop Equipment
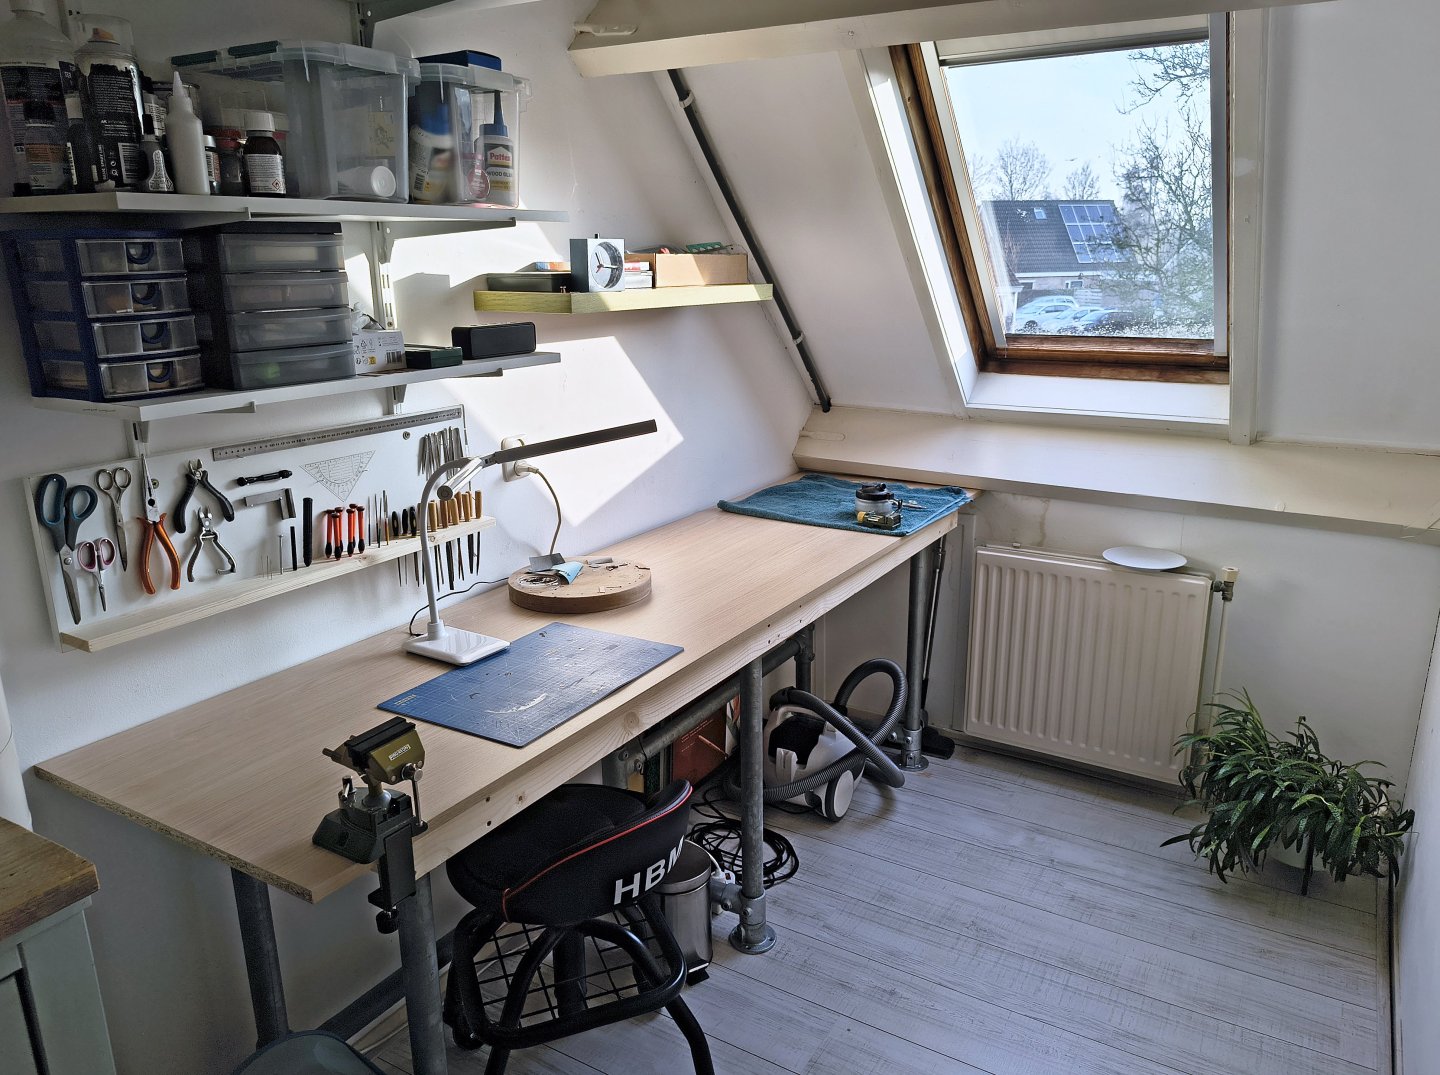
That's a beautiful workplace! If I may ask, what kind of magnifying lamp you have there? -
Thank you for your kind words Phil! To be honest I'm scared as **** all the time too . Not sure if that ever goes away 😄 Although, sometimes more so than other times. New steps, especially when you don't know exactly how or what, are scary. But this hobby is quite forgiving, meaning...if you mess something up, it's often relatively easy to repair or recreate from a scratch piece of wood, very different from plastic modeling, where, in my opinion, it's more difficult to recreate something. But you learn quickly in this hobby, and it will definitely work out, no worries! Take your time...and for me, I only work on it when I feel like it. As soon as it starts to get frustrating or I want to finish something quickly to get to the next step, I walk away and pick it up again when I really feel like it. That makes it much more fun for me (though it does take longer ). Also everyone else thanks for the likes!
-
Thanks Glenn!
-
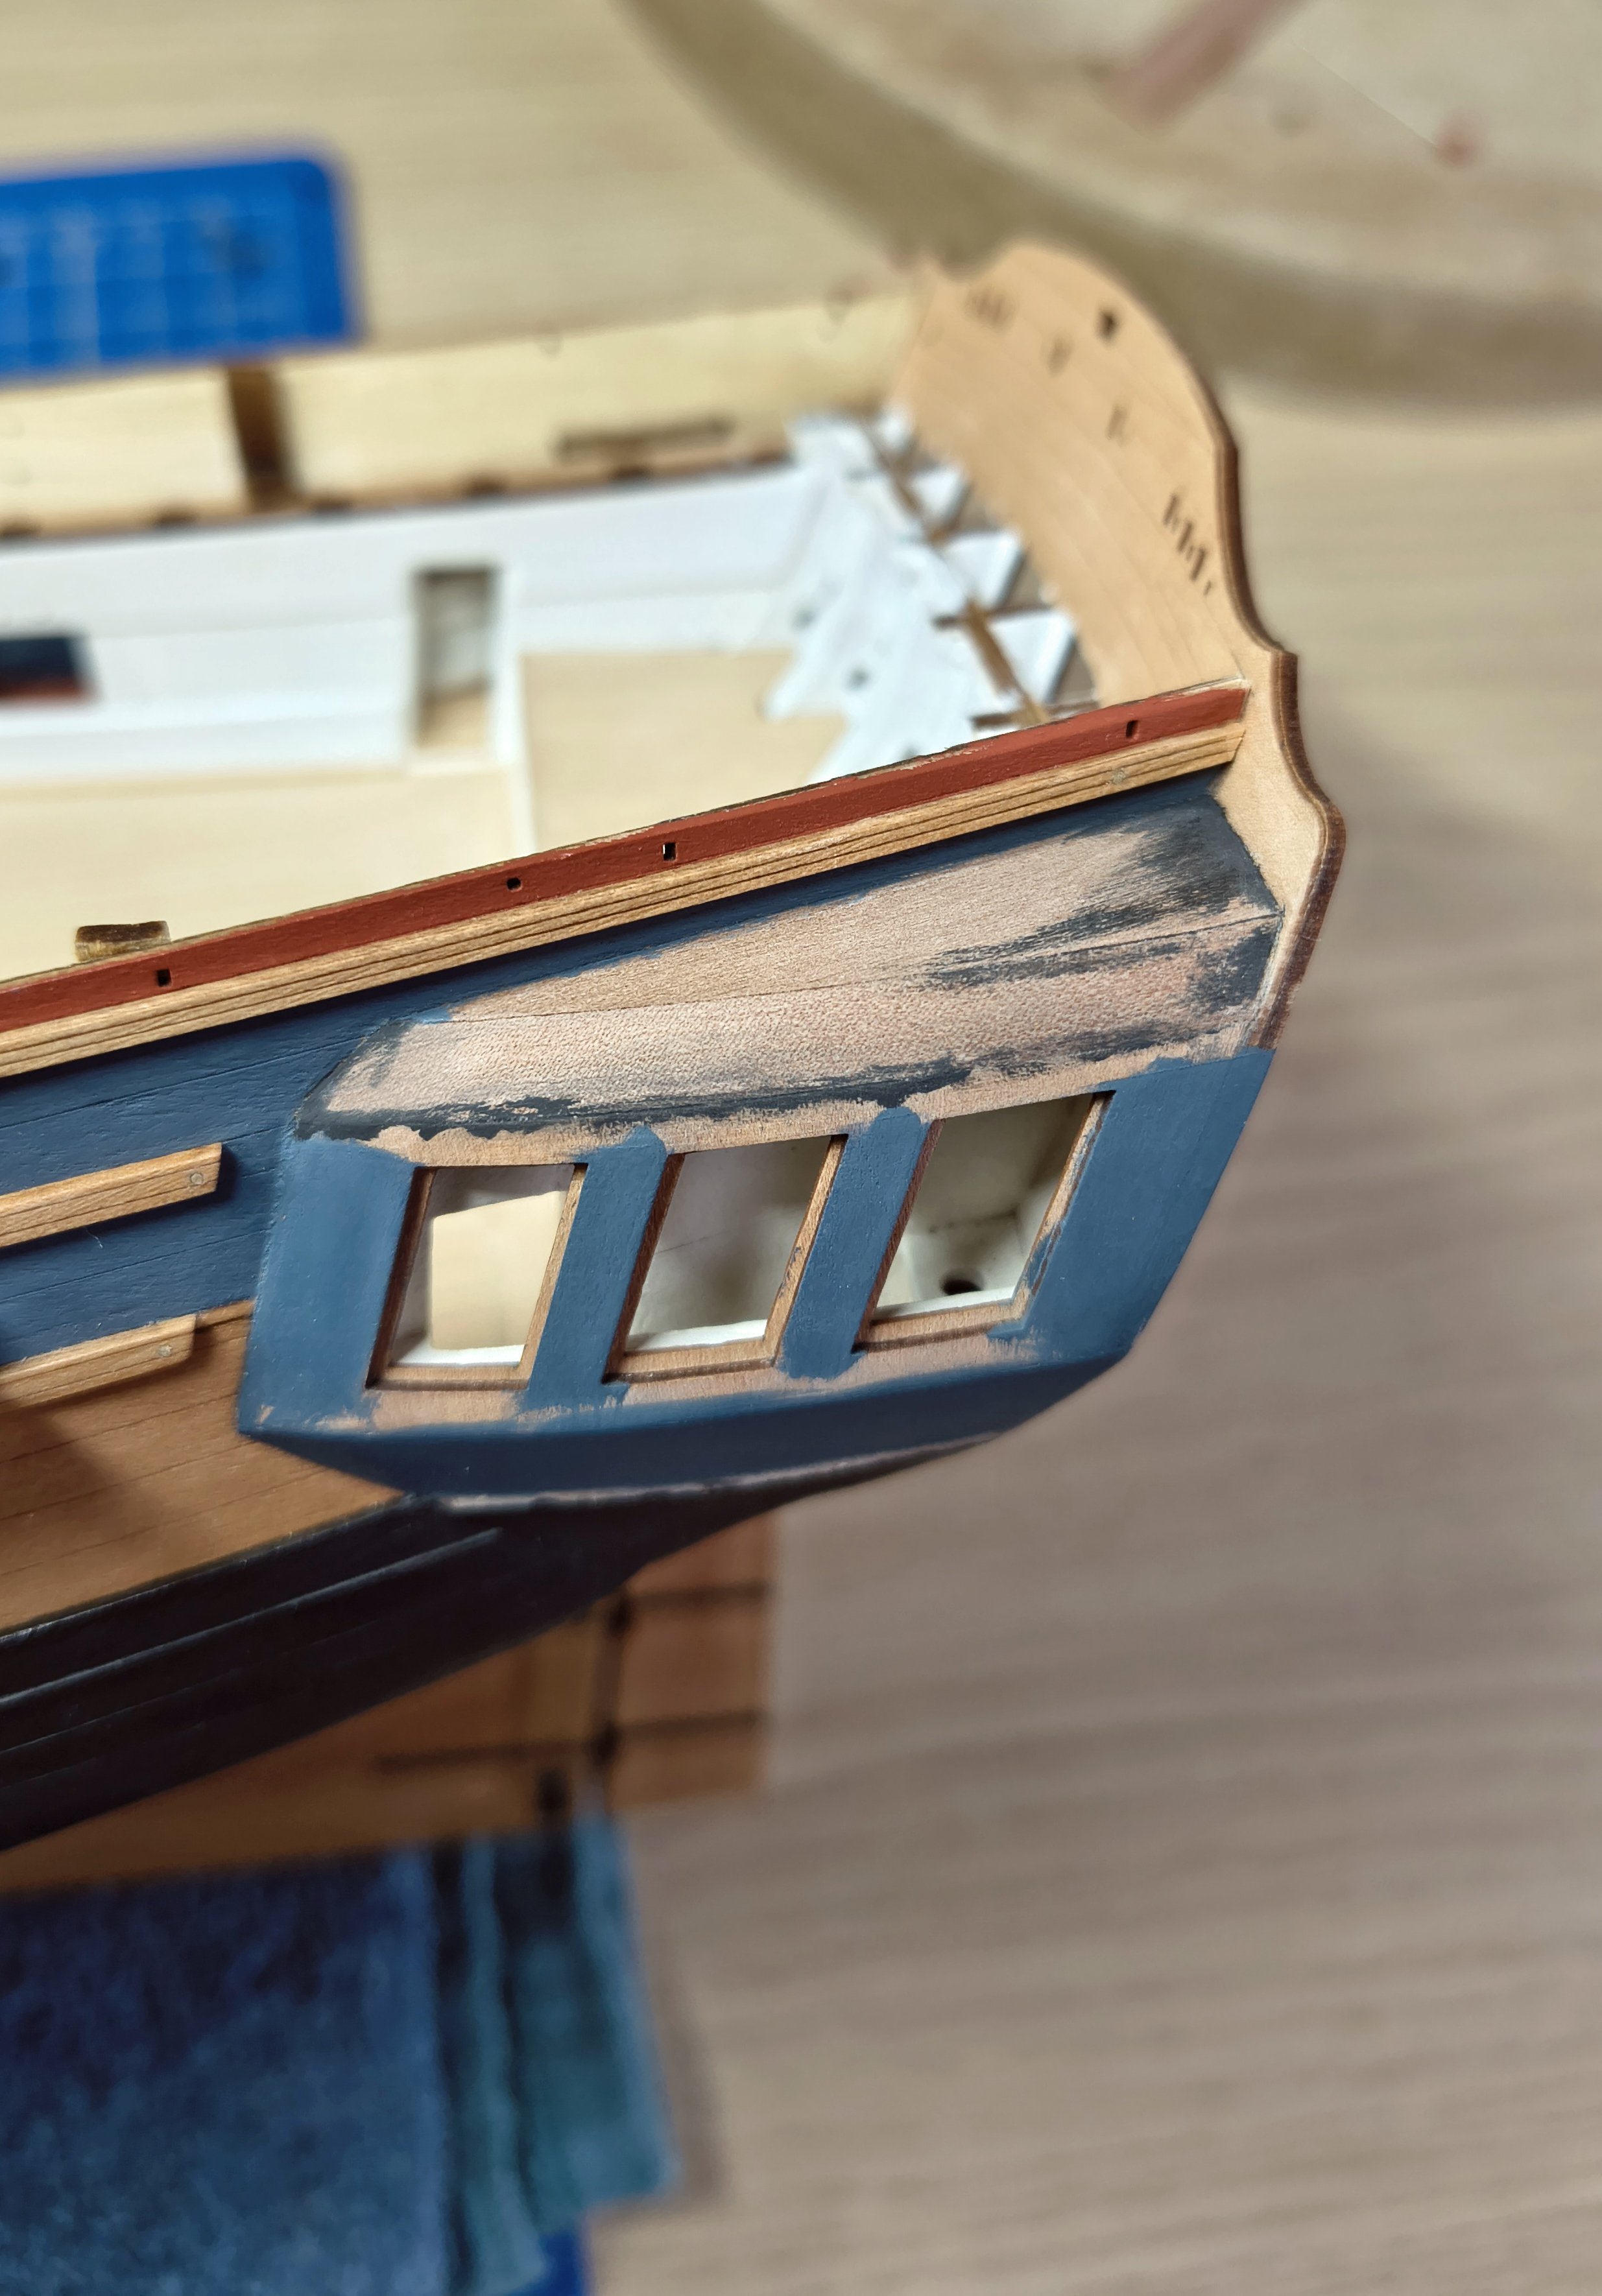
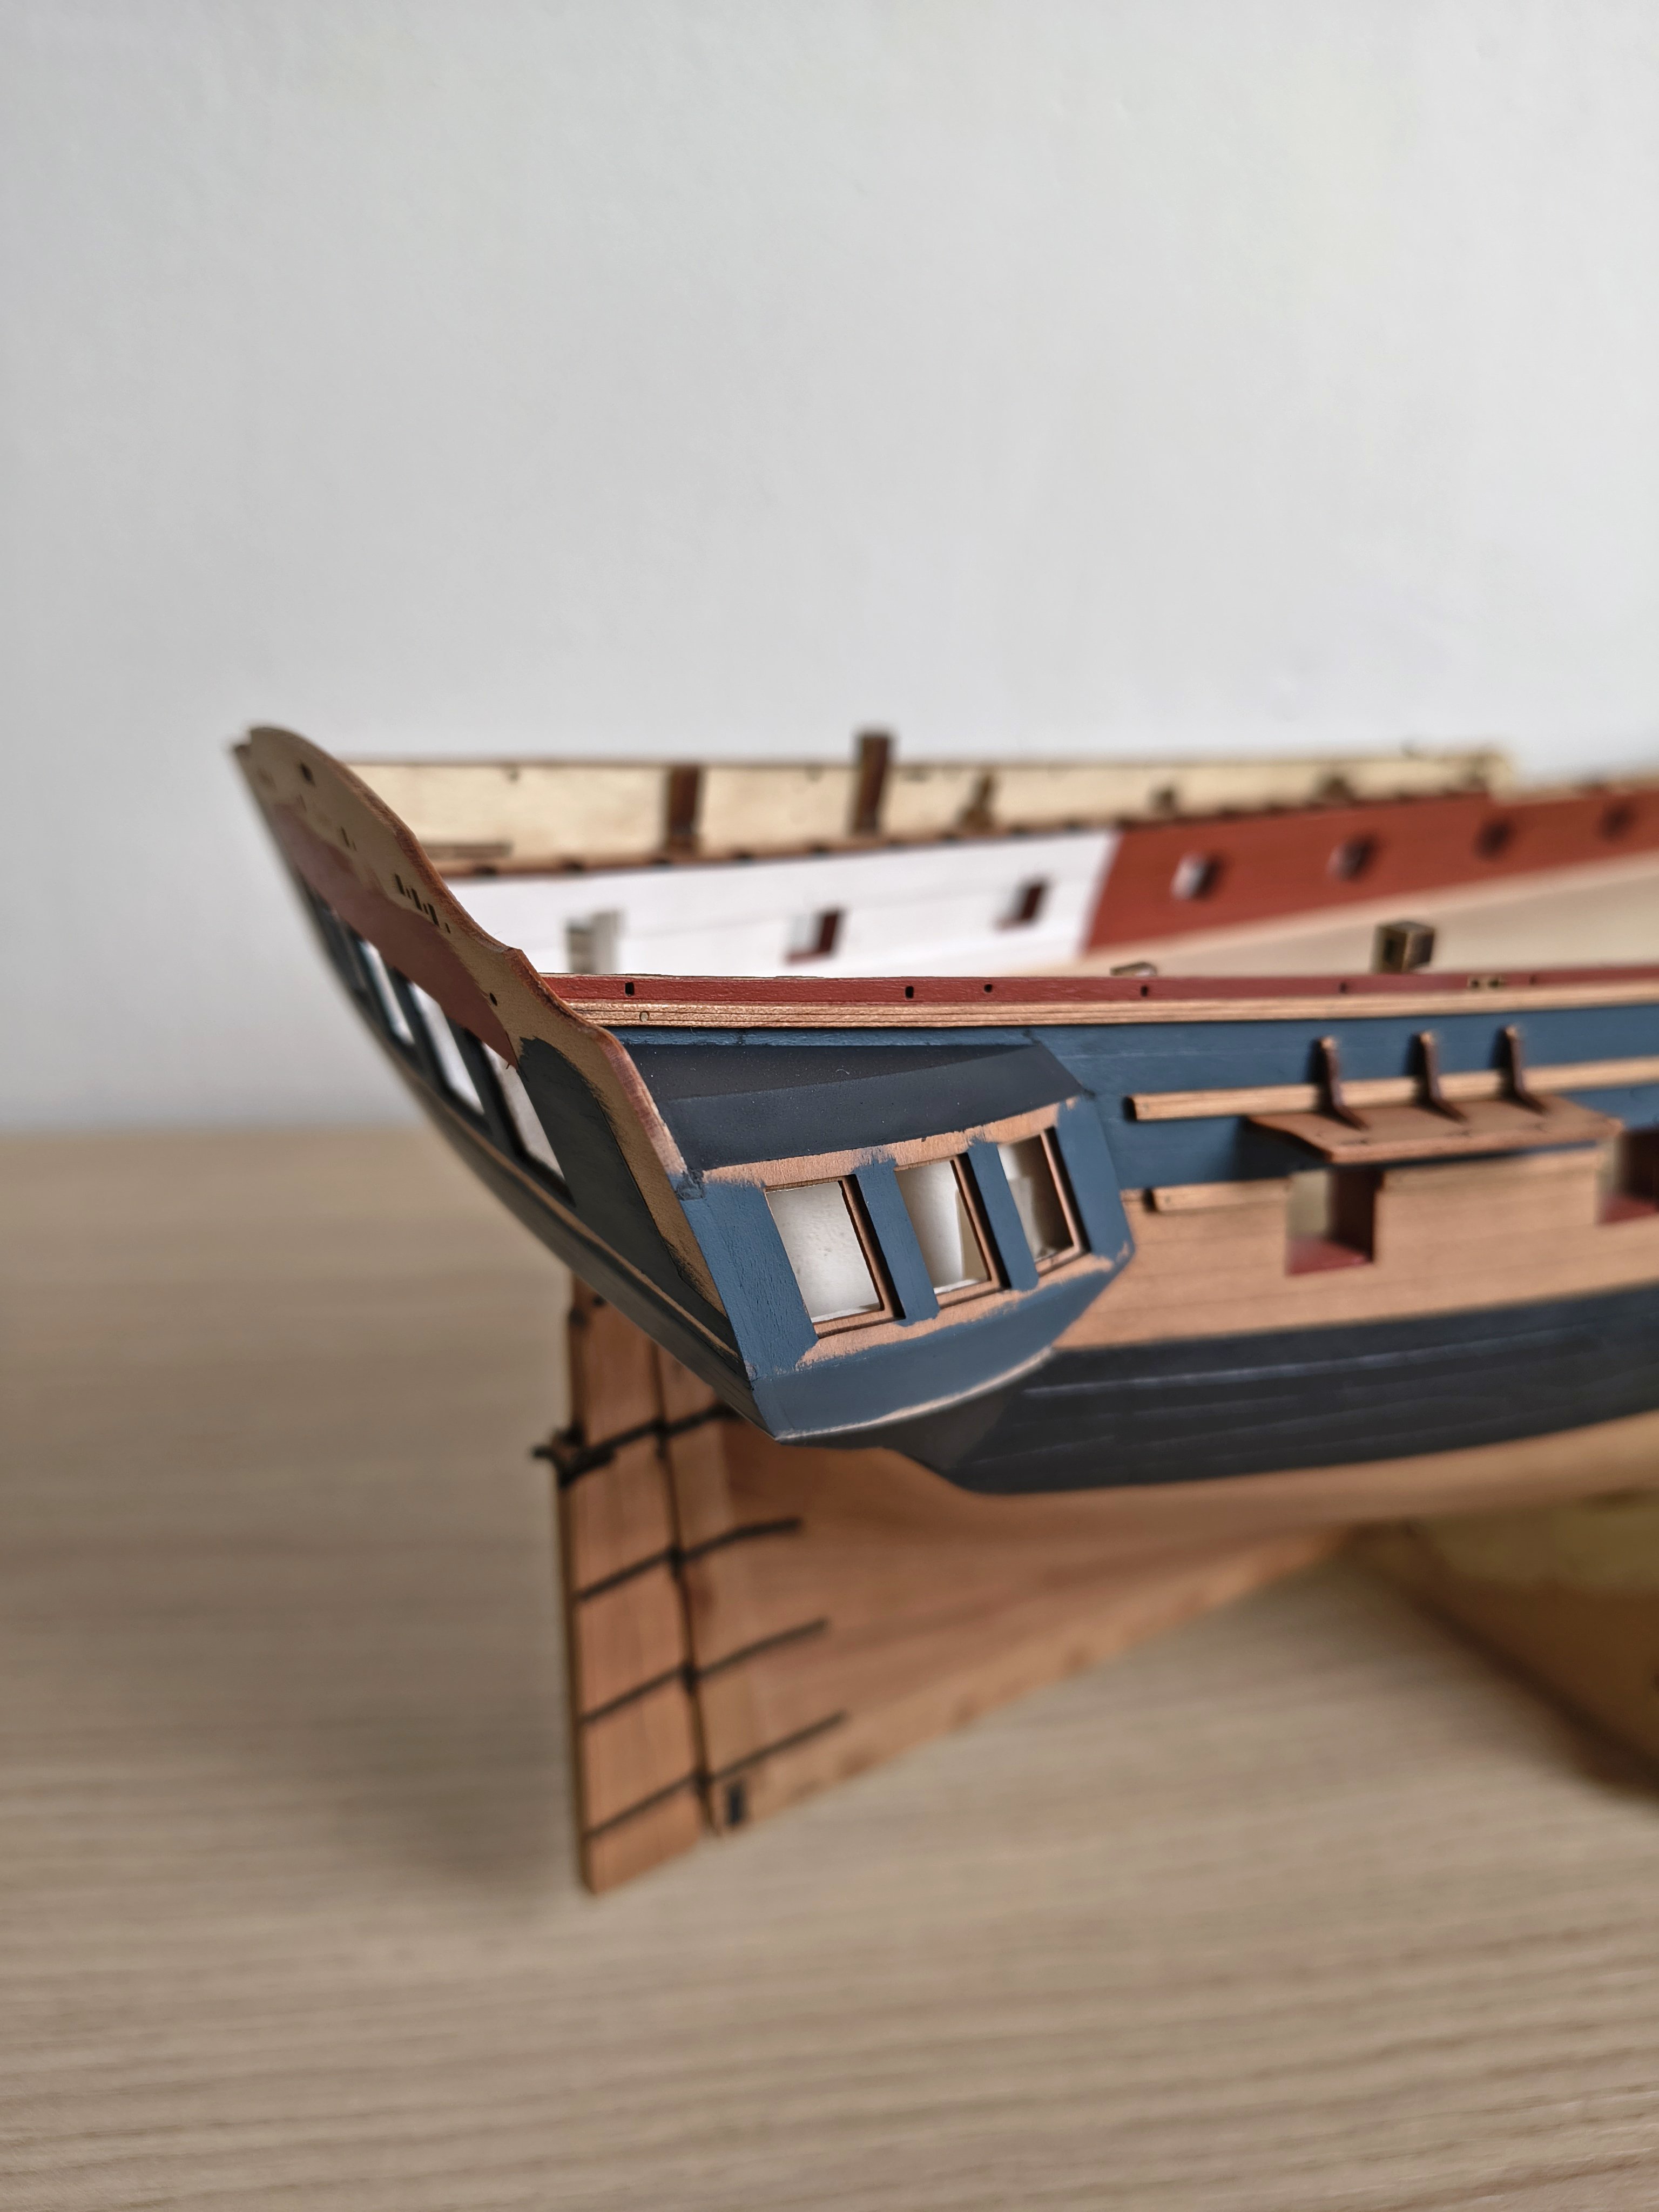
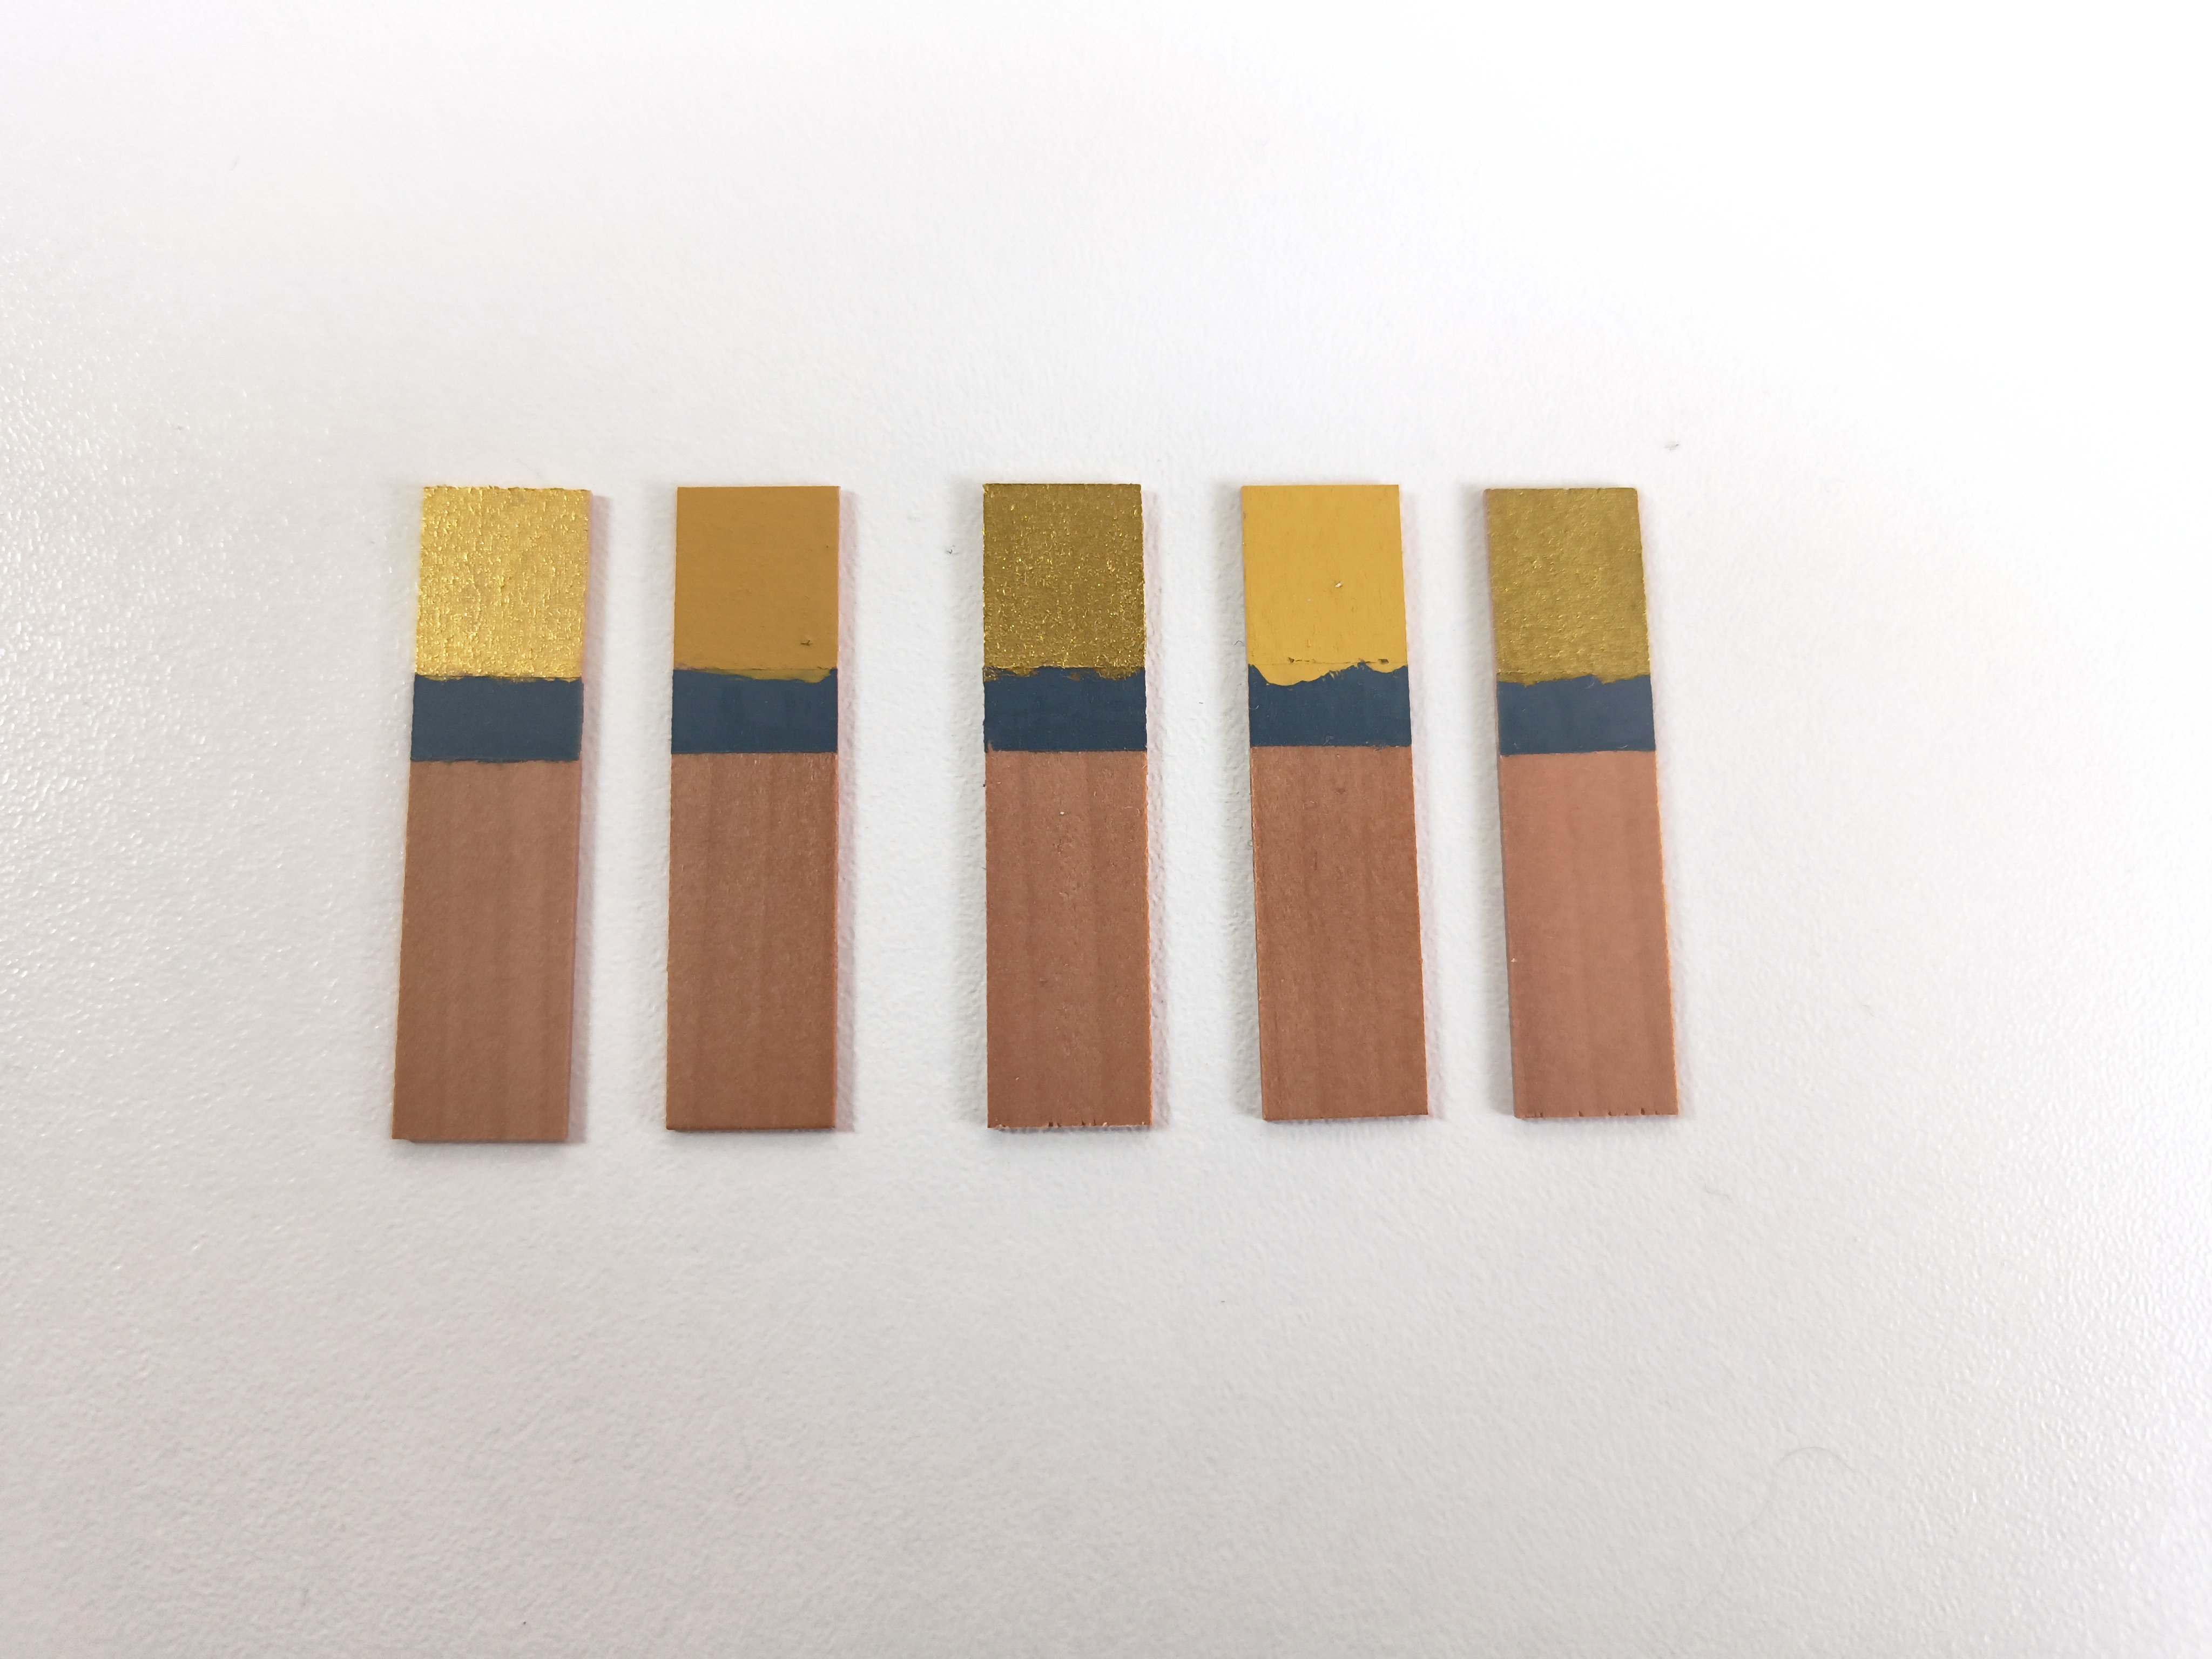
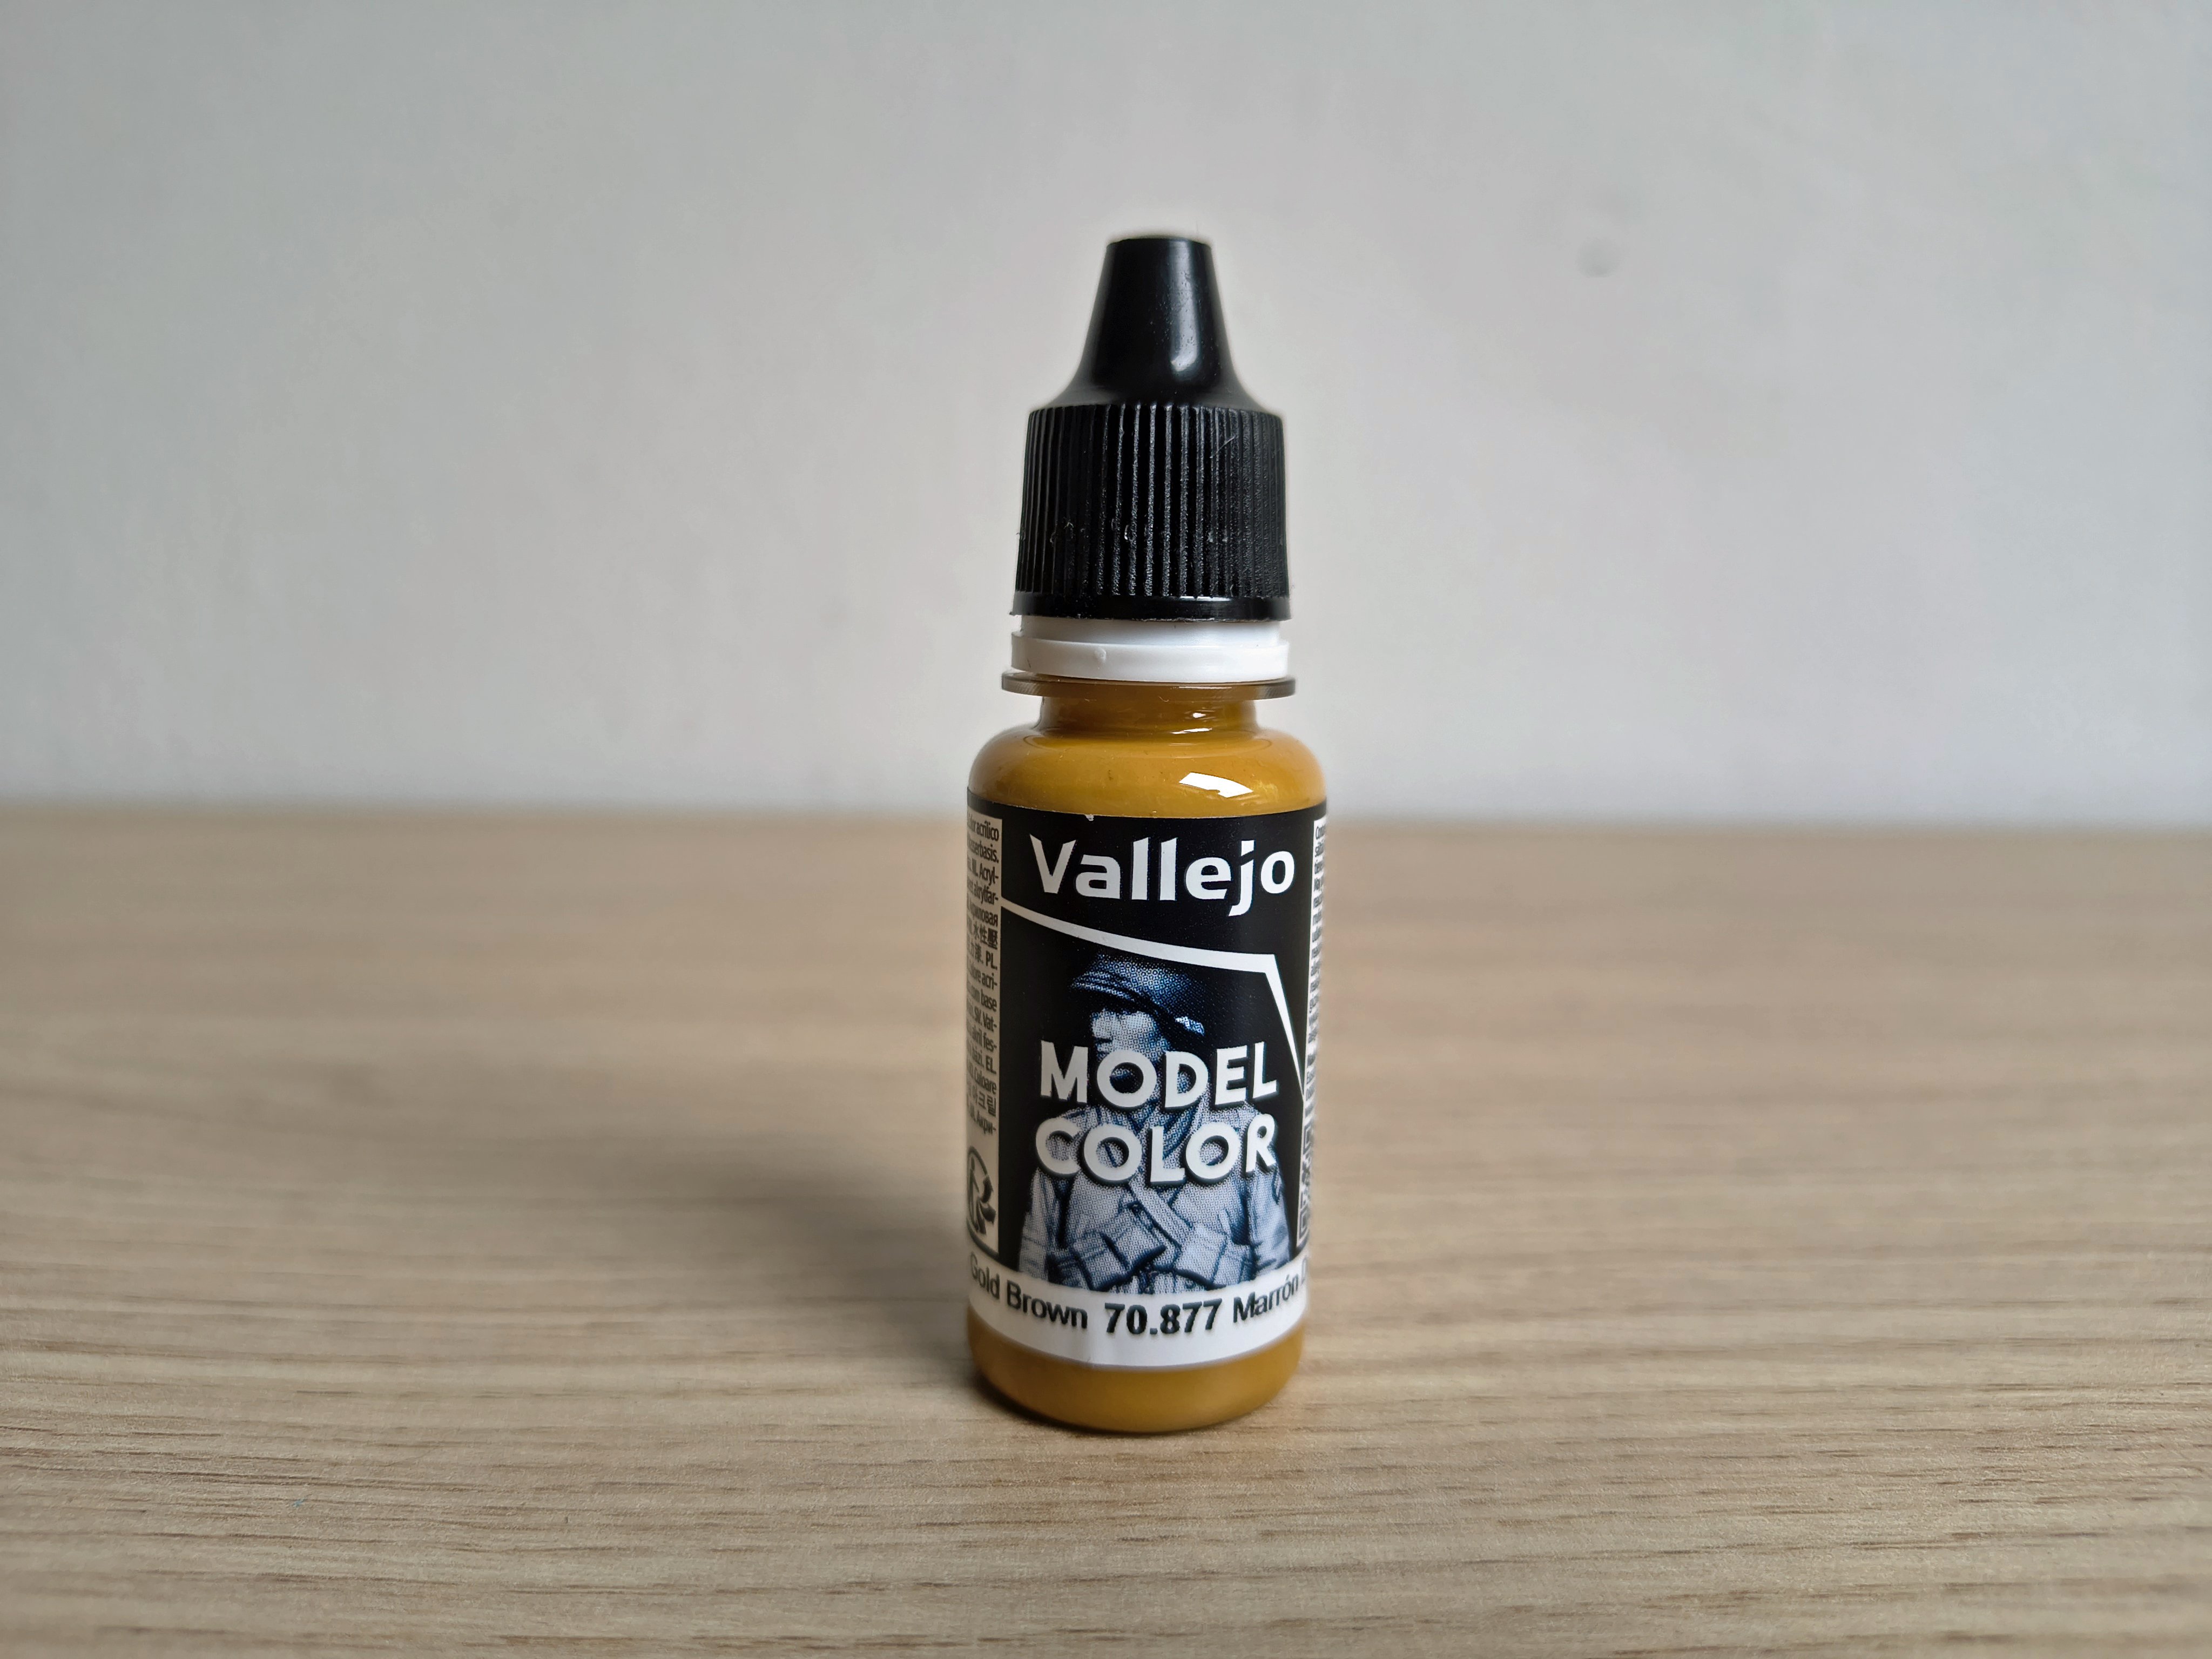
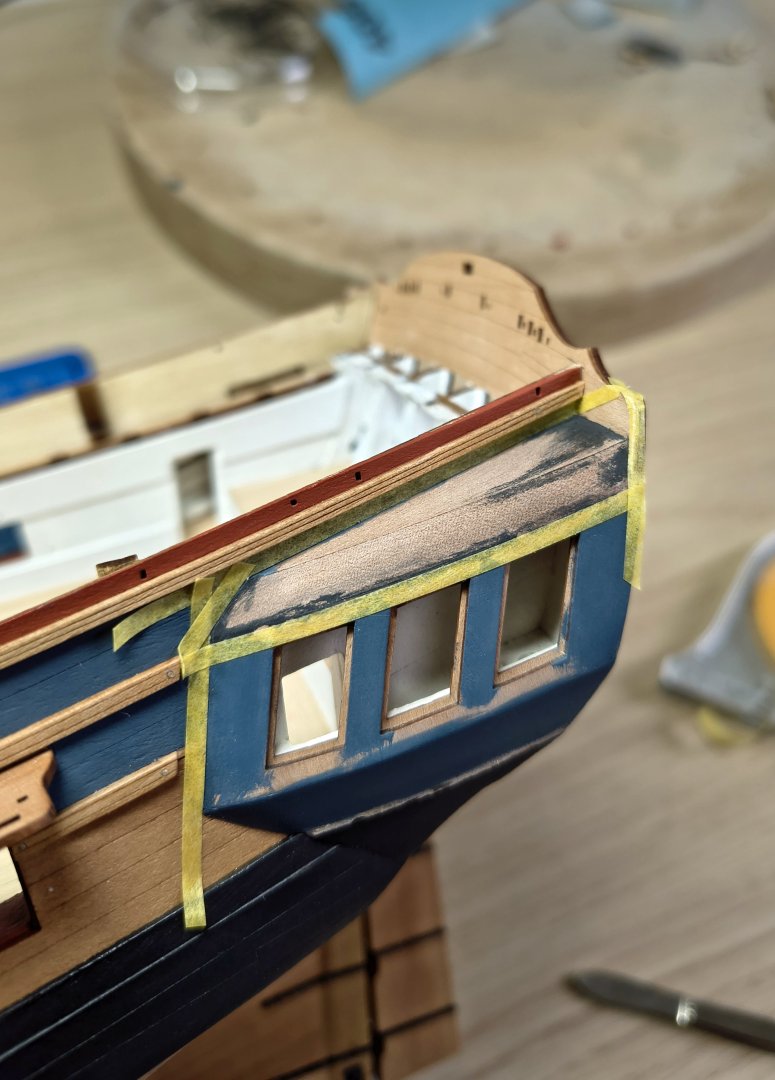
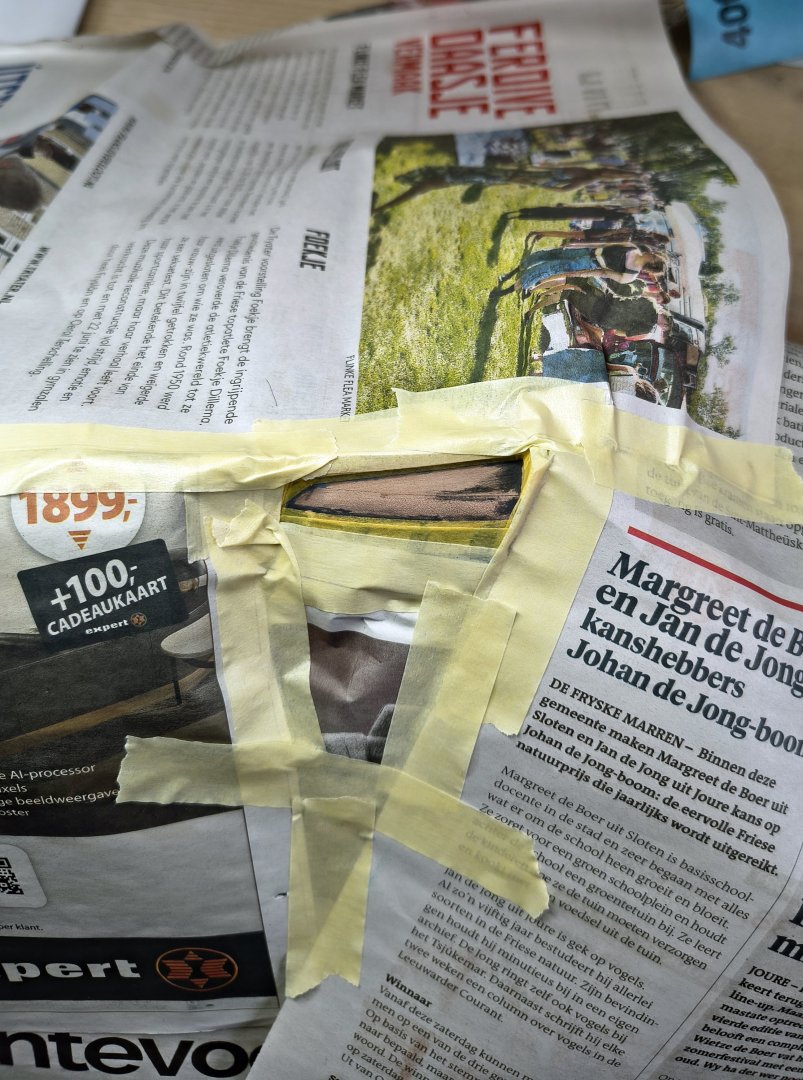
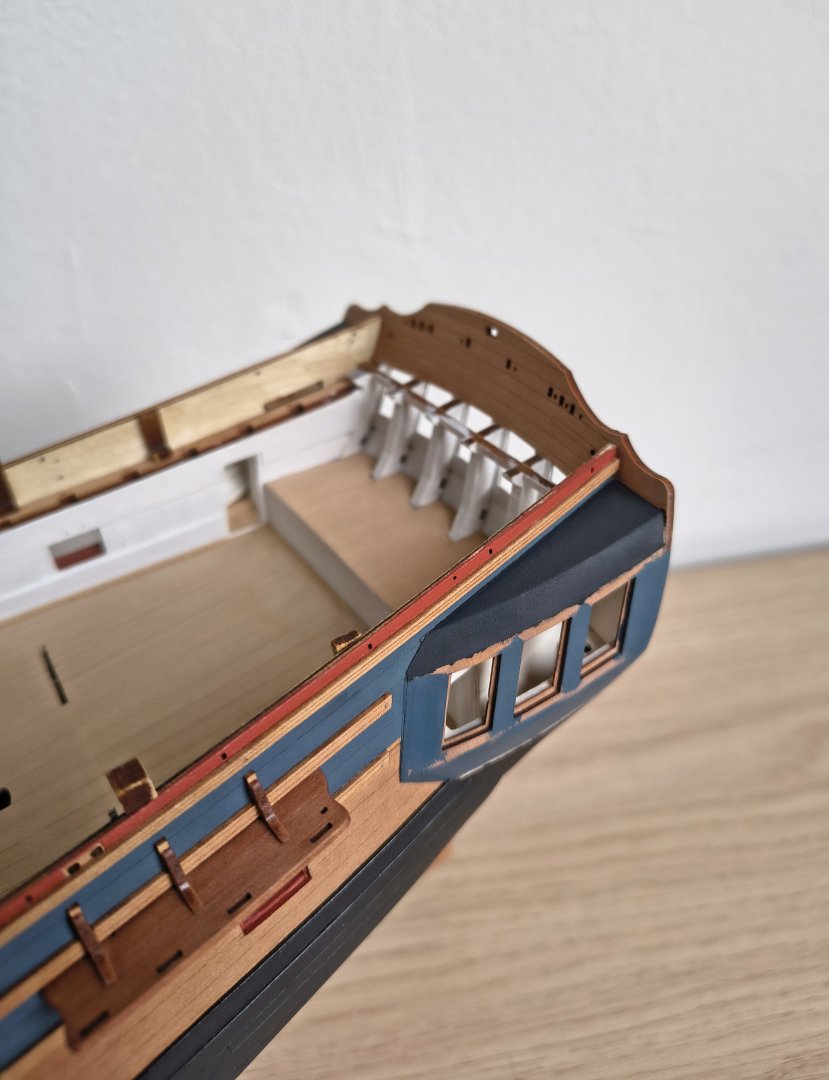
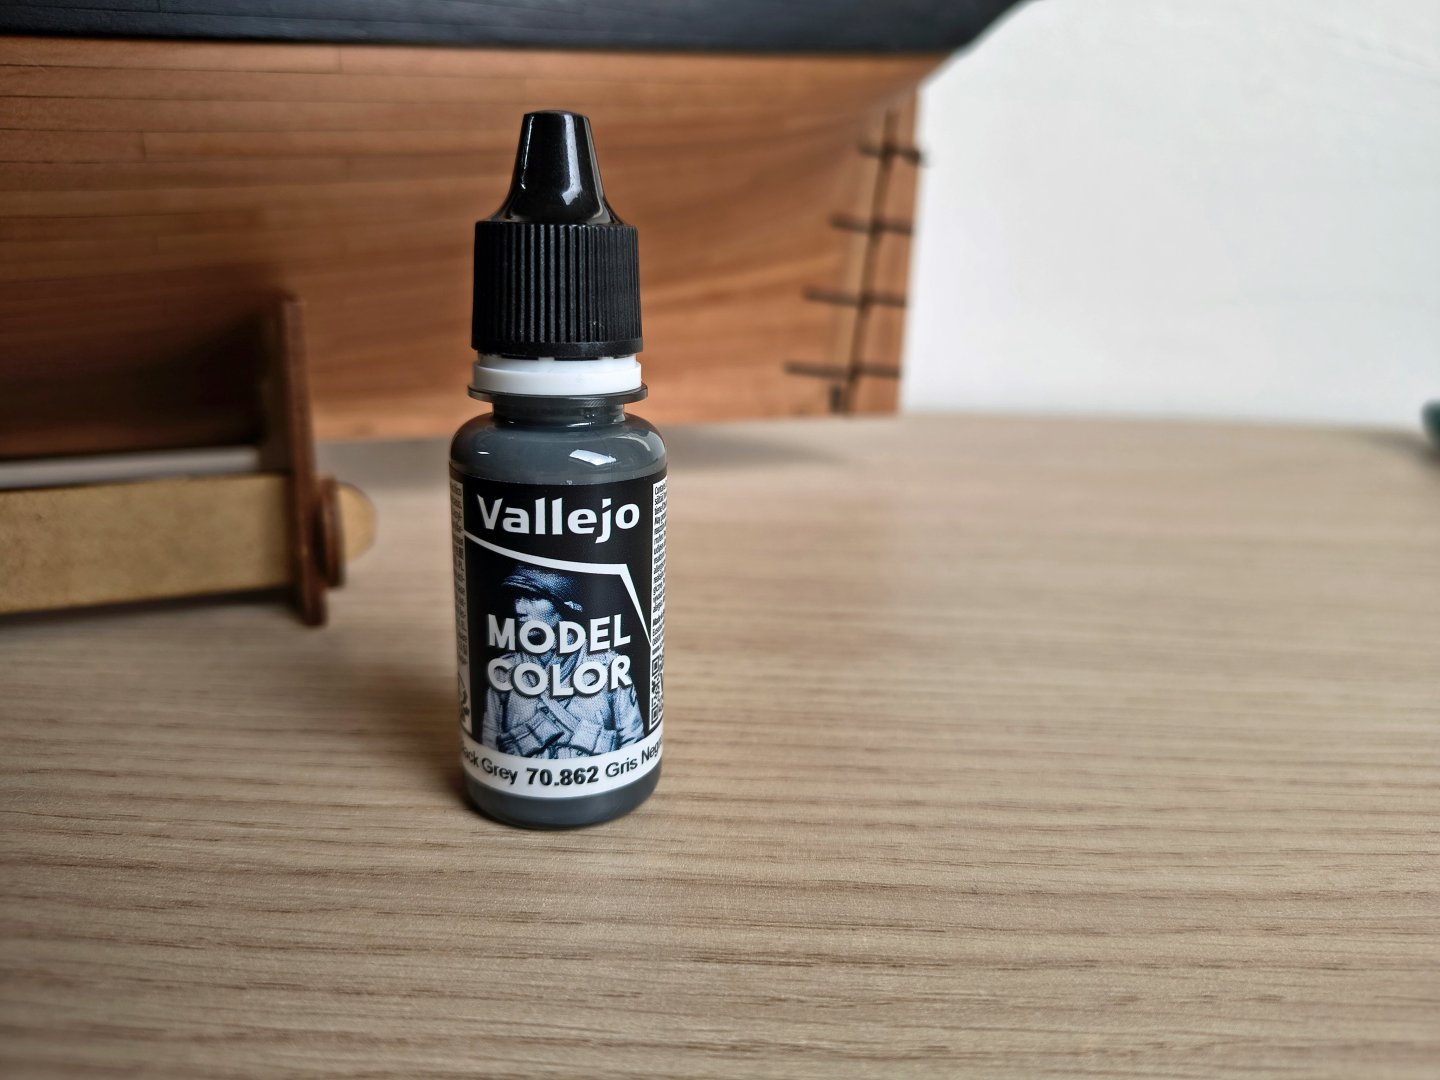
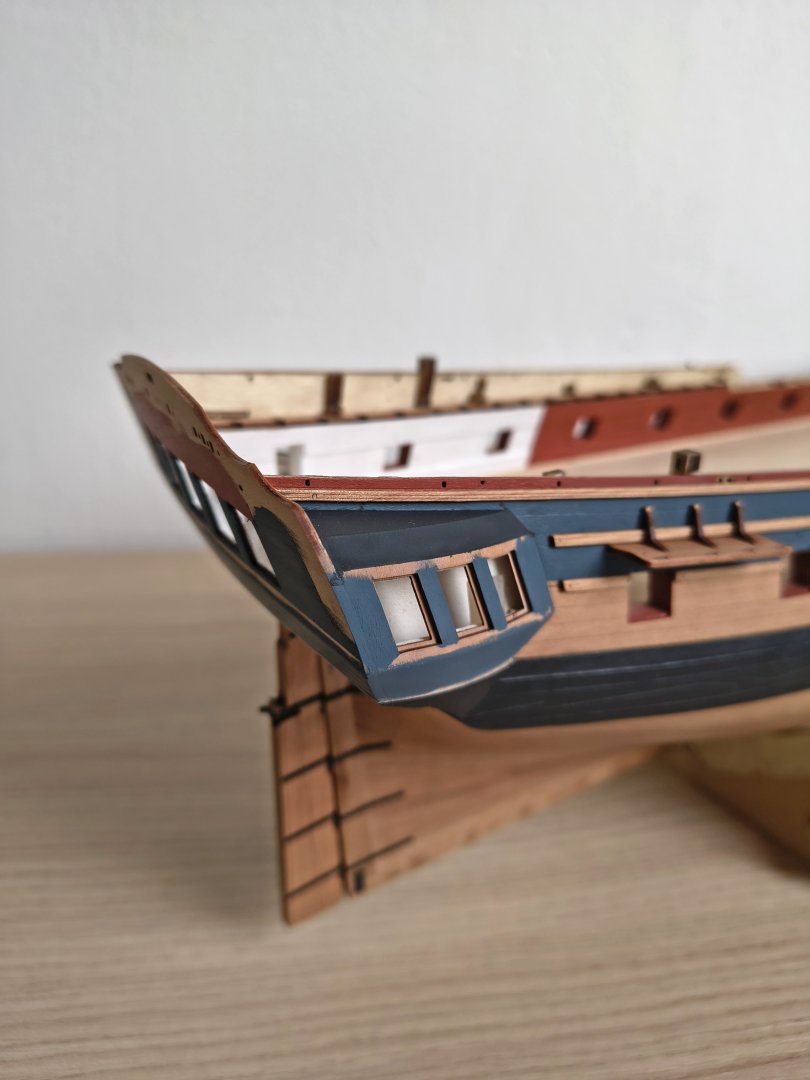
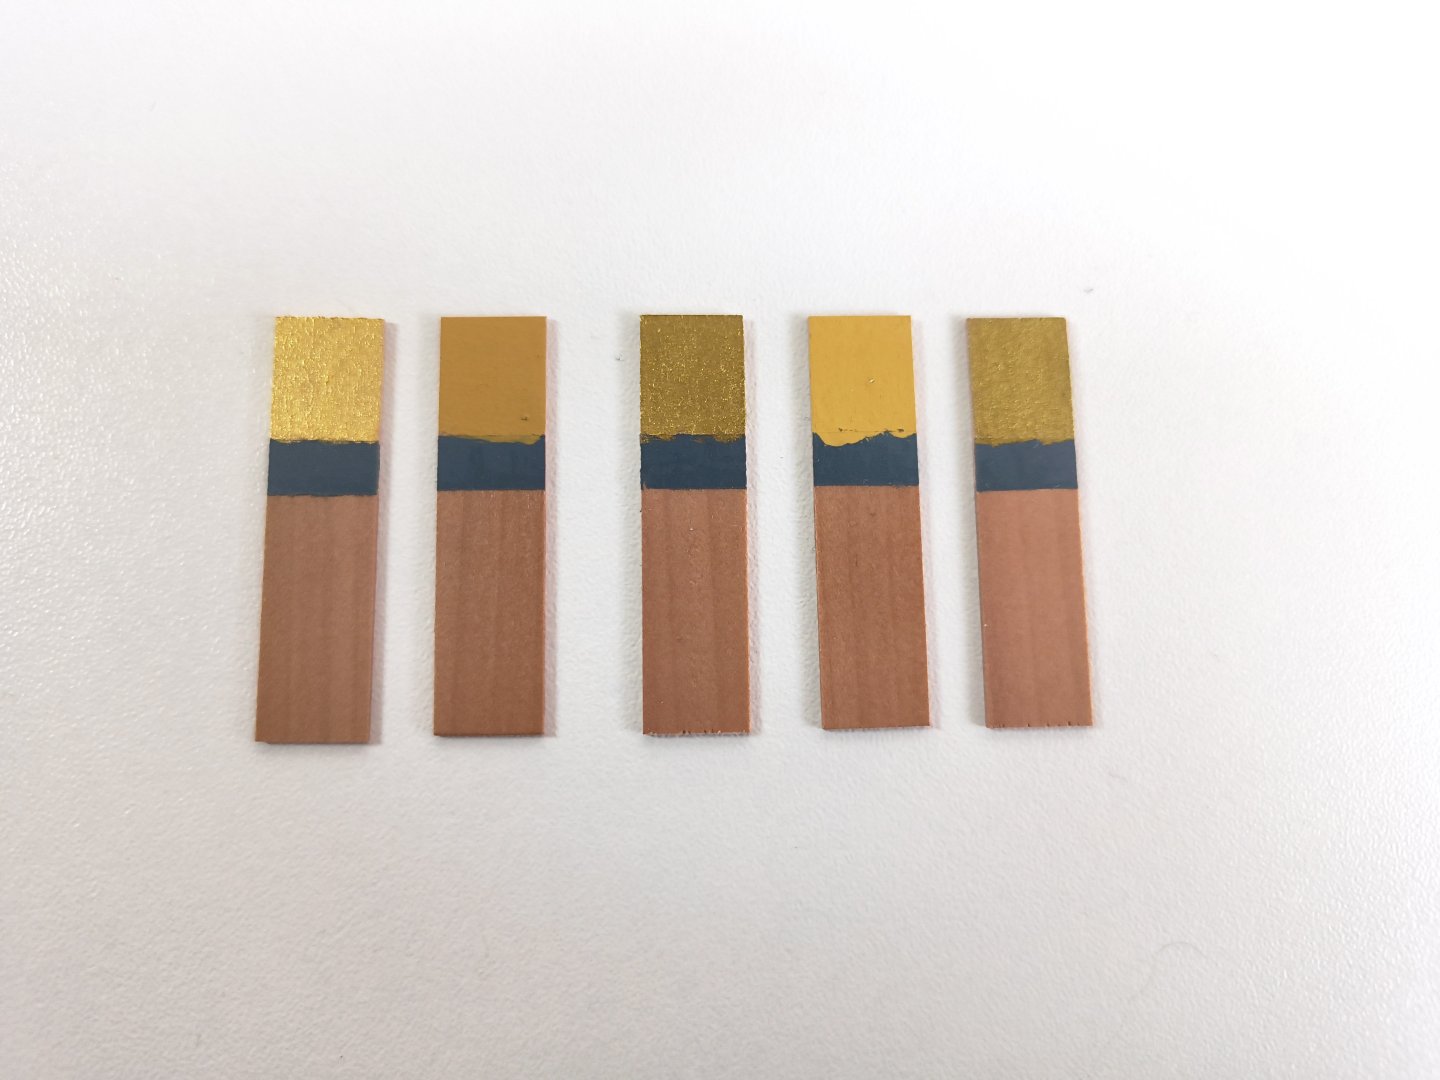
Small update about color choice decorations: But first, I need to paint the roof of the quarter galleries. I tried it with a brush first, just for convenience' sake...but I found it wasn't working well. It looked streaky, and I found myself struggling to paint a straight line. This was partly due to the odd angles of the roof. There's nowhere to rest your hand properly to prevent it from shaking. So I decided to sand the paint attempt and then attack it with an airbrush. First of all, masking...I have different widths of tape for this I'm using Vallejo "black grey" 185 as the color here...the kind of lead color I was going for. It could probably be a bit lighter to make it look truly lead-like. But that could be done with highlights later. I'm quite pleased with the result, nice and even. There's some bleed-through here and there, but nothing that can't be touched up with blue paint, for example, or scraped off the bare wood. The angled section will be covered with photo-etched lead tiles later, so that will be covered. But if any wood is visible underneath, at least it'll be the same color underneath. Starboard in particular had quite a bit of bleed-through, I had already painted this earlier and then masked it off somewhat hastily...it really pays off to take your time with this , port side was already much better. Of course, everything will be neatly finished with either photo-etch or wooden decorative strips. Okay...the color choice for all the decorations. I already had in mind that it should be some kind of ochre-yellow or gold. This seems to me to match my hull color best, the soft, slightly dark pearwood. I personally like a look where everything is somewhat cohesive and not too much stands out. I'm not really into anything too flashy. I certainly liked the gold James used in the prototype, but after testing the pieces below, I discovered that it doesn't go so well with my ship and the colors I already have. It's a bit too flashy. I ended up with Vallejo "Gold Brown" no. 158 (second from the left). This, combined with a rusty (brown,red) weathering stain, gives the decoration some depth and three-dimensionality. Perhaps some highlights, but I'm not sure about that yet. I've already done some test pieces with this color and stain and was quite enthusiastic. I'm glad I picked out a color so I can really get started now, starting with the windows


-
My web "virus scanner" won't even let me use the link...marked as suspicious. Hope it works out for you 🙏
-
Beautiful, neat boats! That must be difficult on that scale.
-
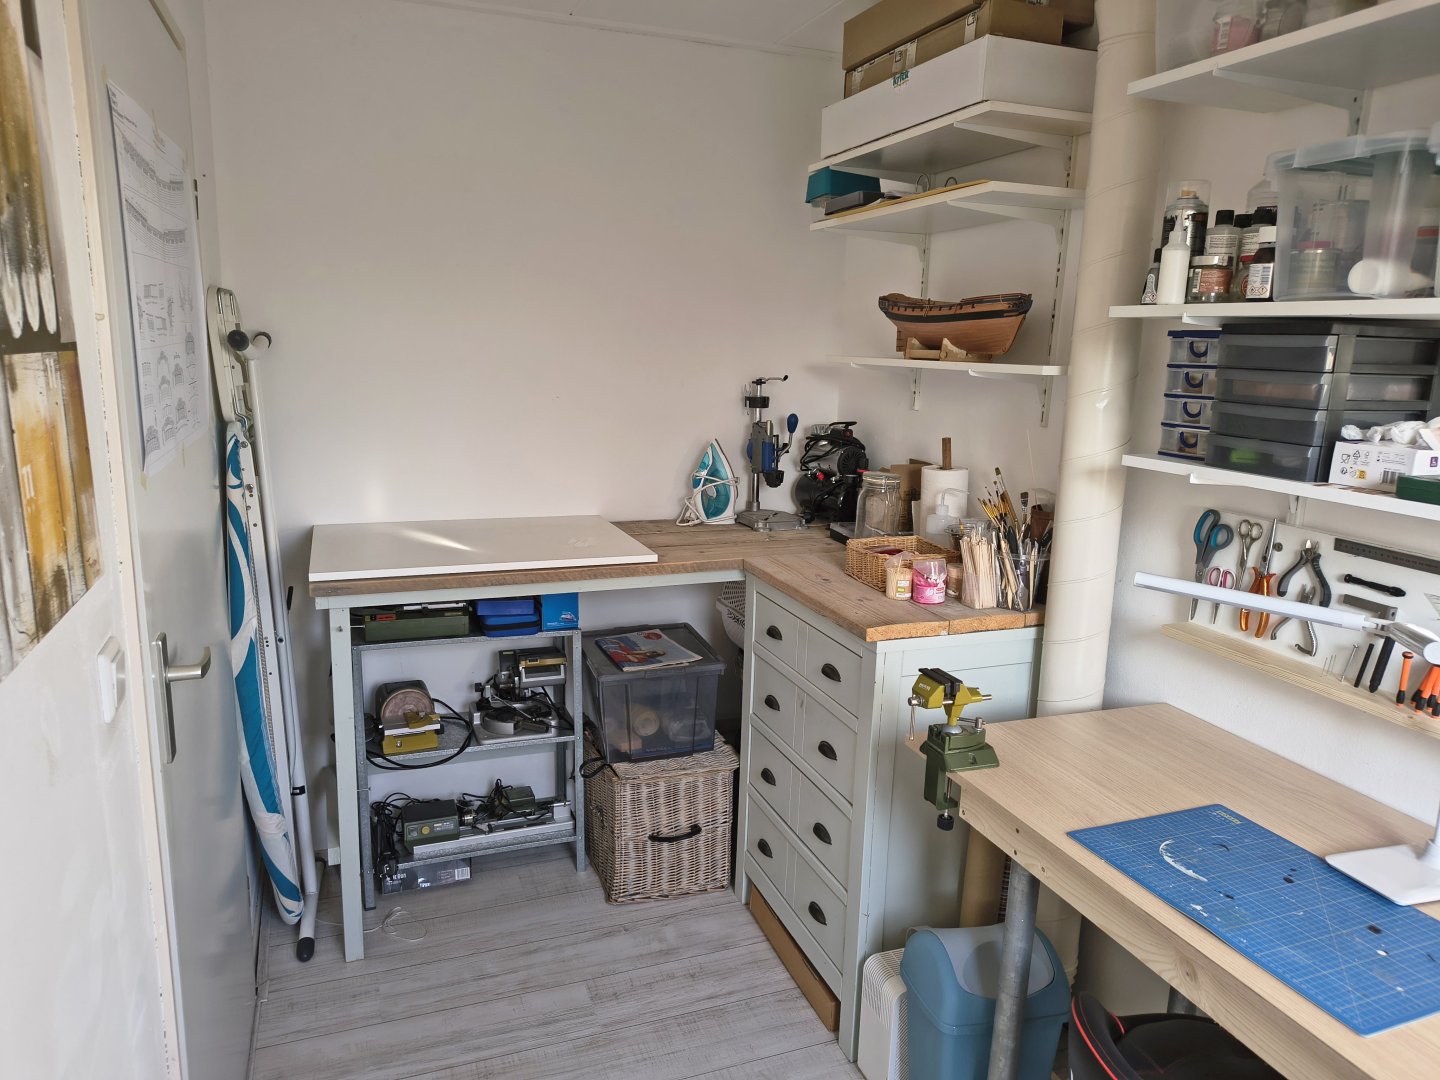
Thank you 🙏 Thanks! No it's not always this tidy, but inbetween fases it is...so, for example, just as I finished the headwork on the bow, I tidy everything up and put it back in its place. It's always nice to start a new chapter from a clean and tidy place. At least that is how I like it. I have a friend who is an artist (painting and miniatures) that has a workplace that looks like there is a bom exploded, and het looks like that all the time. She just likes that and finds that cozy, for me it's too chaotic. Everyone has their preferences
-
New to ship modelling? But what do you build first?
Ronald-V replied to MSW's topic in Wood ship model kits
Not necessarily a beginner's choice as you only have 1 layer of planking that also needs to look good on the inside...But it looks like you're doing well! Have fun! -
Thank you! Yes, absolutely...and it's best when you've just finished a construction phase and then you can tidy everything up and put it back in its place. So satisfying 🫠😁 Thank you! Yes that is really simple to make and I have always enjoyed having these tools within reach, but also not laying on a pile in a drawer. And wish you ofcourse also nice days!
-
That's a lovely "testpiece", it's a decoration piece on itself
-
Thanks James!
-
Not really an update, but a quick snapshot of what I've been working on. I've been busy cleaning up/reorganizing my house these past few weeks, and the hobby room was definitely in need of some work. I had a lot of stuff in there that wasn't hobby-related and was taking up a lot of space... I cleared everything out and moved it, and now I'm really happy with the space I have left! I also rebuilt the work table (it had rather uneven scaffolding planks and therefore wasn't perfectly level), making it a nice, long table (2.4m). I'm currently waiting for a magnifying lamp I ordered, and then I'll have it pretty much complete. It's not a large space, but it's enough for what I'm doing. Now I can happily get back to working on the Sphinx!
-
Good start Ellie! That's a nice hull shape to plank for a first ship Regarding the PVA (wood glue)...there are quite some brands that require less waiting time, like for example TerryPat is sharing. I use the blue Pattex D3 and that one is within 10 mins pretty dry and workable, UHU is also a good one. Do look for a water resistant one, that's handy if you are laying soaked planks on top of it (or something in that matter)
-
Welcome
-
That's a big cutter! Will be nice to see this one build, have fun!
-
I think it's a nice color palette as a whole...it all fits together well