Keith_W
-
Posts
1,145 -
Joined
-
Last visited
Content Type
Profiles
Forums
Gallery
Events
Everything posted by Keith_W
-
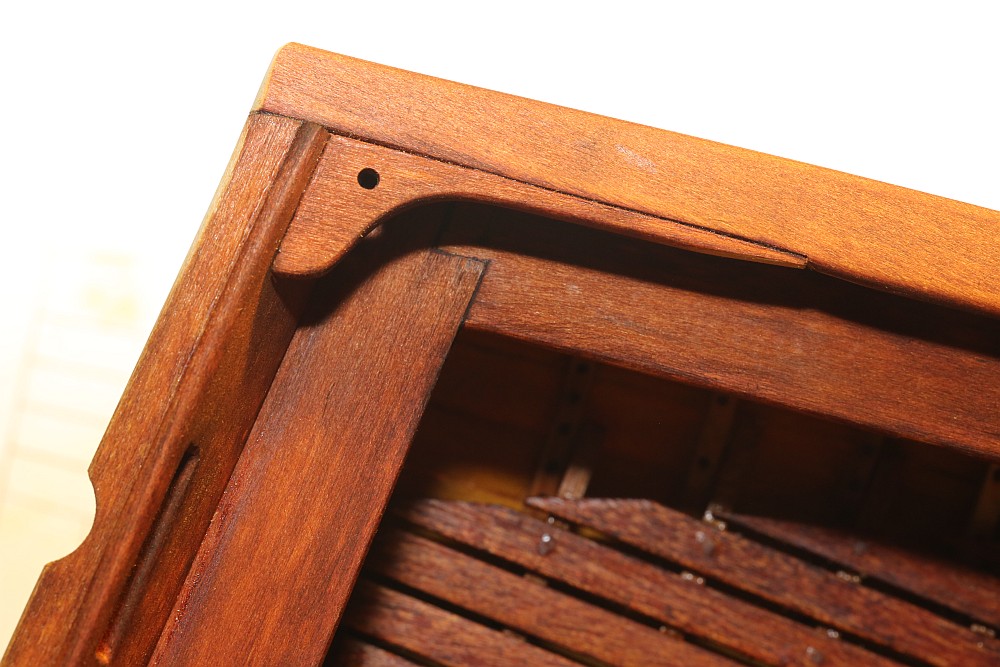
All right, Caldercraft it is then!
-

soldering wire to brass
Keith_W replied to MikeB4's topic in Metal Work, Soldering and Metal Fittings
Yes. Go http://modelshipworldforum.com/ship-model-materials-and-tools.php'>here and read Russell Barnes' tutorial on silver soldering. Note that he uses silver solder paste. Apply the paste to your joint, then hit it with a blowtorch. (edit) the link didn't work, so here it is again: http://modelshipworldforum.com/ship-model-materials-and-tools.php -
CF I did four planks at a time while waiting for them to dry. Two on each side. Depending on your local weather conditions, it will take a few hours for the planks to dry. I waited 24 hours with the planks in a sunny area before proceeding. In the meantime you can work on other areas of your model (e.g. making masts and spars). It is absolutely vital for the planks to be dry before mounting them on a single planked kit - as mentioned, wet planks expand and will shrink as they dry. If you mount planks which are still wet, they will shrink and create gaps in your planking.
-
The best way is with something like this: https://www.frontlinehobbies.com.au/products/ART-27023?Artesania%20Nailer%20For%20WoodBoats Push the nail into the plank as far as it will go with your fingers, then mount the nailer and push it in. No hammer required.
-
Thanks for the recommendation Ulisses, but nobody knows when that Amati Victory is going to be released. It does look to be pretty spectacular ... and heavy. I have built an Amati kit before but wasn't too impressed with the wood or the thread supplied for the rigging. I would hope that for a kit like this, they wouldn't skimp. The model design might be good, but that does not necessarily mean that the kit will be good I suppose I could make another model in the interim while I wait.
-
Glenn, I have been reading your build log although I haven't commented in it yet. I noted the problem where Caldercraft mis-labelled one of the bulkheads and your subsequent error. IF I do buy the Caldercraft kit I will be looking out for it. The feedback from the various build logs has been invaluable. Thanks for the reply and offer Gary, but I suspect that i will only live long enough to finish ONE Victory in my lifetime so I want it to be the best I would love to hear what you think of both your kits though, since you have them in your possession. Obviously you can't talk about how easily they build, but you can tell me more about the instructions, the wood, the fittings, etc ... ?
-
The HMS Victory has been on my bucket list for years. I think I have finally accumulated enough skills to attempt it. The question is - which kit version is the best? By this I mean - which has the best fittings, the best instructions, the most historically accurate, and the one which will come together with the least amount of pain? The last time I looked, there were HMS Victory kits from: - Caldercraft / Jotika - Mamoli - Corel - Artesania Latina - Billings I am leaning towards the Caldercraft version - I have seen many build logs on MSW, I have downloaded the instructions, and the company does seem to be very supportive. Any opinions? (I did a search for Victory and there were 6 pages of results. I looked through every page, and have read at least a dozen build logs!)
-
Good start CF, but the curve on the "deck" does not look right to me. Towards the stern, it appears to rise and then flatten off. I checked DCooper's Bounty build log here and the curve of his deck looks different to yours. It could be the camera angle, but I think it is more likely that frame #7 has not been faired properly. Suggest you check again.
-
This build will be interesting to follow. Agree, the gun carriage is simply ugly! Are you going to replace all of them, or only the ones which will be visible?
-
Proxxon MF70 opinions and accessories
Keith_W replied to Keith_W's topic in Modeling tools and Workshop Equipment
Thank you for your reply Nigel. My problem is a little like a Catch-22 situation. (1) I don't know what is possible, because (2) I don't know what parts are available, therefore back to (1) I don't know what is possible Hence this thread. I have been devouring build logs to get an idea what people can make with this machine. So far what attracts me is the precision - a level above what I can do with my humble hand tools. Unfortunately most build logs are rather sketchy about how they achieved the results ... all I can see is "I milled this on my Proxxon" without specifying what cutter they used, how they clamped it down, how they squared it, etc. -
Hello all, I am contemplating a Proxxon MF70 after seeing how useful it is with making precision parts. However, the accessories page on Proxxon's website seems to be rather limited. I was wondering if MF70 owners (or owners of other mills) could list the accessories they use on their machines, along with a link on where to buy it, as well as possible applications for these accessories. As far as I can see, the standard MF70 kit does not include the precision steel vise PM40, the dividing head, or parallel supports. Neither does it include any milling cutters. I plan to buy these when I order my machine. I wonder if there is a center finder, or whether a tool like this is important for our application. Many machining sources I have read place great emphasis on squaring the quill to the workpiece prior to milling, but there does not appear to be a single accessory on the Proxxon page to assist with this. I would also like to know if the standard Proxxon 1mm, 2mm, and 3mm tungsten milling cutters is good enough (my feeling is not) - and whether milling cutters smaller than this are available.
-
Denis, that is just beautiful. Congratulations, you are doing a wonderful job.
- 555 replies
-
- 1
-

-
- sovereign of the seas
- mantua
- (and 1 more)
-
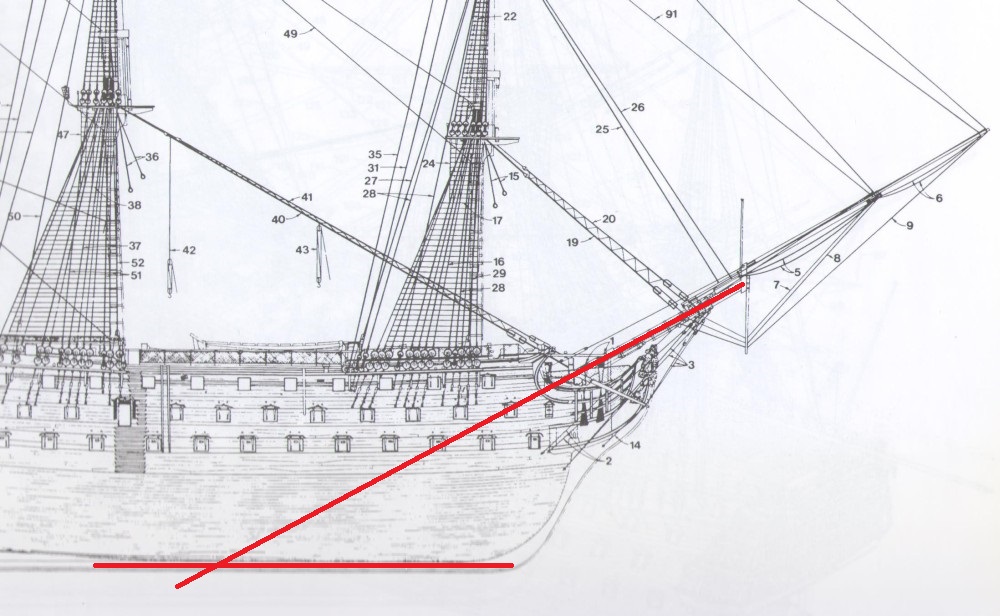
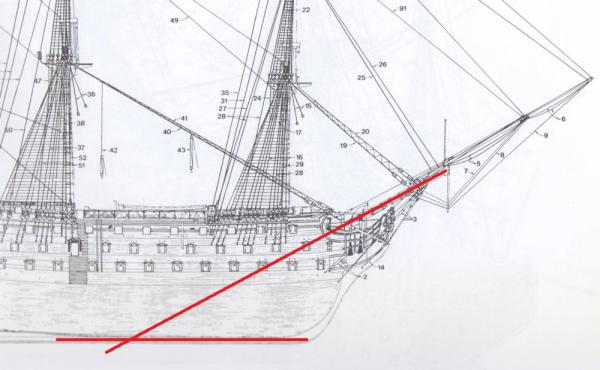
I don't have my protractor with me, but it looks like it's about 25 degrees. If you have a protractor, you can measure it off the screen. This was taken from AOTS: Victory.
-
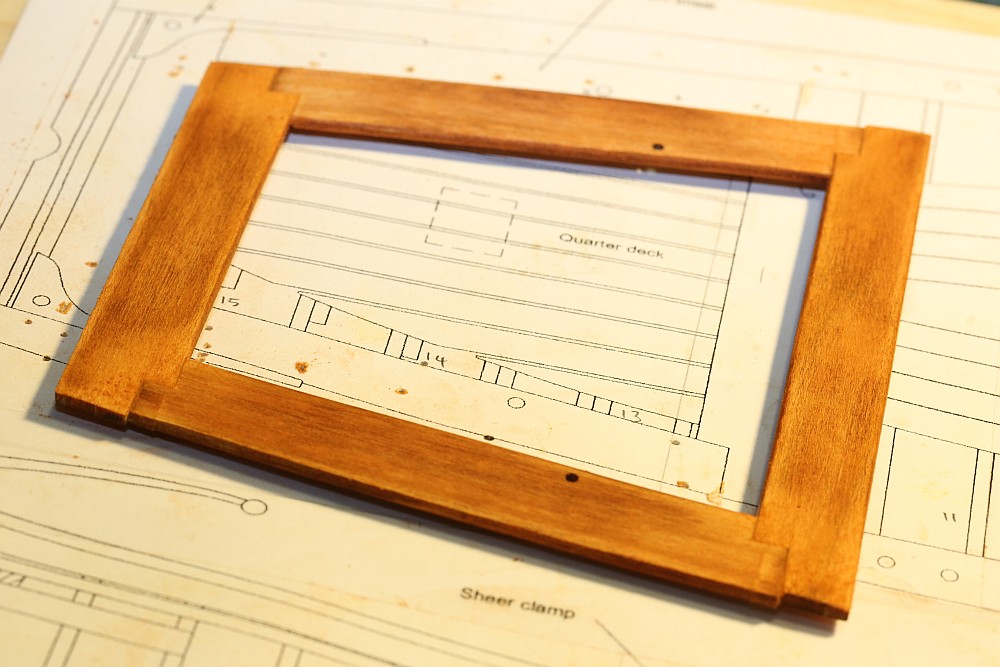
Thanks, CF. To apply glue, I used a toothpick and a piece of card, 2cm wide. The toothpick is good for precision areas, and the wide card is good for edge gluing (i.e. applying glue to the edge of the plank). To clean off excess glue, I used a wet Q-tip. Given that your ribs are exposed and on display, I would sand all the laser burn marks off. Not only that, I would also suggest staining the keel and ribs before you assemble the frame. I have found out to my cost (in a previous build) that stain and glue don't mix. You will get pale blotches of unstained wood if there is any glue at all on the surface. Naturally you will need to stain your planks before you install them as well - especially the inside. The outside is not so critical - you will sand it all off anyway. From what I can see, the AL kit does not include pre-tapered planks - so if you are planning to leave your boat stained and unpainted, your planking job has to be very, very good!
-
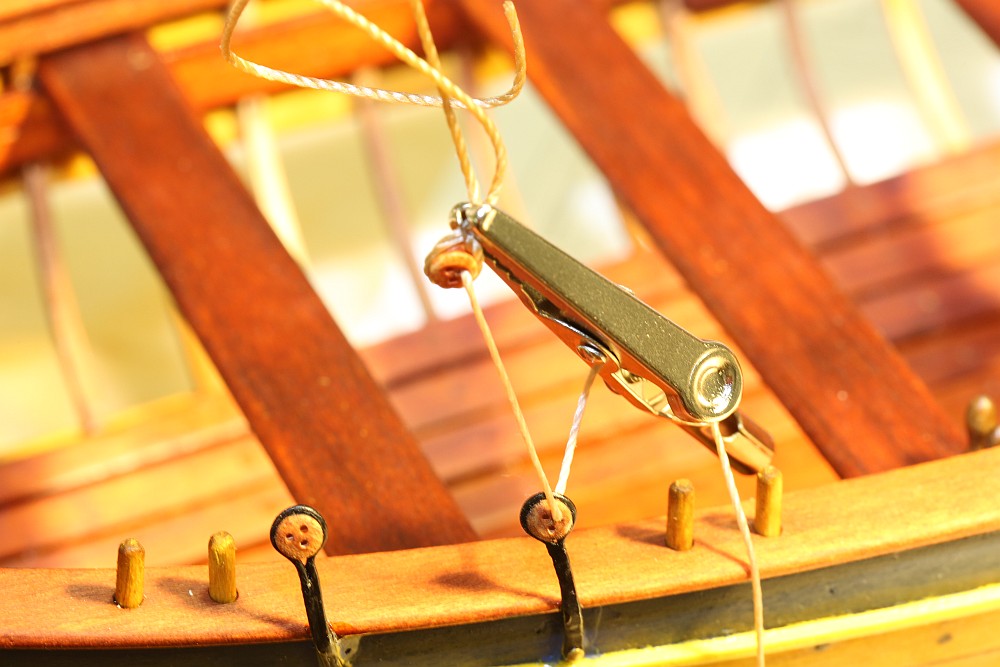
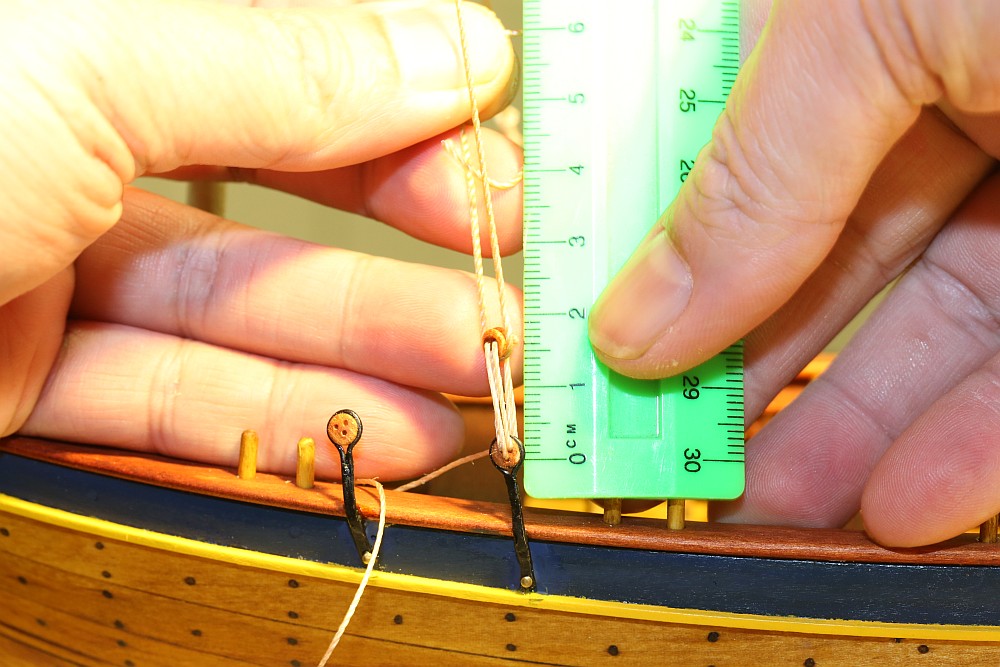
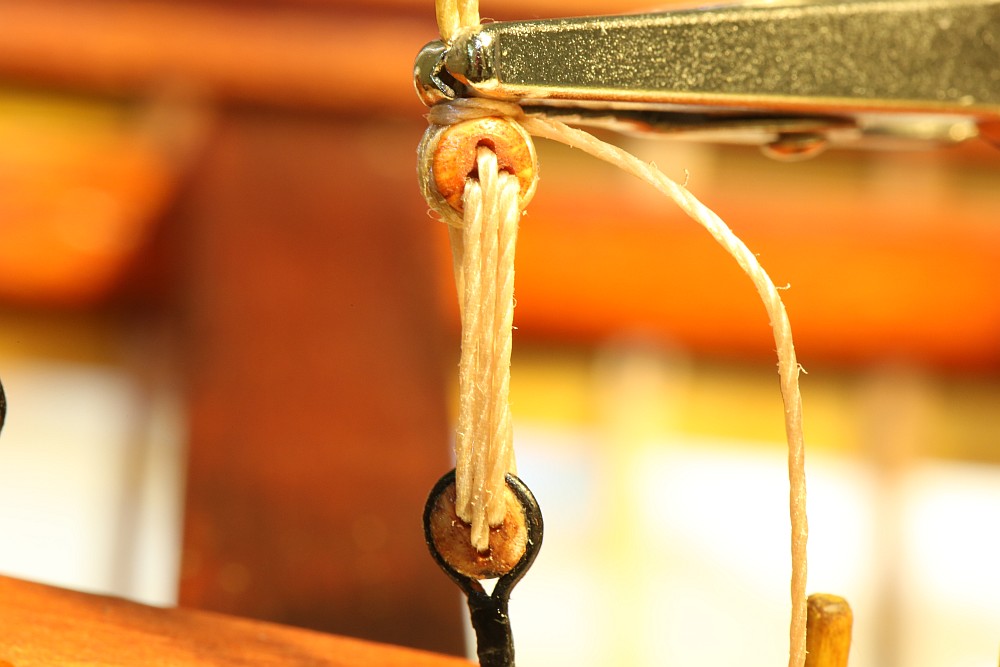
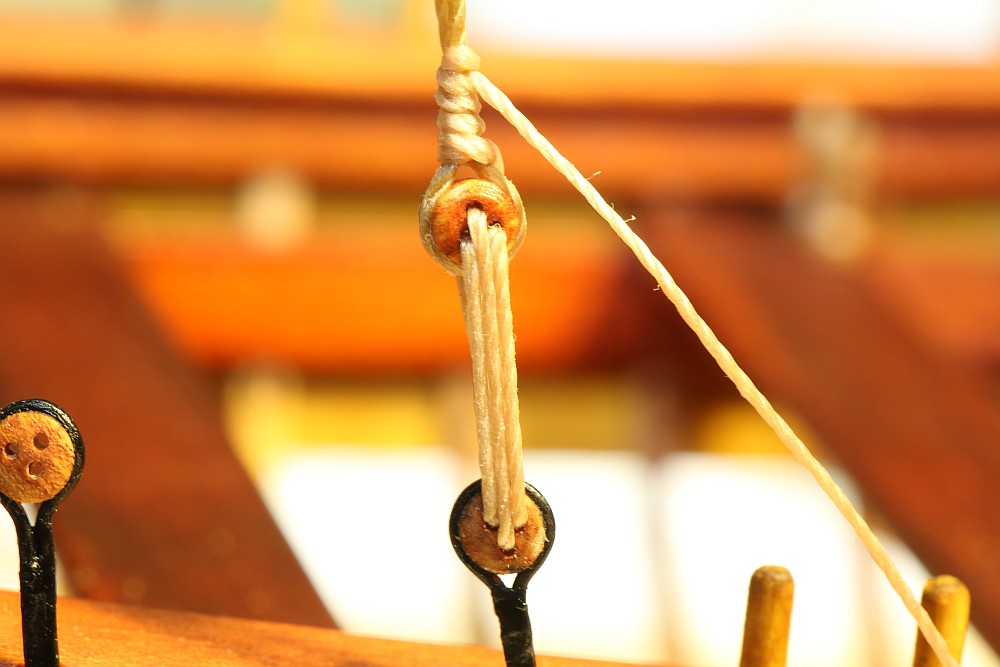
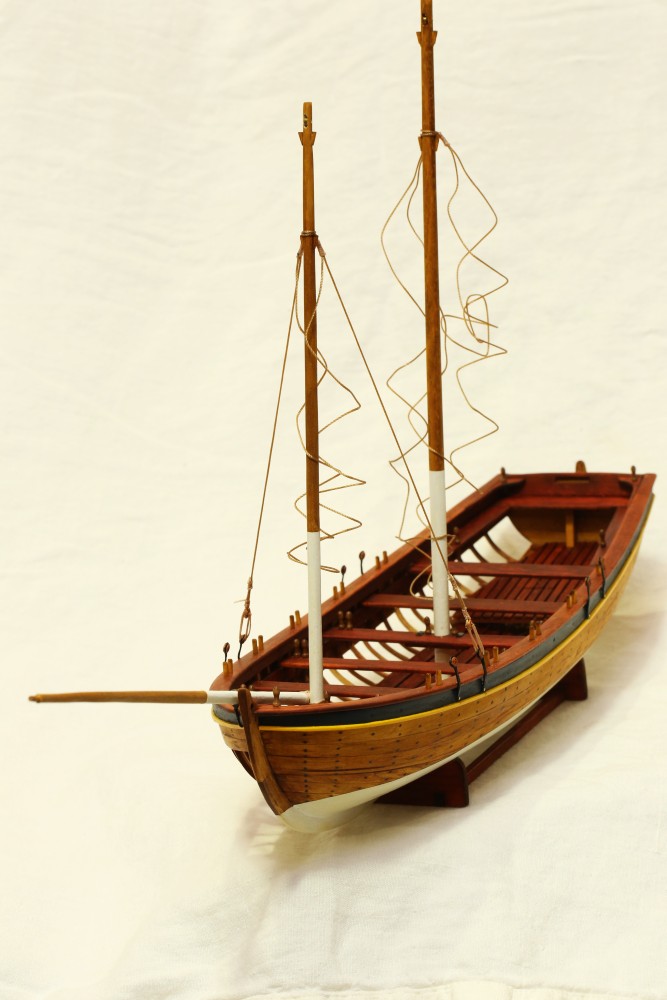
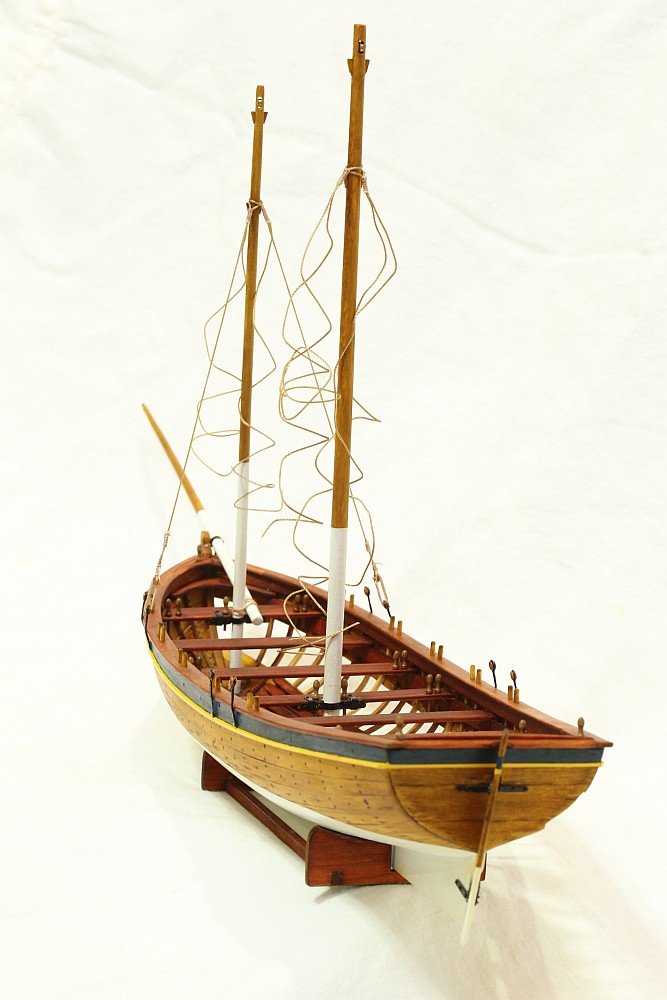
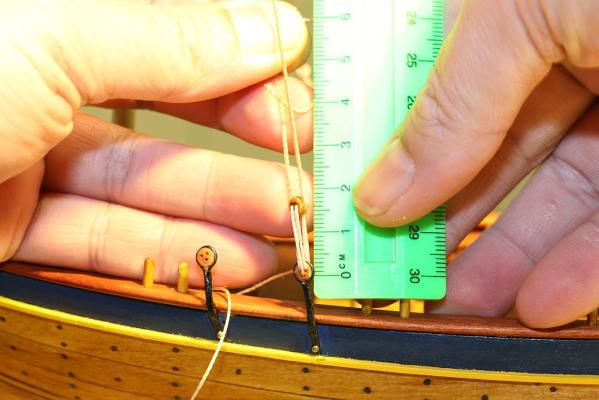
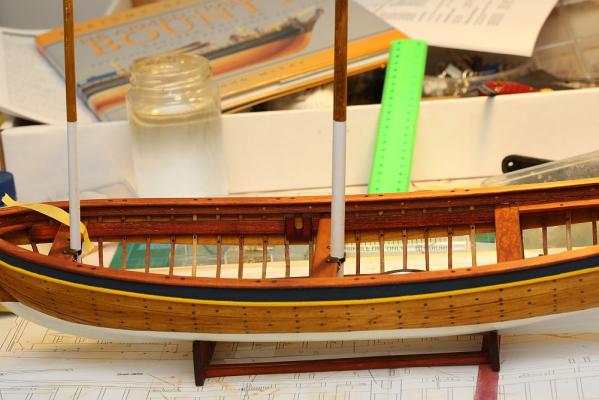
Thanks Bob and Dan. To be honest I think that the photographs flatter the model. I can see all the mistakes, I just make sure that it doesn't show in the photos But if you look carefully, you will find them! Anyway, this will be my last update for a few weeks. Tomorrow, I fly out for work I managed to get started on the rigging, but I had a rather busy evening so I only managed to complete two shrouds. I noticed that McKay's book shows both the foremast and mainmast with sheaves, so I installed the sheaves. This picture shows rigging thread as supplied by Model Shipways (below) and Artesania Latina (above). Note the MS thread is slightly shiny and has no fuzzies. I suspect that it is synthetic fibre, maybe nylon. In use, it is more difficult to handle than the AL cotton thread - knots want to come apart, and it doesn't form compact, tight knots as easily. But I suspect that in the long run it will look better. The bowsprit holder has been painted and installed. McKay shows the bowsprit holder mounted on a plate running down the side of the keel, but I think that my solution looks nicer. The bowsprit is secured at the rear end simply by tying it to the foremast. This is my method for rigging deadeyes. Again, I have not seen it described in MSW or anywhere else. This method uses no jigs. The major advantage is that it allows you to adjust both length and tension easily and perfectly. This is how: 1. Prepare the deadeye thread - CA one end (to make it stiff and easy to pass through holes), and make a stop knot on the other end. 2. Loop the upper shroud around a deadeye and secure with an alligator clip. 3. Rig the thread through both deadeyes loosely. 4. When the deadeyes are fully rigged, tension the thread by pulling them one by one through the holes. When fully tensioned, check the tension of the shroud and the length of the deadeye. When checking the tension, also make sure that the rake of the mast is correct AND it has not been pulled laterally. You will come across these possible scenarios: 4a. IF the deadeyes are too long AND the tension of the shroud is insufficient, you need to tension the deadeyes more. 4b. IF the deadeyes are spaced correctly but the shrouds are insufficiently tensioned, release the crocodile clip and add more tension to the shrouds. 4c. IF the shrouds are correctly tensioned but the space between the deadeyes is too long, release the shroud alligator clip and feed back the exact number of mm you need to shorten the deadeyes by. The deadeyes will become slack - re-tension them and they should be the correct length. 4d. IF the shrouds are correctly tensioned but the space between the deadeyes is too short, release the shroud alligator clip and pull up the exact number of mm you need to lengthen the deadeyes by. Feed the thread back into the deadeyes to lengthen. 5. Once you are satisfied with both deadeye spacing and shroud tension, tie a knot under the alligator clip and secure with a dab of white glue. 6. Complete the seizing. Looks pretty good doesn't it! I'm going to make this Launch so beautiful that Bligh would have preferred to sail in this thing than that breadfruit carrying ship full of mutinous ingrates! And that's it for now. I have to say good-bye to my wife, my home, and my little boat for a few weeks while I fly out to remote Australia. Well, not so remote - it has a beautiful beach There are worse places to work! (edit) ARGHHHH I forgot to make and install the thwart knees before I Tung Oil'ed the thwarts!!! I can still make them, but ... what glue will stick to Tung Oiled thwarts? CA? PVA? Help please!


- 78 replies
-
- 4
-
-
- model shipways
- bounty launch
- (and 1 more)
-
Vince, she is superb. Congratulations - you must be proud. Perhaps I missed it in an earlier post, but how did you get the sails to stay in shape?
-
Welcome to MSW and congrats on your build! I am on the other end of my Bounty Launch - it is almost complete except for the sails. I will follow yours with interest BTW you're not the only one shopping for your next build
-
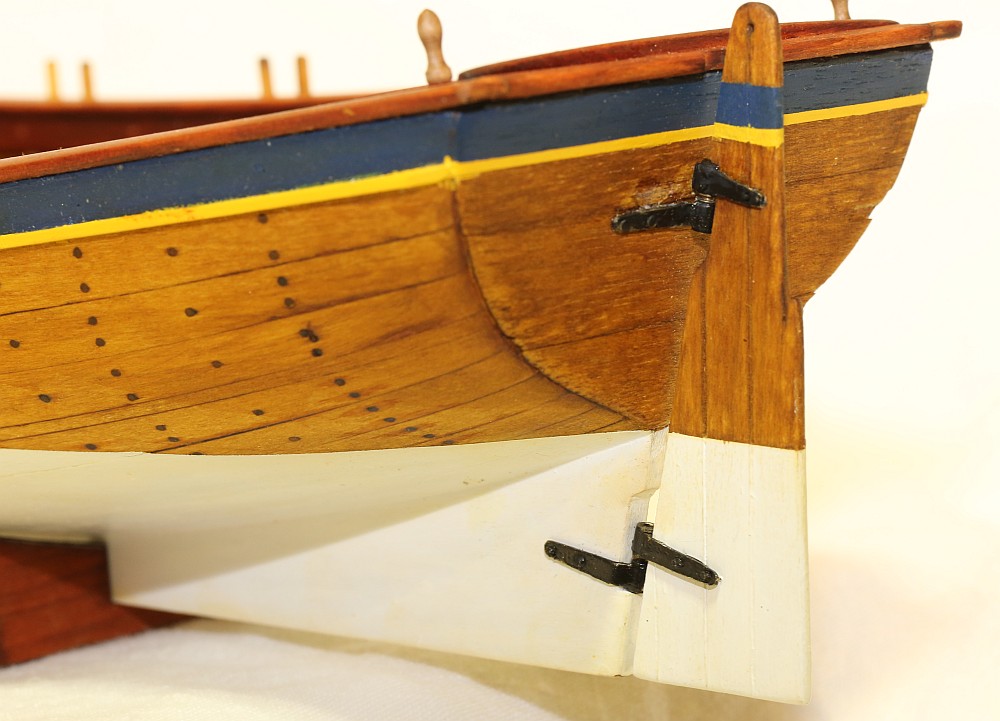
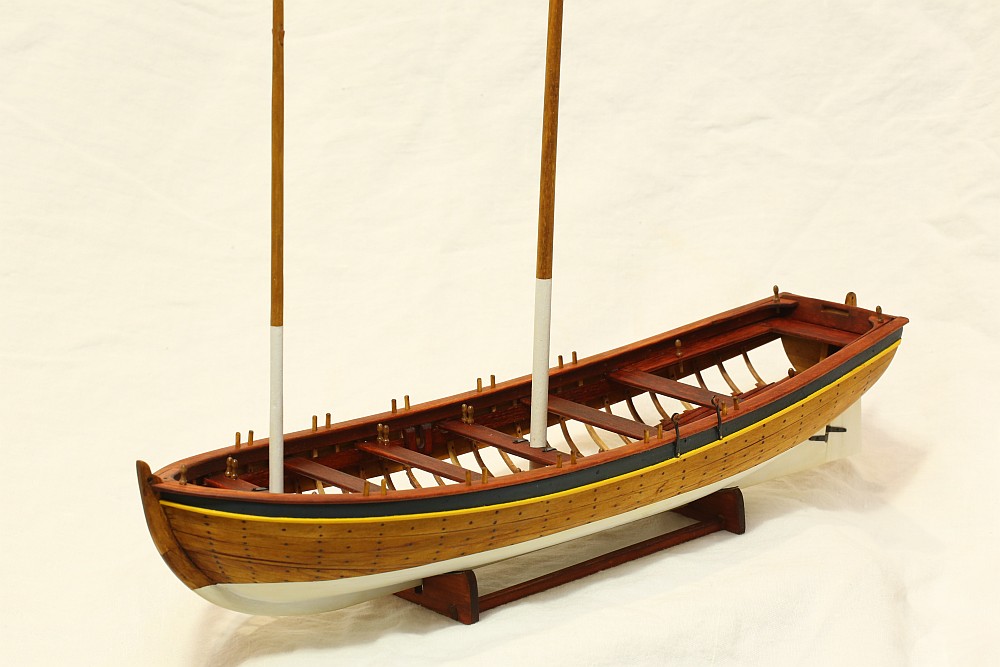
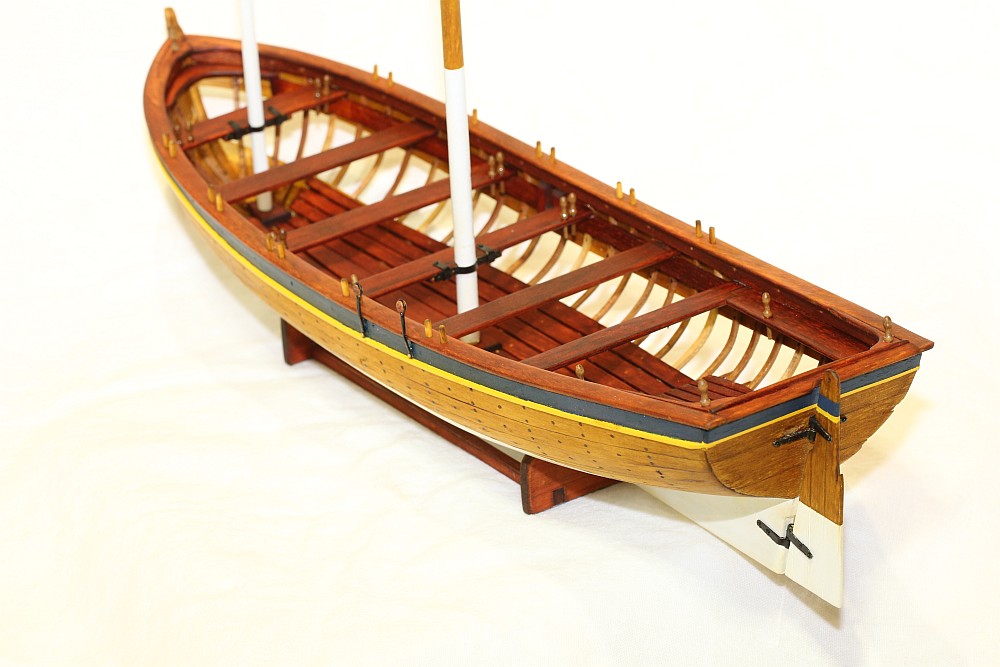
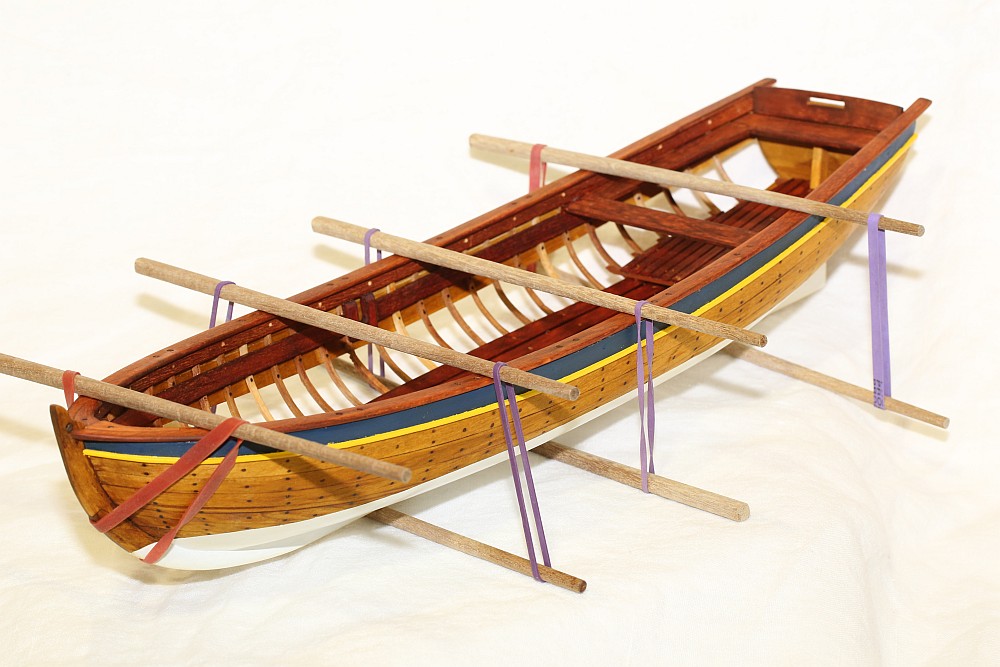
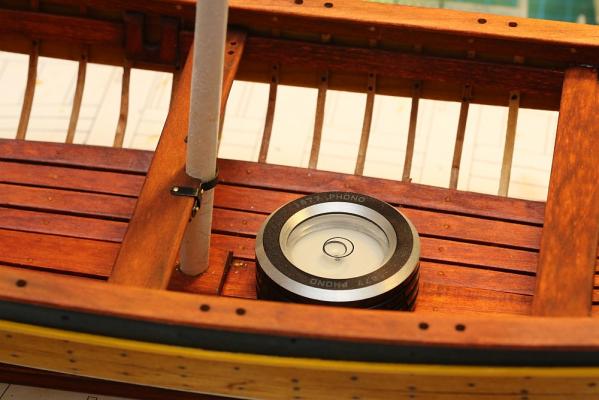
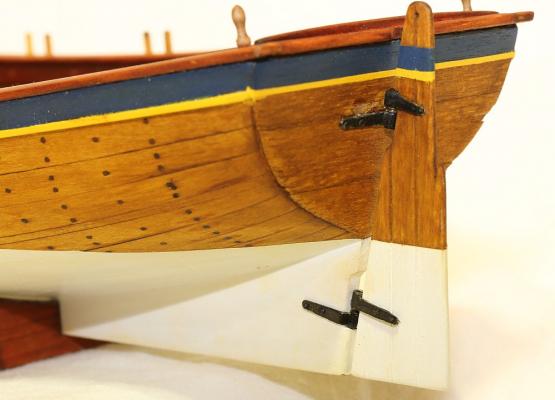
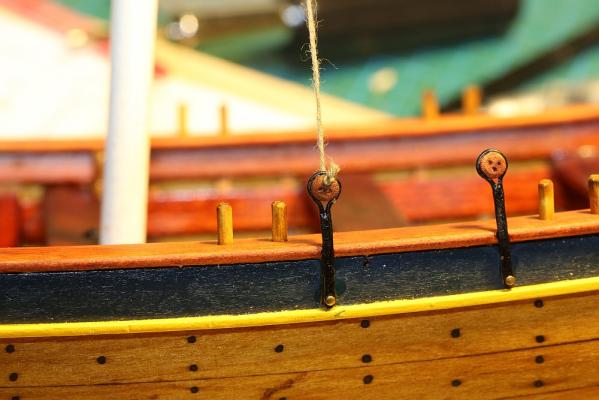
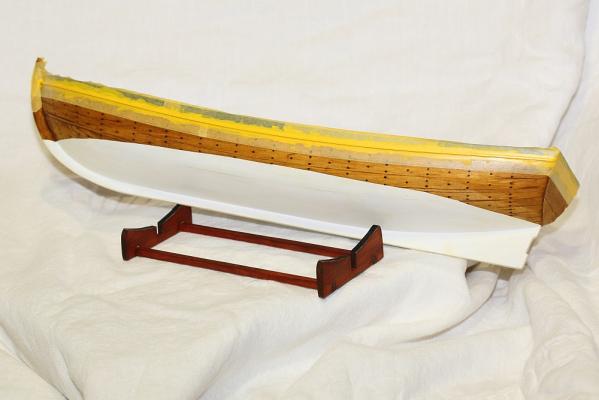
Small update for those following. The hull is now almost complete. I mounted the thwarts and chose the angle of the masts today. This is how I did it: The most horizontal part of the ship is the middle floor plank, so I put a spirit level there and adjusted the height of the stand until it was level. I was then able to align the masts, using the door frame (not in the picture) as my vertical reference. I mounted the rudder with the pintles and gudgeons. I know of the problems others have been having with it (Meredith burnt a cake because she found it exceptionally fiddly), but I had no problems. It might be because my kit includes different pintles and gudgeons ... other build logs mention having to fabricate it out of brass strip. Not so here, mine came pre-bent and pre-drilled. However, the pre-drilled holes were a little off so I ended up fabricating my own anyway. For trouble-free mounting, try what I did - mount the gudgeons to the rudder and the keel. Make sure they are aligned properly. Then mount the pintles onto the gudgeons, then slide the rudder into place. Once in place, pin the pintles securely. These are the shrouds I made using my really poor soldering skills. At least I didn't blacken the deadeyes by burning them! This is how I align the deadeyes prior to rigging. Pin the deadeye to the hull, then thread some rope through the deadeye. Pull the rope tight against the point where the shroud attaches to the mast, then CA the deadeye in place. Ready to begin standing rigging tomorrow.

- 78 replies
-
- 5
-
-

-
- model shipways
- bounty launch
- (and 1 more)
-
Pretty impressive inventory there, will be interesting to watch your log as she progresses.
-
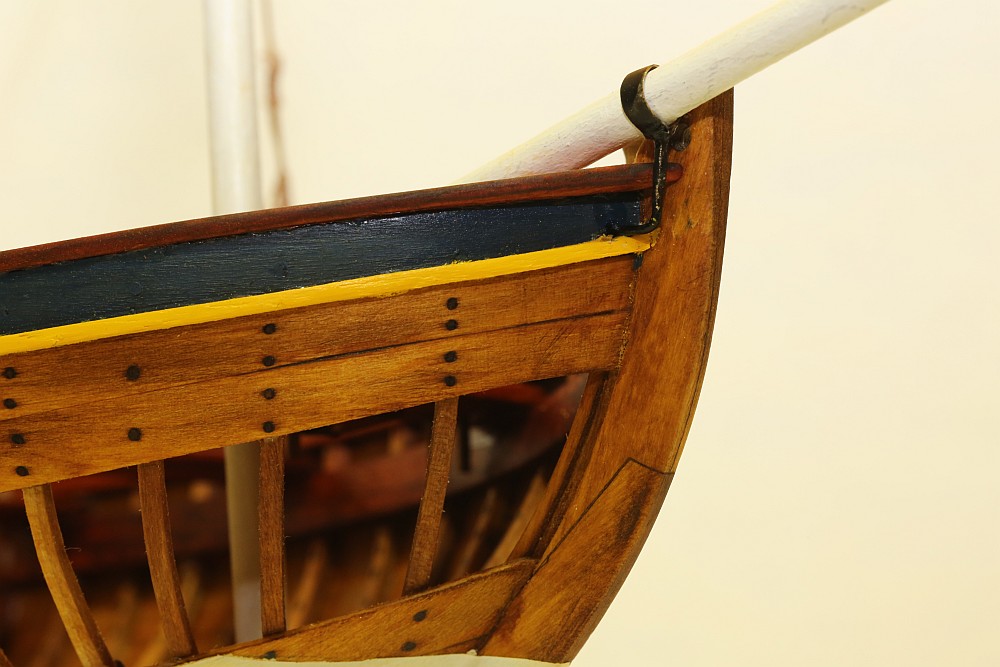
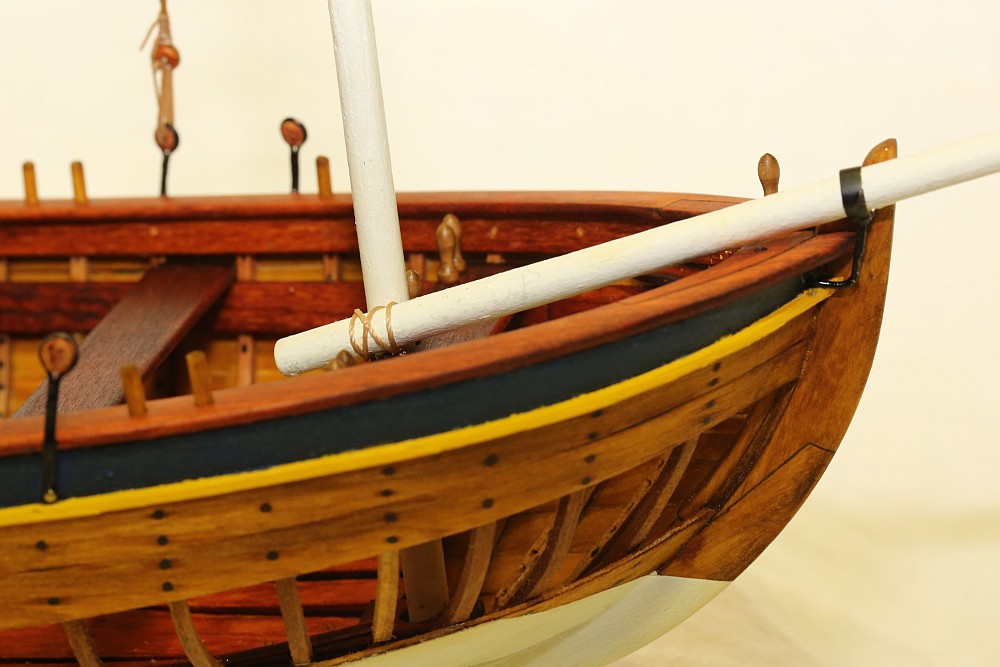
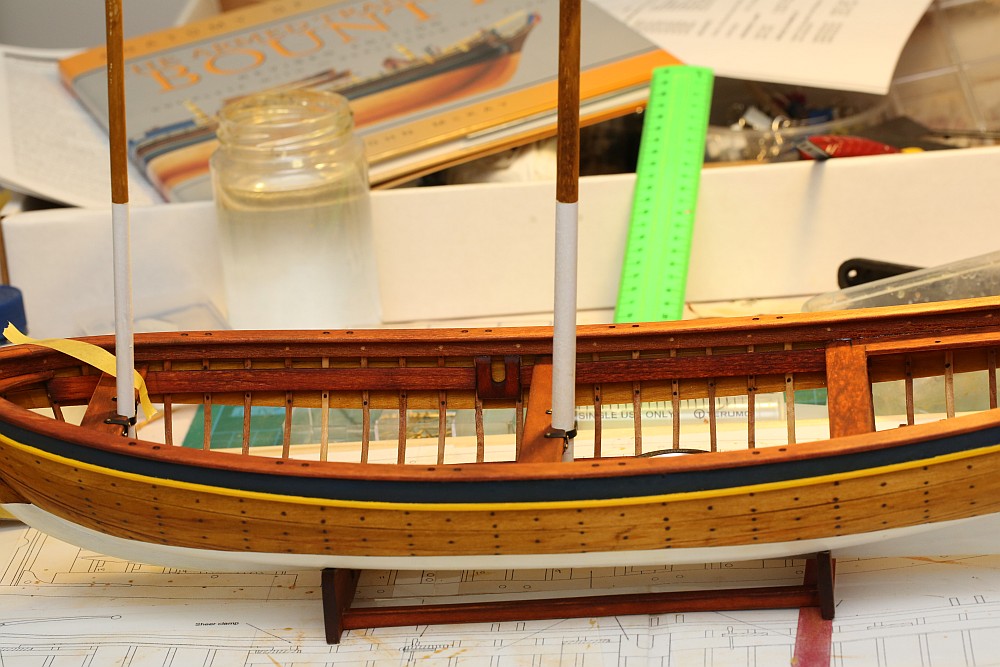
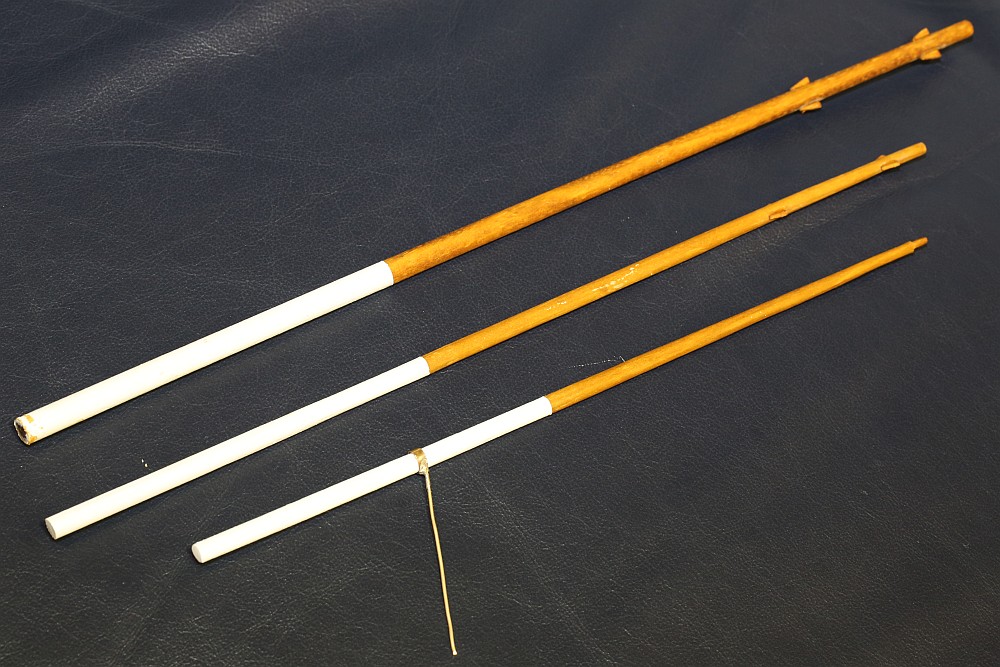
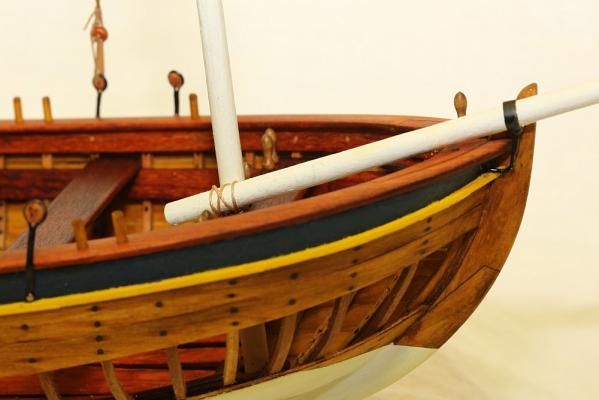
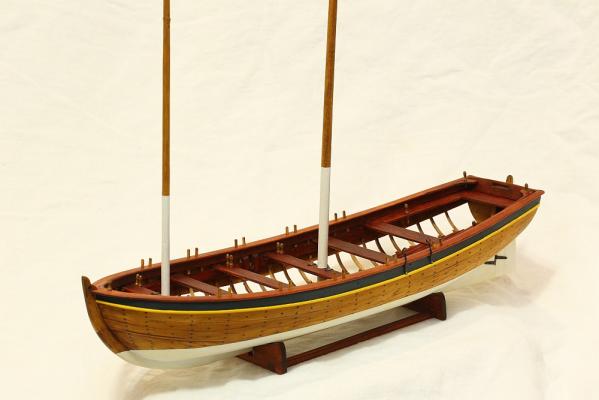
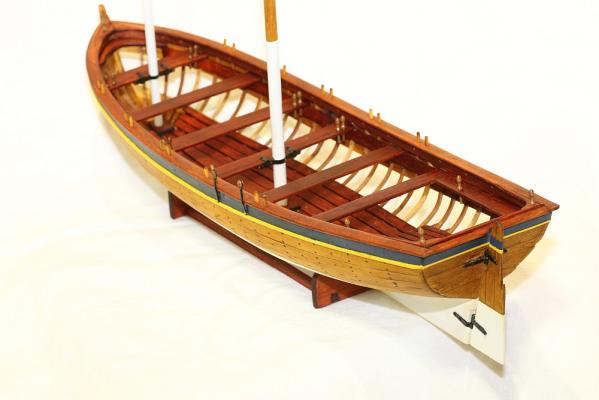
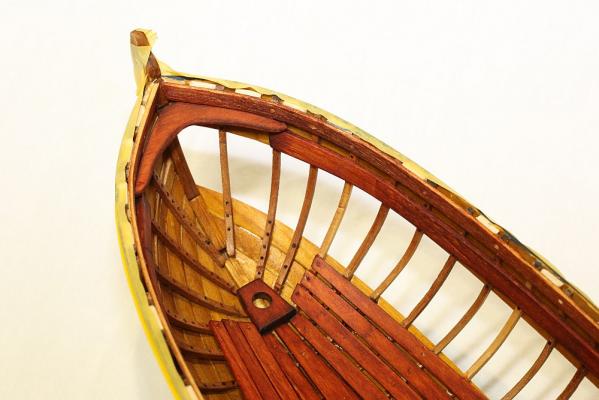
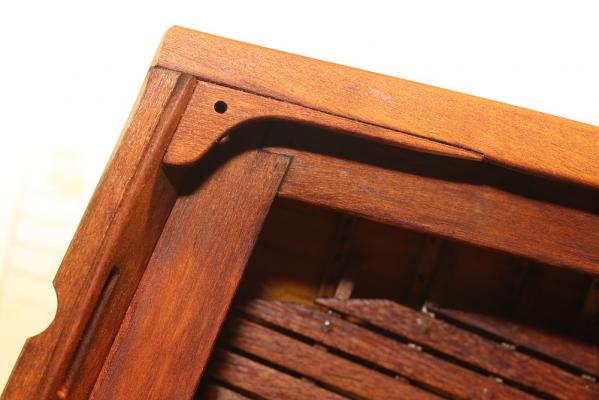
I have also done more work on the hull. These are the rear seats. The kit would have the side seats resting on top of the thwarts. I preferred the look of all the seats on the same level, so that's what I did. This is the grating as supplied in the kit. It looks rather cheesy, and I can not find any reference to the grating in AOTS: Bounty or any other source I have on hand. I therefore cut up some spare wood and fabricated myself a replacement. This hasn't yet been glued in, it was a rough fit for the photo! I added a wale, then masked it off and painted it yellow. Gunwales added! All the other build logs seem to use the same method to clamp down the gunwales while waiting for the glue to dry. I had plenty of chopsticks on hand, so that's what I used. The masts have been completed (L-R): maintmast, foremast, bowsprit. The bowsprit has been finished as per McKay. I calculated it at 82% the length of the foremast. In this kit, the foremast is 32cm, so the bowsprit works out to be 26.2cm. Everyone seems to have a different method for aligning the gunwales. Mario (Cap'n Rat Fink) assembled his on the plans, then lofted the entire thing on the model. I didn't like that idea, so I came up with this. After I glued in the gunwales, I masked off the gunwales and levelled off the bow gunwale cheeks. After a good sanding, these were re-stained. They are now beautifully flush. A number of build logs on MSW have also commented that the rear gunwale cheeks are too short. Not mine - mine dropped in perfectly after I shaved off half a mm. This is the completed rear of the boat, with the rear thwart, the backrest, and the completed gunwales.


- 78 replies
-
- 4
-
-
- model shipways
- bounty launch
- (and 1 more)
-
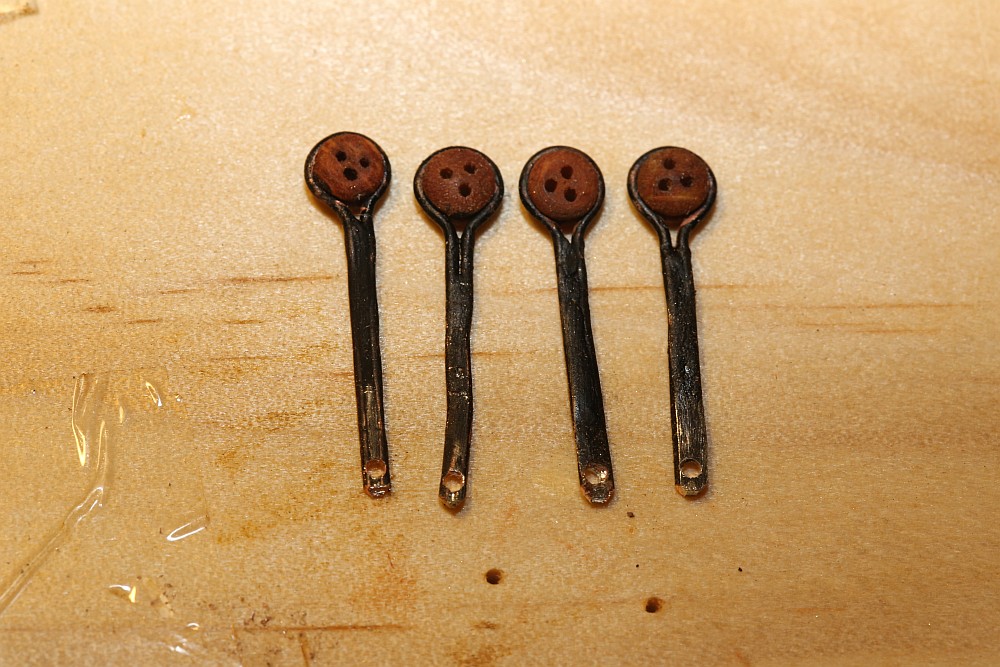
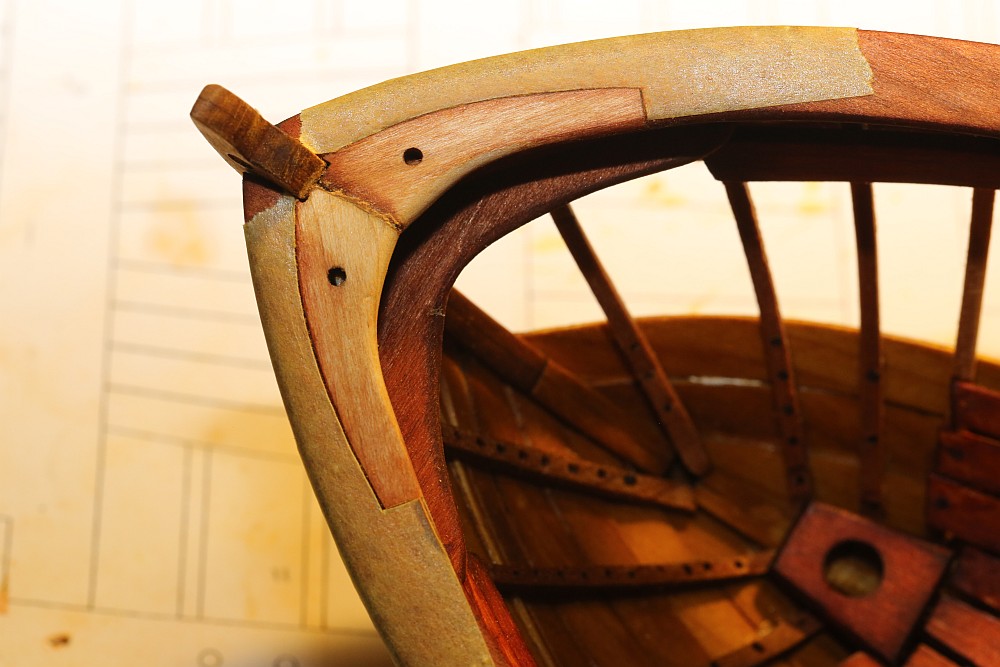
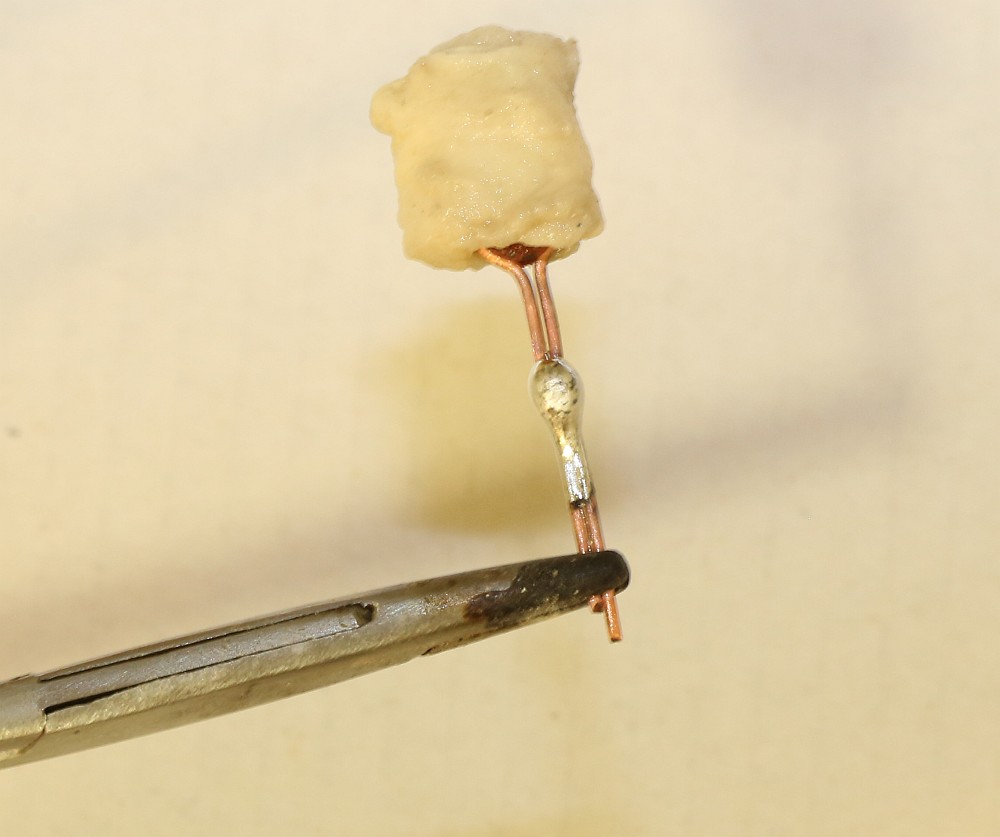
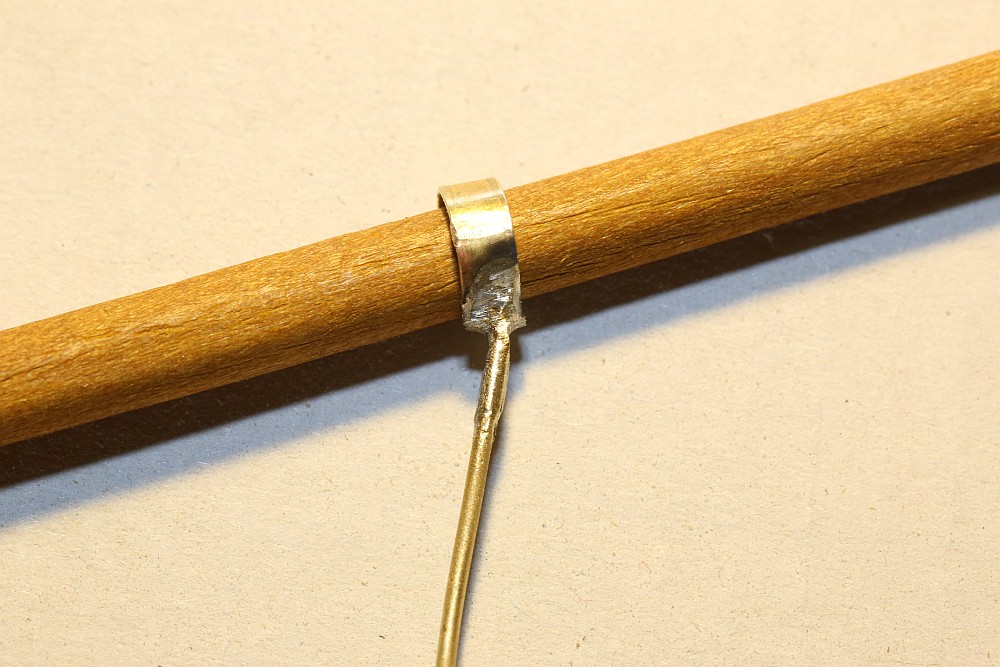
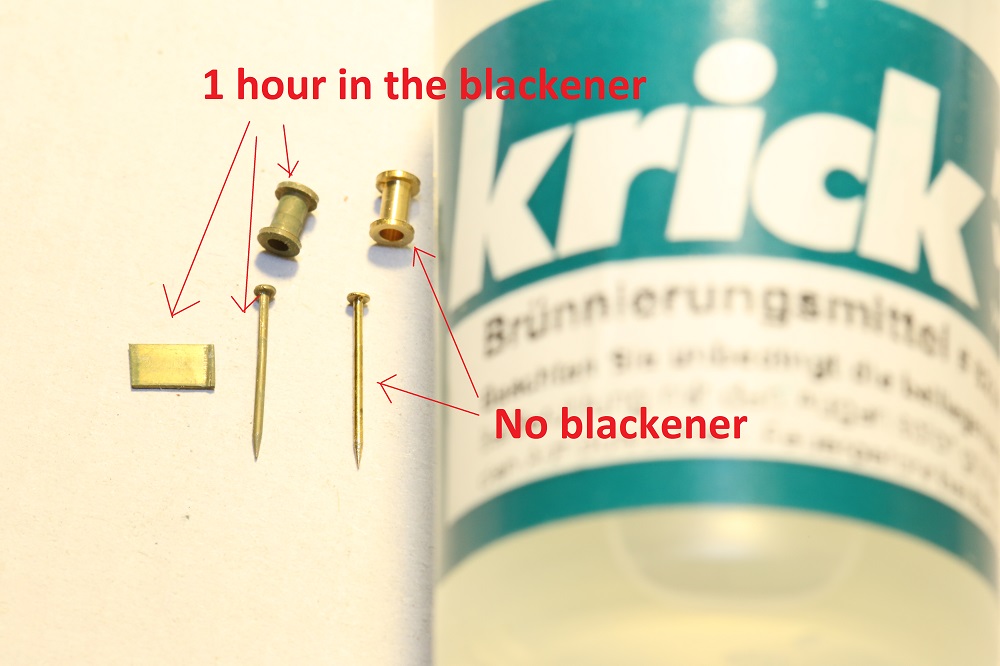
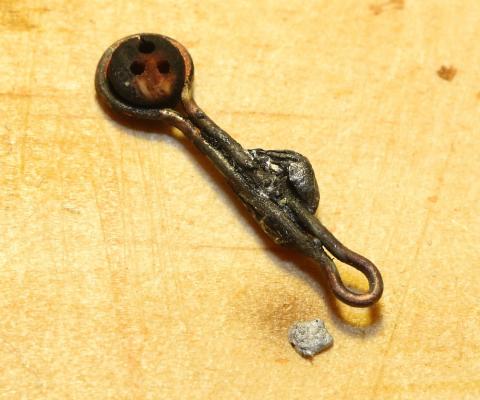
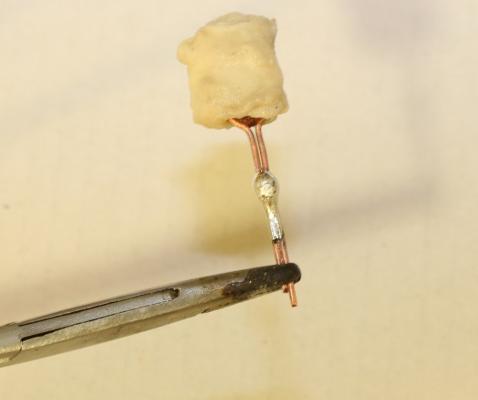
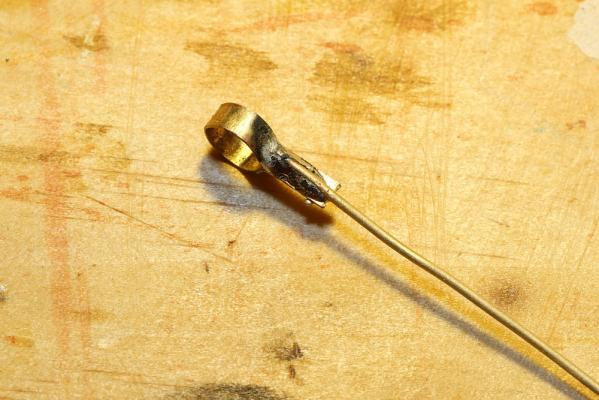
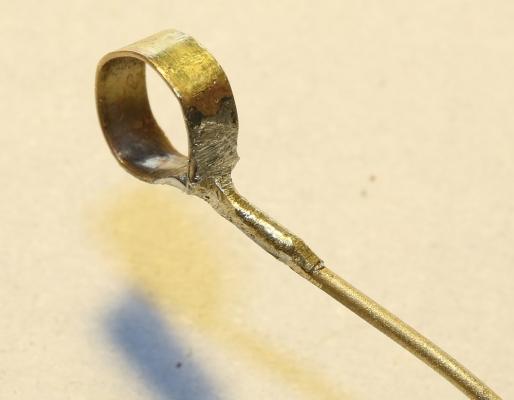
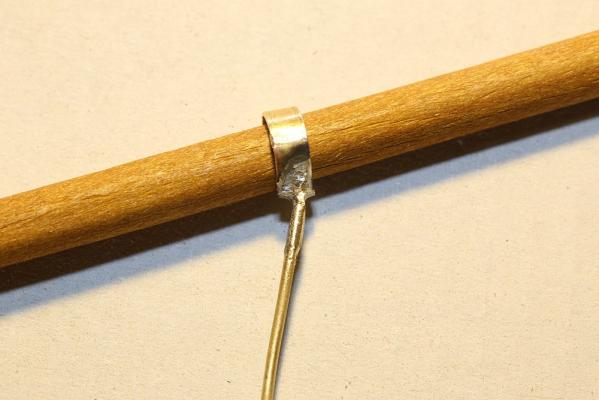
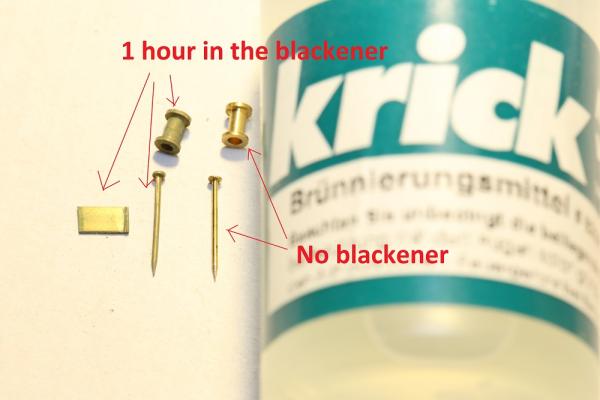
Oh well, looks like nobody could answer my question Anyway, I took a look at the Occre kit, and I noticed that they had deadeyes in the shrouds. So deadeyes it is. Unfortunately, my soldering skills leave much to be desired. The iron doesn't get hot enough, and when the solder melts, it forms a little ball and refuses to go into the metal. I then read Russell Barnes' silver soldering tutorial then remembered I had some silver solder coil (not paste!) in my toolbox. After quite a lot of rummaging, I found it. I then spent a few hours experimenting with different methods to make these damned things without burning the deadeyes. I came up with this: I wrapped the deadeye in some tissue paper, then saturated it with water. The water cools down the wire around the deadeye, preventing it from burning. It worked a treat. I have decided to make a bowsprit. McKay's plans include a bowsprit holder (whatever you call it). I fabricated one by forming a ring with brass plate, soldering it shut, then soldering a brass rod onto it. After much shaping, this is what it looks like. I have yet to finish fine sanding and blackening - that will come later. This is what it looks like attached to the bowsprit. Unfortunately, my metal blackener leaves much to be desired. As the picture shows, it is the "Krick" brand. This picture shows some brass pieces which have been cleaned in methylated spirits, then detergent, then left in the blackener for one hour! As you can see it is nowhere near black. Only the copper has oxidized a little. Silver solder does not change colour at all, and "ordinary" solder turns grey, not black. About the only thing that turns black is wood! Real waste of money. I wonder if anyone else uses Krick and whether they have had good results?
- 78 replies
-
- 1
-
-
- model shipways
- bounty launch
- (and 1 more)
-
Wow Dan, I burst out laughing when I saw that model. But I think it has a certain rustic charm to it, with all the misshapen planks and all
-
Superb, Meredith! Thanks for posting them. I suspect that your skills greatly exceed mine, but i'll see what I can do!
-
Thanks, Meredith. I appreciate it.
-
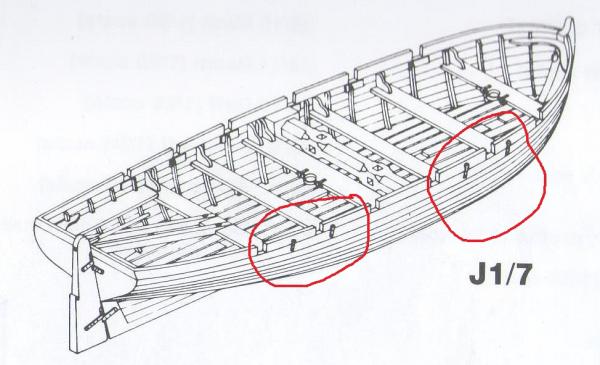
Thanks, Dan! Yes, you should go do it!! I have a question for those who are more knowledgeable than me. This is a drawing of the Bounty Launch from Mackay's AOTS: Bounty: I have circled the shroud stays. No matter how much I squint at the picture, I have no idea what they are supposed to look like. Are they meant to look like this: Or this: (These images were taken from Chuck Passaro's 18th Century Longboat thread here) Any opinions?