Keith_W
-
Posts
1,145 -
Joined
-
Last visited
Content Type
Profiles
Forums
Gallery
Events
Everything posted by Keith_W
-

Has anyone used this product?
Keith_W replied to Ulises Victoria's topic in Modeling tools and Workshop Equipment
That one is a cyanoacrylate. Go to this page: http://www.titebond.com.au/products/index.htm It is near the bottom. Download one of the PDF's and it will tell you it is a CA glue. I haven't used it, but I do use the Titebond PVA glue. It is very fast setting, about 5 minutes of clamp time required with full strength reached in 12-24 hours. The downside is that it dries into a yellowish residue. It can be scraped off, but it is far better to wipe it off when it is still wet. Because it sets so fast, I also keep some normal PVA glue at home when I need more time to adjust things after clamping. -
Good luck with your build! I'll be keeping an eye on this one.
-
Arr. I did not do away with them temporary tabs. Shiver me timbers that ye might have thunk that. Them planks will bend, if ye applyest thy steam iron and maketh sure thy grain is in the correct direction. If thou attemptest to bendeth thy planks in the wrong direction, thy planks shalt splinter - but in the opposite direction, they shalt bendeth nicely.
- 625 replies
-
- 5
-

-
- bounty launch
- model shipways
- (and 1 more)
-
I agree, this thing is crying out for an engine!
-
What exactly are you unhappy about with your model? The colour? The consistency of the paint? Can you post a photo?
-
Actually, you don't. This suggests to me that your planks should have been placed further aft. Too late for that now - as long as the planks reach the transom you should be fine. When I placed my planks, I clamped the fore end to the bow and stretched the plank till it overhung the transom. Each plank was tight to the bulkhead, and if it wasn't - I shaped it. Anyway, you might be doing something right because you completed your planking without having to use any stealers. I did
-
Proxxon MF70 opinions and accessories
Keith_W replied to Keith_W's topic in Modeling tools and Workshop Equipment
Well, I received my order today. In the box: - Proxxon MF70 - Proxxon precision vise - Dividing Head for MF70 - Engraver GE70 I also received my DS-E belt sander. I am already thinking of making some accessories, but for that I will have to wait for my lathe to arrive. -
Alde, if it's not smooth then sand it even more When I sanded my hull, I used successively finer grades of sandpaper - 80, 120, 180, 240, 400, 800, and then finished with 1200. The coarser grades (80 and 120) are only used for removing material. Be careful, because they may leave gouges in your wood.
-
Thanks for your reply, Michael. Believe it or not I have actually had a good, detailed look at your pictures and compared them to the pictures I have of the original and the scale replica in the museum. I did notice that some of the ornamentation seems uncomfortably crowded at places but with gaps in some others. I am not criticizing your build, you are doing a marvellous job. But I do question if the kit designers got it right, and your answer seems to confirm my suspicions. I guess my question is whether it would be possible to rectify these flaws if a new build from the same kit was attempted. Your reply suggests that it would be too difficult - not only would I have to fabricate all the frames (something I don't have an issue with), but I might have to redo the carvings as well (a definite no-no for me!). I guess that makes up my mind for me - thank you very much.
-
Michael I was contemplating this kit and thus headed to your build log to do some research. It appears that the stern of this kit is much too narrow. Since the early part of your build is lost, I am not sure if this can be easily remedied. It seems as if quite a few frames need to be fabricated to correct this problem? Or do you think there is an easier fix? From your pictures it looks as if the stern needs to be wider by at least 1.5cm.
-
HMS VICTORY 1759 by isalbert
Keith_W replied to isalbert's topic in - Build logs for subjects built 1751 - 1800
Albert, très magnifique! -
Batavia by *Hans* - FINISHED
Keith_W replied to *Hans*'s topic in - Build logs for subjects built 1501 - 1750
I don't know how I missed this thread, but i'm going to start following it now! I grew up in Perth as well, and have been to the Batavia museum many times. There is a very nice model of the Batavia in the museum. Unfortunately I don't have a picture of it. Maybe another West Australian can oblige. You are doing a great job with this model. Thank you for posting! -
Lovely build so far Von Kossa. You could simulate those metal bands with black paper.
-
Actually, I DID place the alignment tabs on the fore side of the frames in front, and the aft side of the frames at the rear. Given that the pieces are symmetrical front to back, all I did was flip it around so that I can see the markings
-
Proxxon PD230 metal lathe and CNC kit short review
Keith_W replied to robbl's topic in Modeling tools and Workshop Equipment
Thanks for posting the review, Rob. I was considering a PD230/E myself, but in the end I sprung for a Sherline. -
The discount has been going all week, Brian It was only the 20% discount that pushed me to order the Royal William. I have previously expressed my concerns to you about this kit. I would have preferred to take a look at yours before ordering it, but hey. 20% discount is a 20% discount
- 8 replies
-
- 1
-
-
- Euromodel
- Royal William
- (and 1 more)
-
Brian, I told you the other night that I had ordered one from Euromodel. I did it earlier this week. I'm not sure how kumamax was able to buy one - what I got instead was an email informing me that there are no more left and it will take 2 weeks for them to restock. Maybe he snaffled the last one
- 8 replies
-
- 1
-
-
- Euromodel
- Royal William
- (and 1 more)
-
Albert, you won't like my suggestion. I recommend that you remove those planks and start again. Because the planks are precisely cut, any errors you make now will compound itself giving you more problems to fix later on. Just paint on some water, and that should soften the glue enough for you to remove the planks.
-
Hi Rod, it was great to meet you tonight and have a chat. I was very impressed with your model and blown away that it was your first effort! Are you sure you haven't done this before! Anyway, hope to see you next month and see what progress you have made.
-
Proxxon MF70 opinions and accessories
Keith_W replied to Keith_W's topic in Modeling tools and Workshop Equipment
Nigel, thank you for your response. I am still getting my order together, and I am thinking of adding the GE70 to my order list. -
Proxxon MF70 opinions and accessories
Keith_W replied to Keith_W's topic in Modeling tools and Workshop Equipment
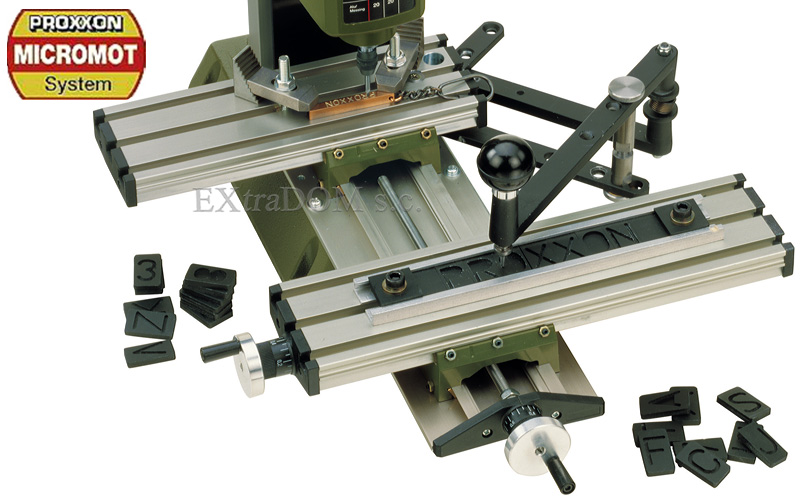
I have a question for owners of the GE70 engraving accessory for the MF70 (pictured above). Proxxon's website warns against using the tool freehand, however I would imagine that this warning is most applicable to milling metal. For our application (milling wood) - has anybody tried using this tool freehand? I would imagine that it would be very useful to blow up a feature from a plan 5:1 and then use this tool to mill out the design, however that would involve using the tool freehand. Is this possible, or is the resistance in the tool too great to allow such precise control?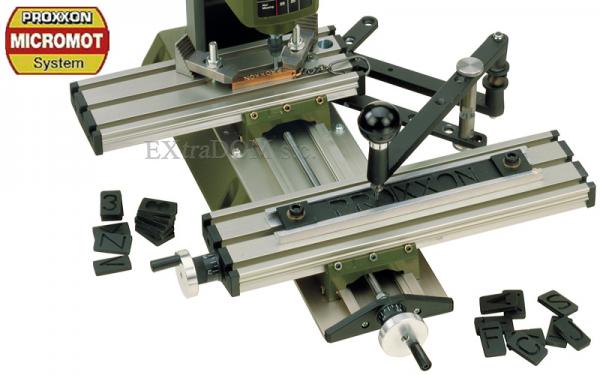
-
Nice fix! Now make sure there is enough space for the gudgeons and pintles before you move on! (edit) In the real boat, the rudder would have been unmounted when the boat is stowed. Most likely the gap exists so that the rudder can be slipped out. Make sure you have enough space for this.
- 625 replies
-
- 1
-
-
- bounty launch
- model shipways
- (and 1 more)
-
Beautiful carving, Sherry. Just a question - where did you get this information from? I would love to look at it too. I want to learn how to carve.
-
No updates because i've been struggling with my sewing machine Darn, i'm really hopeless! After several hours of having the thread stuck to the machine, I figured out that the thread I was trying to use was too thick. Back to the shops and now i'm back with single stranded polyester thread. The machine isn't jamming any more, but now I discovered I can't sew straight. Good thing I bought a couple of meters of spare cloth (enough to make sails for two Cutty Sarks). I have been practising my sewing. The machine is quite fun to use when it's behaving properly! Bindy, I was in Chinatown yesterday. I did contemplate buying a Hello Kitty sticker for the sewing machine, just for you
- 78 replies
-
- 2
-
-
- model shipways
- bounty launch
- (and 1 more)
-
PROXXON DSH 2 SPEED SCROLL SAW – REVIEW.
Keith_W replied to Blue Ensign's topic in Modeling tools and Workshop Equipment
Thank you for posting this most excellent and informative review. Your pictures and demonstration really says it all.