HOLIDAY DONATION DRIVE - SUPPORT MSW - DO YOUR PART TO KEEP THIS GREAT FORUM GOING!
×


Keith_W
-
Posts
1,145 -
Joined
-
Last visited
Content Type
Profiles
Forums
Gallery
Events
Everything posted by Keith_W
-
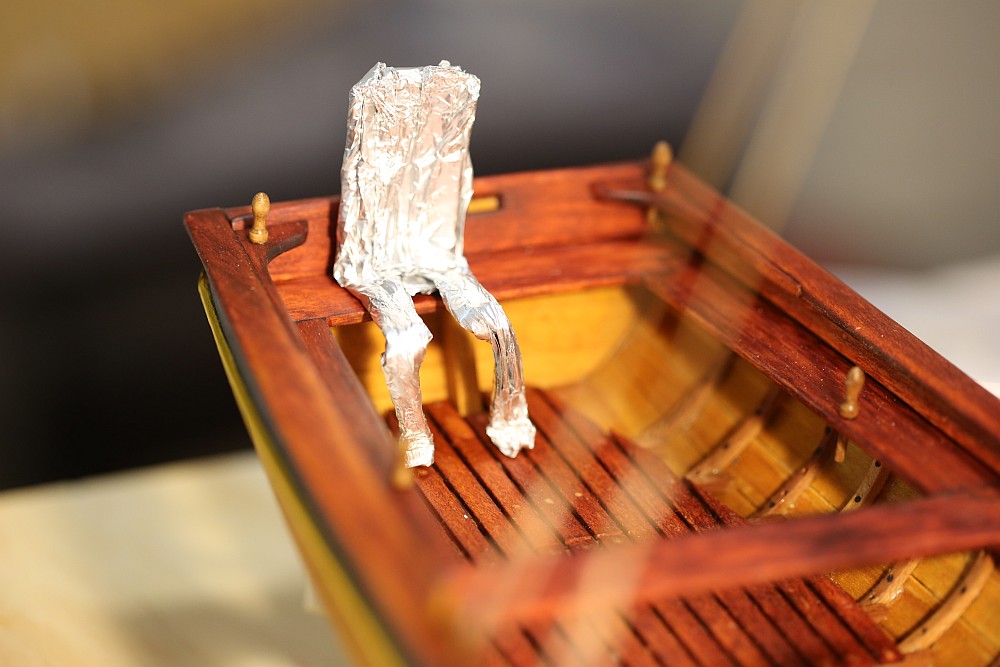
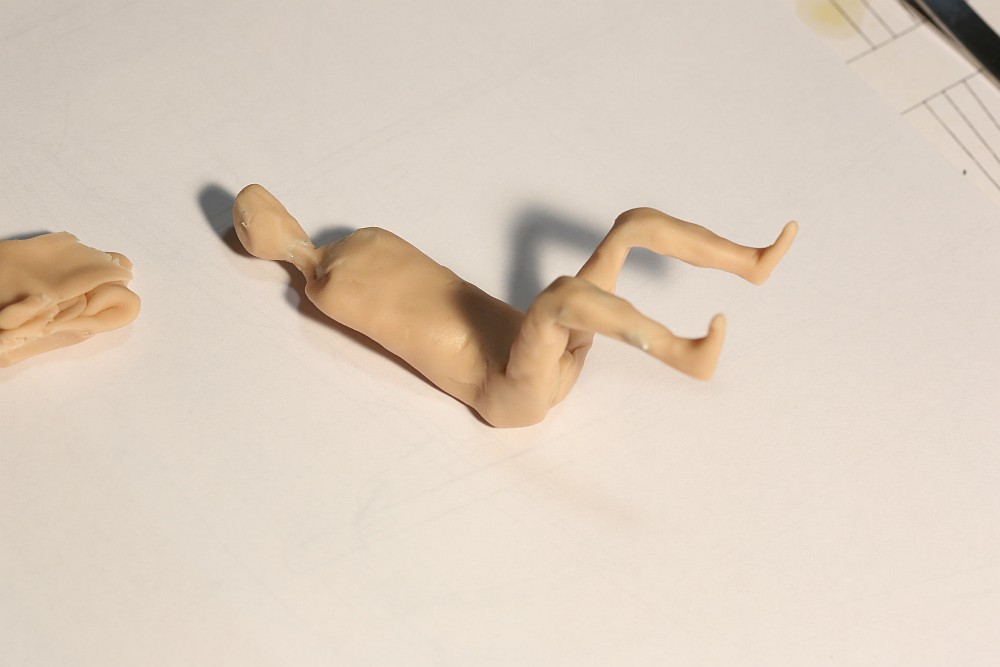
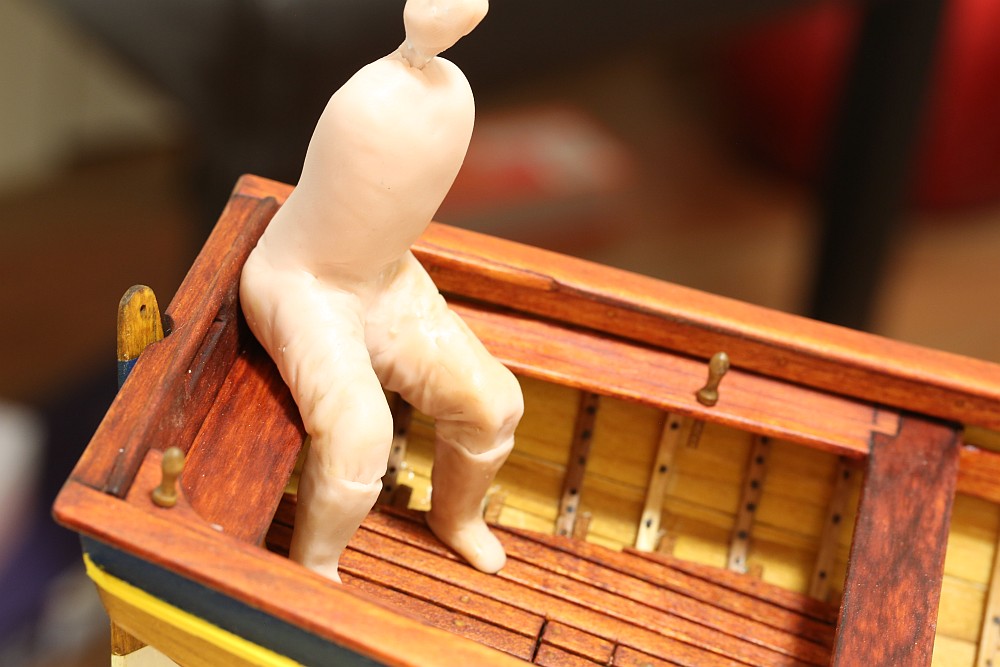
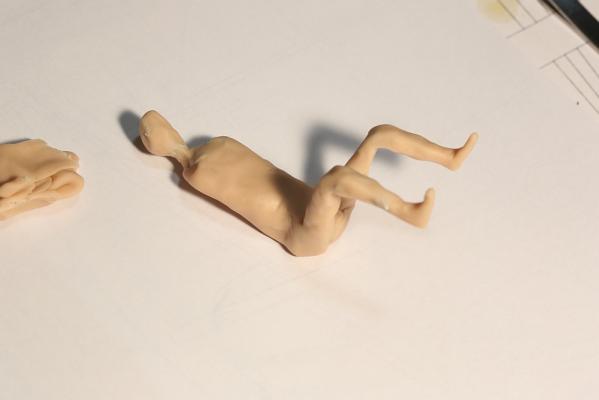
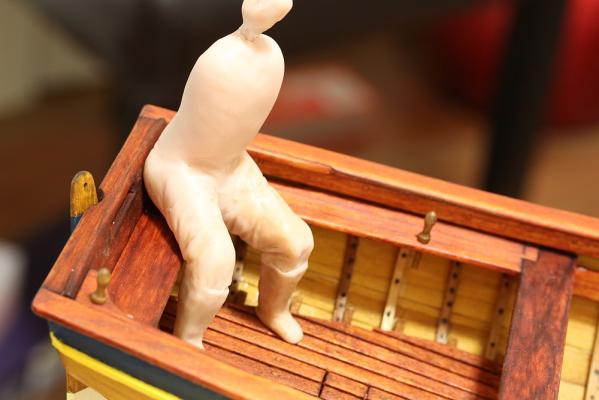
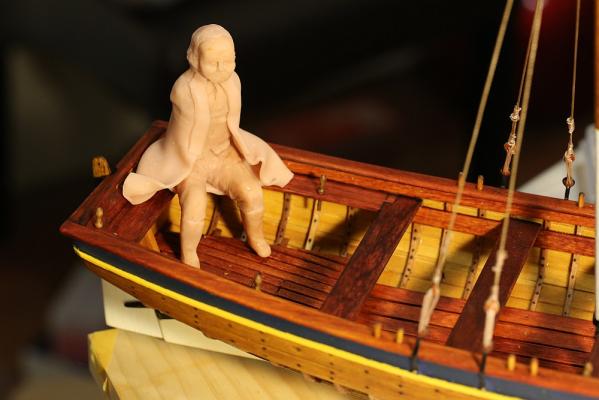
 Today was a happy day modelling. That is, until I received a phone call from my best friend's mother. He passed away from a motorbike accident - apparently he crested a hill and encountered a vehicle driven by a drunk driver travelling on the wrong side of the road: http://www.watoday.com.au/wa-news/claremont-man-killed-in-albany-crash-20140322-359rc.html I am completely numb at the moment. After I put down the phone I continued to work but my mind was a blank. Anyway, i'll just leave these here: I think i'll continue doing work. It was strangely therapeutic.

- 78 replies
-
- 2
-

-
- model shipways
- bounty launch
- (and 1 more)
-
Wow, that thing is only slightly taller than 1mm!?!? How on earth did they make it?
-
Al, if you use oil based stain then you will have trouble gluing it. You should ALWAYS, ALWAYS use either water based or alcohol based wood stain. I made this mistake with my first ship model, a small part which I stained refused to stick. Fortunately I could junk it and make myself a new part ... used a water based stain this time. Steve that last picture of yours looks convincing for a plank. But really it's about the look that you're going for. As you know from my build log, I used Golden Teak / Old Baltic 1:1.
- 625 replies
-
- 1
-
-
- bounty launch
- model shipways
- (and 1 more)
-
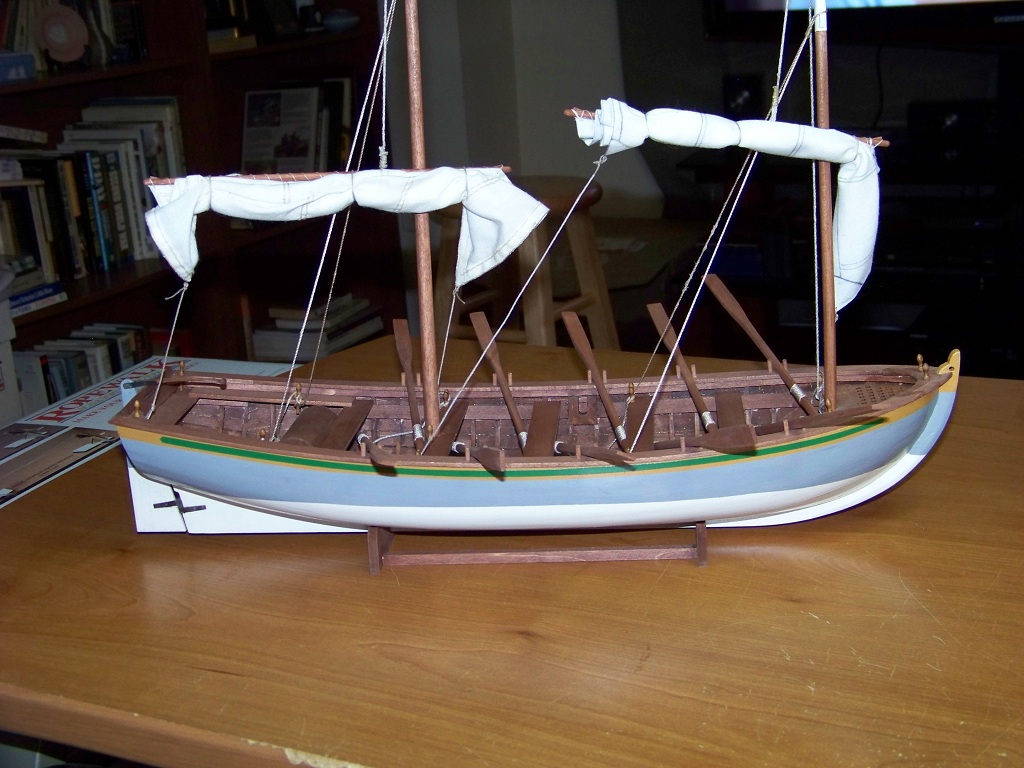
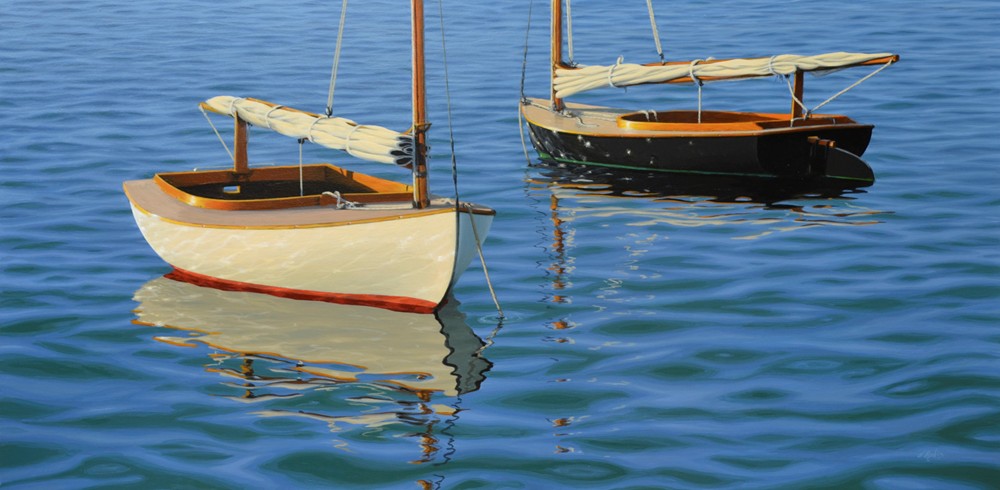
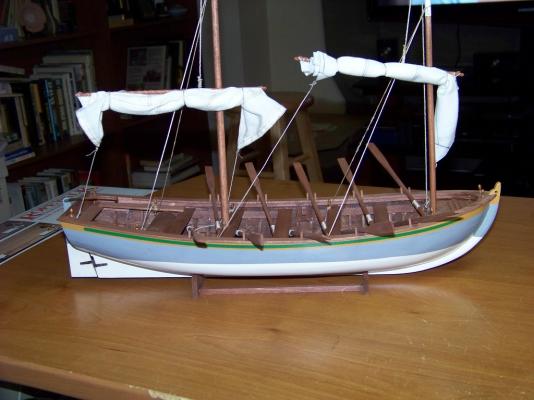
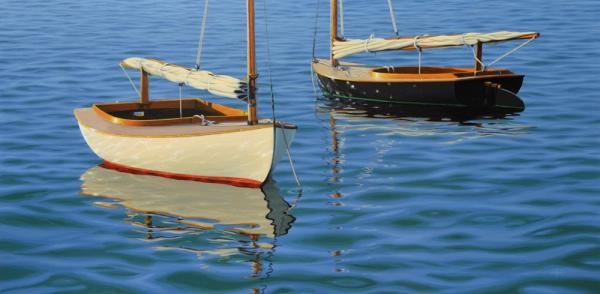
Re: furled sails, I found this, but it looks wrong: I suspect this painting is more accurate. Note how the sails are folded like an accordion: Can anybody help?
- 78 replies
-
- 2
-
-
- model shipways
- bounty launch
- (and 1 more)
-
I have gone through the whole thread and resubmitted all the missing photos. Let me know if anything is still missing.
-
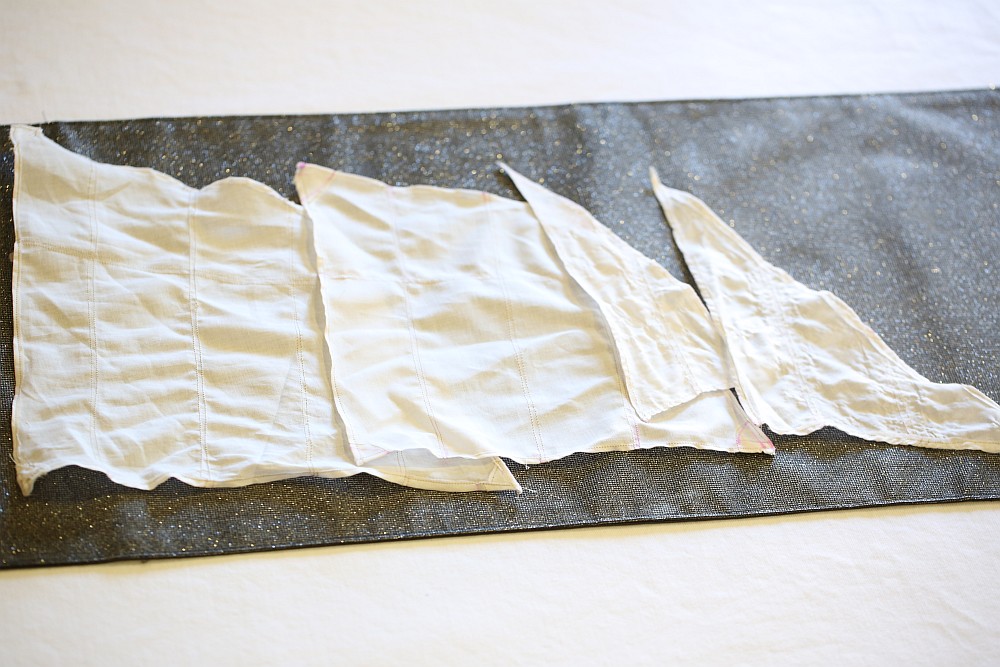
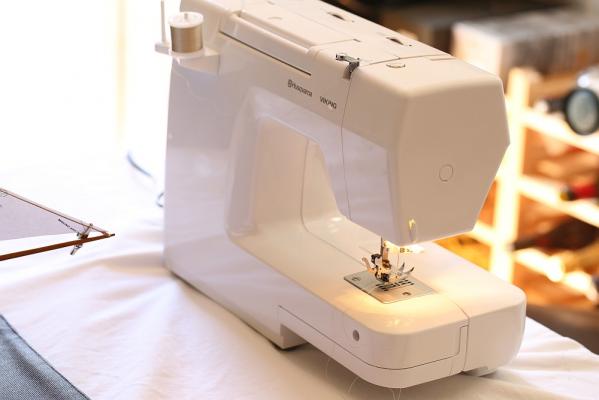
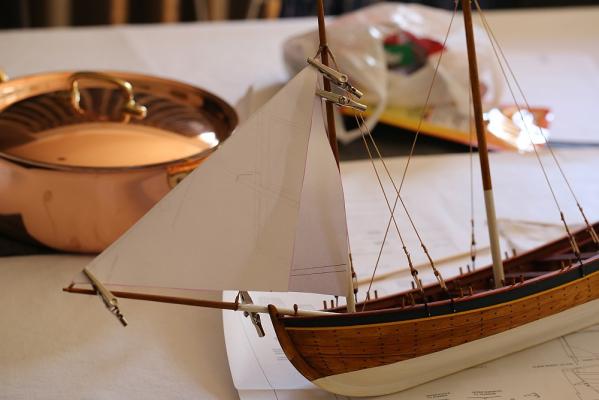
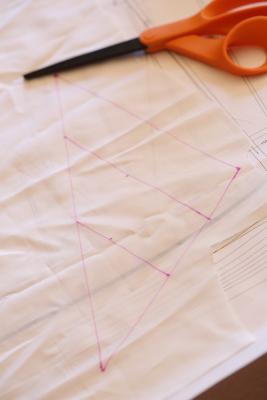
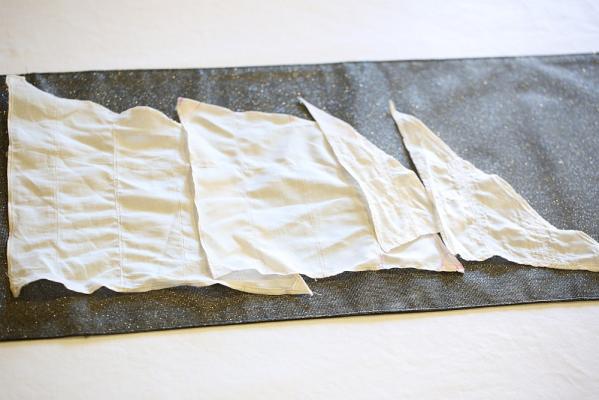
Thank you Geoff and Curtis. I have been practising my sewing only on days when I am home alone with the wife at work. That's not very much time. After reading lots of articles and watching Youtube videos, I taught myself how to use this machine. Amazing what you can find on the net these days! Oh yes, and CurtisW - your tip to let the machine do the pulling really did the trick. I found I was trying to push the cloth into the machine. I now try to hold the cloth straight. It works. Anyway, this is my machine: I took the plans for the sails off the plans, but the two spritsails were not drawn on the plans. I looked at McKay and cut out some paper templates to test for fit on the model: I drew out the outline on cloth using a disappearing ink pen: ... then proceeded to stitch all the sails. I now have a full set of sails, ready to be mounted: I am not sure whether I want to show the sails furled or unfurled. At the moment I am leaning towards furled, so as not to hide all the detail I put in the boat. The problem is, I do not know what furled sails on a Launch are supposed to look like. Plenty of googling later and I am still none the wiser. Does anybody know?
- 78 replies
-
- 3
-
-
- model shipways
- bounty launch
- (and 1 more)
-
This Mil Mi-24 helicopter is equally impressive. It is offered for 18,000 Euros from Helicrazy: http://www.helicrazy.com/crbst_86.html That's right, you can buy a BMW with that kind of money. It is powered by a jet turbine engine. For those who don't know, real helicopters are not powered by piston engines because they generate too much vibration. Instead, a jet engine blows into a turbine, which spins the crankshaft and thus the rotor via a transmission. Most nitro powered helis use 2 stroke piston engines because of the sheer cost of manufacturing a scale miniature of a jet turbine. But if you want realism, a jet turbine is the only way. Need to be convinced? Watch this video:
- 21 replies
-
- 13
-
-
OK I know this is a ship model forum but surely most of us can appreciate other models as well I thought I would post a link to this site: http://www.armortek.co.uk/index.html Armortek makes 1/6 scale model tanks, fabricated from metal. Unfortunately, their production goes in runs, so once a kit is out of production, it is out of production. They are currently selling a British Mk. IV WW1 tank. Very impressive, but not as impressive as this: ... a 1/6 scale King Tiger, measuring 1.2m long and weighing 60kg. Here is a video of it in action. Note the realistic engine sound (which is computer controlled and responds to revs):
- 21 replies
-
- 18
-
-
Thank you again Paul. BTW, for MSW members - if you click on Paul's other videos, they are all as good as this one. I particularly like the solder video (mentioned in another thread), but the video on how to make scale rivets is ... ahem ... riveting, as well.
-
I apply finish to parts when: 1. I have no more things to glue onto it and no more paint to apply, 2. I will lose access to the part (e.g. when I have to glue a deck on top of it). Sometimes I break rule (1) if I have to attach something which will be stained by finish, e.g. coiled rope on a deck. In that case, I finish the deck first before attaching the rope.
-
Yes that is right, Capt. Old Baltic and Golden Teak in a 50:50 ratio. I used a syringe to accurately measure the ratios and mixed it up in a spare container with a cap that fits tight. Those little bottles that dried herbs come in are fantastic for this. Don't worry about your toothpicks. When you restain them after sanding, they present an end grain and absorb much more stain than the wood around it. It will darken up nicely, I assure you.
- 625 replies
-
- 1
-
-
- bounty launch
- model shipways
- (and 1 more)
-
No Al, the football we speak off is Aussie Rules Football. It's played with an oval ball like rugby. Unlike rugby (or American football) with their frequent pauses, Aussie Rules is much faster and more free flowing. Even in Australia, hardly anybody plays it outside Melbourne. Frankly, I don't care much about it but in my city, if you are not an AFL fan it's almost a social handicap.
- 625 replies
-
- 1
-
-
- bounty launch
- model shipways
- (and 1 more)
-
I have tried another brand of epoxy resin before, but it left lots of bubbles in the finish. Yours is completely clear. Did you have any bubbles, and if so, how did you get rid of it?
-
Funny, you are a Hawthorn supporter eh. I live in Camberwell, so everyone here supports Hawthorn. But I grew up in Perth, so I support the Eagles If I were you I would test the stain on the sapelli and the cherry to make sure they come out in a close enough shade.
- 625 replies
-
- 1
-
-
- bounty launch
- model shipways
- (and 1 more)
-
Hi Steve, you definitely don't have enough cherry frames. Don't forget that the quarter deck is also planked on cherry frames. Note that on my kit, the planks supplied for the quarter deck were the wrong size. I can't remember the measurements exactly, but I said so on my build log. You might want to check if yours are correct.
- 625 replies
-
- 1
-
-
- bounty launch
- model shipways
- (and 1 more)
-
Custom photoetch resources
Keith_W replied to Keith_W's topic in Metal Work, Soldering and Metal Fittings
Thanks Brian. I have done a little more reading and it appears that the thickest part that can be photoetched is 1.5mm, and it can be etched using multiple exposures (meaning, it is possible to create depth in a PE part). I wish that I asked to see your Amati PE parts when I was over yesterday, as far as I can tell from your photo, even the 3D parts look nice and crisp. I have since remembered that there is a CAD subforum on MSW, I visited it and devoured quite a few threads. I have downloaded a copy of DraftSight and have an evaluation copy of TurboCAD. I am a complete CAD novice, so far I have drawn a couple of lines and circles! Fortunately there seem to be quite a few free resources to teach yourself CAD. I will also be looking at quite a few PE ship's parts to see what is possible. If I am going to get a few parts made, may as well fill up the sheet. If anyone wants to PE their own parts, it appears that the process is: 1. Obtain a CAD program and learn how to use it 2. Print it out and check it against the plans 3. Send off your file to one of the businesses listed above to produce it for you. No idea of the cost so far. Has anybody done this? Dafi? -
Custom photoetch resources
Keith_W replied to Keith_W's topic in Metal Work, Soldering and Metal Fittings
Pat i'm not looking at doing it any time soon. At the moment I am researching into what is possible, in anticipation of an upcoming build. I can chat to you about it when I next see you. -
Hello all, I did a search and did not come up with any results, so I thought I would start a thread. Has anybody here tried making custom parts using photo-etch? I know that dafi has, so perhaps he would like to chip in. I have done some googling to find out if it is possible to make parts for a ship I would like to build. The fittings that come with the kit are rather chunky and I have been thinking about how I would replace them. I think PE is the solution. It is possible to do photo-etching at home, as per these links: http://www.steelnavy.com/etching.htm http://www.starshipmodeler.com/tech/fh_pe.htm ... and you can buy your own PE kit here: http://www.micromark.com/micro-mark-pro-etch-photo-etch-system,8346.html HOWEVER, it requires an investment in machinery (if you do not already have these): laser printer, fluorescent lamp, heat source, laminator. It also requires consumables, including some toxic chemicals, a glass plate, and so on. In the end, the investment sounds pretty substantial for making a small run of parts. My next thought was to look at businesses that can do it for you. So far I have found a few: http://www.ppdltd.com/web_site_3/page_1_intro.html http://www.photo-etch.co.uk/page1/page6/page6.html http://www.photofab.co.uk/ http://saemann-aetztechnik.de/ http://www.orbel.com/photo-etched-precision-metal-parts I have not looked in detail to see if any of these companies would be happy to do a one-off project. It appears that as a minimum, you need to supply your artwork in vector form, either AutoCAD format or CorelDRAW format. A pixel manipulator (like Photoshop) will not work. Does anybody know of any free CAD programs or vector drawing programs that can output to AutoCAD format or CorelDRAW format?
- 12 replies
-
- 3
-
-
- photoetch
- photo-etch
- (and 1 more)
-
LOL Steve, an American thinks his nephew's 5 year old daughter's Kings English is better than yours! Feeling deflated yet? I do have to warn you, that I realized from the start that I would not have enough cherry wood to finish - so I was very careful not to waste excess wood when cutting. The MS instructions claim that they supply enough cherry wood to account for breakages - baloney! There is barely enough to finish the framing even with MINIMAL breakages! Many of my cherry frames had knots in them which made it nearly impossible to bend, which meant that I had to keep them aside for other use. I thought I would have to order more wood but as it turns out, I had JUST enough to complete my framing. I suggest you look at how much you have left and order more from MS if required. Also bear in mind that if you plan to bash the kit as I did and make yourself a bowsprit AND change the rigging, you may not have enough rope. So you might want to order that too.
- 625 replies
-
- 1
-
-
- bounty launch
- model shipways
- (and 1 more)
-
Al, she's looking really good. I should probably tell you that when mine came off the frame, the first thing I did was to check if it was the correct width (given that all the other build logs reported that she became wider). It was 100% correct. SOMEHOW, over the next few days she became wider! In the end, I fixed the width problem by using the thwarts to hold the boat together, although I did have to fabricate a few new thwarts. I used clamps to squeeze the hull together and then made sure the thwarts were glued solidly in. Just something for you to watch out for.
-
Thanks Rod. Over the past few days I have actually been researching engines because I want to make myself a replica of my Porsche engine. Yes, I know I can go to my garage, remove the thing, disassemble it, take measurements, but surely there must be an easier way Along the way I found some resources for your Arno engine. I thought of you, but I did not think to bookmark it. Argh! That PDF file of the engine is incredible, and far better than any resource I have found. If I were you, I would scratchbuild it and save 900 Euros. You only need the top of the engine to be on display ...
-
Wow, that's a gorgeous gloss finish you have on your canoe! What did you use for it?
-
Has anyone used this product?
Keith_W replied to Ulises Victoria's topic in Modeling tools and Workshop Equipment
That one is a cyanoacrylate. Go to this page: http://www.titebond.com.au/products/index.htm It is near the bottom. Download one of the PDF's and it will tell you it is a CA glue. I haven't used it, but I do use the Titebond PVA glue. It is very fast setting, about 5 minutes of clamp time required with full strength reached in 12-24 hours. The downside is that it dries into a yellowish residue. It can be scraped off, but it is far better to wipe it off when it is still wet. Because it sets so fast, I also keep some normal PVA glue at home when I need more time to adjust things after clamping. -
Good luck with your build! I'll be keeping an eye on this one.
-
Arr. I did not do away with them temporary tabs. Shiver me timbers that ye might have thunk that. Them planks will bend, if ye applyest thy steam iron and maketh sure thy grain is in the correct direction. If thou attemptest to bendeth thy planks in the wrong direction, thy planks shalt splinter - but in the opposite direction, they shalt bendeth nicely.
- 625 replies
-
- 5
-
-
- bounty launch
- model shipways
- (and 1 more)