Rick01
-
Posts
646 -
Joined
-
Last visited
Content Type
Profiles
Forums
Gallery
Events
Everything posted by Rick01
-
looking at ships, what's the best boat for a newby?
Rick01 replied to shutter's topic in Wood ship model kits
My first build was Endeavour's longboat. Simple kit, fairly reasonable instructions and makes up into a nice model. There are a couple of builds on here if you like to search for them. Rick -
Don't fix any sails/running rigging until you've completed the standing rigging. It's a pig trying to do it any other way! Rick
-
First bulkhead compares with my kit but the second does look like a bit of fill may be called for and three also doesn't look too bad. Rick
- 69 replies
-
- 2
-

-
- lady nelson
- victory models
- (and 1 more)
-
Looks as if you've a bit of a curve on the fill you've done. Once you've packed the bow section you need to get a nice smooth sweep from the bow on through to that second bulkhead - takes time and isn't easy but you do need it to get the final planking right. I used a flexible sanding stick to finish that area. This was made by pinching one of my wife's flexible nail buffers and double sided sticky taping fine sand paper to it - made life so much easier. Rick
- 69 replies
-
- 2
-
-
- lady nelson
- victory models
- (and 1 more)
-
You may find planking easier if you completely fill the bow section with balsa and sand/file to shape. It gives the first layer of planks something solid to grip in that first important curve. Rick
- 69 replies
-
- 2
-
-
- lady nelson
- victory models
- (and 1 more)
-
I'd expect it to go to the back - then the lift for the gaff would be hooked/lashed to it. Also note that there should be a similar set up on the fore mast so the cap with only two eye bolts sits above the cap with three one each mast. Search some of the cutters for an illustration of the rigging around this area. Rick
-
If I remember correctly the rings remain on the masts at all times. The sail has a rope that runs down the leading edge looped through a ring then through a hole in the sail then back through the next ring and so on. At a guess the spare hole is for the tail end of the rope running down the sail to be secured through. Sorry but I've no idea what the nautical terms are for these actions. :-( Rick
-
Yes she's only a 50ft brig - I had thought about a straight pull and was only contemplating a lead block to provide better leverage. I've searched for brigs of similar size and era but not been able to find one with a really clear indication of its running rigging. Having said that those I have seen would appear to end on the mast at cleats. I'll do a few more searches and see how I go. Thanks again for your help - it's really appreciated. Rick
-
Put in a complete stern filler - I've worked on this model and it makes planking that area so much easier if you've got a solid surface in that area. Rick
- 69 replies
-
- 1
-
-
- lady nelson
- victory models
- (and 1 more)
-
Thanks very much for that - as a rank amateur most of this is still a mystery to me! One last question then - would halyards and sheets then be run through blocks hooked to ring bolts at the foot of the mast then back up to cleats fixed on the mast, thus saving valuable deck space otherwise taken up by fife rails? Rick
-
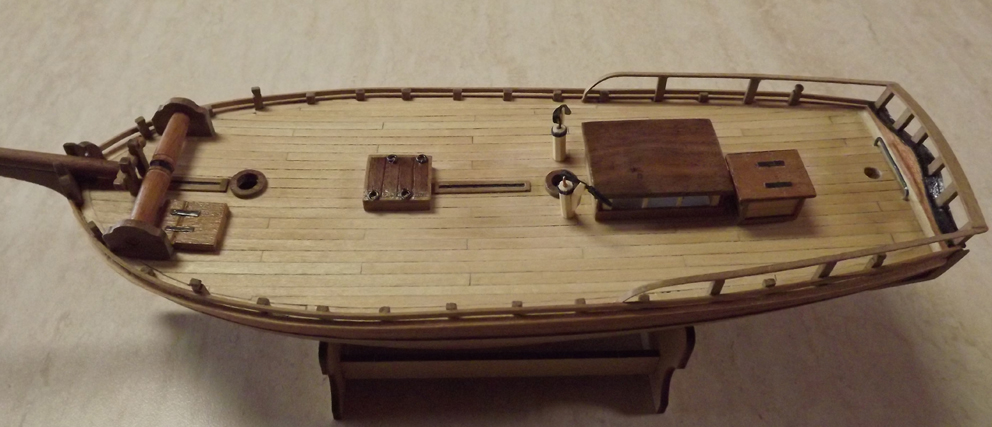
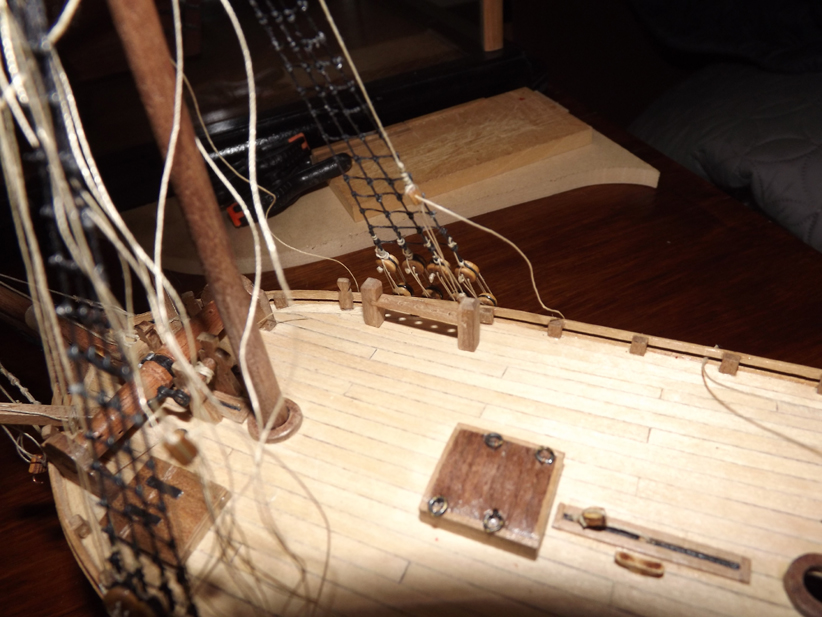
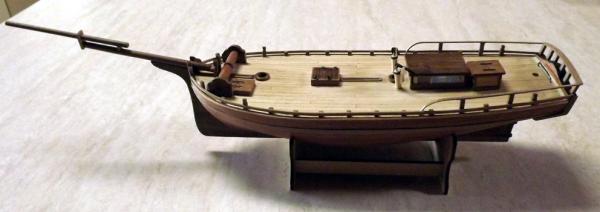
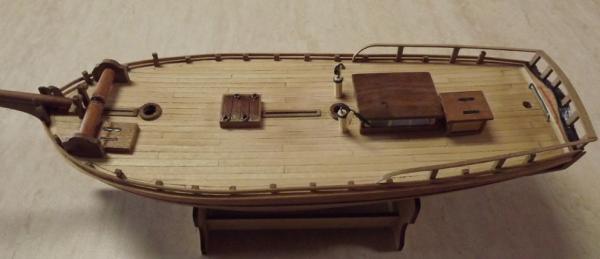
I'm starting rigging my interpretation of HM Brig Lady Nelson http://collections.rmg.co.uk/collections/objects/66562.html andas there are no gunwales it leaves me with a problem re belaying pin locations. The ship is a 1799 built 60 ton brig, thus quite small. I've searched on line for a definitive answer but so far nothing, I have however seen three variations and wonder which would be more correct. 1/ A free standing fife rail as per this photo of one I've mocked up. 2/ Cleats lashed to the shrouds. 3/ Cluelines etc. tied directly to a lanyard strip. Any assistance would be greatfully received. Rick
-
How about a series devoted to Australian exploratory ships. HM Brig Lady Nelson, top sail schooner Enterprize, HM Cutter Mermaid (slightly more accurate version) all come to mind. Scale at 1:48 Price range $200.00 ~ $350.00 With the number of Aussies on this forum alone I'm sure there's a market for models celebrating our history in addition to those "First Fleet" vessels already available. Rick
-
Metric vs English
Rick01 replied to jdiven's topic in Building, Framing, Planking and plating a ships hull and deck
But the old system certainly made your mental arithmetic better - coal is £3, 7s , 6p per hundredweight what is the price of 4 and three quarter tons . Ahhh the good old age of 11+ exams !! 20 cwt = 1 ton 12 pence = 1 shilling 20 shillings = 1 pound. so [(20 x 4) + 15] x 3 pound 7s 6d = ? Quite simple really. Rick -
Recommendations for essential tools for a beginner?
Rick01 replied to Cindyp's topic in Modeling tools and Workshop Equipment
No 3 scalpel handle plus at least 25 number 11 blades, lots of rubber bands, mini clamps, assorted grades of sandpaper, mini vice/drill with drill bits from .25mm up to 1.00mm, water based wood glue (don't know what's available in SA), Helping hand http://www.ebay.com/itm/Helping-3Th-Hand-Soldering-Stand-Magnifier-Glass-Clamps-Modelling-Stand-US-stock-/141503727975, tweezers nicked form someone's makeup kit, likewise a nail buffer ( double sided sticky tape will fix fine sandpaper to it for sanding curves.) The ability to improvise tools from bent bits of wire also helps. Don't go mad buying stuff until you find you really need it - you can end up with expensive tools that you only use once that way!! Rick -
Have you done a trial fit on the stand? My model just wobbled around so I ended up making a cradle stand instead. Rick
- 32 replies
-
- 1
-
-
- longboat
- artesania latina
- (and 1 more)
-
http://www.dailymail.co.uk/news/article-3568740/Captain-Cook-s-HMS-Endeavour-United-States.html Rick
-
Nice oars - I dumped the metal thole pins in favour of double pins in line with Chuck's 18th century longboat build. Rick
- 32 replies
-
- 2
-
-
- longboat
- artesania latina
- (and 1 more)
-
In the plans no mention is made of planking the bulkheads fore and aft. I don't think I mentioned this in my build but it's just a little detail that is worth adding before the seating is installed and the interior is finished. Rick
- 32 replies
-
- 3
-
-
- longboat
- artesania latina
- (and 1 more)
-
Help in Identifying an Unknown Tool
Rick01 replied to BANYAN's topic in Modeling tools and Workshop Equipment
Should have a nice brass butterfly or slotted screw - I'm pretty sure the steel item isn't original. Rick -
I actually re-rigged it recently following more closely Chuck's longboat in the area of the stays for each mast using dead eyes instead of tying the stays directly to eye bolts as the instructions show. Rick
- 6 replies
-
- 1
-
-
- artesania latina
- longboat
- (and 2 more)
-
This may help a little http://modelshipworld.com/index.php/topic/8158-hms-endeavours-longboat-rick01-al-160/. It's my first build and I agree the rigging instructions aren't very helpful but a bit of research will clarify things a bit. The builds here should also help with rigging http://modelshipworld.com/index.php/forum/51-msw-group-build-of-an-18th-century-longboat/. Rick
- 6 replies
-
- 1
-
-
- artesania latina
- longboat
- (and 2 more)
-
Help in Identifying an Unknown Tool
Rick01 replied to BANYAN's topic in Modeling tools and Workshop Equipment
It scribes parallel lines but is missing a block. There's a couple of pictures here https://www.etsy.com/listing/64392965/antique-brass-wood-carpenter-scribe-tool. Set the two pins for the distance apart for the lines then set the block for distance from the edge of the wood. Especially useful for mortice and tenon joints. Rick -
"Lady Nelson" pin rails.
Rick01 replied to Rick01's topic in Building, Framing, Planking and plating a ships hull and deck
Tried them and they follow the painting and Tassie replica. Both of these seem to be based on an engraving published in England in 1803 purporting to show her in the Thames. Problem is that she was here in Aus. at that time - interesting point with the engraving is that it appears to have her showing scrambling netting set and personally I can't think of anyone liable to want to board her there! See Wikipedia illustration https://upload.wikimedia.org/wikipedia/commons/a/ab/His_Majesty%27s_vessel_the_Lady_Nelson_-_1799.JPG Rick -
I'm at the stage of mast assembly and rigging and need some advice on pin rails. As you will see there are no gunwales and so no points to attach rails securely ( the rail running round the hull is only approx 25~30 cm high in full scale. Rigged as a brig there wouldn't be much room for all the cleats needed on the masts themselves. Any assistance/comments/links to help would be greatly appreciated. Thanks Rick
-
Maybe look at a No. 3 scalpel handle with No. 11 blades plus a good supply of rubber bands. Rick