

nobotch
-
Posts
55 -
Joined
-
Last visited
Reputation Activity
-

 nobotch got a reaction from Canute in Proxxon Micro MBS 240/E Band Saw Review
Hi Mike,
I don't have the Proxxon bandsaw, but I have reduced noise on quite a few machines (computers, drill press, cheap scroll saw, and some others) by gluing cardboard sheets (as big as possible) to the inside of the housing or housing parts that act as a resonator. You need the dense variety of cardboard, and it should be thick or you can use two layers if possible. The additional mass of the cardboard is important because it reduces the "vibrational mobility" of the resonator. I normally use epoxy glue on metal and plastic parts. Of course it is also important that the saw's door is firmly closed, without any play. Reading your post you apparently already have hunted down the latter issue, but maybe you still can improve on that one.
Cheers,
Markus
-
nobotch reacted to dvm27 in Using taper jig on Byrnes table saw
Here's how I did it. Cut all the fore faces then the rear ones. Just used a push stick.
-
nobotch reacted to AON in My New Found Respect for Table Saws
I've been telling people it is a knitting injury
you should see the looks I get
-
nobotch reacted to Mike Y in Proxxon Micro MBS 240/E Band Saw Review
Small update: I dramatically reduced the noise by removing both wheels and applying tri-flow silicone lubricant to the internal sides of the ball bearings. They do not take any lube from the outside, but quite open from the inside. Now the bandsaw is running very smooth! I can use it without forcing my family to run away
-
 nobotch got a reaction from tasmanian in Proxxon Micro MBS 240/E Band Saw Review
Hi Mike,
I don't have the Proxxon bandsaw, but I have reduced noise on quite a few machines (computers, drill press, cheap scroll saw, and some others) by gluing cardboard sheets (as big as possible) to the inside of the housing or housing parts that act as a resonator. You need the dense variety of cardboard, and it should be thick or you can use two layers if possible. The additional mass of the cardboard is important because it reduces the "vibrational mobility" of the resonator. I normally use epoxy glue on metal and plastic parts. Of course it is also important that the saw's door is firmly closed, without any play. Reading your post you apparently already have hunted down the latter issue, but maybe you still can improve on that one.
Cheers,
Markus
-
nobotch reacted to Dan Vadas in How would you improve your Byrnes tools?
Umm .... Grant - as far as I'm aware you CAN'T solder aluminium. MIG or TIG welding is the way to go. Otherwise I'd suggest using brass instead for both the clearance plate and knife, which as you know can be silver soldered.
Saw - 1. The above-mentioned Riving Knife.
2. A lock on the drive shaft to make changing blades easier. I use a pair of Vise Grips to hold the shaft when I'm undoing the blade nut.
I used the supplied Clearance plate to make a "Zero Tolerance" plate for the 0.020" blades by simply removing the plate, turning it around, scewing it back down, and then raising the blade (with an old one installed) to cut a new slot alongside the existing one. It works great on very small/thin pieces as they don't disappear down the slot .
I also CA glued a strip of 2mm thick timber to the fence at virtually zero height from the bed. This makes cutting very thin stock possible, as the existing fence clears the bed by about 0.6mm and anything thinner went under it.
Sander - 1. A Forward / Reverse switch so you can sand from either side of the disc. This would make sanding the same angles in both directions much easier, among other operations.
2. A tilting table that goes a full 90 degrees instead of the current 45. Same reason as above.
It only takes me a couple of minutes to change the paper. I remove the table and the lower cover, then use a razor scraper to get the paper off the disc. Final cleanup of the remaining glue/paper is done with Turpentine.
The only mod I'd like to see for this operation is a pair of thumbscrews holding the bottom cover instead of the Allen Head screws - it would save about 30 seconds when replacing the paper.
Drawplate - 1. Some of the holes have increments of more than one size step. When you get to one that is two (or THREE) sizes smaller it makes it rather difficult to start the next "pull", especially in the smaller size holes. Perhaps as mentioned above a second size of drawplate with the larger holes would be of benefit, with all the holes in BOTH plates decreasing in size by ONE number.
2. The laser-etched numbers are on the wrong side of the plate. Some times it's easy to forget which hole you are using, or comes next, without turning the plate upside-down for a look.
Danny
-
 nobotch got a reaction from jwcola in How would you improve your Byrnes tools?
It's the first picture in the first post in the thread I linked to.
No need to click back to that thread again just for the picture, here it is again:
The first one I made of solid mahogany for the plate and thin birch plywood for the splitter.
For the next ones (see attached picture) I used 3mm (1/8") birch plywood for the plate which helps to keep the edge near the holes intact.
Start by cutting the plate to size, bore and countersink the screw holes before thinning down these borders and before rounding over the corners.
As the recess in the table is too thin to receive a stable enough wooden zero clearance plate I used thicker wood (the 3mm ply) and thinned it down where it sits on the aluminium ledge in the table, using the Byrnes saw itself to do so: raise the blade by as much as you need to reduce the plate thickness - there are quite a few cuts to do, start with the innermost ones. Clean up the surfaces with a chisel, knife or scraper.
Once the plate fits the recess (it should be perfectly level and drop in nicely without applying any force at all, if it's a bit a loose fit that's fine too) you have to thin down the small zone where the flange would otherwise touch the insert when the blade is all up. Then screw the insert plate in place, align the rip fence over the right edge of the plate so that you will not cut into the fence while now rising the blade with the saw turned on.
Now, with the saw unplugged move the fence to the right, remove the four screws and lift the plate slightly with the blade still in the slot you just have cut, and move the fence to the left until it touches the right edge of the insert plate. Secure the fence in this position and replace the wooden insert with the one that came with the saw, then cut open the slot the rear side of the wooden insert.
Next, cut out the splitter to the shape it needs to be. Maybe you'd like to first make a cardboard or paper model/template of it to define its shape, it really helps. Don't make the splitter too high because these rather thin splitters would become too flexible over its height.
Sand, plane or scrape it to the exact thickness of the kerf your blade makes, screw the insert in place and tack glue the splitter into its correct position it the extended slot. 1mm from the completely raised blade is just fine, don't go too close. When the glue is dry place the insert upside-down into the recess in the table and build up an anchorage around the part of the splitter that will be inside the saw. Be aware of the position of the blade support.
When the glue has dried place the insert/splitter in its normal position using the 4 screws, and sand the splitter further down a little bit from each side using a small, square sanding block (240 grit is ok) and a square wooden block to hold against it from the opposite side. In the end the splitter should be about 0.1 - 0.15mm thinner than the saw kerf.
I hope I didn't forget anything essential. The whole thing sounds more complicated than it is, but it takes a bit time, patience and 3D imagination to do it.
-
 nobotch got a reaction from Mahuna in How would you improve your Byrnes tools?
Not really.
Actually I had asked myself the same question the other way round: any reason I could not or should not use wooden inserts instead of aluminium ones? As I am much more familiar with woodworking than metal working the decision was an easy one.
Maybe a metal splitter/anchorage assembly screwed to the insert would be slightly sturdier, but the little bit of additional sturdiness is not necessary.
Regarding the wooden inserts: they are as stiff and sturdy as the aluminium ones if you make them of 3mm or thicker birch plywood. This is easy earned money at saving 8$ per insert, especially if you make a batch. I first made one to see how it goes, and then in less than an hour a batch of 10.
-
 nobotch got a reaction from Mark P in How would you improve your Byrnes tools?
It's the first picture in the first post in the thread I linked to.
No need to click back to that thread again just for the picture, here it is again:
The first one I made of solid mahogany for the plate and thin birch plywood for the splitter.
For the next ones (see attached picture) I used 3mm (1/8") birch plywood for the plate which helps to keep the edge near the holes intact.
Start by cutting the plate to size, bore and countersink the screw holes before thinning down these borders and before rounding over the corners.
As the recess in the table is too thin to receive a stable enough wooden zero clearance plate I used thicker wood (the 3mm ply) and thinned it down where it sits on the aluminium ledge in the table, using the Byrnes saw itself to do so: raise the blade by as much as you need to reduce the plate thickness - there are quite a few cuts to do, start with the innermost ones. Clean up the surfaces with a chisel, knife or scraper.
Once the plate fits the recess (it should be perfectly level and drop in nicely without applying any force at all, if it's a bit a loose fit that's fine too) you have to thin down the small zone where the flange would otherwise touch the insert when the blade is all up. Then screw the insert plate in place, align the rip fence over the right edge of the plate so that you will not cut into the fence while now rising the blade with the saw turned on.
Now, with the saw unplugged move the fence to the right, remove the four screws and lift the plate slightly with the blade still in the slot you just have cut, and move the fence to the left until it touches the right edge of the insert plate. Secure the fence in this position and replace the wooden insert with the one that came with the saw, then cut open the slot the rear side of the wooden insert.
Next, cut out the splitter to the shape it needs to be. Maybe you'd like to first make a cardboard or paper model/template of it to define its shape, it really helps. Don't make the splitter too high because these rather thin splitters would become too flexible over its height.
Sand, plane or scrape it to the exact thickness of the kerf your blade makes, screw the insert in place and tack glue the splitter into its correct position it the extended slot. 1mm from the completely raised blade is just fine, don't go too close. When the glue is dry place the insert upside-down into the recess in the table and build up an anchorage around the part of the splitter that will be inside the saw. Be aware of the position of the blade support.
When the glue has dried place the insert/splitter in its normal position using the 4 screws, and sand the splitter further down a little bit from each side using a small, square sanding block (240 grit is ok) and a square wooden block to hold against it from the opposite side. In the end the splitter should be about 0.1 - 0.15mm thinner than the saw kerf.
I hope I didn't forget anything essential. The whole thing sounds more complicated than it is, but it takes a bit time, patience and 3D imagination to do it.
-
nobotch reacted to kurtvd19 in How would you improve your Byrnes tools?
Jheart:
The sliding table for the Preac sounds interesting. Can you show a photo?
The adjustable depth stop feature has me stumped - it sounds like it would make adjusting the depth of cut on the Preac as convenient as adjusting the depth of cut on the Byrnes saw. I have both saws and use them both but the hassle of adjusting the depth of cut on the Preac means I use it less than I would if the depth was easier to adjust. I would sure like to see a photo or two of the depth adjustment feature.
Kurt
-
nobotch got a reaction from Canute in How would you improve your Byrnes tools?
Not really.
Actually I had asked myself the same question the other way round: any reason I could not or should not use wooden inserts instead of aluminium ones? As I am much more familiar with woodworking than metal working the decision was an easy one.
Maybe a metal splitter/anchorage assembly screwed to the insert would be slightly sturdier, but the little bit of additional sturdiness is not necessary.
Regarding the wooden inserts: they are as stiff and sturdy as the aluminium ones if you make them of 3mm or thicker birch plywood. This is easy earned money at saving 8$ per insert, especially if you make a batch. I first made one to see how it goes, and then in less than an hour a batch of 10.
-
 nobotch got a reaction from allanyed in How would you improve your Byrnes tools?
It's the first picture in the first post in the thread I linked to.
No need to click back to that thread again just for the picture, here it is again:
The first one I made of solid mahogany for the plate and thin birch plywood for the splitter.
For the next ones (see attached picture) I used 3mm (1/8") birch plywood for the plate which helps to keep the edge near the holes intact.
Start by cutting the plate to size, bore and countersink the screw holes before thinning down these borders and before rounding over the corners.
As the recess in the table is too thin to receive a stable enough wooden zero clearance plate I used thicker wood (the 3mm ply) and thinned it down where it sits on the aluminium ledge in the table, using the Byrnes saw itself to do so: raise the blade by as much as you need to reduce the plate thickness - there are quite a few cuts to do, start with the innermost ones. Clean up the surfaces with a chisel, knife or scraper.
Once the plate fits the recess (it should be perfectly level and drop in nicely without applying any force at all, if it's a bit a loose fit that's fine too) you have to thin down the small zone where the flange would otherwise touch the insert when the blade is all up. Then screw the insert plate in place, align the rip fence over the right edge of the plate so that you will not cut into the fence while now rising the blade with the saw turned on.
Now, with the saw unplugged move the fence to the right, remove the four screws and lift the plate slightly with the blade still in the slot you just have cut, and move the fence to the left until it touches the right edge of the insert plate. Secure the fence in this position and replace the wooden insert with the one that came with the saw, then cut open the slot the rear side of the wooden insert.
Next, cut out the splitter to the shape it needs to be. Maybe you'd like to first make a cardboard or paper model/template of it to define its shape, it really helps. Don't make the splitter too high because these rather thin splitters would become too flexible over its height.
Sand, plane or scrape it to the exact thickness of the kerf your blade makes, screw the insert in place and tack glue the splitter into its correct position it the extended slot. 1mm from the completely raised blade is just fine, don't go too close. When the glue is dry place the insert upside-down into the recess in the table and build up an anchorage around the part of the splitter that will be inside the saw. Be aware of the position of the blade support.
When the glue has dried place the insert/splitter in its normal position using the 4 screws, and sand the splitter further down a little bit from each side using a small, square sanding block (240 grit is ok) and a square wooden block to hold against it from the opposite side. In the end the splitter should be about 0.1 - 0.15mm thinner than the saw kerf.
I hope I didn't forget anything essential. The whole thing sounds more complicated than it is, but it takes a bit time, patience and 3D imagination to do it.
-
nobotch reacted to gjdale in How would you improve your Byrnes tools?
Thanks Markus,
That makes sense. I was thinking of trying to use an all aluminium version, with the splitter soldered in place. I might still give that a go, just to see how it works. If it doesn't, you've already proved that a wooden version does work.
-
 nobotch got a reaction from Archi in How would you improve your Byrnes tools?
It's the first picture in the first post in the thread I linked to.
No need to click back to that thread again just for the picture, here it is again:
The first one I made of solid mahogany for the plate and thin birch plywood for the splitter.
For the next ones (see attached picture) I used 3mm (1/8") birch plywood for the plate which helps to keep the edge near the holes intact.
Start by cutting the plate to size, bore and countersink the screw holes before thinning down these borders and before rounding over the corners.
As the recess in the table is too thin to receive a stable enough wooden zero clearance plate I used thicker wood (the 3mm ply) and thinned it down where it sits on the aluminium ledge in the table, using the Byrnes saw itself to do so: raise the blade by as much as you need to reduce the plate thickness - there are quite a few cuts to do, start with the innermost ones. Clean up the surfaces with a chisel, knife or scraper.
Once the plate fits the recess (it should be perfectly level and drop in nicely without applying any force at all, if it's a bit a loose fit that's fine too) you have to thin down the small zone where the flange would otherwise touch the insert when the blade is all up. Then screw the insert plate in place, align the rip fence over the right edge of the plate so that you will not cut into the fence while now rising the blade with the saw turned on.
Now, with the saw unplugged move the fence to the right, remove the four screws and lift the plate slightly with the blade still in the slot you just have cut, and move the fence to the left until it touches the right edge of the insert plate. Secure the fence in this position and replace the wooden insert with the one that came with the saw, then cut open the slot the rear side of the wooden insert.
Next, cut out the splitter to the shape it needs to be. Maybe you'd like to first make a cardboard or paper model/template of it to define its shape, it really helps. Don't make the splitter too high because these rather thin splitters would become too flexible over its height.
Sand, plane or scrape it to the exact thickness of the kerf your blade makes, screw the insert in place and tack glue the splitter into its correct position it the extended slot. 1mm from the completely raised blade is just fine, don't go too close. When the glue is dry place the insert upside-down into the recess in the table and build up an anchorage around the part of the splitter that will be inside the saw. Be aware of the position of the blade support.
When the glue has dried place the insert/splitter in its normal position using the 4 screws, and sand the splitter further down a little bit from each side using a small, square sanding block (240 grit is ok) and a square wooden block to hold against it from the opposite side. In the end the splitter should be about 0.1 - 0.15mm thinner than the saw kerf.
I hope I didn't forget anything essential. The whole thing sounds more complicated than it is, but it takes a bit time, patience and 3D imagination to do it.
-
 nobotch got a reaction from usedtosail in How would you improve your Byrnes tools?
It's the first picture in the first post in the thread I linked to.
No need to click back to that thread again just for the picture, here it is again:
The first one I made of solid mahogany for the plate and thin birch plywood for the splitter.
For the next ones (see attached picture) I used 3mm (1/8") birch plywood for the plate which helps to keep the edge near the holes intact.
Start by cutting the plate to size, bore and countersink the screw holes before thinning down these borders and before rounding over the corners.
As the recess in the table is too thin to receive a stable enough wooden zero clearance plate I used thicker wood (the 3mm ply) and thinned it down where it sits on the aluminium ledge in the table, using the Byrnes saw itself to do so: raise the blade by as much as you need to reduce the plate thickness - there are quite a few cuts to do, start with the innermost ones. Clean up the surfaces with a chisel, knife or scraper.
Once the plate fits the recess (it should be perfectly level and drop in nicely without applying any force at all, if it's a bit a loose fit that's fine too) you have to thin down the small zone where the flange would otherwise touch the insert when the blade is all up. Then screw the insert plate in place, align the rip fence over the right edge of the plate so that you will not cut into the fence while now rising the blade with the saw turned on.
Now, with the saw unplugged move the fence to the right, remove the four screws and lift the plate slightly with the blade still in the slot you just have cut, and move the fence to the left until it touches the right edge of the insert plate. Secure the fence in this position and replace the wooden insert with the one that came with the saw, then cut open the slot the rear side of the wooden insert.
Next, cut out the splitter to the shape it needs to be. Maybe you'd like to first make a cardboard or paper model/template of it to define its shape, it really helps. Don't make the splitter too high because these rather thin splitters would become too flexible over its height.
Sand, plane or scrape it to the exact thickness of the kerf your blade makes, screw the insert in place and tack glue the splitter into its correct position it the extended slot. 1mm from the completely raised blade is just fine, don't go too close. When the glue is dry place the insert upside-down into the recess in the table and build up an anchorage around the part of the splitter that will be inside the saw. Be aware of the position of the blade support.
When the glue has dried place the insert/splitter in its normal position using the 4 screws, and sand the splitter further down a little bit from each side using a small, square sanding block (240 grit is ok) and a square wooden block to hold against it from the opposite side. In the end the splitter should be about 0.1 - 0.15mm thinner than the saw kerf.
I hope I didn't forget anything essential. The whole thing sounds more complicated than it is, but it takes a bit time, patience and 3D imagination to do it.
-
 nobotch got a reaction from CaptainSteve in How would you improve your Byrnes tools?
Some time ago I posted here my own additions and mods I immediately made to the saw after I bought it, and I find them useful, helpful or even necessary every time I use the saw.
It takes two screws to remove the fence, which is quick enough for me. What in the pictures may seem to be four other screws are just location pins.
A riving knife would be a great thing, but a good one that can quickly be exchanged according to the saw disk used surely would be an expensive solution. I overcame this issue by making my own zero-clearance plates which include a splitter (shown in the thread I linked to above), which works great. Making those plates/splitters involves some precision work but pays off.
For ripping I just use two push sticks, one with a notch cut out on one side of its tip so I can hold the work piece down and at the same time against the fence, and the other just plain square to shove the workpiece forward.
Edit 2: I use a "short fence" going to less than the middle of the blade, and of course the splitter.
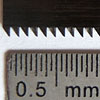
This is a quick and easy solution which allowed me to cut dozens of literally meter-long 1mm and 2mm thin strips that turned out to vary considerably less than half a tenth of a millimetre in thickness from end to end.
It is important that the square push stick is broad enough to go at least to the blade. It also should be really square as should be the back of the workpiece too. Like this you will be able to shove your stuff straight through the blade without having to reach with a stick between the blade and the fence. For long pieces an outfeed table is essential (mine is also in the thread I linked to in the first line of this post).
Edit 1: link fixed
-
 nobotch got a reaction from gjdale in How would you improve your Byrnes tools?
Not really.
Actually I had asked myself the same question the other way round: any reason I could not or should not use wooden inserts instead of aluminium ones? As I am much more familiar with woodworking than metal working the decision was an easy one.
Maybe a metal splitter/anchorage assembly screwed to the insert would be slightly sturdier, but the little bit of additional sturdiness is not necessary.
Regarding the wooden inserts: they are as stiff and sturdy as the aluminium ones if you make them of 3mm or thicker birch plywood. This is easy earned money at saving 8$ per insert, especially if you make a batch. I first made one to see how it goes, and then in less than an hour a batch of 10.
-
nobotch reacted to DJones in Micro-Mark MicroLux LaserKnife 2525 – A Review
Hi Mark, I was so glad to see that we weren't the ONLY ones on the planet that bought the Micro-Mark Laserknife 2525!
Sadly, our problems have been quite similar to yours, only we've been fighting the battle with it longer and still no real results.
You mentioned something about cooling- yes, it's important that the laser tube cooling water be between 62 degrees F and 68 degrees F to prolong the laser tube lifespan. Since we live in Phoenix, AZ we have been using the gel ice packs in the bucket of distilled water to get the temp down. We installed an aquarium thermometer with an alarm and the probe goes in the bucket.
Anyway...We bought ours in April and it took awhile to get here because the main box sat lost on a dock in NM for a week or so until we made a lot of phone calls and they tracked it down. We got the other 2 boxes with the extras right away.
While it is true that their return policy is 30 days, I asked specifically what the warranty was and Tech Support said 90 days. Since ours has never functioned properly since day 1, (and we have documented it with emails and photos) I feel we might have a little bit of recourse. That remains to be seen.
I called the credit card company that I used to buy it with today and explained it's a couple days past the credit card company's protest period (60 days) but since we've been working with Micro-Mark to try to fix the problem (s) they extended the time for us to protest the charge a bit in case Micro-Mark decides not to play fair.
The very first thing we discovered on day 1 was that the laser tube pointed so high on mirror 1 that it missed mirror 2 (going from 1 to 2) completely by 1/2"! Not even ON the mirror at all. Micro-Mark's tech said we shouldn't even have to touch mirror 1. Really? They did send us a MS-Word document on how to align mirrors but we found the same one you did on the internet.
We have adjusted mirrors, cleaned them, tried the lens both ways (ours was installed flat side up also), etc. The gantry arm was not level front to back. On the left side it actually sloped down by 1mm & level on the right. Micro-Mark told us how to fix that. The bed was badly out of level, too. We had to shim it by 1/16" in the back on the right side and 3/32" on the front right to get it level.
The M-M tech said it should cut through 1/16" chipboard in 1 pass using 5mA power and speed of 20. What a joke! It barely engraved and trailed off to nothing (not even engraving) as it got to the lower right of the bed. We had tried it on 75% power and cutting speed of 25 and it took 12 passes and we got exactly 1 part out of 12 in the file cut through before it died off to nothing in the lower right. Of course they were well toasted with char and unuseable.
We have tried and tried and tried. It doesn't even cut 130# cardstock consistently. We've tried bassword from 1/32" to 1/16", and the very thin chipboard they supplied and really have not had good results- ever.
We seem to have a "sweet spot" of about 3"-4" square in the upper left of the bed where it cuts ok and the kerf is decent (although I'd like it thinner) and the further right and down you go, it starts trailing off to nothing or starts ghosting as if the laser beam is hitting the nozzle or something. We have aligned and re-aligned the mirrors for hours and hours and hours. Yesterday we got them very closely aligned and it still did the same thing.
He took pictures every step of the way to prove the test firings in the alignments and that the mirrors were clean, and photos of levels everywhere. He did notice today that the bracket that holds the nozzle assembly is itself NOT level left to right but, at this point we are so disgusted with it all we are not going to bother fixing that. We will contact M-M's tech support one more time, armed with even more photos and info and tell them the ball is in their court. If they don't play nice we will protest the charge with the credit card company.
We have Goggled for weeks trying to find a posting somewhere that someone else had actually bought one of these machines, but all we saw were people talking about it and finally my husband saw your posting a couple days ago.
If you want to compare notes with us, feel free to send me a Private Msg and I'll give you an email address.
We have had years of experience creating the Corel files but always outsourced the cutting to others. We wanted the convenience of being able to pop in and test out a design and to control the process a bit better ourselves, so that's why we bought the Micro-Mark laser. We knew it wasn't going to be robust enough for big production runs, but probably fine for our needs for now. The people we outsourced our cutting to had 25 watt lasers so we thought a 40 watt would be better- HA! BTW, the laser cutter appears to be based off of a K40 Chinese machine, with a few things Micro-Mark added.
OK, I've ranted long enough. We just were so excited to see another person that actually bought one. I swear we thought we were the only ones, with no reviews anywhere until yours. THANK YOU for posting it!
Regards,
Debbie & Charles Jones
-
nobotch reacted to mtaylor in Micro-Mark MicroLux LaserKnife 2525 – A Review
Since interest has been shown in this tool by many including myself, here goes a hopefully, full review. I will preface this by saying that this tool is NOT for everyone. To make it clear: if you are expecting out-of-box performance from this, stop reading and go do something else. I fear this is going to be rather long winded....
Background
My scroll saw skills leave a lot to be desired and for repetitive items like knees, beams and even cutting small pieces for carving is an issue. So rather than stand in front of a scroll saw for hours and end up tossing 30-50% of the pieces into the scrap box, I thought about a laser cutter. The so-called “hobby lasers” seem appealing. Reasonably low power requirements, low costs, and relatively smaller size appeals to me.
Research
The caveats that I read about Laser Cutters and followed in the research are:
Use a company in the country you are in or will provide support to you. Use a company that has been in business for more than a couple of years. I’ve looked at the imported China Lasers (~$500 US) but have found much wrong with them in the reviews. Extra costs of dealing with an import agent to get the unit out of customs and shipped to you, generally mediocre quality in the assembly, and then there’s the normal software that comes with the these products. Also dealing with a seller in China leaves you high and dry without support. I discovered two being “used” here locally. One is not working and hasn’t from the time he got it a few months ago. He’s in the process of replacing the PC board to be compatible with better software and fixing some damaged items like a broken laser tube. The other, I saw it work, and tried my hand but the software (MoshiDraw) is incredibly bad. The owner was running it on an XP PC as it wouldn’t run consistently in Win7 even in compatibility mode.
I looked at another higher priced unit (~$4000 US base price with accessories adding up rapidly). The unit was high quality, made in the US with some Chinese parts including the main board. It used LaserDraw software and from what I saw, the performance was adequate. But as I was unable to sit down and try the woods we use, I can’t give a full report on it. The owners use basswood and thin veneers for creating dollhouses, model railway buildings, etc. The output seemed of good quality but again, it was not the woods or sizes we use. My observation is that this is basically a hobby machine upgraded to being a production type.
The one I’m testing is the Micro-Mark brand (~$2000 US). It comes with a 30 day refund guarantee which, if I determine this isn’t what will work for me, I’ll return it. I read their claims that this machine is built to their specifications (http://www.micromark.com/html_pages/misc/the-micro-mark-difference.pdf) . I know that some of us (myself included) have issues with certain practices which I won’t go into. I will say that I won’t buy ripped off equipment. This unit doesn’t appear ripped off but an upgraded Chinese unit.
I did not consider anything more powerful than 40W. Maybe I should have, but there's also a cost factor that goes with that.
Pre-Order
The unit uses CorelLaser as its cutting software using an industry standard HP Plotter Driver and also Corel Draw. I downloaded the manual and documentation from MM. I also ordered a copy of CorelDraw X6 from Amazon. CorelLaser works only with CorelDraw above version 13 so I bought a shrink wrapped, new-in-the-box program for $150 US. I would suggest you do your homework on this. X7, the latest from Corel is a subscription based program. In other words, you pay every month for it. I prefer to have a CD in my drawer just in case….
I spent a week or so refreshing myself on CorelDraw as the last time I used it was Version 5… yeah… been a few years.
Unpacking and Set-Up
I received this is 3 boxes, well packed in foam. Unpacking is pretty straight forward. I would suggest that the air pump and water pump NOT be removed from their bubble wrap as there is nothing on these items to indicate what they are. I wish that MM had put a photo or two in the instruction manual to identify parts.
One thing that is needed is a GFI socket. I’m using a GFI adapter in case I wish at some future date, to move the cutter to a different place.
Set-up is pretty straight forward following the manual. The hardest part was figuring out the exhaust setup without cutting a hole in the wall of the house. Also, do NOT secure the exhaust unit to the cutter with tape. Use #10 X 3/4” self-tapping screws. There’s bit a misfit between these parts and the tape will not hold it securely in place.
Here's photos of the unit and all the accessories...
Testing Started
I used the factory settings and followed the instructions in the manual for the recommended passes and power. Not a happy camper using boxwood. The little nameplate is 1/8” thick boxwood. Took 9 passes to cut. Lots of charring.
I discovered the mirrors were off. MM instructions are vague in the extreme and need some serious re-writing to be useful. I Googled and eventually found the information I needed here: http://dck40.blogspot.com/
Using other web sources, I discovered that the lens in the cutting head was upside down… WTF!!!! This really irritated me.
After spending a day going back and forth between all three mirrors and adjusting them, and then resetting the focus for the wood, here’s the next round.
I’m continuing to test and massage things. This will take time. I’m able to cut 3/16” boxwwod which requires multiple passes but as yet, not I’ve not tried ¼” boxwood.
Overall Observations.
The learning curve on this machine is a vertical, straight line. These machines are still in their infancy and not mature. Documentation is extremely sparse although there are forums out there for laser cutters, getting to the information you need for a particular type or model is a bit overwhelming and I consider myself a knowledgeable Googler.
There is no guidance on power settings or cutting speed to cut various types and thicknesses of wood. Serious experimentation is required.
This machine is finicky in that all mirrors have to be perfectly adjusted to make use of the power and they have to be kept clean. It is big, and sometimes smelly. It’s not a production machine and the bucket of cooling water will have to be watched. Running at “high” power (no definition from anyone on this or on the max water temperature) will shorten the life of the laser bulb. There is a focus issue and I believe it could cut with a thinner kerf. I’m trying to talk with MM about this….
The nameplate, I couldn’t even begin to cut something that tiny on the scroll saw. It’s now almost ready for carving. I do need to tweak the drawing some more to get a bit better spacing. The anchor stocks I’ve done, would have taken maybe 30 minutes on the scroll saw. Including drawing time, this took approximately 1 hour and no wasted/ruined pieces. However, all 4 are exactly alike and the bolt holes are ready to be cleaned of char and the bolts installed. No fiddling with the drill press, either. I have about 8 other parts ready for cutting and will do them as I go. The kerf size and charring are still an issue.
I’ll say it again, it’s not for everyone. If you have the time and ability to Google and research and then to fiddle with it and get it running correctly and then to keep it running, it might be ok for you. The manuals are skimpy at best and a bit of creative Googling will need to be done to help sort things out. There’s still settings in CorelLaser that I have no idea what they do. There is an alternative to CorelLaser called LaserCut 5.3. I haven’t tried it yet and the documentation on-line seems rather sparse from what I’ve seen.
Thicknesses of 3/16” and up are tricky to work with. There’s no tables or inputs from MM on this and the web is all over the place on using these “hobby” cutters. However, most folks who have reviewed similar machines are using basswood and thin woods. Doll houses and RR accessories seem to be the major uses along with etching for various things like signs, pendants, etc. I need to have a conversation with MM on the lens… I think it needs to be higher quality and damn it... there’s no excuse to have it installed upside down.
Lastly, tech support. I emailed them late on a Sunday night about some issues. I'm still waiting for answer after 3 days…
Since we’re talking tech support, it’s worthwhile to note that tech support hours are very limited… Monday through Friday, from 1:00 pm to 5:00 pm, EDT.
I asked tech support before I ordered about using an extender cable and the answer was a simple: not recommended. The unit comes with a 9 foot USB cable so I had to seriously rearrange my workshop to get it closer to the computer. I’m testing a USB powered extender cable so I don’t have cabling running across the floor where it can be stepped on. Jury is out on this.
The short answer for all this is: I wouldn’t recommend it unless you are tech savvy, not just with computers but also can tolerate a large learning curve. The quality of the cuts could be a lot better. Overall, it might better that if this tool is something you have to have then spend about double the cash and get a higher powered, non-China built laser cutter with some tech support. The BossLaser that Chuck uses runs about $5000 and has the higher power to cut thicker woods and is, I believe, also suitable as a production machine.
I'll continue to test, adjust, fiddle, and tweak for now...
-
nobotch reacted to DJones in Micro-Mark MicroLux LaserKnife 2525 – A Review
Charles and I are very grateful for Mark’s various insights as we are experiencing our own trial and error “journey” with this machine.
I have been hesitant to post much on the forum about it for the time being because we are in the midst of working with Micro-Mart’s techs to resolve our situation. I don’t want to say anything on an open forum that might impede that process.
We returned our laser cutter last week for replacement. They have agreed to take photos or videos of the replacement machine operating using our files and materials, before they ship it to us. We made sure that the files would test most of the full size of the bed in all corners.
The original machine we got would only cut reasonably well in about 3” square inches in the upper left and that was it. It’s very possible it was damaged in transit, although the box showed no outward signs of damage. These are very delicate instruments so even a good jarring can jolt something out of alignment.
The laser tube’s beam hit mirror 1 high and to the far right, making proper alignment of all 3 mirrors nearly impossible by the time you got down to the lower right side of the travel distance. Even using fairly high power settings, it barely engraved beyond the upper left corner of the material and the further down and to the right it went, it seemed to fade off to nothing. Perhaps it was a defective laser tube.
As Mark stated, the quality control of the various laser cutters from China leaves a lot to be desired. We had hoped that by buying it from Micro-Mark a lot of those quality issues commonly associated with the cheap K40’s would be minimized.
Once we have our replacement in hand, we will post a follow up. We are really hoping for a good outcome this time. The materials we cut should not tax the machine’s capabilities much at all. Typically we’d cut 1/16” basswood and the like.
Although my husband is an avid model shipbuilder, this machine was purchased primarily for use for my dollhouse miniatures accessories business. (1:12 scale accessories and 1:48 structures, etc.) He will likely also use it in his own modelbuilding.
I will say I am disappointed that Mr. Frisoli chose to respond in the manner he did. I have found his employees to be polite and professional and willing to work with us to resolve issues, even given the short hours they are available to assist. We did have to do a lot of research on our own on the internet to resolve some issues, as Mark also did.
-- Debbie & Charles Jones
-
nobotch reacted to mtaylor in Micro-Mark MicroLux LaserKnife 2525 – A Review
Final Adjustments and Conclusions
This should be my final review post on this cutter. There's two images attached showing the progression of things. This is with Euro Boxwood and these are either tiny, or detailed and are items that I couldn't cut out of a sheet of with a scroll saw to save my soul. Euro box is even harder and a bit oilier than Castello. By the way, just an observation, Euro does char but it's more like a glaze than a soft ash from Castello.
I realize I'm pushing this thing to it's limit and while there might be some more in it, I need to get back to my build. For the record, I'm keeping this machine. It will meet my needs and there are upgrade parts out there much like any complex tool to increase versatility.
I replaced the lens with a high-quality lens from the Internet and also the lens holder (about $100 total and some choice language during the swap which required some serious fiddling). There was some slop in the factory lens tube which I thought might be creating some issues. I had to adjust for this and it took some time to sort out. But the kerf is now down to 0.02 inches or less after comparing cuts with the factory lens and new lens. They're straighter and almost no taper and will probably get better as I fine adjust the speed and power settings. Yeah... I just blew the warranty.
I realize that the photos may not show a big difference but when I stick them under magnification for carving, the differences become obvious to me.
The first photo is the nameplate. Tiny, not very complex but the lettering is the important part. These will be bas-relief carved. The final one is the bottom. I could do some better spacing on the lettering but I can live with it. The kerf is narrower and while I had the power setting a tad too high, I like the less charring I'm seeing on the cut.
The second is the Arms of France for the stern (again bas-relief carving needed) and are approximately 3 inches wide. Again, Euro box and it's probably the most complex piece I'll ever have to cut. I'm happiest with the bottom one which is what I cut tonight. The kerf was straight, less charring. A bit more definition to the relief lines to guide the carving.
My thoughts are that if I can do these detailed cuts, I can do the bigger stuff like framing futtocks without a hitch. I do need to adjust my drawings for the kerf but again that's learning. Also the different woods we use... ebony is a no go.. it turns to charcoal at the drop of a hat. Holly... I tried some 1/32" and it flamed even at low power that didn't completely cut through the wood. Cherry, pear, Swiss pear, and Castello seem to work best. I've not tried basswood as I don't use it except for prototyping or making jigs.
I realize I've got the first version and I see on the website that they're making updates as they go. I do hope there's some focus on the quality control at the Chinese end, but I guess I'm jaded and have come to expect that any tech I get from China is iffy at best quality control wise. I also realize there's a pretty steep learning curve with any new tech.
I guess one more consideration... I'm working at 1:64 which allows (or demands) thinner wood and smaller parts than 1:48. I realize that 3/16" thick hardwood is pushing the limit. 1/4" is, without upping the laser tube power, really pushing it and it may not give the results one wants as it takes two passes and the kerf is a V-shape because of it. At this point, from 1/32" up to 3/16" I'm now cutting all pieces with a single pass and not pushing the power limit which will help with tube life. When the tube dies, I'll probably replace it with a more powerful tube and a case extender and I'll still be under the cost of the next higher price machine. I've double and triple checked the specs and the power supply should handle it nicely.
Last observation.. I don't think it has the workspace for many of the 1:48 scale pieces, notably in the stem, keel, and keelson areas as they are quite a bit larger than the same pieces at 1:64.
I won't say "buy it" and I won't say, "don't buy it". I've got almost a month at 6-8 hours a day learning, working and tweaking at this point. It will require perhaps more time and effort than you're willing to put into it or maybe you like challenges. I guess I do, otherwise I wouldn't be trying to scratchbuild a relatively unknown frigate. Shipbuilding is a rather unique hobby as we do go outside the normal of things.
Thanks for joining me on this voyage of sometimes frustrating and sometimes rewarding exploration. Let's go build some ships now, shall we?
-
nobotch reacted to augie in Micro-Mark MicroLux LaserKnife 2525 – A Review
Yes, thanks Chuck. I'm with JC Frankie on this one. That's no way to conduct a business.
-
nobotch reacted to lb0190 in Micro-Mark MicroLux LaserKnife 2525 – A Review
I hope to buy a table saw and thickness sander after I finish my current build. Hmmmm, Micromark or Byrnes? Maybe the above post will help me decide.
-
nobotch reacted to JerseyCity Frankie in Micro-Mark MicroLux LaserKnife 2525 – A Review
Sell a guy an expensive product that clearly has some hidden problems, ignore his emails and let him navigate in the dark on how to deal with the failings of the product. Then when he writes in to a forum to give an honest assessment which fairly lays out the shortcomings of the product and the customer service issues of the seemingly indifferent company, the OWNER of the company writes in anonymously pretending to be a satisfied customer to defend the product, but with some odd passive aggressive language blaming of the victim thrown in. This is NOT a good way to handle the products issues and protect the reputation of the company.
-
nobotch reacted to UpstateNY in Micro-Mark MicroLux LaserKnife 2525 – A Review
This is so backwards and sad for an owner to respond this way...Mark has shown the tool has great potential. Yes it won't be a pro level machine like Chuck's, but at this cost level no-one should reasonably expect this. I can see getting one of these as I get older and what dexterity I still have in my fingers vanishes so I can still enjoy building models.
So, why not actively work with your highly motivated, early adopter customers who are your best asset so you get the feedback to debug what is going wrong in the manufacturing and/or shipping processes? Clearly something is going amiss somewhere even if only a few units are impacted and so could probably be easily fixed. End result is happier customers, better quality leading to reduced costs as fewer returns. This drives more sales and an enhanced reputation as a company. A lose-lose situation is then turned into a clear win-win for all.
Cheers,
Nigel.
Added some edits for clarity.