HOLIDAY DONATION DRIVE - SUPPORT MSW - DO YOUR PART TO KEEP THIS GREAT FORUM GOING! (Only 20 donations so far - C'mon guys!)
×


wyz
-
Posts
411 -
Joined
-
Last visited
Content Type
Profiles
Forums
Gallery
Events
Everything posted by wyz
-
 Nicely crafted boats Johann, just beautiful! Tom
 -
Glenn I'm jealous I don't have the machines and the metal working knowledge to do something like this. It simply makes my appreciation of what you're doing all the greater. You are showing all of us you are a master craftsman of the 1st order. Tom
-
ancre La Salamandre by tadheus - 1:24
wyz replied to tadheus's topic in - Build logs for subjects built 1751 - 1800
Sweet looking Paul! I enjoy following your build. Keep those pictures coming. Tom -
Thanks for your responce Ed; I was curious how you took those photos. Tom
- 3,618 replies
-
- 3
-

-
- young america
- clipper
- (and 1 more)
-
Hi Ed, I have a question for you. When you post photos of your work you often show some process where you are working with a tool in hand(s). How do you take the pictures. Does someone help you? A timer with a tripod mount? Tom
- 3,618 replies
-
- 4
-
-
- young america
- clipper
- (and 1 more)
-
G man, just when I think you can't do much more to wow us .... you do. What a fantastic model! Such lovely details you're building into L'Amarante. Please keep those pictures coming. I can't get enough of this. Tom
-
Mike, That is one gorgeous deck you put in. I love the curved planks ..... really sweet looking! Tom
- 452 replies
-
- 3
-
-
- cheerful
- Syren Ship Model Company
- (and 1 more)
-
Cutter Cheerful 1806 by rafine - FINISHED
wyz replied to rafine's topic in - Build logs for subjects built 1801 - 1850
Oh yes, now you're into the rigging. This should be fun. Bob, keep up the beautiful work. Tom- 525 replies
-
- 3
-
-
- cheerful
- Syren Ship Model Company
- (and 1 more)
-
Hi Greg, I'm glad you're enjoying the build. Its true, a large scale bread and butter Georgian style construction is not all that common. And for good reason, it's a labor intensive process that creates a mountain of wood dust. If you don't have a special shop room to help contain the dust and a good air filtration system it's not really doable. Most model builders would be looking at an ugly divorce if they tried it. ;-) Tom
-
To all those who have commented on my build and the likes I thank you. For the past 7 months I've been idle, enjoying your builds in MSW from my StratoLounger. In that time I've eaten a lifetime's worth of buttered popcorn! It's good to get off my butt and get back in the shop again. Tom
-
Paul, I only have a shop like this because I don't have a wife and kids who would commandeer those rooms. Tom
-
Thanks Sal. When I look at the hull now I can barely see its a ship Tom
-
Tom, I'm looking forward to your log and hearing your story. Sometimes in life your train gets sidetracked. Sadly, mine usually goes off the side of a mountain.
-
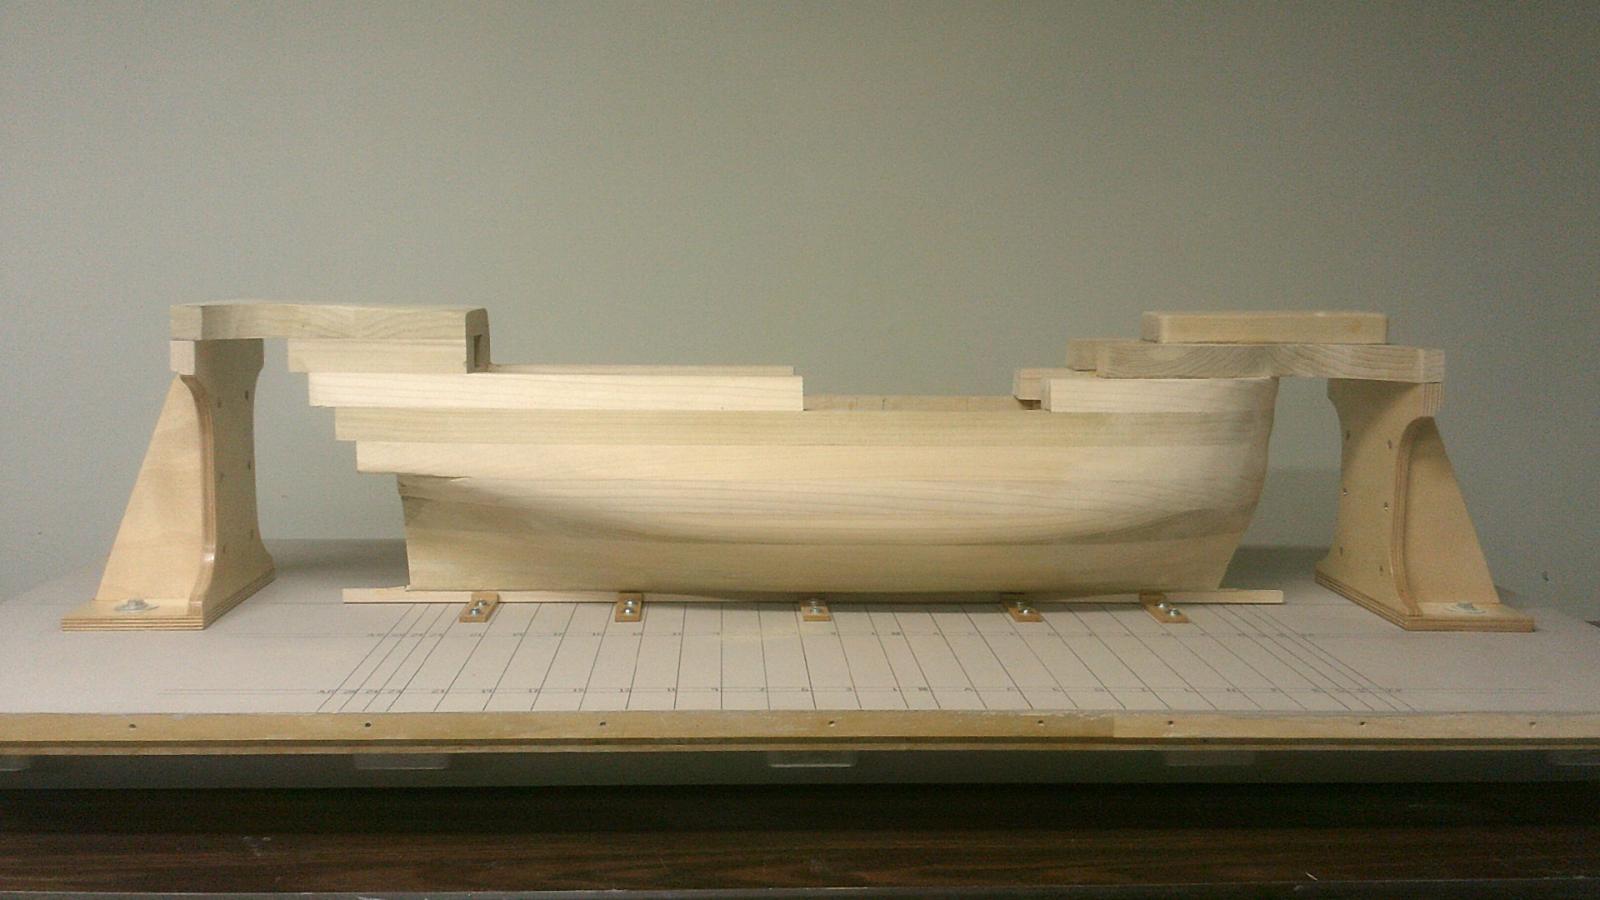
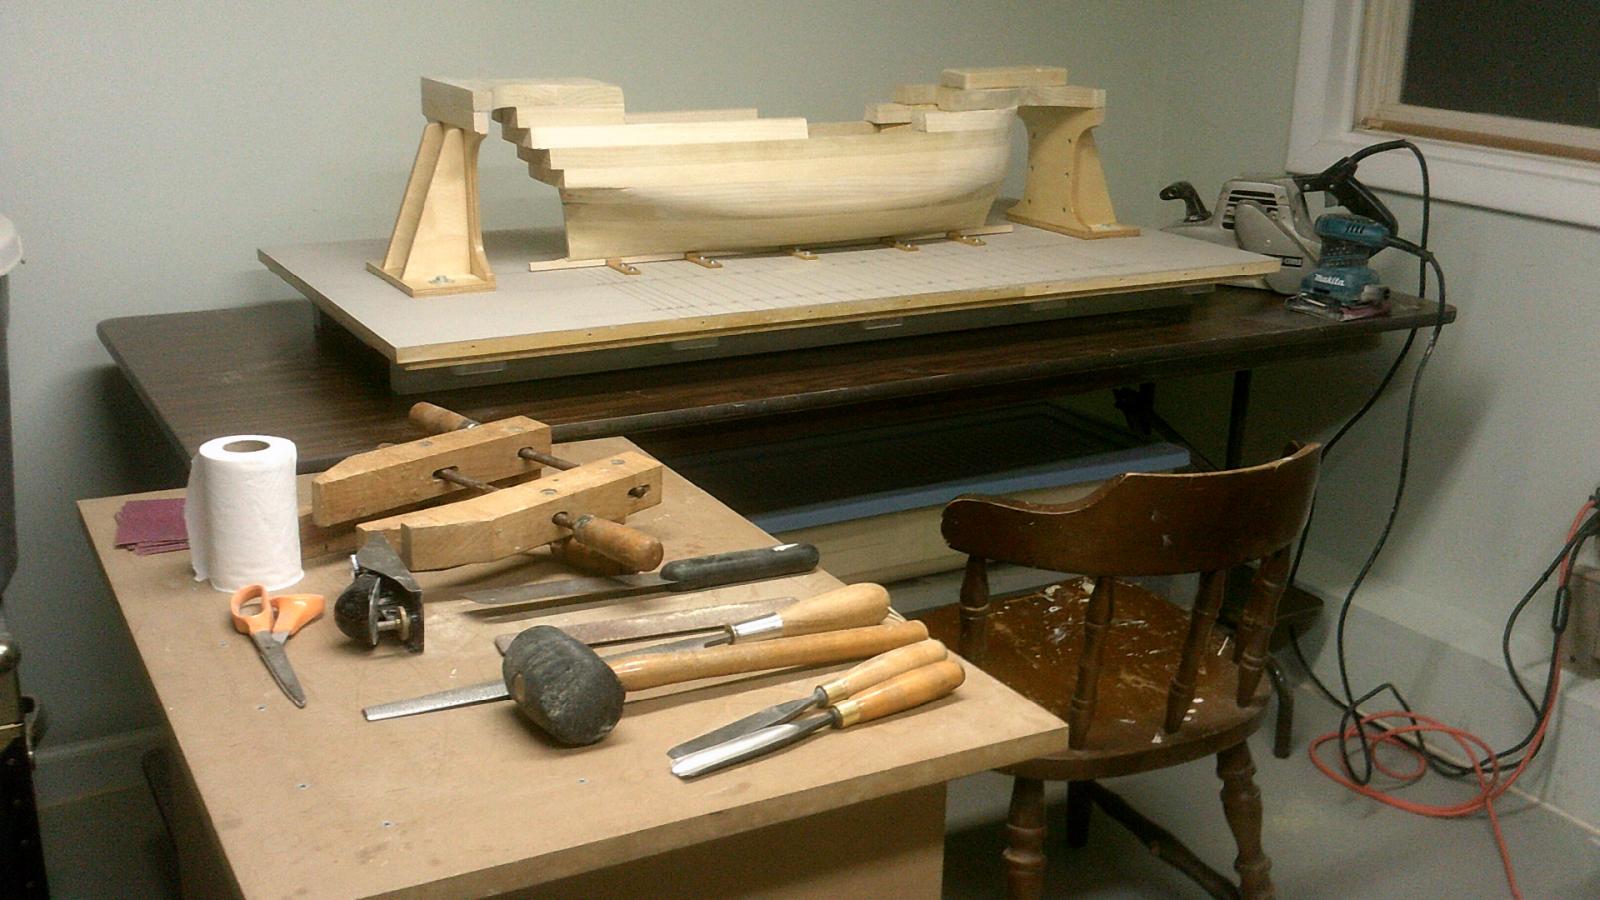
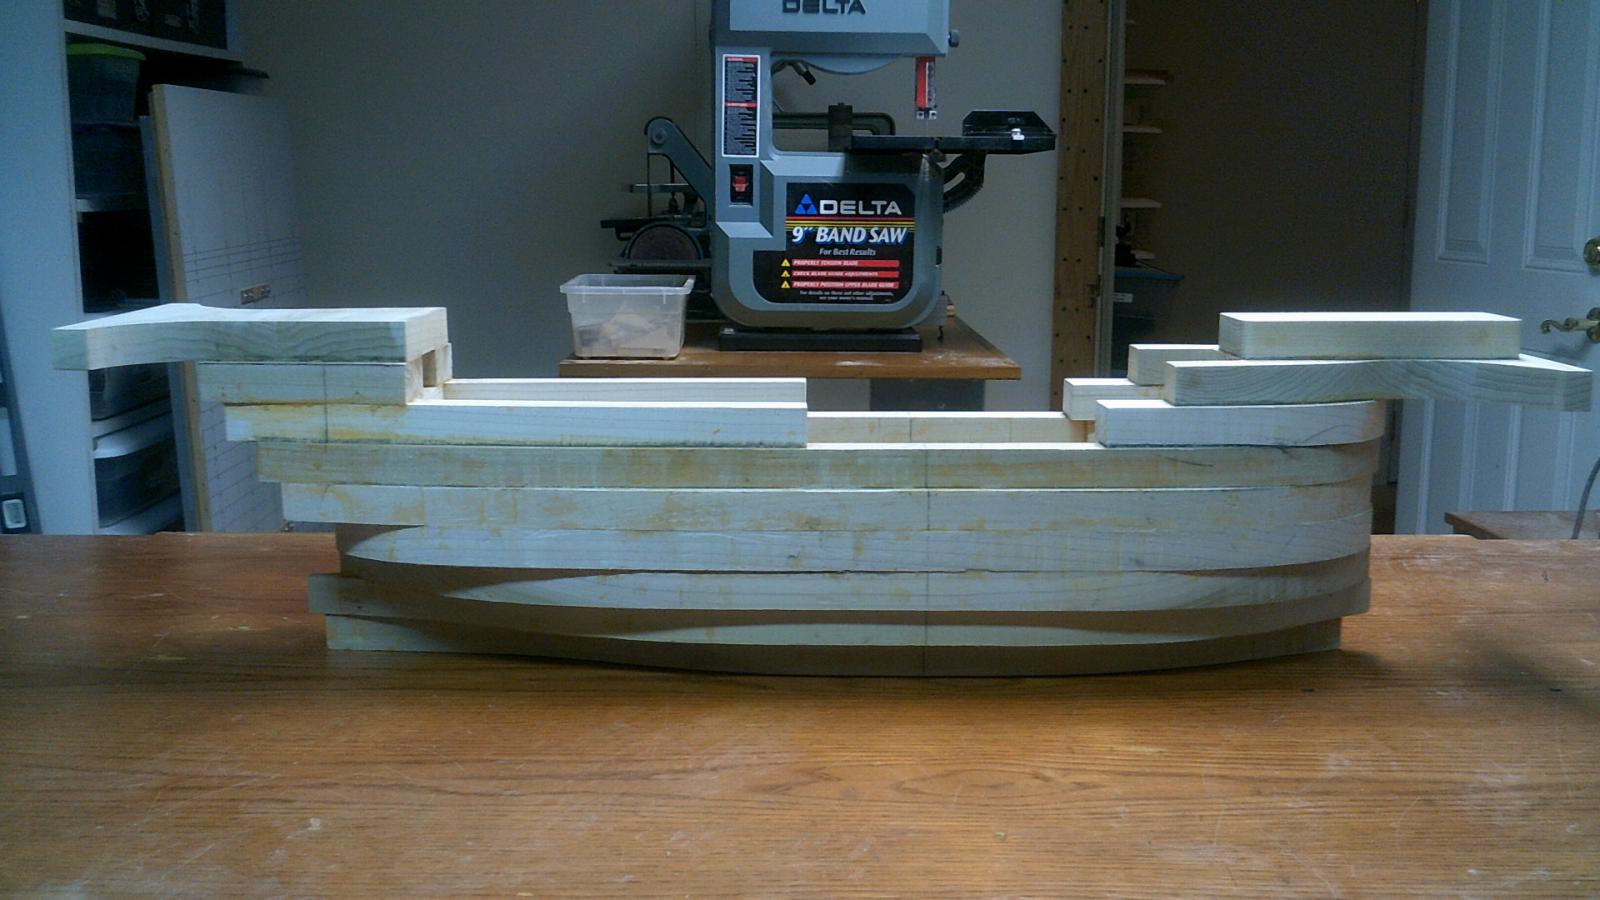
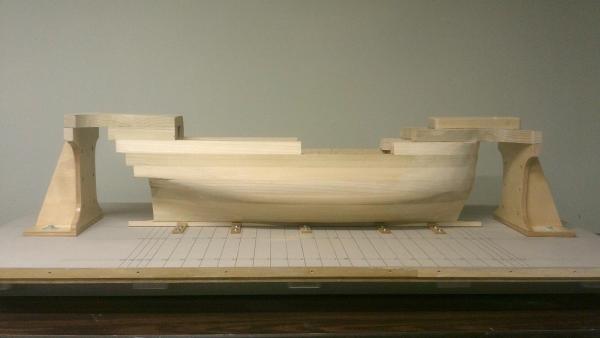
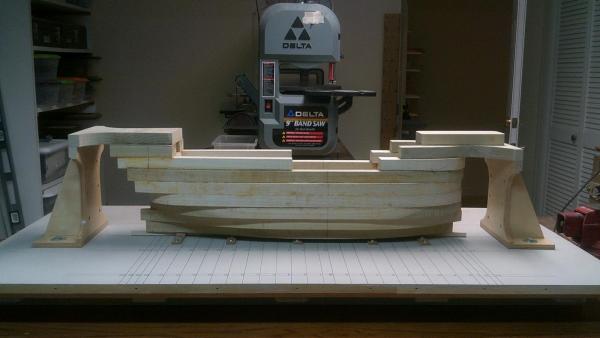
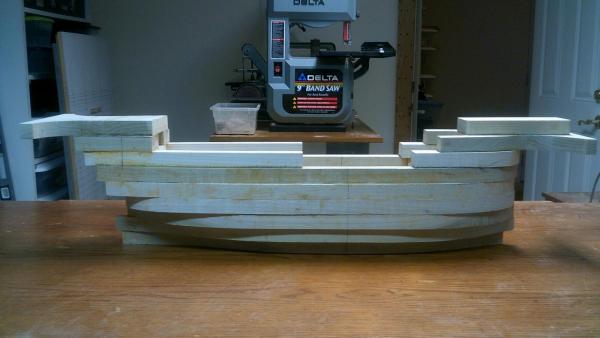
With the hull mounted on the building board it could now be moved into the back shop where the hull shaping will take place. The first thing I did was take out my chisels, gouges and mallet to round the hull some. This is the roughest of the rough shaping. I further shaped the hull with a block plane. This was helpful in rounding out the rough shaped hull, but I could only do so much so fast with it. To speed the process I broke out my 4" x 24" Porter Cable belt sander with a 36 grit belt and tore into the hull. Sawdust went everywhere! With that sander and my Makita pad sander with 60 grit sandpaper I was able to finish up the pre-template shaping in short order. The two photos show the hull at this stage. Now the arduous job of shaping with the templates begins. Because so much saw dust is produced I HIGHLY RECOMMEND you use a dust mask and a room filter. In my condo I have to always remember to keep the three doors to the shops and basement closed. as the fine wood particulate has a magical way of getting into every room. Without question this is one of the major drawbacks to this method of hull construction.

-
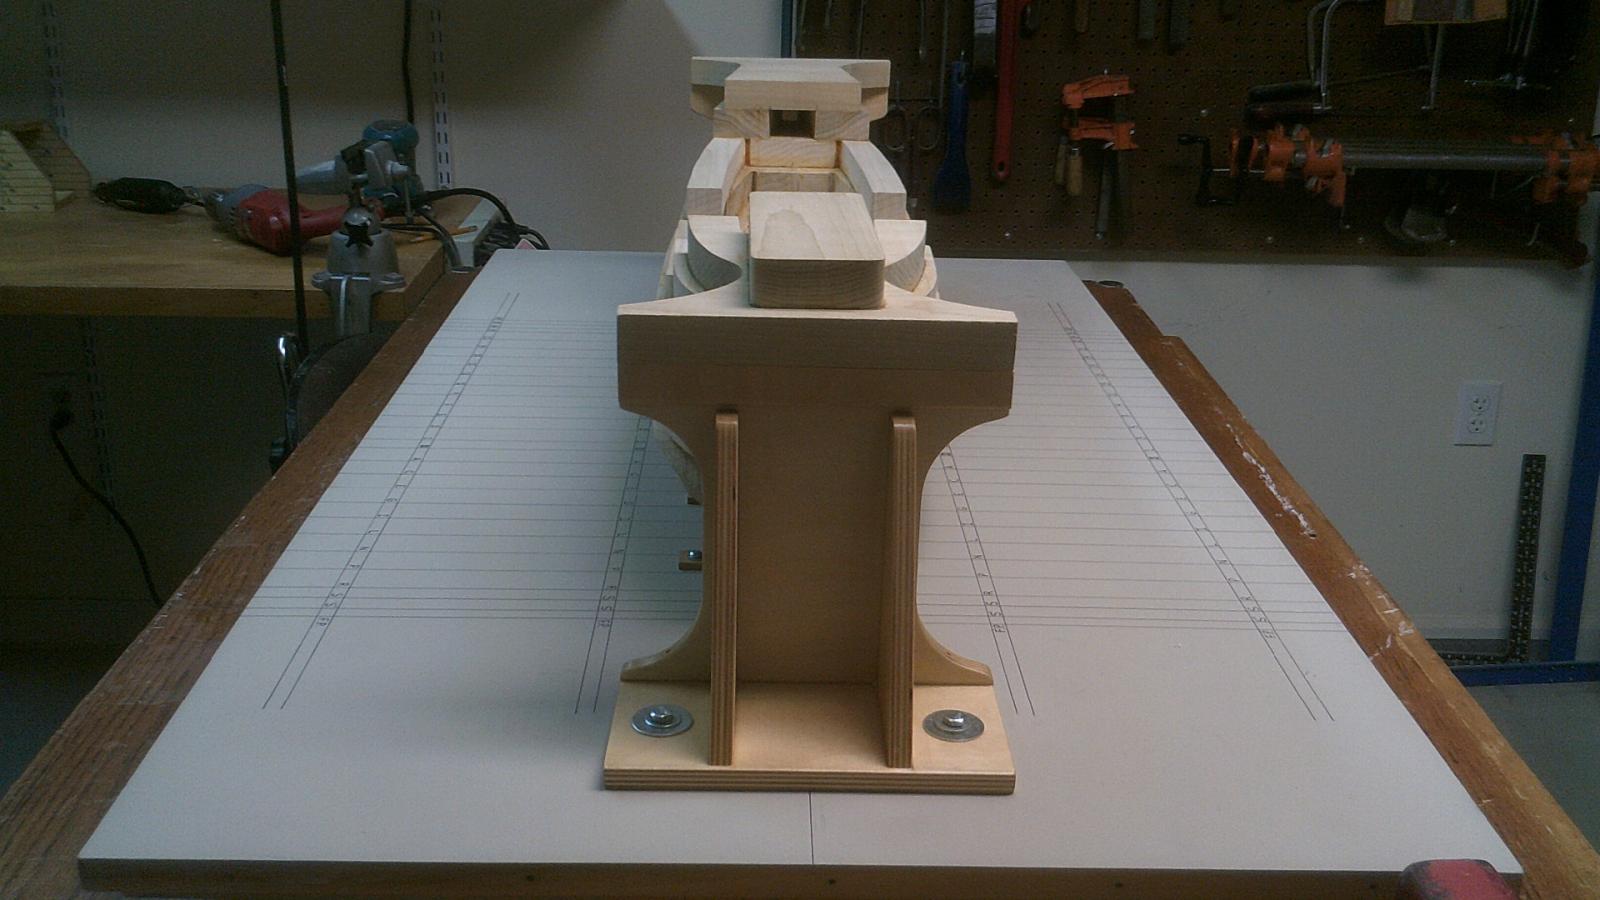
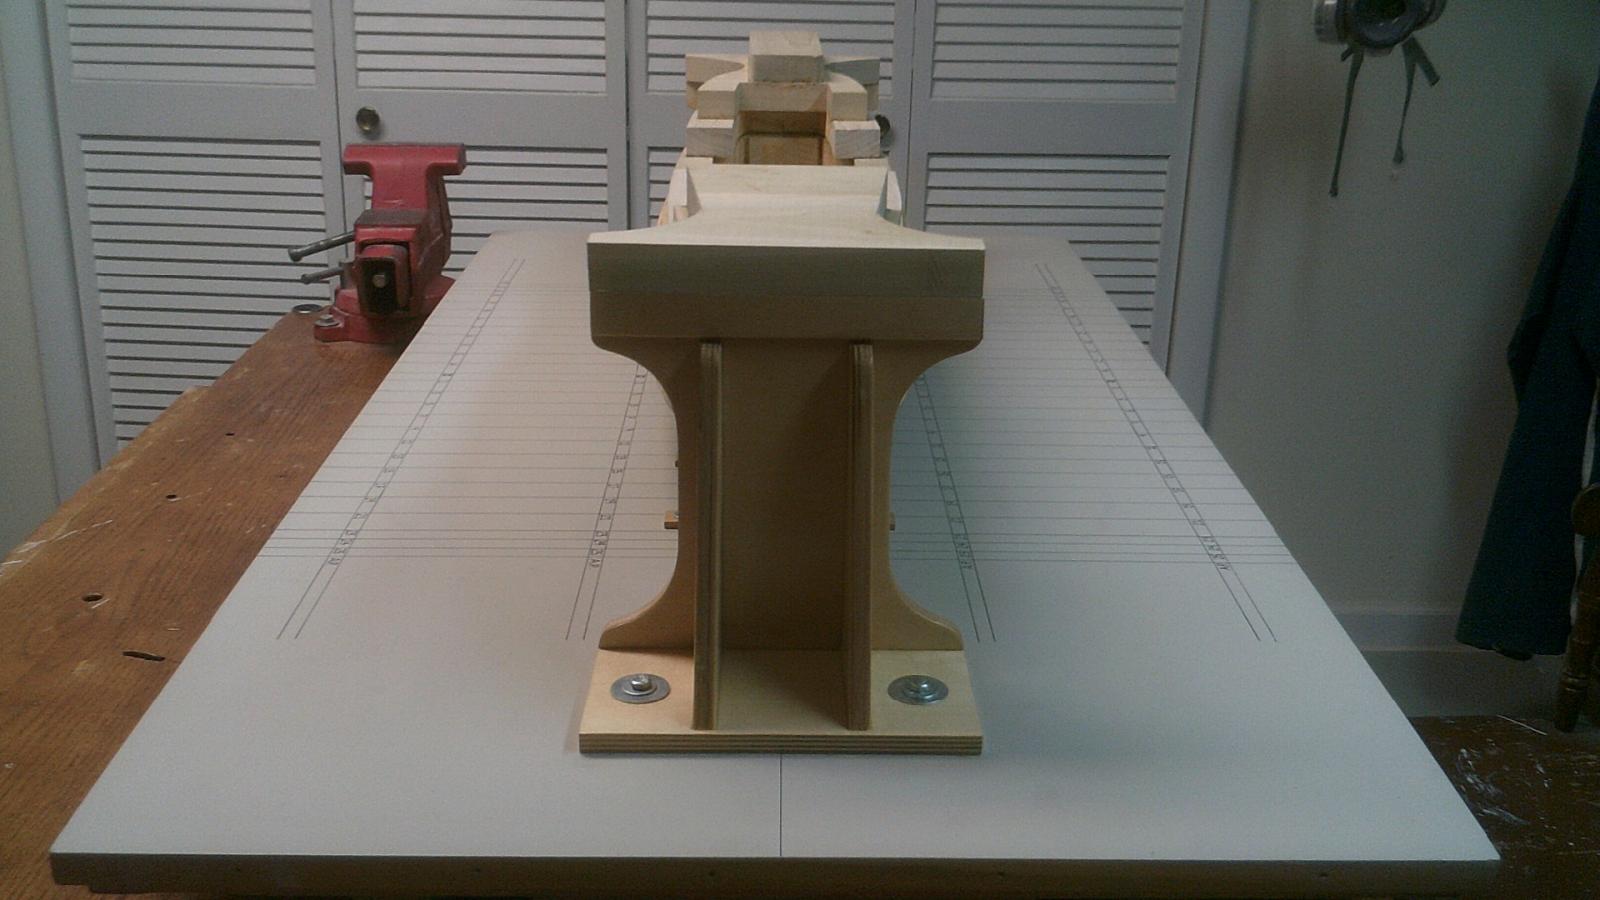
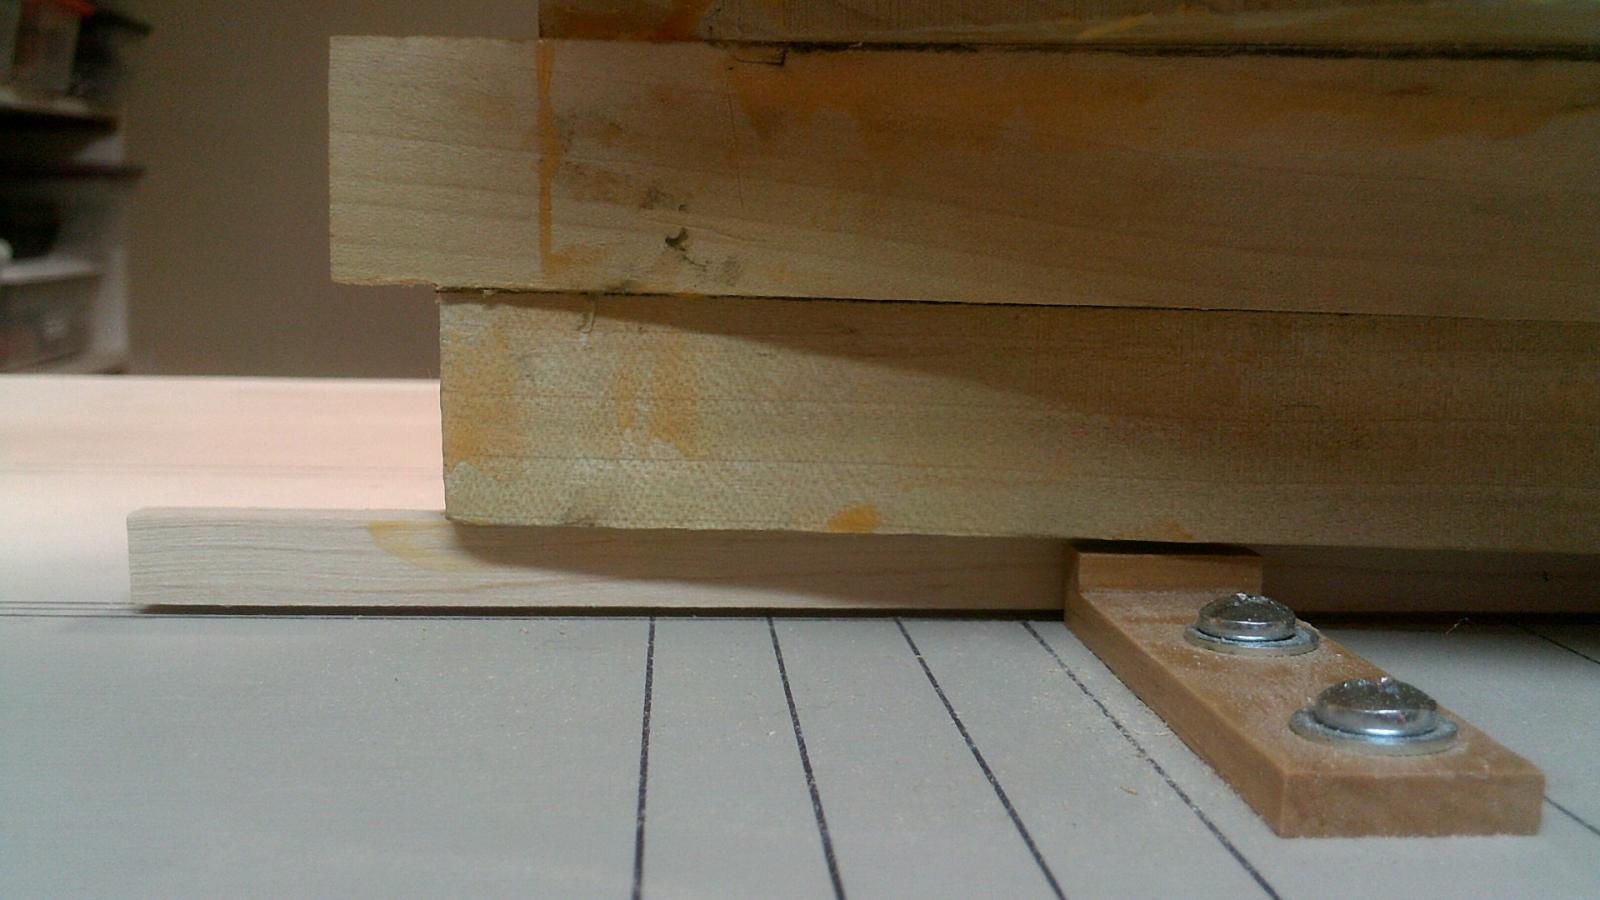
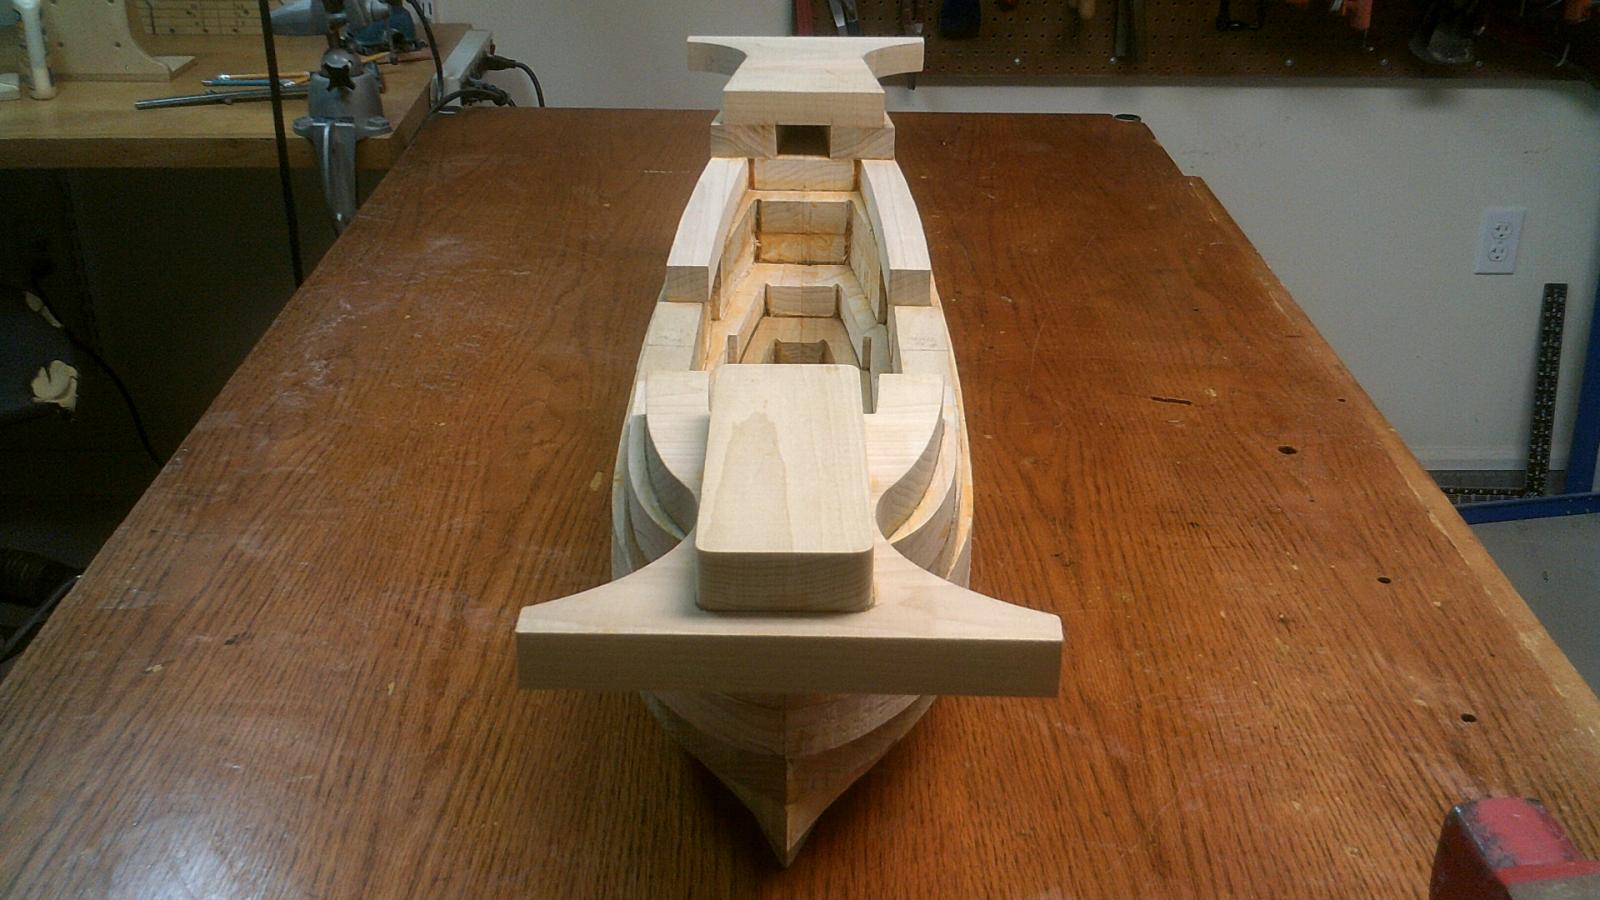
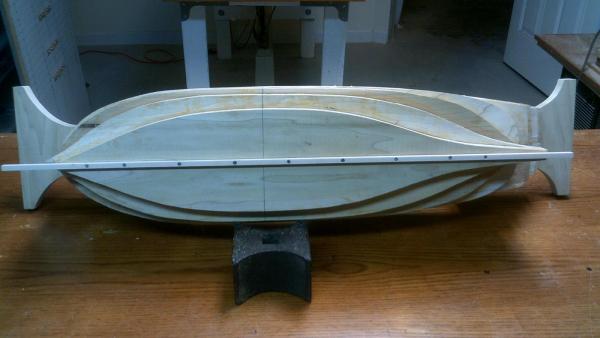
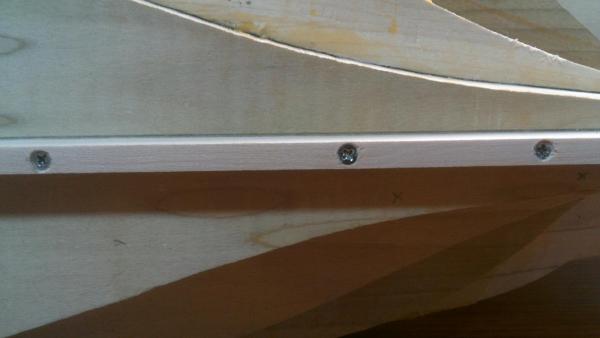
Above are three pictures of the hull finally mounted on the building board. The first step was to locate and then drill holes in the building board where the extension supports would go. Then I had to measure and cut their heights down to where they suspended the hull exactly 1/16" above the building board. I did this step slowly and with great care so as to not go to far. It turned out perfect! The last of the 4 photos shows a closeup of the elevated keel.


-
The next step is to attach the temporary keel. You might ask why temporary? Well, the hull is to be shaped with a variety of hand and power tools. In some of my first bread and butter builds, no matter how hard I tried, I would always end up putting a nick, slice or gouge in the keel. Sadly, I did it more than once. Now it's really a no-brainer to use a temporary one. For this build I decided to switch from using a yellow poplar temporary keel secured with thin birch dowels to a hard maple one attached with 1" long #6 flat head screws. The yellow poplar temporary keels were not very strong and I've had them break in the past where they are more loosely secured in the bow and stern. First I draw the keel width on the hull with a #2 pencil. They are drawn a hair wider on each side so that I can more easily see them when I screw on the keel. I drill the holes in the keel first and then countersink them so the screws don't stick out. Once one screw is in I align the keel to the hull, hold it in place, and then drill through the keel into the hull. Then I put a screw in and move on down the hull repeating this step. At the foremost and aftermost places where the keel and hull touch I put a tiny drop of wood glue, and I do mean tiny.
-
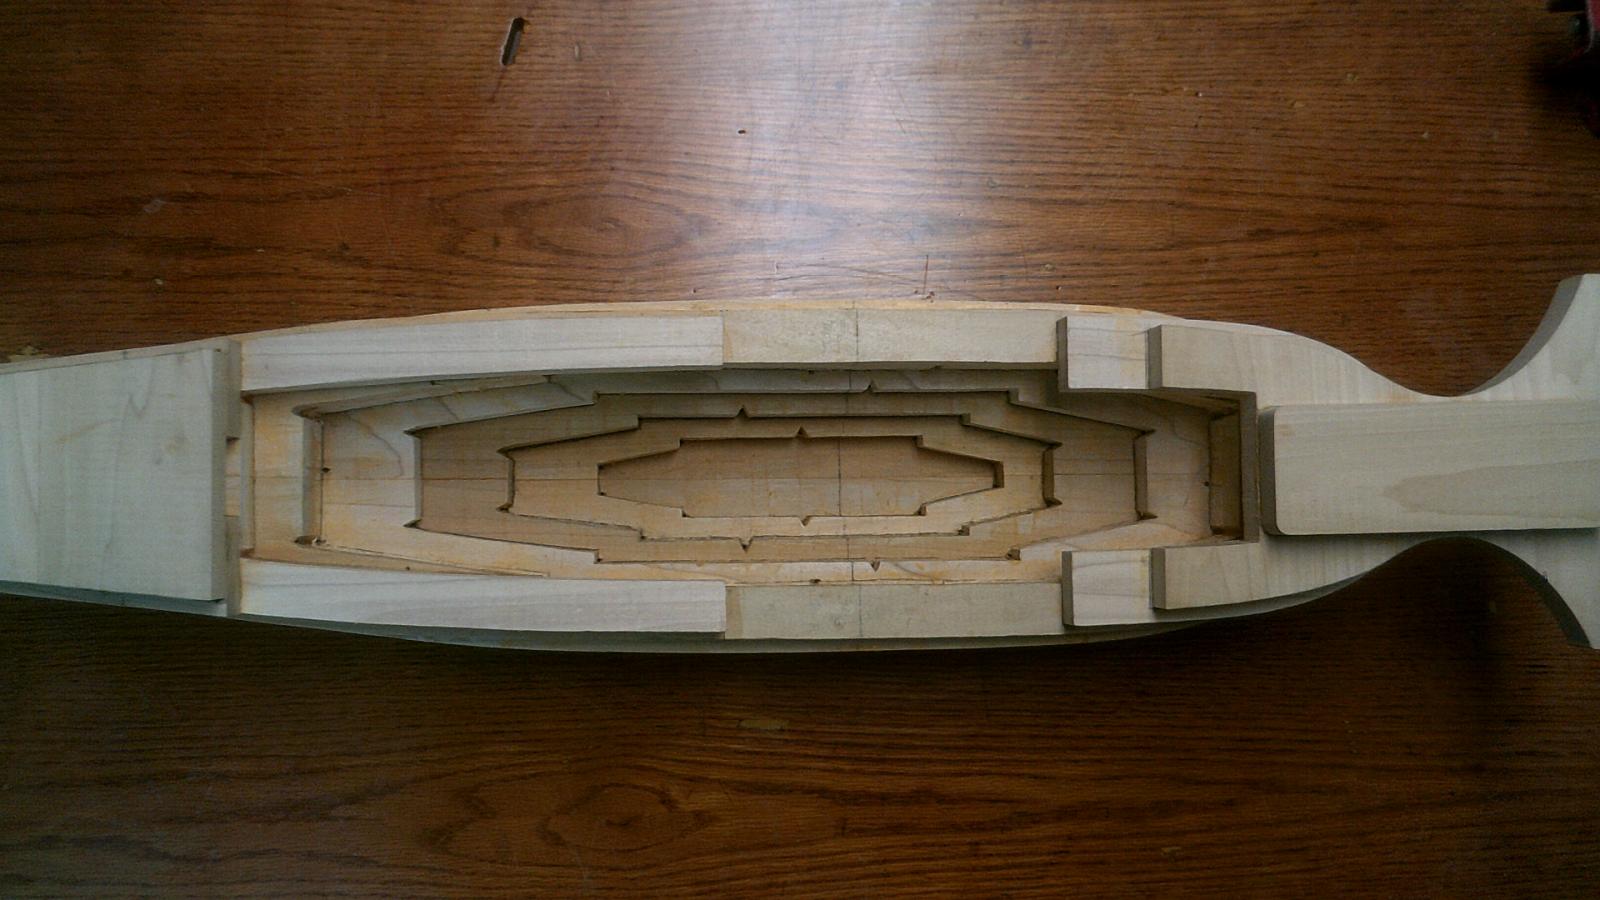
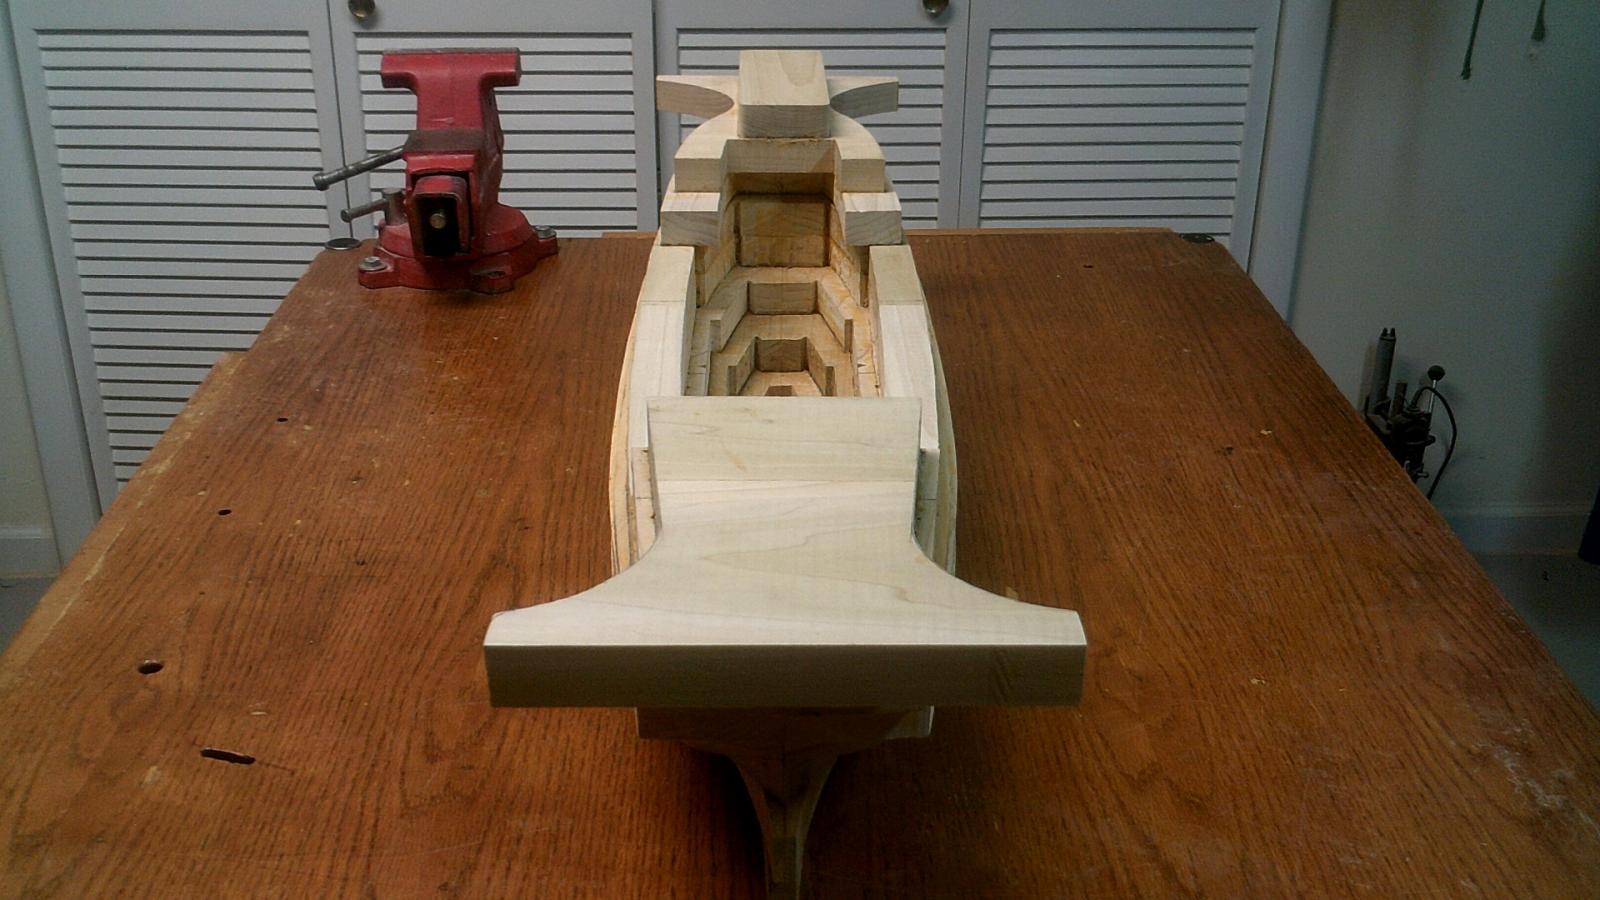
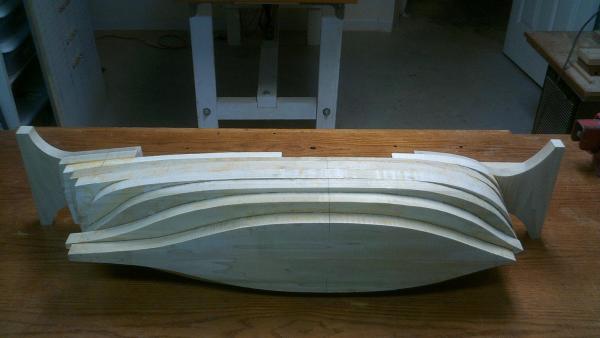
Above are 5 photos, from various angles, of the glued up lifts with the extension arms attached.


-
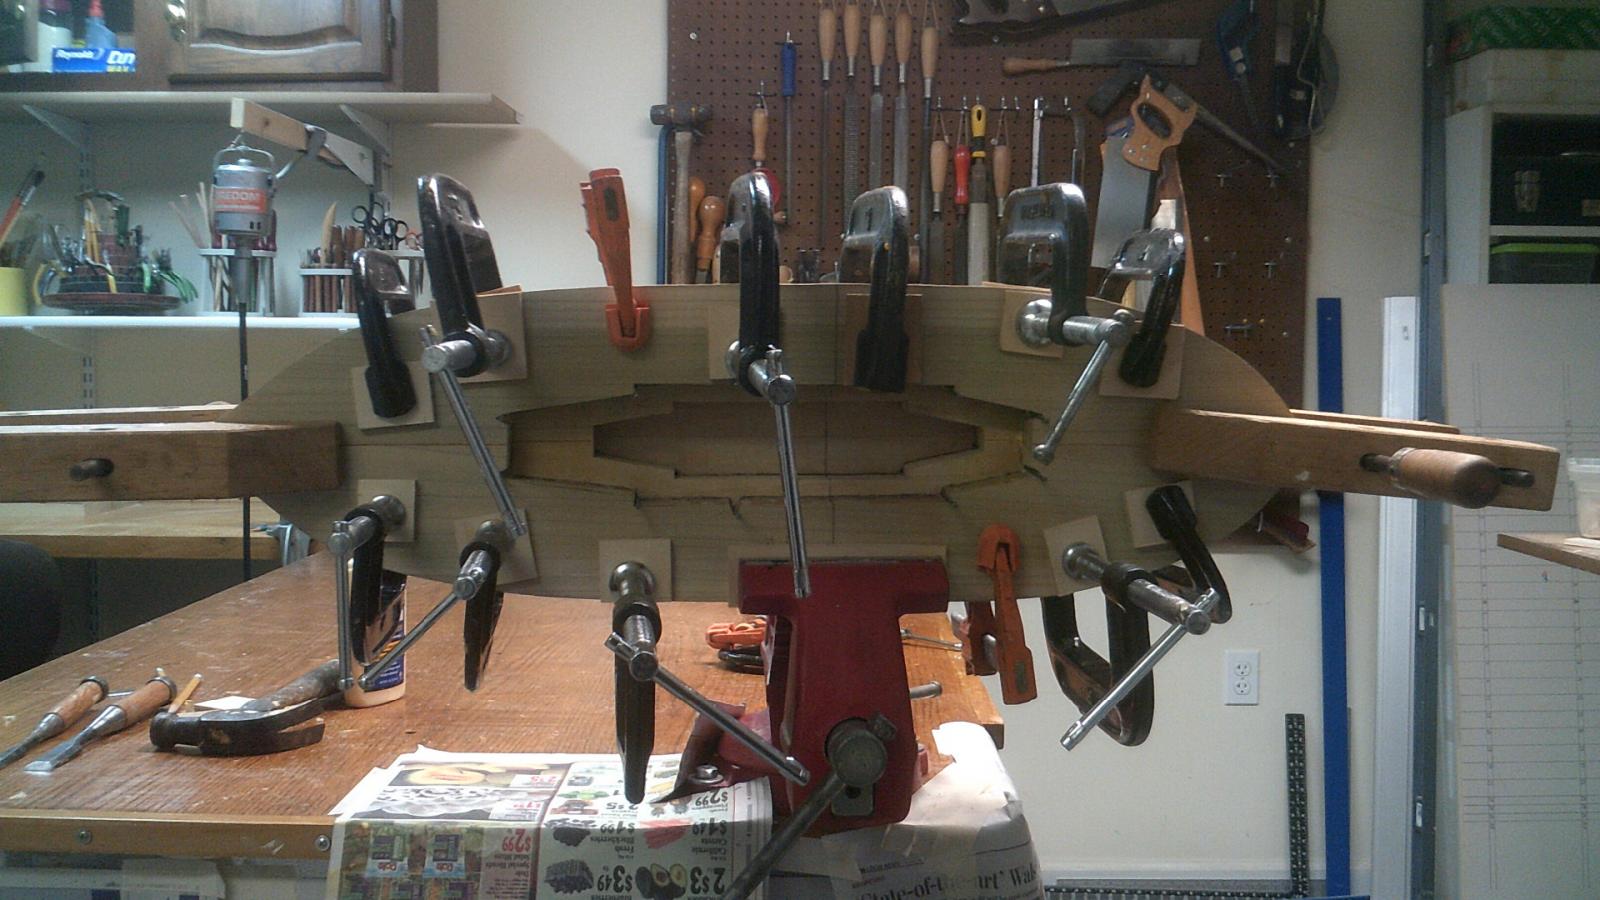
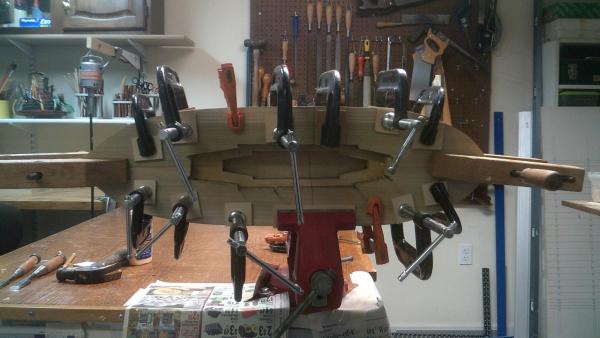
Once the nails are in place there should be no movement in the clamping process. The above photo shows the lifts I just nailed all clamped up. As you can see I use a variety of clamping devices. Note that 1/8" or 1/4" thick plywood squares are employed in this step to prevent the clamps from denting the lifts. After all the clamps are in place I remove the excess glue that squeezes out. There usually is a considerable amount that needs to be cleaned from the lifts. I scrape the glue off with a cheap set of chisels.
-
My next step, and a very important one, is to put nails into the lifts to keep them from moving when clamping. Without them there is no way I can keep the lifts from sliding out of place. I use 2" finishing nails for the job. As you can see in the above photo I don't actually drive the nail through one lift into the other. What I do is to place the nails into certain V grooves or in the corner of L shapes in the the top lift and then drive the nail approximately 1/2" to 5/8" into the lower lift. I use about 8 or 10 nails to immobilize a lift. This step is made possible because yellow poplar takes nails so well. The nails are easy to put in, the wood doesn't split, and when the clamping is done the nails are easily removed. Be very careful the lifts don't slide out of place when nailing. In this photo I completed the nailing and am about to clamp lift #4 to lifts #1, 2 and 3 that are already glued together.

-
Glue is then applied to each lift. I am very liberal with the glue so I have to wait a little longer for it to get tacky. Be careful doing this. You don't want to wait too long because you want all the excess glue to easily squeeze out.

-
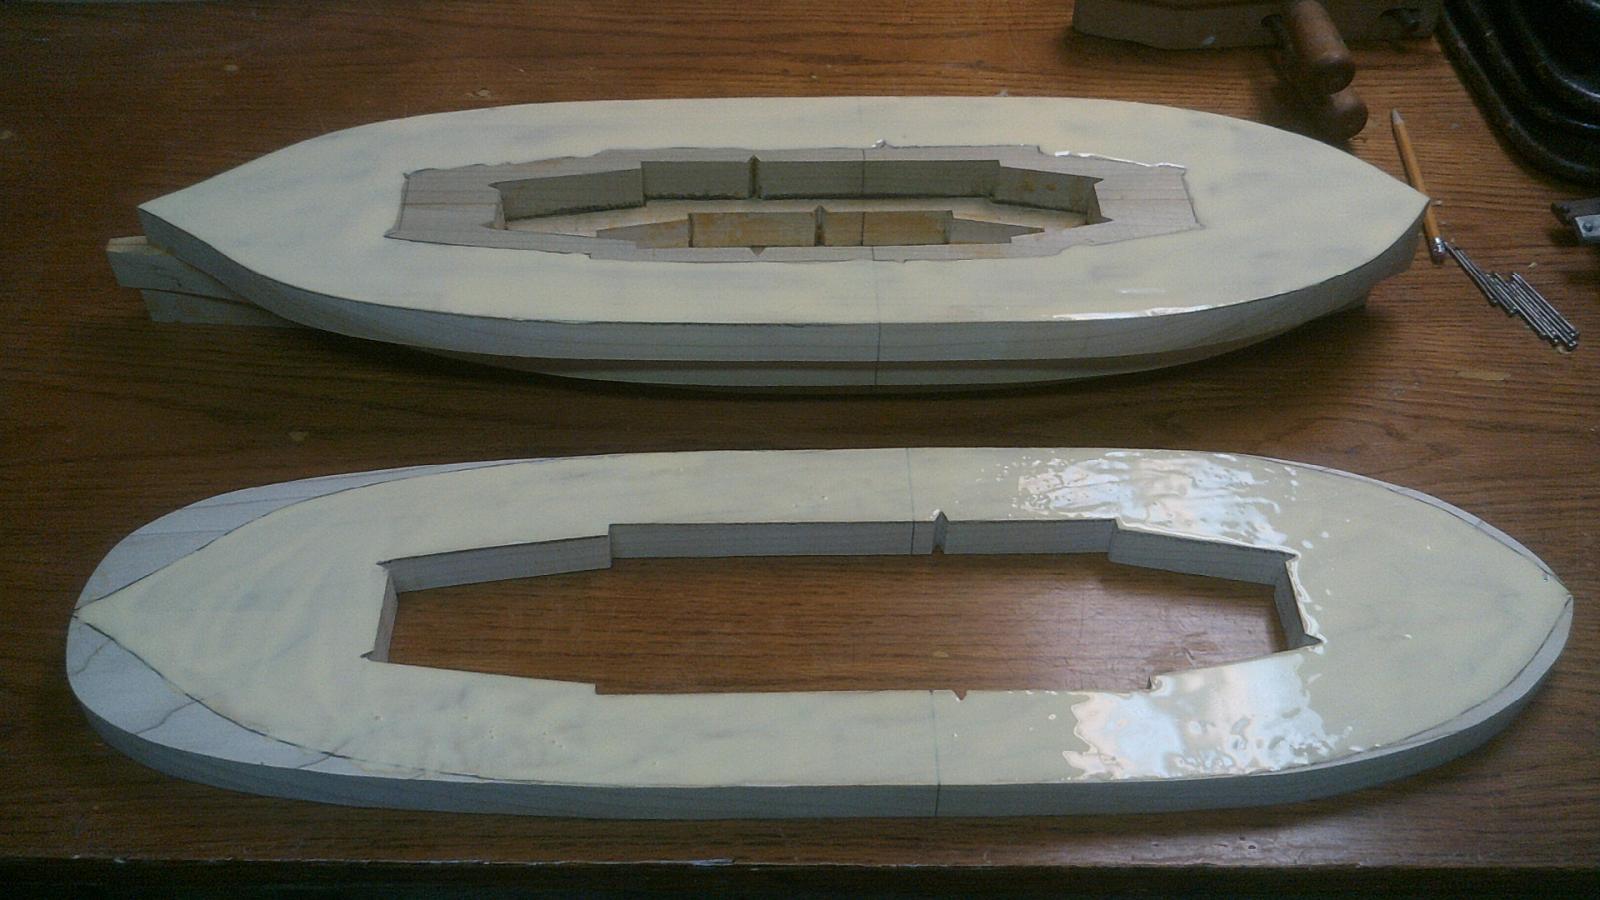
After the glue dries I make sure the areas around the joined pieces are flat. I scrape off any excess dried glue. Even if you are very careful in gluing the halves together and weighting them down you can still have it dry a little uneven. If this happens always sand or carefully plane it smooth. When I say carefully I mean taking the finest shavings. I'm now ready to glue the lifts together. I place the two lifts on top of one another and align everything up. Then I take my #2 pencil and draw the outline of the lifts on each other. This is to show the glue boundary.

-
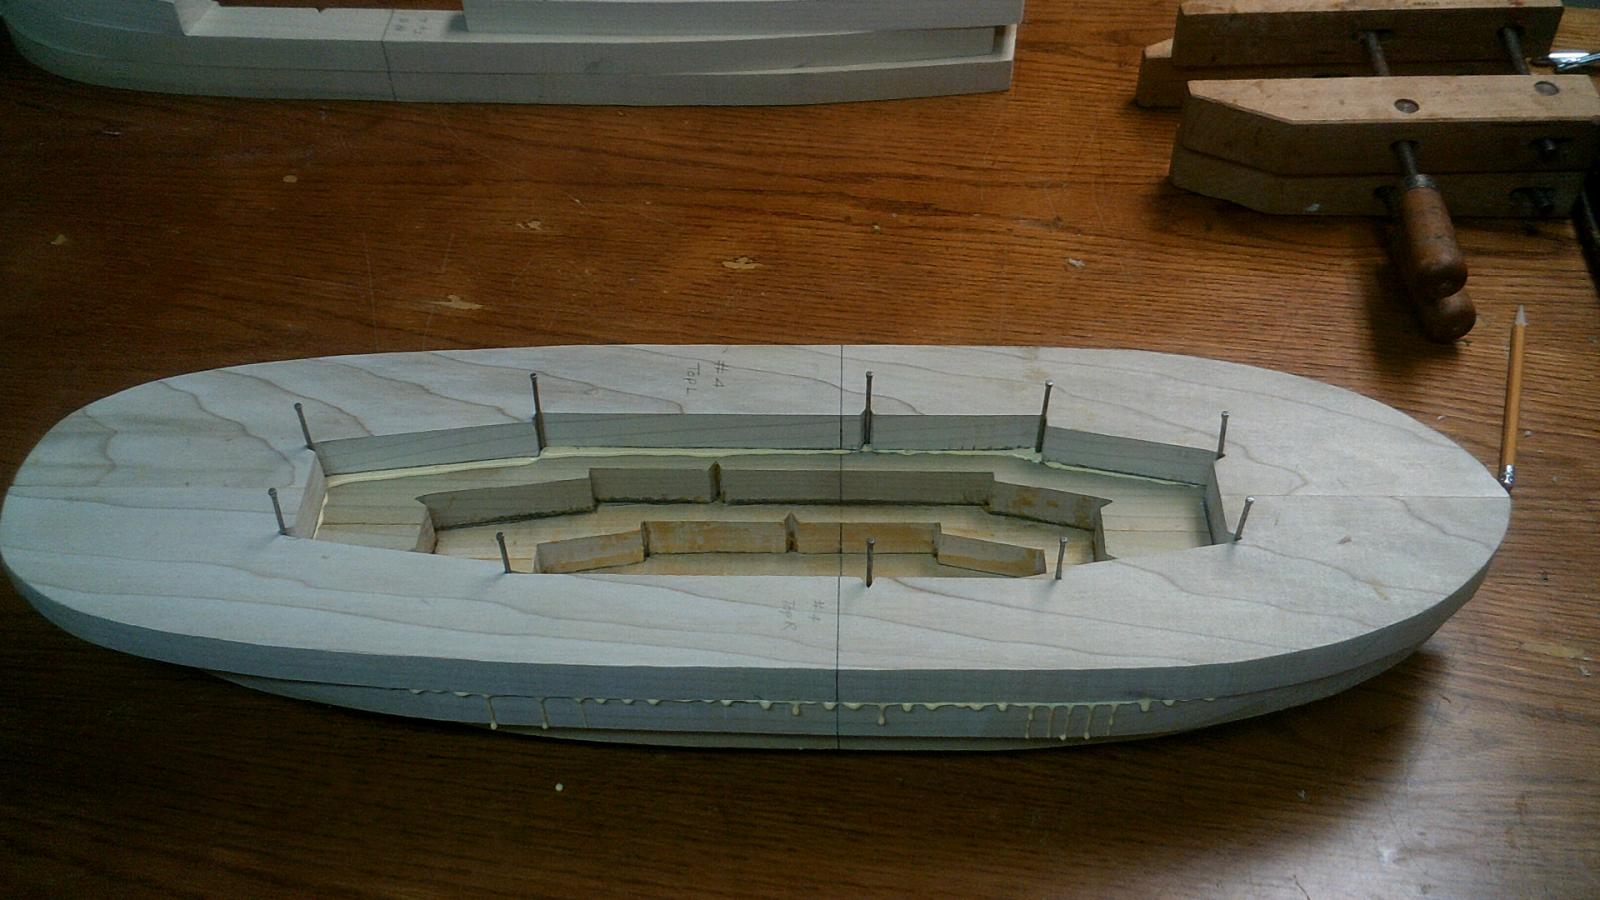
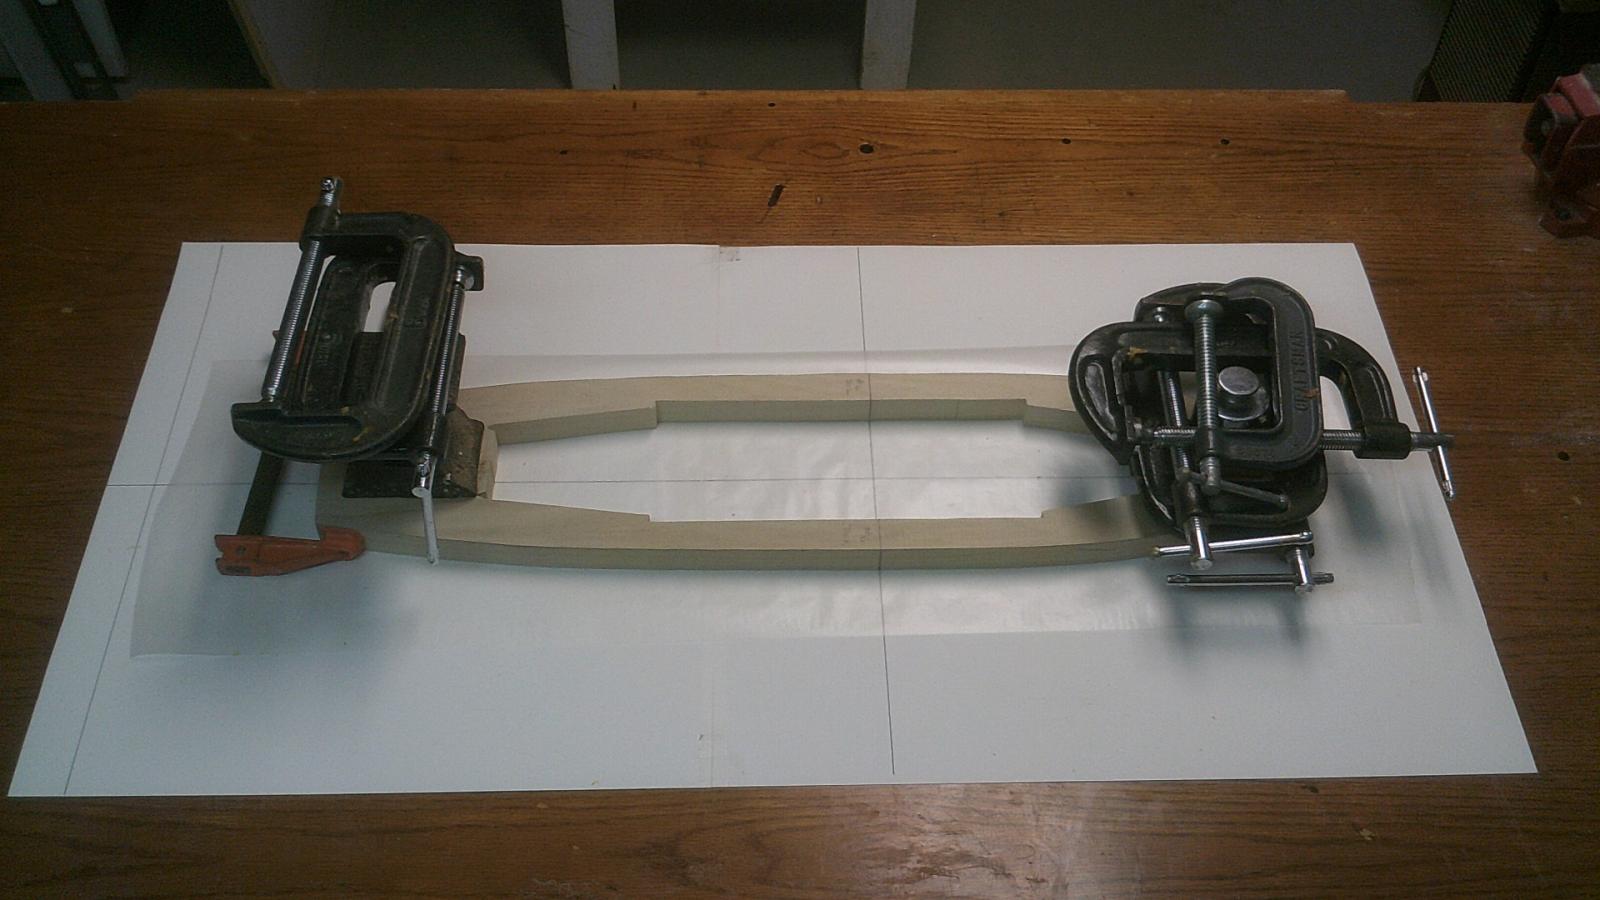
This picture shows the left and right sides of the lifts being glued together. Notice that I put wax paper under the lifts to protect the alignment jig. After glue is applied I clamp and place weight on it, as I want the glued places to remain flat. The glue joint between the left and right lift halves is not as important as the ones between lifts.

-
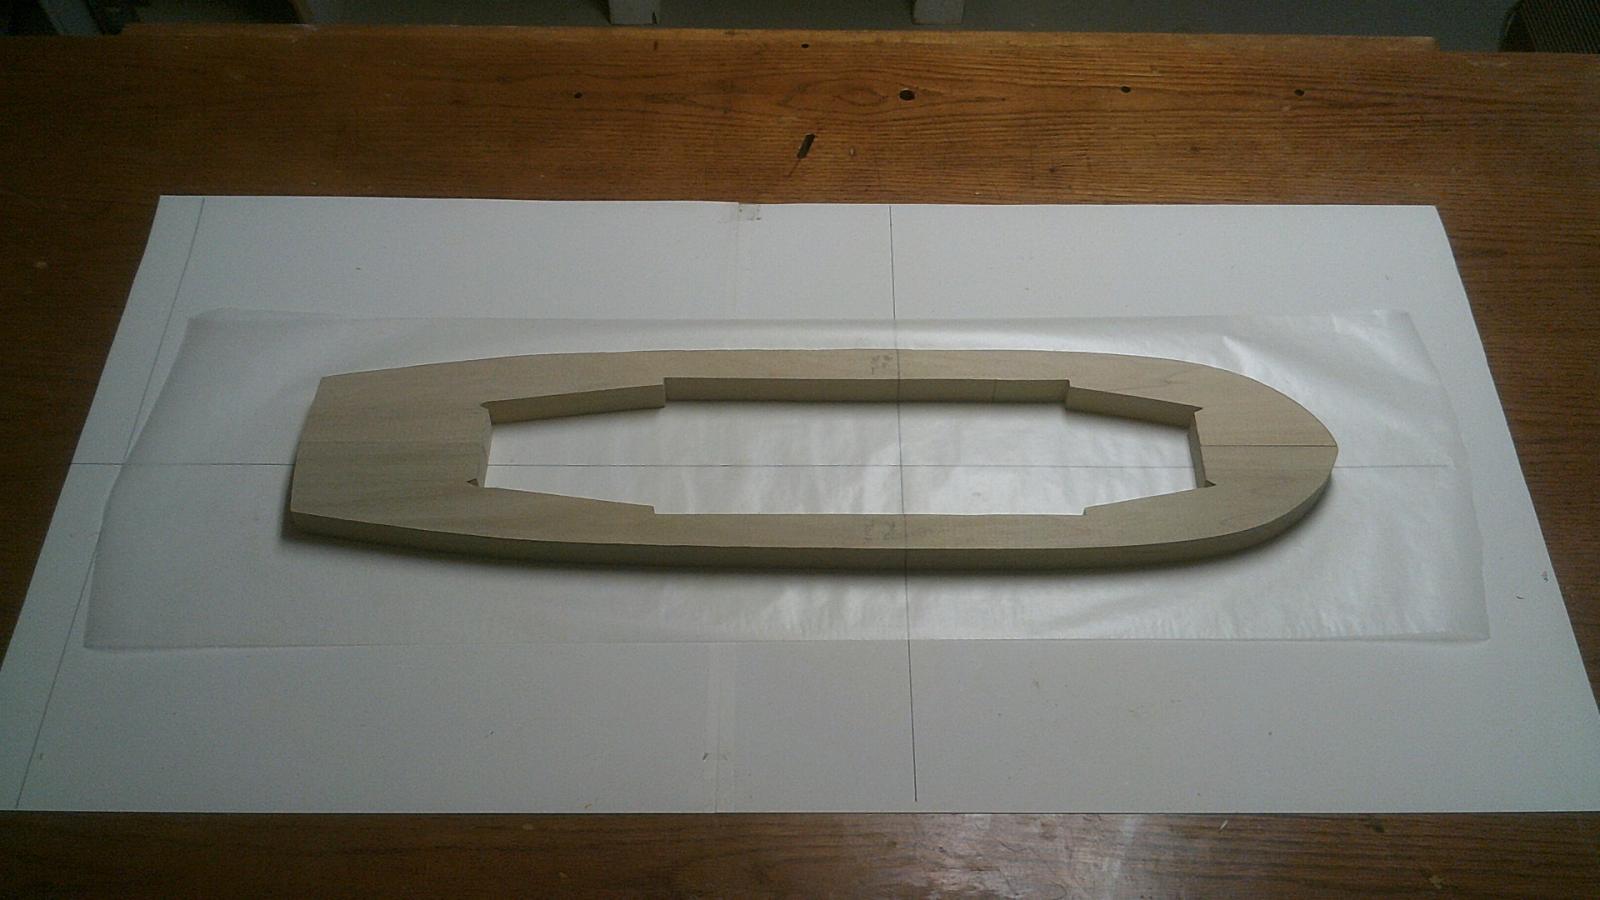
After the two halves of the lifts are cut out to shape I ready them to be glued together. The first thing I do is take my square and continue the midship line around the the half lift. I do this for all the half lifts. Next I make an alignment jig from two large white pieces of paper taped together. On that paper I draw a center line and then cross it at 90 degrees. This represents amidships. Then I take the left and right halves of the lifts and place them on the alignment jig with the midships marks lining up. Now you can see what needs to filed or sanded to make the two halves perfectly symmetrical. You might be asking why do this? Is it really necessary? Having everything symmetrical simply makes it easier to align pieces when gluing, be it the two halves of a lift or two lifts. When glue obscures what you can see It's nice to be able to align the two halves of the lifts tactilely.

-
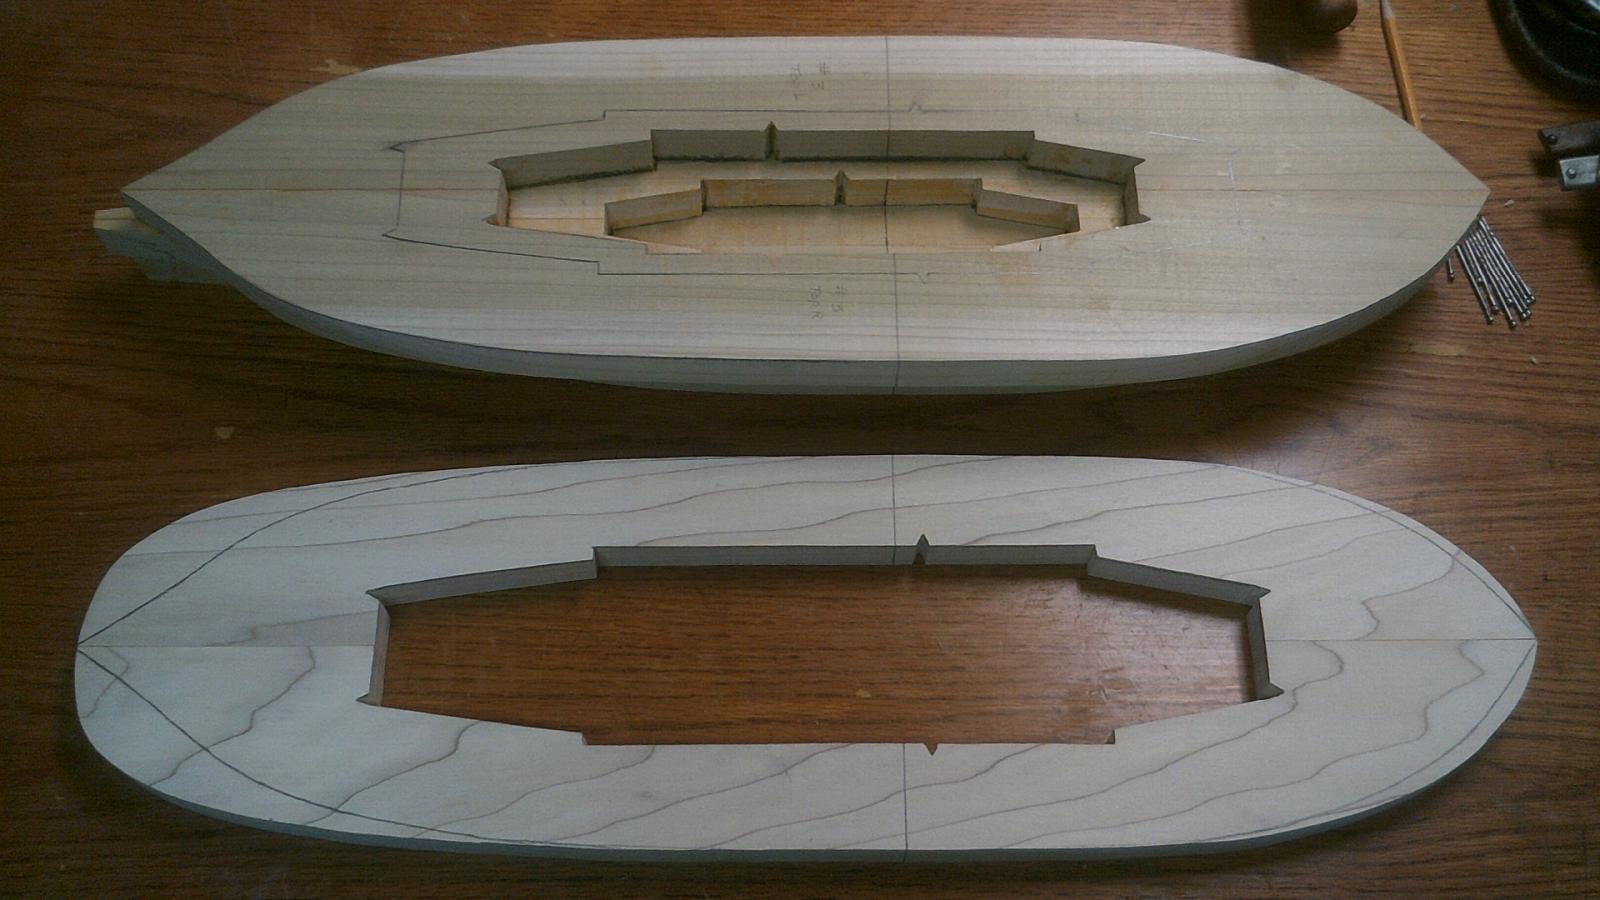
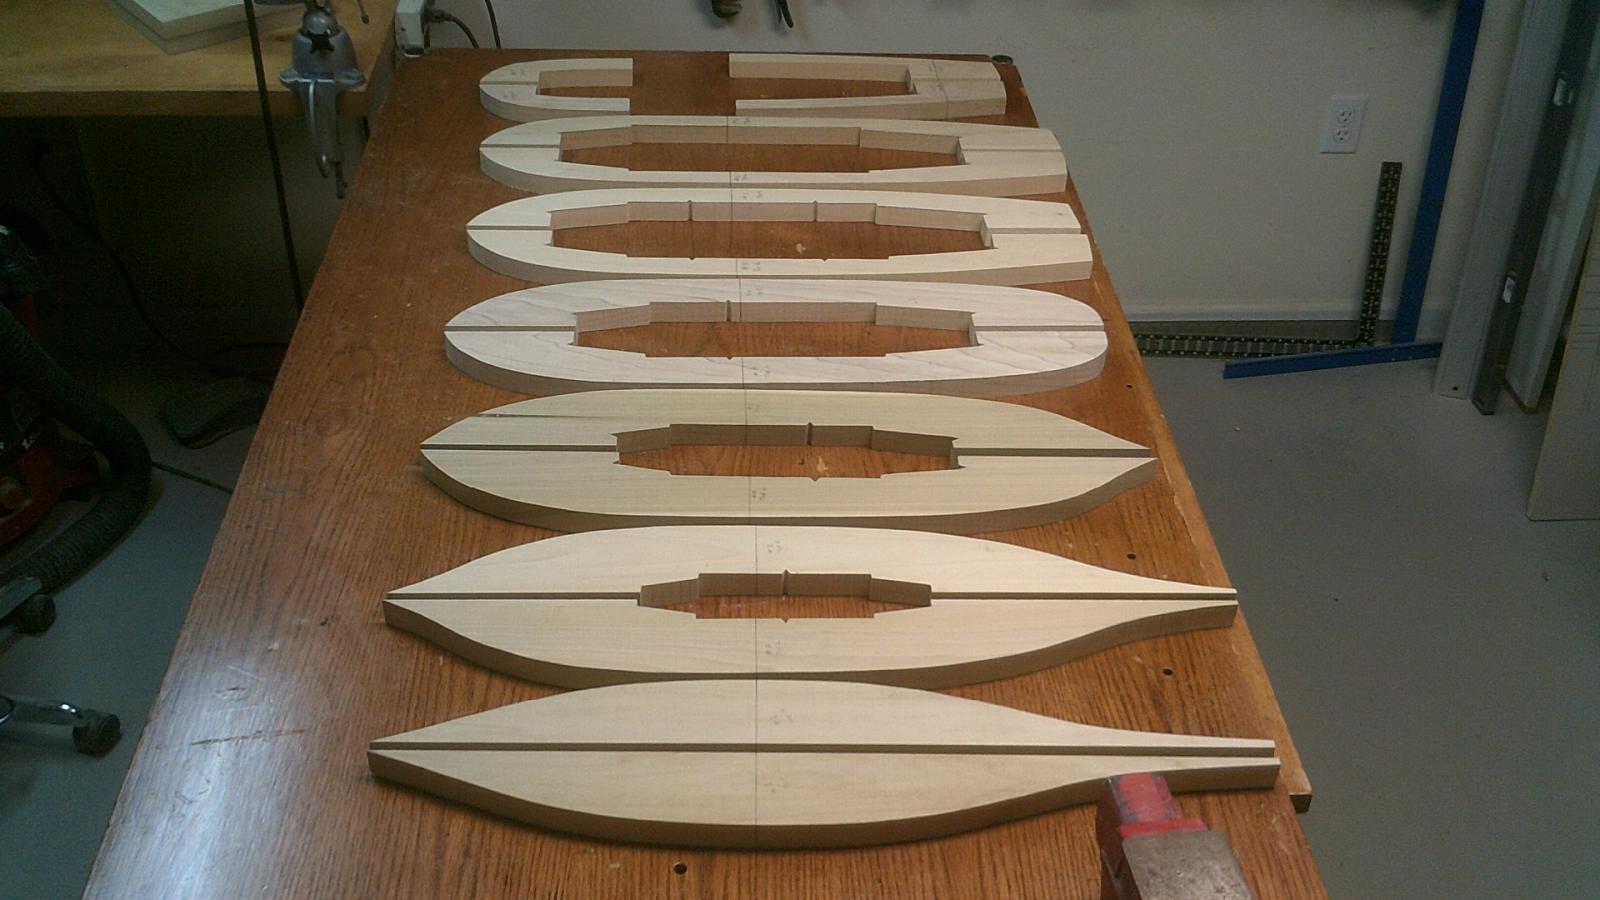
The next step in the process is to place the straight edge of the template on the edge of the wood you've chosen, and then put a mark on the wood where the midships will be. From the edge you chose set your square on the mark and draw a line across the wood. This line will be used later to align the lifts when you are gluing them together. More on this later. With the template where I want I tape it to the wood in a few places. Then I draw the shape of the half lift by running a #2 pencil around the template's edge, inside and out. Remember to flip the mylar template over to do the other half of the lift. When the outline of the half lift is on the wood I'm ready to cut it out on my bandsaw. Before I do I mark on each piece its lift #, whether it's top or bottom, and whether it's the left of right side. This helps to prevent stupid errors. The photo shows all the half lifts, except # 8 cut to shape. Number 8 lift is just two small piece of wood so they don't need a template.