ccoyle
-
Posts
10,520 -
Joined
-
Last visited
Content Type
Profiles
Forums
Gallery
Events
Everything posted by ccoyle
-
 Only rarely, but if you want to OD on card model eye candy, then just browse through the gallery HERE.
- 331 replies
-
- 11
-

-

-
There are several particular skills that set master card modelers apart from the rest of us, and seam work is one them. Matching colors helps make seams less apparent. Only our Polish friends seem capable of making them disappear entirely.
- 331 replies
-
- 11
-
-
The difference is not critical on the edges and only becomes a potential issue if large touch-ups on printed surfaces become necessary. Then the touched-up areas are easier to spot unless the color match is pretty darn close.
-
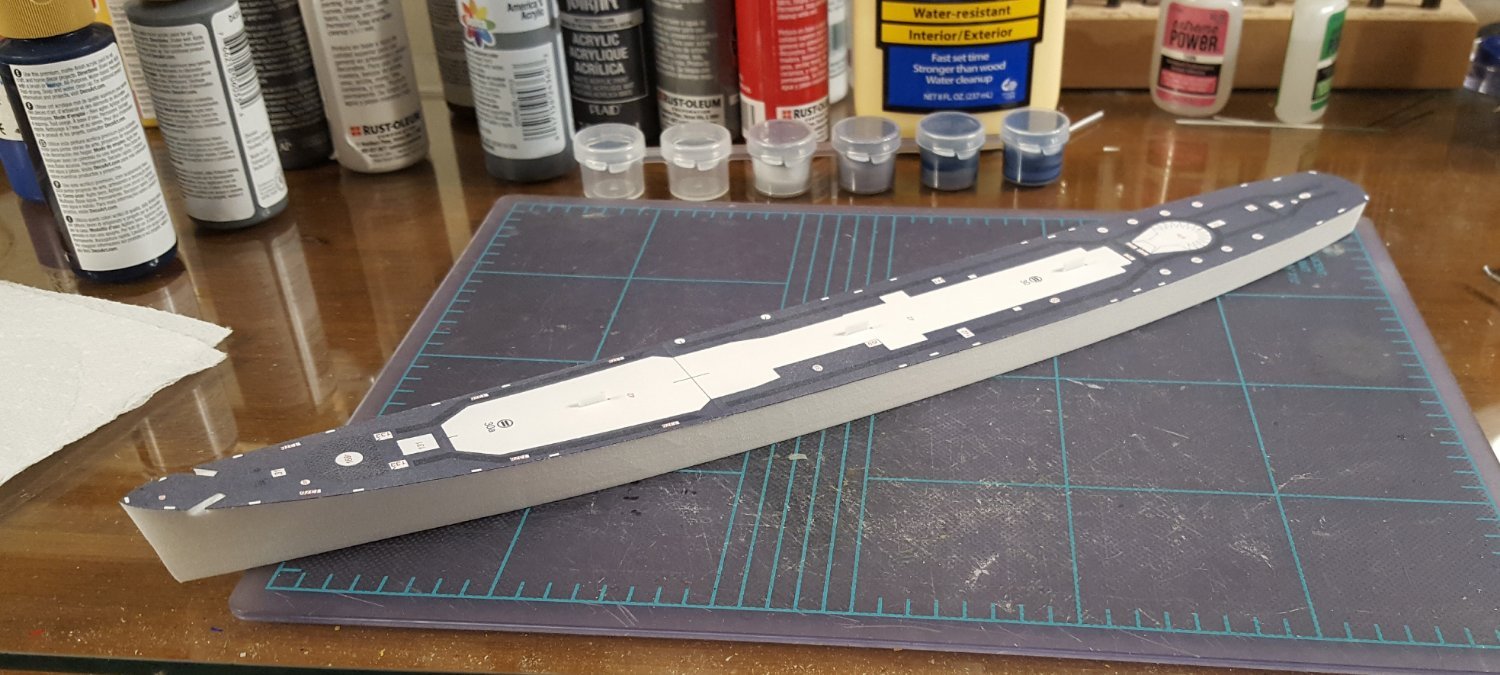
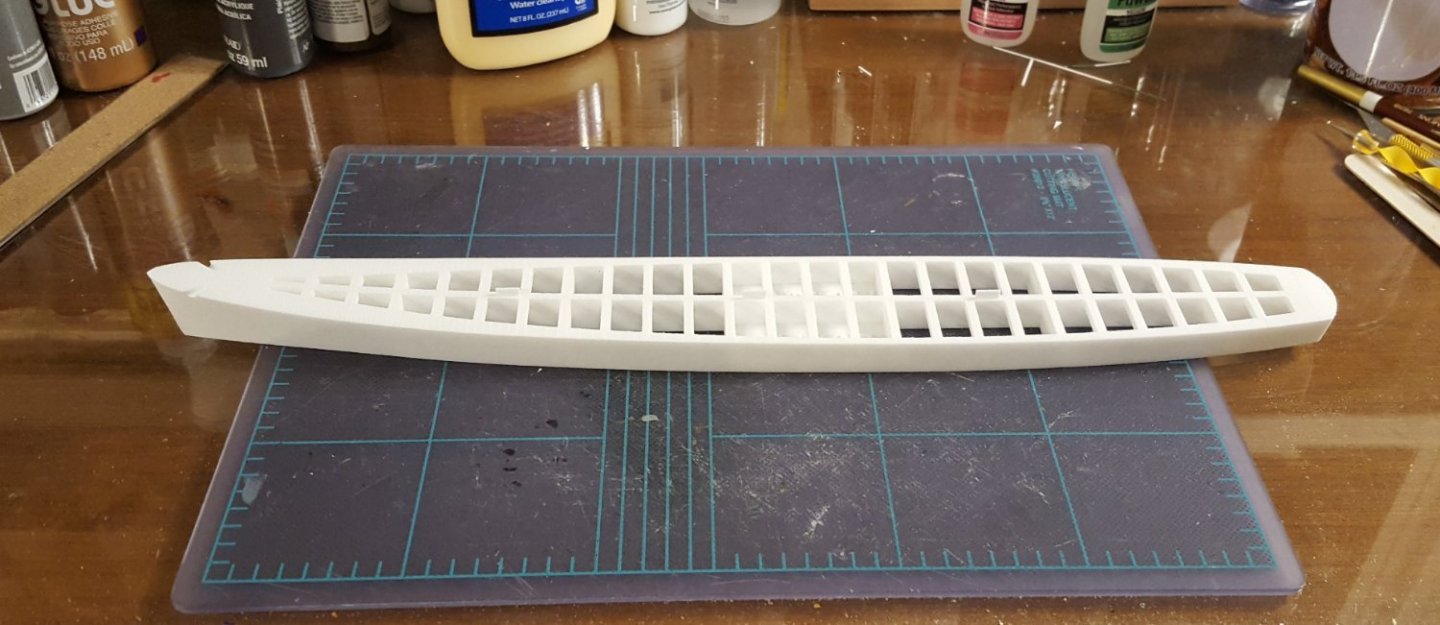
Hull I serendipitously discovered that rubbing the sprayed parts with a bare finger will sort of "buff out" the splotchy look and restore (mostly) the proper black color. So here's the deck (two parts) glued down to the 3D-printed hull. For the most part, the fit is spot-on, and of course there are no waves or buckles -- nice. There is, however, some overhang at the stern of as much as 1.5 mm. Nothing to panic about yet. I will further assess the situation when I get the hull sides ready to apply. The fix may be as simple as adding a layer or two of card to build the hull up a bit. Cheers!

- 331 replies
-
- 17
-
-
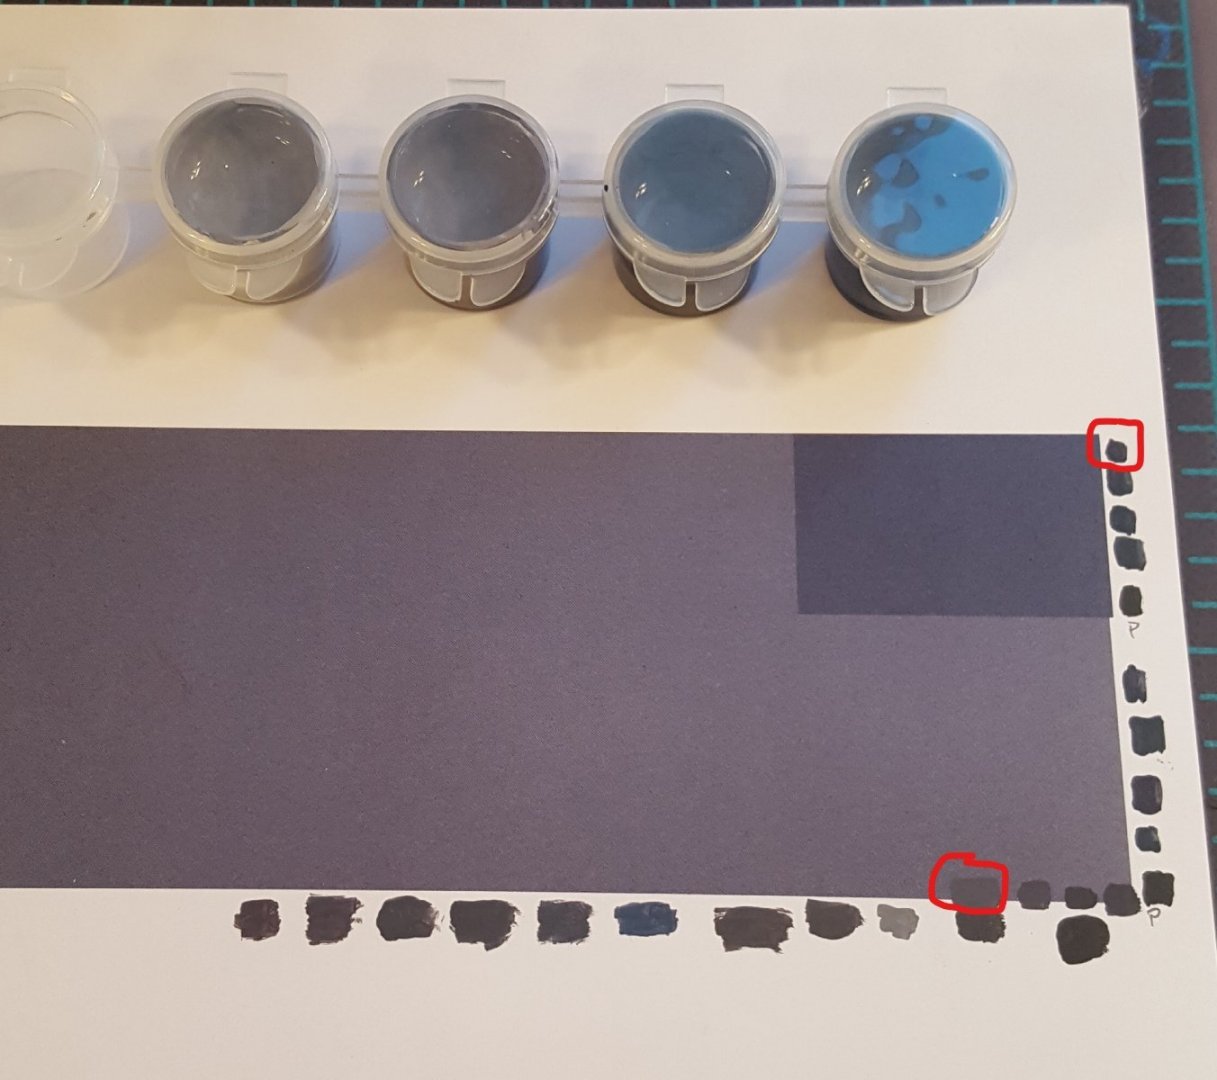
Baby Steps Well, one small triumph and one sorta boo-boo. I started by spraying matte clear finish on the parts. Such is my usual practice, but I had another reason to do so this time around. This kit is printed on semi-gloss stock, and the sheen didn't seem right for a fighting ship in the Southwest Pacific. I did a test-spray last night on a color swatch, and everything seemed okay, so I sprayed the remaining parts. And everything does look okay -- except for where anything is black, which, happily, is not too much. The black parts ended up looking a bit splotchy. Oh well -- shouldn't be too obvious on the finished model. We'll call it weathering. Next I set about making edge colors. Shouldn't be too difficult, right? After all, there's basically only two, and they happen to be different shades of the same color. Ha! The problem is, the color is USN Measure 21 dark blue-gray, but it's printed, not painted. Four-color printing creates colors by blending different saturations of black, yellow, cyan, and magenta dots, and you can actually see these if you squint closely enough. From a distance, the printed color looks gray, but if you look closely you can see that the "gray" has a kind of lilac tone to it -- created by the combination of cyan and magenta dots. It was really hard to recreate this effect, as you can see by my many attempts below. I got the darker shade close enough after just a few tries, but the lighter shade was a booger. The difficulty lay in that red needed to be added to the mixture to push the tone from gray toward toward the desired lilac tone. But my first attempt, not shown, wound up missing the mark and being plain ol' dark purple (or dare I say 'Deep Purple'?) -- too much red. So, after many tweaks, I got the second attempt closer to the desired color (circled). It's not a perfect match, but it looks better in real life than in this crummy cell phone picture, and the tone is right if not the exact shade. My fear is that if I add any more red, I'll push the shade too far into purple territory and have to start all over again. Next up will be cutting the hull sides and deck. Using the 3D-printed hull eliminates the need to cut out and glue forty-seven hull skeleton parts!
- 331 replies
-
- 16
-
-
Eh, you did more than just survive -- you did great! I hope you will tackle another at some point.
- 331 replies
-
- 10
-
-

-
Well, that's the goal at least. Fingers crossed! Define 'reasonable.' 😆 It's US$64, so it's not cheap, but it saves a whole lot of work and should provide a superior result. We'll see.
-
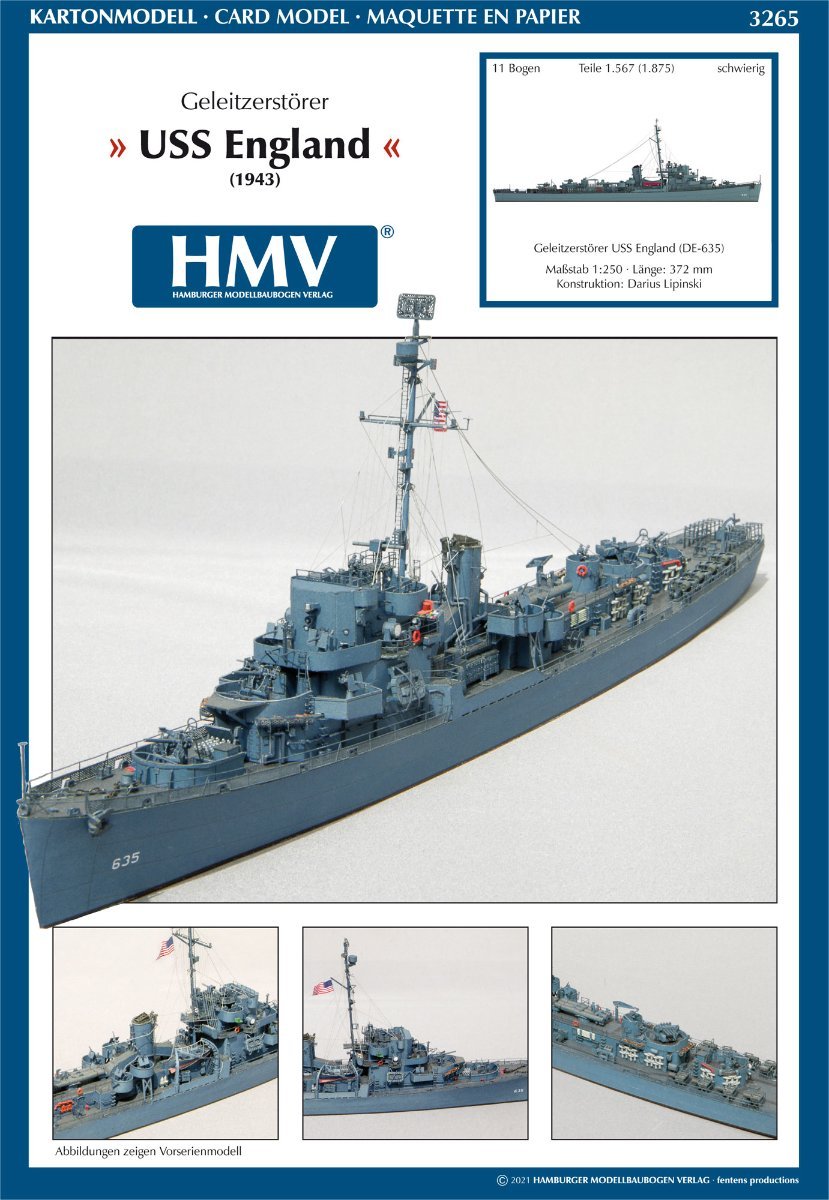
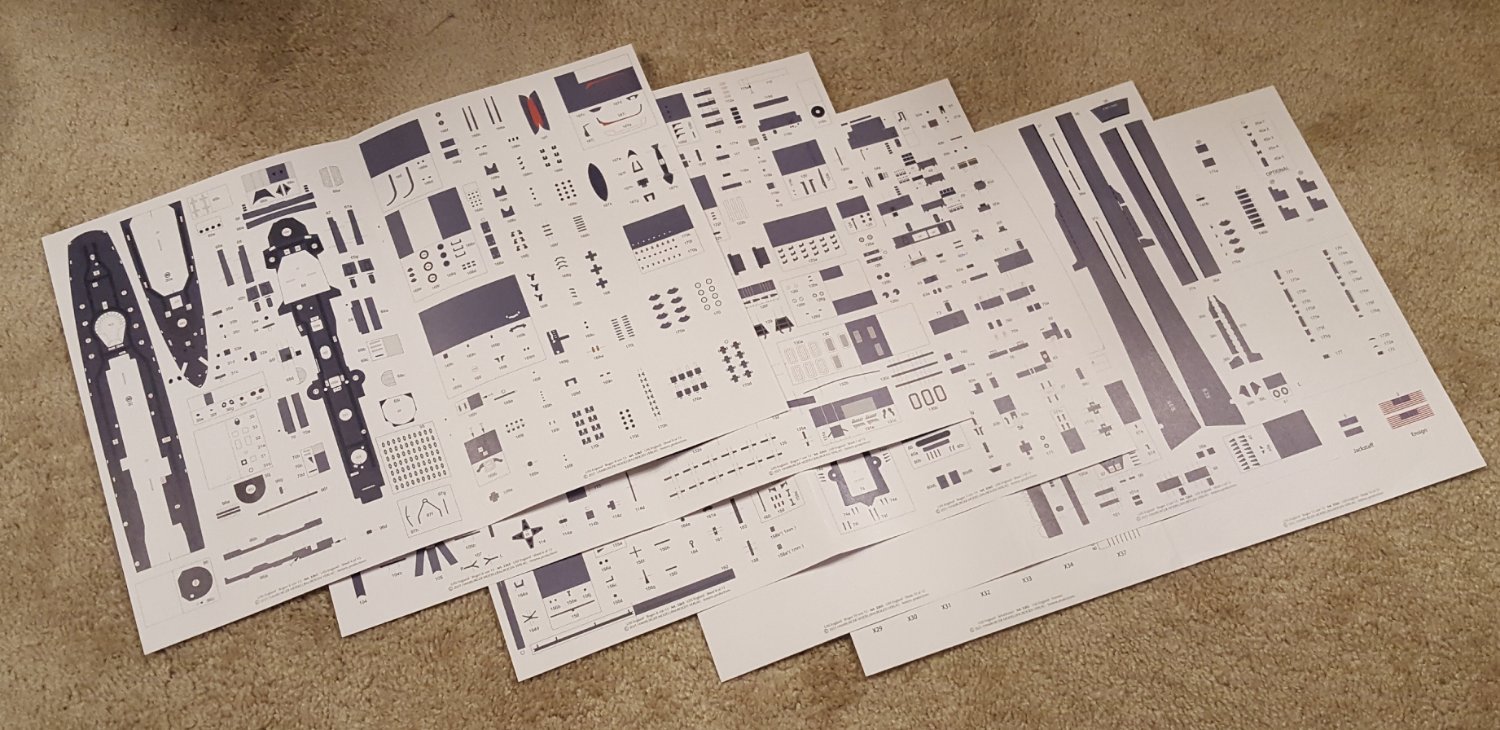
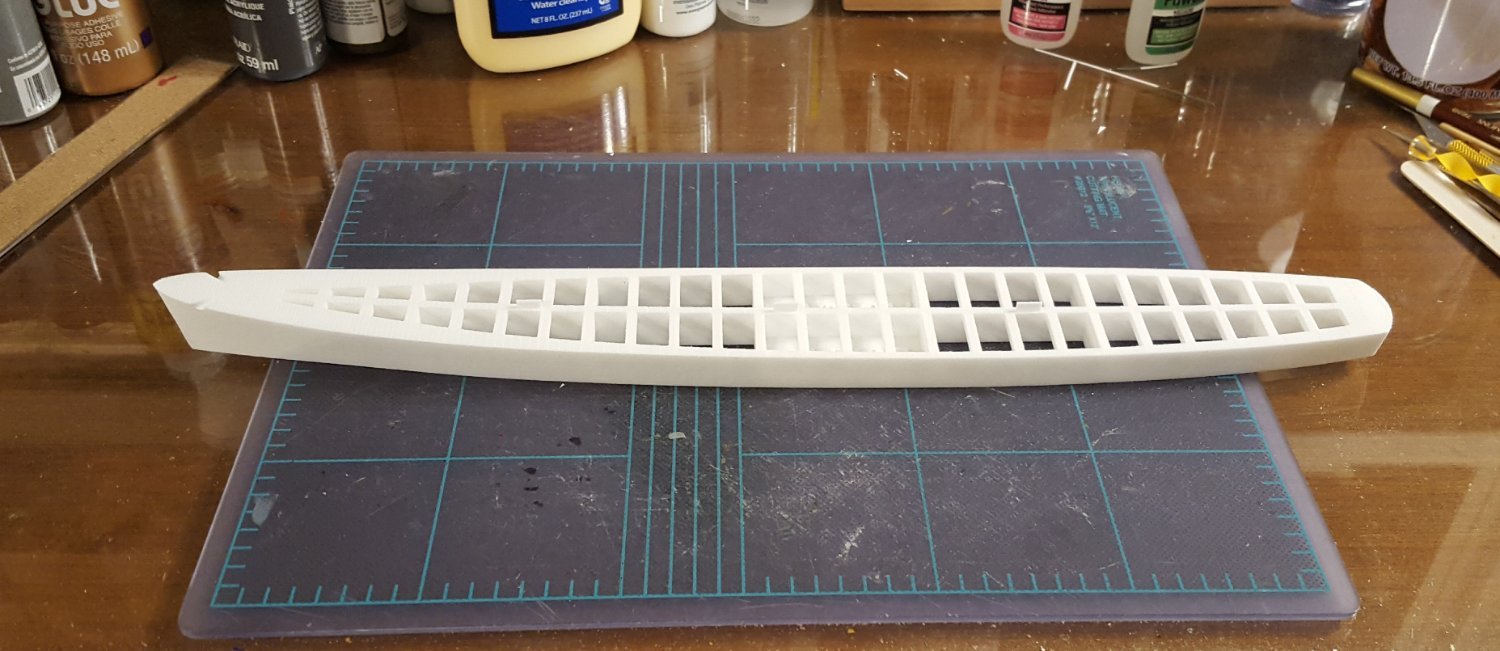
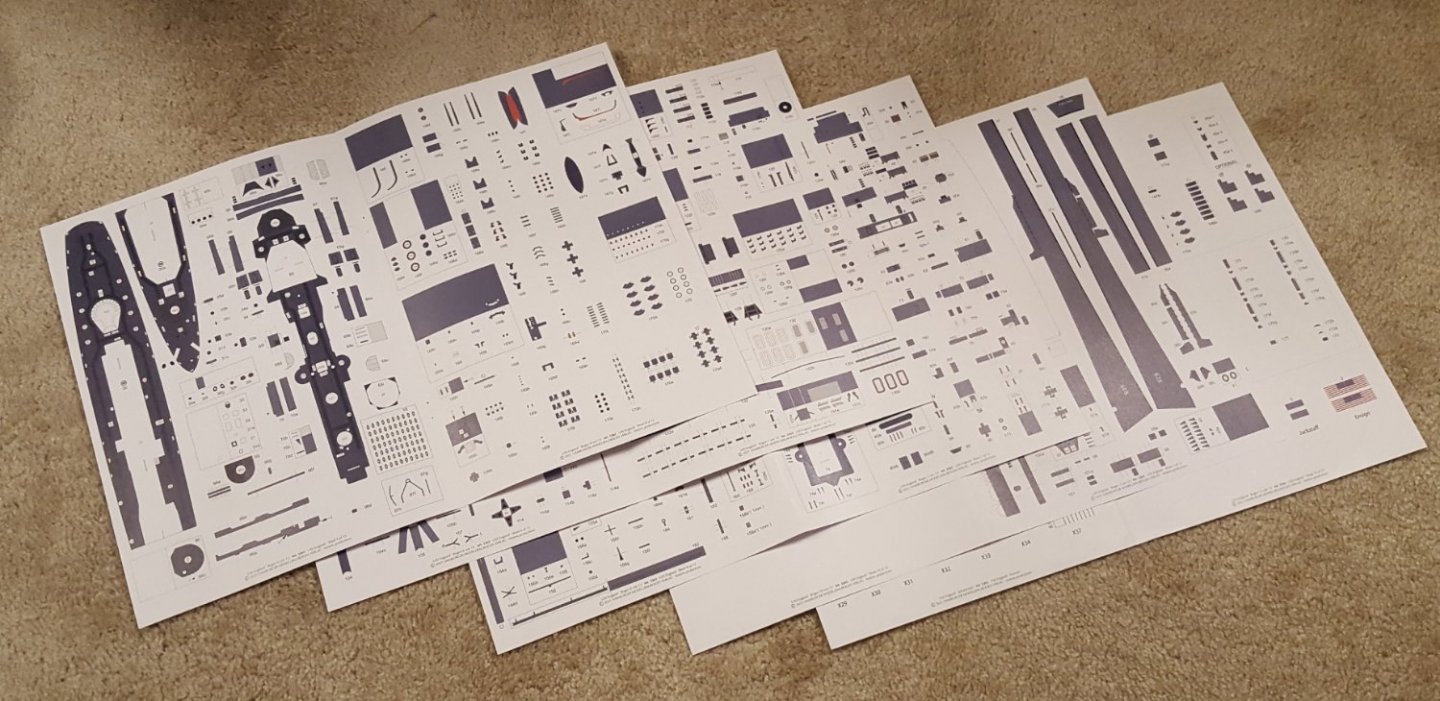
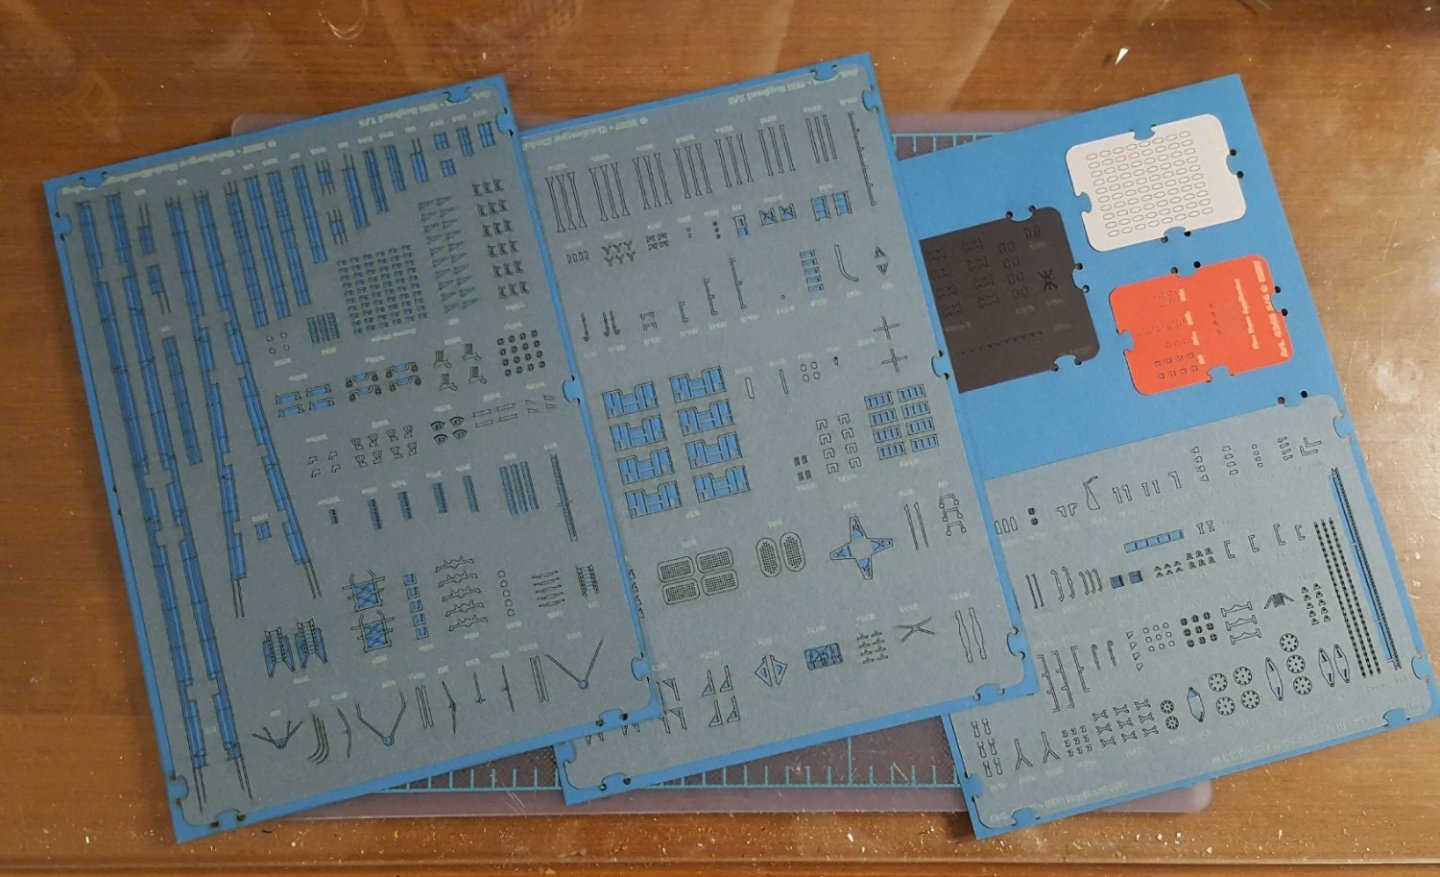
Okay, back to ships! I'm really biting off a lot on this project, but it's such a nice model that I just had to take a crack at it. Hopefully I will be up to the challenge. I wrote a review of this kit, which you can read HERE, so I won't go into great detail about it here. I will, though, repeat that if you like this model and would like to get your hands on a copy, or perhaps try a different card kit, be sure to check out all the HMV kits available from Fentens Papermodels. Unlike my recent aircraft builds, I expect this project to take longer than a month. How long, I can't say. We'll see how it goes and maybe take a break or two if necessary. One nice thing about this project is that I will need only a very small number of edge colors -- the ship is depicted entirely in Measure 21 dark blue-gray. But . . . it has a considerable number of parts -- close to 2000 in total. Ten pages -- wowzers! Happily, I have the laser-cut detail set to replace many of those parts. It consists of six frets. And now I can share what Santa brought me this past Christmas. This lovely 3D-printed hull, available from Shapeways, will replace ALL of the usual egg-crate construction. Only the external skins need to be applied. This will be the most stable card ship hull I have ever worked on. So, that will serve for an introduction. The first thing I will need to do is the usual spraying of the parts sheets. Hopefully tomorrow it will be warm enough in the garage to move forward with that task. Cheers!

- 331 replies
-
- 34
-
-
-
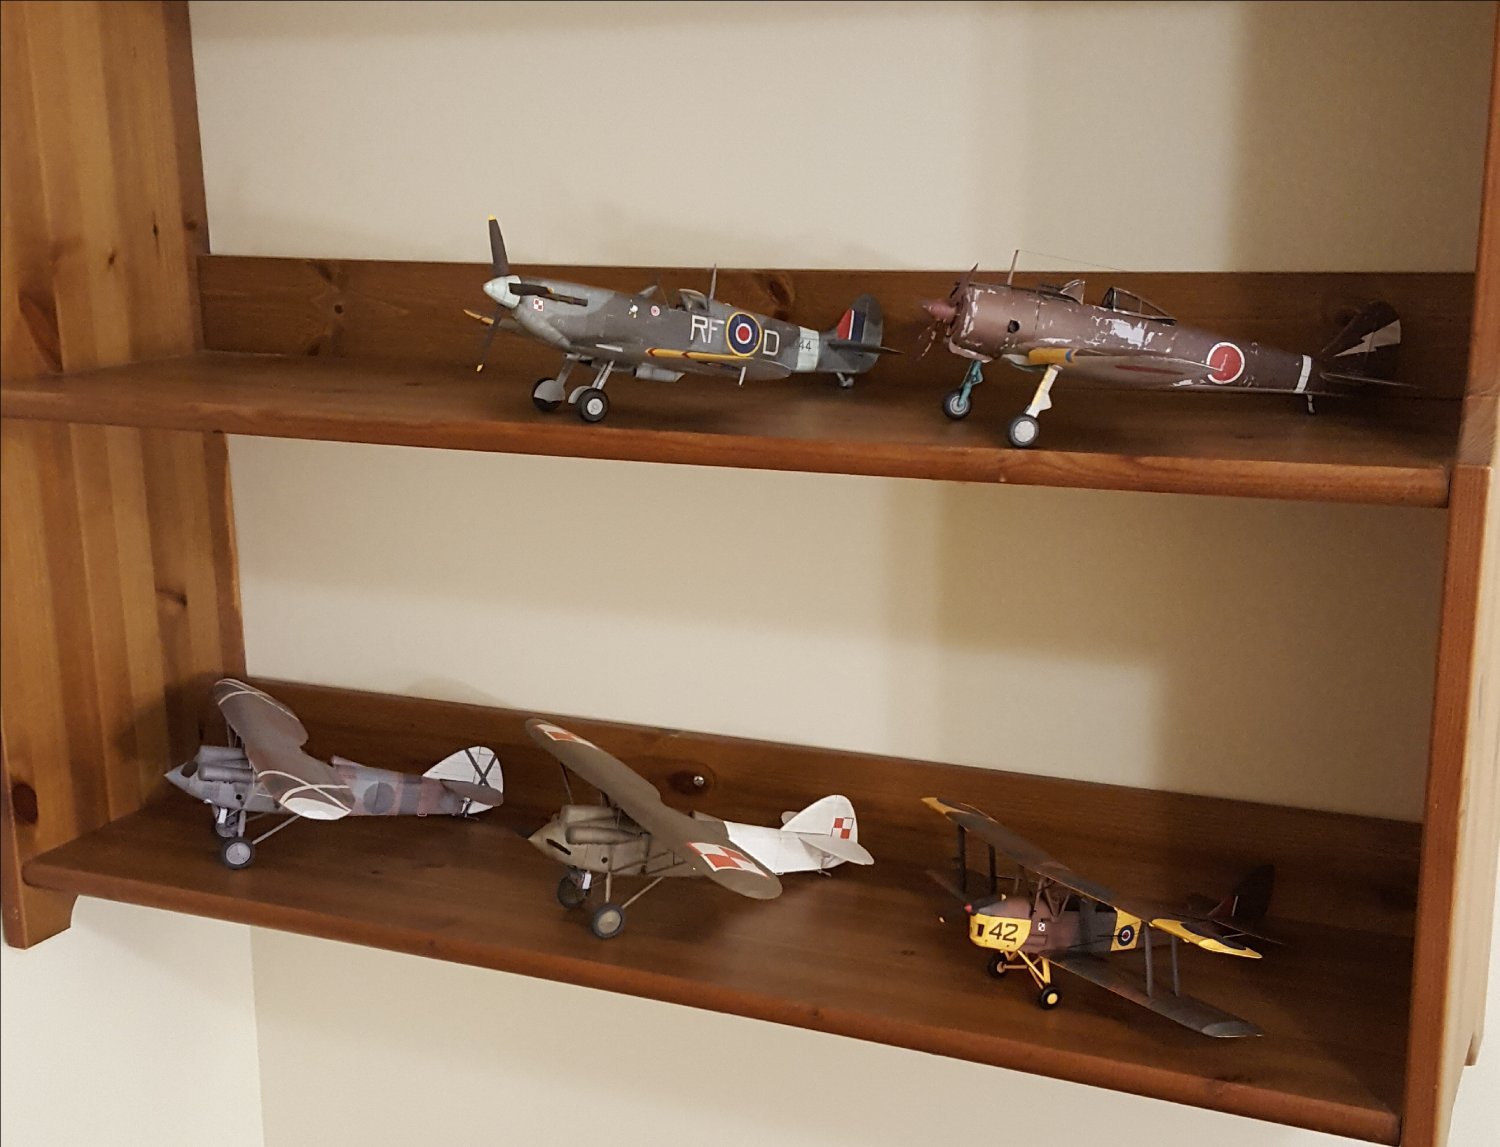
Okay, friends, one last pic to wrap up this thread and put a bow on it -- a group shot of the New Kids on the Block. I'm off to start the topic for my next project!

- 130 replies
-
- 19
-
-
-
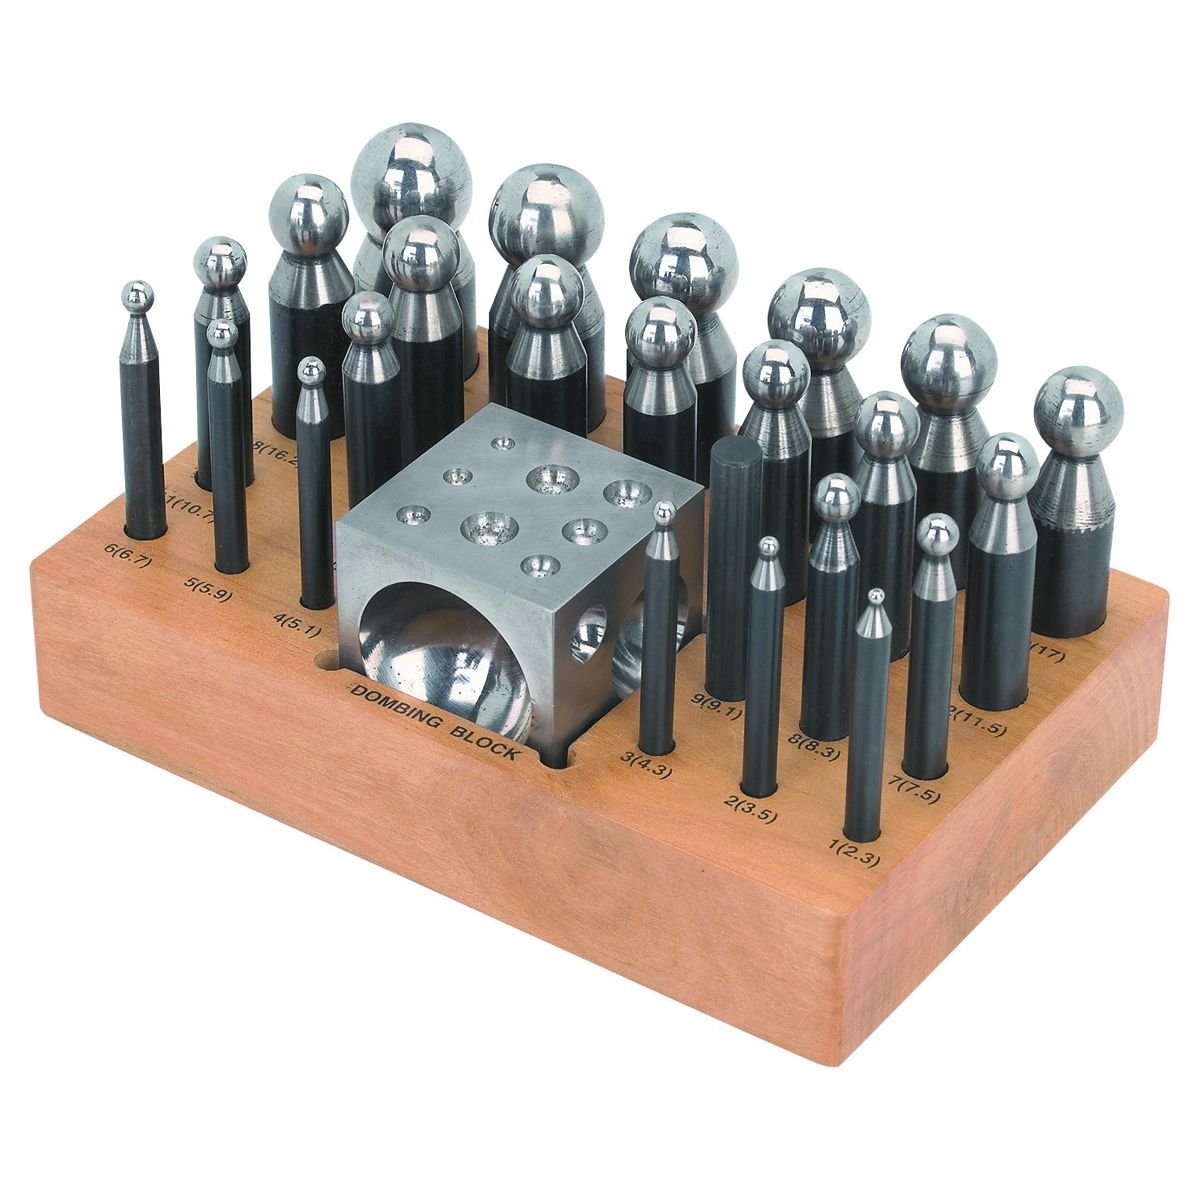
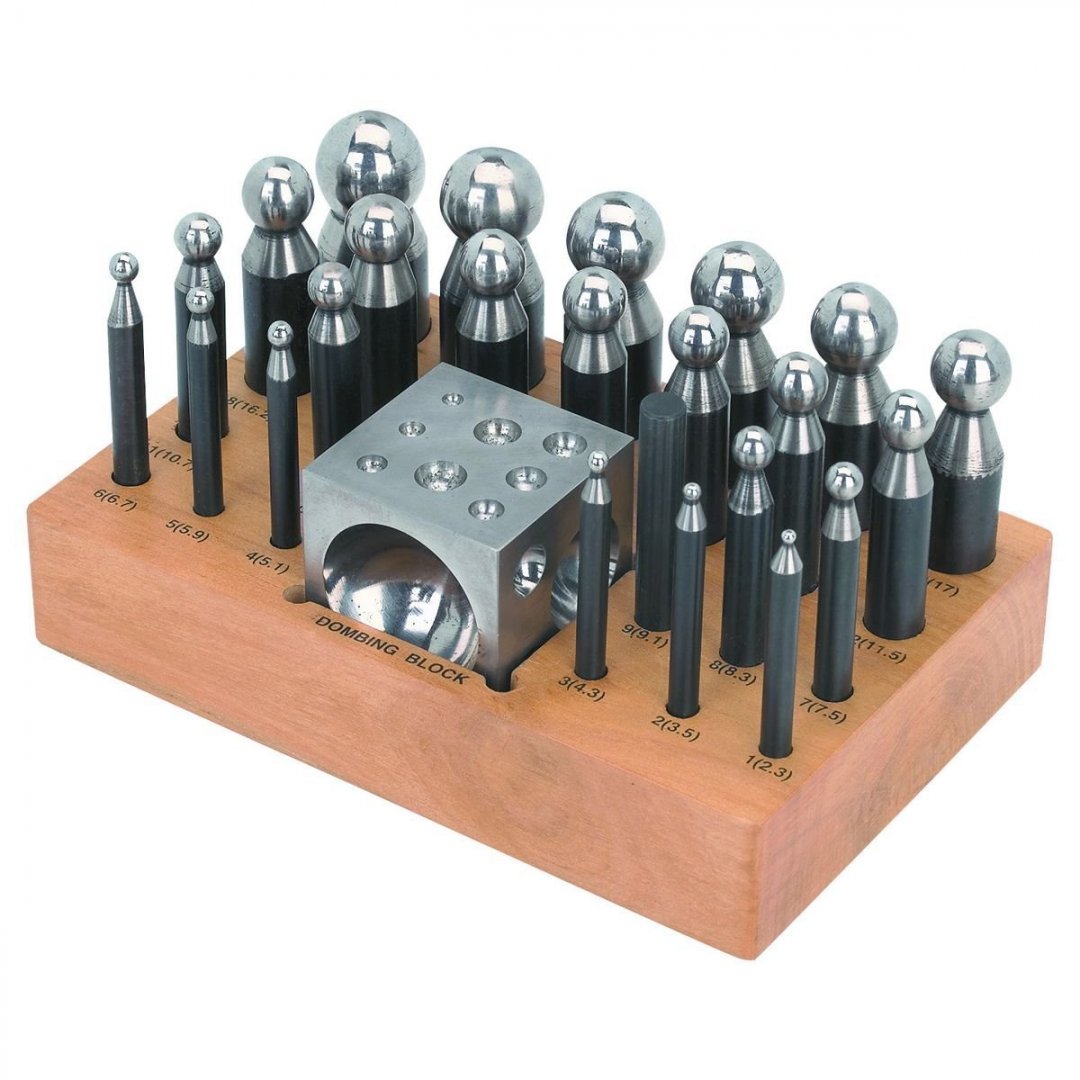
Looks just like this one. It's normally used for dimpling sheet metal, but I'm finding it quite useful for card modeling.
-
I was a die-hard Niners fan for many years, but I lost interest in the NFL a few years back and haven't watched any games for two seasons now. European soccer is my present sports passion. I currently follow Bayern Munich, AC Milan, and Everton FC. For those in the know, I explain my passion for Everton as a kind of pennance for being a Bayern fan. Soccer fans will understand.
- 419 replies
-
- 3
-
-

-
- Victory Models
- Pegasus
- (and 2 more)
-
To quote The Old Man from Das Boot: "Clever trick!"
- 345 replies
-
- 1
-
-
- Duchess Of Kingston
- Vanguard Models
- (and 1 more)
-
That's a fine result, Reece. Display it proudly!
- 9 replies
-
- 5
-
-
-
- Model Shipways
- Lowell Grand Banks Dory
- (and 2 more)
-
Keith, your work never ceases to amaze me. Some of us are modelers, but a rare few are miniature ship makers. I think you fall into the latter category.
-
Believe it or not, I actually consider that high praise! 😉 And thanks to all for your kind comments. I was just sitting here thinking about how many models I have completed recently, so I decided to tally them up. In the two years since I moved into my current house, I have completed nine models -- ten, if we include the canoe, and, hey, it was a kit, so why not? For me, that total represents a rather astonishing burst of productivity, considering that I completed exactly zero kits during the five years prior to that. No wonder I feel like saying, "Whew!!"
- 130 replies
-
- 14
-
-
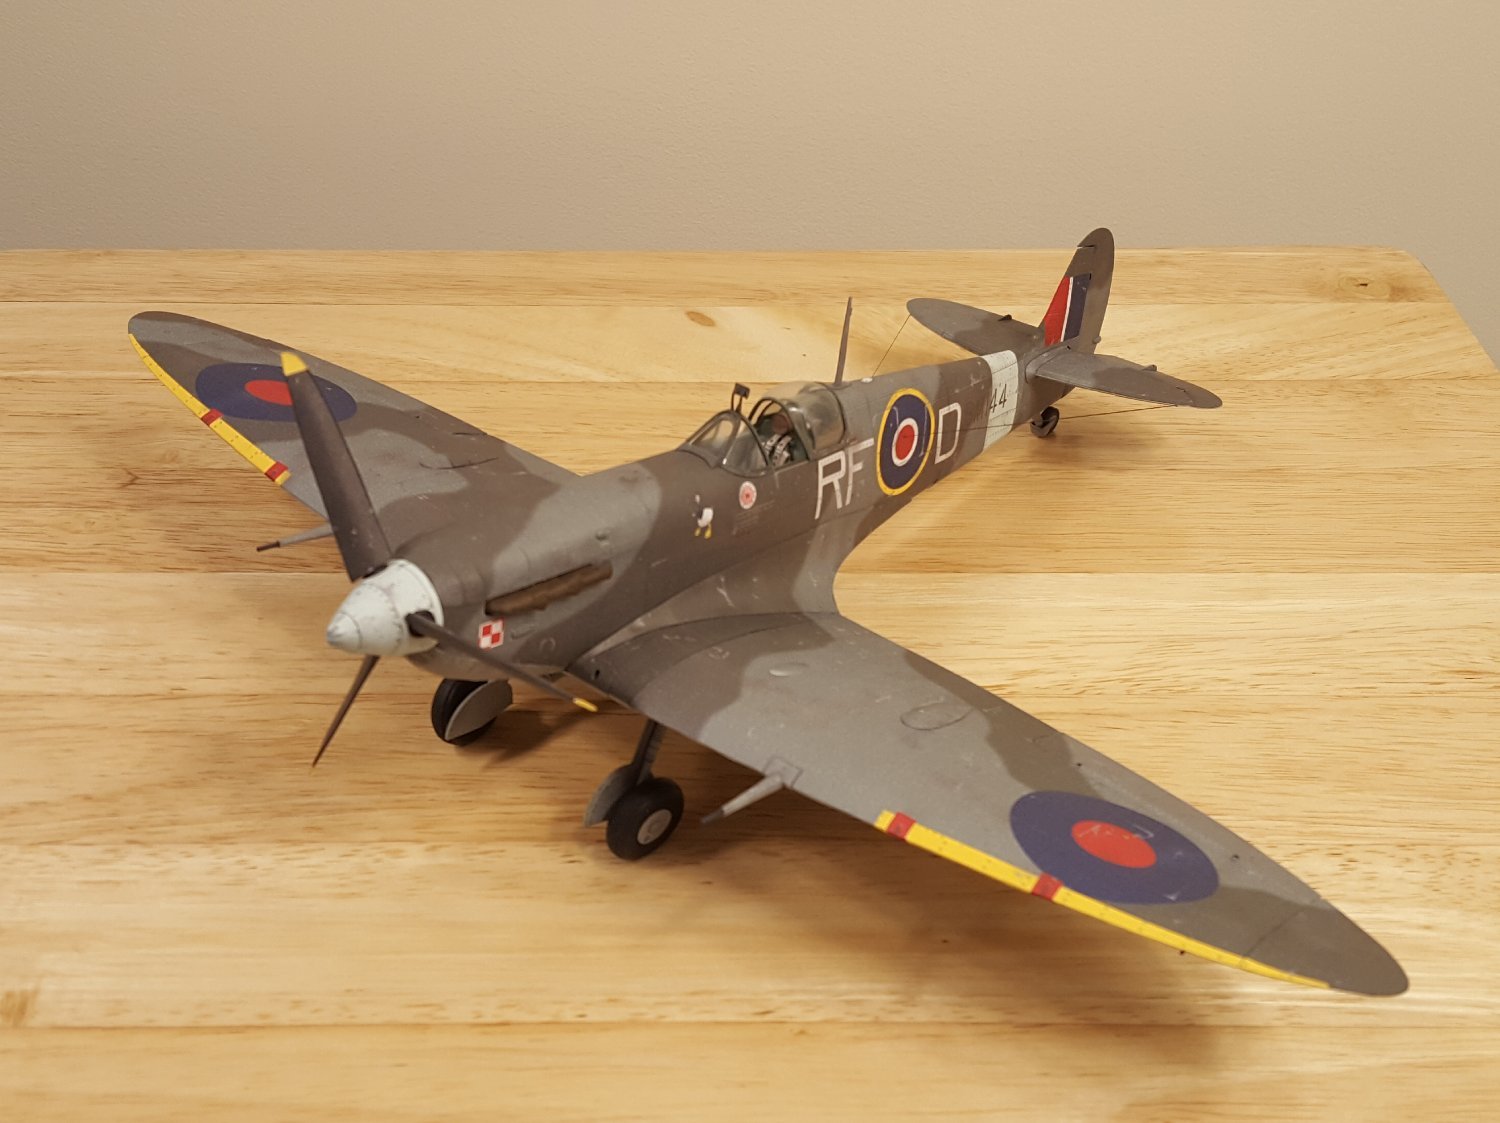
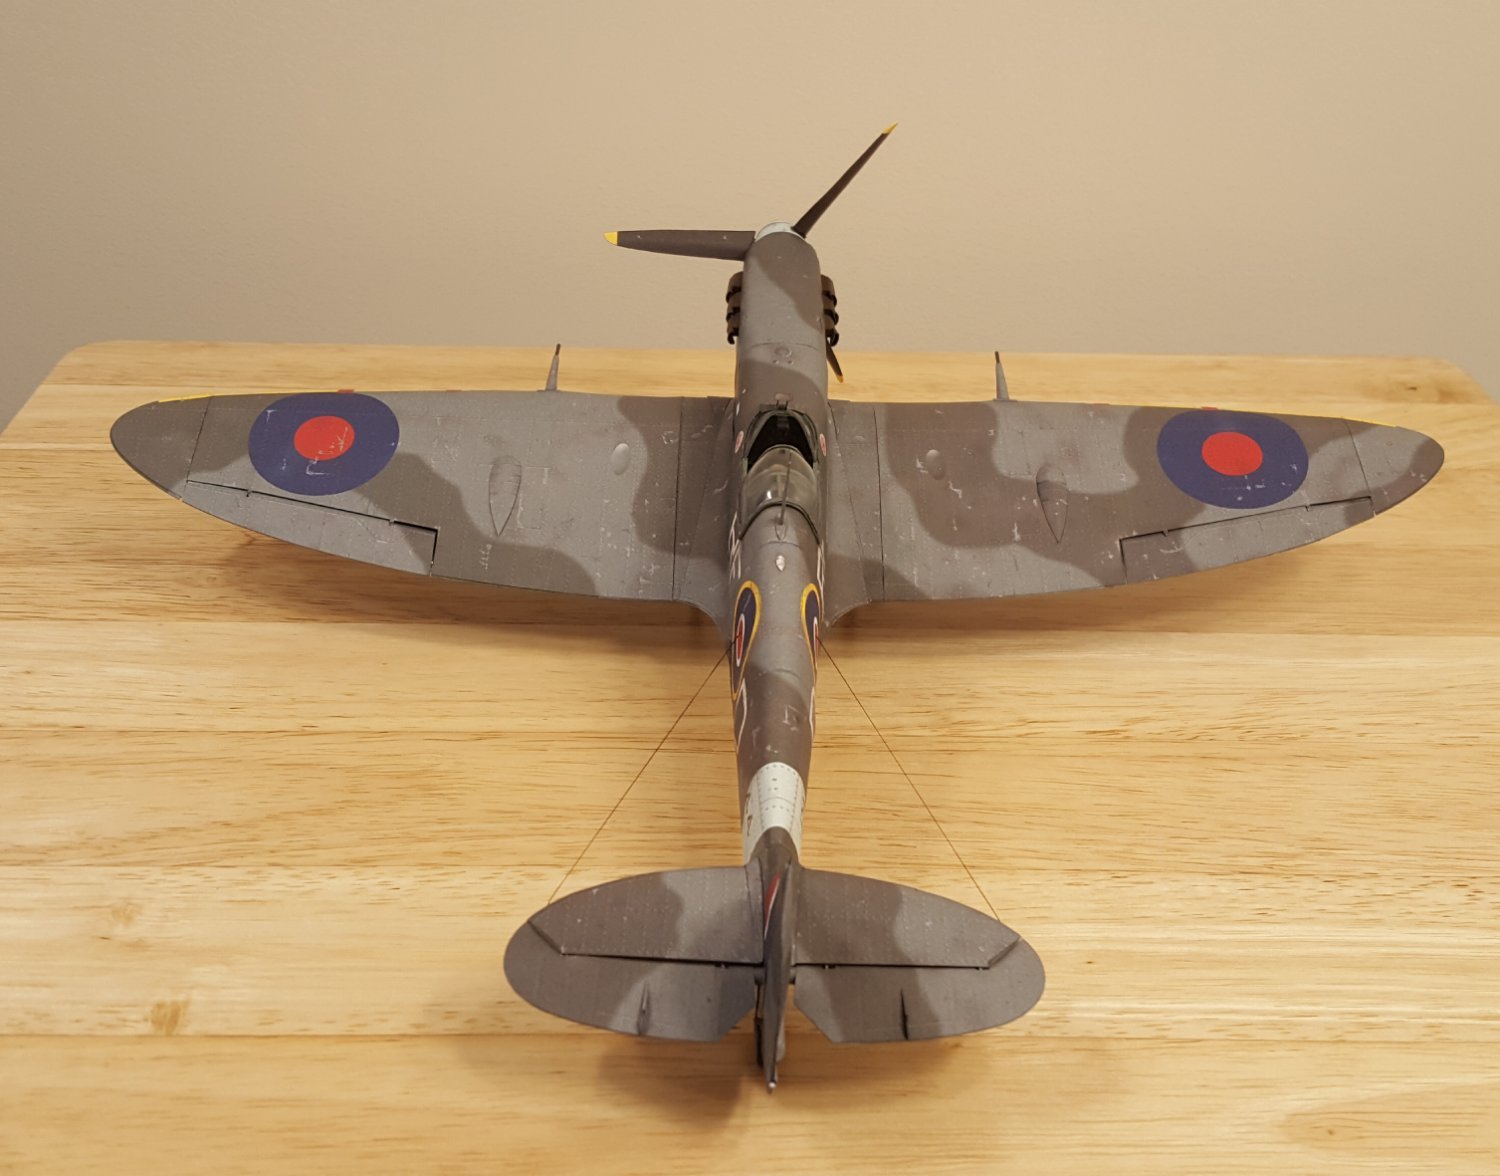
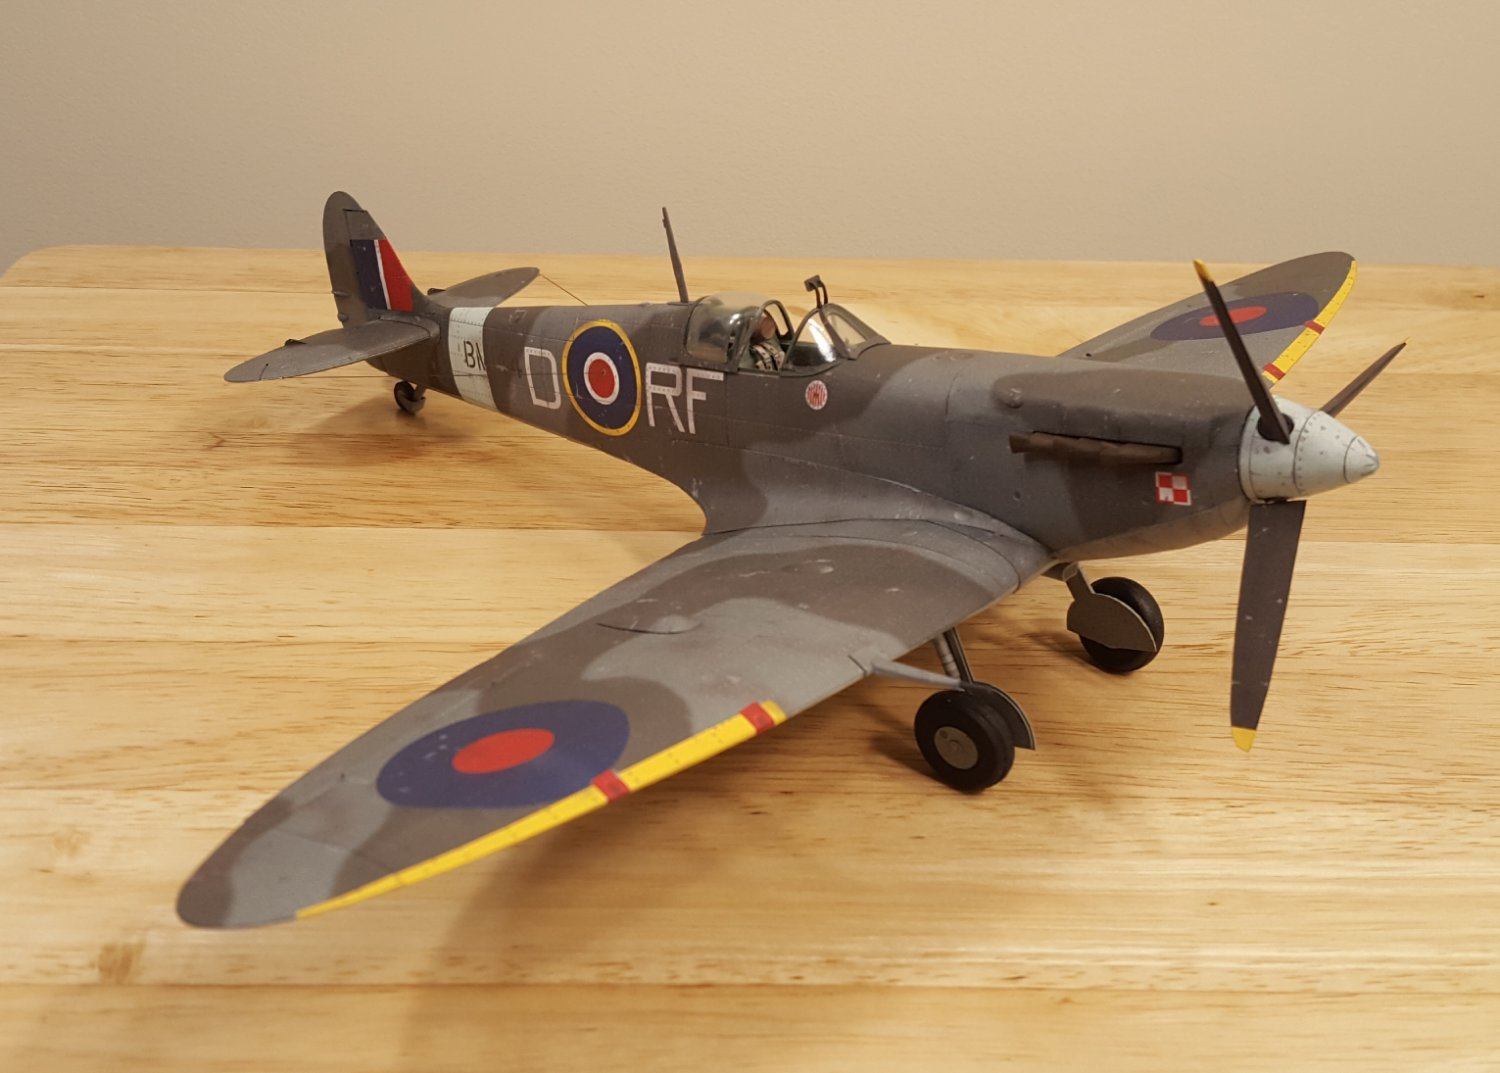
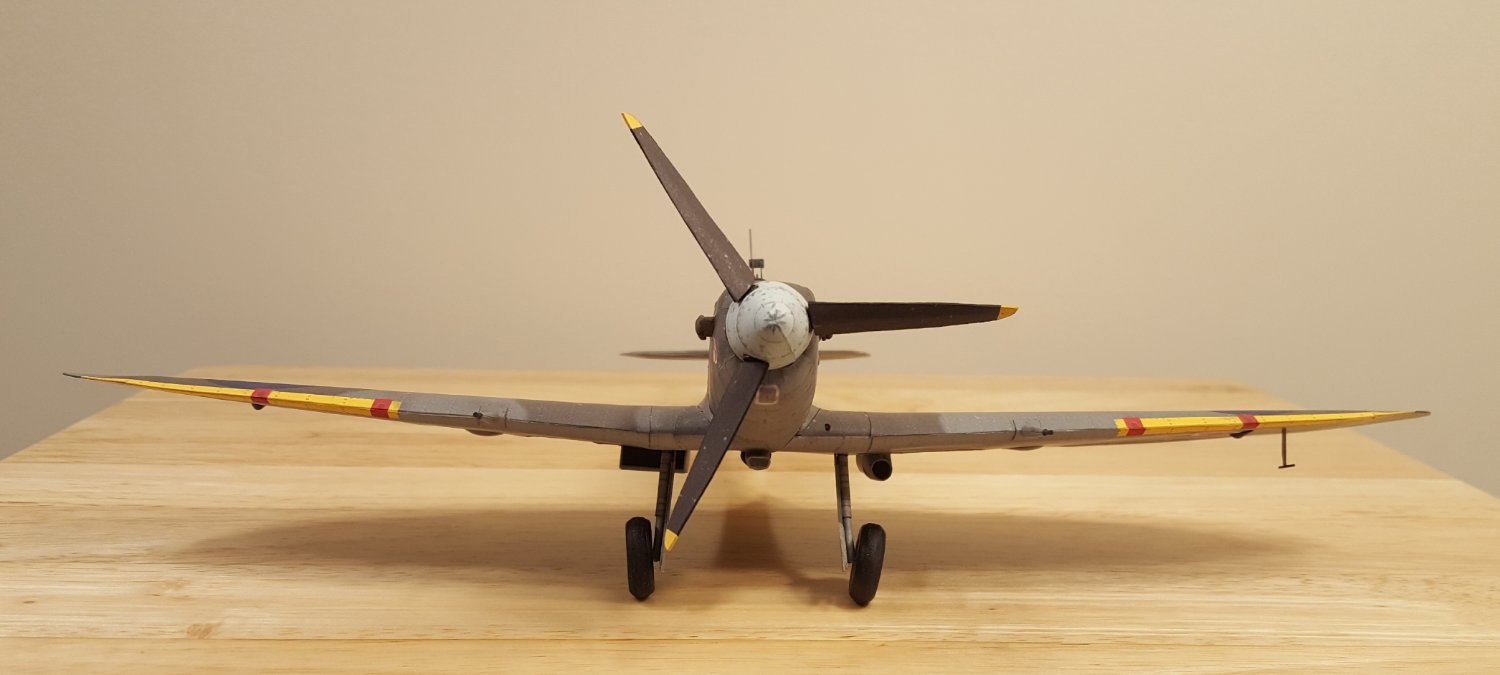
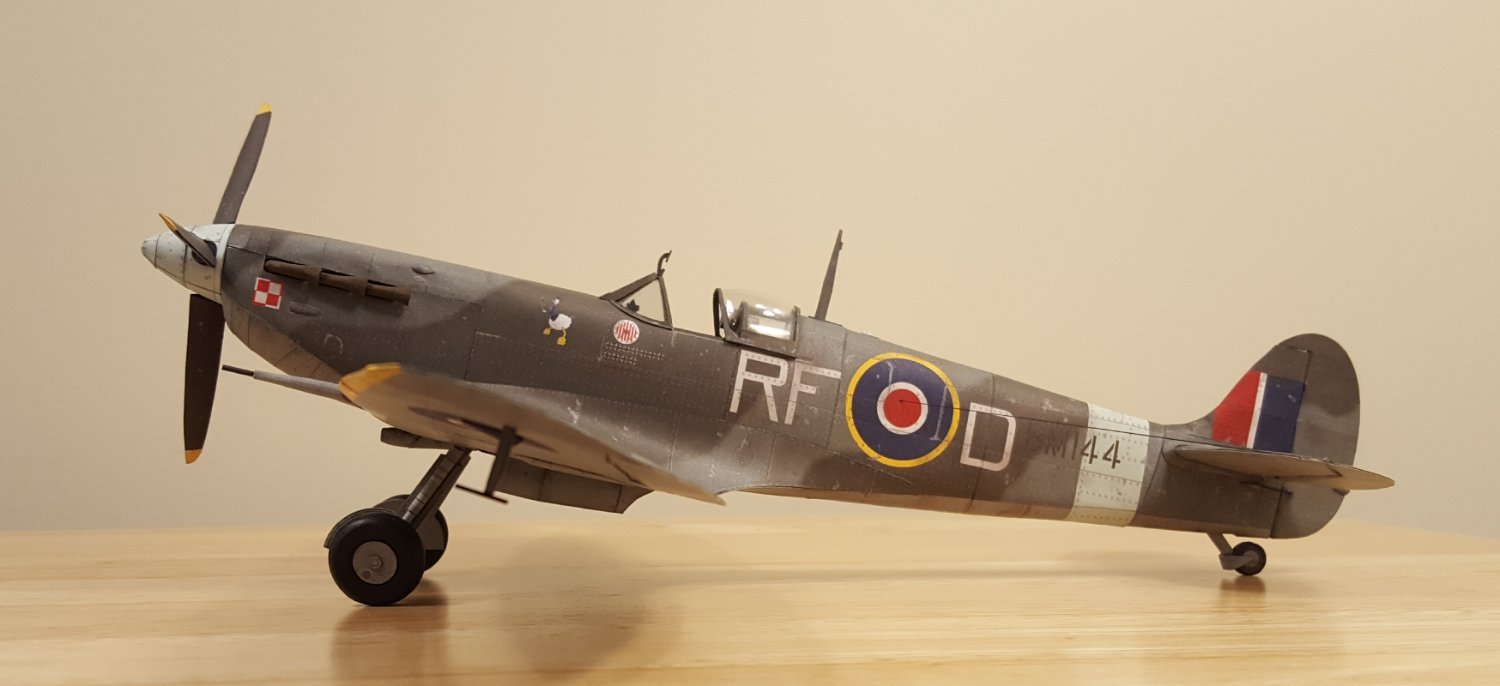
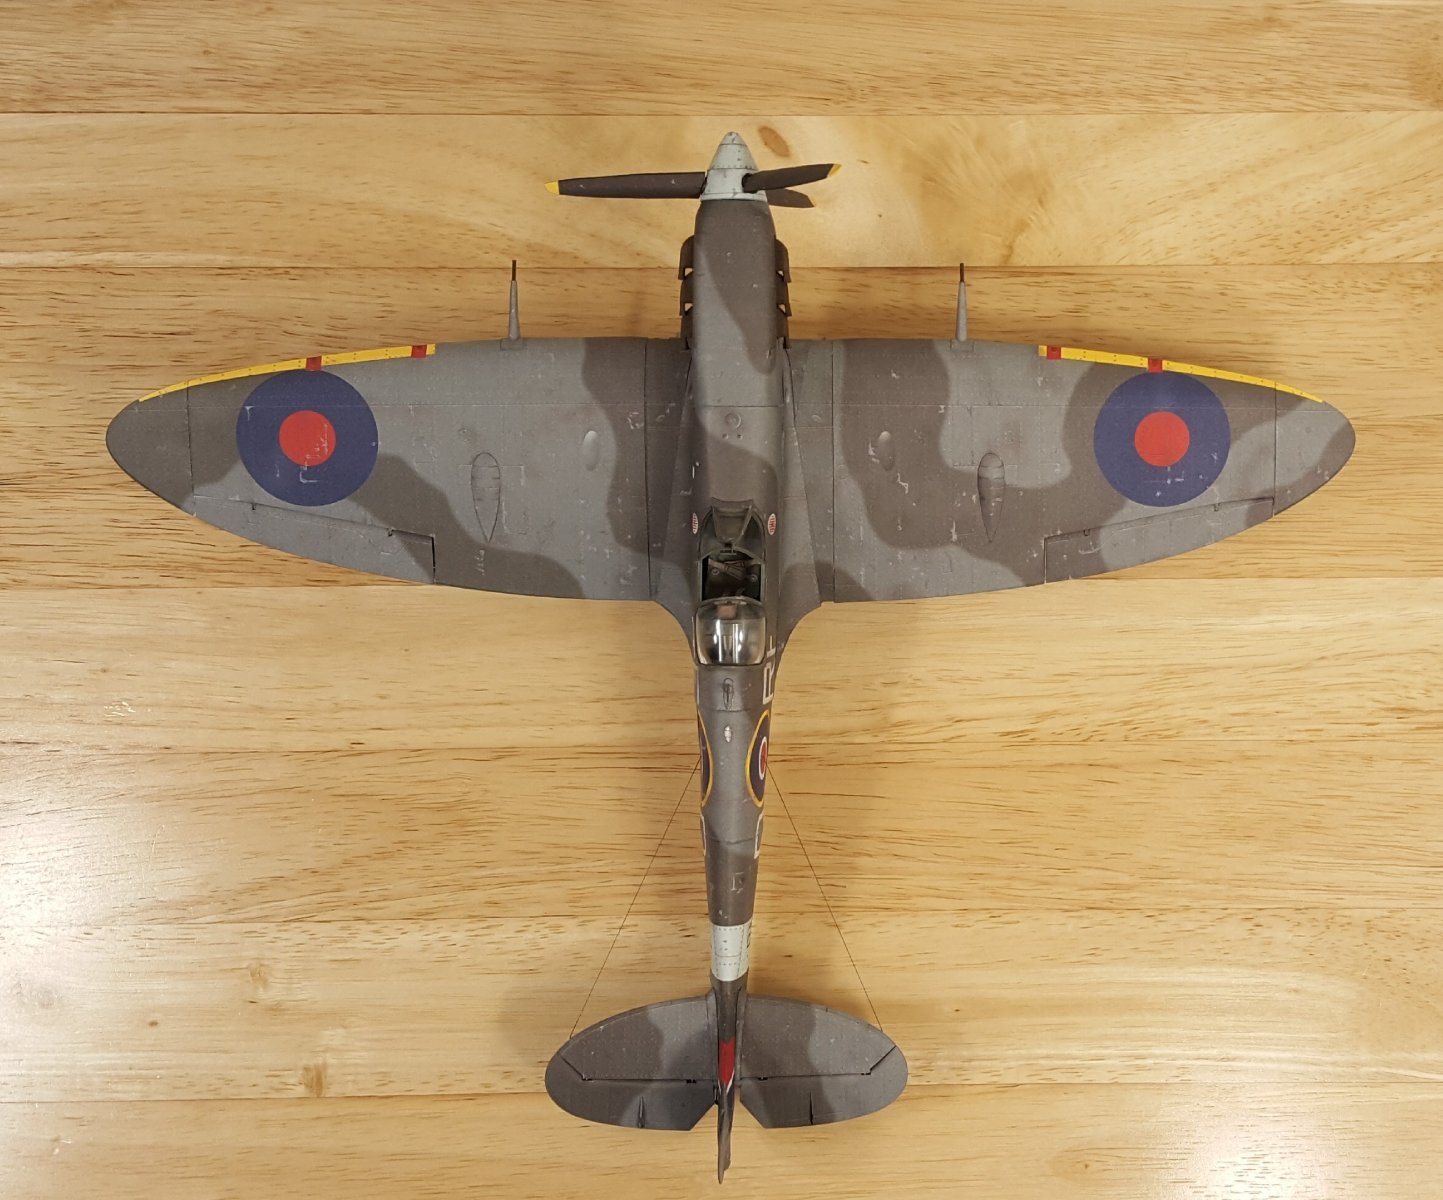
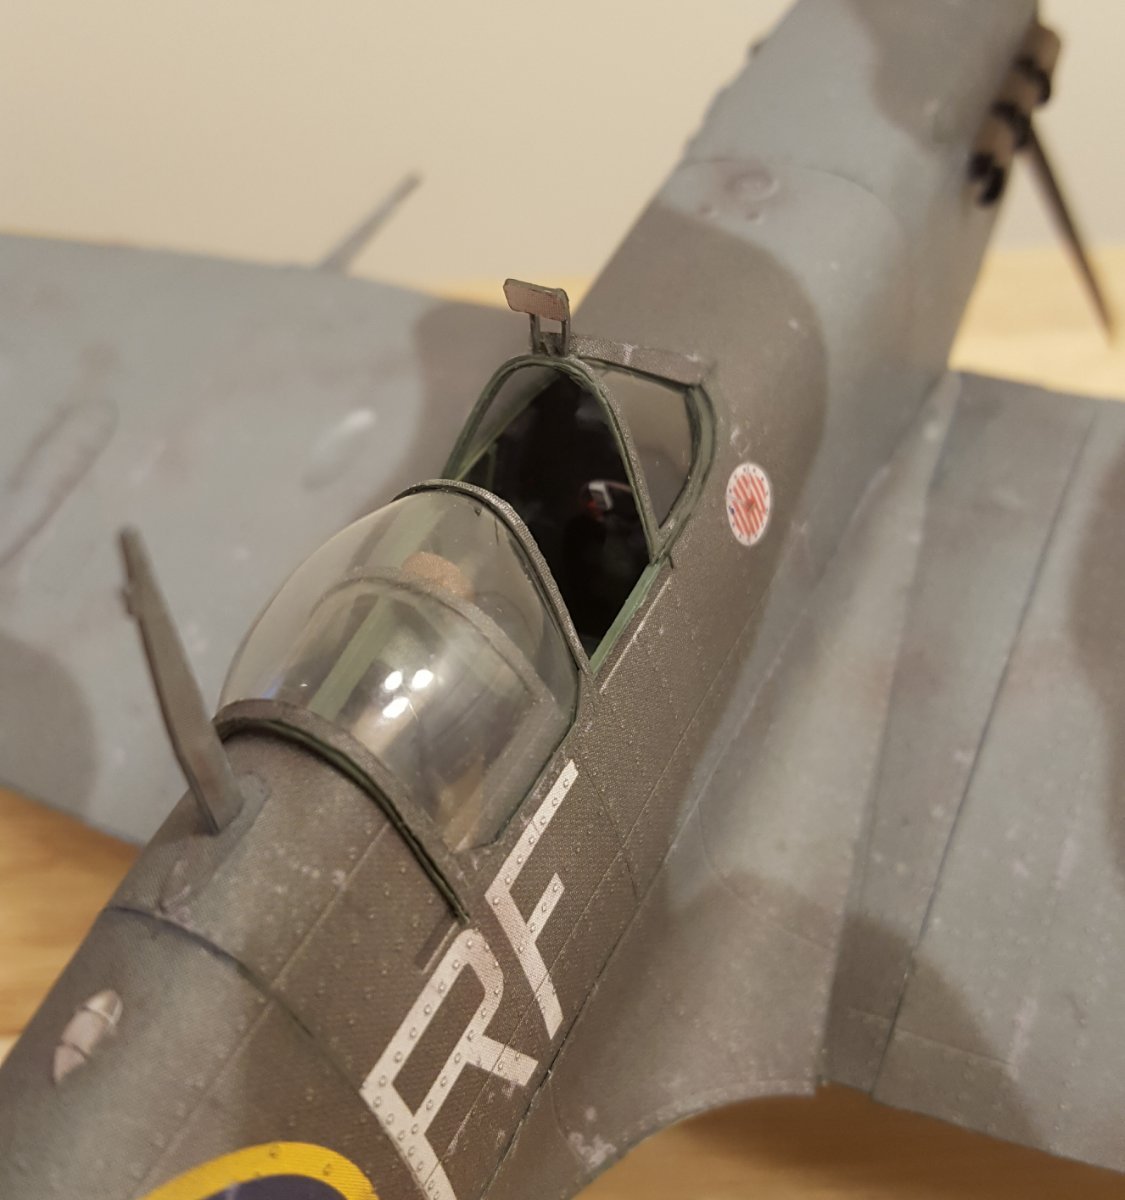
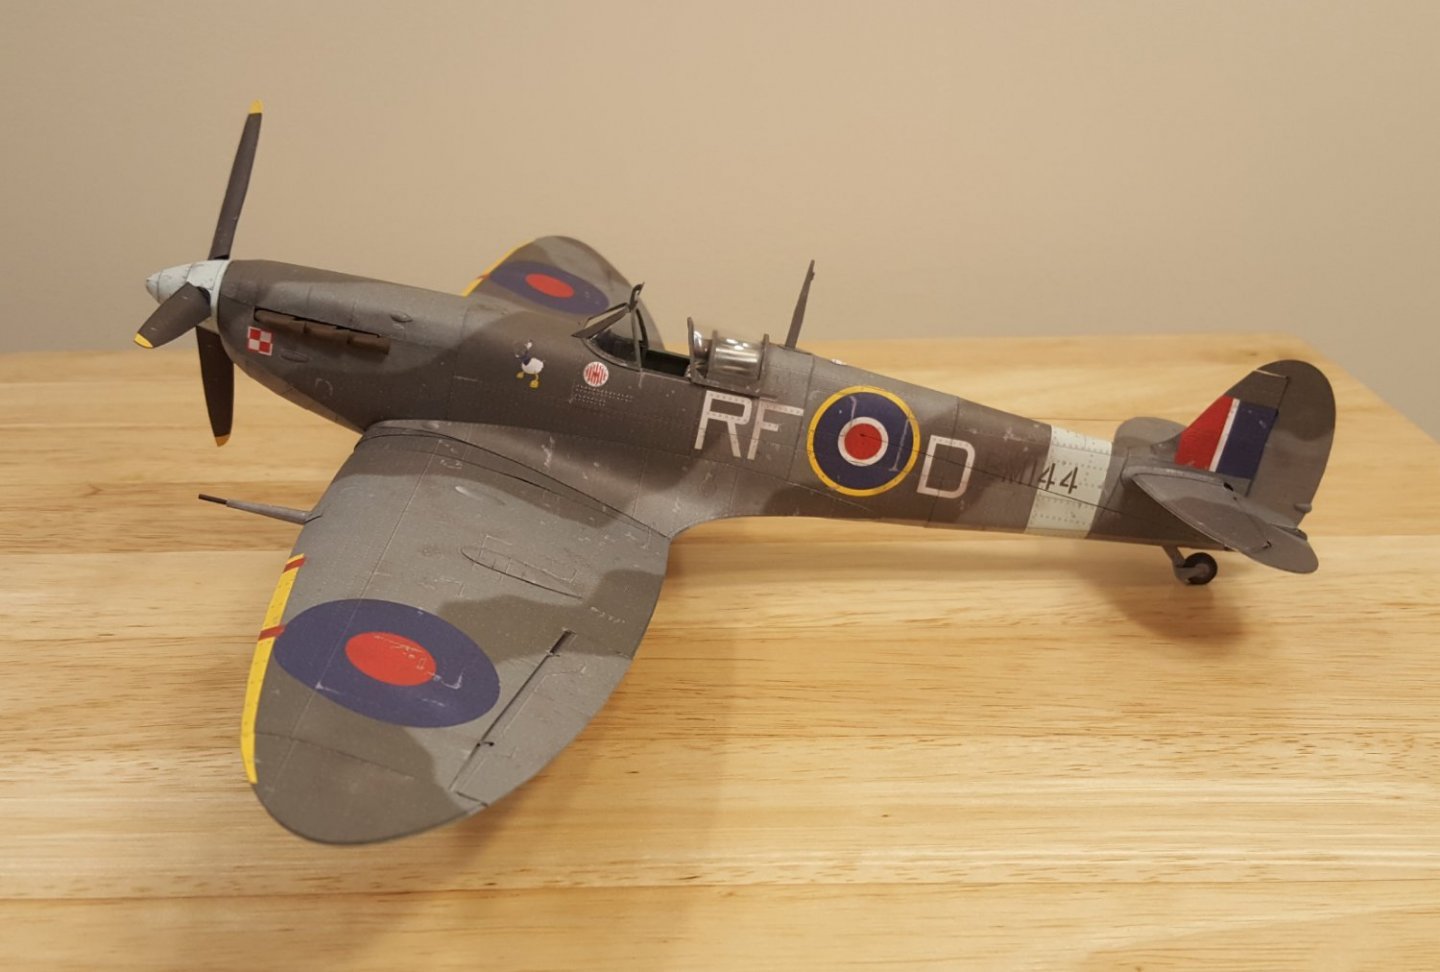
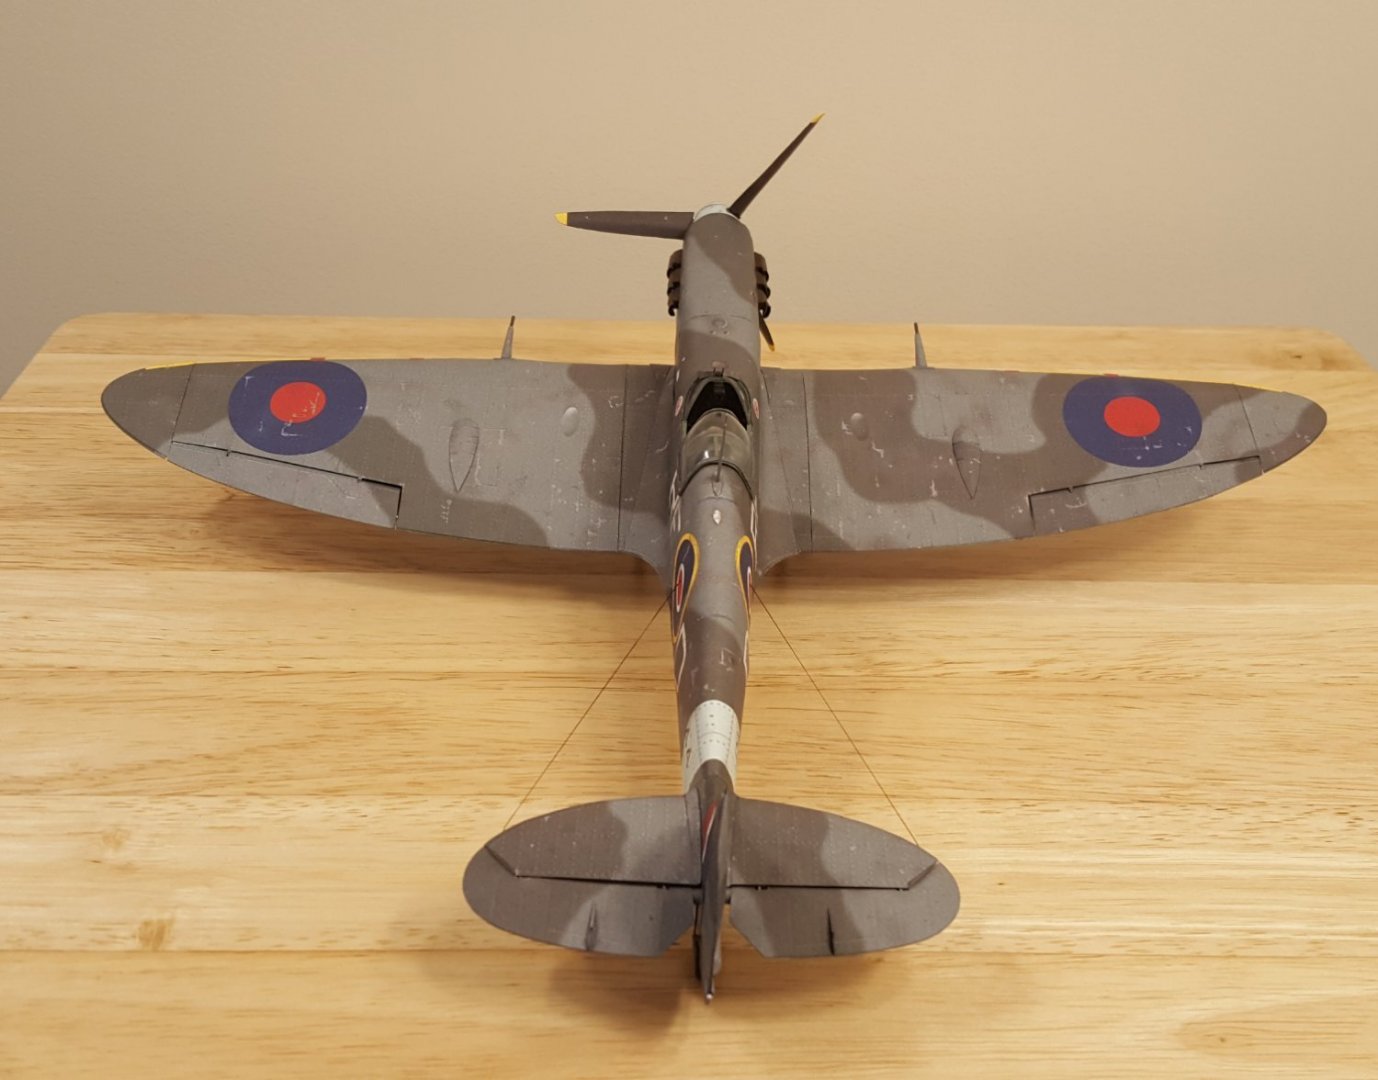
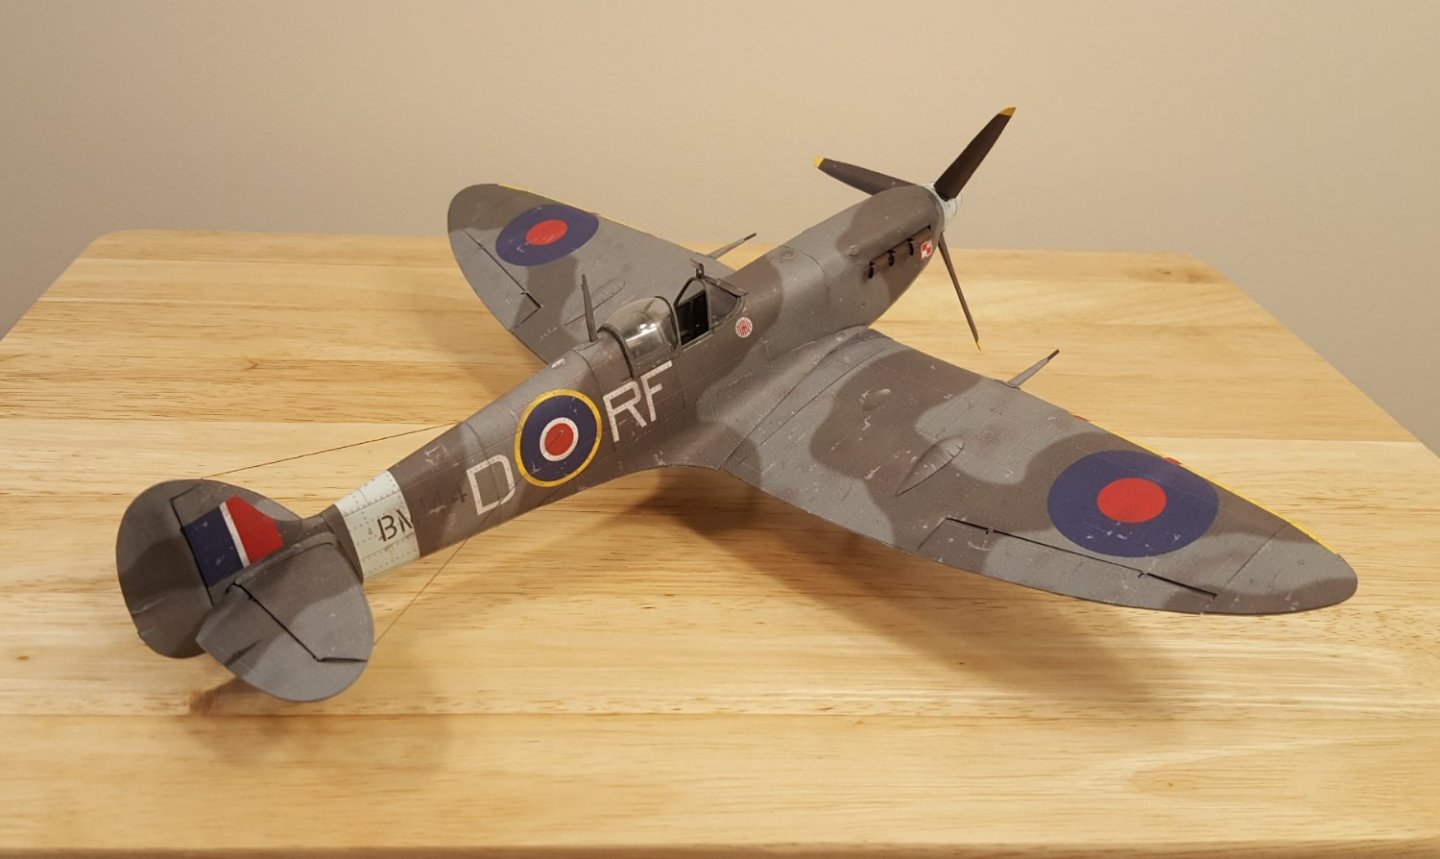
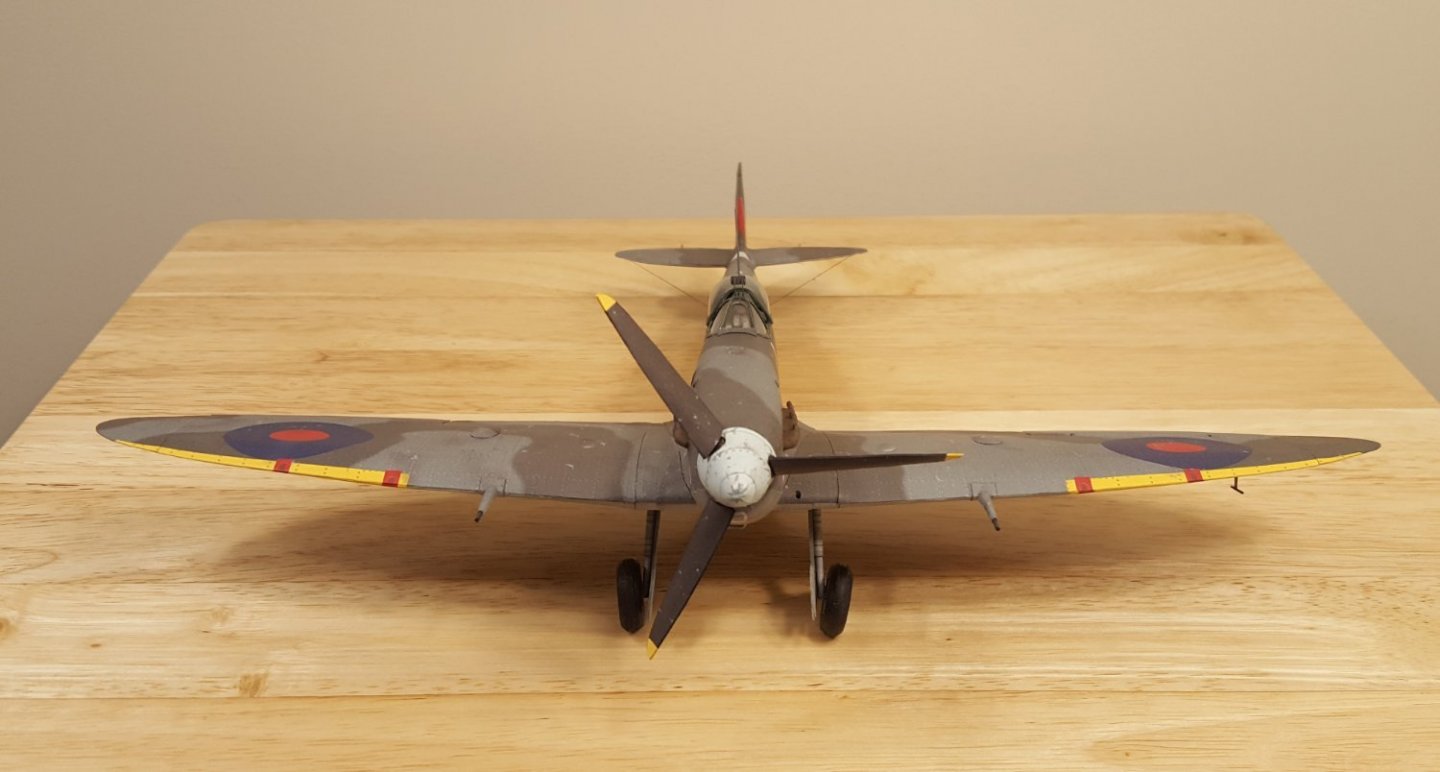
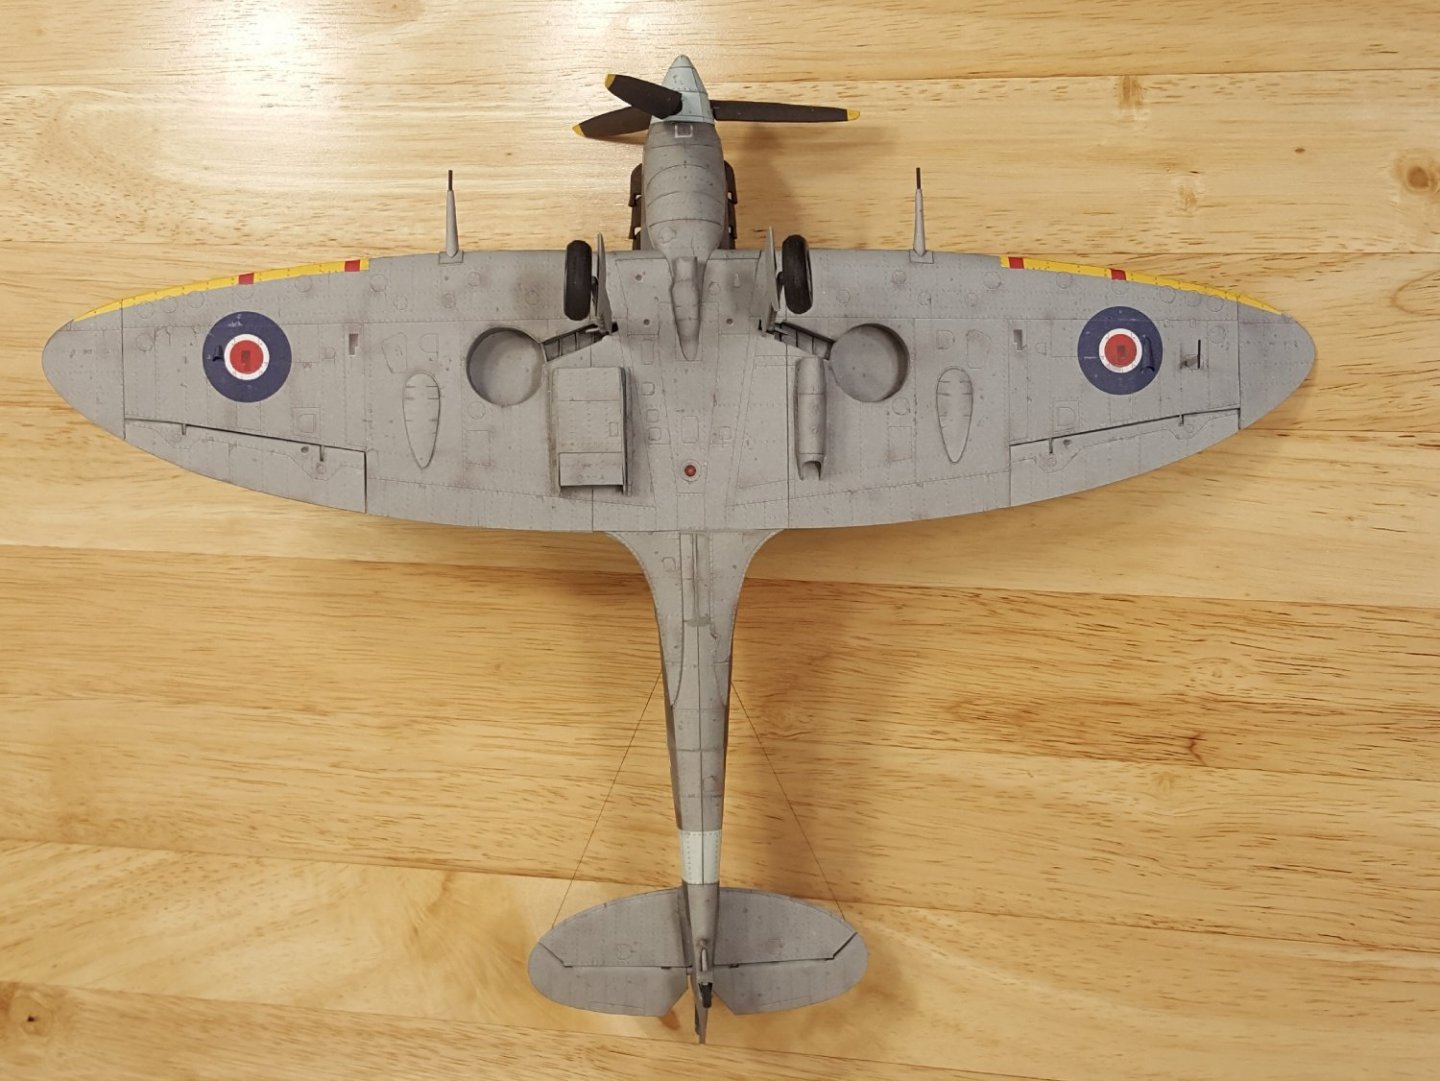
The Big Reveal! All the last little bits have been successfully added. I'm quite pleased with how the propeller and its spinner turned out -- probably the best such work I have done. My new dapping tool set was a tremendous help for the task. Oddly, the instructions did not include any templates or parts for the 20 mm cannon barrels, so I made them from plastic rod and made an educated guess on their length. There are, of course, parts of this build that I think I could have done better, but the main objective was simply to finish a Halinski kit -- any Halinski kit -- and in that regard the build was a success. The Halinski Hurdle has been cleared! And I have to say that overall I feel pretty good about the finished product. Enjoy the pictures!


- 130 replies
-
- 29
-
-
-
Yep. There was a link embedded in the article that Mark linked to.
-
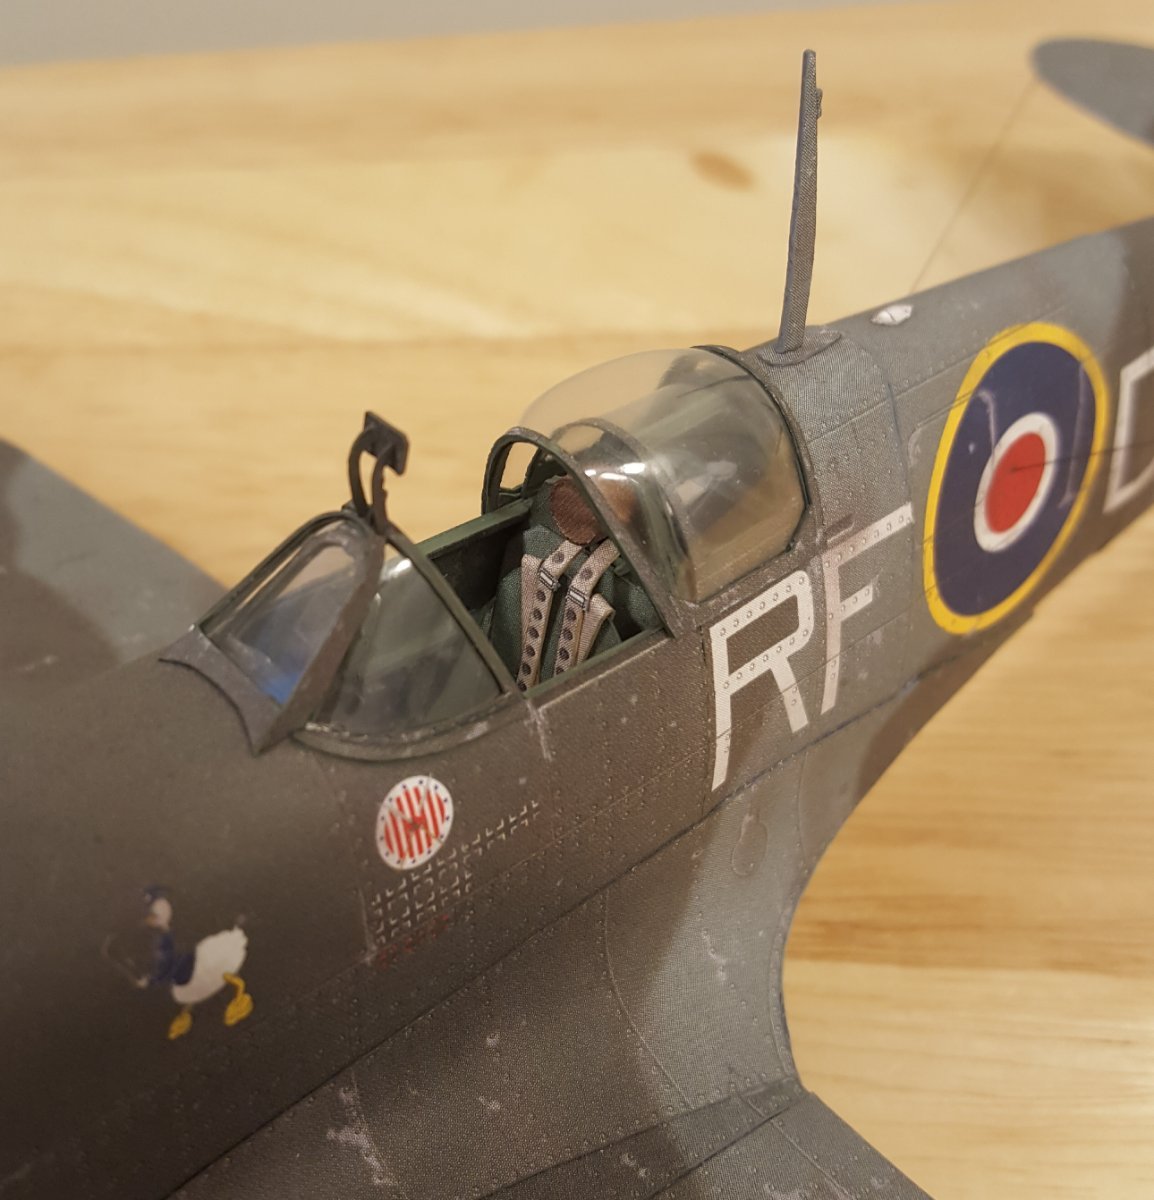
She's a beauty! I love the part about £4.5m equaling 0.05 Pogbas. 😂 PS: I'm mucking along slowly on the build. The canopy is on now and I just finished the exhaust pipes during lunch -- they look pretty cool. The propeller is the only major task remaining, plus the antenna mast, cannon barrels, and pitot tube.